Decided to take the challenge
Definitely time consuming and could have a less than desirable outcome from what Ive heard.
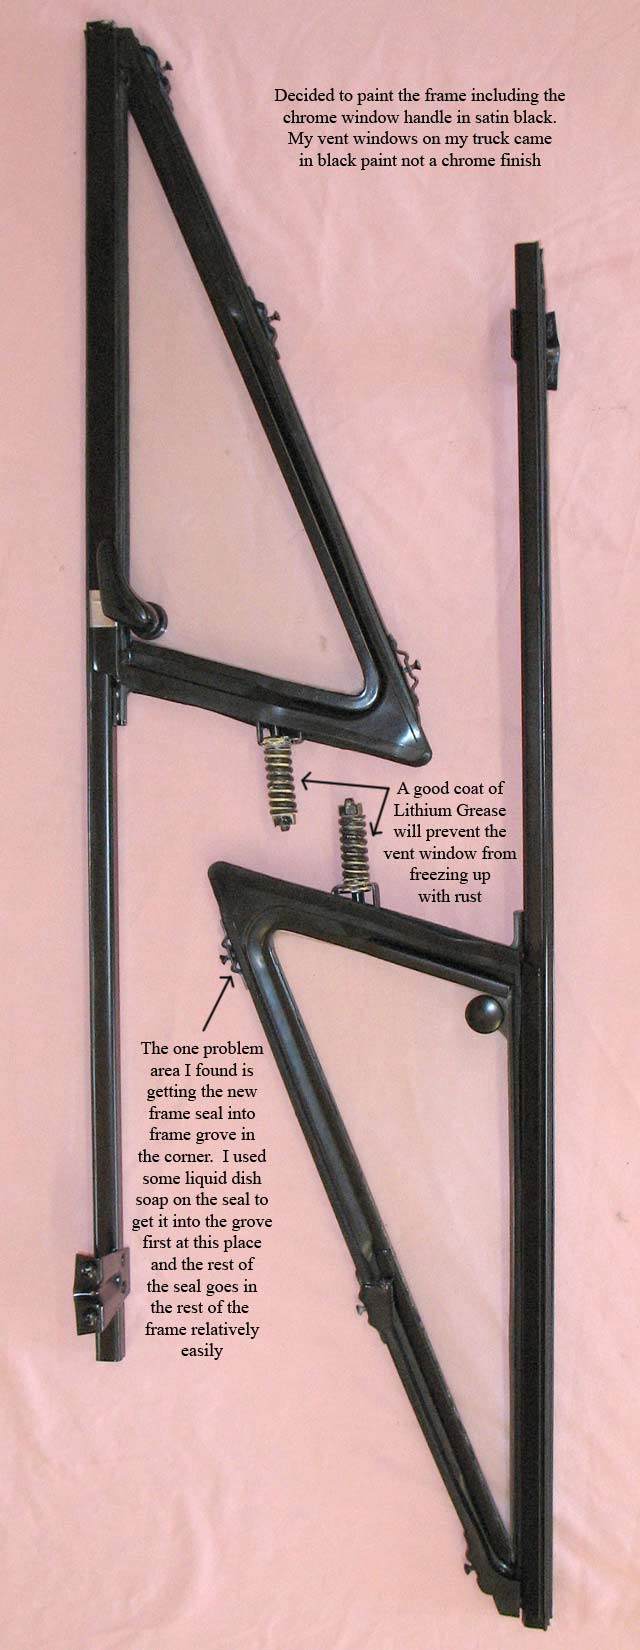
Rebuilding the vent window with new seals and repainting
After disassembly and repainting the parts that could be time consuming in it self, I came up with some tips that might help you with rebuilding the vent window yourself if you want to take the challenge. There is a good (how too) on this forum that I recommend to read in rebuilding the vent window
http://67-72chevytrucks.com/vboard/s...d.php?t=351471 (my tips are a minor addition to this how too, possibly to make it a little easer).
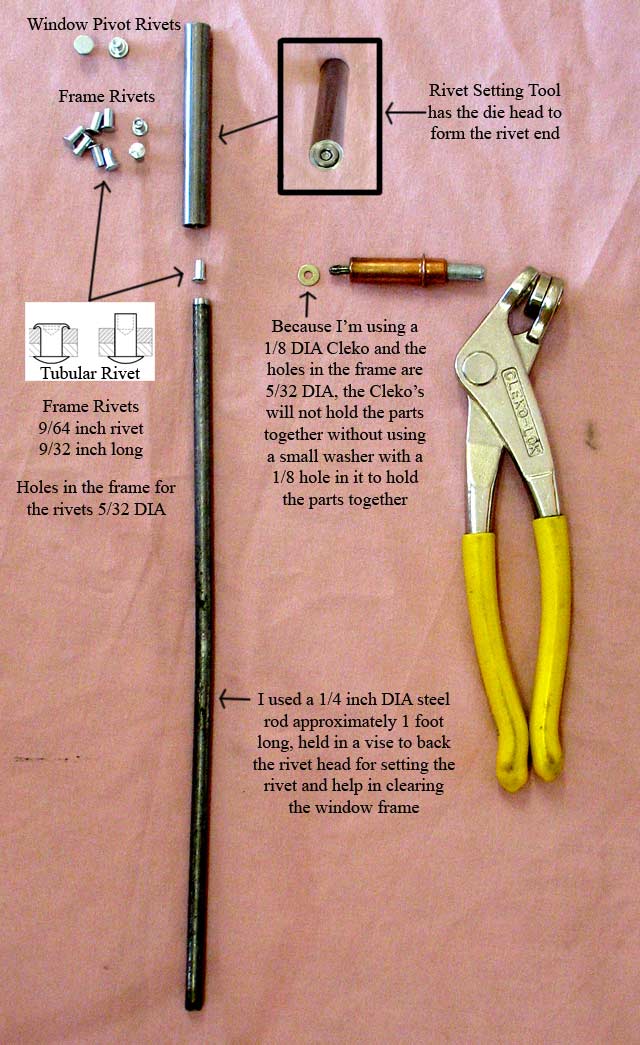
Installing the rivets in the frame and new seal are probably the hardest task. When the vent window was assembled in the factory it was set in a tool/jig and they used a rivet squeeze to install the rivets. Not very practical for a home shop, but it can be done manually with some simple tools.
The window frame and the new seals have to be held in place before installing the rivets (glass and its frame not installed at this time). I used some clekos to accomplish this. One small problem was that my clekos are for 1/8 DIA holes and will not hold in the 5/32 DIA holes in the frame & seal. A simple solution was to use a small washer with a 1/8 DIA hole on the end of the cleko to hold the parts together.
The rivet heads are installed in the channel from the factory with the driven/clinched end on the seal side. With the rivet installed in this manor its hard to drive the rivet with the manual setting tool with the frame in the way. I installed the rivet head on the seal side and used a ¼ inch DIA rod held in a vise to backup the head and drive the other end with the manual setting tool in the channel.
Not many pictures included in this post, I think the above (how too) has a good set of picture showing the steps/process for rebuilding a vent window. Plus my hands where busy holding things, its definitely a two man job (smile).
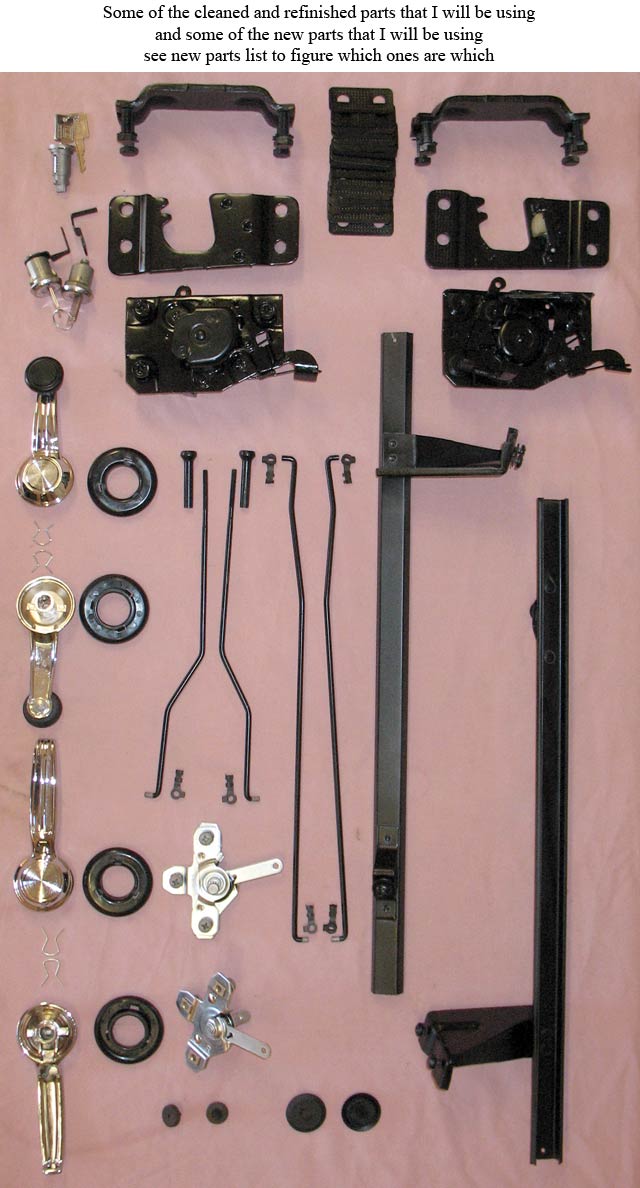
The new parts that Im going to be using in the door area
Note not all parts listed are seen in the pictures, possibly on a different post (smile)
03-835 Vent Rivet Tool by Classic Parts
03-825 Vent Assembly Rivets by Classic Parts
03-831 Vent Pivot Rivets by Classic Parts
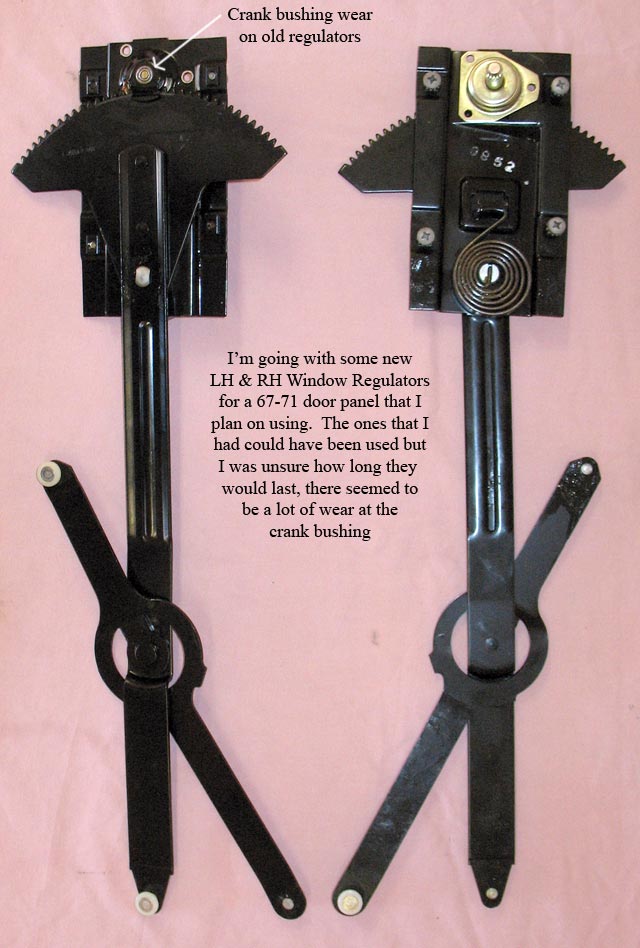
18-731 Window Regulator-Left 67-71 by Classic Parts
18-732 Window Regulator-Right 67-71 by Classic Parts
18-06 Inside Door Handle 67-72 by Classic Parts
18-16 Inside Window Handle-Black Knob 67-76 by Classic Parts
18-45 Inside Handle Escutcheon-Steel 67-71 black by Classic Parts
18-835 Door Control-Left 68-71 by Classic Parts
18-836 Door Control-Right 68-71 by Classic Parts
19-951 Door Hole Plug 60-72 by Classic Parts
18-893 Door Control Rod Retainer Clips 67-72 by Classic Parts
19-645 Arm Rest-Black 69-71 by Classic Parts
38-5621 Window Channel Kit (window felt & channel seal) by LMC
38-6522 Door Handle Outside LH by LMC
38-6523 Door Handle Outside RH by LMC
36-0690 Door Lock Set W/Keys by LMC
38-5934 Vent Window Seal Kit by LMC
After you rebuild a vent window you might find that its less time consuming and easer to just by a complete vent window assembly. Its a little bit tricky but it can be rebuilt.
Enjoy your build