It looks like I have A/C! Started by pulling the clutch and replacing it, which wasn't really a big deal, but was time consuming. Whole thing took about 4 hours with charging the system being last and taking around 20-30 mins.
I have read a few threads of late of people needing to change clutch or compressor, here is how I changed my clutch on my A6 compressor. The docs on the thread below were a BIG help. Hatzie has put a TON of time into collecting and scanning in docs, service manuals, etc in searchable PDF format. This stuff is absolute GOLD. I used the ST_333_80_1980_Chevrolet_Passenger_Car_and_Light_Truck_Unit_Repair_Manual.pdf because it has a section just for overhauling this type of compressor. Go check out the thread below and see if a manual for your square is there.
PDF of Square Schematics & GM Training Manuals
Now for the actual surgical procedure...
Start by loosening the four bolts that hold the compressor in place, two on the upper brackets and two on the lower, then remove the belt from the clutch pulley. Continue by pulling the nut off of the clutch and use the puller to pull the clutch disk first. NOTE that there is a key in there, save it and put it in a SAFE place you will need it later when you re-install the new clutch.
Then pull the snap ring for the actual pulley, which is on the outside of the bearing, and use the puller to remove the pulley. I neglected to take a picture of that one, but it's right there in plain view, you can't miss it after you pull the clutch disk.
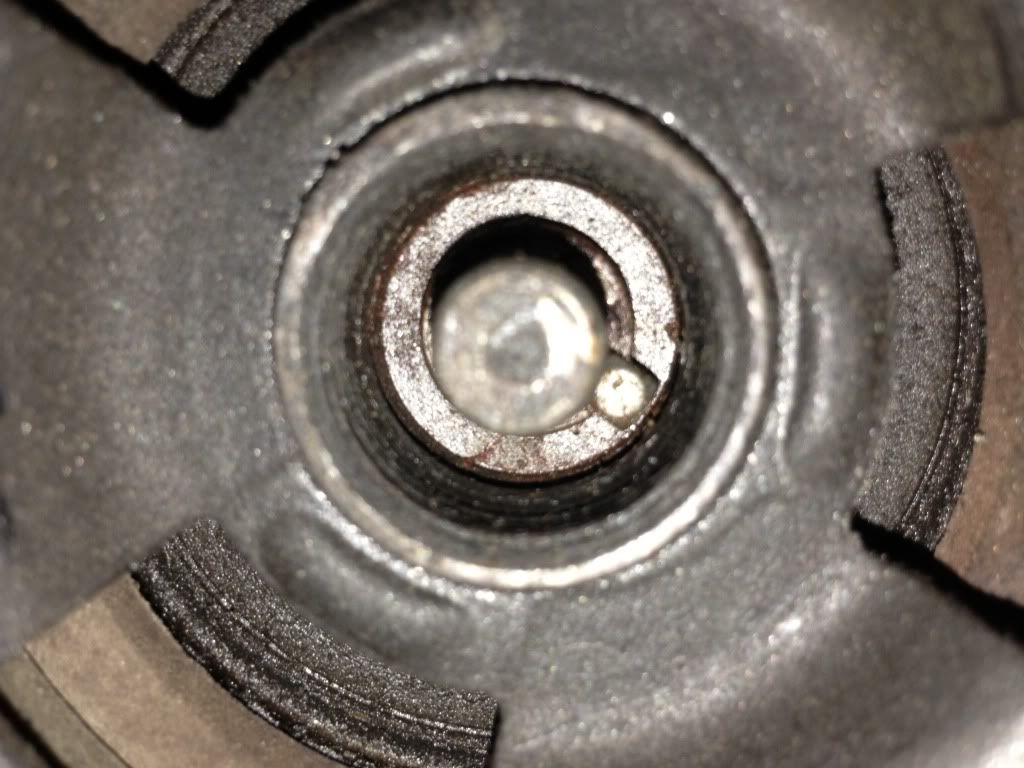
After that, note the orientation of the electrical connector. Make a mental note of it, or better yet take a picture, you will need to put the new coil on the same way. To pull the old coil, there is another snap ring holding it on.
After you pull that snap ring, the coil should just come right off.
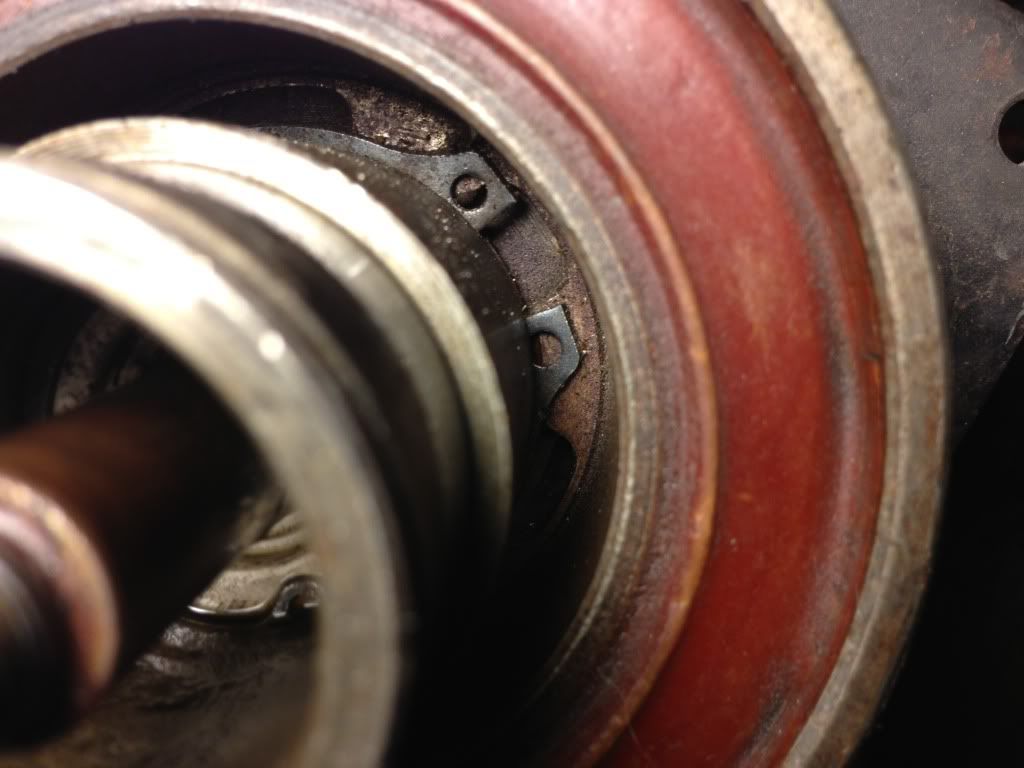
Install the new coil ensuring the orientation of the electrical connector is the same (mine was at 2 o'clock), there are indents that will help line it up. Then install the snap ring, making sure it's seated.
Next install the pulley, but be careful putting it on! There is a bearing pressed in to the pulley and held with a ring. The inside of the bearing is what goes on the shaft, and it is tight fit. If you're not careful, the bearing will move and pop the ring off that holds it in the pulley, and you will have to press it back in and re-install the ring where it belongs. I extracted the bearing out of the old pulley and used that and a block of wood with a rubber mallet to drive the new pulley on the shaft.
Next, you must line up the key way on the clutch with the shaft. If you don't get it lined up perfect, it's ok. It can be a LITTLE off (I mean at most 1/32), the pulley will align with the shaft when you reinstall the key, but try to get it as close as you can. If you don't get it lined up right, you will have to pull it and try again. Once the clutch is aligned and on the shaft, reinstall the key. Remember where you put it?

After that, reinstall the nut on the shaft and tighten to the appropriate spec.
Put the belt back on and get it tensioned properly, then lock it down.
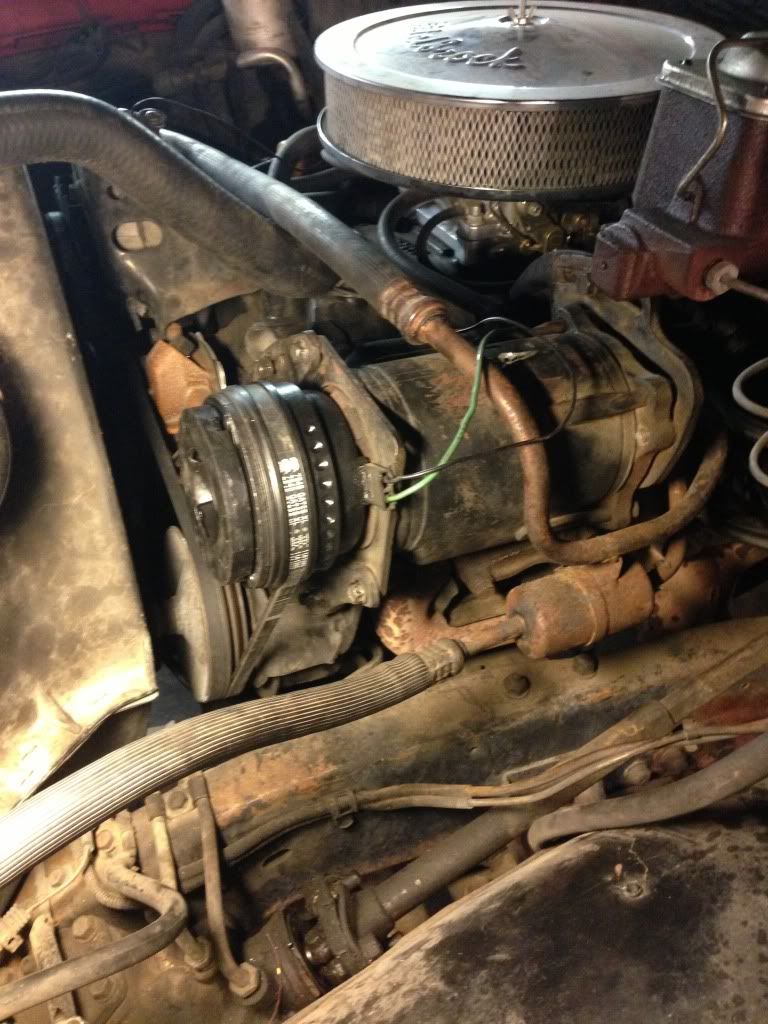
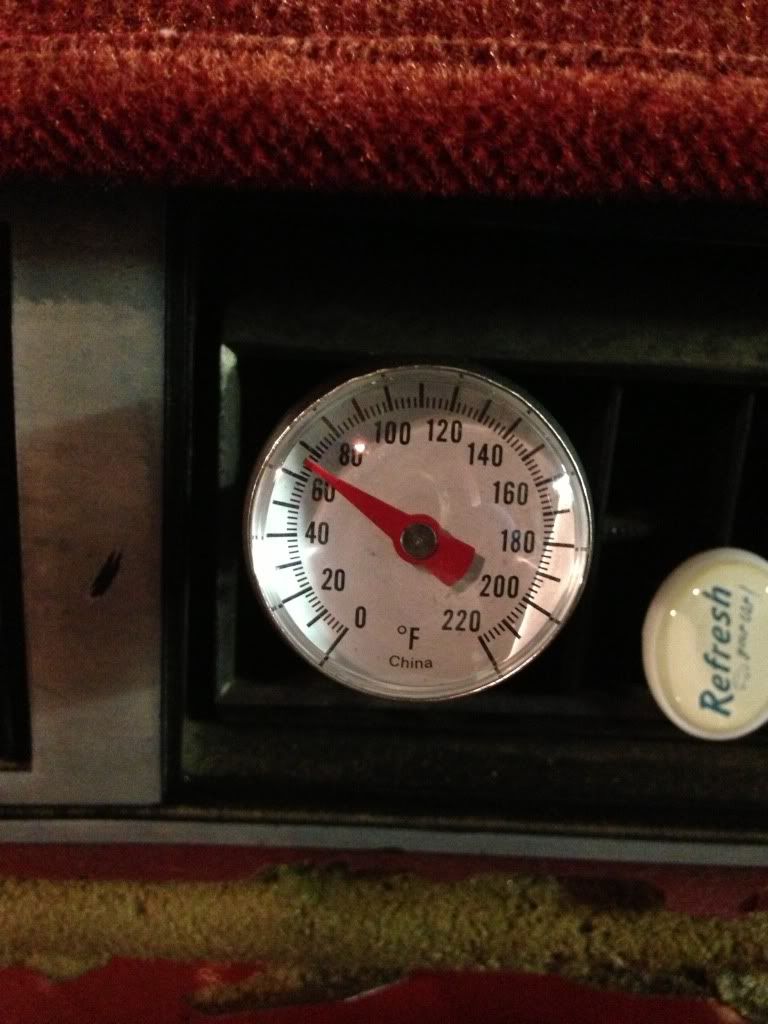
Charged with four 12 oz cans of R134a (not quite enough) and got the A/C in the truck down to ~65-70. I'll have to add another tomorrow, but by golly I have cooler air in it than I had on the drive home!
Before:

After:
One more thing to check off the list!
