The door pulls showed up today, and look great. They fit perfectly where I want to install them, but that will have to wait until after the full size tufted door panels are completed. If I mounted them now theyd be clanging on the upper ridge of the removable door pan.

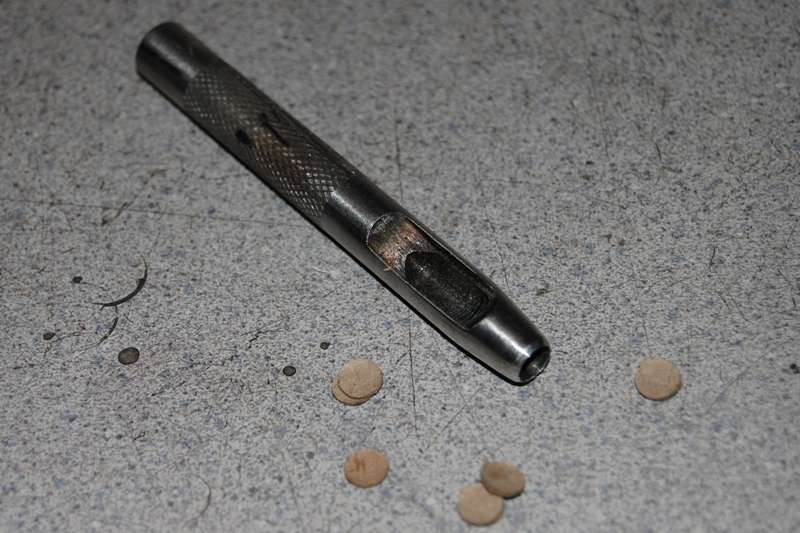
Today the pads were angle trimmed to size, followed by punching the 1 button holes:

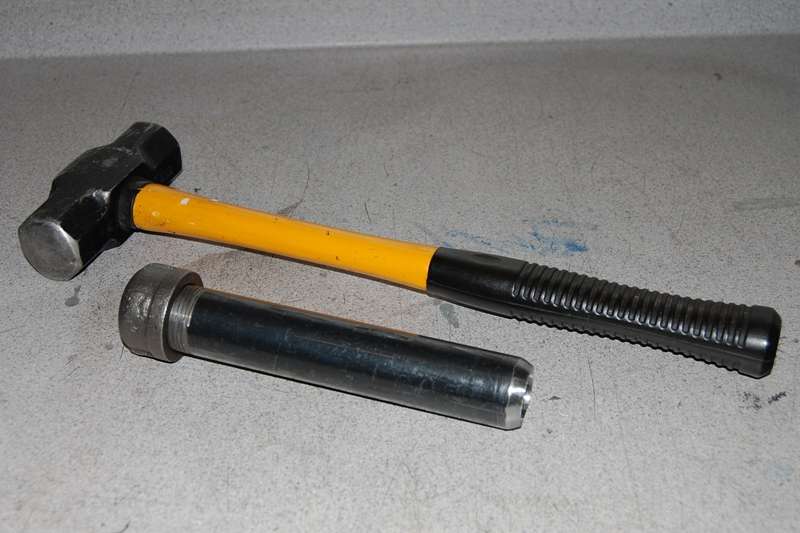
Ive purchased professional cutters before, but they didnt perform nearly as well as a sharpened length of pipe. The O.D. is sharpened on a belt sander, and the I.D. is sharpened with a sanding drum on a Dremel tool:

I always use a cap on top to avoid fragmenting the striking surface of the pipe:

The cap needs to be replaced with almost every job as it takes such a beating, the center eventually fractures out. Ill probably go through 2 or 3 caps on the door panel project:

To insure maximum life of the cutting edge, the foam is placed on 2 layers of corrugated cardboard above a ¾ piece of sacrificial plywood. Heres the best method I have found to insure the cutter is centered exactly over the indication marks;
1. Press down firmly enough with the pipe to leave an impression in the foam.
2. Quickly lift the cutter and double check the positioning of the impression with the marks on the foam. This must be done quickly as the impression will disappear almost immediately.
3. Adjust the position (several times if needed).
4. Once the pipe is perfectly located over the mark, press down as hard as possible with the off hand to compress the foam. This keeps the hole straight up and down.
5. Bash the pipe cap with the hammer in the power hand. I use this 3 pound hammer:
I strike the cap in a circular fashion between 3-5 times for a clean cut, depending on how many holes Ive already cut and how tired Im getting. It doesnt take long to become fatigued holding maximum down force compressing the foam with one hand and swinging the hammer with the other. Id rather take a few breaks rather than miss the pipe and bust my holding arm with a 3 pound hammer blow.
Once the foam was finished, button backers were created out of door panel material:

These will reside behind the foam to retain the prong buttons. They were laid out, marked, cut/trimmed, and punched with ¼ holes using a cheap Harbor Freight hollow punch:
Tomorrow Ill either start working on the Naugahyde, or fabricate buttons. Im looking forward to being done with all this prep work and actually get started on the upholstery.
I realize most of this information is tedious and boring, but Im hopeful it will come in handy for the few people that may find enthusiasm once the seats and door panels are completed and the finished result may generate more interest in this process.