Yesterday was consumed with button making. Cutting the covers took about 4 hours, punching approximately 400, five at a time. Once everything was reset it took until 22:15 to assemble just shy of 300 completed buttons. I should have been able to complete about 60 more buttons, but I received a short count on the 720 caps the box was supposed to contain. In any event I have enough finished buttons to complete both seats and both door panels.
Im not sure if I ever mentioned it before, but a big advantage of tufted upholstery is that no sewing machine is required. This was the primary method of upholstery back in the horse and buggy days, which carried over into brass era cars for the same reason. The biggest change being the use of foam instead of horse hair for stuffing.
Following is what is involved in making covered upholstery buttons for anyone who may have interest:
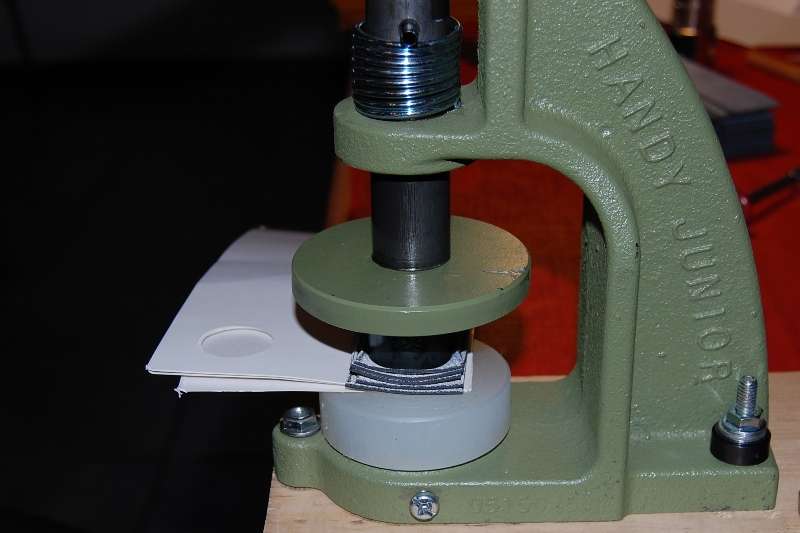
The first step is cutting covers from the upholstery material. The cutter is made of hardened tool steel and looks similar to the foam cutting pipe. Here it is seen set up to punch covers out of assorted scrap pieces:

The instructions indicate using a block of wood to support the cut, but I use a piece of Delrin since it doesnt deform (which ultimately messes up the clean edge of the cut pieces.

In order to minimize dulling of the cutting edge, I use multiple pieces of single layer non-corrugated cardboard for a support pad:

This is the type used to make cereal, Kleenex, and soda pop boxes. Many of the postcards in junk mail work well also. Corrugated doesnt work well as it doesnt provide a hard enough surface for a clean cut.
When Im in the zone I can routinely cut through the fabric and stop at the top layer of cardboard. If the holes in the cardboard dont fall out of position, the fabric can be shifted around and new holes punched numerous times before the cardboard disintegrates and must be replaced.
Material can be stacked up or folded over to punch multiple covers simultaneously. Ive found that a group of 5 is the most I can punch for maximum production. This also makes it easy to keep count on how many have been completed, since 2 batches makes one stack of 10. Trying to punch 6 or more and the edge of the covers start to come out frayed. Here the setup is showing matching strips of fabric before and after being punched:

And here a folded piece of vinyl has just been punched:

There are two inherent problems with this method. Its hard to insure everything is lined up correctly, so its easy to create defective covers missing a piece of fabric as shown at the bottom of this photo. The other problem is waste. The top piece has been folded while the bottom was one layer of matched strips:

If enough surplus material is available, its much easier to produce perfect covers if strips of material are cut into matching sizes. My wife happens to have an Olfa cutting wheel and cutting pads which makes fast work of cutting the scrap to size:

And this is the result. It increases speed by about 70% compared to working with odd sized scrap or folding. It also makes it easier to calculate how much material is needed for how many button covers:

Several hours later here are 390+ covers:
