
|
 06-24-2011, 02:41 PM
|
#1 |
|
Registered User
Join Date: Feb 2011
Location: Vegas
Posts: 71
|
Bagged My 71 Suburban
Im a total newby when it comes to air bags and IFS suspension, my other builds and vehicles are all straight axels. With all the great references and threads to be found on this Forum I tackled this project with a bit of confidence.
First off Ill be using the Suburban for towing and hauling gear, so the drop is pretty mild compared to others that I have seen on this site. I also decided I would try this with individual shrader valves for each bag, to begin with. If I decide on an air system down the road it can be added. Finding the parts needed took some investigating, searching, e-mails and IMs, price was a big factor but support and communication with the supplier was just as important to me. I ended up getting most everything from a fellow Forum member way2low (Boris) He has been great to deal with and answered all my stupid questions through IMs, I cant thank him enough for all the help! Unfortunately as kits go you could have all kinds of combination of parts and no instructions with any of them. So I hope this thread may help others that are contemplating bagging there ride. FRONT SUSPENSION Parts! 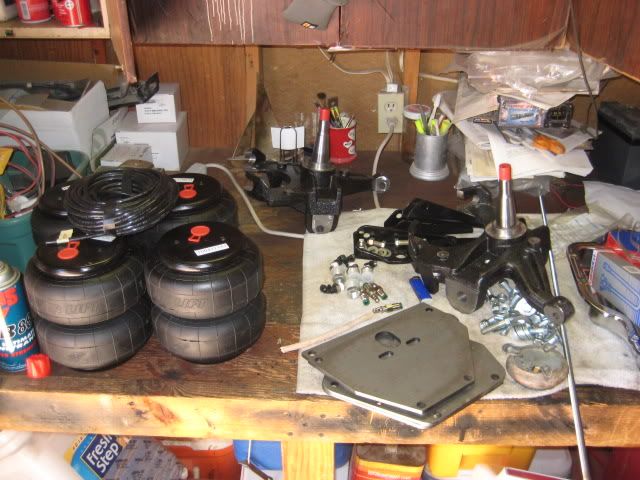 Disassemble front end, the first unplanned bump in the road is the removal of the bump/turn stop perch on the lower arm that is attached with a series of tack welds that is in the way of the lower mounting plate. I drilled the tack welds and cold chiseled the perch off. PITA 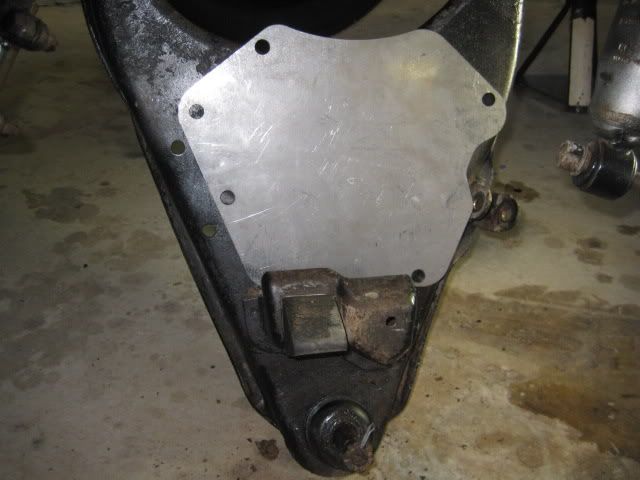 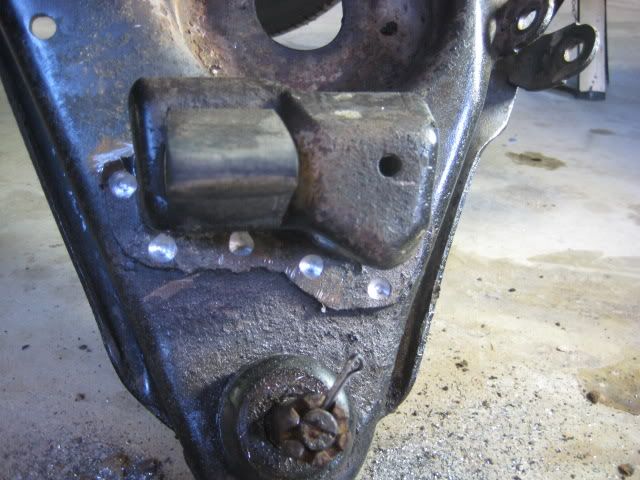 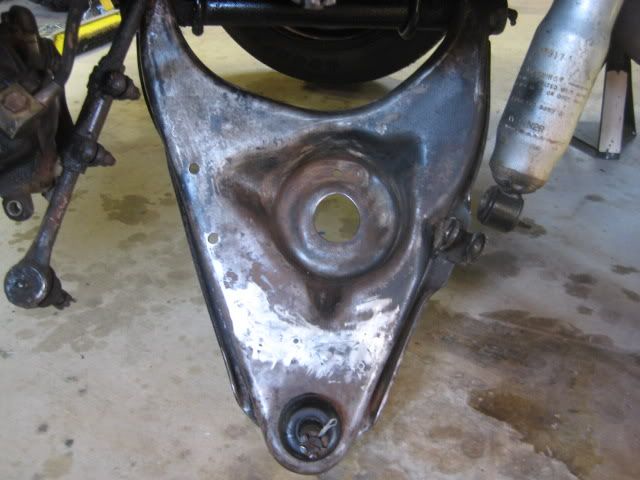 Use the mounting plate as a template and drill holes for the mounting bolts. Do yourself a favor and buy two cobalt drill bits, one for a pilot hole the other for final size, youll thank me later  Drilling these holes under the vehicle is another PITA I am stiff in places I did not even know I had! Drilling these holes under the vehicle is another PITA I am stiff in places I did not even know I had!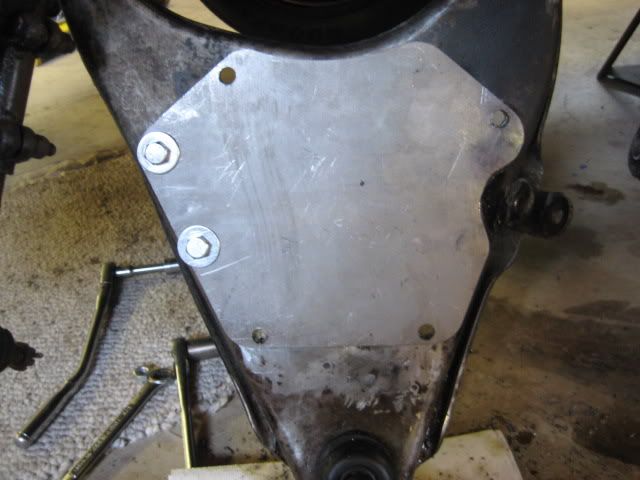 Do the upper spring perch the same. 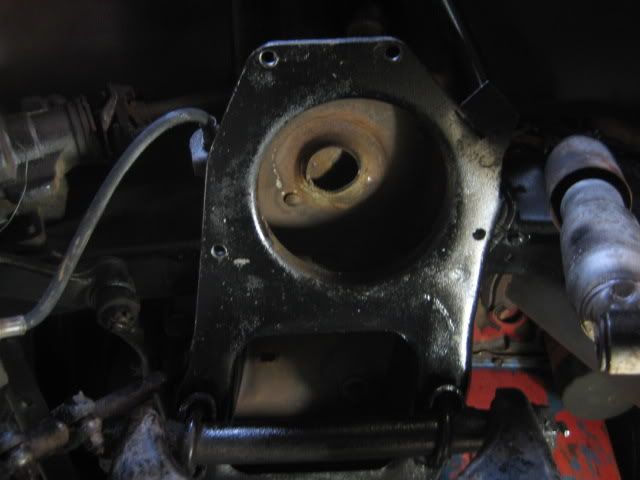 I bought a length of threaded rod, washers and nylock nuts to use for the air bag bolts, I cut the threaded rod to 1.75 ea. Bolt the air bag to the top mounting plate and bolt the plate to the upper spring perch and lower plate to the lower arm, (Do not bolt the lower plate on yet, like I did, again youll thank me later) also install your air fitting and length of hose you will need. I asked Boris what his shop used to seal the air fitting threads and he recommended The Right Stuff by Permatex for a "hopefully" leak proof install! 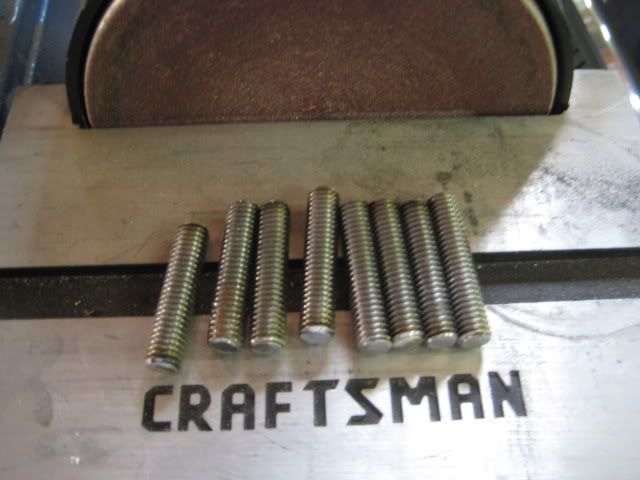 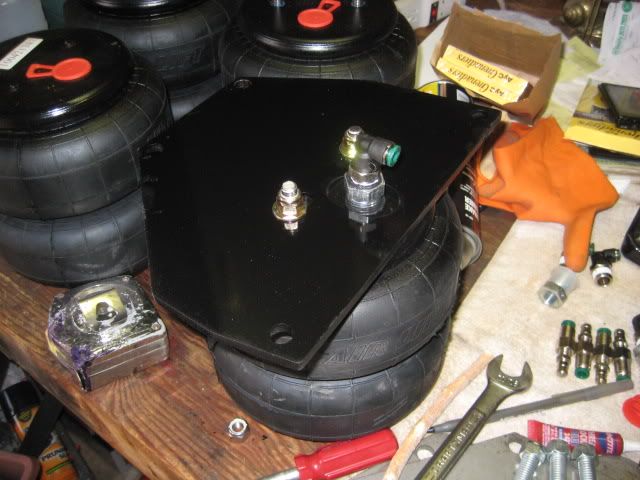 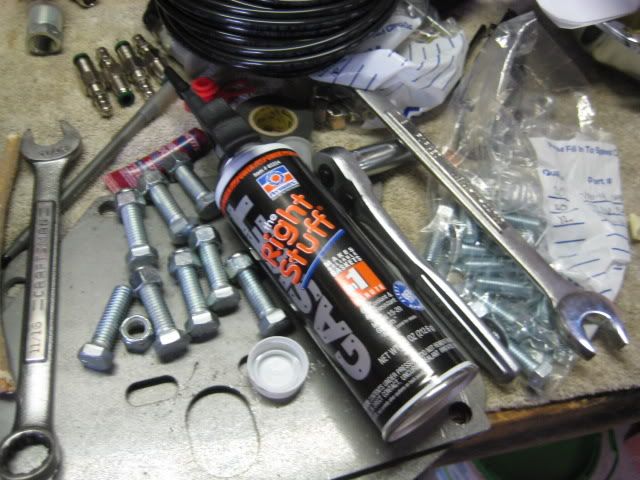 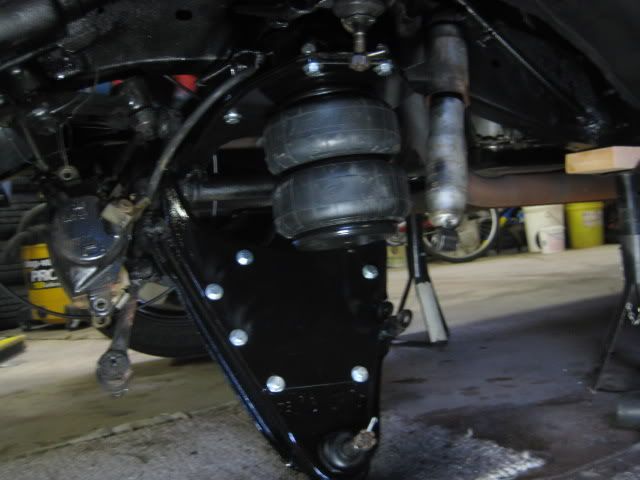 I looked everywhere to find an easily accessible shrader valve location, to fill the bags at, I came up with a neat location, the front and back license plate bolt holes! Had to drill them and the license plate to size. I plan to find acorn nut styled shrader caps and matching acorns for the lower license plate bolts that I added, to camouflage them even more. 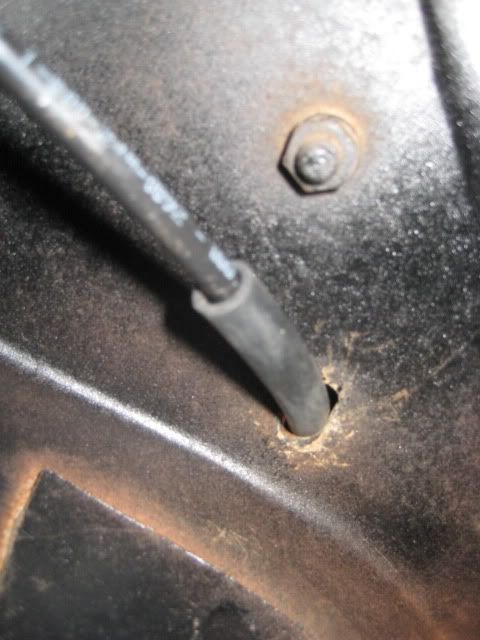 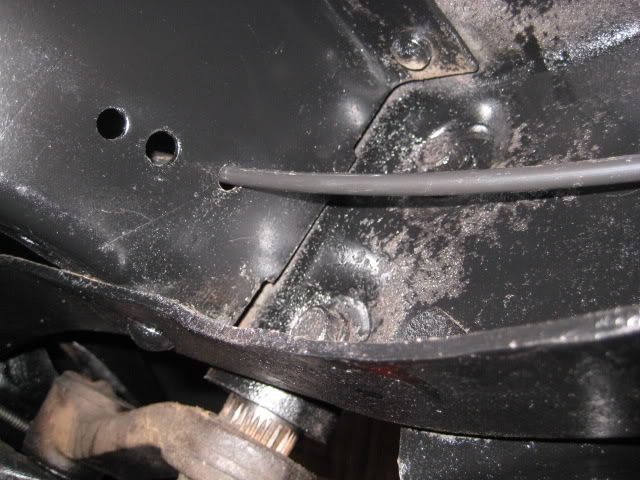 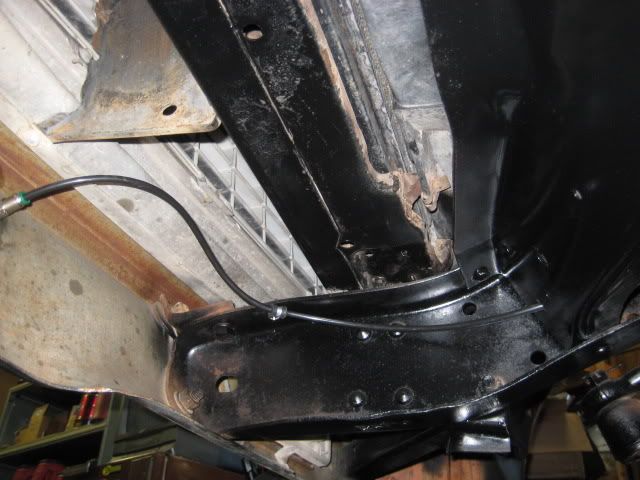 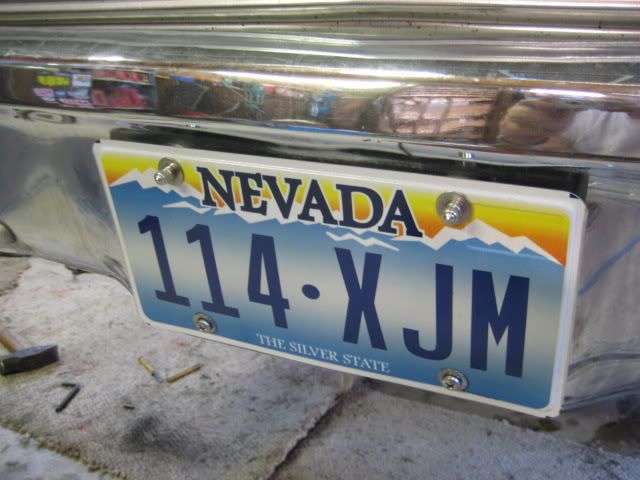 I had a lot of trouble with the next step, so pay attention The lower plate needs to be drilled with one hole to anchor the bottom of the air bag to it. The best way to do this that I found and believe me I tried a few! Is an old trick I have used in the past, powdered chalk! Put a little in the threaded holes in the bottom of the air bag, shake any loose chalk out so a film of chalk is coated in the holes (We will get back to this) First make sure the bottom plate is in place only using the bolts to hold it there, do not bolt it down with the nuts! (Go ahead ask me how I know) I installed my new 2.5 drop spindles and raised the spindle with a jack to level the a-arms as close as possible, slide the bottom of the air bag around on the bottom plate to find the sweet spot to anchor it at, Eye ball it level, front to back and side to side. Once your happy with the location go under the truck with a small hammer and punch and tap the bottom of the bottom plate below the air bag, this will knock the powdered chalk loose leaving the exact location to drill on the plate. Now let all the air out of the bags at the shrader valve and lower youre a-arms back down, the empty bags will be above the plate now and you should see your hole marks, you only need to anchor the center hole, I put chalk in all three just to be sure I marked it correctly. Now take your lower mounting plate off and drill it, bolt it all back together and the front bags are done!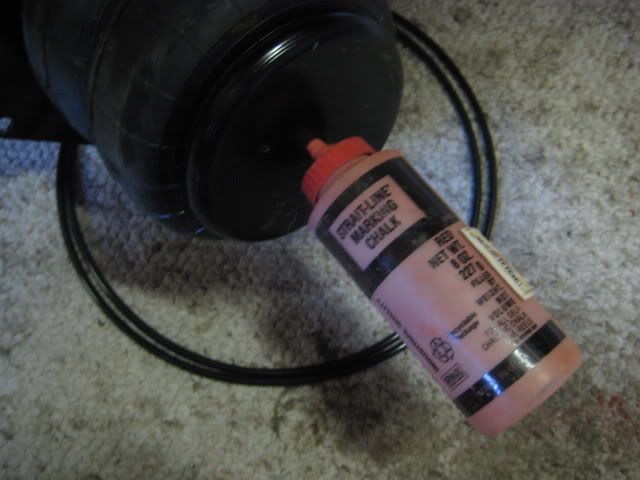 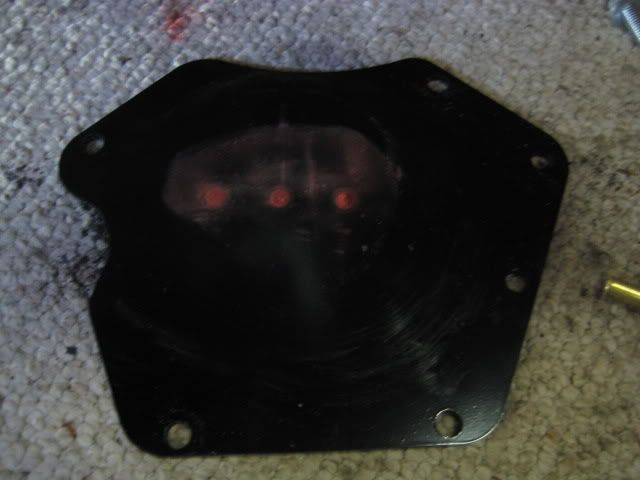 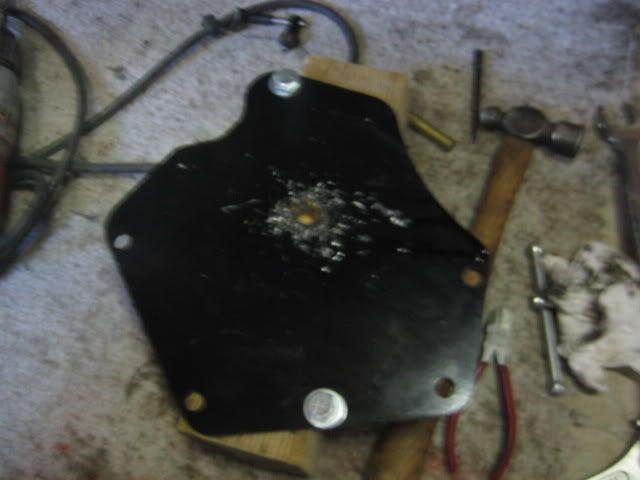 Want Drop! 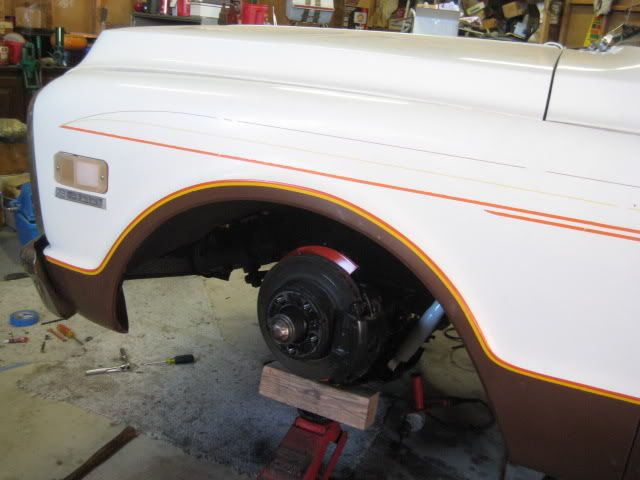 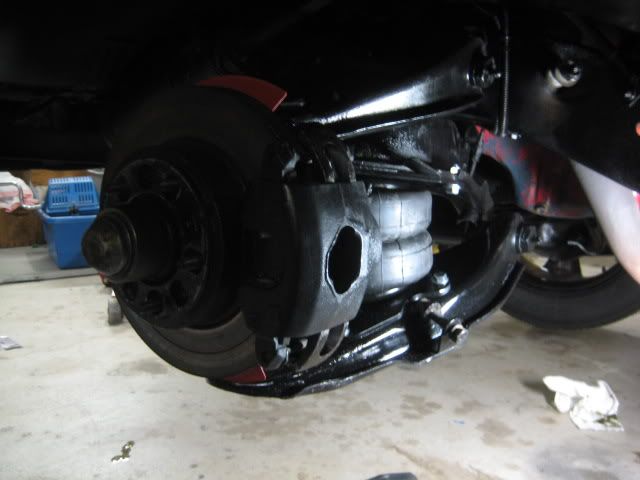 I decided I wanted anti sway bars also, CPP had a heavy Duty Front & Back kit, here is the front kit. Please pay attention again, if you do you will only need to install it once, unlike me! Since the sway bar mounts on the lower a-arms will be ¼ higher than designed since it will be setting on the lower bag plate you will need to shorten the 1 spacer to ¾ to make up the difference of lower plate thickness. Other than that you can follow the instructions that come with the kit. 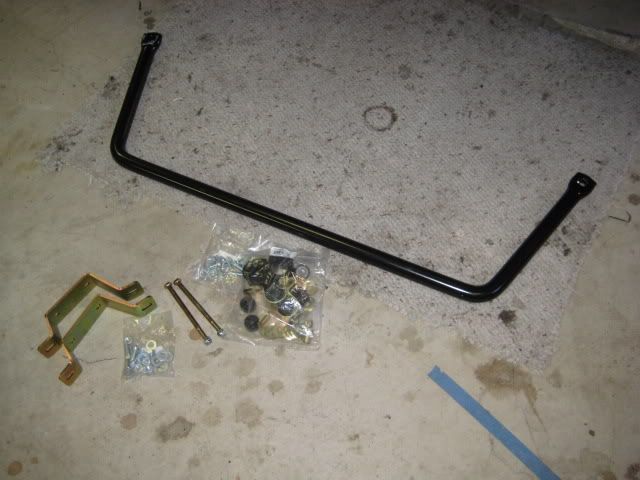 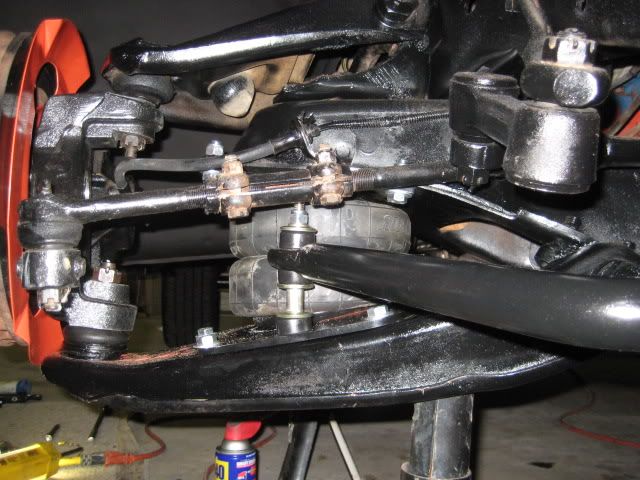 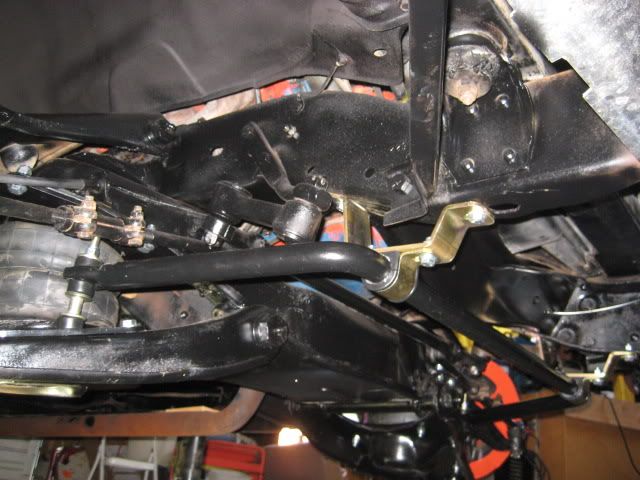 Might as well install new Timken wheel bearings while youre at it! Dang it was hard to find USA made bearings, plus they were a little less $ than the China crap all the auto parts stores are selling, really Ts me off, I get so tired pulling good old American made parts only to install China Crap! (Thanks, I feel better now) 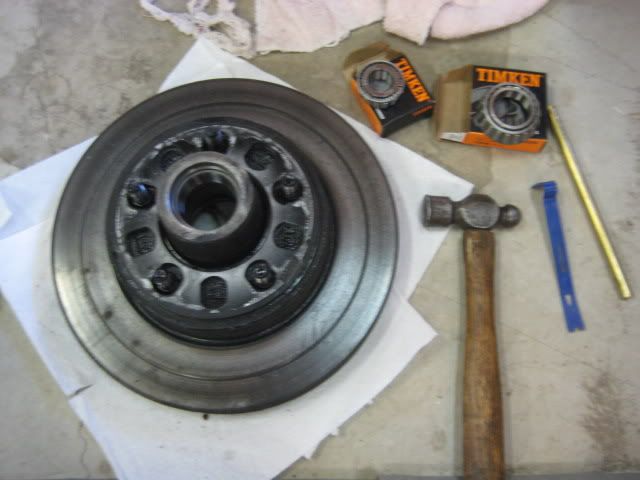 Ill be starting on the rear this weekend and will update this post once completed!
__________________
Scott S 54 Chevy Pick-Up 71 Chevy Suburban 76 FJ40 LandCruiser - 454, TH350, NP205, Ford 9" 98 Dodge Ram 2500 4X4 Cummins |

|

|
| Bookmarks |
|
|


 Threaded Mode