
 |
|
|
|
|
#1 |
|
Senior Enthusiast
Join Date: Feb 2007
Location: Spokane Valley, WA
Posts: 8,356
|
No warp hole filling.
Here’s a tip on how to eliminate those unwanted holes in sheet metal without the risk of welding distortion. This method requires access to the back side of whatever is being repaired, preferably where the back side won’t be seen in the finished result. If you possess welding equipment and great metal working skills, this may not be of much interest, but for those of us that don’t have welding equipment or skills, it’s an inexpensive and permanent alternative.
The short answer is JB Weld epoxy. It’s a metal heavy epoxy safe up to 500 degrees. It has similar expansion and contraction characteristics so cracks aren’t a problem like when using fiberglass. My first encounter with this product was in the early 1980’s when I was sold a rebuilt cylinder head with a semi-circular damage slot in the gasket rail. Obviously it leaked like a sieve. When I complained to the machinist, he said “no problem, I’ll have it fixed in a few minutes” - and introduced me to JB Weld epoxy. He explained he had filled a hole as big as 3” in an engine block with the stuff. I was skeptical at first, but he made a dam out of tape and filled the damaged area. After the JB Weld cured and was ground down, it worked perfectly for many years until I wore out the engine. With that in mind, I started using it to fill trim holes in car bodies. In the beginning I just did trim holes up to about 1/4 inch in size. Technique – best practice: 1. Thoroughly clean the front and back side of whatever you’re fixing with lacquer thinner or acetone (don’t use alcohol). 2. Sand the front side, and slightly chamfer the hole if possible. 3. Sandblast the back side, or rough it up good with sand paper if blasting isn’t practical. 4. Place duct tape over the front of the hole. 5. Select an appropriate size coin or disc that will cover well beyond the diameter of the hole. I’ve used lots of pennies and a few quarters over the years. 6. Rough up one side of the coin by sandblasting or sanding. Note – it isn’t illegal to destroy coins. Early laws pertaining to defacing coins pertained to gold coins, where people would abrade them to collect gold dust, then sell the dust and spend the coin). If something cheaper than a penny is available, that would work as well. 7. Place an appropriate size piece of duct tape face up on the bench. 8. Lay the coin centered on the duct tape, roughened side up. 9. Mix up a suitable batch of JB Weld, and form a generous puddle on top of the coin. 10. Apply the coin to the back of the hole, sealing it in place with the duct tape. Press firmly until a slight bulge is showing in the tape on the front side. 11. Allow the patch to cure overnight. Remove the tape from both sides. 12. Paint the backside if any bare metal is showing from the sanding or blasting process. Block the bulge flat on the front side. The repair may require one simple coat of primer and the hole will become virtually invisible. The most vigorous test result I’ve seen was when my 67 Chevelle was destroyed by a guy running a red light. Along with the rest of the car, the quarter panels were demolished, but the JB Weld over the original emblem holes remained untouched. I’ve made a few exceptions to the preferred technique. For example, my truck originally had the west coast style truck mirrors installed. To fill the mounting holes in the top door flange, I sanded both sides, chamfered the holes on both sides, taped the front, filled the hole from the rear with JB Weld, and pressed duct tape in place on the back. Once cured, both sides were sanded flat and painted. That was almost 20 years ago and there’s no indication where the holes were. Chamfering the hole provides more surface area and grip to the plug. About 10 years ago I got much more ambitious with this process and started filling bigger holes. The following pics show the gas tank filler hole on my 1960. I used the same technique above, but substituted a patch made from part of the original front fender. I metal worked it on a sandbag to a shape matching the body before installing. Here’s a picture of the patch from the inside, and the finished result from the outside. 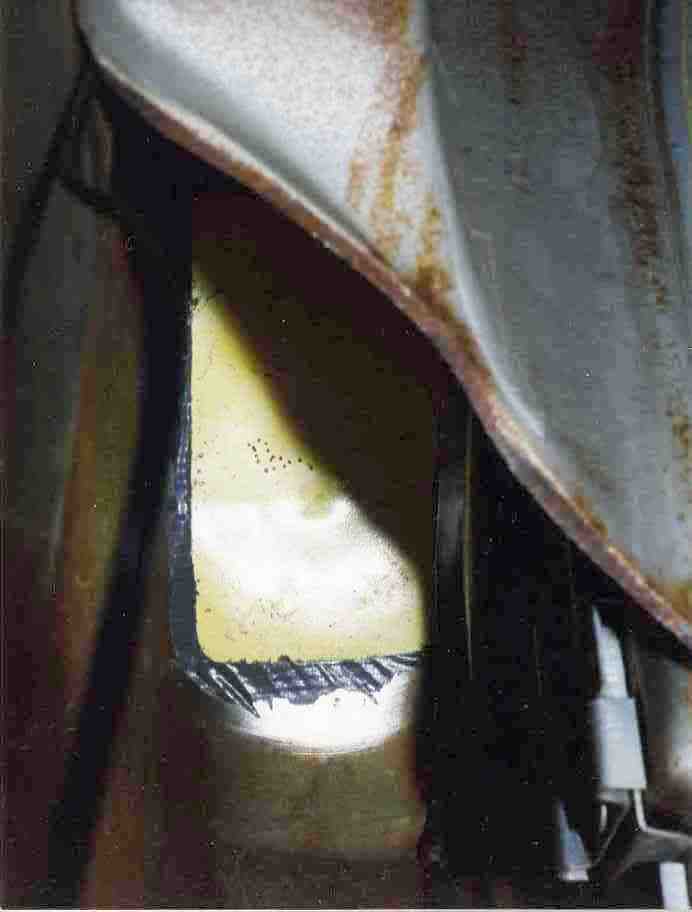 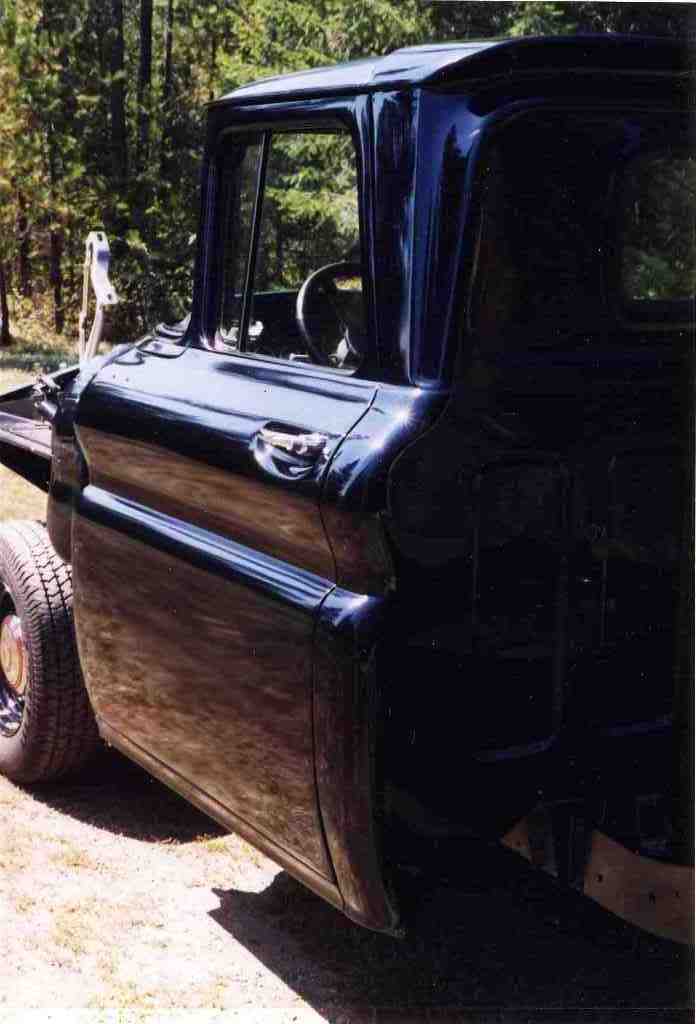 I made a bed of almost ¼ inch of JB Weld, pressed in place from the inside. The outside was covered with wax paper, held in place with duct tape. When cured, there were a few low spots I filled with more JB Weld, before a final skim of Rage filler. It’s been in place for about a decade, and the door has been slammed against it about a zillion times (okay maybe not that many). Other than a recent repaint it looks exactly as it did when I patched it. There’s never been any hint of a crack or defect. About the same time, I purchased new aftermarket front fenders. The seam at the front of each fender was so poorly formed the inner panel had square corners leaving gaps big enough to push a pencil into. I used the same repair, sandblasted the entire crack/gap, sealed the back with duct tape, stood the fenders on their rear edge, and filled the entire seam with JB Weld. Same result – the fenders showed years of chips before the recent repaint, but the JB Weld repairs are permanent and look as good as new. 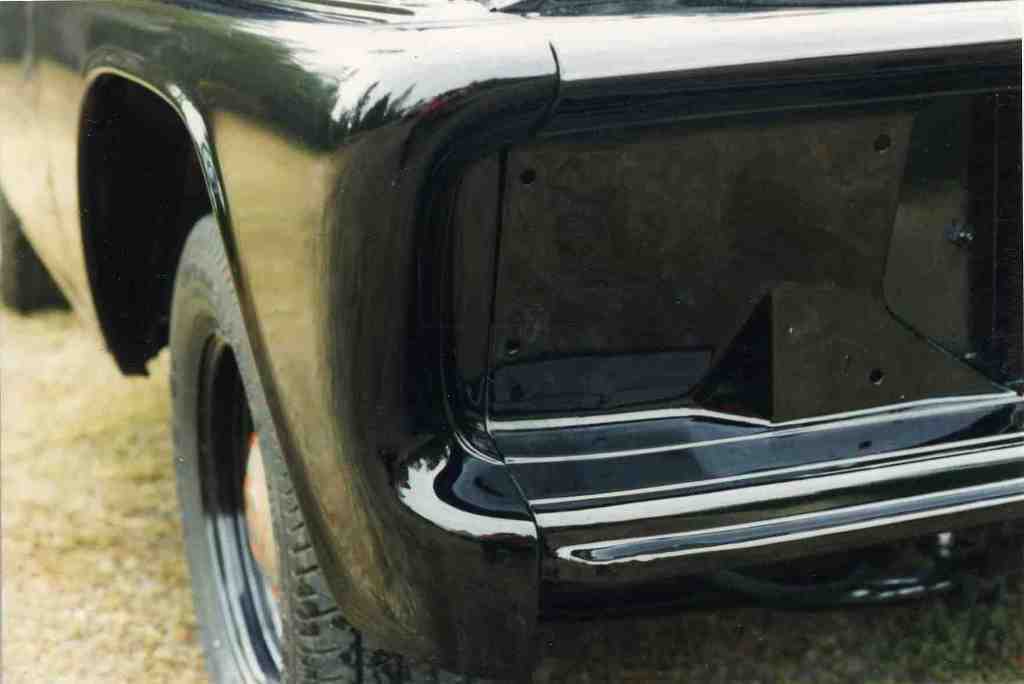 JB Weld is available at Walmart, Amazon, and most auto supply stores so it’s easy to find. It’s the only brand I use. I’ve tried other competitive products, and they just don’t have the same characteristics. JB Kwik is a similar product from the JB Weld company that sets up and dries faster. I use it for modeling, but it isn’t as strong or heat resistant as original JB Weld, so most of the time I stick with the original. One more note – don’t use heavy magnets to hold pieces in place while JB Weld is curing. The metal content is so concentrated in the epoxy filler the magnetic field can cause the mixture to pool around the magnet during the curing cycle. * * * * * * * * * * * * * * * * * * * * * * Here’s another body crack that was successfully repaired with JB Weld. I had small cracks on the outside of both door jambs, right where the sail panel meets the belt line. The area really takes a pounding from the door slamming. I had a body shop weld them up, and each side cracked again about a month later. So like everything else I fixed the problem with JB Weld. I formed a reinforcement piece from a hardware store angle bracket, drilled out the crack to keep it from spreading, covered the face of the hole with duct tape and glued in the splint from behind. Once cured, I just pulled the duct tape, blocked it out and finished with primer. Four years later there remains no trace of repair. 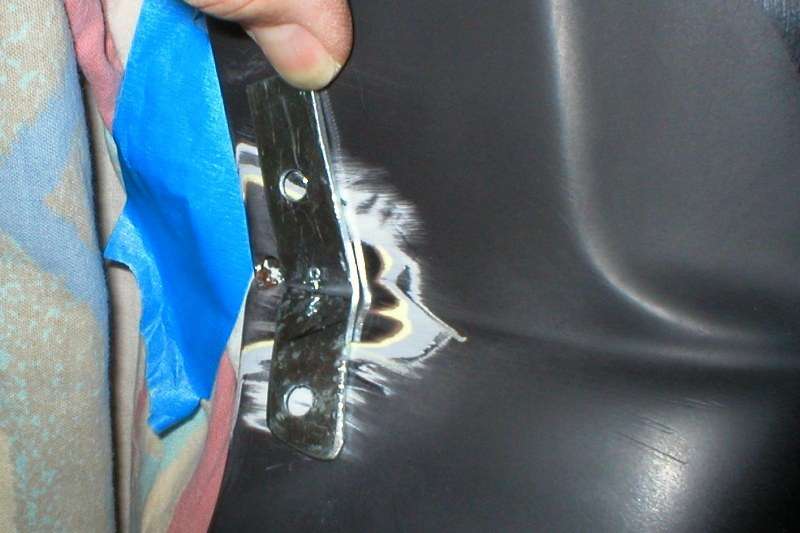 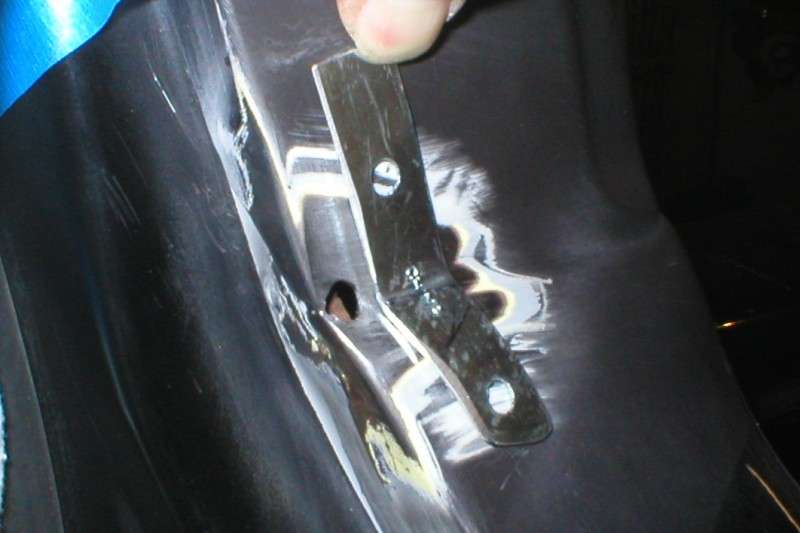 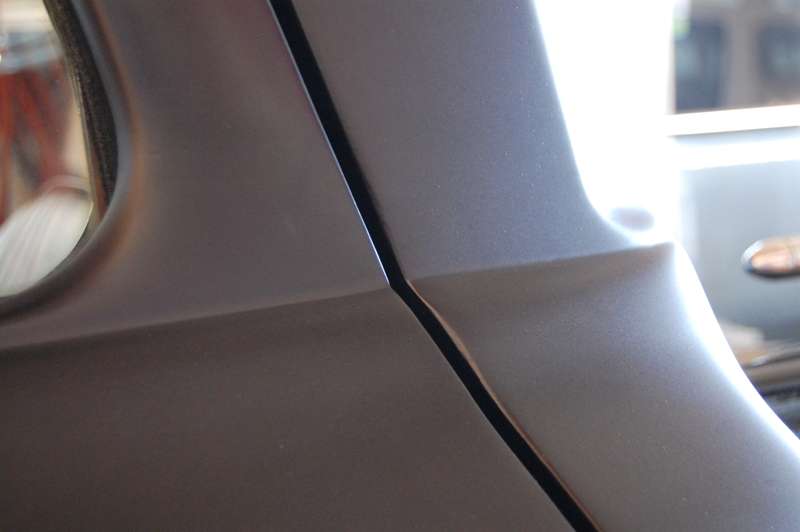
Last edited by markeb01; 03-29-2012 at 09:47 PM. |
|
|

|
|
|
#2 |
|
Registered User
 Join Date: Mar 2008
Location: San Marcos, CA
Posts: 578
|
Re: No warp hole filling.
Awesome writeup!! Thanks for sharing. I have been wondering about that stuff myself to use in place where either welding is hard, ruins paint or just might warp metal too much. Nice to get some feedback from some who has used it and has seen it last for years!
I like how you used it to fill the seams, versus welding, I want to fill mine but I don't trust my welding skills enough that I am afraid of putting too much heat in and warping it. Have you ever used it in the seams of a LWB side?
__________________
1964 Fleetside LWB 1995 Yellow Mustang convertible 1996 Camaro Z28 My build thread Looking for help on completing the Disc Brake Upgrade Reference Thread If you didn't build it, you don't really own it Last edited by 1964C10; 10-16-2009 at 12:03 PM. |
|
|

|
|
|
#3 |
|
Senior Enthusiast
Join Date: Feb 2007
Location: Spokane Valley, WA
Posts: 8,356
|
Re: No warp hole filling.
Sorry, can't say I have since mine is a short stepside. If you're talking about the veritcal joint on the outside at the rear of the bed, I'd have no problem filling that with this method. It's really no different that the seam on my front fender. I don't think that area would have any more inherent flex than a front fender. And my front fender has had the hood slammed against it for ten years, along with close to 50,000 miles rough driving over a lot of gravel and rock roads. I live in the Northwest where the temperatures also range from the 90's in summer to sub zero in the winter. This stuff really does have the consistency of metal once cured.
The key to success is having the surfaces rough and clean, and fully packing the material in the seam. This is how I'd do it: 1. Wash the gap and the surrounding area with wax and grease remover. 2. Sandblast the gap thoroughly. If necessary do it again to make sure it is completely clean. 3. Take great care with a pick and air hose to make sure the area is completely free of debris. It's important no sand particles remain as they will interfere with the epoxy gripping the metal. 4. Wash the gap with wax and grease remover again. 5. Tear off and set aside a strip of duct tape long enough to cover the seam. 6. Starting at the bottom, pack the material in the gap with a small putty knife or Bondo spreader. Work your way up the seam covering with duct tape as you go. I prefer doing this work in a horizontal position so it has natural flow to help in filling. For areas where this isn't practical, the duct tape seals the epoxy in the desired position until it cures. It takes several hours for the material to set up so it has a tendency to run during this period, leaving you plenty of time to press it into position before covering. Should you end up with any gaps, simply repeat the process. Once the cavity is completely filled, simply block it out smooth and cover with a thin coat of body filler or primer as needed. |
|
|

|
|
|
#4 |
|
Registered User
Join Date: Aug 2009
Location: Coaldale Alberta
Posts: 174
|
Re: No warp hole filling.
Thats amazing! Sounds scary but looks good....
 Jory 
|
|
|

|
|
|
#5 |
|
Registered User
 Join Date: Oct 2006
Location: San Jose NOR*CAL
Posts: 3,080
|
Re: No warp hole filling.
cool write up !thanks
__________________
1960 Apache long bed fleet L6 250 Clifford intake 2 bbl carb. Langdon cast headers with dual exhaust and bellflower tips. T-5 5 speed, power steering and power disc brakes. "Over, Around or through it... " |
|
|

|
|
|
#6 |
|
Registered User
Join Date: Feb 2007
Location: Phoenix Az
Posts: 432
|
Re: No warp hole filling.
Thats awesome, thanks for sharing!
BTW, the vent cowl looks really slick.
__________________
Rockin' a '66 and loving every minute of it 
|
|
|

|
|
|
#7 |
|
Account Suspended
Join Date: Sep 2009
Location: High Plains of Colorado
Posts: 2,485
|
Re: No warp hole filling.
It's hard to argue with success. Thanks for the detailed write up.
|
|
|

|
|
|
#8 |
|
Senior Car Nut
 Join Date: Jan 2008
Location: shellman bluff, GA
Posts: 1,411
|
Re: No warp hole filling.
markeb01, ditto on the write-up!
Since I dismantled the long fleetside bed I've been toying with the idea of using JB Weld to fill in the pitting in the sills and wheel tubs edges, etc.. As you probably know, epoxy is a great resin, far, far (orders of magnitude)tougher than the polyester used in body fillers because of its flexibility and highly water-resistant. It should also be great for filling seams like fleetside bedsides and the hood. As always, surface preparation is the key. You helped convince me, thanks!
__________________
Larry |
|
|

|
|
|
#9 |
|
Senior Enthusiast
Join Date: Feb 2007
Location: Spokane Valley, WA
Posts: 8,356
|
Re: No warp hole filling.
|
|
|

|
|
|
#10 |
|
Registered User
 Join Date: Mar 2008
Location: San Marcos, CA
Posts: 578
|
Re: No warp hole filling.
Thanks for all the help! I have used this stuff a long time ago so my memory on how it behaves is faded (like many things hahaha) Anyways, as it starts to cure those it for a skin and does it stay a little pliable so if it isn't in the correct shape, can you "mold" it a little?
__________________
1964 Fleetside LWB 1995 Yellow Mustang convertible 1996 Camaro Z28 My build thread Looking for help on completing the Disc Brake Upgrade Reference Thread If you didn't build it, you don't really own it |
|
|

|
|
|
#11 | |
|
Registered User
Join Date: Aug 2009
Location: Unionville Mo.
Posts: 217
|
Re: No warp hole filling.
Quote:
You can sand and or file it to shape. I use it at work to fill dents in our printing press tables. I use JB quick. Any dent will show in what we print, so I work down to 800 grit wet, wish my body work skills were as good! |
|
|
|

|
|
|
#12 |
|
Sunburst C10!!!
Join Date: Jan 2009
Location: Texas
Posts: 2,560
|
Re: No warp hole filling.
that is awesome
__________________
Gage 1967 C10 Shortbed Stepside |
|
|

|
|
|
#13 |
|
Member of the longbed union.
Join Date: Feb 2009
Location: Killeen, Tx
Posts: 2,158
|
Re: No warp hole filling.
so your telling me I can put my whole truck together with this? HAHA JK. I have a welder.
__________________
Paul 88 GMC Crew Cab dually, 454/T400 64 LWB 400 HP 350/350T Bagged, under construction! Sold most of it! 92 S10 Iron Duke 5 speed, 5/7 drop for now. soon to be bagged. Sold http://67-72chevytrucks.com/vboard/s...59#post4637759 |
|
|

|
|
|
#14 |
|
Senior Member
   Join Date: Jan 2018
Location: Hickory Flat, GA
Posts: 4,493
|
Re: No warp hole filling.
Hey Mark, I hope you and your truck are doing well.
Was reading through this again, and I was wondering how it's held up after another 10 years of driving. I hope it's still looking good because I might end up doing it to some places on my truck soon
__________________
Christian Carpenter 1963 C10 - Frankentruck 283, Muncie 3 speed with overdrive Overdrive wiring here1963-ish truck bed trailer - Half-Wit 1981 C10 - Penny 305, th350 --> Soon to be 350, Saginaw 4 speed 1995 Dodge Dakota Sport "I'll put it simple: if you're going hard enough left, you'll find yourself turning right." - Doc Hudson |
|
|

|
|
|
#15 |
|
Registered User
Join Date: Apr 2016
Location: Dawson Creek, B.C.
Posts: 144
|
Re: No warp hole filling.
One of the guys I work with showed me this. He uses it over welds in body panels to seal any defects that would allow moisture to get between the steel and body filler. He has been doing this for 30 years and never had an issue with it.
__________________
Nick 1961 Apache short stepside 4X4 SBW 348/4 speed 1960 Apache C-20 long fleet custom cab BBW 283/4 Speed 1967 rust bucket Olds Cutlass with a 455 1972 GMC K-15 350/4 speed long fleet |
|
|

|
 |
| Bookmarks |
| Thread Tools | |
| Display Modes | |
|
|