
 |
Register or Log In To remove these advertisements. |
|
|
|
|||||||
 |
|
|
Thread Tools | Display Modes |
|
|
|
|
#1 |
|
Local Redneck Authority
Join Date: Mar 2009
Location: Grand Rapids, MI
Posts: 584
|
My Mater Build *** 71 ChevMC plow rig ***
Hey everyone, I'm Kevin. Please forgive me, I didn't see this 4x4 build section! I'm going to transfer most my build from the main build section, as I think it would fit best over here...
So I'm building a new plow truck for next winter. Currently I run a 90 Chevy short box with front and rear blades and an 89 K5 with the same setup. The K5 is rotten to the point where the body is literally sitting on the frame. So I've decided to use what parts I have and build a truck. I'm reading on this site every chance I get and working in the mean time. Progress is slow because of the family, a young toddler daughter and an infant daughter and Mommy needs my help whenever I'm not workin! The truck will have a Boss 8' blade on the front , a wooden box I built a few years ago and a 7.5' back blade too. My thoughts are tough the first time, less down time when snow flies in Michigan. I'll be running belt driven hydraulics robbed from the K5. Started with my donor frame - 86 K10 Longbed 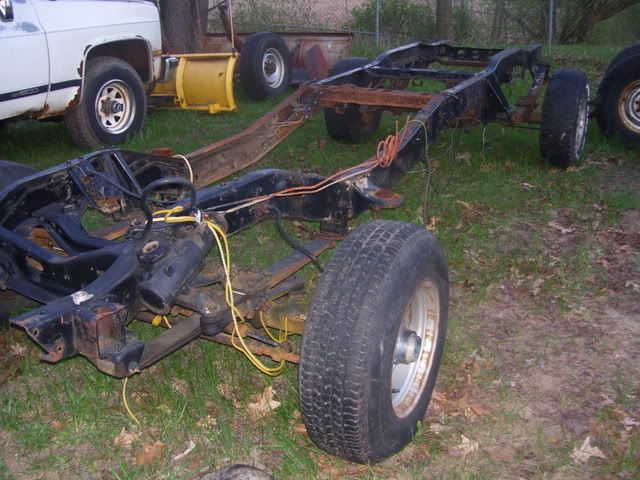 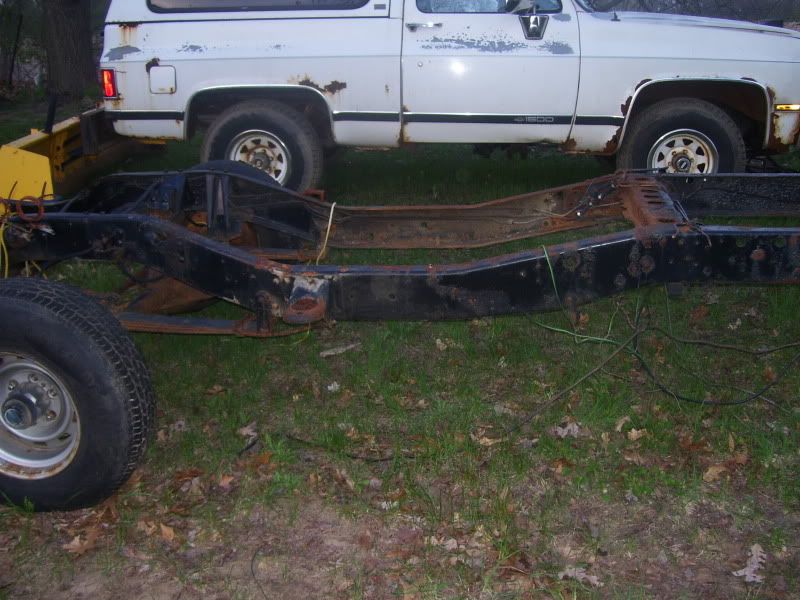 Stock Leaf Springs 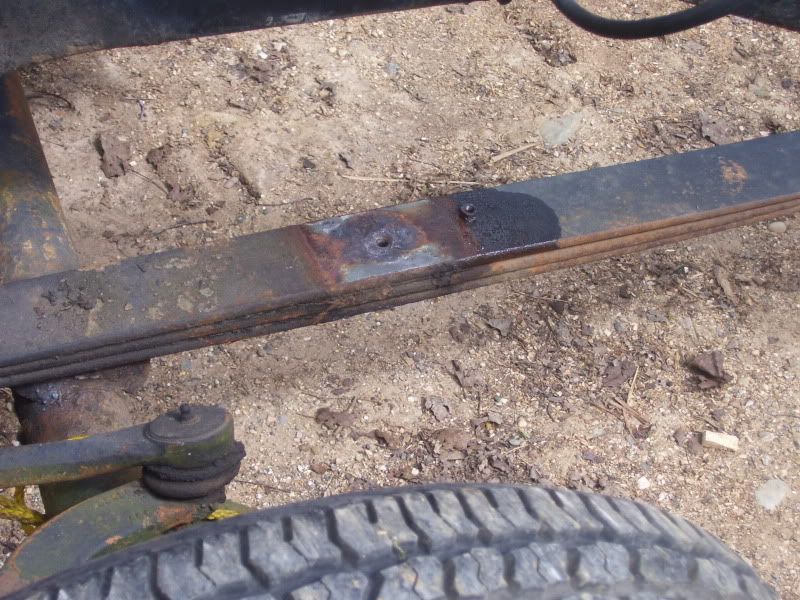 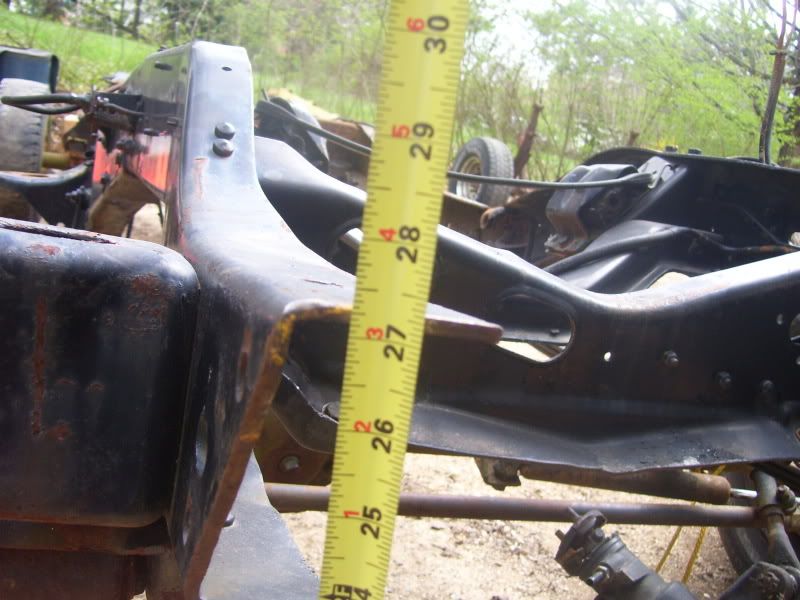 Donor Leaf packs / 86 10 bolt w/ 4.10 gears swapped in 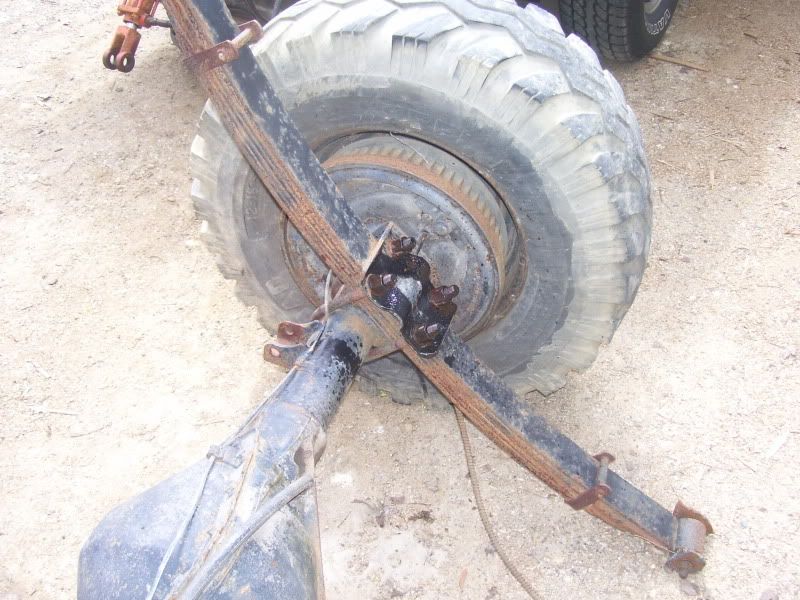 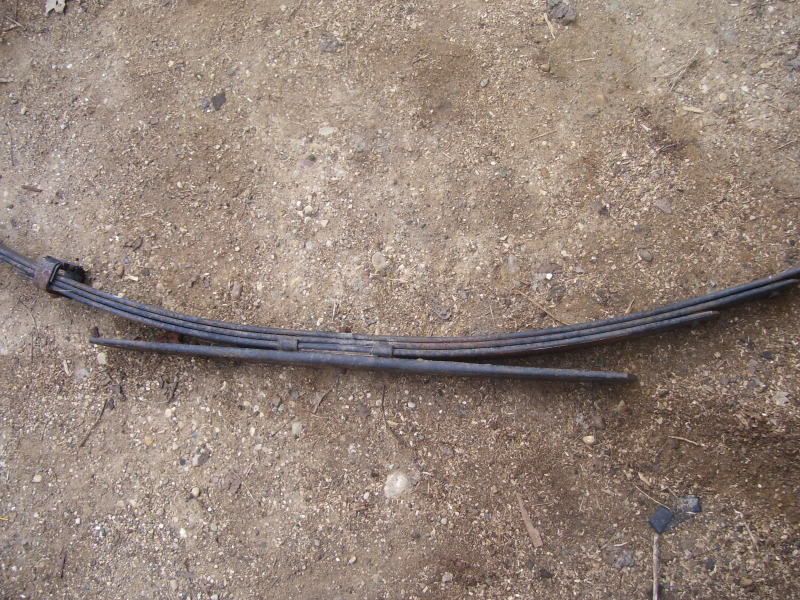 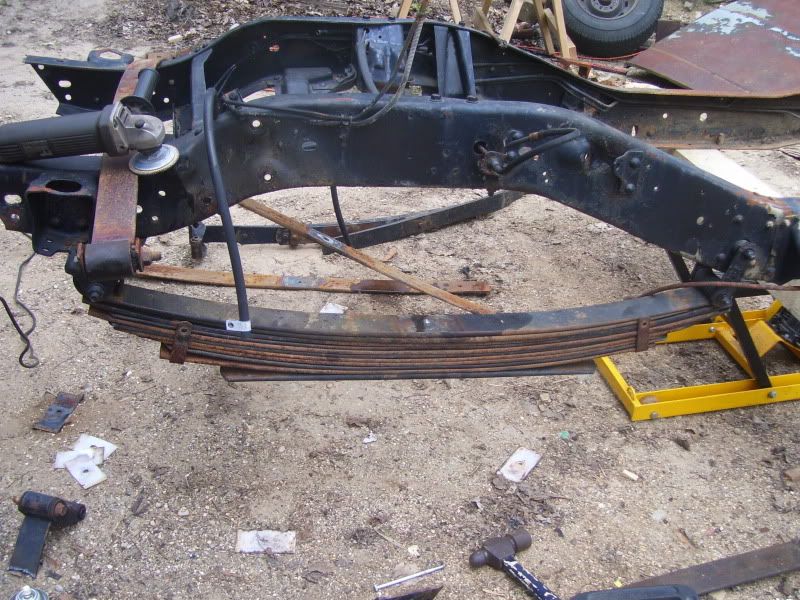 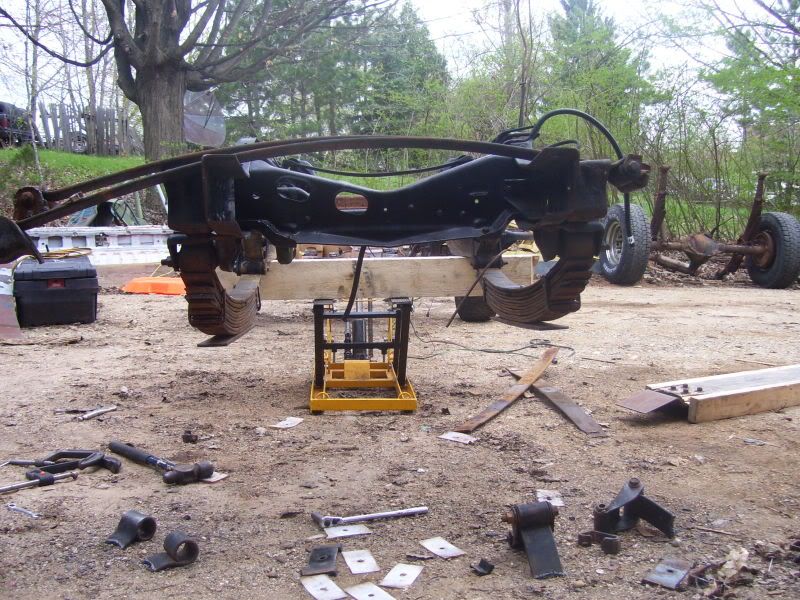 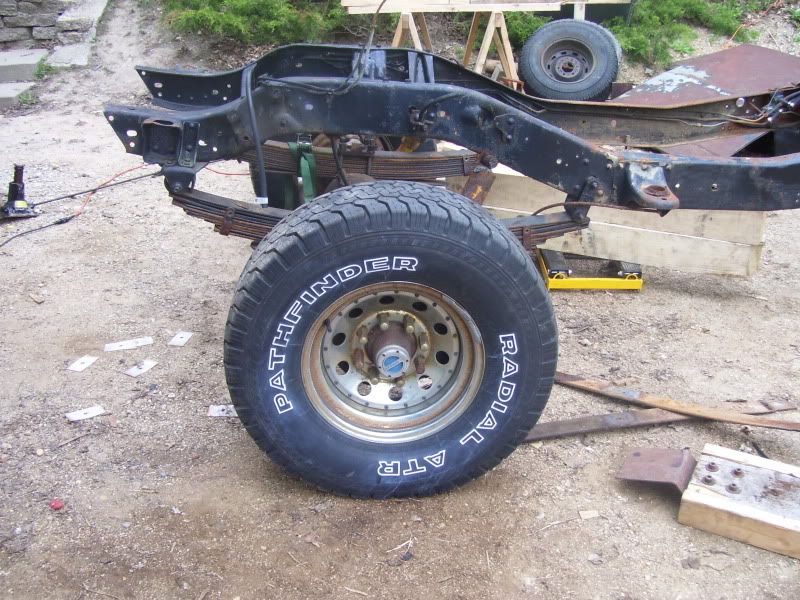 Frame marked to cut 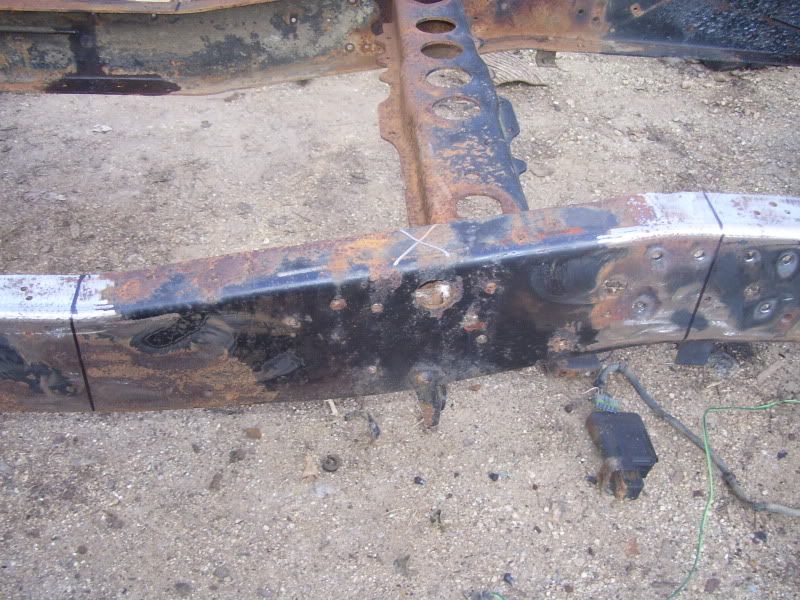 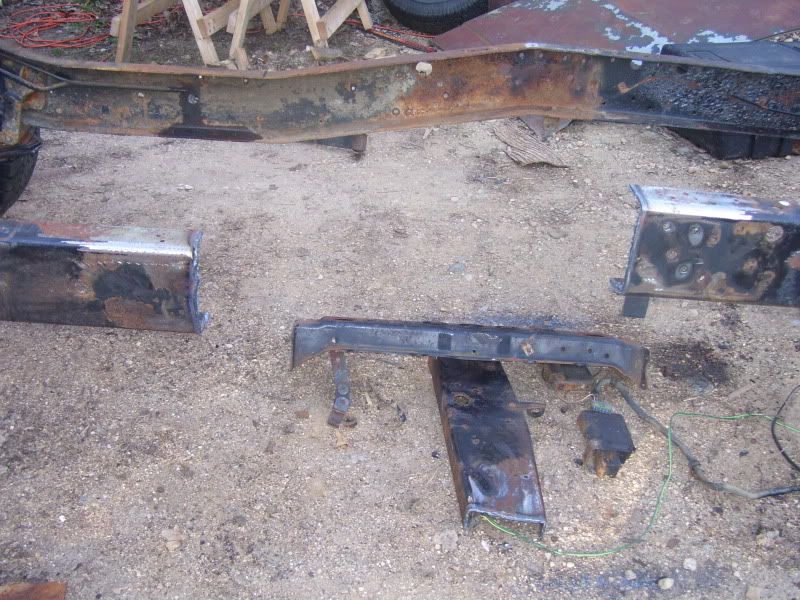 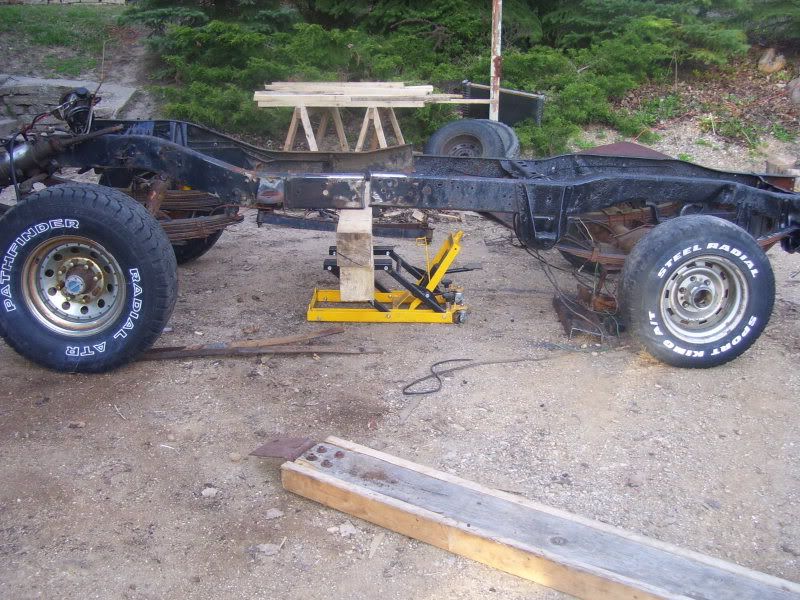 Donor rear axle with leafs - 86' 14 bolt / 4.10 gears 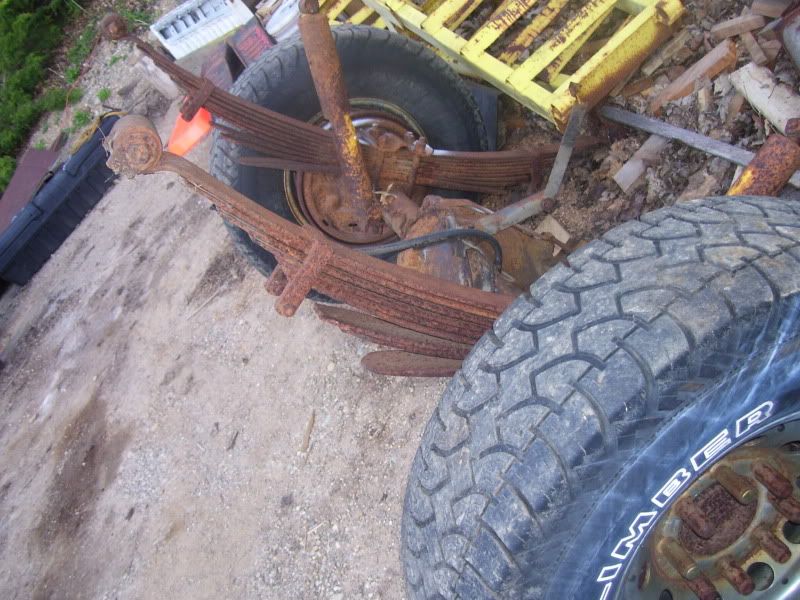 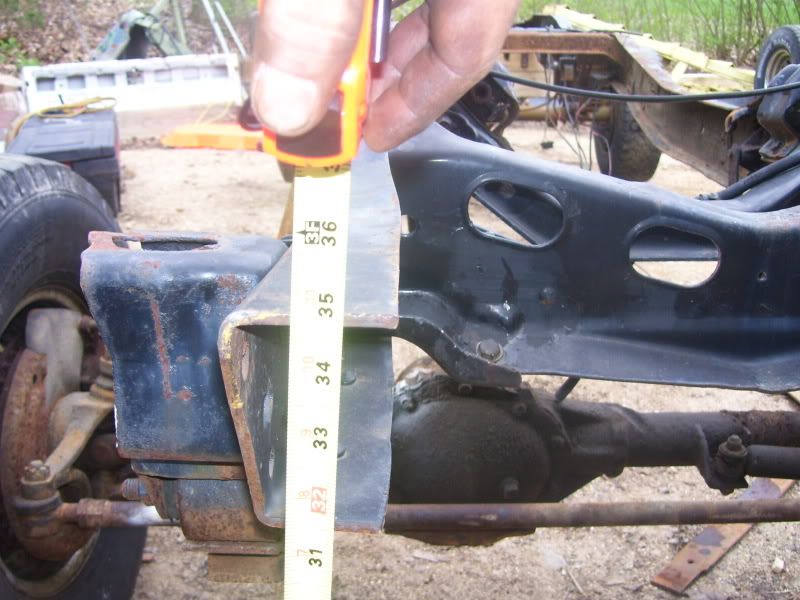 Rough cuts lined up - Cleaned up edges following the straight edge, clamped frame in place and welded. 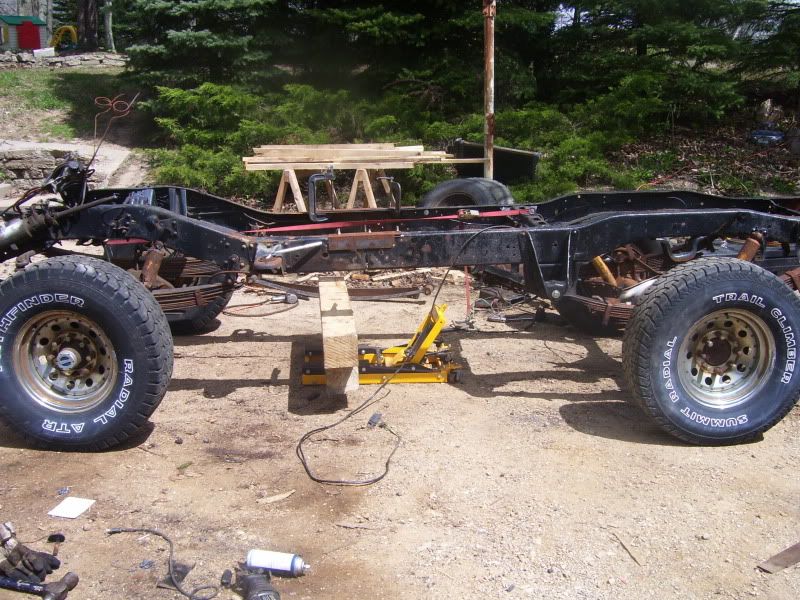 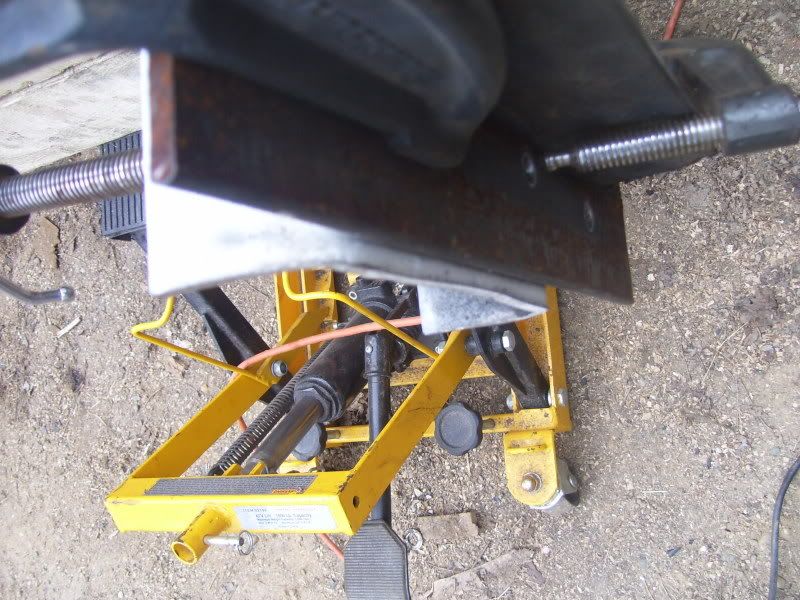 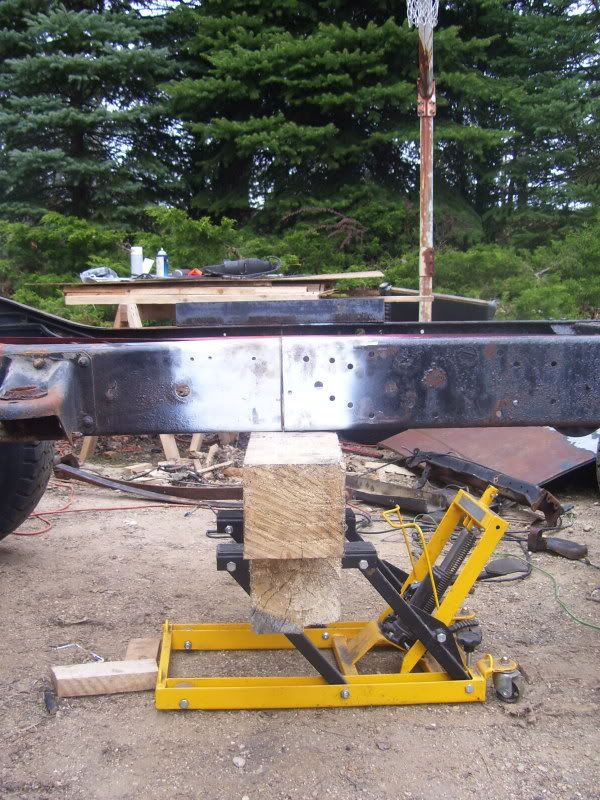 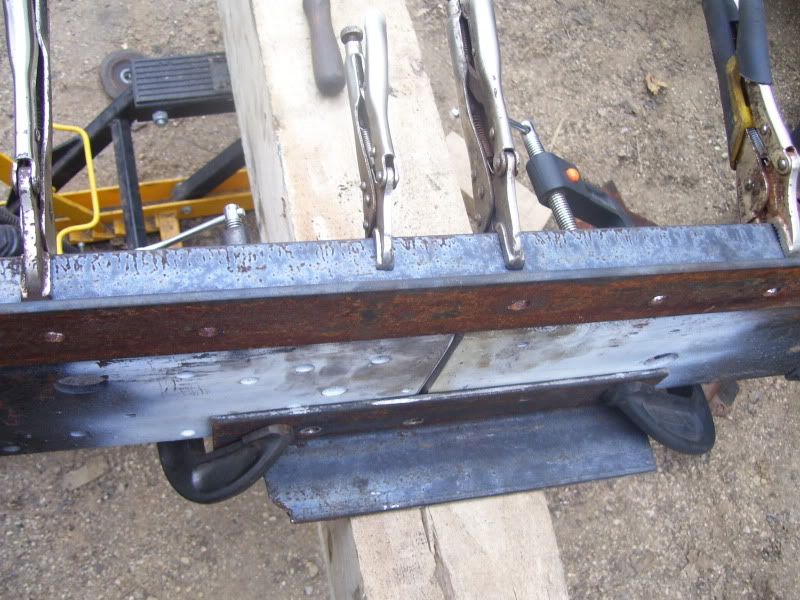 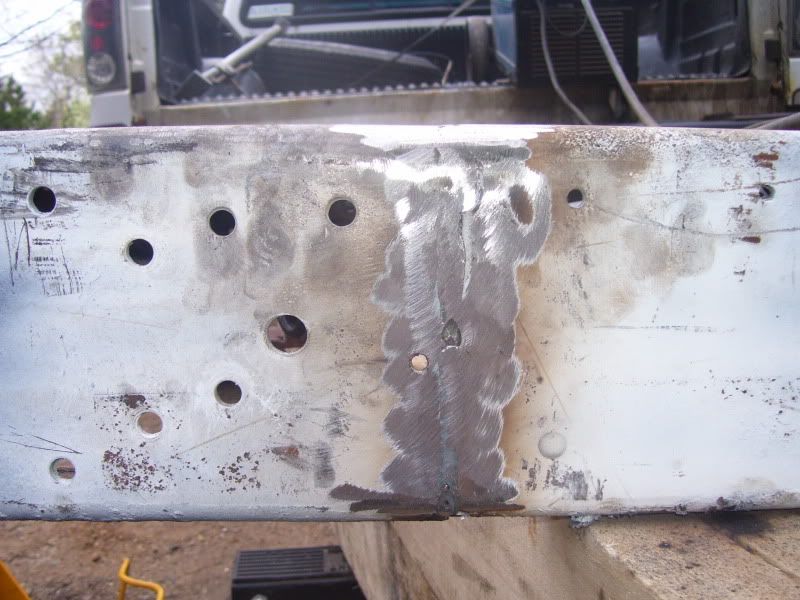 Engine installed - 86 350, .443" lift & 212° duration cam, new lifters, pushrods, rockers, and valve seals. Edelbrock performer intake, 1405 Carb and Hooker Headers 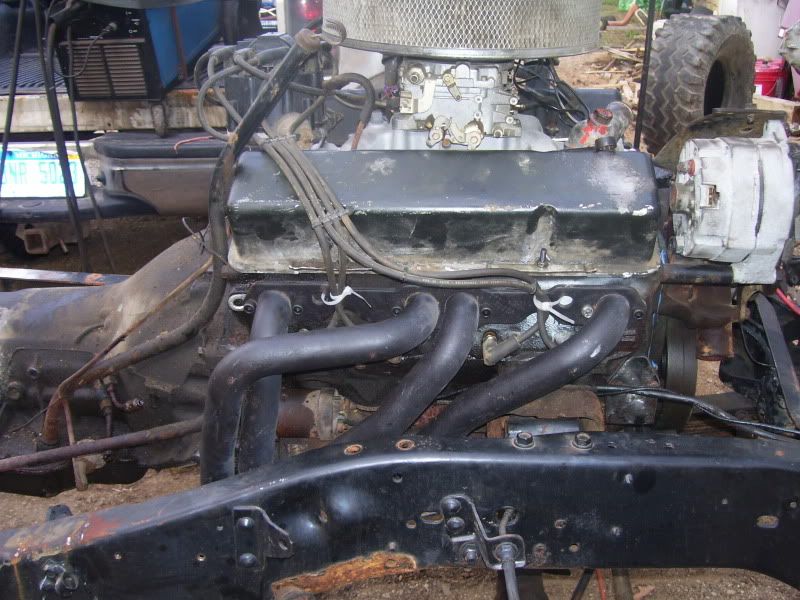 Fuel Pump Blockoff - Plan to run TBI in tank fuel pump w/ regulator 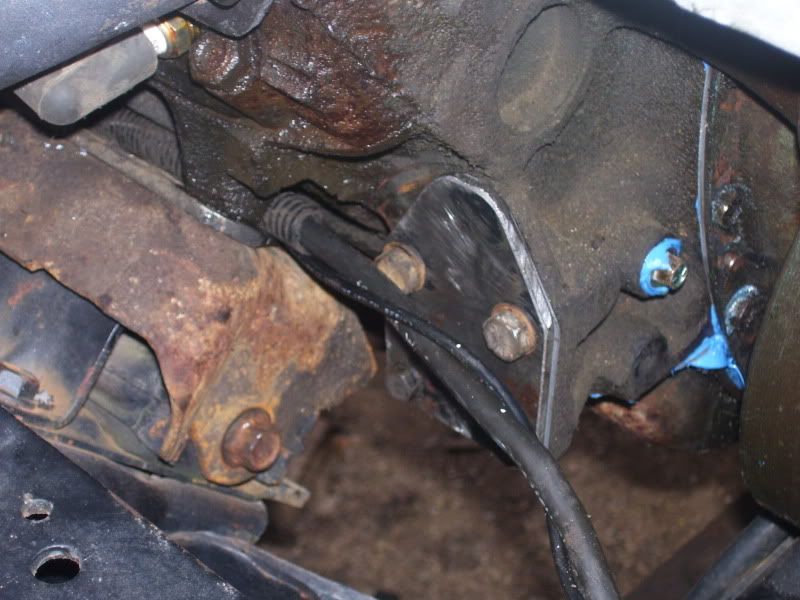 My free cab and front clip - the cab needs plenty of work and it's not quite worth it. I'll get the truck going down the road safely and worry about another cab to work on later. It will be nice some day! 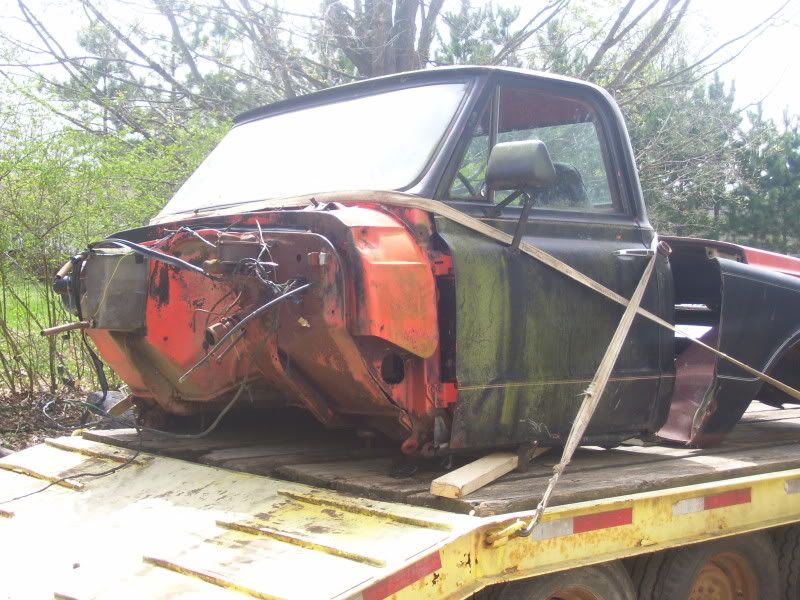 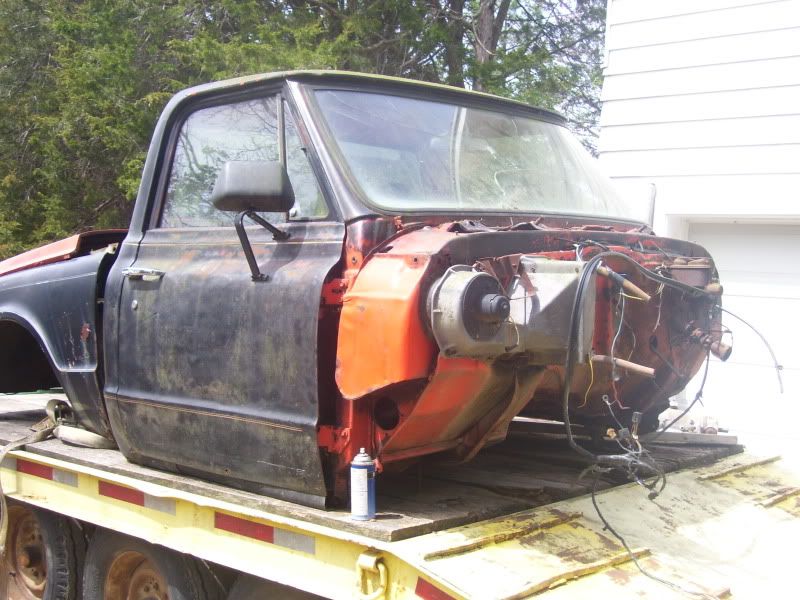 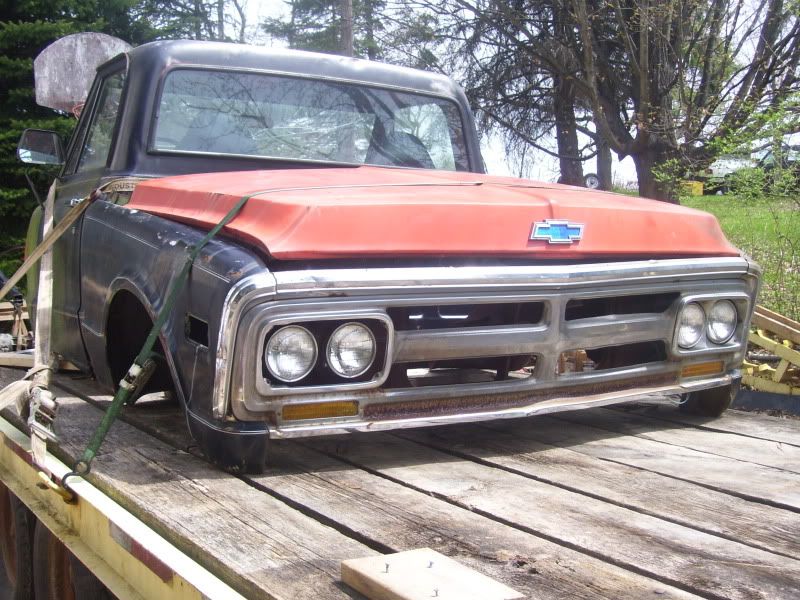 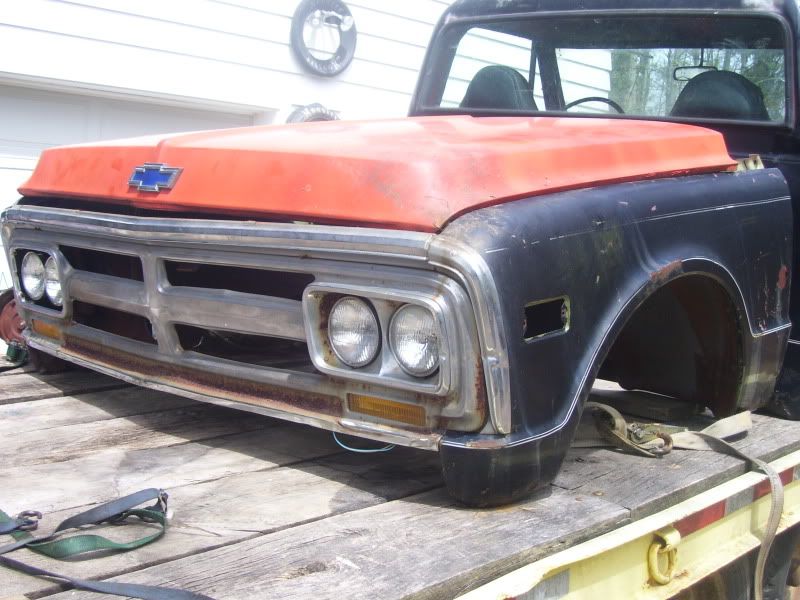 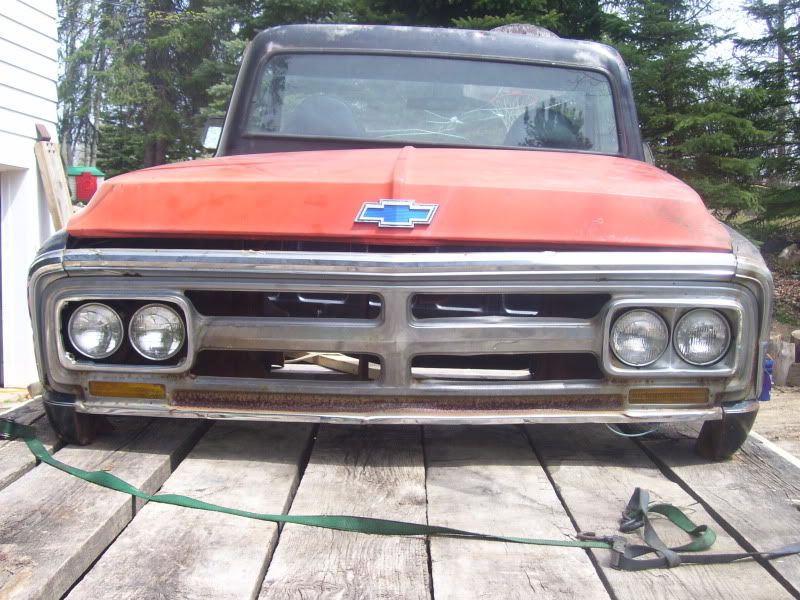 Got the cab and front clip sitting on the frame just to get a look at how high it will sit. It's well over 7' tall at the top of the cab, it towers over my F250 super duty with 2" AAL and 35" tires. 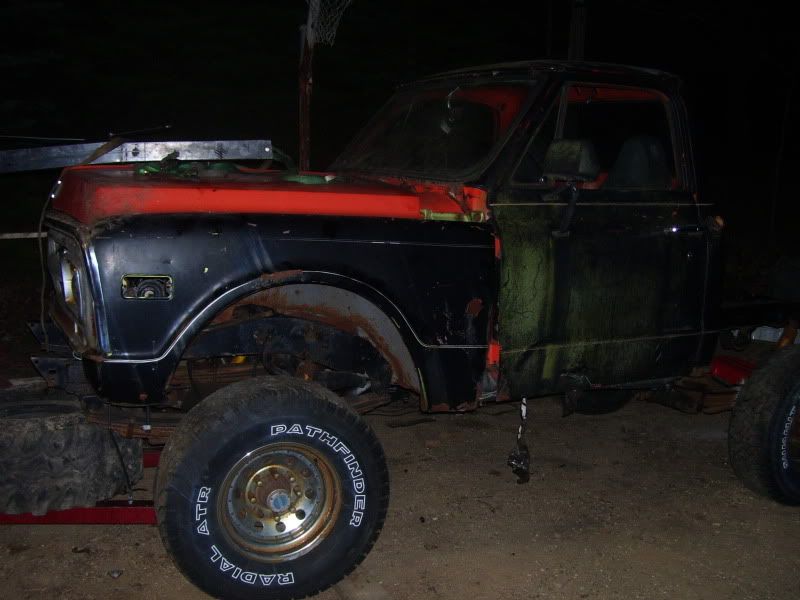 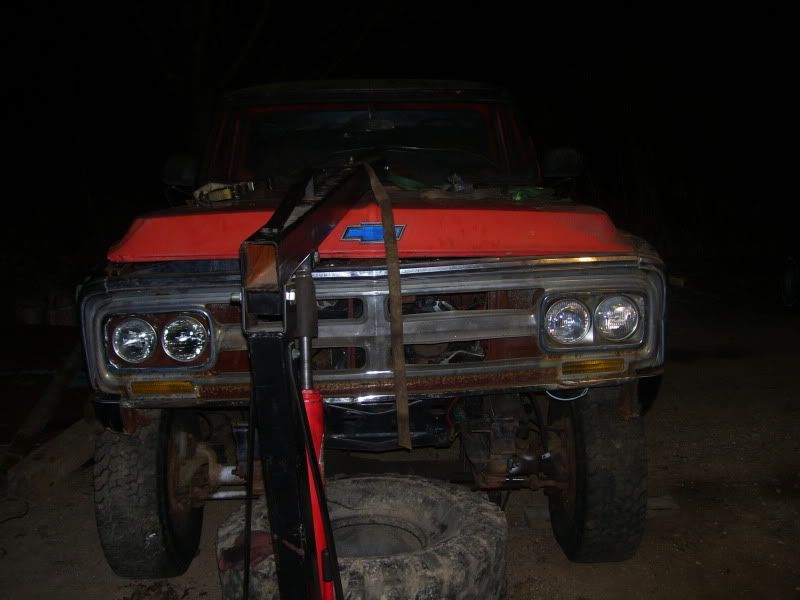 I'll be manufacturing and selling this universal clutch alignment tool, for only 3 easy monthly installments of $29.95!     I know my vent hole isn't plugged! I tipped the tranny up on my dolley to get it in place. Looks like the ball socket that the shifter sits in is a little leaky too.     Clutch pivot bracket bolted to the frame, something to line up when I'm figuring my trans mount. 
Last edited by propanemudtruck; 06-10-2010 at 08:14 AM. |
|
|

|
|
|
#2 |
|
Sb 400 club
Join Date: Nov 2005
Location: NH / MA
Posts: 2,746
|
Re: Pardon the new guy... My plowrig build
lotta wok going on there. is a 60/14b full floater in the plans later down the road? did you fish plate the weld?
This is gonna be a killer plow rig
__________________
 1984 chevy c10, built 400sb,.(SOLD 1984 chevy c10, built 400sb,.(SOLD ) )77 K10 Project / daily driver "The Grinch" http://67-72chevytrucks.com/vboard/s...d.php?t=318363 1956 Willys Wagon (327 chevy) Project (Now Buick 225) 1980 Corvette L-48 4 speed 1992 Mustang GT built 5.0 5 speed  1985 C10 LWB Sold 1982 K10 SWB plow truck Parted out 1986 D30 M1028 fire brush truck Parted out |
|
|

|
|
|
#3 |
|
Local Redneck Authority
Join Date: Mar 2009
Location: Grand Rapids, MI
Posts: 584
|
Re: Pardon the new guy... My plowrig build
It seems that I have a stock pile of 14/10 bolt sets, so I figured I'd start with those. If I break all my 10 bolts I know I'll be on the lookout for a 60. I have a Driver's side HP44 from a 70's ford too, kinda saving that for the S10 SFA project!
I did plate the frame, I used 1/8" plate, 5"x8" with one 1.5" plug weld on each side as well. I realized I didn't get any pics of that yet. I've been plowing for 8 years, 4 years independently and it pays for my home heat and some fun too every year. Every year I try to make my fleet a bit tougher. Last year both rigs had TBI belt driven hydraulics because I was killing batteries and alternators left and right! |
|
|

|
|
|
#4 |
|
Sb 400 club
Join Date: Nov 2005
Location: NH / MA
Posts: 2,746
|
Re: Pardon the new guy... My plowrig build
yeah seems like you know what your doing then. IF you got a stock pile of 10's m ight as well use em.
__________________
 1984 chevy c10, built 400sb,.(SOLD 1984 chevy c10, built 400sb,.(SOLD ) )77 K10 Project / daily driver "The Grinch" http://67-72chevytrucks.com/vboard/s...d.php?t=318363 1956 Willys Wagon (327 chevy) Project (Now Buick 225) 1980 Corvette L-48 4 speed 1992 Mustang GT built 5.0 5 speed  1985 C10 LWB Sold 1982 K10 SWB plow truck Parted out 1986 D30 M1028 fire brush truck Parted out |
|
|

|
|
|
#5 |
|
Local Redneck Authority
Join Date: Mar 2009
Location: Grand Rapids, MI
Posts: 584
|
Re: Pardon the new guy... My plowrig build
I'm comfortable with the build from the frame down, but the "new" body is what brought me here. Thanks for the input guys.
|
|
|

|
|
|
#6 |
|
Local Redneck Authority
Join Date: Mar 2009
Location: Grand Rapids, MI
Posts: 584
|
Re: Pardon the new guy... My plowrig build
Last night I cut all the parts for my trans crossmember, I'll hopefully get that all finished up today with some pics to follow. Progress is slow but steady!
|
|
|

|
|
|
#7 |
|
Local Redneck Authority
Join Date: Mar 2009
Location: Grand Rapids, MI
Posts: 584
|
Re: Pardon the new guy... My plowrig build
Crossmember is done - need to drill holes in the frame and debur a couple edges then maybe even paint it.
Had some help the other night too while the girls were sleeping! My wife was finishing the carb gasket up for me. It's been a while since she has been able to come out to the garage, next will be tuning up her welding skills again. 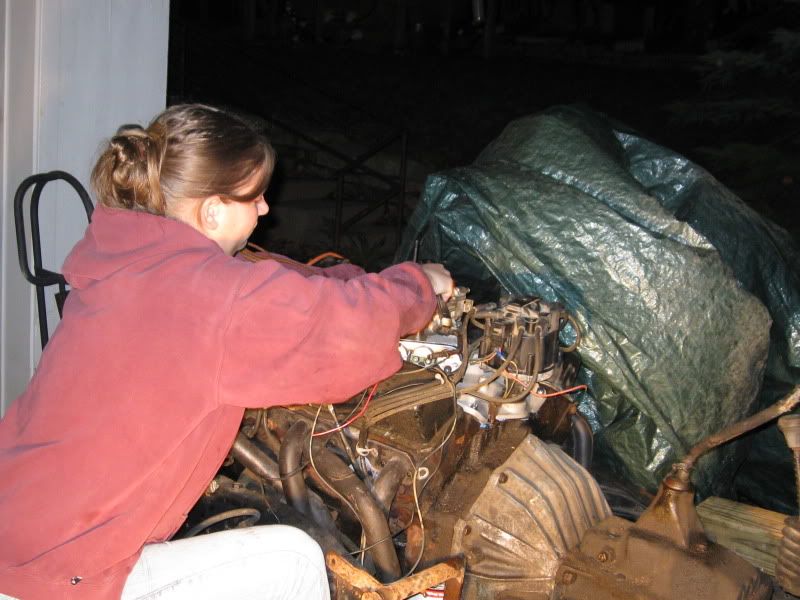 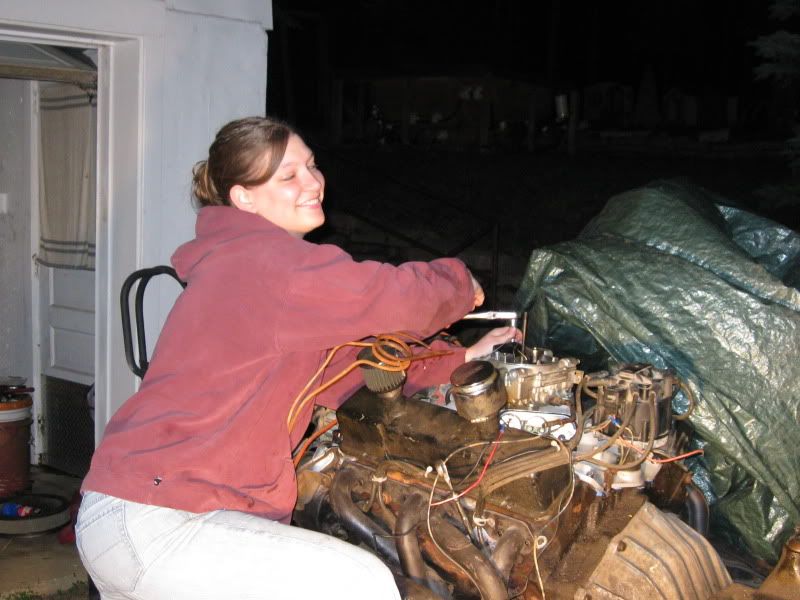 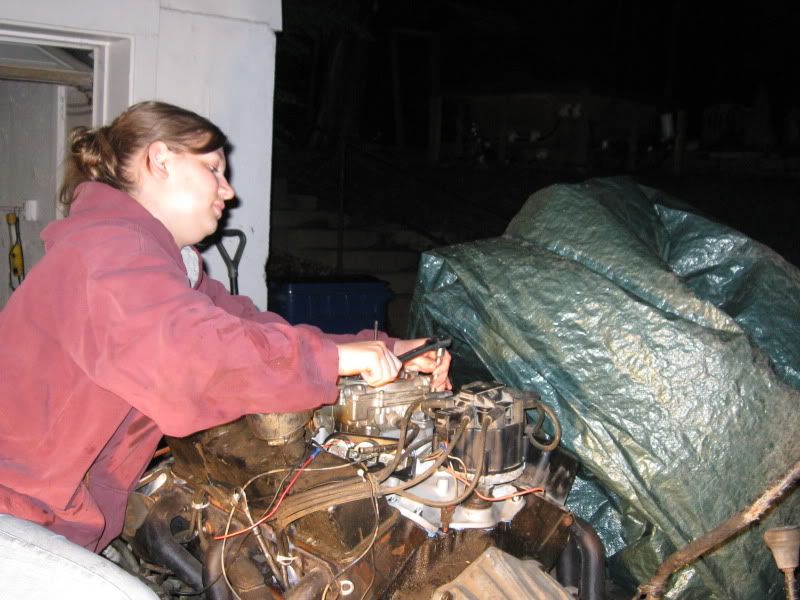 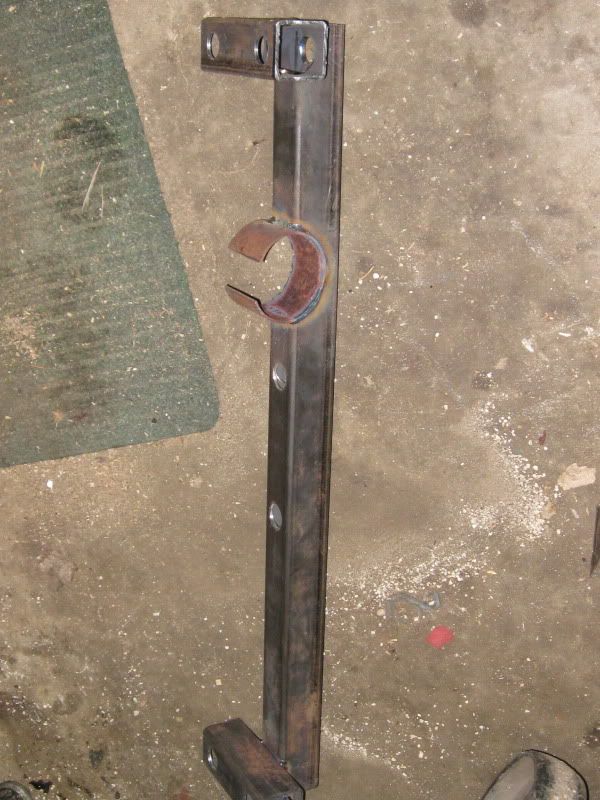 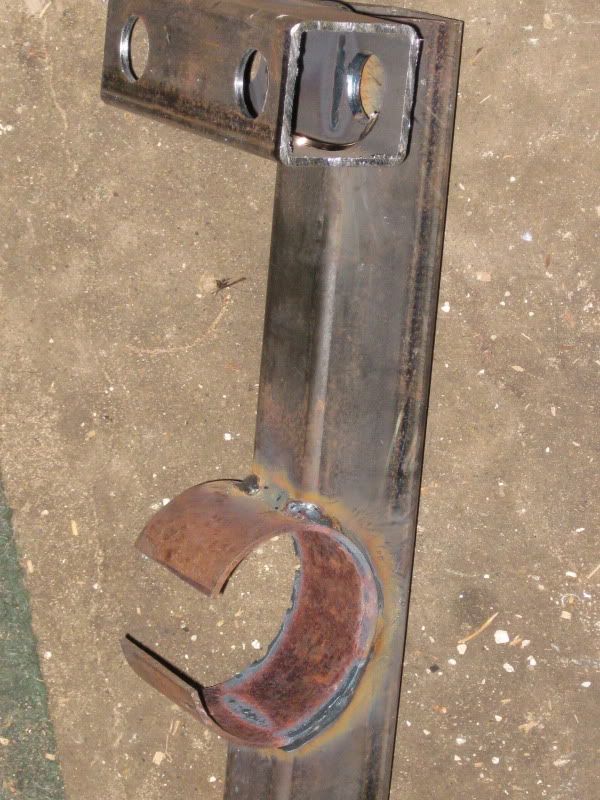 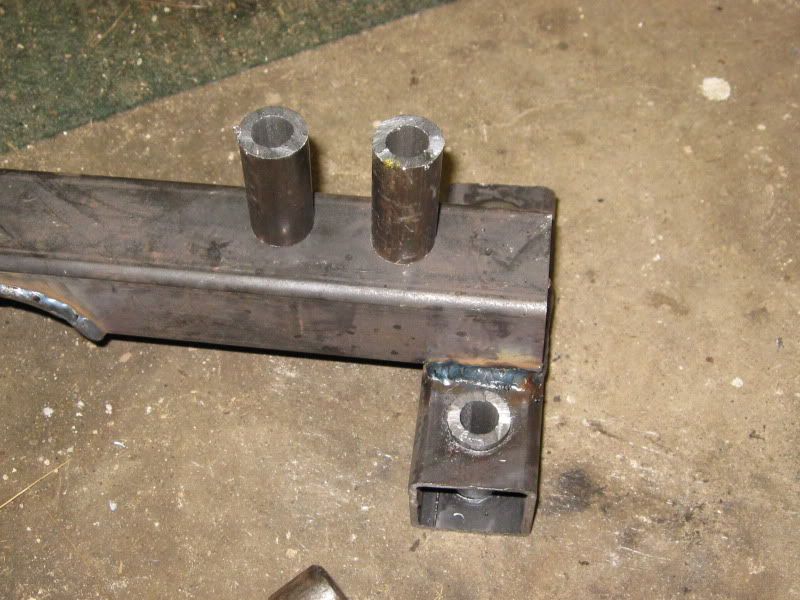 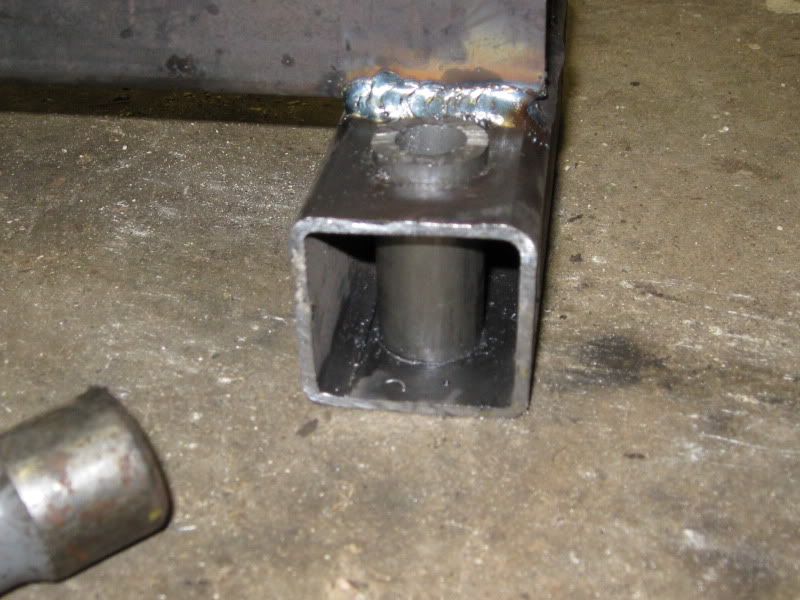 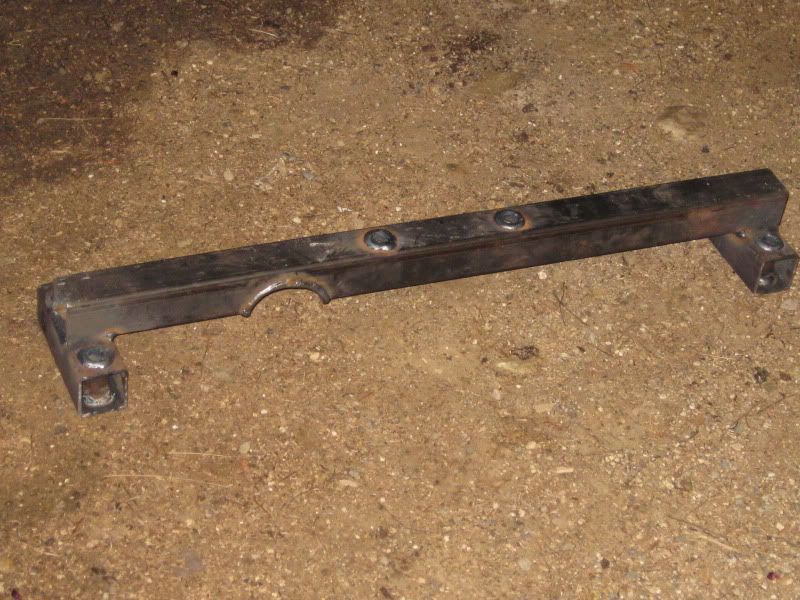 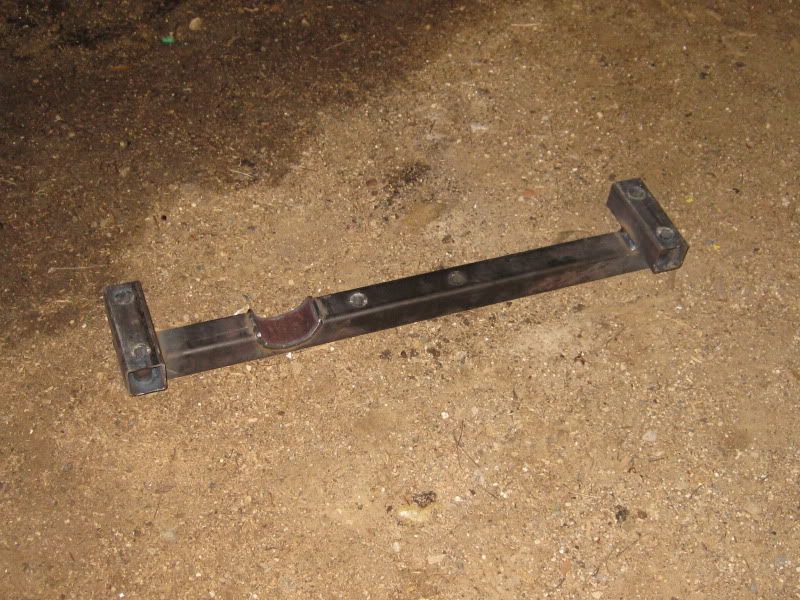 Might need more clearance once I get the driveshaft I'll make some modifications as needed. 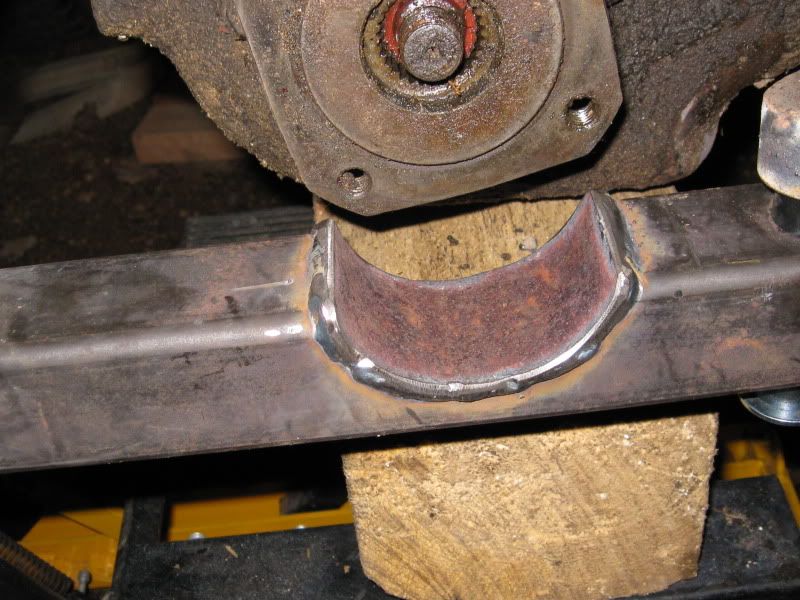 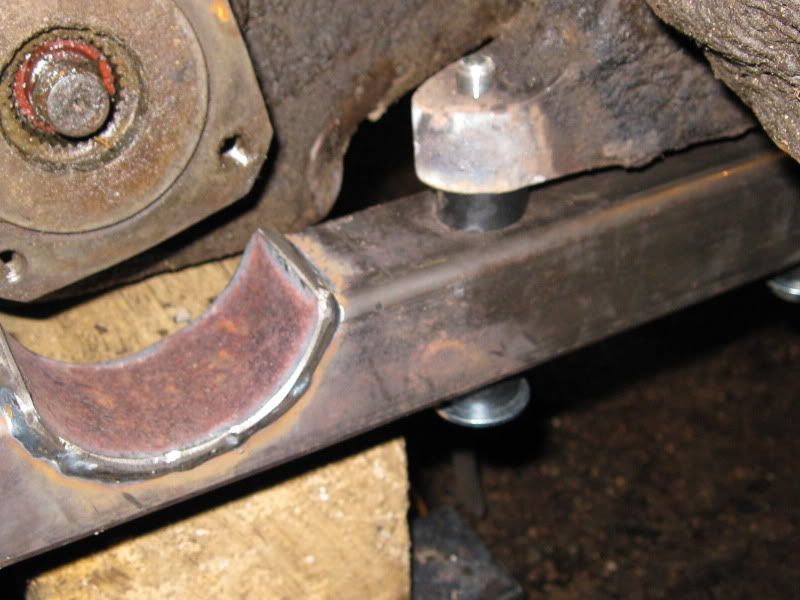 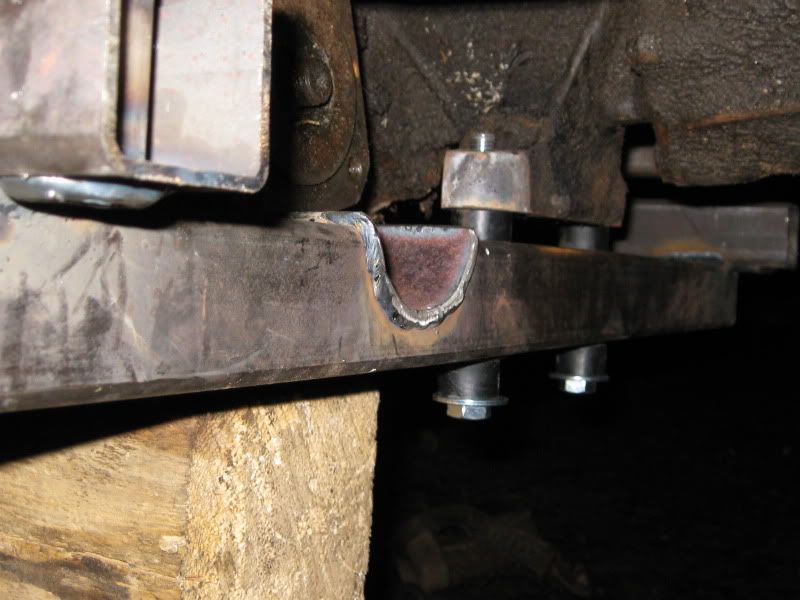 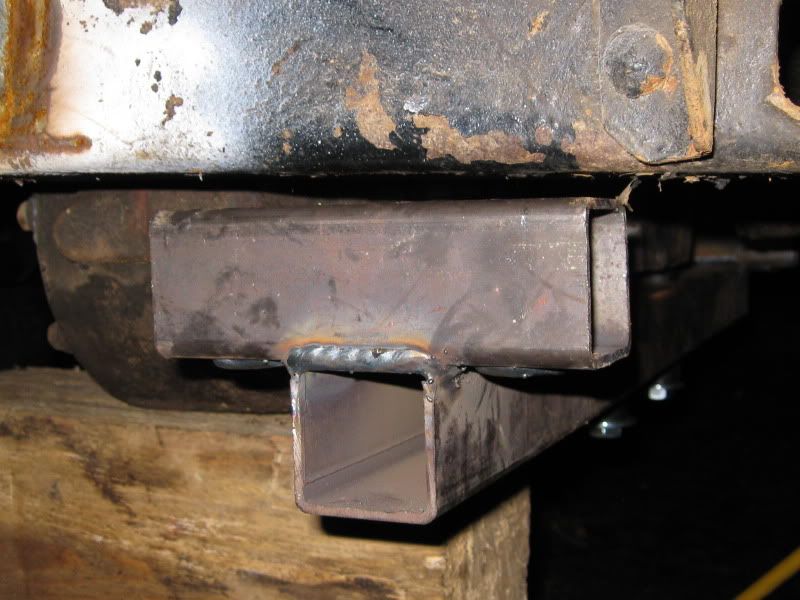
|
|
|

|
|
|
#8 |
|
Local Redneck Authority
Join Date: Mar 2009
Location: Grand Rapids, MI
Posts: 584
|
Re: Pardon the new guy... My plowrig build
Last night I drilled the holes in the frame for the crossmember, got it bolted up and mocked a front driveshaft in place. It clears the notch so I can pull it apart and throw some paint on for good. Need to pull a retaining nut from another t-case for my front yoke and measure for driveshaft lengths. Slow progress compared to most on here, but what do you do? I'll have to start pulling parts from the K5 soon, flowmaster exhaust, gas tank. I think it has stainless fuel lines that I should be able to use, I need to pick up a fuel pressure regulator and then I'll work on firing up the heart of this beast to see how it runs!

|
|
|

|
|
|
#9 |
|
Local Redneck Authority
Join Date: Mar 2009
Location: Grand Rapids, MI
Posts: 584
|
Re: Pardon the new guy... My plowrig build
So I cleaned the glove box sticker enough that I could get the VIN and decode it...
 It was a 1971, 2wd, 1/2 ton V8. The original color is 524 Hugger Orange 
|
|
|

|
|
|
#10 |
|
Local Redneck Authority
Join Date: Mar 2009
Location: Grand Rapids, MI
Posts: 584
|
Re: Pardon the new guy... My plowrig build
Last night I did some more little work here and there. I moved the rear spring hangers for 56" springs and now my shackles look happy again. I also got my rear bumper/back blade bracket clamped in place. Then I pulled the gas tank from my 89 K5, I'll need to pull the two crossmembers tonight and mock them up. The truck frame is a bit wider than the blazer frame and some of the geometry is different, but it should be easy to get everything fit up well.
|
|
|

|
|
|
#11 |
|
Local Redneck Authority
Join Date: Mar 2009
Location: Grand Rapids, MI
Posts: 584
|
Re: Pardon the new guy... My plowrig build
More progress.
Got my plow frame welded on last night, then cut out the rear crossmember and welded the blazer crossmembers in for the gas tank install. A few pictures of how the body is sitting now with it mocked in place. I'll need to make mounts now.        
|
|
|

|
|
|
#12 |
|
Local Redneck Authority
Join Date: Mar 2009
Location: Grand Rapids, MI
Posts: 584
|
Re: Pardon the new guy... My plowrig build
Ok, I have a deadline. I plan on going camping for nearly a week in about 8 weeks. The last week of July I recall. I'll be less than 15 minutes from the Silver Lake Sand Dunes in NorthWestern Michigan and would like to be able to go for a cruise with my wife. I've got quite a bit of work to do and not much time left considering my schedule so I need to make every bit of work count!
Fuel Lines from the tank to the regulator to the carb Power booster installed with pedal assembly Brake Lines and hoses run Front Clip hung onto the cab, figure all body mounts repair rockers/outer floors just strong enough to hold for a year until I find a decent cab to redo build body mounts and bolt body down Run some of the truck electrical using the 89 K5 as a donor for future ECM/TBI Cut down driveshafts Repair Steering Column or use K5 column, customize as needed to mate to 86 steering box Replace old critter eaten buckets with another set of buckets from an old GEO Tracker. Once I return from the trip I'll worry about mounting up the wooden bed if I run short on time, wire the lights and markers, figure wipers and all. Hope I make it, it's been 5 years since I've had any toys out there! |
|
|

|
|
|
#13 |
|
Local Redneck Authority
Join Date: Mar 2009
Location: Grand Rapids, MI
Posts: 584
|
Re: Pardon the new guy... My plowrig build
Things are coming along ok. I ran the supply fuel line to the fuel pressure regulator and to the carb, jumped some wires to the fuel pump, distributor and starter and jumped with a battery on the front frame rail...
 No fuel pressure.  Come to find out my new regulator had two plastic diaphrams in it and wouldn't allow any fuel through. All is well after I pulled the second out. It fired up and it's close on time, but I've got some bad noises coming from the gear box  I pulled the top cover back off, did some rework to the shifter rod while I had it apart, made sure the forks were in line with the gears and now I can't get it together again with the darkness. I'll wait until I can see what I'm doing without a drop light... Got some paint on the bare spots of the frame, the welds, the crossmember. It's nice to work on it now that I got the HUGE bumble bee's nest out of the heater box! 
|
|
|

|
|
|
#14 |
|
6>8 Plugless........
 Join Date: Sep 2007
Location: Prairie City, Ia
Posts: 17,142
|
Re: Pardon the new guy... My plowrig build
Nice work! Those stupid bees and wasps sure make it a challenge for sure! :hehe:
__________________
Ryan 1972 Chevy Longhorn K30 Cheyenne Super, 359 Inline 6 cylinder, Auto Trans, Tilt, Diesel Tach/Vach, Buckets, Rare Rear 4-link and air ride option Build Thread 1972 GMC Sierra Grande Longhorn 4x4 1972 Chevy Cheyenne Super K20 Long Step side tilt, tach, tow hooks, AC, 350 4 speed 1972 C10 Suburban Custom Deluxe 1969 Chevy milk truck 1971 Camaro RS 5.3 BTR STG3 Cam Super T10 1940 Ford 354 Hemi 46RH Ford 9" on air ride huge project Tired of spark plugs? Check this out. |
|
|

|
|
|
#15 |
|
Sb 400 club
Join Date: Nov 2005
Location: NH / MA
Posts: 2,746
|
Re: Pardon the new guy... My plowrig build
sounds good man. I can't wait to get my sm465 in my rig but hav eheard the shifting fork is its weak link. Those damm bees can be a real bugger to get out.
Keep up the good work
__________________
 1984 chevy c10, built 400sb,.(SOLD 1984 chevy c10, built 400sb,.(SOLD ) )77 K10 Project / daily driver "The Grinch" http://67-72chevytrucks.com/vboard/s...d.php?t=318363 1956 Willys Wagon (327 chevy) Project (Now Buick 225) 1980 Corvette L-48 4 speed 1992 Mustang GT built 5.0 5 speed  1985 C10 LWB Sold 1982 K10 SWB plow truck Parted out 1986 D30 M1028 fire brush truck Parted out |
|
|

|
|
|
#16 |
|
Local Redneck Authority
Join Date: Mar 2009
Location: Grand Rapids, MI
Posts: 584
|
Re: Pardon the new guy... My plowrig build
Thanks guys!
Those bees have been humming in the cab since I picked it up, but they just started flying around and making problems. It only took a few cans of spray, a shop vac running, a crow bar to dig the nest out and my hat to swat at the bees! I'm sure once I get the top cover of the trans figured out and put in it's place things will go smoothly from there. I'm really hoping so at least! It's nice having a body that's not so great looking, I'm not too afraid to try a cut here or there for the newer parts coming into the build. Then when I go find a nice donor I'll know where to measure from and what to modify to make everything come together. |
|
|

|
|
|
#17 |
|
Local Redneck Authority
Join Date: Mar 2009
Location: Grand Rapids, MI
Posts: 584
|
Re: Pardon the new guy... My plowrig build
So I know this is most likely my own fault, but I'm still having transmission issues. I got the top cover back off, situated in 1/2 reverse position, all gears set right, everything dropped together just like it should, but the grinding got worse. I have another transmission at a friend's house about 25 miles away and I'm thinking it will take less time to go get that to swap in then it will screwing around with this one. Nothing like things to set you back, huh?
This thing starts and sounds great for the 1/2 second that I fire it up to hear it grinding like crazy! I can't wait to go spin a wheel for a change! It's been 9-10 years since I had a 4x4 toy to go play with, 5 years since I've been in the sand dunes (2 hours away) and 3 years since I've ridden my quad. It's time to play and I'm ready even though I have a ton of work to do still. Tonight I also measured for body mounts. I'll dig my 1/8" stock out of my rack and start fabbing those some time soon. looking forward to having the body bolted down 
|
|
|

|
|
|
#18 |
|
Local Redneck Authority
Join Date: Mar 2009
Location: Grand Rapids, MI
Posts: 584
|
Re: Pardon the new guy... My plowrig build
Hope this is ok to post on here, but I found a manual online. Maybe this will save me a trip and a sore back loading that big pig into my super duty...
 http://www.zieglerdigital.ca/public/...sm465rbman.pdf |
|
|

|
|
|
#19 |
|
Local Redneck Authority
Join Date: Mar 2009
Location: Grand Rapids, MI
Posts: 584
|
Re: Pardon the new guy... My plowrig build
This weekend I got some time to do some work. I pulled the power booster and master cylinder off my 89 K5 to see how it would mount up. A couple new holes drilled in the mount and some trimming on the bottom for steering column clearance and it bolted on. Took some customization of the pedal assembly just like the clutch did but I have the top half of the brakes complete, just need to run some lines now. For the time being, since my steering column is shot and the cab isn't worth restoring, I'll be mounting the blazer column and hacking the dash to make it work. Once I get a nicer cab and decent rebuildable column I'll make sure to pay my respects to the old iron and splice the original column into the 89 K5 wiring.
|
|
|

|
|
|
#20 |
|
Local Redneck Authority
Join Date: Mar 2009
Location: Grand Rapids, MI
Posts: 584
|
Re: Pardon the new guy... My plowrig build
Sorry, I'll have to get pictures soon, but the custom body mounts are tacked on and the truck cab is sitting on body bushings. I hung the front clip to see how things will end up for the core support mounts. Ending up with about 13" between the 32" tire and the top of the fenderwell. I've got room for up to a 40" tire I'd say without wheeling it too hard, probably a 36 or 37 for moderate wheeling. Now that the body mounts are on the truck and things line up well, I'm going to pull the cab once again and get a different tranny in that's not grinding in neutral. Although it has to come apart again, I feel like I accomplished quite a bit in the few hours I worked.
 Pictures to come. |
|
|

|
|
|
#21 |
|
Local Redneck Authority
Join Date: Mar 2009
Location: Grand Rapids, MI
Posts: 584
|
Re: Pardon the new guy... My plowrig build
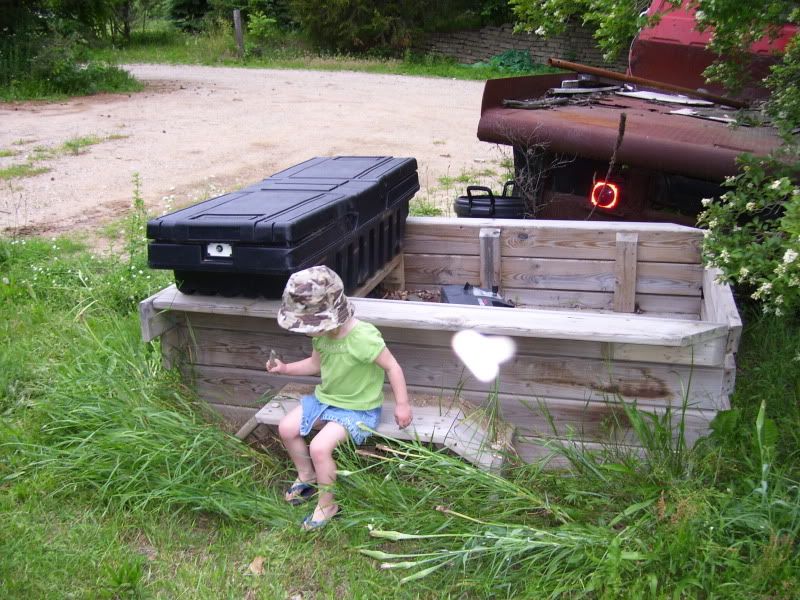
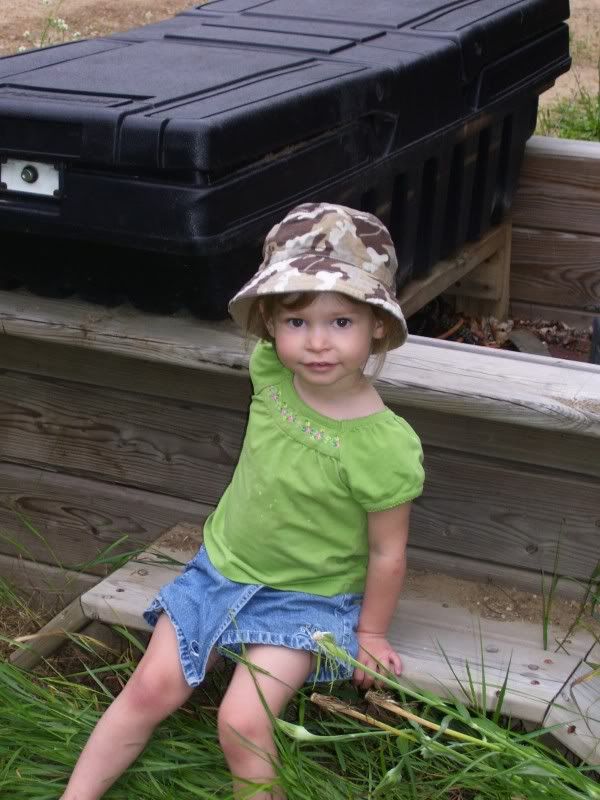
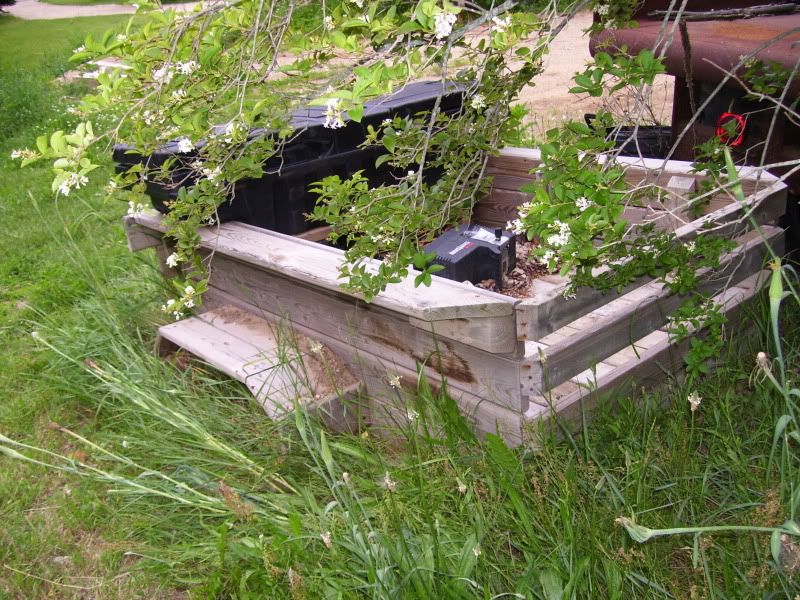
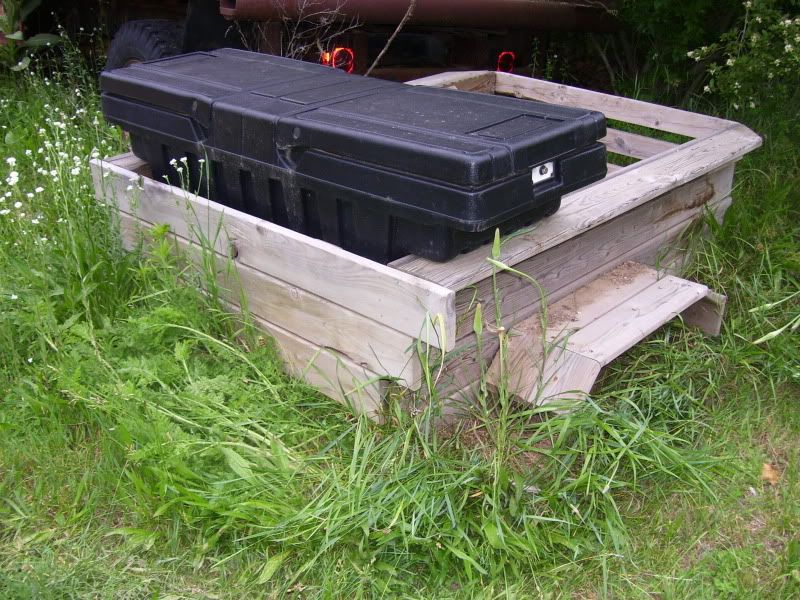
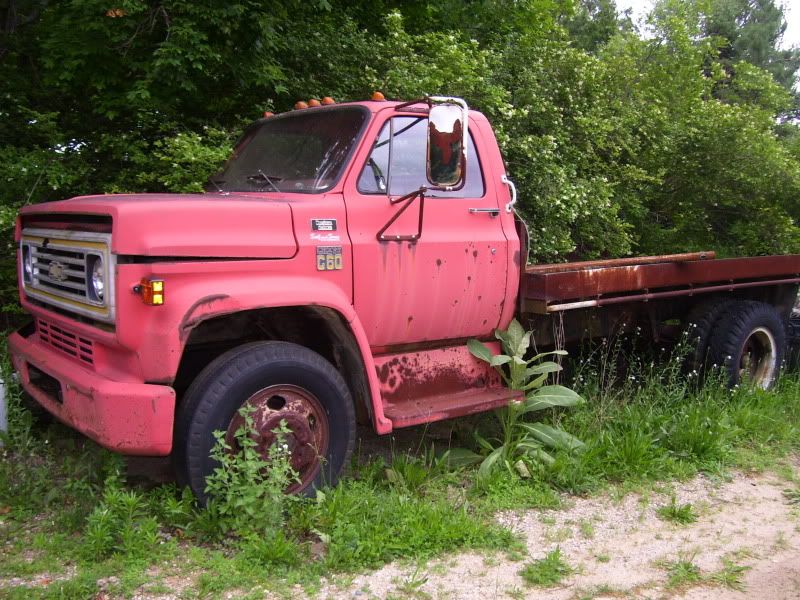
Here are the pictures of the body on the mounts and the front clip just sitting for some reference. Also my wooden box that I'll be mounting up and the C60 that came with the house. Some day I'll be sure to get it running to haul vehicles, wood, whatever needs to be moved I guess. The cute little girl is my oldest daughter. She loves to come play outside and turn a wrench with daddy!
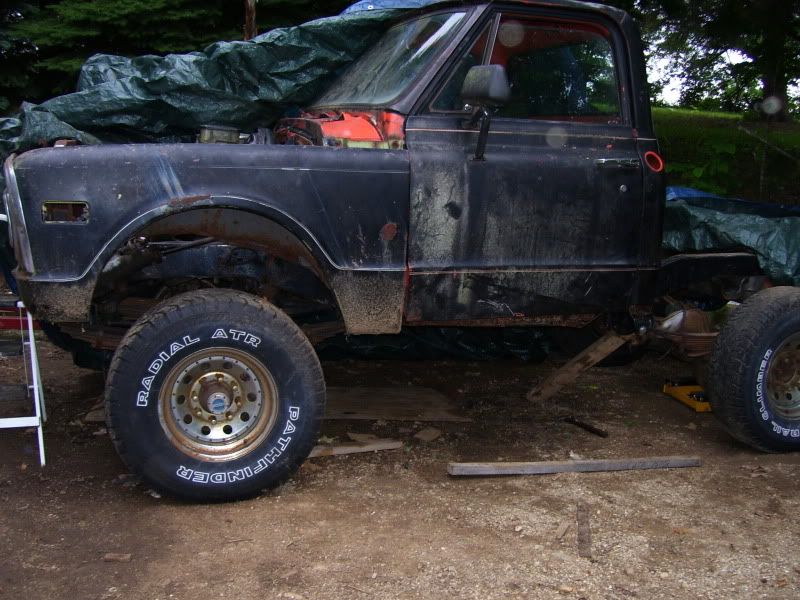 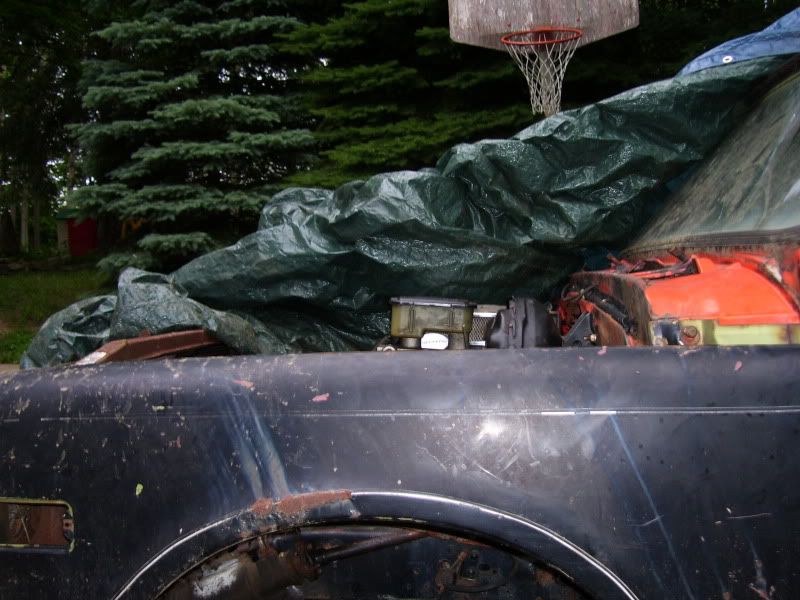      
__________________
-Kevin four on the floor feel the beat in your soul movin to the rhythym pumpin til ya cant take no more dance if you want to do what you came to you cant ignore the feeling of that four on the floor Last edited by propanemudtruck; 06-10-2010 at 08:18 PM. |
|
|

|
|
|
#22 |
|
Local Redneck Authority
Join Date: Mar 2009
Location: Grand Rapids, MI
Posts: 584
|
Re: Pardon the new guy... My plowrig build
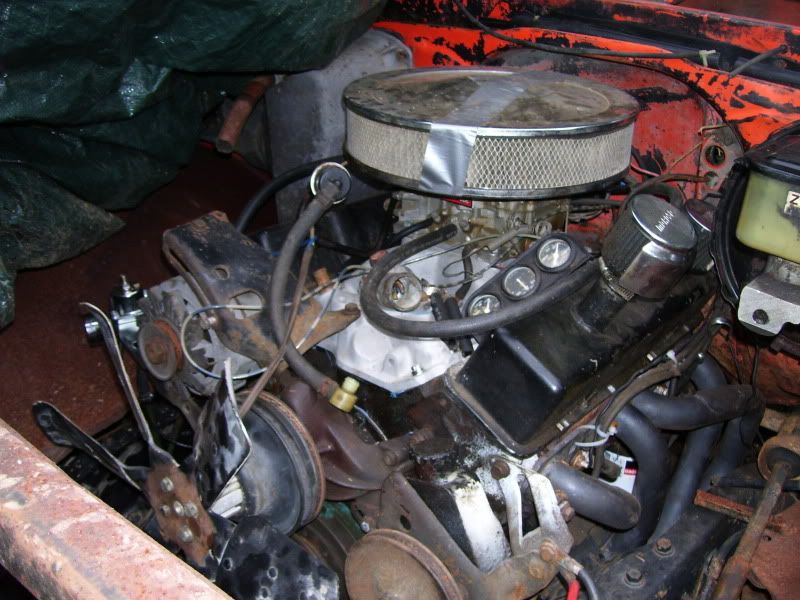
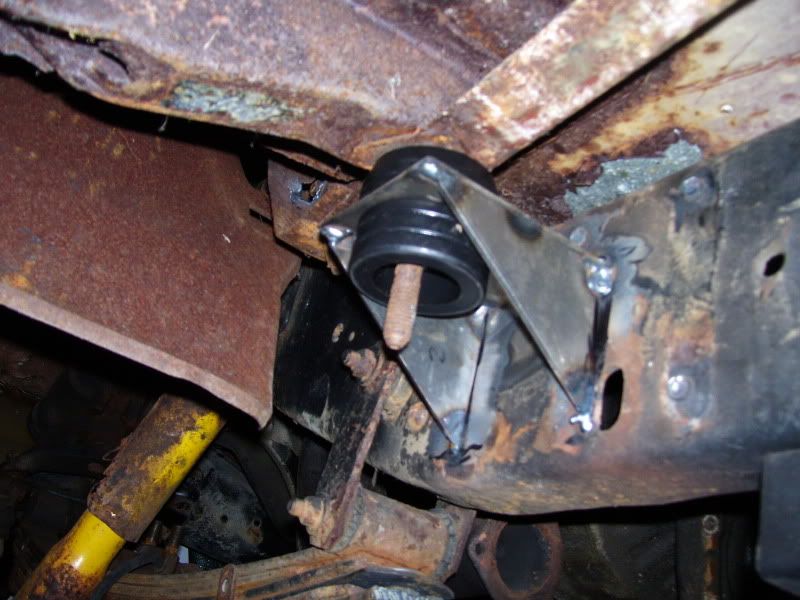
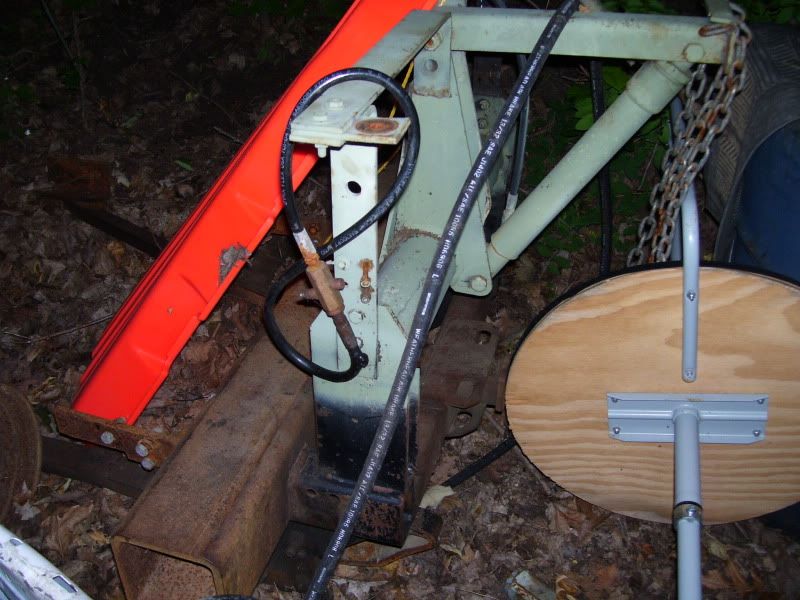
Couple more pictures...
__________________
-Kevin four on the floor feel the beat in your soul movin to the rhythym pumpin til ya cant take no more dance if you want to do what you came to you cant ignore the feeling of that four on the floor |
|
|

|
|
|
#23 |
|
Registered User
 Join Date: Oct 2005
Location: shakopee minnesota
Posts: 515
|
Re: Pardon the new guy... My plowrig build
Nice..Helpers are always good..!!!
__________________
WTB 1972 CHEVY 3/4 4X4 1971 chevy c30 4x4 NAPCO (project) 1972 chevy 3/4 4x4 350/350 4spd, tach, tow hooks,radio delete,heat delete,hubcaps,lockers 1972 chevy 3/4 4x4 383/350 dads original farm truck tilt,tach,tow hooks,hubcaps,radio delete,heat delete 2006 chevy LBZ crew cab duramax,4 inch,beadlocks 2015 chevy tahoe Z71 my fifth one,love em 2016 chevy 2500HD Z71 LTZ duramax midnite 2018 chevy suburban Z71 midnite |
|
|

|
|
|
#24 |
|
Local Redneck Authority
Join Date: Mar 2009
Location: Grand Rapids, MI
Posts: 584
|
Re: Pardon the new guy... My plowrig build
Even if it does take an extra couple minutes to complete a job! Or find that 9/16 deep well again...

__________________
-Kevin four on the floor feel the beat in your soul movin to the rhythym pumpin til ya cant take no more dance if you want to do what you came to you cant ignore the feeling of that four on the floor |
|
|

|
|
|
#25 |
|
Local Redneck Authority
Join Date: Mar 2009
Location: Grand Rapids, MI
Posts: 584
|
Re: Pardon the new guy... My plowrig build
The grinding problem is fixed! My pressure place is the diaphram type with the short bearing. My issue was that the fork was not clipped to the pivot point properly! Dumb me....
 But she's quiet now and I will be able to continue the build! Yesterday I moved the cab back near the rear tires, removed the brake booster/mc and pulled the trans/t-case loose, found the issue, got everything assembled the way it was supposed to be, the trans and t-case back in then my father in law showed up to help me some. He finished welding the body mounts in place and helped with other little things. We moved the cab back in place, got the inspection/PTO covers back on the transmission and found a couple bad plug wires from the old race engine so we'll use the new ones from the blazer. We put the master cylinder back on along with the brake booster and tonight possibly we'll start on brake lines. I need to shorten my steering shaft then the blazer steering column will work good enough for now. We discussed using a set of gauges and ignition panel off one of the race cars, so we'll need to find those at his place. Soon I'll need to pick up me seats from his house too! But she's quiet now and I will be able to continue the build! Yesterday I moved the cab back near the rear tires, removed the brake booster/mc and pulled the trans/t-case loose, found the issue, got everything assembled the way it was supposed to be, the trans and t-case back in then my father in law showed up to help me some. He finished welding the body mounts in place and helped with other little things. We moved the cab back in place, got the inspection/PTO covers back on the transmission and found a couple bad plug wires from the old race engine so we'll use the new ones from the blazer. We put the master cylinder back on along with the brake booster and tonight possibly we'll start on brake lines. I need to shorten my steering shaft then the blazer steering column will work good enough for now. We discussed using a set of gauges and ignition panel off one of the race cars, so we'll need to find those at his place. Soon I'll need to pick up me seats from his house too! No real point in pictures, it's just rework for the most part  
__________________
-Kevin four on the floor feel the beat in your soul movin to the rhythym pumpin til ya cant take no more dance if you want to do what you came to you cant ignore the feeling of that four on the floor |
|
|

|
 |
| Bookmarks |
| Thread Tools | |
| Display Modes | |
|
|