
 |
Register or Log In To remove these advertisements. |
|
|
|
|||||||
|
|
Thread Tools | Display Modes |
|
|
|
|
#1 |
|
Registered User
Join Date: Jun 2007
Location: South Carolina
Posts: 106
|
12 bolt rebuild + Eaton
To read the original thread and discussion on this topic go here- LINK
I am rebuilding my rear end with a new ring and pinion, seals, bearings and Eaton. The first thing I will noticed when ordering parts is the car and truck 12 bolts do not have interchangeable parts, second is they come with a 3 or 4 series carrier. The three series is for 2.76-3.42 ratio and the 4 series is 3.73+. The difference is the 4 series carrier is thicker, but they make what they call "thick" 3.73 + gears that are made to work with the 3 series carrier. In other words if you have a three series carrier you can run any ratio. A 4 series you would be limited to 3.73+ Gears. Note: 3 series Eaton is cheaper than 4 series. Parts I used: Eaton 3 series #19587-010 Ebay $425 Motive gear #mgr-gm12-3.73 Summit $169 Rebuild kit #rat-3005k Summit $109 Last edited by augie; 02-16-2012 at 12:27 AM. |
|
|
|
|
#2 |
|
Registered User
Join Date: Jun 2007
Location: South Carolina
Posts: 106
|
Re: 12 bolt rebuild + Eaton
Keep in mind I'm not an expert just sharing a project to entertain or help some one.
Tools used. 1/2 impact gun air hammer punch and hammer Race seal installer dial indicater wrenches/sockets: 7/16 for drive shaft bolts 1/2 lock pin, cover bolts 9/16 ring gear bolts 5/8 carrier caps 1 1/8 pinion nut And a shop press. |
|
|
|
|
#3 |
|
Registered User
Join Date: Jun 2007
Location: South Carolina
Posts: 106
|
Re: 12 bolt rebuild + Eaton
Dissasembly:
Remove wheels, drums, panhead bar. 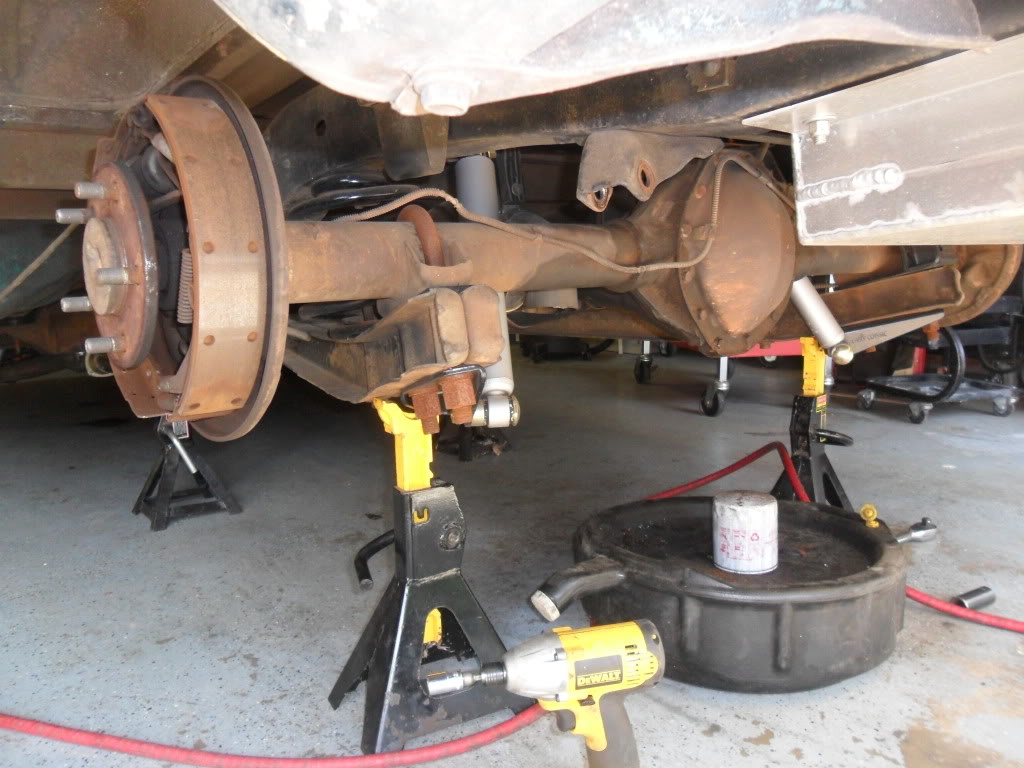 Remove cover and lock bolt .  Drive shaft 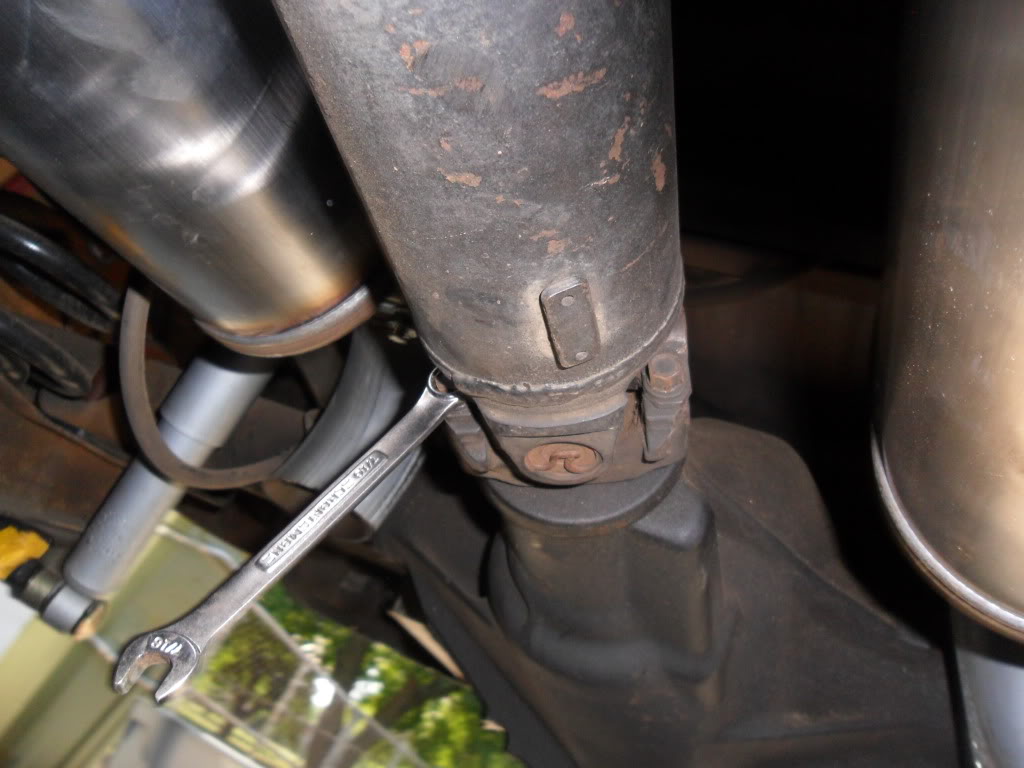
Last edited by augie; 02-16-2012 at 12:18 AM. |
|
|
|
|
#4 |
|
Registered User
Join Date: Jun 2007
Location: South Carolina
Posts: 106
|
Re: 12 bolt rebuild + Eaton
The axles are held in by c clips. Start by removing pin bolt then sliding out pin.
 The in keeps the axles from sliding in so the c-clips don't fall out so after removing pin push axles in and remove c-clips. 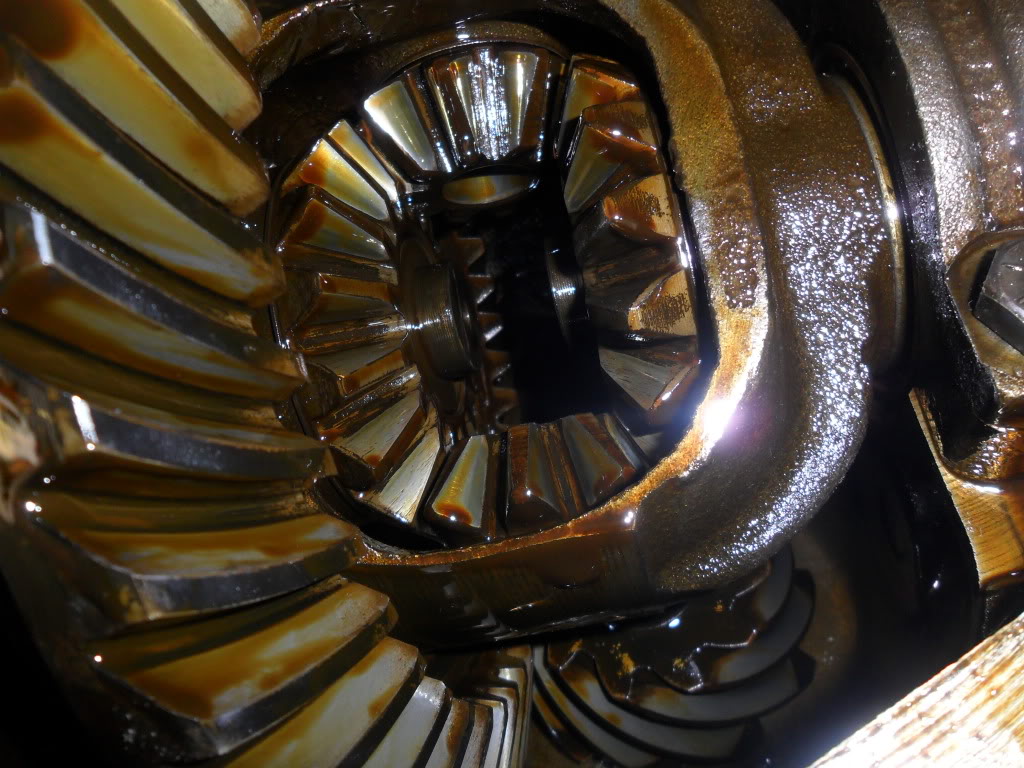 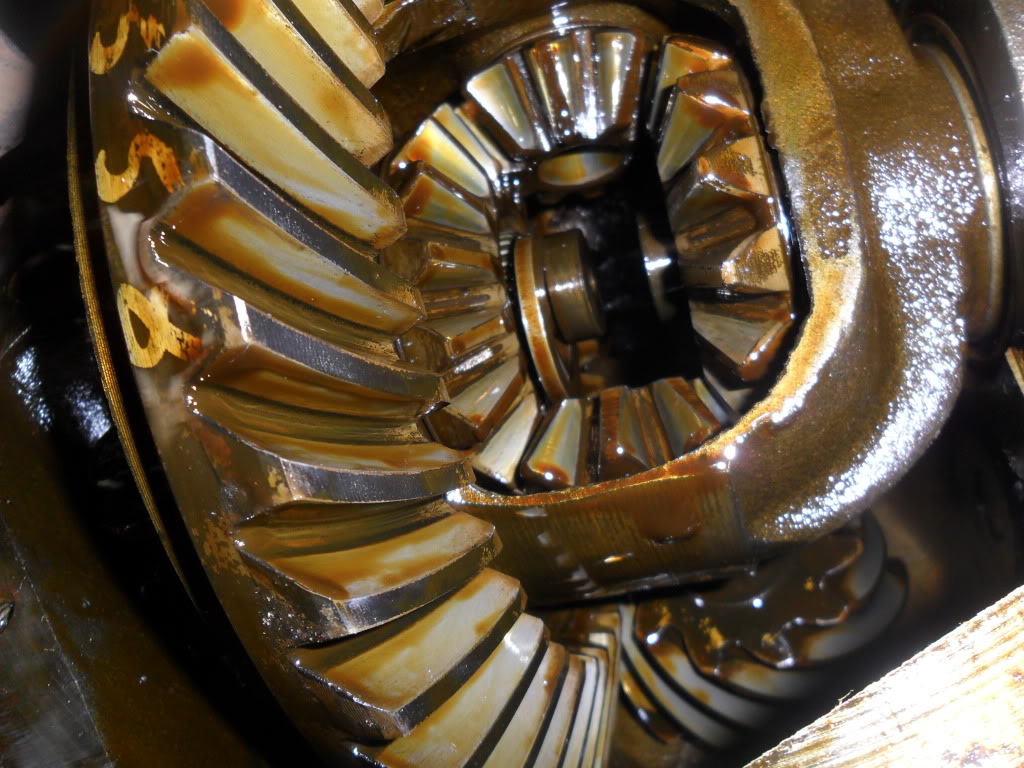 Then slide both axles out. 
Last edited by augie; 02-16-2012 at 12:19 AM. |
|
|
|
|
#5 |
|
Registered User
Join Date: Jun 2007
Location: South Carolina
Posts: 106
|
Re: 12 bolt rebuild + Eaton
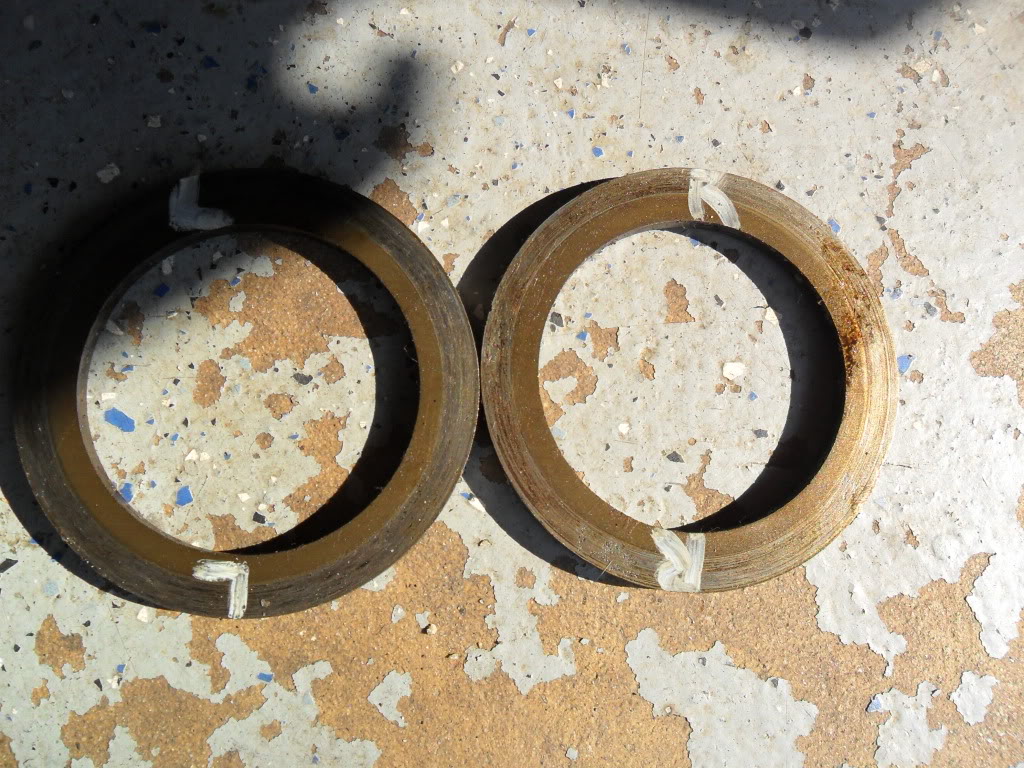
Now that the axles are out we can take out the carrier. Once you unbolt the caps can be a little tricky, it can be shimmed in so tight you have to pry it out and once it starts moving it it can come fast.( a carrier on your toes is bad news) The bearing races and shims come with it. Make sure to keep track of what side each shim goes in. I mark them with a paint marker as soon as they come out.
Last edited by augie; 02-16-2012 at 12:19 AM. |
|
|
|
|
#6 |
|
Registered User
Join Date: Jun 2007
Location: South Carolina
Posts: 106
|
Re: 12 bolt rebuild + Eaton
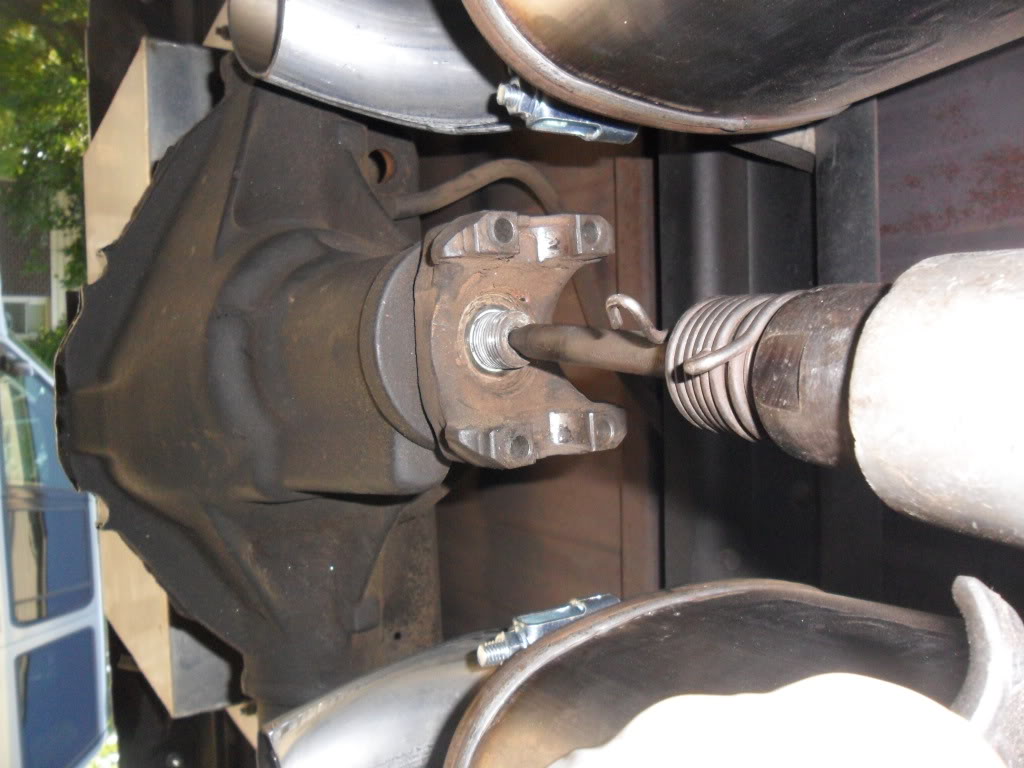
Remove the 1 1/8 pinion nut with a impact. The pinion will be stuck in there pretty good. Resist the temptation to hit the threaded end with a hammer. Not only will it mess up the threads it could mushroom the tip so it wont come out. The end of the pinion has a dimple in it similar to a cv axle use a punch or a air hammer with a pointed end to push out.
Last edited by augie; 02-16-2012 at 12:20 AM. |
|
|
|
|
#7 |
|
Registered User
Join Date: Jun 2007
Location: South Carolina
Posts: 106
|
Re: 12 bolt rebuild + Eaton
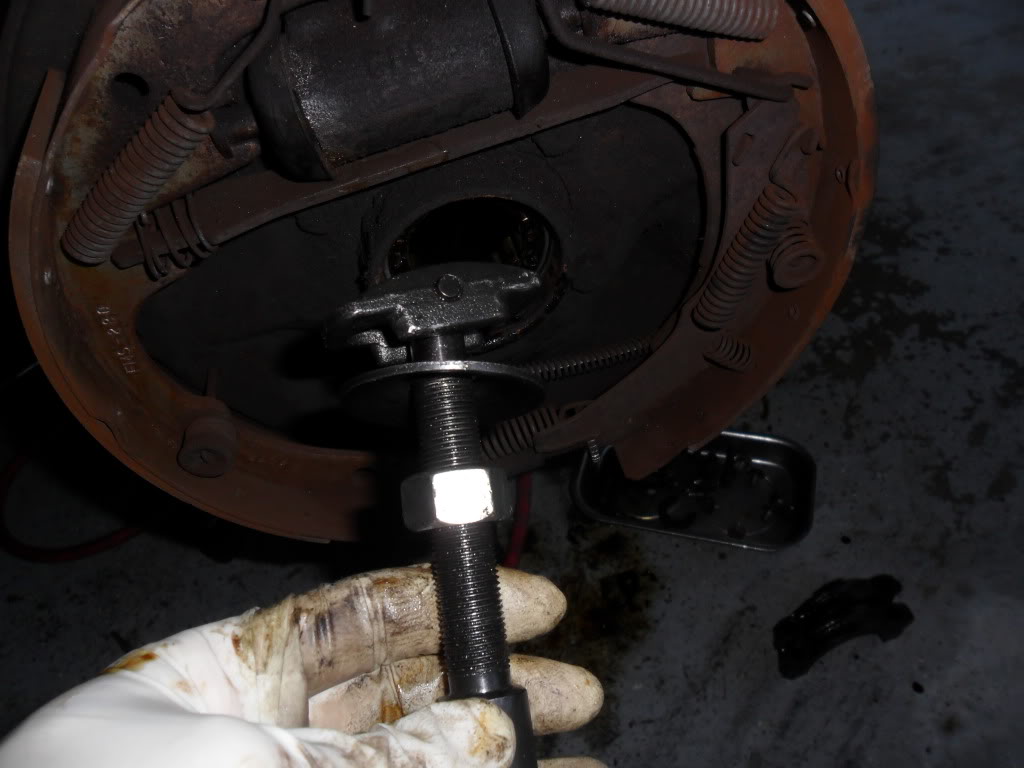
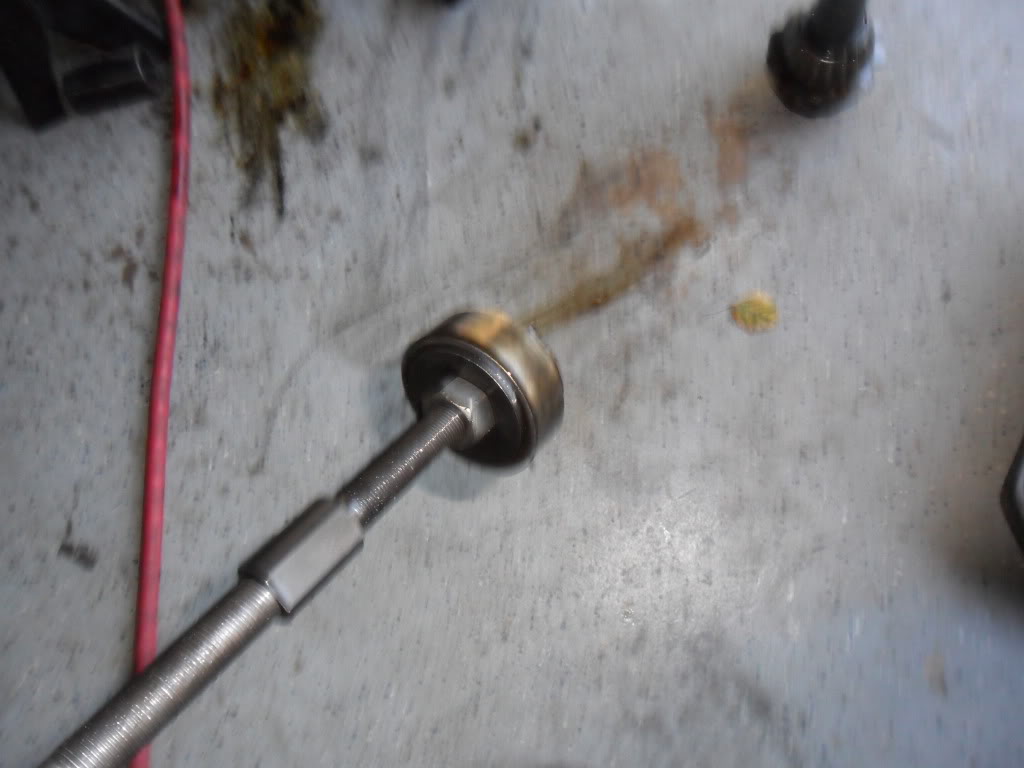
Now remove your axle bearings and seals if you want to replace them. I used my slide hammer, if you don't have one most auto parts stores will loan them.
Last edited by augie; 02-16-2012 at 12:20 AM. |
|
|
|
|
#8 |
|
Registered User
Join Date: Jun 2007
Location: South Carolina
Posts: 106
|
Re: 12 bolt rebuild + Eaton
Time to remove front and rear pinion races. A air hammer or punch and hammer will make quick work of this.
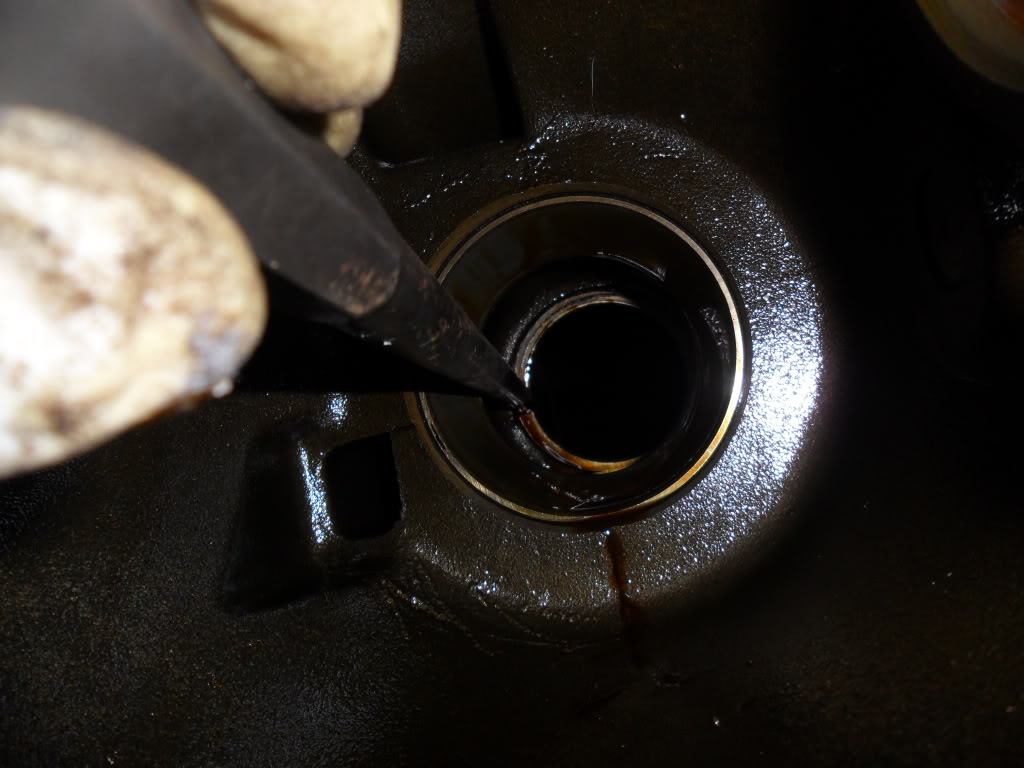 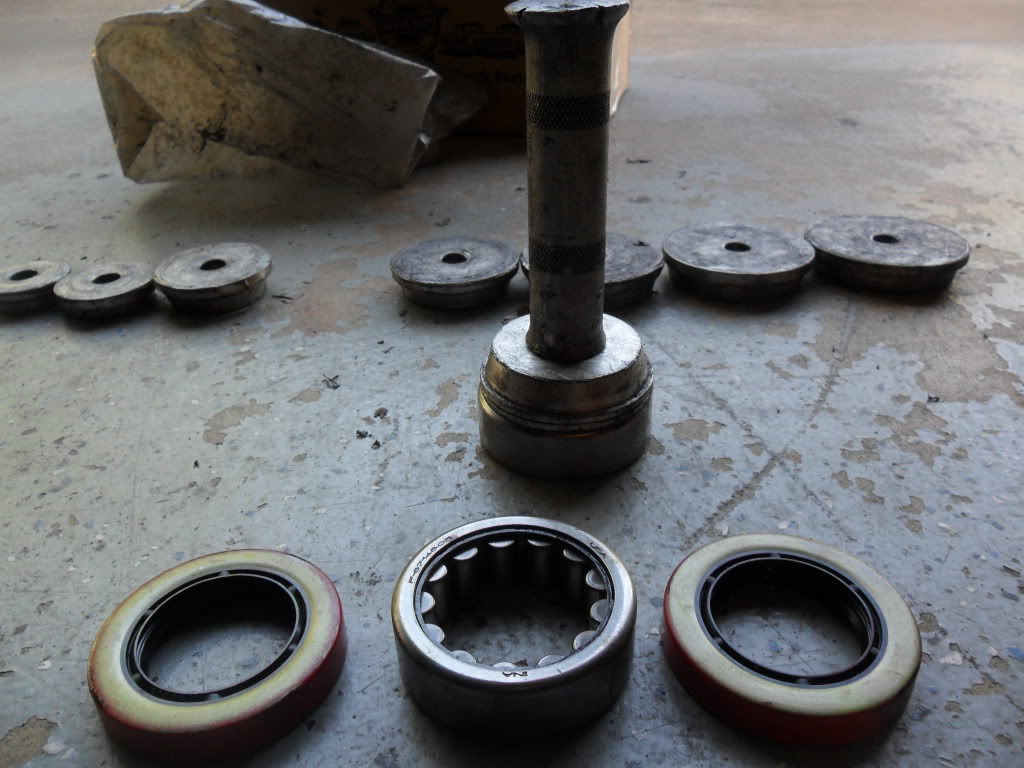
Last edited by augie; 02-16-2012 at 12:21 AM. |
|
|
|
|
#9 |
|
Registered User
Join Date: Jun 2007
Location: South Carolina
Posts: 106
|
Re: 12 bolt rebuild + Eaton
We are down to nothing but the housing! Time for assembly! Lets start with the wheel bearings. Grab your race/ seal installer and find one that is just a hair smaller than the bearing so the pressure is spread nice and even, but small to go into housing.
 You will feel a solid hit when it is seated, Note the USA stamp. Love it! 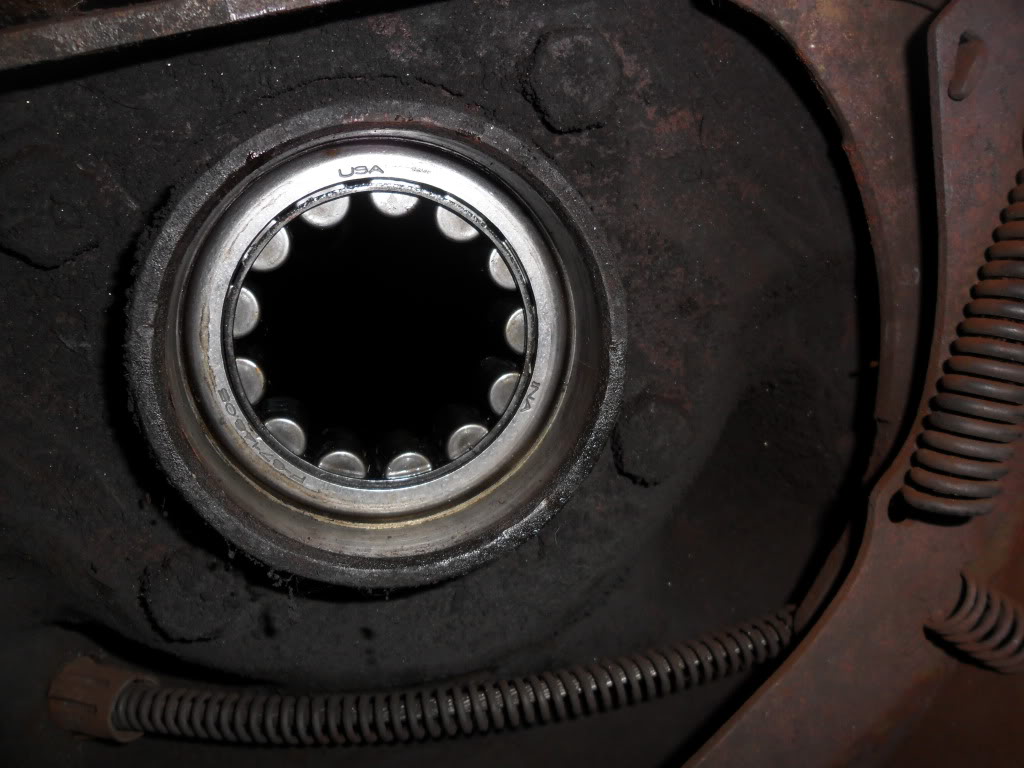 Install the seal the same way, but use a tool bigger than the housing so it will sit nice and flush. As you can see I like use just a bit of rtv for cheap insurance. The red stuff around the out side is made for that though. 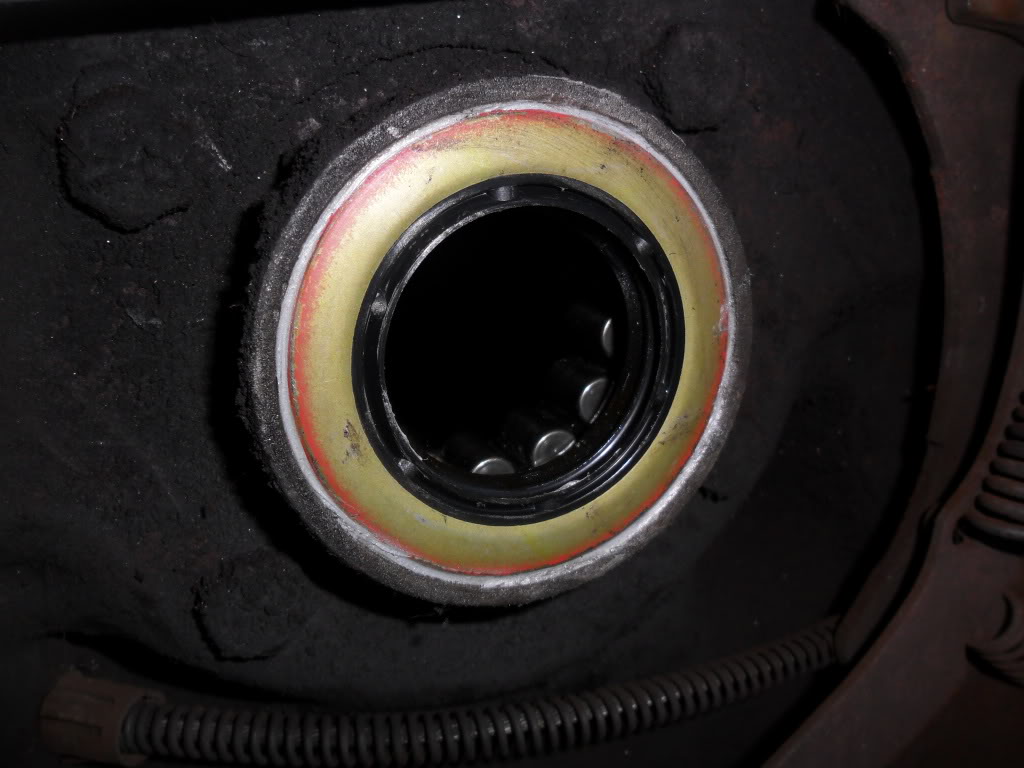
Last edited by augie; 02-16-2012 at 12:22 AM. |
|
|
|
|
#10 |
|
Registered User
Join Date: Jun 2007
Location: South Carolina
Posts: 106
|
Re: 12 bolt rebuild + Eaton
Going to hammer in the pinion bearing races with the same tool.
You had six bearings in your rebuild kit. The wheel bearings were easy to spot. Now you have four races and four wheel bearings. Take out the two races and bearings that are the exact same those are your carrier bearings. The last two are for your pinion, hammer the big race in from the cover side and the small one in the back. Then you can go ahead and hammer in the pinion seal same way as we did with the axle seals. |
|
|
|
|
#11 |
|
Registered User
Join Date: Jun 2007
Location: South Carolina
Posts: 106
|
Re: 12 bolt rebuild + Eaton
The carrier and pinion bearing will have to be pressed off. I'm sure you could have your local machine shop to do this. If you have access to a press make sure you get the carrier bearings a little past flush or it will not be seated all the way. On the pinion I removed the old bearing off the old pinion to retrieve the shim underneath. The original shim is usually the right one for the job. A neat tip if you have to play with different shims to set you pinion depth waller out the old bearing so it will slide on and off so you don't have to run to the press or machine shop to try different shims.
 Installing the pinion bearing: They make a $100 tool that looks like a real tall socket to hammer or press the pinion bearing. I used the old bearing I wallerd out. 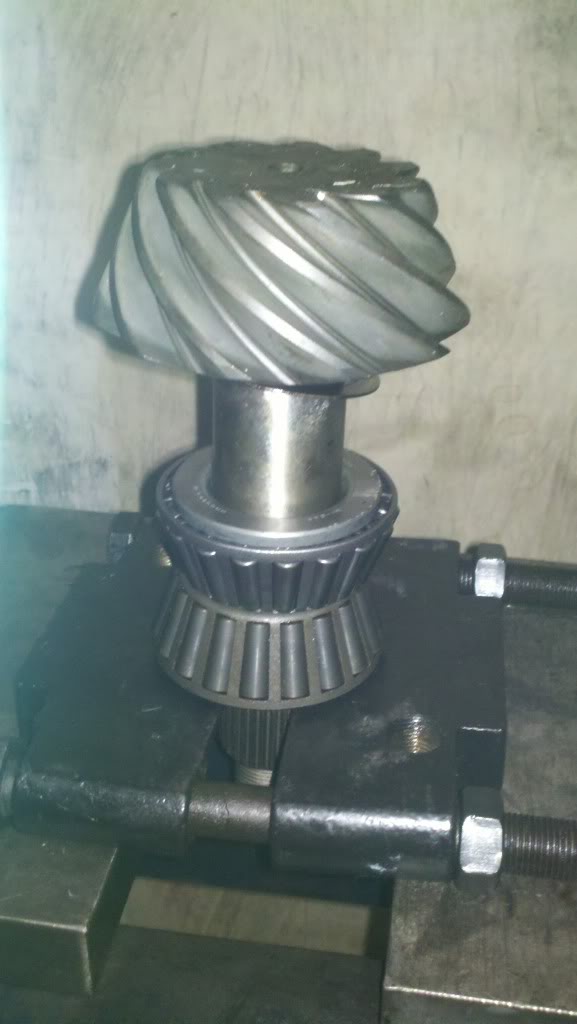
Last edited by augie; 02-16-2012 at 12:23 AM. |
|
|
|
|
#12 |
|
Registered User
Join Date: Jun 2007
Location: South Carolina
Posts: 106
|
Re: 12 bolt rebuild + Eaton
Here are the new parts ready to go in.
 Slide on your new crush sleeve and slide pinion though your previously installed bearing and seal, slide yolk on other side. 
Last edited by augie; 02-16-2012 at 12:23 AM. |
|
|
|
|
#13 |
|
Registered User
Join Date: Jun 2007
Location: South Carolina
Posts: 106
|
Re: 12 bolt rebuild + Eaton
Note: if you are fighting getting the pinion depth right and using the above wallerd out bearing to try different shims do not install the cruch sleeve till final assembly. It is only supposed to be crushed once and it will be alot easier to put together and take apart.
|
|
|
|
|
#14 |
|
Registered User
Join Date: Jun 2007
Location: South Carolina
Posts: 106
|
Re: 12 bolt rebuild + Eaton
Now the notorius pinion nut. The crush sleeve has to be crushed so that both bearings will make contact with the races. There is no torque specs. It take a lot of force to crush the sleeve but once it is crushed you can over tighten and hurt the bearing easly. I will bump nut with impact then push pinion back and forth do this till you feel no play. Now feel how hard it is to turn yolk. It is supposed to be measured with a progressive type inch pound torque wrench and take a constant 12(I think) inch pounds to keep turning. I do it by feel like I said tighten it down till there is no back and forth play but kida free spinning (once your here a little goes along way) and gently tighten till it takes just a little effort to turn yolk.
|
|
|
|
|
#15 |
|
Registered User
Join Date: Jun 2007
Location: South Carolina
Posts: 106
|
Re: 12 bolt rebuild + Eaton
Pinion depth: There is a spec (2.468 per Motive gear) for depth. This is measured from center of ring gear to end of pinion.They make a tool that you can use to measure this. After you bolt in pinion this tool is centerd under your carrier caps and gives you a point to measure from.
I have never used this tool or know of anyone that does. From reading my earlier post you know I like to reuse pinion shim, but am prepared to got to war with my wallered out bearing and extra shims from my rebuild kit. If you are changing gear ratio I found this in a hot rod magazine for a starting point. My shim was not marked so I can't say if it is accurate. 3.08 .021-.024 3.73 .026-.027 4.56 .031 5.13 .033-.034 |
|
|
|
|
#16 |
|
Registered User
Join Date: Jun 2007
Location: South Carolina
Posts: 106
|
Re: 12 bolt rebuild + Eaton
Now install your ring gear on the carrier. Some times it is really hard to slide the ring gear on. Heating the gear up in oven or with torch can make this easier. In this case it just slid on with a little wiggling. The torque on the ring bolts is 55 foot lbs. Tip: Snug bolts down pretty good with air tool and wait till its installed in housing to torque them. Imagine trying to hold that assembly while torquing in, people will point and laugh.

Last edited by augie; 02-16-2012 at 12:24 AM. |
|
|
|
|
#17 |
|
Registered User
Join Date: Jun 2007
Location: South Carolina
Posts: 106
|
Re: 12 bolt rebuild + Eaton
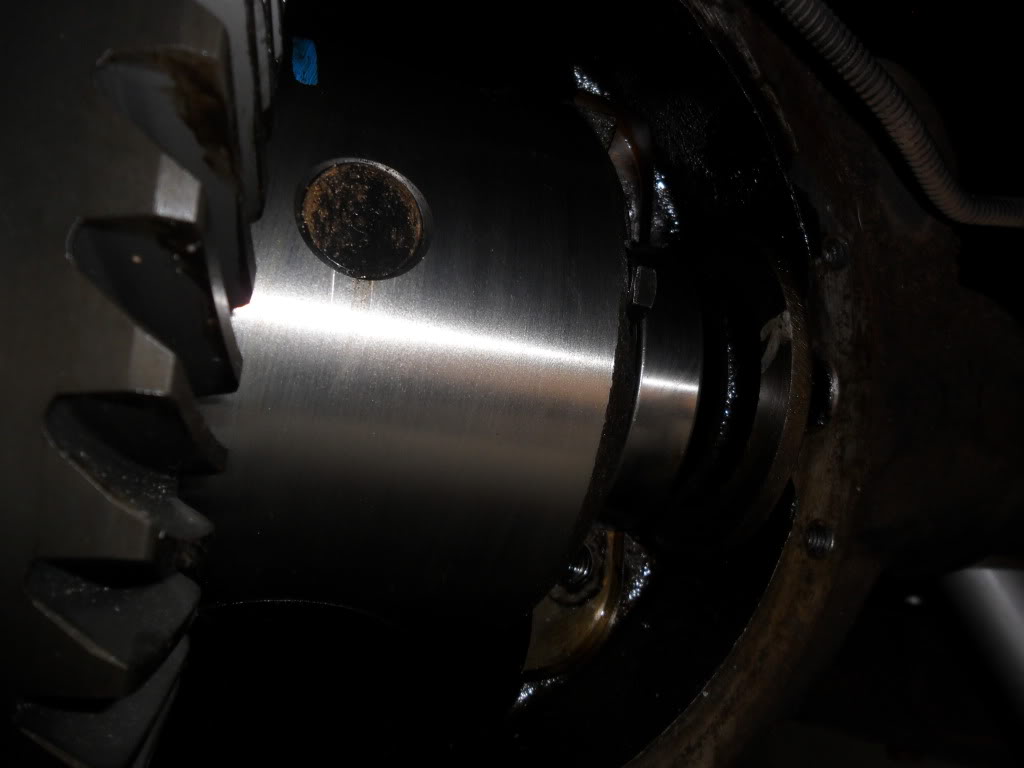
Carrier installation "take one" Remember from dis-assembly you have to hold the races on the bearings along with the shims on the correct sides and it should be as tight going in as it was coming out. Then put your caps back on.
Last edited by augie; 02-16-2012 at 12:24 AM. |
|
|
|
|
#18 |
|
Registered User
Join Date: Jun 2007
Location: South Carolina
Posts: 106
|
Re: 12 bolt rebuild + Eaton
The set up games begin: I was not as lucky as I had hoped. After snugging caps down with original shims I had no back lash you could not turn ring or pinion at all.
This means I need to use the aftermarket shims that came with my rebuild kit. To increase back lash You need to move the ring gear away from the pinion by taking out shims from the left side and adding the exact amount to the right. A micrometer comes in handy here. Of course if you have too much backlash you would do the opposite. Almost all ring and pinions call for .006-.010. The Motive gears I'm using call for .007-.009 |
|
|
|
|
#19 |
|
Registered User
Join Date: Jun 2007
Location: South Carolina
Posts: 106
|
Re: 12 bolt rebuild + Eaton
If you put your hand on the ring gear and gently push it up and down with out the pinion moving. That movment is the back lash. It can be measured with a dial indicator.
|
|
|
|
|
#20 |
|
Registered User
Join Date: Jun 2007
Location: South Carolina
Posts: 106
|
Re: 12 bolt rebuild + Eaton
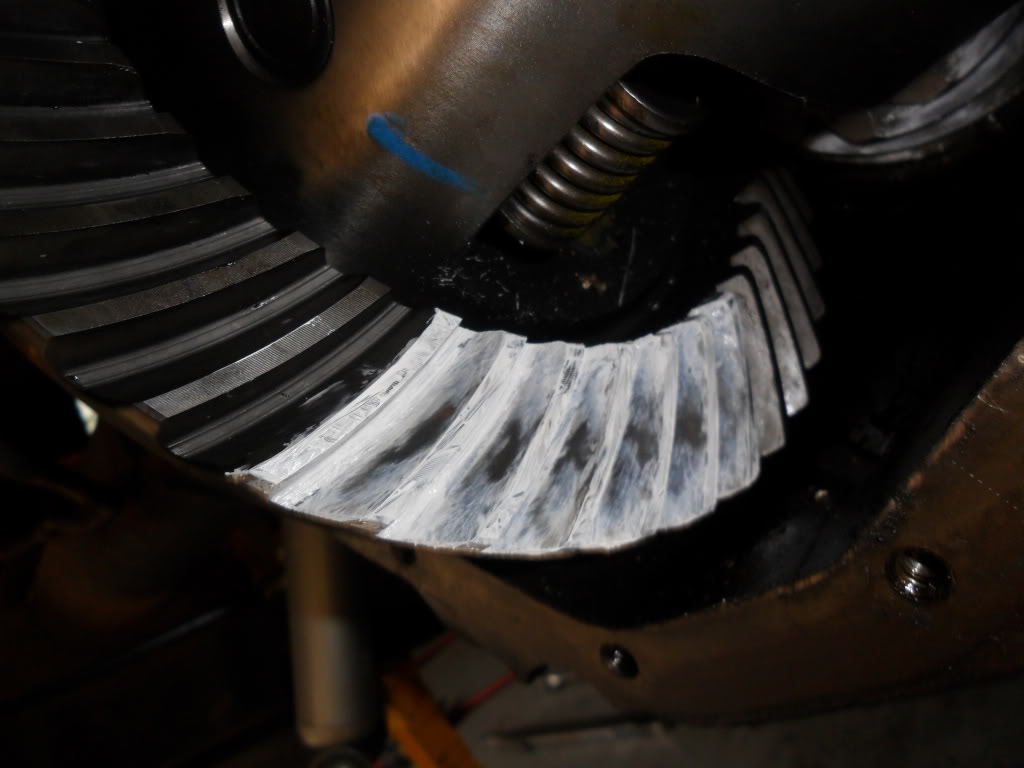
Wipe: My handy rebuild kit came with some paint. So I painted a section of the ring gear with a used tooth brush.Then turned the pinion in both directions while holding pressure on the ring gear to ensure a readable pattern.
Last edited by augie; 02-16-2012 at 12:24 AM. |
|
|
|
|
#21 |
|
Registered User
Join Date: Jun 2007
Location: South Carolina
Posts: 106
|
Re: 12 bolt rebuild + Eaton
If you look at my ring you can see on both sides of tooth( called coast and drive) my clean spot is centered between the out side of ring (heel) and inside of ring (toe) That tells me my pinion depth is good. Which me happy. If you keep looking you will notice there is paint between the clean part and bottom of tooth and between clean and top. This confirms my backlash is good.
|
|
|
|
|
#22 |
|
Registered User
Join Date: Jun 2007
Location: South Carolina
Posts: 106
|
Re: 12 bolt rebuild + Eaton
Slide your axles in far enough to get your c-clips back on then pull them to seat the c-clip in the carrier. Slide you pin in to lock in the axles. Then your lock bolt and torque it 23-30 ft lbs per Eaton. Now the cover, my kit came with a gasket but I used RTV ( I like to take my paint marker and leave a message on the inside of the cover only the next guy in will see such as "go USA!)
Eaton specifies- fill with conventional 80w90 and limmited slip additive. The fill plug is on the right side a little over half way up and is removed with a 3/8 drive. Add fluid till it overflows. |
|
|
|
|
#23 |
|
Registered User
Join Date: Jun 2007
Location: South Carolina
Posts: 106
|
Re: 12 bolt rebuild + Eaton
Test drive: Took it for a spin confident the set up was right , but never used motive gear or an Eaton. Happy to say it has 0 noise or whine and 0 chatter while turning. I can say the truck has never accelerated that nice in first (traction is sweet) and leaves some nice even black marks. I'll work on some pics of that. lol
|
|
|
|
|
#24 |
|
Registered User
Join Date: Jun 2007
Location: South Carolina
Posts: 106
|
Re: 12 bolt rebuild + Eaton
After thought. Ended up with.oo8 back lash spec was .007-.009 This pic gives an Idea how it is measured. I got the magnetic base from Harbor freight for $10
 I was inspired to write this after reading another thread on this forum and there was more than one recommendation to leave rear end alone and take it to a pro. Hopefully after reading this you can better judge if you have the tools and skills to tackle a full or partial rebuild. Last edited by augie; 02-16-2012 at 12:25 AM. |
|
|
| Bookmarks |
| Thread Tools | |
| Display Modes | |
|
|