
 |
Register or Log In To remove these advertisements. |
|
|
|
|||||||
 |
|
|
Thread Tools | Display Modes |
|
|
|
|
#1 |
|
Registered User
Join Date: Aug 2015
Location: Sacramento, Ca
Posts: 26
|
1970 Chevy C10 LWB to SWB and frame off
Hi Everyone,
this thread will document my VERY long term project truck. I have had the truck for over 4 years and been working on it off and on. First some specs on the truck and then goals and maybe after that, if I have time, we will get to pictures.  Specs when I got it: 1970 Chevy C10 Long bed coil sprung Chevy 350 2 bolt main / Turbo 350 12 bolt rear open diff, I forget the ratio... 2 under bed saddle tanks with a neat little valve under the drivers seat 6 lug drum brakes all around The truck drove home but had a fairly serious radiator leak which kept it mostly grounded. Here are some pics from the craigslist ad when I bought it. 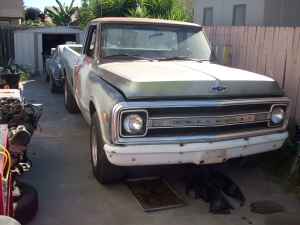 IMG_0485 by meeker4323, on Flickr IMG_0485 by meeker4323, on Flickr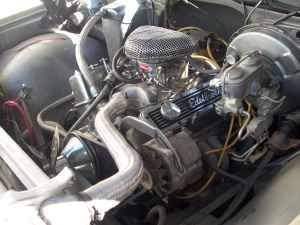 IMG_0483 by meeker4323, on Flickr IMG_0483 by meeker4323, on Flickr IMG_0486 by meeker4323, on Flickr IMG_0486 by meeker4323, on FlickrNow the truck was pretty rough and I took it all the way down to the frame. I have not started taking a lot of pictures until fairly recently. I would like to post my goals for the truck and get you up to date with where I am: Short bed: I gather that it is a bit controversial to chop these trucks up on this board but it was a matter of economics for me. I bought this truck for $1200, a shortbed in the same condition would go for $4500 around here. I have completed the frame cut and removal. I have also cut down the steel bed floor and bedsides and have them smoothed out. 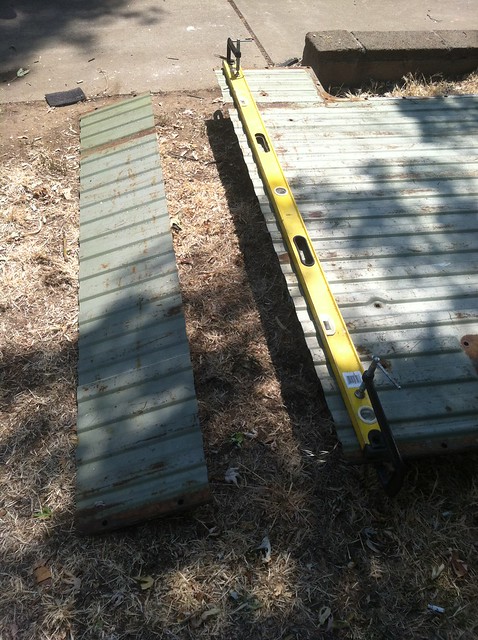 IMG_0526 by meeker4323, on Flickr IMG_0526 by meeker4323, on Flickr IMG_0528 by meeker4323, on Flickr IMG_0528 by meeker4323, on Flickr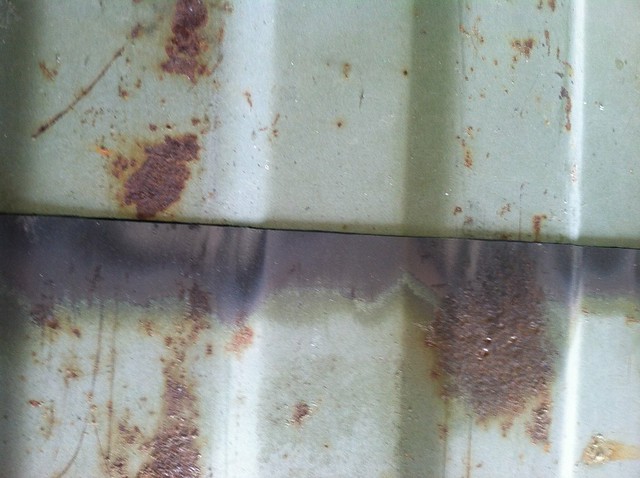 IMG_0529 by meeker4323, on Flickr IMG_0529 by meeker4323, on Flickr IMG_0539 by meeker4323, on Flickr IMG_0539 by meeker4323, on Flickr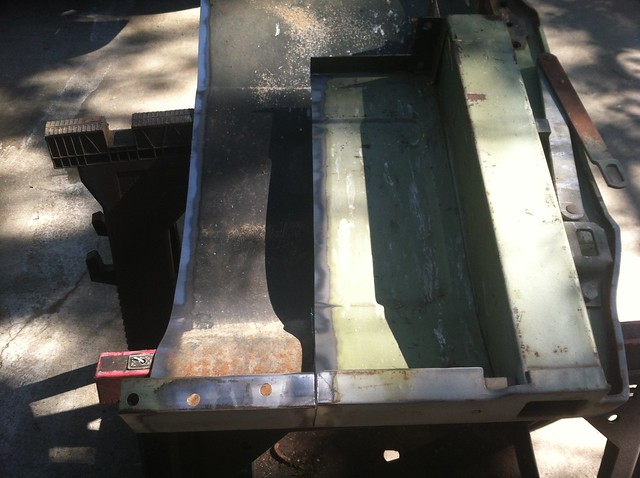 IMG_0541 by meeker4323, on Flickr IMG_0541 by meeker4323, on Flickr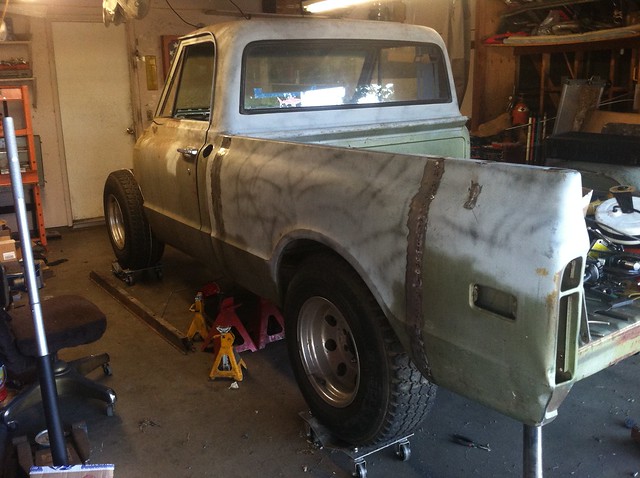 IMG_0544 by meeker4323, on Flickr IMG_0544 by meeker4323, on FlickrTo be continued! |
|
|

|
|
|
#2 |
|
Registered User
Join Date: Aug 2015
Location: Sacramento, Ca
Posts: 26
|
Re: 1970 Chevy C10 LWB to SWB and frame off
Now we do a bunch of freeway driving here in California so I knew I would need an overdrive. I picked up a 700r4 for $400 from a real character on craigslist, it seems to be in good shape and freshly rebuilt. I threw a shift kit and lockup conversion from b&m and TCI gave it a coat of paint and bolted it up.
 IMG_0473 by meeker4323, on Flickr IMG_0473 by meeker4323, on FlickrThe truck also came with a Edelbrock Carb which I rebuilt and Performer Aluminum intake. 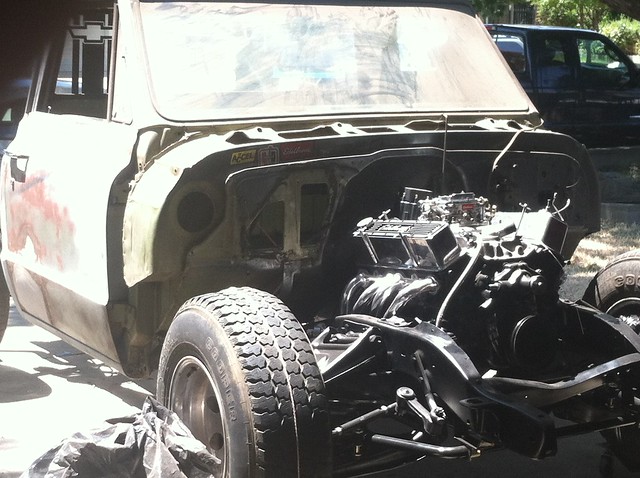 IMG_0517 by meeker4323, on Flickr IMG_0517 by meeker4323, on FlickrYou may also spy the DUI HEI unit and the Summit Racing Ceramic coated headers in that last pic. |
|
|

|
|
|
#3 |
|
Registered User
Join Date: Aug 2015
Location: Sacramento, Ca
Posts: 26
|
Re: 1970 Chevy C10 LWB to SWB and frame off
Now for stance and suspension I went with the 2.5" drop spindles and disc brake upgrade from Brothers in the front. I think they were running a sale at the time. You may notice that I stayed with the 6 Lug pattern, I had a nice set of 6 lug wheels picked out but Pro Comp stopped making them.
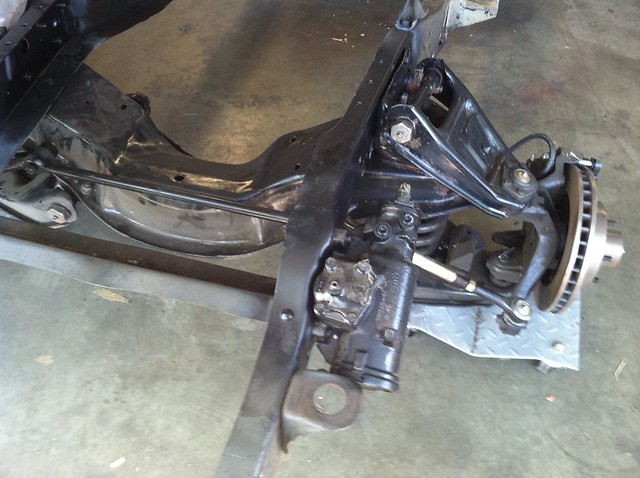 IMG_0480 by meeker4323, on Flickr IMG_0480 by meeker4323, on FlickrIn the rear I went with 4" drop springs from Early Classic Enterprises as well as their shock relocation kit. I am not a huge fan of slammed trucks and C notches, so this is about as low as I could go. 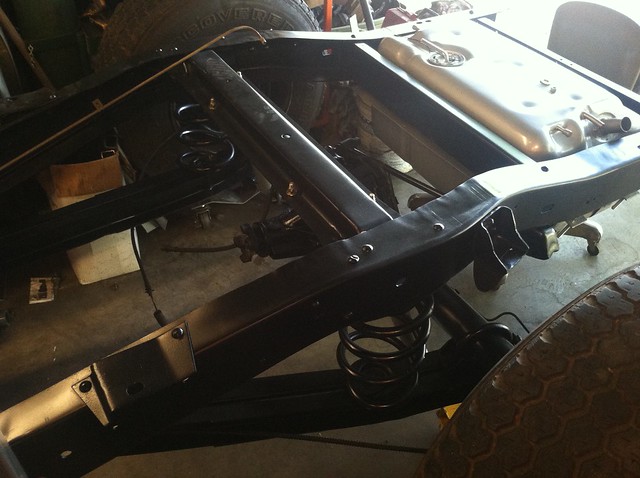 IMG_0476 by meeker4323, on Flickr IMG_0476 by meeker4323, on Flickr
|
|
|

|
|
|
#4 |
|
Registered User
Join Date: Aug 2015
Location: Sacramento, Ca
Posts: 26
|
Re: 1970 Chevy C10 LWB to SWB and frame off
Fuel tank: As you can see in the above pic I have put a Blazer Tank in the rear under the bed for better weight distribution and more room in the cab. I plan on grafting a fuel door in the side of the bed to keep everything nice and easy to refuel.
You may have noticed in some of the pics my shiny stainless exhaust. This is the Magnaflow kit, I am impressed with the quality overall but the instructions were terrible to say the least.  IMG_0490 by meeker4323, on Flickr IMG_0490 by meeker4323, on Flickr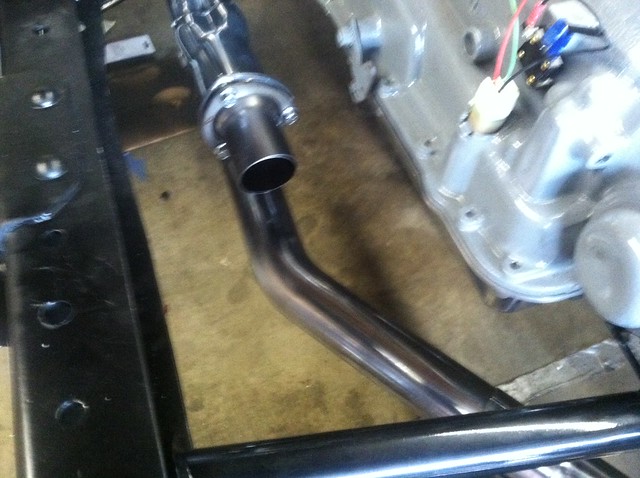 IMG_0491 by meeker4323, on Flickr IMG_0491 by meeker4323, on Flickr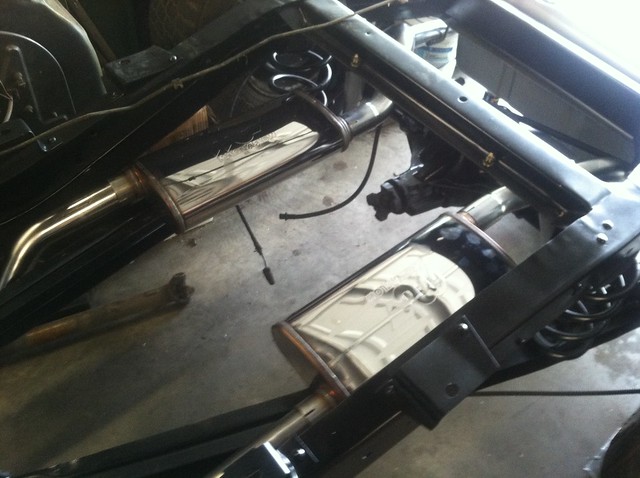 IMG_0493 by meeker4323, on Flickr IMG_0493 by meeker4323, on FlickrWelding of the collectors to the x-pipe was done with my old school Lincoln Tig Welder, unfortunately I don't have any pics of the welds but they turned out good. |
|
|

|
|
|
#5 |
|
Registered User
Join Date: Aug 2015
Location: Sacramento, Ca
Posts: 26
|
Re: 1970 Chevy C10 LWB to SWB and frame off
I know these pictures have jumped around a bunch and shows the truck in various stated of assembly, I am trying to focus on one section at a time.
I have pretty much finished the metalwork on the bed and have moved on to the drivers side rocker panel repair. I spotted the rust when I bought the truck but I did not realize that it went this deep. The famed California rust free truck everybody: 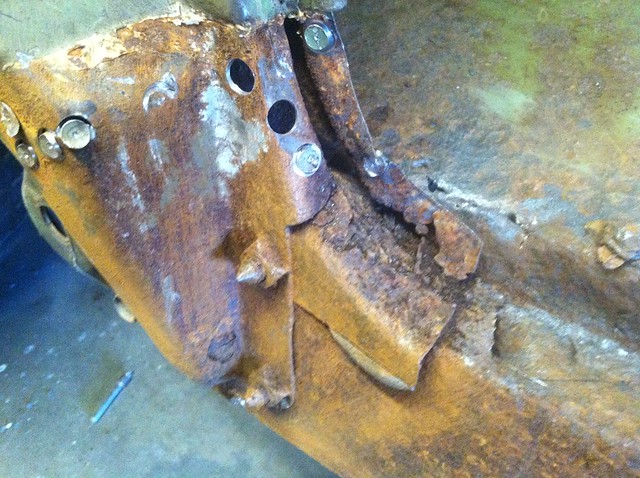 IMG_0567 by meeker4323, on Flickr IMG_0567 by meeker4323, on Flickr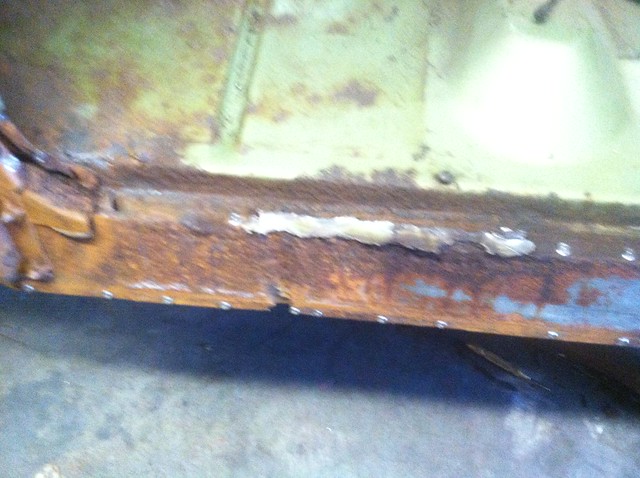 IMG_0568 by meeker4323, on Flickr IMG_0568 by meeker4323, on Flickr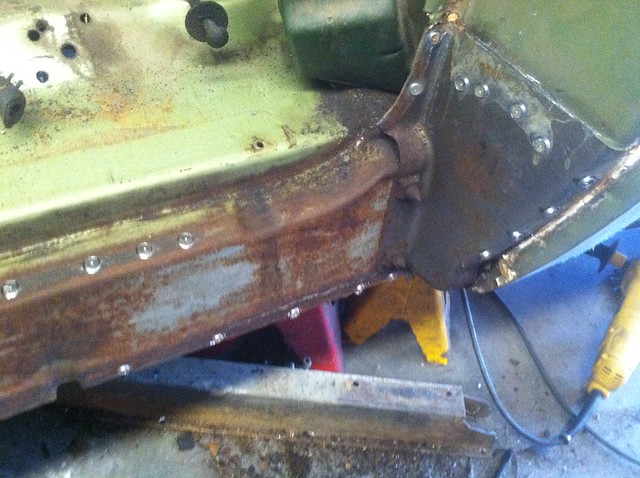 IMG_0570 by meeker4323, on Flickr IMG_0570 by meeker4323, on FlickrThe rear of the inner rocker is solid so I will need to replace only the front section of outer floor and kick panel. The cab support seems solid as well with just a bit of surface rust. That brings us to about current, hopefully the updates will be steady from here out. Feel free to ask about anything or point out anything that you have questions on, I kind of rocketed through about 2 years worth of work in 4 posts! |
|
|

|
|
|
#6 |
|
Registered User
Join Date: Sep 2014
Location: meridian, idaho
Posts: 95
|
Re: 1970 Chevy C10 LWB to SWB and frame off
Looks good, keep up the work.
|
|
|

|
|
|
#7 |
|
Registered User
Join Date: Aug 2015
Location: Sacramento, Ca
Posts: 26
|
Re: 1970 Chevy C10 LWB to SWB and frame off
Thanks dacavy!
Didn't get much done this afternoon as it was pretty hot here in Sacramento and I was literally dripping sweat on the bare metal. Oh well at least I didn't put the spot weld cutter into my hand again  Cut out the rotten metal and it went deeper than I had hoped. Luckily I have all of these patch panels on order with classic industries already. I marked out where to cut the floor to remove the rust and avoid complex humps and bumps. 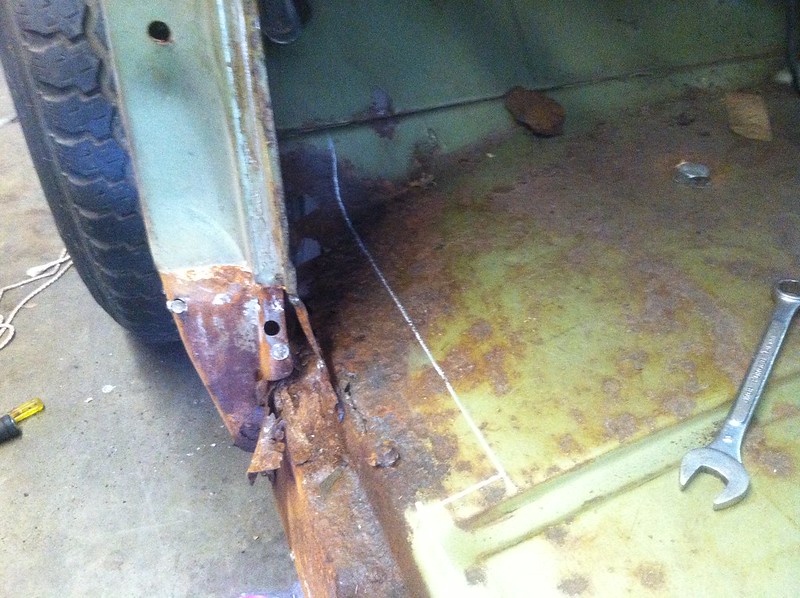 IMG_0573 by meeker4323, on Flickr IMG_0573 by meeker4323, on Flickr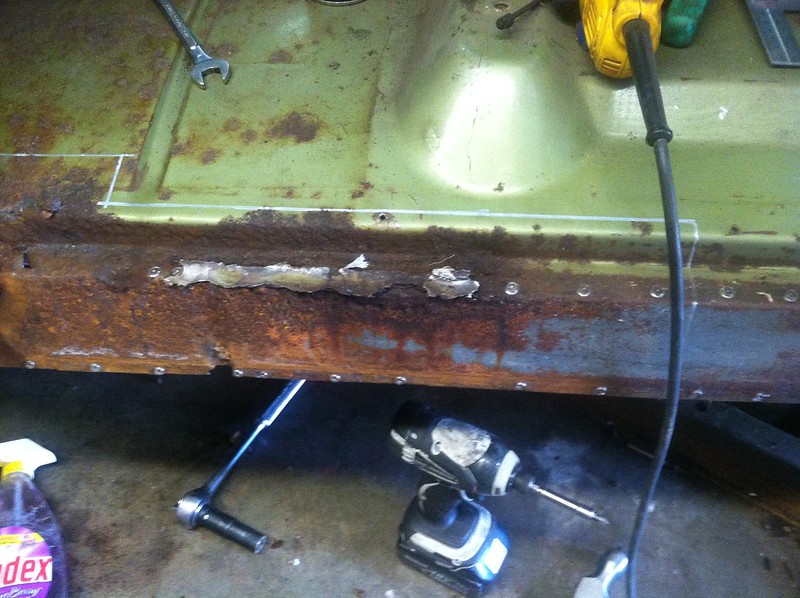 IMG_0572 by meeker4323, on Flickr IMG_0572 by meeker4323, on FlickrAnd then the cut! 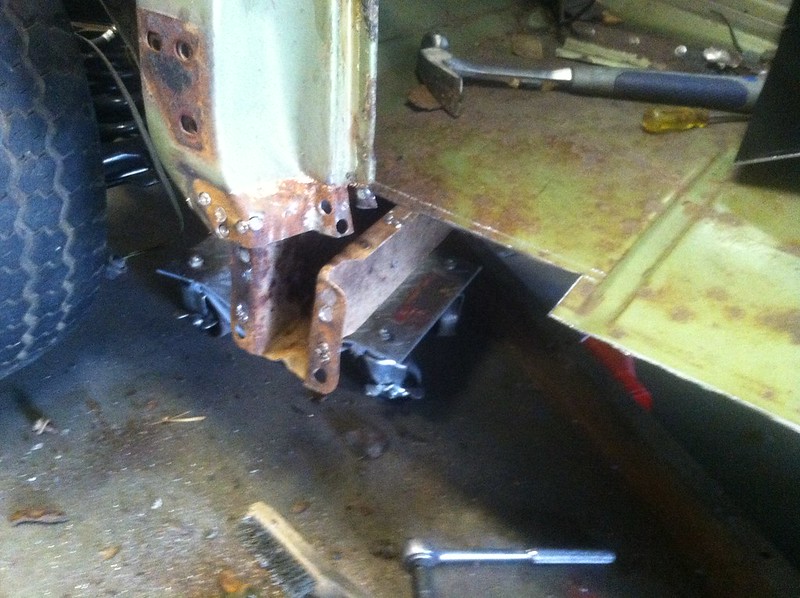 IMG_0574 by meeker4323, on Flickr IMG_0574 by meeker4323, on FlickrOf course this all looks simple enough but trust me there was a lot of hidden spot welds and banging with a hammer and chisel to make this happen. 
|
|
|

|
|
|
#8 |
|
Registered User
Join Date: Mar 2011
Location: Kansas City, Missouri
Posts: 3,541
|
Re: 1970 Chevy C10 LWB to SWB and frame off
Nice looking build you have going.
__________________
Scott |
|
|

|
|
|
#9 |
|
Registered User
Join Date: Aug 2012
Location: Topeka Kansas
Posts: 2,655
|
Re: 1970 Chevy C10 LWB to SWB and frame off
That cab floor is in incredible condition I would say it is in the 98 percentile and I have never seen a factory inner rocker with that little rust on it before, of course we are talking about a matter of degrees here it is all about the same amount of work in the end but still it's a nice example.
Last edited by Xeen; 08-29-2015 at 09:50 AM. |
|
|

|
|
|
#10 |
|
Registered User
Join Date: Mar 2010
Location: Aledo, Texas
Posts: 803
|
Re: 1970 Chevy C10 LWB to SWB and frame off
I'm IN. Doing the same thing myself.
__________________
84 step side 87 swb |
|
|

|
|
|
#11 |
|
Registered User
Join Date: Aug 2015
Location: Sacramento, Ca
Posts: 26
|
Re: 1970 Chevy C10 LWB to SWB and frame off
Thanks for the comments guys, I didn't get much done this weekend between working on my brothers jeep and getting stuff done around the house. I promise more updates soon.
Duckworth, I was checking out your thread the other day and noticed a lot of similarities between our rocker repairs, you even had the saddle tank valve in almost the same spot in the cab floor. Xeen, Yea, I was halfway joking about the California truck thing, most of the cab floor is spotless. The truck did not have carpet in it so I think the paint was worn away leaving room for rust in addition to a leak in the cowl or window. I was also very impressed with the bed floor, most long beds are beat up pretty bad from a life of hard work. The climate here is actually very anti rust, you can leave bare steel out indefinitely as long as it does not get wet. |
|
|

|
|
|
#12 |
|
Registered User
Join Date: Aug 2015
Location: Sacramento, Ca
Posts: 26
|
Re: 1970 Chevy C10 LWB to SWB and frame off
Only one pic to share this morning. I made some progress fitting the replacement inner Rocker piece. I had to spend a bunch of time rebuilding the portion of the patch panel that mates with the firewall. I gather that these patch panels always have some sort of problem so at least it was something I could fix.
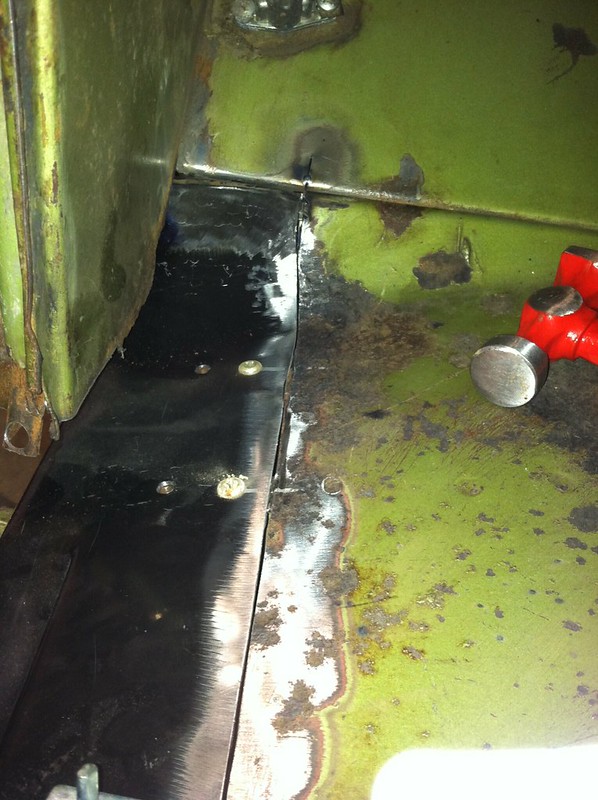 IMG_0583 by meeker4323, on Flickr IMG_0583 by meeker4323, on Flickr
|
|
|

|
|
|
#13 |
|
Registered User
Join Date: Aug 2015
Location: Sacramento, Ca
Posts: 26
|
Re: 1970 Chevy C10 LWB to SWB and frame off
Well I got the patch panel welded in and smoothed out. I sprayed a little rattle can primer on to make everything one color and stop any rust.
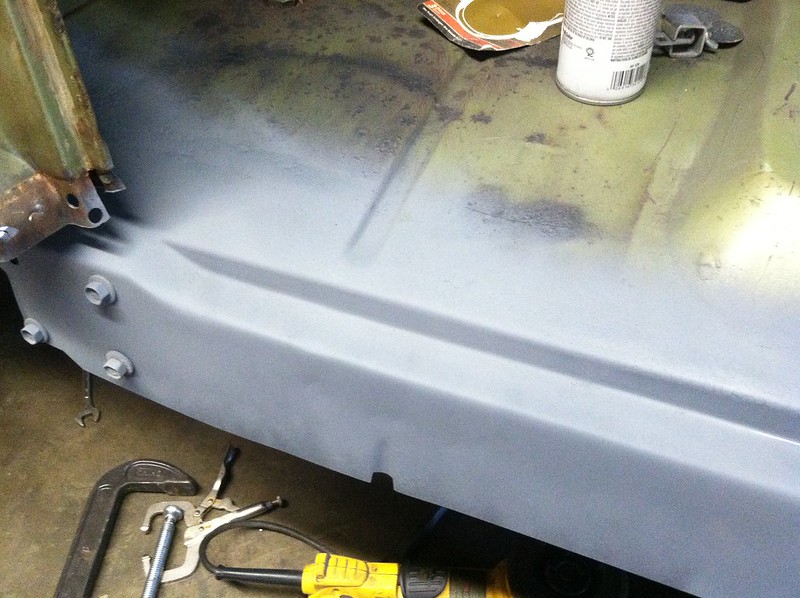 IMG_0584 by meeker4323, on Flickr IMG_0584 by meeker4323, on Flickr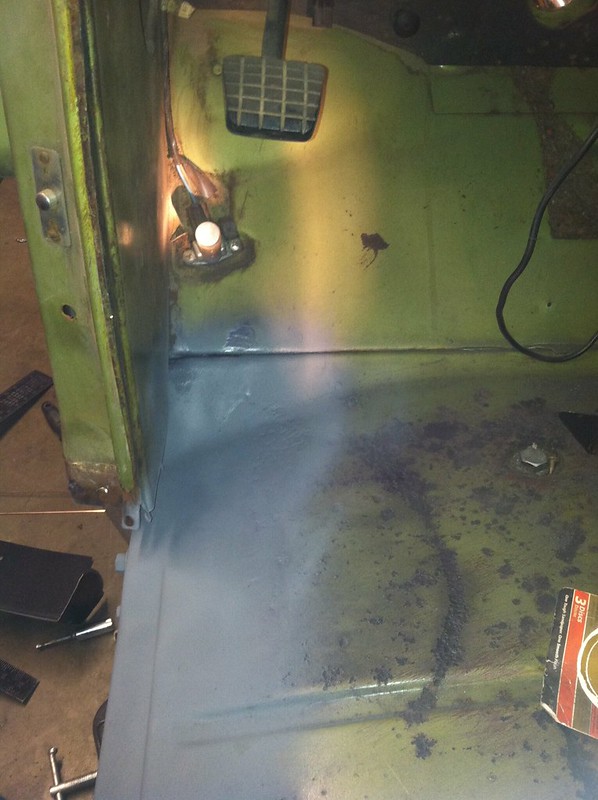 IMG_0589 by meeker4323, on Flickr IMG_0589 by meeker4323, on FlickrI had a heck of a time getting the step on the patch panel to match up with the original, they had completely different profiles. I had to slice the edges with a cut off wheel and force them to match up. 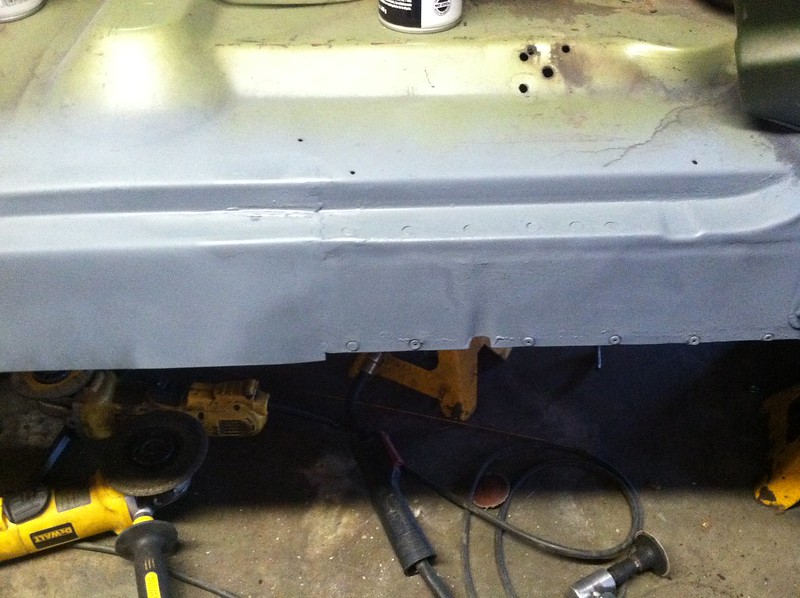 IMG_0585 by meeker4323, on Flickr IMG_0585 by meeker4323, on FlickrNot my finest work but it should look good with the rocker on. |
|
|

|
|
|
#14 |
|
Registered User
Join Date: Aug 2015
Location: Sacramento, Ca
Posts: 26
|
Re: 1970 Chevy C10 LWB to SWB and frame off
I put in a few more hours last night and got the inner foot well panel replaced and welded in
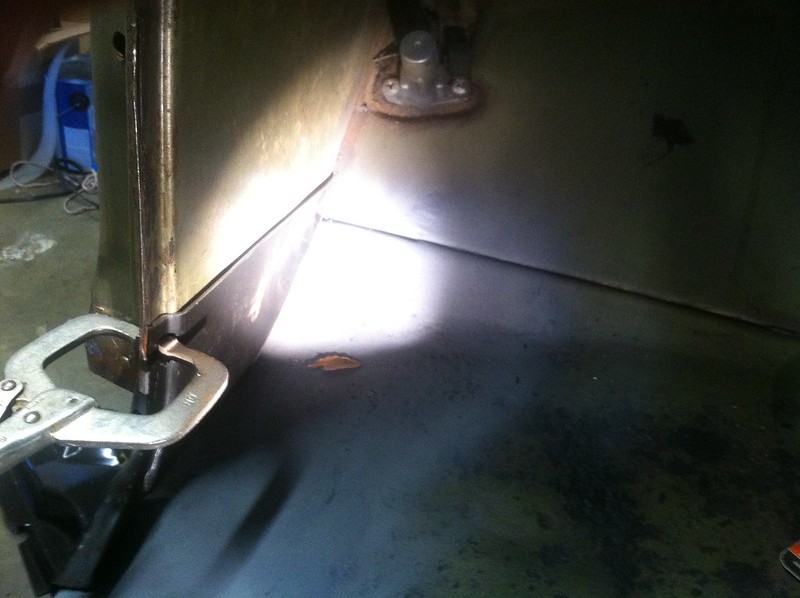 IMG_0600 by meeker4323, on Flickr IMG_0600 by meeker4323, on Flickr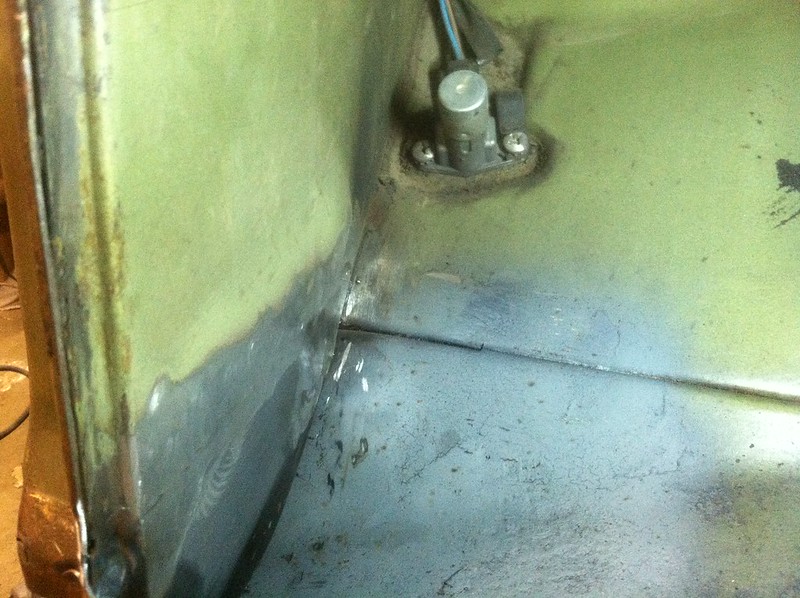 IMG_0602 by meeker4323, on Flickr IMG_0602 by meeker4323, on Flickr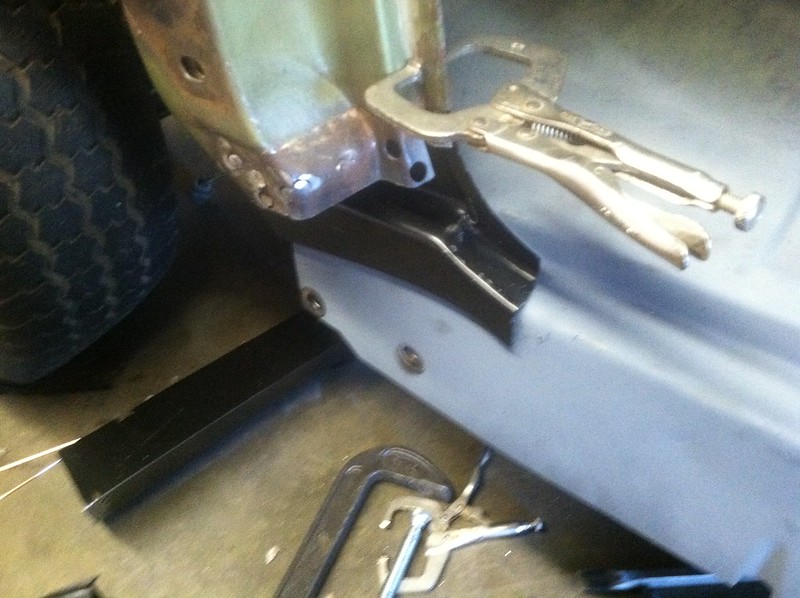 IMG_0596 by meeker4323, on Flickr IMG_0596 by meeker4323, on FlickrI also got a replacement tailgate from Classic Industries Because my old one was bent up pretty bad. 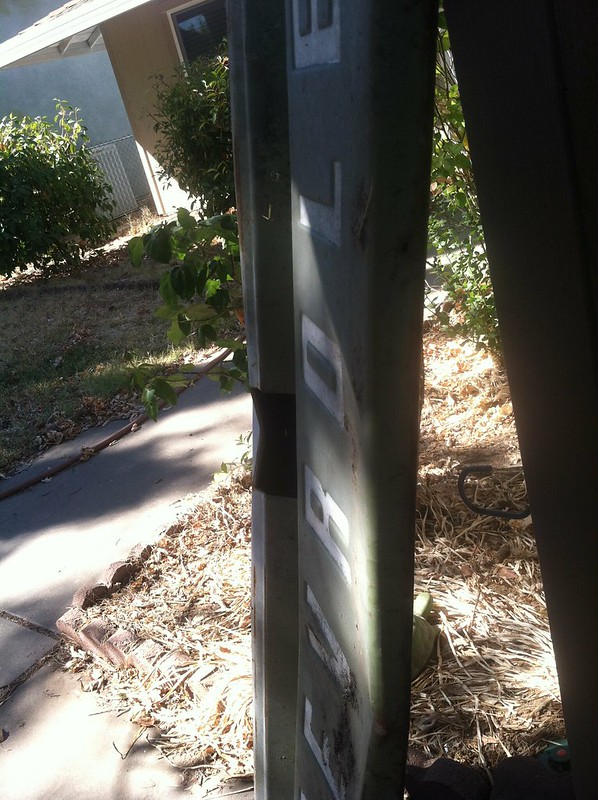 IMG_0595 by meeker4323, on Flickr IMG_0595 by meeker4323, on Flickr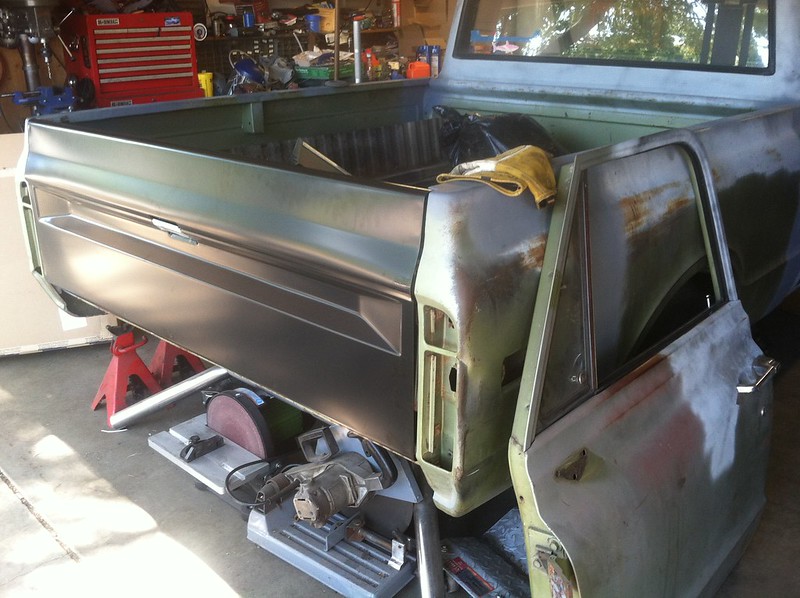 IMG_0591 by meeker4323, on Flickr IMG_0591 by meeker4323, on FlickrI did notice that the profile at the top of the tailgate does not match the bedsides, so I will probably be reworking the top corner of the bedsides in the future. 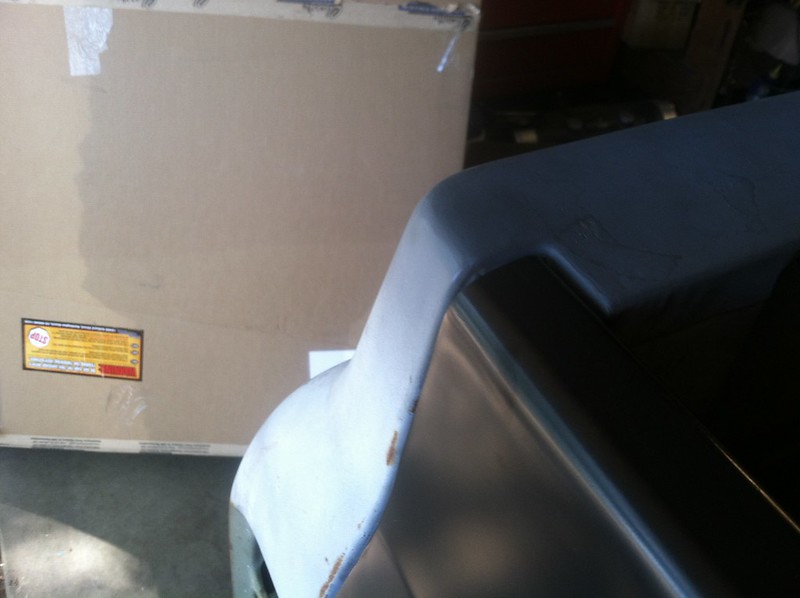 IMG_0594 by meeker4323, on Flickr IMG_0594 by meeker4323, on Flickr
|
|
|

|
|
|
#15 |
|
Registered User
Join Date: Aug 2012
Location: Topeka Kansas
Posts: 2,655
|
Re: 1970 Chevy C10 LWB to SWB and frame off
Nice progress, you are moving right along and at this pace you will be done with the cab before you know it.
|
|
|

|
|
|
#16 |
|
Registered User
Join Date: Aug 2015
Location: Sacramento, Ca
Posts: 26
|
Re: 1970 Chevy C10 LWB to SWB and frame off
So it is 103+ degrees here in Sacramento for the rest of the week so I may not get much done on the rocker repair. I did however see a 96-04 serpentine set up come on craigslist near me so I drove out to pick it up.
I couldn't wait to try and bolt it on to the engine. I must say the setup came with everything I needed, even all of the hardware. As expected there is a bit of trouble fitting a system from a engine that is 25 years newer. the biggest problem is my tall Edelbrock Elite Valve Covers.  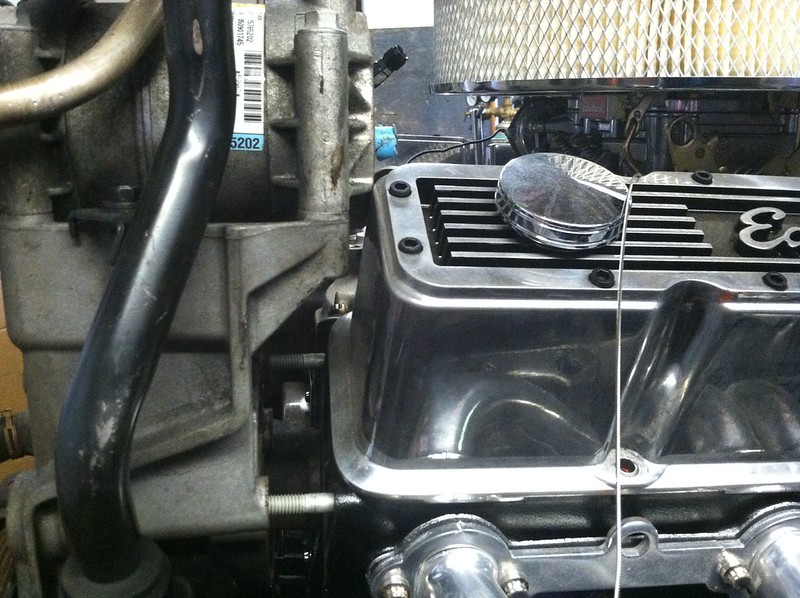 IMG_0606 by meeker4323, on Flickr IMG_0606 by meeker4323, on Flickr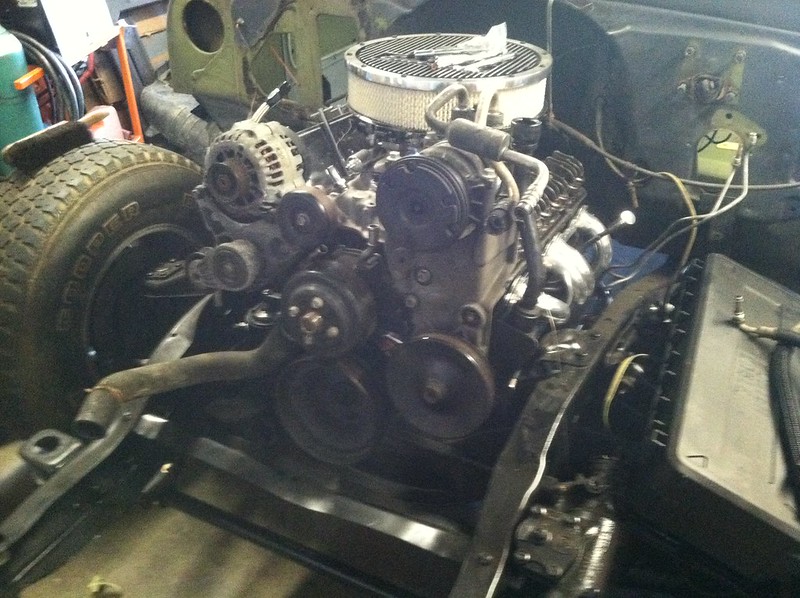 IMG_0607 by meeker4323, on Flickr IMG_0607 by meeker4323, on FlickrLuckily Edelbrock seems to be discontinuing their stock height elite series valve covers and I found them on sale on summit racing and amazon. but only amazon had them in stock. Item #42484 Let me know if there is any reason to believe these will not fit. 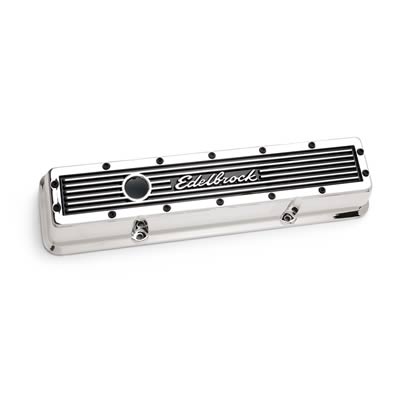 edl-42484_w by meeker4323, on Flickr edl-42484_w by meeker4323, on Flickr
|
|
|

|
|
|
#17 |
|
Registered User
Join Date: Aug 2012
Location: Topeka Kansas
Posts: 2,655
|
Re: 1970 Chevy C10 LWB to SWB and frame off
I would call up Edelbrock and ask them, they will be happy to tell you if it will work or not because they want your business and want to make sure you are a happy customer.
|
|
|

|
|
|
#18 |
|
Registered User
Join Date: Aug 2015
Location: Sacramento, Ca
Posts: 26
|
Re: 1970 Chevy C10 LWB to SWB and frame off
Well, Amazon canceled my valve cover order, I guess that they did not have any in stock either. The only place I could find the 42484 in stock was eBay for over $300.00!! I went back to summit and picked up the updated design 4262 these should match well enough.
http://www.summitracing.com/parts/edl-4262 I also made some progress on mounting the 96-04 serpentine set up. The bracket that holds the alternator / idler pulley / tensioner is only being held on by 1 bolt in the previous pictures. The heads on my engine do not have the proper mounting provisions so I had to drill a hole. First I mounted the bracket where it seemed to fit best and used a transfer punch to mark the hole location on the head: 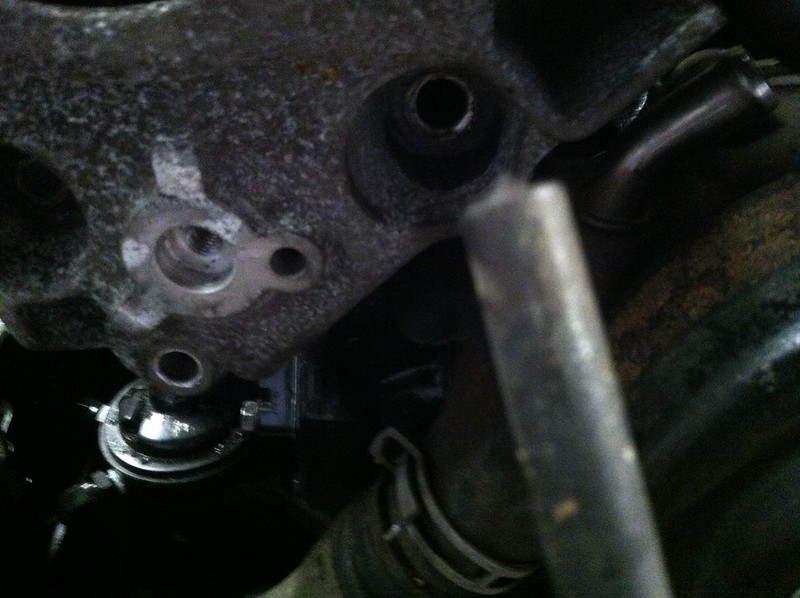 IMG_0610 by meeker4323, on Flickr IMG_0610 by meeker4323, on Flickr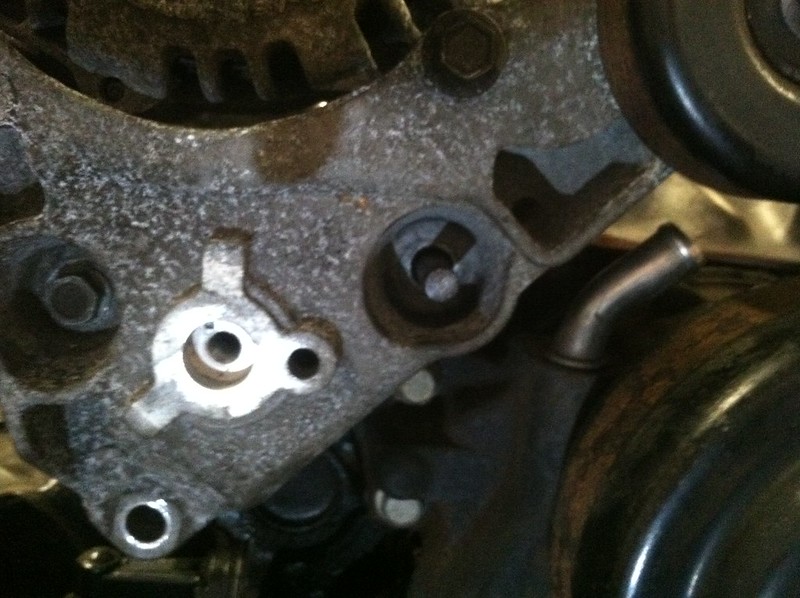 IMG_0611 by meeker4323, on Flickr IMG_0611 by meeker4323, on FlickrI then removed the bracket and drilled a 5/16" hole about 1/2" deep. For those of you that have not drilled cast iron heads slow drill speeds and decent pressure seemed to be the ticket. I then reinstalled the bracket and tapped the hole with a 3/8-16 8" long pulley tap. The bracket ensured that the hole was tapped reasonably straight. I don't have any fancy cutting fluid so I cleaned the tap every so often and used clean motor oil. 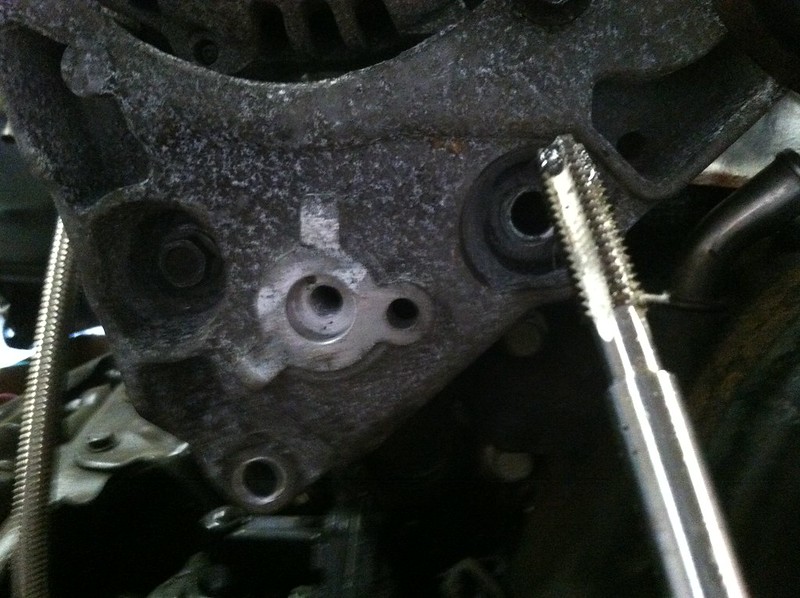 IMG_0612 by meeker4323, on Flickr IMG_0612 by meeker4323, on Flickr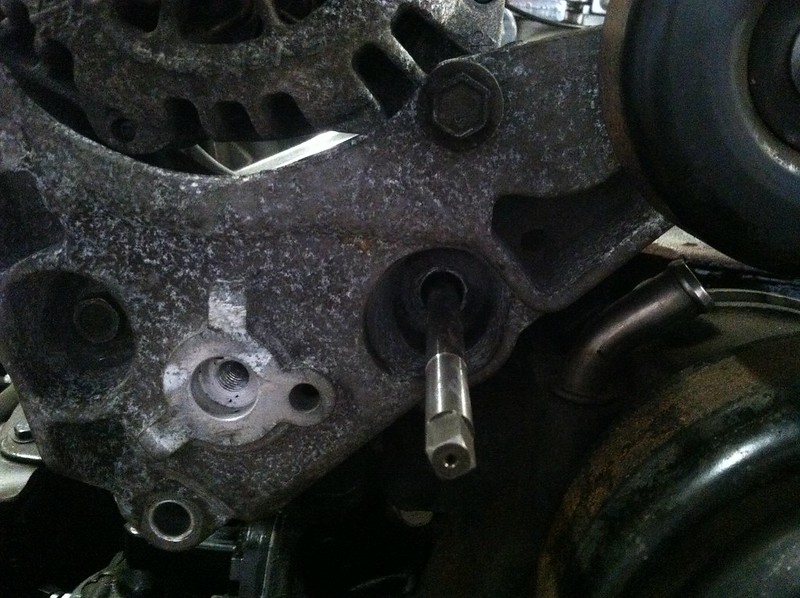 IMG_0613 by meeker4323, on Flickr IMG_0613 by meeker4323, on FlickrI then test fit using one of the factory studs that came with my setup. 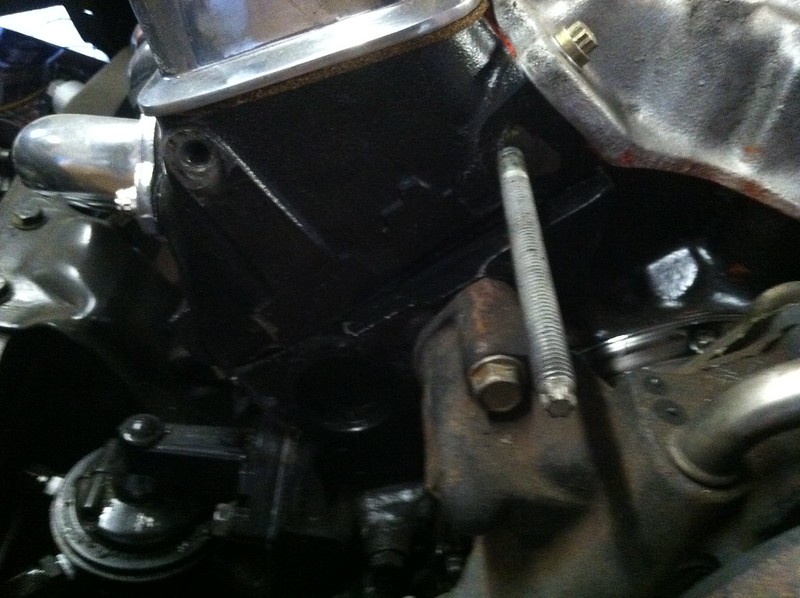 IMG_0615 by meeker4323, on Flickr IMG_0615 by meeker4323, on FlickrI don't have a picture of it all bolted up but everything went well! While installing the water pump that came with the serpentine setup I discovered another problem. The new water pump does not cover this hole on the passenger side. (See the blue gasket) I have a replacement reverse rotation pump coming which should fix this. 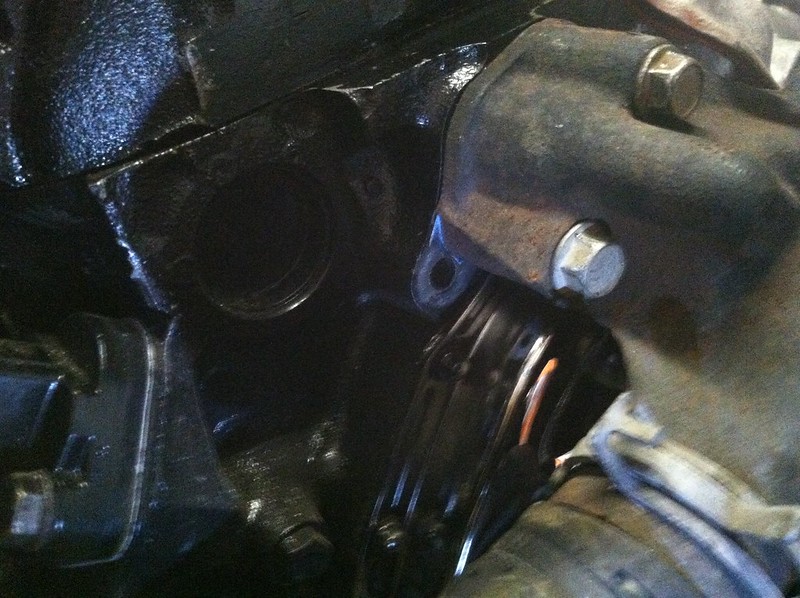 IMG_0616 by meeker4323, on Flickr IMG_0616 by meeker4323, on Flickr
|
|
|

|
|
|
#19 |
|
Registered User
Join Date: Aug 2015
Location: Sacramento, Ca
Posts: 26
|
Re: 1970 Chevy C10 LWB to SWB and frame off
I received the Edelbrock 4262 valve covers and my new Bomba de agua (water pump sounds way cooler in spanish)
Its nice living within 2 hours of a summit racing warehouse. The new water pump fixed the problem of having the exposed hole and one too many heater core return lines. this pump was from a 1995 Chevy astro van with the 4.3. This caused another problem: 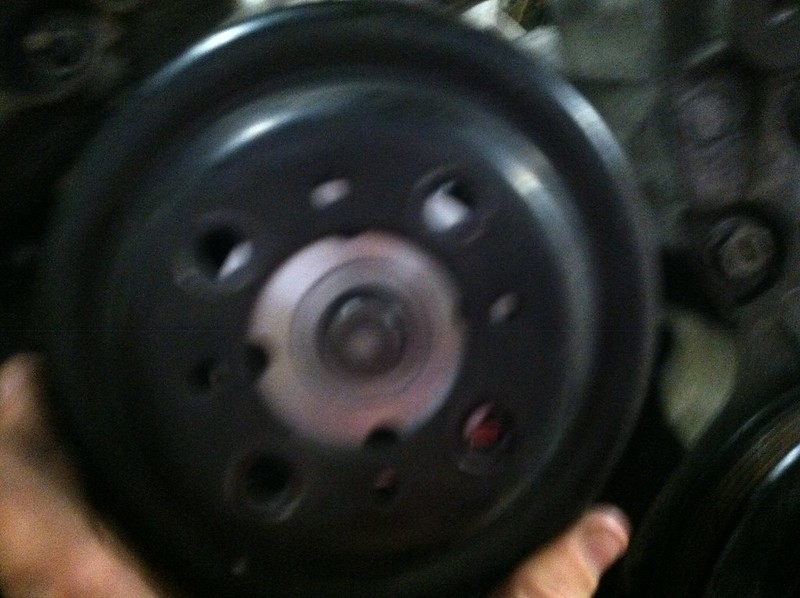 The water pump pulley has a different mounting pattern! The difference is the astro van pump is set up for a conventional fan mount, and the pump that came with my pulley kit used one of the big screw on clutch fans. I have a replacement astro van pulley on the way... I also got the new valve covers to fit with the AC bracket. I did a bit of grinding on the valve covers and the ac bracket. They just barely clear but they fit. 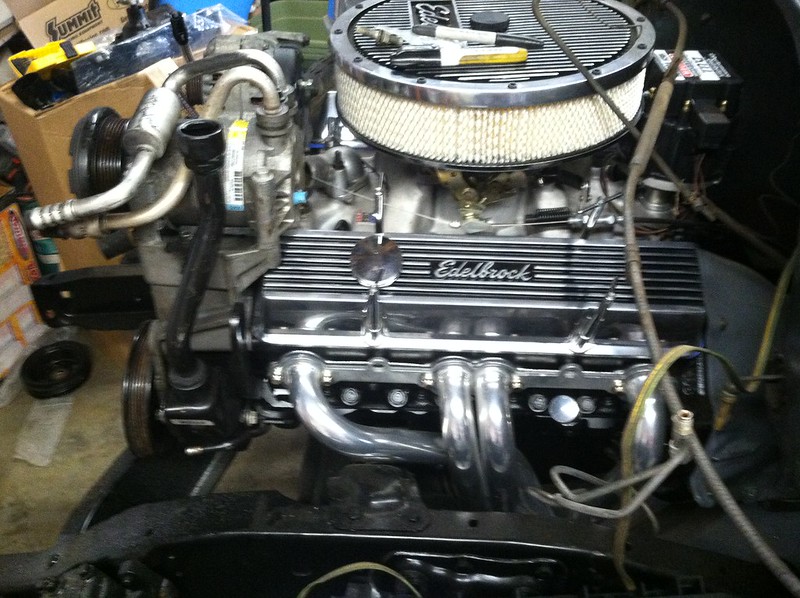 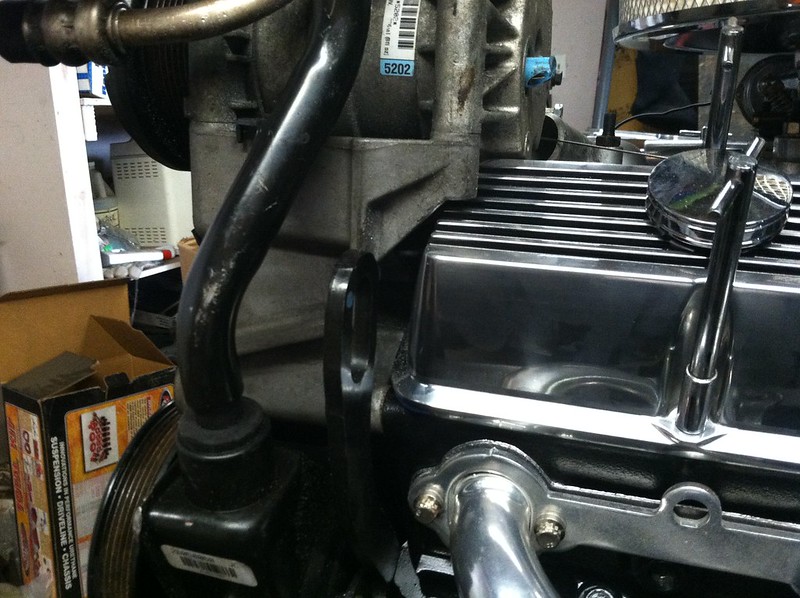 It is supposed to be cooler this weekend so I hope to get the rocker repair wrapped up, stay tuned! |
|
|

|
|
|
#20 |
|
Registered User
Join Date: Aug 2012
Location: Topeka Kansas
Posts: 2,655
|
Re: 1970 Chevy C10 LWB to SWB and frame off
I applaud your determination and ability to adapt and overcome obstacles.
Attaboy! |
|
|

|
|
|
#21 |
|
Registered User
Join Date: Aug 2015
Location: Sacramento, Ca
Posts: 26
|
Re: 1970 Chevy C10 LWB to SWB and frame off
Over the weekend I cleaned and organized half of the garage. I found myself stepping on tools and summit racing boxes trying to work on the C10 in my two car garage.
I did manage to get the front of the engine wrapped up after cleaning and painting the brackets. The rest of the engine, the rear end and the frame are all painted with this same semi gloss black engine paint. 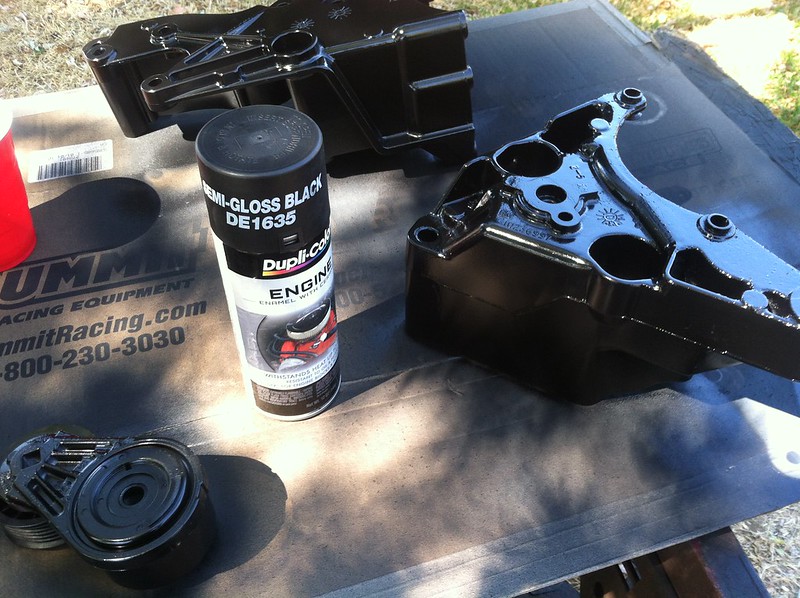 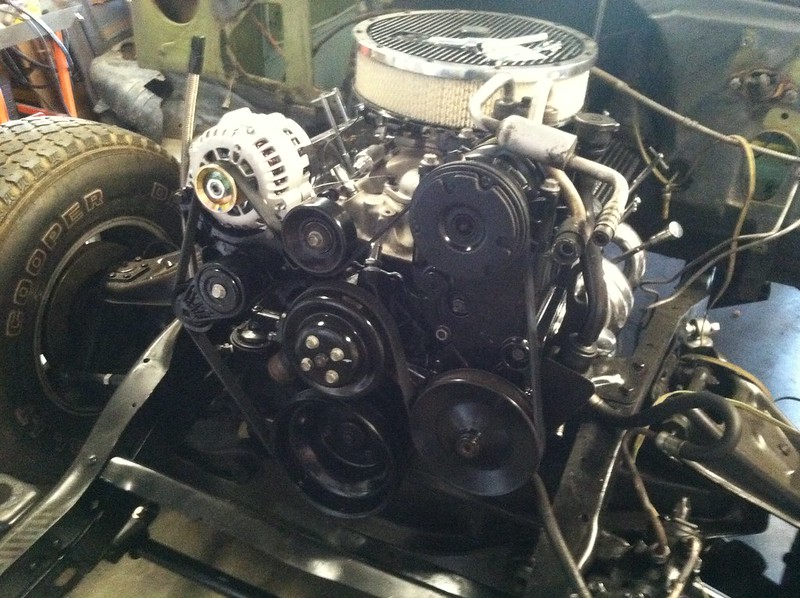
|
|
|

|
|
|
#22 |
|
Registered User
Join Date: Sep 2013
Location: Evansville, IN
Posts: 1,774
|
Re: 1970 Chevy C10 LWB to SWB and frame off
Progress is looking good!
__________________
Ryan 1967 Red Stepside..."Laymond" http://67-72chevytrucks.com/vboard/s...40#post6441840 1972 Medium Olive SWB-Chester http://67-72chevytrucks.com/vboard/s...d.php?t=759628 1967/71 Blue SWB C10..SOLD 1977 SWB K10..my grandpa's.....never should have sold |
|
|

|
|
|
#23 |
|
Registered User
Join Date: Sep 2011
Location: Ark City, Kansas
Posts: 3,409
|
Re: 1970 Chevy C10 LWB to SWB and frame off
|
|
|

|
|
|
#24 |
|
Registered User
Join Date: Aug 2012
Location: Topeka Kansas
Posts: 2,655
|
Re: 1970 Chevy C10 LWB to SWB and frame off
Serpentine for the win!
#winning |
|
|

|
|
|
#25 |
|
Registered User
Join Date: Aug 2015
Location: Sacramento, Ca
Posts: 26
|
Re: 1970 Chevy C10 LWB to SWB and frame off
In order to get my outer rocker panel installed in the right place I wanted to adjust the drivers side door. I had also rebuilt the hinges on this door. I got the rear door gap looking good and then put the core support and fenders on for the first time in years.
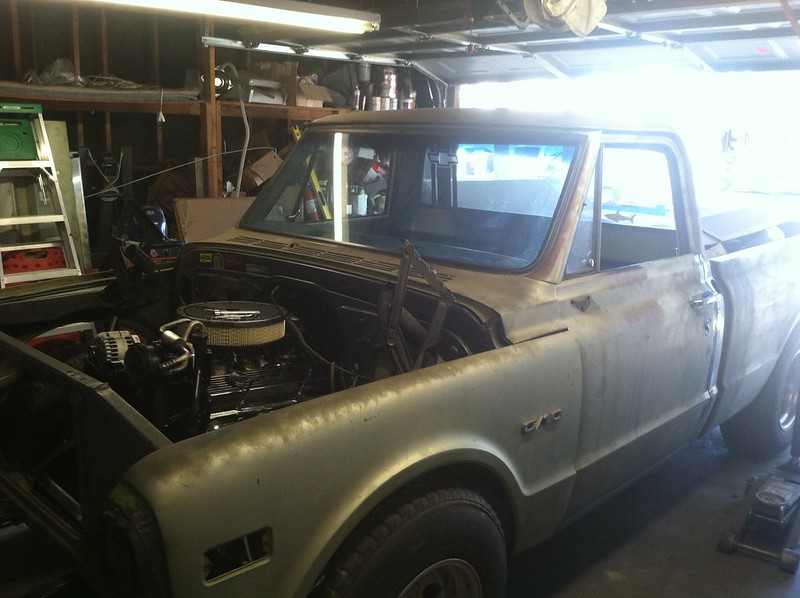 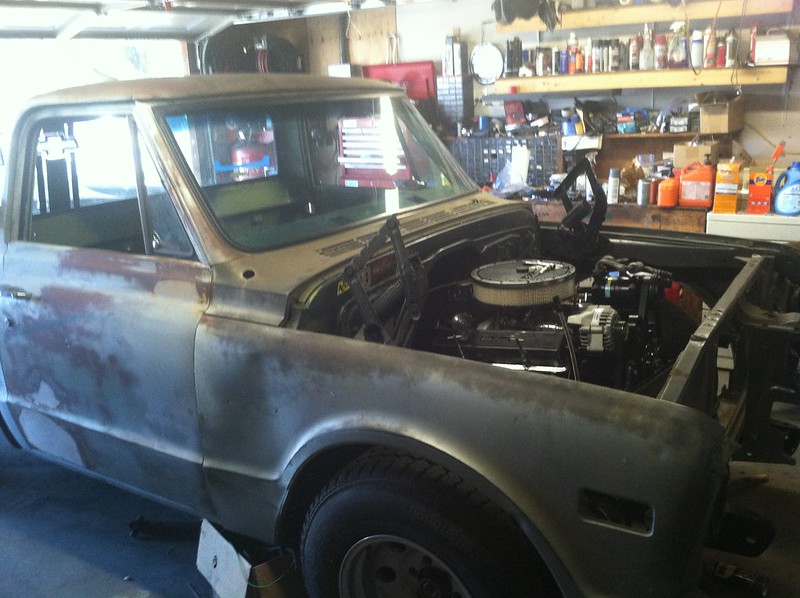 You may notice that the passenger side fender is dented up pretty badly, the plan right now is to try and bang it back into place and bodywork it, I have enough experience with re popped sheet metal to know that I don't want to deal with it. The Fenders and door hinges need a lot of adjustment but it feels really good to have them on. Does anybody know of a good write up or preferably a YouTube video of the proper procedure to align the doors and fenders? I can work my way through logically but if there is a "correct" method out there I would love to see it. |
|
|

|
 |
| Bookmarks |
| Thread Tools | |
| Display Modes | |
|
|