
 |
|
|
|
|
#1 |
|
Registered User
Join Date: Sep 2013
Location: Westminster, SC
Posts: 933
|
Loadmaster '47 COE
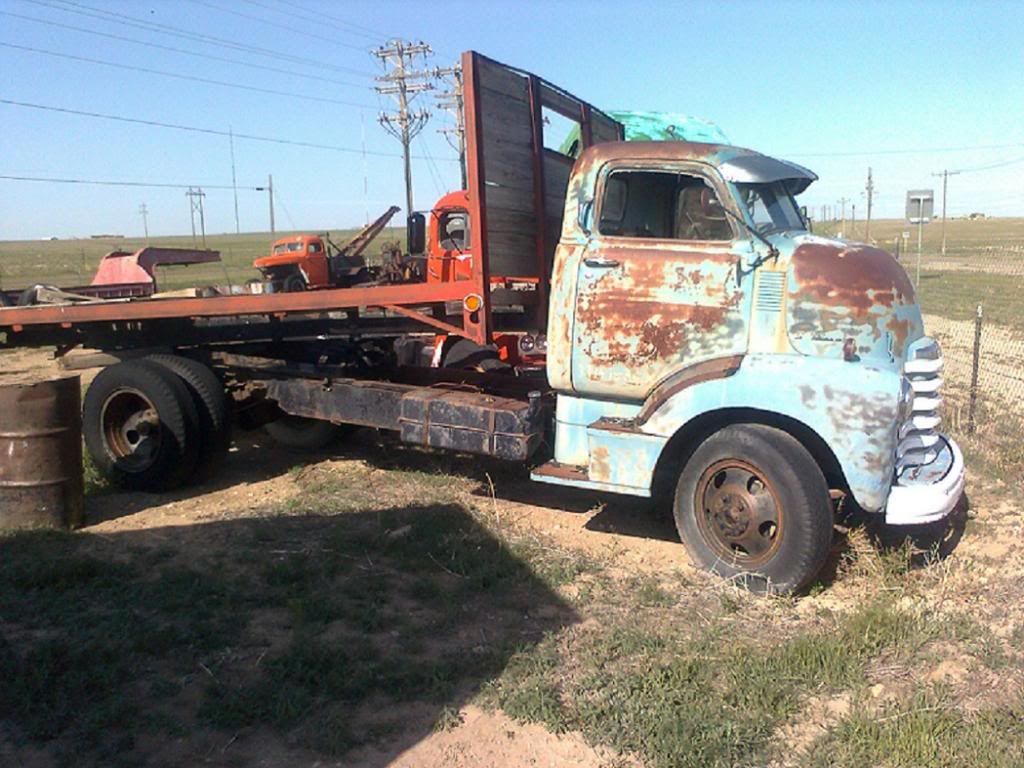
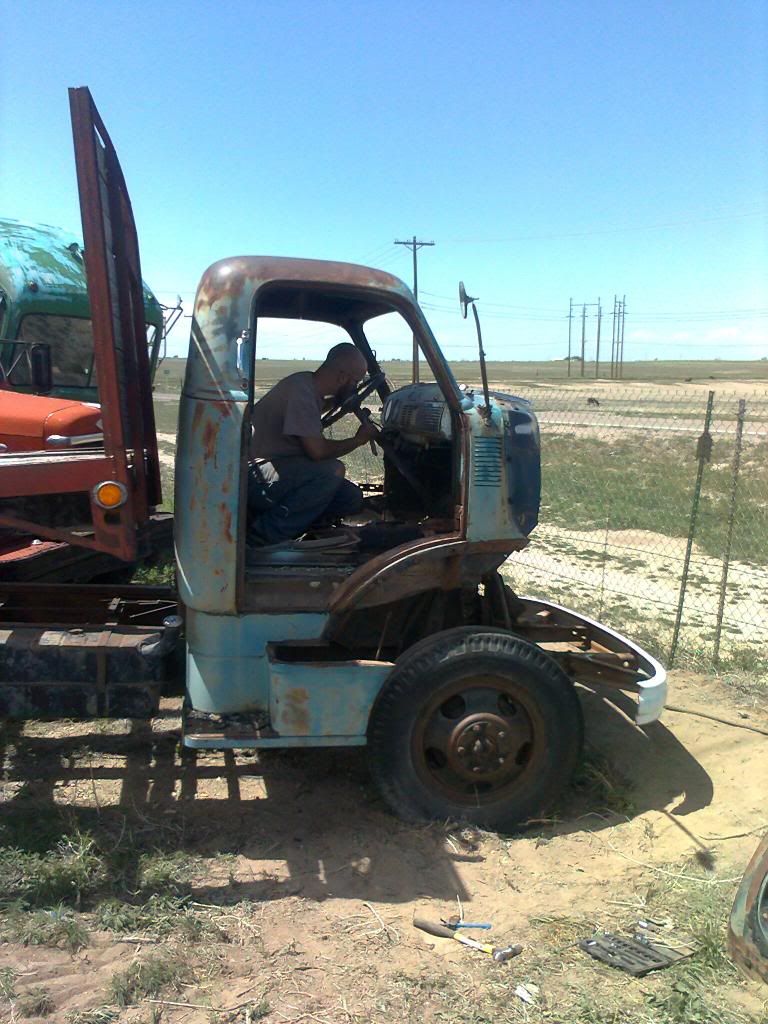
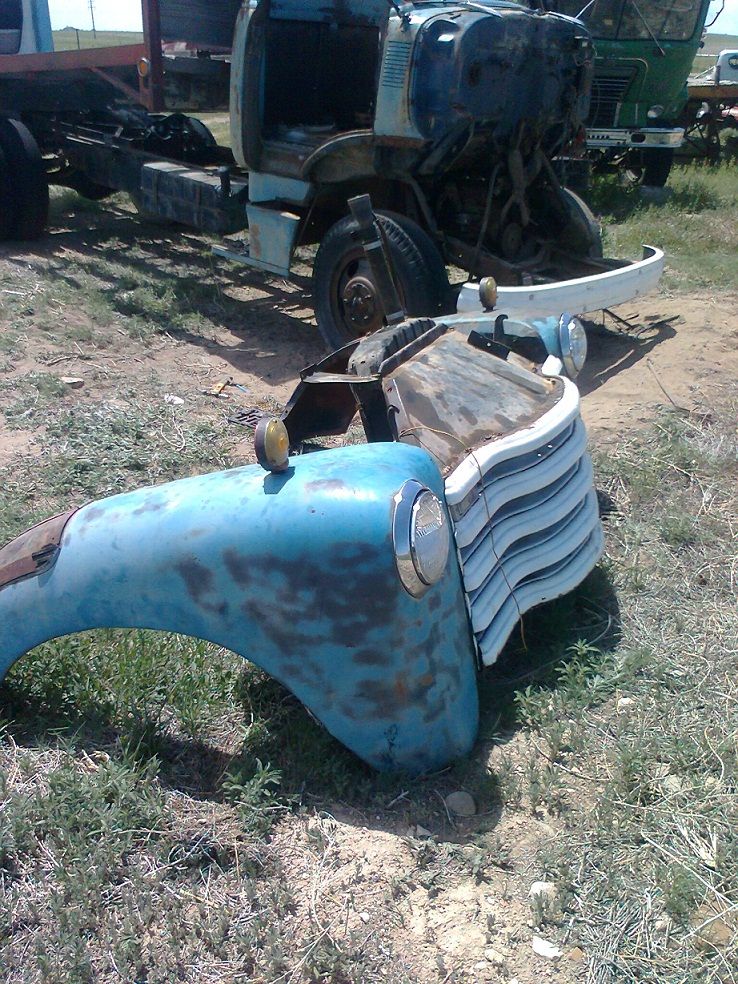
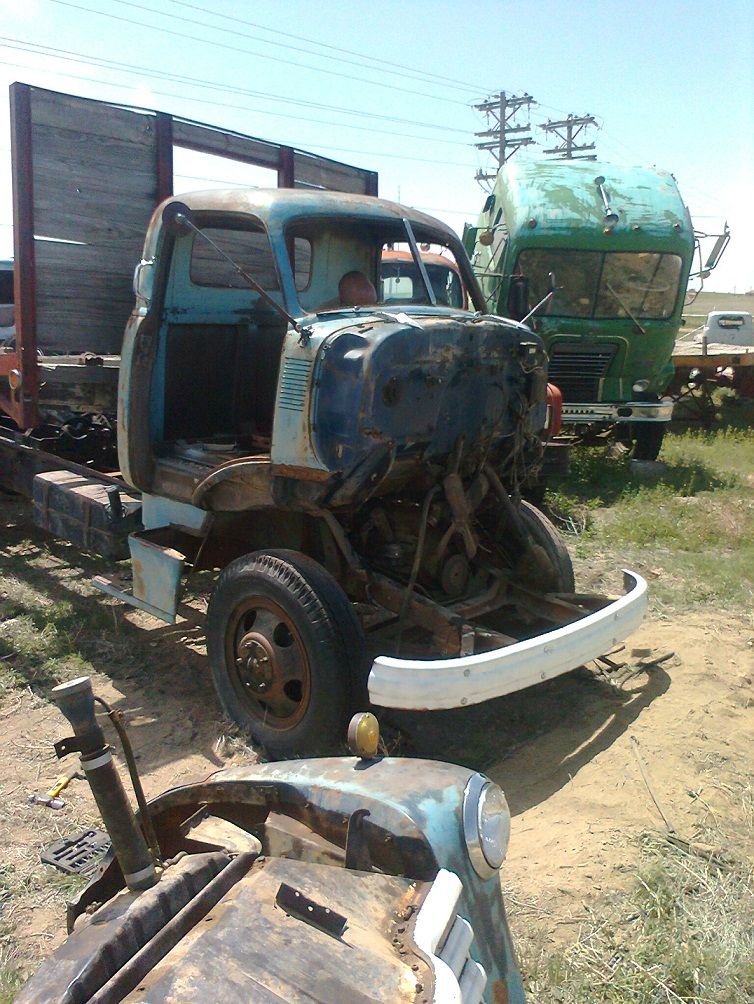
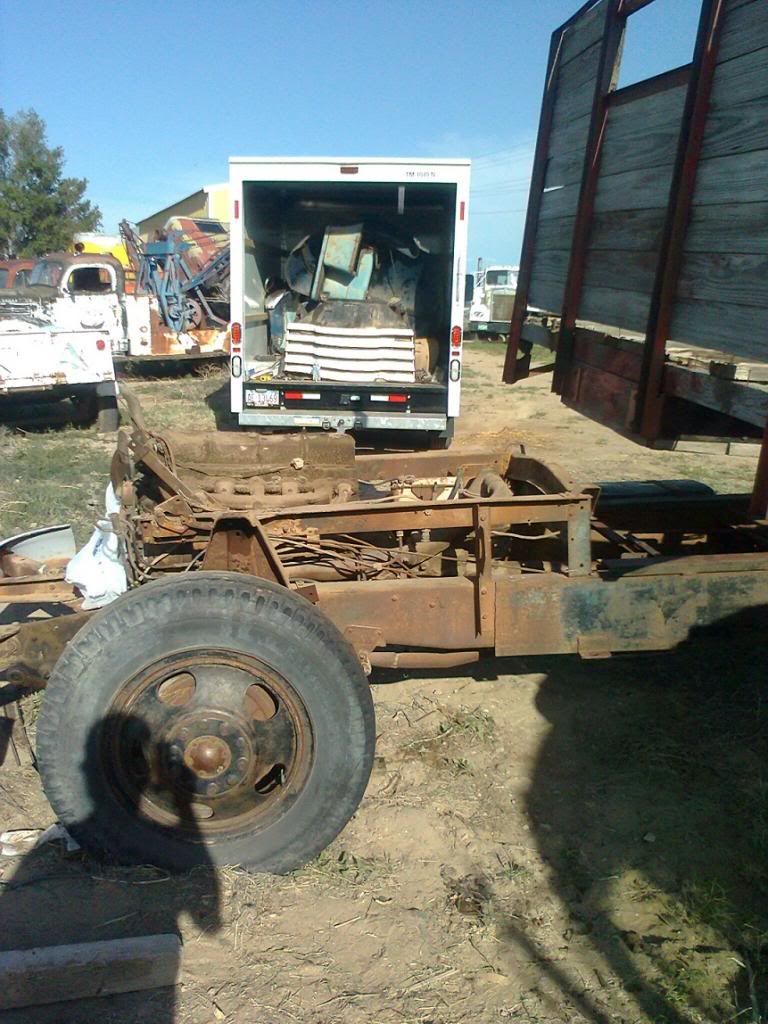
Hi to all, new to the forum and figured I'd start a build thread on my '47. It's a 1 1/2 ton COE (cab over engine). I picked this thing up in 2012 while on vacation in southern Colorado visiting my son. I had no extension on buying a new project, but after seeing it still sitting in the same place I saw it 2 years earlier I figured why not check it out. Well, as it turned out the guy who owned it had passed away 3 months prior and his widow and son in-law where happy enough to sell it. We started at $2400 for the whole truck but after checking on shipping ($2000+) I decided all I really wanted was the sheet metal. I explained this to them and offered $1000. They said "here's the title" and the next morning my son and I showed up at 7:00 with a U-Haul van and some new tools to get to work. 10 hours later, sun burned and worn out. It was loaded in the van. Mind you, we did this with hand tools and no lift. We actually slid the cab from the truck frame into the U-Haul on 2 old pieces of tubing we found laying around the yard.
     47 Fasttoys |
|
|

|
|
|
#2 |
|
Registered User
Join Date: Sep 2013
Location: Westminster, SC
Posts: 933
|
Re: Loadmaster '47 COE
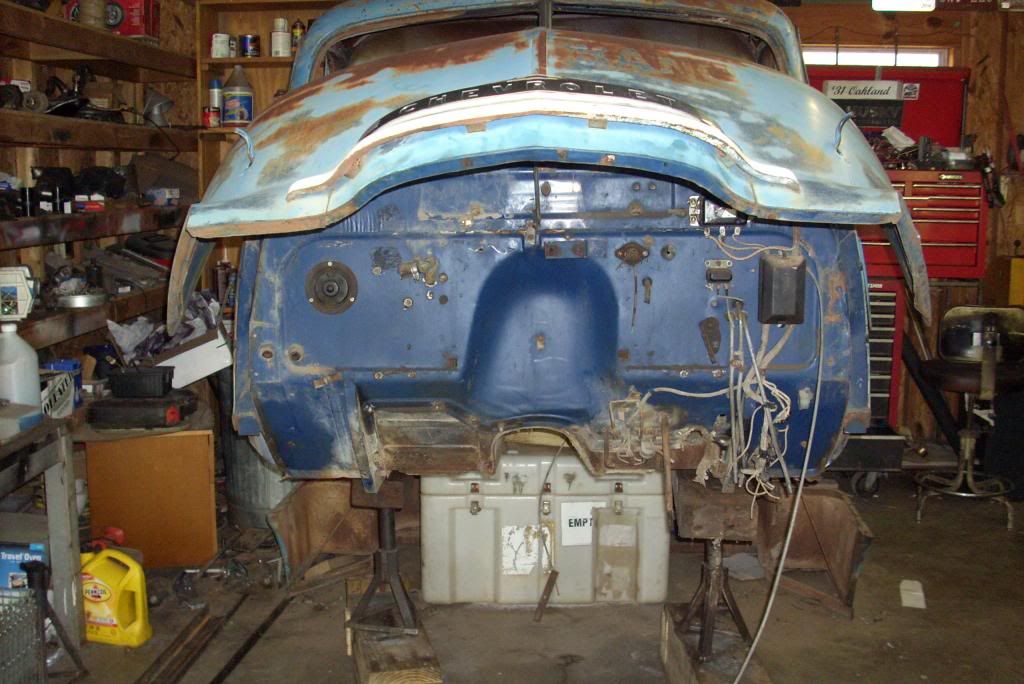
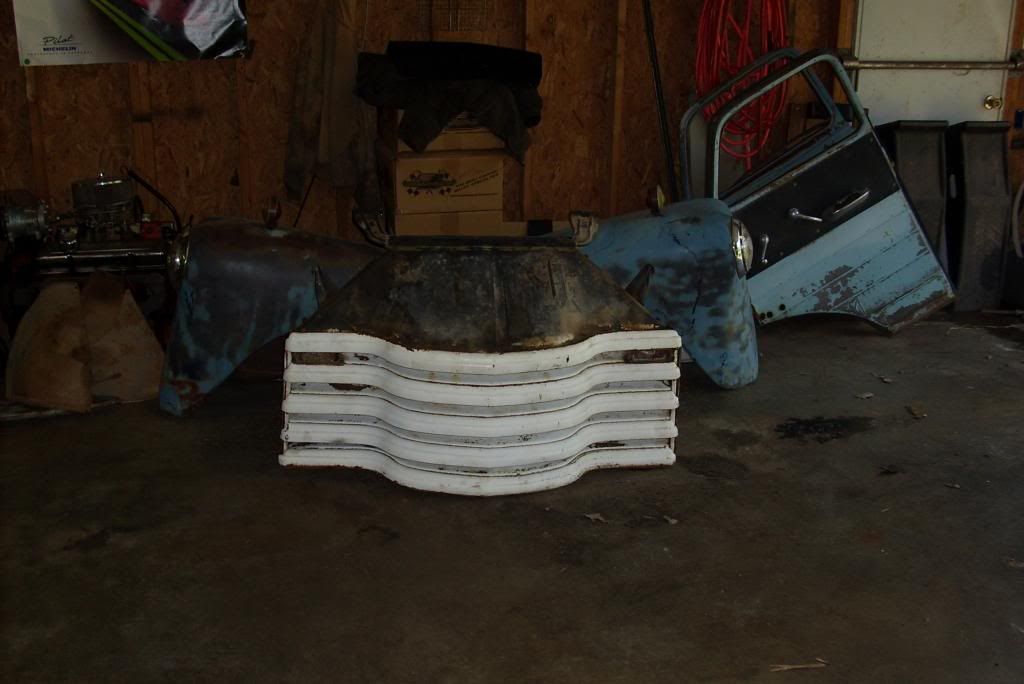
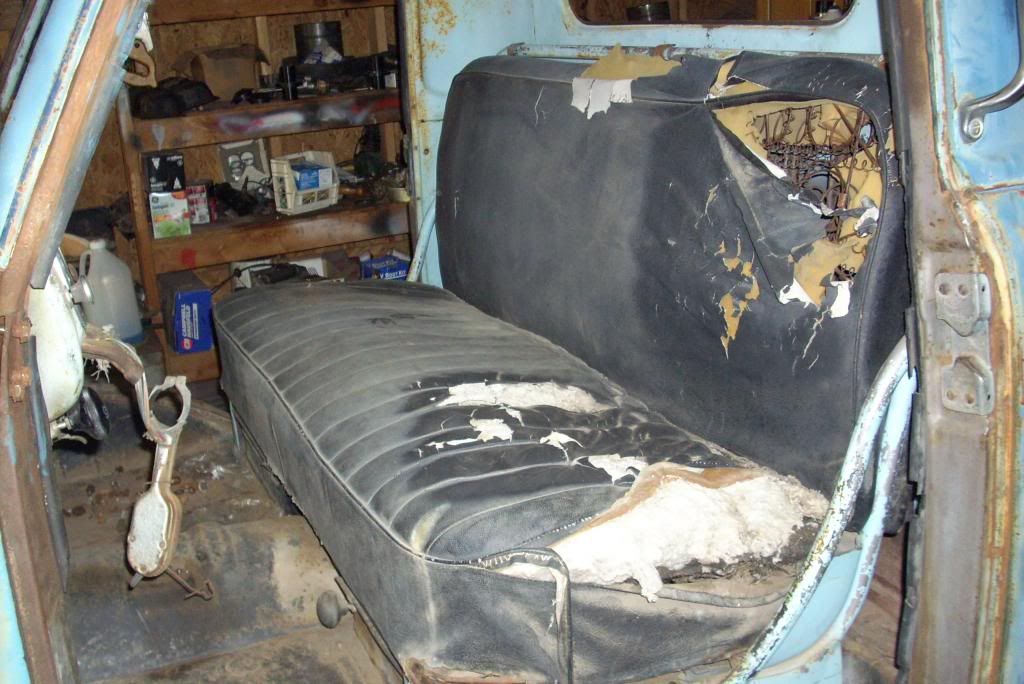
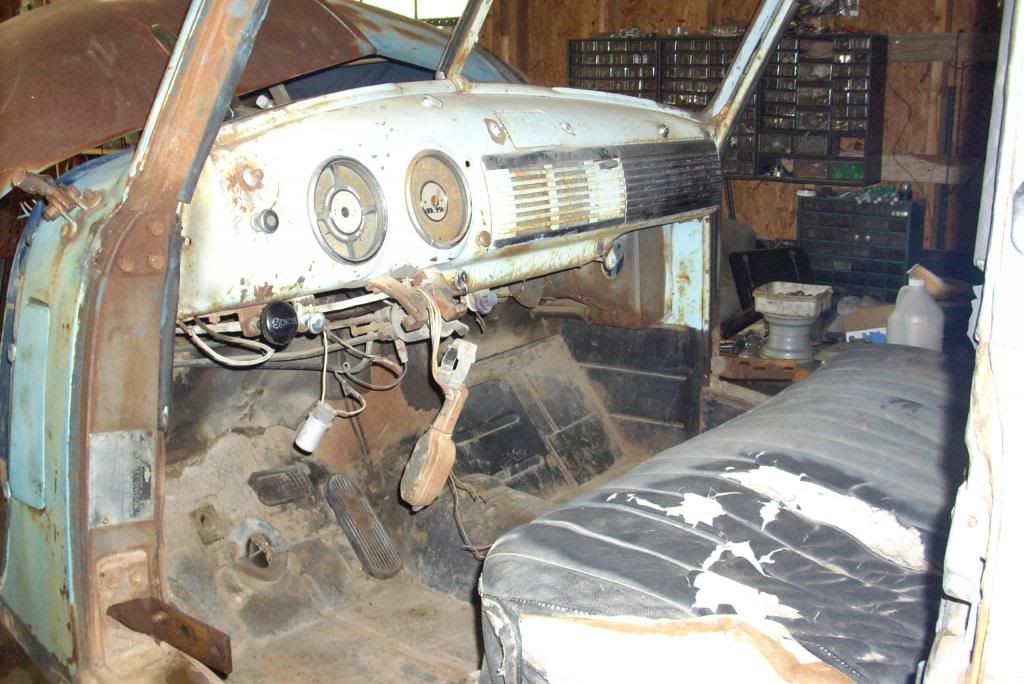
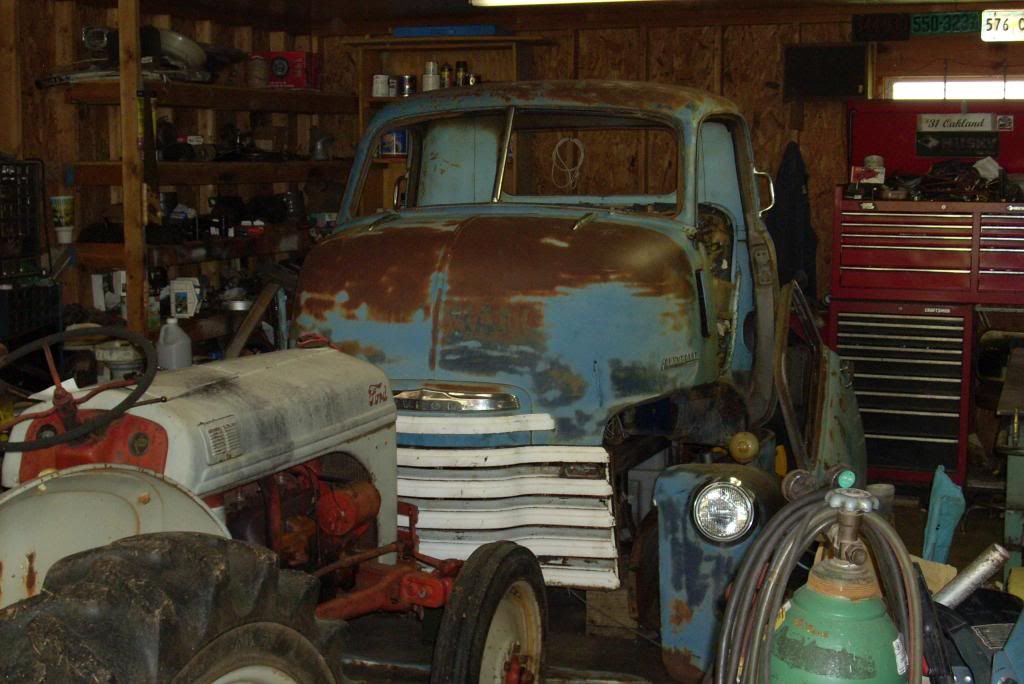
OK, so after a 16 hour solo drive back to South Carolina I had 1 day to unload it check it out a little, return the U-Haul and hop on a plane back to the small (9 million plus people) industrial city of Shenyang, China. I rearranged the shop enough to get it off the ground and stuff it in the corner awaiting my next vacation. Below are a couple of shots of what I'm starting with: a almost rust free, almost dent free, unmolested and complete "47 COE.
     47 Fasttoys |
|
|

|
|
|
#3 |
|
Registered User
Join Date: Sep 2013
Location: Westminster, SC
Posts: 933
|
Re: Loadmaster '47 COE
Fast forward to April on this year. I got back to the states to find a few boxes of parts I had ordered awaiting in the shop. My brother-in looks after things for me while I'm away so no house maintenance issues to deal with and all the other cars where in good running order.
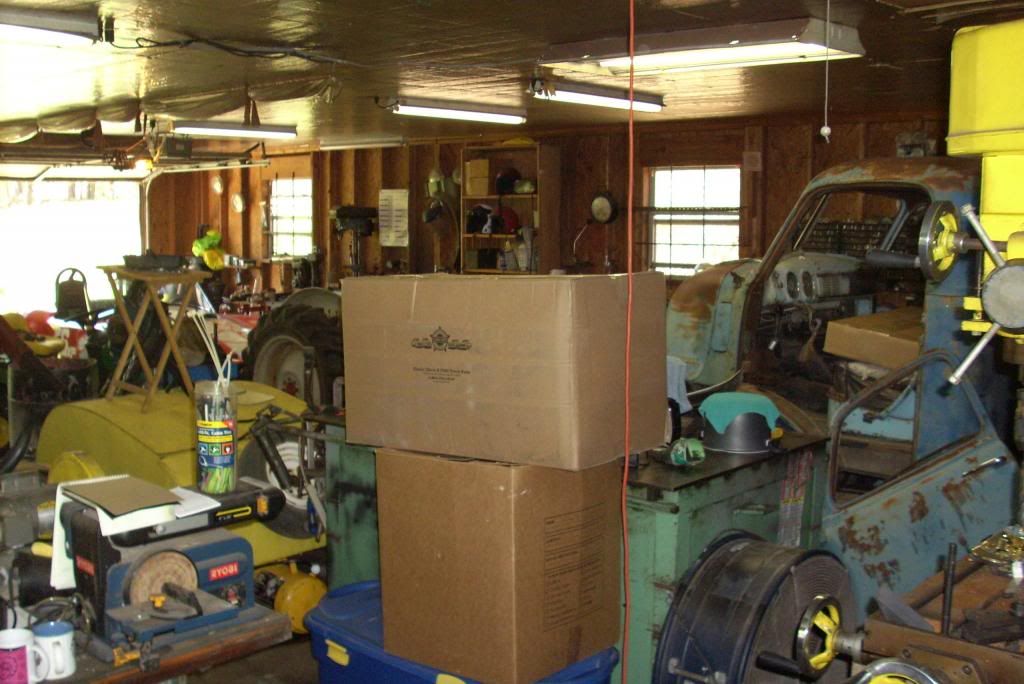 First order of business was to build a cart for the cab make some working space. For this I needed to get some steel to the shop, what better a way to do this then put the other truck into service. 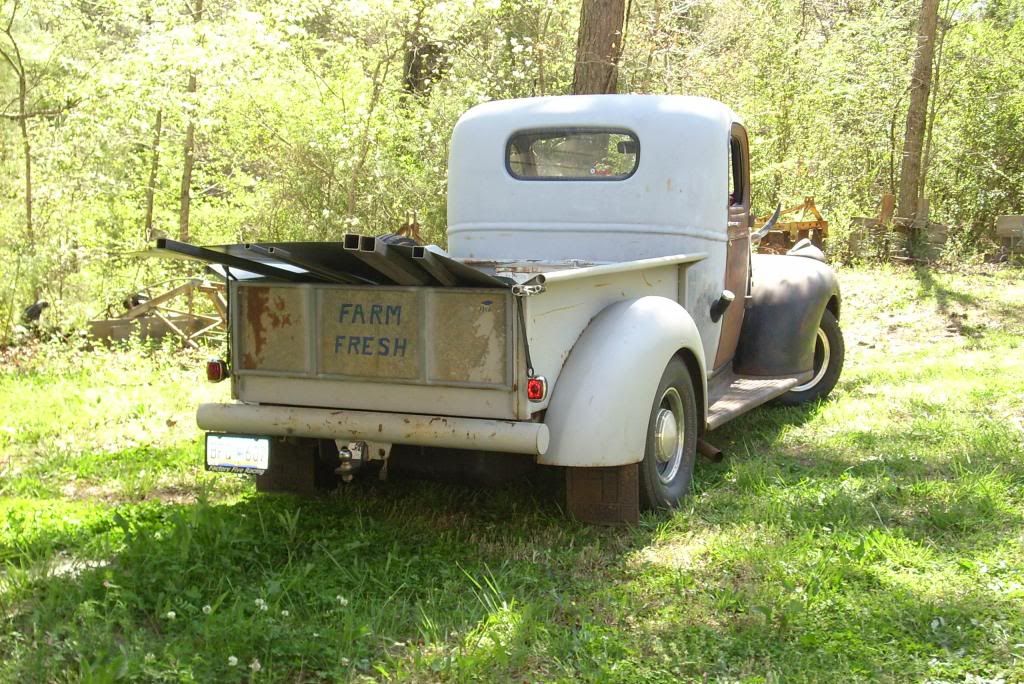 I build the cart at the final ride height and angle. This was determined the red-neck way...will it fit into the shop? 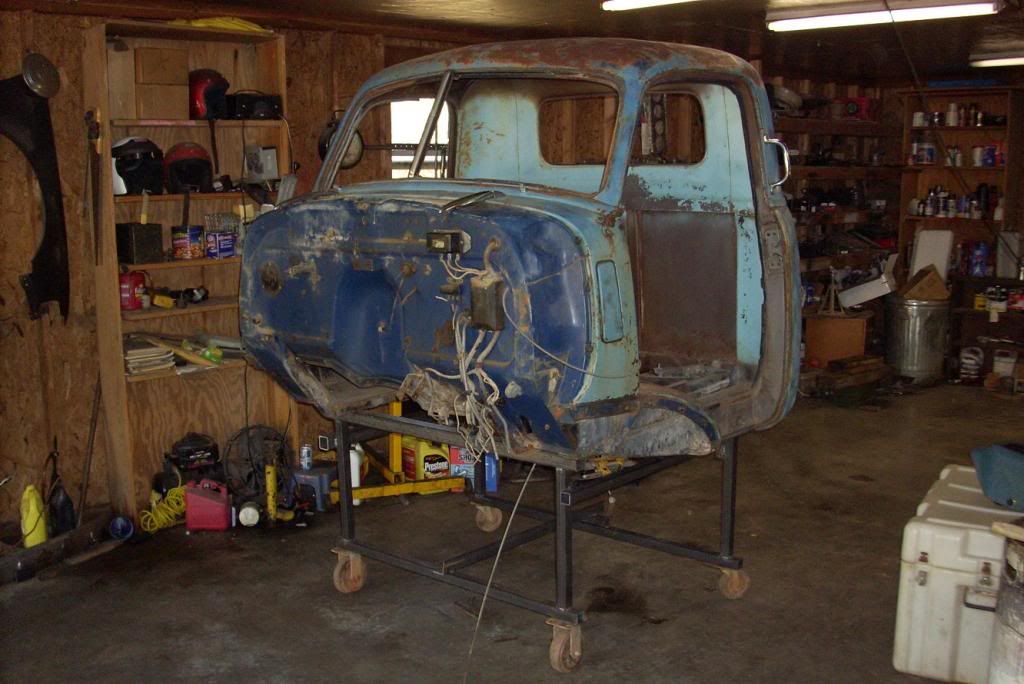 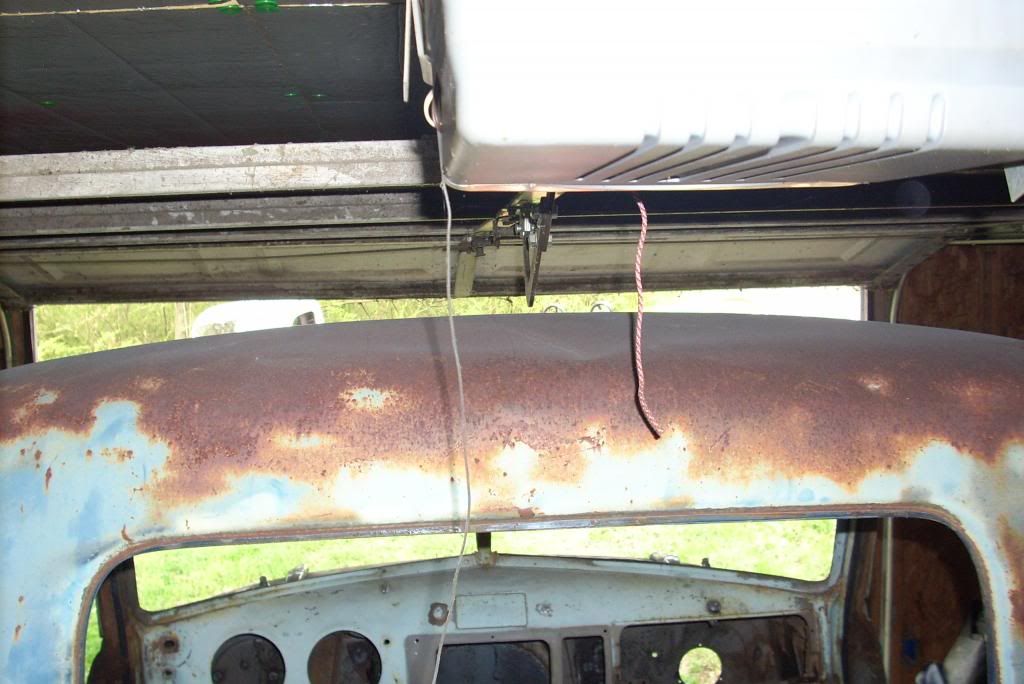
|
|
|

|
|
|
#4 |
|
Registered User
Join Date: Feb 2012
Location: Memphis, TN
Posts: 285
|
Re: Loadmaster '47 COE
Great looking project. What are your plans for a frame/engine? How often will you get to work on it (are you still in China)?
|
|
|

|
|
|
#5 |
|
Registered User
Join Date: Jan 2007
Location: York, Pa.
Posts: 1,386
|
Re: Loadmaster '47 COE
47 Fasttoys, now that looks like a great project. You got a great deal on it and a plus is how good of shape it is in. I like your other shop truck too. I can not wait to see this come under way.
Shannon
__________________
48 Panel Truck 1948 Chevy / S10 1954 Chevy / S10 1951 Chevy / C4 47 Step van Lowered 1996 Dually |
|
|

|
|
|
#6 |
|
Registered User
Join Date: Sep 2013
Location: Westminster, SC
Posts: 933
|
Re: Loadmaster '47 COE
Plans are a late model GM 1/2 ton (2000-2006) mid mounted LS/auto, pick style bed, front of engine under the seat with intake flipped backwards. Single rear wheels. Airbags only if needed to get it in the shop. Finished interior but nothing special on the exterior. This will be a daily driver and tow vehicle for other toys. Function over fashion. As far location, nope I'm still in China, I've got 1 more year left and then it's busy, busy on the truck. I get 1 or 2 trips home each year I'll be updating this thread with what I completed in April. April's trip was truck only and I think i got a lot done for 19 days, you be the judge.
47 Fasttoys |
|
|

|
|
|
#7 |
|
Registered User
Join Date: Sep 2013
Location: Westminster, SC
Posts: 933
|
Re: Loadmaster '47 COE
Well Shannon, I just took a peek at page 1 of your build thread and I can see where I'll be spending a few hours very soon. A burb/panel is on the short list for future builds (don't tell the wife) hehe
Rob / 47 Fasttoys |
|
|

|
|
|
#8 |
|
Registered User
Join Date: Aug 2007
Location: Corona, California
Posts: 7,998
|
Re: Loadmaster '47 COE
This should be a real neat project.
I've always thought a COE would be a cool truck to have. Kim |
|
|

|
|
|
#9 |
|
Registered User
Join Date: Sep 2012
Location: Valdese NC
Posts: 151
|
Re: Loadmaster '47 COE
Looking forward to watching this one. I have a 54 COE I plan to start on next. I cant wait
__________________
51 Chevy Truck S-10 Chassis Bagged http://67-72chevytrucks.com/vboard/s...d.php?t=545820 49 Burb with a 5.3 LS swap http://www.67-72chevytrucks.com/vboa...d.php?t=612572 Find us on Facebook https://www.facebook.com/pages/Smitt...s/252838673654 |
|
|

|
|
|
#10 |
|
Senior Member
 Join Date: Jul 2012
Location: huntington beach
Posts: 845
|
Re: Loadmaster '47 COE
Su-weeeet!!
|
|
|

|
|
|
#11 |
|
Registered User
Join Date: Sep 2013
Location: Westminster, SC
Posts: 933
|
Re: Loadmaster '47 COE
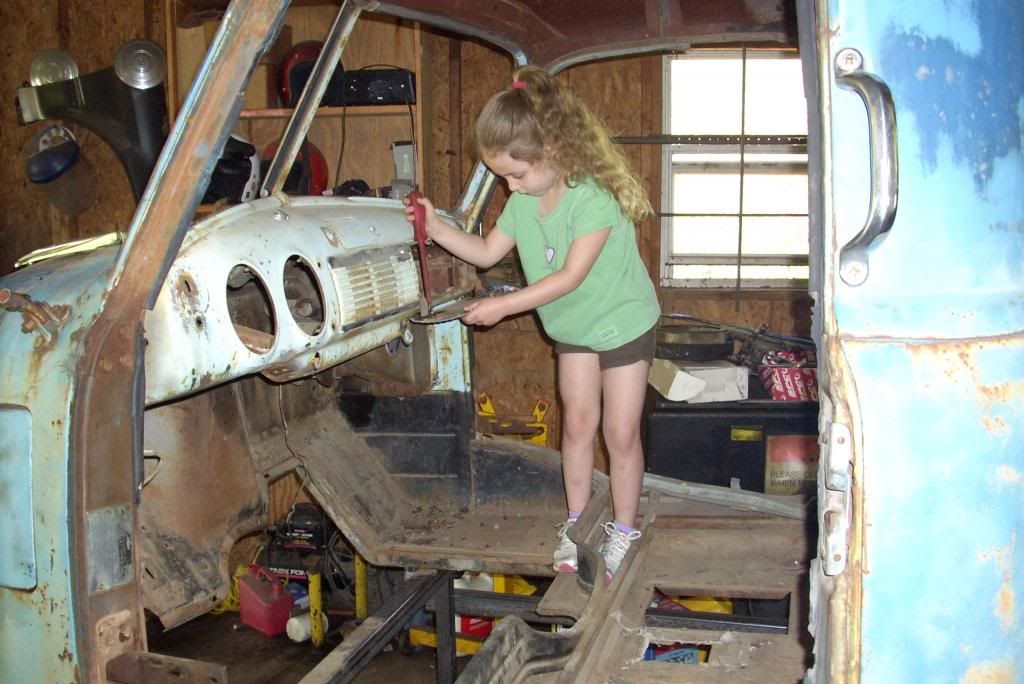
OK so I started stripping to the cab . Put my granddaughter to work (no child labor laws at my house), I can't remember ever being at a height where I could stand in the cab of a pick-up. At 5 years old she can't wait to be in the shop to help out. I hope it lasts forever. After removing all the trim pieces I realized I had zero screws strip oR rusted to bad to remove. In working on old junk for 30 years this is the first time that has happened. WOW this is a very good sign.
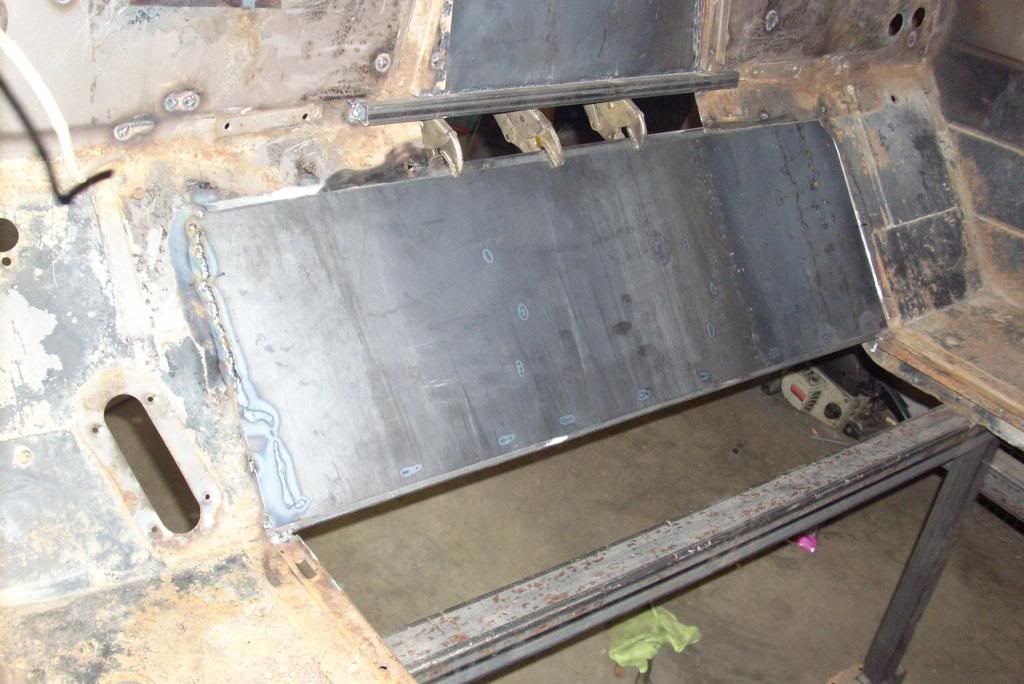
 Stripped the firewall of parts and cut out the hump as I want a flat floor and don't need the recess. I welded in a connecting brace to keep the firewall in place while welding. 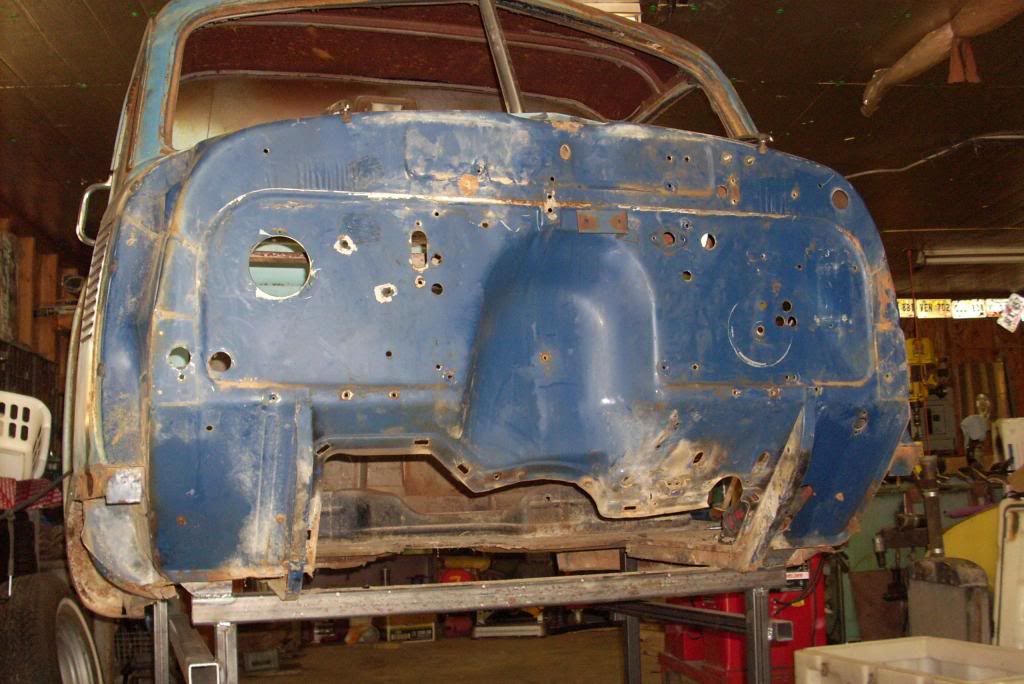 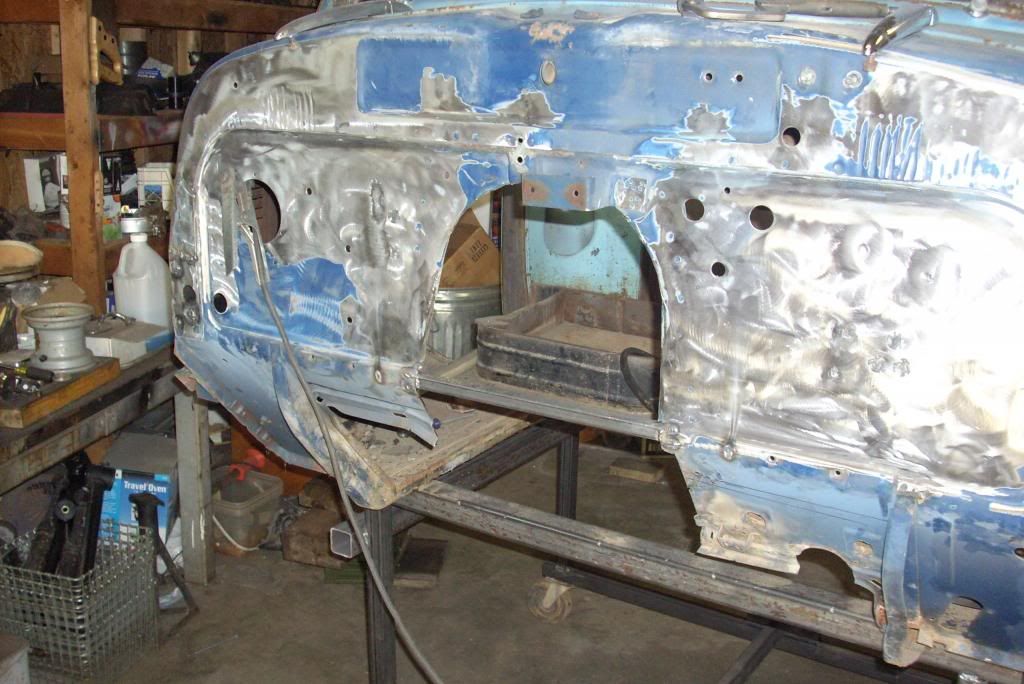 Welded in a piece if 16 gauge sheet metal to fill the cut out. 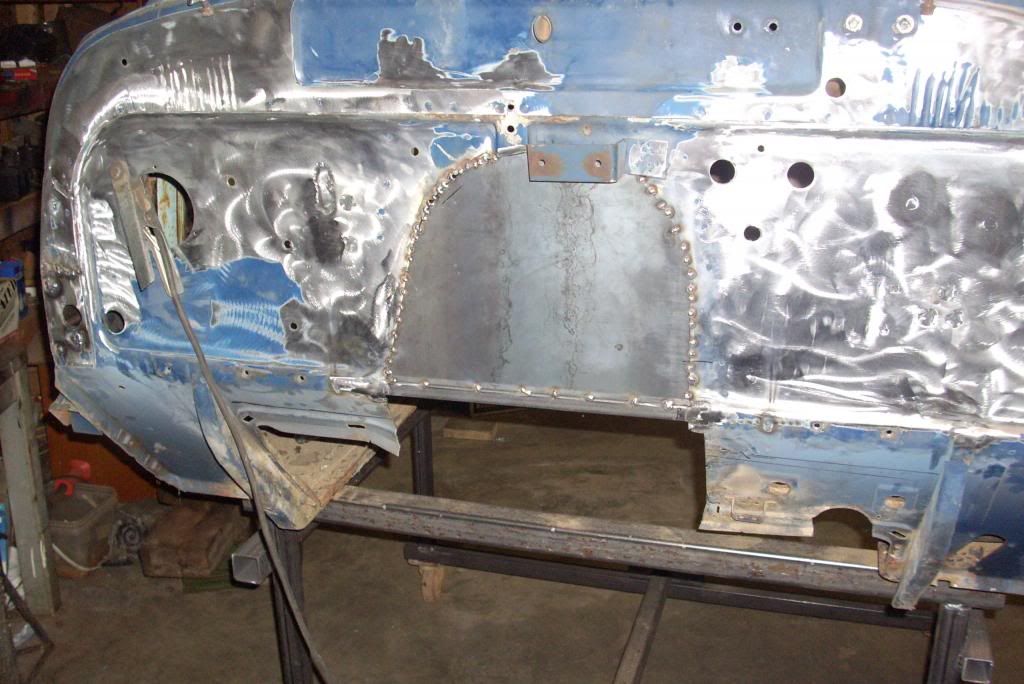 Rob |
|
|

|
|
|
#12 |
|
6>8 Plugless........
 Join Date: Sep 2007
Location: Prairie City, Ia
Posts: 17,139
|
Re: Loadmaster '47 COE
Awesome work so far! I'd love to get a hold of that old B900 KW that was sitting in that yard! We just struck a deal on a 54 GMC AND COE. I'm definitely intrigued by these. If you don't mind, I'll post some pics of a couple I saw at the all truck mats last weekend.
__________________
Ryan 1972 Chevy Longhorn K30 Cheyenne Super, 359 Inline 6 cylinder, Auto Trans, Tilt, Diesel Tach/Vach, Buckets, Rare Rear 4-link and air ride option Build Thread 1972 GMC Sierra Grande Longhorn 4x4 1972 Chevy Cheyenne Super K20 Long Step side tilt, tach, tow hooks, AC, 350 4 speed 1972 C10 Suburban Custom Deluxe 1969 Chevy milk truck 1971 Camaro RS 5.3 BTR STG3 Cam Super T10 1940 Ford 354 Hemi 46RH Ford 9" on air ride huge project Tired of spark plugs? Check this out. |
|
|

|
|
|
#13 |
|
Registered User
Join Date: Sep 2013
Location: Westminster, SC
Posts: 933
|
Re: Loadmaster '47 COE
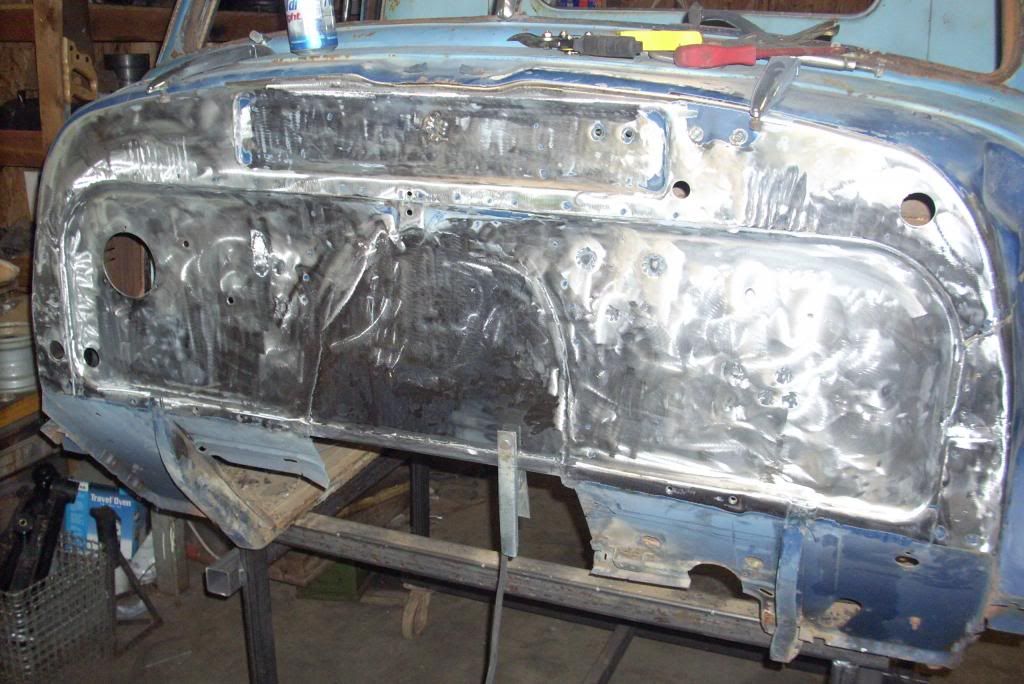
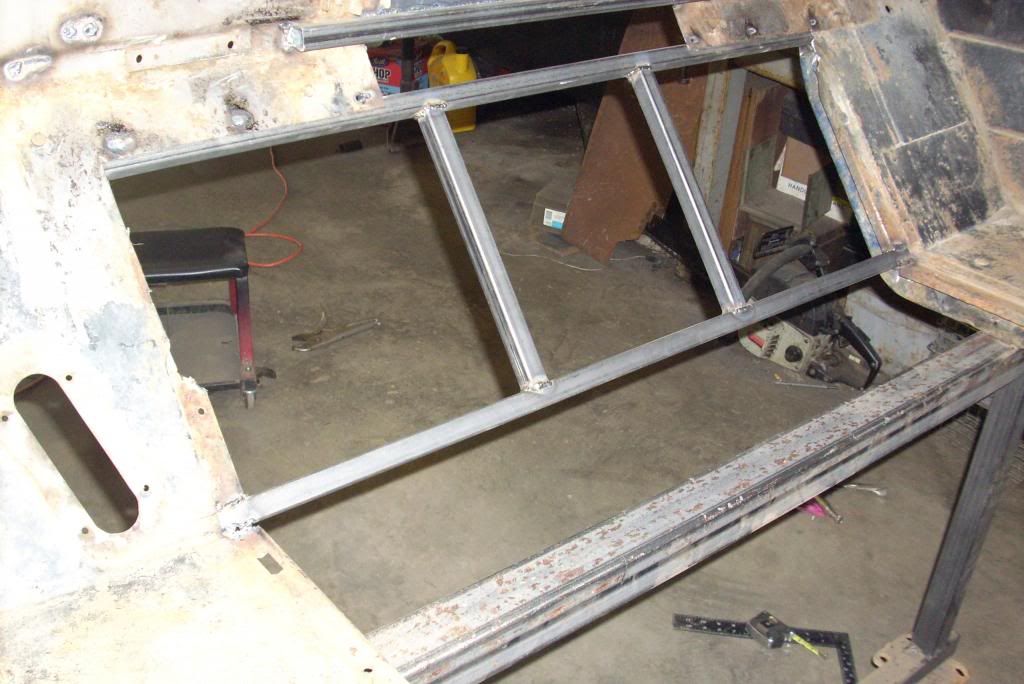
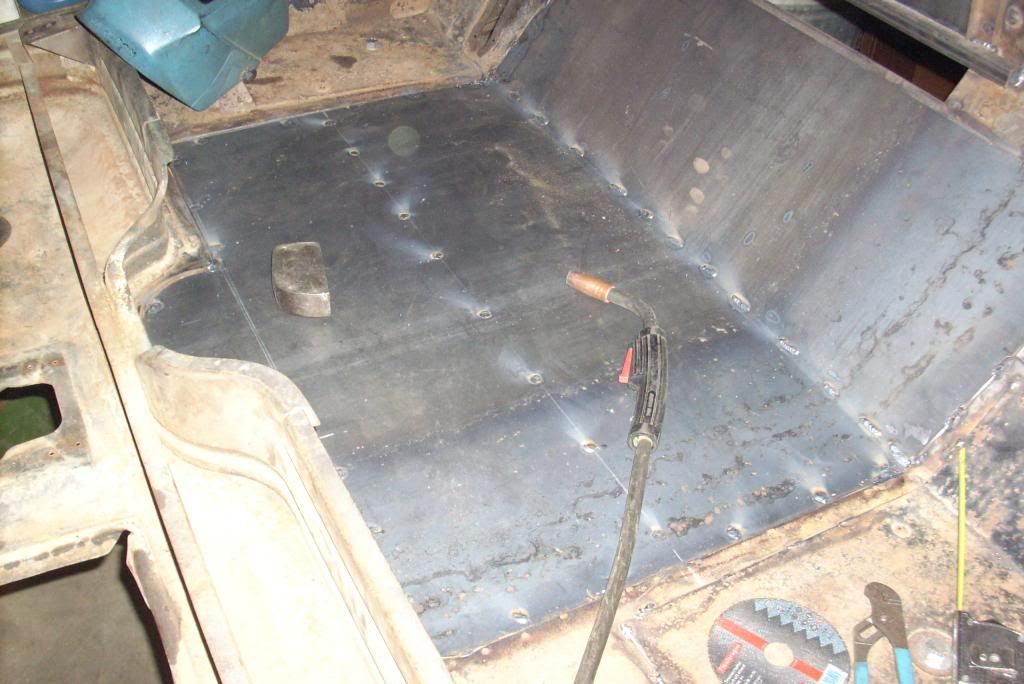
By all means post away, worked on filling the remaining holes in the firewall and the frame work for kick panel and floor, installed floor plate. I will be going back and finishing the firewall later after remaining mods are complete. You can see the COE has other access doors under the seat. These where for air filter service and rear shifter hook up service. The battery was under another door the same as the pick-up but was removed as part of the main removable floor sections (3). The area under the floor may end up being the location for the gas tank, not sure. By the time you stick a radiator and electric in the front end there's not a whole lot of room in the engine bay.
|
|
|

|
|
|
#14 |
|
Registered User
Join Date: Sep 2013
Location: Westminster, SC
Posts: 933
|
Re: Loadmaster '47 COE
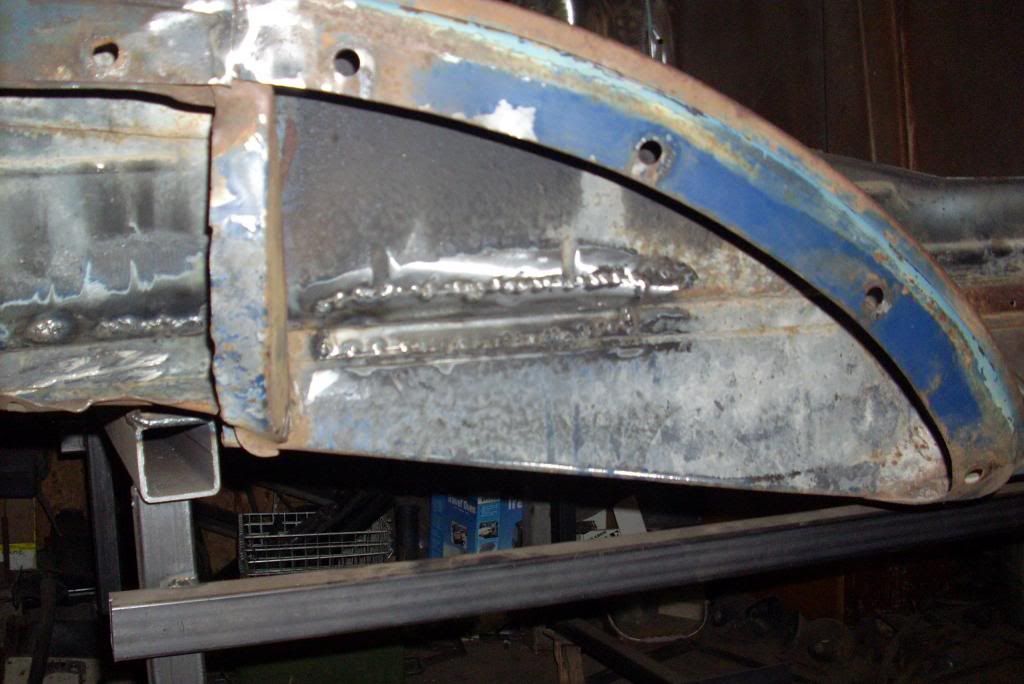
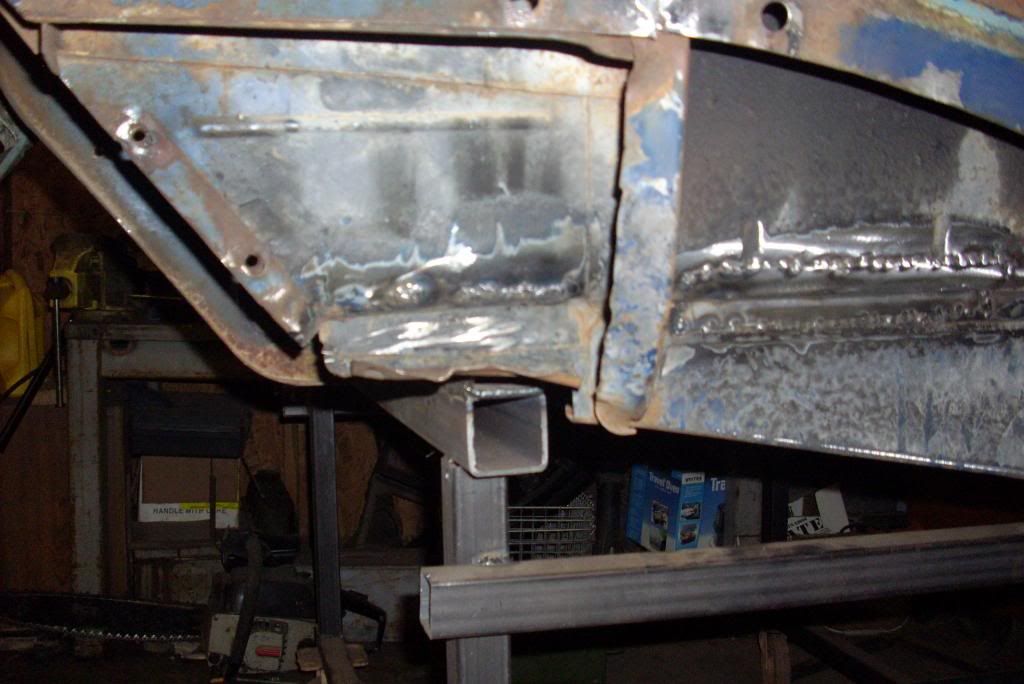
Well if you remember earlier I stated almost no rust. Well here it is in all its glory.This is after the patch, the front part didn't need any steel added but the rear part was a little thin so I had to add a small piece. The cab corners are all solid just full of dirt, it came out fine but what a mess. The 2X2 tubing you can see in the second photo is part of the body cart but will probably end up as part of the main body support structure, above it out of view is short sections of 2X2 with nuts welded on which the cab is bolted to. The vertical reinforcing beams (not sure what their called) rest on the lower 2X2. Originally the rear of the cab mounted on a center support, my engine will be in the way of this so I will need to come up with something similar to what the later models use.
|
|
|

|
|
|
#15 |
|
Registered User
Join Date: Nov 2011
Location: Langley, BC
Posts: 702
|
Re: Loadmaster '47 COE
Lookin' good! I"m a big fan of hot rod cab-overs. Good luck the rest of the way.
__________________
56 Chevy PU http://67-72chevytrucks.com/vboard/s...d.php?t=531955 Question: Know how to sell your truck for $50,000? Answer: Spend $100,000 building it. |
|
|

|
|
|
#16 |
|
Registered User
Join Date: Aug 2007
Location: Corona, California
Posts: 7,998
|
Re: Loadmaster '47 COE
Looking good.
Kim |
|
|

|
|
|
#17 |
|
Registered User
Join Date: Jul 2011
Location: Las Vegas - Nev. aka Sin City
Posts: 1,835
|
Re: Loadmaster '47 COE
Love them COE;s alway thought what a cool look they have.
Guys who build them as a pickup make the look great. |
|
|

|
|
|
#18 |
|
Registered User
Join Date: Sep 2013
Location: Westminster, SC
Posts: 933
|
Re: Loadmaster '47 COE
Thanks for the comments guys, I got to thinking why I wanted to build a COE....lets face it it's an odd looking bird. kind of like an afterthought GM had. The thinking may have went something like this: # 1 designer : Hey lets make a heavy duty truck shorter but still have the load rating of a normal size. # 2 OK , sounds good, but we need to use a much of the standard parts as possible. # 3 Great, now all we need to do is jack up the cab about a foot, stuff the engine under it, shove the hood back a couple of feet and BINGO. What they failed to mention was OK, it's gonna give you a nose bleed just climbing up into the cab, its got the aerodynamic efficiency of a small building and you now will have a big heat generator is under your butt so put on 3 pair of undies so you don't cook the family jewels. Yep, it all sounds just like my kind of project.

|
|
|

|
|
|
#19 |
|
Registered User
Join Date: Sep 2013
Location: Westminster, SC
Posts: 933
|
Re: Loadmaster '47 COE
OK so with most of the floor complete I decided to spend a little some more time on filling more holes.
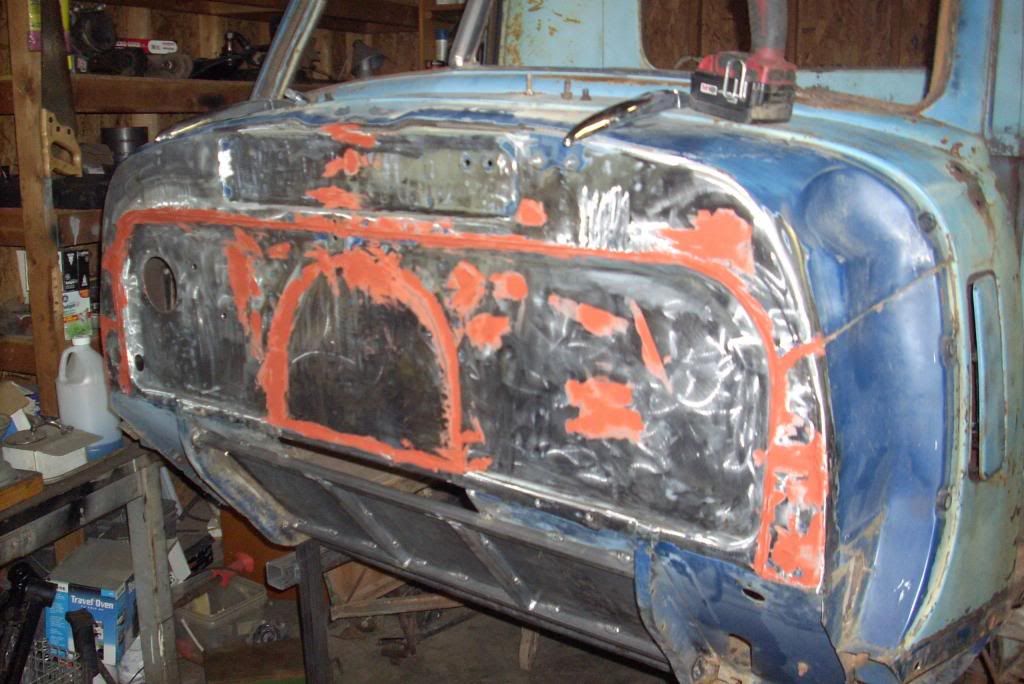
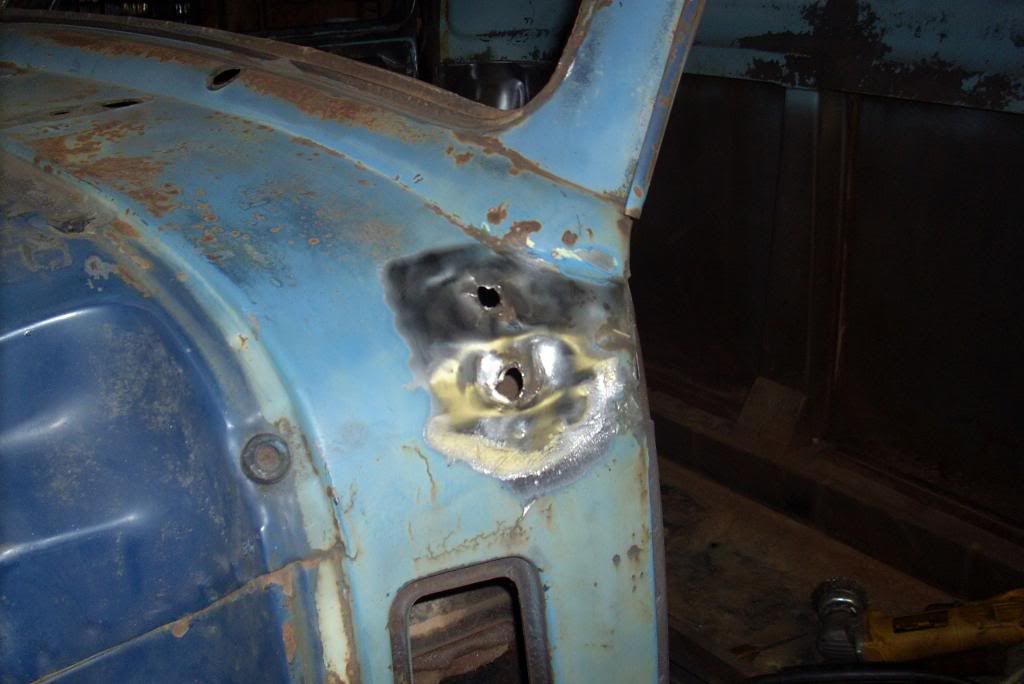 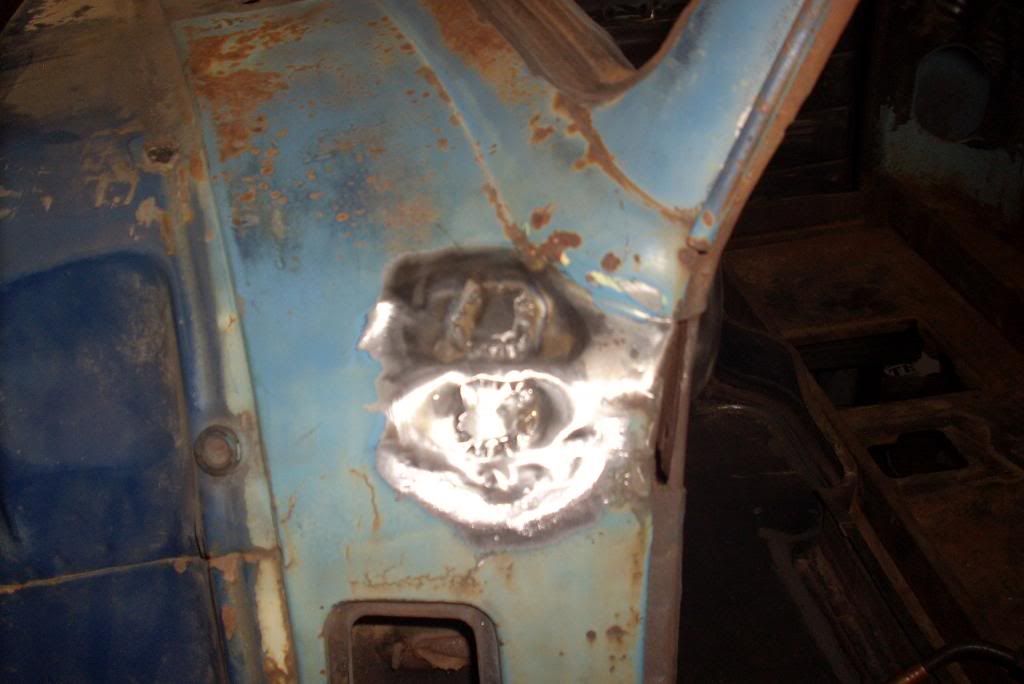 I just patched the ones for the old mirror mounts for now, If later I decide on showy paint I'll go back and redo them. The dash was another story, it had an extra hole above the headlight switch. There was a push button in that location but I'm not sure what it was for. I cut a little tab, shaped it and welded it in place. It came out fine and a little filler primer should finish the job. 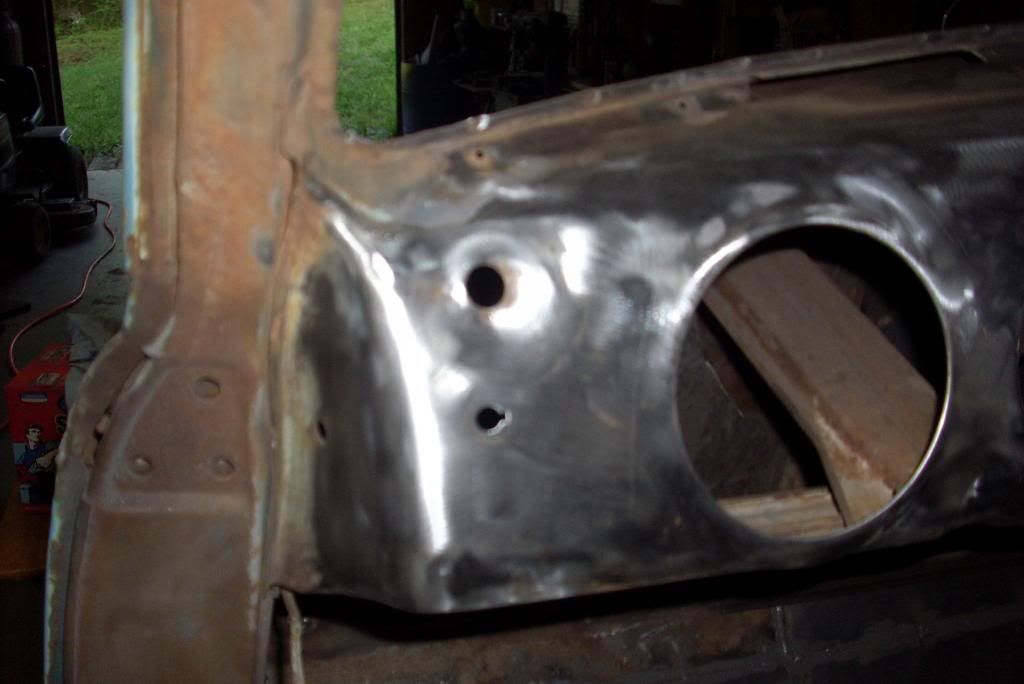 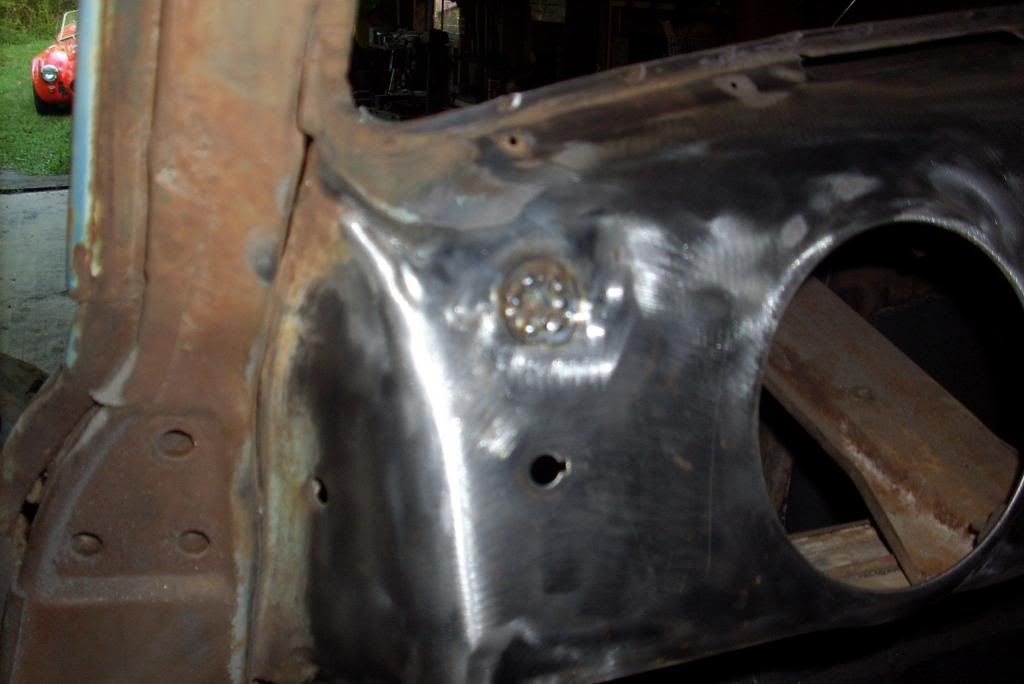 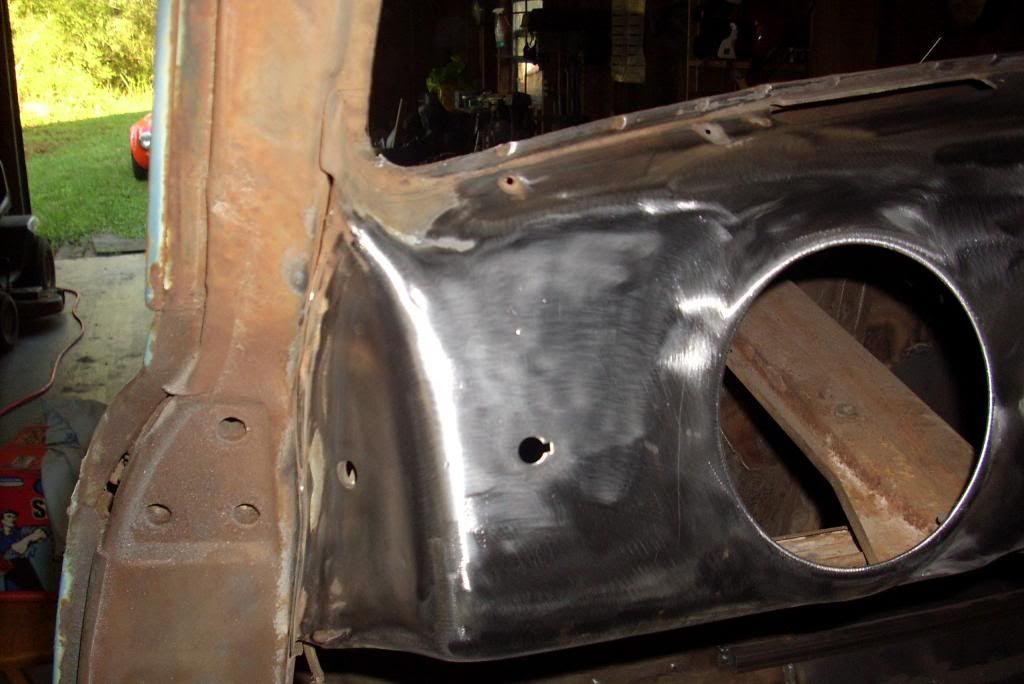 Rob |
|
|

|
|
|
#20 |
|
Registered User
Join Date: Sep 2013
Location: Westminster, SC
Posts: 933
|
Re: Loadmaster '47 COE
Decided to clamp things together to get a visual of where I'm at as far as ground clearance on the running boards etc..you can see from the first 2 picks I should be OK for fender clearance as long as I don't do any off roading. For the last picture this is my basic engine space. An LS engine with the Vette or F body intake and oil pan measures about 28 inches, if I go 3 inches up on the back of the cab I can maintain around 6 inches ground clearance. If I flip the intake backwards and run the low mount alternator I can push about half the engine behind and under the seat. I will of course have to make an access panel for front engine maintenance. My thinking is with a newer model drive train once I work out the normal start up bugs I will not be spending a lot of time working on the engine. I have EFI in both my other rides ('46 1/2 ton and '65 FFR Cobra) and they are almost maintenance free. The more I can move the engine to the front the better. I want to avoid a 10 foot bed. 7 foot or 8 foot would be fine. I plan on doing some towing with this thing and maybe a 5th wheel. The engine location and options are still in the planning phases. As a matter fact the whole chassis is still in the planning phase.
Rob 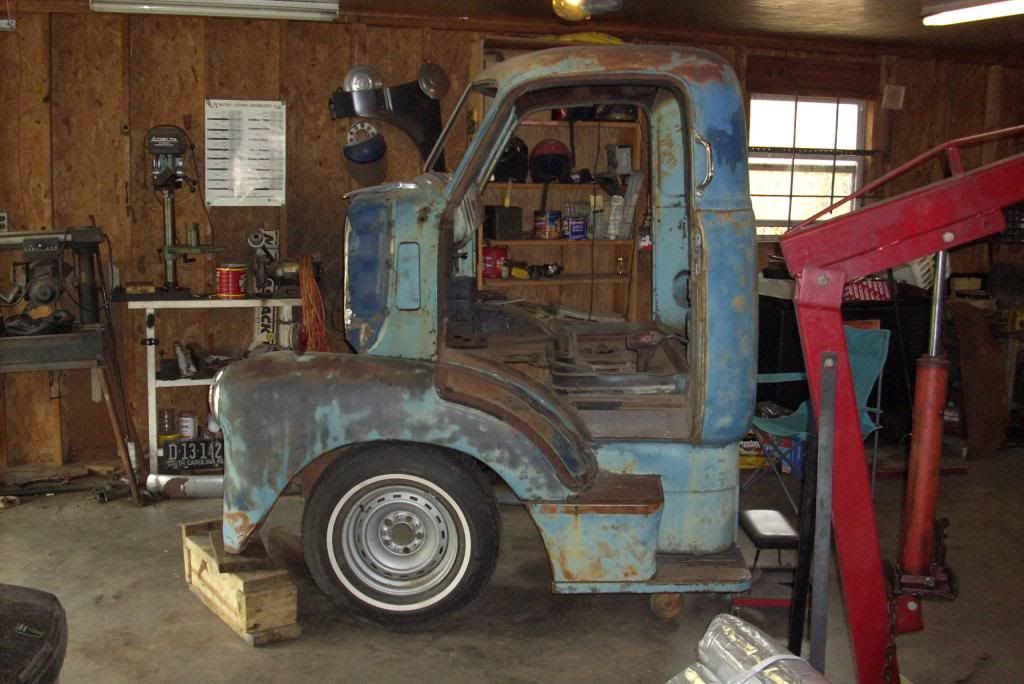 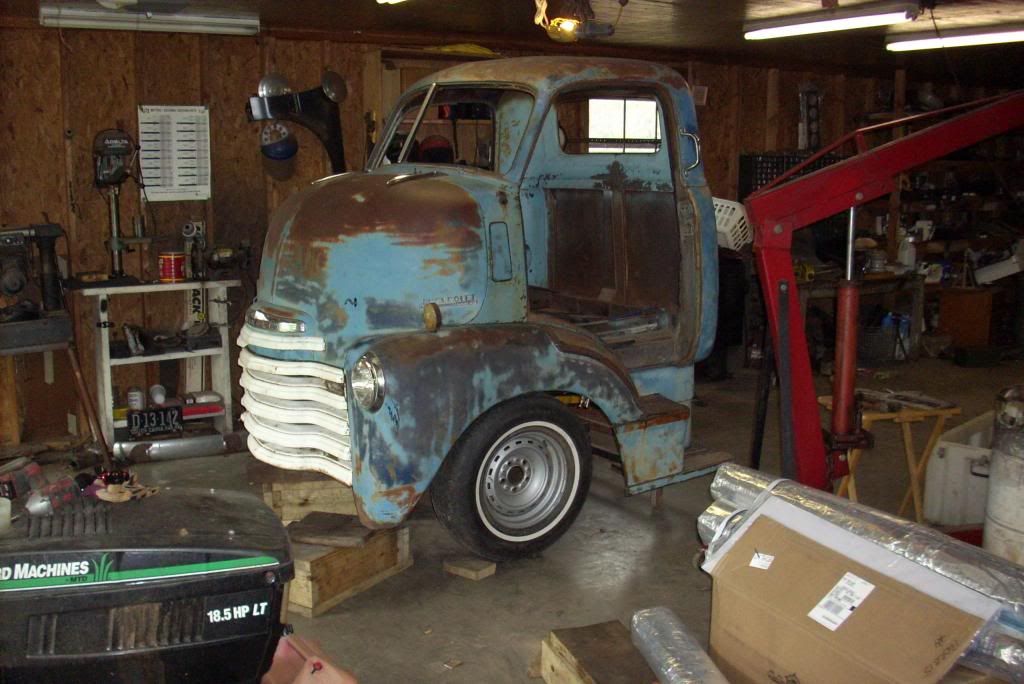 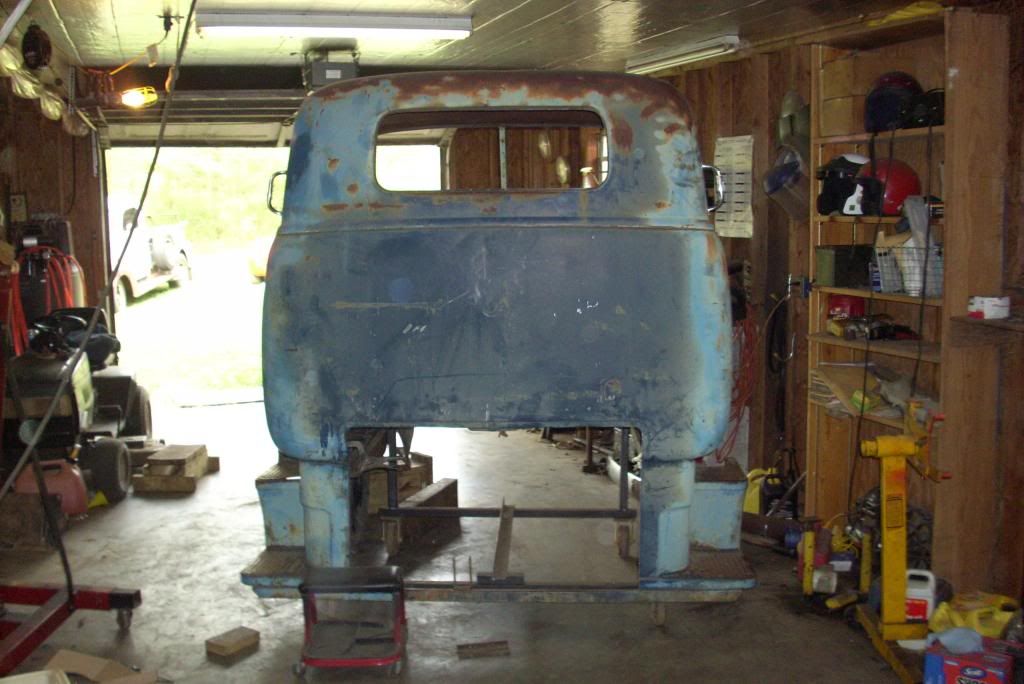
|
|
|

|
|
|
#21 |
|
Registered User
Join Date: Sep 2013
Location: Westminster, SC
Posts: 933
|
Re: Loadmaster '47 COE
I've got a couple of questions if any of you guys own a 2000-2006 GM 1/2 ton. I have read they have R&P steering? This being the case is it front steer? Is there any reason why, with some modifications to the mount, the rack couldn't be rotated upwards so the COE steering could be connected? I don't have one to look at in my present location. Ant pictures would be great.
Thanks in advance, Rob |
|
|

|
|
|
#22 |
|
Registered User
Join Date: Jan 2012
Location: Motown
Posts: 7,680
|
Re: Loadmaster '47 COE
nice find, good price too
 be sure to check out buggy"s build of his 57? crew cab, not saying you should crew cab it but he has all new running gear.
__________________
cool, an ogre smiley  Ogre's 58 Truk build Ogre's 58 Truk buildhow to put your truck year and build thread into your signature shop air compressor timer |
|
|

|
|
|
#23 |
|
Registered User
Join Date: Sep 2013
Location: Westminster, SC
Posts: 933
|
Re: Loadmaster '47 COE
OK, Shannon so I've been searching for Buggy"s build and I can't find it anywhere, sounds like what I need to see, any help?
Thanks, Rob |
|
|

|
|
|
#24 |
|
Registered User
Join Date: Feb 2012
Location: Memphis, TN
Posts: 285
|
Re: Loadmaster '47 COE
I copied the Buggy link (I hope). see below:
http://67-72chevytrucks.com/vboard/s...ighlight=buggy If I didn't do it right, search the word Buggy in this section, then look at his "Big Bertha" build. |
|
|

|
|
|
#25 |
|
Registered User
Join Date: Sep 2013
Location: Westminster, SC
Posts: 933
|
Re: Loadmaster '47 COE
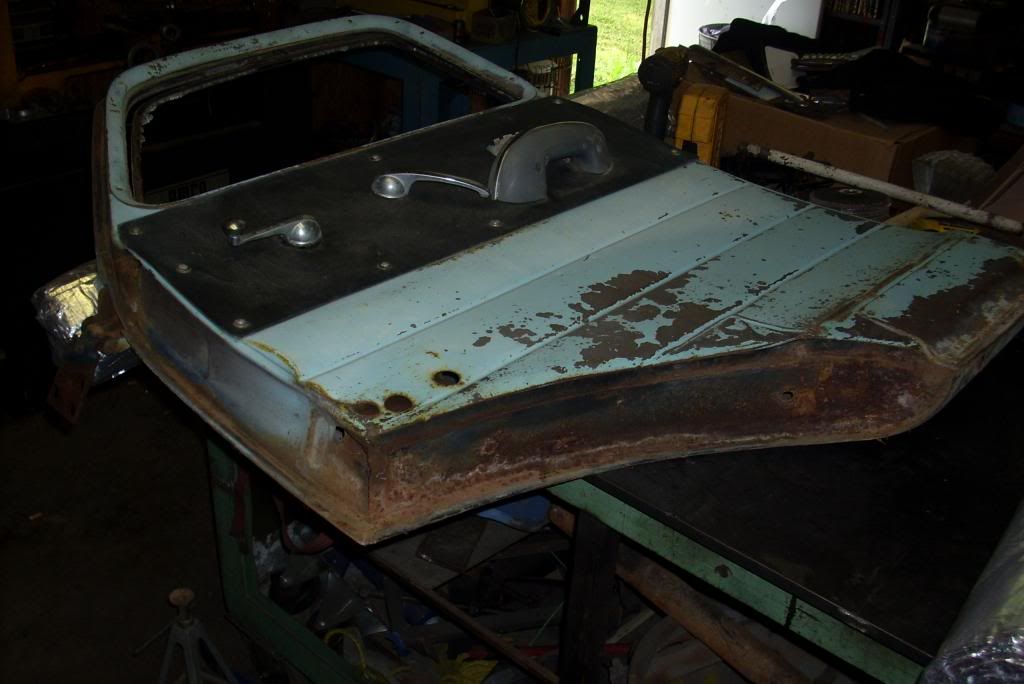
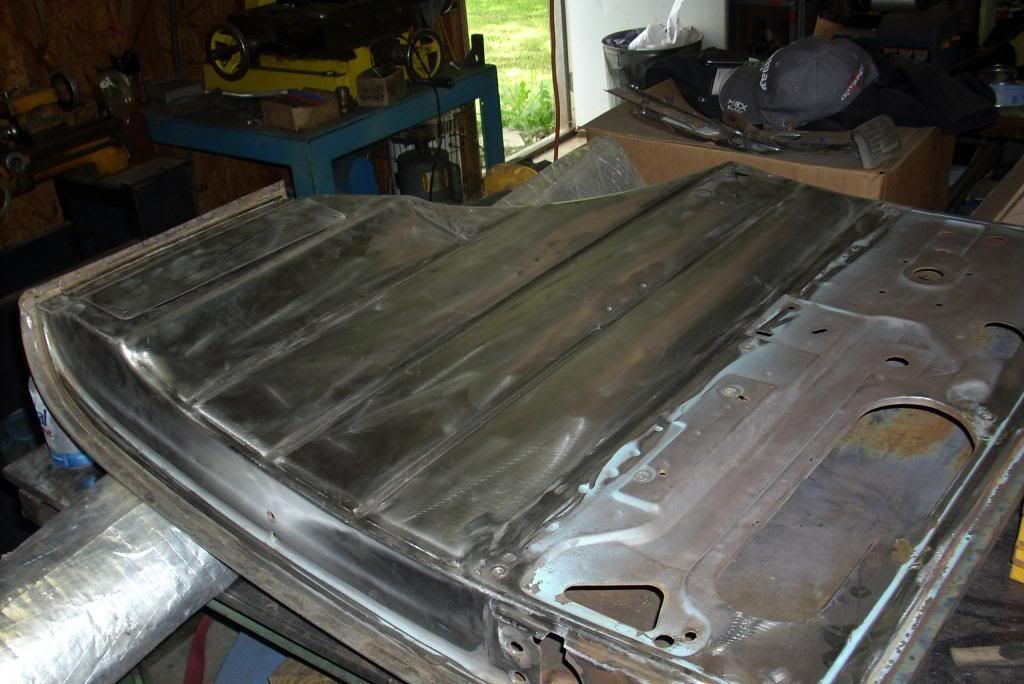
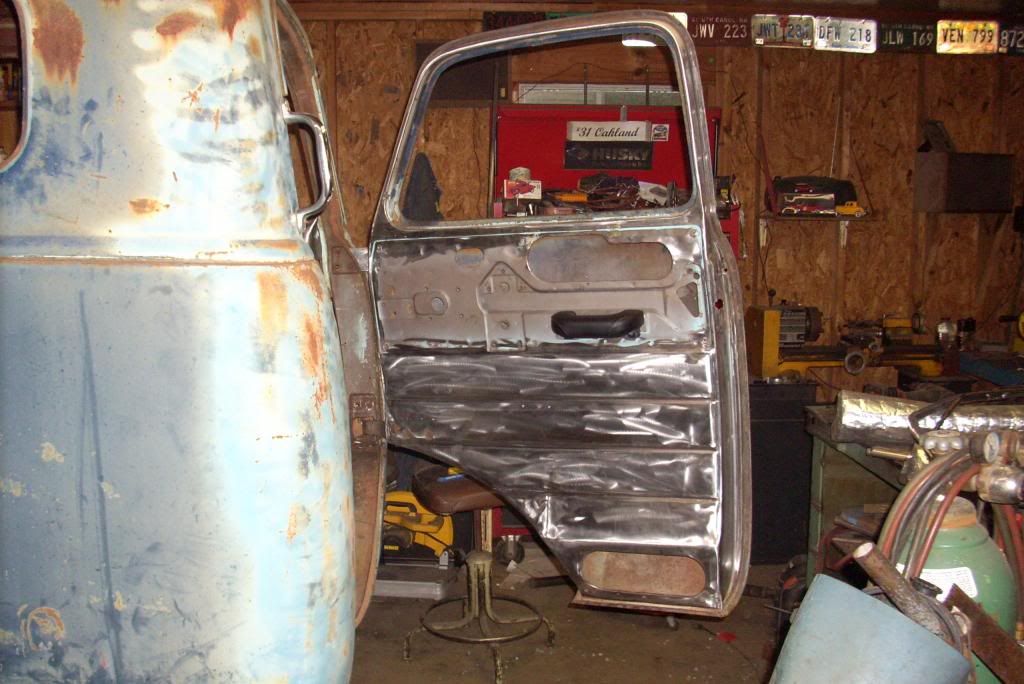
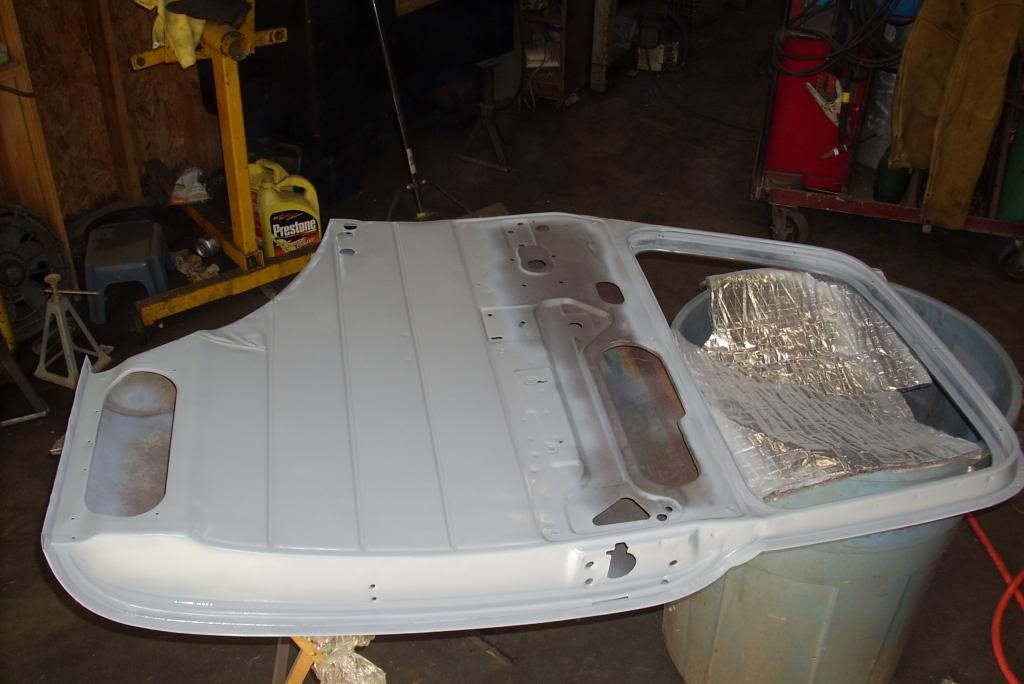
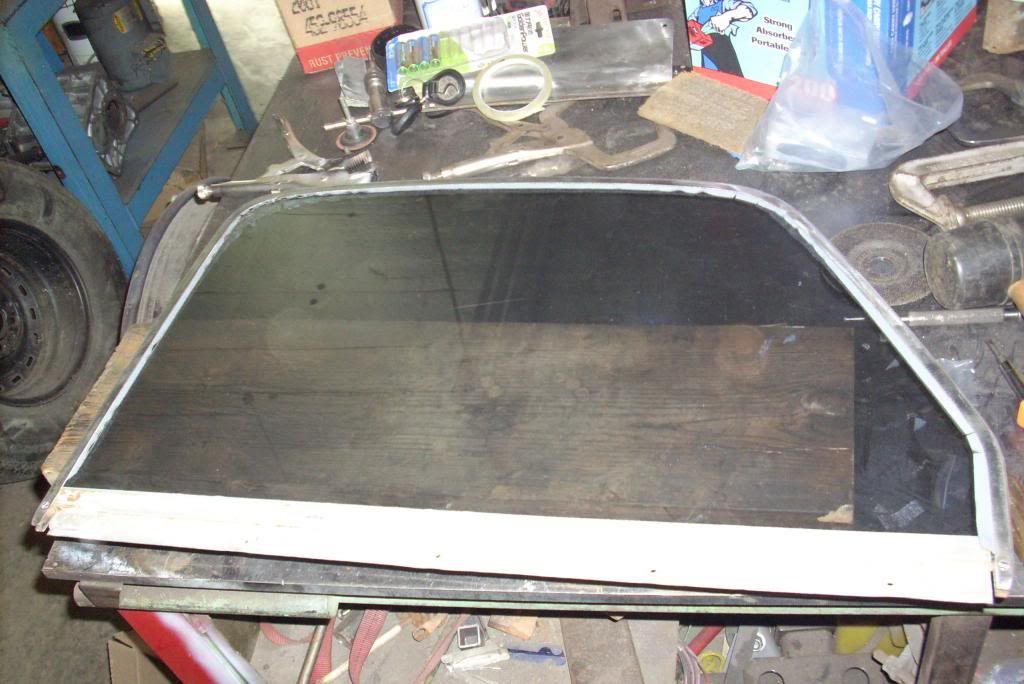
Thank's for the link. Started working on the passenger door. Most of the parts are in good shape except the window crank gears. I ordered new rollers, crank handles, a gear set, arm rests, panel/SS trim, outside handles, seals, tinted glass, glass seals, wipers. Door bottoms are solid with only minor surface rust. Both doors have the lower hinge area pushed in, it looks like at one time they used a block of wood to attempt to adjust the door alignment. I as able to fix this for the most part. Not perfect by any means but it will do.
     Rob |
|
|

|
 |
| Bookmarks |
|
|