
|
|
|
 01-20-2007, 07:36 PM
|
#1 |
|
Registered User
 Join Date: Aug 2005
Location: Hillsboro Oregon
Posts: 6,449
|
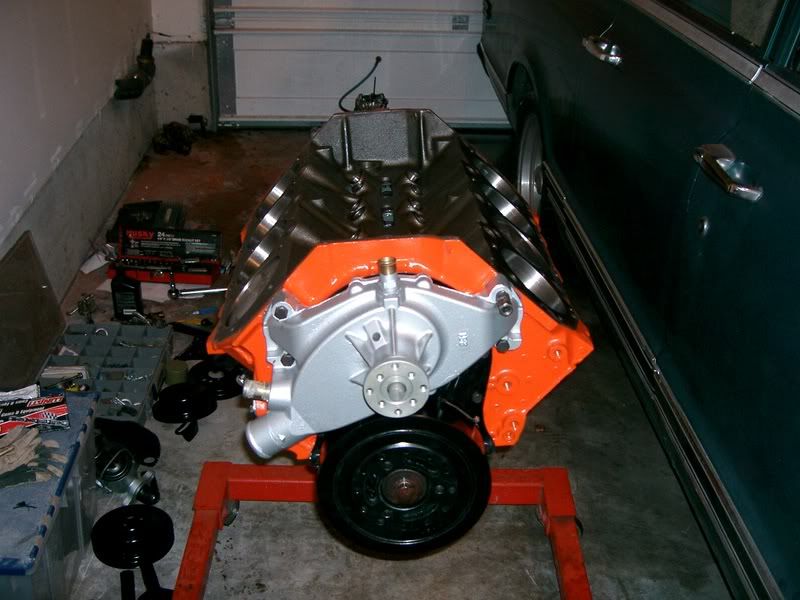
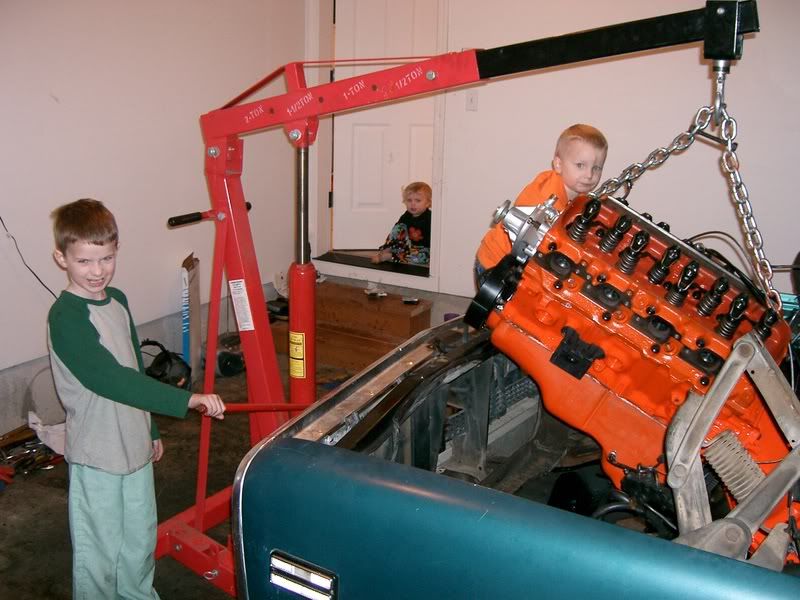
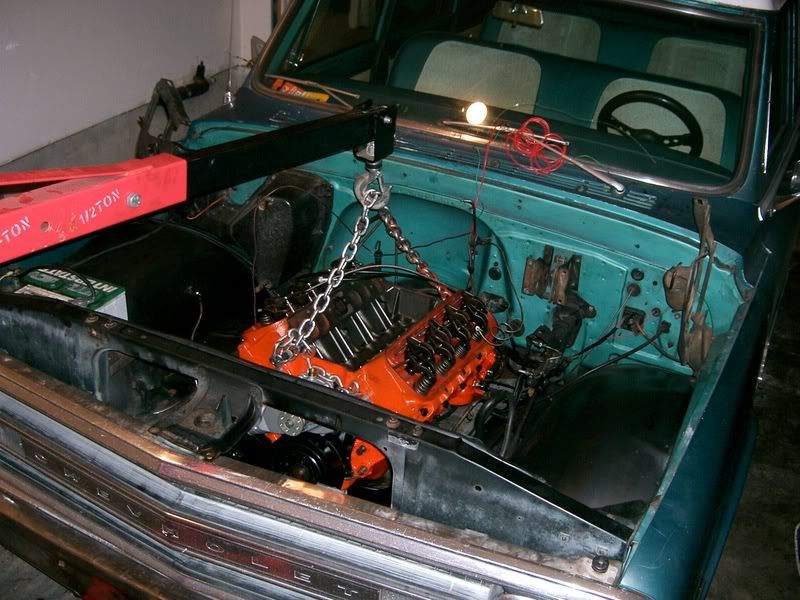
476 Install Pictures
I put a new cam, lifters, intake, and carb on the 396 and the bottom end couldn't hang with the new-found power...
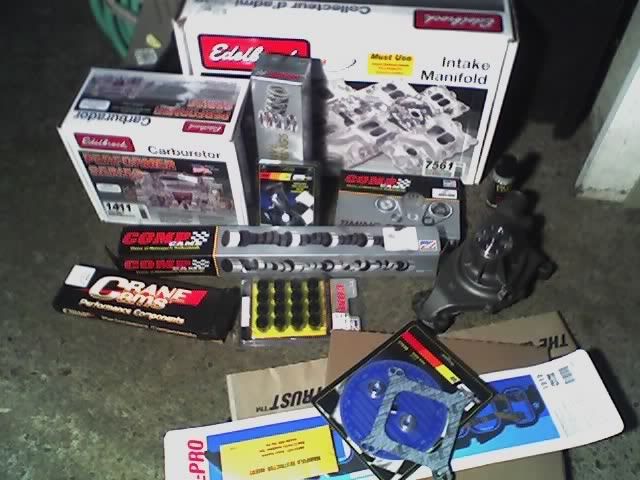  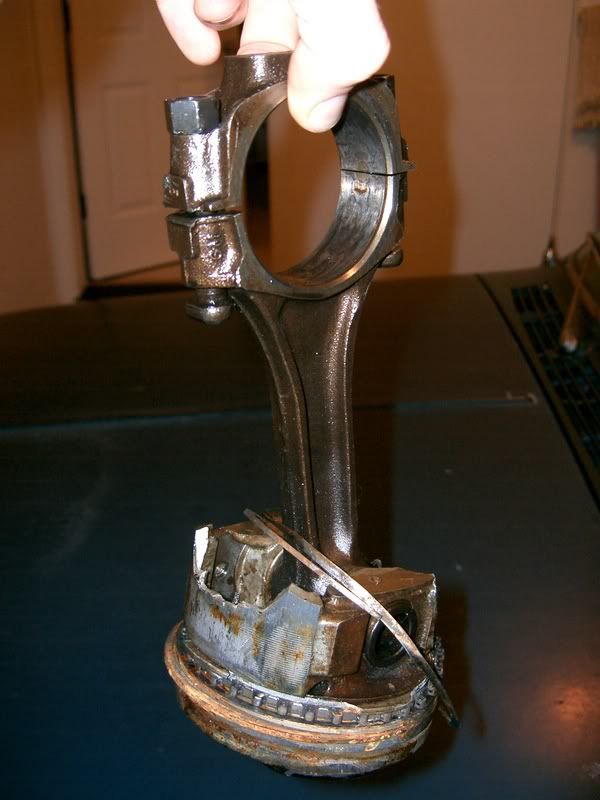 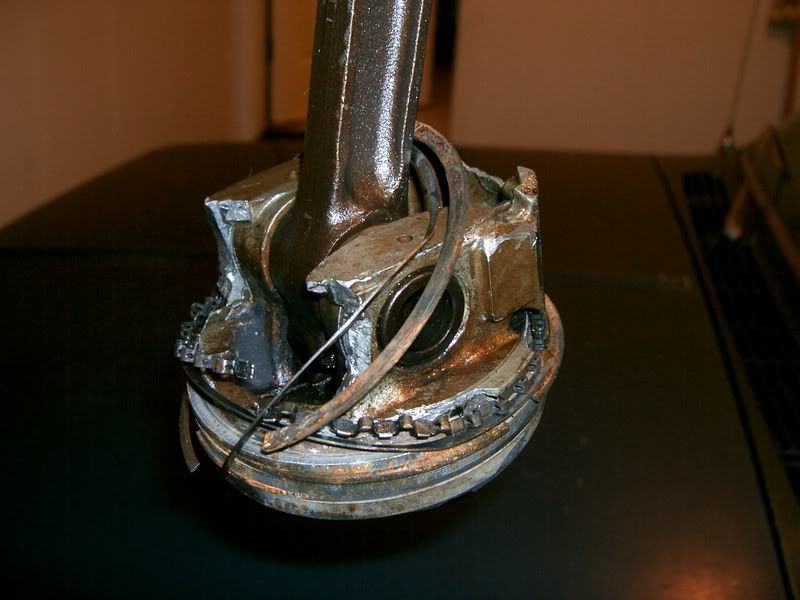 Crazy thing is that it still ran with the piston like that! I know, I know... don't bolt nice parts on a tired bottom end... So I built the 476 from a freshly machined block (454 +0.100" bore). Bought the assembled shortblock and heads, and slapped it together with the existing bolt-ons. I had to buy another new cam and lifter set though bc the comp lost a lobe in the process. It's very healthy but I have yet to really get on it because it's still breaking in. After I change the oil this weekend and get some dry roads we'll see what she's got... |

|

|
|
01-20-2007, 07:38 PM
|
#2 |
|
Registered User
Join Date: Aug 2005
Location: Hillsboro Oregon
Posts: 6,449
|
Re: 476 Install Pictures
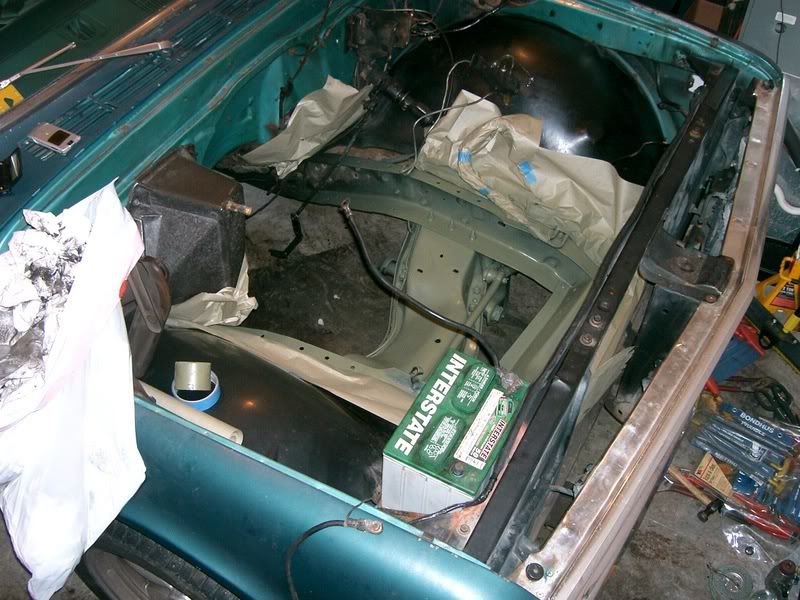
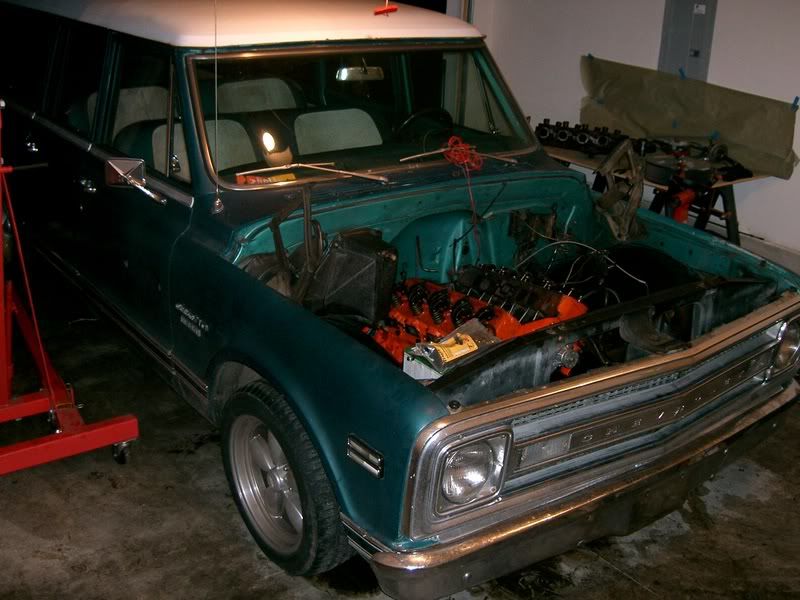
Here's what the engine bay used to look like
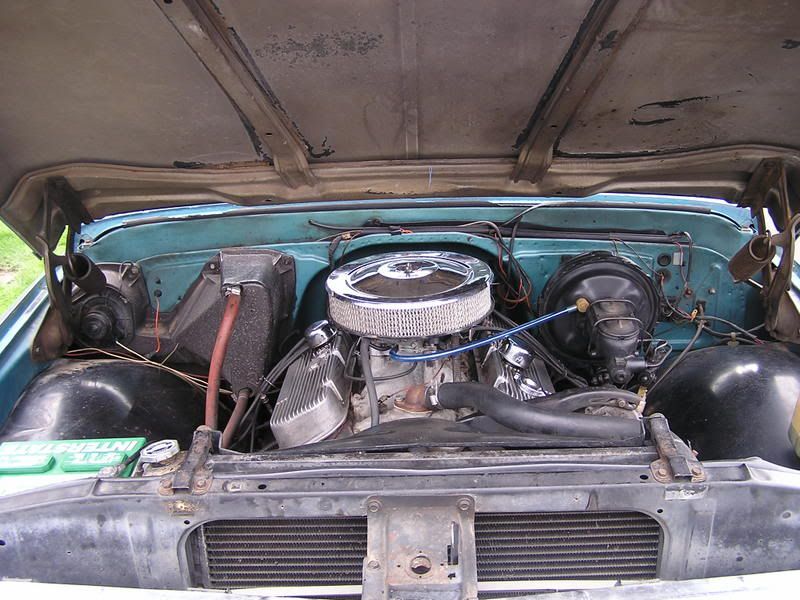 and you can see the destroyed piston prior to removal here 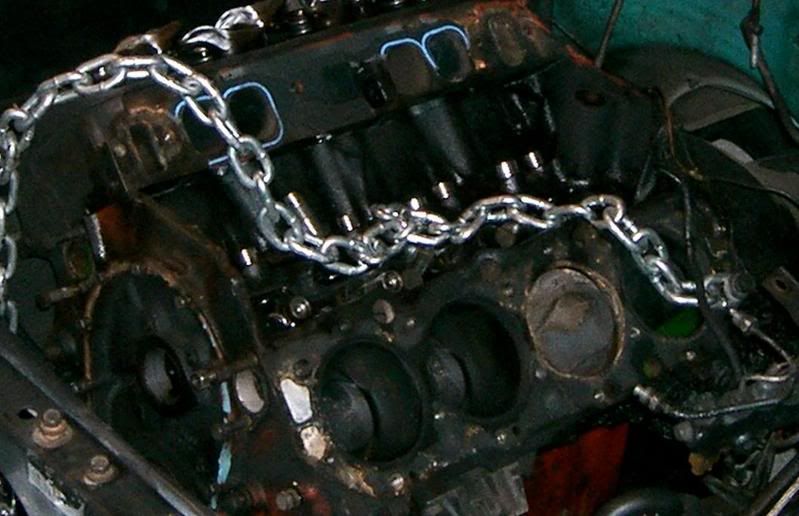
|
|
|
|
|
01-20-2007, 07:38 PM
|
#3 |
|
Broken Down
Join Date: Dec 2006
Location: Choctaw, Oklahoma
Posts: 1,267
|
Re: 476 Install Pictures
Ouch Im glad my wasn't that bad
__________________
kenm78 1982 Chevy 4X4 Project truck  Its better to keep your mouth shut and let people wonder about your ignorance, than open your mouth and reveal all doubt |
|
|
|
|
01-20-2007, 07:41 PM
|
#4 |
|
Registered User
Join Date: Aug 2005
Location: Hillsboro Oregon
Posts: 6,449
|
Re: 476 Install Pictures
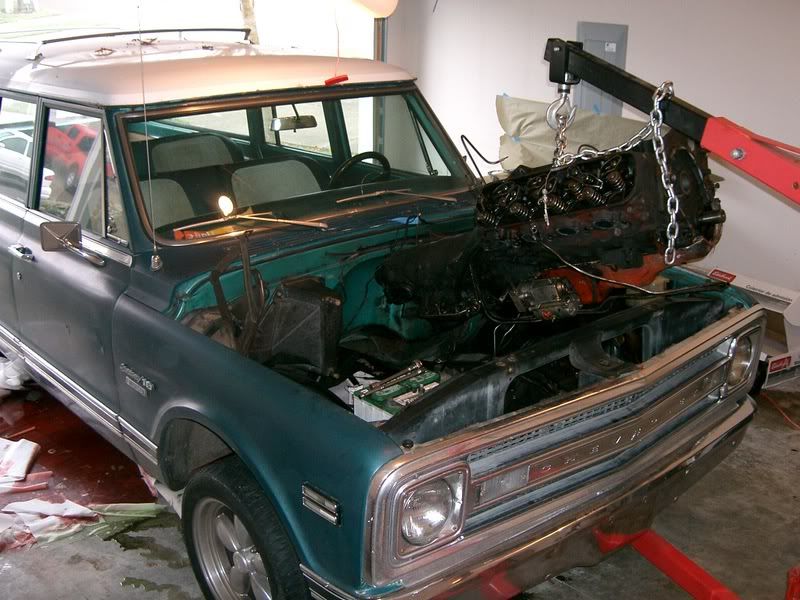
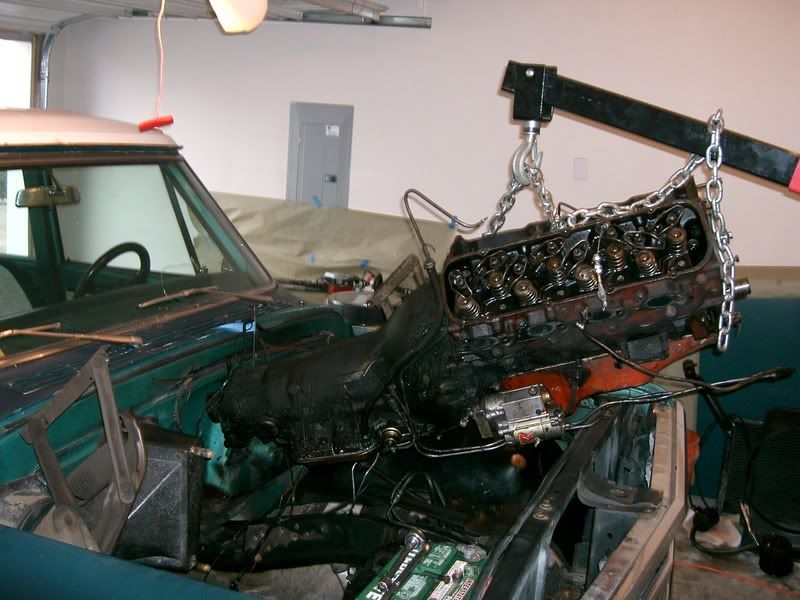
out with the pig... (she made quite a mess mess)
|
|
|
|
|
01-20-2007, 07:44 PM
|
#5 |
|
Registered User
Join Date: Aug 2005
Location: Hillsboro Oregon
Posts: 6,449
|
Re: 476 Install Pictures
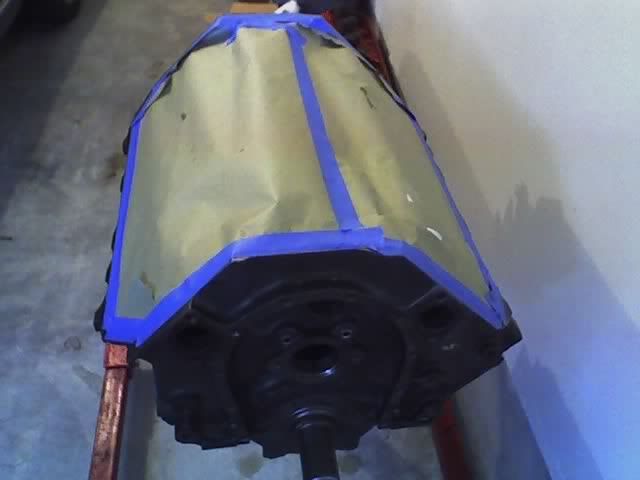
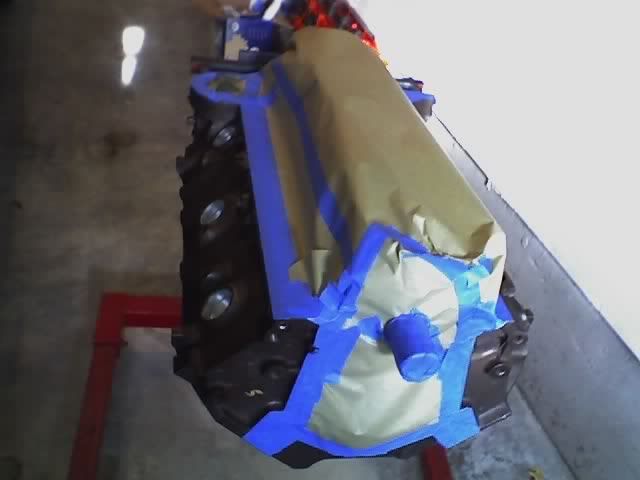
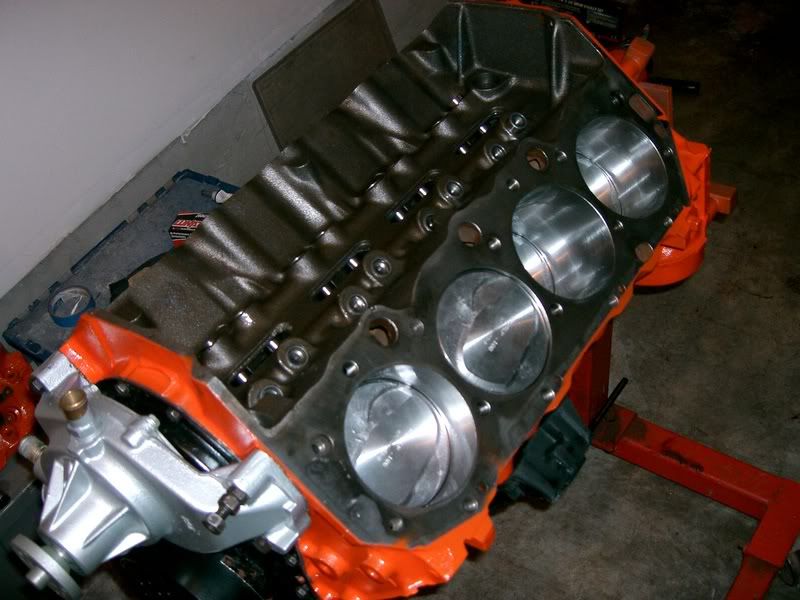
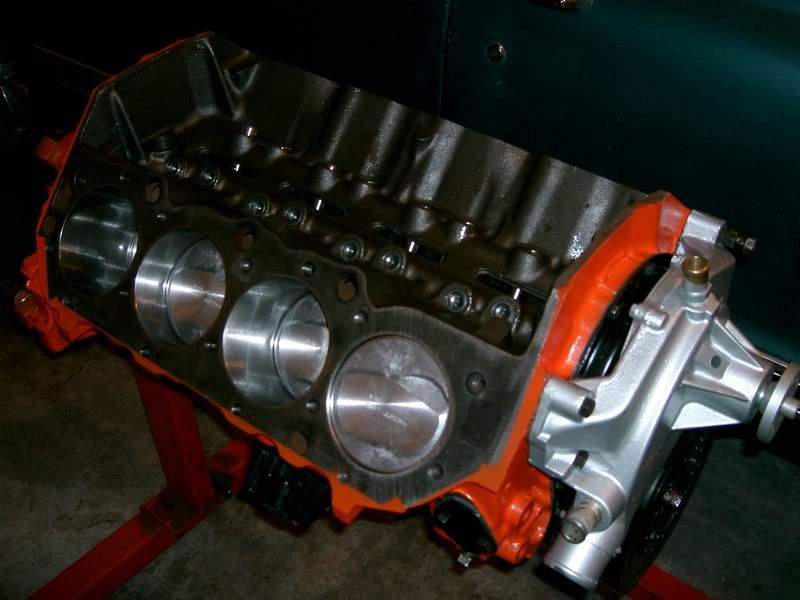
Painting the new block
|
|
|
|
|
01-20-2007, 07:48 PM
|
#6 |
|
Registered User
Join Date: Aug 2005
Location: Hillsboro Oregon
Posts: 6,449
|
Re: 476 Install Pictures
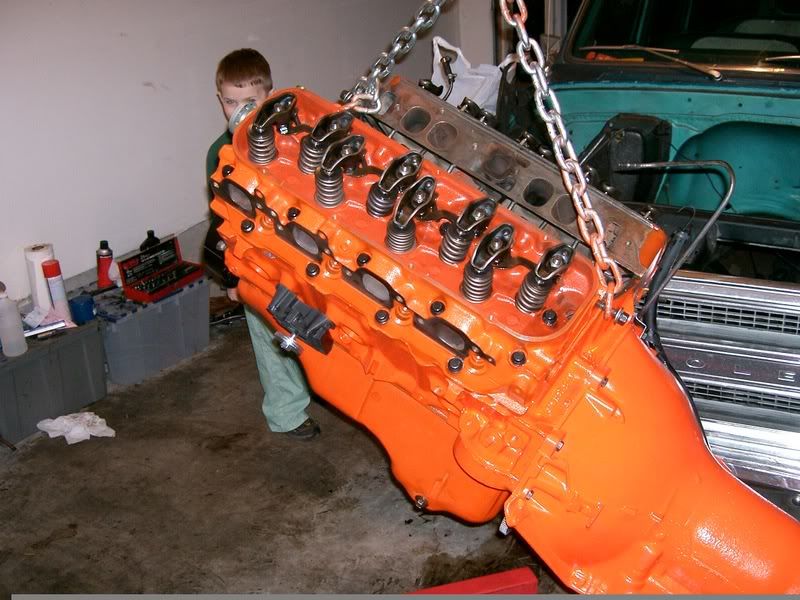
Heads on
 it had studs for a windage tray so I had to get one... (note the small block mounts I used thanks to a FAQ from this board) 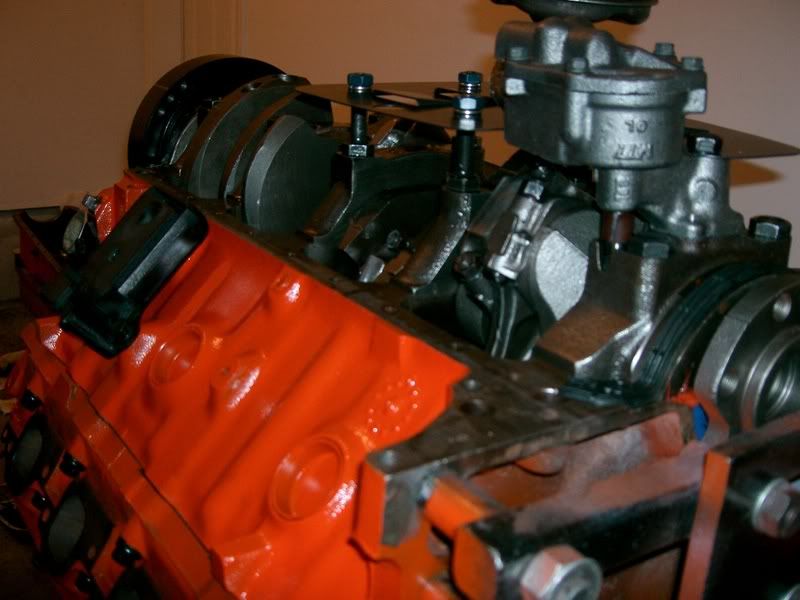
|
|
|
|
|
12-17-2007, 10:38 AM
|
#7 | ||
|
Registered User
Join Date: Oct 2007
Location: Wendell, Idaho
Posts: 608
|
Re: 476 Install Pictures
Quote:
Quote:
__________________
1969 4x4 Nothing beats a good rock drill and some dynamite |
||
|
|
|
|
12-17-2007, 11:30 AM
|
#8 | |||
|
Registered User
Join Date: Aug 2005
Location: Hillsboro Oregon
Posts: 6,449
|
Re: 476 Install Pictures
Quote:
Quote:
Check out the FAQ by Tx Firefighter |
|||
|
|
|
|
12-17-2007, 01:07 PM
|
#9 |
|
Registered User
Join Date: Oct 2007
Location: Wendell, Idaho
Posts: 608
|
Re: 476 Install Pictures
Thanks, I was looking for the thread on that, helps a lot.
__________________
1969 4x4 Nothing beats a good rock drill and some dynamite |
|
|
|
|
01-20-2007, 07:48 PM
|
#10 |
|
fugedaboutit
Join Date: Mar 2005
Location: Gresham, OR
Posts: 832
|
Re: 476 Install Pictures

__________________
Currently truckless 
|
|
|
|
|
01-20-2007, 07:51 PM
|
#11 |
|
Registered User
Join Date: Aug 2005
Location: Hillsboro Oregon
Posts: 6,449
|
Re: 476 Install Pictures
etching primer after hours of cleaning
  Painted (the inner fenders can be done later) 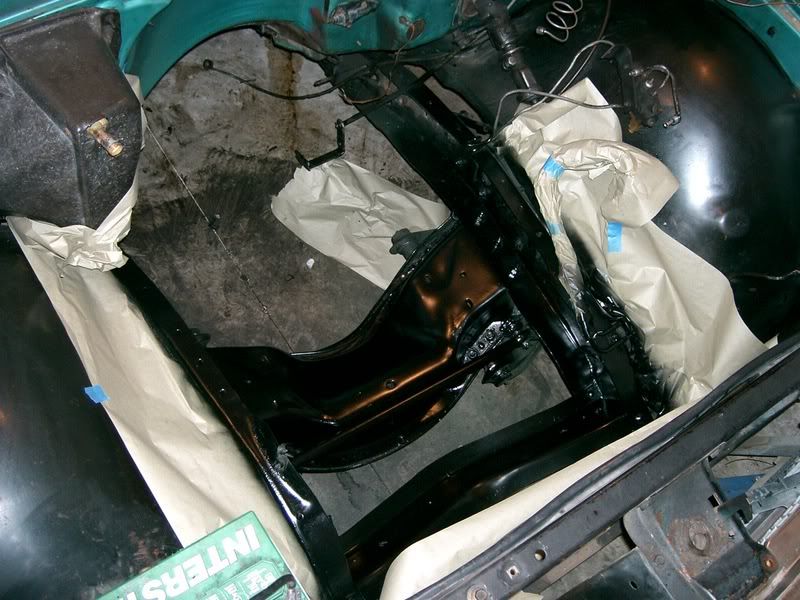 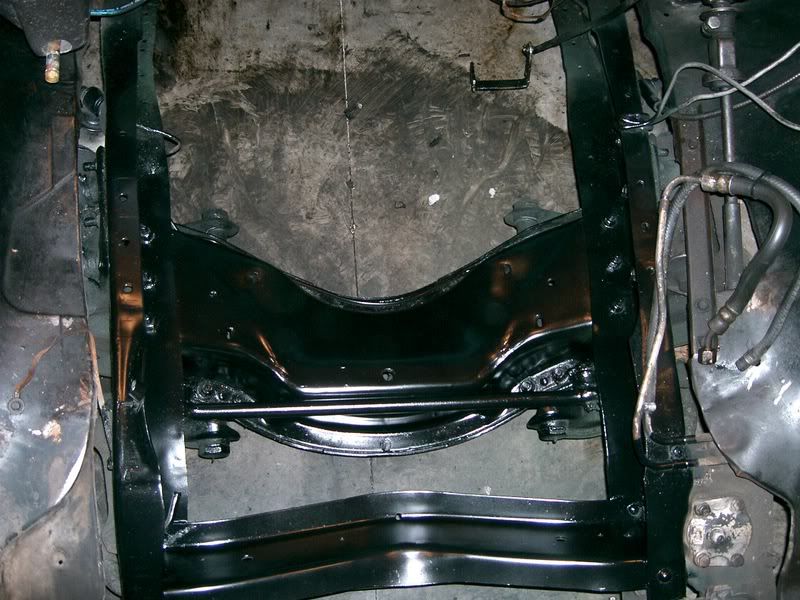
|
|
|
|
|
01-20-2007, 07:52 PM
|
#12 |
|
fugedaboutit
Join Date: Mar 2005
Location: Gresham, OR
Posts: 832
|
Re: 476 Install Pictures
__________________
Currently truckless
|
|
|
|
|
01-20-2007, 07:56 PM
|
#13 |
|
Registered User
Join Date: Aug 2005
Location: Hillsboro Oregon
Posts: 6,449
|
Re: 476 Install Pictures
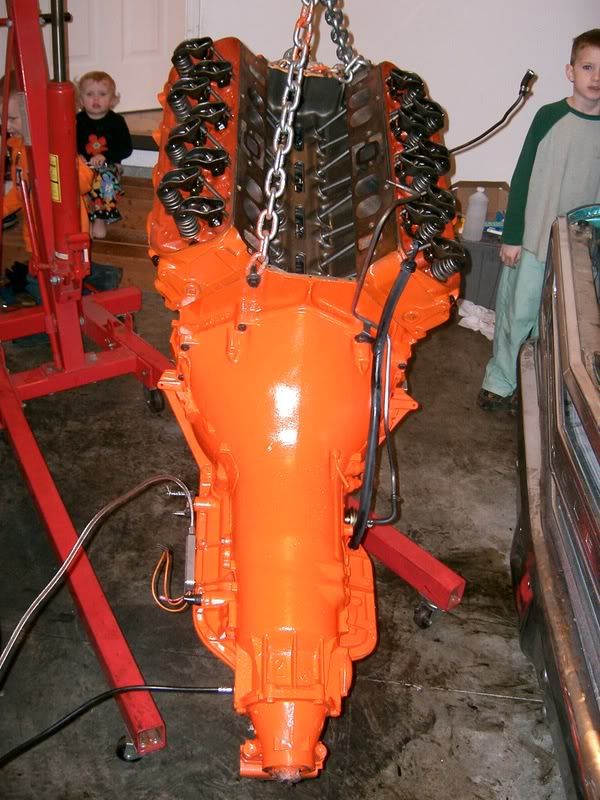
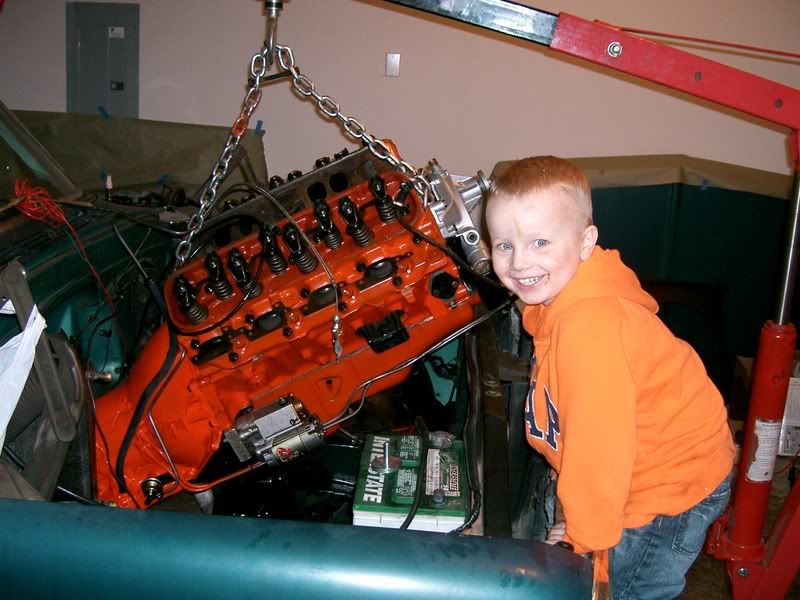
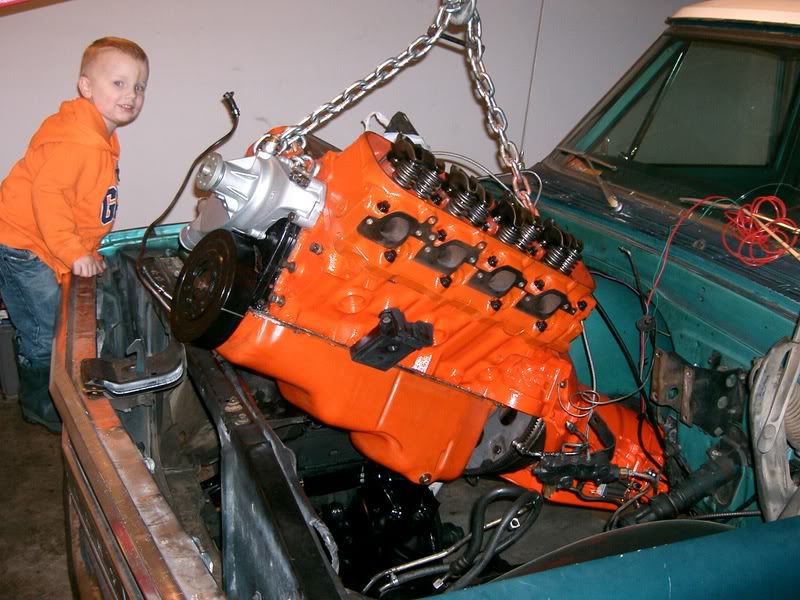
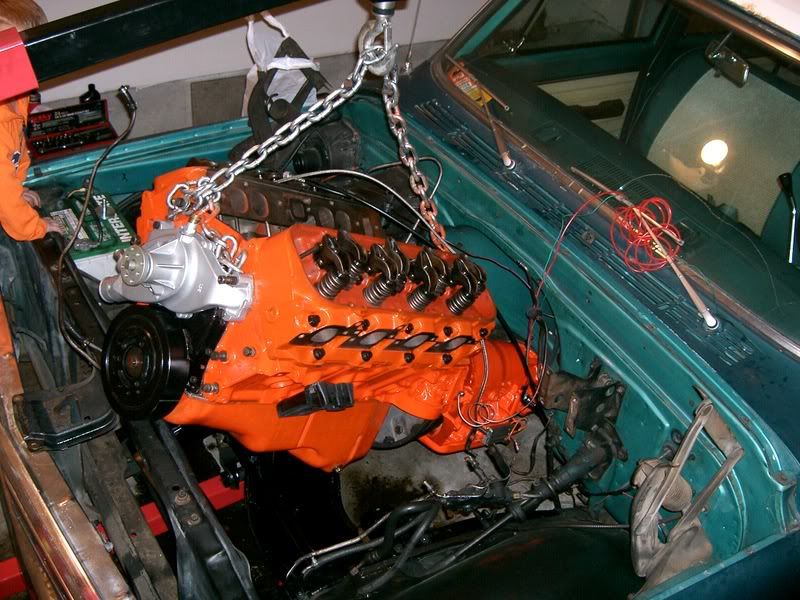
New combo goin in with the help of some expensive labor (476/TH400):
|
|
|
|
|
01-20-2007, 07:59 PM
|
#14 |
|
Registered User
Join Date: Aug 2005
Location: Hillsboro Oregon
Posts: 6,449
|
Re: 476 Install Pictures
I removed the wire guide on the firewall and re-routed the wires to clean things up. I also took this oppertunity to finally run the proper 12 AWG wire to the HEI.
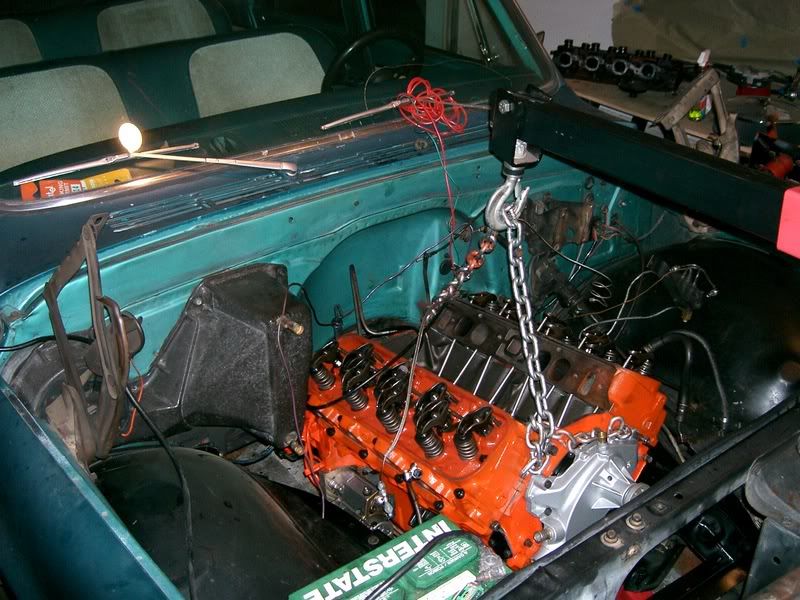  
Last edited by Frizzle Fry; 01-22-2007 at 01:57 AM. |
|
|
|
|
12-17-2007, 10:08 AM
|
#15 |
|
Registered User
Join Date: Nov 2006
Location: Sun City, Arizona
Posts: 430
|
Re: 476 Install Pictures
[QUOTE=Frizzle Fry;1995184]I removed the wire guide on the firewall and re-routed the wires to clean things up. I also took this oppertunity to finally run the proper 12 AWG wire to the HEI.[QUOTE]
what if you don't run this wire? What are the draw backs? What is AWG? Thanks dan Last edited by dan468; 12-17-2007 at 10:08 AM. |
|
|
|
|
01-20-2007, 08:01 PM
|
#16 |
|
Registered User
Join Date: Aug 2005
Location: Hillsboro Oregon
Posts: 6,449
|
Re: 476 Install Pictures
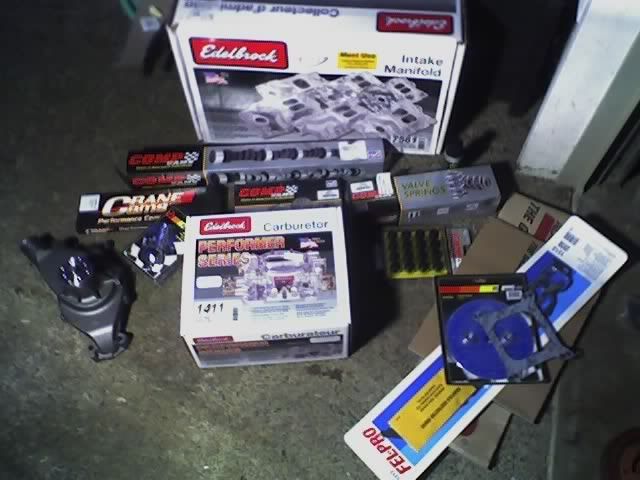
few more parts...
|
|
|
|
|
01-20-2007, 08:04 PM
|
#17 |
|
Registered User
Join Date: Aug 2005
Location: Hillsboro Oregon
Posts: 6,449
|
Re: 476 Install Pictures
When I fired it up for the first time I had a heater core leak! So I figured it was a better time than any to replace it. What a pain that is! While it was out I had no choice but to paint the heater box... You can see the Accel billet HEI, painted brake booster, and new/painted MC here too:
Last edited by Frizzle Fry; 01-22-2007 at 02:00 AM. |
|
|
|
|
01-20-2007, 08:13 PM
|
#18 |
|
Registered User
Join Date: Aug 2005
Location: Hillsboro Oregon
Posts: 6,449
|
Re: 476 Install Pictures
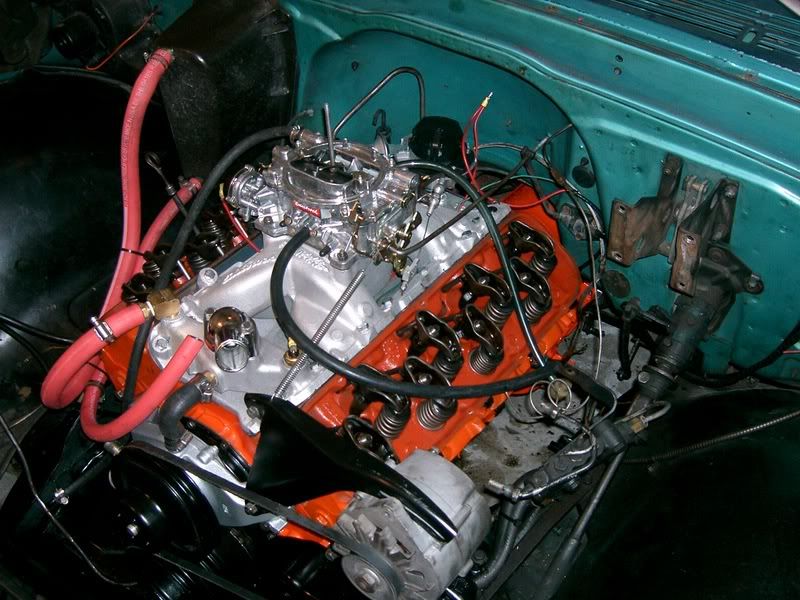
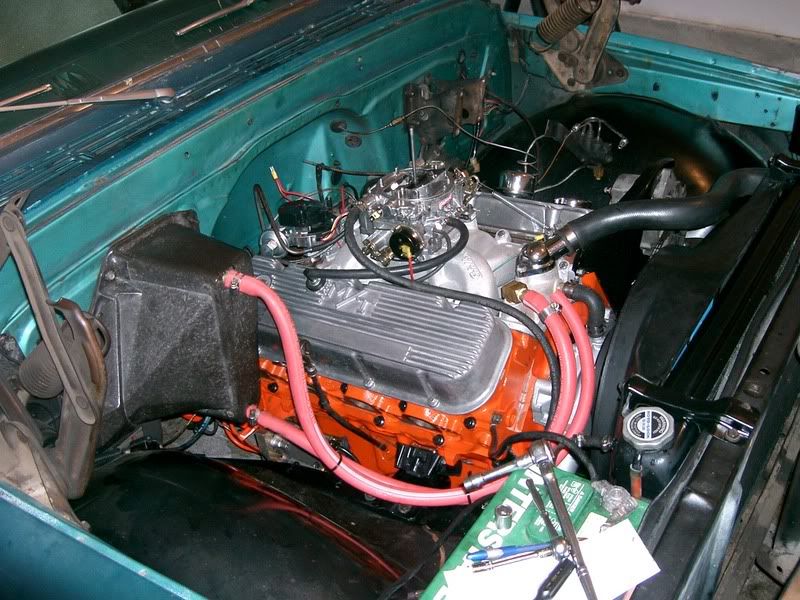
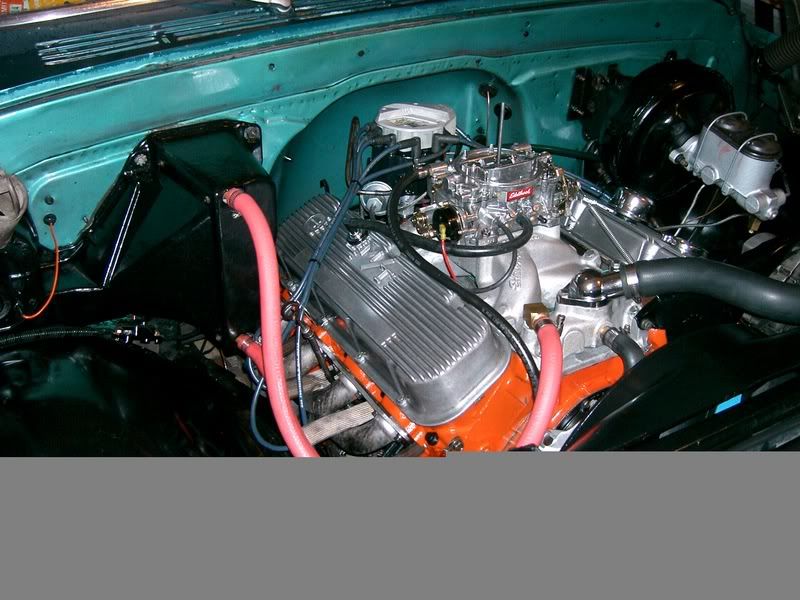
Here's all the specs and some final shots for now:
* 476 (454 + 0.100 for 4.35) * Heads: 336781 oval, 118cc chamber, 256/114cc port * Pistons: Speedpro -10.5cc dome with above heads makes 9.5/1 * Intake: Edelbrock Airgap * Carb: Edelbrock 1411 750cfm * Headers: 1 3/4" primary 3" collector full length neck down to 2.5" post collectors through dual flowmaster 40 series. No H or X yet. * Cam: Lunati Voodoo Here's the link to my cam specs: http://store.summitracing.com/partde...0&autoview=sku * Accel HEI with "supercoil" and I have full roller rockers to go in when I have the time (they were delayed in shipping so they didn't make the build) 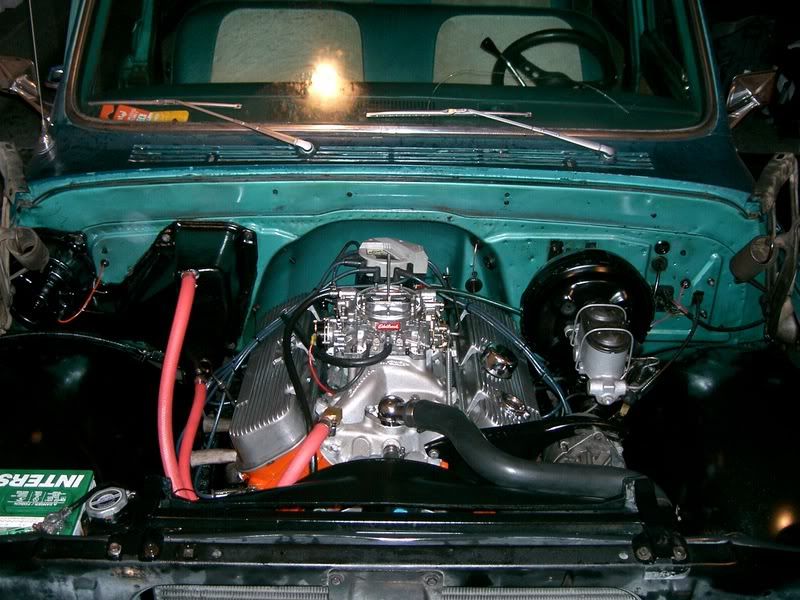 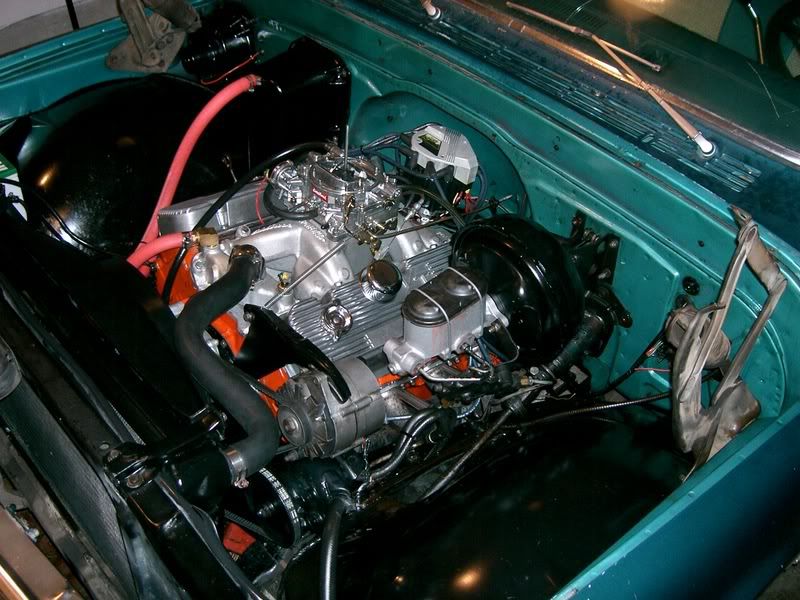 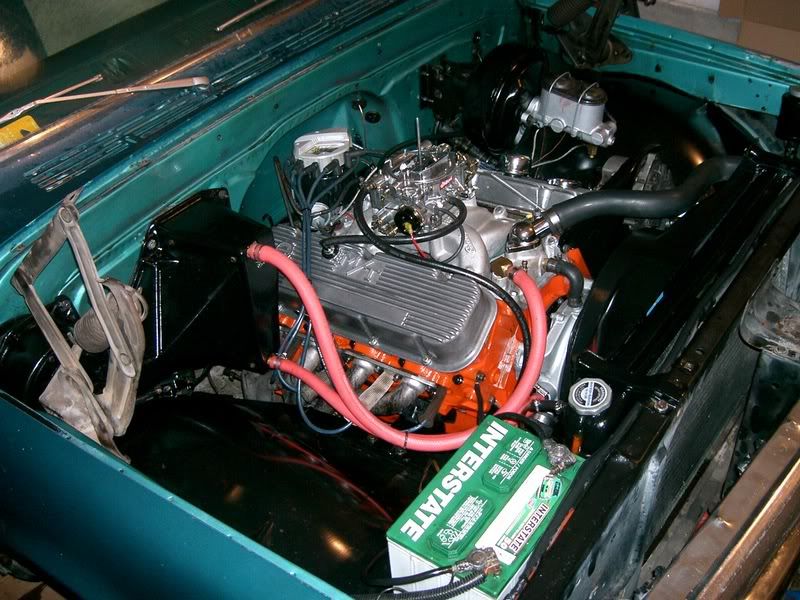 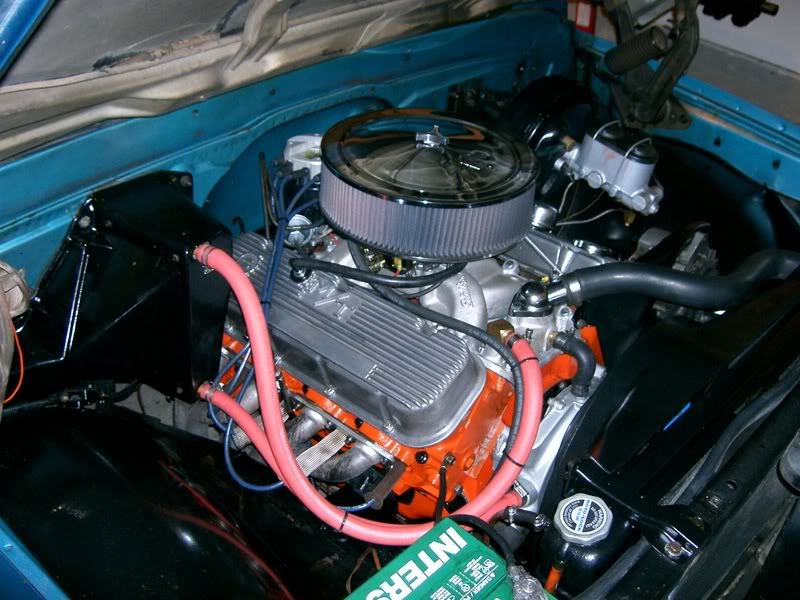 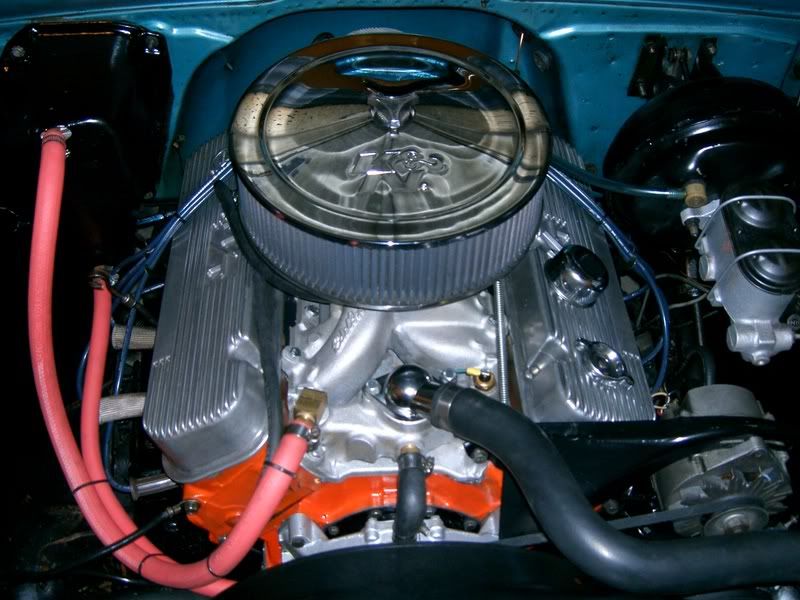 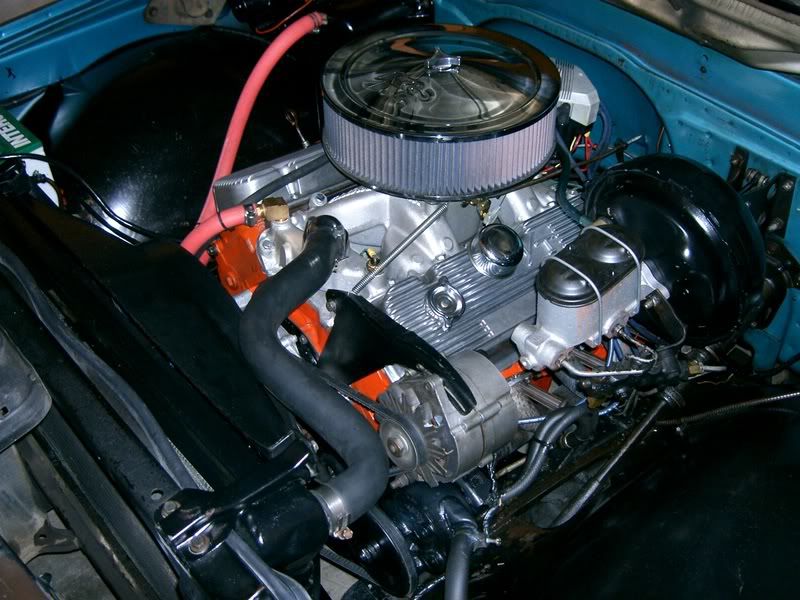 
Last edited by Frizzle Fry; 12-21-2007 at 12:36 PM. |
|
|
|
|
01-24-2007, 02:02 AM
|
#19 |
|
Account Suspended
Join Date: Sep 2005
Location: Monroe, WA
Posts: 3,815
|
Re: 476 Install Pictures
Man, what an AWESOME thread! Cool, if sad, broken parts pictures, great build, great to see the kids out with the truck and one swee engine.
You ge rep points from me, dude 
|
|
|
|
|
01-20-2007, 08:26 PM
|
#20 |
|
Aluminum slot wheels rule...
Join Date: Jan 2006
Location: Maine
Posts: 6,212
|
Re: 476 Install Pictures
Wicked! That Burb is gonna be a true sleeper!
|
|
|
|
|
01-20-2007, 08:52 PM
|
#21 |
|
Registered User
Join Date: Dec 2006
Location: Wesley Chapel, Florida
Posts: 1,113
|
Re: 476 Install Pictures
That is awesome, thanks for all the pics and details! Quick question did you disassemble the A arms and steering linkages and what did you use to paint the frame? Did you sandblast it or just degrease and paint over rust?
__________________
2004 Chevy Silverado 1500LS SWB 5.3L 2004 Corvette Z16 #770 Wish I had not sold 72 blazer |
|
|
|
|
01-20-2007, 09:41 PM
|
#22 |
|
Registered User
Join Date: Aug 2005
Location: Hillsboro Oregon
Posts: 6,449
|
Re: 476 Install Pictures
Thanks. I cleaned it with carb cleaner and a wire-wheel/brush down to bare metal for the most part. I painted just the area you see in the pics. No rust though. The 1/2" of oily muck must have been good protection.
|
|
|
|
|
01-20-2007, 10:00 PM
|
#23 |
|
Post Whore
Join Date: Feb 2000
Location: Rose Hill, KS, USA
Posts: 12,684
|
Re: 476 Install Pictures
Looking great - sounds like a stout engine! I haven't read your 61 Stepside build thread in a while so I'm gonna jump over there - if any of you haven't checked out that thread - you really need to!
__________________
1970 Blazer with a 400 sbc and 4" lift 1980 Pontiac Trans Am, 455 Oldsmobile 2012 Kawasaki Concours 14 |
|
|
|
|
01-20-2007, 10:09 PM
|
#24 |
|
Registered User
Join Date: Feb 2004
Location: Tacoma WA
Posts: 1,365
|
Re: 476 Install Pictures
Great job. What brand/part # are the headers?
TIA - Bob
__________________
67 C-20 LWB, tilt, speed alert, vac, 454, T400 67 C-10 SWB, factory air with more to follow |
|
|
|
|
01-20-2007, 10:15 PM
|
#25 |
|
Registered User
Join Date: May 2005
Location: Portland, OR.
Posts: 414
|
Re: 476 Install Pictures
Looks like a clean install (should get it also), Digging the polished s200's on Burb
|
|
|
|
 |
| Bookmarks |
|
|


 Hybrid Mode
