
 |
|
|
|
|
#1 |
|
Senior Enthusiast
Join Date: Feb 2007
Location: Spokane Valley, WA
Posts: 8,356
|
Markeb01 Build Thread
This is a test of Flickr Photo Host:
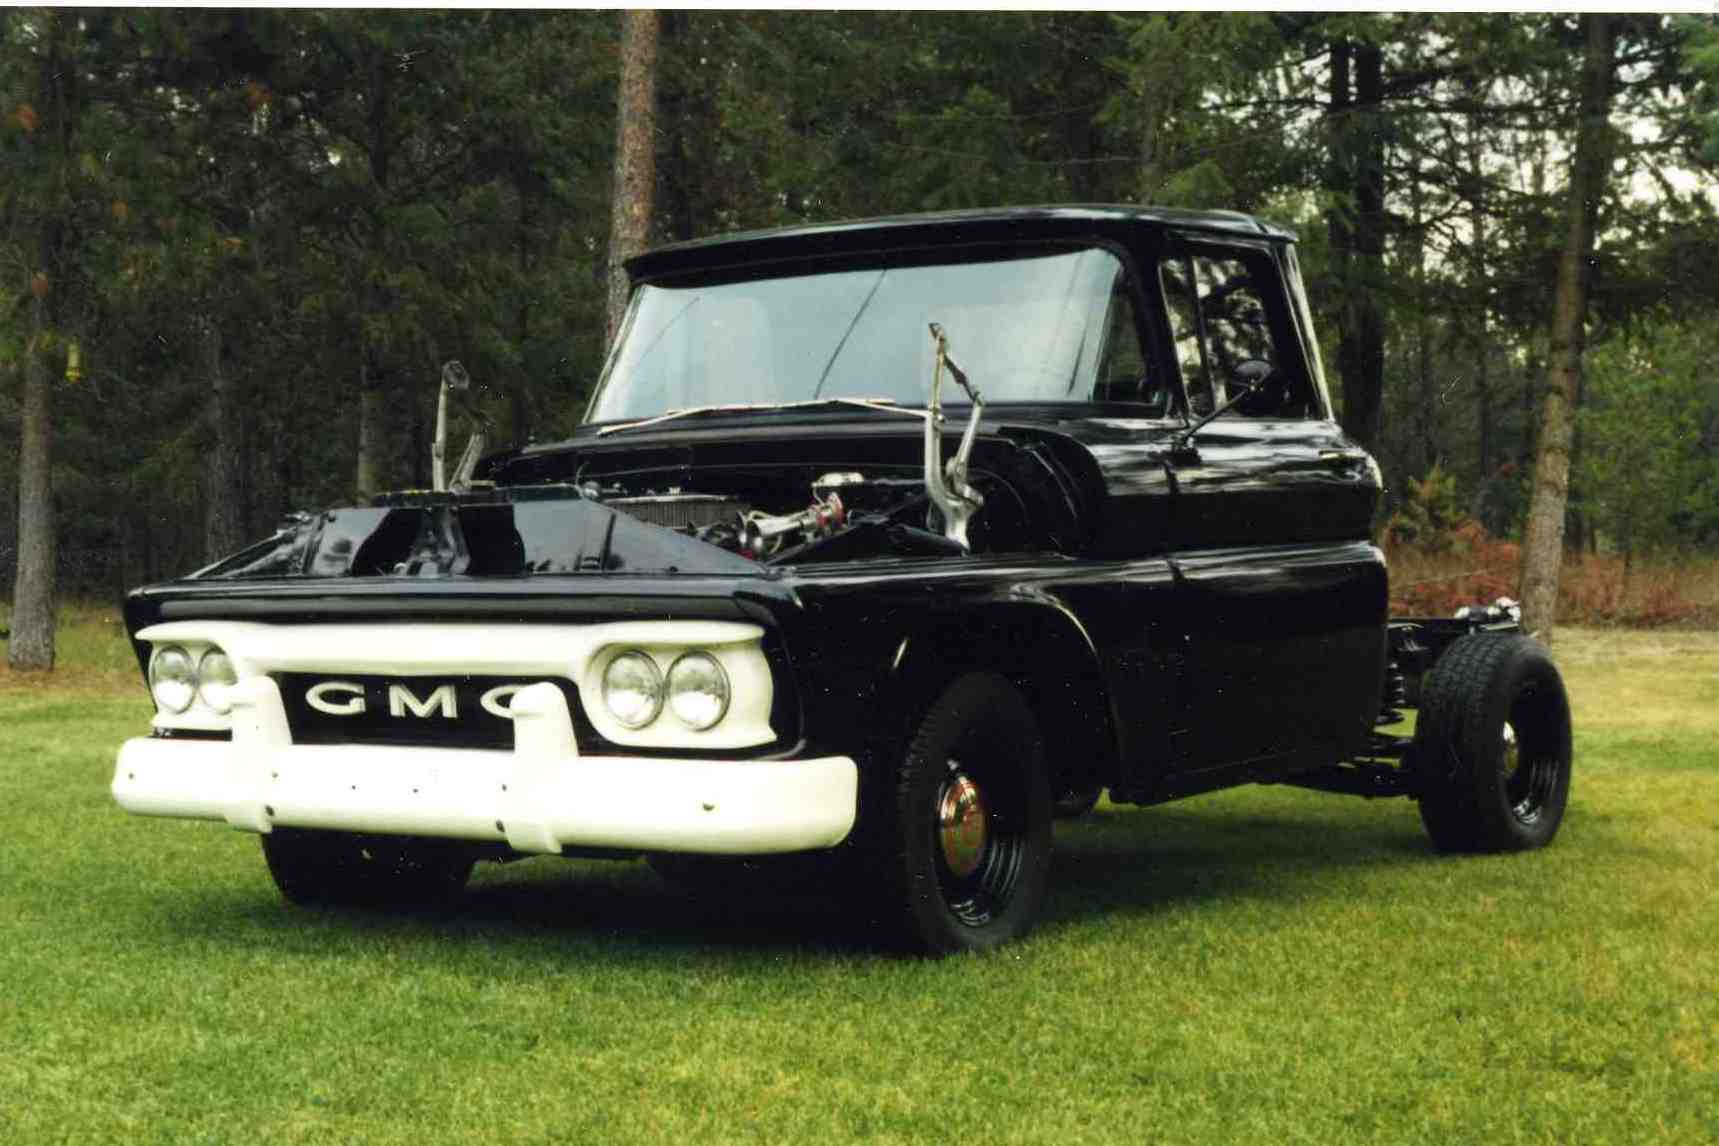
 0001 by markeb01, on Flickr Our truck is semi-finished, so Iím posting a history of the transition from where it started to how it looks currently. A lot of the pictures are boring but Iím going to post many of the disassembly shots in case someone might find the details interesting for their own project. Weíve owned the truck for nearly 20 years so it may take a while to get everything uploaded. The truck was originally sold by Kimball Motors Company in San Luis Obispo, California to a retired gentleman. Base price was $2,112.45, with a discount of $800 trade in for his 1954 GMC. The only options were a Bardin bumper, West Coast style mirrors, and front and rear turns signals (separate line items). A camper shell was soon added and remained in place until his passing in the late 1980ís. Some time in the 1960ís he hit a deer, damaging the grille, grille support, and hood. The bent grille parts were replaced, while the hood was simply repaired. A nephew living in Alameda, California inherited the truck, and kept it for about 3 years. He replaced the 3 speed column shift transmission with a 4 speed SM-420 before losing interest and putting it up for sale. The truck became a birthday present from my wife in April 1992. Hereís what it looked like when we first got it home, minus the passenger side mirror I had already removed. Other than the transmission swap it was fundamentally dead stock with one remaining hubcap and a few dents and dings: 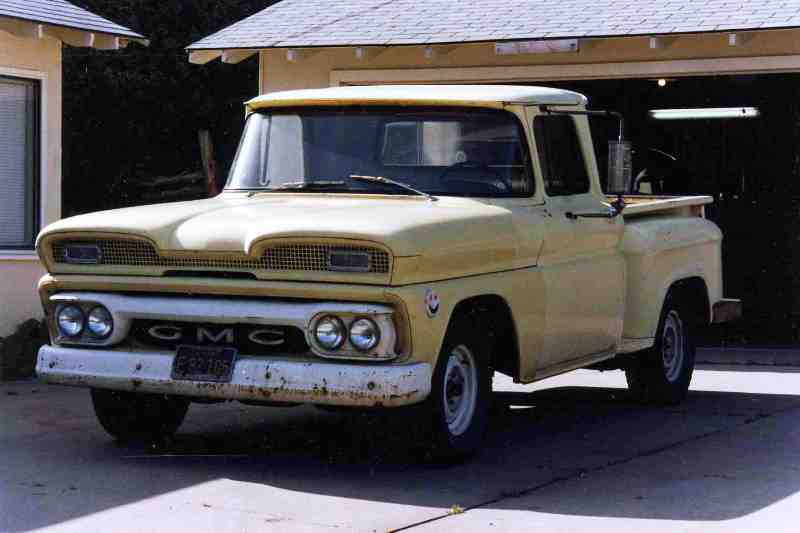 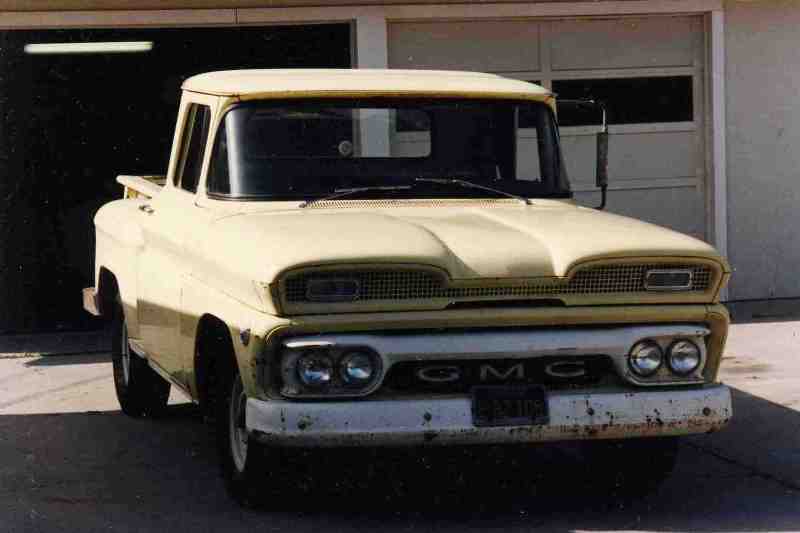 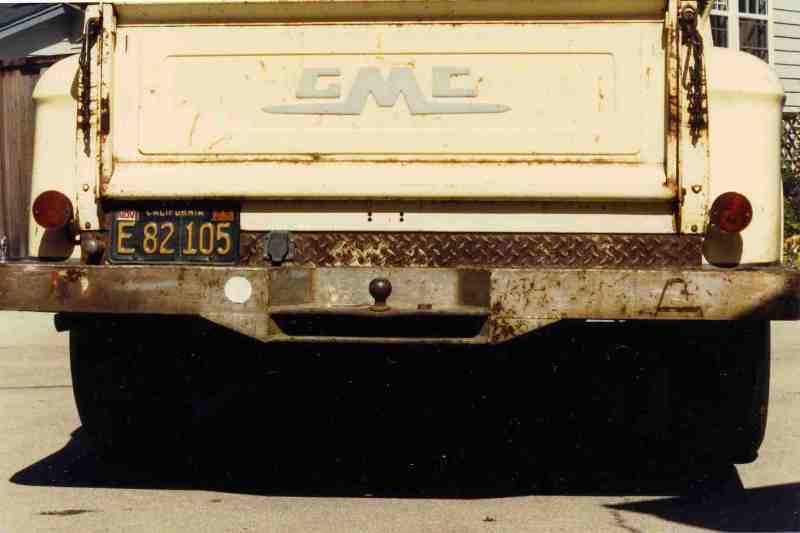 The wheels and tires were given to a friend for his 54 Chevy Ĺ ton and the fender emblems went to GMC Jolly. Hereís the worst of the body damage: 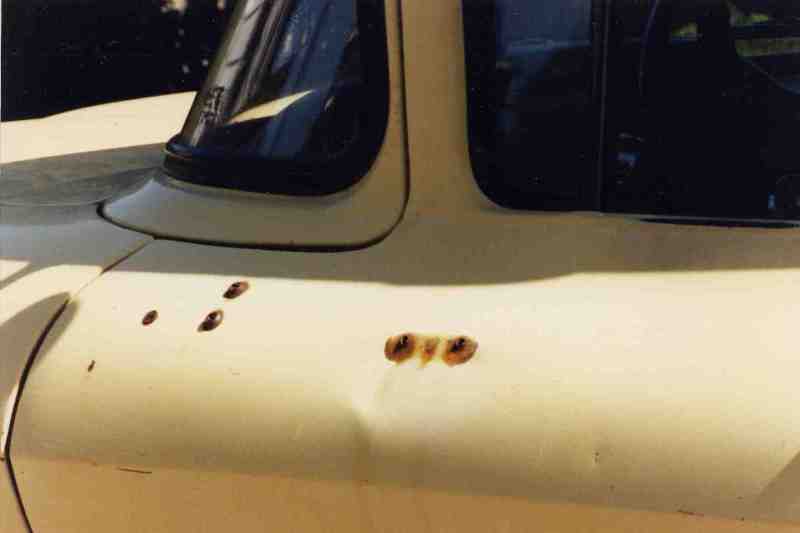 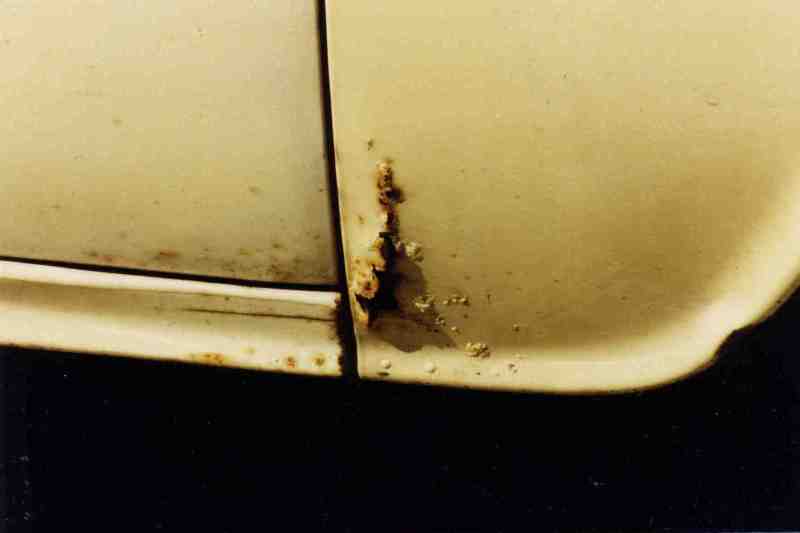 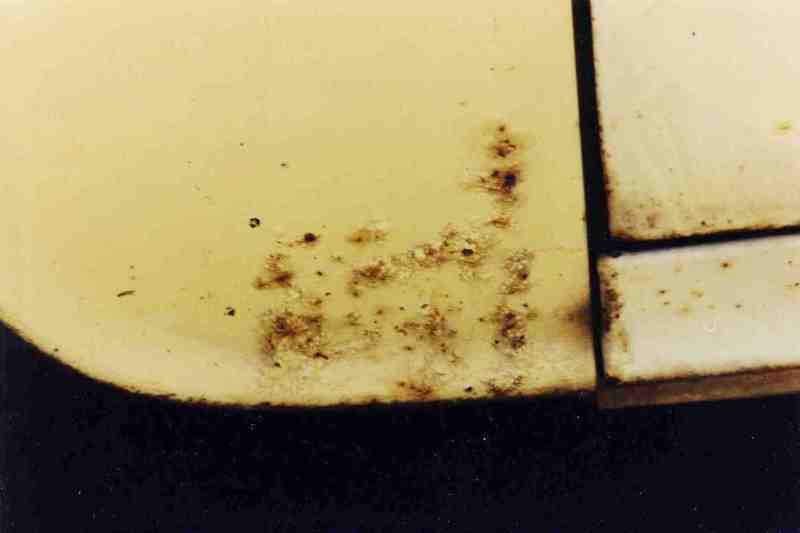 The first upgrade was a new set of wheels. 15x6 disc brake wheels up front with 15x8ís in the rear. 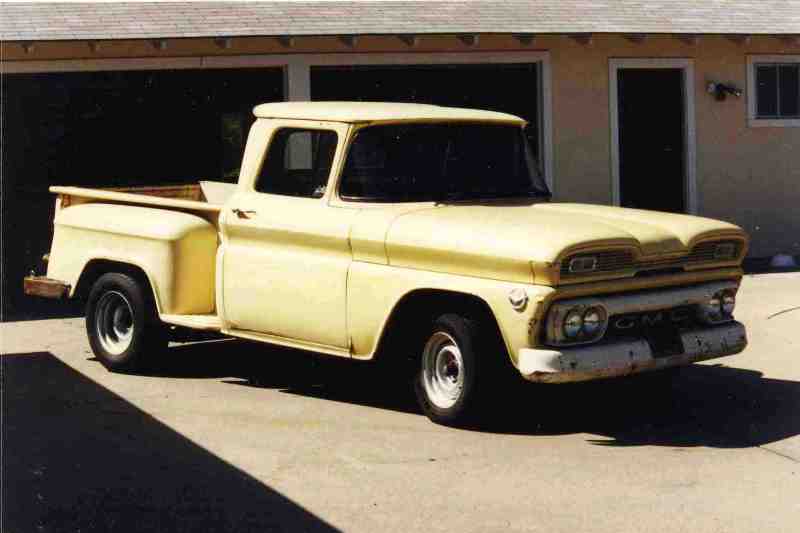 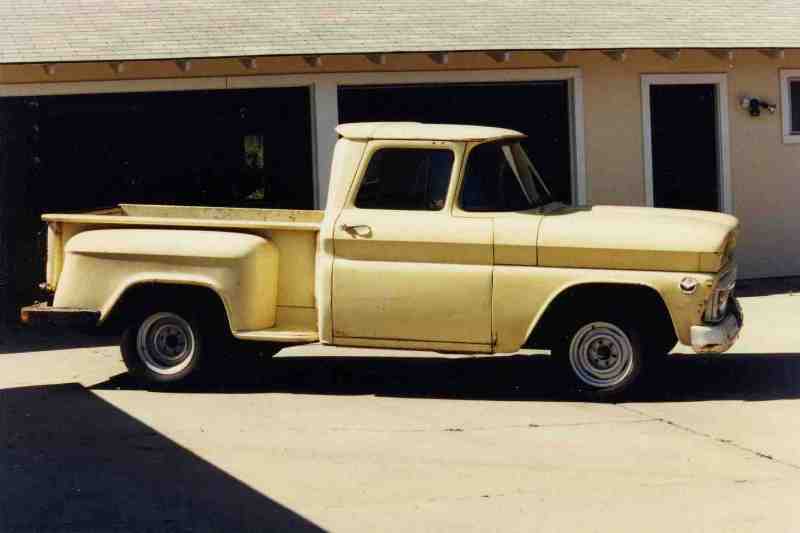 And a $5 set of 54 Chevy hubcaps, just because I liked 54 Chevys. 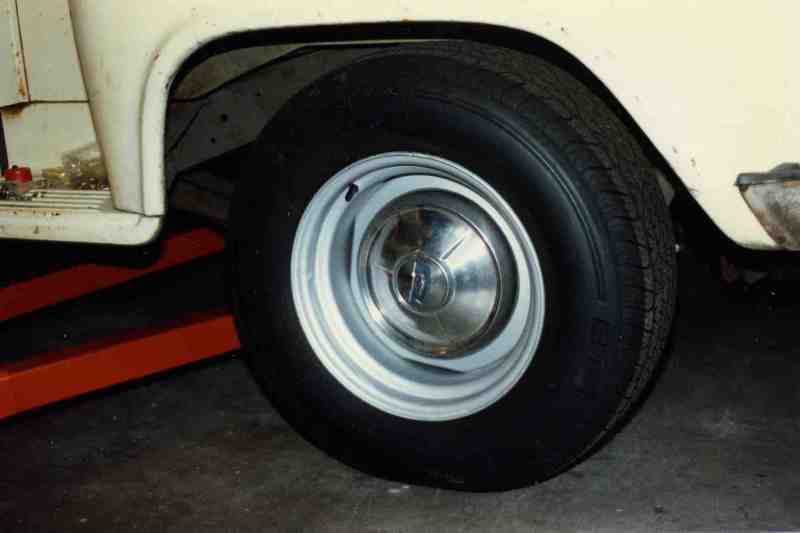
Last edited by markeb01; 07-24-2013 at 12:26 AM. |
|
|

|
|
|
#2 |
|
Senior Enthusiast
Join Date: Feb 2007
Location: Spokane Valley, WA
Posts: 8,356
|
Re: Markeb01 Build Thread
Bumper guards were the first accessory purchase. They were new old stock from Golden State Pickup Parts in the original box (including mounting template and instructions). In the first photo they havenít been bolted in place yet.
 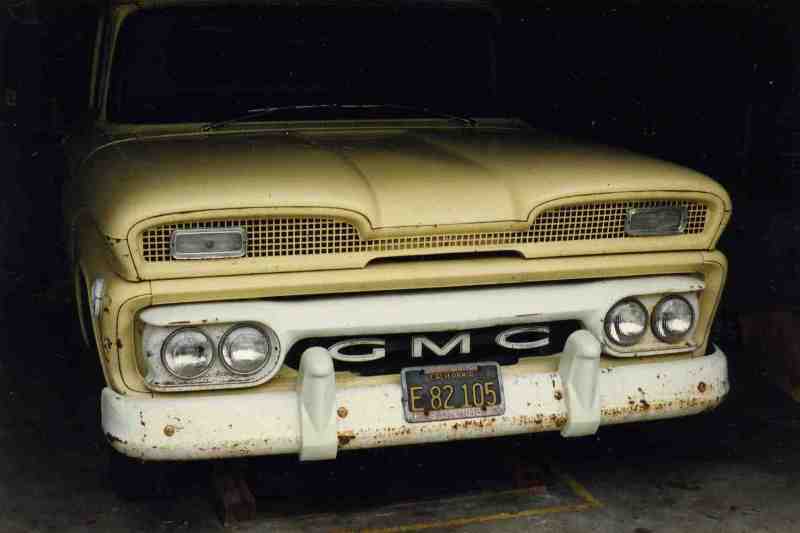 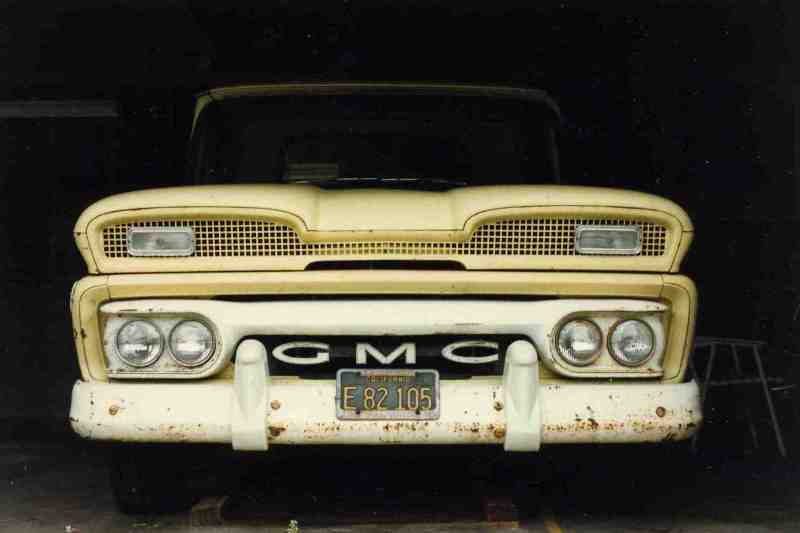 And this is what the interior looked like. Bare bones and starting to deteriorate, although the seat cover was almost mint except for some broken fabric on the driver seat area: 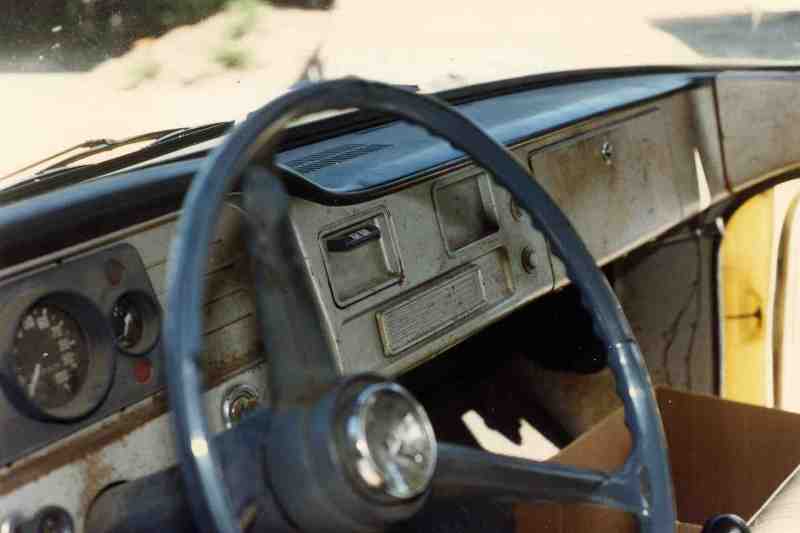 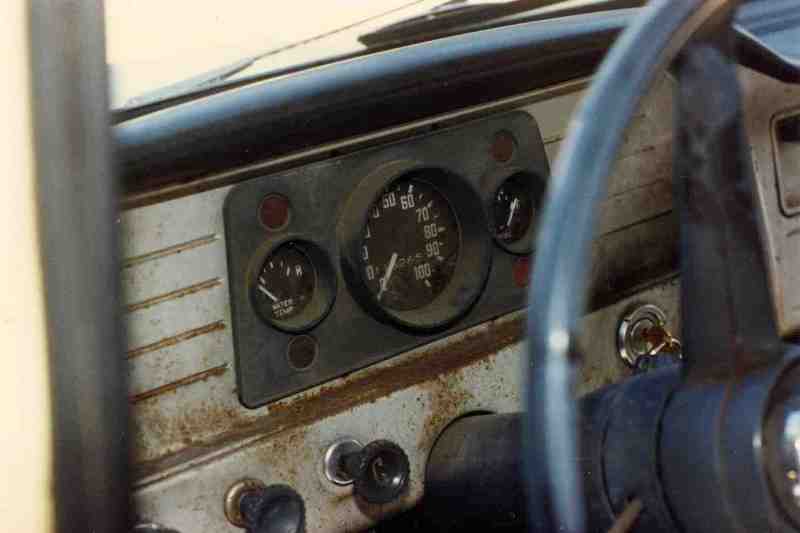  The original 305 V6 ran fairly well on 5 cylinders. It turned out to have cracked valves in one cylinder. I briefly thought about keeping the truck stock and rebuilding the V6, but a brand new crate 350 was less than half the cost, and I really wanted a hot rod. 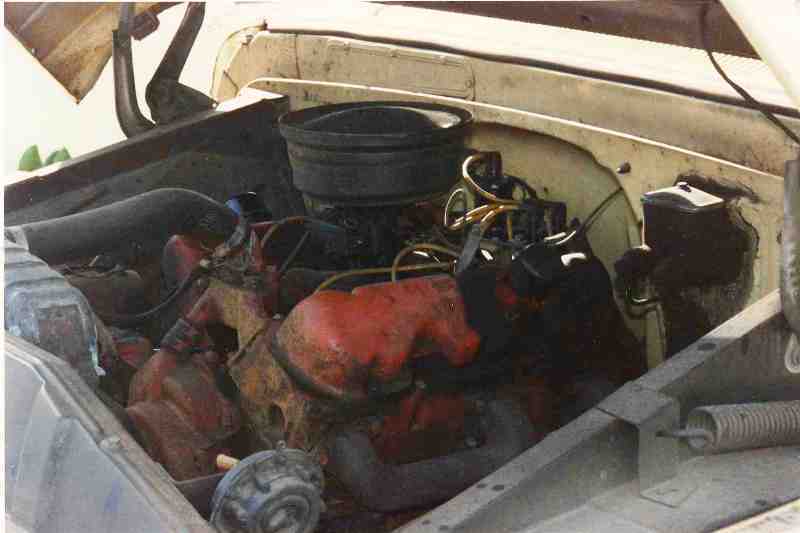 Itís amazing how big this engine is. Check out the dimple in the firewall next to the valve cover, compared to the clearance with the small block Chevy a few photos down.  The engine was so undesirable at the time I couldnít even give it away. It had to be disassembled into components to break up the weight enough to take it to the dumps. This is a shot of the bellhousing after the transmission was removed to accommodate pulling the engine: 
|
|
|

|
|
|
#3 |
|
Senior Enthusiast
Join Date: Feb 2007
Location: Spokane Valley, WA
Posts: 8,356
|
Re: Markeb01 Build Thread
I’ve detailed the engine swap in another thread so I won’t duplicate all that stuff here:
http://67-72chevytrucks.com/vboard/s...d.php?t=369663 Instead these are just a few before and after shots showing the before, clean up, and 350 crate motor install: Passenger side before and after: 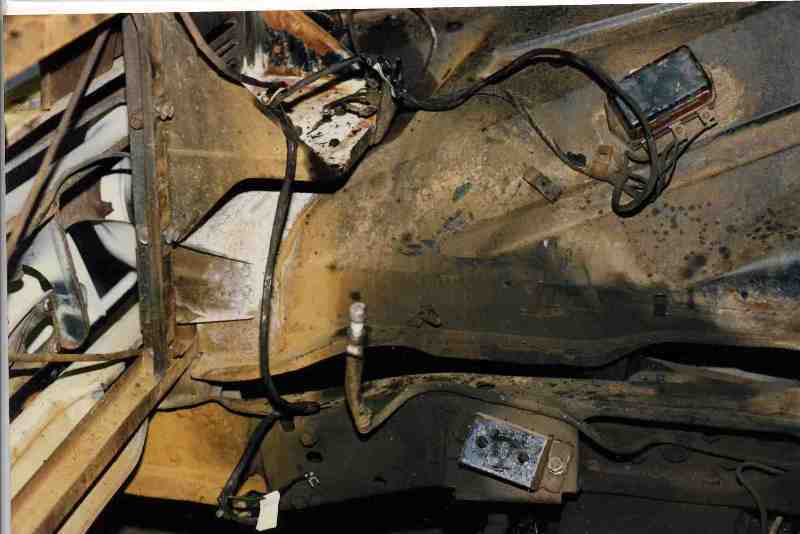 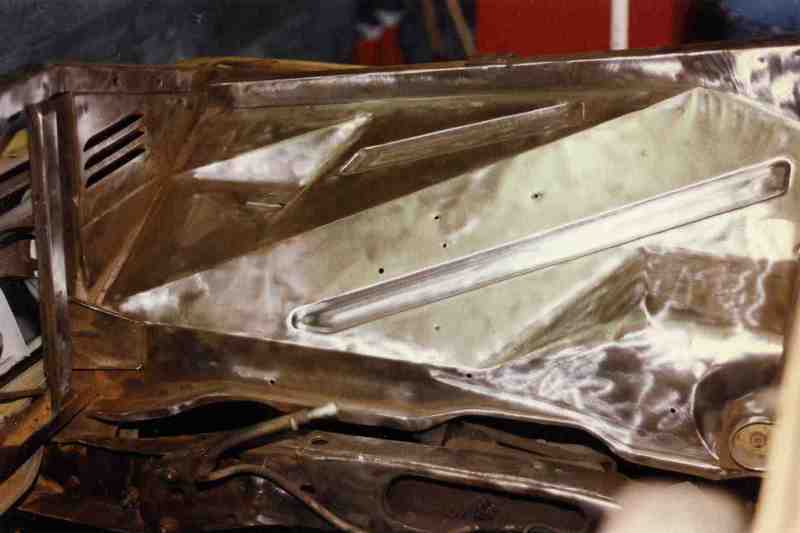 Driver side: 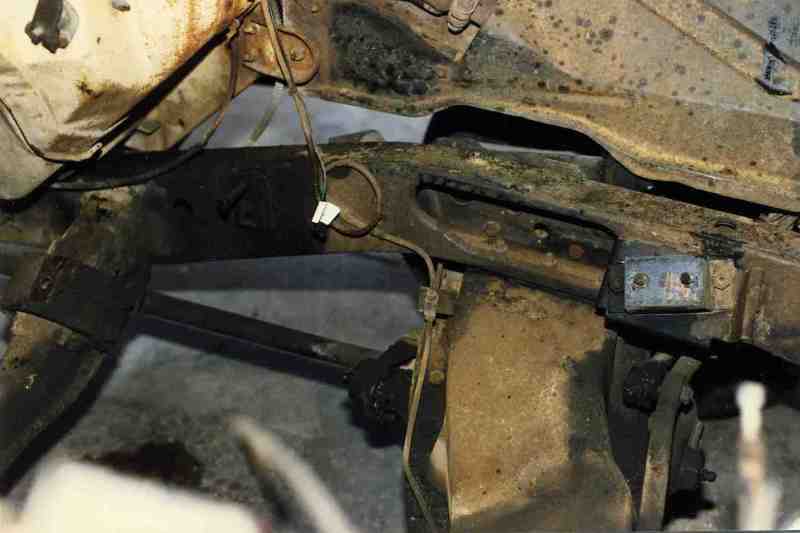 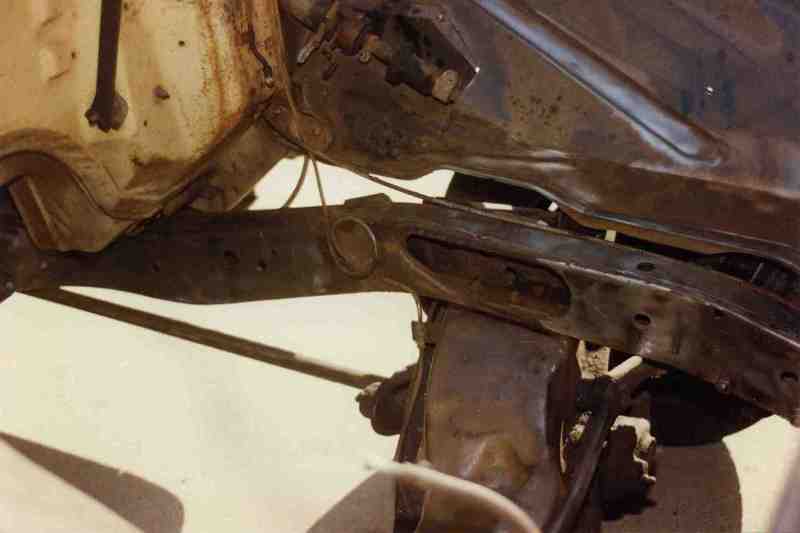 Transmission crossmembers:    And here the new Targetmaster 350 is receiving a Summers Brothers gear drive: 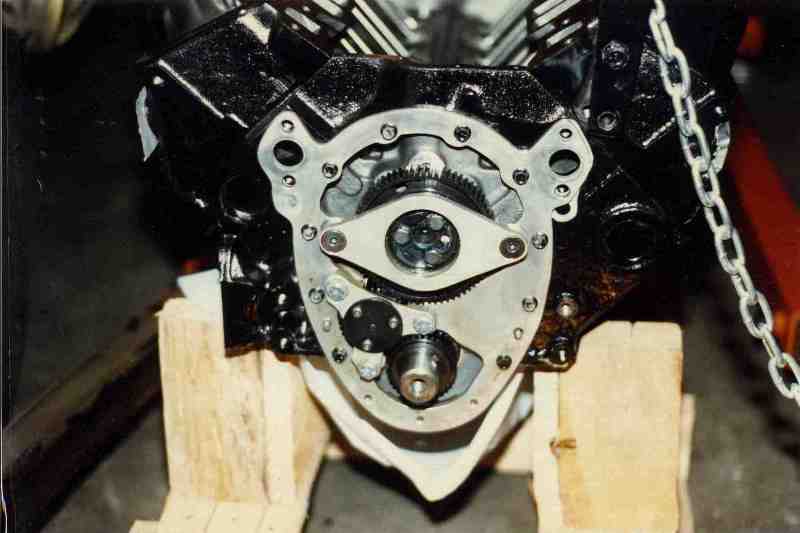 And sitting on the new engine mounts: 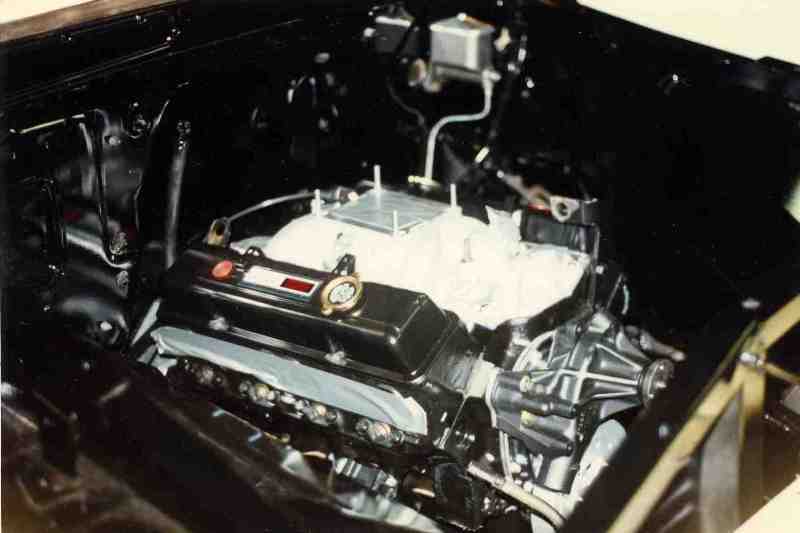 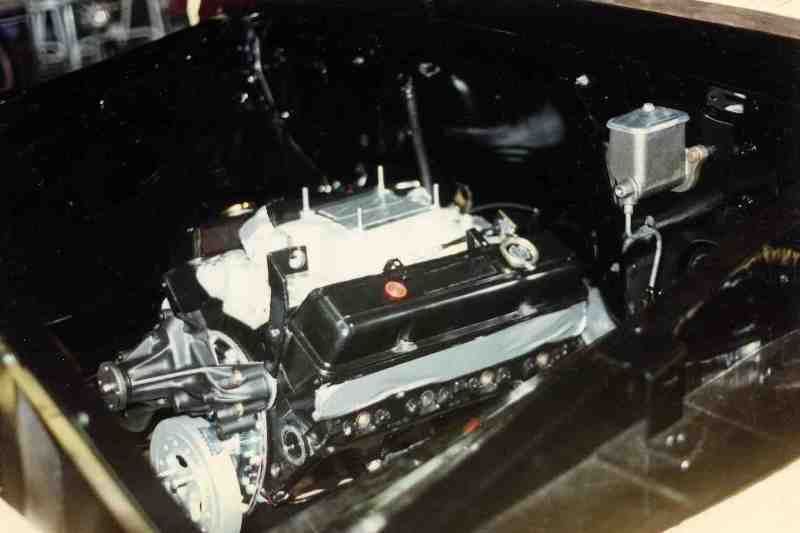
Last edited by markeb01; 01-07-2013 at 12:40 AM. |
|
|

|
|
|
#4 |
|
Senior Enthusiast
Join Date: Feb 2007
Location: Spokane Valley, WA
Posts: 8,356
|
Re: Markeb01 Build Thread
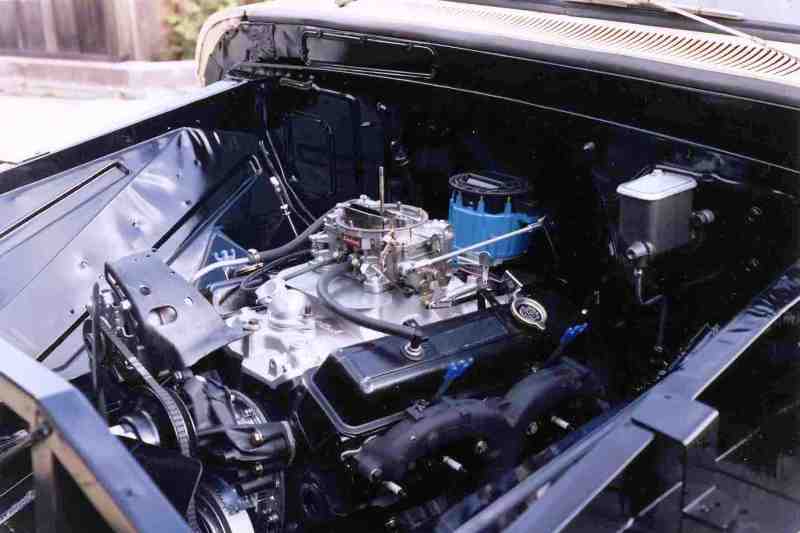
And here is it partially assembled. At the time I was just trying to make it look nice, but didnít really have a theme or direction:
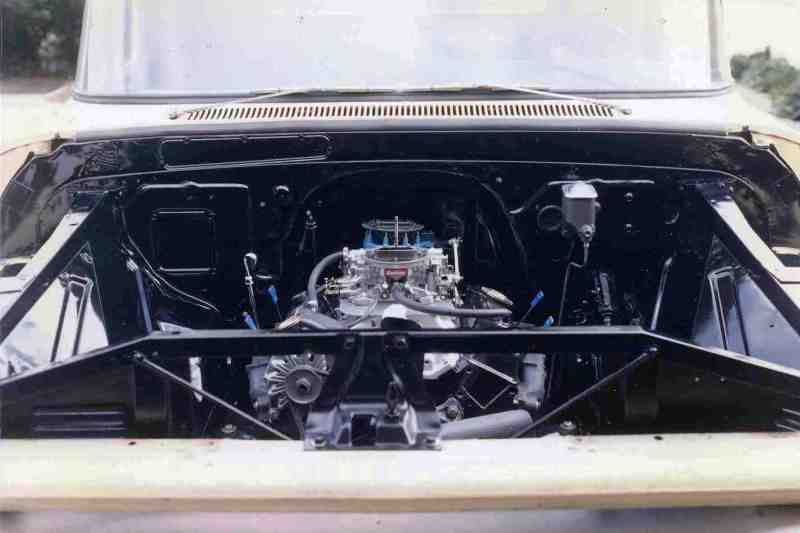 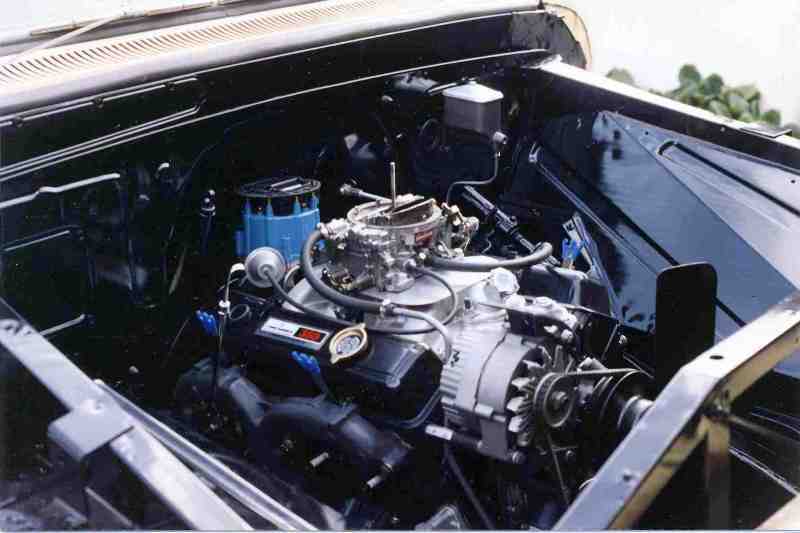 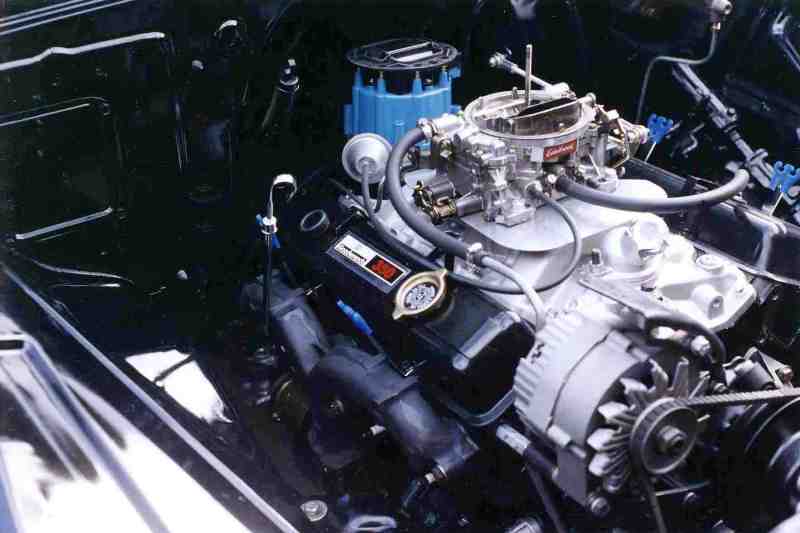  Just about ready to start her up: 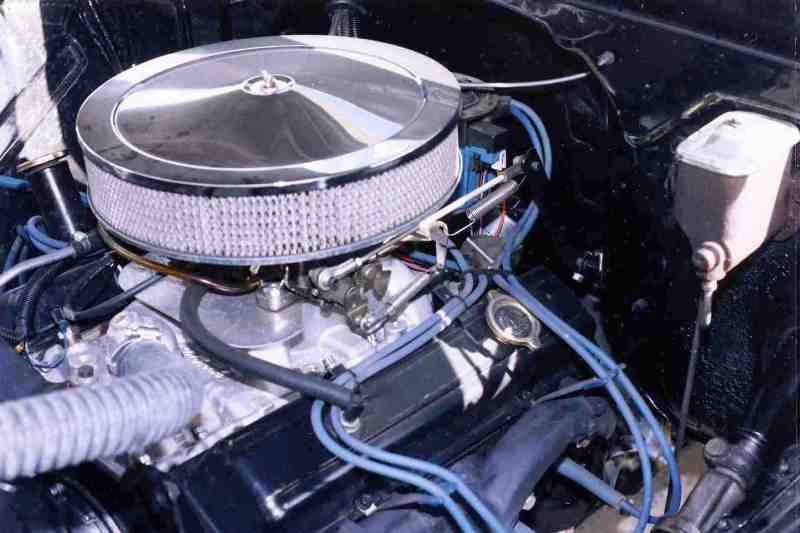 Hereís the Turbo 350 with and without the Lokar shifter. I bought this instead of a Gennie shifter which I preferred because at the time only the Lokar could be mounted forward through the original shifter hole. The rattle drove me insane and the grease froze up in the handle during the winter rendering the truck inoperable. By then Gennie shifter made an adjustable mount so the Lokar was pulled and given away. 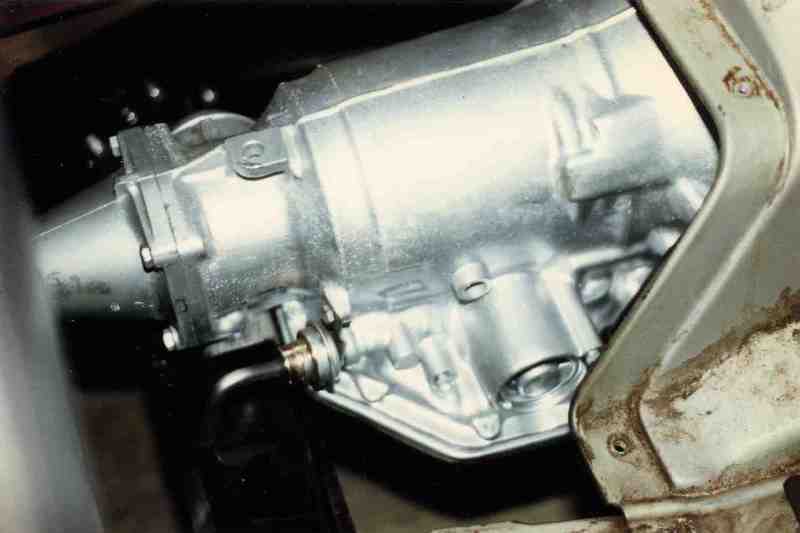 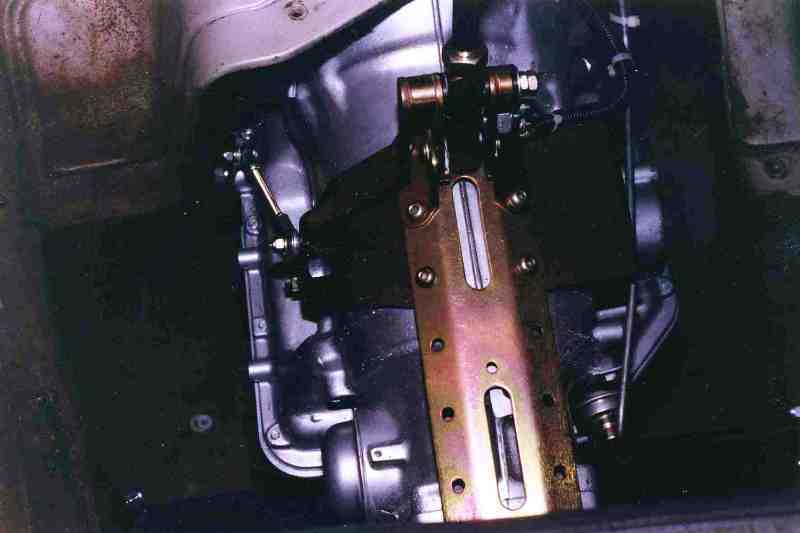 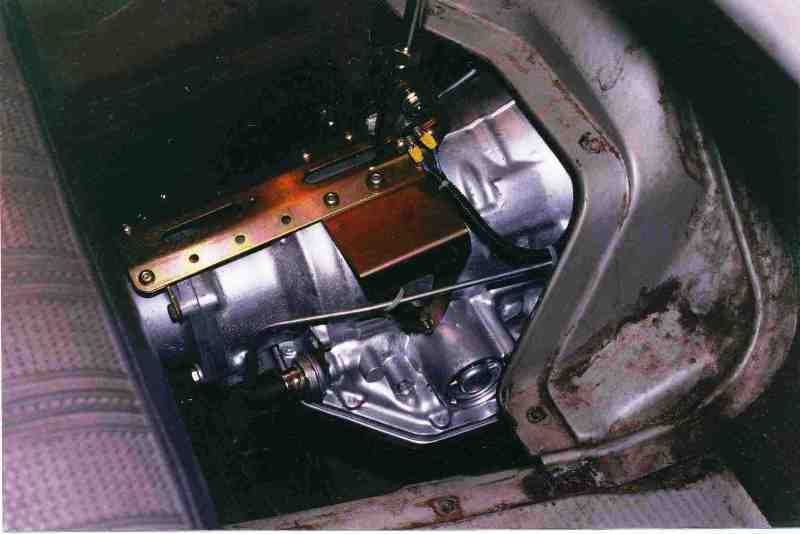 This is the only shot I took of the power steering installation using the REZ adapter kit: 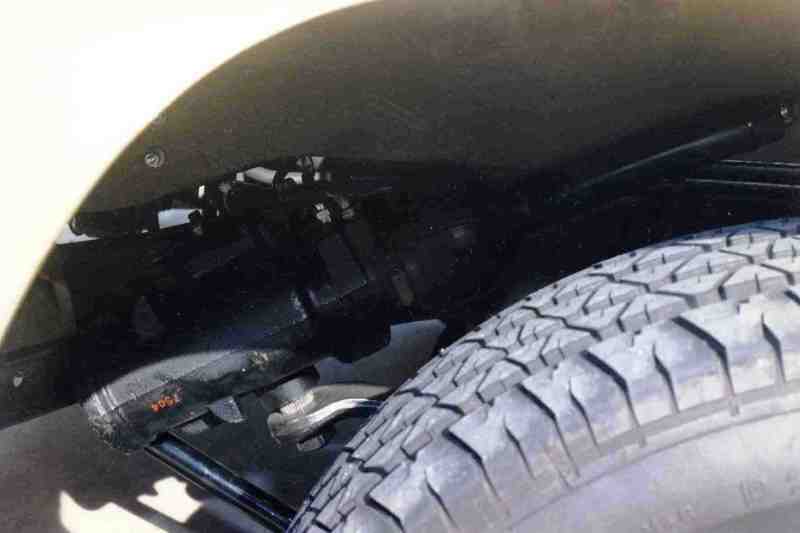
|
|
|

|
|
|
#5 | |
|
But Found Her 25yrs Later!
Join Date: Oct 2010
Location: Oregon City, Oregon
Posts: 10,528
|
Re: Markeb01 Build Thread
Quote:
You surely have plenty of room to spare behind the HEI in your V8. My V8 HEI is right up against the firewall on my 66 that had the I6 292.
__________________
I lost my 65 - Found it 25 years later: http://67-72chevytrucks.com/vboard/s...d.php?t=426650 66 C20 Service Truck: http://67-72chevytrucks.com/vboard/s...d.php?t=428035 Last edited by LostMy65; 02-03-2011 at 03:38 AM. |
|
|
|

|
|
|
#6 |
|
Senior Enthusiast
Join Date: Feb 2007
Location: Spokane Valley, WA
Posts: 8,356
|
Re: Markeb01 Build Thread
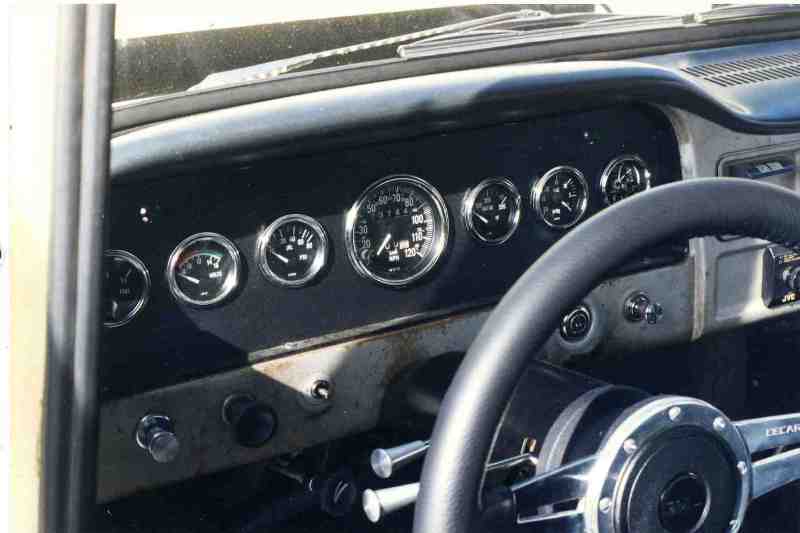
This was the last upgrade completed in California, the first of several gauge panels. I soon tired of the boring appearance:
 This became the new garage for our first year after moving to North Idaho: 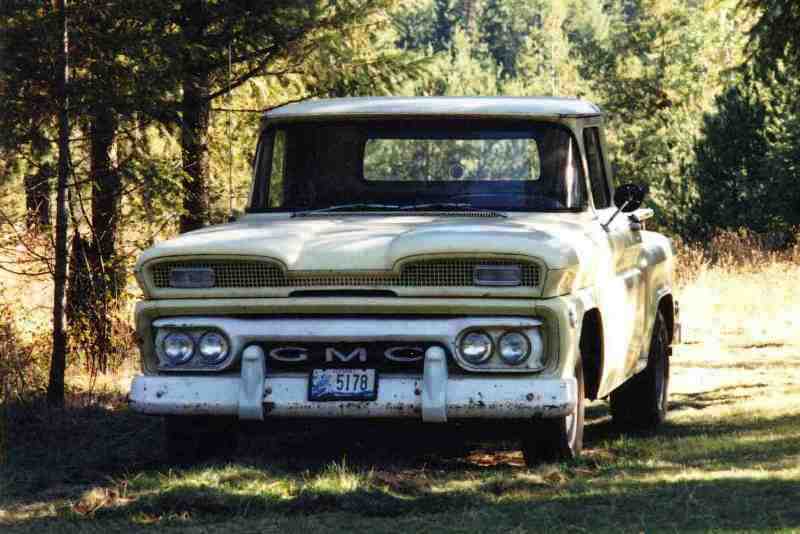 And this was our first Idaho winter. The original paint didn’t take too kindly to the blue tarp, moisture and frigid temperatures. The 2nd picture is after being dug out in the spring: 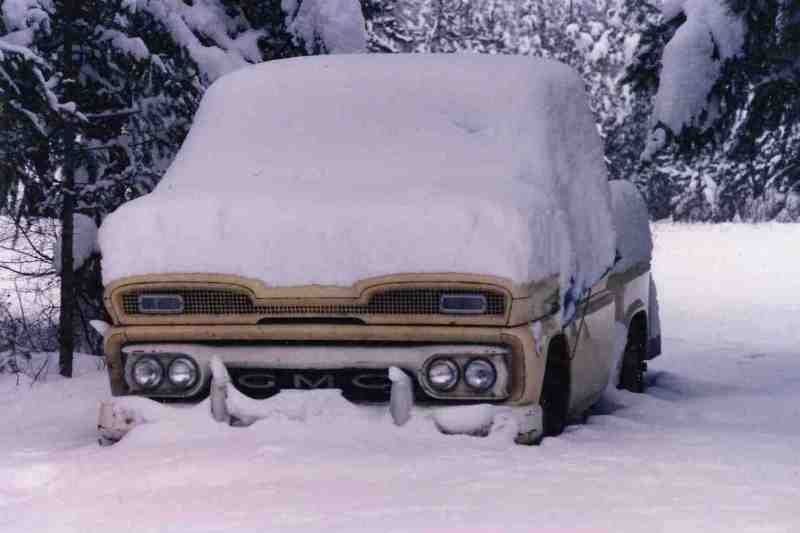 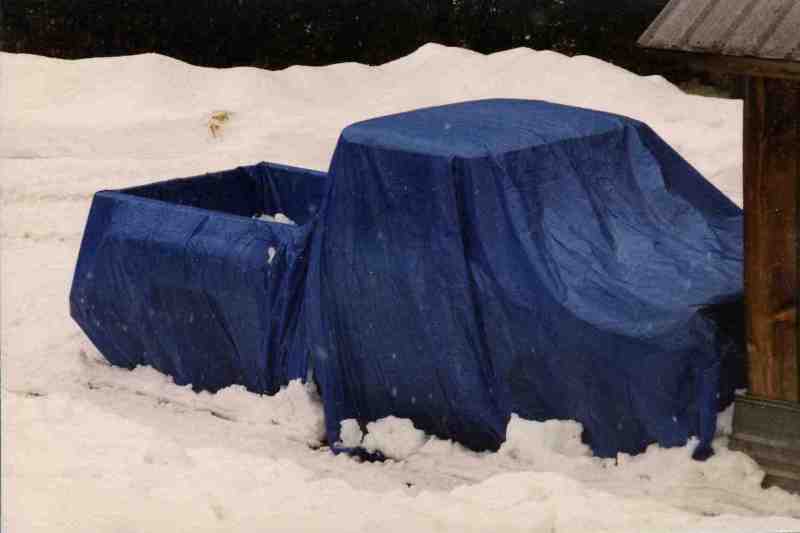 Here’s the truck wearing snow tires. It doesn’t show up too well in this photo, but the truck broke out in rust measles all over: 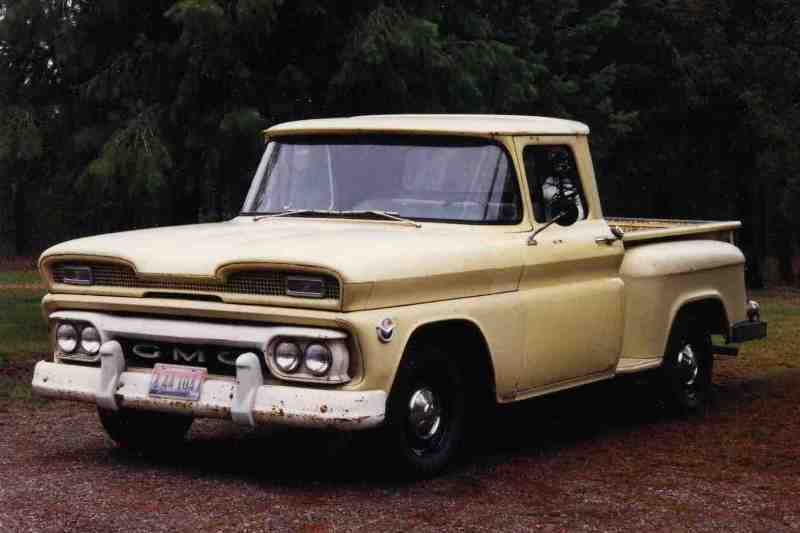 About this time I decided it was time to swap out the 3.90 Dana 44 rear axle for a 3.08. Not much to see except for new paint on the valve cover thin type rear axle cover. Chronic leakage caused me to seek and find a heavy steel chrome replacement cover. 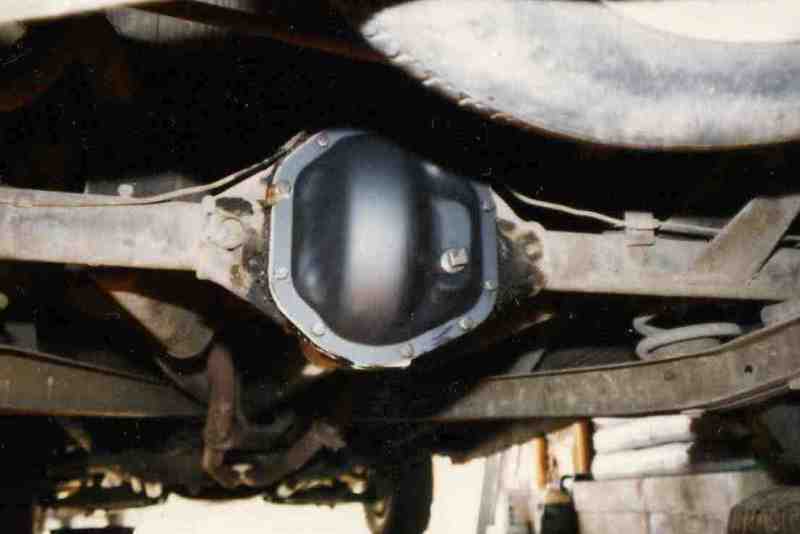 The front suspension swap was up next, and is detailed in another thread: http://67-72chevytrucks.com/vboard/s...d.php?t=366828 Here’s what the truck looked like going through the transition. The installation took almost a month, because the temperature ranged from 10 below zero to just under 20 degrees above zero the whole time, limiting work periods to less than 30 minutes at a time followed by several hours of warming up. The paint measles show up a lot more prominently in these pictures:   Better weather and on to seat cover replacement. The seat was in amazing condition for its age. 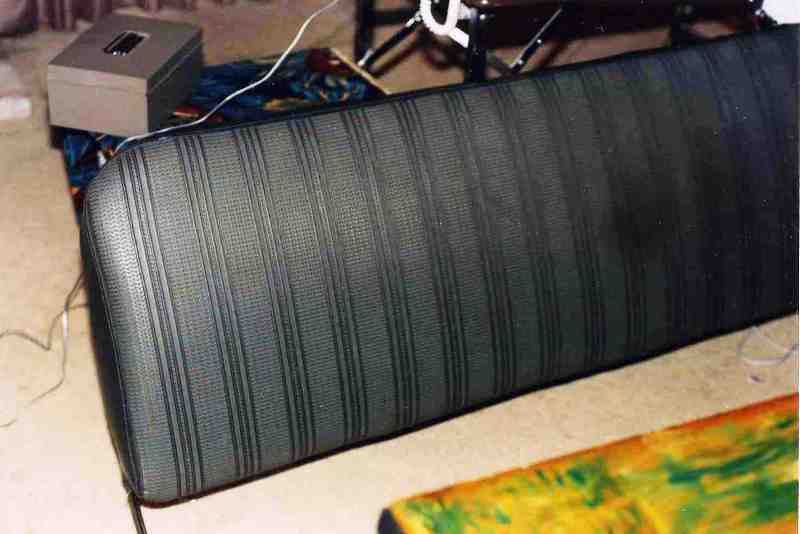 
Last edited by markeb01; 01-25-2012 at 06:37 PM. |
|
|

|
|
|
#7 |
|
But Found Her 25yrs Later!
Join Date: Oct 2010
Location: Oregon City, Oregon
Posts: 10,528
|
Re: Markeb01 Build Thread
I'll delete this post, so I don't mess up your consecutive posts

__________________
I lost my 65 - Found it 25 years later: http://67-72chevytrucks.com/vboard/s...d.php?t=426650 66 C20 Service Truck: http://67-72chevytrucks.com/vboard/s...d.php?t=428035 |
|
|

|
|
|
#8 |
|
Senior Enthusiast
Join Date: Feb 2007
Location: Spokane Valley, WA
Posts: 8,356
|
Re: Markeb01 Build Thread
|
|
|

|
|
|
#9 |
|
Senior Enthusiast
Join Date: Feb 2007
Location: Spokane Valley, WA
Posts: 8,356
|
Re: Markeb01 Build Thread
The upgrade upholstery came from Seatz. http://www.seatzmfg.com/seatz/index.htm It was very well made with the foam sewn in, and fit perfectly. It looks exactly the same today, now residing in my son’s truck.
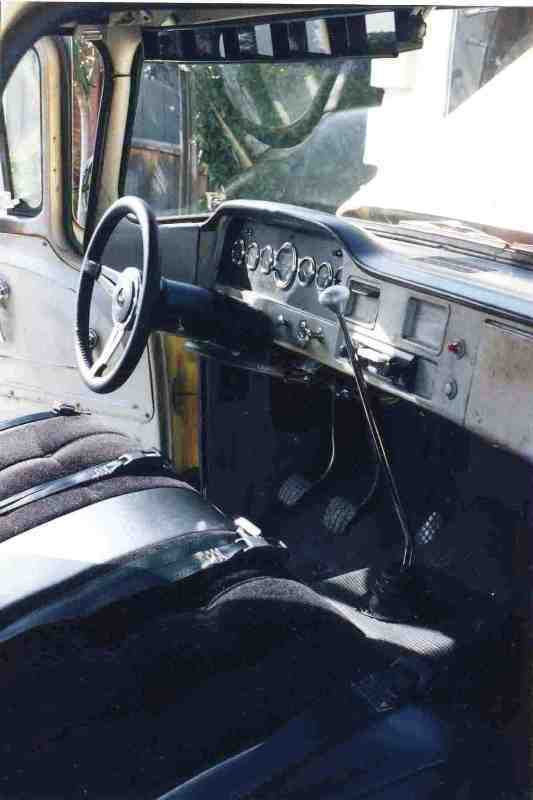  Next up was custom dash panel #2. Sitting in the driver seat the steering wheel passed through the area indicated leaving a clear view of all the gauges. Although effective, it was pretty ugly. 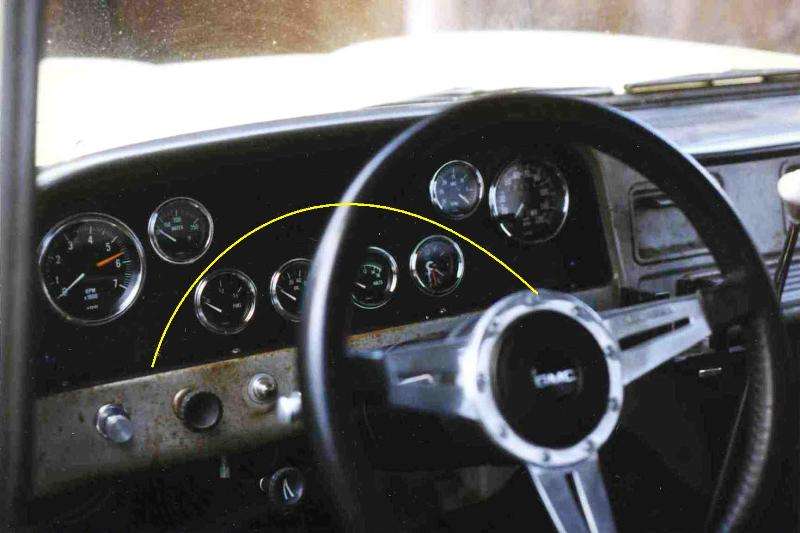 The dash has now been painted and the Lokar shifter received a black anodized knob. 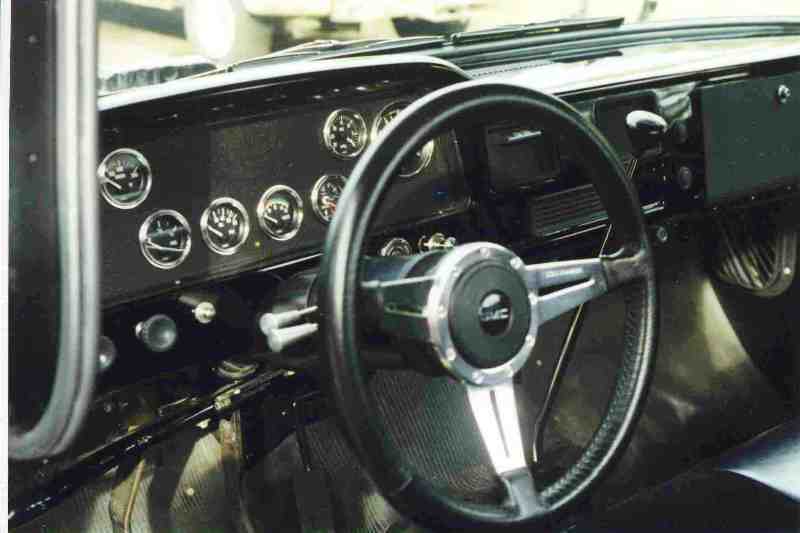 And subsequently Old Air A/C was installed, and the shifter was replaced with the Gennie short stick version. 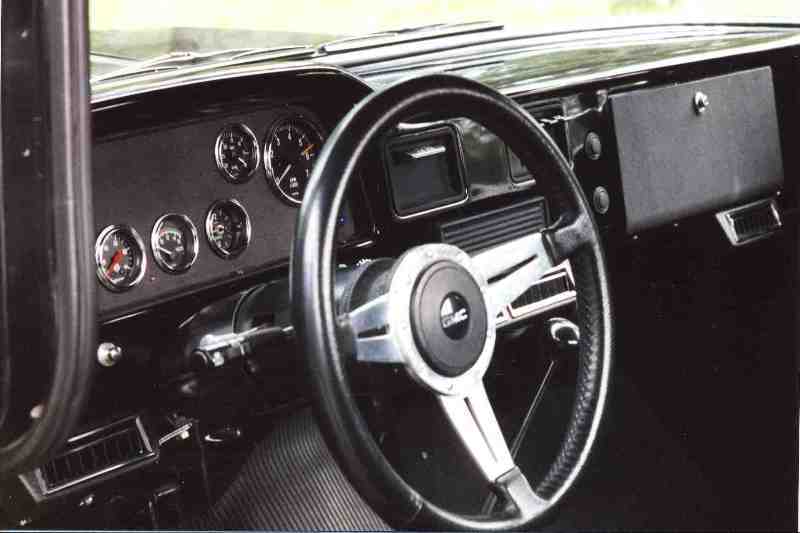 After changing the front suspension, I wanted a matching set of rally wheels. These 15x6” models went up front. Note the distance between the red stripes. 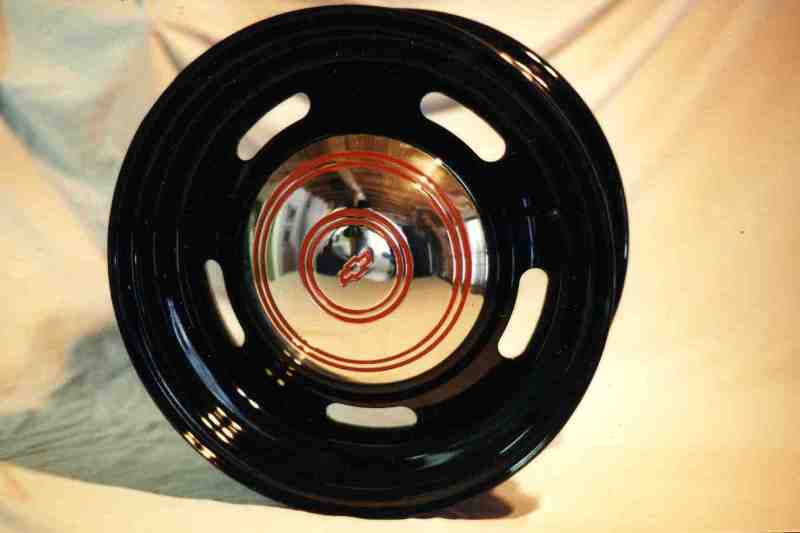 These were 15x8” 6 lug truck rally wheels. I discovered after they were purchased and powder coated that standard rally wheel caps wouldn’t fit, only one off odd ball caps offered by the wheel manufacturer would work. I thought they looked stupid, and didn’t last very long before they were sold. The difference in spacing on the stripes, and curvature of the cap are obvious. 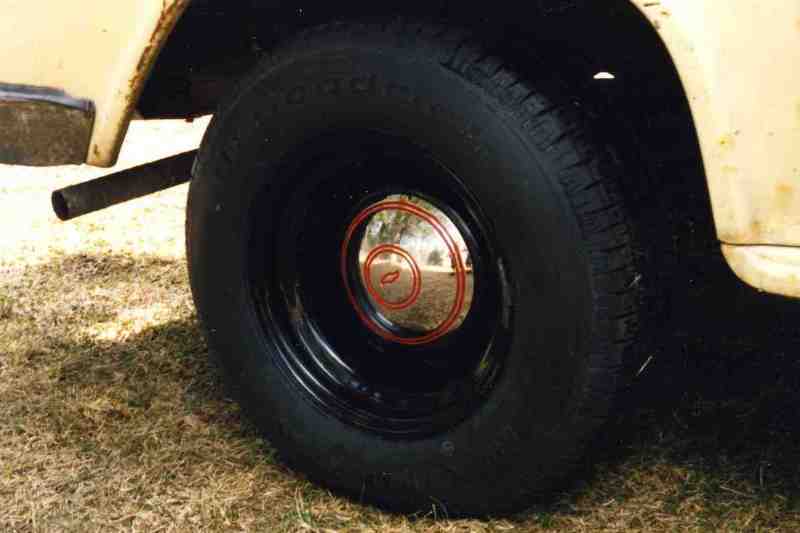 With rally wheels in place, deterioration of the paint was rapidly accelerating, and a new paint job became a priority to prevent more rust damage. 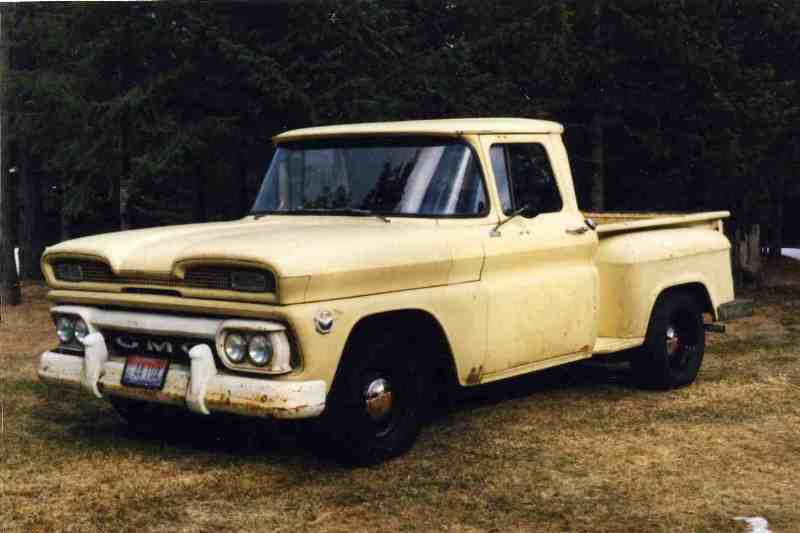 Disassembly begins. The body work/paint project would take almost a year to complete. 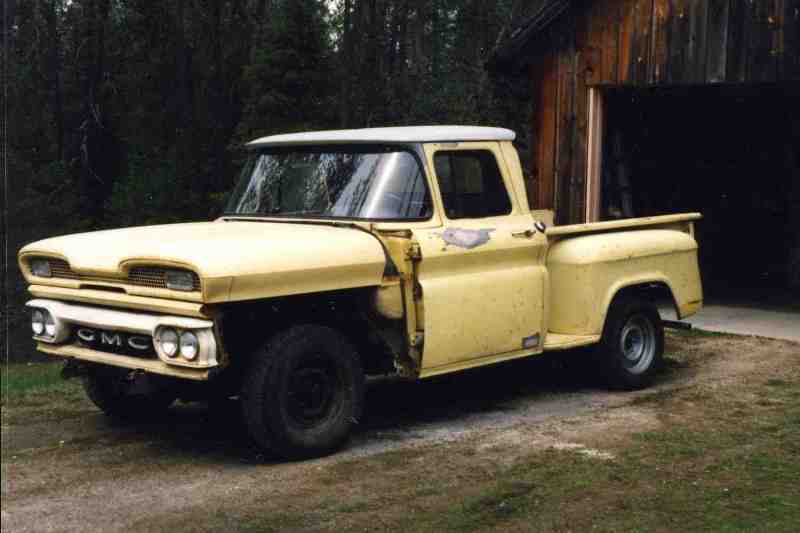
Last edited by markeb01; 01-07-2013 at 12:43 AM. |
|
|

|
|
|
#10 |
|
Senior Enthusiast
Join Date: Feb 2007
Location: Spokane Valley, WA
Posts: 8,356
|
Re: Markeb01 Build Thread
More disassembly photos:
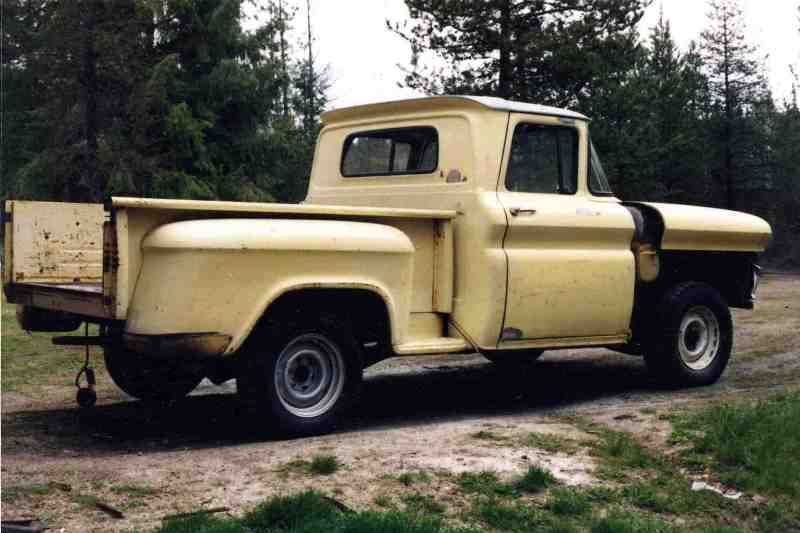 The bed had become a little impractical for hauling anything small. Since there was just the two of us to move it around, I made a dolly out of 2x4ís and industrial casters. The bed was jacked up and the truck driven out from under it. Then legs were bolted in place and the complete bed could be rolled in and out of the garage with relative ease. 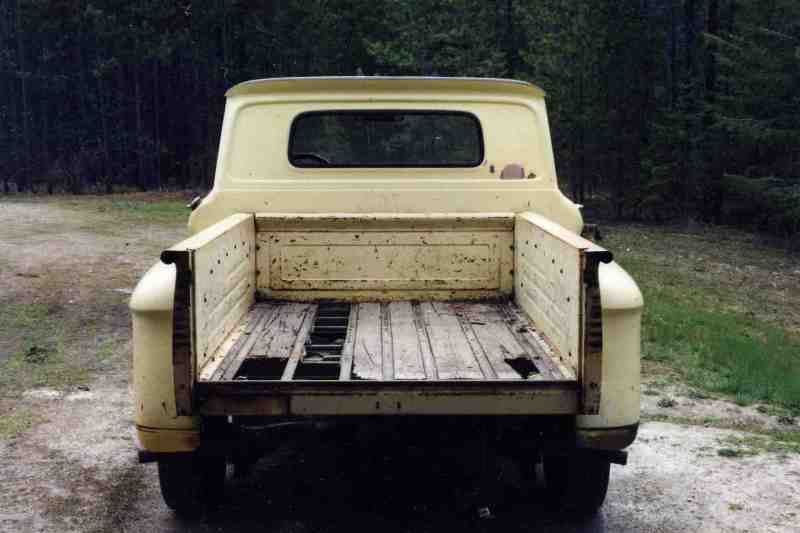 And hereís what the back half of a 1960 GMC frame looks like for anyone with interest: 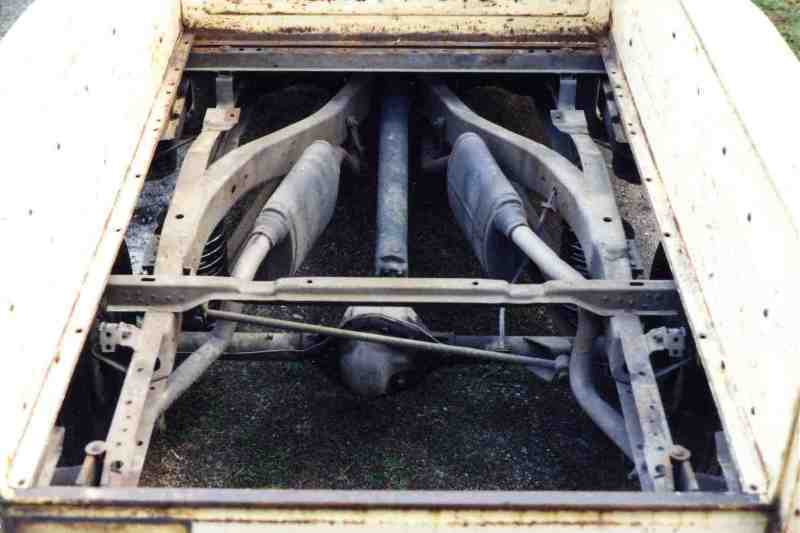  All of the dings and dents are pretty evident at this stage: 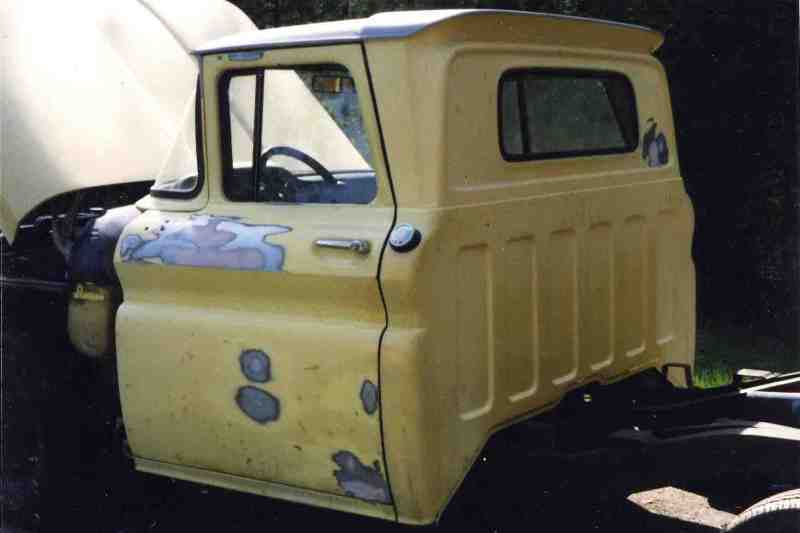 After sandbagging a chunk of the old front fender into a body matching patch, it was permanently installed in the body using JB Weld, eliminating the gas filler hole. 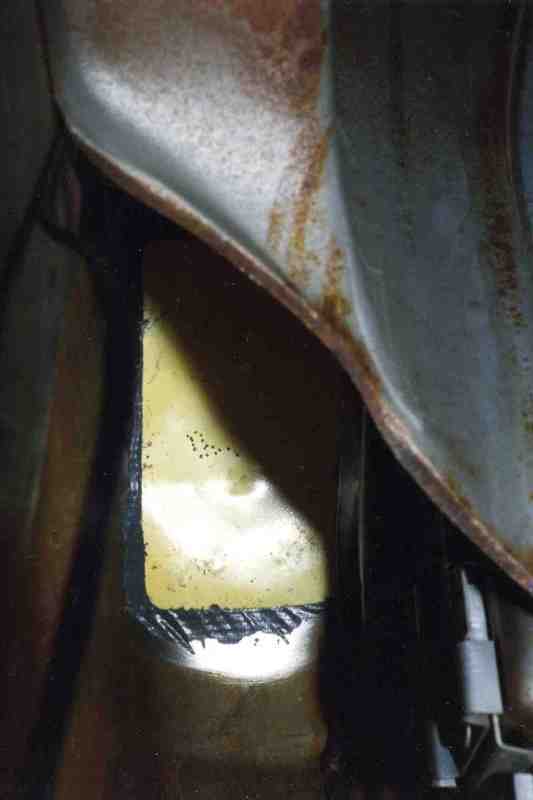 And hereís how it looked in primer:  All the body work had been completed by this stage. Any defects showing are in the crappy old film pictures, not on the truck.  And here is my #1 squeeze and hot rod assistant. Since I have chronic back and knee problems, she actually prepped and painted the entire chassis for me. 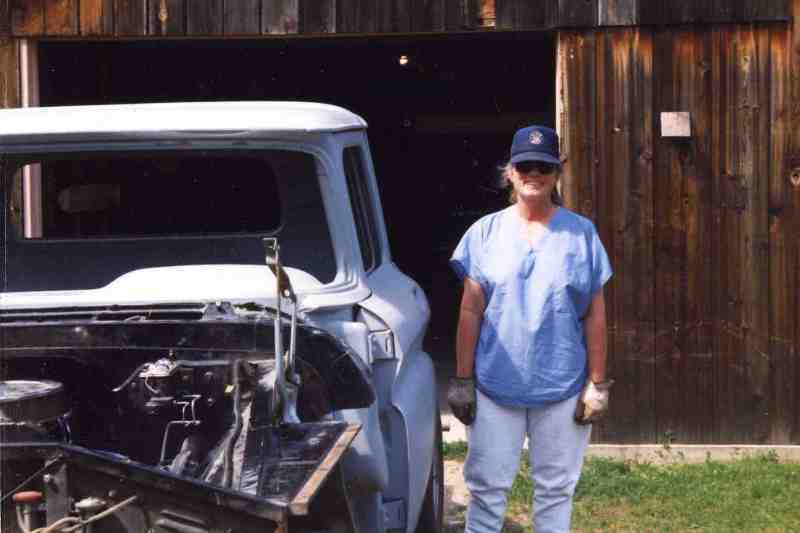 And finally all the hard work starts coming together. The gas tank filler turned out looking factory original, and without gaskets the doors aligned perfectly: 
|
|
|

|
|
|
#11 | |
|
But Found Her 25yrs Later!
Join Date: Oct 2010
Location: Oregon City, Oregon
Posts: 10,528
|
Re: Markeb01 Build Thread
Quote:
I found a bunch more pics of my 65 to 62 frame build that I did back in 84. I'll check to see if I can see those frame channels on my 62 frame.
__________________
I lost my 65 - Found it 25 years later: http://67-72chevytrucks.com/vboard/s...d.php?t=426650 66 C20 Service Truck: http://67-72chevytrucks.com/vboard/s...d.php?t=428035 |
|
|
|

|
|
|
#12 | |
|
Senior Enthusiast
Join Date: Feb 2007
Location: Spokane Valley, WA
Posts: 8,356
|
Re: Markeb01 Build Thread
Quote:
|
|
|
|

|
|
|
#13 |
|
Registered User
Join Date: Oct 2012
Location: Fort Worth,TX.
Posts: 13
|
Re: Markeb01 Build Thread
So lucky to have a Assistant...mine just watches and drinks wine. I can't tell what you did with relocation of gas filler but the Jb weld gives me ideas for mine!
|
|
|

|
|
|
#14 |
|
Registered User
Join Date: Apr 2012
Location: Cambridge, Ontario, Canada
Posts: 1,771
|
Re: Markeb01 Build Thread
I am in tears laughing, now that is funny... I have one just like that actually...
__________________
Craigerrr My build thread, CRGRS 66 Winter Build: http://67-72chevytrucks.com/vboard/s...09#post5638709 |
|
|

|
|
|
#15 |
|
Senior Enthusiast
Join Date: Feb 2007
Location: Spokane Valley, WA
Posts: 8,356
|
Re: Markeb01 Build Thread
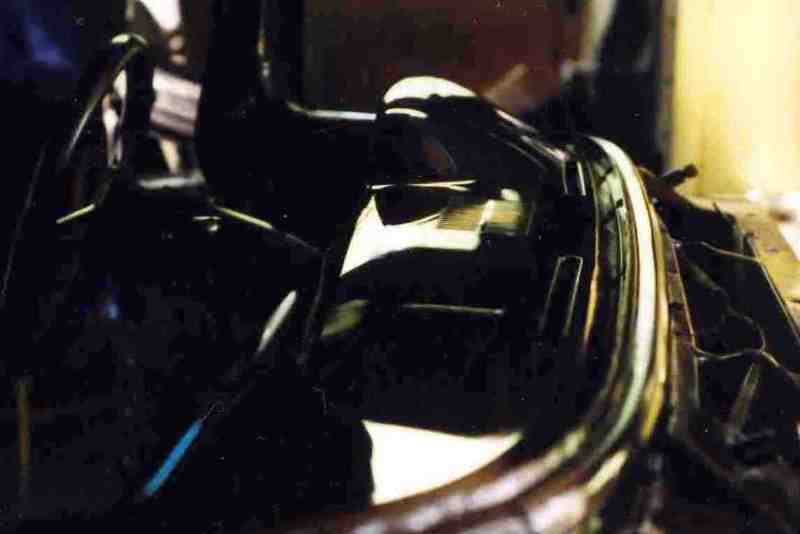
The entire cab inside and out was painted the same day. After unmasking everything the truck was rolled outside only to discover the paint on the dash was too thin and needed more coats. Many additional hours of masking ensued before the problem was corrected.
 With the fuel fill hole in the body eliminated a new tank was next up on the priority list. Since the truck was going to be a long distance commuter I wanted the biggest tank that would fit in the space without hanging down too far. The dimensions resulted in a 33 gallon tank. Rock Valley built it to spec with very heavy end walls and built in mounting brackets, eliminating the need for straps.  This photo shows the old exhaust system exited directly into the tank. The muffler was cut off and a pair of $10 glasspacks were clamped in place for the ride to a local muffler shop for new pipes (not shown).  The gas tank mounting brackets can be seen in this shot:  Moving under its own power again, back outside for a photo update: 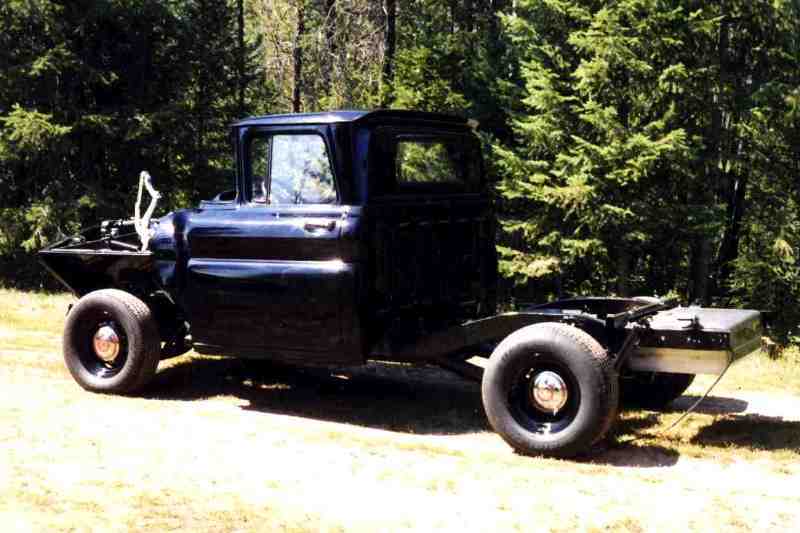 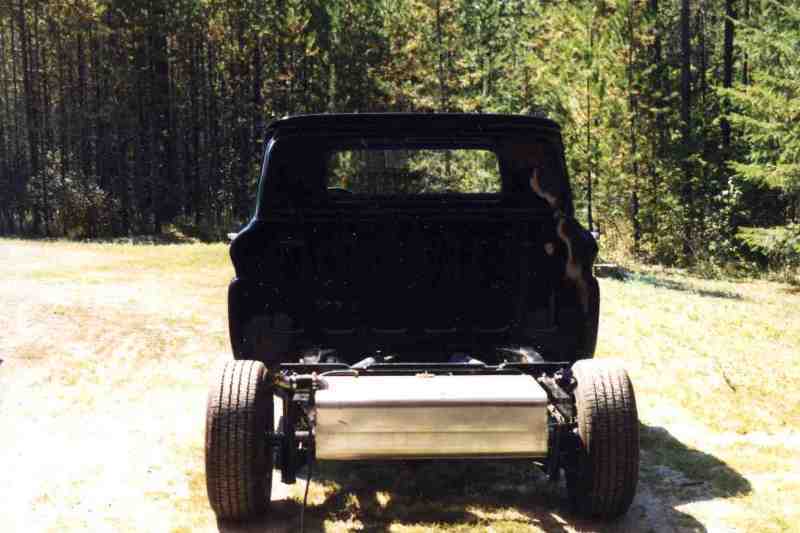 Now that it was self propelled again, the glass guys came out and installed a new windshield. I attempted to reinstall the damaged original, and both cracked the glass and failed to get it mounted. This is the only vehicle in which I was not capable of installing the windshield. It took 3 guys to get it done.  This shot shows that at one point the truck was equipped with both a deluxe heater and a radio.  Some of these shots are obviously out of sequence because the next photos still show the Lokar shifter in place. 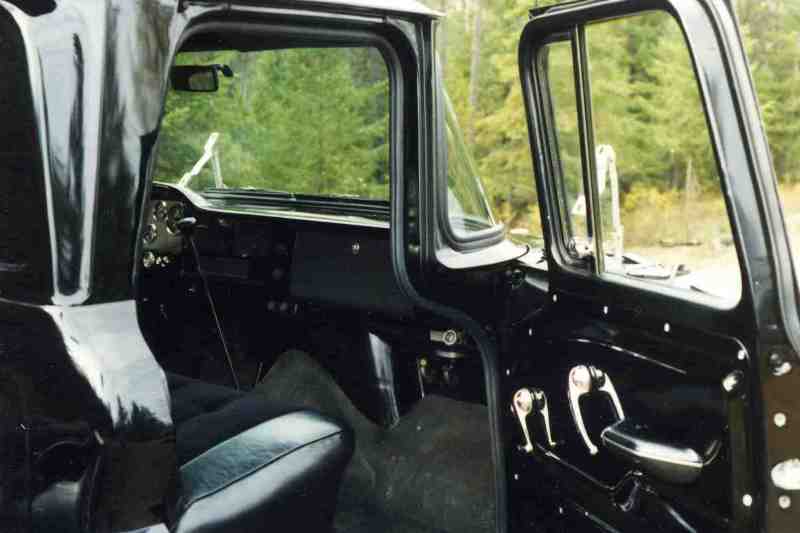 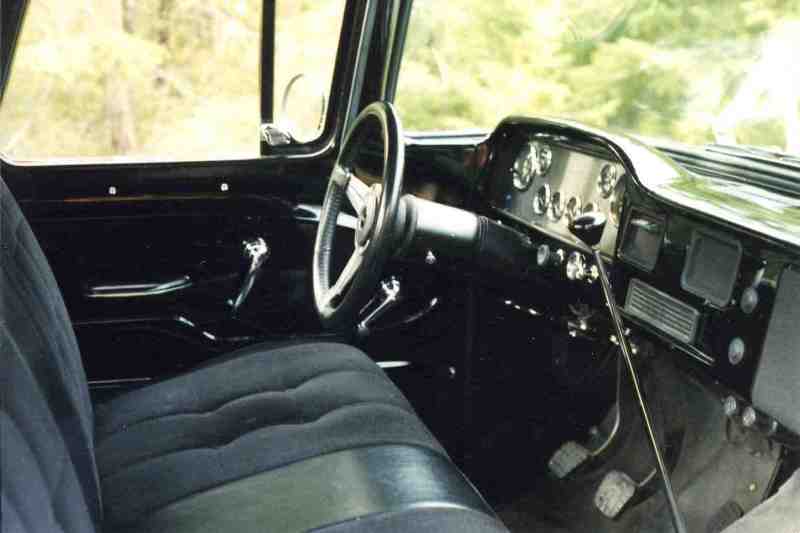
Last edited by markeb01; 03-09-2012 at 12:34 PM. |
|
|

|
|
|
#16 |
|
But Found Her 25yrs Later!
Join Date: Oct 2010
Location: Oregon City, Oregon
Posts: 10,528
|
Re: Markeb01 Build Thread
I had to go check, I don't have any pics that show that far to the back.
But searching for pics in the forums, they all seem to show it stopping the same as yours. http://67-72chevytrucks.com/vboard/s...d.php?t=325736 http://67-72chevytrucks.com/vboard/s...d.php?t=340457 Hey, it was back in 84, and my old brain probably isn't remembering correctly. Mine was most likely the same as yours.
__________________
I lost my 65 - Found it 25 years later: http://67-72chevytrucks.com/vboard/s...d.php?t=426650 66 C20 Service Truck: http://67-72chevytrucks.com/vboard/s...d.php?t=428035 Last edited by LostMy65; 02-03-2011 at 04:28 AM. |
|
|

|
|
|
#17 |
|
Resistance is Futile
Join Date: Dec 2006
Location: Mesa,Arizona
Posts: 3,520
|
Re: Markeb01 Build Thread
Nice to see all in one place, mark. I have a Gennie I need to install so I was hung up on those pics for a few minutes.......is that the Lokar mount or Gennie?
__________________
64 CHEVY PICK-UP > http://67-72chevytrucks.com/vboard/s...otrash+re-hash 64 CARRYALL >http://67-72chevytrucks.com/vboard/s...=1964+suburban 66 LB >http://67-72chevytrucks.com/vboard/s...d.php?t=427852 STRENGTH/DETERMINATION/MERCILESS/FOREVER .......posted via stationary device |
|
|

|
|
|
#18 |
|
Senior Enthusiast
Join Date: Feb 2007
Location: Spokane Valley, WA
Posts: 8,356
|
Re: Markeb01 Build Thread
The photos above are of the Lokar install. Years later when the Gennie Shifter went in, the truck was my daily driver and had to be done over the weekend. I was in such a hurry to get it back in service I didn't think to take any photos. I loved the Gennie Shifter as much as I detested the Lokar.
|
|
|

|
|
|
#19 |
|
Account Suspended
Join Date: Sep 2009
Location: High Plains of Colorado
Posts: 2,485
|
Re: Markeb01 Build Thread
Nice build thread Mark. Really cool that you and your wife have been working on it together through all the changes and upgrades.
|
|
|

|
|
|
#20 |
|
But Found Her 25yrs Later!
Join Date: Oct 2010
Location: Oregon City, Oregon
Posts: 10,528
|
Re: Markeb01 Build Thread
I think it's neat your wife got it for you as a present.
My wife rolled her eyes when I brought mine home.
__________________
I lost my 65 - Found it 25 years later: http://67-72chevytrucks.com/vboard/s...d.php?t=426650 66 C20 Service Truck: http://67-72chevytrucks.com/vboard/s...d.php?t=428035 |
|
|

|
|
|
#21 |
|
Senior Enthusiast
Join Date: Feb 2007
Location: Spokane Valley, WA
Posts: 8,356
|
Re: Markeb01 Build Thread
My wife is my best friend and a great partner. She enjoys being well taken care of and returns the support, is very adventurous and fiercely loyal. If I’m ever in a firefight she’s the one person I’d want next to me.
Here’s another upload batch: The front fenders on our truck had typical rust through in the lower rear corners, and the right front fender got clobbered near the grille by an uninsured motorist right before we left California. Since I don’t have welding skills, I bought a pair of brand new steel replacement fenders which had recently come on the market. After 3 months of waiting and numerous inquiries, they finally showed up. What a disappointment. The front seam on each fender was deformed beyond repair, and as shown in the photo below the upper rear was damaged by heavy handed, indifferent spot welding. Sadly the area was visible just below the fender extension when installed on the truck, which I didn’t realize until after everything was painted and bolted together. In order to make the fenders usable the deformed front seams were sandblasted and filled with JB Weld. After removing the original fenders, a casual glance confirmed why they all rust out. Apparently the GM marketing philosophy of designed obsolescence included self-destructing front fenders. By design, debris was encouraged to pack up in the fender brace and rust out. There is a convenient gaping hole at the top for leaves and debris to enter, shown in the first photo. The entire area is open to the channel below: 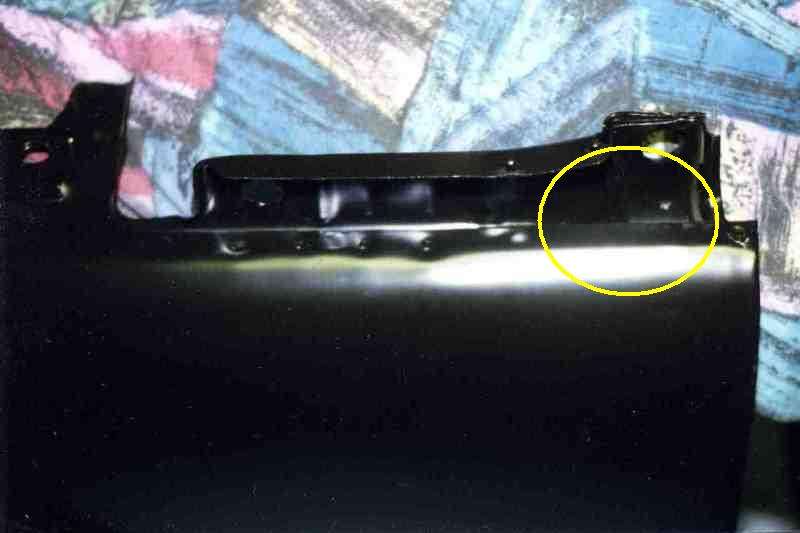 To prevent the new fenders from ending up looking like the old ones, I decided to plug up all the openings so nothing could enter the channel. First up was making a cap to block the upper opening as seen in this photo. This was sealed in place with urethane windshield adhesive. They’ve been on the truck for over 10 years and no one has ever noticed them. This plate blocks the upper entrance.  In addition to the opening at the top, the forward vertical edge of the fender brace is open, so the tire may easily pack it full of more crud thrown directly in from the tire. There is also a horizontal channel at the top of the tire, with an opening on the forward end about the size of a quarter, for yet more corrosion causing materials to easily enter. This is a really bad photo, but it’s the only one I have showing the bare fender. As indicated there are a lot of openings for crud to enter the support brace: 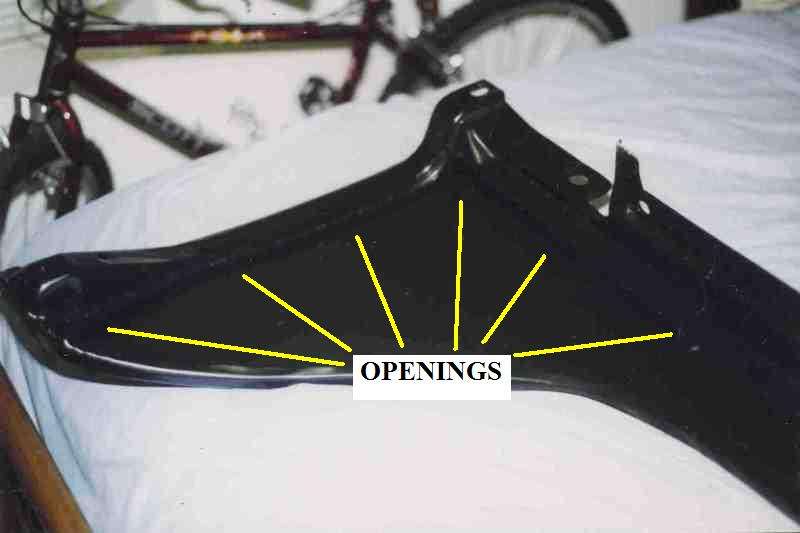 I made another filler panel, pop riveted to the horizontal channel above the tire, and a plug for the forward end of the channel (both shown in the 2nd photo). Then “everything” was sealed with either urethane windshield adhesive, or urethane seam sealer.  For a final level of protection the entire area was sprayed with 3M Body Schutz. The result is a fender that allows moisture out at the bottom, and no entrance anywhere for debris to get in to begin with. 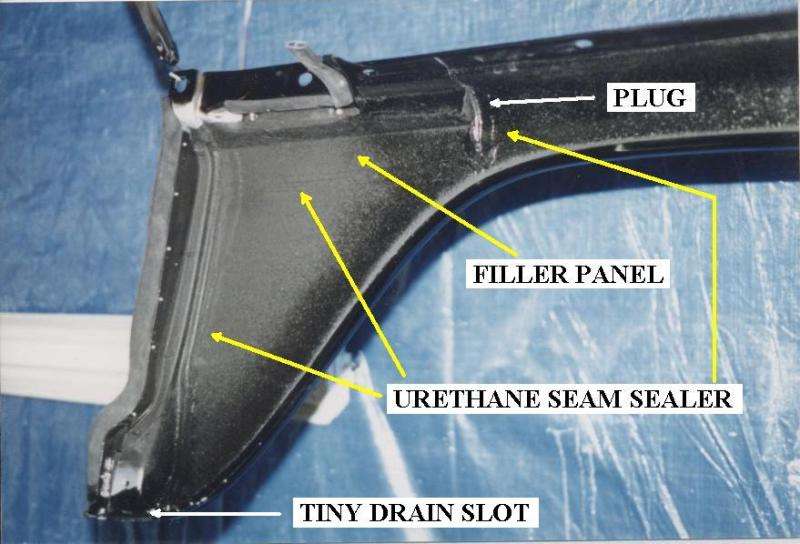 For anyone mounting new fenders or adding patch panels, I would highly recommend taking a couple of extra steps to seal the openings to prevent repeating the process a few years in the future. And finally here’s a shot of the front of the driver side fender after filling the seam: 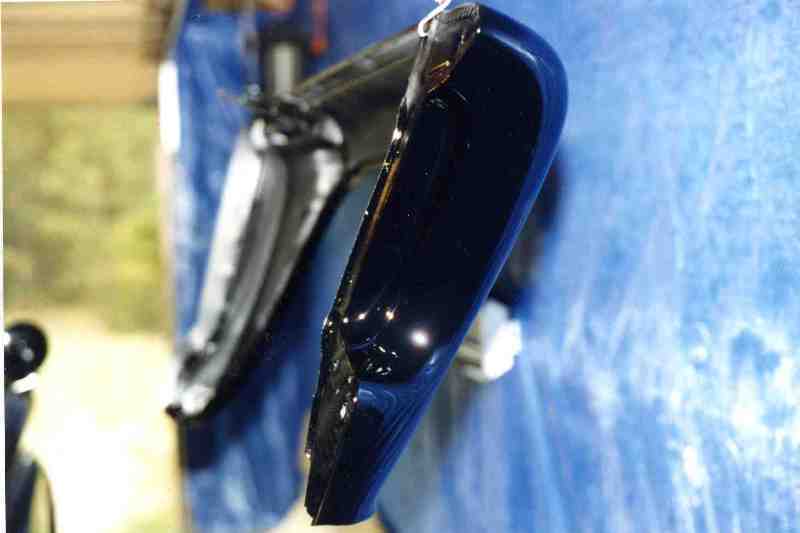 A smaller project was coming up with a clever solution for routing speaker wires into the doors. These are shots of the passenger door with a hinged piece of steel tubing, formed in a shape to move freely with the door carrying the speaker wires safety from the cab to the door speakers. The tubing slid on a grommet mounted on the door, with another grommet permanently mounted to the tubing to act as a seal when the door was closed. It was a novel solution, but over time it either rattled or squeaked (I can’t remember which) and was removed. About this time I swapped the radio into my wife’s truck and never replaced it. 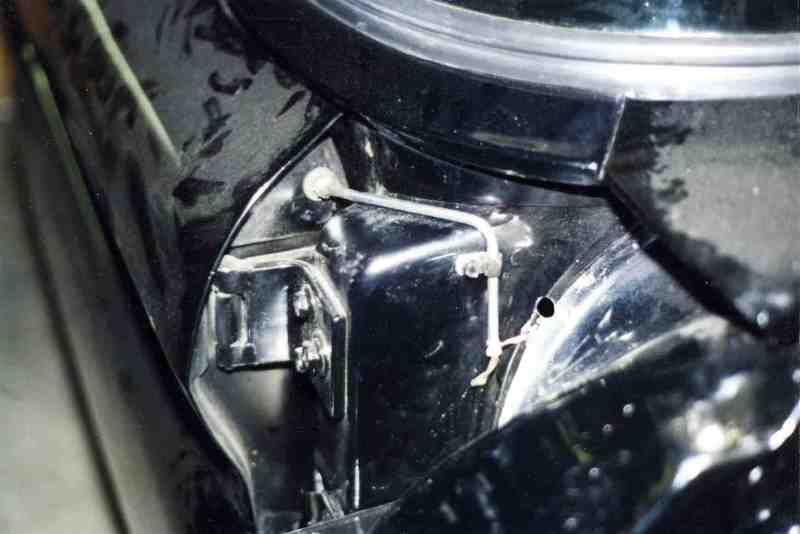 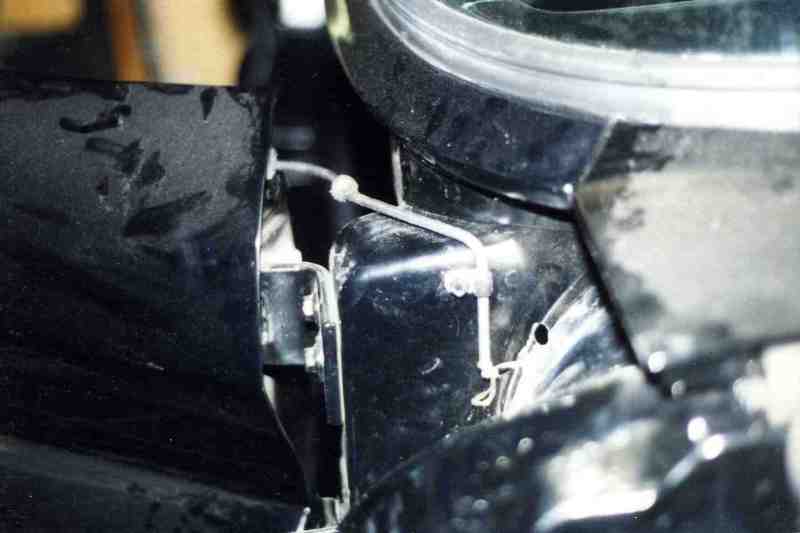
Last edited by markeb01; 03-09-2012 at 12:40 PM. |
|
|

|
|
|
#22 |
|
Senior Enthusiast
Join Date: Feb 2007
Location: Spokane Valley, WA
Posts: 8,356
|
Re: Markeb01 Build Thread
After a great deal of hand blocking the filled seams turned out perfectly. With the fenders painted, the grille support was power coated gloss black and bolted back together. Surprisingly, the color of the black lacquer matched the powder paint perfectly. Here are a few shots when it was first assembled:
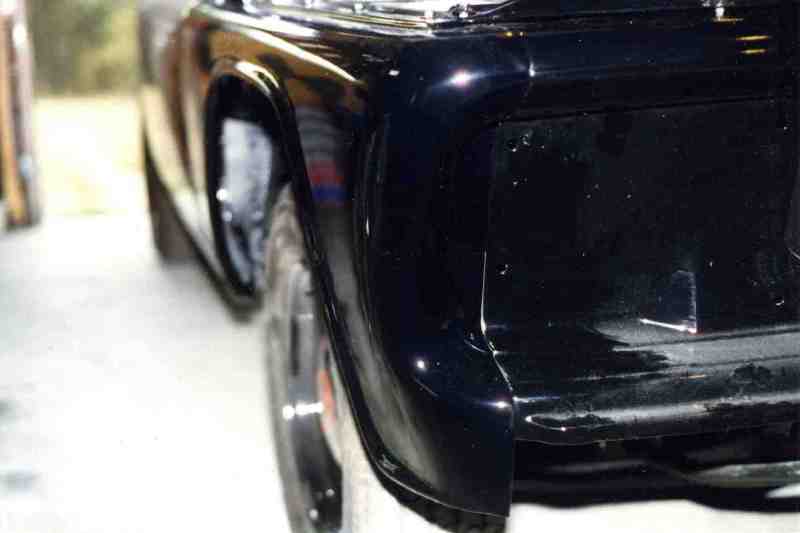 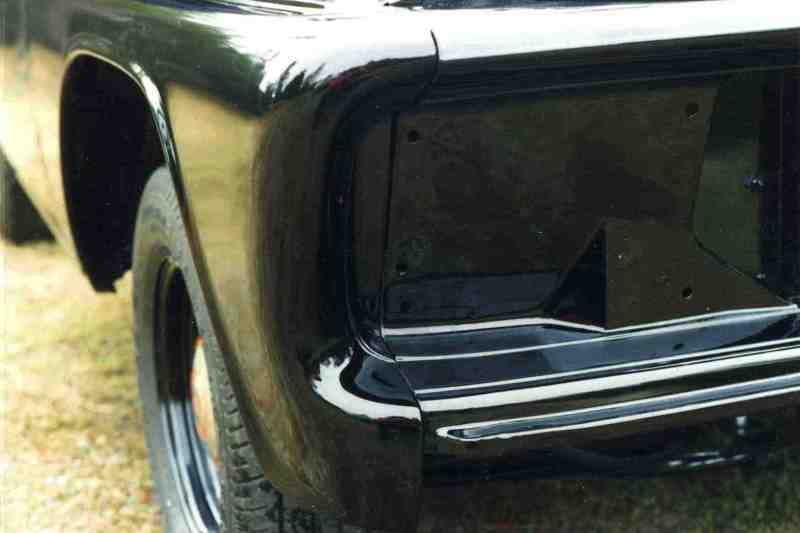 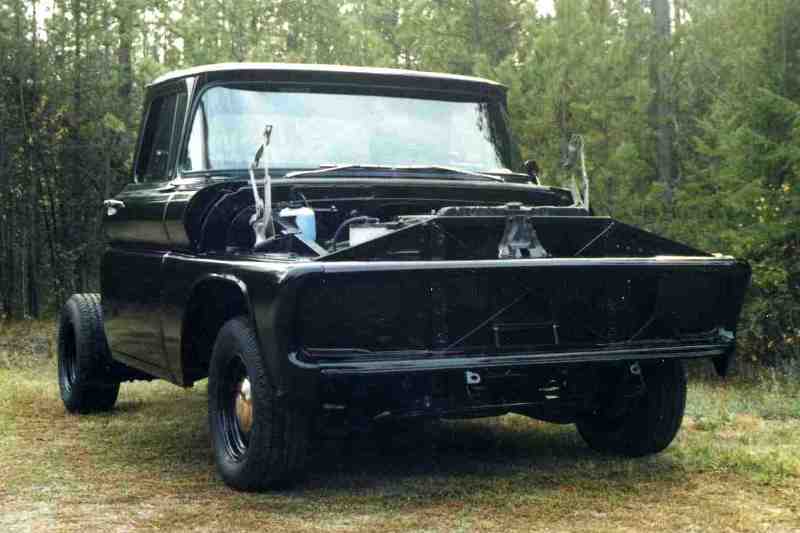   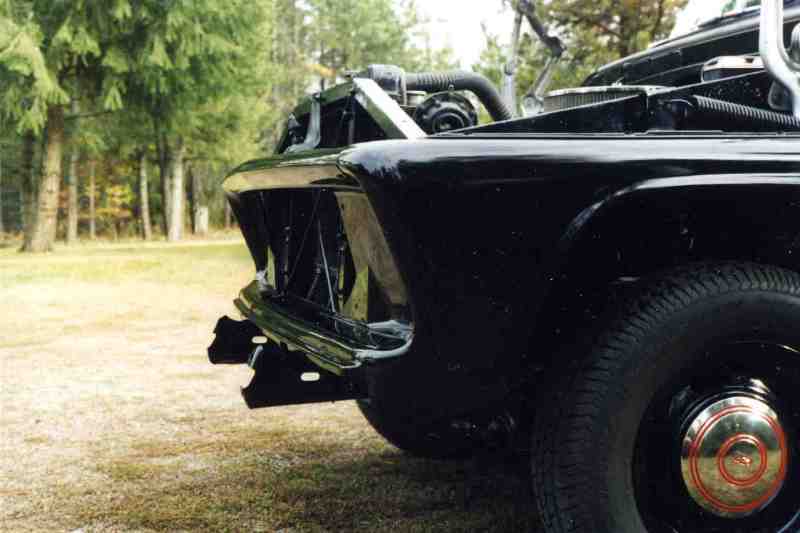 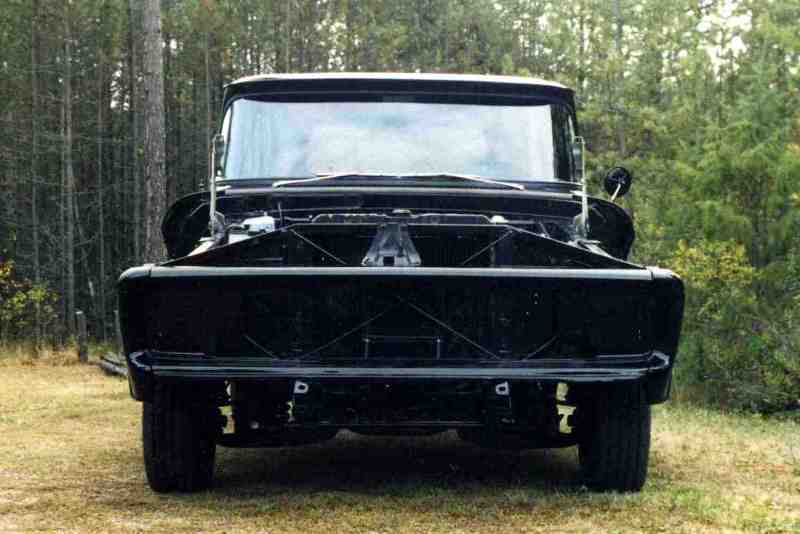 With the addition of the grille and bumper it started to look something like a truck again: 
Last edited by markeb01; 01-07-2013 at 12:45 AM. |
|
|

|
|
|
#23 |
|
Senior Enthusiast
Join Date: Feb 2007
Location: Spokane Valley, WA
Posts: 8,356
|
Re: Markeb01 Build Thread
A couple more pics at the same level of completion:
 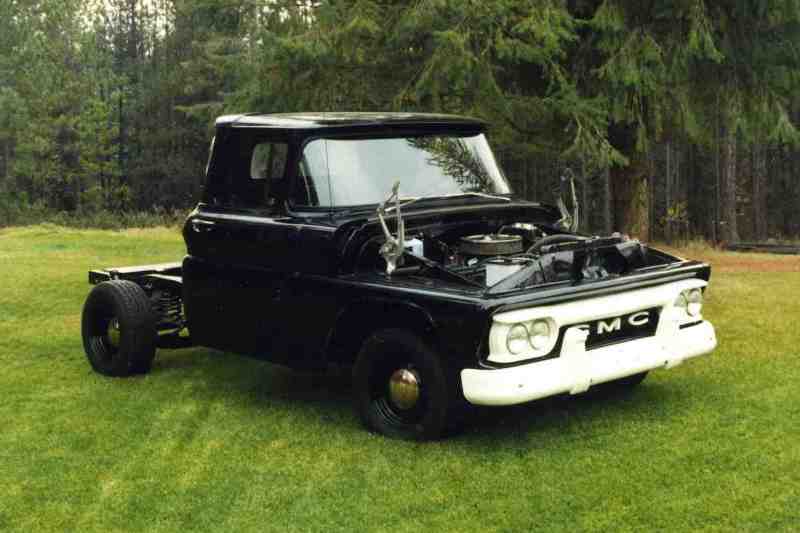 The original hood was damaged in a deer collision by the original owner. There were extensive shrink marks underneath where it had been worked. Although it looked straight in photos, the passenger side hump was at least 1/2 “ higher than the driver side. It looked fine wearing the original flat yellow paint, but black lacquer would have glaringly displayed the defect. It was painted Rustoleum flat black and reinstalled while a long ongoing search for a replacement hood continued. Besides, having been a car and truck enthusiast since childhood, I thought the 60-61 hood was butt-ugly when I first laid eyes on them. Over the years I’ve come to appreciate the design a bit more, but I still wouldn’t want one on my truck. The hood I really wanted was the 62-66 GMC version with the attractive scoop in the center, but 10 years of searching never turned up an example worthy of purchase. When a rust free 62-66 Chevy hood came up I grabbed it immediately. At first I thought the stainless bumper bolts might add detail, but soon came to think of them as rather tacky and painted them to match the bumper.  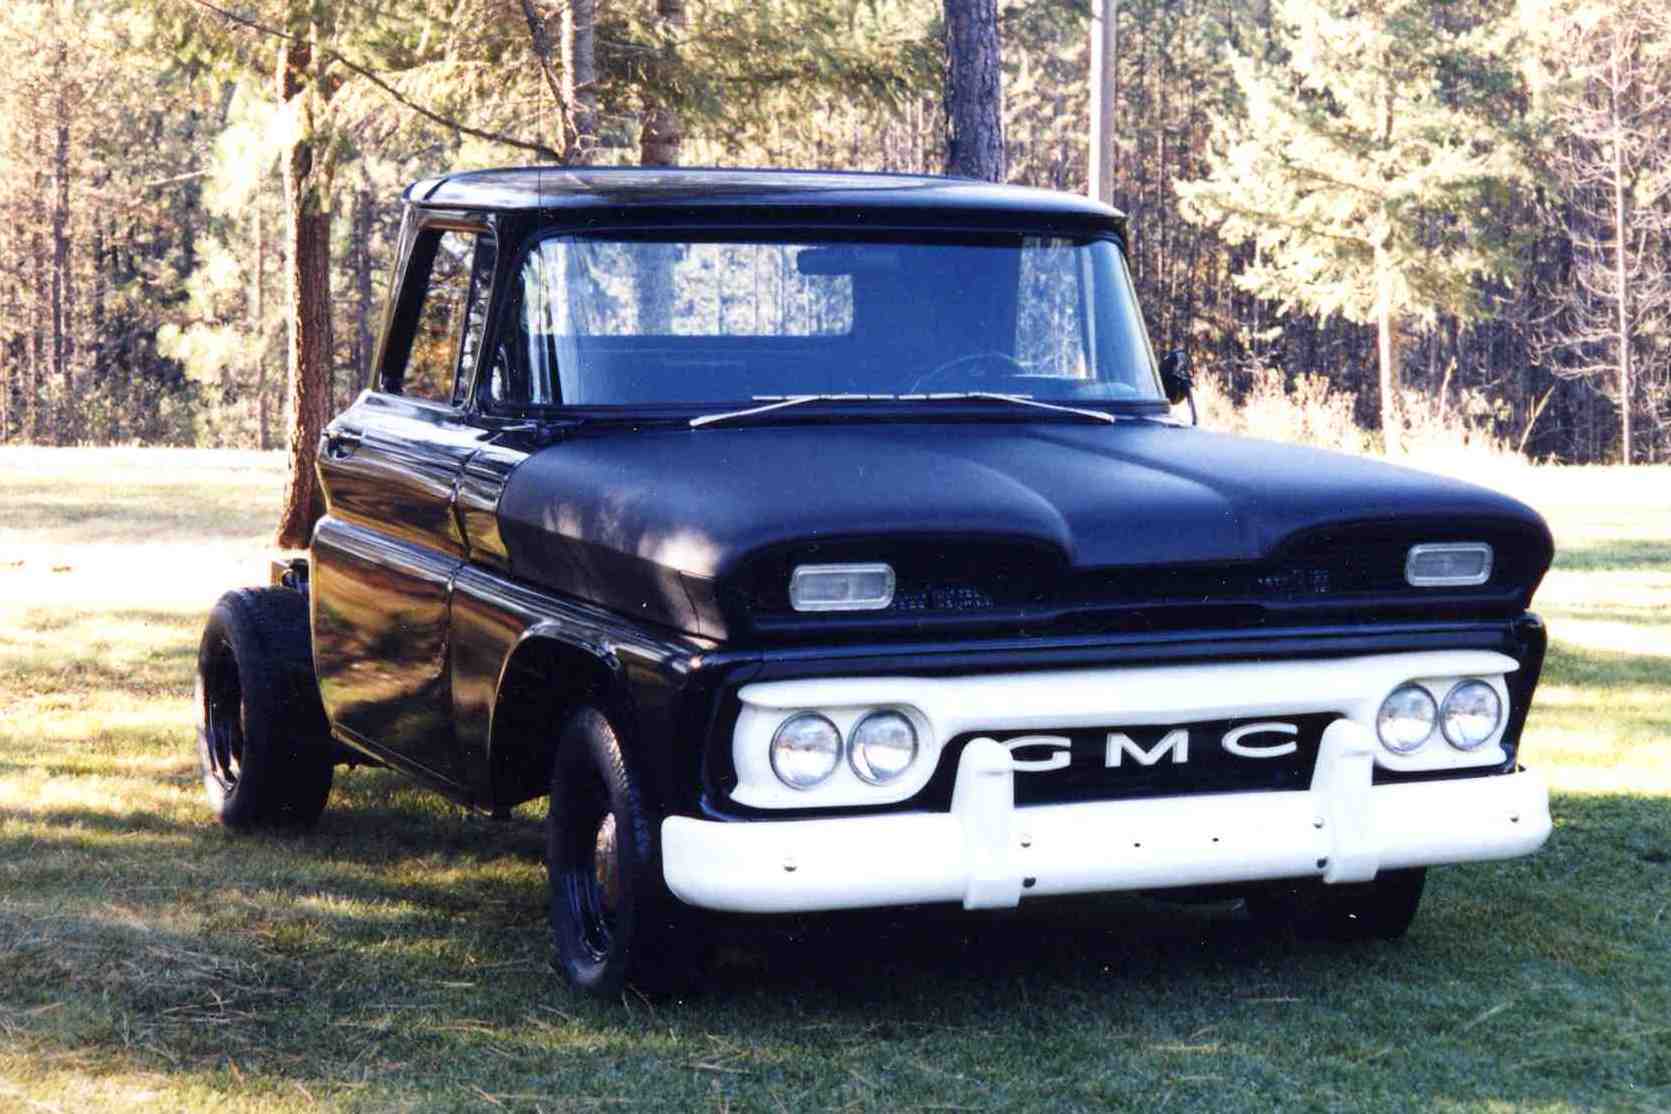
Last edited by markeb01; 10-29-2012 at 11:36 PM. |
|
|

|
|
|
#24 |
|
Senior Enthusiast
Join Date: Feb 2007
Location: Spokane Valley, WA
Posts: 8,356
|
Re: Markeb01 Build Thread
With the truck self propelled again and the front half reassembled, the bed started getting attention. It was painted on its portable dolly, the truck backed up under it, and the bed lowered in place and bolted down. With the intention of using the truck both as a daily driver and long distance vacation vehicle, a Gaylord hard cover was ordered up. Having never seen it done before, I always intended to mount the fuel fill in the driver side bed wall, near the top of the fender, concealing and securing the gas cap under the bed cover.
As seen here a 1967 C10 filler neck was mounted with a sealed cap to keep fumes out of the closed bed. The roll over/vent valve was located next to the filler neck. A local muffler shop bent up a piece of exhaust tubing to connect the neck to the gas tank. 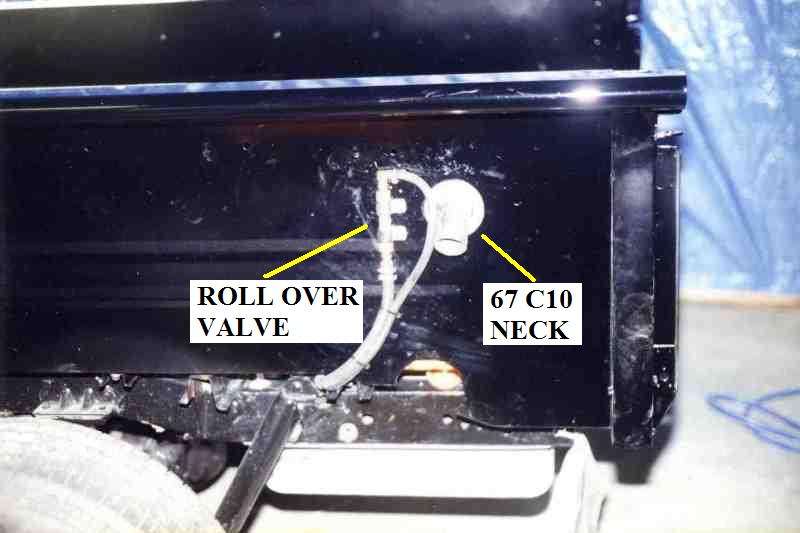 The setup worked perfectly - except - for one design flaw. When I designed the tank, I had them fabricate an inlet elbow on top of the tank (circled in photo). 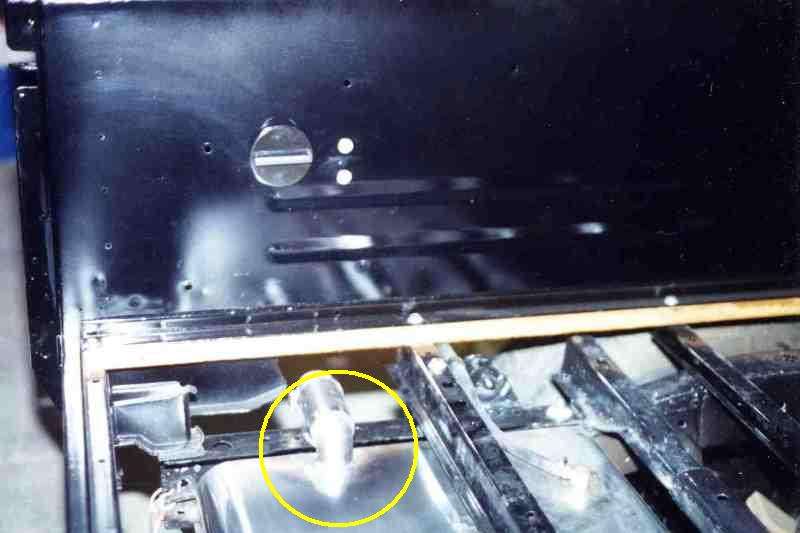 The radius of the turn was too short, and unless the tank was filled at dead slow, gas would kick back, shutting off the pump nozzle. It could take 15-20 minutes to load 33 gallons of fuel. This misery was discovered on our shake down 2000 mile trip to California. There was plenty of room for a less restrictive inlet, I just hadn’t considered the short radius neck a potential problem. Jumping out of sequence, here’s a shot of the connecting pipe and how well it fit under the fender:   To retain the side fill arrangement, I needed to either replace the elbow on the tank with a baloney slice opening on top, or relocate the inlet to the side of the tank. Either repair would have allowed fuel to freely enter. By the time I discovered the problem the truck was my daily driver and I lived 40 miles from town, so I couldn’t afford to be without it long enough to pull the tank and have a radiator shop modify the opening. Instead I pulled the tank, filled it with water, cut a new hole and installed an aircraft gas cap directly through the floor. The tank was dried out, refilled and reinstalled in time for work on Monday. I was really disappointed the side fill didn’t work out, since it was very convenient to access and would have worked fine if the tank opening was modified. I’ve never seen anyone else install the filler in this location, which is a very clean solution and avoids the problems associated with a floor fill. Back to the bed, since the floor was going to be hidden under the cover I didn’t want to waste money on a fancy wood floor, so I installed ĺ marine plywood soaked in fiberglass resin covered with a sheet of aluminum diamond plate. The bed being wider than plywood, two filler strips were installed under the angle strips and a single sheet filled in the floor. The diamond plate was simply bolted down on top. Being polished aluminum, it was very striking when first installed and remained shiny for many years after. 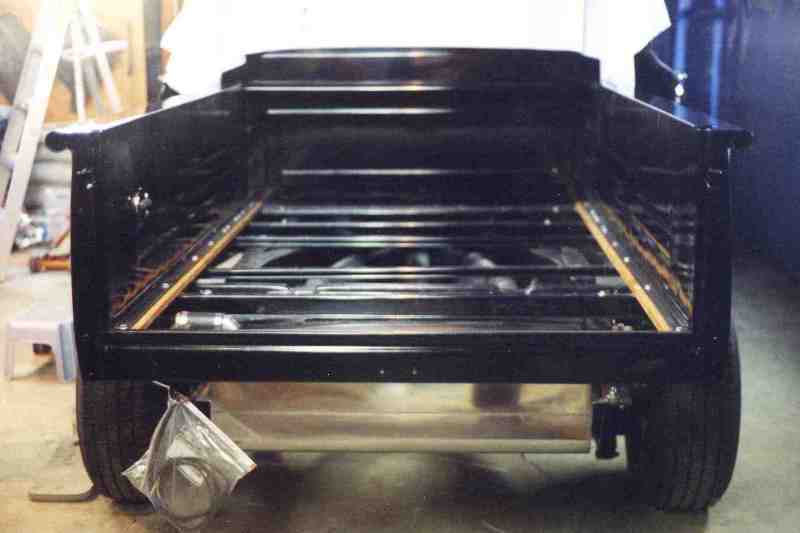 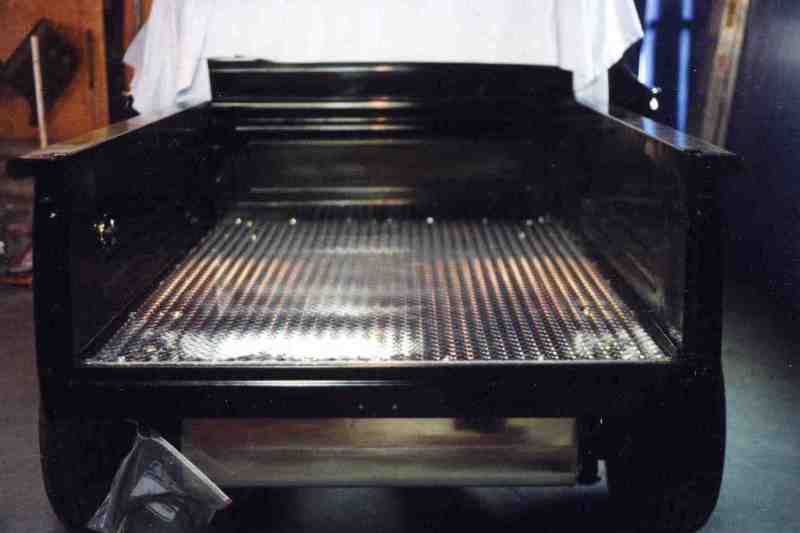 
Last edited by markeb01; 10-29-2012 at 11:39 PM. |
|
|

|
|
|
#25 |
|
Senior Enthusiast
Join Date: Feb 2007
Location: Spokane Valley, WA
Posts: 8,356
|
Re: Markeb01 Build Thread
Iíve always had a passion for 59 Cadillac tail lights and was determined to have a set on the truck. I really wanted a set of six with electronic sequencing turn signals, but could not come up with a layout for six that didnít look stupid, so I had to settle for four. The housing was designed to mimic the profile of the fender, and my son milled them out of aluminum. He also refined the installation so that the rear half holding the lenses clamps to the bracket half using stainless socket head screws, attaching to hidden nutserts imbedded in the mounting brackets. The wires run under the bed through the brackets. The finished assemblies were powder coated black and bolted to the stake pockets using stainless steel oval socket head bolts.
Here are a few shots in various stages of completion:  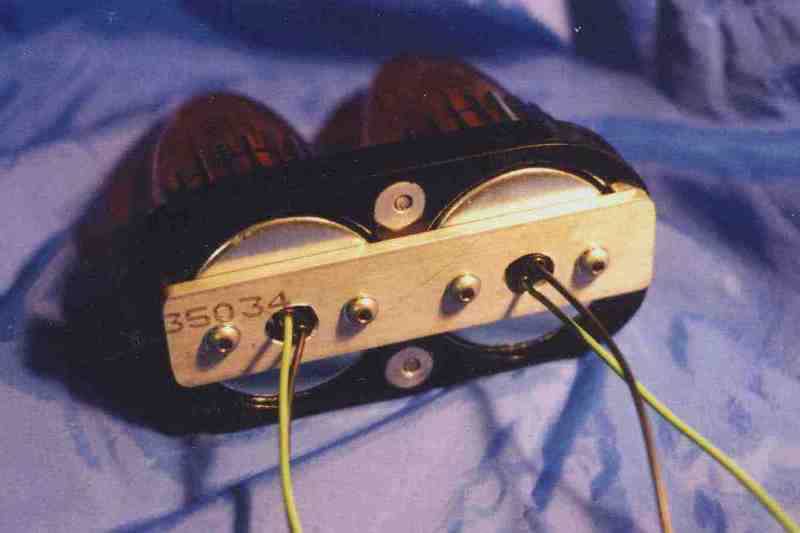  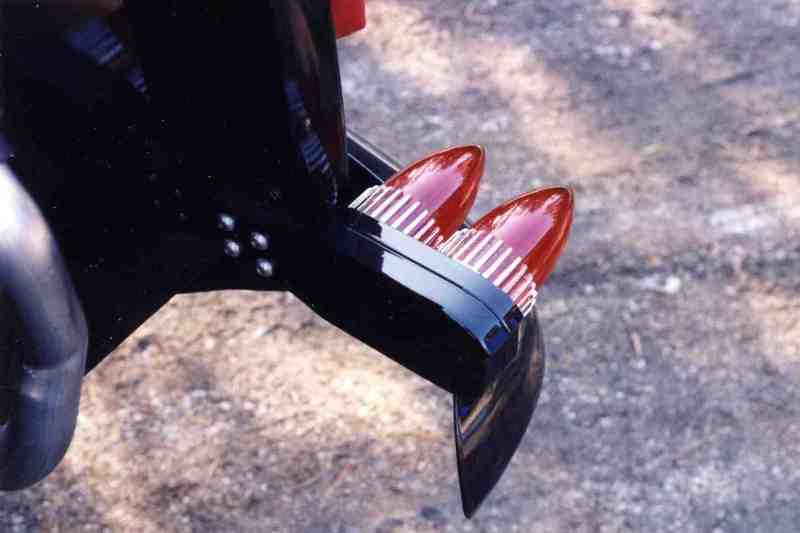 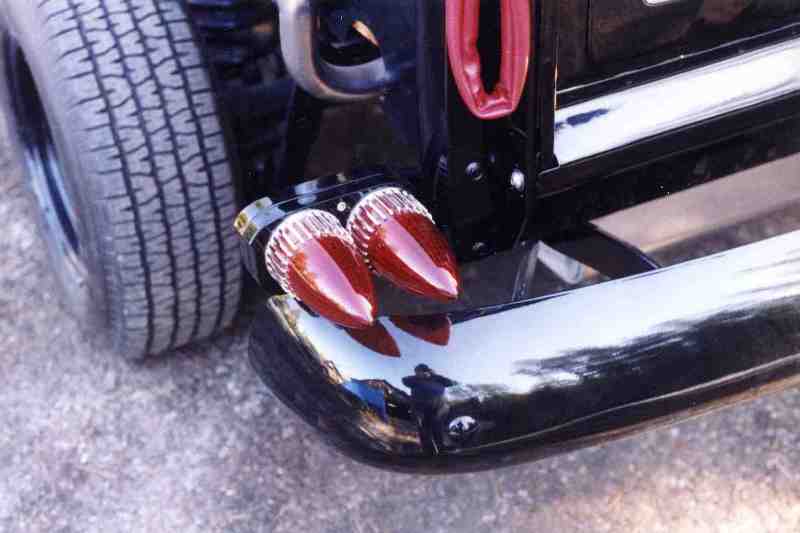 Rear fenders and steps were the final phase in the paint job. After hours of paint stripping, primer, and block sanding Ė here they are wearing primer drying under heat lamps: 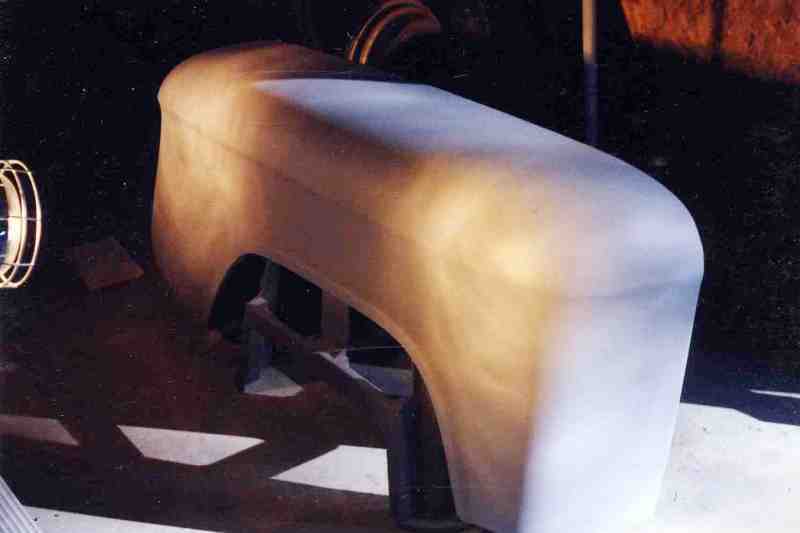 And after final paint: 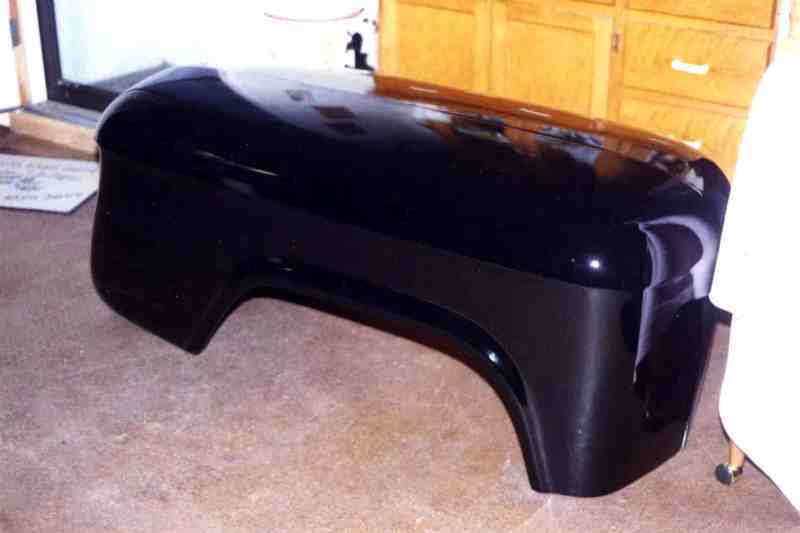 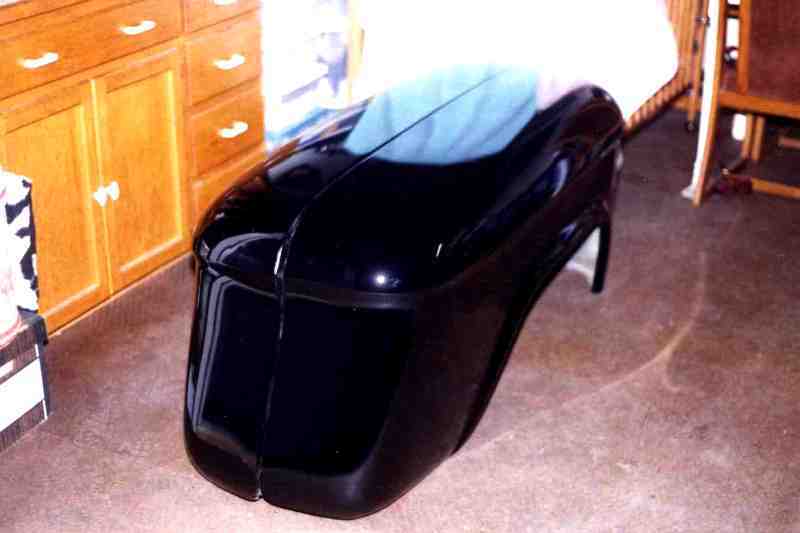
|
|
|

|
 |
| Bookmarks |
|
|