 |
Register or Log In To remove these advertisements. |
|
|
|
|||||||
 |
|
|
Thread Tools | Display Modes |
|
|
|
|
#1 |
|
Registered User
Join Date: Jul 2013
Location: Essex
Posts: 948
|
Converting from a Standard dash to Deluxe
Evening All,
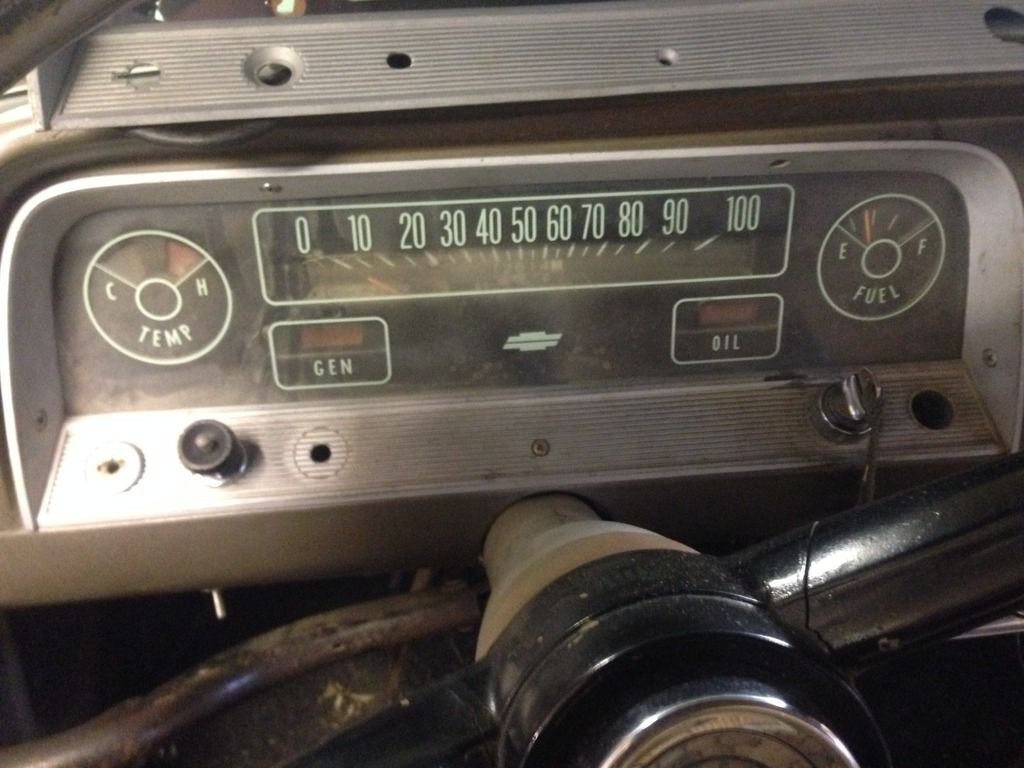
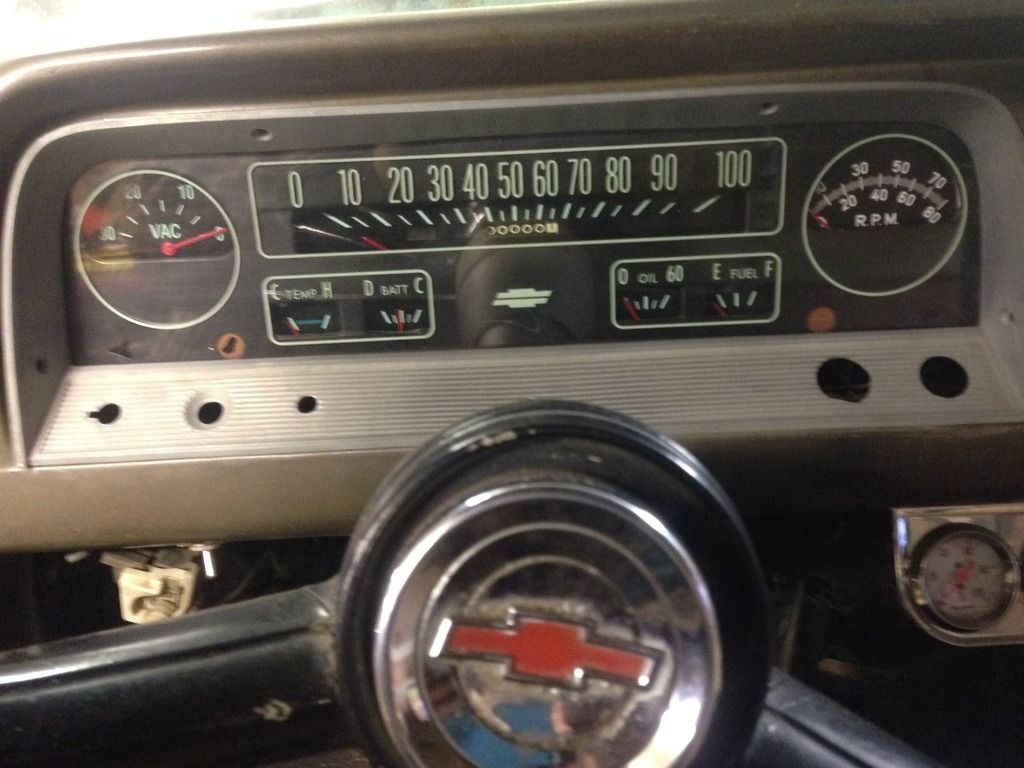
I am in the process of changing from this:-  To this.  and would like to know if anybody has done a 'how to' thread on the wiring. Had a quick look at the plugs and think I can change the function but before I go down that route would like to see how others have overcome this issue. Know I am going to have to work out the Tach wiring separately, other than that, over too you. P. 
|
|
|

|
|
|
#2 |
|
Registered User
Join Date: Nov 2009
Location: Sherman, ME
Posts: 2,363
|
Re: Converting from a Standard dash to Deluxe
Hi Paul,
I did that swap about 15+ years ago in Dad's 66 C10. Here's a page I wrote about the swap --> http://rmcavoy.freeshell.org/Truck_gauges.html I've been working on updating that page but haven't got the new version uploaded yet. In the meantime, I did add some new wiring diagrams showing the gauge-specific portions of the wiring (they're at the bottom of the page). The changes that need to be made include: Engine harness: -The dark green "hot" light wire can be re-used for the temp gauge sending unit by changing the plastic connector shell (metal terminal inside stays the same). -The light green "cold" light wire can be re-used as one leg of the ammeter circuit. Put in a 4 Amp inline fuse and connect it to the large "batt" stud on the starter solenoid. Or if you want to make the wiring match the factory colors, change this to a black wire. -The dark blue wire for the "oil" light is no longer needed with the mechanical gauge but leaving it in place won't hurt anything. Note: the 4A fuses were not factory in the 64-66 trucks but I strongly recommend adding them to the ammeter circuit (like GM did in the 67+ trucks). They'll save the ammeter and it's wiring from burning up if the system is overloaded or if the "shunt wire" that runs from the horn relay over to the positive battery terminal ever gets disconnected (which without the fuses will attempt to force all of the current through the meter & it's small wires). Alternator / Headlight harness: -The brown wire that used to operate the "gen" light needs to remain connected to the voltage regulator. But the end going into the bulkhead connector needs to be re-located (see the wiring diagrams). -An additional wire needs to be added for the other leg of the ammeter circuit. Use black with a white stripe for the factory color. Put in another 4 Amp inline fuse and connect it to the screw terminal junction on the horn relay. Cab harness: -The warning light setup has the brown "gen" light wire and the resistance wire for the alternator "exciter" circuit tied together at a common terminal in the bulkhead connector. That needs to be separated so the resistance wire (brown w/white stripe) gets connected to the brown wire in the alternator harness. (again, see the wiring diagrams). -The brown wire in the cab harness (once separated from the resistance wire) can be re-used as one leg of the ammeter circuit by re-locating it on the bulkhead connector so it joins up with the black/white wire that was added to the alternator harness. Or replace this wire in the cab harness with black/white to match. -The light green wire that used to be used for the "cold" light can be re-used for the other leg of the ammeter circuit by leaving it as-is. Or you could replace it with a black wire to match the factory color code. -Finally, the dark green "hot" light wire in the cab harness can be re-used for the temp gauge. But there is a leg of the circuit that connects to a grounding terminal on the ignition switch that's used for a "bulb test" on the hot light when cranking the engine. I'd recommend removing the dark green wire's connection from the ignition switch. Otherwise, it will make the temp gauge peg hot while cranking the engine. Cluster harness: This small harness on the back of the cluster itself has significant differences (like plugs for the gauges vs. sockets for the bulbs). So it's much easier to swap/replace this harness instead of trying to modify it. Last edited by ray_mcavoy; 03-06-2016 at 07:39 PM. |
|
|

|
|
|
#3 |
|
Registered User
Join Date: Jul 2013
Location: Essex
Posts: 948
|
Re: Converting from a Standard dash to Deluxe
Wow!
Ray thanks for this, really saves me a heap of time and bother as it is well known that electronics and I do not make good bedfellows.... Will report back as I work through. P. 
|
|
|

|
|
|
#4 |
|
Registered User
Join Date: Feb 2013
Location: Cottonwood, Arizona
Posts: 1,380
|
Re: Converting from a Standard dash to Deluxe
I did a similar swap on a 65 Chevy II several years ago. Went from idiot lights to a full gauge setup fron a 65 Chevy II SS. Simple as pie. Just had to change out the harness. Your truck should be fairly easy. Keep us posted.
|
|
|

|
|
|
#5 |
|
Registered User
Join Date: Nov 2009
Location: Sherman, ME
Posts: 2,363
|
Re: Converting from a Standard dash to Deluxe
You're welcome Paul! Feel free to ask if you need any more details or a better explanation of anything.
Yes, swapping out the harnesses with ones meant for gauges will work too. And is probably a better option if the existing wiring is in poor condition and/or has lots of previous owner modifications. But if the existing wiring is still relatively stock and in good condition, the modifications I posted above will allow it to work with a gauge cluster. |
|
|

|
 |
| Bookmarks |
|
|