
 |
Register or Log In To remove these advertisements. |
|
|
|
|||||||
 |
|
|
Thread Tools | Display Modes |
|
|
|
|
#1 |
|
Watch out for your cornhole !
 Join Date: Jun 2003
Location: Azle, Texas
Posts: 14,162
|
Back to the Basics: Re-Sealing a leaky power steering box
A recent thread about leaky steering boxes prompted me to take some photos and do a little tech article here. Some folks were replacing their power steering boxes because of leaks rather than fix the leaks. I prefer to fix a leaky box because 1) Its drastically cheaper, and 2) the existing box is likely as good or better than a parts store replacement.
The whole process is very straightforward and intuitive. Few special tools are needed and the entire process can be done in an hour or so and for a cost of 15 dollars. For this article, I pulled a steering box out of my parts pile. This setup is off of an 87 model R10 that I parted out a few years ago. The power steering worked well, but it did leak. The process is the same for all of this style of box. Parts from a Rockauto. This is the pitman shaft seal kit and the stub shaft seal kit. Both were right at 15 dollars delivered, shipping included. 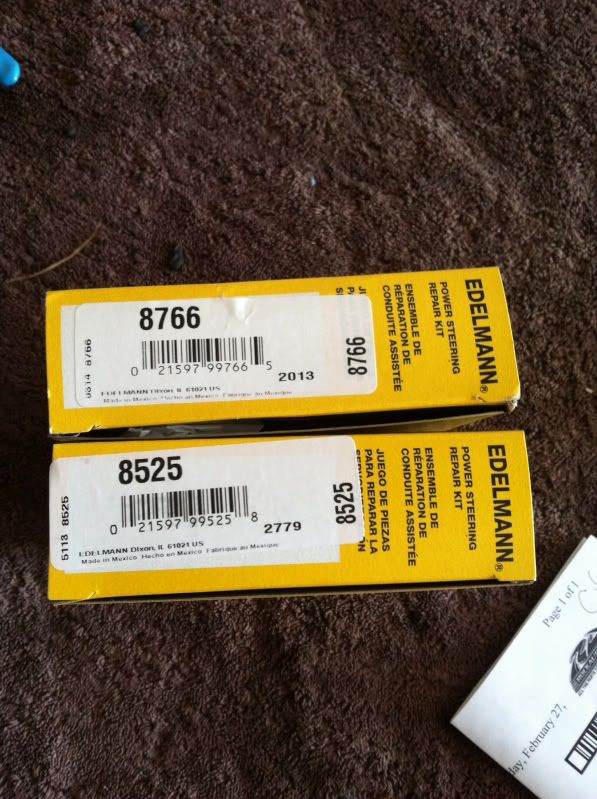 The victim 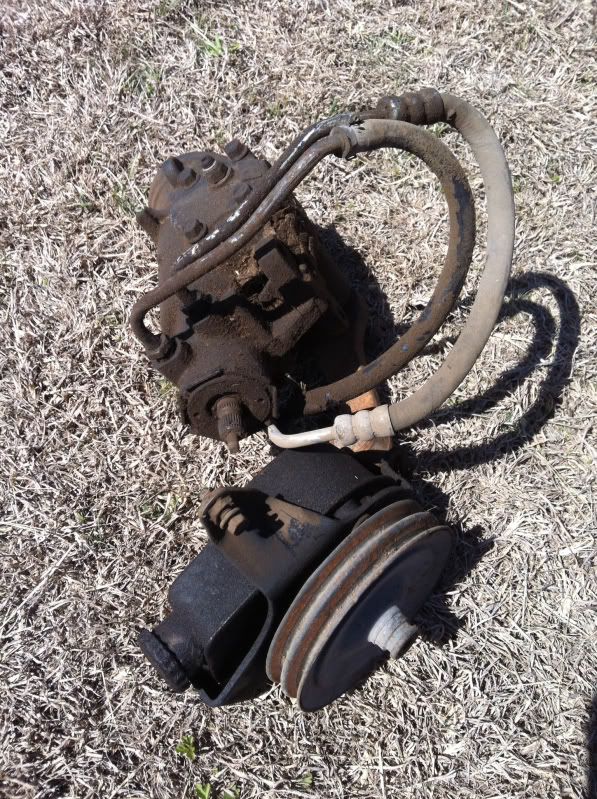 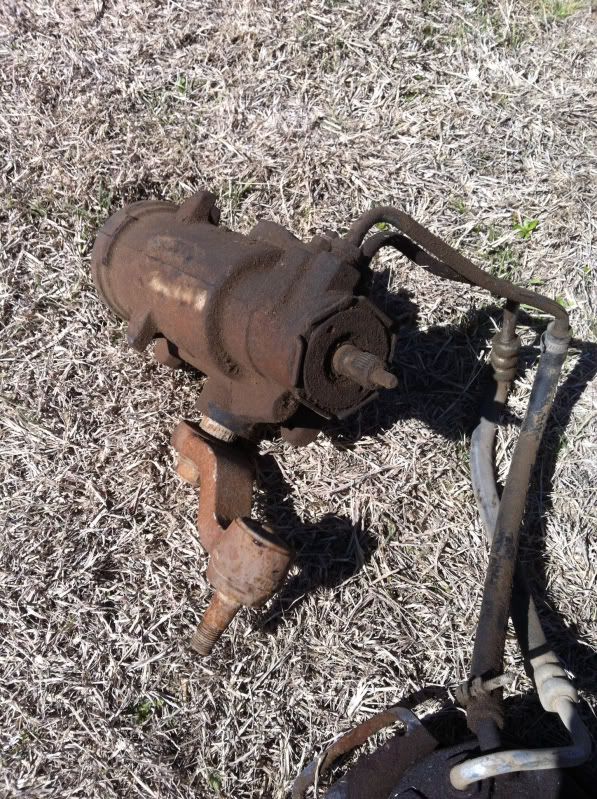 First step is to clean and degrease the box. I used spray degreaser and a Harbor Freight "toothbrush" type of nylon brush. 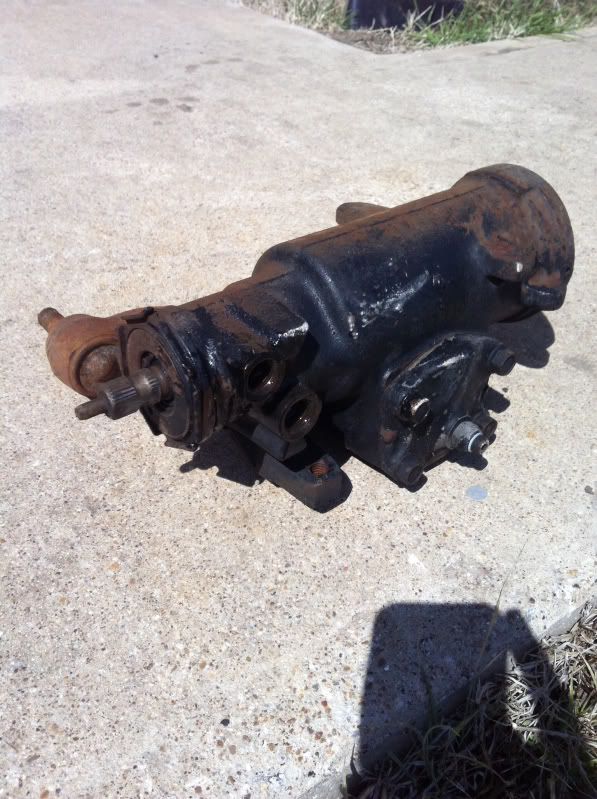 This is one special tool you'll need, a pitman arm puller. Don't cry over it though. I bought mine years ago for cheap but you can get one from the parts' store tool loan program too. You're gonna have to have one whether you reseal your box or replace it anyway. 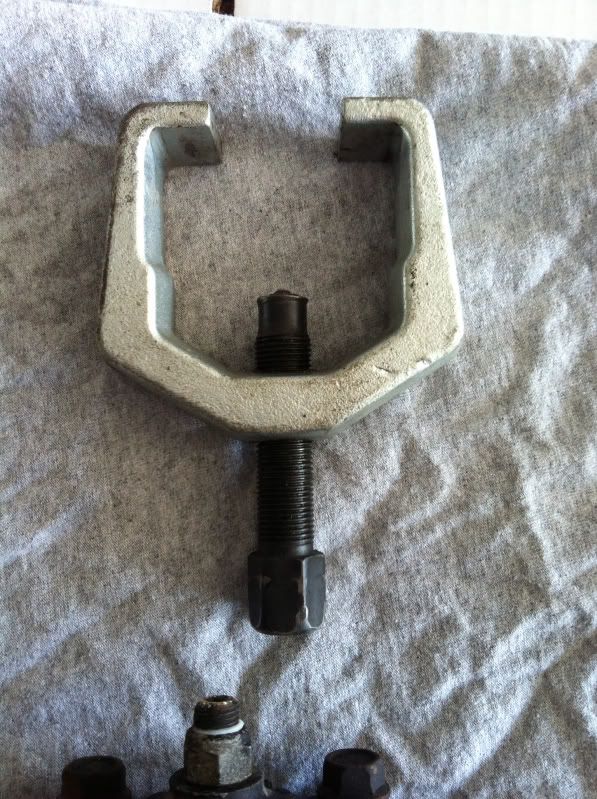 Remove large nut and washer that retain the pitman arm. A big adjustable wrench works fine. It's not going to be too horribly tight. 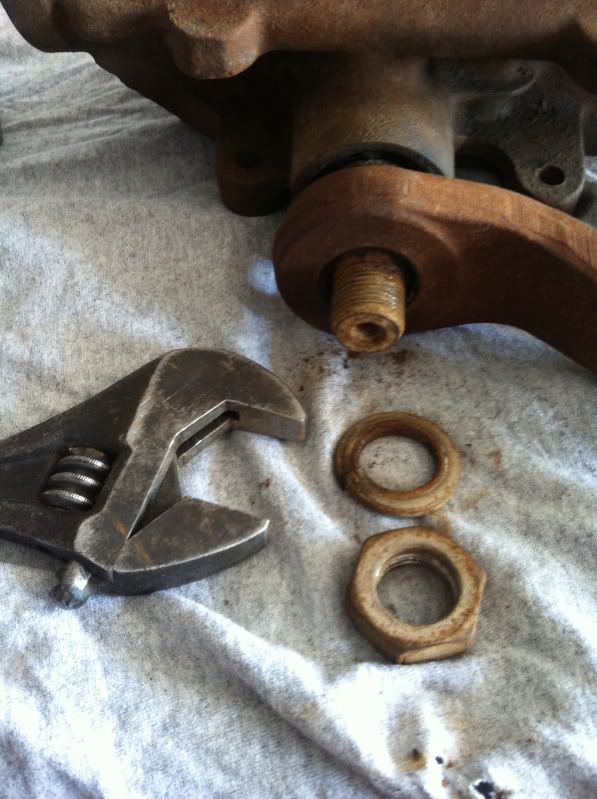 Now, use the puller and remove the pitman arm. They come off pretty easy with a little bump from an impact wrench. Once you get the pitman arm removed, take a wire brush and clean the shaft and cavity where the seal is. 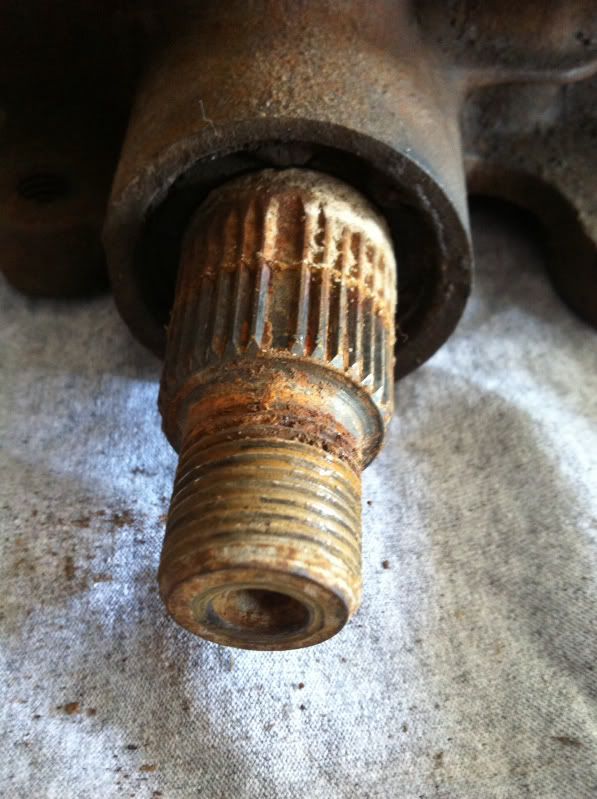 Now, make sure the steering box is centered and flip it over and remove these four bolts. They are 9/16" head. 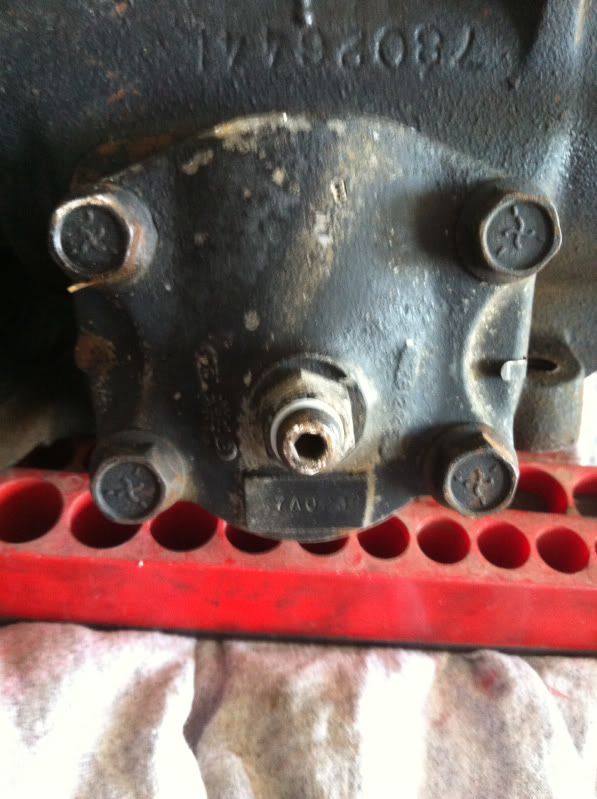 Then, gently whack the output shaft with a mallet to drive it upward. Remove. 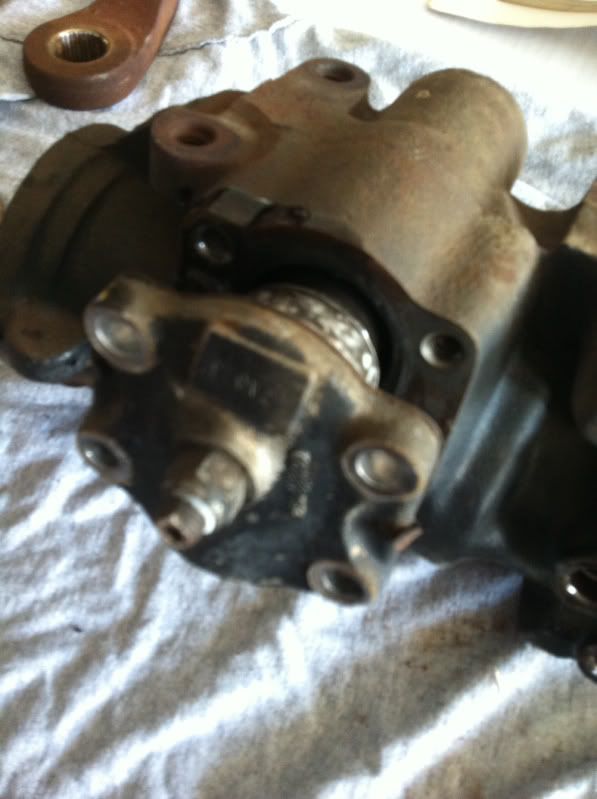 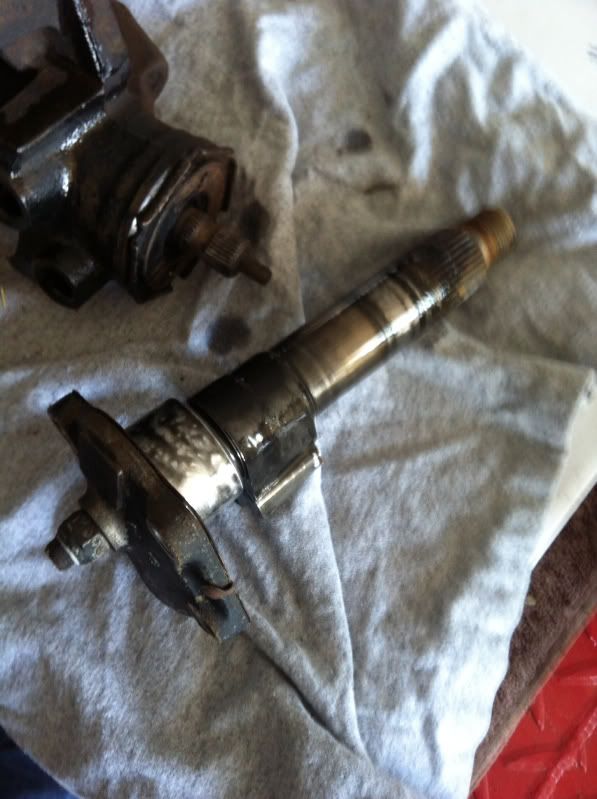 Now, lay the box on its side and clean the seal area with a little screwdriver. The purpose of laying it on its side is to keep any contaminates from falling down the hole and into the steering box. 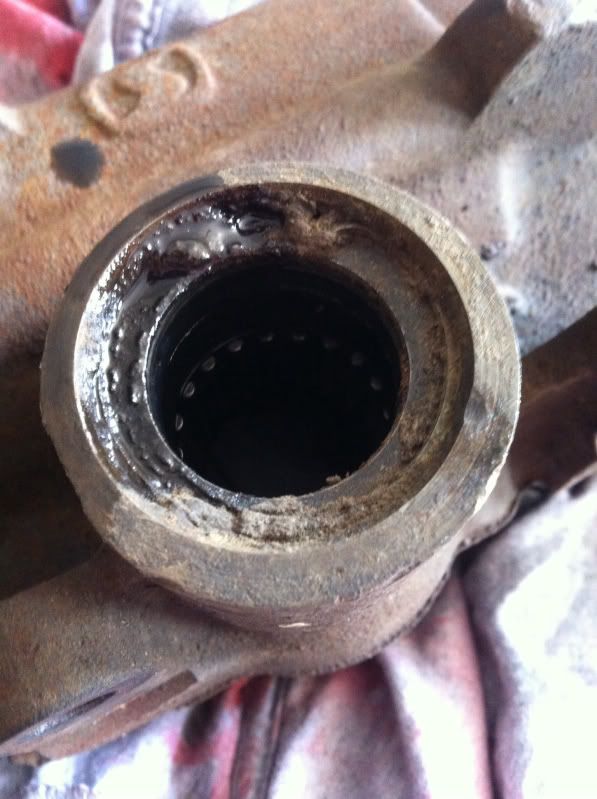 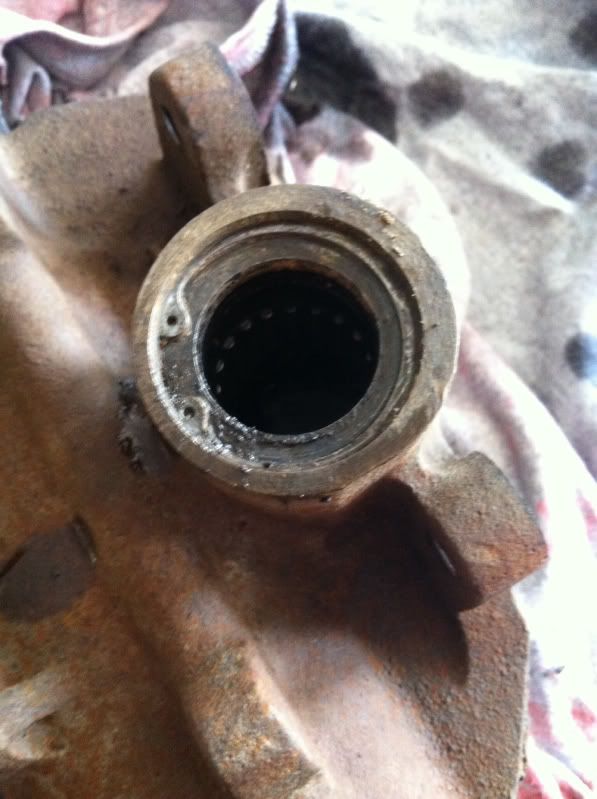 Use snap ring pliers to remove the retaining ring and then remove the parts and lay them in order. They will go....snap ring, flat washer, thick seal, washer, thin seal. In that order. A bent tip screwdriver will pull them out. Worst case, turn the box over and use a long skinny screwdriver to tap them out from the top. 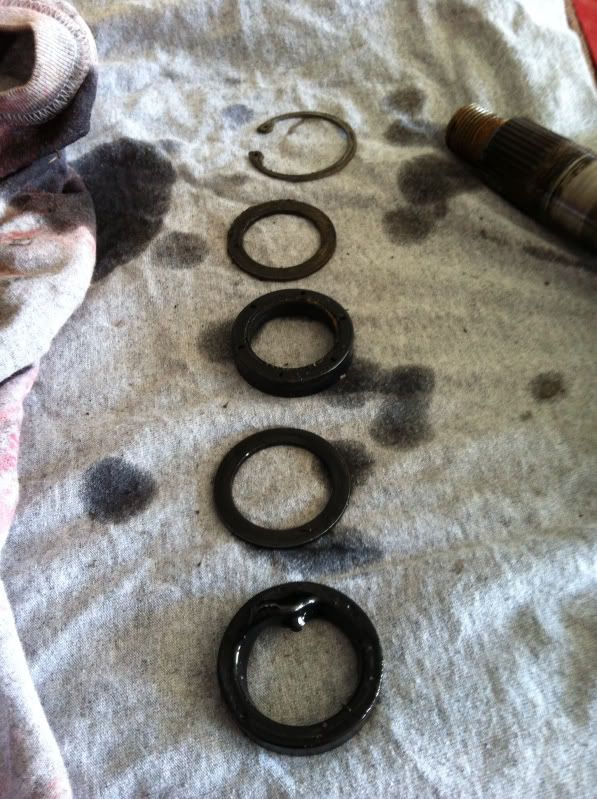 Again, to reiterate, it goes....snap ring, washer, thick seal, washer, thin seal. Lay out new parts next to old to match them up. 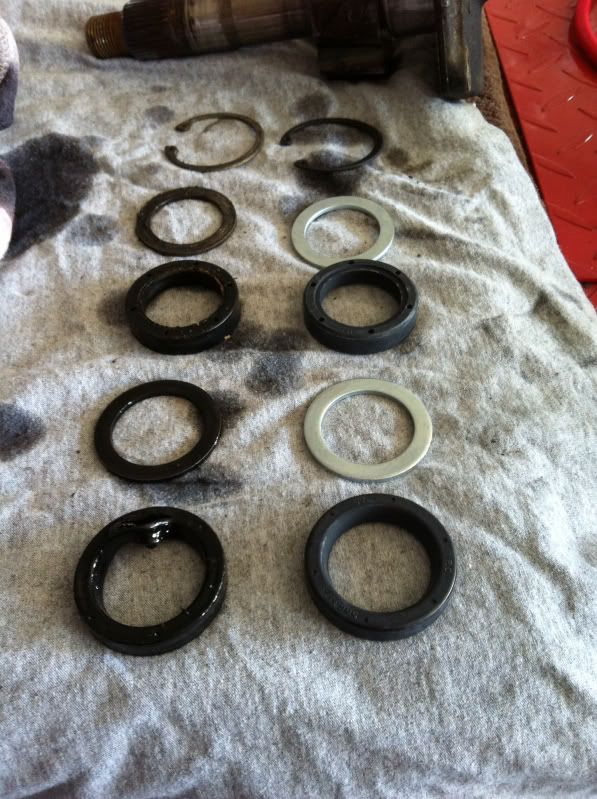 Clean out the bore in the steering box and install new parts in correct order. Use a socket of the appropriate size with a mallet as a driver. 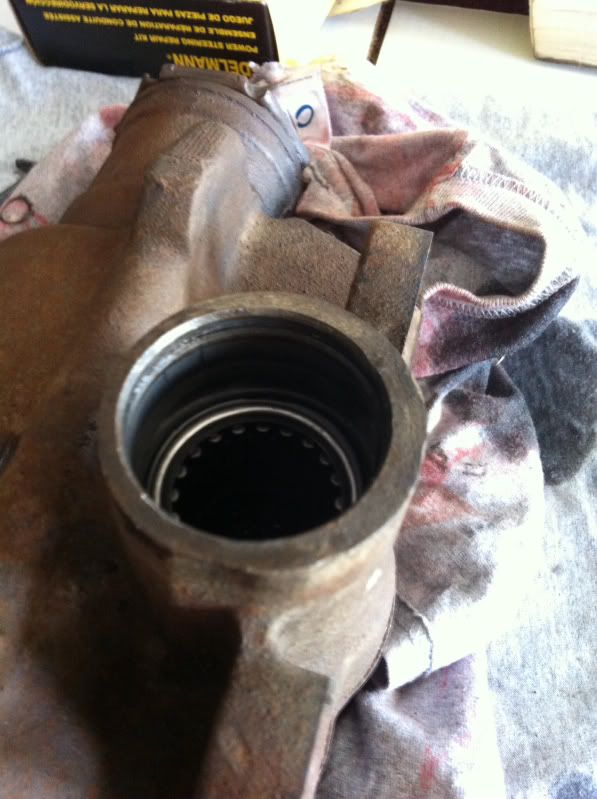 Now, lube the seals with a smear of grease and drop the top of the box back in place. You might have to fiddle with it to get the parts to drop in. Its intuitive and you will see what needs to happen. Wiggle, wiggle, tap, tap and it will drop in. 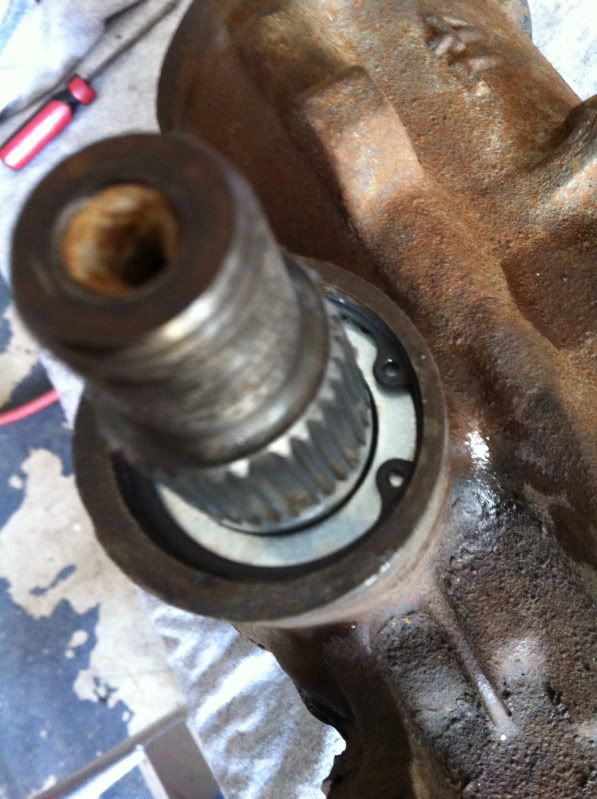 Reinstall and tighten the four bolts. 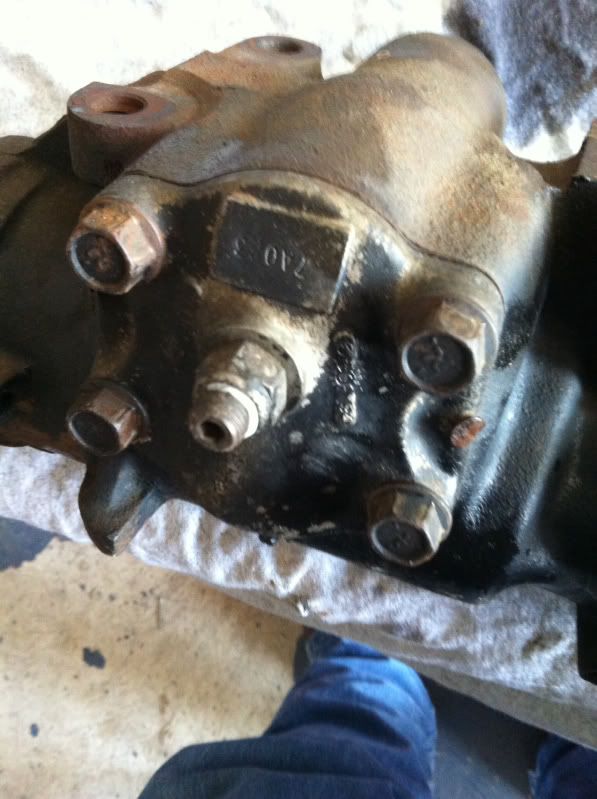 More to come in the next post....
__________________
I'm on the Instagram- @Gearhead_Kevin |
|
|

|
|
|
#2 |
|
Watch out for your cornhole !
 Join Date: Jun 2003
Location: Azle, Texas
Posts: 14,162
|
Re: Back to the Basics: Re-Sealing a leaky power steering box
Now, we're gonna change the input shaft seal. This is usually the one that really leaks on old boxes.
Look closely and you can see the cracks in the old rubber. Clean well with a wire brush before you go any further. 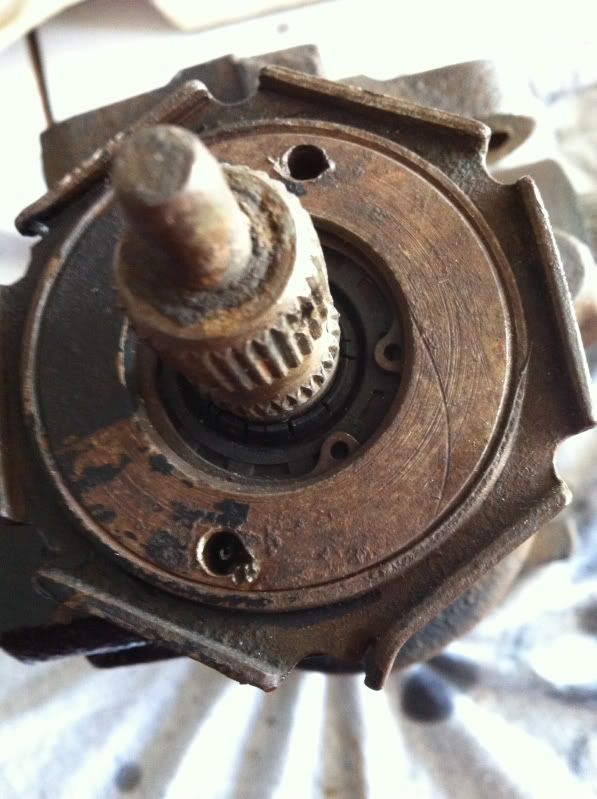 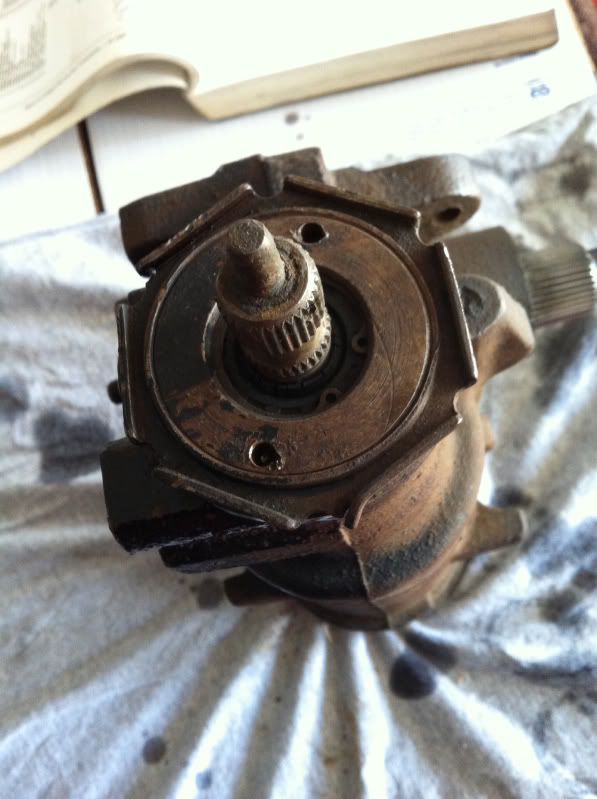 You need a blunt punch and a small hammer. Use these to loosen the locknut. 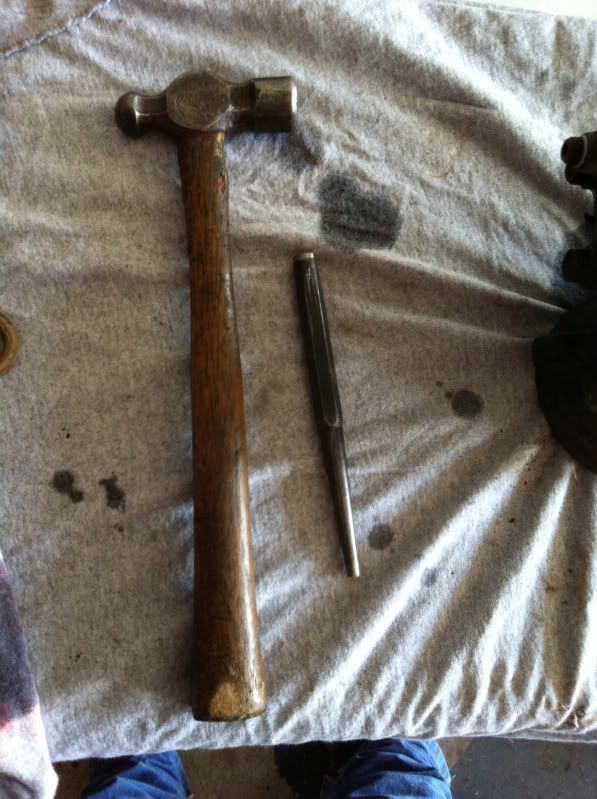 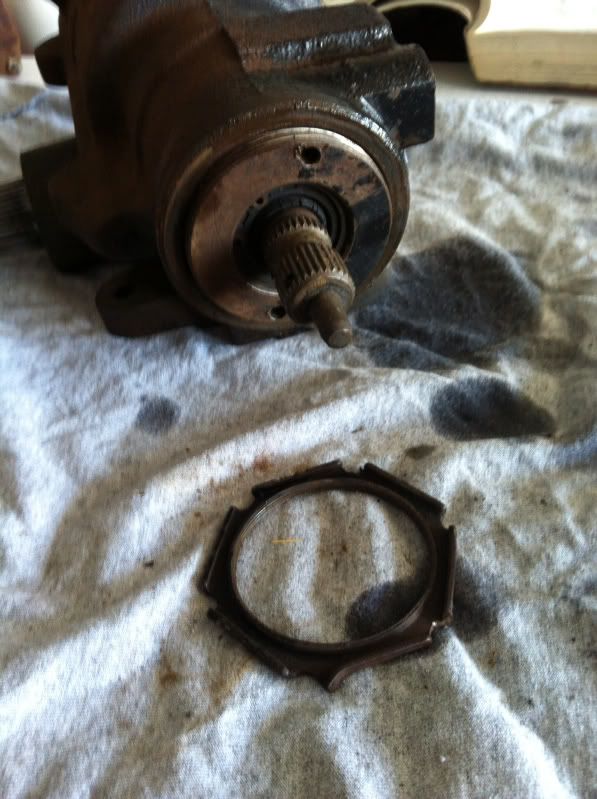 Next, remove the gland assembly. Notice there are two holes in the face of it. I used a face pin spanner, but have also done this many, many times using a small punch and hammer to gently unscrew the thing. Just tap it counterclockwise to unscrew it. As you're doing this, gently hold pressure down on the shaft so it doesn't pull up out of the box as you remove the gland assembly. Again, hold slight pressure to keep the center shaft from rising up as the outer housing is screwed up and off. 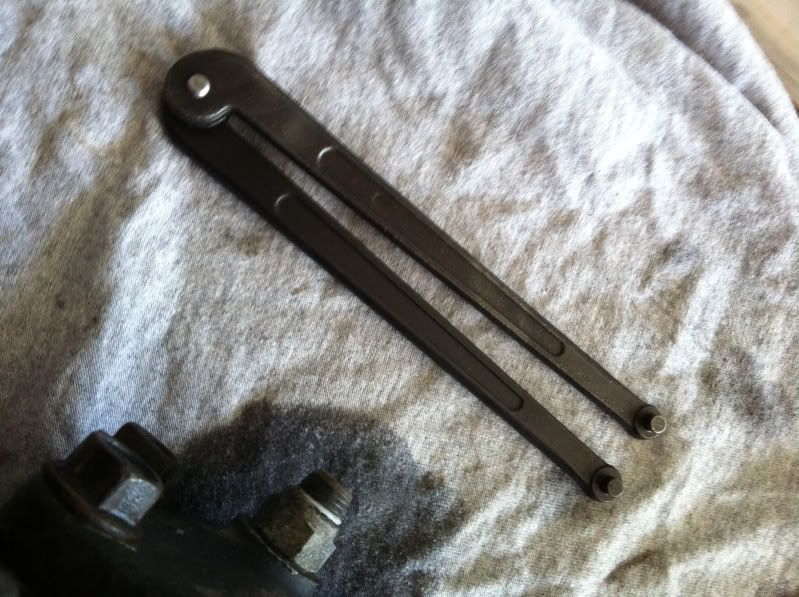 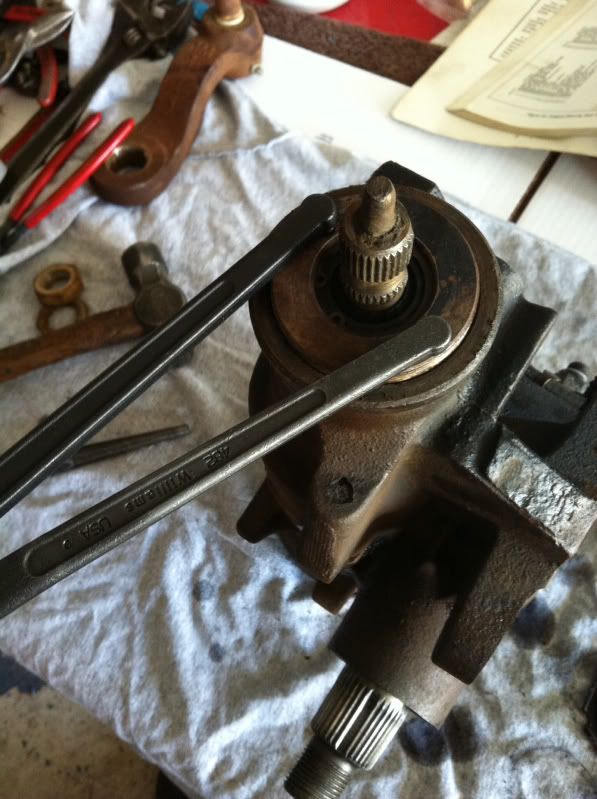 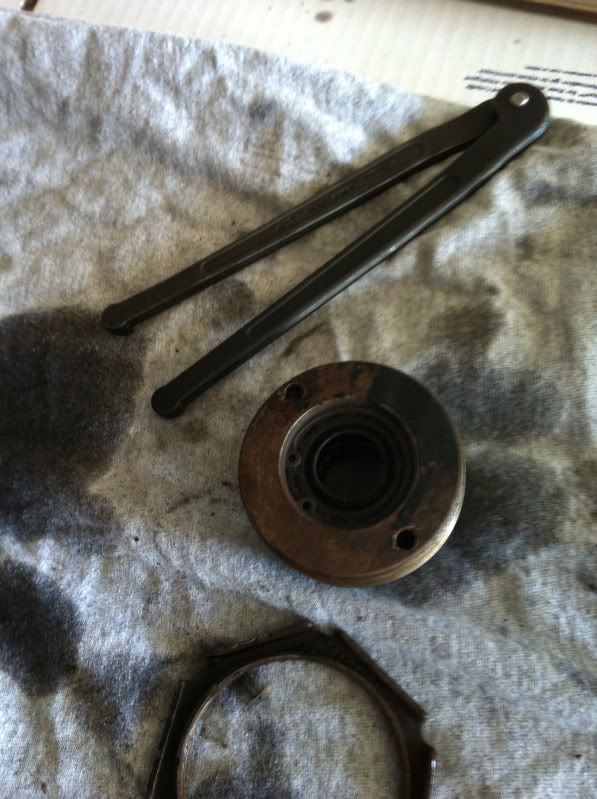 Leave this in place. We are only messing with the cartidge that we unscrewed and removed. Go no deeper. You can pull that shaft out, but you don't want to. Don't turn the shaft or fiddle with it. 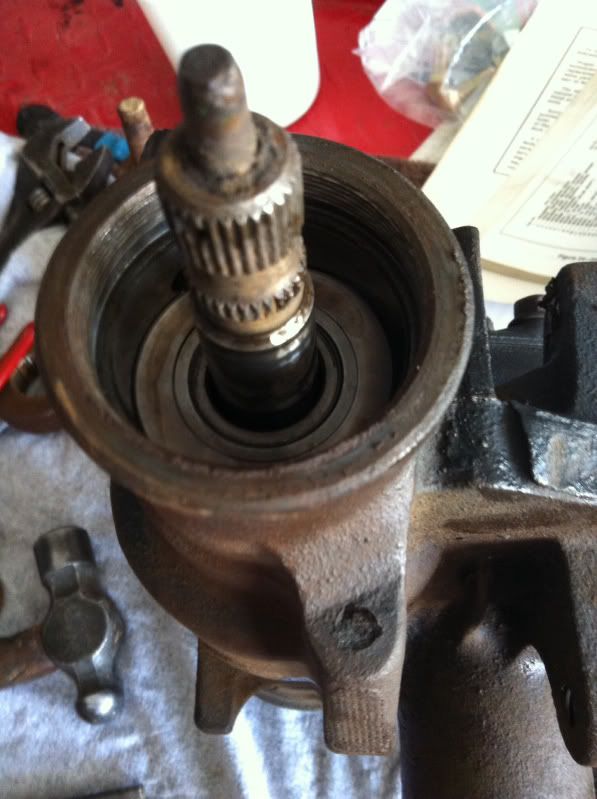 Here is the old dried seal that is the culprit on a majority of leaky steering boxes. 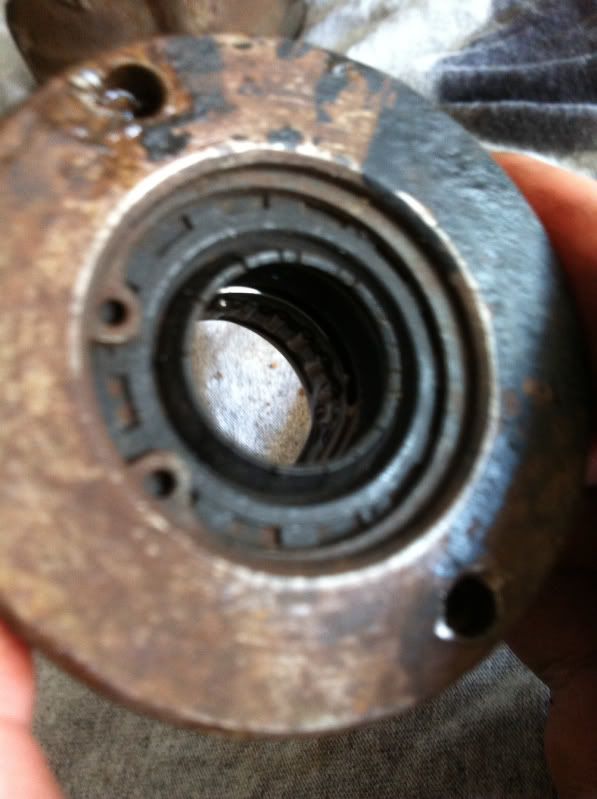 Remove snap ring and remove the dust seal and the main seal. They come right out or you can flip the cartridge over and tap them out with a skinny screwdriver. Parts laid out in order. 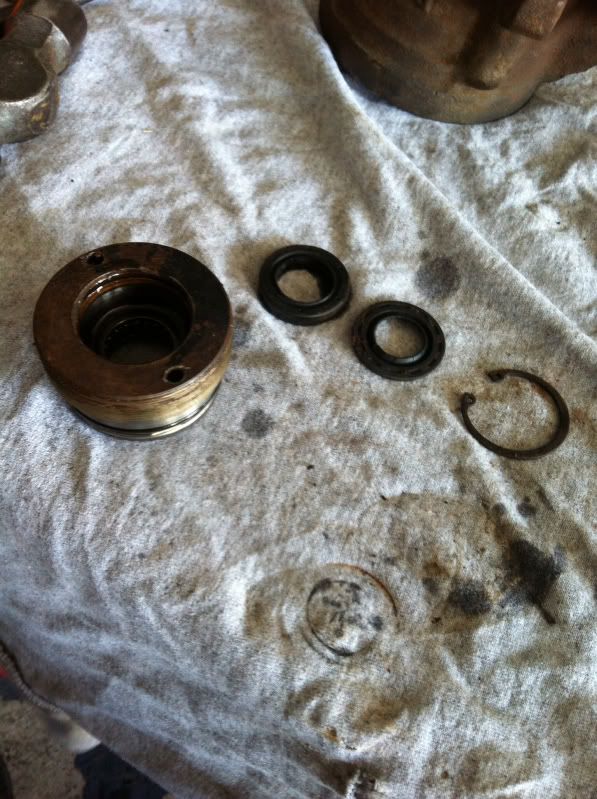 Tap new seal and dust seal into place with a socket and install new snap ring. 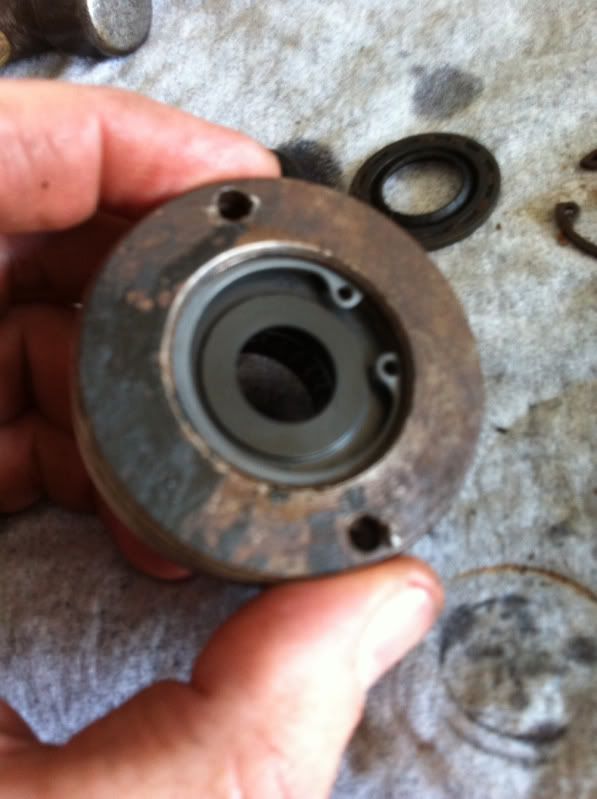 Also, change the outer O ring. A new one is included. 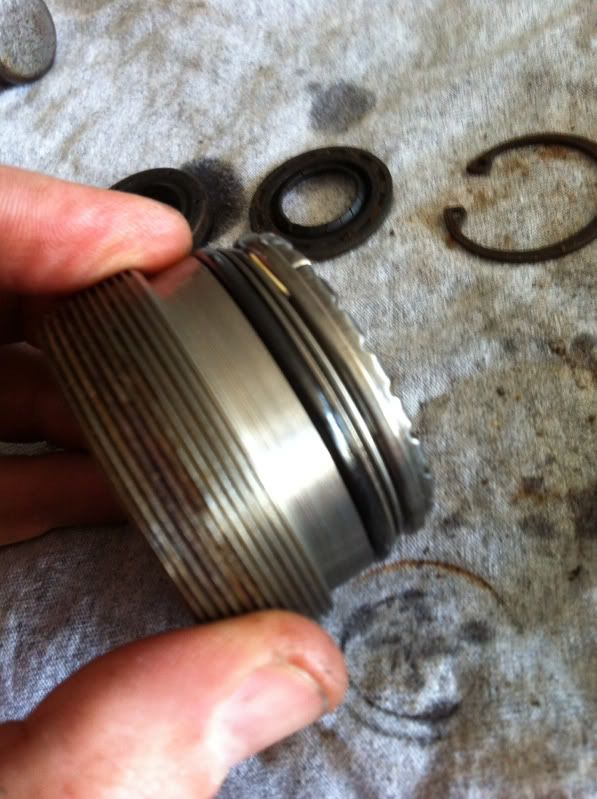 Smear grease on the inner seals and the outer O ring and screw the cartridge back into the steering box. Screw it into place until it bottoms out. You'll feel it. It screws down nice and smooth, then all of the sudden, stops. Don't reef down on it, stop there. Now, measure 1/2" and back off the adjuster that amount. 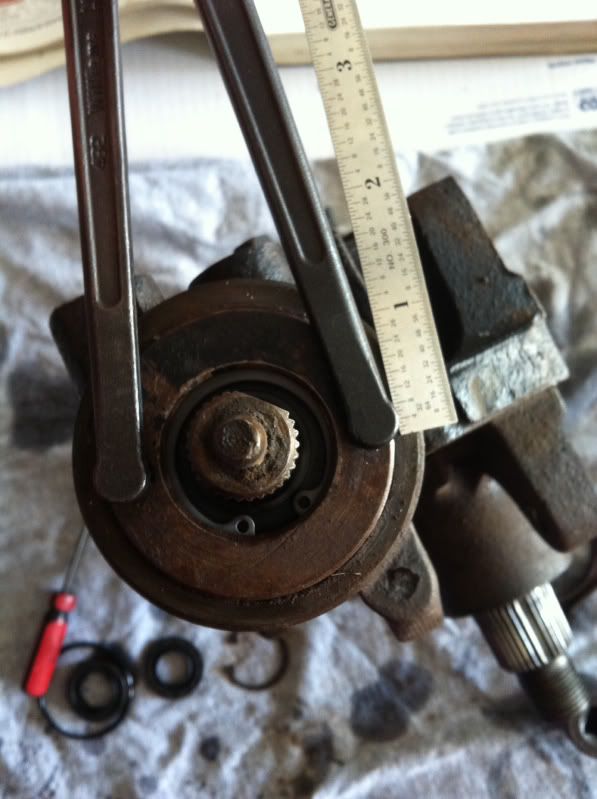 Let's review that part, its important. Screw the cartridge down until it bottoms snugly. Don't force it, its real obvious when it bottoms out. Then, make a mark of some kind as reference and loosen it half an inch (.5 inch). Then, reinstall locknut, making sure you don't move the adjustment while you're tightening it down. 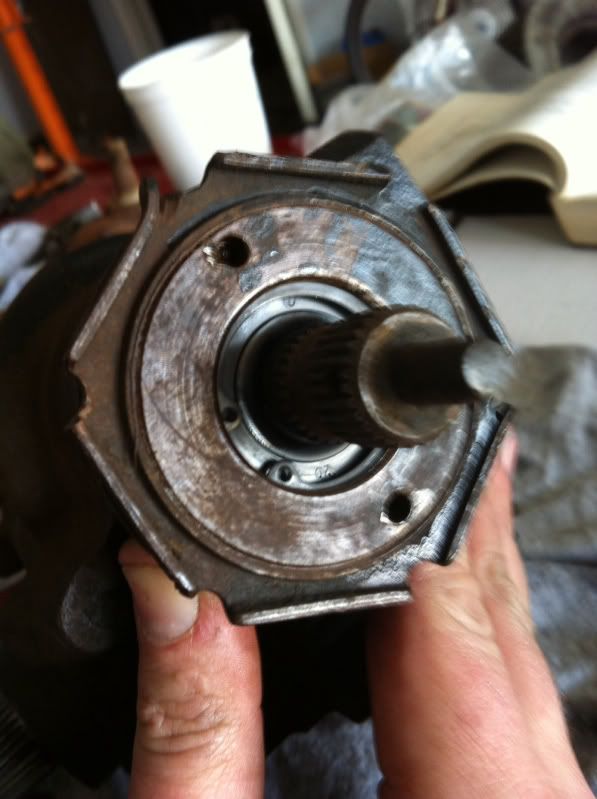
__________________
I'm on the Instagram- @Gearhead_Kevin Last edited by Tx Firefighter; 03-07-2014 at 05:39 PM. |
|
|

|
|
|
#3 |
|
Watch out for your cornhole !
 Join Date: Jun 2003
Location: Azle, Texas
Posts: 14,162
|
Re: Back to the Basics: Re-Sealing a leaky power steering box
So, that's it. You've fixed your leaking pitman shaft seal and input shaft seal.
You spent about 15 bucks for the two seal kits. And, you did some interesting mechanic work. Don't be distracted by my tools I used. You can easily use a punch and small hammer to screw/unscrew instead of a pin spanner. I'm just a tool whore and spend way too much time in the SnapOn catalogs geeking out on specialty tools. If you wanted to buy your own pin spanner, Williams tools, SnapOn's industrial division sells them. Mine was 25 dollars delivered off eBay. Snap ring pliers are also easy to get. You might spend 15 bucks for a pair of top of the line ones off eBay. A pitman arm puller is 30-40 bucks from any parts store. You need one whether you reseal your box or swap in a rebuilt box anyway. Look at it this way, you could buy all of the specialty tools from SnapOn or whatever premium tool company you prefer, and still come out cheaper than buying a parts store steering box. And you're left with bad ass tools to keep forever. And you learned something.
__________________
I'm on the Instagram- @Gearhead_Kevin Last edited by Tx Firefighter; 03-07-2014 at 05:41 PM. |
|
|

|
|
|
#4 |
|
Registered User
Join Date: Oct 2016
Location: fort worth texas
Posts: 30
|
Re: Back to the Basics: Re-Sealing a leaky power steering box
Thanks for the tutorial. I see you are in Springtown I am just down the road in Ft. Worth. I am also a firefighter
|
|
|

|
|
|
#5 |
|
Registered User
Join Date: Jul 2014
Location: South East Ohio
Posts: 644
|
Re: Back to the Basics: Re-Sealing a leaky power steering box
Great tutorial. I will be referring to this in the near future. To bad photobucket had to impose their damage to another fine thread. Even got the one at Pirate4x4
|
|
|

|
|
|
#6 |
|
Registered User
Join Date: Aug 2011
Location: Montrose, CO
Posts: 972
|
Re: Back to the Basics: Re-Sealing a leaky power steering box
Excellent writeup, thanks. As with most things on these trucks, once you dive in they really aren't that difficult. But is sure is nice to have a guided tour.
I may have to do this before I button up my 79 crossmember swap with the 79 steering gearbox. Sure easier to do now than later when it is all mounted and then find out it leaks. |
|
|

|
|
|
#7 |
|
Registered User
Join Date: May 2010
Location: Edmonton, Alberta
Posts: 3,850
|
Re: Back to the Basics: Re-Sealing a leaky power steering box
Great info, I am only days away from having to this. Thanks
__________________
--------------------------------------------------------------- Jason. 68’ GMC shortbox https://67-72chevytrucks.com/vboard/...d.php?t=794201 72' 2WD Blazer http://67-72chevytrucks.com/vboard/s...d.php?t=425385 67' LongBox C-10 http://67-72chevytrucks.com/vboard/s...d.php?t=691845 InstaGram ybnorml67 |
|
|

|
|
|
#8 |
|
Senior Member
 Join Date: Aug 2012
Location: Somewhere In So. IL.
Posts: 412
|
Re: Back to the Basics: Re-Sealing a leaky power steering box
Thanks so much for the info you've presented Kevin. I've got an 81 parts truck and was going to use the ps box as a core for a rebuilt box when I convert my 66 to ps. I had no idea the were of such low quality.
I'll just throw new seals in it and reuse my "core" in my 66. It's info and members like you how make this forum the best on the net !!! Thanks again Kevin.
__________________
Doug Old Build Thread - 383/T56 http://www.67-72chevytrucks.com/vboa...d.php?t=540838 Updated Build Thread - Modern Relic - 66 C10 536 Dark Aqua 5.3/4L60E - BTR Stage IV Truck Cam - Vintage Air - Dakota Digital http://67-72chevytrucks.com/vboard/s...d.php?t=778784 |
|
|

|
|
|
#9 |
|
Active Member
 Join Date: Jul 2007
Location: Centrally located between Houston, Austin and Waco. BCS area.
Posts: 7,947
|
Re: Back to the Basics: Re-Sealing a leaky power steering box
Good write up TX.
And as Tx said, don't even think about turning or twisting the steering shaft after removing the lock nut and adjusting nut -even if tempted (ask me why). I did my first gearbox couple of years ago and the biggest problem other than turning the shaft mentioned above, was yanking out the old pressed in seals. Another problem I had was losing a couple of ball bearings and couldn't locate anyone that sells them. So if you go all the way (or move the shaft mentioned above) be careful.
__________________
68 GMC 250/3 speed Saginaw p/b p/s 69 Chevy 350/350 currently in pieces still lookin for a cab 06 Trailblazer I just want a vehicle that I can work on, that won't talk to me, leave error msgs or keep track of how I drive... Last edited by 68gmsee; 03-08-2014 at 12:07 PM. |
|
|

|
|
|
#10 |
|
Registered User
Join Date: Oct 2009
Location: chilliwack, BC
Posts: 136
|
Re: Back to the Basics: Re-Sealing a leaky power steering box
Thank you so much! I have a leaky power steering box that drives me batty, and can't afford a new one right now! Ill definitely be trying this! Thanks again for the write up, it was very clear and well-written.
__________________
'71 GMC pickup; "Ashley," 
|
|
|

|
|
|
#11 |
|
Watch out for your cornhole !
 Join Date: Jun 2003
Location: Azle, Texas
Posts: 14,162
|
Re: Back to the Basics: Re-Sealing a leaky power steering box
Something I wanted to add fellas. Y'all make sure and catalog your own part numbers for the seal kits. The input shaft was different size depending on which year of box you have. I'm sure they take correspondingly different sized seals too. My numbers for the 87 box might be different than say, a 78 model box would take. The procedures are the same though.
__________________
I'm on the Instagram- @Gearhead_Kevin |
|
|

|
|
|
#12 |
|
Registered User
Join Date: Apr 2003
Location: Indep, MO
Posts: 5,893
|
Re: Back to the Basics: Re-Sealing a leaky power steering box
Great writeup, thanks!
__________________
Boppa's Old Yeller Truck Build, Old Yeller's New Heart! Project Buzz Bomb Flyin' Low! |
|
|

|
|
|
#13 |
|
driving is in my blood
Join Date: Dec 1999
Location: Mesa AZ
Posts: 5,739
|
Re: Back to the Basics: Re-Sealing a leaky power steering box
Yup, totally would have done this recently instead of a junkyard box. Oh well, glad I inspiried you to write this, thank you!
__________________
-78 c10 short/step: 388cid, M20, 5/5 drop, lots more. Playtoy and first vehicle. -98 c1500 x-cab: 5.7L, 17" rims, 5/6 drop, flowmaster, helper bags,NBS rear disk brakes. -02 Suburban 4x4: leveled front -CBR600F4i, CBR600RR, CBR1000RR, and standup skis DISCLAIMER: I cant spell for the life of me. |
|
|

|
|
|
#14 |
|
Registered User
Join Date: Mar 2014
Location: West Monroe, Louisiana
Posts: 79
|
Re: Back to the Basics: Re-Sealing a leaky power steering box
Great write up and just in time for me, my box is leaking and I was going to replace it while rebuilding my front end but now I'm going to try and repair it.
|
|
|

|
|
|
#15 |
|
Registered User
Join Date: Jun 2006
Location: Jackson, Mo.
Posts: 607
|
Re: Back to the Basics: Re-Sealing a leaky power steering box
Kevin,
Thank you very much for these pics and directions! I just recently added p/strg. to my 65' and, thanks to your write-up, was able to re-seal the salvage yard box I used. Thanks again!!
__________________
Chris 1966 Chevy C10 LWB, 434 sbc, TH350, 12-bolt, factory suspension, pump gas 7.02 @ 95.8, 1.45 60' 1965 Chevy C10 LWB, 355 sbc, TH350, daily driver |
|
|

|
|
|
#16 |
|
Watch out for your cornhole !
 Join Date: Jun 2003
Location: Azle, Texas
Posts: 14,162
|
Re: Back to the Basics: Re-Sealing a leaky power steering box
I'm very glad this article is helping you fellas. I'm planning to post an entire series of them as I do various jobs around the shop. Next up I'm planning on doing a reseal your power steering pump article.
__________________
I'm on the Instagram- @Gearhead_Kevin |
|
|

|
|
|
#17 | |
|
I'm just glad to be here!
Join Date: Jan 2008
Location: Longview, TX
Posts: 4,788
|
Re: Back to the Basics: Re-Sealing a leaky power steering box
Quote:
What ever happened to the article for the power steering pump?
__________________
Karl  1965 Chevy Stepside(Grandpa's Old Blue) and (July 2015 Shop Build!)(2020, the Saga Continues) http://67-72chevytrucks.com/vboard/s...d.php?t=372424 The LST Challenge: http://67-72chevytrucks.com/vboard/s...=1#post7812257 Korbin's 1st Square: "Sunburn" http://67-72chevytrucks.com/vboard/s...d.php?t=418618 1985 GMC Sierra: "White Trash", Korbin's 2nd now... http://67-72chevytrucks.com/vboard/s...d.php?t=632305 Henry - 1984 Chevrolet, Owen's 1st Square |
|
|
|

|
|
|
#18 |
|
Registered User
Join Date: Apr 2013
Location: Houston,TX.....Hometown of San Jose Cali
Posts: 361
|
Re: Back to the Basics: Re-Sealing a leaky power steering box
great step by step. im not mechanically inclined but your write up makes me willing to tackle this
__________________
63 big window lwb bagged and shaved |
|
|

|
|
|
#19 |
|
Registered User
Join Date: Apr 2006
Location: Alaska
Posts: 48
|
Re: Back to the Basics: Re-Sealing a leaky power steering box
My 77 box is making a popping sound when you turn the wheel, I've adjusted the gears before and guessing they are shot. Do they make replacement gears or complete rebuild kits?
|
|
|

|
|
|
#20 |
|
Registered User
Join Date: Mar 2014
Location: West Monroe, Louisiana
Posts: 79
|
Re: Back to the Basics: Re-Sealing a leaky power steering box
Again, a great write up Tex but one question
 . You mention making sure the pitman shaft is lined up, how do you do this or know when it aligned and what are you lining it up to to make sure everything goes back the same way, I must be missing something. Thanks for your help. . You mention making sure the pitman shaft is lined up, how do you do this or know when it aligned and what are you lining it up to to make sure everything goes back the same way, I must be missing something. Thanks for your help.
|
|
|

|
|
|
#21 | ||
|
Watch out for your cornhole !
 Join Date: Jun 2003
Location: Azle, Texas
Posts: 14,162
|
Re: Back to the Basics: Re-Sealing a leaky power steering box
Quote:
Quote:
If so, the pitman shaft has gigantic teeth on it. Something like three of them. You just make sure that when you drop it into place, the center of the three teeth lines up with the center of the other teeth inside of the box. Sounds complicated, but I personally guarantee you will see what I mean when you do yours.
__________________
I'm on the Instagram- @Gearhead_Kevin |
||
|
|

|
|
|
#22 |
|
Registered User
Join Date: Jun 2004
Location: Medford,Oregon
Posts: 390
|
Re: Back to the Basics: Re-Sealing a leaky power steering box
I think he meant how do you make sure your steering box is centered before you take the pitman shaft out.
I wish i would of went this route because i purchased a rebuilt steering box for my truck a few months back and it was a complete waste of money. Now instead of having a truck with a leaky box i have a truck that doesn't want to return to center and tends to stay stuck in the direction your turning. I tried to get it replaced but i guess i scratched off the green paint marking they put on the box when i installed it so they wont take it back now.
__________________

|
|
|

|
|
|
#23 |
|
Registered User
Join Date: Mar 2014
Location: West Monroe, Louisiana
Posts: 79
|
Re: Back to the Basics: Re-Sealing a leaky power steering box
Thanks Billy81, that what I meant but I guess I didn't explain it clear enough. I have the whole steering system out now including the steering box, can the steering box be centered now before the pitman shaft comes out or do I have to wait until the system is back together before it can be centered correctly.
|
|
|

|
|
|
#24 |
|
Watch out for your cornhole !
 Join Date: Jun 2003
Location: Azle, Texas
Posts: 14,162
|
Re: Back to the Basics: Re-Sealing a leaky power steering box
To center the box, just turn the steering wheel all the way to one side, then all the way to the other side, counting the turns. Then turn it back half way.
__________________
I'm on the Instagram- @Gearhead_Kevin |
|
|

|
|
|
#25 |
|
Watch out for your cornhole !
 Join Date: Jun 2003
Location: Azle, Texas
Posts: 14,162
|
Re: Back to the Basics: Re-Sealing a leaky power steering box
Sure,
Just slip the coupler back down onto the input shaft (to act as a knob) and spin the box lock to lock. Then turn back to the center from there.
__________________
I'm on the Instagram- @Gearhead_Kevin |
|
|

|
 |
| Bookmarks |
|
|