
 |
Register or Log In To remove these advertisements. |
|
|
|
|||||||
 |
|
|
Thread Tools | Display Modes |
|
|
|
|
#1 |
|
WTB this ad
Join Date: Sep 2004
Location: Lafayette Georgia
Posts: 5,074
|
Saturday pics (4-11) Drop FAQs...(AKA making it WORTHLESS!)
Hey gang! I see a lot of questions here on the forum about dropping these trucks. Since we had plans to lower my lil bro's pickup I took the opportunity to try to document the process. I took a few short vids as well as some pics of the shenannigans! By no means is this considered a "how to"...it's just how we did it. Now....let's Get on it doggone it!!
All the parts came from Early Classic Enterprises. They're the only company that I've ever used for dropping a truck, and they're the only company that I would recommend! After scanning the instructions I saw that most of the questions I see asked here were answered in the instructions. So...once you get your parts read the instructions guys!  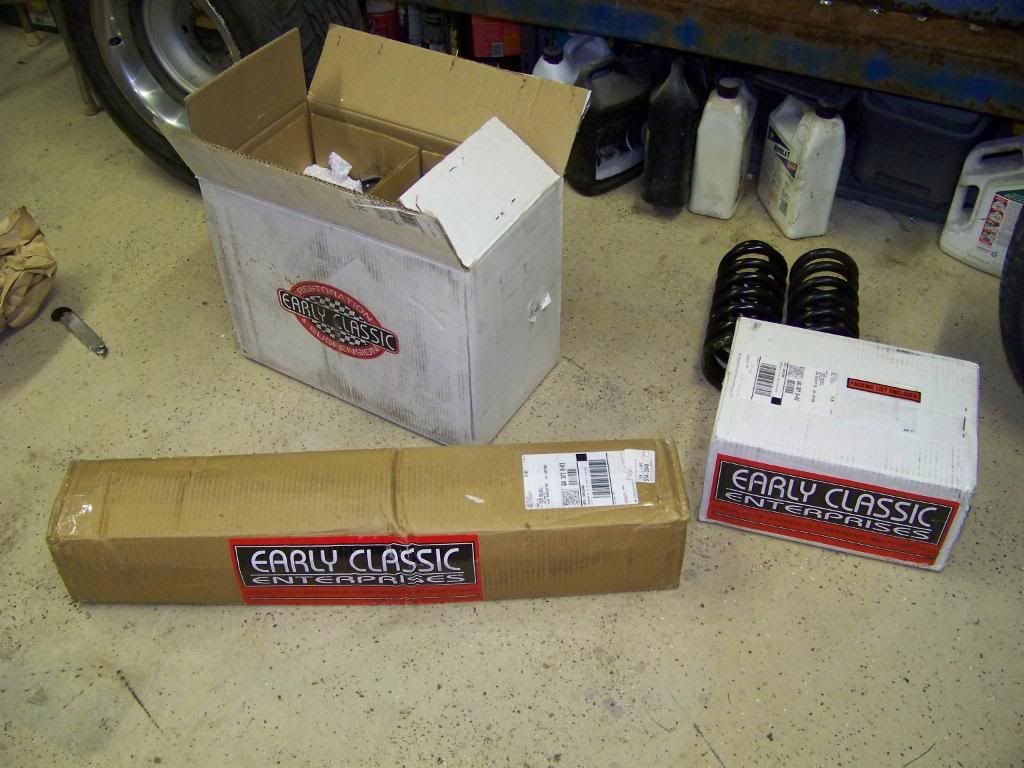 I made a feeble attempt to photograph the phone so you could see that how long this process takes in real time. "How long should it take to drop my truck?" Is a question that turns up a lot....stay tuned for the final tally...  Video intro...(I really don't think I sound so much like a hick in person...Oh well!) "How do you seperate the tie rod from the spindle without damaging it?" We removed the cotter pin backed off the nut and applied a couple firm whacks with a large hammer. "How do you seperate the balljoints from the spindle?" Again, We removed the cotter pins from the ball joints and backed off the nuts. The trucks frame is supported by jackstands. Notice the control arms are hangin freely. The pressure from the stock springs will do the work for you...well, after a couple whacks with a hammer. " Do I need a coil spring compressor to remove my coils once I have the spindle off?" Short answer...Nope. Let's backtrack just a bit. Once you've seperated the balljoints from the spindle you're going to place a jack under the lower control arm and apply some pressure. Once you've removed your spindle let the jack down slowly and the spring will just fall out on to the ground. We had the caliper tied up with a coat hanger...the coat hanger failed. Be sure you have em tied up securely to prevent this from happening to you! No harm occured as far as we can tell... "Will I need a coil spring compressor to re-install my coils" Short answer..Nope. There is an indention in the control arm and in the upper pocket that the end of the coil rests in...You'll know it when you see it. We generally place the upper end in place and then use a jack to push up the lower control arm until it's high enough to install the spindle. Again! This isn't what we do for a living. We're just a couple a guys that wanted to have a bit of fun by showing ya'll how we do things! Give me a minute and we'll move on to the back! |
|
|

|
|
|
#2 |
|
WTB this ad
Join Date: Sep 2004
Location: Lafayette Georgia
Posts: 5,074
|
Re: Saturday pics (4-11) Drop FAQs...(AKA making it WORTHLESS!)
I took a few still shots of the front install but since I had so many vids I just used them instead. So many of the things we did are more effective if you can see them in action instead of a "still" shot. The back half of this job ended up having more stills then vids.....Let's Get on it DOGGONE it!
We took the bed off for the back...No, you don't have to, but this one is getting a C-notch as well. (Not to mention Brian likes using his new toy). A big shout out goes to Kevin at LFD (Rokrln) for his bed/lift plans! It works flawlessly, as it was designed to! 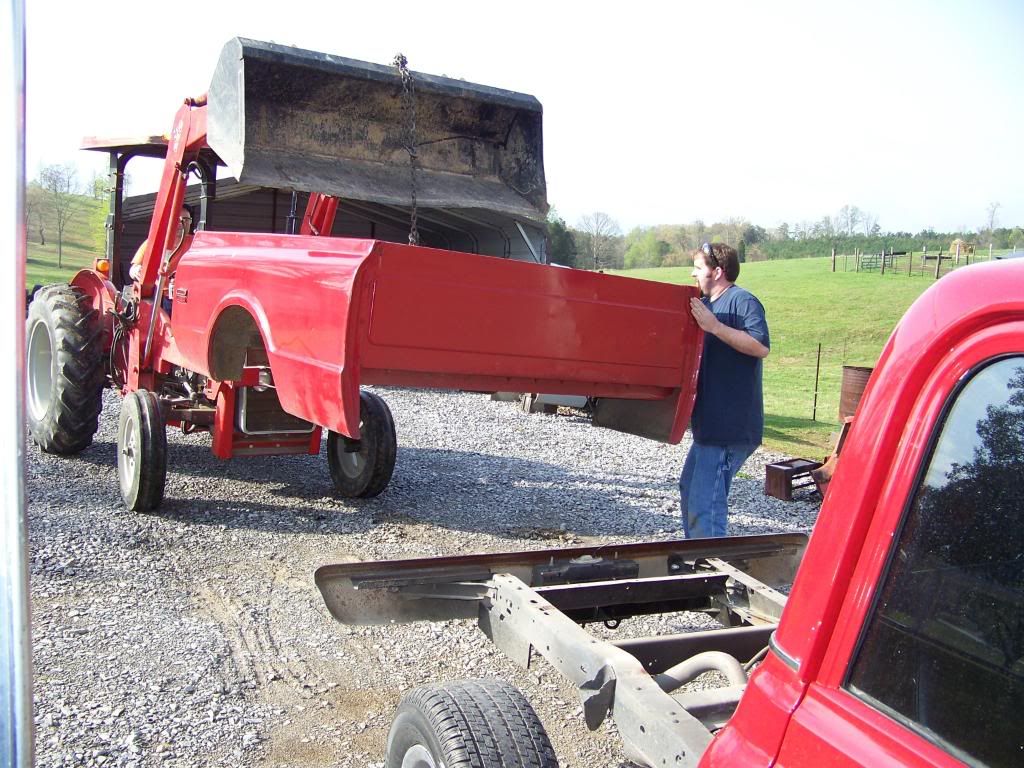 "Do I need a C-notch with X amount of drop?" That's a good question...I guess it depends on how you plan on using your truck. Based on my personal past experience. My truck with 6" ECE springs WILL bottom out from time to time. I drive it like I stole it and do some light hauling. There are guys on this forum with the exact same drop that claim to have never bottomed out. I'm not disputing them, I just know that I have had issues. The first thing we did once the bed was removed was to torch the factory rivets for the upper shock mounts and the bumpstops. 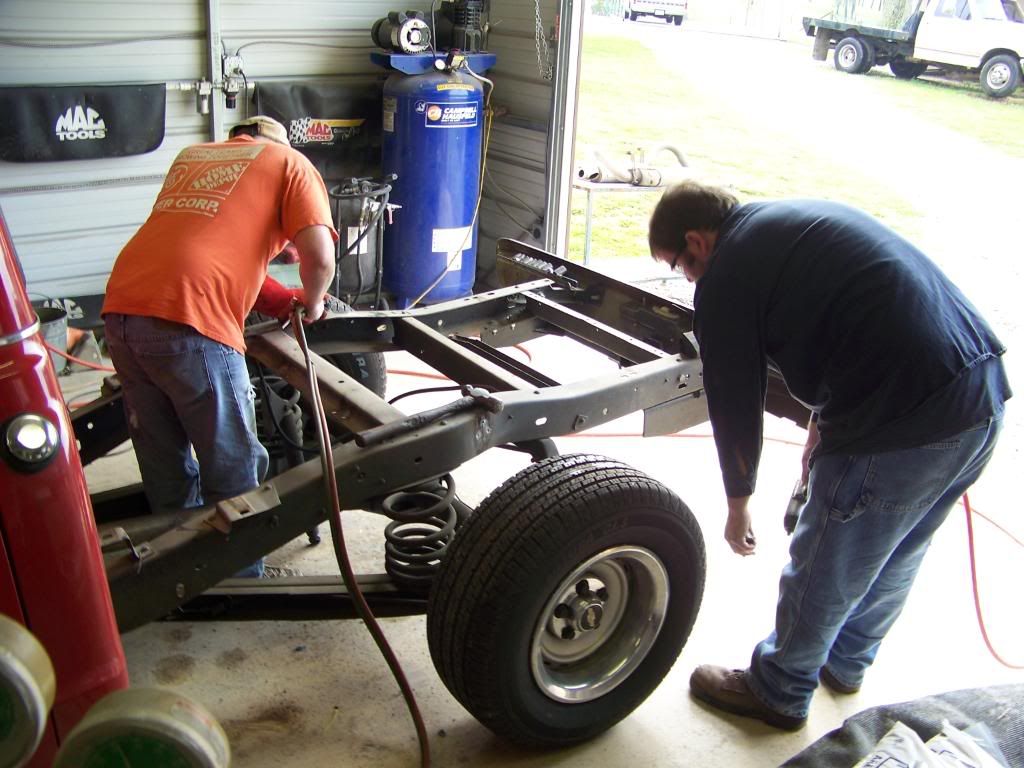 Then we removed the rear coils so that we could jack up the rearend to get an accurate mark for our notch. 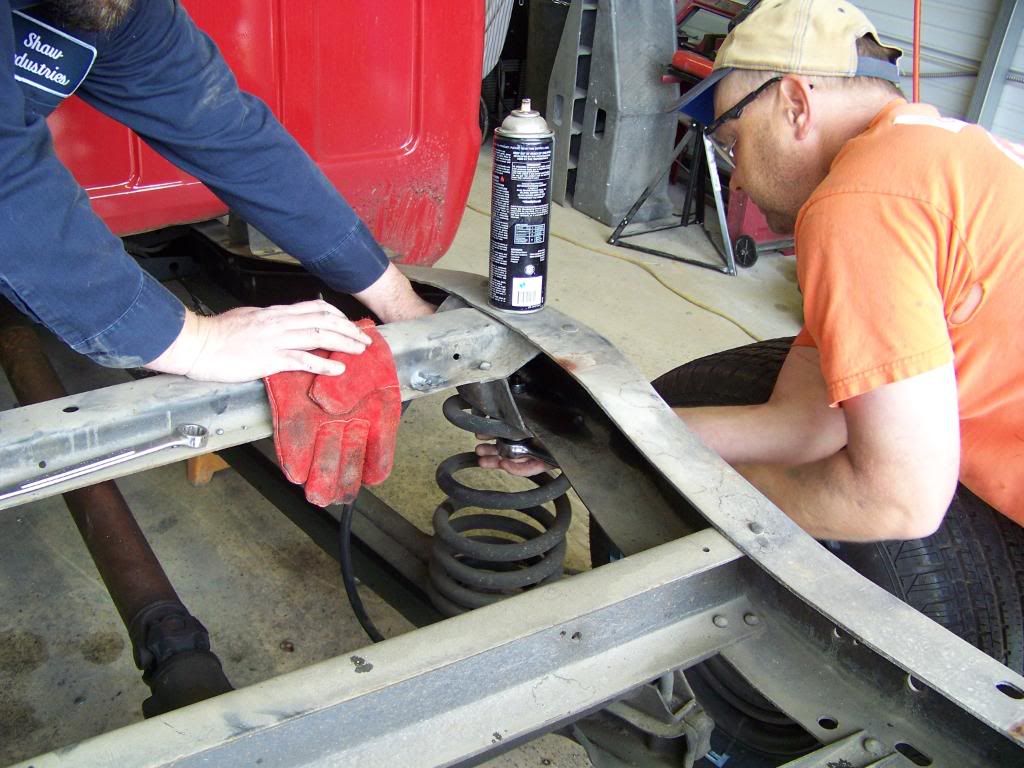 We soon realized that the carrier bearing mount would contact the one piece driveshaft before the rearend touched the frame....So it was torched as well. 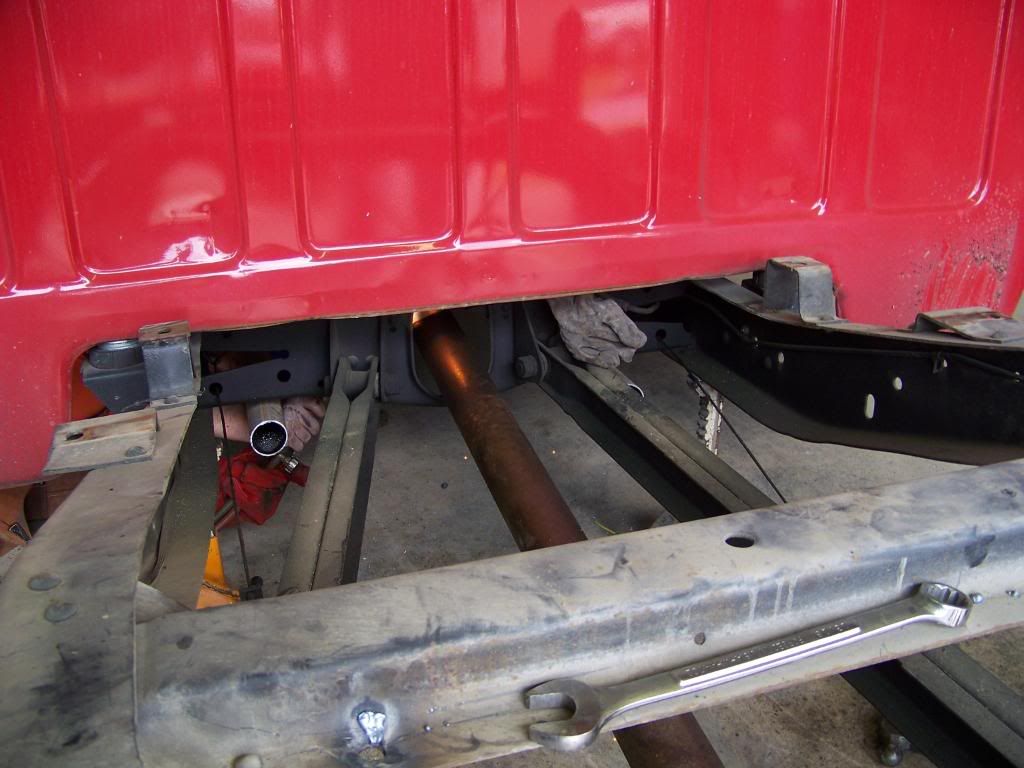 The general rule that I've read is to not take out more then half the height of the frame when doing a notch...Here's our VERY rough and quick mockup. For our homemade notch we used some 4" square tubing that we cut one side off of and then flared two sides of out to get the shape that we wanted. 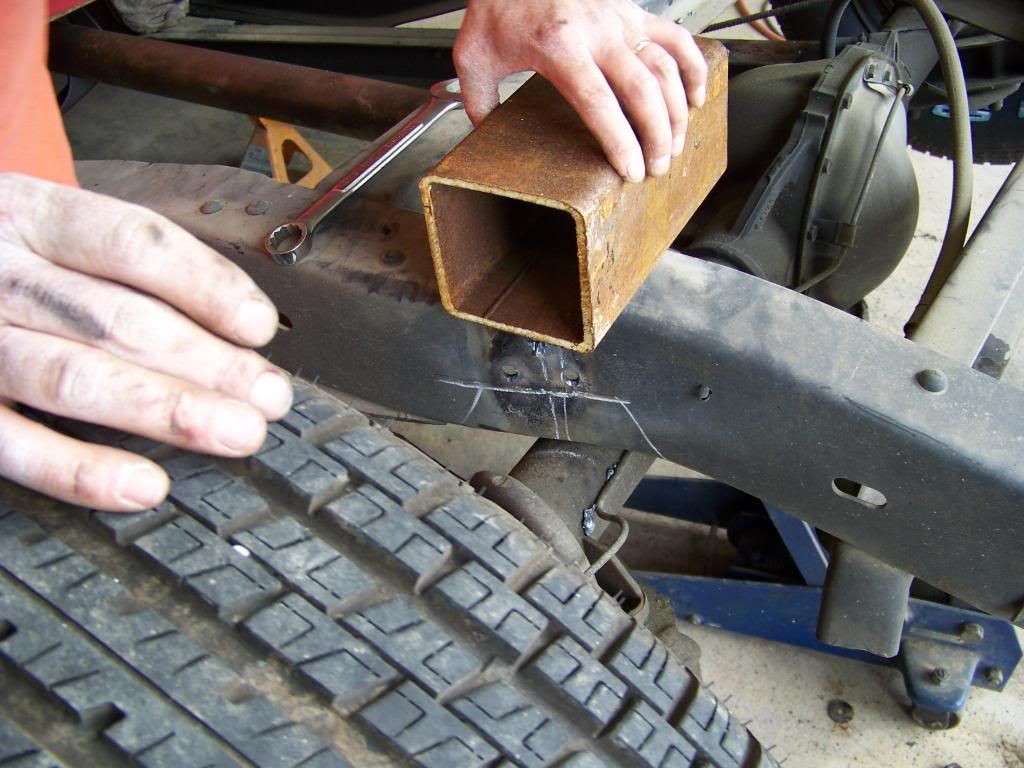 Lil brother is a master of the cut off wheel! Note that there are jackstands under the frame behind the notch as well as jackstands under the frame forward of the notch (not visible in the shot). 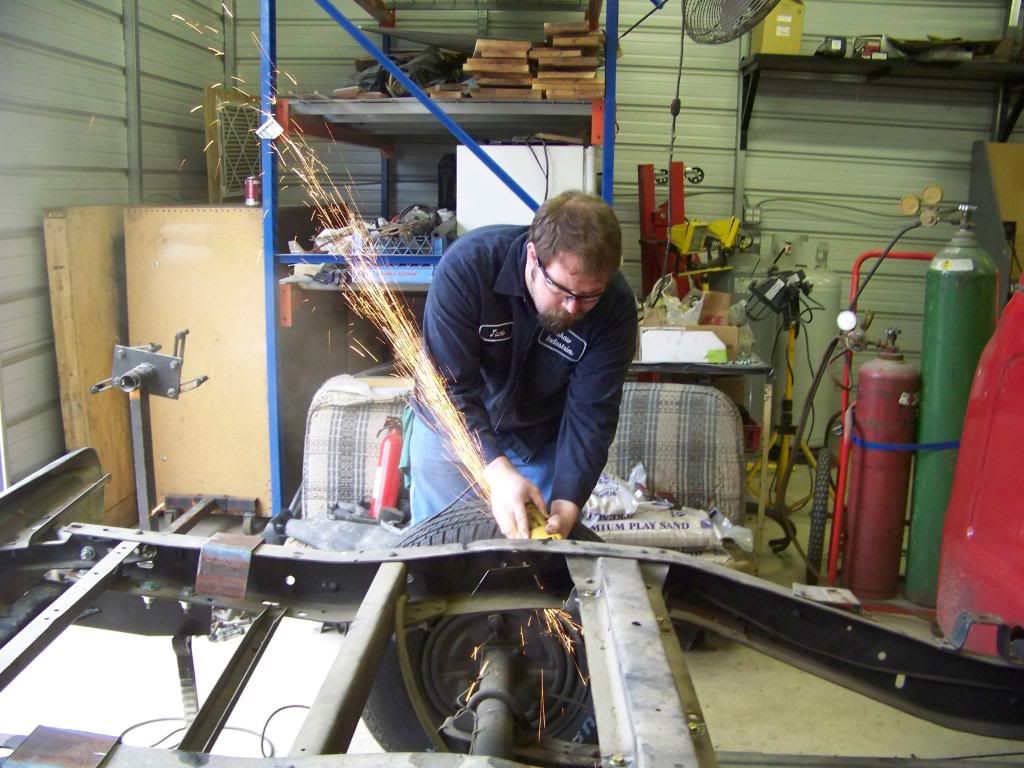 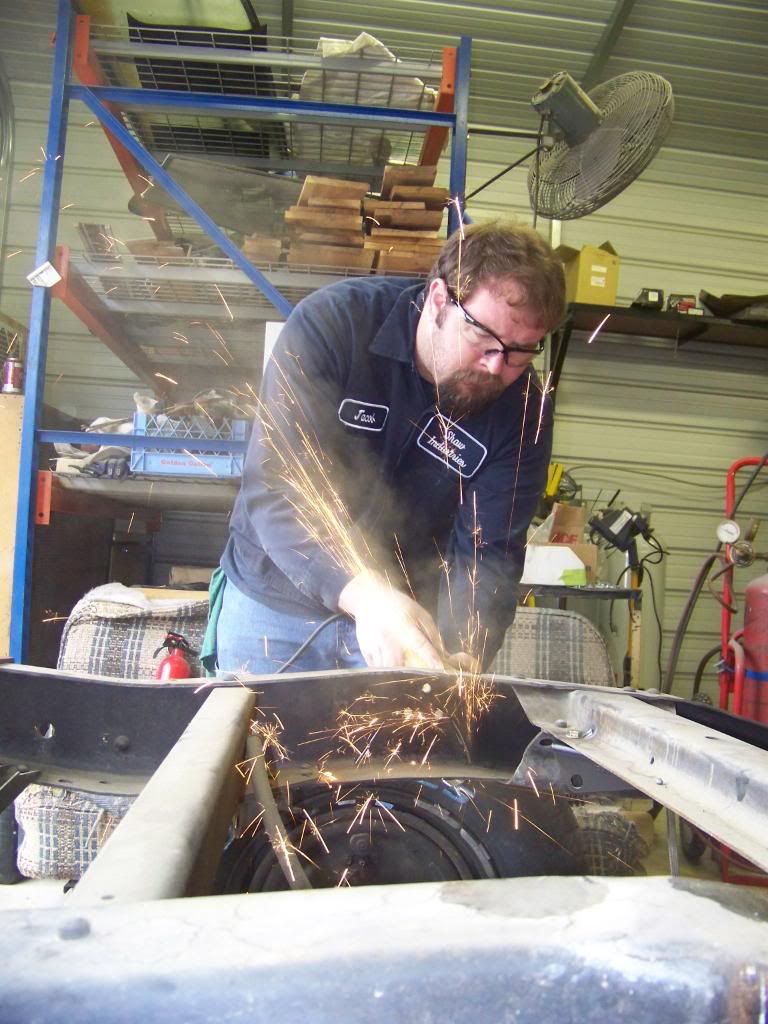 Not to shabby so far... 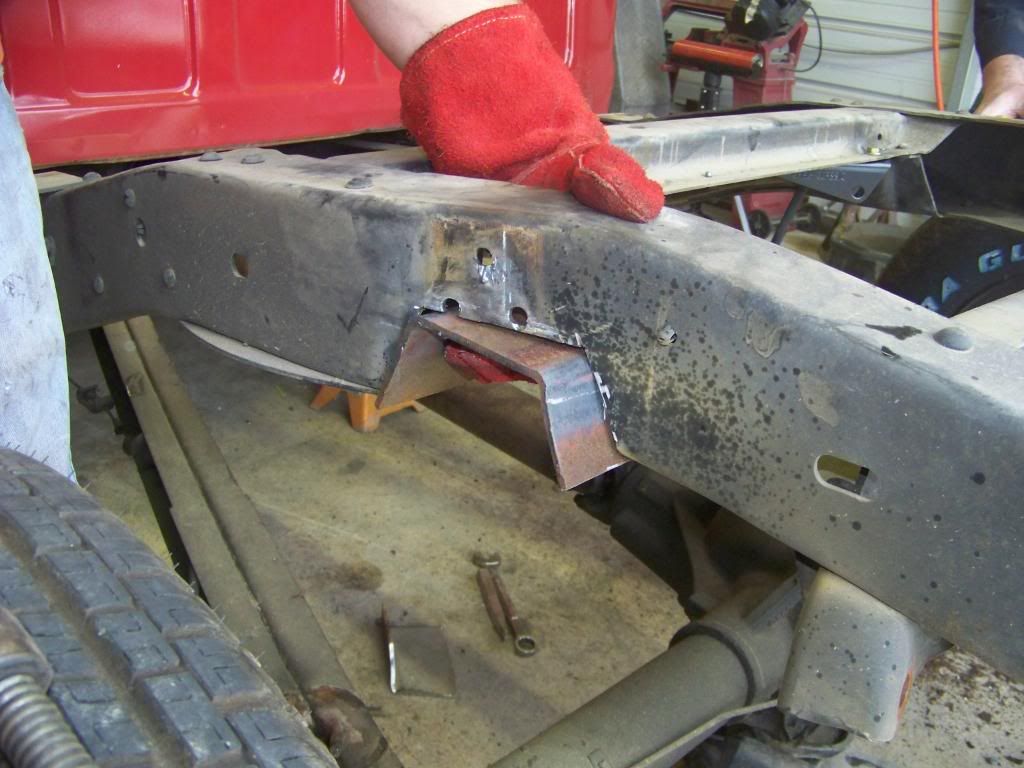 Had a portaband failure while we were building the notch... 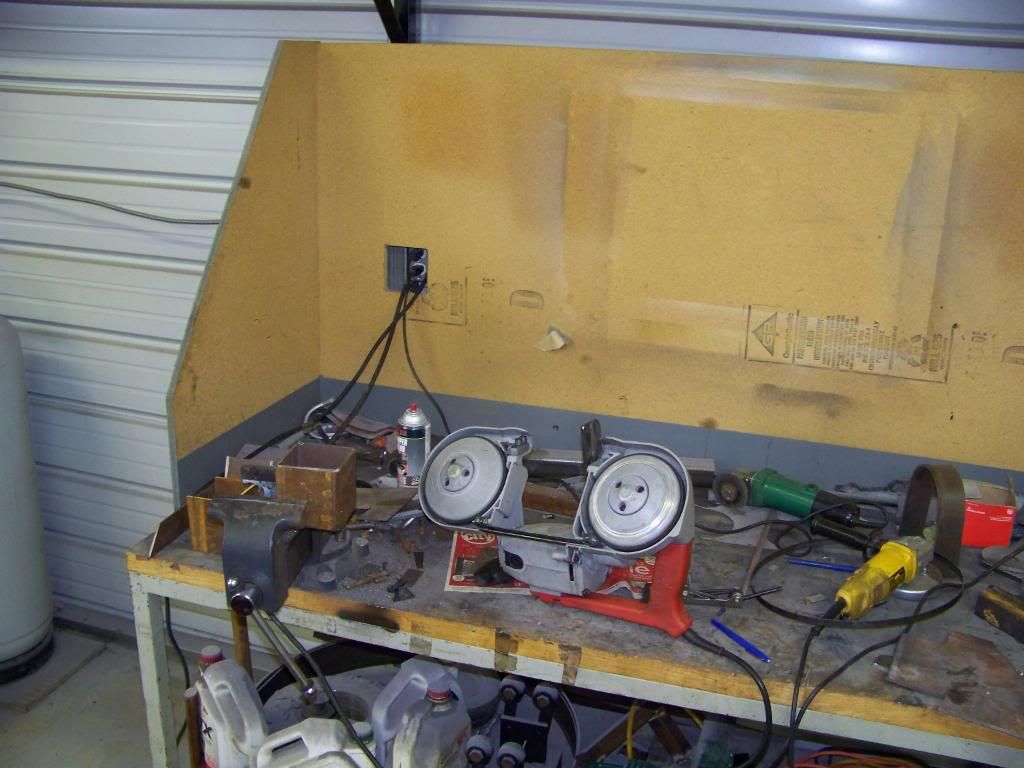 I took that as an opportunity for a flop eared Peep break! 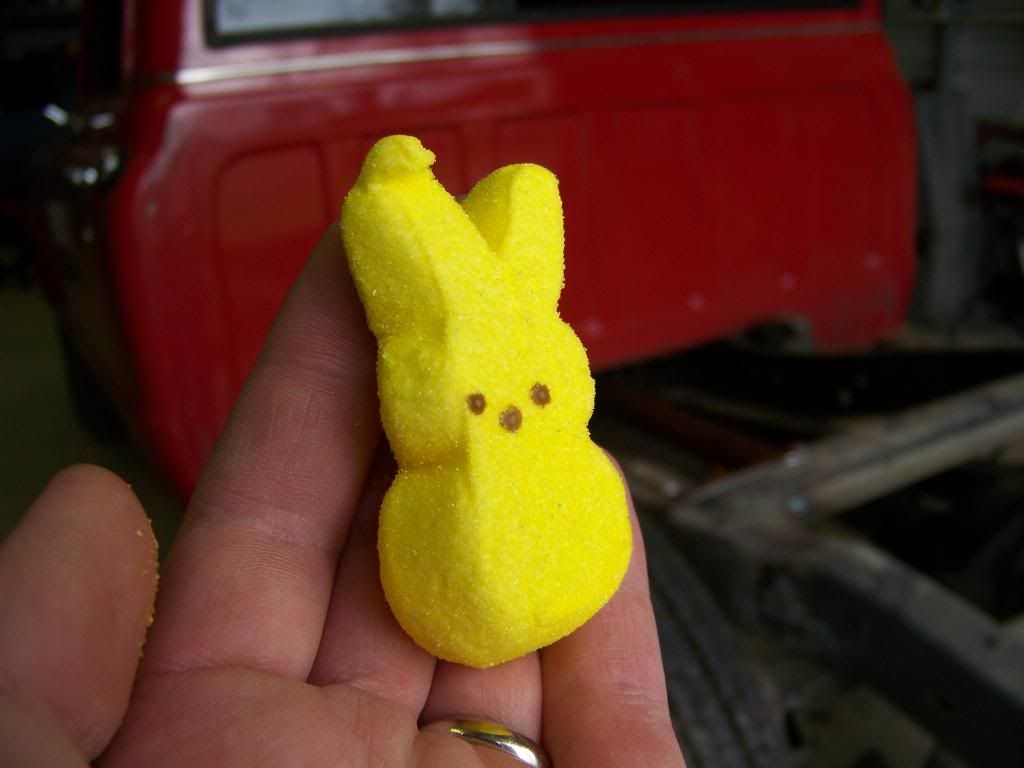 Stay tuned! We're not done yet! |
|
|

|
|
|
#3 |
|
WTB this ad
Join Date: Sep 2004
Location: Lafayette Georgia
Posts: 5,074
|
Re: Saturday pics (4-11) Drop FAQs...(AKA making it WORTHLESS!)
He's not afraid...He was made for this!
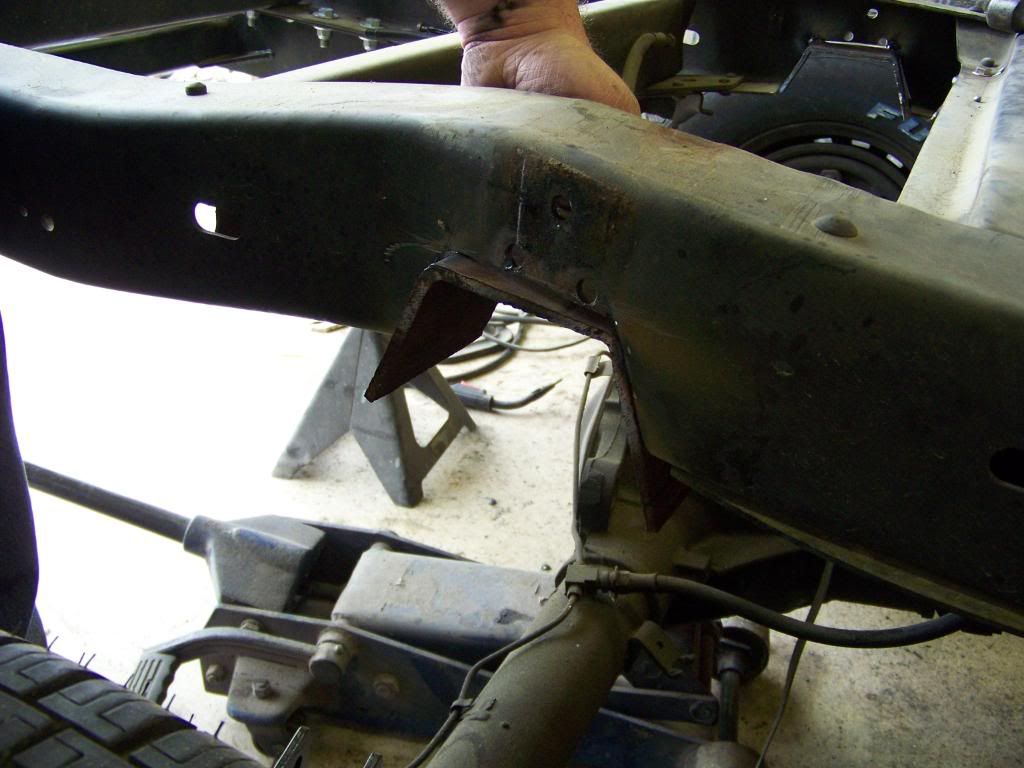 Self explanatory at this point... 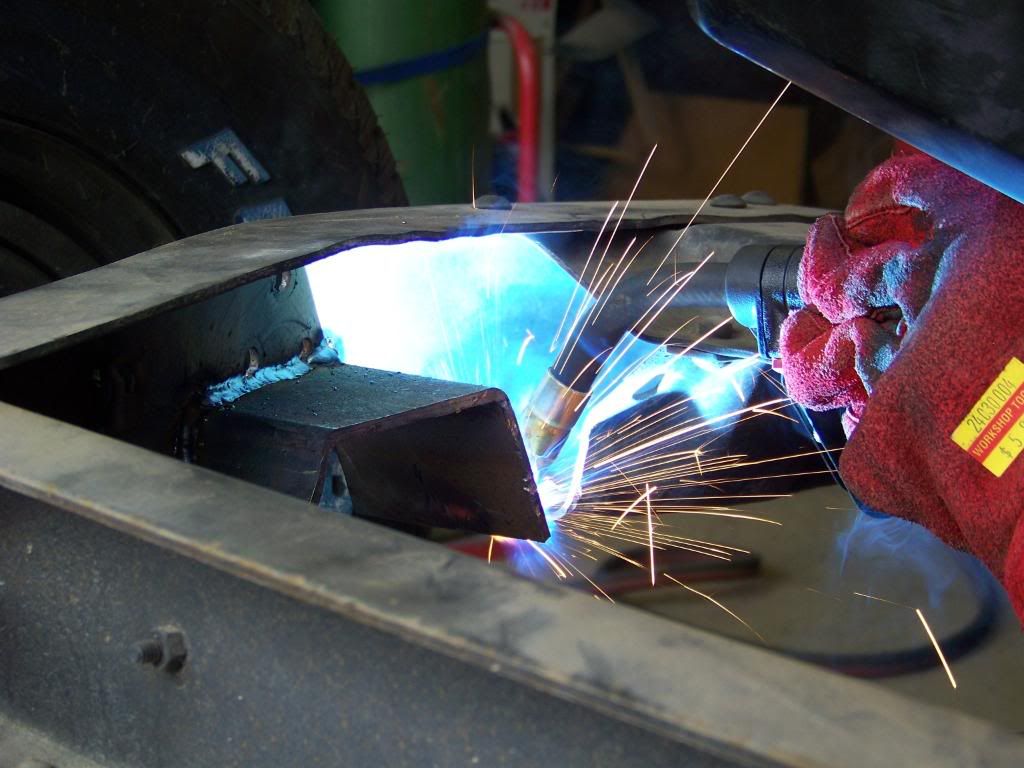 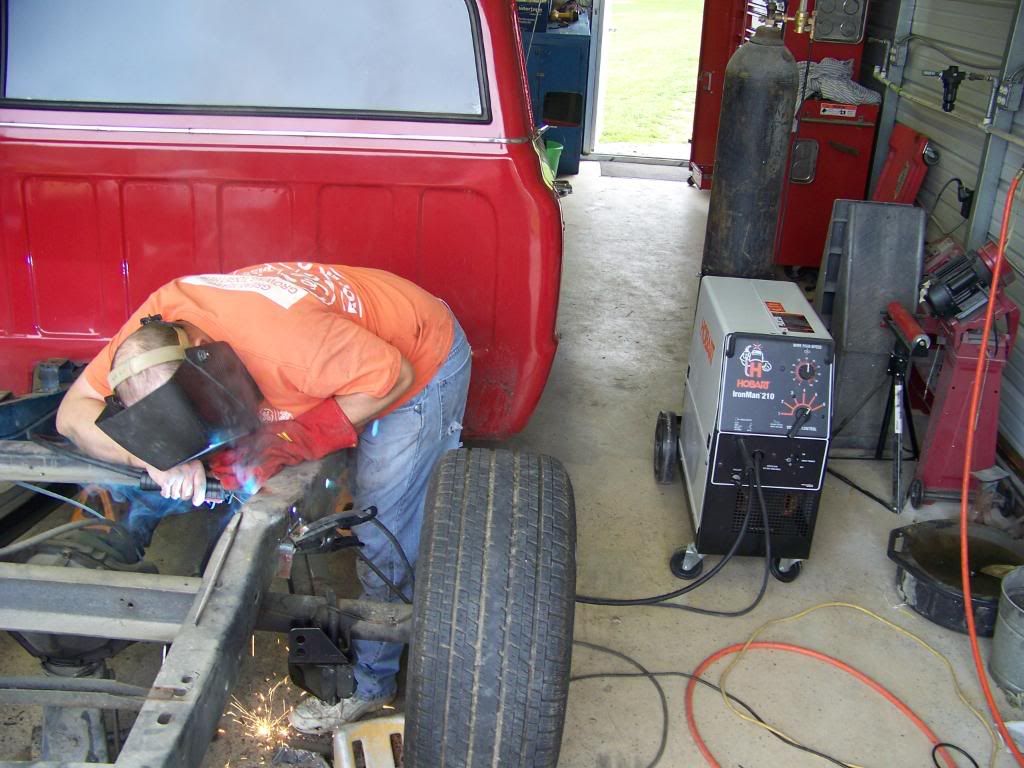 We also boxed the frame with a plate for a few inches before and after the notch. 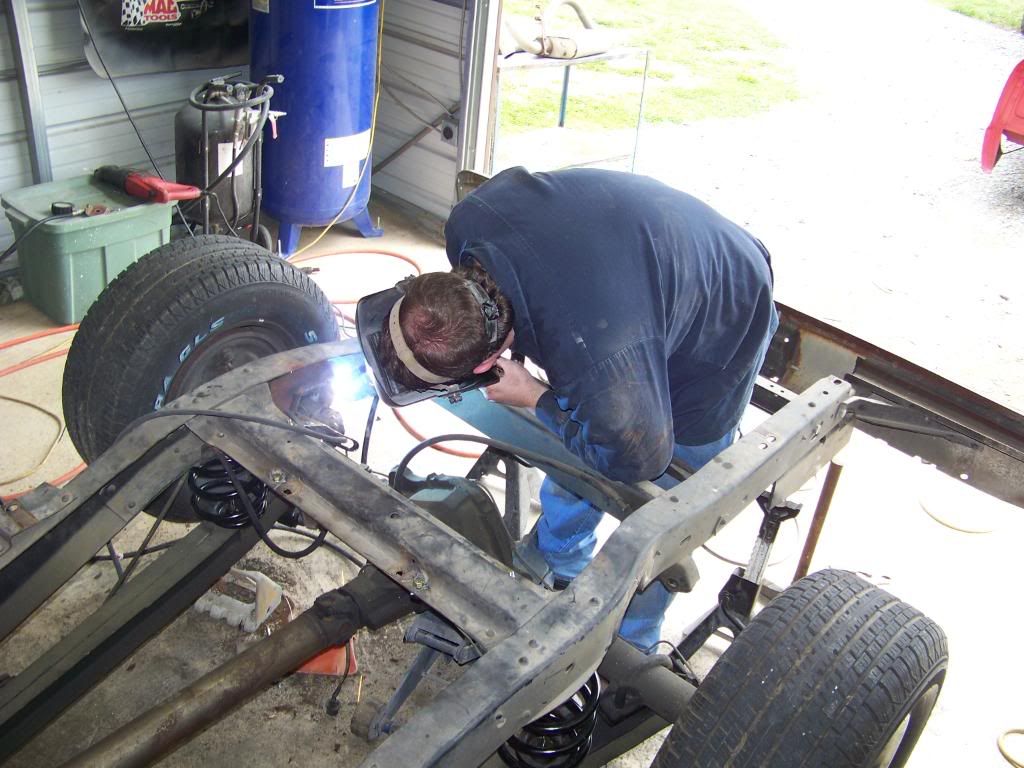 We cut off the bumpstop brackets and then welded them to the frame. The bottom of the bumpstop is even with the bottom of the factory frame. Since my truck doesn't hit a lot (but does hit) we wanted to keep the bumpstops like this. If they turn out to be to long we'll go back and trim them. 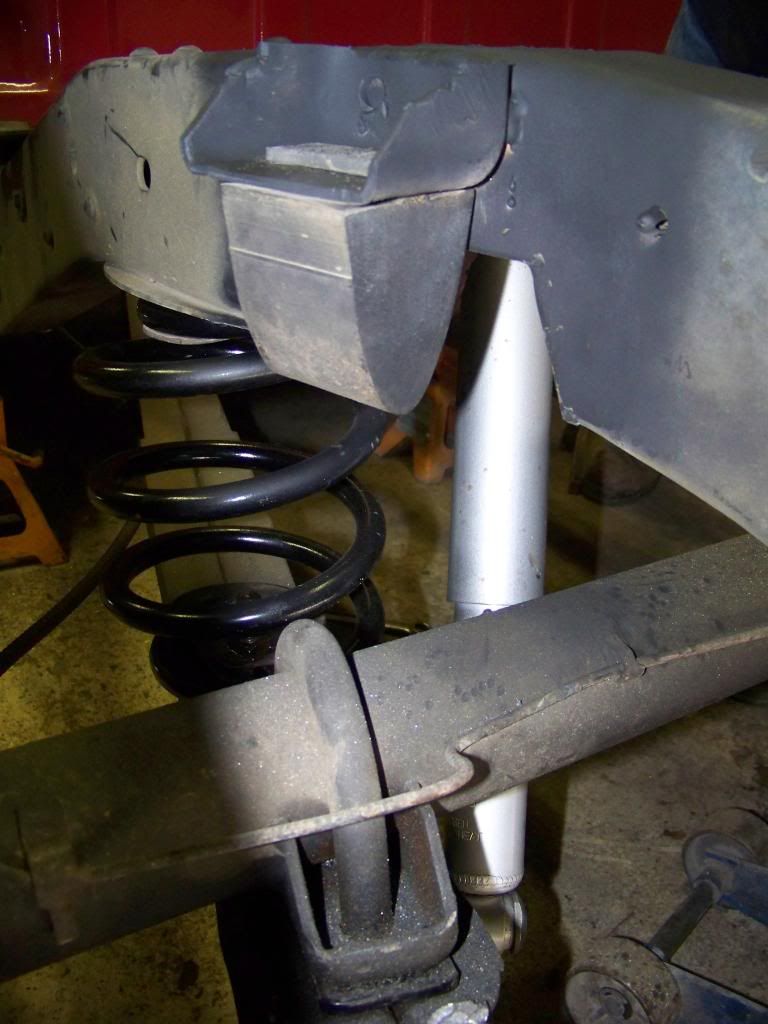 "How do you get out the stud for the factory track bar?" Short answer remove the nut closest to the cab...strike with hammer! In this shot you can see that the springs have been swapped and the shock relocaters installed. 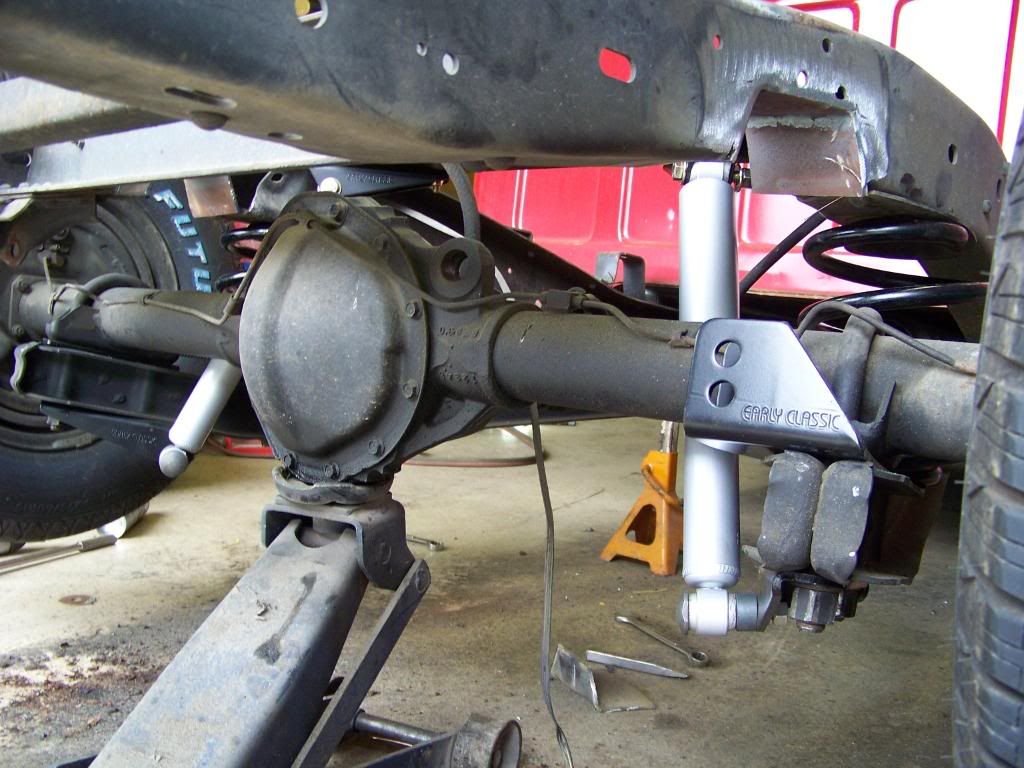 You might have noticed that we reused the stock u-bolts. You might ask "why?". Well, I'll tell you why. This has got to be my ONLY complaint about ECE. It's happened to me twice before this and it's always been after they're closed and usualy we're trying to get the truck put back together right then. The U-bolts they provide are somewhat inconsistent in their spacing at the end. Makes it a booger to get things put back together friends! 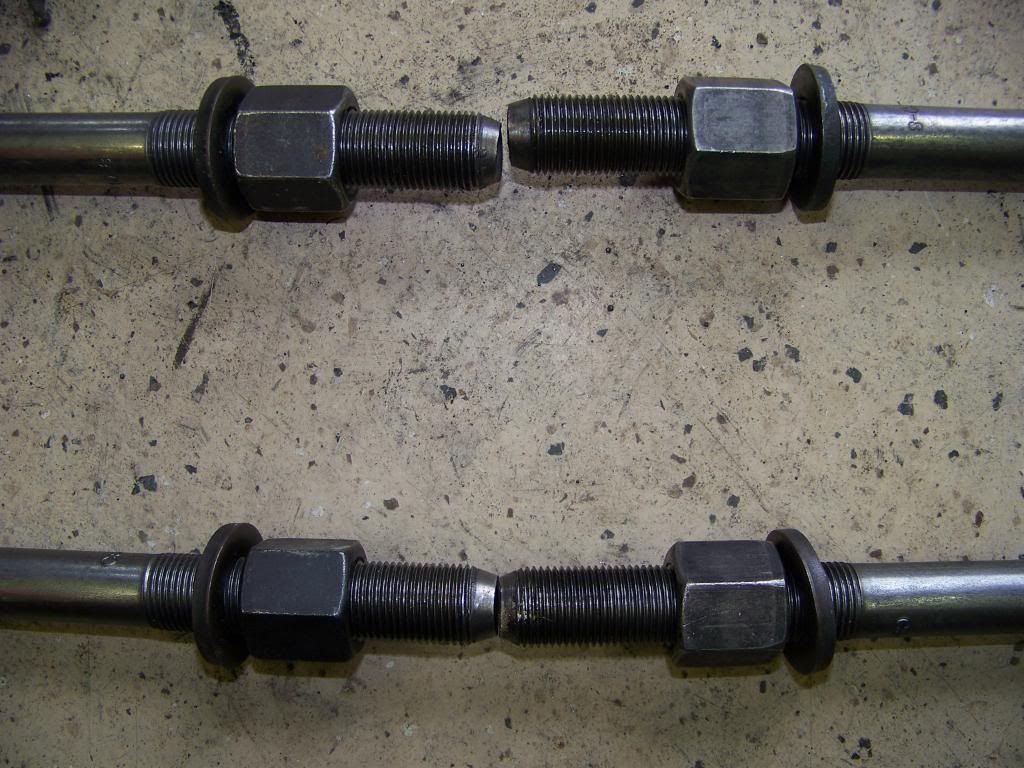 Stay tuned! There's more! 
|
|
|

|
|
|
#4 |
|
WTB this ad
Join Date: Sep 2004
Location: Lafayette Georgia
Posts: 5,074
|
Re: Saturday pics (4-11) Drop FAQs...(AKA making it WORTHLESS!)
So far so good! Right??
OK. "How do I center the rearend with the track bar?" It's not as bad as everyone makes it sound. It's something that we've always done with the bed on before this round. I generally will have the trucks rear supported by a jack with the rear wheels removed. We'll put our jackstands under the frame just short of actually touching it forward of the axle (we want all the weight to be on the rear axle, not on the stands). We then take a measurement from the frame to the backing plate on both sides and split the difference to find the center. Generally we've always just pulled on the backing plate with our feet on the frame to pull it the direction that we need it to go. Spin around the adjustable end of the track bar and drop it in. Since the bed was off the truck for this one a couple of us just stood on the rear of the frame to simulate the weight of the bed. Brian took some measurements and we just pried a piece of tubing between the side of the trailing arm and the frame until things were centered. Then we dropped in the track bar. 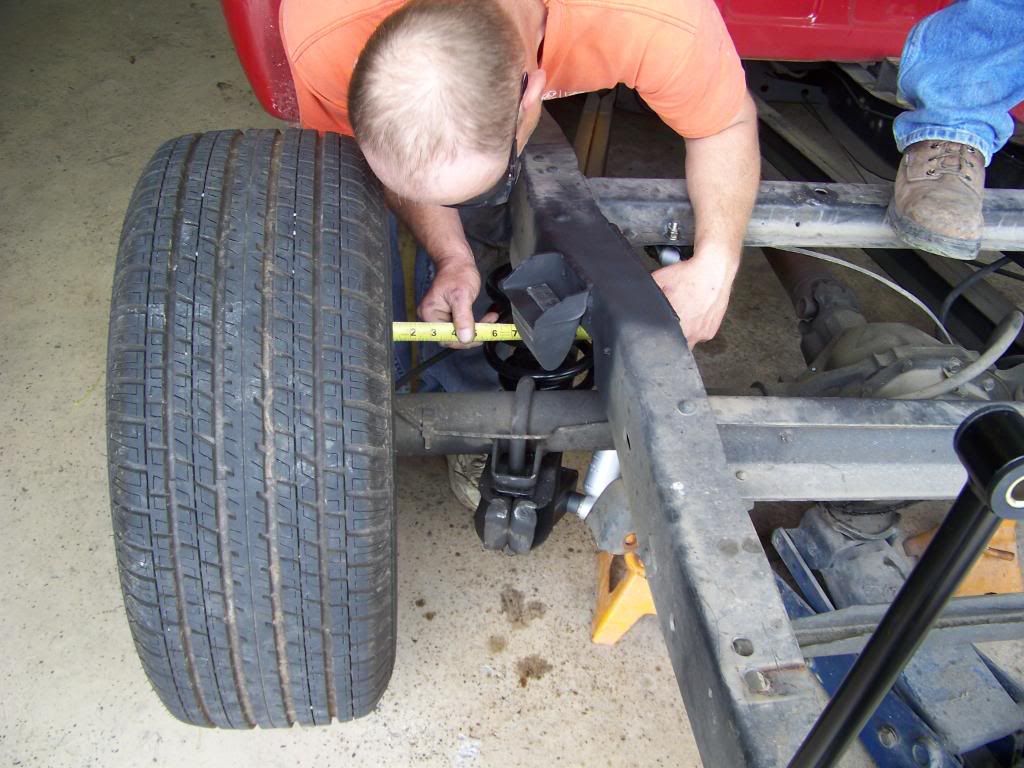 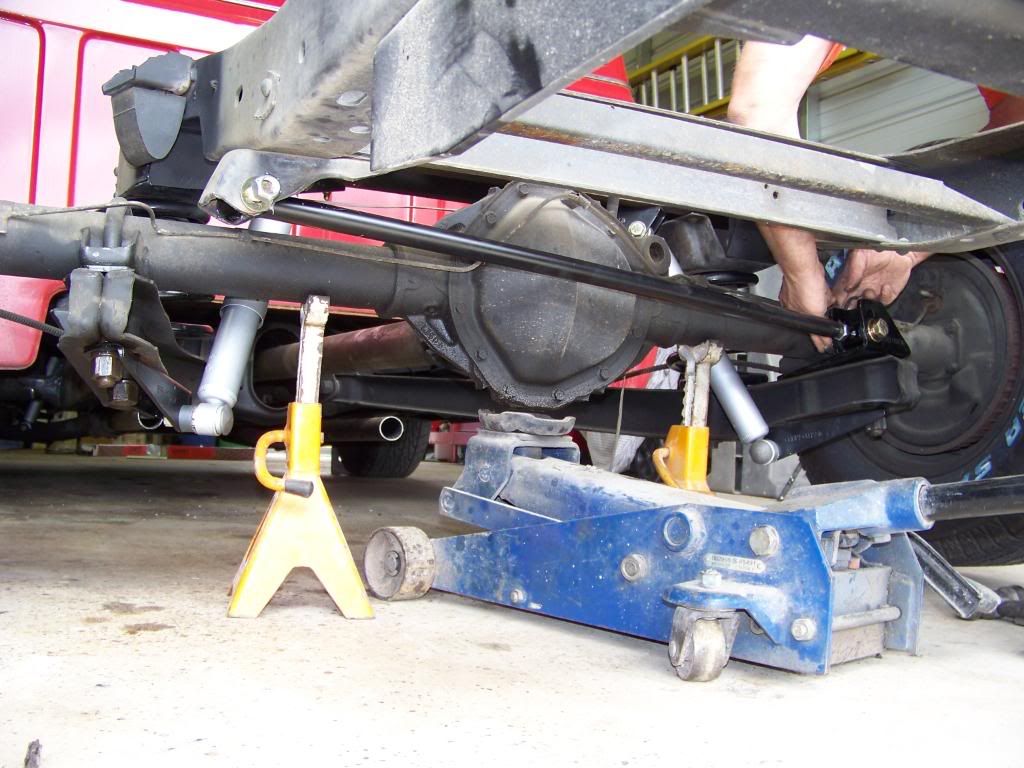 Good to go! 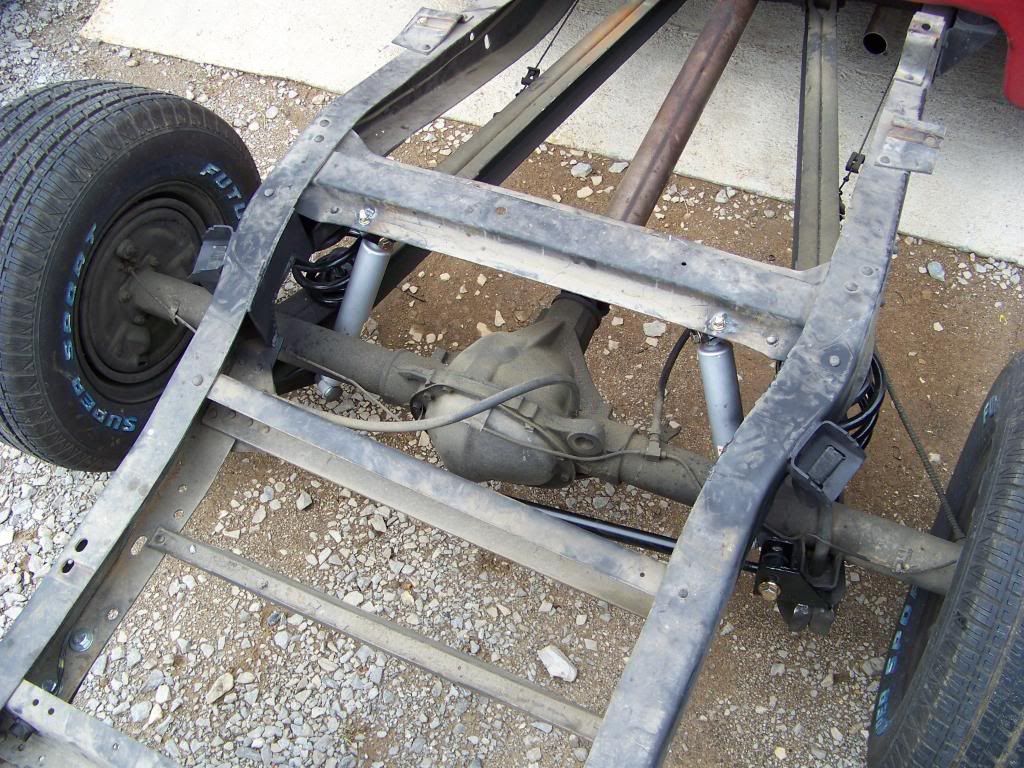 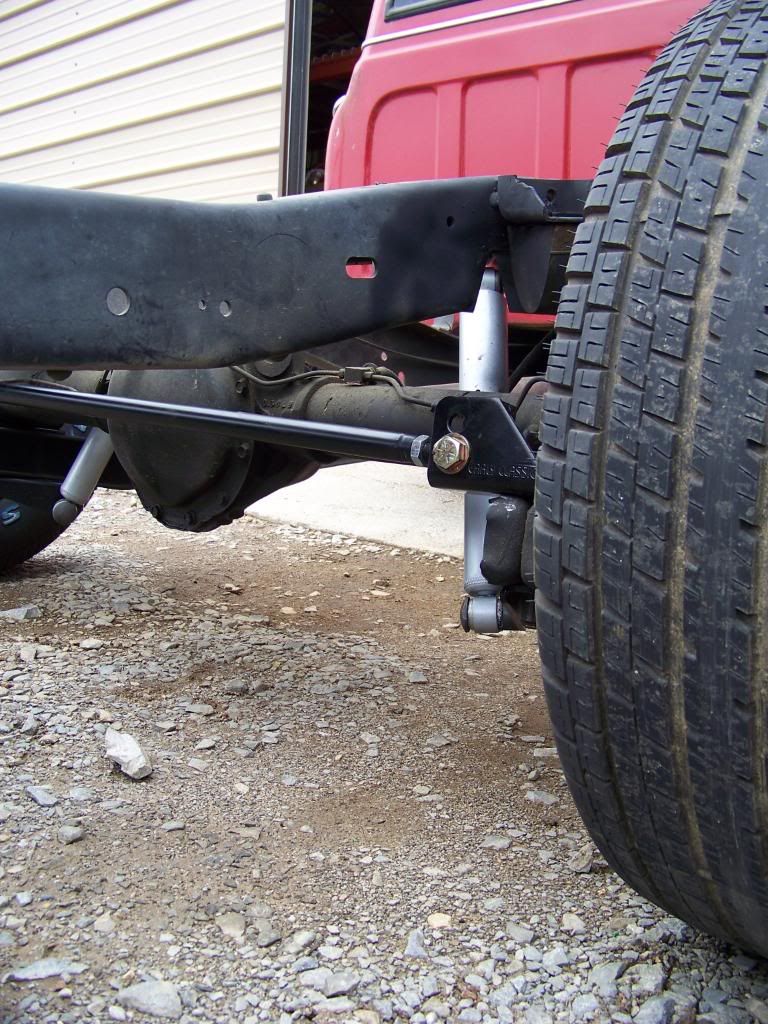 Previously mentioned lift... 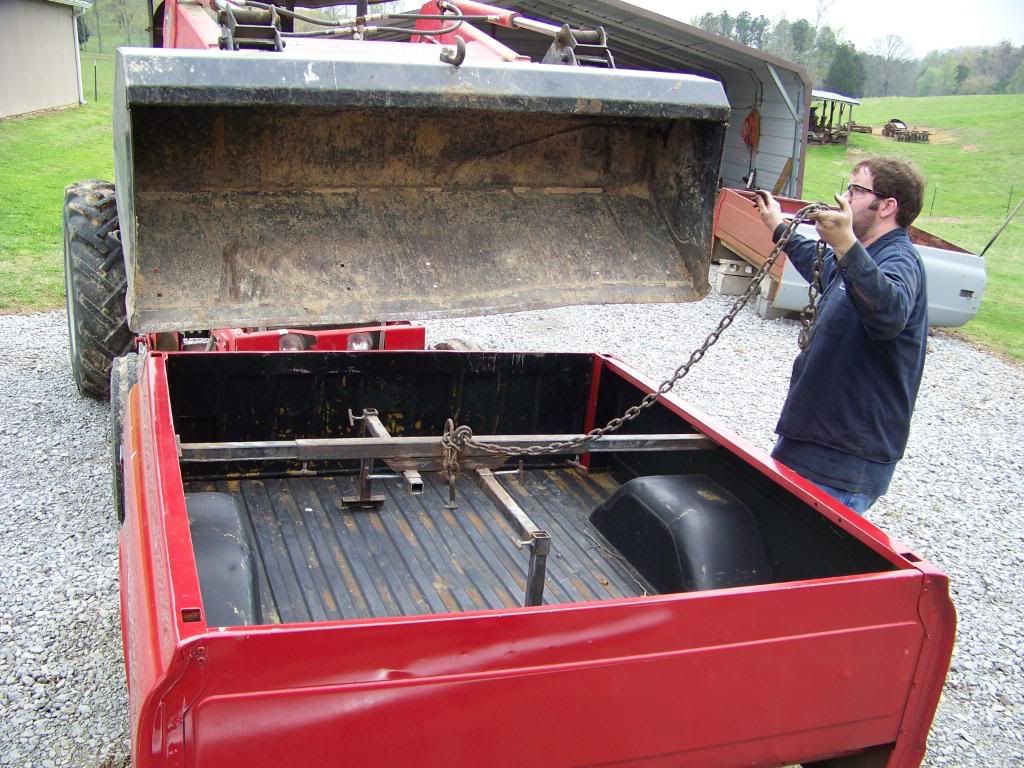 New altitude! 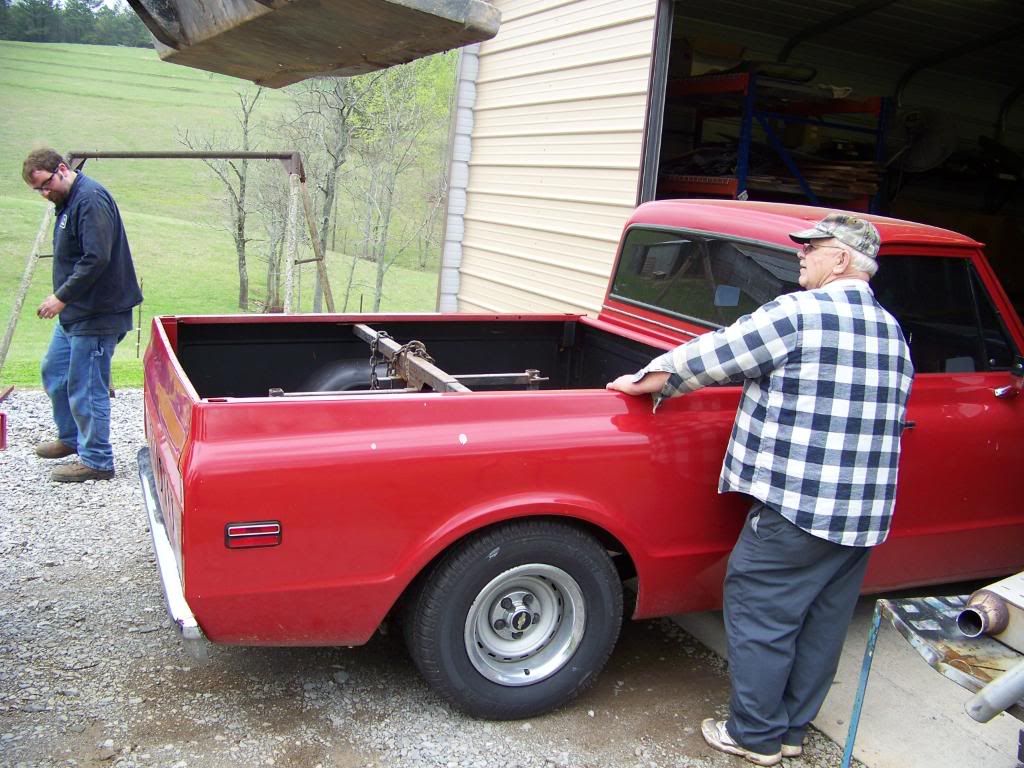 Yep, Just under 7 hours from start to finish. I'm not to say if that's fast or slow for a job like this....but that's how long it took us! 
|
|
|

|
|
|
#5 |
|
WTB this ad
Join Date: Sep 2004
Location: Lafayette Georgia
Posts: 5,074
|
Re: Saturday pics (4-11) Drop FAQs...(AKA making it WORTHLESS!)
Then we pulled it back in and ditched the long tube headers for some mid-length ones that we thought would provide some more clearance.
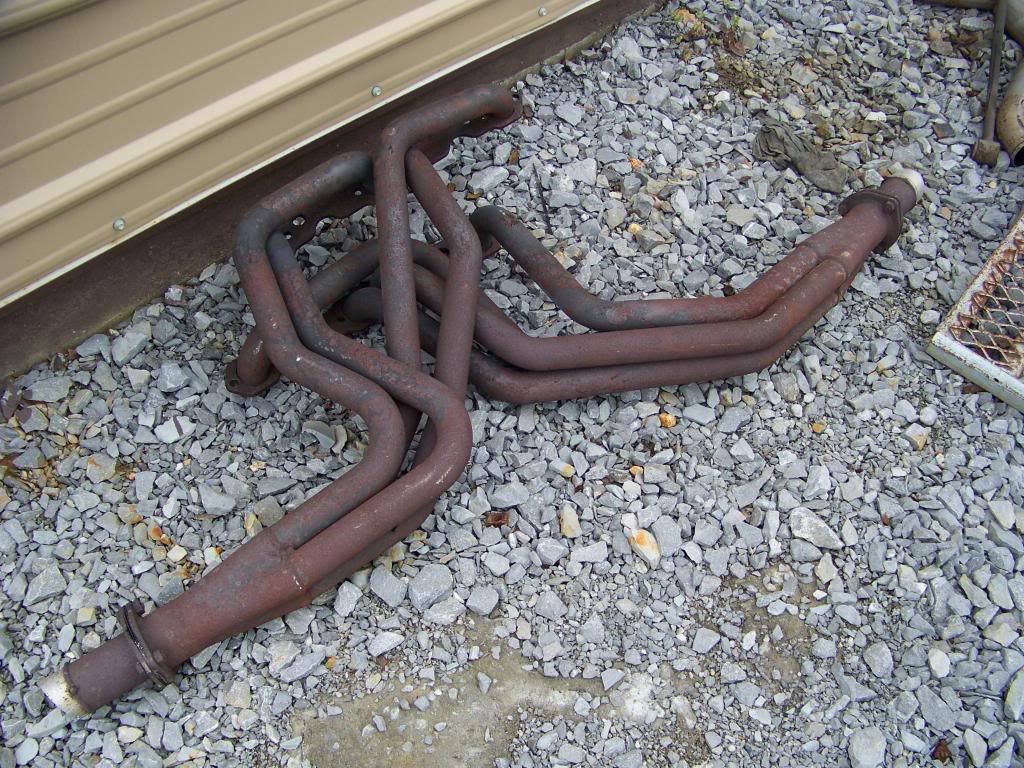 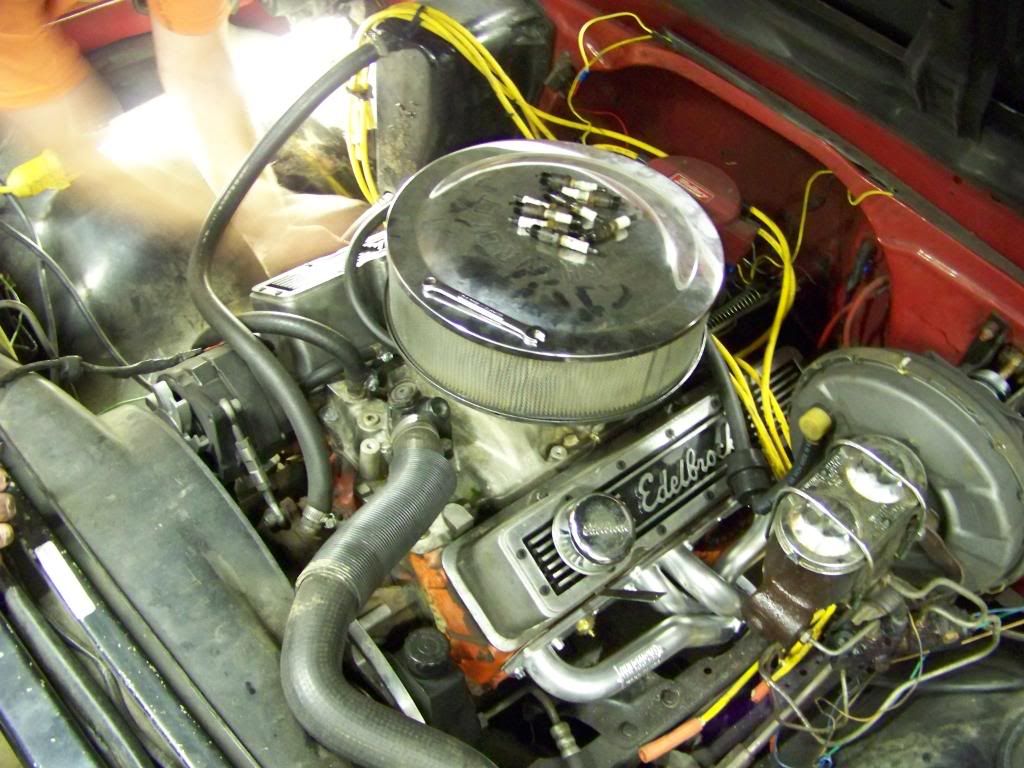 So...Anybody need some really nice slightly used headers?? 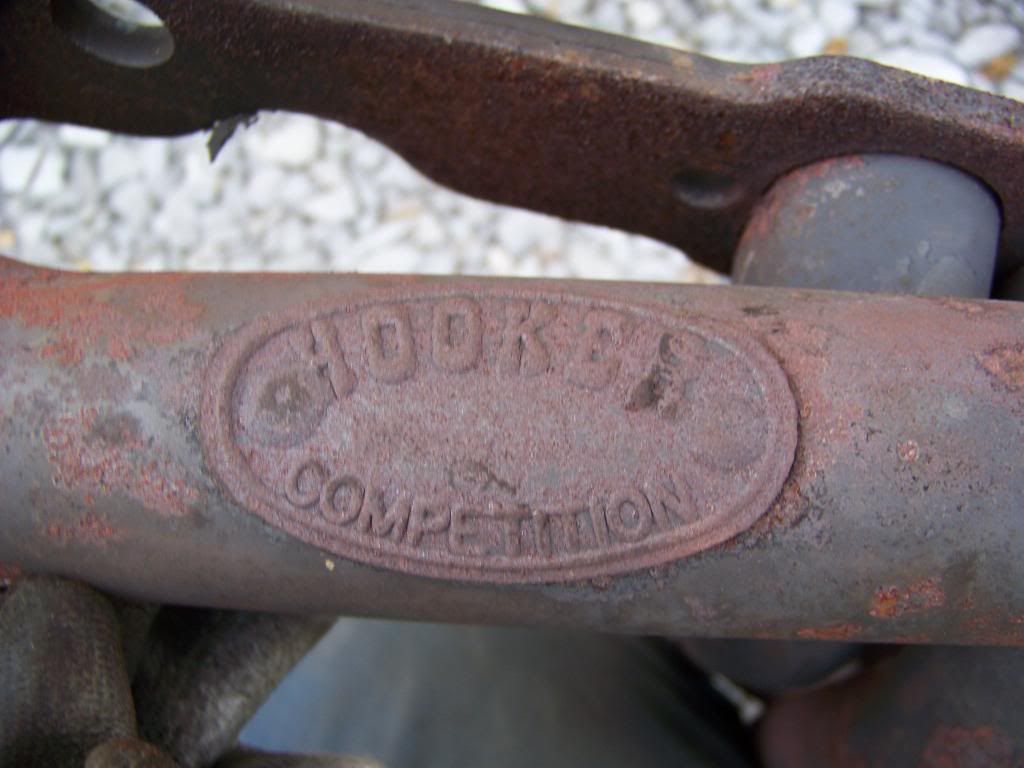 I really feel that these springs were new (or newer) factory height replacements. This truck was TALL before the drop. If somebody needs em and wants to come get em give me a shout! They'll be so cheap they'll practically be free! 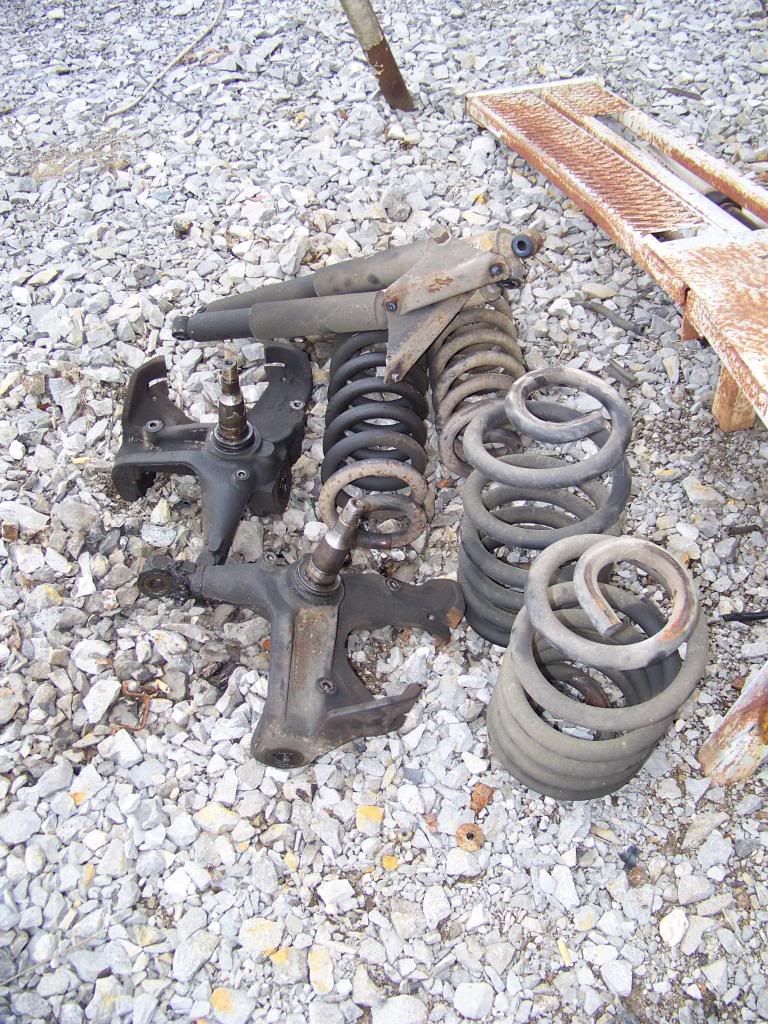 Just for review... Before 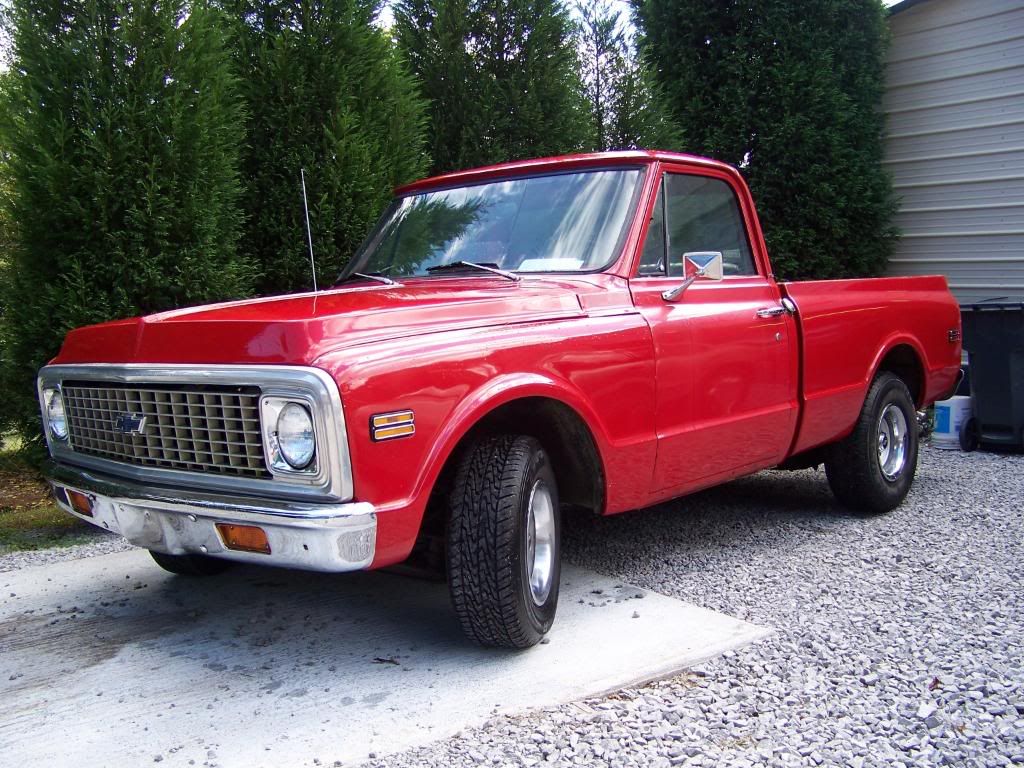 After 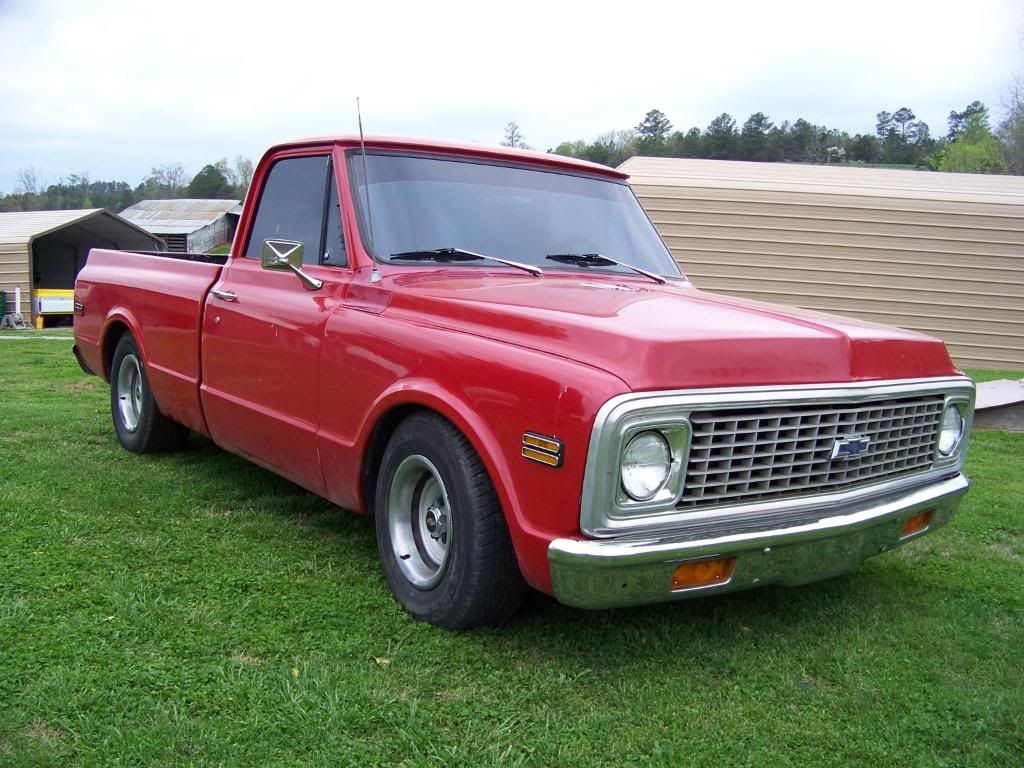 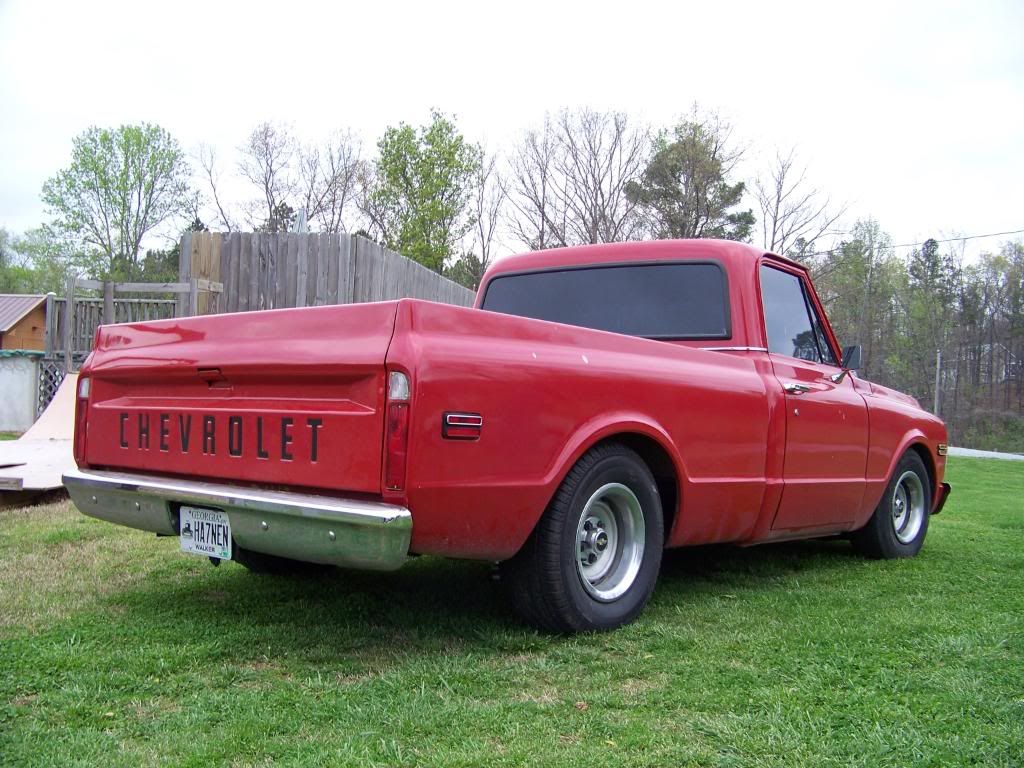 I hope you guys have enjoyed our project as much as we have! Keep your eyes open for the "Worthless" crowd when you're out and about. You might even catch us sporting this seasons new threads.  Thanks!! Edit: I can't believe I got all that info typed in before another reply was made....Maybe it was courtesy...Or this wasn't near as entertaining as I thought it would be! LOL! Last edited by see ten; 07-19-2009 at 02:29 PM. |
|
|

|
|
|
#6 |
|
Nothing to see here.....
 Join Date: Jun 2007
Location: Shawnee, KS
Posts: 4,625
|
Re: Saturday pics (4-11) Drop FAQs...(AKA making it WORTHLESS!)
WOW, talk about step by step!!! DEFINITELY worthy of the FAQ section!
Great writeup.
__________________
Doug  THANK YOU to our American Soldiers & Veterans - POW MIA "You will NEVER be forgotten". THANK YOU to our American Soldiers & Veterans - POW MIA "You will NEVER be forgotten".  The democracy will cease to exist when you take away from those who are willing to work and give to those who would not. Thomas Jefferson |
|
|

|
|
|
#7 |
|
Registered User
Join Date: Jun 2008
Location: South Florida
Posts: 11,375
|
Re: Saturday pics (4-11) Drop FAQs...(AKA making it WORTHLESS!)
Lowering the truck is the best upgrade.....
you never said what kit was used 3 front and 6 rear or 2 front and 5 rear? thanks for posting....
__________________
Get your facts first, and then you can distort them as much as you please!!!!!. Sylvester's build thread >>>http://67-72chevytrucks.com/vboard/s...ht=big+rebuild |
|
|

|
|
|
#8 |
|
WTB this ad
Join Date: Sep 2004
Location: Lafayette Georgia
Posts: 5,074
|
Re: Saturday pics (4-11) Drop FAQs...(AKA making it WORTHLESS!)
Wow! You're right, after all of that I never mentioned the drop! We dropped it the same as mine which is 3.5"/6". The front used a 2.5" drop spindle combined with a 1" drop coil. ECE also sells a 4/6 but they just look a bit to unlevel for my personal taste.
Also, Just for future reference. If you are already running a 3" drop front coil, you'll have to resort to other methods for seperating the balljoints from the spindles. |
|
|

|
|
|
#9 |
|
Registered User
Join Date: Jun 2008
Location: South Florida
Posts: 11,375
|
Re: Saturday pics (4-11) Drop FAQs...(AKA making it WORTHLESS!)
ok cool thanks

__________________
Get your facts first, and then you can distort them as much as you please!!!!!. Sylvester's build thread >>>http://67-72chevytrucks.com/vboard/s...ht=big+rebuild |
|
|

|
|
|
#10 | |
|
resident oilfield trash
Join Date: Jan 2009
Location: Lubbock TX
Posts: 1,465
|
Re: Saturday pics (4-11) Drop FAQs...(AKA making it WORTHLESS!)
Quote:
__________________
1967 SWB C10 396/400 factory air factory tach (sadly had to send to a new home) 1986 Honda 70 Fourtrax 1991 Chevrolet K5 blazer 2wd 1982 Mastercraft Pro Star 190 Stars and Stripes 2002 Chevrolet Tahoe 2011 Nissan Armada 
|
|
|
|

|
|
|
#11 |
|
WTB this ad
Join Date: Sep 2004
Location: Lafayette Georgia
Posts: 5,074
|
Re: Saturday pics (4-11) Drop FAQs...(AKA making it WORTHLESS!)
I have NO personal experience with a 5/7 drop. It seems like member TCB-1 has a drop that's similar. We've done some 2.5"/5" and some 3.5"/6" drops and have been pleased with them. A 5/7 is going to be pretty low for a daily. There are times when I'm afraid that mine is going to scrub and it's not that low.
|
|
|

|
|
|
#12 |
|
Restoring a 68 SWB
Join Date: Jan 2008
Location: Nashville, TN
Posts: 1,068
|
Re: Saturday pics (4-11) Drop FAQs...(AKA making it WORTHLESS!)
Very nice step by step Asa. You guys made it look easy. I learned a few things. Thanks!
__________________
My Build Thread: Lucy - My 1968 SWB - Shop Truck Style North Nashville Concrete Contractor |
|
|

|
|
|
#13 |
|
Senior Member
 Join Date: Jul 2001
Location: Hyattsville, Maryland
Posts: 3,685
|
Re: Saturday pics (4-11) Drop FAQs...(AKA making it WORTHLESS!)
great write up and pics, I too learned a few things. You guys made that look pretty straight forward too.
__________________
72 Cheyenne Super (Purchased new by my parents in August of 71) Black and White |
|
|

|
|
|
#14 |
|
Registered User
Join Date: Sep 2005
Location: Clanton, AL
Posts: 26
|
Re: Saturday pics (4-11) Drop FAQs...(AKA making it WORTHLESS!)
awesome write up! This ones definitely getting bookmarked

|
|
|

|
|
|
#15 |
|
BlahBlahBlah
Join Date: Feb 2002
Location: Wa.
Posts: 20,021
|
Re: Saturday pics (4-11) Drop FAQs...(AKA making it WORTHLESS!)
Nicely done. This one will end up in FAQ's. Thanks for taking the time.
__________________
… … … … … … … … ... … … … … … … … … … … … |
|
|

|
|
|
#16 |
|
WTB this ad
Join Date: Sep 2004
Location: Lafayette Georgia
Posts: 5,074
|
Re: Saturday pics (4-11) Drop FAQs...(AKA making it WORTHLESS!)
|
|
|

|
|
|
#17 |
|
Registered User
Join Date: Nov 2007
Location: Sask Canada
Posts: 1,666
|
Re: Saturday pics (4-11) Drop FAQs...(AKA making it WORTHLESS!)
very nice Asa. i wish i could have been there to give you guys a hand but 1800 miles one way is a bit of a strech for me

__________________
Trueman Last edited by 463; 04-11-2009 at 10:07 PM. |
|
|

|
|
|
#18 |
|
Low & Fast!
Join Date: Jan 2007
Location: Knoxville, TN
Posts: 3,110
|
Re: Saturday pics (4-11) Drop FAQs...(AKA making it WORTHLESS!)
Good one man, one thing who was the guy at the end of each clip..

__________________
|
|
|

|
|
|
#19 |
|
WTB this ad
Join Date: Sep 2004
Location: Lafayette Georgia
Posts: 5,074
|
Re: Saturday pics (4-11) Drop FAQs...(AKA making it WORTHLESS!)
|
|
|

|
|
|
#20 |
|
One day.....
Join Date: Aug 2008
Location: Ocala, FL.
Posts: 702
|
Re: Saturday pics (4-11) Drop FAQs...(AKA making it WORTHLESS!)
Awesome!! I will be referring to it in the very near future!
DZL1. |
|
|

|
|
|
#21 |
|
WTB this ad
Join Date: Sep 2004
Location: Lafayette Georgia
Posts: 5,074
|
Re: Saturday pics (4-11) Drop FAQs...(AKA making it WORTHLESS!)
If this helps one person do the job correctly the first time, I feel justified in taking the time for the write up!
 Major thanks goes out to Brian for providing the shop space and tool usage and Jacob for providing the truck!! We pulled this off in just under 7 hrs...probably would have went quicker if it hadn't been for me telling them "Wait! People need to see how to do that!" You also have to keep in mind that this isn't our first rodeo either. Between the three of us we've dirtied our hands and tools on many of these trucks. Remember, It's not a race. Take your time, work safe and get it done right the first time. Major thanks goes out to Brian for providing the shop space and tool usage and Jacob for providing the truck!! We pulled this off in just under 7 hrs...probably would have went quicker if it hadn't been for me telling them "Wait! People need to see how to do that!" You also have to keep in mind that this isn't our first rodeo either. Between the three of us we've dirtied our hands and tools on many of these trucks. Remember, It's not a race. Take your time, work safe and get it done right the first time.It wasn't a bad day overall. We had a lot of fun with it. Aside from the portaband failure and an auto darkening welding hood failure it all went off without a hitch!.... We also stopped and made the drive to town for a sack full of burgers....So, plan ahead for hunger and that's time you won't be wasting chasing down grub! 
|
|
|

|
|
|
#22 |
|
'71 chevy s.bed/s.side
 Join Date: Mar 2005
Location: Chesapeake, VA
Posts: 1,571
|
Re: Saturday pics (4-11) Drop FAQs...(AKA making it WORTHLESS!)
Great job...doggonit!
__________________
STILL PLAYS WITH CARS...AND TRUCKS!! Parents! Be good to your kids...they get to choose your nursing home! 250 I-6 with a 3 speed Saginaw and Borg Warner Overdrive...She's got overdrive! |
|
|

|
|
|
#23 |
|
Grandpa in the rustmobile...
Join Date: Nov 2008
Location: Spokane WA/Viola TN
Posts: 11,422
|
Re: Saturday pics (4-11) Drop FAQs...(AKA making it WORTHLESS!)
great writeup cleared some stuff up for me btw nice truck!
__________________
John Goose-1968 C10 355,9.32-1CR, Vortec Heads ,262 voodoo, 3.73:1 3OTT (HS ride/beater/farm truck) http://67-72chevytrucks.com/vboard/s...d.php?t=317684 Grams 53-1953 Chevrolet Belair http://67-72chevytrucks.com/vboard/s...=1#post4327784 1969 Chevy C10 Shortbed 4.5/6?" Frame off resto http://67-72chevytrucks.com/vboard/s...d.php?t=548136 1999 Toyota Tacoma 4x4 |
|
|

|
|
|
#24 |
|
Hittin E-Z Street on Mud Tires
 Join Date: Nov 2004
Location: Greenville, SC
Posts: 23,090
|
Re: Saturday pics (4-11) Drop FAQs...(AKA making it WORTHLESS!)
GREAT write up! Bookmarked for my drop.
I'm stuck on 2.5/5 or 3.5/6. I really don't want to notch my frame... Anyway... sucks about the u bolts. Any chance a pinch in a vice would close 'em up enough to work?
__________________
Jesse James 1967 C10 SWB Stepside: 350/700R4/3.73 1965 Ford Mustang: 289/T5-5spd/3.25 Trac-Loc 1968 Pontiac Firebird: Project Fire Chicken! 2015 Silverado Double Cab 5.3L Z71 2001 Jeep Wrangler Sport 4.0L 5spd 2020 Chevrolet Equinox Premium 2.0L Turbo 2011 Mustang V6 ~ Wife's ride  American Born, Country by the Grace of God  1967 CST Shop Truck Rebuild! My 1967 C-10 Build Thread My Vintage Air A/C Install Project "On a Dime" Trying my hand at Home Renovation! 1965 Mustang Modifications! |
|
|

|
|
|
#25 |
|
WTB this ad
Join Date: Sep 2004
Location: Lafayette Georgia
Posts: 5,074
|
Re: Saturday pics (4-11) Drop FAQs...(AKA making it WORTHLESS!)
The truck has 275/60 -15 tires on the rear...no idea what's on the front. It seems like we had it figured that a 255/60 is about right for the front.
I generally advise/suggest to people that don't want to notch their frames and plan on hauling anything heavier then a couple hundred pounds to not go any lower then 5" in the back. A 2.5" drop spindle combined with a stock height spring goes well with it I think. The only reason that I haven't pulled the bed to notch my C10 is that I don't want to mess up the spray-in bedliner. The "Get on it Doggone it!"....Well, I was just mocking some drunk guys from a car show....They were shouting that at every car as it pulled out.  Zero, Alcoholic beverages were consumed while this drop was being performed! 
|
|
|

|
 |
| Bookmarks |
|
|