
|
Register or Log In To remove these advertisements. |
|
|
|
|||||||
 |
|
|
Thread Tools | Display Modes |
|
|
 03-16-2014, 10:35 AM
|
#1 |
|
Registered User
Join Date: Nov 2013
Location: Ocean Springs, MS
Posts: 43
|
My first build SAFETY ORANGE
I had been looking for an old truck off and on for about 2 years, when I came across this one. She's a Craigslist special, but I'm glad I got her before someone else did.
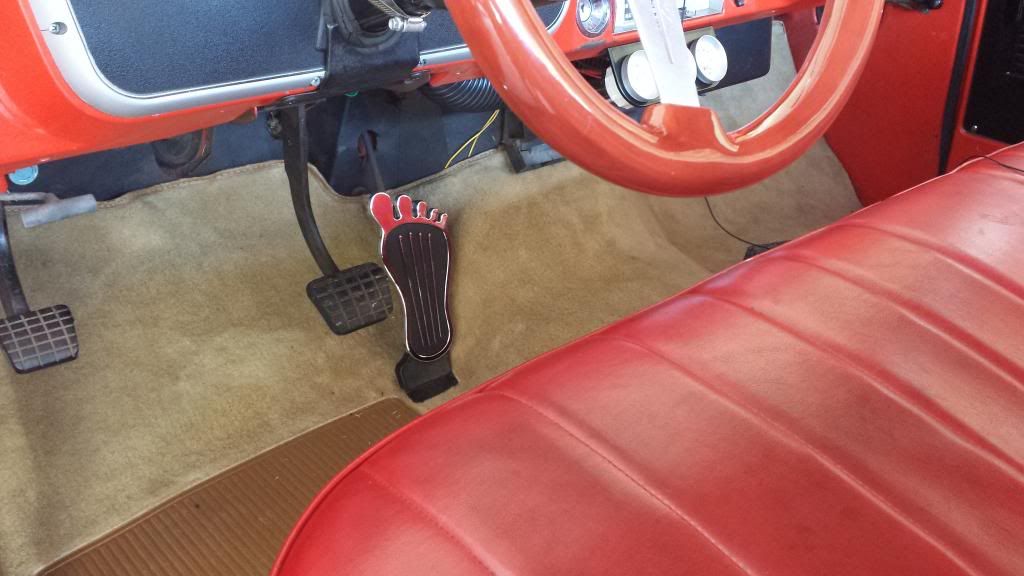
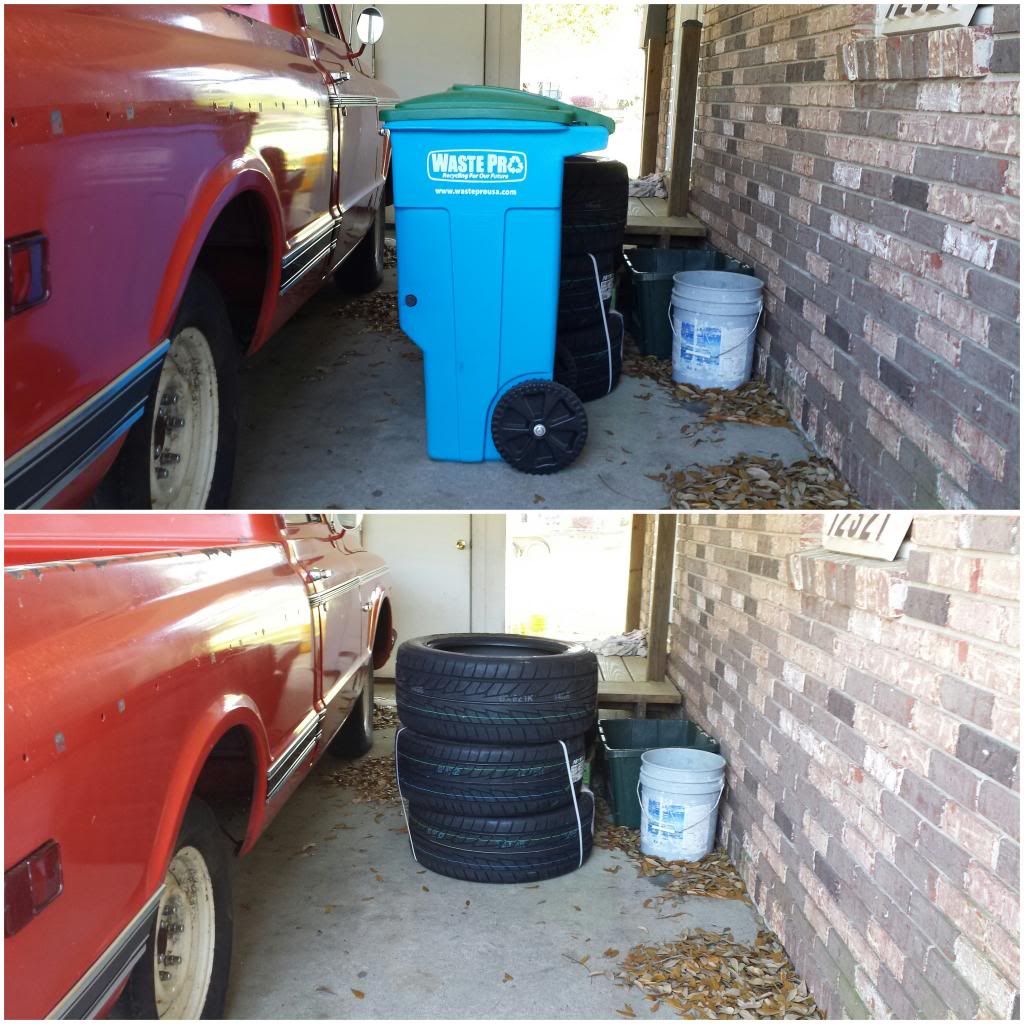
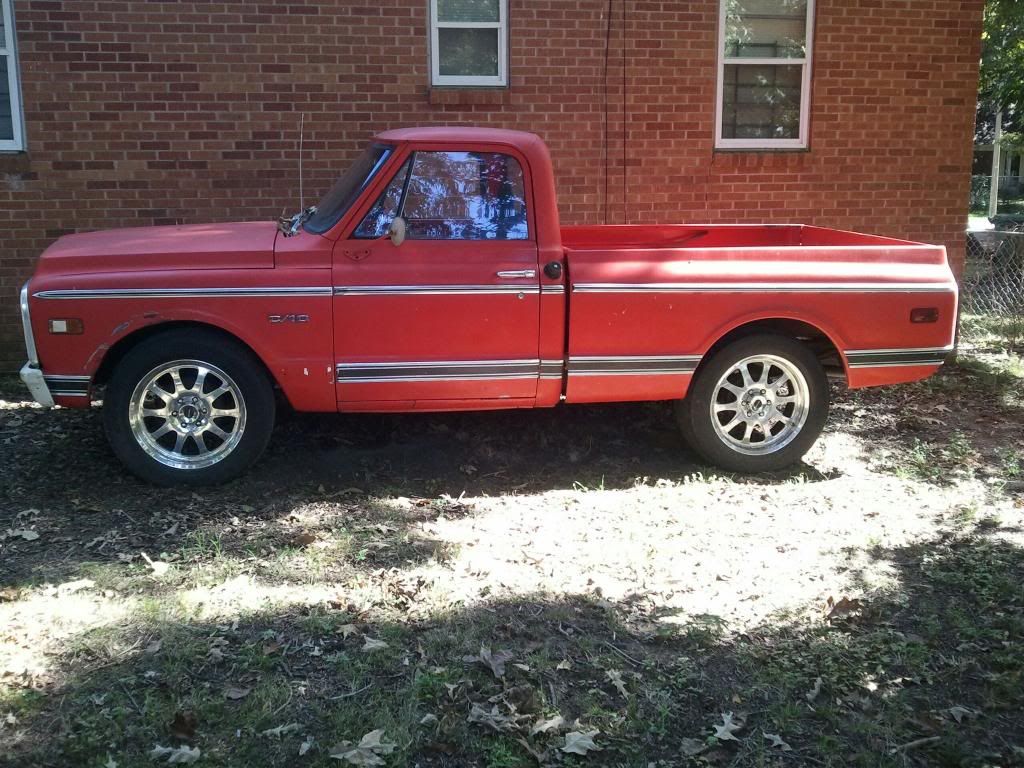 She's a 1970 with a 400 SB and 350 T. She may not be fast but she'll do a pretty good burnout!! (even with those big 20's)  I live in the gulf coast area of MS, and had to drive to Memphis, TN to get this truck. Long story short, trailered the truck all way back. Then began working on her. I'm sure many of you know this feeling right here..  Attachment 1228232 Attachment 1228232The body is in decent condition with a few dents and dings here and there and some rust of course. But all in all she is pretty straight. The motor ran good and the transmission shifted good as well. But the guy who I bought it from swapped motors and pretty much just threw it together and didn't really do everything right. Had to do a few minor things like replace the headers, change valve covers and put a new drain plug in the radiator. 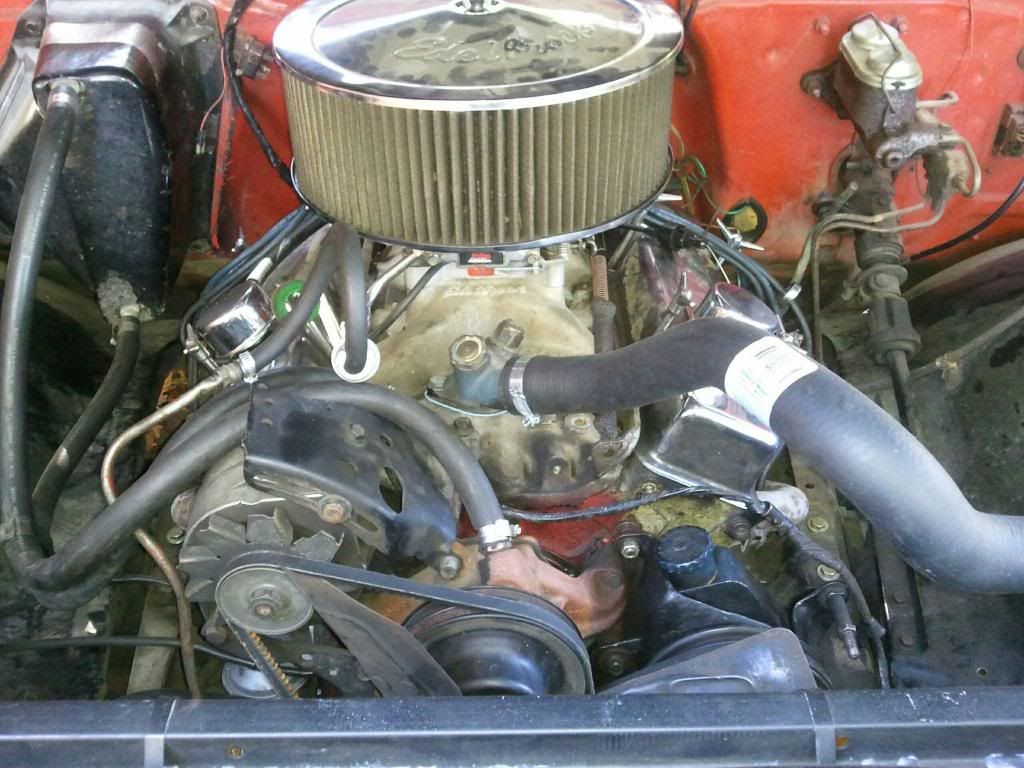 Next task was replacing all the busted ball joints.. There may be easier ways to do it but I cut the factory studs off the top with an angle grinder and beat the crap out of the bottom ones to get them out. Top was easy to bolt back up and used a ball joint press to get the bottom ones. Definitely not an impossible job, but definitely makes you use your brain when you've never done it before. (as far as not having the right tools for the job) 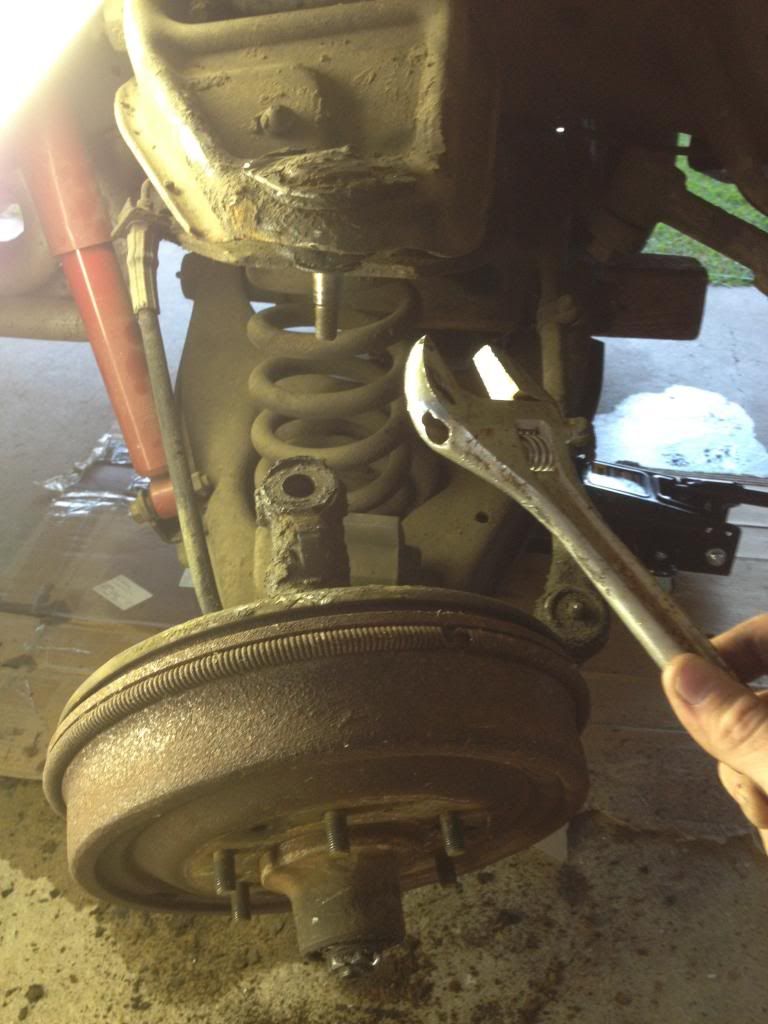 I got really lucky with interior. It came with some factory bucket seats out of who knows what and some vinyl flooring. I ended up finding a guy who had a factory 68 bench seat and traded him straight up for my bucket seats. A guy I know with a 67 re-did his whole interior and sold me his tan carpet for $50! The heater control panel rivets were all broke off. Had to drill the old ones out and put regular screws in them. Installed some white faced gauges from the parts store. 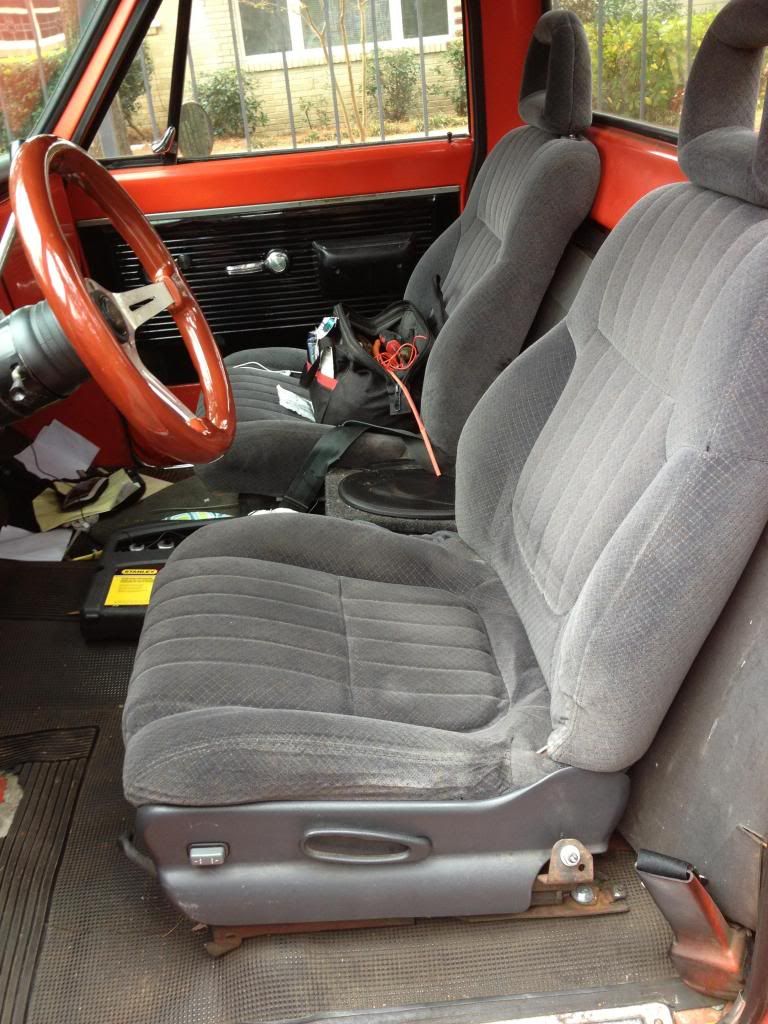 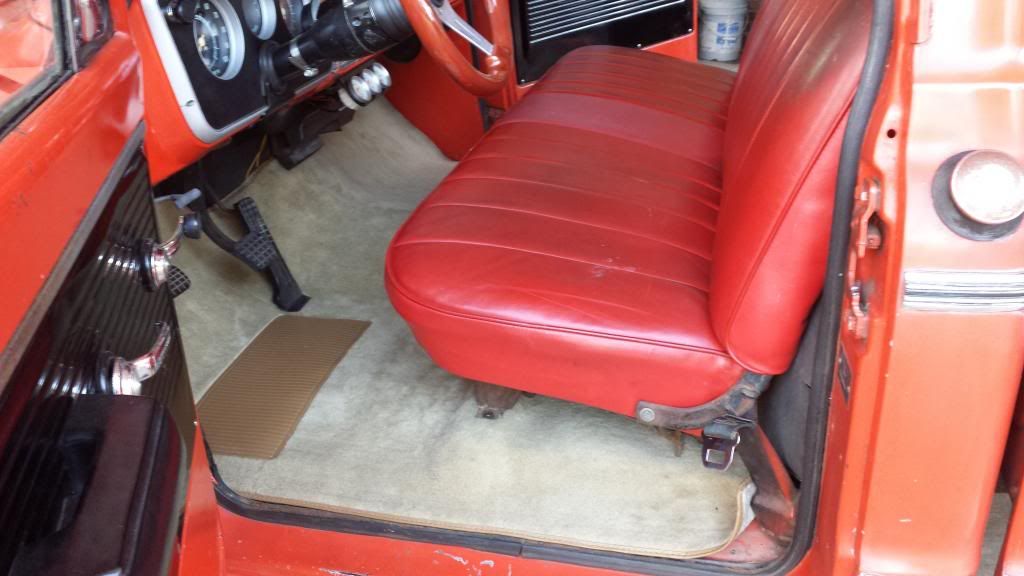 And now comes the fun part.. I was really wanting to put some newer factory wheel on this old truck. As I found out the hard way, the hubs are different diameters. The older trucks being and larger diameter and the newer trucks being a smaller diameter. This is an issue because the rim does not sit flush on the hub and the lugs are no where near long enough. There are several options to fixing this problem. Option 1: Wheel adapters. Which I heard 50/50 on. Some said they launch at the drag strip every weekend with them and some said their wheels rolled off past them. Too much bad for me to pull the plug on them. Option 2: Boring the center hub out. I would have felt more comfortable doing this option. That being said, I would hate to mess with the integrity of a wheel that's going to be traveling 70 mph+. I also have heard people say that they have done this process many times with no problems. On the flip side, I have heard of wheels cracking and separating from this as well. Needless to say, I kinda gave up on trying to make that work. I figure, old school truck needs old school wheels. 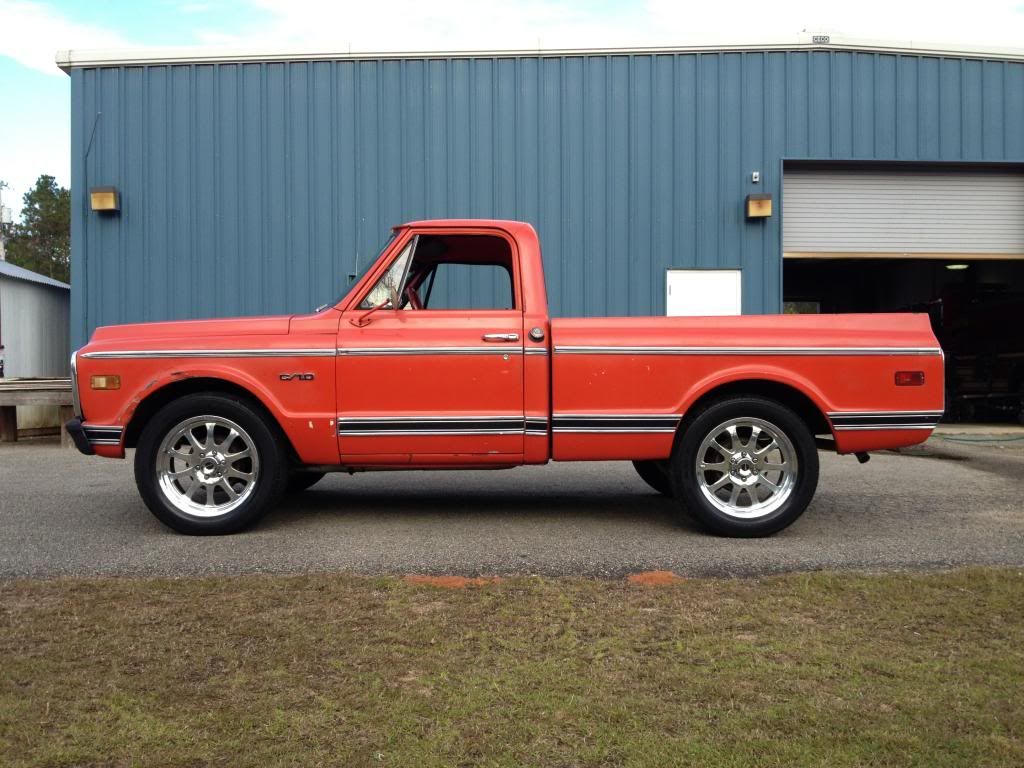 These are the factory 20's that came with it. As I quickly found out, it is hard to find good looking factory GM wheels that are 6 lug. I ended up finding these on Craigslist for a decent price and they look good, just not exactly what I want.. 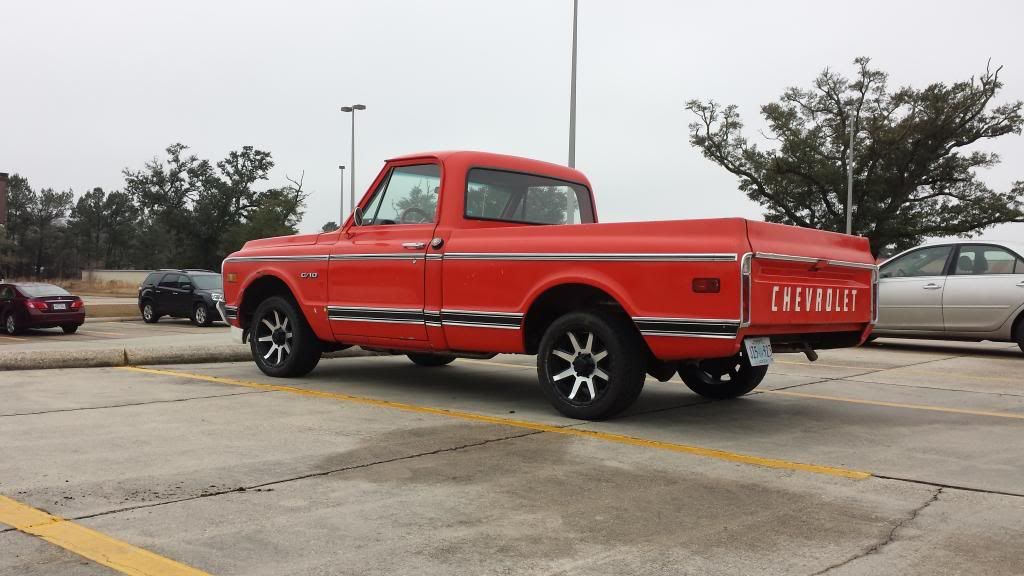 And would look a lot better like this.. 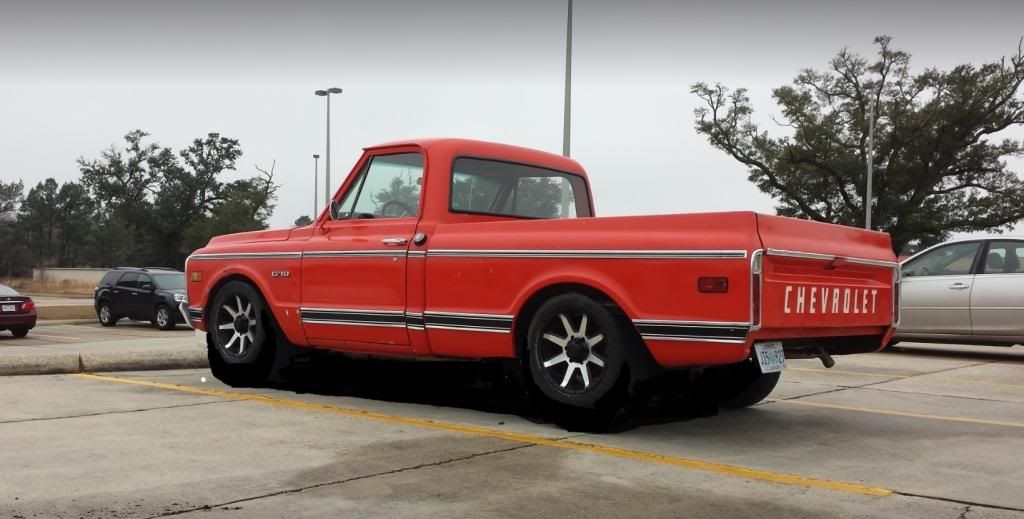 Cheesy edit job, I know. Gets the job done though. As far as lowering it, I know how I'm going to do the front. Just not 100% on the rear just yet. The front I'm gonna to the disc brake conversion with drop spindles and possibly some drop springs as well. The rear I would like to do the axle flip kit with the shock extensions. I have heard that with the axle flip you are prone to axle wrap and other problems as well. My truck has the leaf springs in the rear and I personally don't see how it would affect it much if any. But I've never dealt with them before either. If not the axle flip I suppose the only other options are drop shackles and lowering leafs? I do not want to cut the frame for a notch, so I'm guessing my max lower would be around 5" Which should be fine. Not going to go crazy with the truck. Just lower it some, nice wheels and roll with it. MAYBE.. In the future put an LS motor with 4L80. |

|

|
|
03-16-2014, 11:20 AM
|
#2 |
|
Registered User
Join Date: Jun 2010
Location: San Diego Co.
Posts: 1,193
|
Re: My first build SAFETY ORANGE
Congrats! You found a SWB in decent driving condition, and are off to a great start!
__________________
1972 Chevy C-10, SWB, Fleet, 350/350, PS, PB, HEI, mostly stock, Survivor. 
|
|
|
|
|
03-16-2014, 02:17 PM
|
#3 | |
|
Registered User
 Join Date: Nov 2013
Location: Winnipeg, Mb
Posts: 1,115
|
Re: My first build SAFETY ORANGE
Quote:
|
|
|
|
|
|
03-16-2014, 04:04 PM
|
#4 | |
|
Registered User
Join Date: Nov 2013
Location: Ocean Springs, MS
Posts: 43
|
Re: My first build SAFETY ORANGE
Quote:
I could, and that was also an option I explored. And it might have worked and been ok but, then the rims would be lug-centric instead of hub-centric, which leaves room for error (maybe small, but still not a factory fit). Also, (again could have been a minimal issue) it seemed as if the adapters put excess stress the hub studs. All this being said, I never tried any of this. Mainly because I wasn't 100% either way, right or wrong. I always reverted to "it would be a sad day if one of my wheels rolled off past me and destroyed my truck over a cheap way of doing something". |
|
|
|
|
|
03-16-2014, 04:33 PM
|
#5 |
|
Registered User
Join Date: Oct 2009
Location: canton ga
Posts: 12,724
|
Re: My first build SAFETY ORANGE
Nice truck and I like the bench seat better than those buckets and I like the orange but Im a little biased as my truck is Medium Red which looks orange.
|
|
|
|
|
03-16-2014, 05:38 PM
|
#6 | |
|
Registered User
Join Date: Nov 2013
Location: Ocean Springs, MS
Posts: 43
|
Re: My first build SAFETY ORANGE
Quote:
|
|
|
|
|
|
03-16-2014, 07:20 PM
|
#7 |
|
Registered User
Join Date: May 2011
Location: Northern Calif.
Posts: 3,816
|
Re: My first build SAFETY ORANGE
Good looking truck. The bench seat looks good!
|
|
|
|
|
03-17-2014, 04:21 PM
|
#8 |
|
Registered User
Join Date: Nov 2013
Location: Ocean Springs, MS
Posts: 43
|
Re: My first build SAFETY ORANGE
Had to pull out all the stops and go all 70's!!
|
|
|
|
|
03-17-2014, 05:12 PM
|
#9 |
|
Registered User
Join Date: Oct 2009
Location: canton ga
Posts: 12,724
|
Re: My first build SAFETY ORANGE
I like that .
|
|
|
|
|
03-18-2014, 12:53 PM
|
#10 | |
|
Registered User
Join Date: Oct 2012
Location: nevada iowa
Posts: 285
|
Re: My first build SAFETY ORANGE
Quote:
|
|
|
|
|
|
03-18-2014, 02:08 PM
|
#11 |
|
Registered User
Join Date: Nov 2013
Location: Ocean Springs, MS
Posts: 43
|
Re: My first build SAFETY ORANGE
Via http://djmsuspension.com/works/djm-flip-kits/
"Shocks just are not very effective if they are laid over nearly horizontal, some kits only require one shock to be “extended”. CALMAX SuperShox would be an excellent choice for shocks to optimize the ride with your flip kit. Having done that its time to test drive. Another good tip is to check the tightness of all bolts (including the axle U-bolts) after you have put a hundred so miles on your lowered truck." Last edited by JP238; 03-18-2014 at 02:30 PM. |
|
|
|
|
03-18-2014, 03:39 PM
|
#12 |
|
Registered User
Join Date: Oct 2012
Location: nevada iowa
Posts: 285
|
Re: My first build SAFETY ORANGE
hmm, i see what they are doing. the extender actually moves the bottom mount down and forwards. i suppose a person could go that route.
the holes are already in the truck to relocate the top of the shocks. i used these http://www.oreillyauto.com/site/c/de...0962&ppt=C0035 and just stuck them in the factory rear hole in the factory top shock mount. although i did need new shocks anyway, and replaced them with a shorter one meant for a 70's corvette. i suppose if you have new or nice shocks already then that might not be as cost effective. im not fond of how much lower the new bottom shock mount would seem to hang down off the rearend though. looks kind of funny from behind. |
|
|
|
|
03-18-2014, 04:49 PM
|
#13 | |
|
Registered User
Join Date: Nov 2013
Location: Ocean Springs, MS
Posts: 43
|
Re: My first build SAFETY ORANGE
Quote:
|
|
|
|
|
|
04-09-2014, 08:23 PM
|
#14 |
|
Registered User
Join Date: Nov 2013
Location: Ocean Springs, MS
Posts: 43
|
Re: My first build SAFETY ORANGE
Parts finally started showing up at the door step..
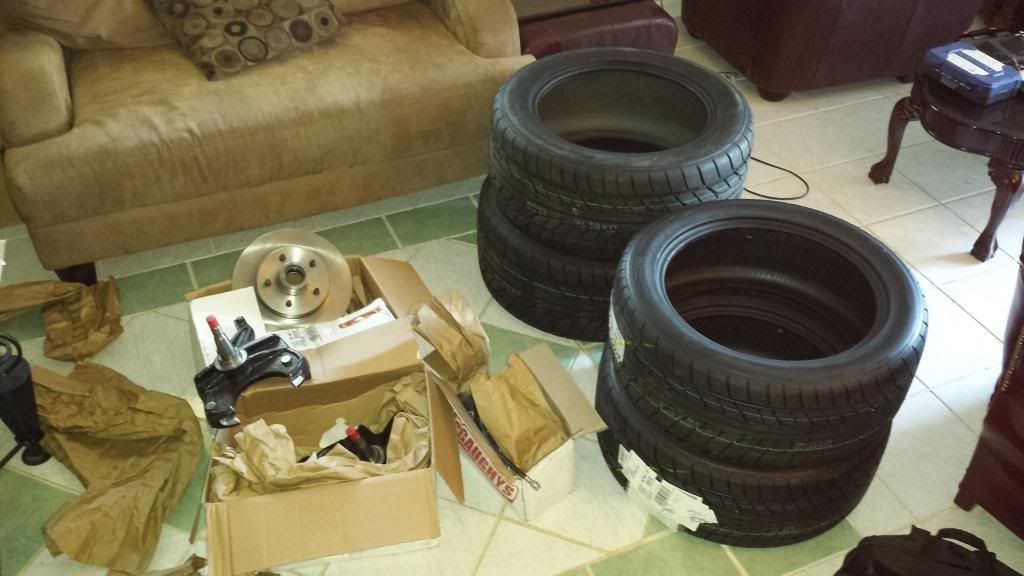 Got the McGaughy 2.5 drop spindle/disc brake conversion. Also some Nitto NT555 tires. 255/45/18 up front and 295/45/18 for the rear. Waiting on the Boss 338's, my DJM flip kit and still need to order the 5 lug rear conversion. 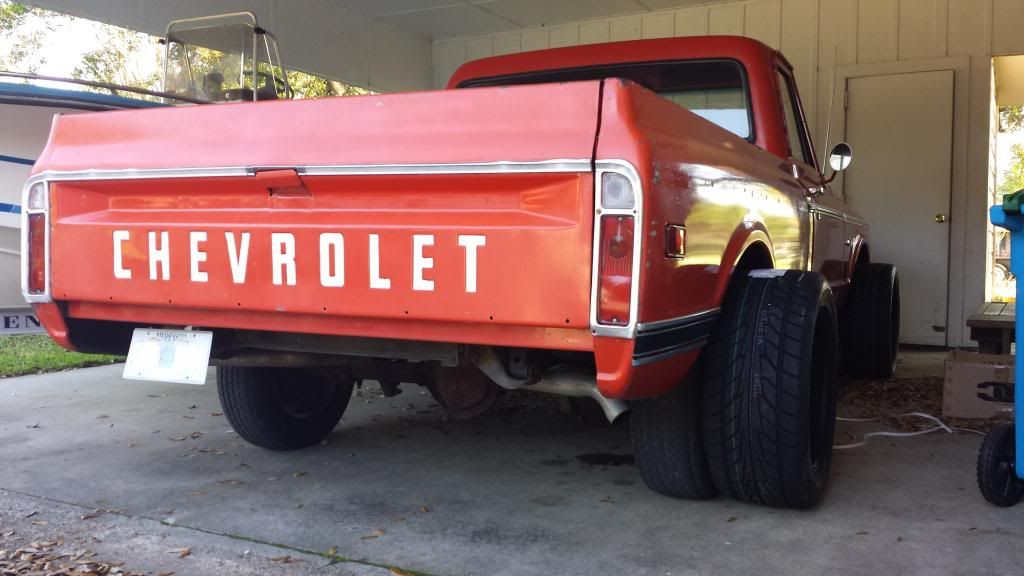 I think they will look pretty sweet. |
|
|
|
|
04-09-2014, 08:36 PM
|
#15 |
|
Registered User
Join Date: Oct 2009
Location: canton ga
Posts: 12,724
|
Re: My first build SAFETY ORANGE
And the fun begins .
|
|
|
|
|
04-09-2014, 09:13 PM
|
#16 |
|
Registered User
Join Date: Nov 2013
Location: Ocean Springs, MS
Posts: 43
|
Re: My first build SAFETY ORANGE
Prolly gonna get dirty..
|
|
|
|
|
04-30-2014, 11:49 PM
|
#17 |
|
Registered User
Join Date: Nov 2013
Location: Ocean Springs, MS
Posts: 43
|
Re: My first build SAFETY ORANGE
My UPS guy knows what's up..
 So the fun did begin.. As parts started rolling in I started taking old stuff off and putting new stuff on. Starting up front with the spindles. Separating the upper ball joint and control arm were easy. (I'm gonna separate this for future references.) *** Separating lower ball joint the easy way!!!*** Now the lower ball joint was a bit tougher.. So I tried beating on the side of the spindle (horizontally), I tried using a bigger hammer, I tried using a pickle fork, I tried doing nothing and that didn't work either. So I get pops to come over for a look, after he saw my methods not working he says "you need a bolt". I looked at him funny, but after he explained his self, it all made since. So after a trip to the hardware store this is what we came up with.. 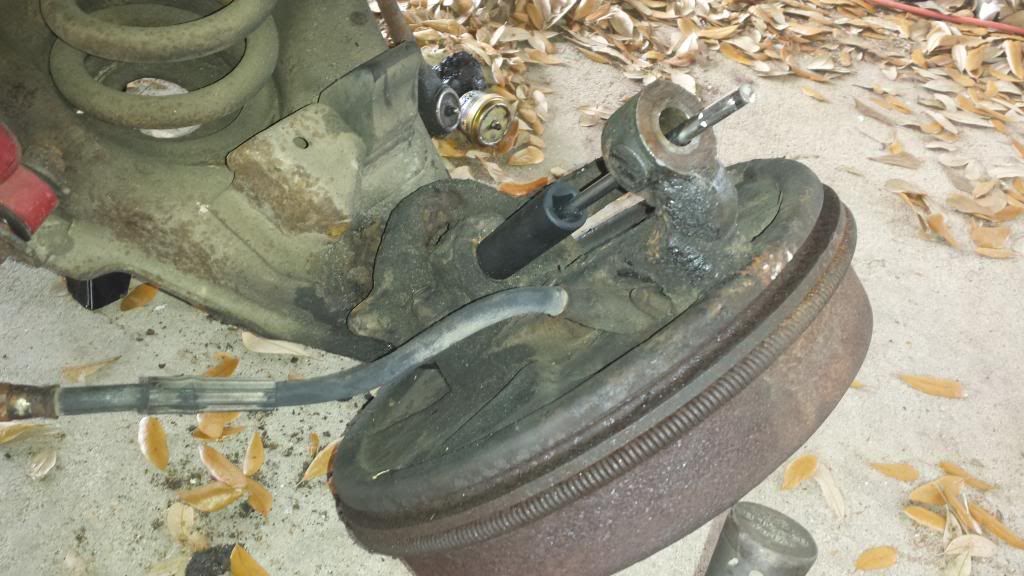 About 4 good whacks with a 3 lb hammer and done. ***note in picture is a busted up screw driver, but a 1/2" x 8" bolt would be perfect*** I would be willing to say that if you could get a cover nut, that it would save the ball joint all together (as you hit it with the bolt). Another problem I ran into was the little brake line nut stripping out. Luckily I was able to get enough bite on both to be able to remove and re-apply without having to replace. Also, the nose cone on the rotor had to be trimmed down due to the Boss hub diameters being a little bit smaller. 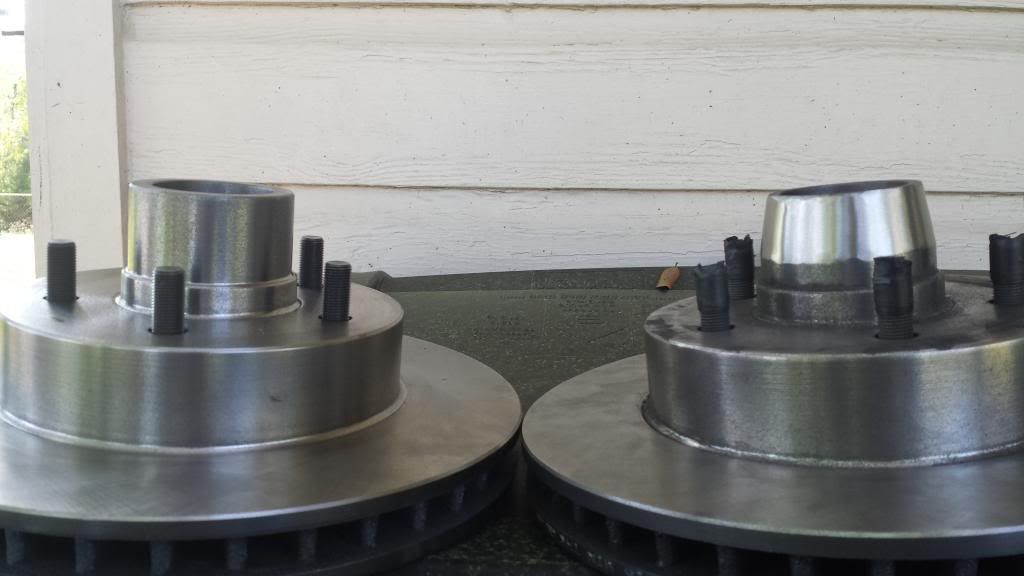 Not a tough job, just need a side grinder and a good flap disc and some patience. So I packed all the bearing with grease and assembled the rotor to the spindle, bled off the brake lines and the front was good to go. (for now any way, it'll need to be lowered later) The rear went easier than I thought. Popped the gear cover off, let the fluid run out, rotated the chunk until I could see the gear retainer bolt (or whatever it is called), removed the racer cover to the right of the bolt (because it is in the way of accessing the retainer bolt), then removed the retainer bolt. At this point that center pin will fall straight out. But keep in mind do only ONE axle shaft at a time. I don't know for sure, but it has been said that if you remove both shafts the inner gears will fall out along with the shims that get them aligned. At this point you remove the drum and slide the shaft inward and the c-clip should fall out, or you access it to remove it. After the clip is removed then slide the whole shaft out. Slide the new shaft in (it will take a little adjusting to get it in just right **that's what she said!!**), then re-apply the c-clip. Do the same for the other side, clean up the cover surface and axle surface for the new gasket and pop that dude back on. Here comes the strange part. I researched how many quarts to use/buy. Heard a few say 2-3 and ever heard a few instances of them taking 6 quarts (how, who knows). So I bought 3 to be safe. Got one in there no problem, letting the second one rip and about half way through it was already leaking out. So I stuck it back in there and squeezed it pretty good, just to make sure I wasn't missing any areas and it started pouring out. After it stopped draining out I put the nut back in it. Couldn't see how to get anymore in there, so I assume It's good. Approx. 1 1/2 total quarts. This is it before the flip kit..  My DJM flip kit arrived almost a month late. Ended up having to call them after 3 weeks of no package. They said "they forgot to ship it". Oh well, I wasn't too upset about it, being as this isn't my daily driver. Removing the leafs was fun, being as I had never done this before. After I had figured it out, it went pretty smoothly. ***Only thing I would have to say about the flip kit is to make sure your pinion angle is correct. (should be able to check by sight) Just make sure the axle is in line with the drive shaft. So, my truck came with a lowering shackle (I'm guessing 2"). This is what it looks like with the flip and 2" shackle.. 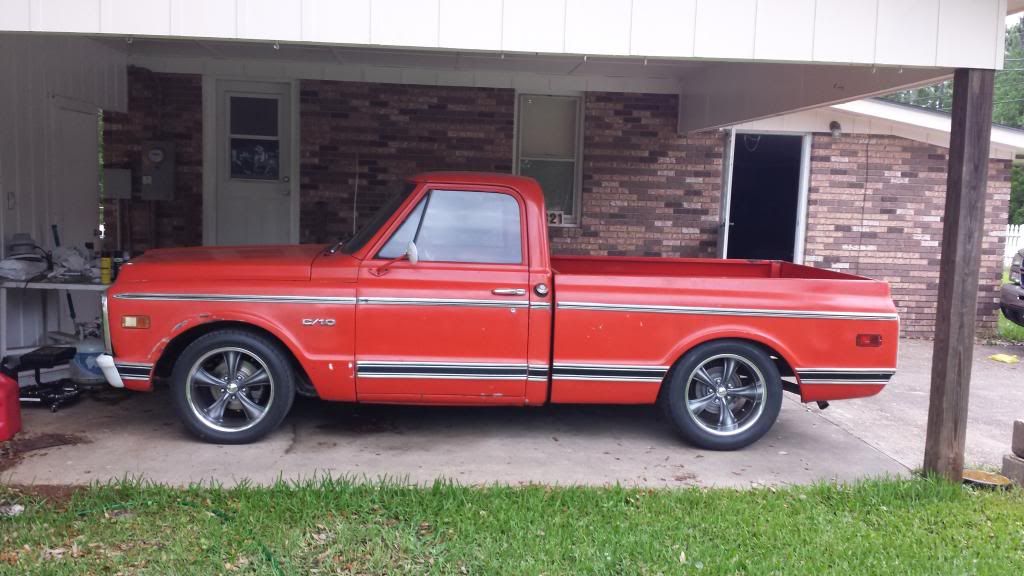 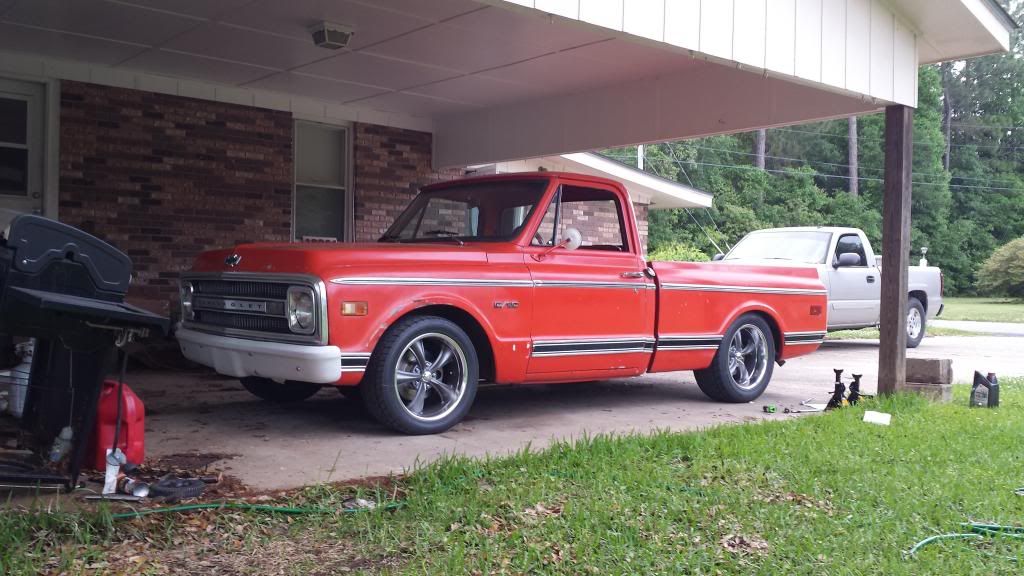 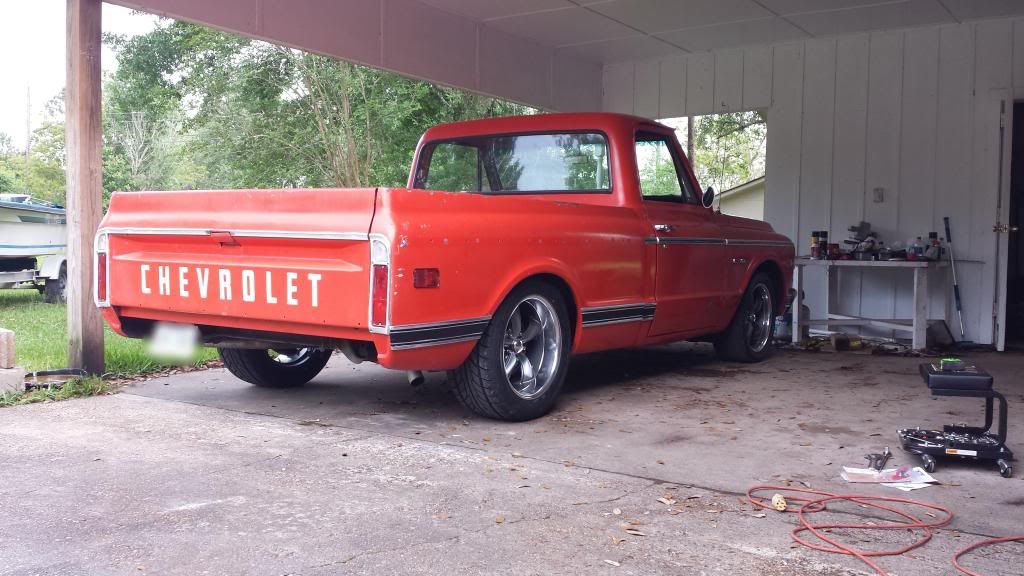 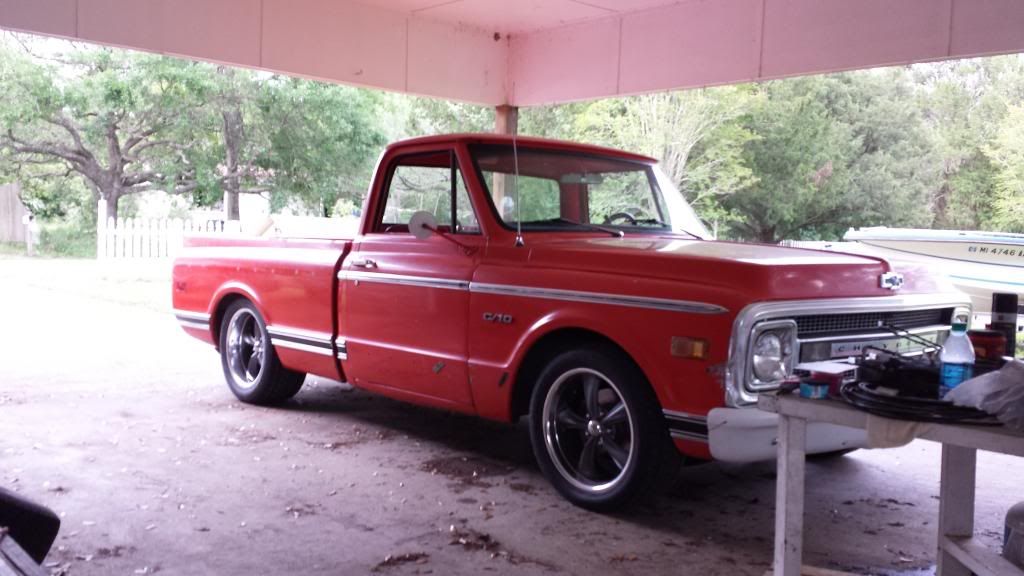 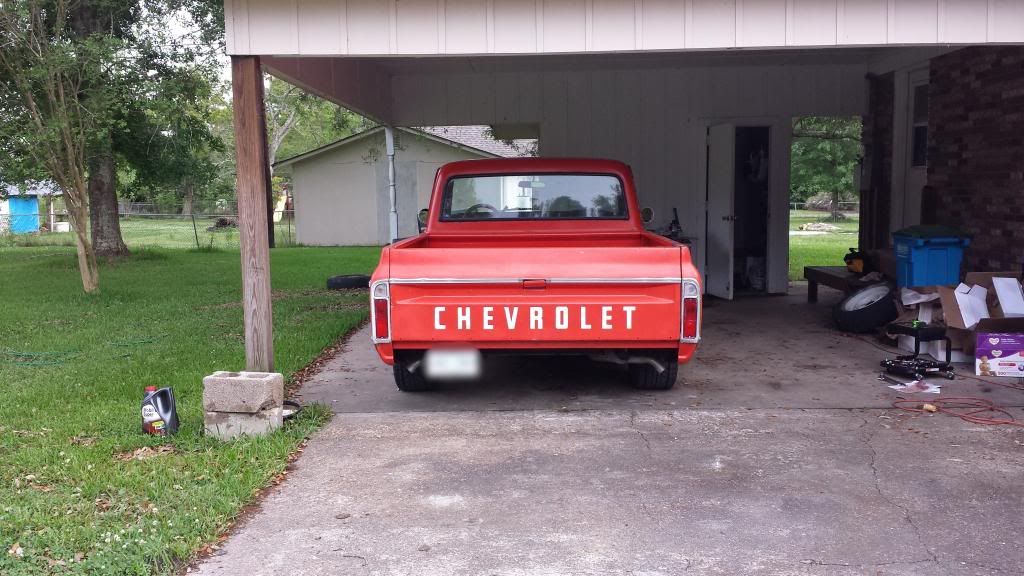 I think it looks bad@$$ in the back myself!! But it bottoms out riding over a gnat hair. I'll end up having to get a custom shackle made for the rear to raise it up an 1" or so and lowering the front about an 1" as well. |
|
|
|
|
05-01-2014, 02:31 AM
|
#18 |
|
Registered User
Join Date: Oct 2011
Location: Watson, Louisiana
Posts: 312
|
Re: My first build SAFETY ORANGE
your drop shackles should of had 2 or 3 holes at the top to lift it up and inch per hole. Nice build.
__________________
build thread - 1972 C/10 "Ethyl" 1974 C/10 " Paw Paw" C/10 Club Louisiana instagram - @esso_c10 @projectpawpaw |
|
|
|
|
05-01-2014, 06:42 AM
|
#19 |
|
Registered User
Join Date: Nov 2013
Location: Ocean Springs, MS
Posts: 43
|
Re: My first build SAFETY ORANGE
Preciate it man. That shackle does have several holes, but the shackle is tapered so it only fits that top hole.
|
|
|
|
|
05-01-2014, 07:28 AM
|
#20 |
|
Registered User
Join Date: Jan 2014
Location: Stigler,OK
Posts: 125
|
Very nice truck!
Congrats with your find and keep the pics coming. It's always fun to see the progress.
|
|
|
|
|
05-01-2014, 08:29 AM
|
#21 |
|
Registered User
Join Date: Nov 2013
Location: Ocean Springs, MS
Posts: 43
|
Re: My first build SAFETY ORANGE
Definitely will, thank you
|
|
|
|
|
05-01-2014, 08:29 AM
|
#22 |
|
Senior Member
Join Date: Apr 2008
Location: Franklinton NC
Posts: 1,309
|
Re: My first build SAFETY ORANGE
Nice truck. Keep us posted on as you go.
|
|
|
|
|
05-01-2014, 10:18 AM
|
#23 |
|
Registered User
Join Date: Aug 2013
Location: Alabaster, Alabama
Posts: 18
|
Re: My first build SAFETY ORANGE
Nice truck, great write-up too! If you don't mind, can you post up your wheel info, size, backspace, etc.? I am about to order some, and what you have is about what I am looking for. Keep the pics coming. Thanks!
__________________
Mark _____________________________________________ 1968 c10 stepside 1948 GMC 1969 Chevelle |
|
|
|
|
05-01-2014, 10:37 AM
|
#24 |
|
Registered User
Join Date: Nov 2013
Location: Ocean Springs, MS
Posts: 43
|
Re: My first build SAFETY ORANGE
Tires are 255/45/18 up front and 295/45/18 in the back. Wheels are 18x8 with a 2mm offset (approx. 4.50") and 18x9.5 with -4mm offset (approx. 5")
|
|
|
|
|
06-14-2014, 11:59 AM
|
#25 |
|
Registered User
Join Date: Nov 2013
Location: Ocean Springs, MS
Posts: 43
|
Re: My first build SAFETY ORANGE
After a few months of not being able to drive my truck, I finally came across some extra money to finish lowering it..
Ordered DJM 2" lowering springs and a CPP c notch (c notch still on the way..) It's about to go down! Literally.. 
|
|
|
|
|
| Bookmarks |
|
|


 Hybrid Mode
