
 |
Register or Log In To remove these advertisements. |
|
|
|
|||||||
 |
|
|
Thread Tools | Display Modes |
|
|
|
|
#1 |
|
Registered User
 Join Date: Nov 2007
Location: Vernon, Texas
Posts: 331
|
Project "Ron Burgundy" 67 c10 5.3
Well I figured i would finally start a thread on my truck, since im about half way through my build. A little background on it: 1967 c10 327 th400, bought it around 7 years ago. It was restored at some point in the early 90's. Now the truck was super solid before the build. Some people even think im crazy to tear it down from where it was at. The goal of my truck is to be a resto-mod i can daily drive. My project has been going on for almost 2 years between balancing work, paramedic school and honestly money. Im really bad about taking pictures but remember every now and again to snap a few so lets start at the beginning and get caught up to present.
This is truck when i bought it. Truck was flawless minus the wood in the bed. I daily drove this thing for years with out a ounce of trouble. After a couple years the clear coat started to peel and some rust started to appear around the rockers where it had been bondo'd 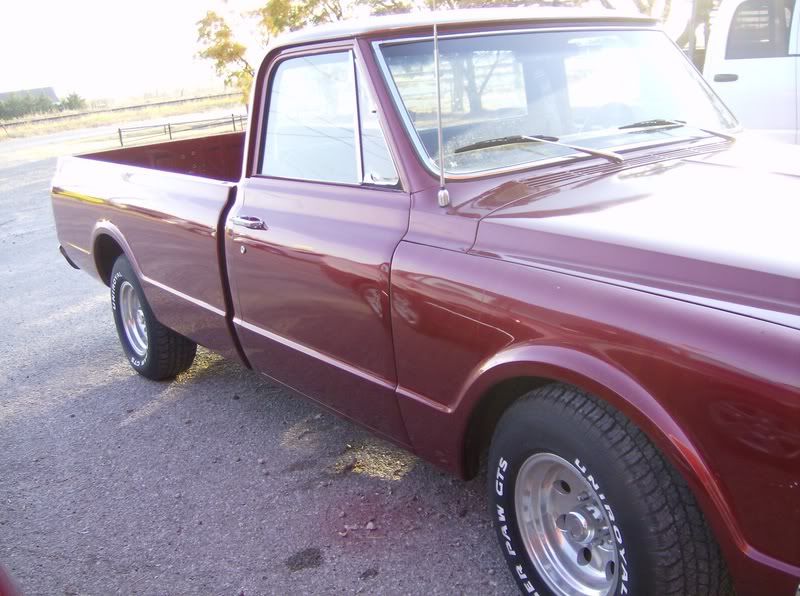 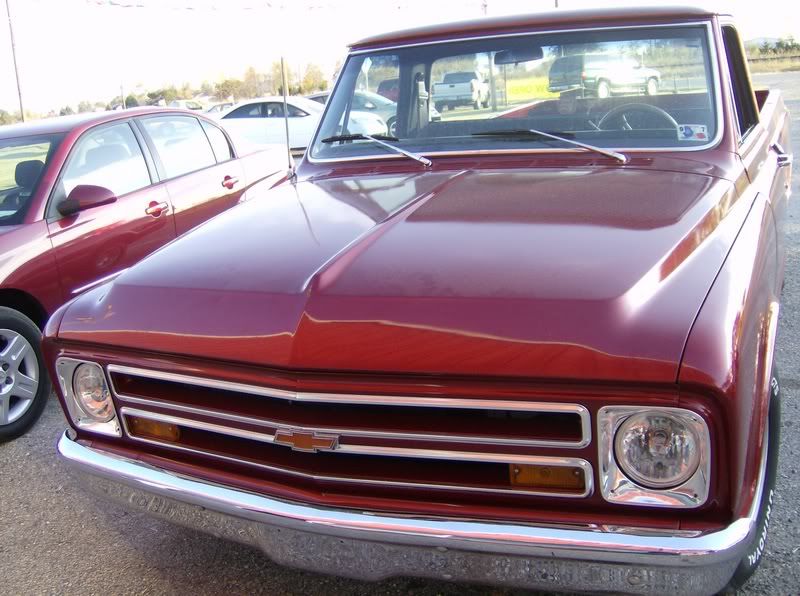 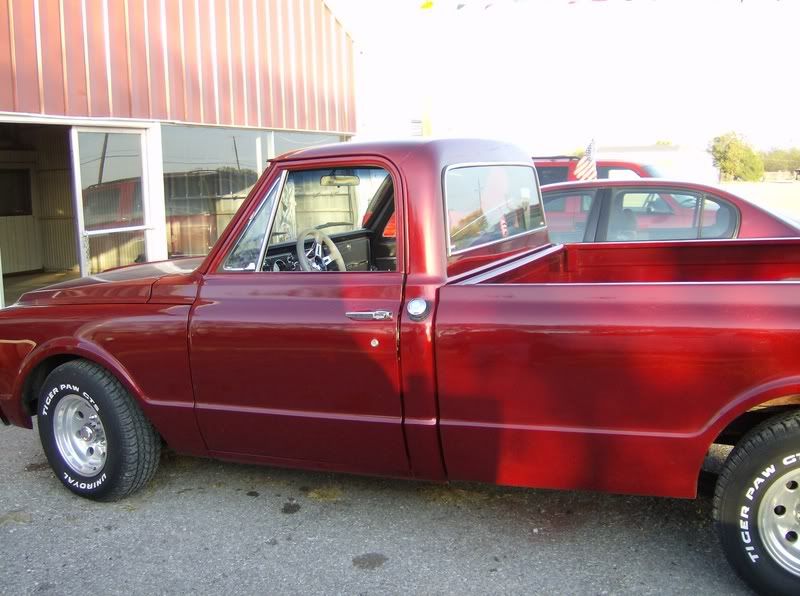 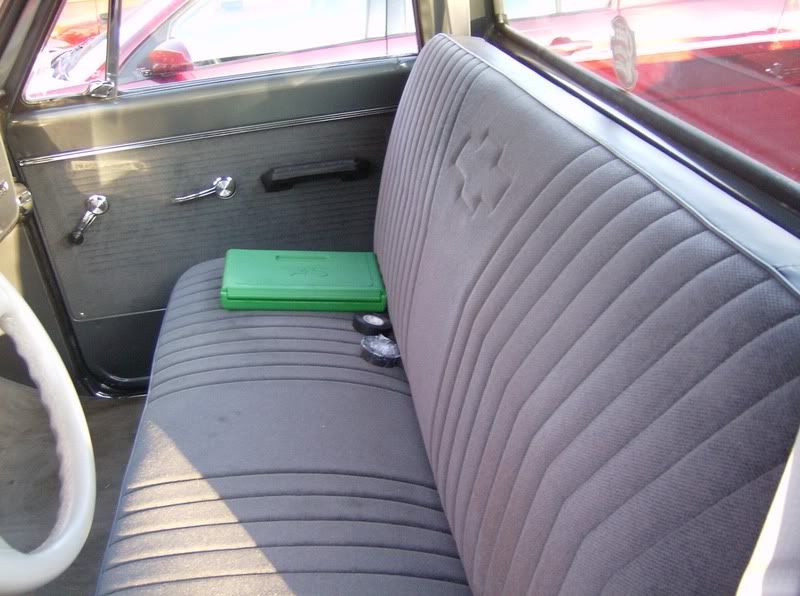 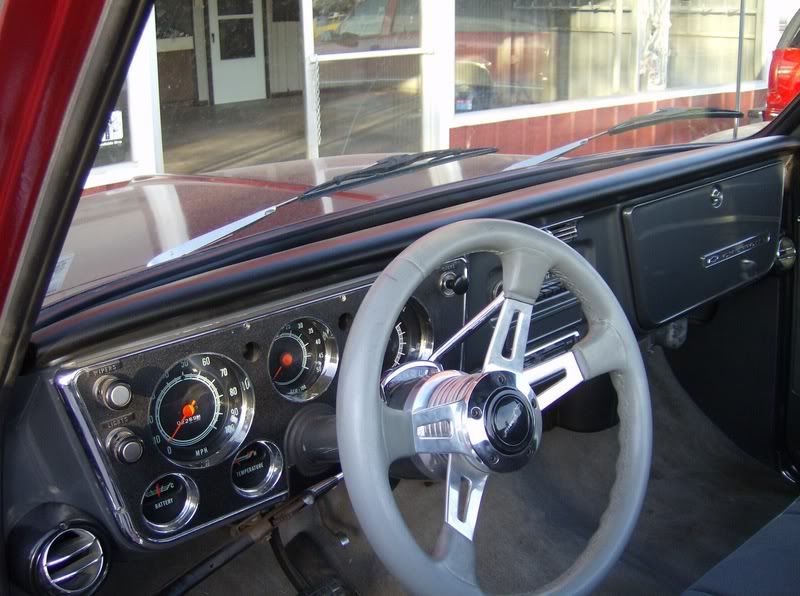
|
|
|

|
|
|
#2 |
|
Registered User
 Join Date: Nov 2007
Location: Vernon, Texas
Posts: 331
|
Re: Project "Ron Burgundy" 67 c10 5.3
So as any project goes, you start with a simple goal in mind but once you start working on something you start thinking " well while im here.." So originally i wanted the truck to have a comfortable ride. The previous owner had heated to the coils to lower it and it rode like a hay wagon, to be fair it did have a killer stance though lol. I decided to go with air ride and ordered a stage 1 porterbuilt front and rear. The install went in fairly easy with a few phone calls to travis at http://www.azproperformance.com/home.php
 Ignore the spindles as they ended up being the wrong ones   
|
|
|

|
|
|
#3 |
|
Registered User
 Join Date: Nov 2007
Location: Vernon, Texas
Posts: 331
|
Re: Project "Ron Burgundy" 67 c10 5.3
I always hated how the exhaust hung down below the frame rail. So i cut two pieces of 4" pipe i had lying around. I cut two holes in the trailing arm cross member and welded in the pipe so the exhaust can tucked nice and tight. I also painted the frame in POR-15. Since i had decided on 4 wheel disc brakes i needed to convert the old 6 lug over to a 5 lug setup. I ordered a set of Moser conversion axles and installed the rear discs. I also installed a set of lowering blocks
   
|
|
|

|
|
|
#4 |
|
Registered User
 Join Date: Nov 2007
Location: Vernon, Texas
Posts: 331
|
Re: Project "Ron Burgundy" 67 c10 5.3
So next up is the motor. I found a low mileage 5.3l and a 4l80e. The 5.3l already had a set of beehives spring in it and a ls6 cam. I opted for a little bit bigger cam so i bought a vinci trucker cam. I also ordered a Transgo HD-2 shift kit and a Circle D 3200 stall. after everything was installed a put some left over POR-15 black paint on the tranny and some hugger orange POR-15 on the engine block. I Have some aluminum paint for the heads and accessory brackets but haven't got to that yet.
   
|
|
|

|
|
|
#5 |
|
Registered User
 Join Date: Nov 2007
Location: Vernon, Texas
Posts: 331
|
Re: Project "Ron Burgundy" 67 c10 5.3
So now, the chassis is almost done. I needed some wheels and tires. I went with the gun metal gray Boss 338 wheels 20x10 rear and 20x8 front. I found a guy local that had a set of Nitto 420s tires for a great deal. One of my wheels i ordered was the wrong bolt pattern so ill have to address that issue.
    The last pic the front end is aired out. So far thats where im at now. I have a few odds and ends to tie up. The body should be off to be painted pretty soon. Last edited by kamikazekyle05; 09-21-2014 at 04:42 PM. |
|
|

|
|
|
#6 |
|
Registered User
 Join Date: Nov 2007
Location: Vernon, Texas
Posts: 331
|
Re: Project "Ron Burgundy" 67 c10 5.3
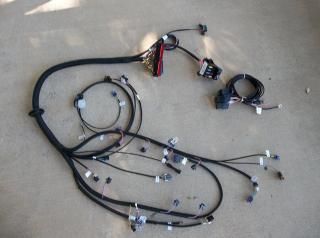
For the engine wiring I chose to got with a new harness from LS performance wiring https://www.facebook.com/LsPerformanceWiring I also had a electric fan wiring harness added. Ill be using a ls1 electric fan setup. Im still debating on using the stock 3 core radiator or to go ahead and upgrade to a aluminum one, thoughts?
|
|
|

|
|
|
#7 |
|
Registered User
 Join Date: Nov 2007
Location: Vernon, Texas
Posts: 331
|
Re: Project "Ron Burgundy" 67 c10 5.3
Last edited by kamikazekyle05; 01-30-2015 at 06:11 PM. |
|
|

|
|
|
#8 |
|
Registered User
Join Date: Oct 2007
Location: Spanaway
Posts: 8,451
|
Re: Project "Ron Burgundy" 67 c10 5.3
Your doing some nice mods, kinda hard to see the pictures tho.

__________________
Mike. Swamp Rat build thread : http://67-72chevytrucks.com/vboard/s...d.php?t=595019 72 3/4T 4X4 4" BDS Lift 33" BFG's |
|
|

|
|
|
#9 |
|
Registered User
 Join Date: Nov 2007
Location: Vernon, Texas
Posts: 331
|
Re: Project "Ron Burgundy" 67 c10 5.3
|
|
|

|
|
|
#10 |
|
Account Suspended
Join Date: Jan 2009
Location: Kuna, Idaho
Posts: 1,046
|
Re: Project "Ron Burgundy" 67 c10 5.3
Looks good to me. I'm in for the ride.
|
|
|

|
|
|
#11 |
|
Registered User
Join Date: Nov 2014
Location: Columbiana Ohio
Posts: 1,210
|
Re: Project "Ron Burgundy" 67 c10 5.3
Its was a nice one to start with but sort of like mine it sounds like some issues was covered up in bondo... I paid too much for it and now its in a million pieces. The coils was heated on mine too so i just bought all new drop springs and spindles. Doing a couple extra things in back too along with the disks.
Anyway, Im in for the ride on yours... good luck. Looks good so far. Are you going back with the same color? Thats one of my choices for mine.
__________________
"Hey... its only time and money right? Just do it." 67 Short Bed under major construction http://67-72chevytrucks.com/vboard/s...=651356&page=8 |
|
|

|
|
|
#12 | |
|
Registered User
 Join Date: Nov 2007
Location: Vernon, Texas
Posts: 331
|
Re: Project "Ron Burgundy" 67 c10 5.3
Quote:
|
|
|
|

|
|
|
#13 |
|
Registered User
 Join Date: Nov 2007
Location: Vernon, Texas
Posts: 331
|
Re: Project "Ron Burgundy" 67 c10 5.3
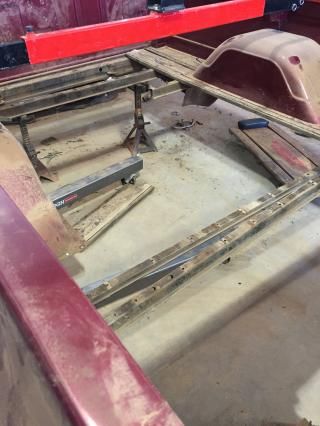
It was nice today so i spent some time working on the truck. Finally got my last wheel and tire mounted so were officially a rolling chassis. I forgot to take pictures but I went ahead and did the "castor mod". It went pretty well. I then turned my attention to the bed. The bed wood has seen better days, so I went ahead and took it all out. There were a lot of rusty and mismatched bolts/screws etc. All that rotted wood made a huge mess. I took all the support cross members out, wire brushed them, and then put a couple coats of rustoleum on them.
|
|
|

|
|
|
#14 |
|
Registered User
Join Date: Dec 2011
Location: winnipeg
Posts: 1,107
|
Re: Project "Ron Burgundy" 67 c10 5.3
Very nice,will be following along.
|
|
|

|
|
|
#15 |
|
Registered User
 Join Date: Jan 2015
Location: Charlotte, NC
Posts: 483
|
Re: Project "Ron Burgundy" 67 c10 5.3
I'm diggin' it!
|
|
|

|
|
|
#16 |
|
Registered User
 Join Date: Nov 2007
Location: Vernon, Texas
Posts: 331
|
Re: Project "Ron Burgundy" 67 c10 5.3
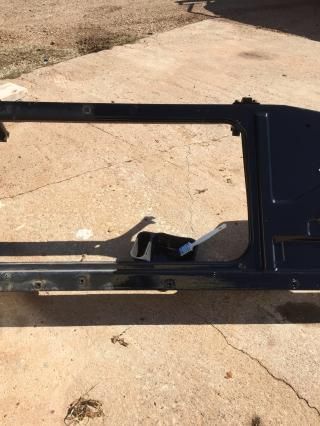
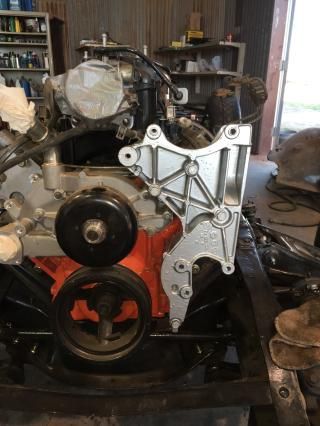
The weather was nice today so I starting installing the steel braided fuel line, pump, and filter. I realized I realized i one was AN fitting short so ill have to order one. I also ended up snapping a fitting off accidentally. This was my first time using steel braided lines. I borrowed my dads cable cutters and it works perfect. Since I was unable to finish o turn my attention to the radiator core support. I added a fresh coat of POR-15 to it. Its kind of hard to see in the picture but half of it is painted and the other half unpainted. It definitely looks better in person. I plan on installing the core support tomorrow. I also installed the alternator mount on the motor. Its is also painted in POR-15 aluminum color. This was the only time I've had a bad experience with this product. The paint kept separating no matter how much i mixed it. I ended up top coating it with some aluminum rattle can to hide the streaks.
|
|
|

|
 |
| Bookmarks |
|
|