
 |
Register or Log In To remove these advertisements. |
|
|
|
|||||||
 |
|
|
Thread Tools | Display Modes |
|
|
|
|
#1 |
|
Registered User
Join Date: Jun 2016
Location: American Canyon, CA
Posts: 253
|
And so it begins! Ghost's 68 project
Hello every one!
I would like to share my project with all of you guys. This is my first C-10 and loving owning it. I have always wanted one and now I am lucky enough to call myself an owner of my very own 1968 short bed C-10. For now I just plan on getting her running reliably and further down the road I plan on doing air suspension. But first I will be doing an LS3 swap and doing everything else I need to fix on this truck. Stats on the truck when I bought it new are as; 1968 short bed 5.3 vortex motor from a 03 suburban backed with a 4L60E Disc brakes all around Front brakes are the HD version with the 1.25" rotors Ford 9" rear end w/3.08 gears Dropped on cut springs 20x8.5 front 20x10 rear boss 338's Trailing arm set up in the rear Upholstered bench seat with what appears to be a fresh carpet Aside from that stock interior Fake patina paint job (body is in a really good straight shape) Rears have a mini tub to account occomadate 13.75 rims Headers going into tru duals with flows (series 50) There is some issues as with anything else that's 50 years old but I plan on fixing it as time and money permits. For now an actual drop kit and steering rebuild. 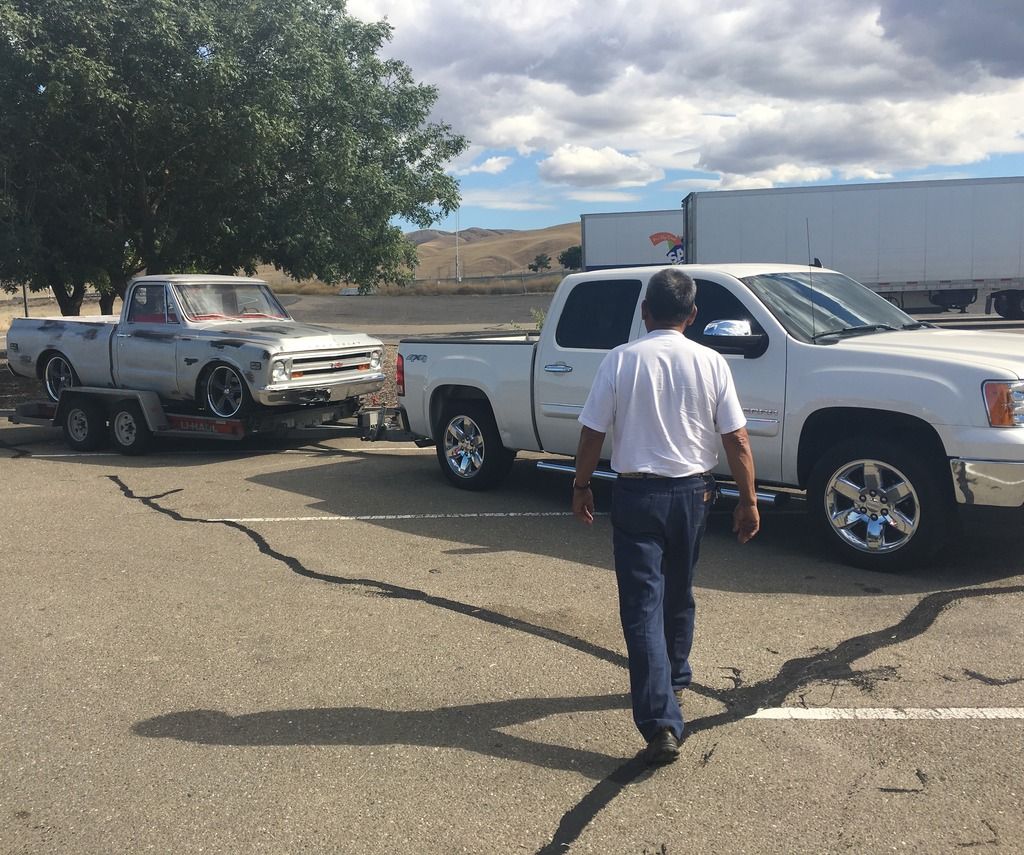 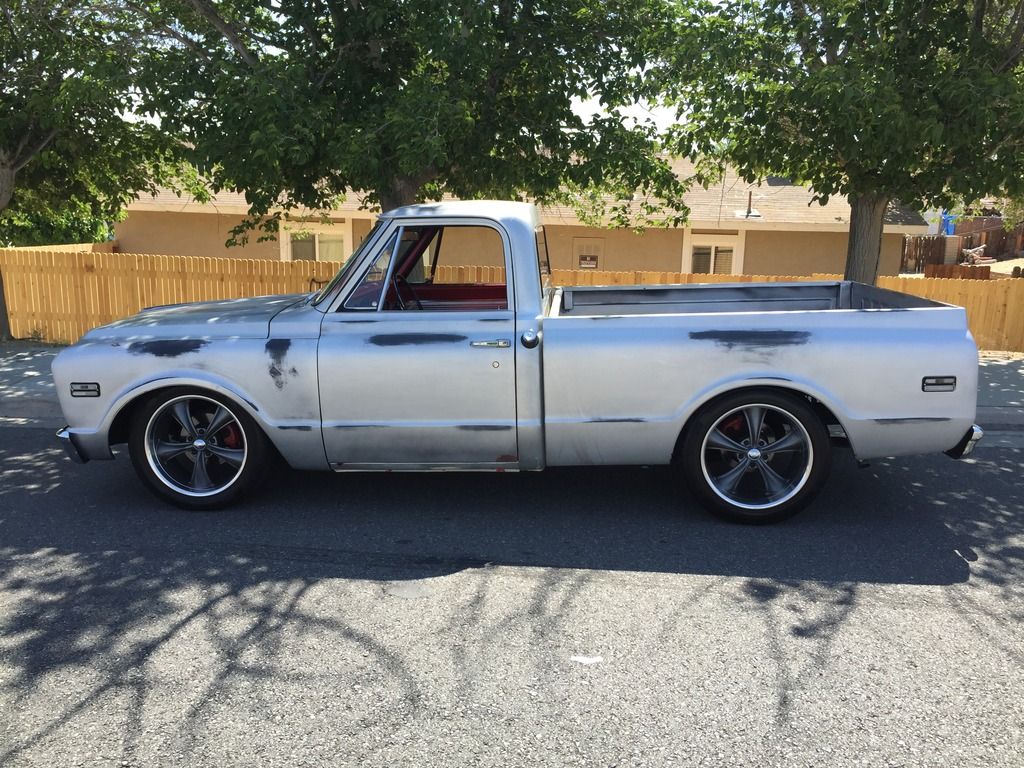 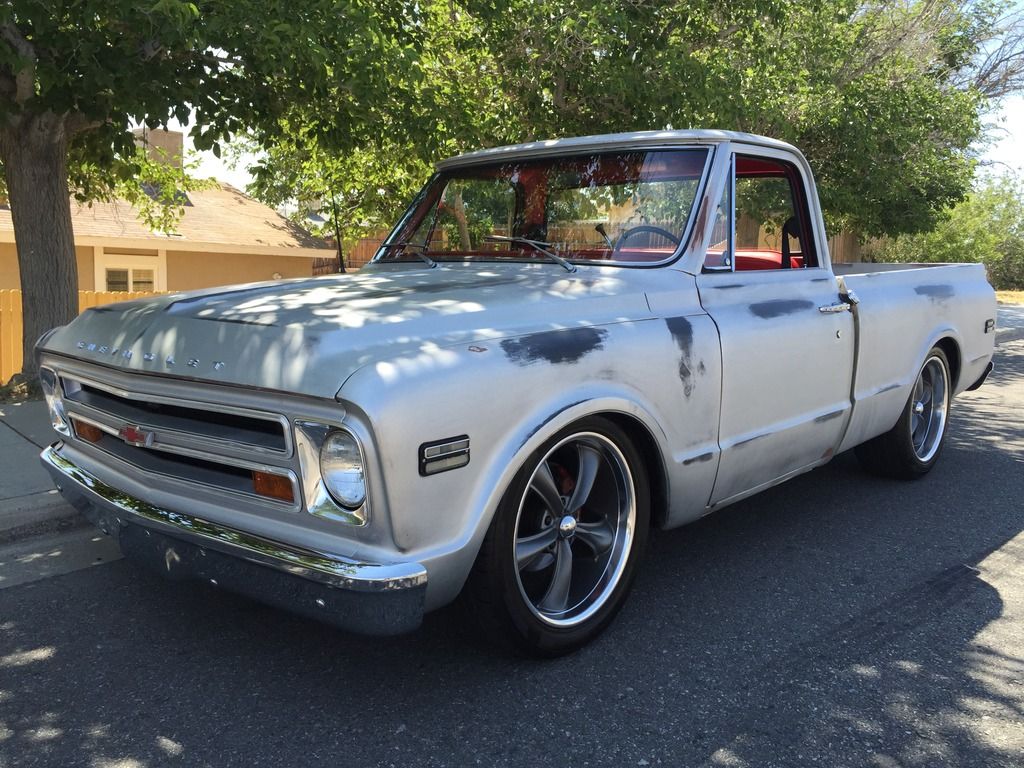 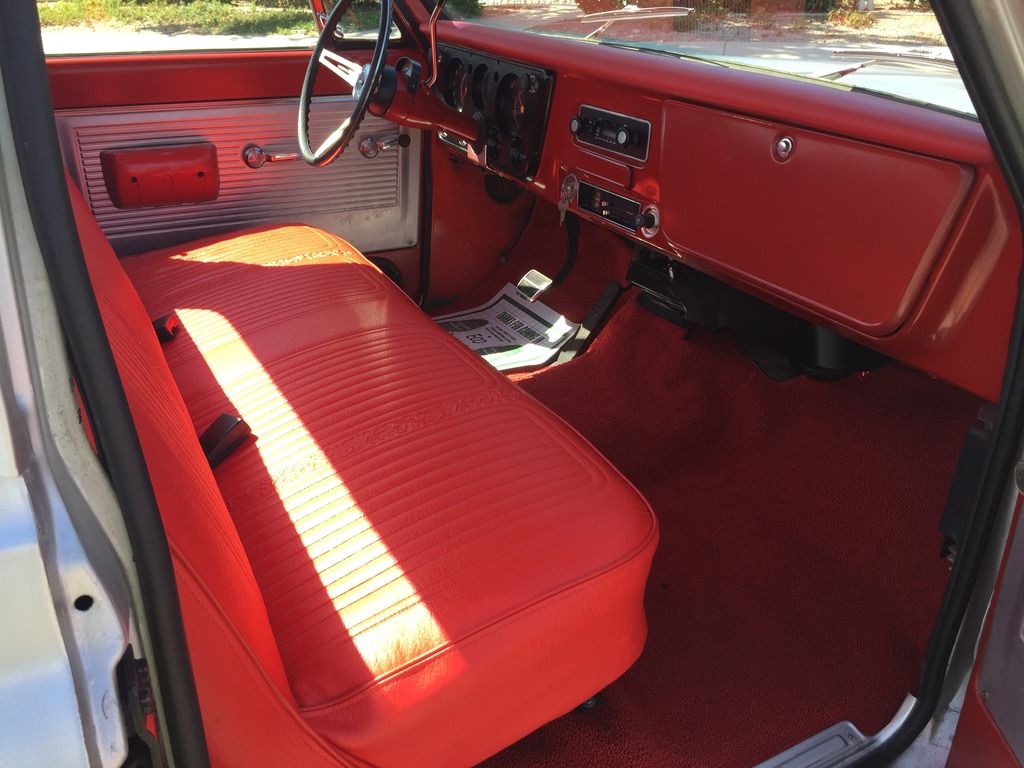
|
|
|

|
|
|
#2 |
|
Registered User
Join Date: Jun 2016
Location: American Canyon, CA
Posts: 253
|
Re: And so it begins! Ghost's 68 project
I have had my C-10 less then a month and all ready I have began on working on it. First I will be doing an actual drop kit consisting of a ECE 4/6 drop with their 73-87 drop spindles. I also ordered their front sway bar set up to go along with it. The PO dropped it on cut springs. I literally felt like a bobble head. My daughter made the decision to fix that problem cause she didn't like how it felt lol.
While I have everything torn apart I'm going to rebuild all the steering parts; ball joints, tie rods, pitman arm, idler arm and a new RedHead tight ratio power steering pump. I have to give a BIG SHOUTOUT To Lolifee99 for helping me with all the questions when it came to parts and what works with what year. These trucks are all new to me, frankly I'm diving into the deepens head first with no real experience. Thanks to this sight that has a plethora of information and answers. Here's the stock setup. I'll post some pics of it torn apart tomorrow. 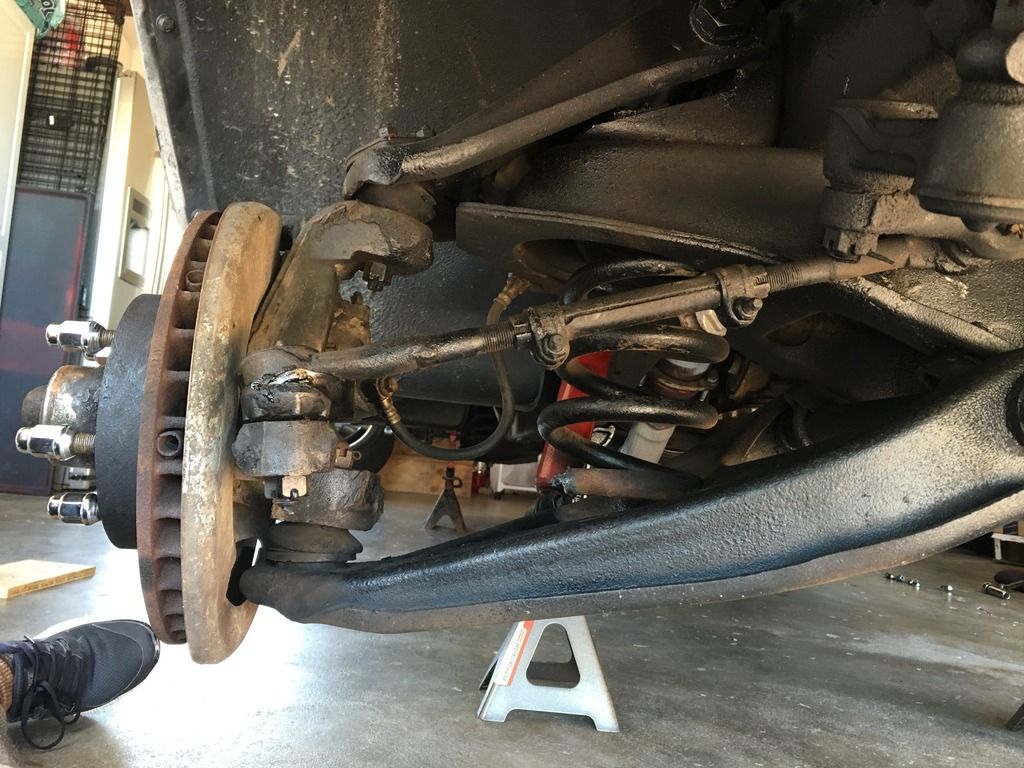 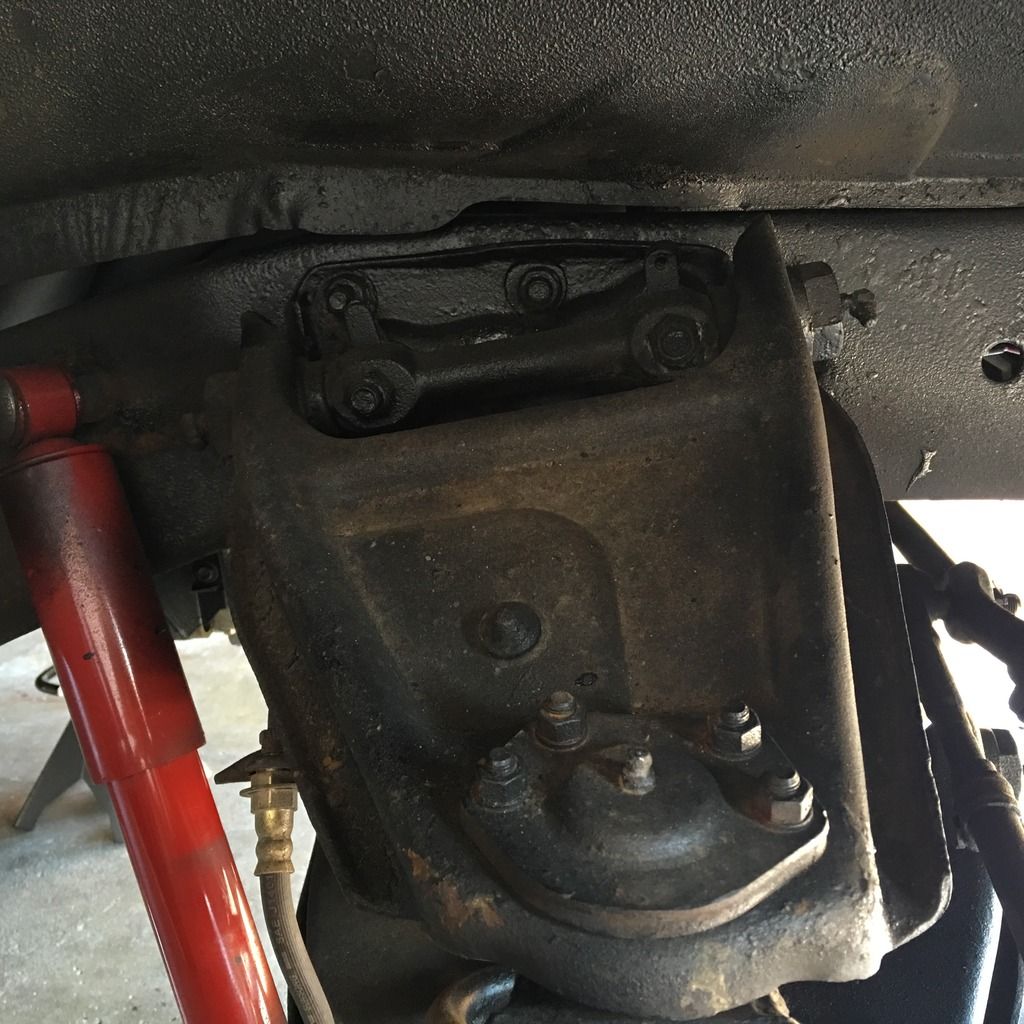
Last edited by Ghost's68; 07-19-2016 at 08:14 PM. |
|
|

|
|
|
#3 |
|
Man of Mini-Talents
Join Date: Sep 2009
Location: Oklahoma City, OK
Posts: 4,295
|
Re: And so it begins! Ghost's 68 project
Alright! Looks like a great start.
__________________
Steve Project - Ruth 66 Skylark Project - Lola 60 Biscayne Project - Iron Ox 54 GMC 100 Project - Darth 69 Camaro |
|
|

|
|
|
#4 |
|
Registered User
Join Date: Jun 2016
Location: American Canyon, CA
Posts: 253
|
Re: And so it begins! Ghost's 68 project
Thanks zoomin!
Here's how she sits as of now. I will be removing both control arms and trying to reprint them. What's the best DIY method for prep? 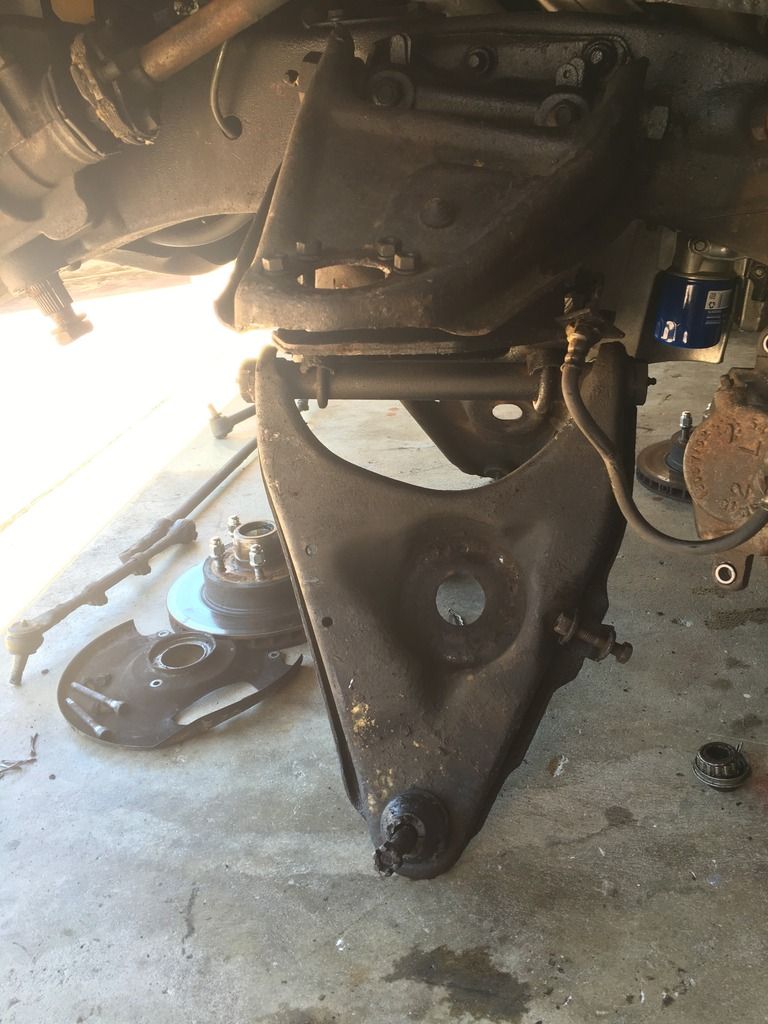 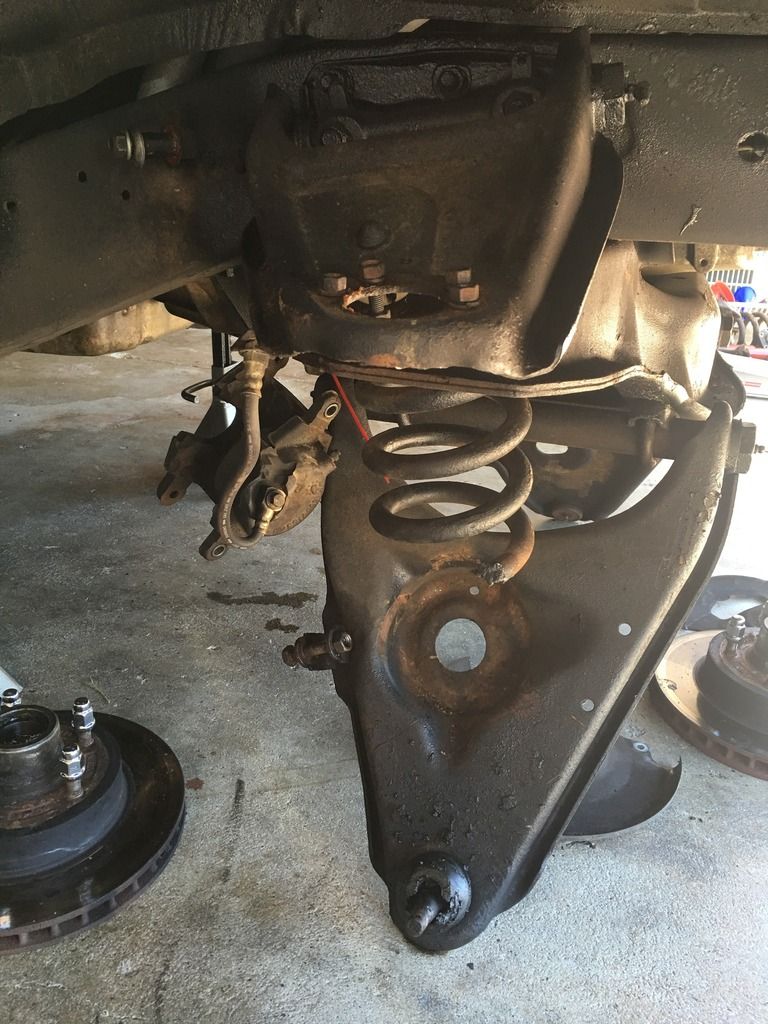 The passenger coil is stuck inside the upper control arm. I'm going to cut it loose. 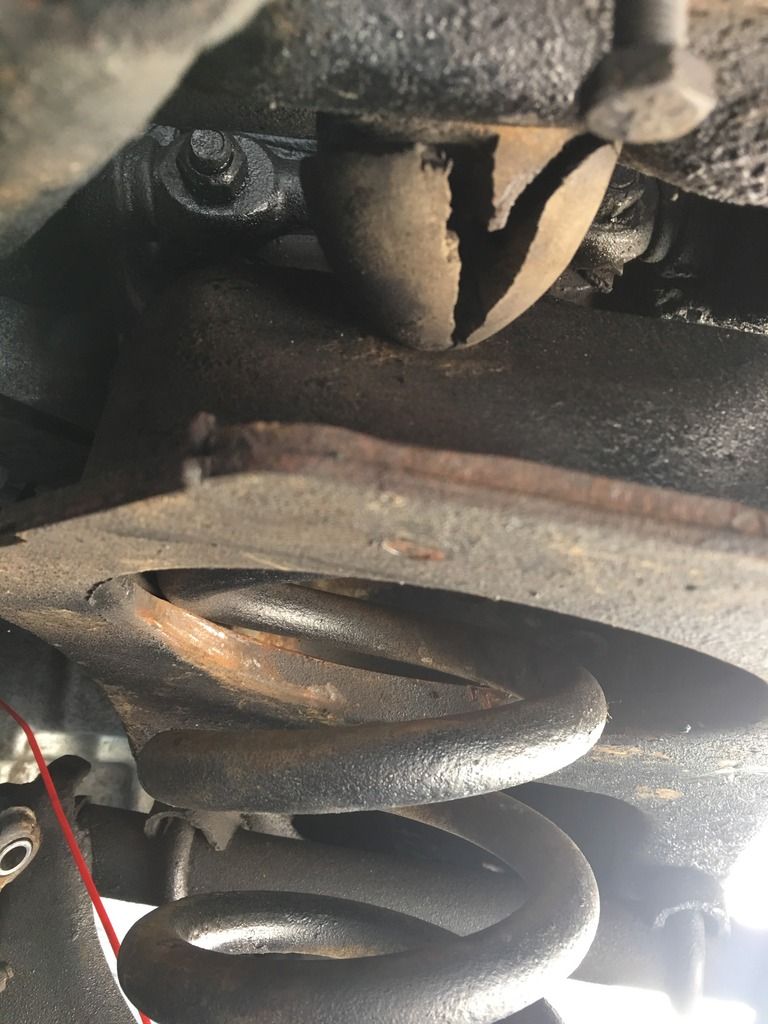 And here's the steering parts removed. 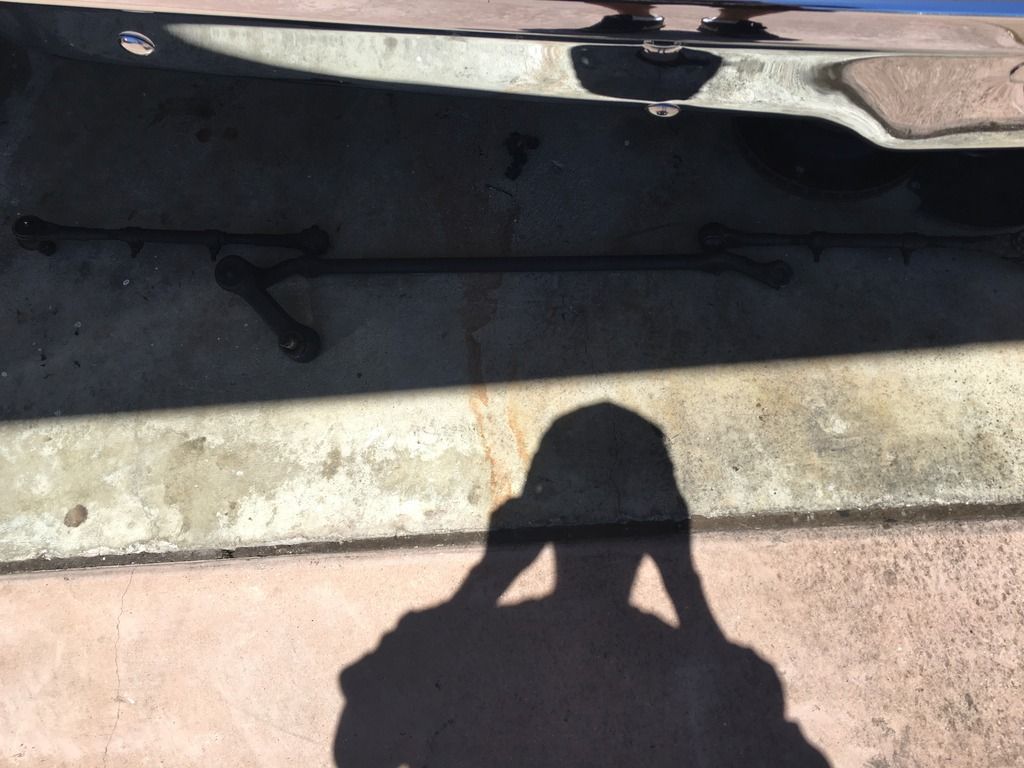 My ECE drop kit with their HD drop spindles and sway bar arrived today! I'm so juiced. I also went out and bought new HD rotors with new bearings also. I'm waiting on the rest of my Moog steering parts to arrive. 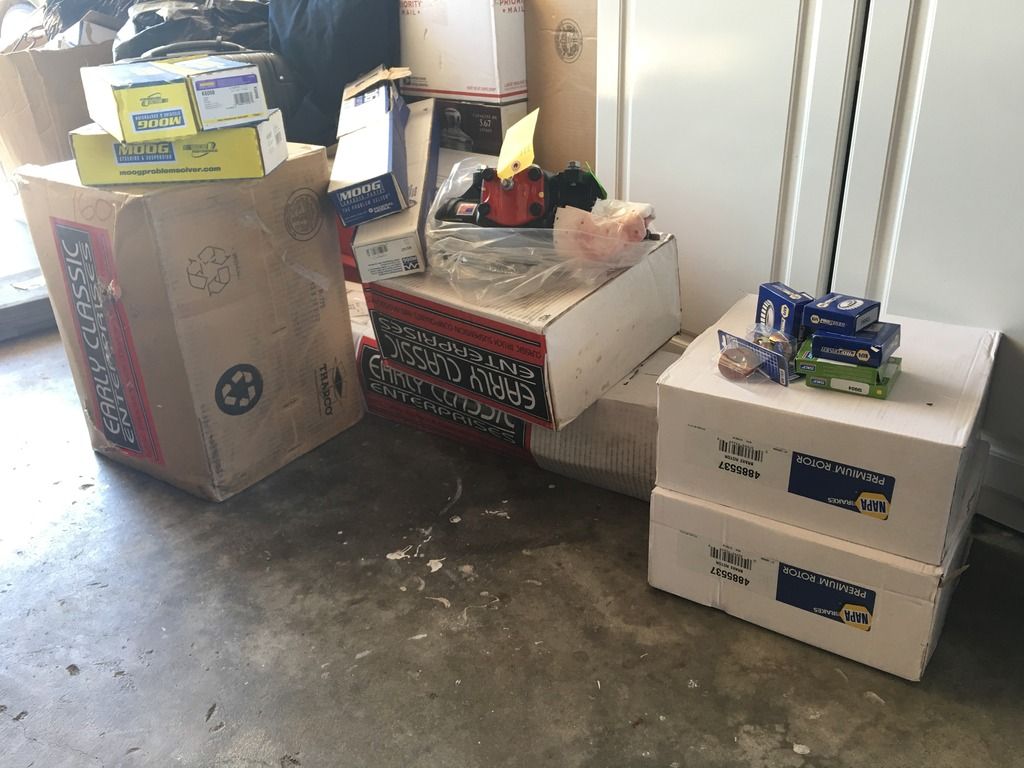
|
|
|

|
|
|
#5 |
|
67-72 parts collector,…
 Join Date: Nov 2002
Location: Mid-MO
Posts: 22,701
|
Re: And so it begins! Ghost's 68 project
Take a good look at your steering centerlink when you re-assemble everything.
There have been many people install them backward. The picture you have is correct.
__________________
Keith Convert to disc brakes. http://67-72chevytrucks.com/vboard/s...d.php?t=444823 |
|
|

|
|
|
#6 |
|
Registered User
Join Date: Sep 2009
Location: ottawa,canada
Posts: 4,550
|
Re: And so it begins! Ghost's 68 project
nice truck!
__________________
my build threads '86 C10 http://67-72chevytrucks.com/vboard/s...d.php?t=415628 '67 C10 http://67-72chevytrucks.com/vboard/s...d.php?t=635078 '63 GMC http://67-72chevytrucks.com/vboard/s...d.php?t=674682 |
|
|

|
|
|
#7 |
|
Registered User
Join Date: Jun 2016
Location: American Canyon, CA
Posts: 253
|
Re: And so it begins! Ghost's 68 project
Haven't been able to do much due to work this past couple days. But I was able to take my control arms into work and bead blast them. They were swamped with years of grease dirt grime and other Nast stuff.
Before 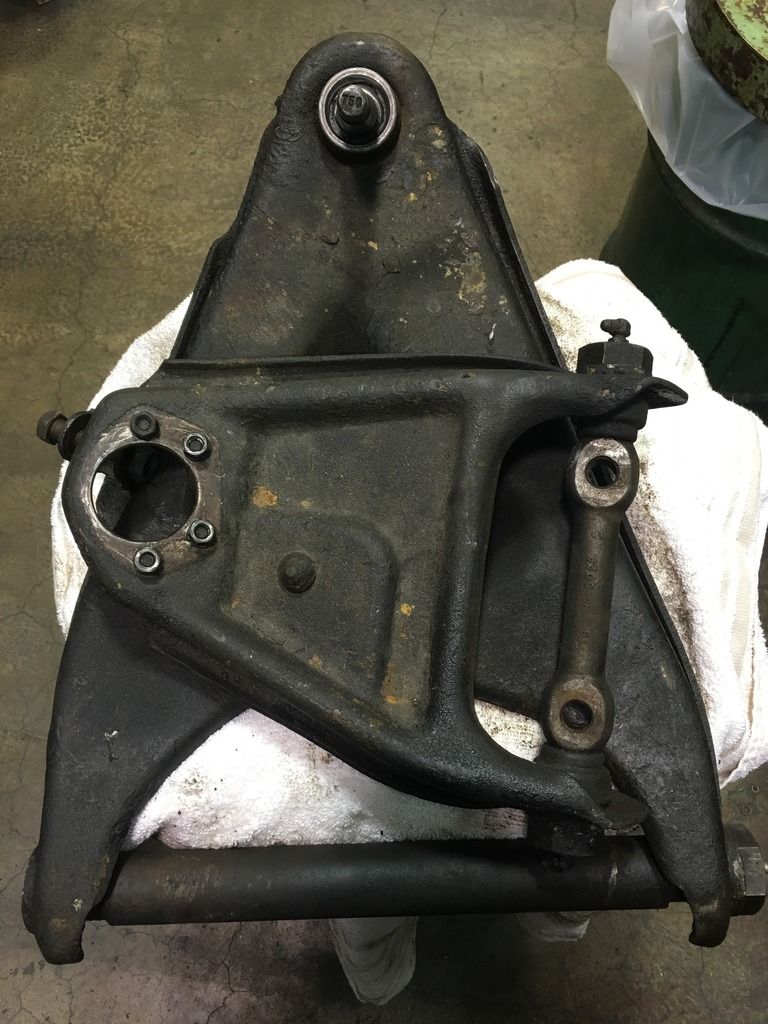 After 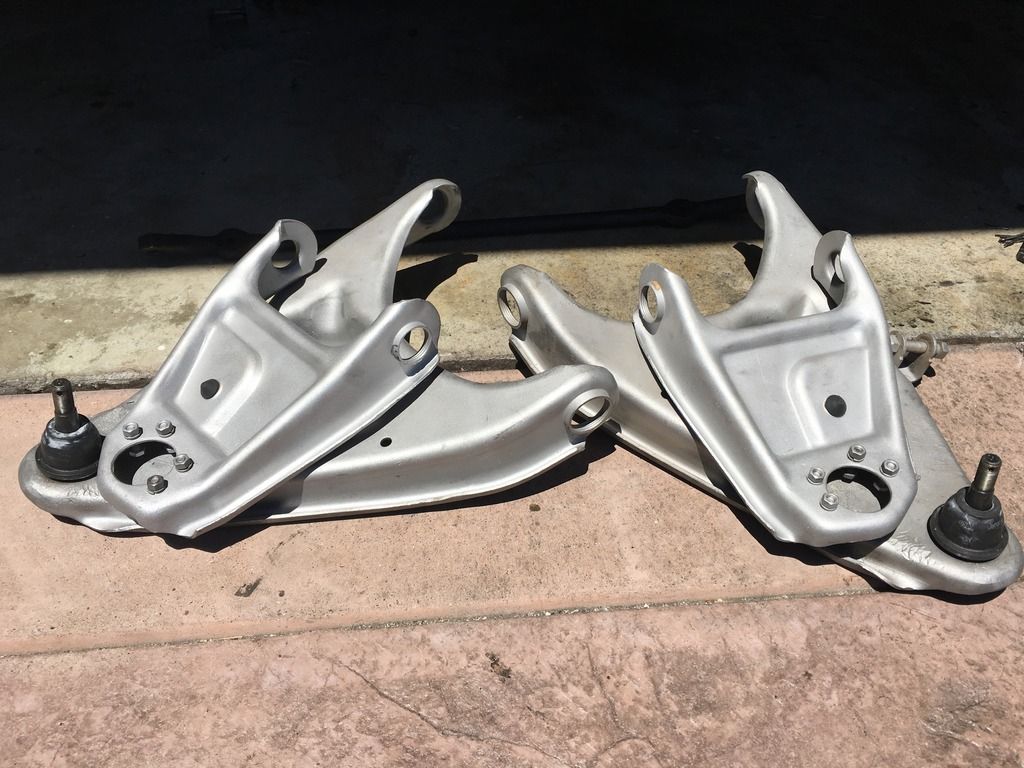 I prepped them for a coating of VHT epoxy suspension parts paint. I also dropped the old ball joint and pressed in a new Moog lower BJ. 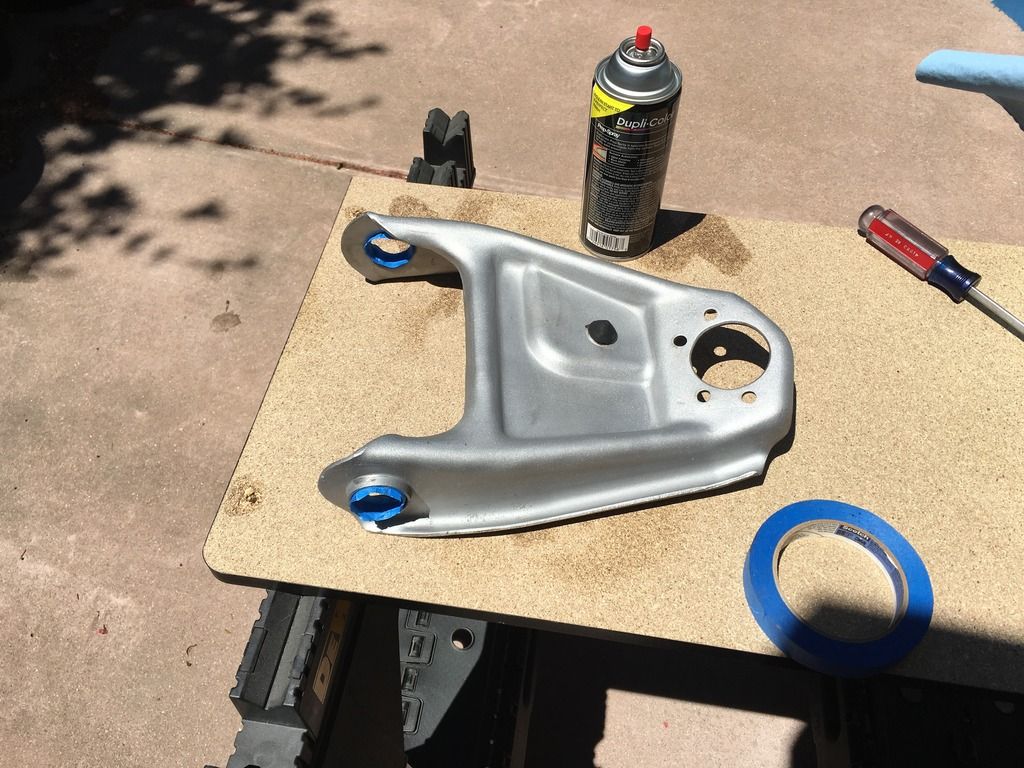 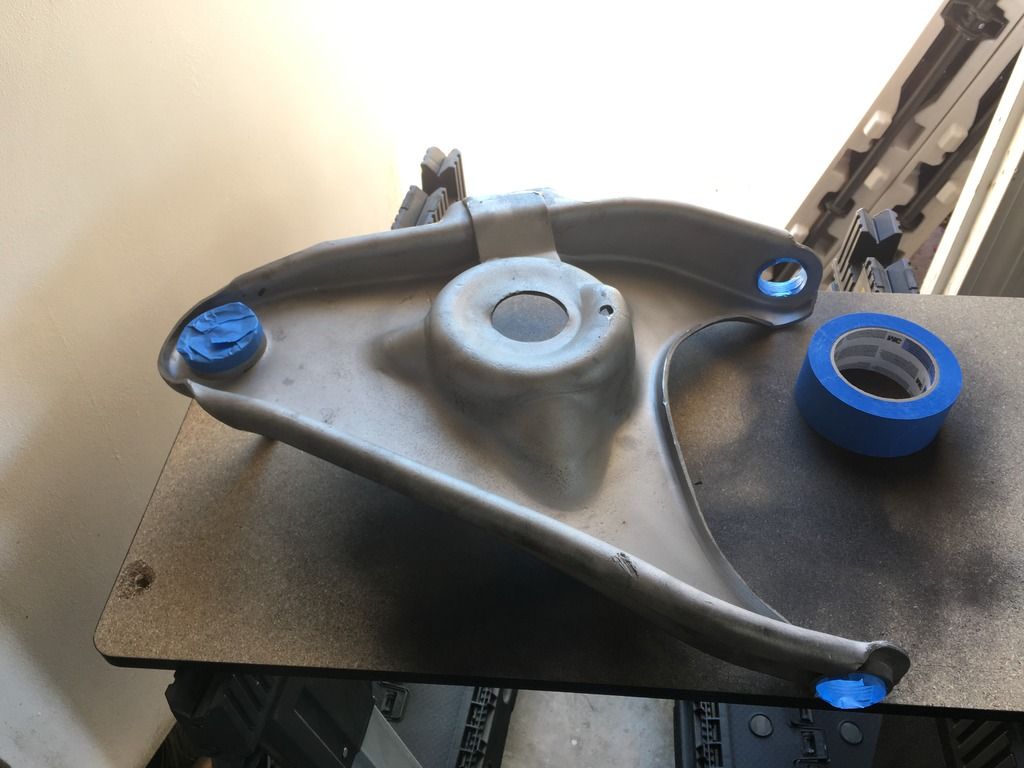 Here's what they look like after the recommended 2 light coats and a final medium coat. Look way better then before. I didn't have time to get the other arms as I was pressed for time but I will be knocking those out tomorrow. 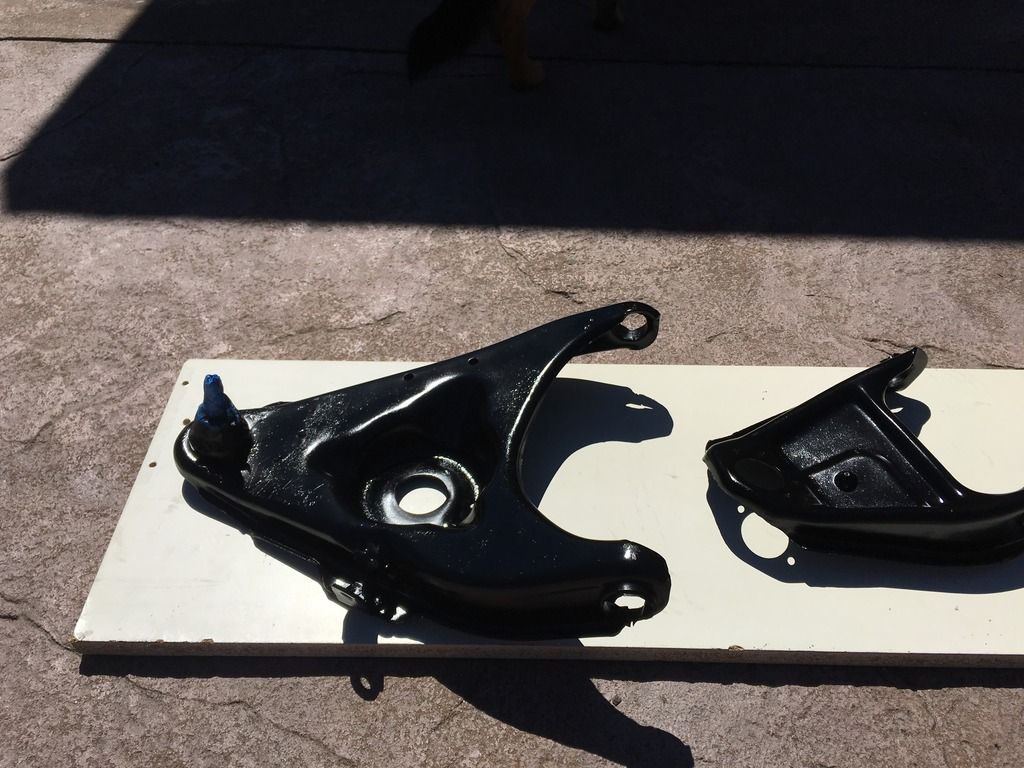
|
|
|

|
|
|
#8 |
|
Registered User
Join Date: Jun 2016
Location: American Canyon, CA
Posts: 253
|
Re: And so it begins! Ghost's 68 project
So once I received my steering parts from summit I checked to see of the tie rods for the 73-87 would fit the steering link removed from the truck. Sure enough, it didn't fit. Seems like PO just slapped together what fit. Now I'm going to try and source a 73-87 link.
|
|
|

|
|
|
#9 |
|
Registered User
Join Date: Jun 2016
Location: American Canyon, CA
Posts: 253
|
Re: And so it begins! Ghost's 68 project
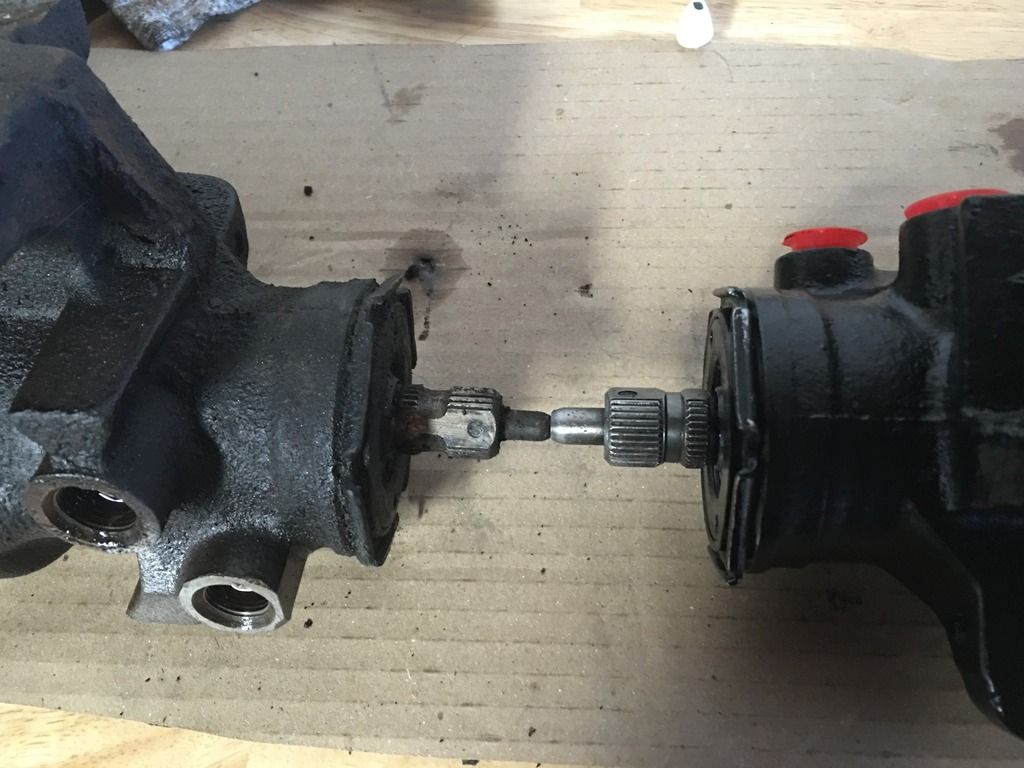
Hit a small bump in the road while trying to install my new redhead steering gear box. The one I ordered for the 68 had a larger input shaft. About a 1/16" bigger. Call up to RedHead and they figured out I had a unit used on 78? And up. I forgot what year Steve told me. Shipped me what I needed with a return label for the first one. Awesome guys up there and super helpful. New one installed and feels SOOOA much better.
 I began to get all my steering parts in order and ended up pulling the correct steering link from a junker this week. So the PO who did the disc conversion just cut the head off of a 73-87 outer tie rod, cut the original tie rod head and then welded the later year tie rod head to the orignal threaded shank. You can see in the pic the weld area. So now we got correct year period componenets. Thanks again for all those who helped along the way! You guys rock  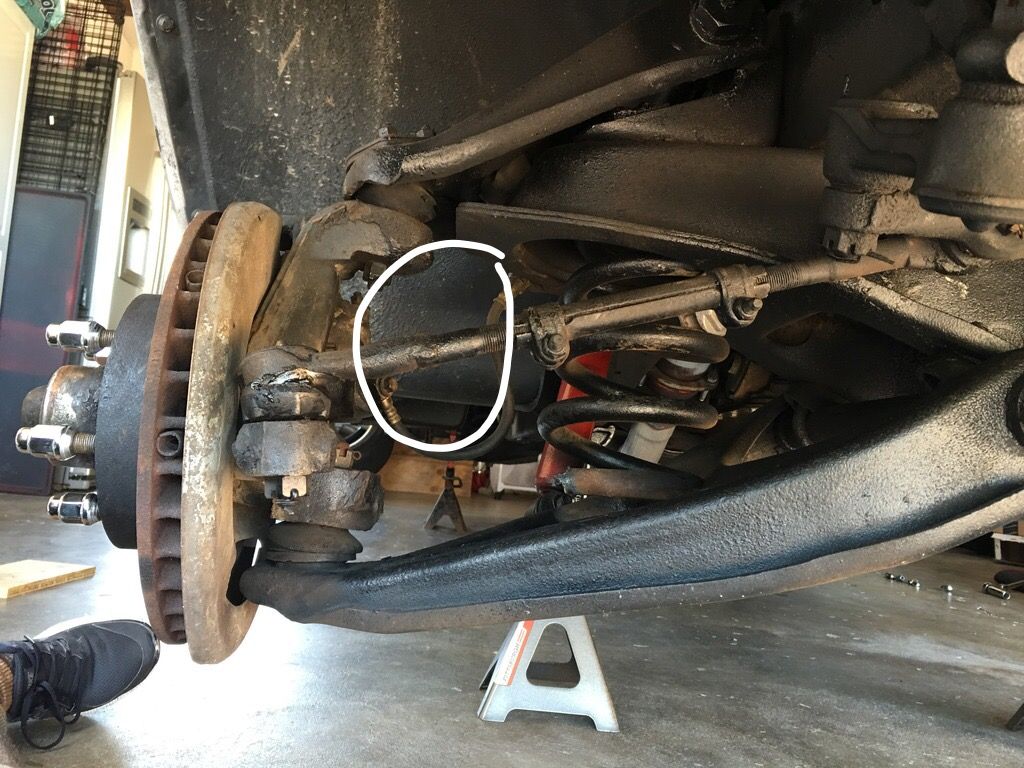 The original one on the left and newer centerlink on the right. Going to get the new one cleaned up painted up. 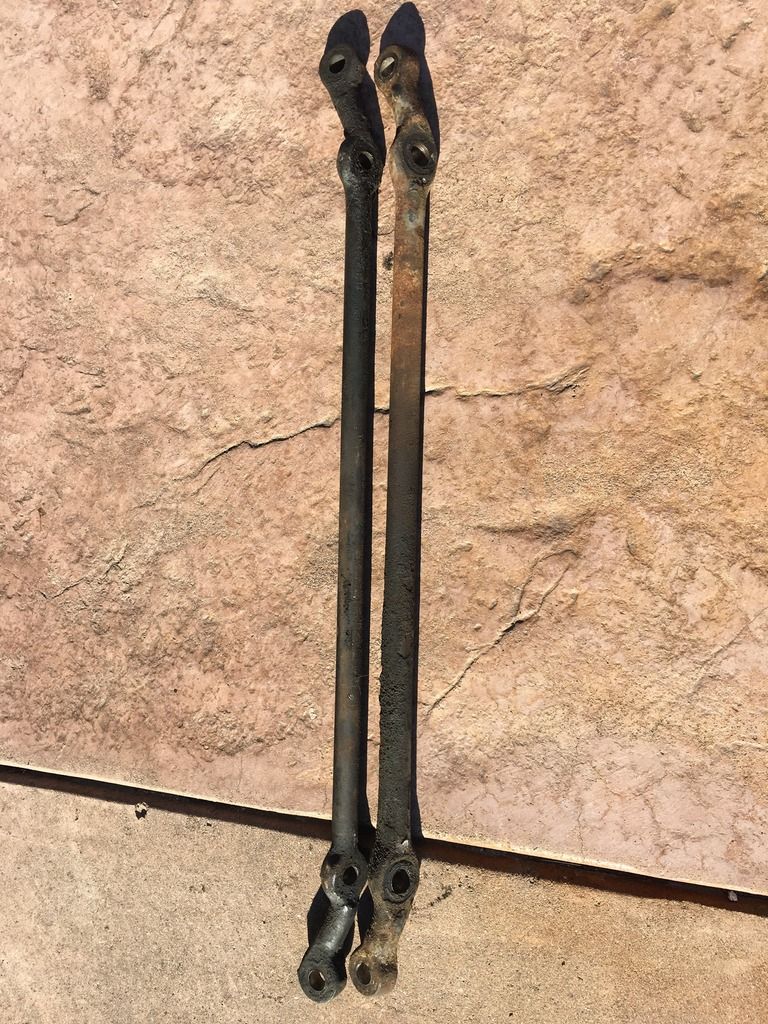 I'll try and take some pics of the steering gear tomorrow. I ended up dropping off the control arms to have the shafts installed. I tried for over an hour and was having trouble. I don't have a large vice, air compressor and or air tools. Solely working with hand tools. I couldn't even find sockets in the size I needed so I gave up. Lol. Hope to start putting all the parts together next week. Still waiting on the rear springs to arrive. ECE was waiting on their supplier. |
|
|

|
|
|
#10 |
|
Registered User
Join Date: Jun 2016
Location: American Canyon, CA
Posts: 253
|
Re: And so it begins! Ghost's 68 project
Progress made today!
I was able to just about get the front end together. I picked up the control arms from the local shop. Drilled the old u bolts to the later 9/16" befier ones. Got both control arms installed and greased up. Torques down all the needed bolts to specs I found online. 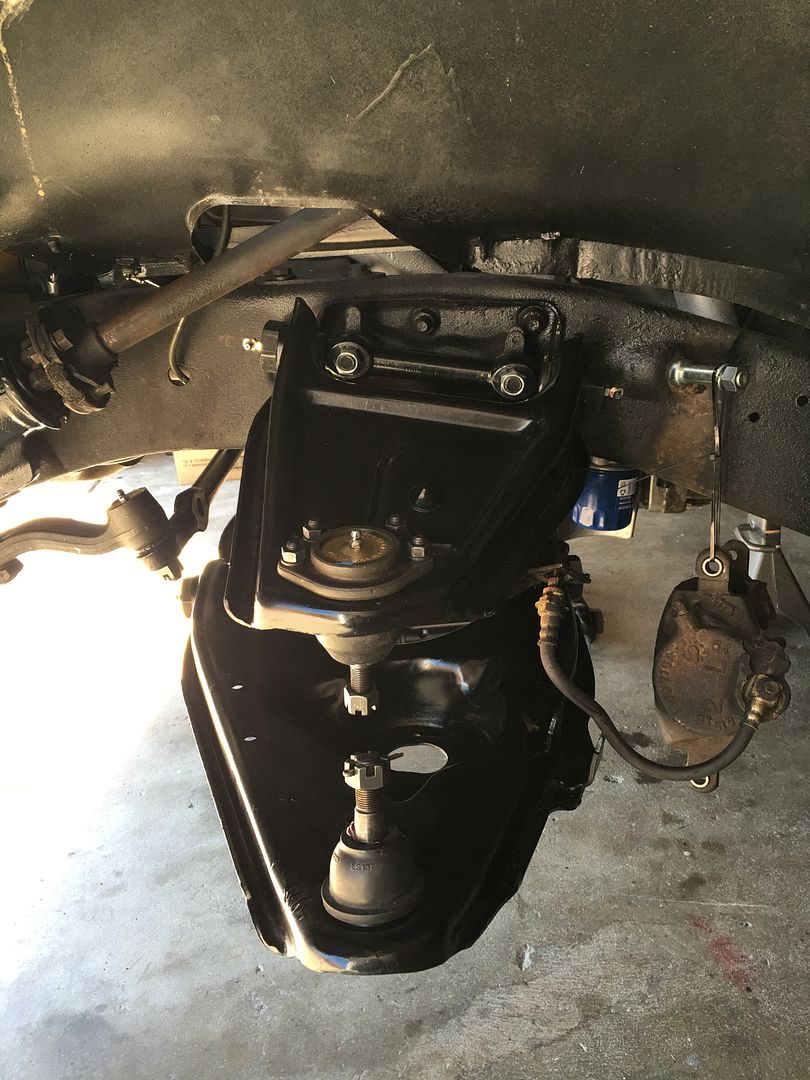 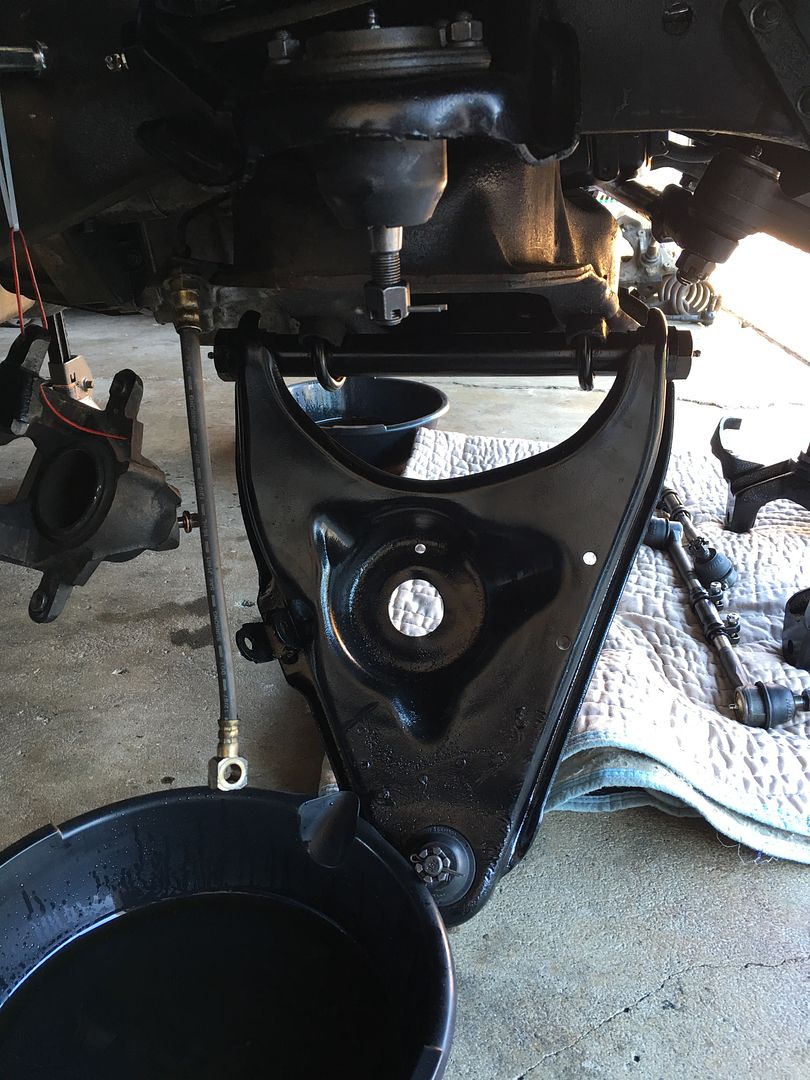 While installing the center link I ran into the issue with clearance. It was hitting the oil pan when link was centered. Took a grinder to it to make clearance. No issues now. 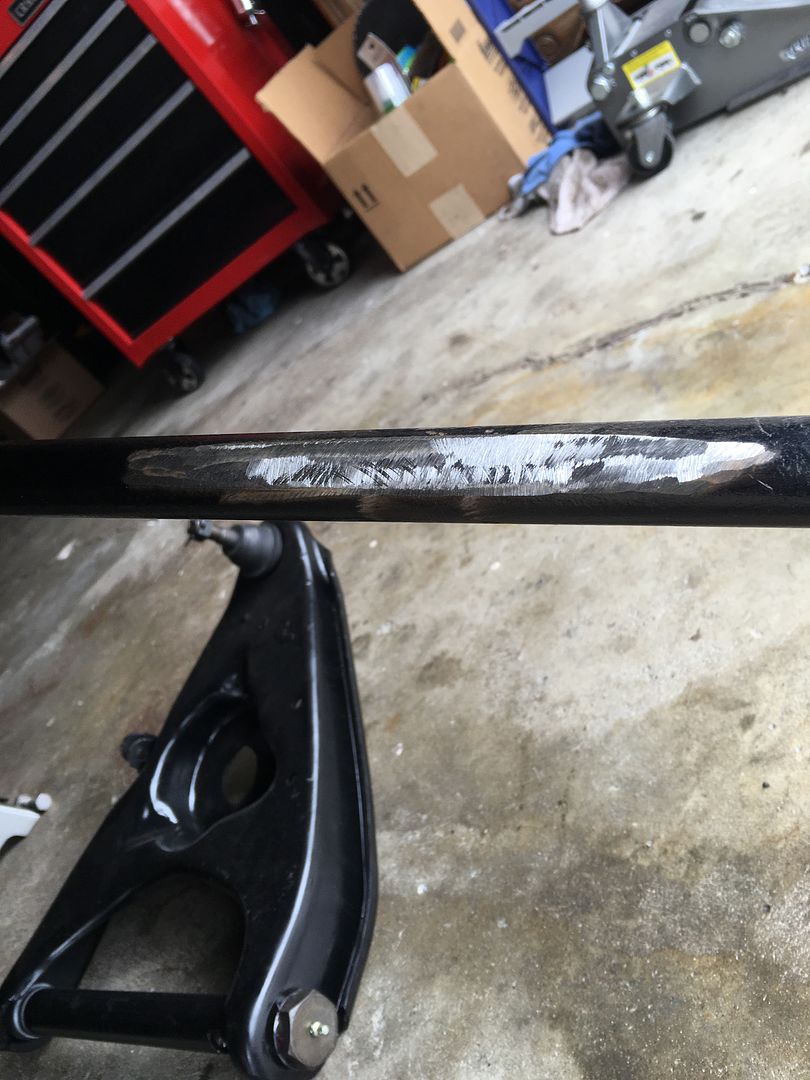 Here's after clearance. 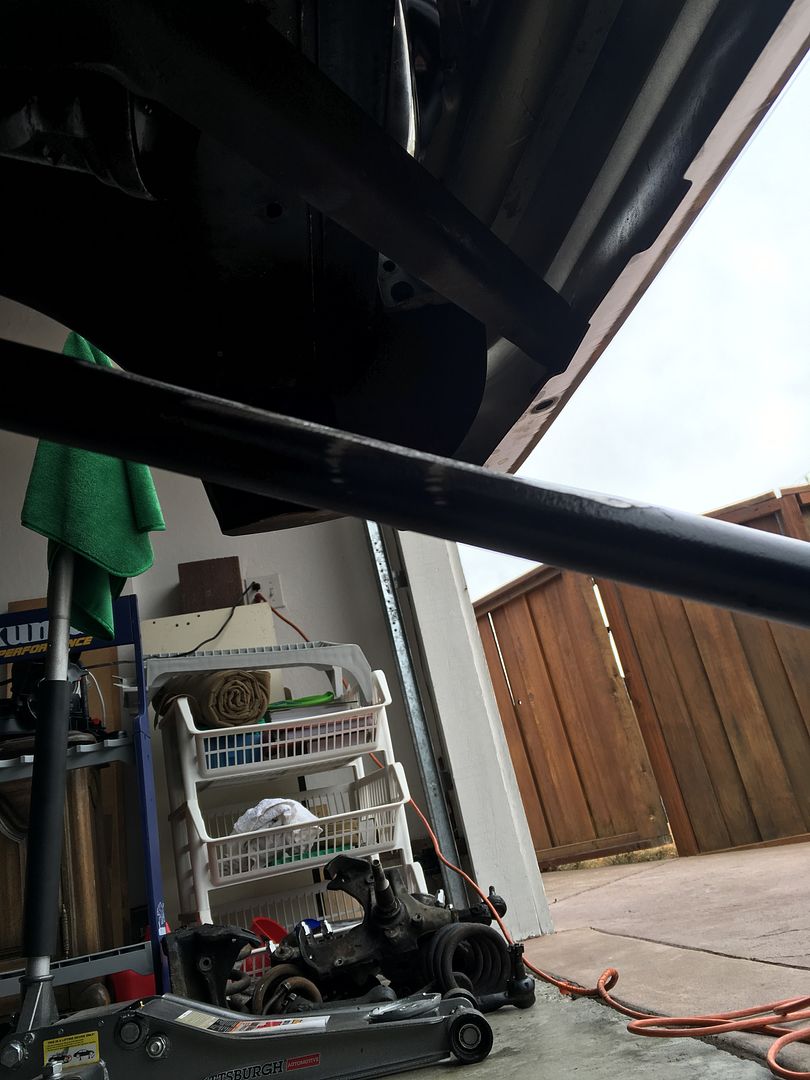 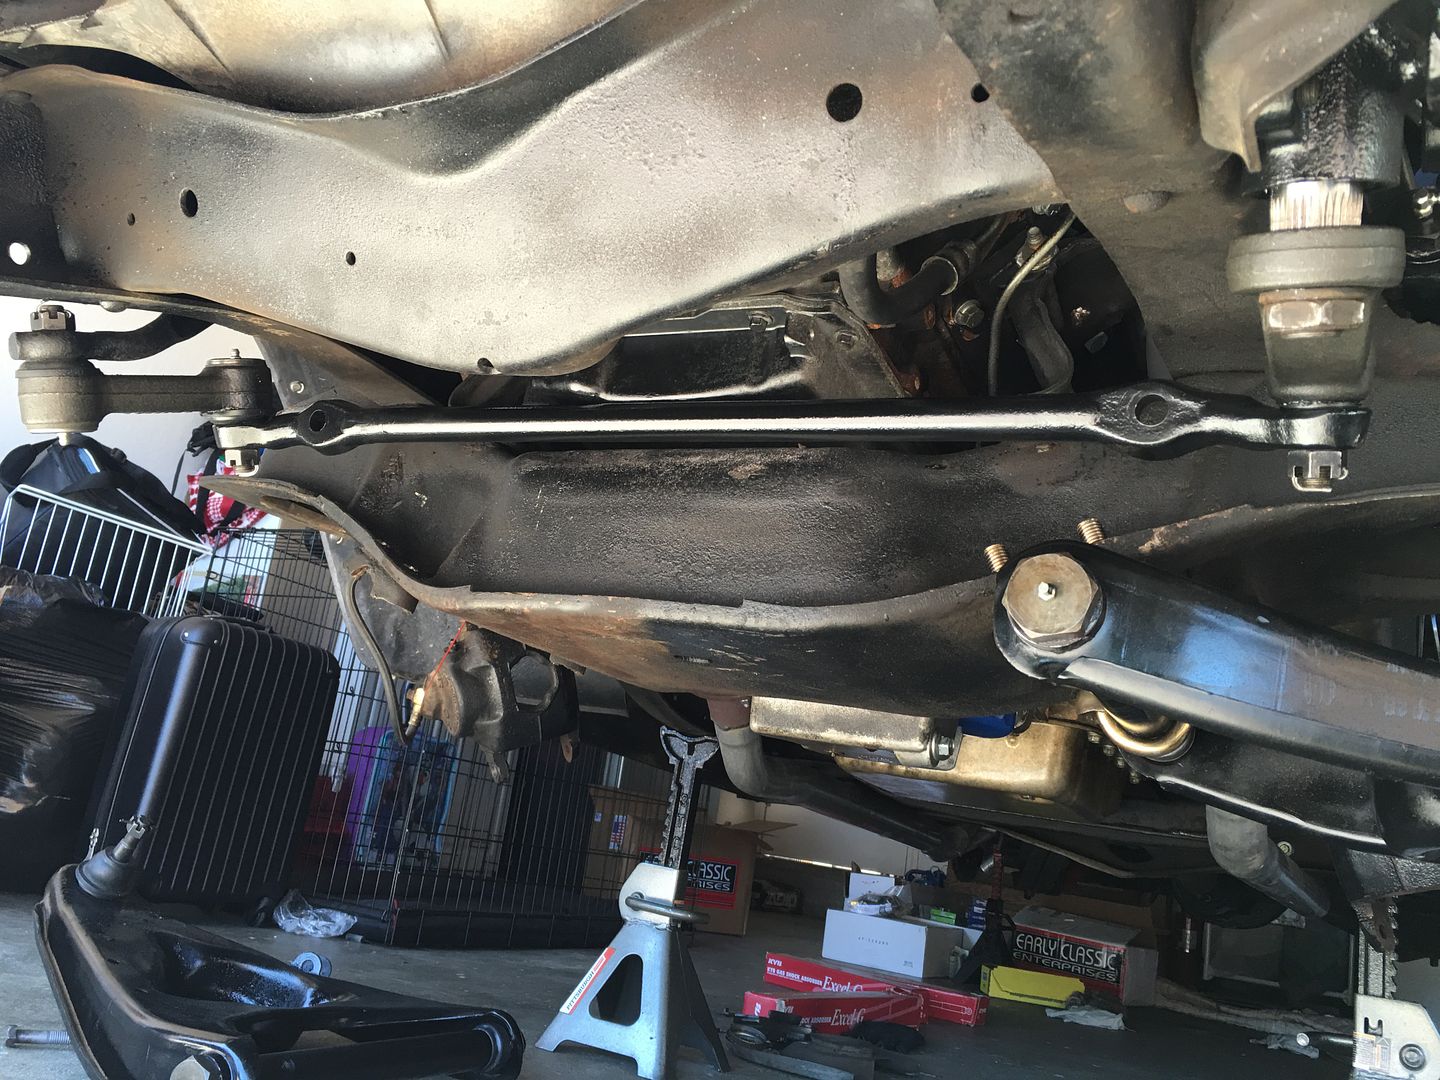 I spray painted the spindles and will putting those on next. I will also be replacing the brake lines with new ones to refresh everything up. 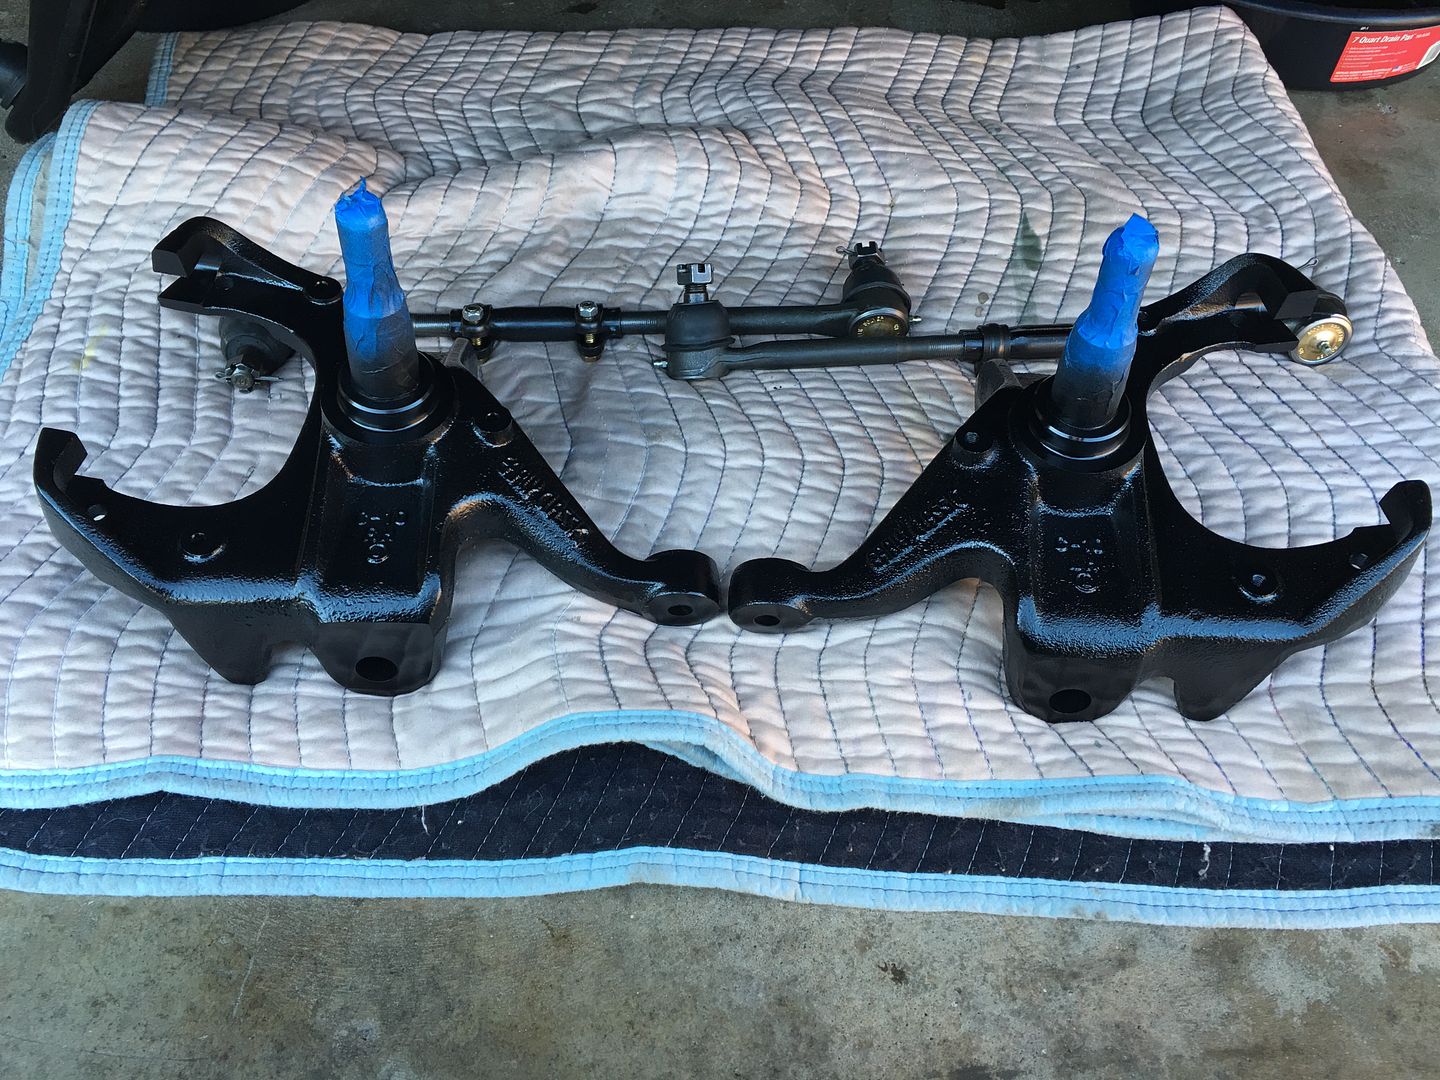
|
|
|

|
|
|
#11 |
|
67-72 parts collector,…
 Join Date: Nov 2002
Location: Mid-MO
Posts: 22,701
|
Re: And so it begins! Ghost's 68 project
Great pictures. Thanks for posting.
__________________
Keith Convert to disc brakes. http://67-72chevytrucks.com/vboard/s...d.php?t=444823 |
|
|

|
|
|
#12 |
|
Registered User
Join Date: Mar 2011
Location: Wytheville, Virginia
Posts: 591
|
Re: And so it begins! Ghost's 68 project
Cool truck!
__________________
Corey Jones Designs CoreyJonesDesigns on instagram Ole Silver- 1967 stepside http://www.hotrod.com/articles/1103c...chevrolet-c10/ http://67-72chevytrucks.com/vboard/s...d.php?t=598758 |
|
|

|
|
|
#13 |
|
Registered User
 Join Date: Dec 2012
Location: Rochester, IL
Posts: 537
|
Re: And so it begins! Ghost's 68 project
Looks like a great truck to start with !
__________________
__________________ Mike 70 Med Olive build http://67-72chevytrucks.com/vboard/s...d.php?t=714804 Instagram- protouring66 |
|
|

|
|
|
#14 |
|
Senior Member
 Join Date: Nov 2010
Location: Lordstown, OH / Wentzville, MO
Posts: 870
|
Re: And so it begins! Ghost's 68 project
Nice. Good pics.
|
|
|

|
|
|
#15 |
|
Registered User
Join Date: Jun 2016
Location: American Canyon, CA
Posts: 253
|
Re: And so it begins! Ghost's 68 project
Not much of an update. It I did get some progress done. I was battling a damaged front cross members rivets, so I just decided to hack it up and install a undamaged one I picked up from a great member here. Thanks Randy! You can see the nice dent in the middle there. Took a flap wheel where I was doing some hammering to just clean up the area. Ready to throw the new one in and get the ECE sway bar installed.
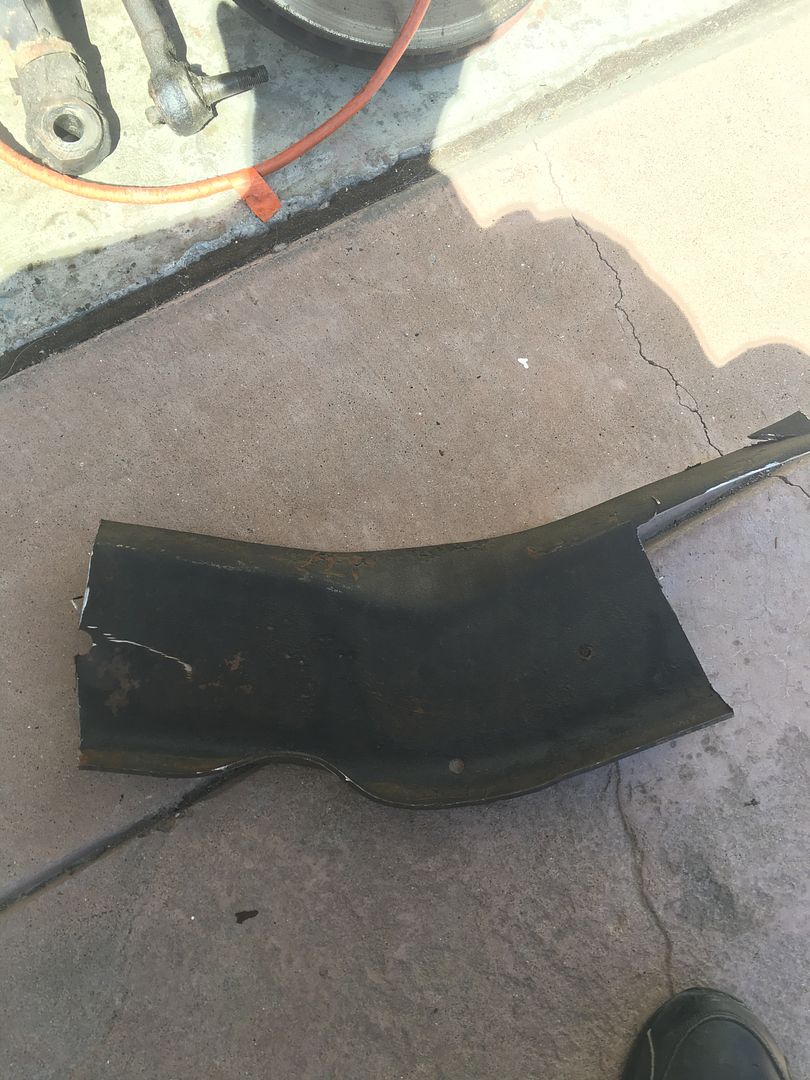 Little buggers giving me problems 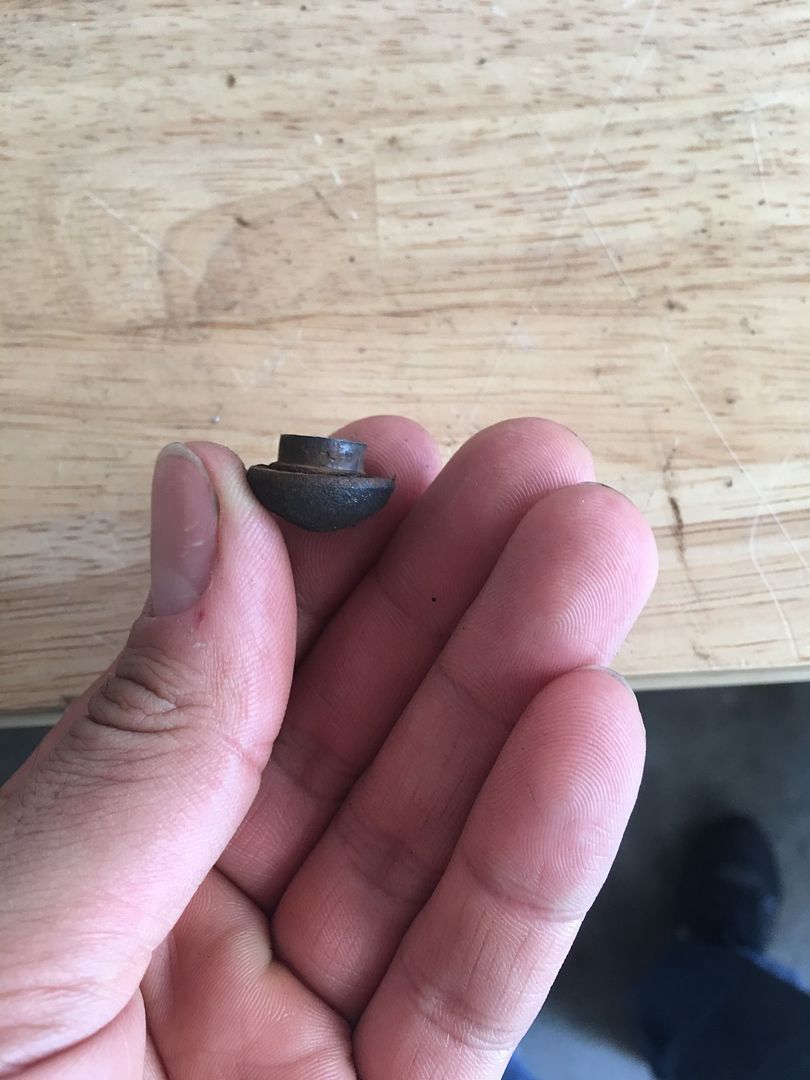 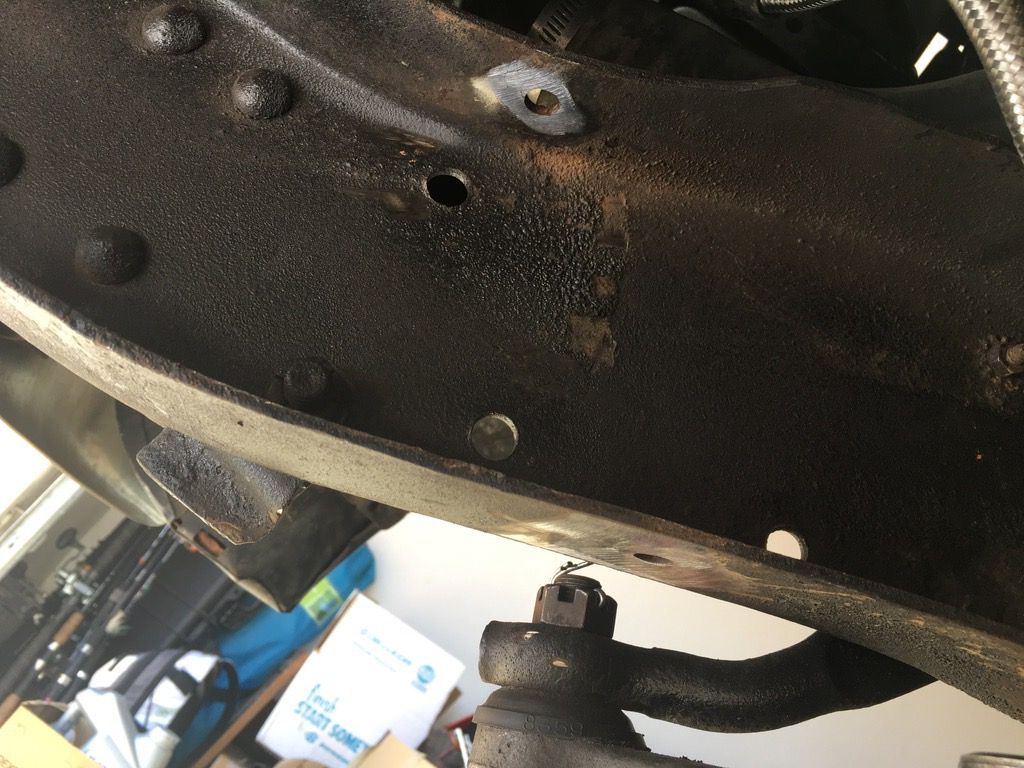 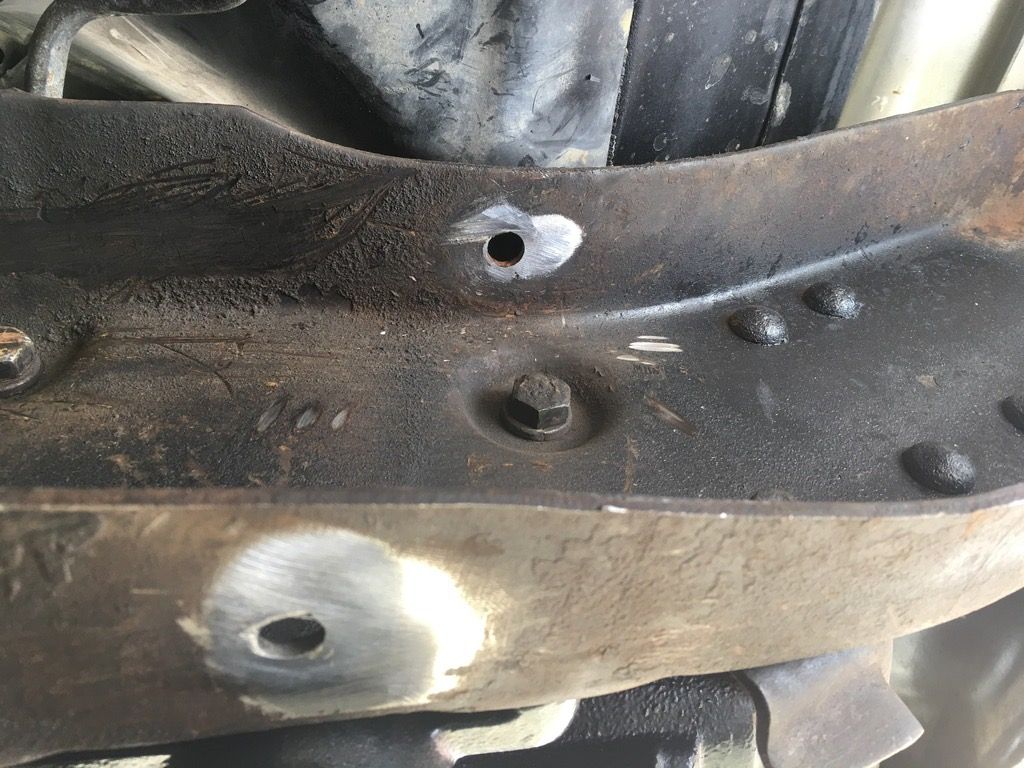 And I got my legacy plates after a 3 month wait! 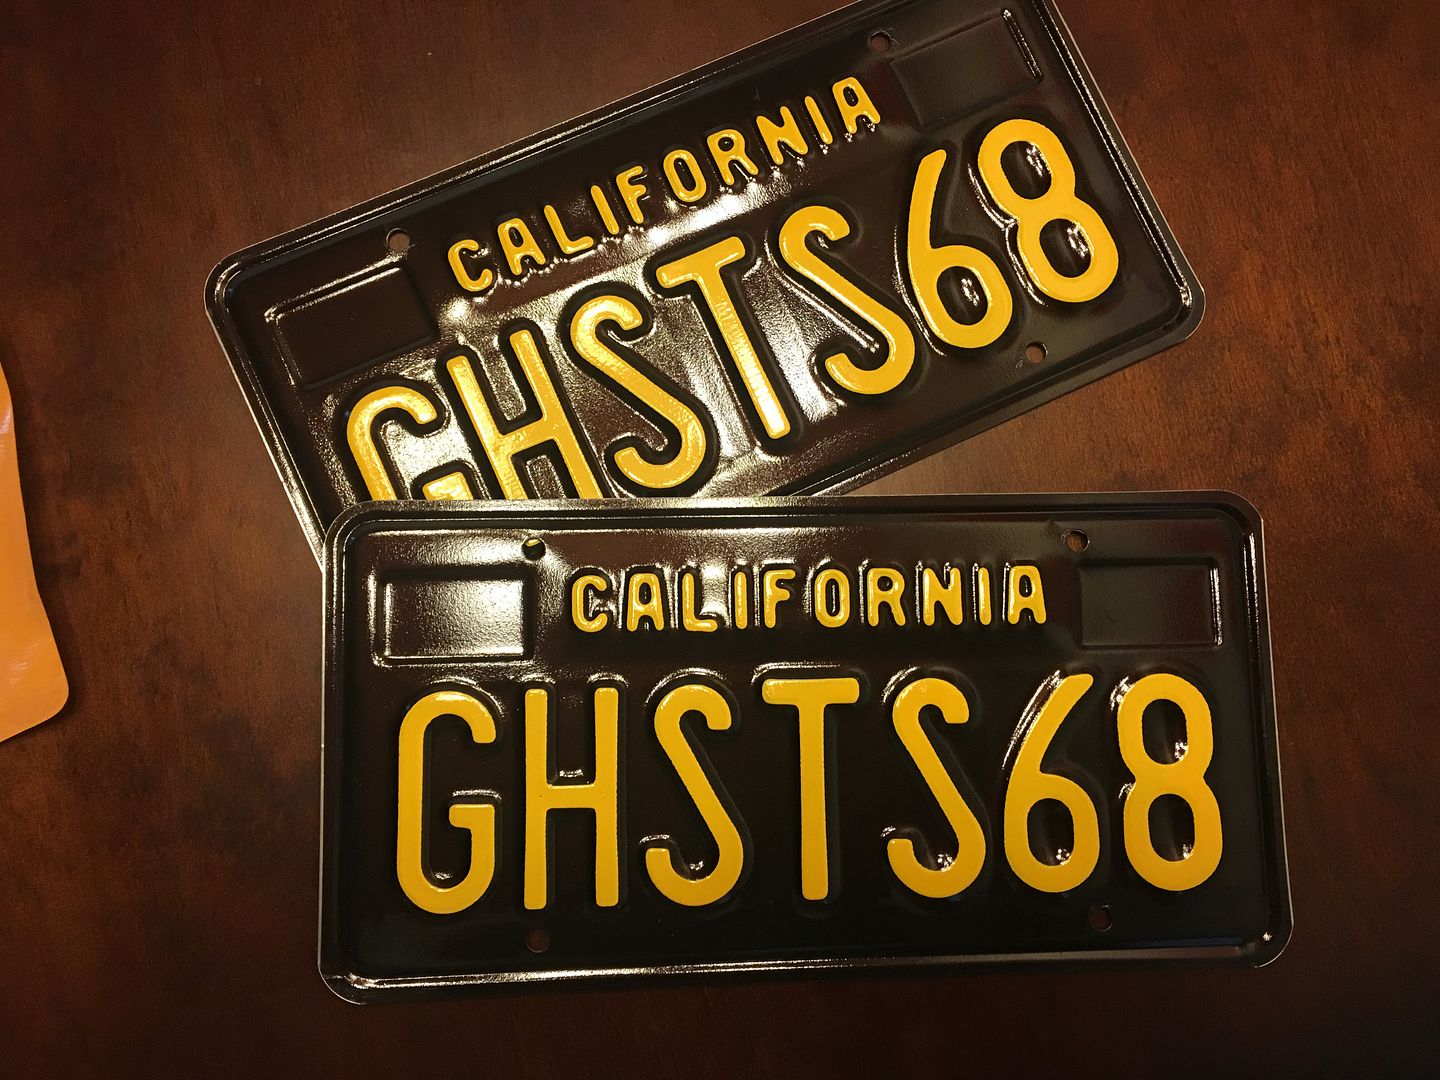 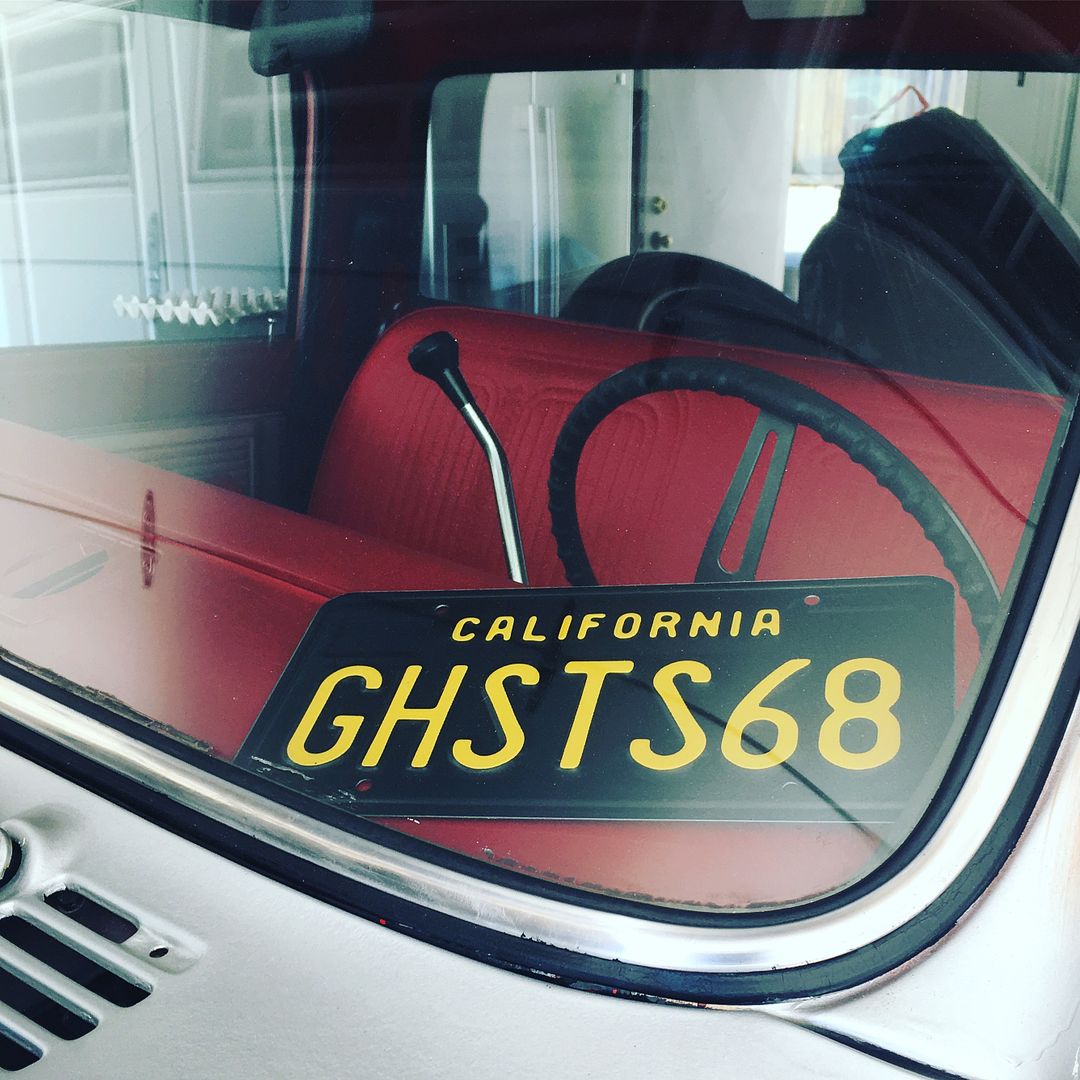
|
|
|

|
|
|
#16 |
|
Registered User
Join Date: Feb 2012
Location: turlock
Posts: 2,177
|
Re: And so it begins! Ghost's 68 project
Very clean truck and love the suspension update! Keep up the solid work man
__________________
 Project NewType 1972 Chevy C/10 Cheyenne Super ( Daily Driven Showtruck ) http://67-72chevytrucks.com/vboard/s...d.php?t=507903 Project NewType 1972 Chevy C/10 Cheyenne Super ( Daily Driven Showtruck ) http://67-72chevytrucks.com/vboard/s...d.php?t=507903Project Great Grandpa's Legacy 1973 Chevy C/10 Cheyenne ( Current daily driver collecting big time parts ) http://67-72chevytrucks.com/vboard/s...89#post7084289 - Dylan (209)-985-7721 |
|
|

|
|
|
#17 | |
|
Registered User
Join Date: Jun 2016
Location: American Canyon, CA
Posts: 253
|
Re: And so it begins! Ghost's 68 project
Quote:
I cleaned up the dust shields and sprayed some black paint on them before install. 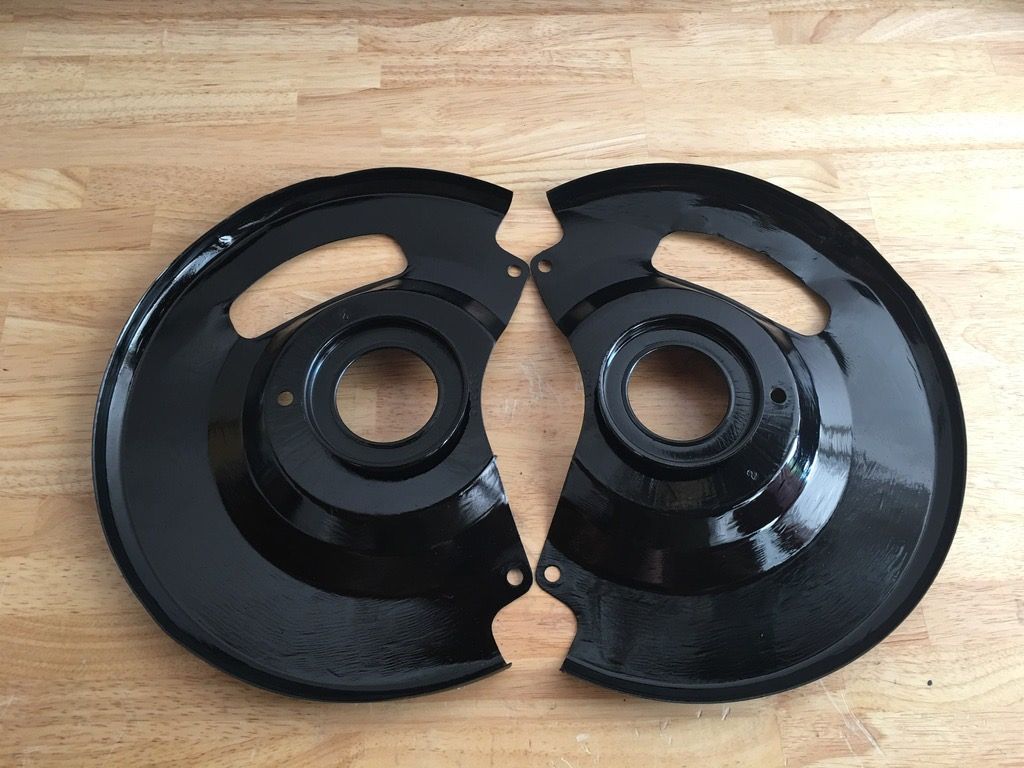 Repacked both front rotors with all new bearings. I was able to install the driver side one using new spindle washer and castle nut. The passenger side spindle did not have the holes threaded for the bolts that hold the dust shield in place. Not knocking ECE but this shouldn't have passed QC. I'll have to look up the threads and tap them myself. I haven't really gone through the tightening process on the spindle nut I just snugged up the nut snapped some pics and had to take off. I'll do so once I have both installed. 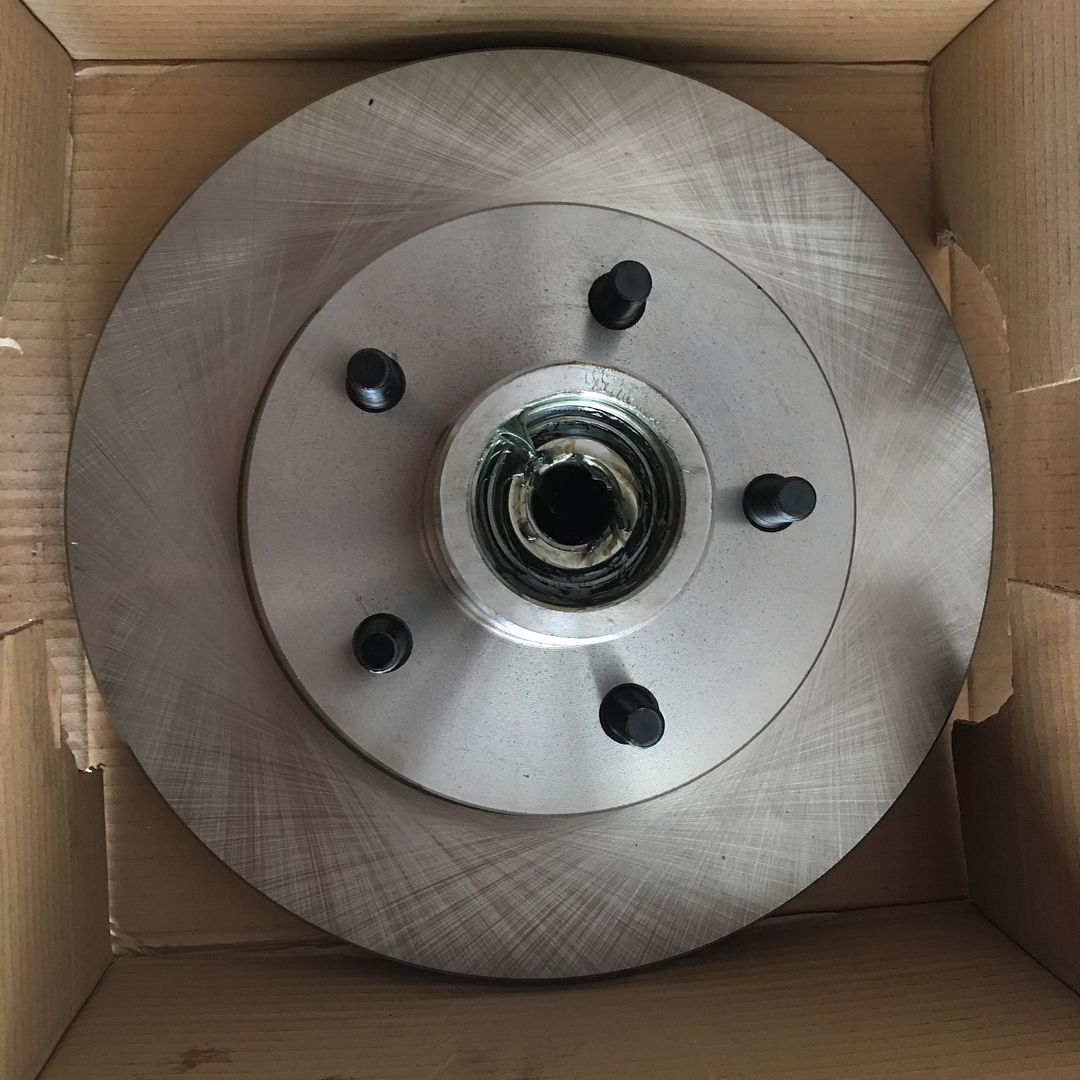 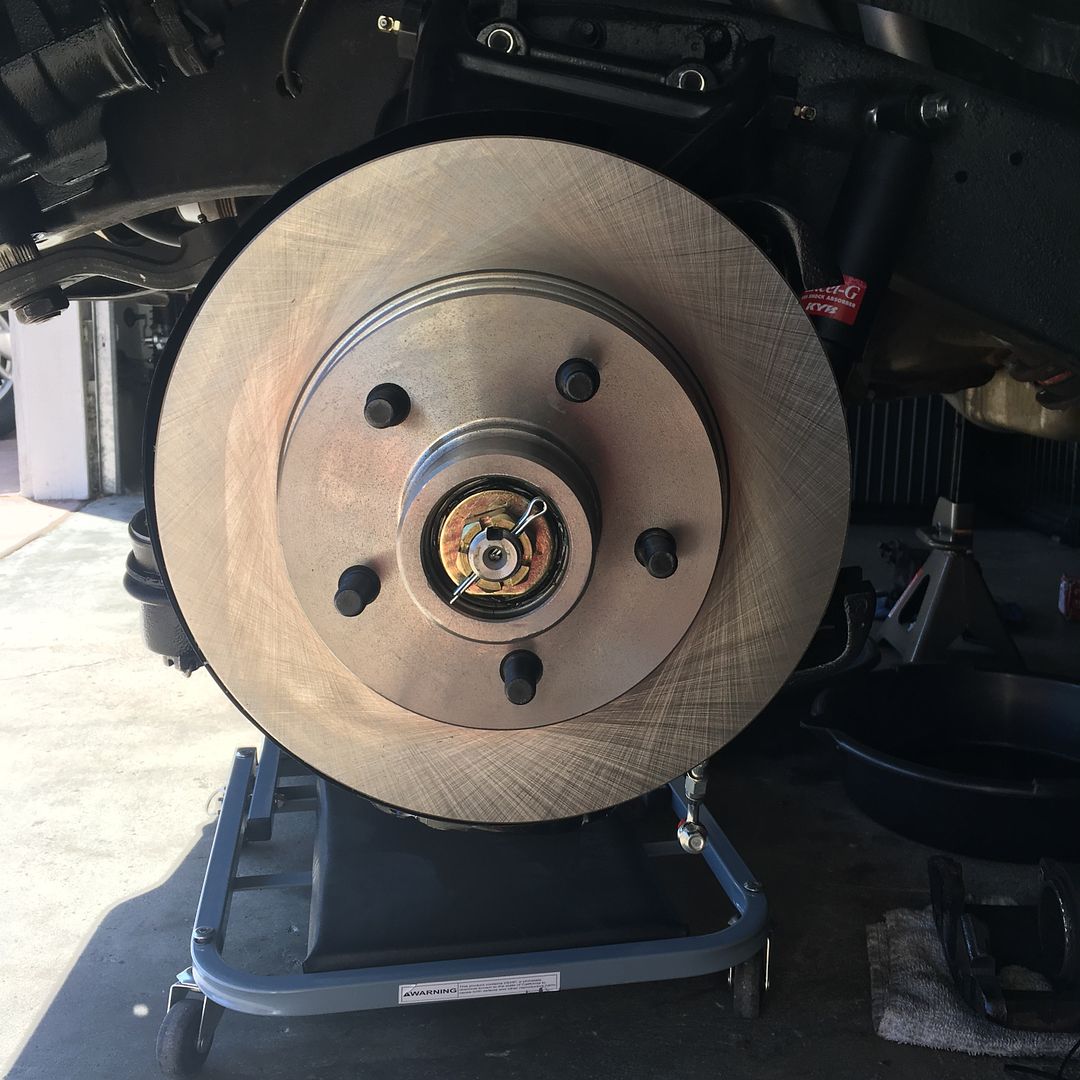 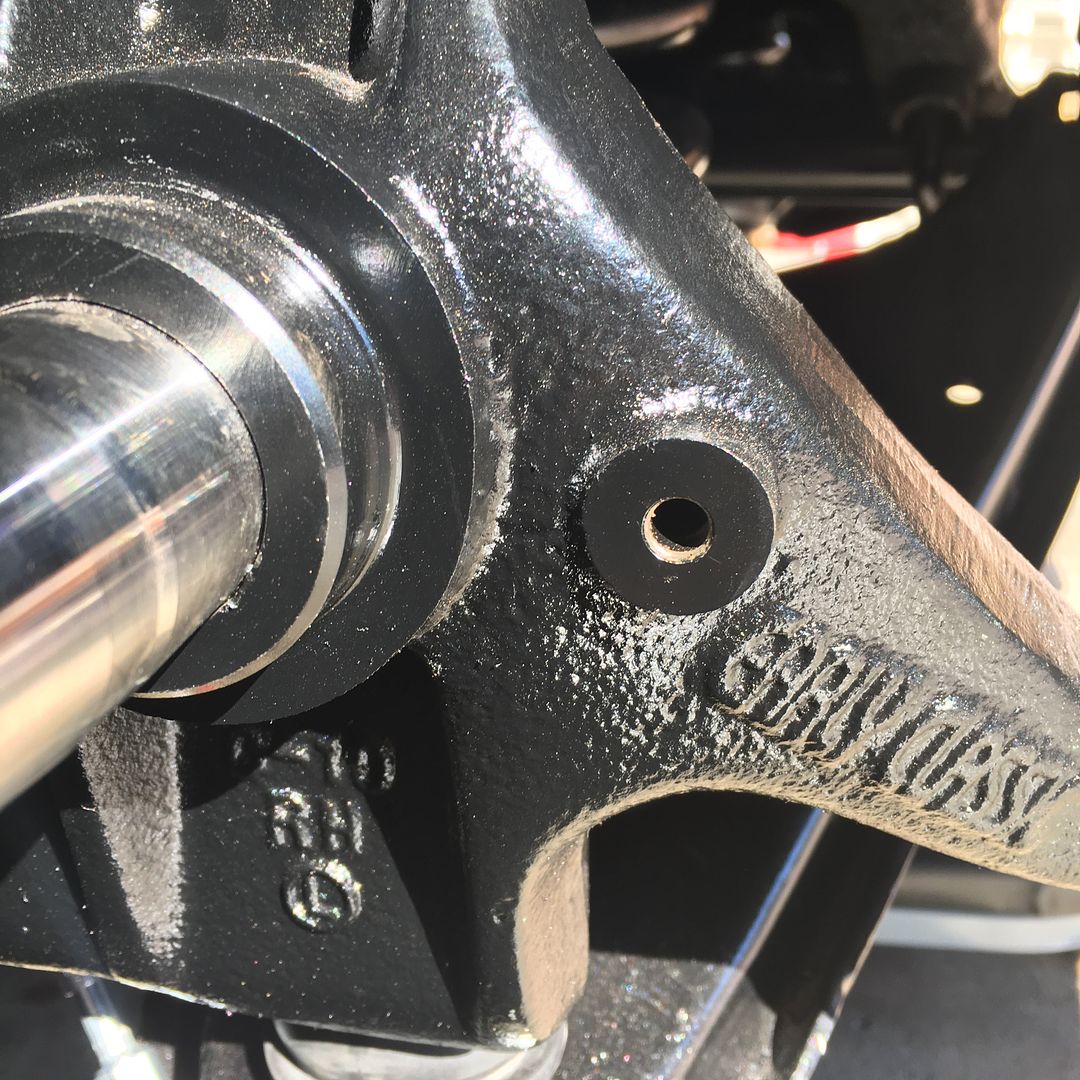 If anyone knows the thread pitch for the bolts that hold the dust shield in place please let me know. |
|
|
|

|
|
|
#18 |
|
Registered User
Join Date: Feb 2012
Location: turlock
Posts: 2,177
|
Re: And so it begins! Ghost's 68 project
If you have the bolts ready just run to lowes and run to the hardware section they'll have those thread pitch checkers Inbetween the bins for a fool proof way to do it. I just installed the bolts on a 73 front front brake setup but can't recall the bolt used sorry man
__________________
 Project NewType 1972 Chevy C/10 Cheyenne Super ( Daily Driven Showtruck ) http://67-72chevytrucks.com/vboard/s...d.php?t=507903 Project NewType 1972 Chevy C/10 Cheyenne Super ( Daily Driven Showtruck ) http://67-72chevytrucks.com/vboard/s...d.php?t=507903Project Great Grandpa's Legacy 1973 Chevy C/10 Cheyenne ( Current daily driver collecting big time parts ) http://67-72chevytrucks.com/vboard/s...89#post7084289 - Dylan (209)-985-7721 |
|
|

|
|
|
#19 |
|
Registered User
Join Date: Jun 2016
Location: American Canyon, CA
Posts: 253
|
Re: And so it begins! Ghost's 68 project
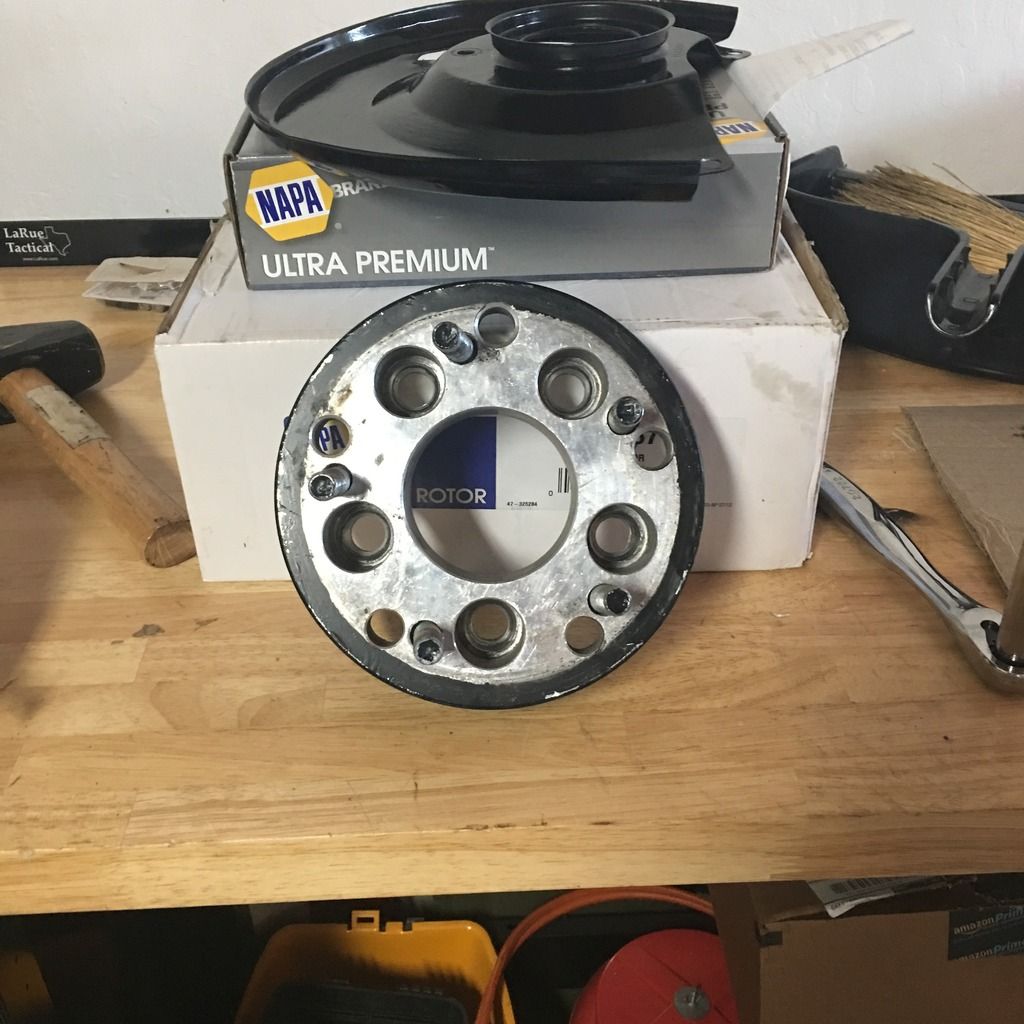
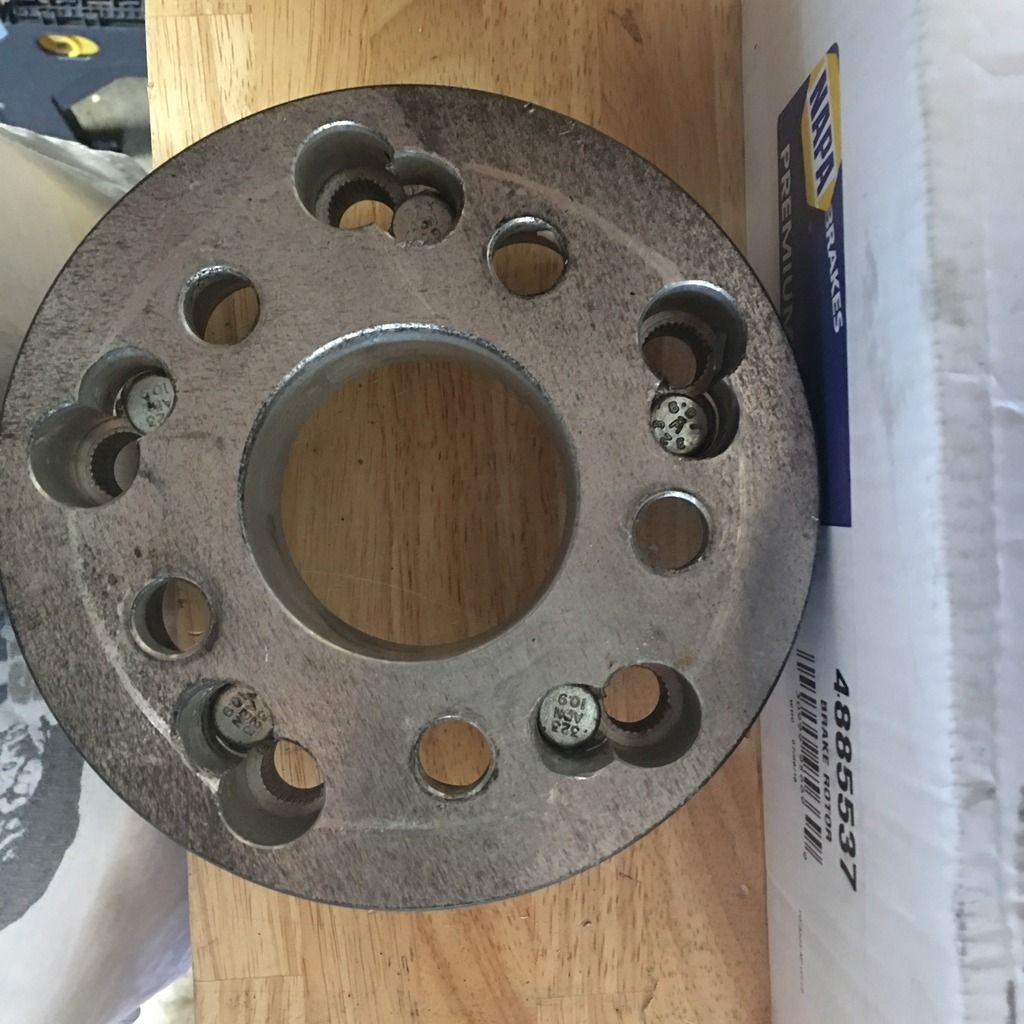
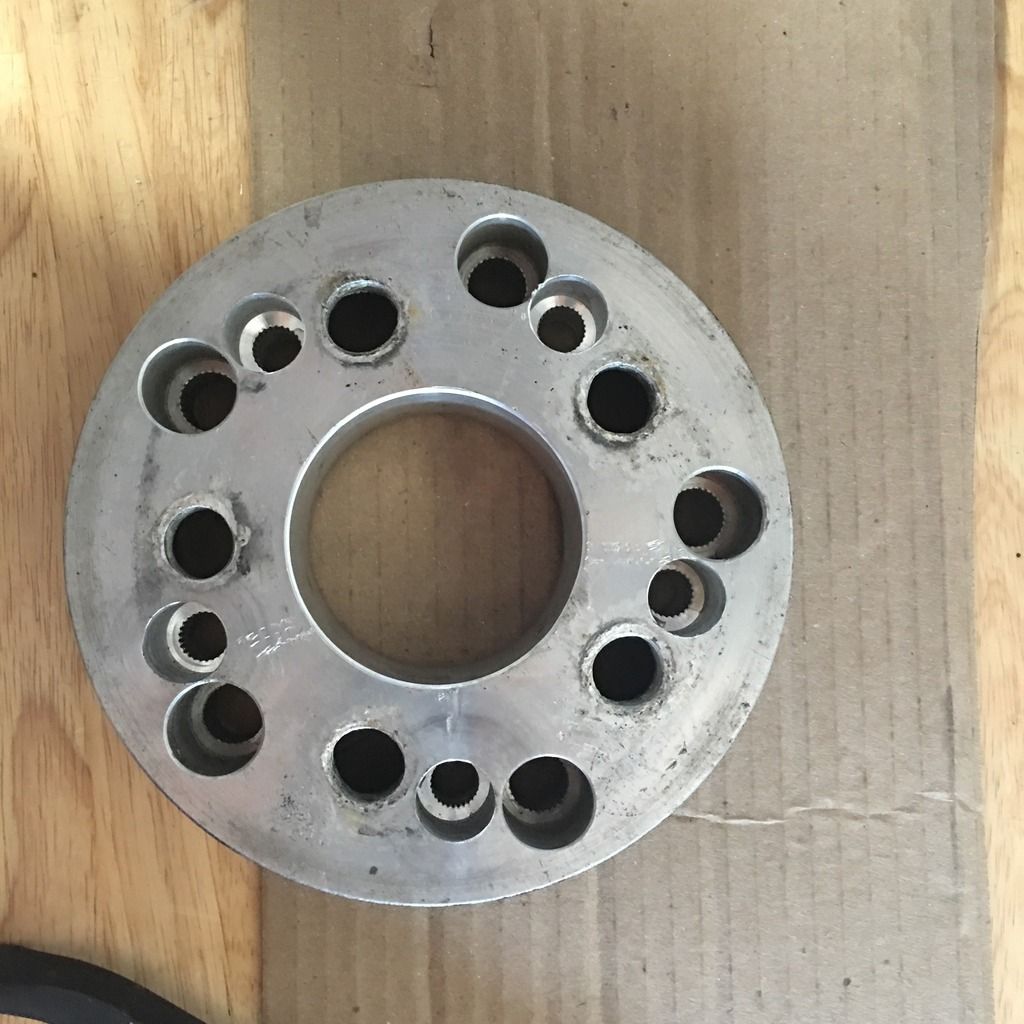
Went out and finally got around to removing the adapters that were on the rear. I found out the Ford 9" is 5x4.5 pattern and the spacer was used to run 5x5. Also found the PO possibly re drilled the spacers for the 5x5 by the look of them. Both were drilled differently. See anything wrong with the studs?...... this is the passenger side. Drive side was the same.
|
|
|

|
|
|
#20 |
|
Registered User
Join Date: Jun 2016
Location: American Canyon, CA
Posts: 253
|
Re: And so it begins! Ghost's 68 project
Front end is about 75% complete. I just need to throw in the new front cross member and install my sway bar and I can call that done. I was able to tap new threads for the left side dust shield. I got the rotors installed and set the bearing preload.
I also needed to clearance the snout of the new rotor to be able to fit the BOSS 338's. As you can see it didn't really take much to have them fit with no clearance issues. Before 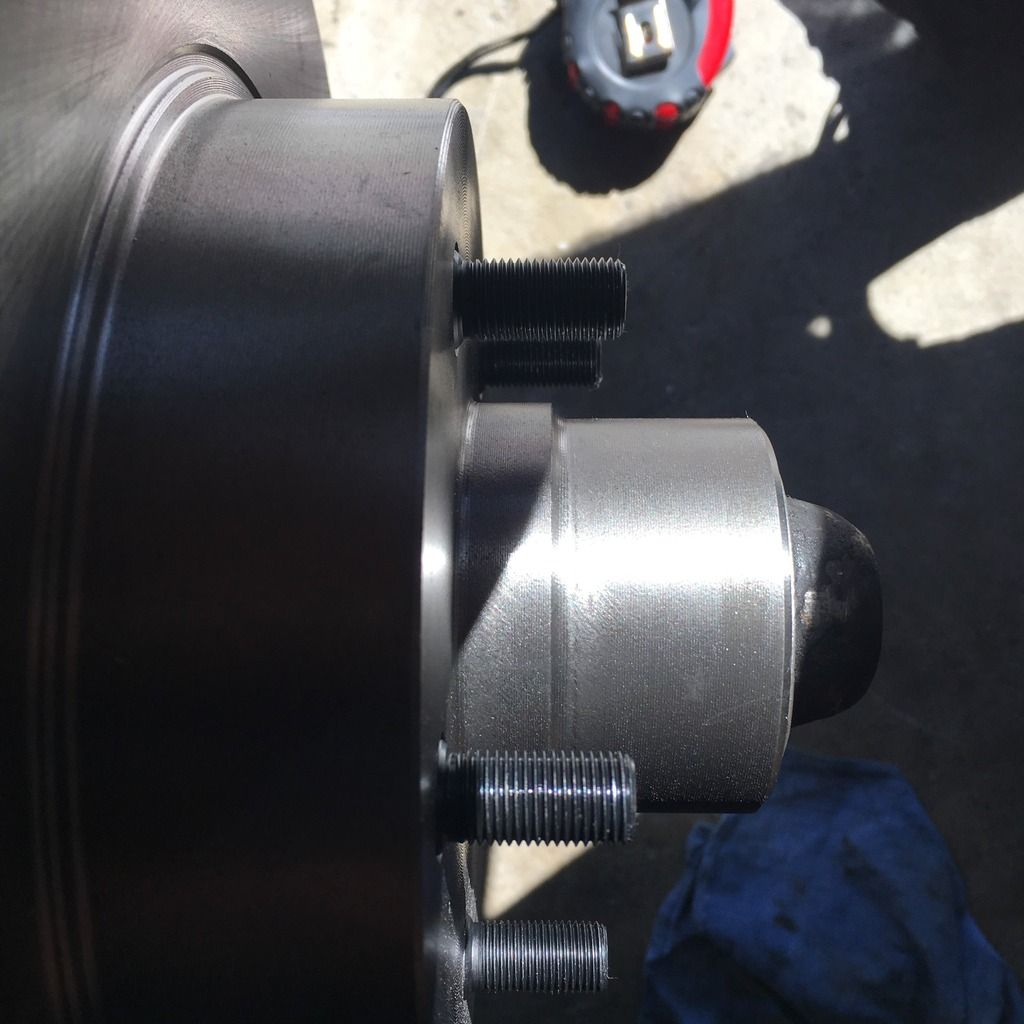 After 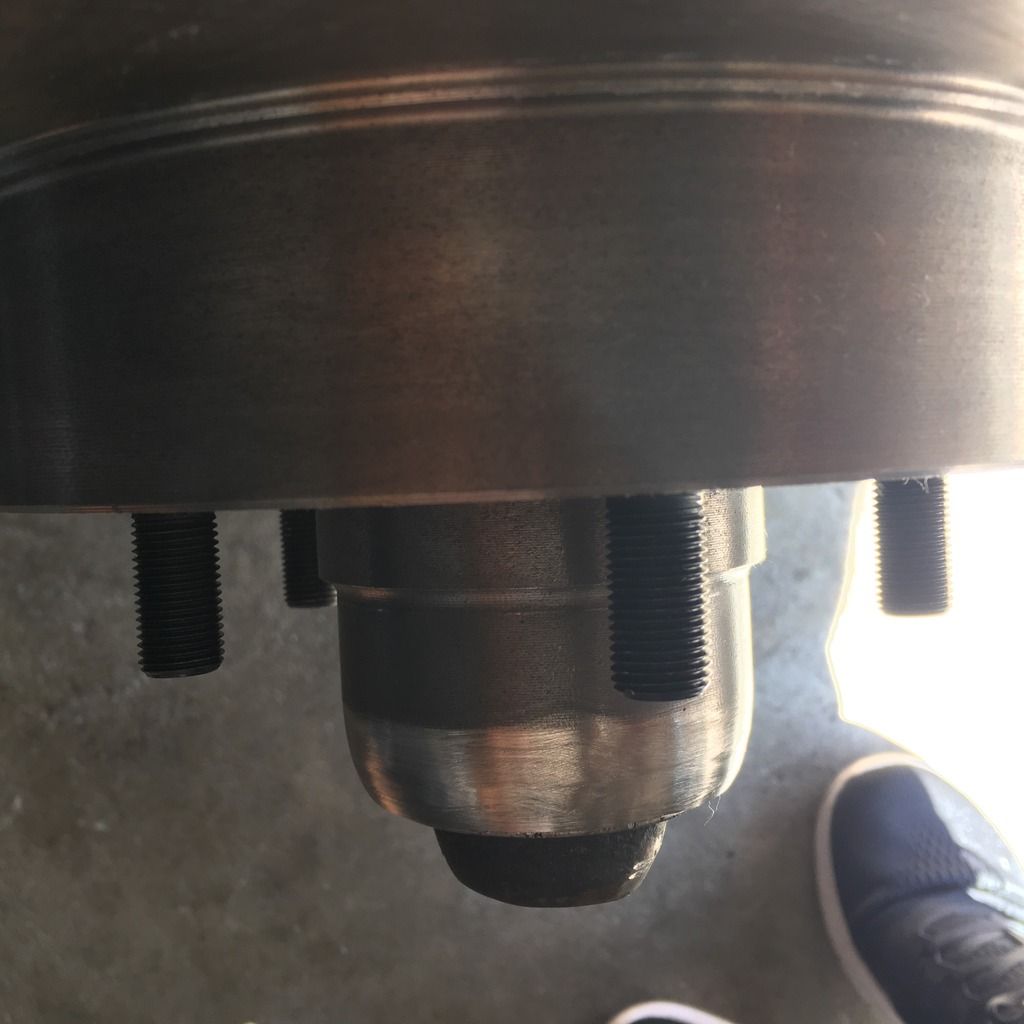 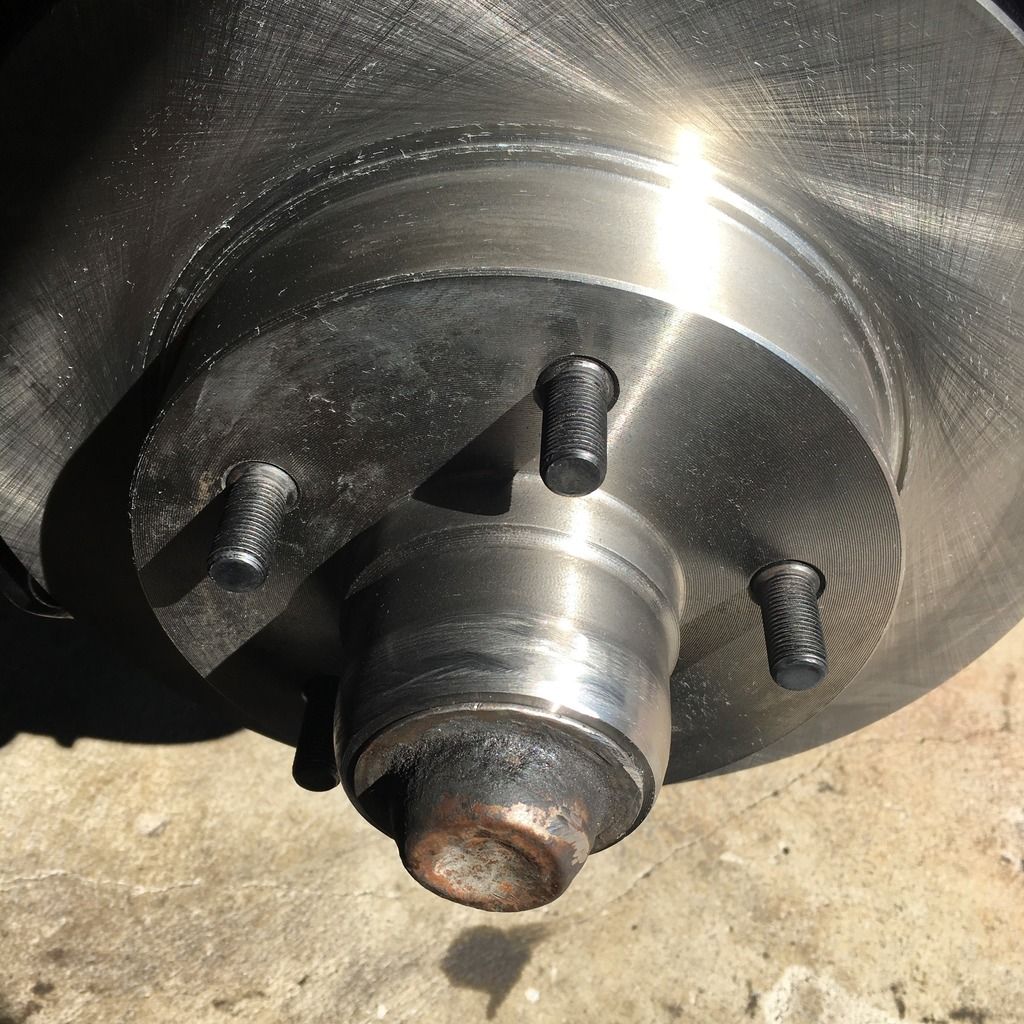 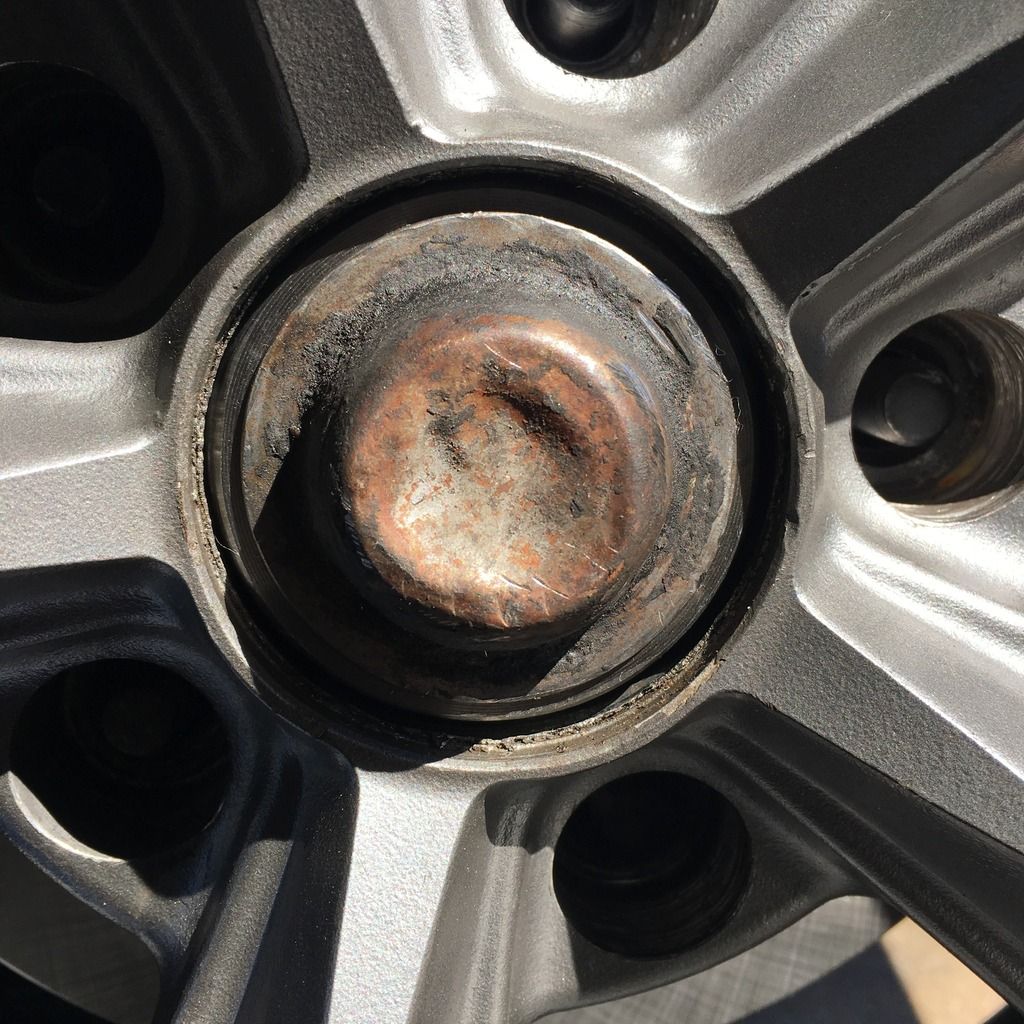
|
|
|

|
|
|
#21 |
|
Registered User
Join Date: Jun 2016
Location: American Canyon, CA
Posts: 253
|
Re: And so it begins! Ghost's 68 project
|
|
|

|
|
|
#22 |
|
Registered User
Join Date: Jun 2016
Location: American Canyon, CA
Posts: 253
|
Re: And so it begins! Ghost's 68 project
Truck is back on the ground!
I ended up redoing the whole rear brake set up also while it was torn apart. I went with wiwood rear discs and pads. PO ran a hard line straight to the caliper so I ended up installing brake hoses that a good buddy gave me. Drained out all the old brake fluid and filled the system with new Motul RBF600. I purchased a Motive brake bleeder and bleed the system until all the air was out. Topped of the rear end with some 80-90 gear oil and slapped the rims on. Should I wait in the alignment until the suspension settles. I might have to try and bleed the brakes again since the peddle feels really mushy and the pads don't grab like they should. Happy with the progress though. Too bad I can't post up a vid but here's a pic 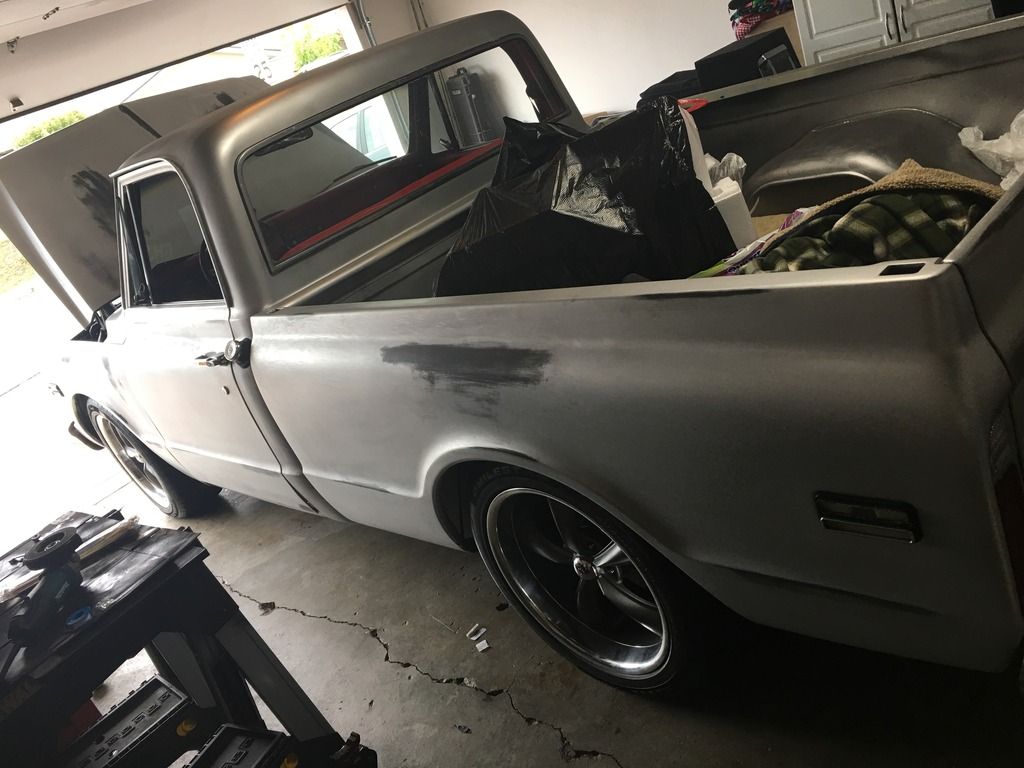
|
|
|

|
|
|
#23 |
|
Registered User
Join Date: Jun 2016
Location: American Canyon, CA
Posts: 253
|
Re: And so it begins! Ghost's 68 project
Since the last update the truck has come a long way.
Brakes: Redid the whole entire brake lines with 3/16SS with AN fittings. Engine: Swapped the old 5.3 out with a LS3 from a 5th gen Camaro. Did ported heads, custom Pat G cam, springs, ported 102 intake, ported NW 102 TB, sent out stock injectors to be flow tested, headers I purchased Kooks TBSS long tubes. Waiting on those to install. Went with CPP engine stands running DD sliders, painted my timing cover, valve covers, and valley cover wrinkle black that closely matches the 102 lid. Fast fuel rails. Ported LS6 oil pump, Sac city Corvette oil barbell. BTR .660 dual valve springs. Tossed the stock rocker needle bearings and upgraded to Straub bronze bushings. manton 11/32 PR. New LS7 lifters with new trays as well. Switched from the single bolt cam to the 3 bolt style cam gear with the LS2 style tensioner. ATI SuperDamper crank pulley, with with the 10% UD. ARP crank pulley bolt. Transmission: went with a Jake’s performance stage 2 4l80E with their triple disc 3200 billet converotor. Mates to the motor via ICT SFI rated flex plate. Running a transmission fluid bypass valve with a Derale hyper cool trans fluid cooler. Radiator: Ordered up an Entropy LS swap radiator with dual fans running their standalone controller. Replaced the rusted radiator support with a new one from brothers. Wiring: Got a new vintage wiring standalone harness for the engine. Also cleaned up all the unused engine bay wiring no longer needed. Fuel tank: Will be dropping in the new Boyd’s under bed EFI tank with built in Aeromotive stealth pump. Will be using fuel hose with all new AN fittings. Running the corvette FPR. Driveline: ordered up a new PST aluminum one piece shaft running a strange trans / pinion yokes. All 1350 series spicer solid U-Joints. Rearend: Ford 9” rear end, 28spline axles, all new seals, bearings shims, running a Trutrac with motive 3:70 gears. Exhaust: still not there since I’m stil working on getting everything else together. Maybe MF ATAKS. I’ll try and update this more often. Sorry I haven’t been posting much. Just had a baby recently and have been investing a lot of time with the family. Last edited by Ghost's68; 04-29-2018 at 01:31 AM. |
|
|

|
|
|
#24 |
|
Registered User
Join Date: Apr 2014
Location: Azle,Texas
Posts: 2,248
|
Re: And so it begins! Ghost's 68 project

|
|
|

|
|
|
#25 |
|
Registered User
Join Date: Jun 2016
Location: American Canyon, CA
Posts: 253
|
Re: And so it begins! Ghost's 68 project
|
|
|

|
 |
| Bookmarks |
|
|