
 |
Register or Log In To remove these advertisements. |
|
|
|
|||||||
 |
|
|
Thread Tools | Display Modes |
|
|
#1 |
|
Registered User
Join Date: Aug 2010
Location: West Chicago, IL
Posts: 24
|
Installing a CPP C-Notch kit on a '66 shortbed
I just finished installing a CPP C-Notch kit on my '66 shortbed Fleetside. My truck has a 5"/6" drop. The rear is lowered using Classic Performance springs, adjustable panhard bar, drop shocks and a shock relocation kit. I didn't have a problem with the rear hitting the frame but I do want to do some towing so the notch will give me about 5" more travel.
First, here are CPP's online instructions: http://www.classicperform.com/tech_a...ch/c-notch.htm What they don't tell you is you first need to pull the springs and cut the old bump stops off. I used an angle grinder to cut the top bumpstop rivet off, wedged it out and then use a reciprocating saw to get the next two. 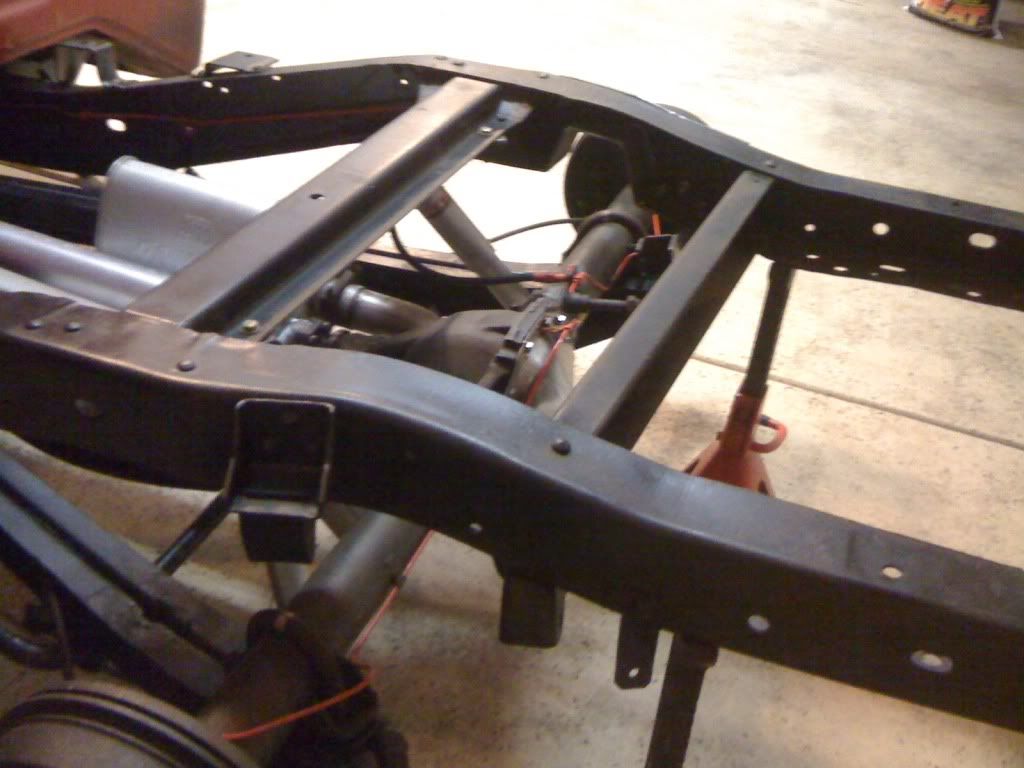 If you don't have a right angle drill, you need to drop the rear end and trailing arms to drill holes in the bottom of the frame. They say you can do this with the bed on, good luck!!! I used jackstands to support the frame on both sides of the cut. 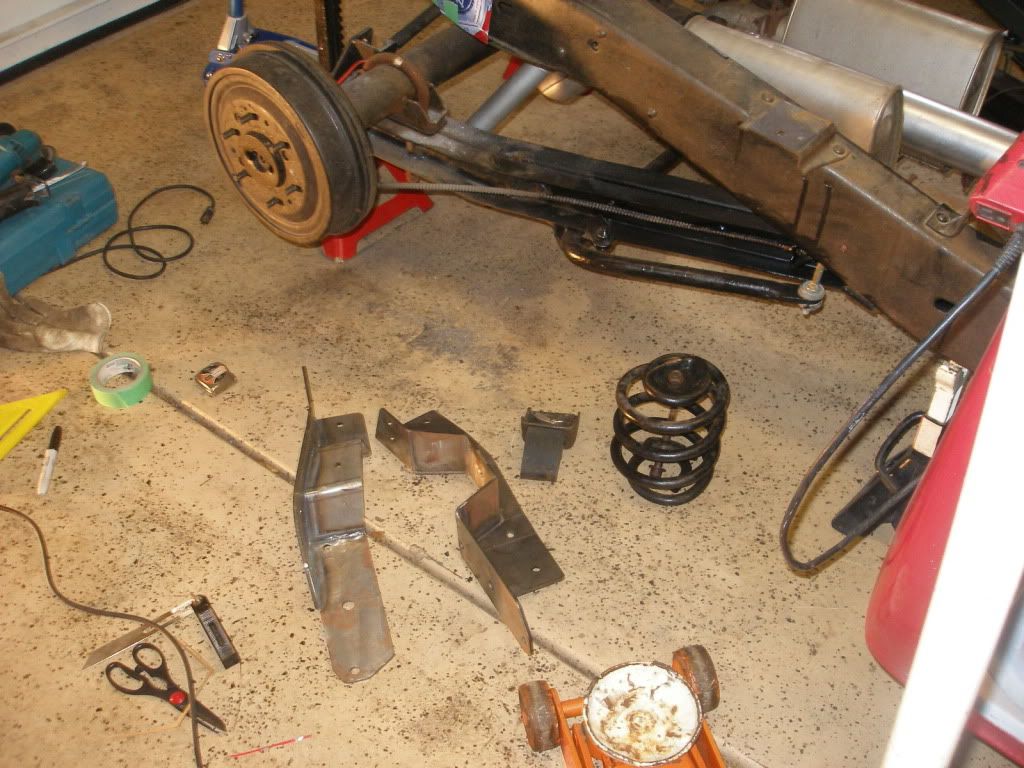 They tell you to line up the front of the notch with the back of the oval shaped holes in this pic. They don't tell you to cut off part of the coil spring mount where it hangs over the frame. The important part of the line up is making sure the hole on the bottom of the notch lines up with the hole for the coil spring mount bolt. I found mine needed to be about 1/8" forward of the back of the oval shaped hole. 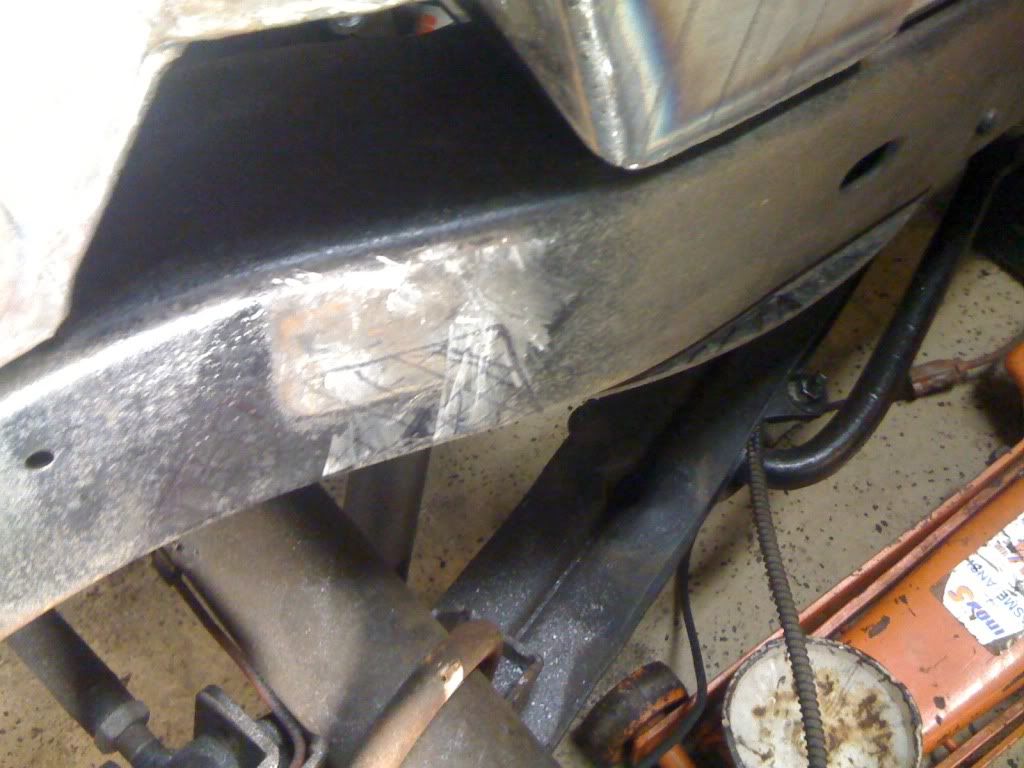 Next, I made a template and marked the frame. Drink the PBR after using the power tools! 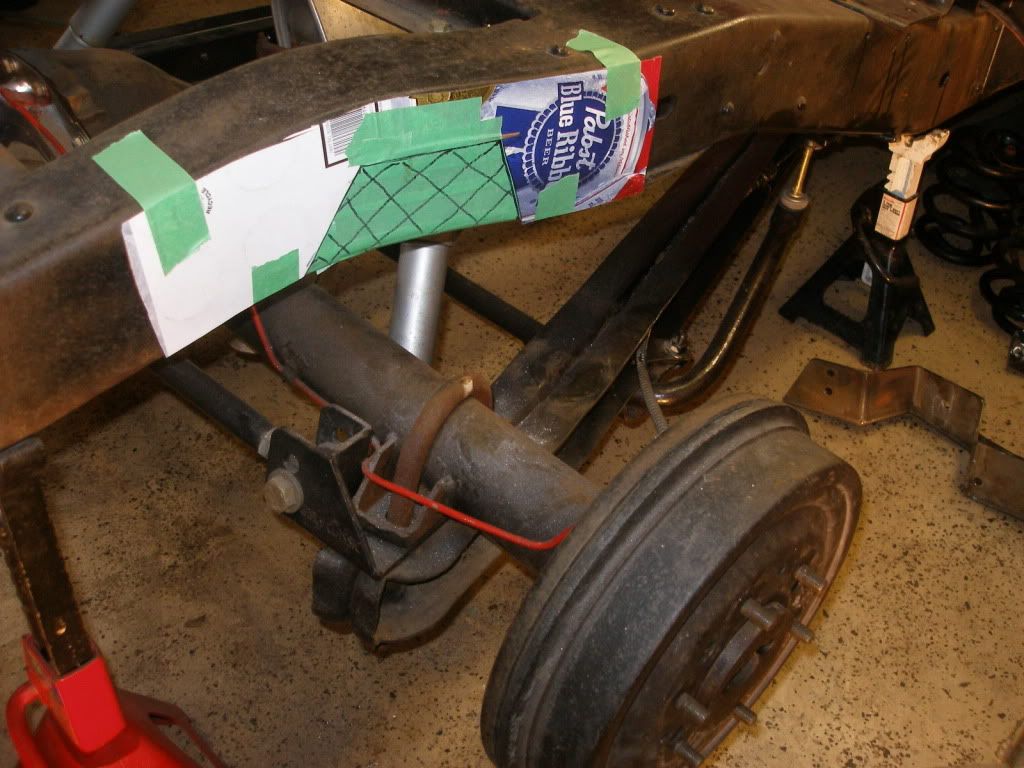 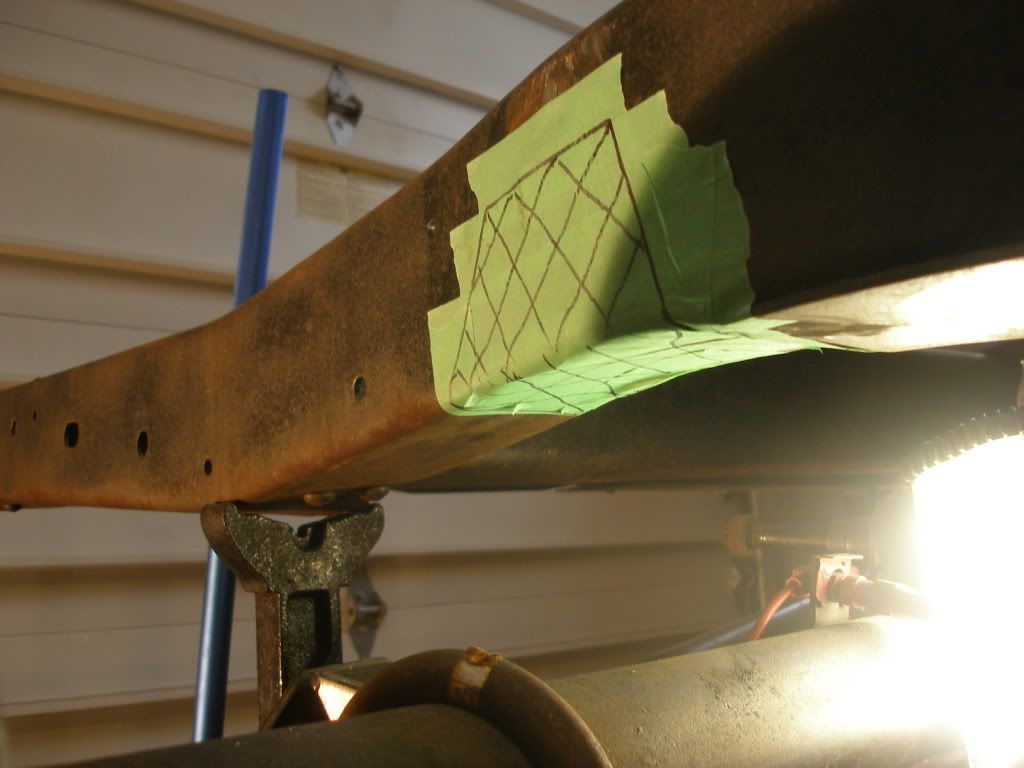 Then using a thin cut off wheel and a reciprocating saw I cut out the notch. The bottom of the frame is cut at a 90 degree angle to the face of the frame. 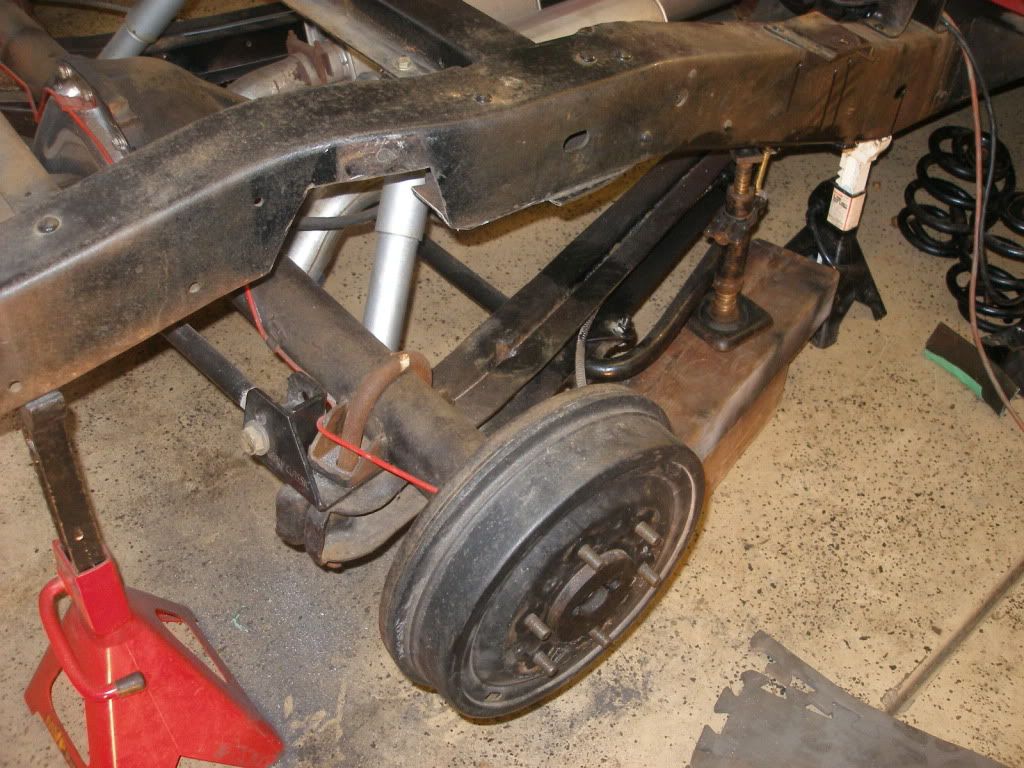 I then used a cut off wheel to remove any rivet heads from the bottom of the frame and I cut off part of the coil spring bracket where it overhangs on the side. The C-Notch is now ready to be clamped in place for a trial fit. Use the coil spring bolt to line it up and c clamps to pull it tight. 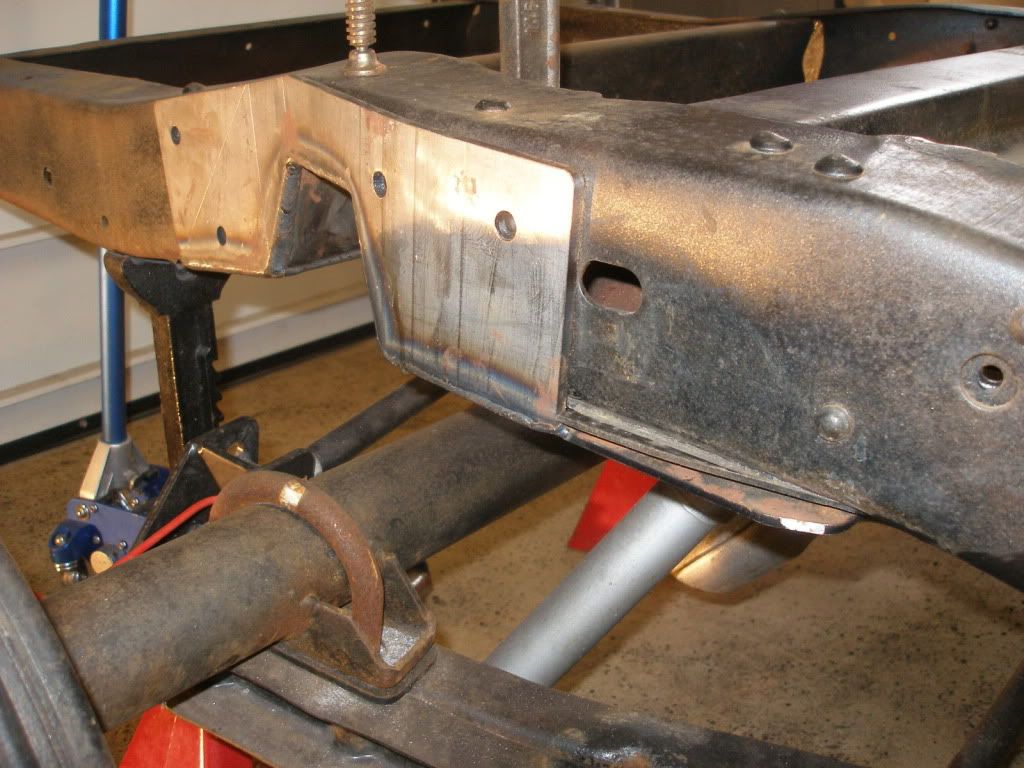 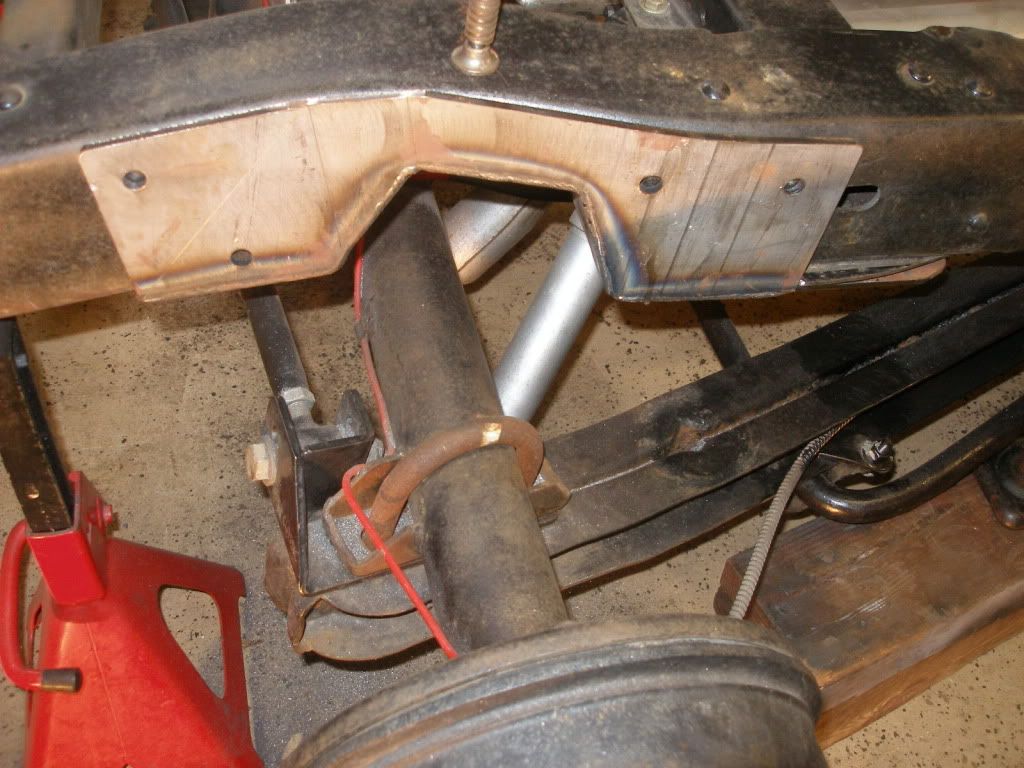 You are supposed to be able to use some of the rivet holes for the bolts. Unfortunately, I found the C-Notch holes to be about 1/4" off from the rivet holes. So DO NOT punch out the rivets yet! I used a 7/16" drill bit to start the holes so they would be centered, then went to a step drill and then back to the 7/16". It was a long drilling process with 16 holes to be done. After I was through the rivet head, the remaining rivet was easy to chisel/punch out. some of the holes were a little elongated but there was still enough material to keep the bolts from moving. I needed to buy two slightly longer Grade 8 bolts for the front two bolts on the bottom. 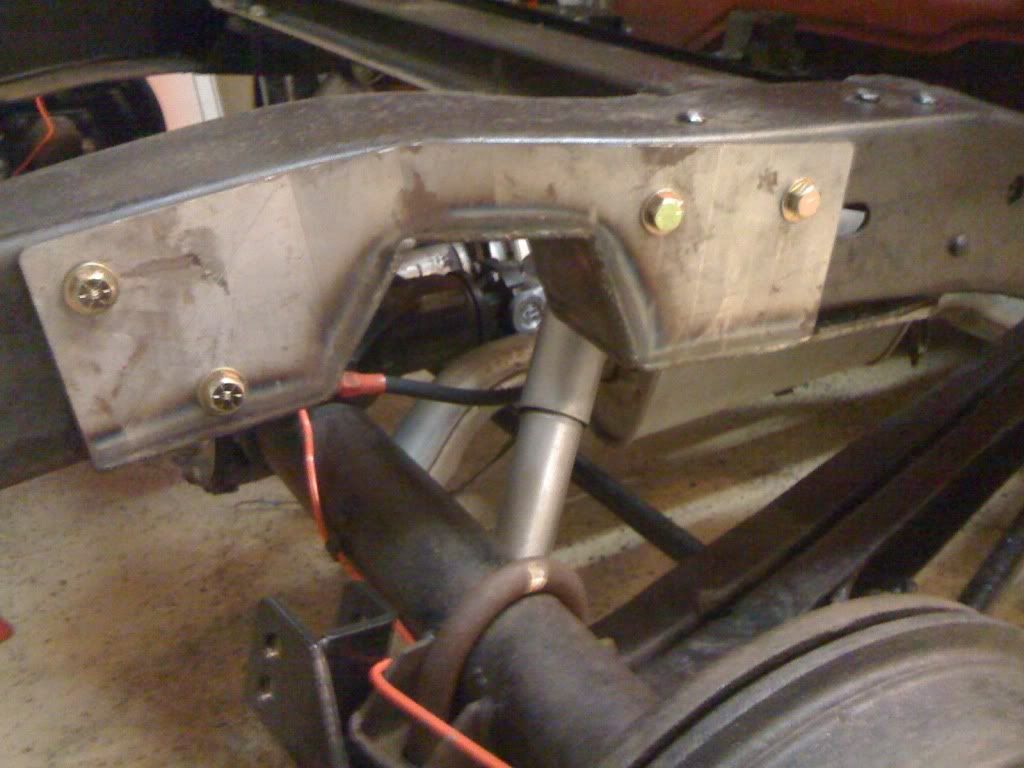 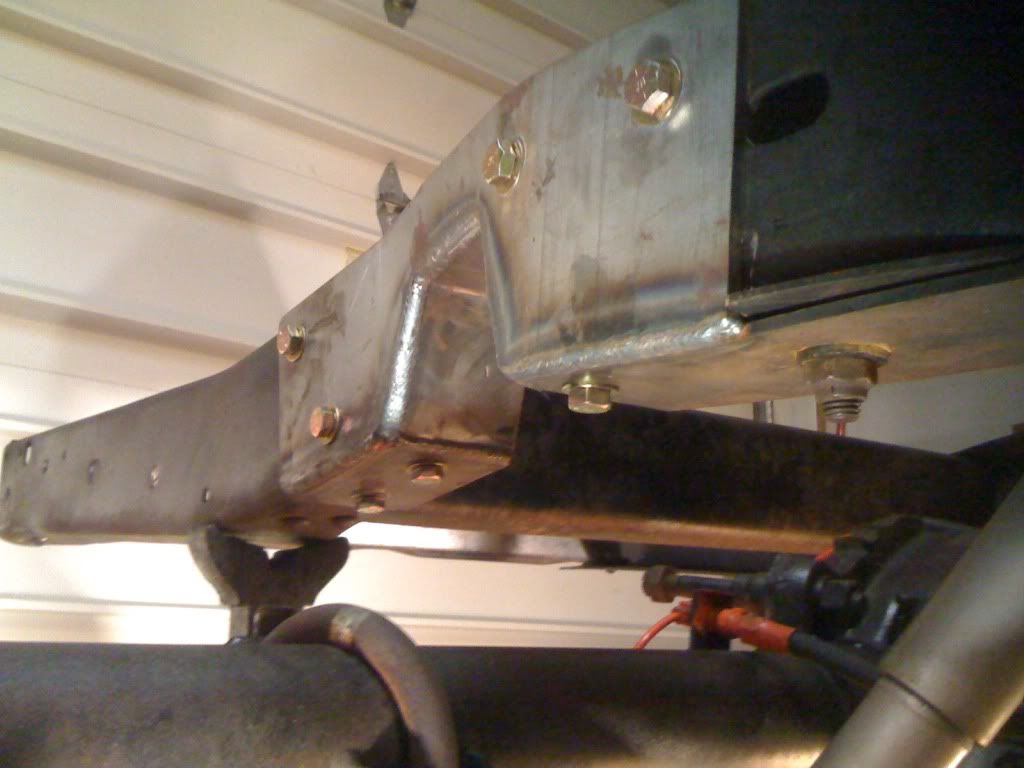 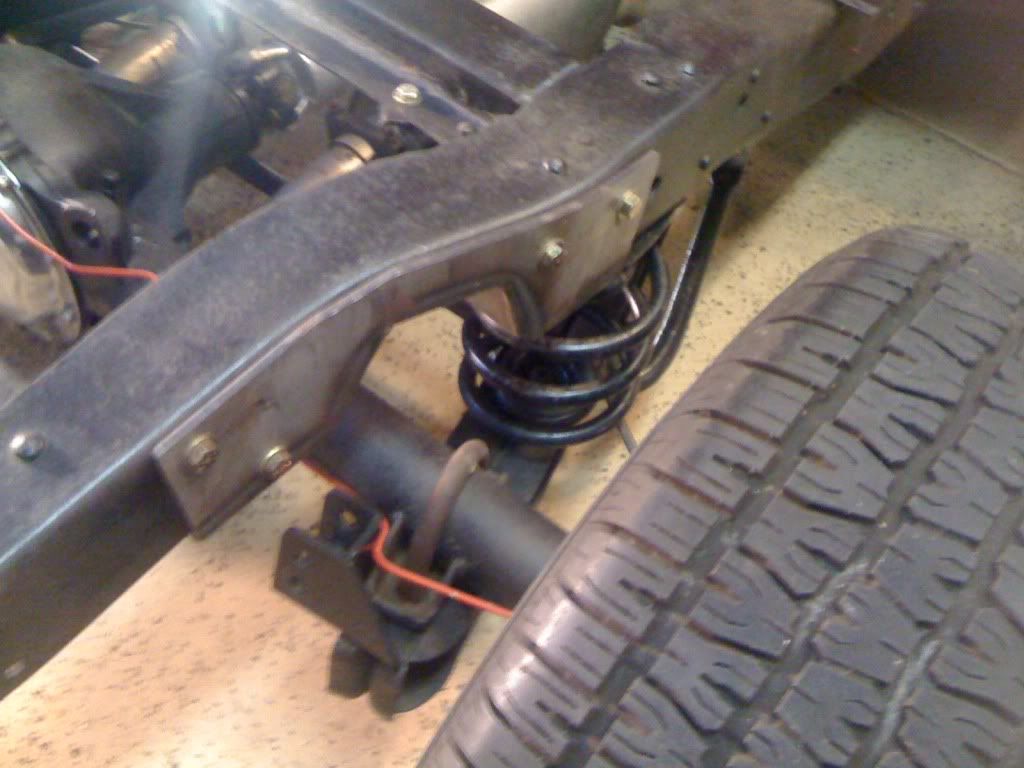 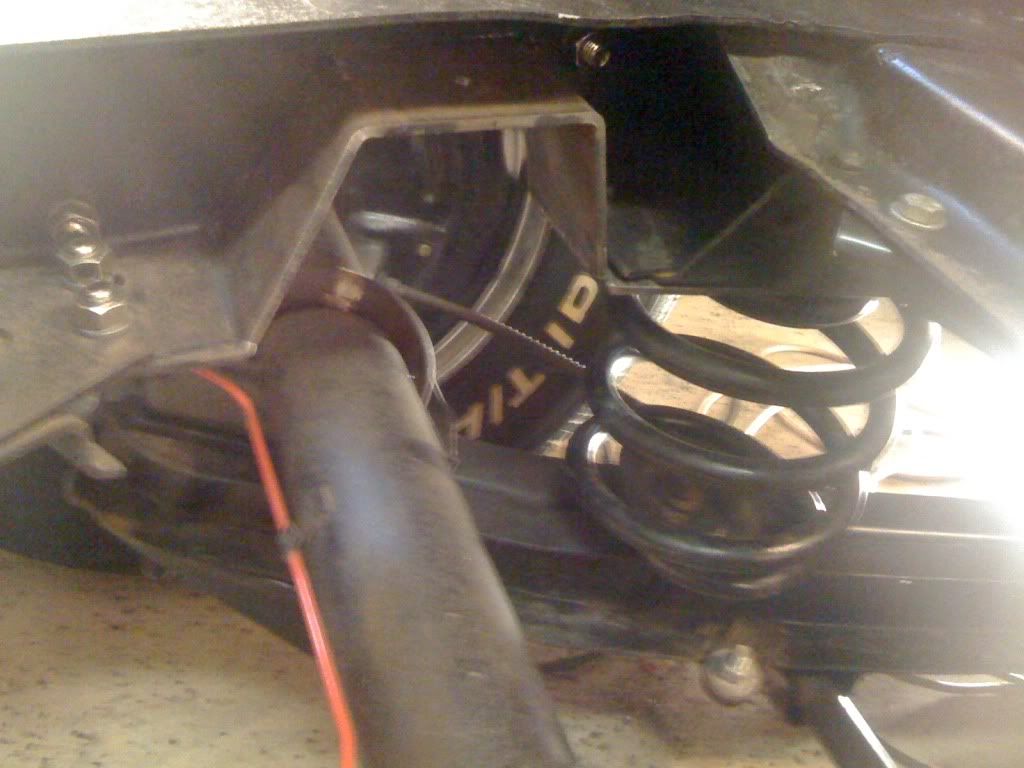 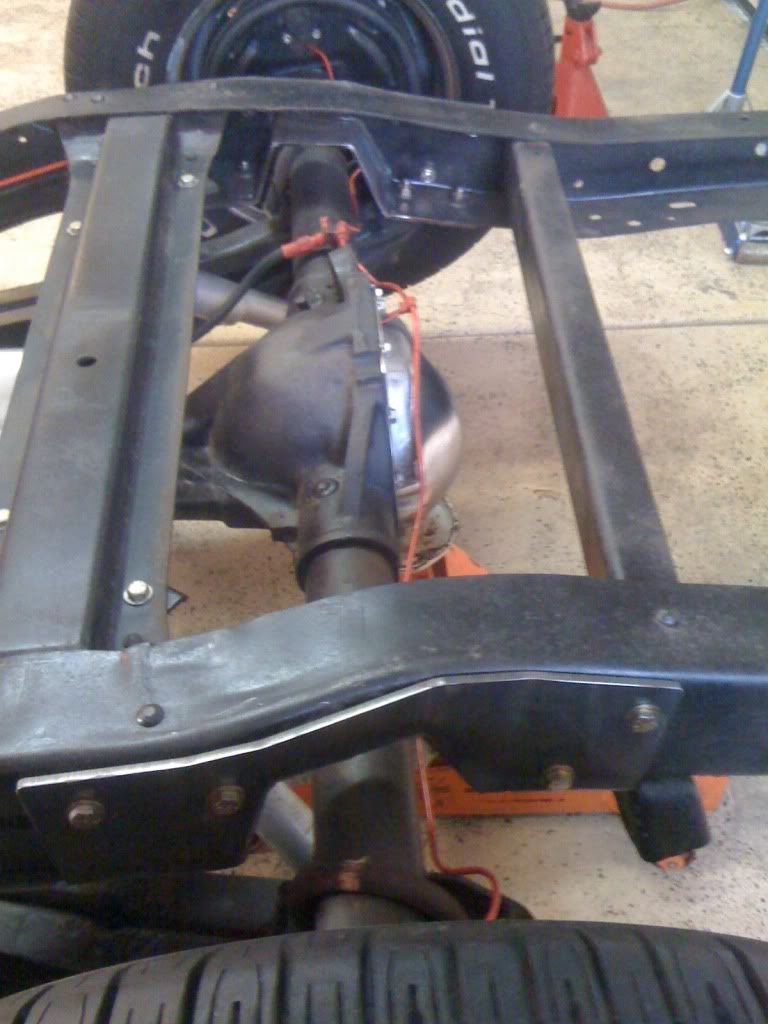 All done, I used a BFH to beat in the top edge to keep water from ponding in there. I might run a weld bead around the entire notch just to be safe. A few more pictures here: http://s1093.photobucket.com/albums/...view=slideshow So in all, not a bad product but the instructions could be better. Next step is to install a hitch receiver and then coat everything in Chassis Saver paint (it is like POR-15). |
|
|

|
|
|
#2 |
|
Registered User
Join Date: Mar 2011
Location: Cleveland, OH
Posts: 32
|
Re: Installing a CPP C-Notch kit on a '66 shortbed
Looks good. I just finished my c notch yesterday. Do you think towing will be a problem with these notches? I am a little concerned....what are you thoughts?
__________________
1964 Chevy C10 LWB 
|
|
|

|
|
|
#3 |
|
Registered User
Join Date: Feb 2011
Location: Reno Nevada
Posts: 7
|
Re: Installing a CPP C-Notch kit on a '66 shortbed
Wow-very informative and in-depth for something that is so seemingly simple. This also took me much longer than I expected, just because of all the trimming and fiddling with hole alignment that was needed (drinking the PBR first was no help either). I filled in the edges with seam sealer rather than welding it so that I could remove it later (not entirely sure why though. . .) without too much hassle. My truck looks a lot like yours; ECE panhard/shock relocators, KYBs and 5-inch drop coils, not to mention the notch (no rear sway bar though). Thanks for elaborating this process. . .
|
|
|

|
|
|
#4 |
|
Registered User
Join Date: Feb 2007
Location: NE Ohio
Posts: 737
|
Re: Installing a CPP C-Notch kit on a '66 shortbed
Great timing for me. I just got my cpp notch in the mail this week. Plan is to do it next weekend.
And I agree. Looks like a PIA to do with bed on, so we're gonna take it off. May as well paint everything black while its easy to do. Ive heard towing with the basic 100 notch is a no-no. I wanted to tow a vintage camper or car trailer with my buddys 61 comet gasser, but now Im affraid I wont be able to. At least not without alot of beefing up. Anyone tow with theirs????
__________________
Tim Road Hounds |
|
|

|
|
|
#5 |
|
Registered User
Join Date: Nov 2009
Location: Galt, Calif
Posts: 2,437
|
Re: Installing a CPP C-Notch kit on a '66 shortbed
My thoughts on anybody c-notching is weld the outside and box and weld the inside, all the stress is put on the c-notch if you don`t, you really need to spread the work load out.
__________________
`64 C10 vortec 350/350/373 posi `69 RS/SS 350/350/308 `37 Ford 406/350/324 traclock `68 Dart 370/904/323 suregrip |
|
|

|
|
|
#6 | ||
|
Account Suspended
Join Date: Sep 2009
Location: High Plains of Colorado
Posts: 2,485
|
Re: Installing a CPP C-Notch kit on a '66 shortbed
Quote:
Quote:
Yes, towing capacity will be a problem! I ran FEA based on some data that a site member sent me and this type of bolted in notch severely derates the frame strength behind the rear axle. Call CPP. Ask them for some documented proof of towing capacity, such as FEA or actual tests they have done. Ask them to "certify" the capacity of the hitch by providing something that is on company letterhead, signed by a Professional Engineer or a company officer. I am betting you won't get it. Don't shoot the messenger here guys. I don't have a dog in this hunt. I am not saying CPP stuff isn't top quality. I am saying though if you don't get something in writing from them stating rated towing capacity you are on your own if you have a towing failure or problem. Here is a thread that goes into this in more detail: Frame Notch Based On Strength Quoting myself, from the aforementioned link: "If you want the frame to be as strong as stock and you want a notch deeper than the 2" there is simply no substitute for adding some sort of truss above the frame, or replacing the frame section with another structural member that has the same section height as the original frame. Last edited by lakeroadster; 03-27-2011 at 10:04 AM. |
||
|
|

|
|
|
#7 |
|
Registered User
Join Date: Mar 2011
Location: Cleveland, OH
Posts: 32
|
Re: Installing a CPP C-Notch kit on a '66 shortbed
thanks for putting all of this data together lakeroadster
Looks like I won't be towing with my truck. Now, I guess I need to sell my hitch. 
__________________
1964 Chevy C10 LWB 
|
|
|

|
|
|
#8 |
|
Registered User
Join Date: Jun 2009
Location: Roseville, CA
Posts: 247
|
Re: Installing a CPP C-Notch kit on a '66 shortbed
looks like a good job there! I did the CPP notches in my build too, see my link below. I welded mine after I i bolted them in. Makes them soo much stronger.
__________________
My build thread: '66 Chevy |
|
|

|
|
|
#9 |
|
Registered User
Join Date: Aug 2010
Location: West Chicago, IL
Posts: 24
|
Re: Installing a CPP C-Notch kit on a '66 shortbed
Thanks Lakeroadster, you have done a lot of analysis on this. I am adding a receiver hitch in place of my rear cross member. I looked at your various c-notch stress studies and none seemed to match the CPP design. Any chance you can add one? I can send you the dimensions. I qualify as one of those who does not understand beam analysis. Dammit Jim, I'm a banker, not an engineer.
My goal is to keep the bed floor stock. There is about 1" of space between the frame and the bottom of the bed wood. Maybe welding two pieces of 1"x1" square tubing to the top of the frame will increase the vertical height? I do plan to weld the C-notch in place and possibly box the inside. My truck will be multi-purpose, mostly cruising, hauling stuff from the lumber yard, maybe towing a car trailer or car, and the occasional vintage drag race.
__________________
The dude abides. |
|
|

|
|
|
#10 |
|
Registered User
Join Date: Sep 2009
Location: California Delta
Posts: 2,163
|
Re: Installing a CPP C-Notch kit on a '66 shortbed
Is this install for the original CCP notch or the Heavy Duty CCP notch?
__________________
Name: Rich Current Ride: 1964 C-10 Short Fleetside Daily Driver: 2005 GMC crew cab short fleetside /2001 Chevy Tahoe Past GM Trucks: 1959 GMC short stepside 1968 GMC short stepside-4x4 1973 Chevy short stepside 1989 Chevy short fleetside-reg cab 1993 Chevy short fleetside-Xcab 2002 Chevy short fleetside-Xcab Save the dinosaurs, use synthetic oil. |
|
|

|
|
|
#11 | |
|
Account Suspended
Join Date: Sep 2009
Location: High Plains of Colorado
Posts: 2,485
|
Re: Installing a CPP C-Notch kit on a '66 shortbed
Quote:
Please contact CPP. It's their design, they know the materials of construction, weld filler metals used and they need to be the one to steer you guys in the right direction by informing their customers of the towing capacity, and do so in writing. If it isn't in writing, it isn't worth risking it. I really don't want to get between site vendors and their customers. But I am looking out for you guys. These notches derate frame strength and the vendors should be telling you how much. To not do so is just plain dangerous, IMO. As SlowBuild eluded to there is heavy duty notch available. If it is designed for towing what is its rated capacity? I haven't seen that stated anywhere. This is serious business guys. If you hang a Class III hitch on your truck and load it up to it's rated capacity what will happen? FEA, Finite Element Analysis is one way of trying to determine "what will happen" Here is a generic FEA performed on a notch that is similar in design geometry to the one being discussed above. See the slide bar on the side, it denotes Safety Factor based on a given load.The generic notch FEA reveals the frame has 19% of its original strength. Stock Frame = 1.72 Safety Factor Notched frame = 0.327 Safety Factor Last edited by lakeroadster; 03-15-2011 at 04:02 PM. |
|
|
|

|
|
|
#12 |
|
Who Me?
Join Date: Sep 2010
Location: Royal Palm Beach, FL
Posts: 4,067
|
Re: Installing a CPP C-Notch kit on a '66 shortbed
Im still waiting for CCP to make a kit for the 60-62's.
Come on guys!!! 
__________________
 Steve Steve1997 Tahoe LT 4D 2WD (DD) 2001 Blazer 4D 2WD 1961 Apache 10 (sold) 1965 C10 Stepper (sold) |
|
|

|
|
|
#13 |
|
Registered User
Join Date: Aug 2010
Location: West Chicago, IL
Posts: 24
|
Re: Installing a CPP C-Notch kit on a '66 shortbed
I've continued to work on my frame with the help from a friend. The end of the frame seemed torqued, one rail was higher and the whole rear was out of square. After much thought, we decided to mount the hitch receiver as the rear cross-member and use a come-along to pull the rails together. It worked like a charm, everything is now square and level, well at least close enough for factory specs. My Fleetside end bed rail will need some clearance work but the receiver should end up above the bumper right behind the stock license plate holder. I'll make a quick release for the plate when and if I do tow something. It should look pretty stock with the hitch hidden. On a lowered truck, I like having the receiver mounted higher.
Then we used some 1/4" steel to make boxing plates for the C-Notch. They turned out pretty nice after an afternoon of cut, grind, fit, bend, do it again. Next step is to make plates to box in the hitch, coat all the insides with Chassis Saver (like POR-15) and weld them up. 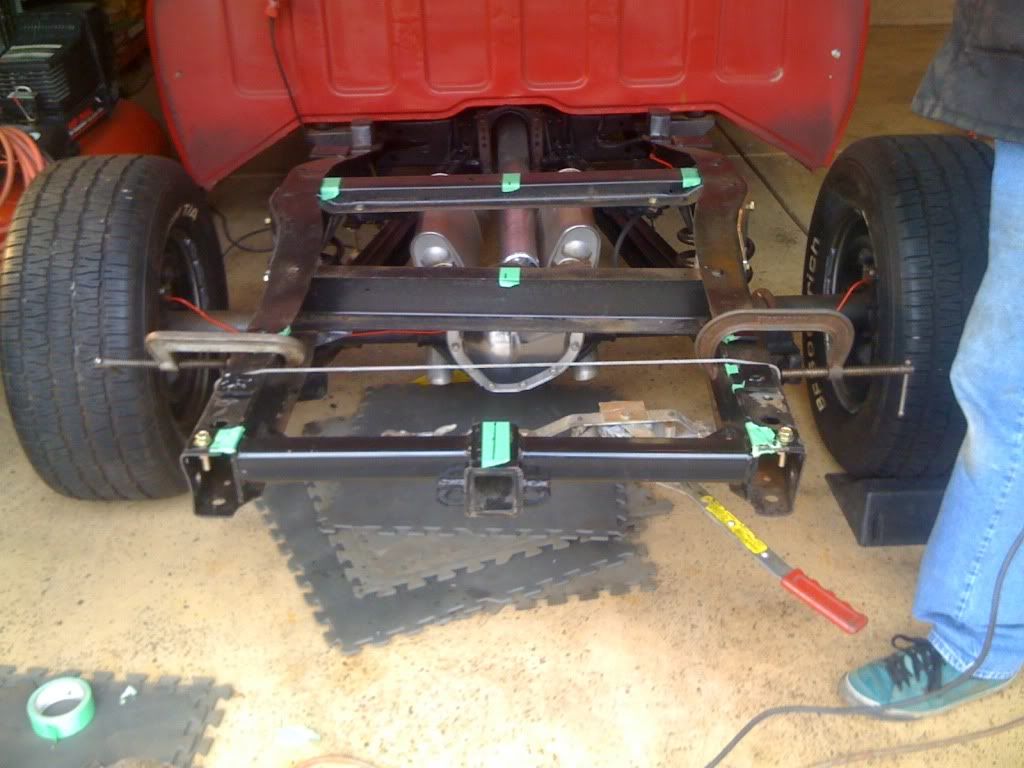 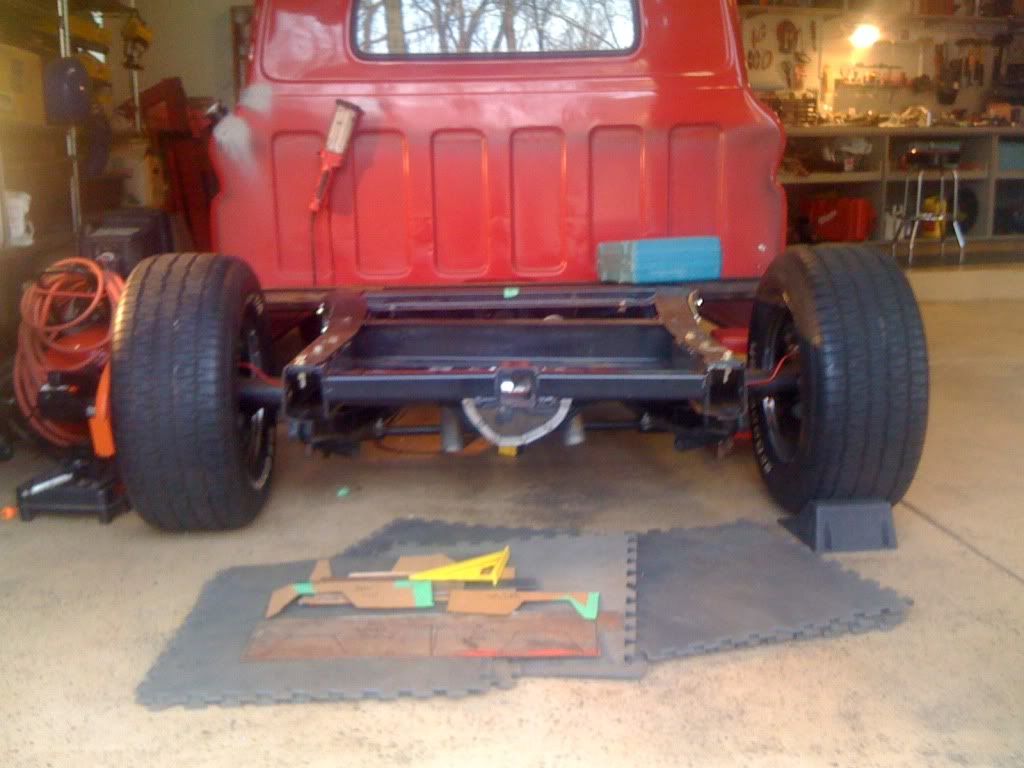 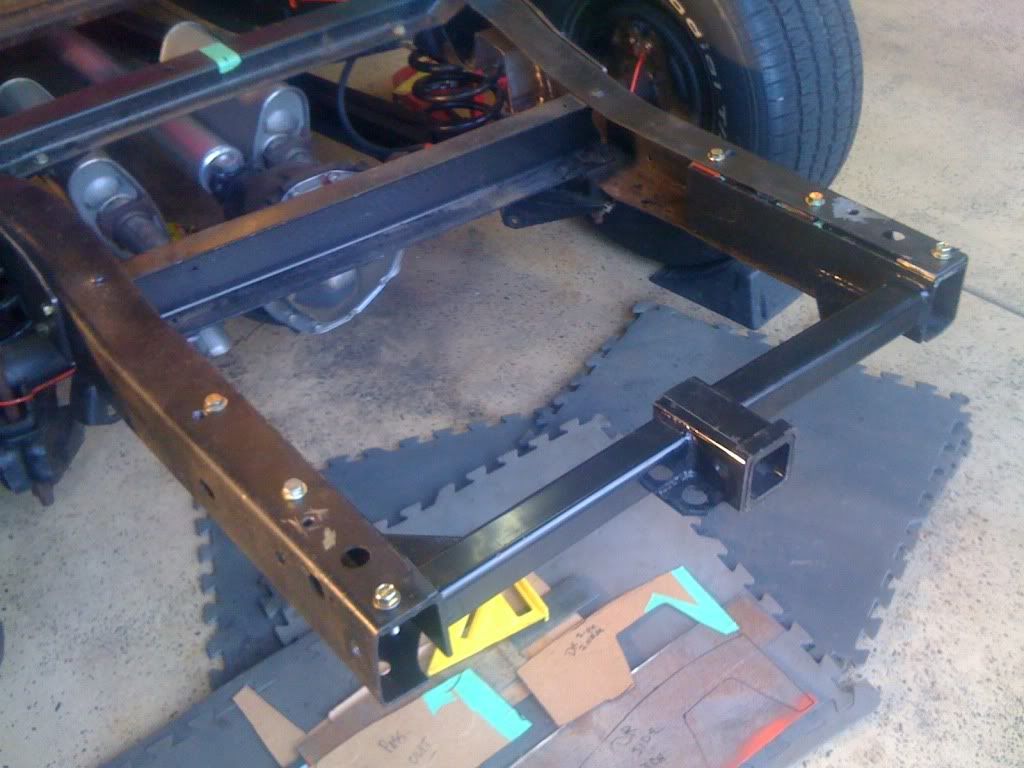 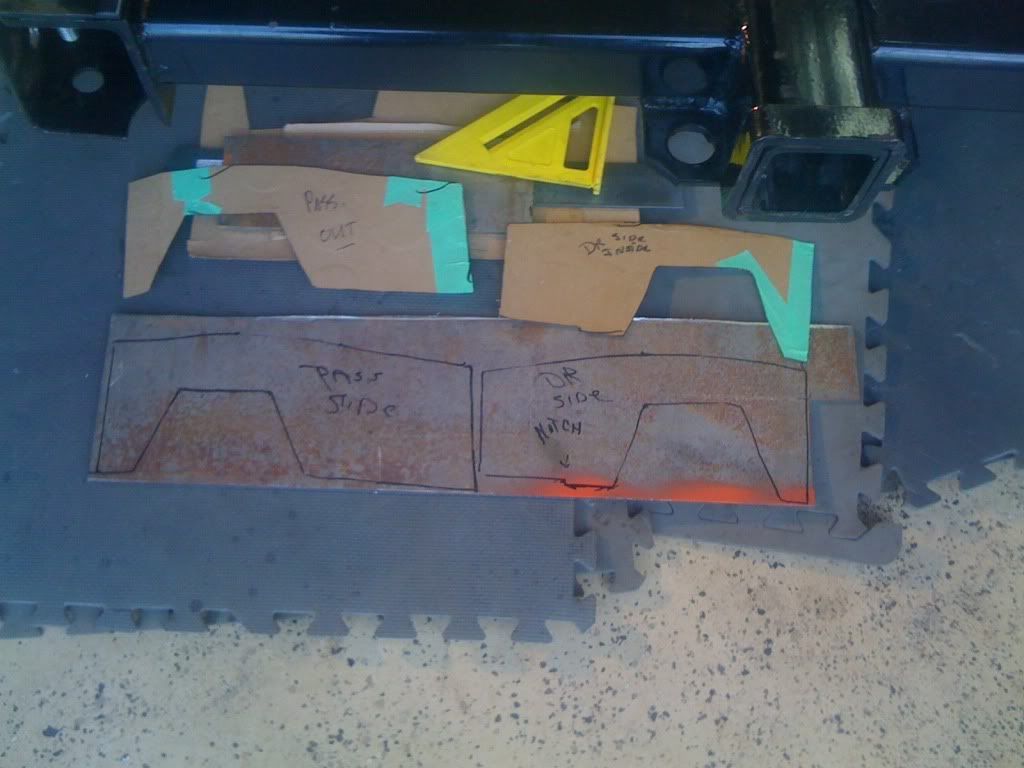 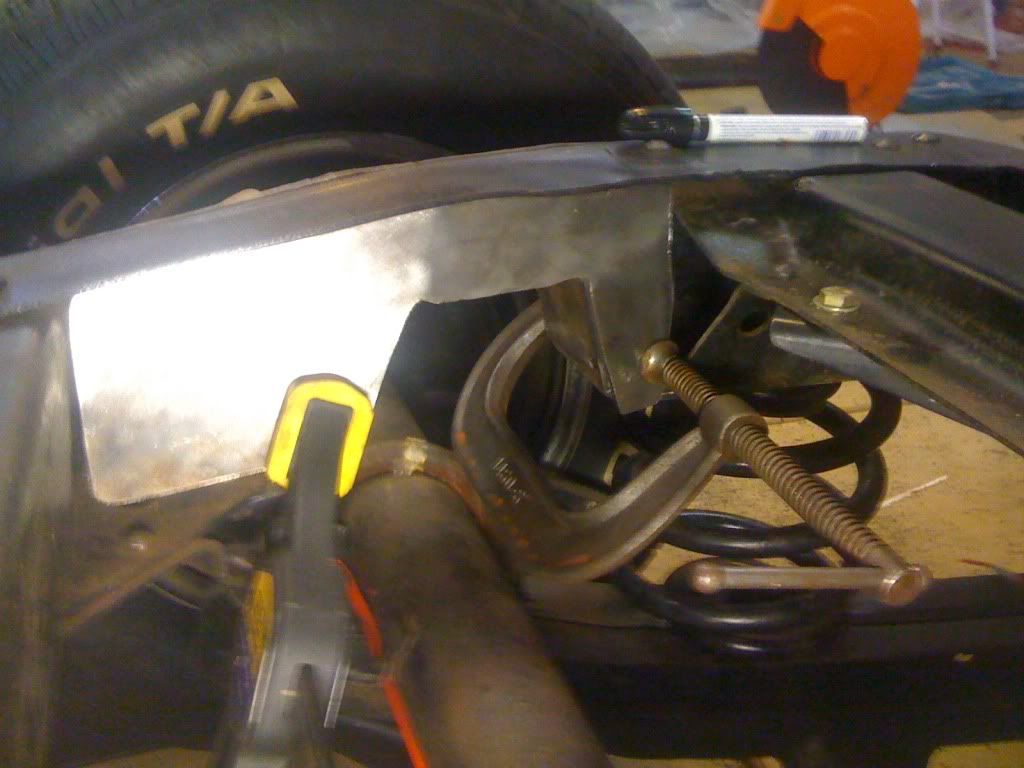 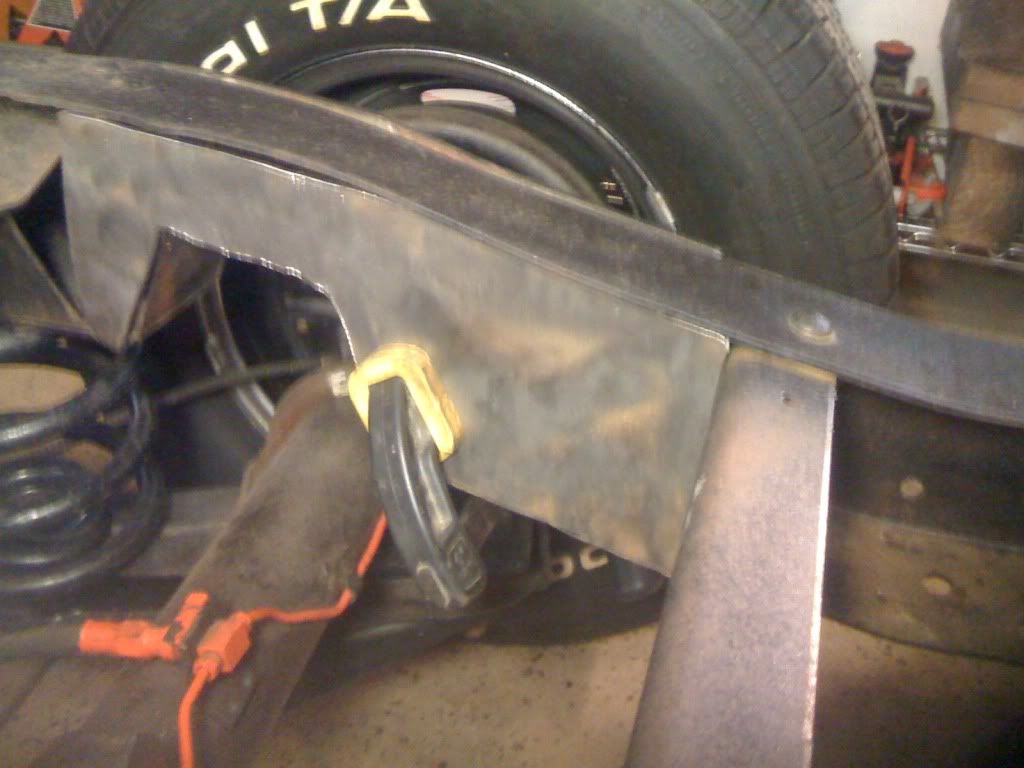 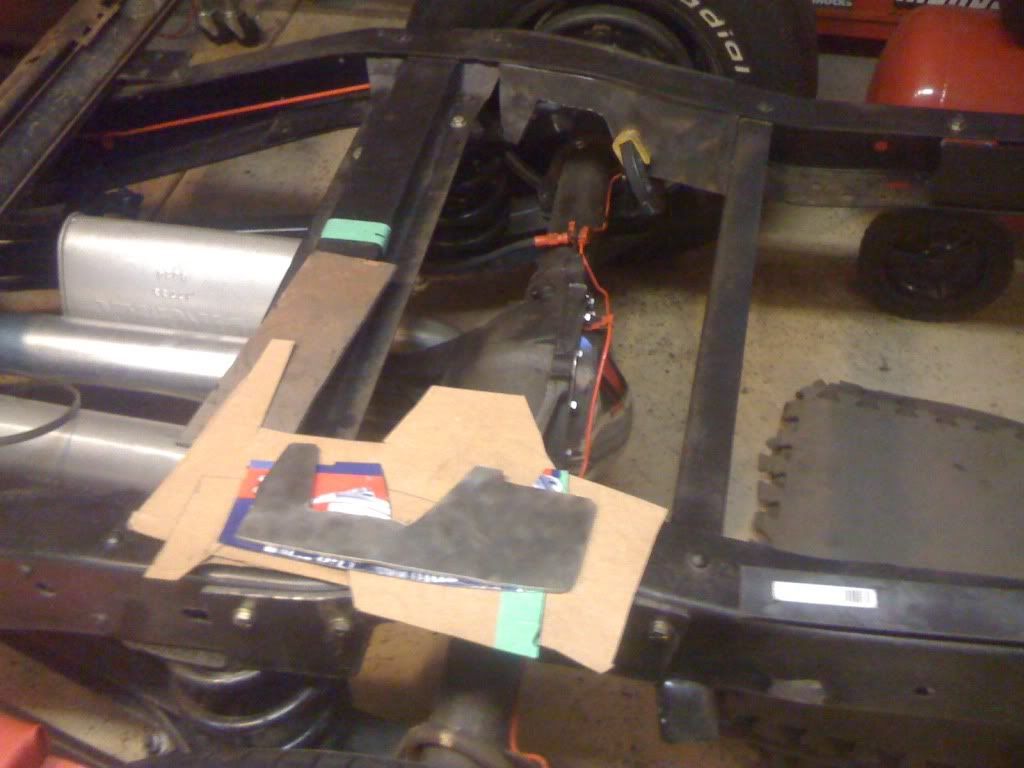
__________________
The dude abides. |
|
|

|
|
|
#14 |
|
Registered User
Join Date: May 2010
Location: Hillsboro, Oregon 97123
Posts: 1,300
|
Re: Installing a CPP C-Notch kit on a '66 shortbed
Nice job on the C-notch. I think I need one to tuck it a little lower in the rear.
Off topic...What rear sway bar is that your using..and did you really notice any Differance after installing it?
__________________
Measure with a yard stick Mark with Chalk Cut with a torch  Built it yourself, don't count on others to to do it for you or with you. It will never get done |
|
|

|
|
|
#15 |
|
Registered User
Join Date: Aug 2010
Location: West Chicago, IL
Posts: 24
|
Re: Installing a CPP C-Notch kit on a '66 shortbed
The rear swaybar is a Hellwig, I bought it from JC Whitney many years ago. The front swaybar is from CPP. Both are nice pieces. I had a factory front bar that somehow disappeared, too many moves while building this thing. With all my suspension mods, this thing really handles.
__________________
The dude abides. |
|
|

|
|
|
#16 |
|
Registered User
Join Date: Aug 2010
Location: West Chicago, IL
Posts: 24
|
Re: Installing a CPP C-Notch kit on a '66 shortbed
OK, finally done with the C-Notch and hitch boxing. My buddy welded in the 1/4" boxing plates. Like he said, my welds aren't pretty but they are strong. I painted the inside of the boxed area with Chassis Saver before welding. I had to mount the bump stops before we closed up access, the CPP notches had the wrong size holes so out came the angle drill again. '
I cleaned up the welds and painted everything with Chassis Saver, great stuff, like POR-15. Not perfect but OK for a hack working in the garage. 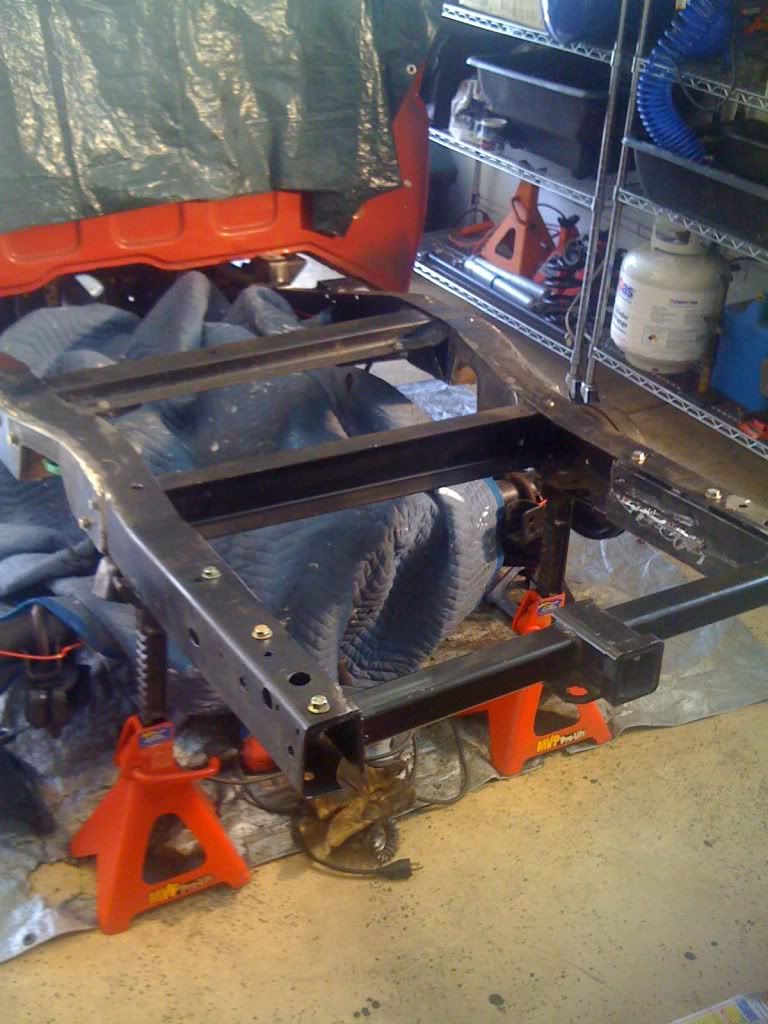 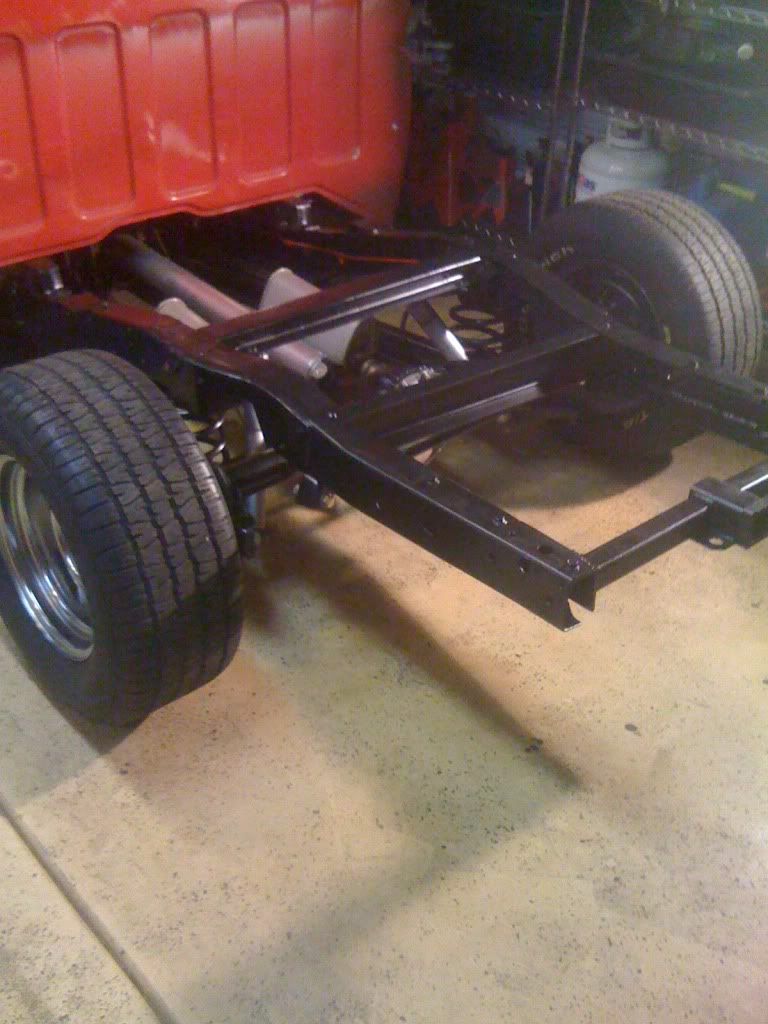 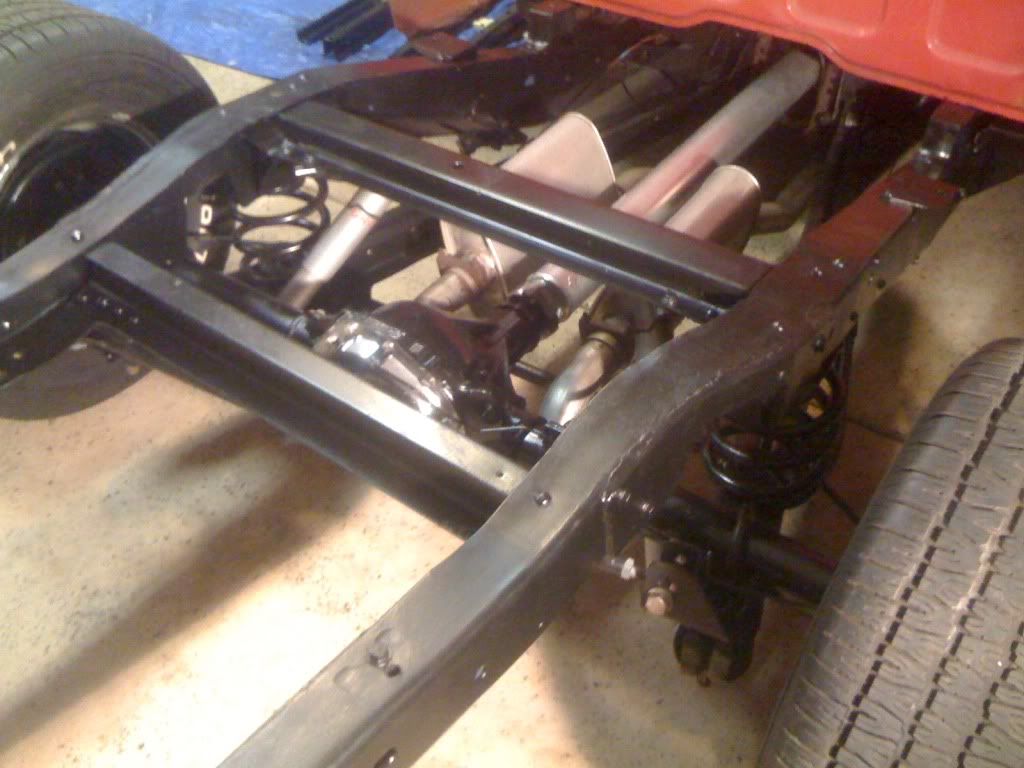 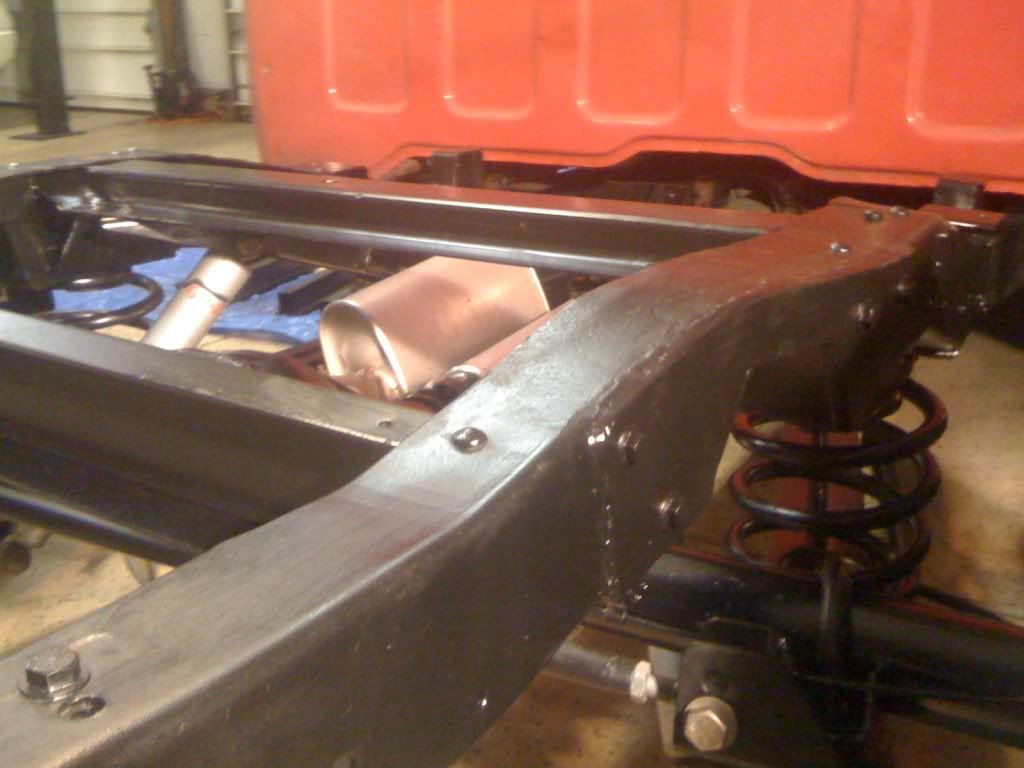 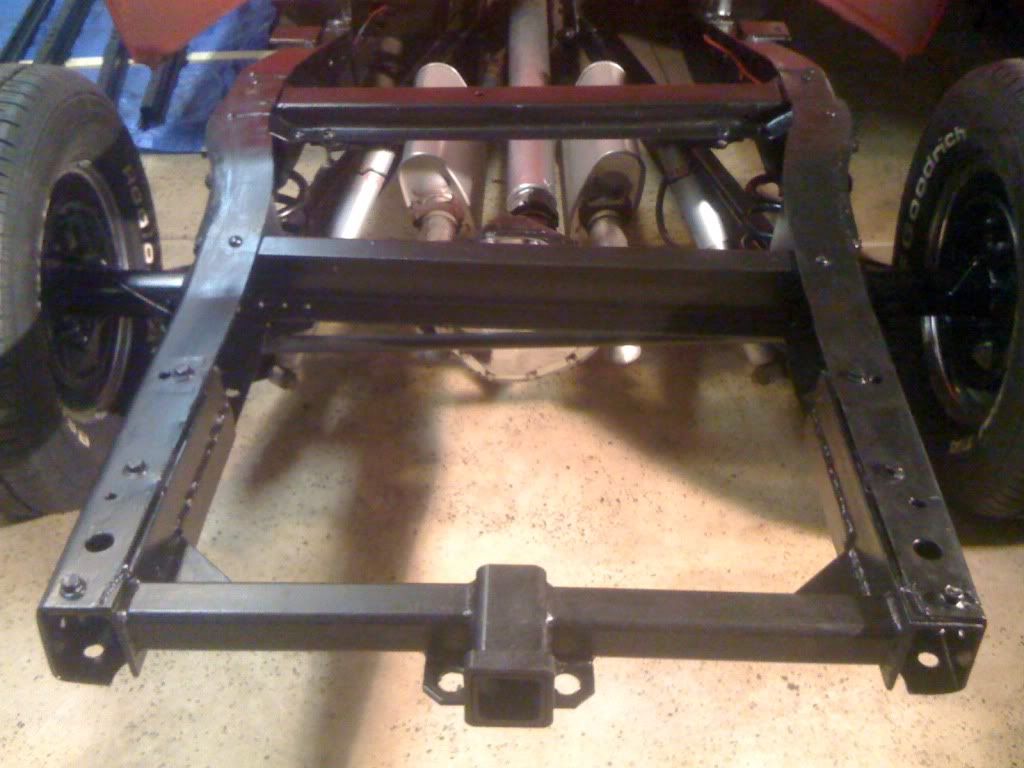
__________________
The dude abides. |
|
|

|
|
|
#17 |
|
Registered User
Join Date: May 2011
Location: montclair nj
Posts: 2
|
Re: Installing a CPP C-Notch kit on a '66 shortbed
Wow I just checked you tech article and photo's of the c notch very informative.
My 69 c10 fleet side long bed frame is rusted real bad over the coils. I will probably have to fab side and bottom plates and box the inside and make my own c notch. Do you have any templets left of the notch? Or can you make me one? Or provide measurements, how deep is the notch. How much frame is left above. Is the center of the notch, over the center line of the axel? Any info will be appreciated Thanhks C |
|
|

|
|
|
#18 |
|
Registered User
Join Date: Jul 2016
Location: Chatsworth, GA
Posts: 2
|
Re: Installing a CPP C-Notch kit on a '66 shortbed
Came across this thread just a few mins ago, and I thank you for all of the info. I've already lowered mine 6 inches in the rear with a flip kit, but I am definitely notching it too to help give it better ride, just waiting for it to come in the mail. I was wondering what everyone did to lower the front of their trucks though? The hubby and I cut the springs on mine bc I already had a stress break in one side so we just evened it up, but it definitely bounces to much for a lady to drive it comfortably with just cut springs lol. Was thinking lowering springs and spindles for the front for better ride, but wanted to see what you guys used? Any help would be appreciated. Thanks.

|
|
|

|
|
|
#19 | |
|
Registered User
Join Date: Apr 2001
Location: DALLAS,TX
Posts: 22,071
|
Re: Installing a CPP C-Notch kit on a '66 shortbed
Quote:
__________________
67SWB-B.B.RetroRod 64SWB-Recycle 89CCDually-Driver/Tow Truck 99CCSWB Driver All Fleetsides @rattlecankustoms in IG Building a small, high rpm engine with the perfect bore, stroke and rod ratio is very impressive. It's like a highly skilled Morrocan sword fighter with a Damascus Steel Scimitar..... Cubic inches is like Indiana Jones with a cheap pistol. |
|
|
|

|
|
|
#20 |
|
Registered User
Join Date: Jul 2014
Location: Frsico, Ca.
Posts: 40
|
Re: Installing a CPP C-Notch kit on a '66 shortbed
Theres a Heavy Duty C-Notch kit for towing. The steel is 3/8" thick.
https://www.cjponyparts.com/classic-...2/p/6372CNKHD/ |
|
|

|
 |
| Bookmarks |
| Thread Tools | |
| Display Modes | |
|
|