
 |
Register or Log In To remove these advertisements. |
|
|
|
|||||||
 |
|
|
Thread Tools | Display Modes |
|
|
#1 |
|
US Army Veteran
 Join Date: Nov 2008
Location: Central Texas
Posts: 1,049
|
1972 Highlander -The making of a daily driver
After my first project, Pancho Villa, I swore I'd never do it again. I'm a software developer for crying out loud, not a mechanic <slash> paint and body man <slash> car guy.
And here I am again, sigh. Had been looking for a 67-72 over the past year, off and on, that I could "freshen" up to be a daily driver. Picked up this 72 down in the Austin area about a month ago. 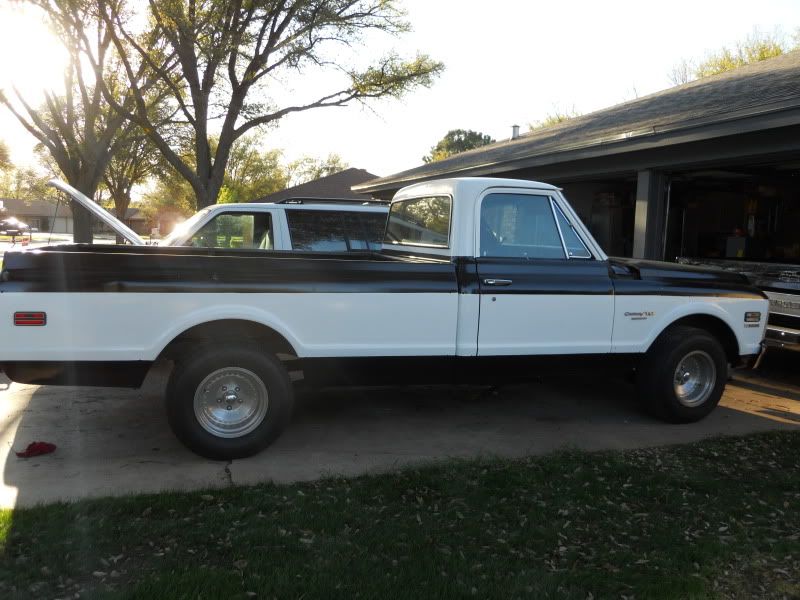 Mechanically, it's very sound. Has a GM crate 350 motor that starts immediately, first time, every time. Drove it back to San Angelo, about a 3.5 hour drive, and it drove like a champ. I could have taken it down, got the inspection sticker and just started driving it, but NOOOOOO, my OCD just wouldn't allow for it. You know how it is. "Hey, I'll put in that RetroSound deck from my other project that I didn't use." and "well, I should probably get some speakers," and "oh, look...those shiny chome ac vent balls on ebay would look cool!" And so it began. So I'll document what all I'm doing. Heck, if I don't, I'll forget most of what I did! Either the 67-72's are easier to work on then the 73-87's, or maybe I actually learned something from my last project. Here we go: Hood to cowl seal: 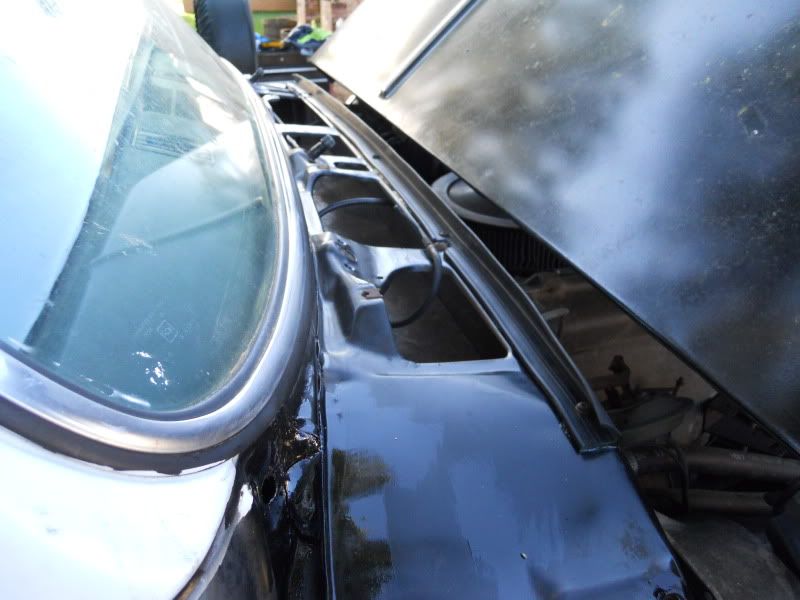 And of course, while I was there, I recalled reading about some trouble spots prone to leaking/rust in a thread somewhere, so naturally I was compelled to pick up some POR15. And naturally, living in a small town, you can't find anything in a store here other than beans and rice, so I ordered it online. And when I received it, I touched up these areas (there was no rust, but figured while I was there, might as well hit these areas): 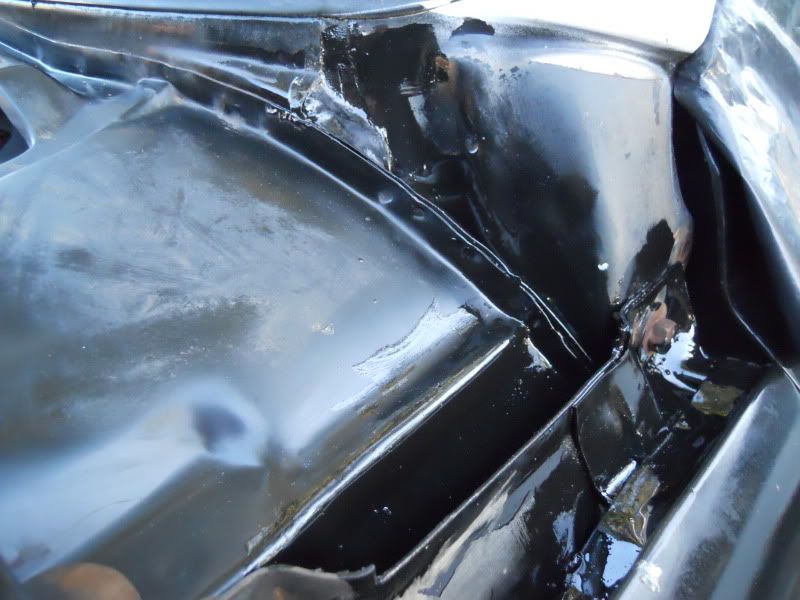 and the other side where the antenna hole is: 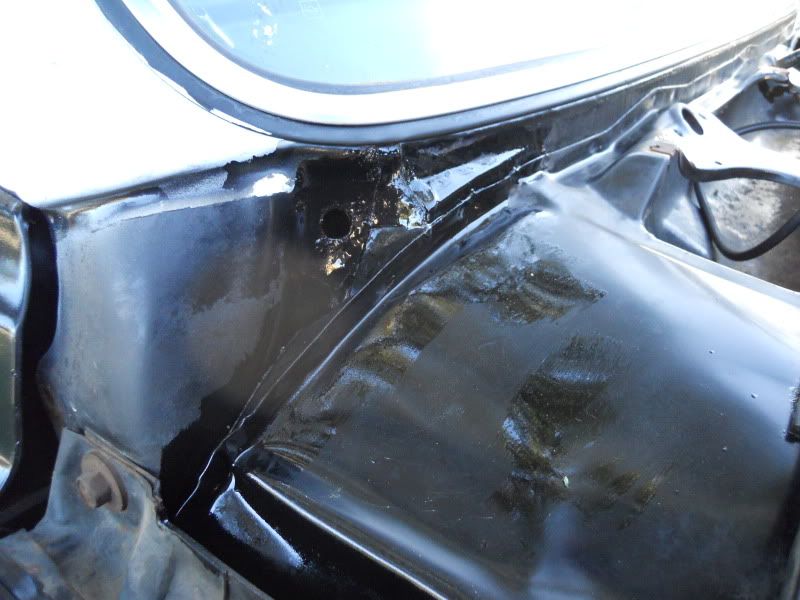 Didn't take photos, but the first things we (my youngest son....23, is helping out some) did were replace the upper/lower ball joints, sway bar bushings and shocks. And of course, while I was there, I couldn't resist breaking out the power sprayer, degreaser and a screw driver to take off years and years of caked up dirt/oil/motion lotion build up. And then we started on the interior. Out comes the seat, as I ordered new seat covers from TruckSeats (here on the forum). And of course, I just *had* to replace the carpet, right? And heck, if I'm going to do that, I might as well get some sound deadener too, right? Heh! (have you noted my self-depricating cynicism yet?)  Vent windows. Pulled them. The seals had more cracks and stretch marks than Rosanne Barr. I read many posts here about replacing them. I ordered the seals and the rivet kit. The first one took quite a while. I was probably over-analyzing the procedure (ya think?), but it really wasn't too bad. Didn't take pics of this, but here's some picks of it after installed, after polishing (glass polish) the window, new mirrors, door locks, outside door handles: 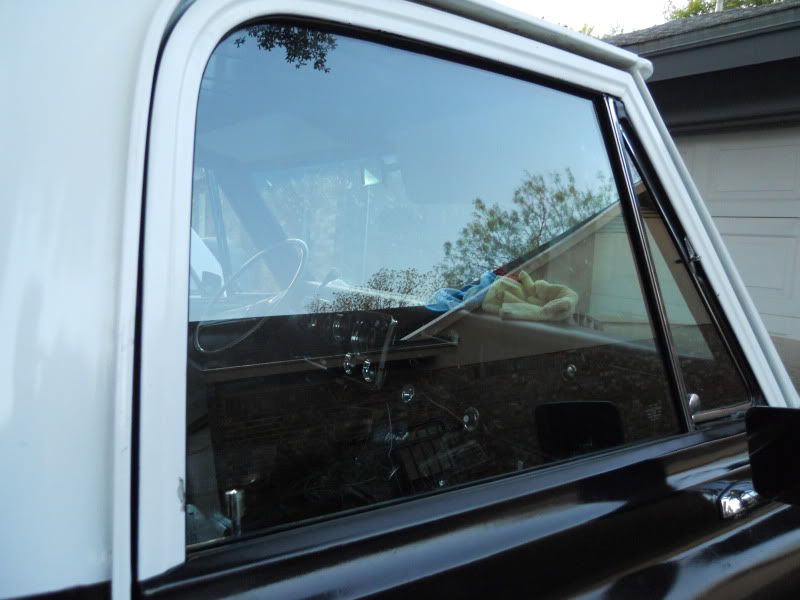 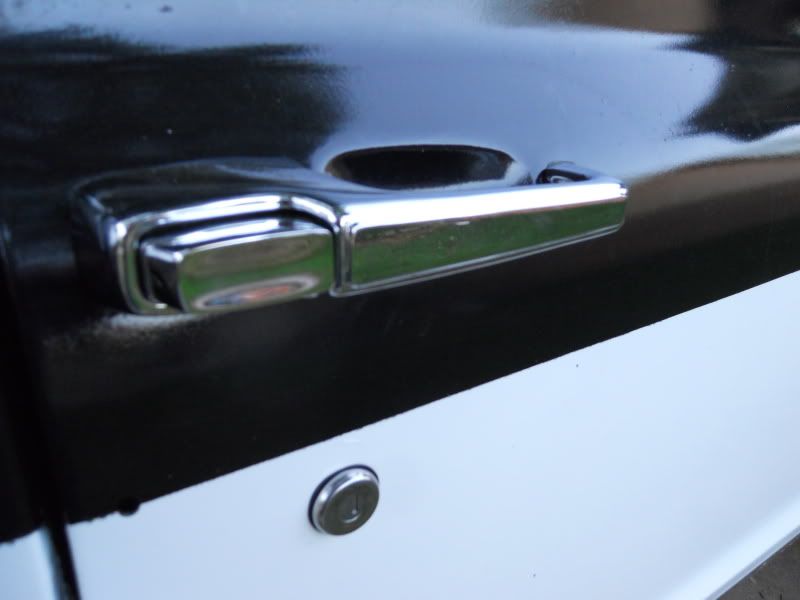 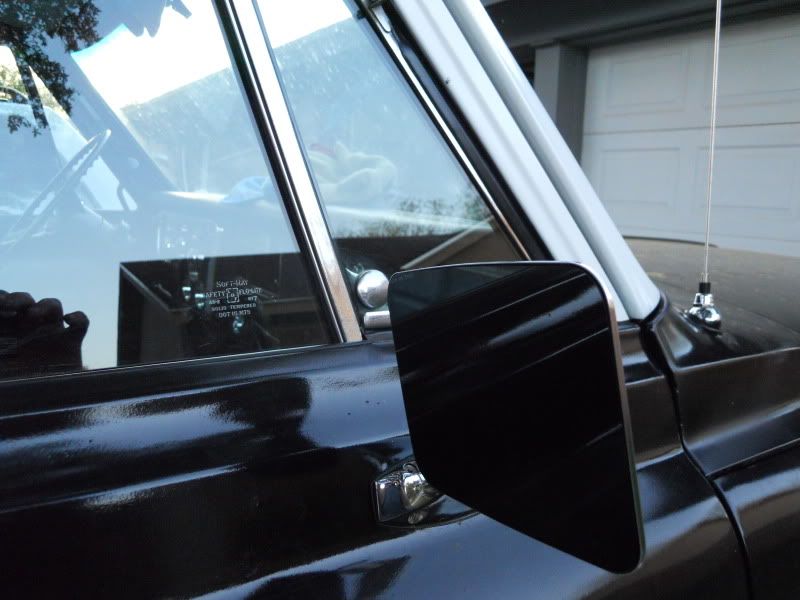 It took longer getting the passenger side vent window BACK IN, then it did to do the vent window seal. My patience was *more*than tested! Continuing with passenger side door, after vent window installed, I took the opportunity to add POR15 to the inside of both doors. Protection! They were really pretty clean. One of the trucks previous owners put not just one, but TWO speakers in both doors. This was not pleasing to bruh'man, but I knew I would get over it. I removed both speakers from both doors. Used a hammer/dolly to flatten them back out some from where they drilled/cut, then lined from the inside with fatmat, then on the outside with another layer of fatmat. 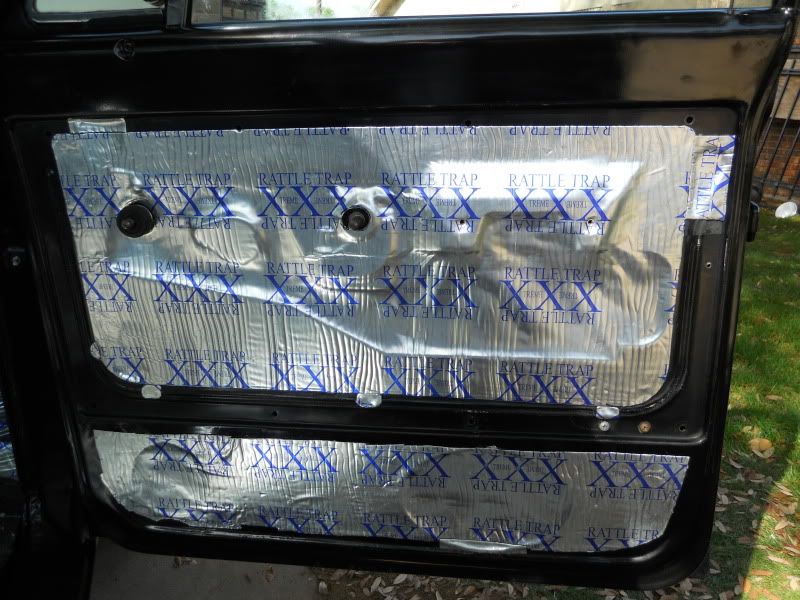 For the main door area, I had this crazy idea of "hey, what if I cut to fit a single sheet of fatmat," and I set out measuring, remeasuring, cutting, recutting aligning, fine tuning, etc, until I had one single sheet of fatmat. I used a socket to cut out the center holes for the door/window handle, then used a hand cleaner can to do the rounded corners, until it looked like: 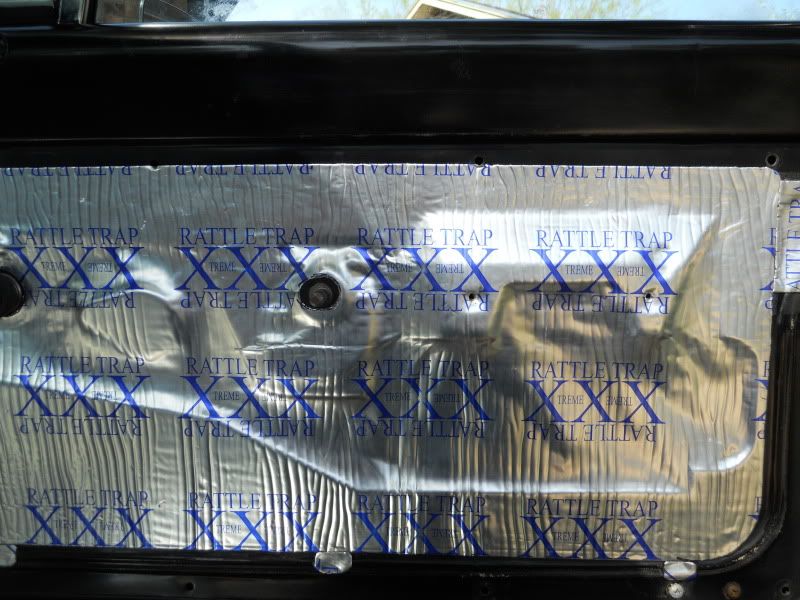 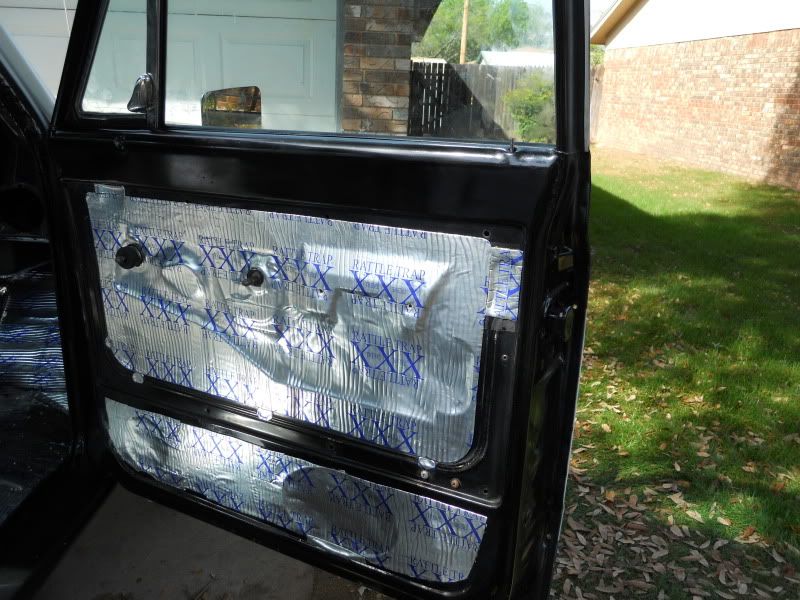 Then I did something very unusual. I had a brilliant idea! With the fatmat cut to perfection (don't ask how long I spent, it was ridiculous!), it occurred to me to take that piece, turn it over on the fatmat roll, and draw it out so I'd have perfect piece for the driver side when I got it. Bruh'man was pleased, as he doesn't often experience such epiphanies! Door panels. They were in pretty good shape, though I'm pretty sure these are not originals. And that's ok, they still look pretty good. And no, I couldn't leave well enough alone! On black plastic/rubber, I use some stuff called "forever black" tire gel. I really like this stuff. It's like a cream (more so than a gel) and it's a dye. It soaks into the plastic/rubber and really brings life back to whatever you put it on, that's black. 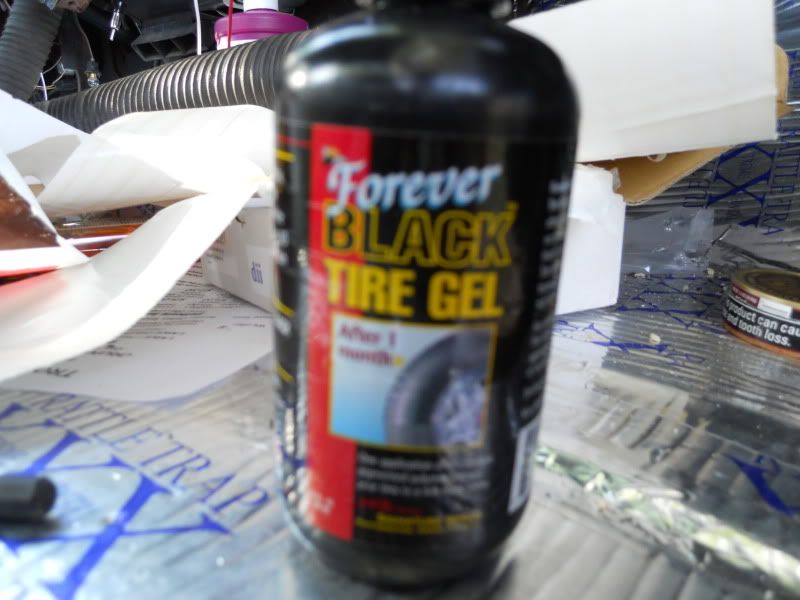 And here's some of it, as I'm applying it to the door panel: 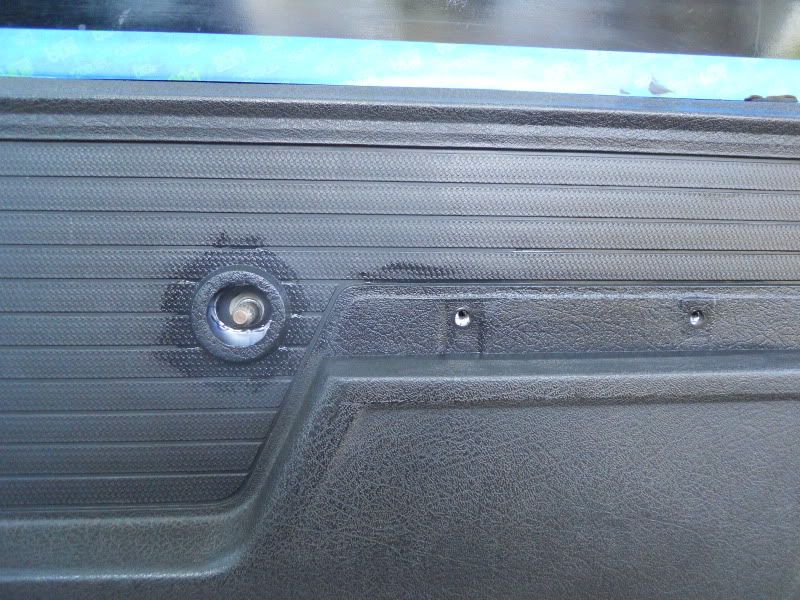 it's not fully coated here, so you can get an idea of what it looks like as it goes on. Might be a useful tip if you have some black plastic/rubber you want to give some depth to. Here's the door panel reassembled. I ordered the black carpet panels to go over the fatmatted area where the speakers were. New door/window handle (not NOS, my obsession is drawing the line there on this project). 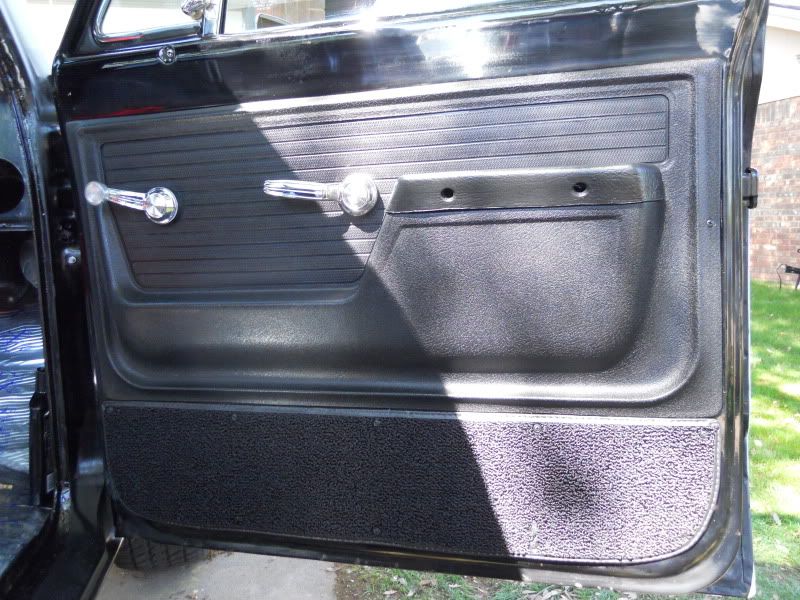 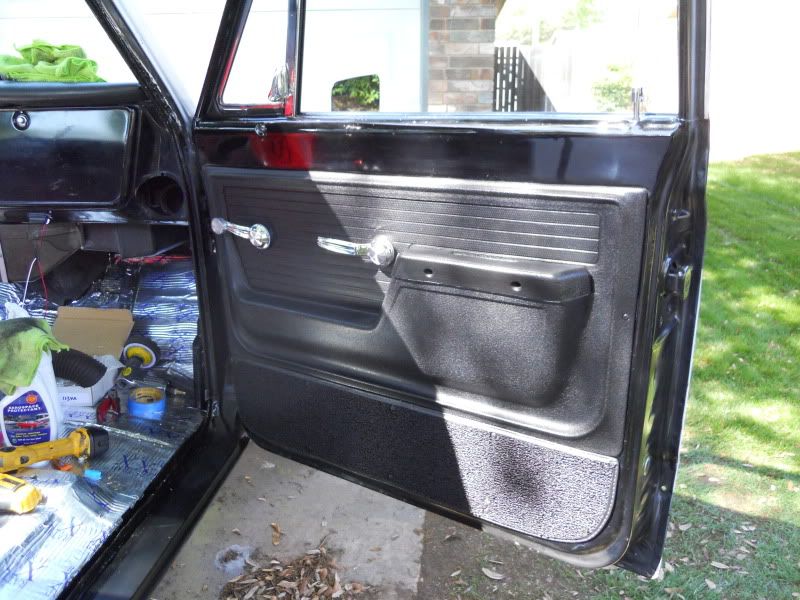 The cab floor is fatmatted. Haven't taken pics of it yet, because I have stuff scattered about and wanted to get some clean shots. Was really surprised at how little rust there was. In the passenger side, right at the seam of the floor and kick panel area, there was a little rust, but no cancer. I cleaned it with POR15 Prep/Ready, then sealed the small area with POR 15, before we laid the sound deadener down. 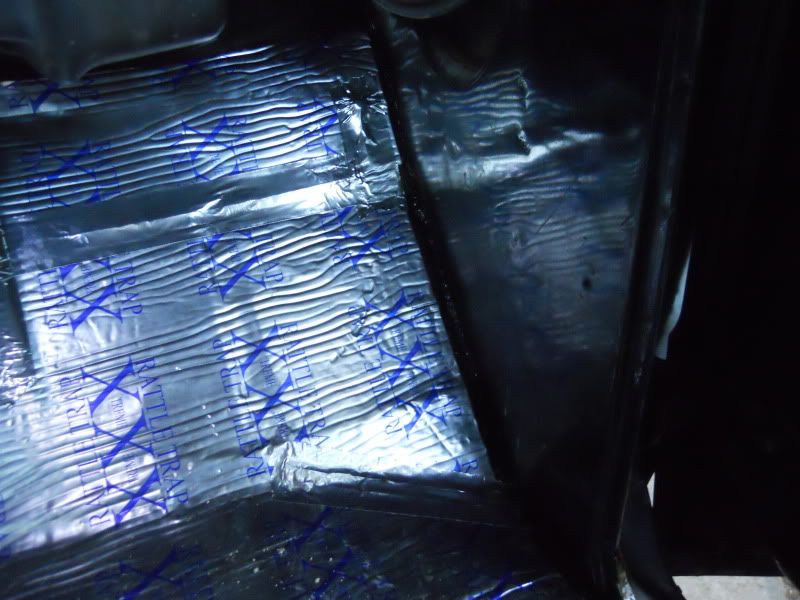 Bruh'man doesn't like the dark. It's not that I'm afraid of the dark, but rather I've stumped my toes, stepped on crunchy toys (think of Home Alone with the jacks on the floor), banged my head, etc too many times in the dark. I like to see. So I picked up some courtesy lights and pointed them to the floor on driver/passenger side: 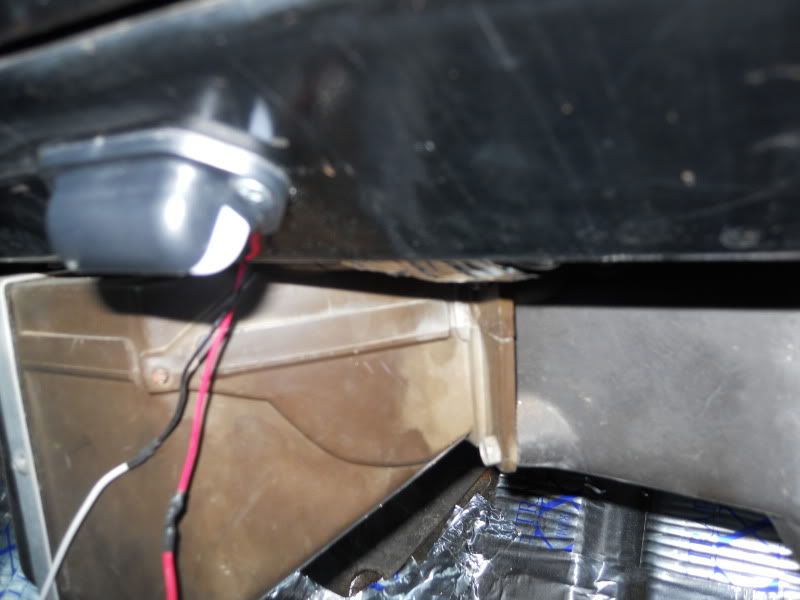 Picked up LED lights from superbrightleds.com for the dash (no pics yet), dome, AC and the courtesy lights above are LED. LEDs make a huge difference! I'll get some pics of those later in the project. Currently working on the glove box area. There was no liner (have one to install, along with glove box light). I polished up the inside glovebox lid: 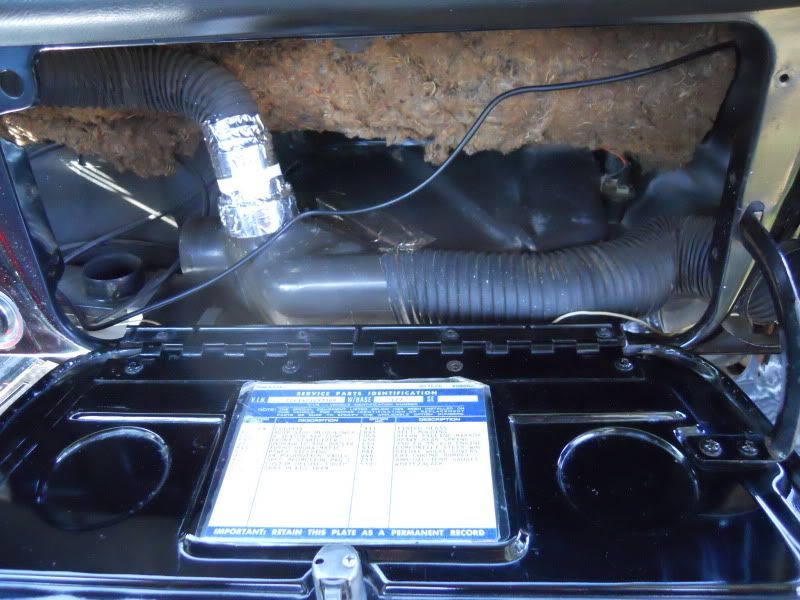 Then wetsanded the outside of the GB door with 2000. Polished half of it out, but it still shows it's years. 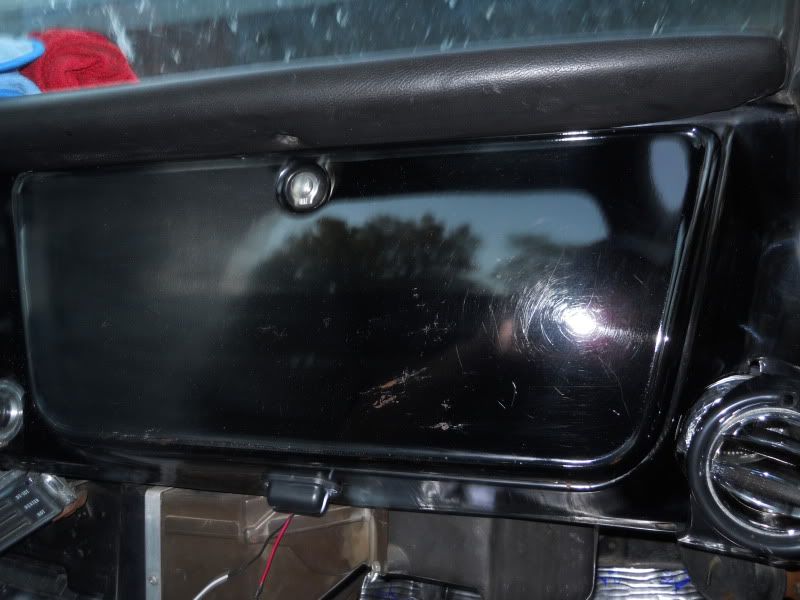 Has a YG8 code on the tag, Highlander. And that's pretty much where I am, as of this evening. Have rally wheels along with new center caps and trim rings that I will be mounting on BFG RWL tires next week. New carpet has arrived, but have to finish up other interior stuff before installation. Working from passenger side to driver side. More to follow as I "freshen up" this old truck to be a daily driver and not a garage queen, like my other truck! Later in the build, I'll reveal a top secret modification/addition I'm going to put on this truck that will truly make it very rare, very desirable and very nostalgic. For me, it is the ultimate addition to any classic daily driver that will truly bring back fond memories of better days and it only costs a few bucks. No, it's not fuzzy dice (but I do have a "big foot" gas pedal and it is going in!). It will make sense when I reveal it. --------------------------- I was just about to make this first post when my daughter and son-in-law stopped by, just now, to share with my wife and I that they are having another baby! I'm overwhelmed with happiness! My eyes are watering and proud to say it's not from onions! This will be our fifth grand child. Our Father in Heaven has truly blessed us.
__________________
1972 C10 Highlander - The making of a daily driver |
|
|

|
|
|
#2 |
|
Registered User
Join Date: Apr 2003
Location: Indep, MO
Posts: 5,893
|
Re: 1972 Highlander -The making of a daily driver
Looks great, and good post! Oughta be a good bomb-around truck. (The best kind!) Congrats on the baby! My bet on the addition: 8-track!
__________________
Boppa's Old Yeller Truck Build, Old Yeller's New Heart! Project Buzz Bomb Flyin' Low! Last edited by Low Elco; 03-31-2012 at 12:12 AM. Reason: Forgot something! |
|
|

|
|
|
#3 |
|
Registered User
 Join Date: Jul 2010
Location: memphis
Posts: 2,537
|
Re: 1972 Highlander -The making of a daily driver
Niceeeeee
__________________
1981 C-10 (Pop's) 1978 Camaro 2006 Lacrosse |
|
|

|
|
|
#4 |
|
US Army Veteran
 Join Date: Nov 2008
Location: Central Texas
Posts: 1,049
|
Re: 1972 Highlander -The making of a daily driver
Thank you, gentlemen! 8-track is tempting! Had an 8-track in my first truck back in the late 70s. Wore out "Boston" and "Hotel California!"
Started working on the passenger kick panel area this morning. Opened the vent and found what easily could have been a birds nest: 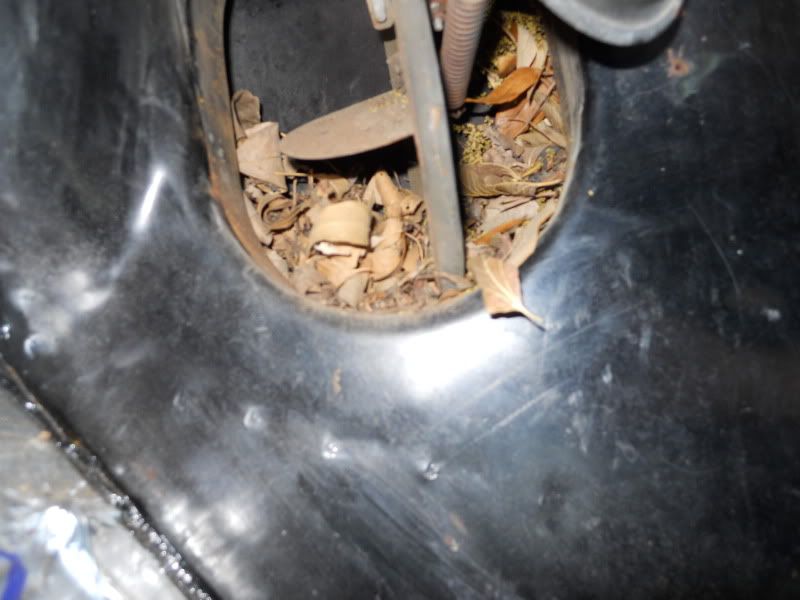 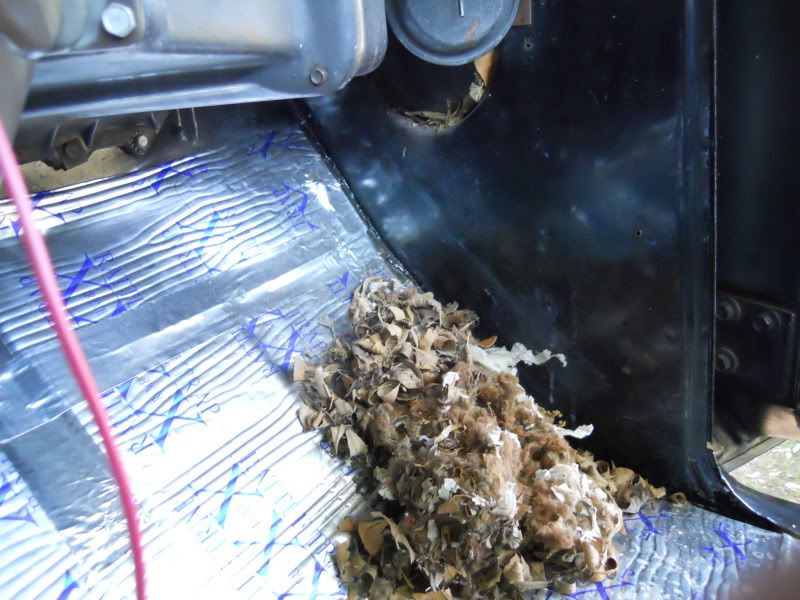 After cleaning out the bulk of it by hand, took the shop vac and cleaned out the rest. This was one of the trouble areas for rust. When I pulled the old door seals out a few weeks ago, the lip for the door seal and the general area had a fair amount of rust and a good deal of the lip was shot. 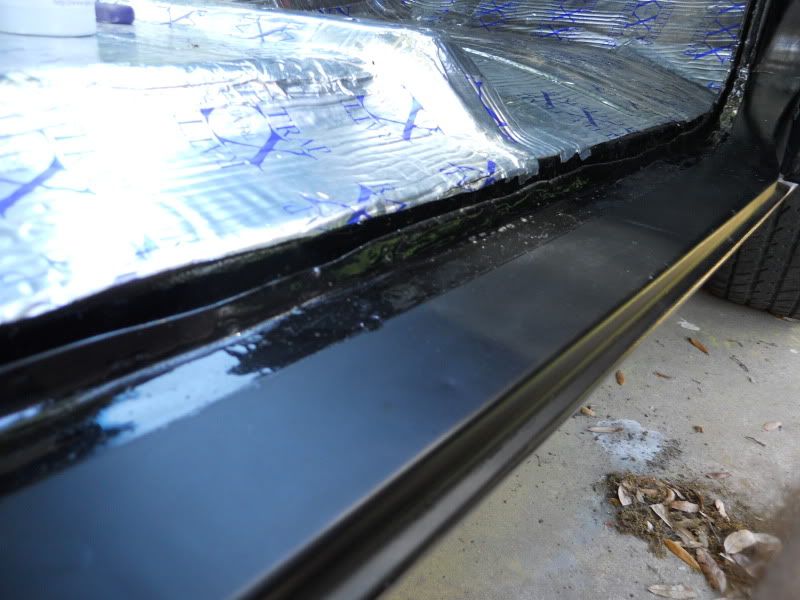 I cleaned it out really good, used a steel brush on what was left, then POR15 Metal Prepped the area (kept it moist with a brush for about an hour). Then used POR15 Marine clean on it several times. Finally, dried everything out with the air hose. From there, I used POR15 Epoxy Putty and rebuilt the lip area. The following day, once cured, I used an die grinder with heavy sand paper to smooth it all out. Then taped off the area you see, and applied POR15 Rust Preventative paint to the area to protect it. It came out pretty good and I really like the POR15 products. Again, this isn't a full restoration, just trying to do my best to fix trouble areas the best way I can and preserve the truck. All this was done last week. Didn't snap any pics of the process, but thought I'd document it anyway. For the door seal, I used air tool with a wire wheel and cleaned up the entire seal area, then used POR15 on it to protect it: 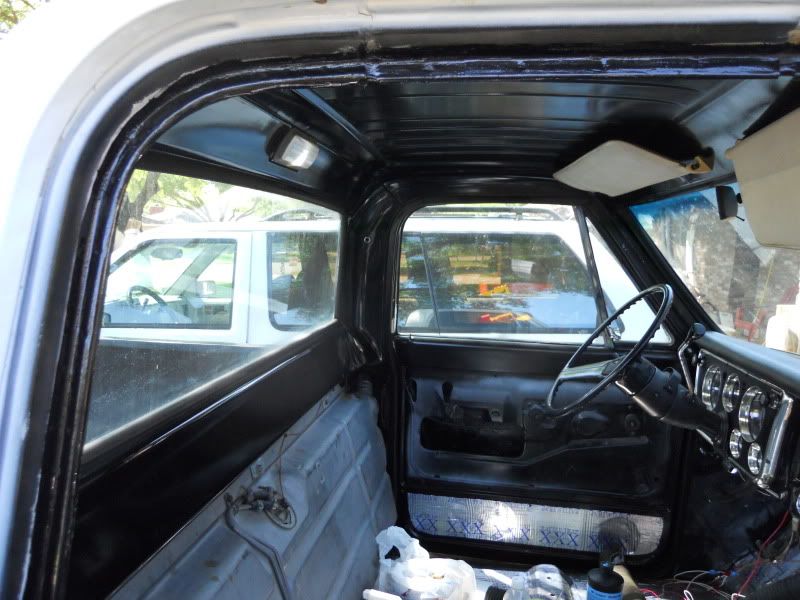 Installing the door seal: 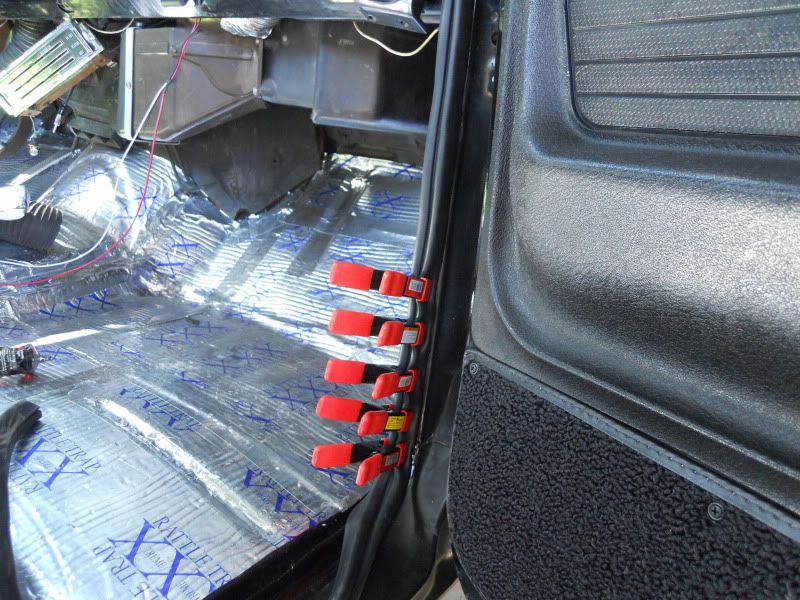 Starting work on the sound system. I have a Retrosound deck from my 78 project that I ended up not using, so going to install it in this truck. Ordered some kick panels for speakers. Didn't have the original dash speaker bracket, so ordered a cheap set of speakers that had it, and replacing those with Boston Acoustics. Here's a shot of the bracket (has speakers but replacing them), kick panels, Boston Acoustics 3.5 (should have ordered 4 in, wasn't sure), and a new plate for the RetroSound deck: 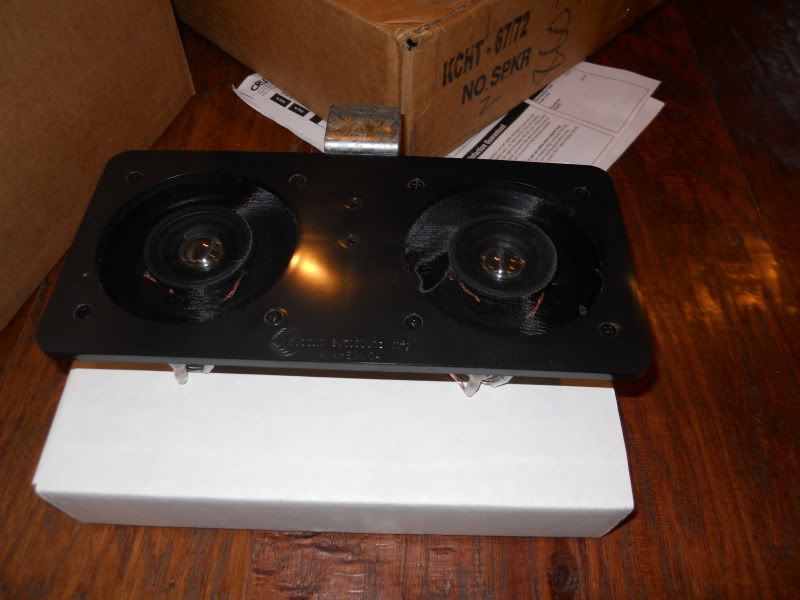 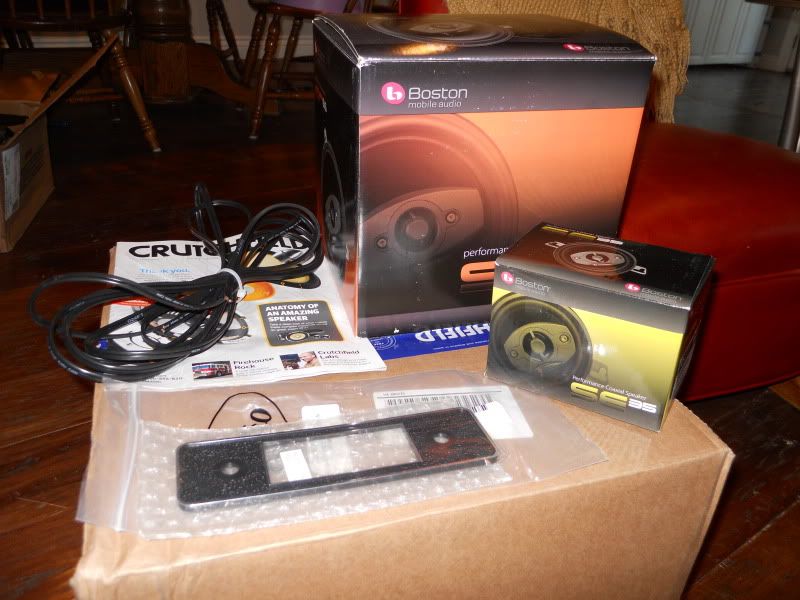 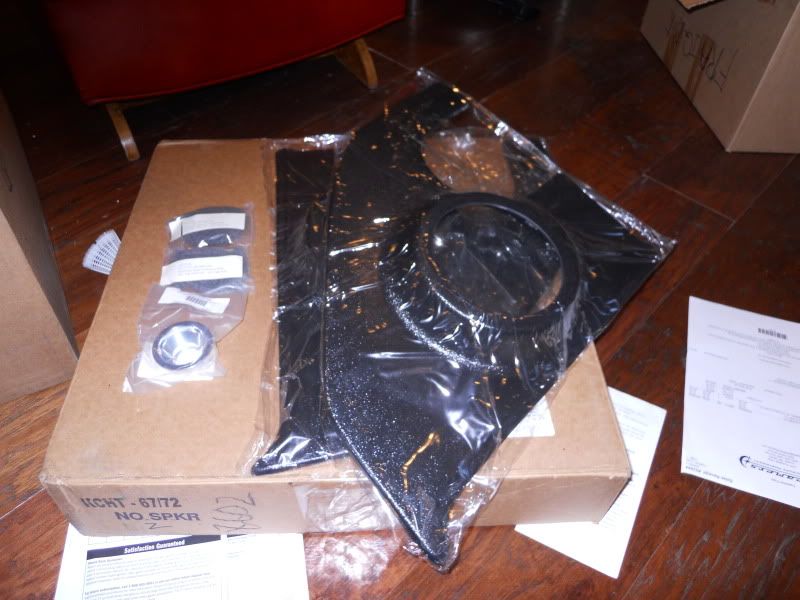 Some slight modification to the dash speaker bracket, and the 3.5's are ready for mounting: 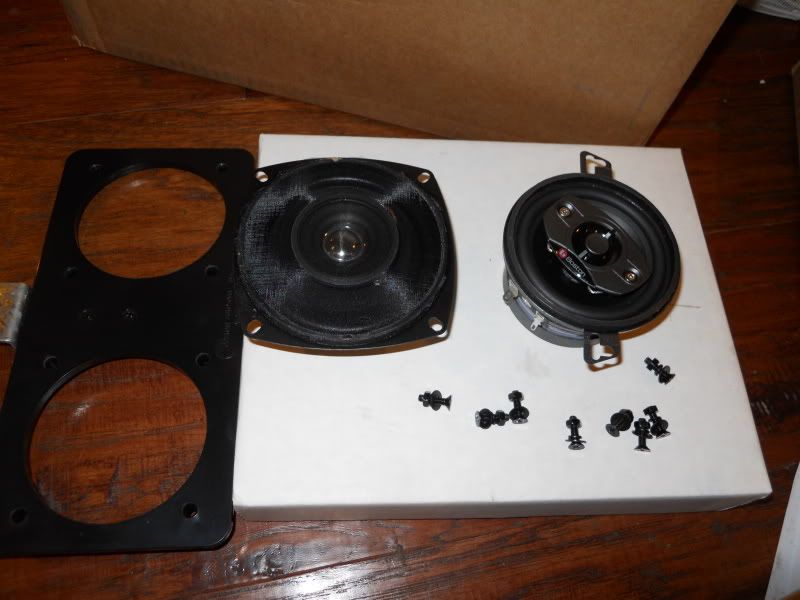 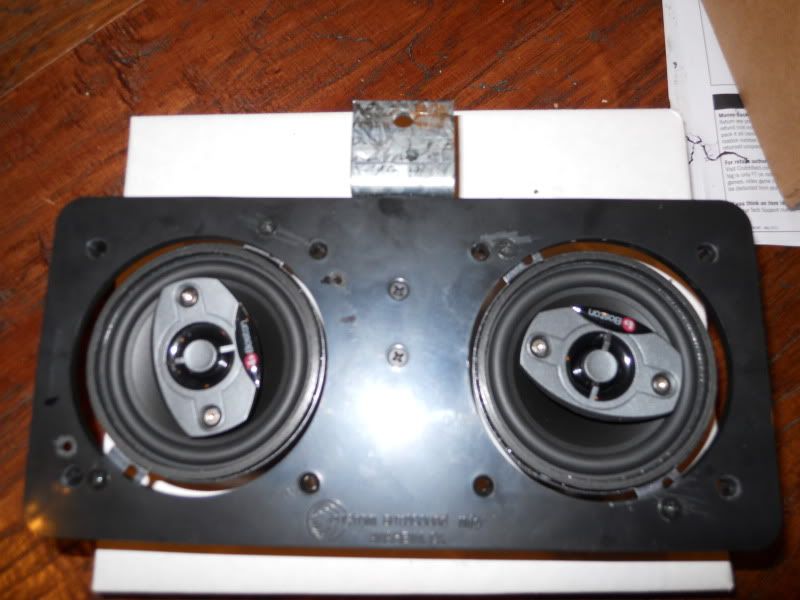 More to follow tomorrow.
__________________
1972 C10 Highlander - The making of a daily driver |
|
|

|
|
|
#5 |
|
Registered User
Join Date: Apr 2003
Location: Indep, MO
Posts: 5,893
|
Re: 1972 Highlander -The making of a daily driver
Before you go further, a tip- Get some foam camper tape. 1/4" x 11/4W. Seal off the gaps around those speakers, then seal the mount to the dash with it. Lots more output. Hope it goes well, and take lotsa pics! I'm gonna do something similar to Boppa's Truck. Good Luck!
__________________
Boppa's Old Yeller Truck Build, Old Yeller's New Heart! Project Buzz Bomb Flyin' Low! |
|
|

|
|
|
#6 |
|
Registered User
Join Date: Dec 2006
Location: SLC, UT
Posts: 706
|
Re: 1972 Highlander -The making of a daily driver
Great truck and great job!
|
|
|

|
|
|
#7 | |
|
US Army Veteran
 Join Date: Nov 2008
Location: Central Texas
Posts: 1,049
|
Re: 1972 Highlander -The making of a daily driver
Quote:
Thank you, Zane! ------------------------ Dash speakers installed. Didn't go quite as planned, took some work to get them in. Magnets hung pretty low. Polished up the center dash area. Added a new chrome center air vent. Installed the Retrosound deck with speaker wires down by the kick panel area, for the new kick panel speaker setup. A "thank you" to John and others, as I used their advice in this thread. I have a face plate ordered, as I purchased this one for my 78, and didn't have one. 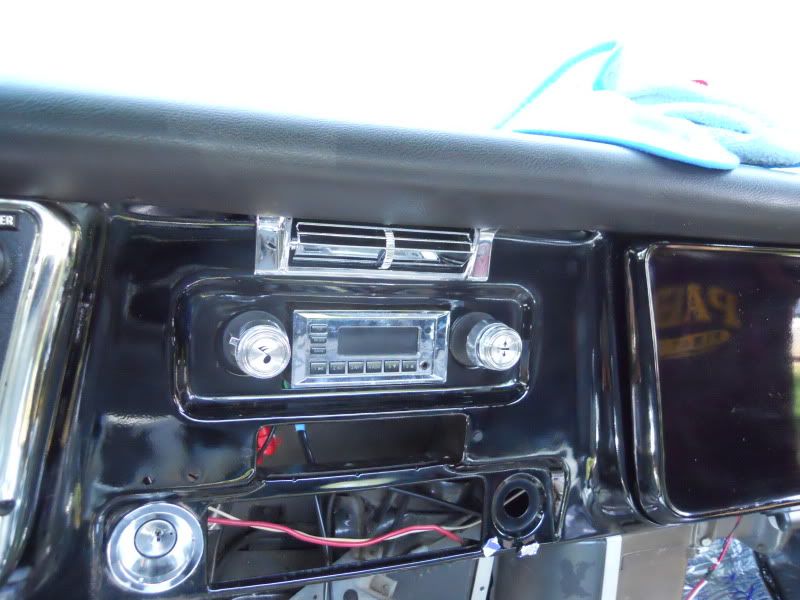 Ordered new vent ducting from Old air products. These seem just like the originals and fit like a glove. 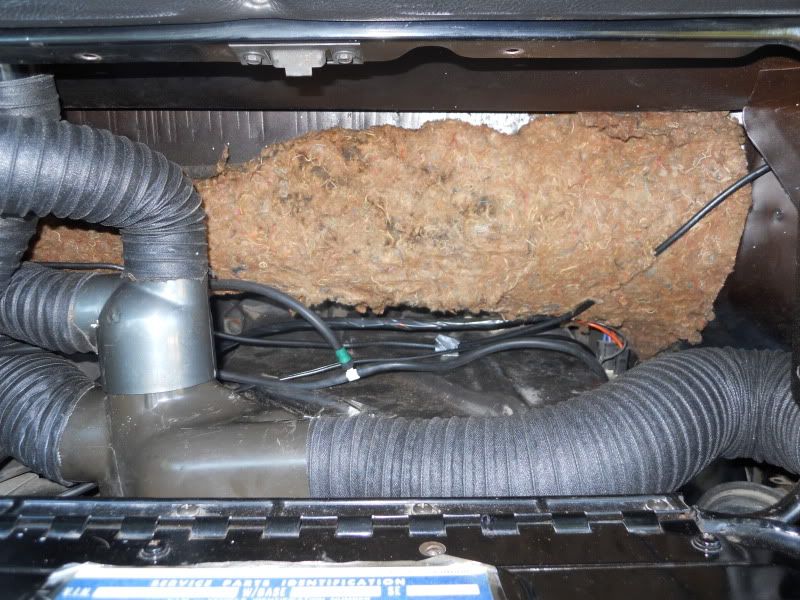 There was no glovebox with the truck. Ordered one, and picked up a glovebox light from Chuck (here on the forum). Installed, came out pretty good! The vacuum lines from the canister and outside vent, and inside vent, were not hooked up. Ran all new vacuum lines. 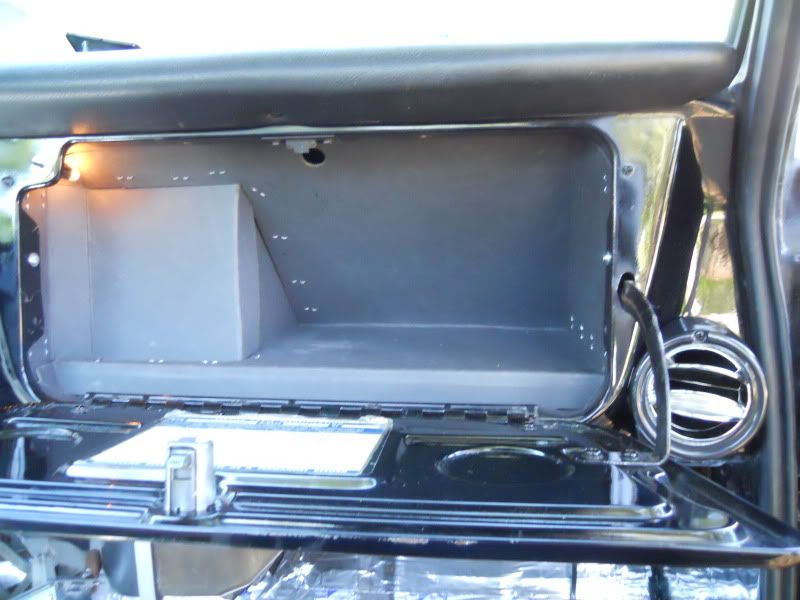 More updates as we make progress.
__________________
1972 C10 Highlander - The making of a daily driver Last edited by BruthaMan; 04-04-2012 at 07:56 PM. |
|
|
|

|
|
|
#8 |
|
US Army Veteran
 Join Date: Nov 2008
Location: Central Texas
Posts: 1,049
|
Re: 1972 Highlander -The making of a daily driver
Another long day. Seems like very step forward is two steps back and having read many threads here over the years, I'm glad it doesn't just happen to me!
We started the day off painting the rally wheels. Wet sanded them a few days ago to the get them nice and smooth. Base coat with argent silver, did the back with black, then three coats of clear. Was tempted to do rattle can, but I have a compressor and paint guns. Just hate the cleanup! 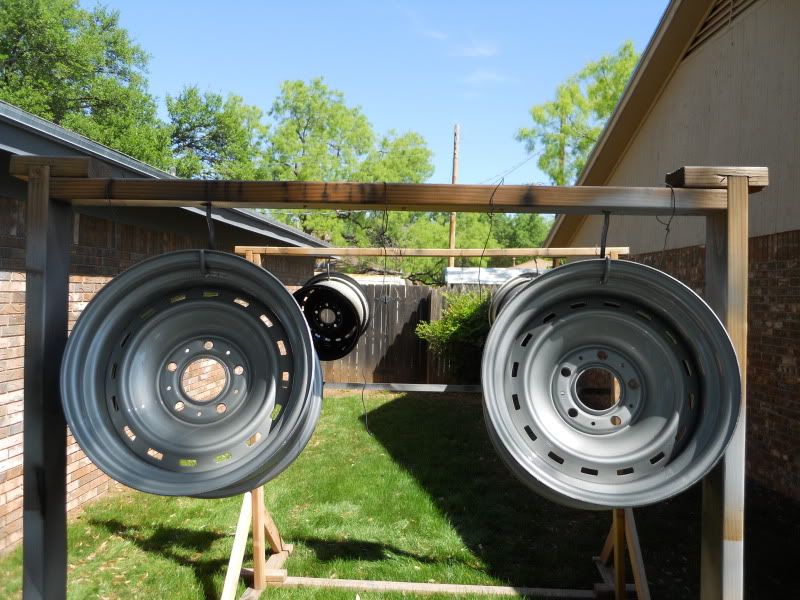 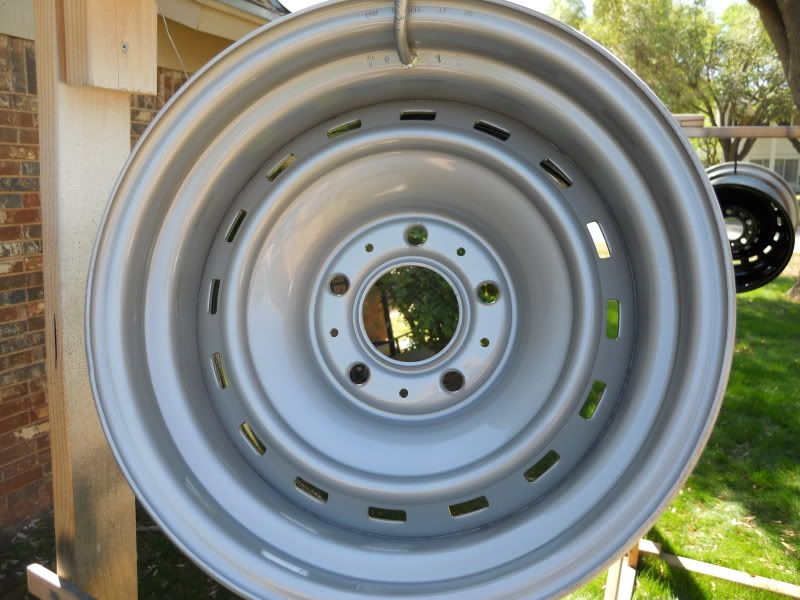 Checked on the ac/heater control, in anticipation of setting up the AC down the road. Posted here, as I'm having all sorts of trouble getting the hookup correct. The fan switch would only work on low. This meant pulling the freshly installed glovebox liner to get at the resistor mounted right behind the glovebox. Why don't I think of this stuff before hand? Temporary loss of cabin pressure! Sent my son to O'Reilly's to pick up a new resistor and drop off the freshly painted rally wheels at Discount Tire for some new paws. 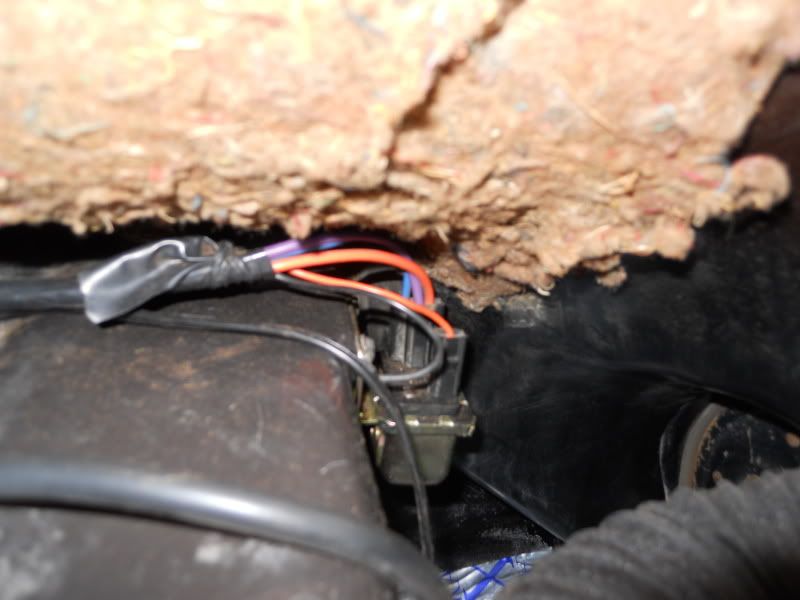 Installed the new resistor, tested the fan, still only low. Took the fan switch out, up to O'Reilly's. Roger spent a good thirty minutes (this is why I like O'Reillys) trying to located a new one. Then asked if I had sent my son up earlier to pick up a new resistor (after he tested the fan switch with an ohm meter). Said he may have given him the wrong resistor. Checked, was pretty sure, ordered a new one, should be in tomorrow. 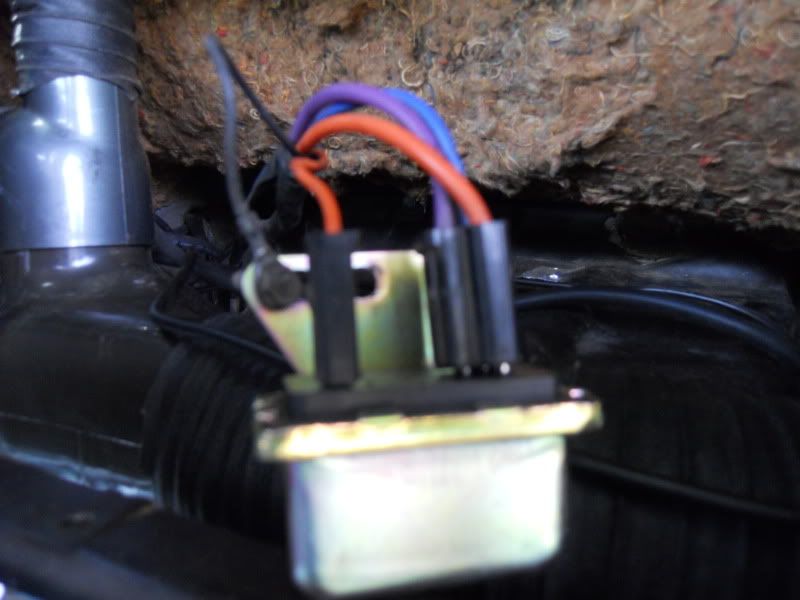 Hopefully that will take care of the fan blower speeds, as it only works on low right now. Picked up the rally wheels from Discount Tire. 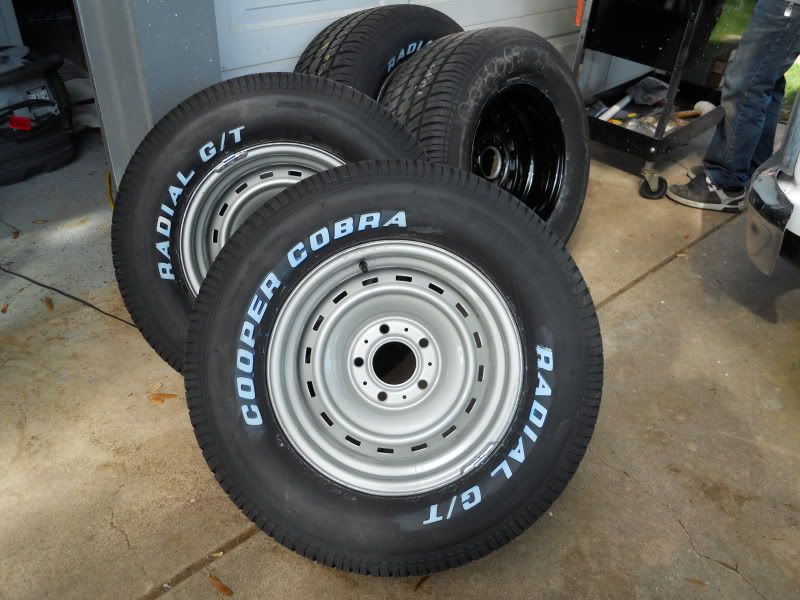 Next, we set out to spray in the bedliner. Mike, the guy that painted my 78, used Gator liner in it and it turned out great, so we picked up this kit from the paint shop when we picked up the paint supplies for the rally wheels. 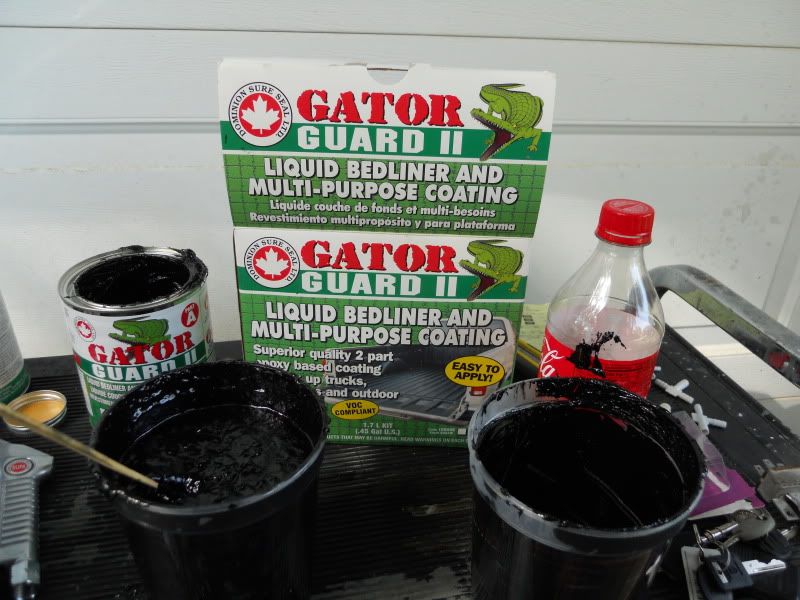 That stuff is nasty. All over my hands. It was like a kid that gets jelly on his fingers, then goes to every counter in the kitchen leaving a trail. We prepped the bed. Power spray, light wet sanding. My youngest son in the pic, spraying out the bed. Oldest son in the background, who stopped by to give "pops" and helping hand today. 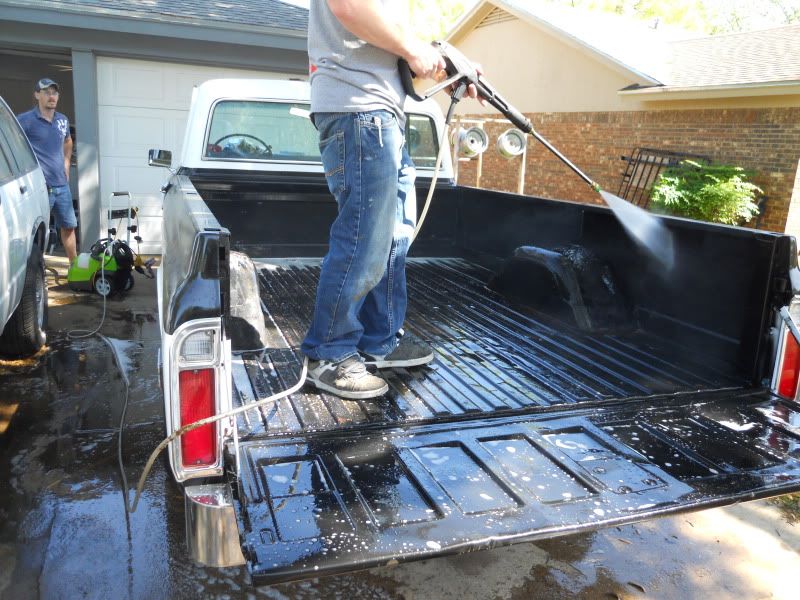 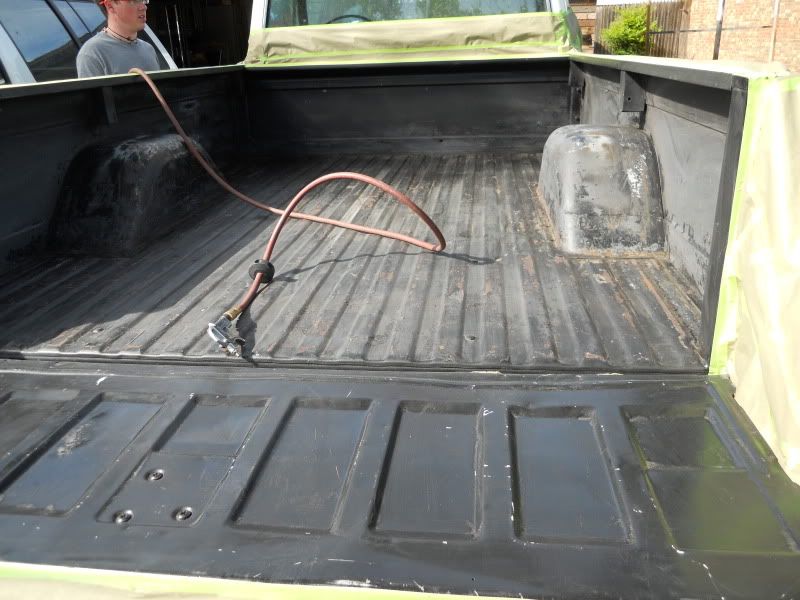 Guy at the paint store said one kit would do the bed. He was wrong. After fussing with this stuff and having the clean out the spray gun multiple times (before finally giving up and thinning it out some with some paint thinner...it's thick as molasses), we got about two/thirds of the bed done. Will have to pick up another kit tomorrow. No good deed goes unpunished seems to be the motto of the day. Good Lord, I'm tired. These twelve hour days are catching up with me. Light, I see light at the end of the tunnel!
__________________
1972 C10 Highlander - The making of a daily driver |
|
|

|
|
|
#9 |
|
US Army Veteran
 Join Date: Nov 2008
Location: Central Texas
Posts: 1,049
|
Re: 1972 Highlander -The making of a daily driver
Started the day off early and picked up another Gator Liner kit. Finished up the bed liner:
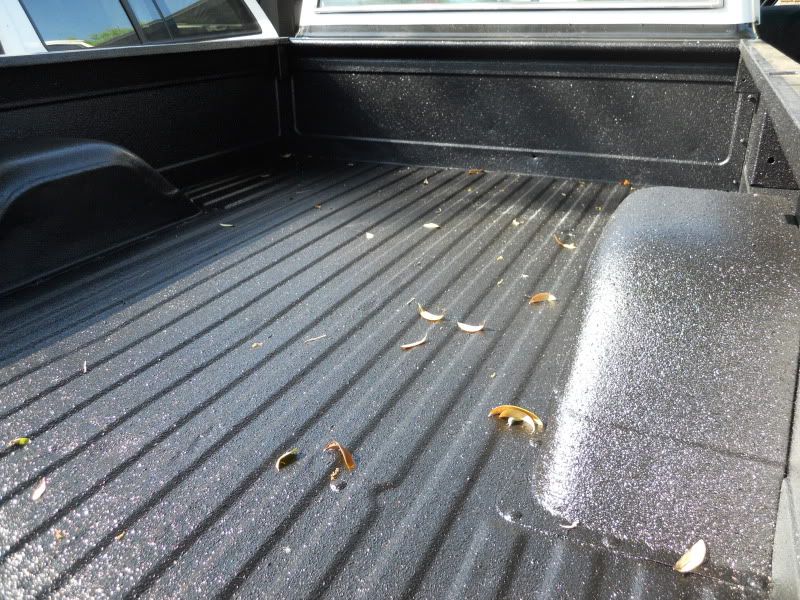 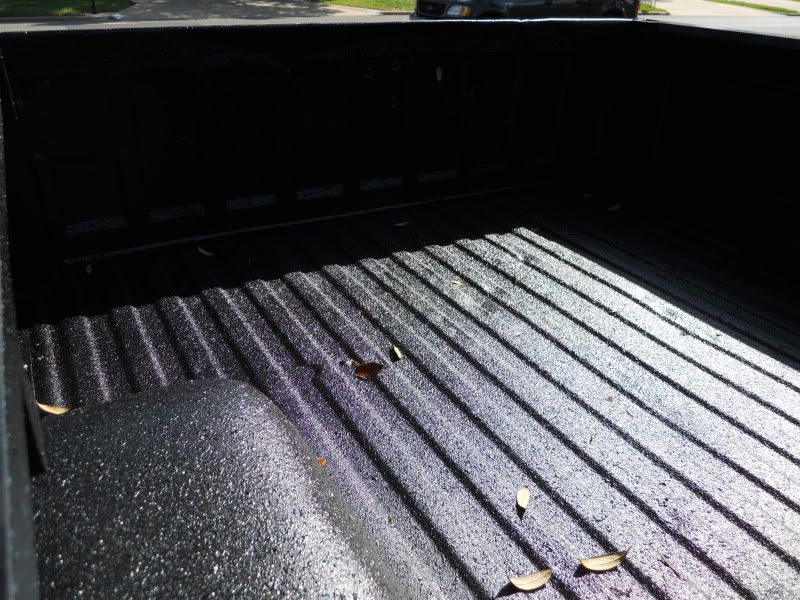 (Oak trees here shed their leaves in the spring and we're right under one on this project) Next, we put on the freshly painted rally wheels with new tires (275/60/15): 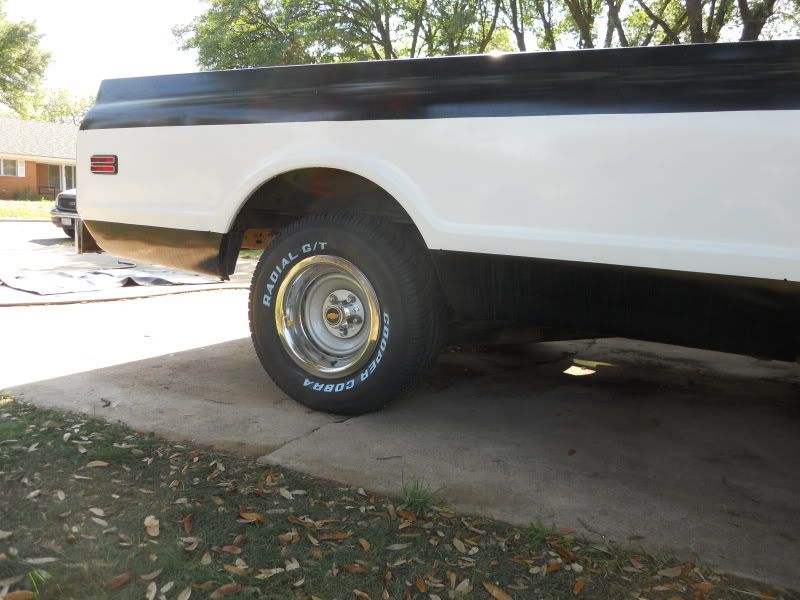 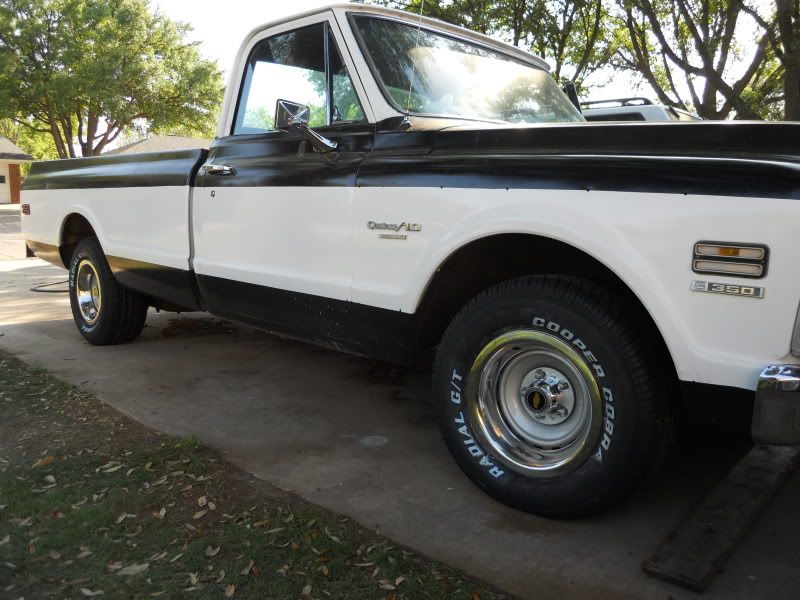 Set the new carpet out in the sun for a while for easy installation: 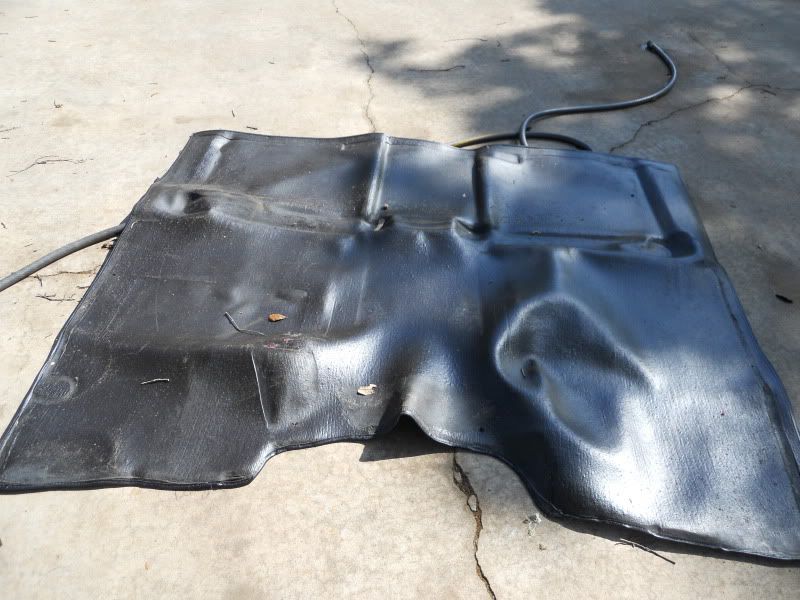 Few pics of the cab with fatmat: 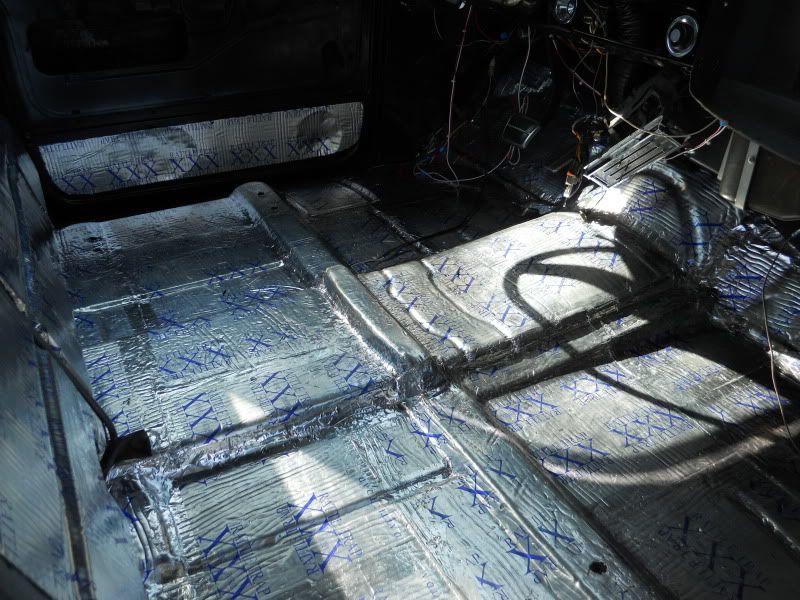 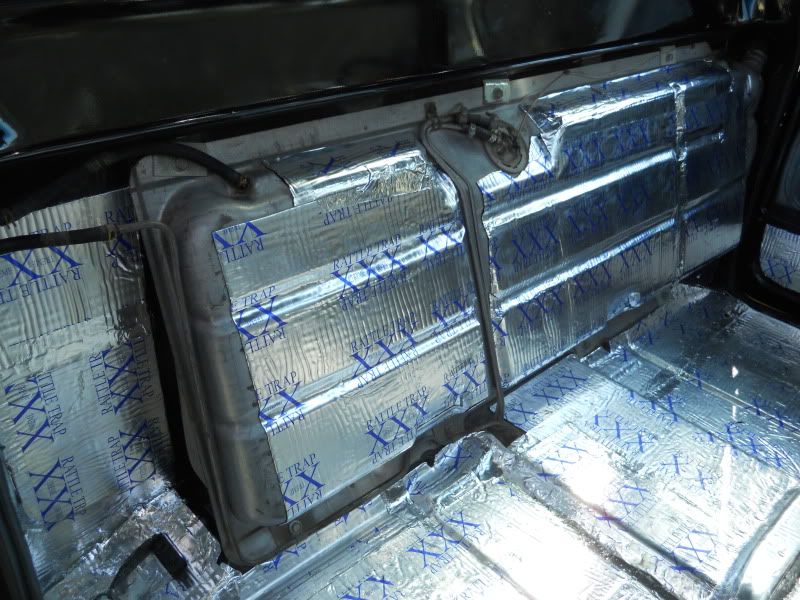 Have a gas tank carpet kit on order from LMC. Laid in the jute matting with some spray glue: 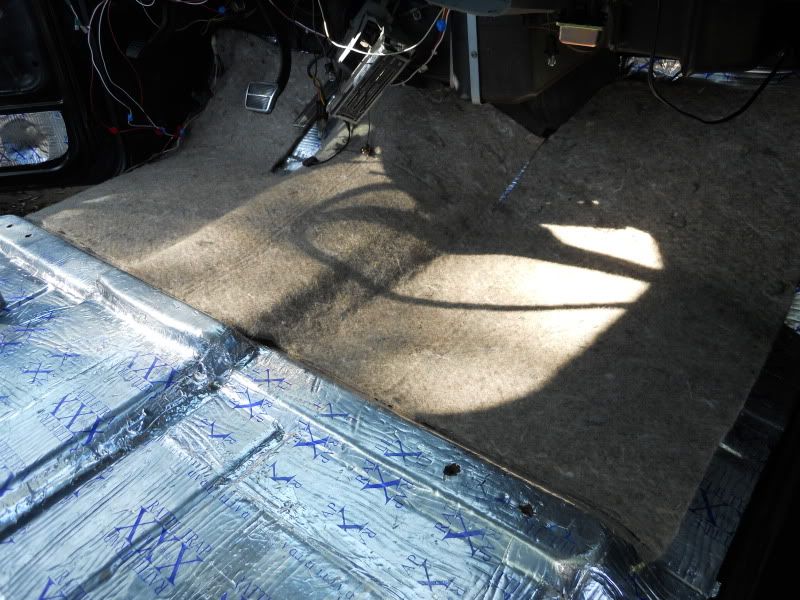 Next the new black carpet (from ACC): 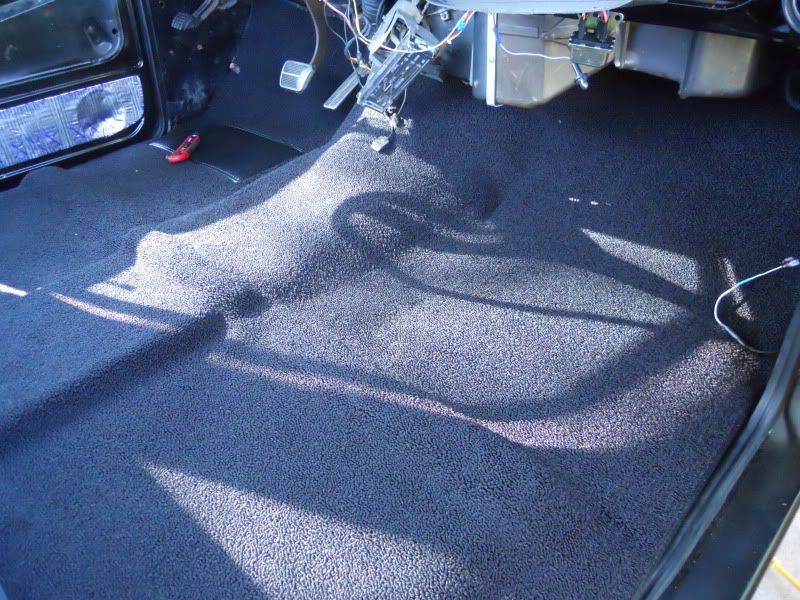 Oh yes I did! Couldn't resist big foot: 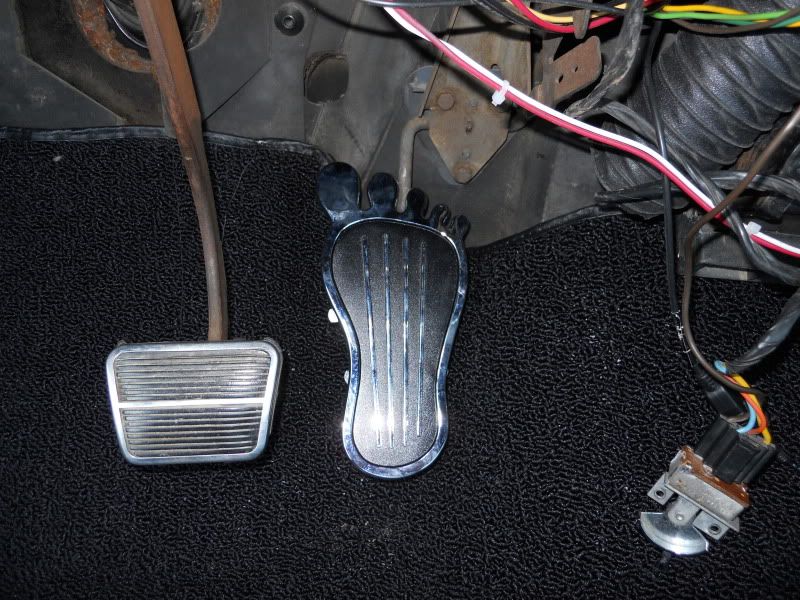 Still trying to get the fan switch to work. Works on one speed. Received some good advice in the post here, installed new blower resistor, no luck. Took the fan switch apart and cleaned up the contacts with a wire wheel. Going to run a the ground on the relay to the ground post on the battery terminal tomorrow with heavy gauge wire to see if maybe it's a ground issue. Running out of ideas and it's already get pretty hot here.
__________________
1972 C10 Highlander - The making of a daily driver |
|
|

|
|
|
#10 |
|
Registered User
Join Date: Apr 2003
Location: Indep, MO
Posts: 5,893
|
Re: 1972 Highlander -The making of a daily driver
Several things- 1. Looks good with the new paws! Wanting to 8-10, 255-275 myself.
2. Get a good heavy gauge wire and go straight to the "HI" tab from the battery. Do not pass go, etc... The hi wire in my 87 LOOKED good, come to find out the stud in the block under it had damn near melted and had no connection. LOOKED just fine. Also, see if you have hot to the switch from where the arm slides onto the contacts. Get a light/meter and see what's up with the hi wire, I bet you got nuthin. Give it a shot. You're doing great! 3. I saw that you're shooting that liner with a standard gun. Oy Vey! Go to the car paint store and ask for a Schutz (shoots) gun. Get a bottle if you need it. It's designed to shoot undercoating, etc. and makes that job child's play. Not even expensive. Again, looks great!
__________________
Boppa's Old Yeller Truck Build, Old Yeller's New Heart! Project Buzz Bomb Flyin' Low! |
|
|

|
|
|
#11 |
|
VA72C10
 Join Date: Mar 2008
Location: Midlothian, VA
Posts: 25,267
|
Re: 1972 Highlander -The making of a daily driver
Looks great! Nice work upgrading/improving an already nice truck
Posted via Mobile Device
__________________
Looking for a 67-72 swb or blazer project in or around VA. 
|
|
|

|
|
|
#12 |
|
Registered User
Join Date: Sep 2011
Location: Hilo, Hawaii
Posts: 1,051
|
Re: 1972 Highlander -The making of a daily driver
Lookn good!!! I need to get crackin on my interior! If I only had time.........................
__________________
Frank (Hilo, Hawaii) Trucks, Tacos, and Beer go together like Peanut Butter and Ladies!  85 C/10 SOLD http://67-72chevytrucks.com/vboard/s...d.php?t=760383 67 C/10 SOLD http://67-72chevytrucks.com/vboard/s...d.php?t=489298 79 K5 Blazer SOLD http://67-72chevytrucks.com/vboard/s...d.php?t=657461 |
|
|

|
|
|
#13 |
|
high-Tech Red Neck
Join Date: Feb 2008
Location: Livingston, MT/On my boat WA/BC/AK
Posts: 2,294
|
Re: 1972 Highlander -The making of a daily driver
Man you scored on that truck, it looks nice.
A thought I have on the outside since it appears there are no holes for the trim, instead why not do a nice pin stripe in a contrasting color like red to break the line, I think it would look really nice.
__________________
"He used to be a pretty nice feller, now he's a welder!" |
|
|

|
|
|
#14 |
|
Registered User
Join Date: Apr 2008
Location: Oregon City, Oregon
Posts: 741
|
Re: 1972 Highlander -The making of a daily driver
"After my first project, Pancho Villa, I swore I'd never do it again. I'm a software developer for crying out loud, not a mechanic <slash> paint and body man <slash> car guy."
Your're a (all of the above) and work just get's in the way at times (like the rest of us). Nice job! |
|
|

|
|
|
#15 | ||||||
|
US Army Veteran
 Join Date: Nov 2008
Location: Central Texas
Posts: 1,049
|
Re: 1972 Highlander -The making of a daily driver
Quote:
The ac/fan switch lit the light up on each setting. Baffled by this, I took some sand paper to the blower motor connector, then sacrificed one of my wife's nail files, ground it down, and super glued some 100 grit sand paper to it, and cleaned up the contact in the blower motor pigtail. Hooked it back up, and voila...fan works on all settings! Was really surprised that's all it was...blower motor connector just needed contacts cleaned up! Quote:
Quote:
Quote:
Quote:
Quote:
------------------------------------- Pic wise, it was a rather uneventful day. Low Elco's suggestions above sparked some ideas and finally got the fan/blower working! I couldn't leave well enough alone though. The levers on the ac control were not sliding very well at all. Was afraid I'd put too much pressure and break something, so while there, I took each lever cable off, one at a time, and soaked it in PB Blaster. Squirted a little at a time, down the cable, till it started coming out the other side. When I got to the last lever, the one that connects to the back of the heater unit, I noticed a resistor of some sort there. Pulled it out and going to see if I can get a replacement for it. Man, it's hard to get back there! I'm going to pay a heavy price (soreness) tomorrow for all the twisting my body did to get to the back of the heater box! The ac levers move very well, now that they've been lubed.
__________________
1972 C10 Highlander - The making of a daily driver |
||||||
|
|

|
|
|
#16 |
|
Registered User
Join Date: Apr 2003
Location: Indep, MO
Posts: 5,893
|
Re: 1972 Highlander -The making of a daily driver
Cool! Glad something worked for somebody, bakes me feel better about burning a whole damn Sat-day chasin' my tail! A little time on those levers makes you feel good, too. Glad it's coming along. We need burnout pics!
__________________
Boppa's Old Yeller Truck Build, Old Yeller's New Heart! Project Buzz Bomb Flyin' Low! |
|
|

|
|
|
#17 |
|
US Army Veteran
 Join Date: Nov 2008
Location: Central Texas
Posts: 1,049
|
Re: 1972 Highlander -The making of a daily driver
Few more updates:
Installed Retrobelt three-point belts for driver/passenger side. Want to make sure whichever grandchild is riding with me, that they are safe. 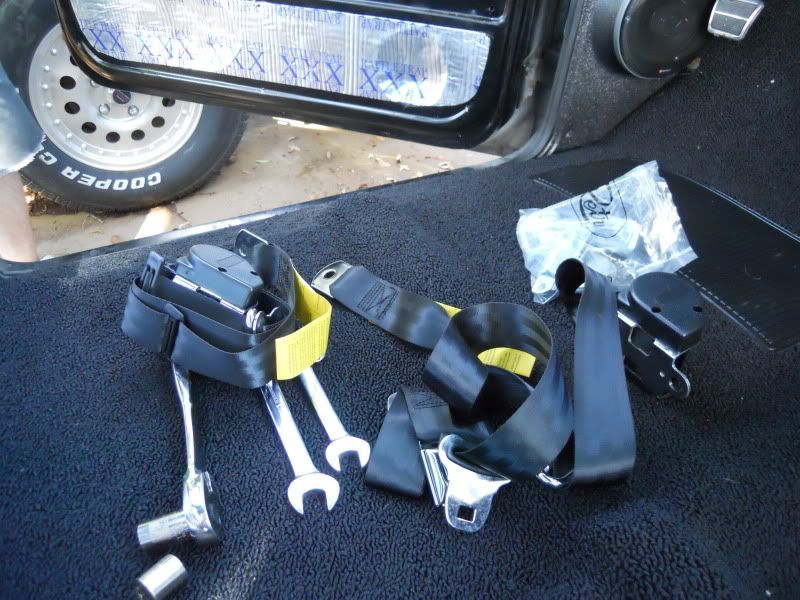 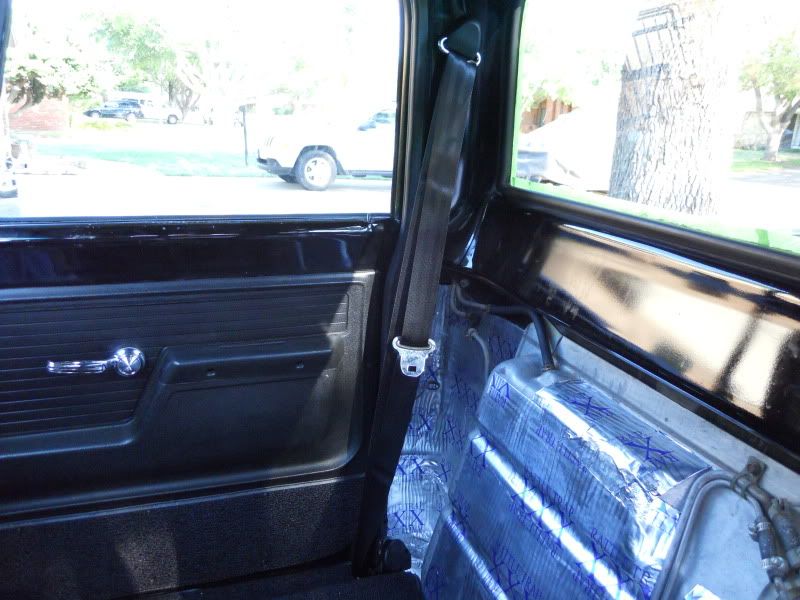 Boston Acoustic 6.5's installed with kick panels. Had to do some trimming on both panels to fit. Wonder if people that make these ever installed a set? Once the kickpanels were trimmed and test fitted, used it as a template to cut out two sheets of fatmat. Installed one on the kick panel "area" and another on the back of each kick panel, since we have quite a bit left over (ordered two rolls, 100 ft). Moved the emergency brake over about 1.5 inches to clear the driver kick panel with plenty of room. State inspection here requires emergency brake to work and don't want any hassle at renewal. 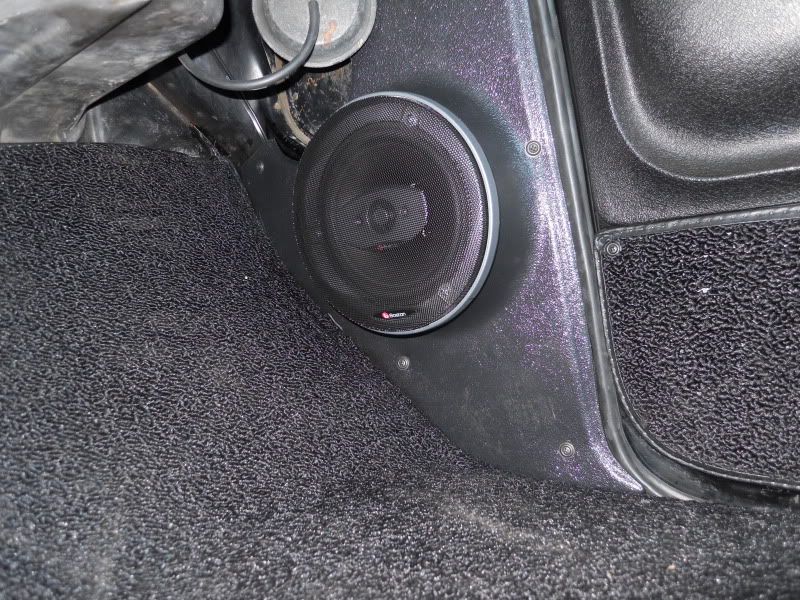 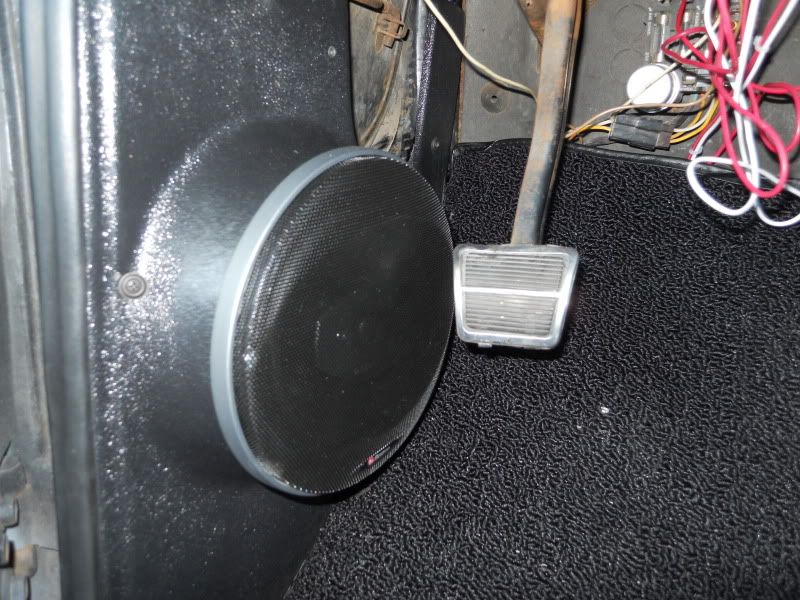 Have to admit, the Retrosound deck and these speakers really sound good. I have an Alpine deck and JL Audio amp and speakers in my '78. Received a mail for a political donation that had this flag in it. Had already donated, and cannot toss out something so dear to me, so decided to find a place in the truck for it. 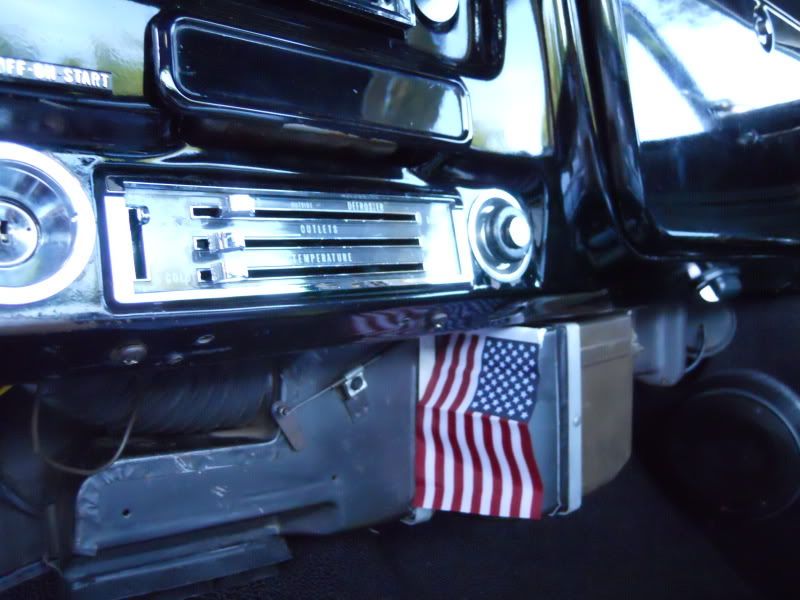 Polished out the glass on the rear window. It had a ton of grime and apparently some overspray from the bed liner. Use glass cleaner and a razor blade on the outside, then polished it up. Tried a few different glass polishes, but I like the 3m rubbing compound best. Really cleaned the window up good. 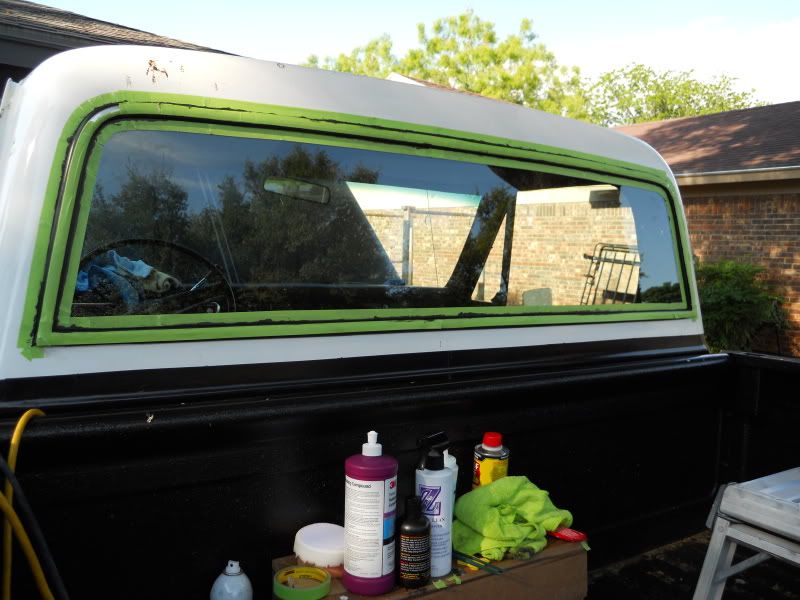 The rubber seal on the back window had overspray from the poor paint job. I mentioned this product earlier in the thread:  It really brings back the black on rubber and plastic. Taped off the window and applied "forever black" around the rubber seal: 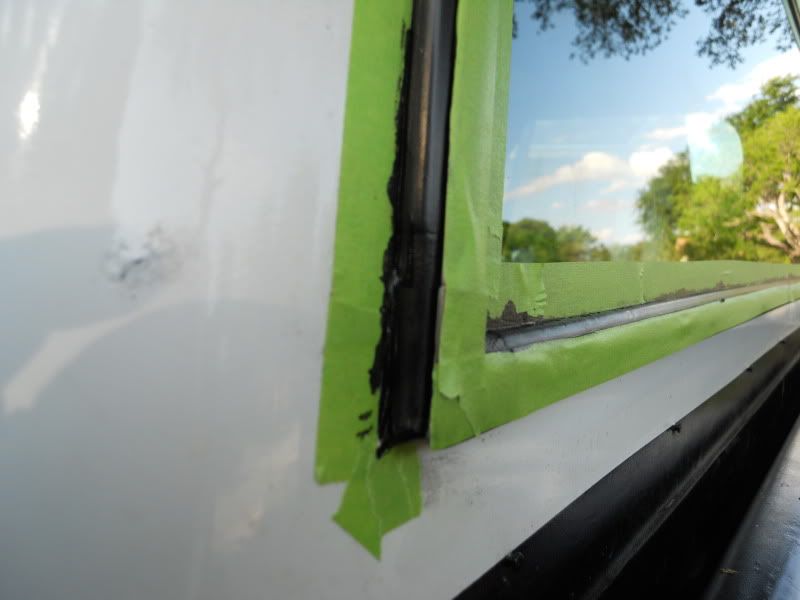 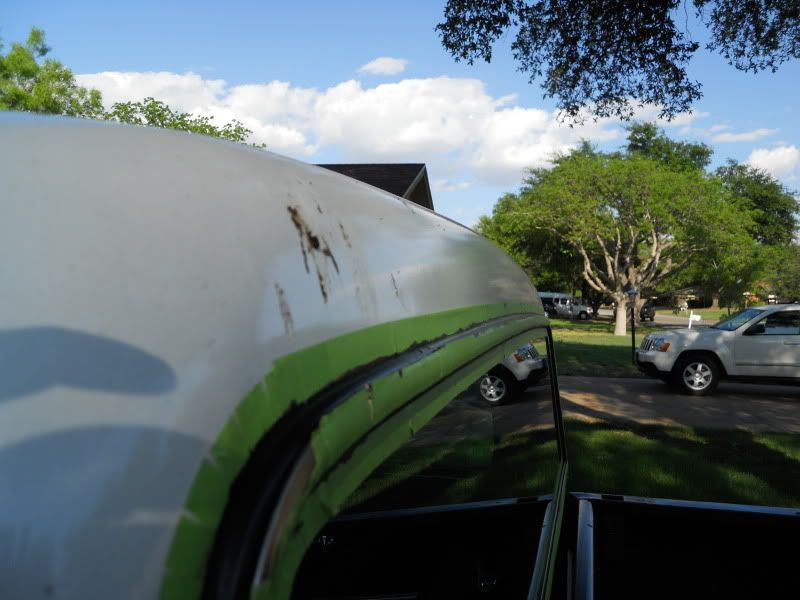 Yes, that's a "bird bomb" just above the window. I may wet sand the truck later on to see if I can bring some shine to the paint job. Center seat belt. Applied some "forever black" to it, small foam brush. 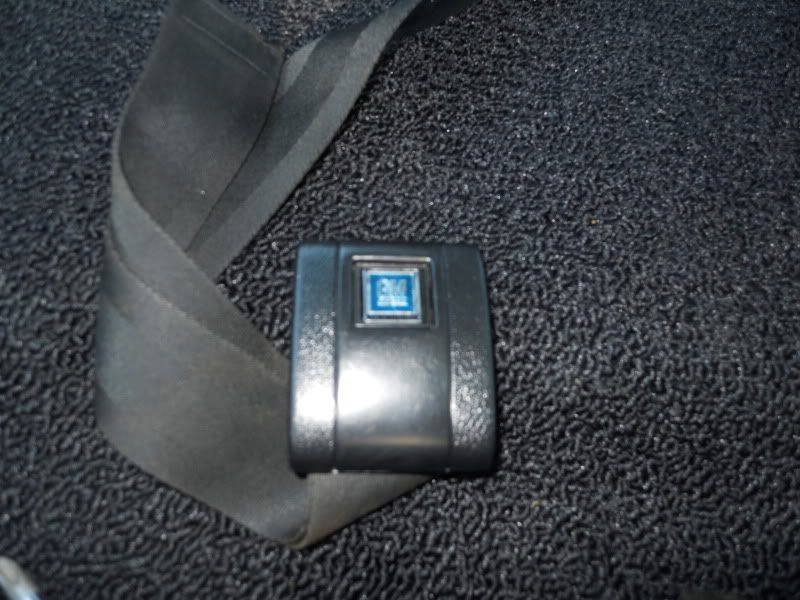 Was going to save this next photo till the end, but waiting on new seat covers so we can install the seat. Received word today they won't be shipped till next week and also have some AC parts on order to get the AC working, so we're in standby mode. 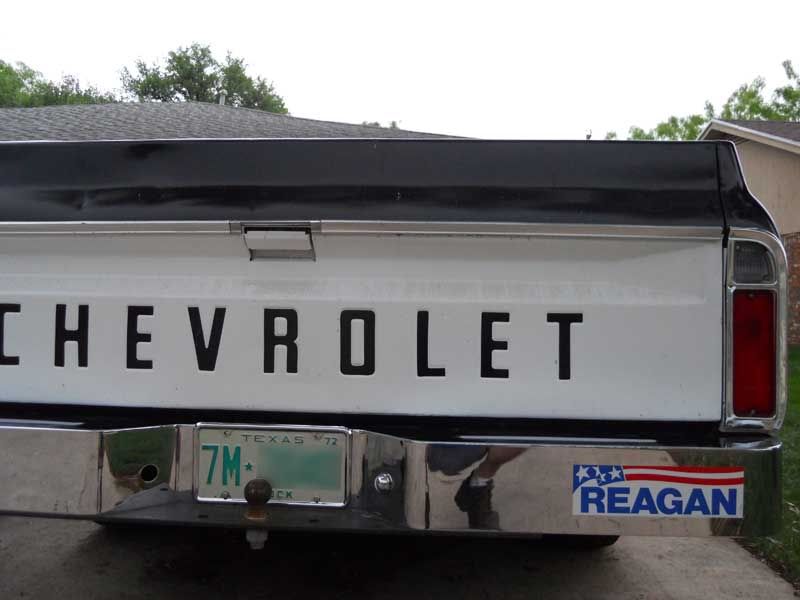 Since we cannot discuss politics here (and I really don't have the desire to and respect that decision), I'll just say "a picture is worth a thousand words." My favorite upgrade on the truck!  Picked up the '72 plates when I first bought the truck and registered/tagged the truck with them. No hassle when registering the plates. Also got the 67-72 face plate in for the Retrosound deck and installed, but didn't get a pic of it yet. More to follow as remaining parts come in. I could use a few days of rest!
__________________
1972 C10 Highlander - The making of a daily driver |
|
|

|
|
|
#18 |
|
VA72C10
 Join Date: Mar 2008
Location: Midlothian, VA
Posts: 25,267
|
Re: 1972 Highlander -The making of a daily driver
Looking nice!
__________________
Looking for a 67-72 swb or blazer project in or around VA. 
|
|
|

|
|
|
#19 |
|
Registered User
Join Date: Apr 2003
Location: Indep, MO
Posts: 5,893
|
Re: 1972 Highlander -The making of a daily driver
Looks great! Thanks for the speaker write up, we're aiming that way.
Posted via Mobile Device
__________________
Boppa's Old Yeller Truck Build, Old Yeller's New Heart! Project Buzz Bomb Flyin' Low! |
|
|

|
|
|
#20 |
|
US Army Veteran
 Join Date: Nov 2008
Location: Central Texas
Posts: 1,049
|
Re: 1972 Highlander -The making of a daily driver
Getting closer to having the truck back on the road. This is week five, since I've had the truck and getting it where I want it to be a daily driver.
When I bought the truck, the PO had a new compressor on, but not hooked up. New dryer as well. Was missing connection tubes from the evaporator, so I ordered those online along with a new expansion valve. AC is a must here central Texas. Had to pull the battery/tray out to get these in: 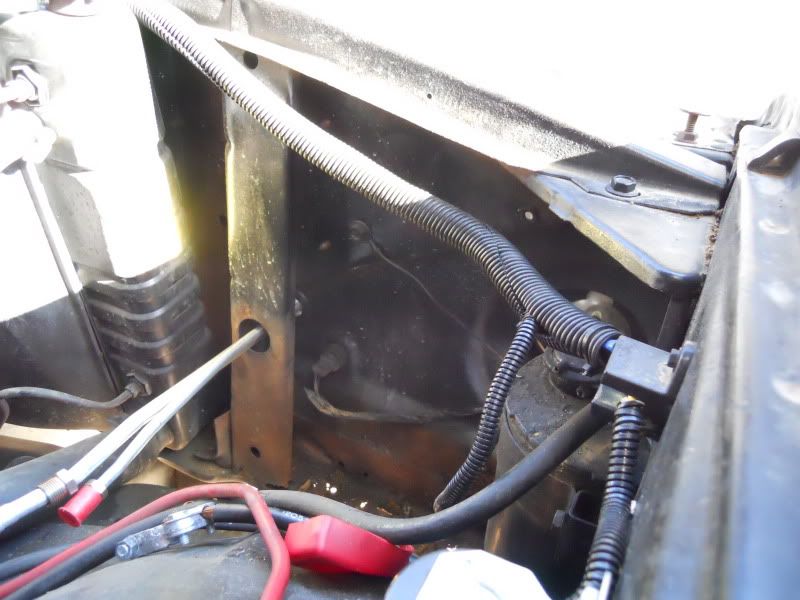 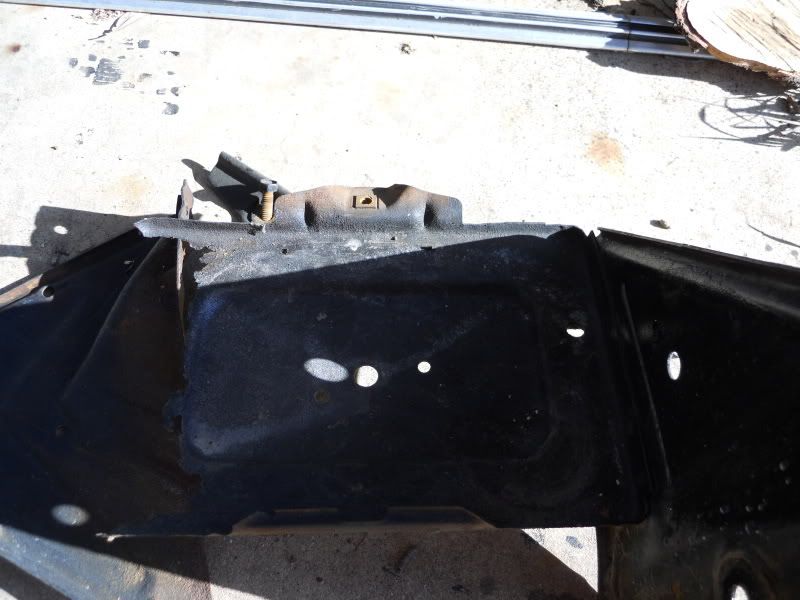 Battery tray was pretty rough, so I ordered a new one. Man, I'm tired. This is a lot more work than I thought it would be (project). My old body aches at the end of the day, far more than what Tylenol can fix. Days are long, but reward is on the horizon. New heater shut-off valve (didn't have one). As hot as it gets here in San Angelo, figured it might be worth adding. 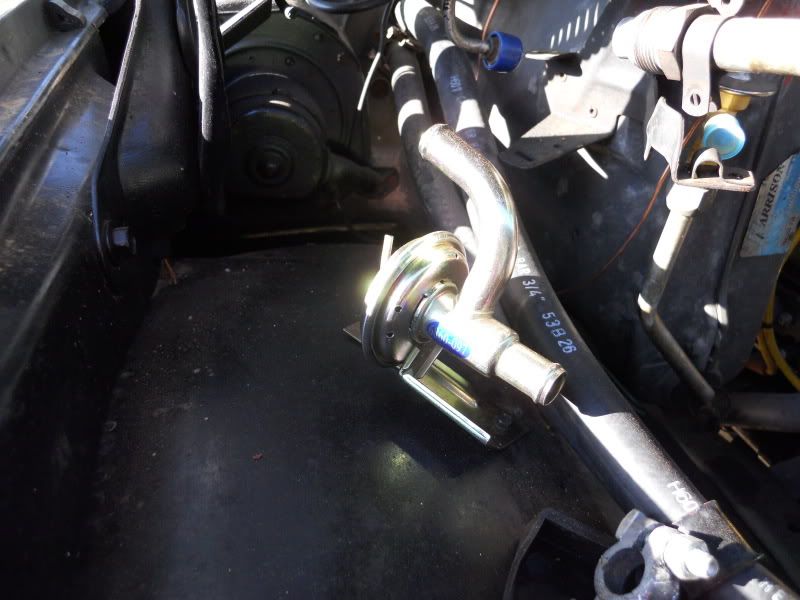 New expansion valve installed: 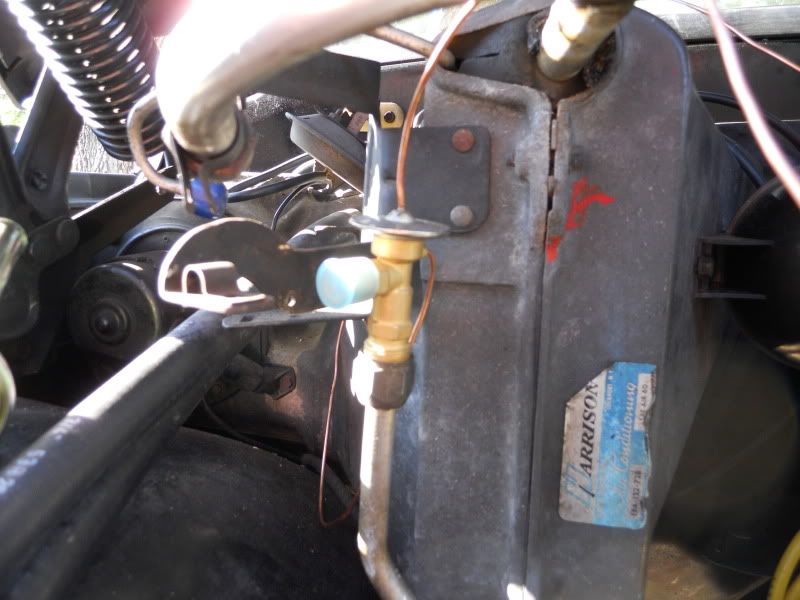 New dryer installed: 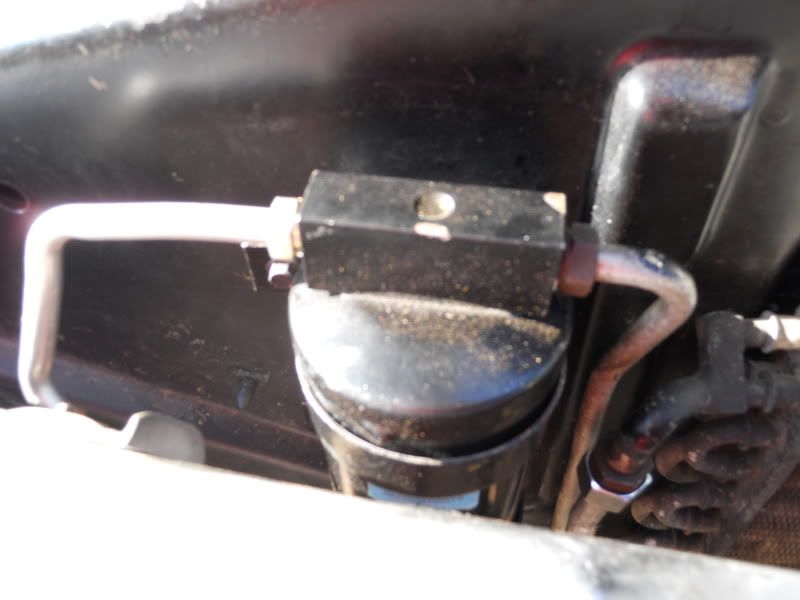 POA valve had been stripped/polish by PO. Was already showing very minor rust on exterior, so I cleaned it up, tapped it off, primed and painted: 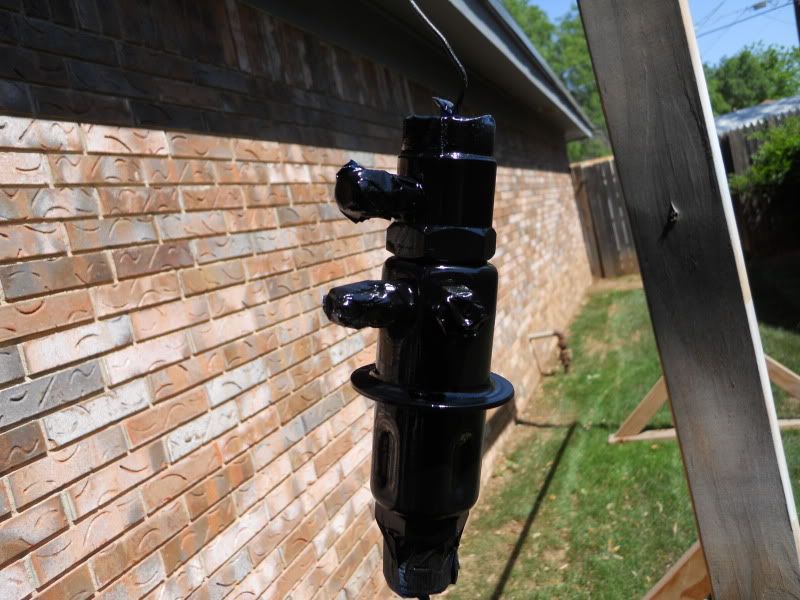 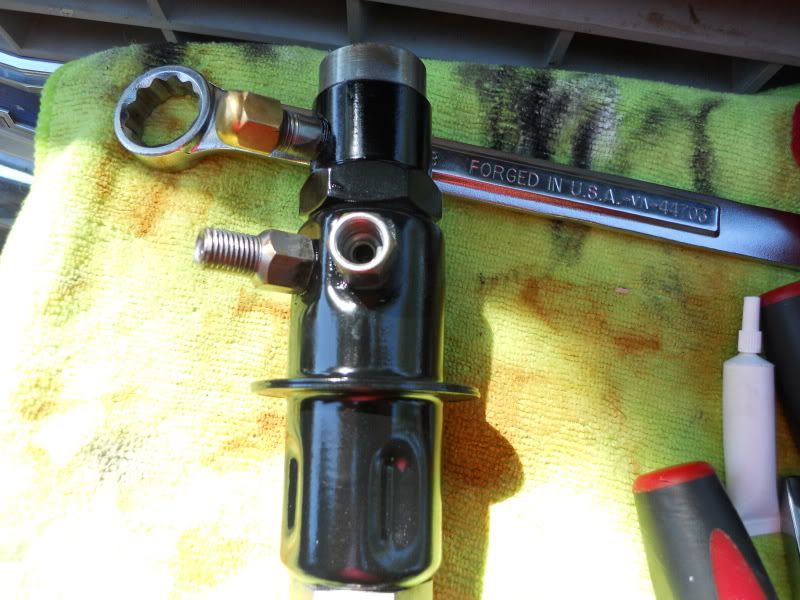 Emptied oil from new compressor. Flushed the system thoroughly, multiple times, with AC flush: 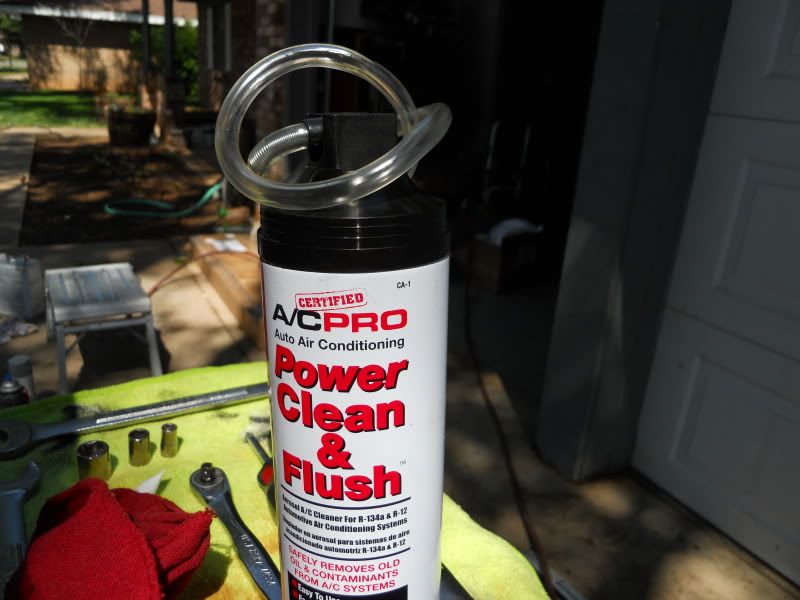 Used three cans of the flush (it's expensive, but I want to get this right and not have to deal with it again down the road). Flushed the compressor as well, then refilled with 10 oz of oil. Used air hose to blow out all the flush. New orings in everything AC related, with oring oil. Here's a shot after everything was hooked back up: 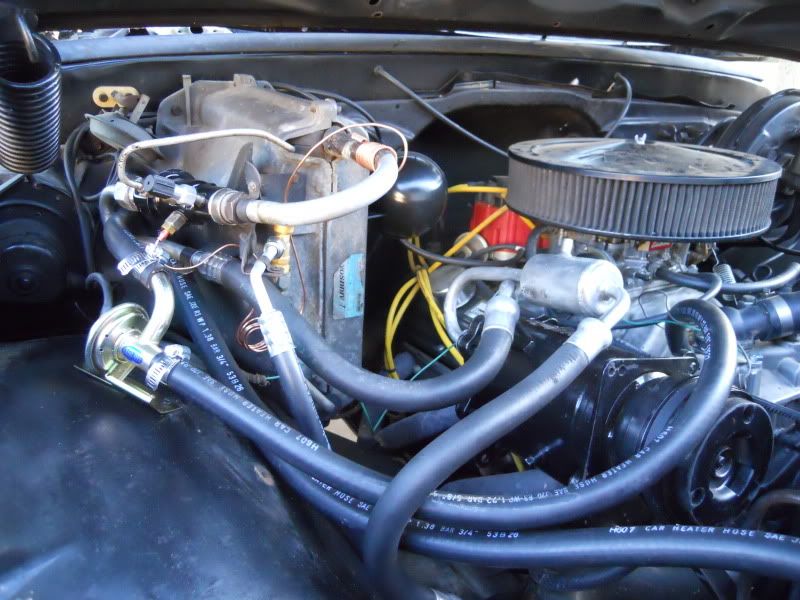 Everything is setup and ready to pull vacuum on it tomorrow and get the system charged. My youngest son (23) and a friend of his have been helping on the project. New seat covers came in, doing a test fit: 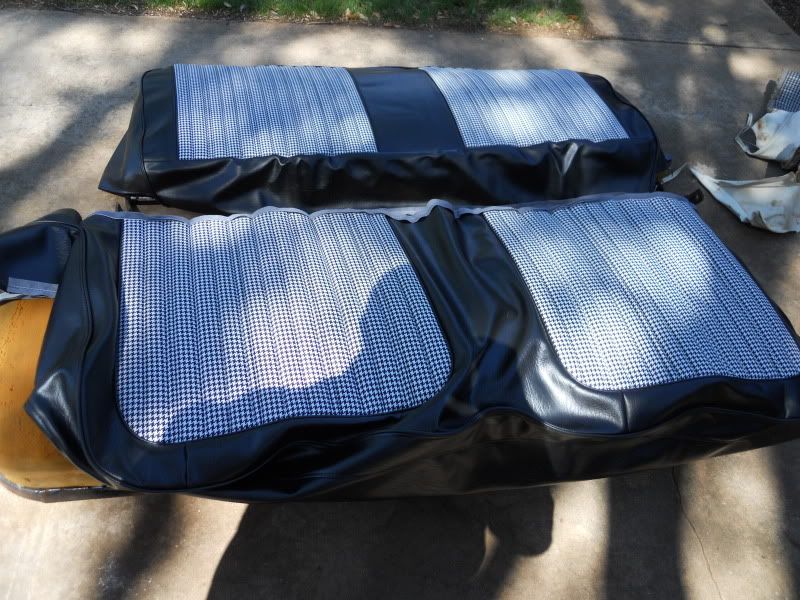 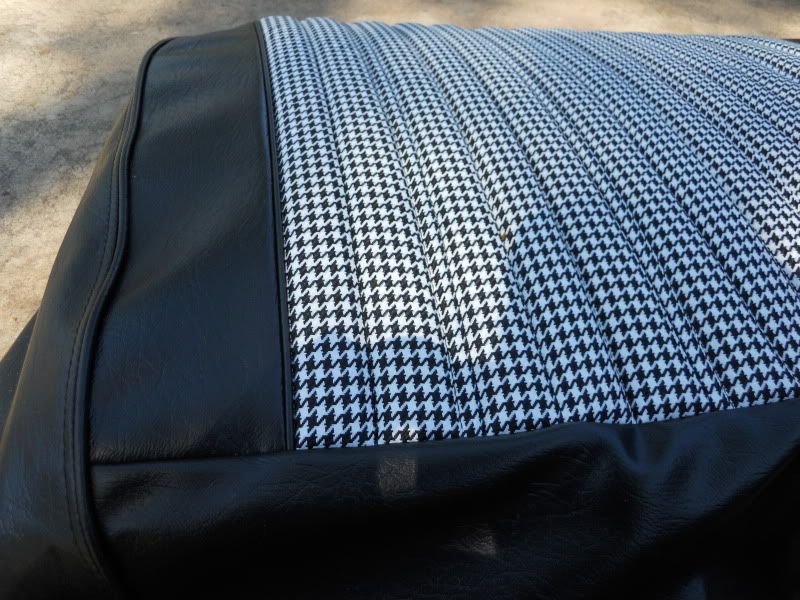 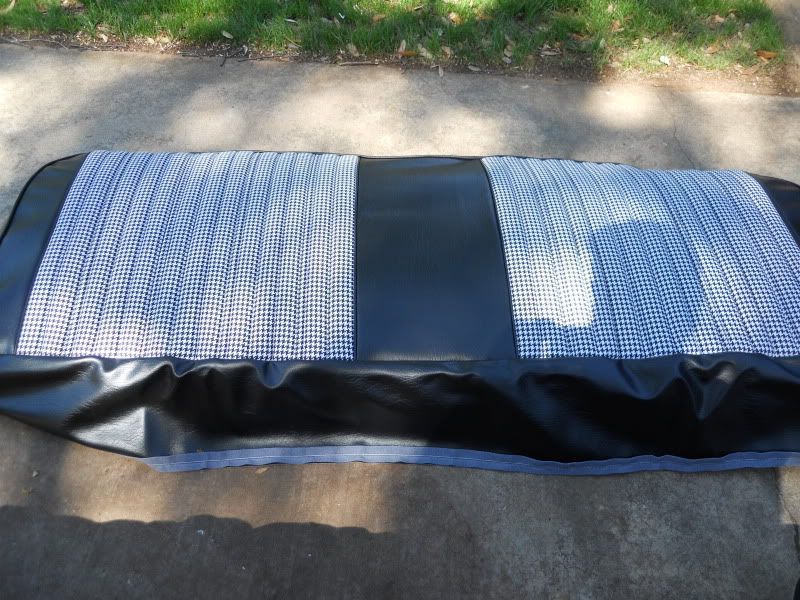 And some more shots after fully covered, with hogrings: 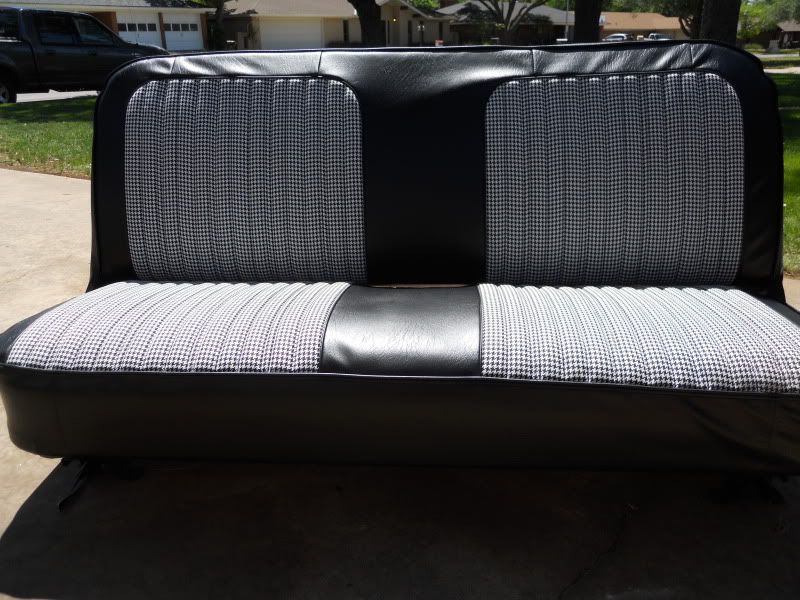 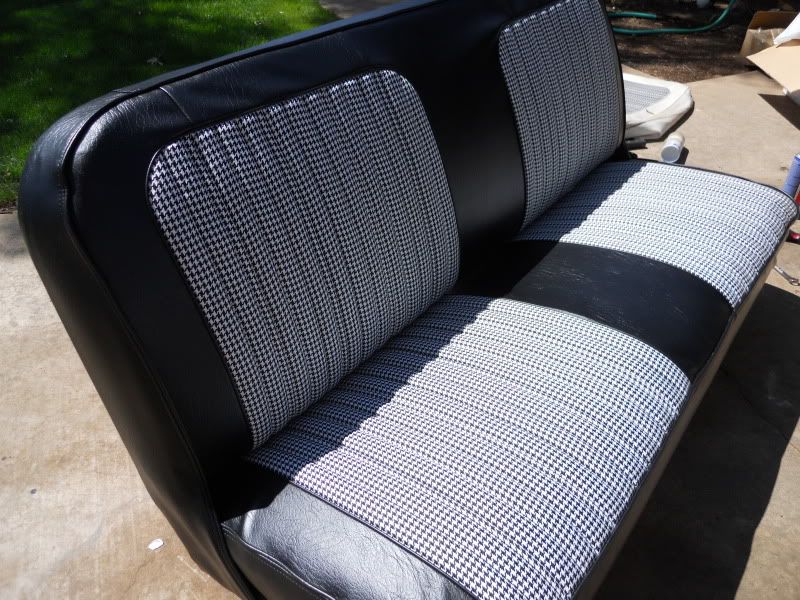 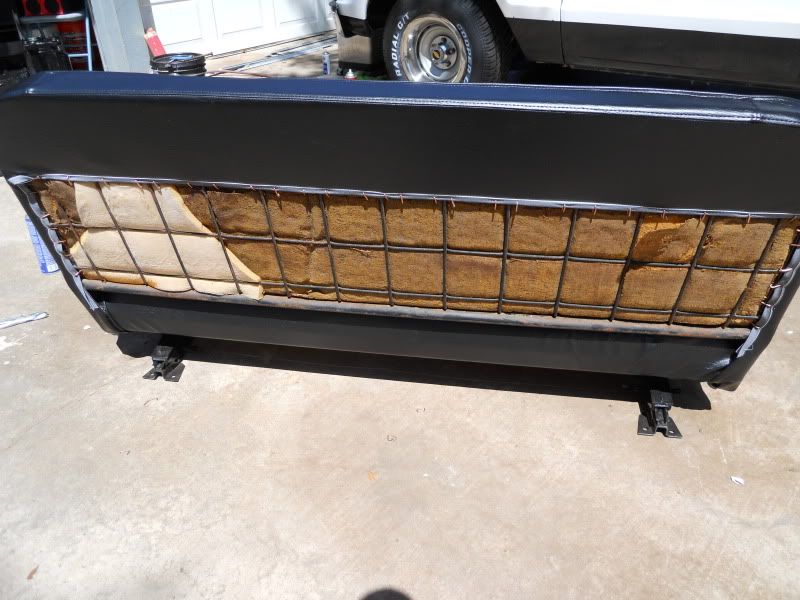 These really came out nice. My thanks to Tim (Truckseats - supporting vendor here) for these, very pleased with the covers. And finally, seats installed back in the truck: 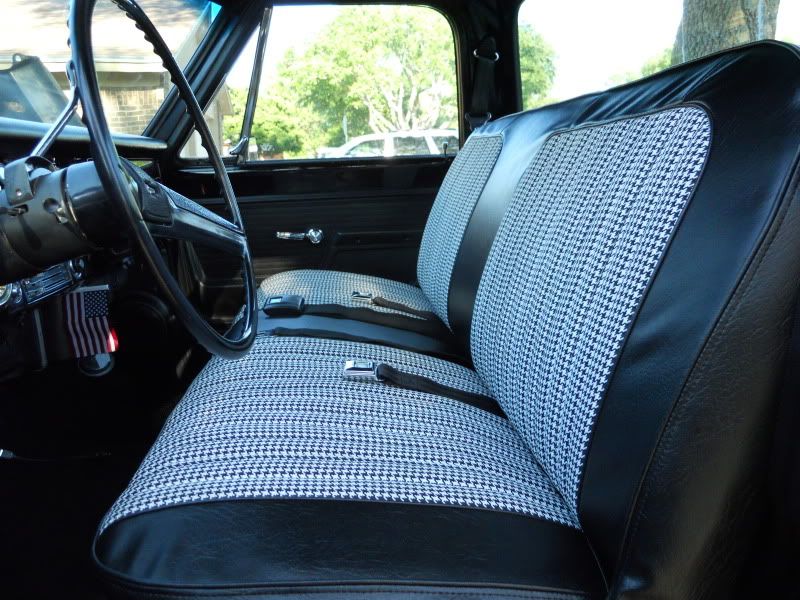  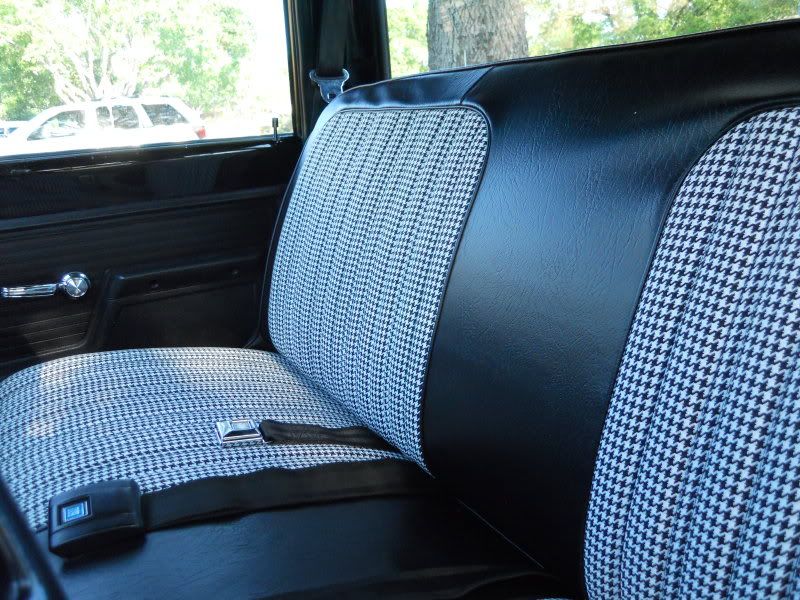 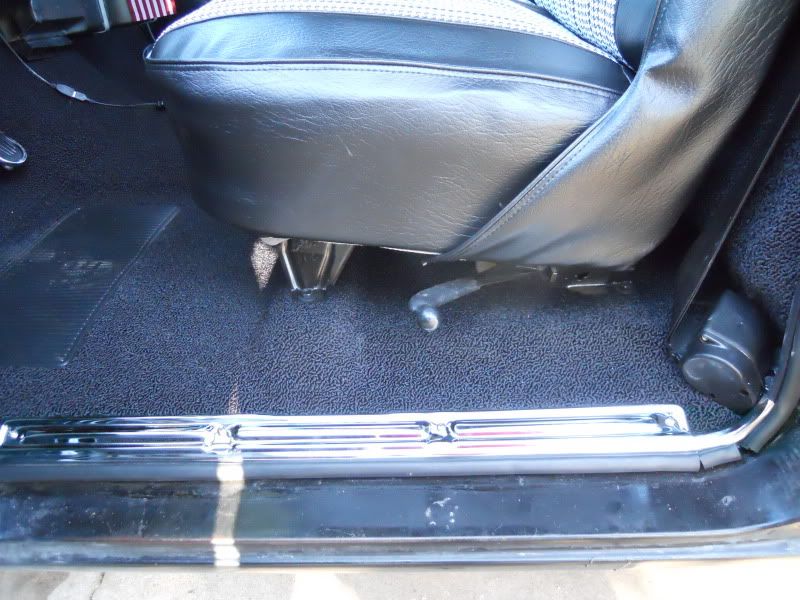 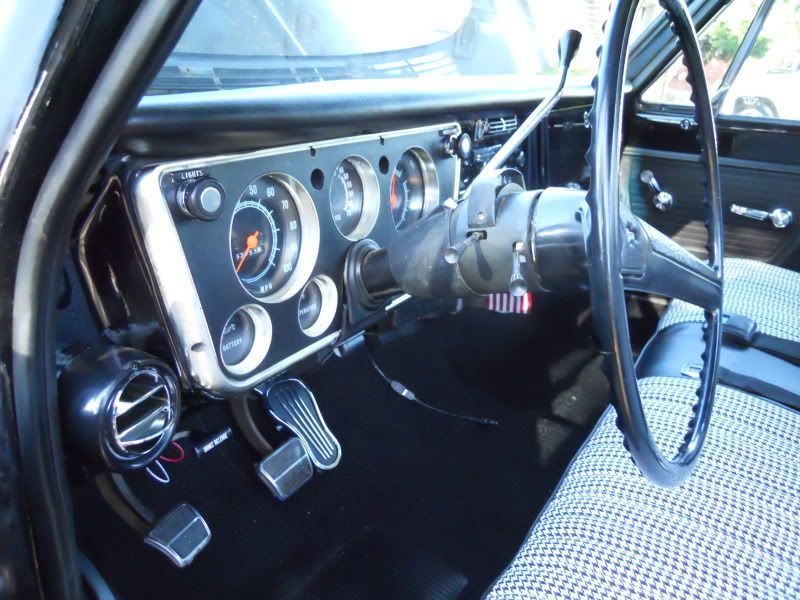 Bought side trim and a spare tire carrier from Randy (teeitup - here on the forum) and it arrived today: 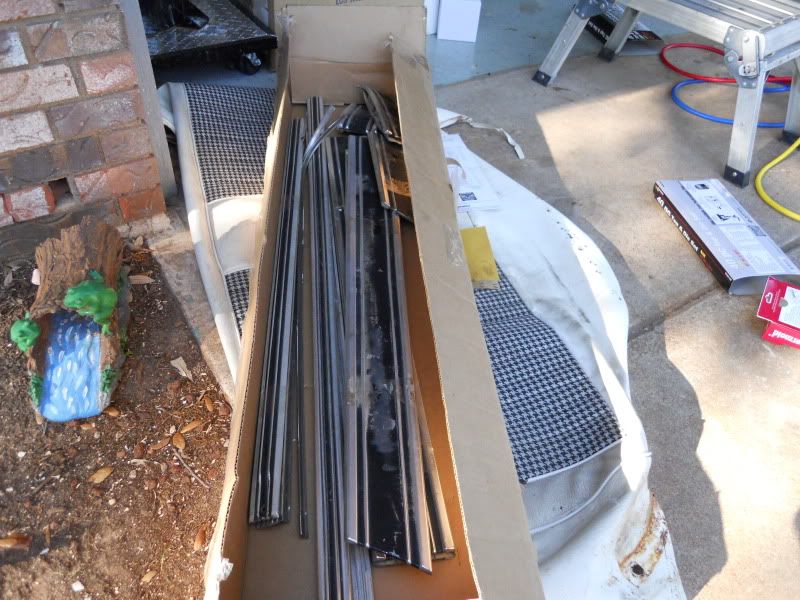 Lot's of progress. Should be able to start driving tomorrow or Friday at the latest.
__________________
1972 C10 Highlander - The making of a daily driver |
|
|

|
|
|
#21 |
|
VA72C10
 Join Date: Mar 2008
Location: Midlothian, VA
Posts: 25,267
|
Re: 1972 Highlander -The making of a daily driver
Very nice progress! Seat cover looks great! Love that black and white houndstooth
__________________
Looking for a 67-72 swb or blazer project in or around VA. 
|
|
|

|
|
|
#22 |
|
Registered User
Join Date: Apr 2003
Location: Indep, MO
Posts: 5,893
|
Re: 1972 Highlander -The making of a daily driver
Looks great! Not looking forward to my own ac adventure. Hope it's all you want it to be when it's done. Are you gonna put a 700r4 in?
Posted via Mobile Device
__________________
Boppa's Old Yeller Truck Build, Old Yeller's New Heart! Project Buzz Bomb Flyin' Low! |
|
|

|
|
|
#23 |
|
Registered User
Join Date: Apr 2003
Location: Indep, MO
Posts: 5,893
|
Re: 1972 Highlander -The making of a daily driver
Oh yeah, when are we gonna see Pancho out laying stripe? I think a family pic is in order!
Posted via Mobile Device
__________________
Boppa's Old Yeller Truck Build, Old Yeller's New Heart! Project Buzz Bomb Flyin' Low! |
|
|

|
|
|
#24 | |||
|
US Army Veteran
 Join Date: Nov 2008
Location: Central Texas
Posts: 1,049
|
Re: 1972 Highlander -The making of a daily driver
Quote:
Quote:
I really like this truck. It "feels" right when I'm in it, like you could drive across the country in it. If I do end up driving it more than expected, I'll probably put a 700r4 in it with a lockup. I do have one in Pancho. Quote:
The first motor in Pancho was built by a shop when we lived in Amarillo. 383 with decent cam, but stock heads. When we moved to San Angelo, I came across a guy that really knew his stuff with building motors, so would come over and work on the truck for me and swapped out the stock heads for AFR 195 heads (which was so unbelievable on the performance gain...scary!). When I ordered the heads, he suggested bumping the cam up. At the time, I didn't know how much of a bump it was, but he put in a Lunati bracket racing cam. It was too big, too lumpy and I fought to keep the truck running, even after adjusting idle a dozen times. So, I did my own research and that's when I discovered the truck was really setup more for bracket racing (according to cam specs). I bought a retro roller cam (from comp - XE 264) next. He started working on it, but faded out. He'd come by once a month, every other month, and so now Pancho sits in the garage. Heads and cam ARE back in, but I'm nervous about the work done. Some tension before he finally stopped coming back over. I may just bite the bullet and go back through it myself. I don't get out much here, so I don't know any good engine guys that could help me. I bought a engine building DVD from CFA services. I really want to learn it. I don't like relying upon others. Well, off to see if I can pull a charge on the ac system. This will be a first, too! I've researched the AC system on this truck for the past few weeks, saved notes, put together an "order list" and saved a dozen bookmarks with specific info. Been going through all those saved notes and list the past day or so, taking things in order and hoping all the research will pay off. I'm determined to know and understand this, so I can take care of things myself.
__________________
1972 C10 Highlander - The making of a daily driver |
|||
|
|

|
|
|
#25 |
|
Registered User
Join Date: Apr 2003
Location: Indep, MO
Posts: 5,893
|
Re: 1972 Highlander -The making of a daily driver
Hell, it ain't rocket science and you're no dummy. If the cam's in and the heads are on, it's all nuts and bolts. Get David vizards building small block Chevys book and spend a calm meticulous afternoon poppin that dude together. Pancho' come too far to sit there all forlorn. Enjoy getting this one on the road, then handle Pancho. In the words of Crash Davis, "are we havin fun? This games supposed to be fun, dammit!". Go have fun!
Posted via Mobile Device
__________________
Boppa's Old Yeller Truck Build, Old Yeller's New Heart! Project Buzz Bomb Flyin' Low! |
|
|

|
 |
| Bookmarks |
| Thread Tools | |
| Display Modes | |
|
|