 |
|
|
#201 |
|
Registered User
Join Date: Aug 2011
Location: Trumansburg ny
Posts: 230
|
Re: 55-57 one piece windows
Ok all you 1 piece window gurus... There are several different #'s and sources listed for felts and channels. What do i need ( i dont want stainless trim) and where is best to get it??
|
|
|

|
|
|
#202 |
|
Registered User
Join Date: Nov 2011
Location: Winlock Wa
Posts: 584
|
Re: 55-57 one piece windows
bump
__________________
Retired and too busy to work. |
|
|

|
|
|
#203 |
|
Registered User
Join Date: Nov 2011
Location: Winlock Wa
Posts: 584
|
Re: 55-57 one piece windows
See my previous post, I bought it from them, the chrome trim just peels off. Actually its hard to keep it on.
__________________
Retired and too busy to work. |
|
|

|
|
|
#204 |
|
Registered User
Join Date: Jan 2009
Location: REDLANDS CA
Posts: 20
|
Re: 55-57 one piece windows
I got my window felt from brothers trucks in corona, ca
Posted via Mobile Device |
|
|

|
|
|
#205 |
|
Registered User
Join Date: Nov 2011
Location: Winlock Wa
Posts: 584
|
Re: 55-57 one piece windows
up
__________________
Retired and too busy to work. |
|
|

|
|
|
#206 | |
|
Registered User
Join Date: Feb 2010
Location: Lebanon, Ohio
Posts: 1,359
|
Re: 55-57 one piece windows
Quote:
Harding Automotive Harry & Gloria Harding 1069 Reinhart Road Loogootee, IN 47553 W: (812) 295-3544 C: (812)425-4247
__________________
Bob "It won't take long and it won't cost much." '55 3100 (383/700R4)--'55 Belair Sedan (350/4-speed)--'64 'Vette Conv. (327/4-speed)--'68 GTO Conv. (462/4-speed)--'69 Cutlass Conv. (350/TH350)--'06 'Vette Conv. (LS2/6-speed) Bob's Retirement Build - My 55 TF Bob's 700R4 Build (how-to) |
|
|
|

|
|
|
#207 |
|
Registered User
Join Date: Feb 2010
Location: Lebanon, Ohio
Posts: 1,359
|
Re: 55-57 one piece windows
I don't want to hijack the thread, but I've been using the blackdiesel's videos (awesome!) to do my one-piece POWER windows and thought others might want the info. I got a hold of these power units at a swap meet for $50 last year and now I'm trying to install them:
I got no directions, no hardware and no mating electrical connectors, but they were still worth it. Using the tip from the video, I made these "batwings" out of my old regulators:  The major dimension of each "wing" of the batwing is about 6". I cut both wings at 15 degrees and welded them together, then drilled them as shown. I used a nylock nut so I could leave the two mounting screws loose because the window has to tilt forward as it goes up. The power unit doesn't fit into the door too easily so I cut a slot in the door about the width of the bar on the power unit, as shown:  I cut the slot straight down, but this was a mistake. When I do the other door I will cut the slot about 1/2" wider than the bar and will angle the slot toward the back lower corner of the door. When you slide the unit in you have to reach down a couple of times into the door to guide first the "tube", then the motor assembly over the brace half way down the door. Realize that this slot weakens the door slightly, but when I install the cover plate over the hole it should give it some needed reinforcement. Note also the allen wrench sticking out of the button-head screw. This holds the top of the bar in place. Also note that these regulators may have metric threads. 1/4"-28s almost fit, but they're too tight. On the next installment I'll take some measurements of the regulator mounting holes near the rear-center of the door. I don't know if this is going to work or not yet (gotta have about 16" of travel and the door brace might be in the way), so we'll see...
__________________
Bob "It won't take long and it won't cost much." '55 3100 (383/700R4)--'55 Belair Sedan (350/4-speed)--'64 'Vette Conv. (327/4-speed)--'68 GTO Conv. (462/4-speed)--'69 Cutlass Conv. (350/TH350)--'06 'Vette Conv. (LS2/6-speed) Bob's Retirement Build - My 55 TF Bob's 700R4 Build (how-to) Last edited by DransportGarage; 09-22-2019 at 05:27 AM. |
|
|

|
|
|
#208 |
|
Registered User
Join Date: Jan 2009
Location: Omaha, Arkansas
Posts: 929
|
Re: 55-57 one piece windows
Hey man that looks good, That's real close to what mine looks like. I would have taken my panels off and took a pic., but their a real pain to get on and off. Thanks for sharing yours.....hoped the videos helped.
__________________
'57 Chevy Pickup '56 GMC LCF Cummins '38 Chrysler Royal '57 2wd change http://67-72chevytrucks.com/vboard/s...light=speedway |
|
|

|
|
|
#209 |
|
Registered User
Join Date: Feb 2010
Location: Lebanon, Ohio
Posts: 1,359
|
Re: 55-57 one piece windows
Thanks, blackdiesel. I couldn't have gotten this far without your videos!
Well, I got the thing working but the batwing design didn't give me enough travel. I actually simplified the design of the roller assembly to this:  It's 12" long. The only reason I did the batwing in the first place was because the bolt heads interfered with the roller channel. In the new design I eliminated the bolt heads by welding the threaded part of the bolt into the bar. As noted in the video, I did drill two holes in the bar to access the screws that hold the channel to the window. (Sorry, I took the pic before I drilled the holes.) You can't drill both of them directly over the screw holes because the slide is in the way on one of them, but if you loosen the upper regulator mounting bolt you can shift the regulator back and forth to access the holes. After notching the regulator slider and roller cross bar, the new design causes the window to hit the rubber stop on the door brace just as the window gets to its lowest travel. Perfect. Also, instead of using all four bolts at the bottom of the regulator I use just the top two. Using all four can cause the mechanism to bind a little. Another note: I made a 1-1/4" spacer out of a 2x4 to space the bottom of the regulator away from the door. This aligned the glass in the glass run channel for me. Another tidbit: I bought my glass from "Auto City Classic". The glass is not made correctly. Even with the regulator disconnected I cannot get the glass to go all the way into the front upper corner. I have read that this is a problem with other suppliers as well, so it's best that you make a template or get a known good one and have your glass made from that. I promised the dimensions of the holes for mounting the lower part of the regulator, so here they are (passenger side shown): Passenger side shown. To do the driver's side, make the distance between the regulator bar and the door brace the same as the passenger side. The dimensions were taken by hooking a tape measure on the side/bottom of the door and measuring to the center of the hole. A cardboard template of the four-bolt pattern saves a lot of time when laying out these holes, and in making the wooden spacer. I used M6-1.0 x 45mm screws at the bottom of the regulator and an M6-1.0 x 20mm at the top. That's it. Have fun!
__________________
Bob "It won't take long and it won't cost much." '55 3100 (383/700R4)--'55 Belair Sedan (350/4-speed)--'64 'Vette Conv. (327/4-speed)--'68 GTO Conv. (462/4-speed)--'69 Cutlass Conv. (350/TH350)--'06 'Vette Conv. (LS2/6-speed) Bob's Retirement Build - My 55 TF Bob's 700R4 Build (how-to) Last edited by DransportGarage; 01-04-2013 at 08:49 PM. |
|
|

|
|
|
#210 |
|
Registered User
Join Date: Nov 2011
Location: Winlock Wa
Posts: 584
|
Re: 55-57 one piece windows
up
__________________
Retired and too busy to work. |
|
|

|
|
|
#211 |
|
Registered User
Join Date: Nov 2012
Location: Fox, AR
Posts: 394
|
Re: 55-57 one piece windows
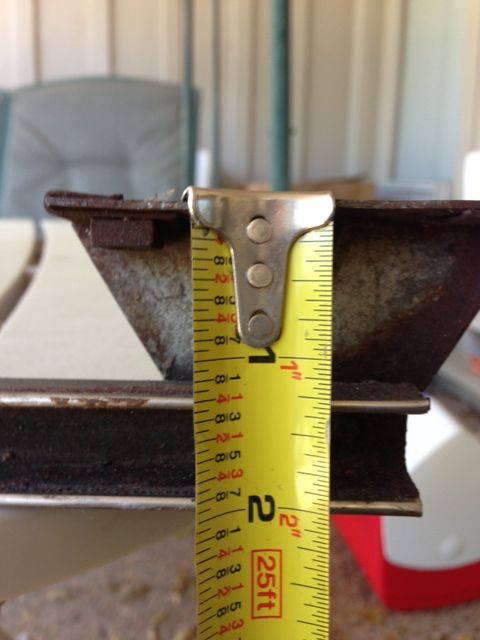
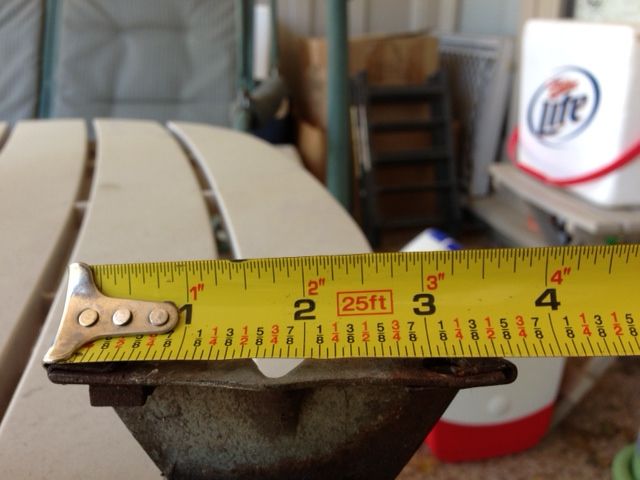
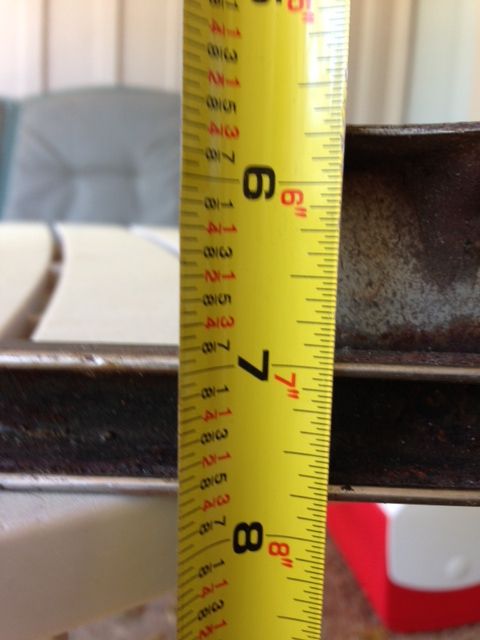
OK, I'll bump this again. I'm working on a truck that the owner put the Brother's kit in himself several years ago. He didn't do any of the track mods that blackdiesel shows, just glued the run channel into the tops of the doors and let the windows flop.
Now, I'm getting ready to do the mods, but I don't have the vent windows to use for the front tracks. I'm planning on cutting a piece of square tubing to get the channel part of the track, but I have no idea of the length of the standoff that bolts to the door at the bottom. Would somebody have theirs out at this time and be able to give me the measurement between the edge of the track and the surface that bolts to the back side of the door? |
|
|

|
|
|
#212 |
|
Registered User
Join Date: Nov 2011
Location: Winlock Wa
Posts: 584
|
Re: 55-57 one piece windows
You mean like this? Three feet on each side should do you for the length, this was a scrap of sheet metal spacer from a sliding patio door. I used a stove bolt on the bottom with three nuts, one to hold it in place, one to get the stand off, and one to lock it in place after adjustment. Then cut the rest off where it stuck thru. I thnk its an inch and half, but you have to adjust it to make the new track line up.
__________________
Retired and too busy to work. |
|
|

|
|
|
#213 |
|
Registered User
Join Date: Nov 2012
Location: Fox, AR
Posts: 394
|
Re: 55-57 one piece windows
Hmm, I like the stove bolt idea. Only 1 new hole to drill per side that way.
|
|
|

|
|
|
#214 | |
|
Senior Member
 Join Date: May 2011
Location: Cypress, Tx.
Posts: 1,504
|
Re: 55-57 one piece windows
Quote:
Blackdiesel, great job! Cute guys! Don't see the members here very often!; )   This pic just shows the opening site of the channel.  Posted via Mobile Device Posted via Mobile Device
__________________
'72 Ford Bronco project(July 17 2021-?) https://67-72chevytrucks.com/vboard/...d.php?t=828015 59 Apache (sold 6-25-2021) 67 Ford Mustang (re-restored after Harvey) 1968 Jeep Cj5 (2-8-2020 to present) 1992 Jeep Yj (8-17-20 to present) (Jurassic build) www.Classiccarsandtools.com Last edited by Denee007; 03-11-2013 at 04:19 PM. Reason: Info |
|
|
|

|
|
|
#215 |
|
Registered User
Join Date: Nov 2011
Location: Winlock Wa
Posts: 584
|
Re: 55-57 one piece windows
thanks for the pics, if I had had that I would not have had to make up my own.
__________________
Retired and too busy to work. |
|
|

|
|
|
#216 |
|
Senior Member
 Join Date: May 2011
Location: Cypress, Tx.
Posts: 1,504
|
Re: 55-57 one piece windows
Your certainly welcome! I like to contribute info when I can
 Posted via Mobile Device
__________________
'72 Ford Bronco project(July 17 2021-?) https://67-72chevytrucks.com/vboard/...d.php?t=828015 59 Apache (sold 6-25-2021) 67 Ford Mustang (re-restored after Harvey) 1968 Jeep Cj5 (2-8-2020 to present) 1992 Jeep Yj (8-17-20 to present) (Jurassic build) www.Classiccarsandtools.com |
|
|

|
|
|
#217 | |
|
Registered User
Join Date: Nov 2012
Location: Fox, AR
Posts: 394
|
Re: 55-57 one piece windows
Quote:
Denee, noticed that you were in Houston. This truck will call The Woodlands home when I get it finished. |
|
|
|

|
|
|
#218 |
|
Senior Member
 Join Date: May 2011
Location: Cypress, Tx.
Posts: 1,504
|
Re: 55-57 one piece windows
You're welcome! Perhaps the pics may be another question answered for another member; ). It's coming to the woodlands? Neato, maybe I'll see it at a local nifty50ee's or a car meet in the not so distant future! ; )
Posted via Mobile Device
__________________
'72 Ford Bronco project(July 17 2021-?) https://67-72chevytrucks.com/vboard/...d.php?t=828015 59 Apache (sold 6-25-2021) 67 Ford Mustang (re-restored after Harvey) 1968 Jeep Cj5 (2-8-2020 to present) 1992 Jeep Yj (8-17-20 to present) (Jurassic build) www.Classiccarsandtools.com |
|
|

|
|
|
#219 |
|
Senior Member
 Join Date: May 2011
Location: Cypress, Tx.
Posts: 1,504
|
Re: 55-57 one piece windows
Hi, is this about the depth that the runner will be? It's easy enough to cut, I can make a deeper cut. dne'

__________________
'72 Ford Bronco project(July 17 2021-?) https://67-72chevytrucks.com/vboard/...d.php?t=828015 59 Apache (sold 6-25-2021) 67 Ford Mustang (re-restored after Harvey) 1968 Jeep Cj5 (2-8-2020 to present) 1992 Jeep Yj (8-17-20 to present) (Jurassic build) www.Classiccarsandtools.com |
|
|

|
|
|
#220 |
|
Registered User
Join Date: Jun 2006
Location: Idaho
Posts: 8,800
|
Re: 55-57 one piece windows
Finally got the fabrication and mock phase done and wanted to offer some comments. First thanks for blackdiesel and grimss for the original documentation and everyone else that has contributed to this thread.
1. When tacking in the modfied front channel, make sure your latch will fit. I got mine out to far and had to back track on the first door. 2. I tried to get it to work without modifying the latch side track but could not, the window kept hanging up on the front pivot point. 3. I had to move the front channel lower bolt holes about 3/8" farther towards the front than the dimensions given in the video to get the last 3 inches of drop to drop easier. Like diesels Dad said, "your results may vary". 4. I ended up pulling the chrome trim off my channels. I worked for 15 minutes on the first corner trying to do what they do in 3 minutes. Problem was the chrome on the channel I got was chinched on pretty tight and would not slide. After pulling it off it was a piece of cake. Now one question for the group. It looks like I am going to have to shim out the channel on the sides to get it flush with the opening and cover the glass. Did anyone else encounter this and did you just use the 3M adhesive to fill the gap or something else? If the 3m adhesive dries relatively hard then it will work, if not I was going to get some high density house door jamb weatherstripping and use it (looks like I will need something about 1/8" thick).
__________________
1959 Chevy Short Fleetside w/ 74 4WD drive train (current project) OrrieG Build Thread 1964 Chevelle Malibu w/ 355-350TH (daily driver) Helpful AD and TF Manual Site Old Car Manual Project |
|
|

|
|
|
#221 |
|
Registered User
Join Date: Oct 2009
Location: Broken Arrow, OK
Posts: 1,245
|
Re: 55-57 one piece windows
I had to do the same thing and shim it on the rear of the passenger door to make it fit tight to the glass. The driver side was a lot tighter and it has one spot that hangs and I have to pull the glass past it when rolling. You're right about the chrome, too. Pulled it off and the job went MUCH faster.
__________________
56 GMC BUILD THREAD: http://67-72chevytrucks.com/vboard/s...d.php?t=368649 69 long bed Chevy turned 67 gmc jimmy roadster: https://67-72chevytrucks.com/vboard/...d.php?t=851167 |
|
|

|
|
|
#222 |
|
Registered User
Join Date: Apr 2009
Location: medford, OR
Posts: 80
|
Re: 55-57 one piece windows
Ttt
|
|
|

|
|
|
#223 |
|
Registered User
Join Date: Nov 2012
Location: Fox, AR
Posts: 394
|
Re: 55-57 one piece windows
OK, got the passenger side door done and working. Had to relocate the front track several times to get the window to go down all the way(I guess my mileage varied). Started on the driver's door and watched the videos again because I forgot to write down the length measurements for the front track. Noticed he mentioned something about cutting the bottom bracket off the rear track when you relocate it into the slot, but never showed a pic of the track after that was done. I apparently missed that statement the first 20 times I watched the video and didn't remove the bracket from the first door. The window for that door works ok, so I'm not re-doing it, but would it work better if I did on the next door? If you remove the bracket, how do you secure the bottom of the track?
This mod, IMHO, isn't worth the hassle...I like wind wings. Won't be happening to my personal truck.
__________________
Old Crow '54 Chevy Panel, '00 Bounder 36S, '95 Jeep YJ |
|
|

|
|
|
#224 |
|
Registered User
Join Date: Jun 2006
Location: Idaho
Posts: 8,800
|
Re: 55-57 one piece windows
When you remove the spot welds there are 4 holes that need welded. I took off the bottom bracket like they showed and just drilled another hole and spot welded the track to the door. I remember I did the first one twice because I did not pay close attention to keeping it centered and the front and back tracks were not in the same plane.
__________________
1959 Chevy Short Fleetside w/ 74 4WD drive train (current project) OrrieG Build Thread 1964 Chevelle Malibu w/ 355-350TH (daily driver) Helpful AD and TF Manual Site Old Car Manual Project |
|
|

|
|
|
#225 |
|
Senior Member
 Join Date: May 2011
Location: Cypress, Tx.
Posts: 1,504
|
Re: 55-57 one piece windows
At the bottom of the window guide at the latch area, inside and low, there is a bracket spot welded to the guide. In order to remove the rear guide, spot welds need to be drilled so it can be taken out and modified. That little bracket needs to be removed for more room. Ill see if I can find a pic.
Post number 219 (up above)shows the rear window guide in its recessed slot, then welded into place. I hope this helps  Dne'
__________________
'72 Ford Bronco project(July 17 2021-?) https://67-72chevytrucks.com/vboard/...d.php?t=828015 59 Apache (sold 6-25-2021) 67 Ford Mustang (re-restored after Harvey) 1968 Jeep Cj5 (2-8-2020 to present) 1992 Jeep Yj (8-17-20 to present) (Jurassic build) www.Classiccarsandtools.com Last edited by Denee007; 10-14-2013 at 05:59 PM. |
|
|

|
 |
| Bookmarks |
| Thread Tools | |
| Display Modes | |
|
|