
 |
|
|
#701 |
|
Senior Member
 Join Date: Oct 2009
Location: Fayetteville, Arkansas
Posts: 1,923
|
Re: Markeb01 Build Thread
anticipation, is making me crazy.
|
|
|

|
|
|
#702 |
|
chevy only
 Join Date: Sep 2006
Location: Phoenix, AZ
Posts: 6,619
|
Re: Markeb01 Build Thread
nice work and you have done a ton of it! I like how clean you work looks killer
__________________
CHEVY ONLY... Nothin Else ! |
|
|

|
|
|
#703 |
|
Registered User
Join Date: Jun 2012
Location: Selkirk Ontario Canada
Posts: 1,141
|
Re: Markeb01 Build Thread
nice work ..so you think it will be running for the weekend?
__________________
My 63 GMC Panel Slow Build http://67-72chevytrucks.com/vboard/s...=1#post5457281 63 
|
|
|

|
|
|
#704 |
|
Rollin' Old Skool
Join Date: Jun 2007
Location: Hattiesburg, MS
Posts: 5,371
|
Re: Markeb01 Build Thread
I know, right? Hurry up Mark! J/K
 ....seriously though, you're making awesome progress, & I know this thing will be roaring to life very soon. It's great to be able to live through other members' builds when not much is happening with your own. Excited for you! ....seriously though, you're making awesome progress, & I know this thing will be roaring to life very soon. It's great to be able to live through other members' builds when not much is happening with your own. Excited for you!Posted via Mobile Device
__________________
_____________________________________________ Phillip My Build threads: 1966 Chevy C-10 "Black Betty" shortbed, fleetside, BBW, 327 V8/ Powerglide (under construction) http://67-72chevytrucks.com/vboard/s...ighlight=betty 1997 Chevy Tahoe, 2dr/2wd, mild custom (Daily driver) http://67-72chevytrucks.com/vboard/s...d.php?t=601142 Pics: '66 C-10 https://flic.kr/s/aHsjHWD4h9 '97 Tahoe https://flic.kr/s/aHsjGZ7wKP '93 C-1500 https://flic.kr/s/aHskxdpdnQ '88 S-10 Blazer https://flic.kr/s/aHsjYGx4Md Previous Rides: 1993 Chevy S-10 ext. cab, 4.3L, 4/5 drop (Sold) 1993 Chevy C-1500 short/step Retro-Rod (Sold) 1988 S-10 Blazer 2dr/2wd mild custom (Sold) |
|
|

|
|
|
#705 |
|
Registered User
Join Date: Sep 2011
Location: Tacoma, WA
Posts: 2,425
|
Re: Markeb01 Build Thread
Your gear drive is pretty cool, you say it is noisy though eh?
__________________
Michael McMurphy My 66 Stepside My 64 Tow Truck My 66 Tempest Table Of Contents Added to Page1 |
|
|

|
|
|
#706 |
|
Registered User
Join Date: Apr 2012
Location: Searcy, AR
Posts: 4,203
|
Re: Markeb01 Build Thread
Great, that's all, just Great!!!
__________________
DON Proverbs 27:17  US Air Force Retarded errr Retired My '65 Stepper Build:http://67-72chevytrucks.com/vboard/s...d.php?t=533920 My '60 Rusty Patina Build:http://67-72chevytrucks.com/vboard/s...66#post7402266 My '72 http://67-72chevytrucks.com/vboard/s...59#post7204359 SOLD |
|
|

|
|
|
#707 | ||||
|
Senior Enthusiast
Join Date: Feb 2007
Location: Spokane Valley, WA
Posts: 8,356
|
Re: Markeb01 Build Thread
Quote:
Thanks guys. The anticipation is making me crazy too! I canít wait to get beyond the break in so I can get some decent video. Quote:
Quote:
Quote:
 Yes itís a Pete Jackson ďNoisyĒ version. I was blown away when I first saw it. A lot of ďuneducatedĒ critics in the 80ís complained they just sounded like a bad transmission. In truth, thatís exactly why they are noisy. They are exactly like a bad manual transmission with a chipped or broken tooth, except the deep scratches cut into each gear tooth is more uniform. Some of those surfaces have polished up a bit over the last 20 years, but it still whines pretty loud. Thanks Don, thatís what I keep telling myself on a daily basis. I havenít had an engine out in two decades, and had forgotten how invigorating it can be. There are so many little tips and tricks we all learn spending a lifetime doing this stuff. Itís the challenge of remembering how not to make mistakes, and to do things right, while also trying to learn current skills. Much of what I learned happened 50+ years ago, and some stuff actually changed to a better process so I want to understand that stuff as well. Itís just so much more rewarding that sitting around watching TV. Regarding the work load today, thereís not a lot of visible progress to show. Got the truck up in the air so I could install the driveshaft, torque the transmission mount bolts, reattach the shifter, reverse switch, speedo/cruise control drives, and the hydraulic clutch hose. I also filled the oil filter and reinstalled it. 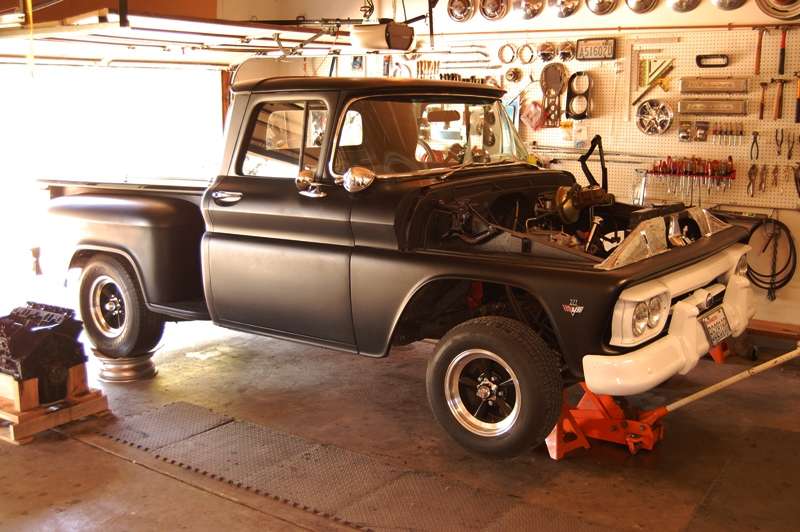 Pretty much everything under the truck is done at this point, except I forgot to grease the u-joint after installation, and the transmission still requires filling. Bleeding the clutch can be done from above. Having the u-joint cap fall off turned out to be rather fortuitous. I pulled out my spare/brand new u-joints, and neither of them matched. However, one of them was a combination joint (longer on one axis than the other). All 4 caps were an exact match for the bad joint. So I wiped off the first trunnion and popped on a new cap. I made it to number 3, when I discovered it was full of striations. So I returned the caps to the new joint and boxed it back up. Called the wife and she arrived home later with a replacement joint. If u-joint hadnít got stuck in the u-bolt and pulled the cap off, I probably wouldnít have looked and discovered the bad joint until it failed in the field. Thinking back, that was probably the original u-joint I put in back in 1992 when I had the driveshaft made. I changed the front yoke/u-joint 8 years ago when I installed the 4 speed, because it required an upgrade to the Turbo 400 front slip yoke. The rear u-joint was probably old enough to vote! All thatís left to do is partially install the balancer so I can set the engine at 10 degree Before Top Dead Center. I need to be able to remove and reattach it so I can use the crank socket to rotate the engine to the exact timing mark. Once thatís done I can permanently install the balancer, along with the P/S pump, water pump, alternator, etc. After that the carb and distributor are about all thatís left Ė and the exhaust manifolds. Those will go on last because I want to paint them first. Barring any disasters, Iím hoping to have it running tomorrow night. I have to admit this marathon stuff is for younger guys. Being on blood thinners my chest is covered in new bruises (17 of them) from leaning over the hood spring anchor all day yesterday. My left shoulder is pinched and I banged my left elbow on something yesterday, so of course all day today my left elbow clobbered everything in the garage (ouch)! But this has been so much fun Iím having a hard time leaving it alone. Iím even figuring out problems in my sleep!
__________________
My Build Thread: http://67-72chevytrucks.com/vboard/s...d.php?t=444502 |
||||
|
|

|
|
|
#708 |
|
Registered User
Join Date: Apr 2011
Location: .
Posts: 3,104
|
Re: Markeb01 Build Thread
Your jumpin' all over that install.
I can relate on the figuring out problems when in sleep mode. I've built some really wild stuff in me brainz in slumber land. Can't wait for the onboard vid of the first test drive. Good Job. |
|
|

|
|
|
#709 |
|
Registered User
Join Date: Apr 2012
Location: Cambridge, Ontario, Canada
Posts: 1,771
|
Re: Markeb01 Build Thread
Awesome detail Mark, i have the same engine waiting to go in mine (minus the cam upgrade), so many helpful bits of info for me to refer to when I get to this point, thanks for sharing all of this with us!
__________________
Craigerrr My build thread, CRGRS 66 Winter Build: http://67-72chevytrucks.com/vboard/s...09#post5638709 |
|
|

|
|
|
#710 |
|
Senior Enthusiast
Join Date: Feb 2007
Location: Spokane Valley, WA
Posts: 8,356
|
Re: Markeb01 Build Thread
Thanks for the comments. Iíve found so many helpful bits of information in the build threads of other memberís, I do my best to document everything I think might be helpful to someone. Itís my way of trying to pay back all the stuff I learned in my youth from the old timers that put up with me.
Today was another 9 hour effort. The truck isnít running yet, but is very close: 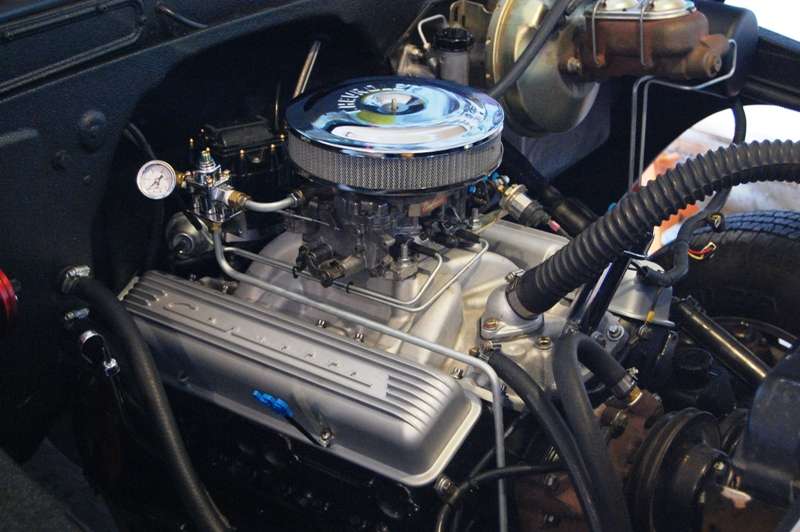  The exhaust manifolds held up the show. They look so crappy I just couldnít put them back on without a couple of hours with the wire wheel and a new coat of paint. I lost my sandblasting freebies when my son went on dayshift, so Iíll just do the best I can and hope the POR exhaust paint holds up. The only remaining engine accessory not installed is the alternator since part of the Alan Grove bracket set bolts to the exhaust manifold. The distributor is in and timed at 10 degrees initial but I held up on running the wires until the manifolds are in. I donít want to have to do the spark plugs twice, and also donít want to risk breaking them hanging the manifolds. Iím also going to be reworking the Moroso wire looms as the stems are too long for the rear set, and would probably look better shorter on the front pair as well. First thing in the morning I installed the harmonic balancer and pulleys, followed by the power steering pump, water pump, and hoses. After that the engine was primed for about 3 minutes after the mechanical oil gauge showed pressure. The distributor followed, along with the valve covers, smog connection, vacuum brake hose, cruise control, throttle linkage, and return springs. My wife helped with bleeding the clutch. It may or may not need adjusting with the new clutch. The old clutch went in 8 years ago but probably never racked up even 5,000 miles, and never needed adjustment. So the new clutch may measure out the same. Iíll have to check though. The ground cables were connected to the engine, and the fuel lines and carb were reinstalled. For now I reinstalled the mechanical fuel pressure gauge on the regulator. The internal gauge with the isolator was providing very inconsistent readings before everything was taken apart. The direct acting gauge works perfect, so at least Iíll know I have pressure before I start cranking. Iím hoping tomorrow turns out to be a short day. All that remains is cleaning/painting the exhaust manifolds, install the plugs, wires, looms, and alternator. A couple of follow up issues also remain, like resetting the torque on the crank bolt and lower pulley, filling the transmission, and lubricating the rear u-joint. I wanted to buy the heavy duty version without a zerk fitting, but they didnít seem to carry one for my application. If nothing goes wrong we should be back to cruising this weekend.
__________________
My Build Thread: http://67-72chevytrucks.com/vboard/s...d.php?t=444502 |
|
|

|
|
|
#711 |
|
Registered User
Join Date: Apr 2012
Location: Cambridge, Ontario, Canada
Posts: 1,771
|
Re: Markeb01 Build Thread
Hey Mark, there is a threaded hole on the driver side cylinder head, can you tell me what that hole is, my old 283 doesnt have this hole, assume it is either for exhaust emmission, or coolant cavity port...
__________________
Craigerrr My build thread, CRGRS 66 Winter Build: http://67-72chevytrucks.com/vboard/s...09#post5638709 |
|
|

|
|
|
#712 |
|
Senior Enthusiast
Join Date: Feb 2007
Location: Spokane Valley, WA
Posts: 8,356
|
Re: Markeb01 Build Thread
I think that is for a cylinder head temperature gauge, rather than an intake manifold temperature reading. At least prior to smog stuff. I imagine it is probably used for a thermal sensor connected to the smog controls today. If we're talking about the same hole. I'll take a picture of the one I'm talking about tomorrow, on the old engine because there's nothing in the way of the heads.
__________________
My Build Thread: http://67-72chevytrucks.com/vboard/s...d.php?t=444502 |
|
|

|
|
|
#713 |
|
Senior Enthusiast
Join Date: Feb 2007
Location: Spokane Valley, WA
Posts: 8,356
|
Re: Markeb01 Build Thread
And I just ran into a snag. Reading the can of POR exhaust manifold paint, once they are painted, they are not supposed to be exposed to high heat for 24 hours. Yikes! So now I either put them on cruddy, or go ahead and clean them up and paint, then have to wait another day before I can hear the engine run.
__________________
My Build Thread: http://67-72chevytrucks.com/vboard/s...d.php?t=444502 |
|
|

|
|
|
#714 |
|
The 60-66 GMC/Pontiac guy....
Join Date: Oct 2010
Location: Apache Junction, Arizona
Posts: 1,306
|
Re: Markeb01 Build Thread
Mark, the way you document your stuff is a help to everyone.. both novice and expert I am sure...
 
__________________
 Building Genuine Pontiac Firepowered cars and trucks for several decades.  Why Pontiac?? That's just me daring to be different.  Projects.. 63 C10 Short Wheel Base fleetside (The Pro-Street) currently under reconstruction. 440CID 2X4 Pontiac 
|
|
|

|
|
|
#715 | |
|
Rollin' Old Skool
Join Date: Jun 2007
Location: Hattiesburg, MS
Posts: 5,371
|
Re: Markeb01 Build Thread
Quote:
__________________
_____________________________________________ Phillip My Build threads: 1966 Chevy C-10 "Black Betty" shortbed, fleetside, BBW, 327 V8/ Powerglide (under construction) http://67-72chevytrucks.com/vboard/s...ighlight=betty 1997 Chevy Tahoe, 2dr/2wd, mild custom (Daily driver) http://67-72chevytrucks.com/vboard/s...d.php?t=601142 Pics: '66 C-10 https://flic.kr/s/aHsjHWD4h9 '97 Tahoe https://flic.kr/s/aHsjGZ7wKP '93 C-1500 https://flic.kr/s/aHskxdpdnQ '88 S-10 Blazer https://flic.kr/s/aHsjYGx4Md Previous Rides: 1993 Chevy S-10 ext. cab, 4.3L, 4/5 drop (Sold) 1993 Chevy C-1500 short/step Retro-Rod (Sold) 1988 S-10 Blazer 2dr/2wd mild custom (Sold) |
|
|
|

|
|
|
#716 |
|
Registered User
 Join Date: Sep 2009
Location: menifee california
Posts: 788
|
Re: Markeb01 Build Thread
M ark the way you have been going on this engine redo you will be to tired to push the clutch in for the first drive. lol you may have to have the wife do the first test drive hahahaha
|
|
|

|
|
|
#717 |
|
Registered User
 Join Date: May 2009
Location: Rathdrum, Idaho
Posts: 1,135
|
Re: Markeb01 Build Thread
Mark thank you for your amazing generosity today it was over and above anything I've ever experienced in my lifetime. Thank you, thank you...Vernski

|
|
|

|
|
|
#718 | ||||
|
Senior Enthusiast
Join Date: Feb 2007
Location: Spokane Valley, WA
Posts: 8,356
|
Re: Markeb01 Build Thread
Quote:
Hereís what the drivers side looked like before prep, and after being stripped with a twisted wire cup in a 3 ĹĒ angle grinder: 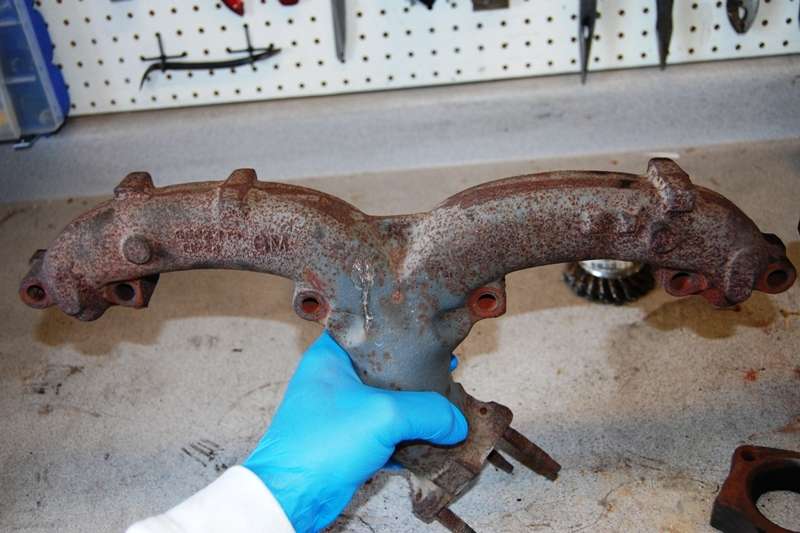 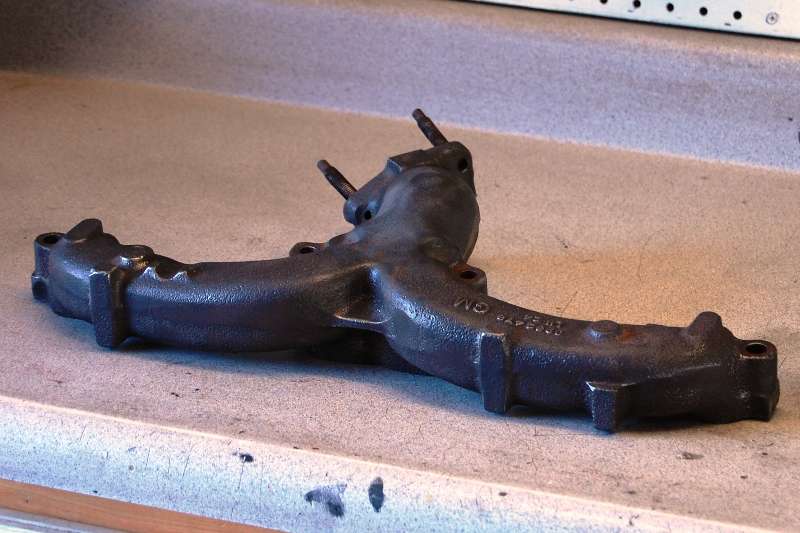 Those twisted wire cups will remove just about anything, including metal if youíre not careful! Hereís the passenger side. It looked better to begin with, as it was painted about 10 years after the driver side. It was a replacement for the first manifold that cracked after we moved to North Idaho: 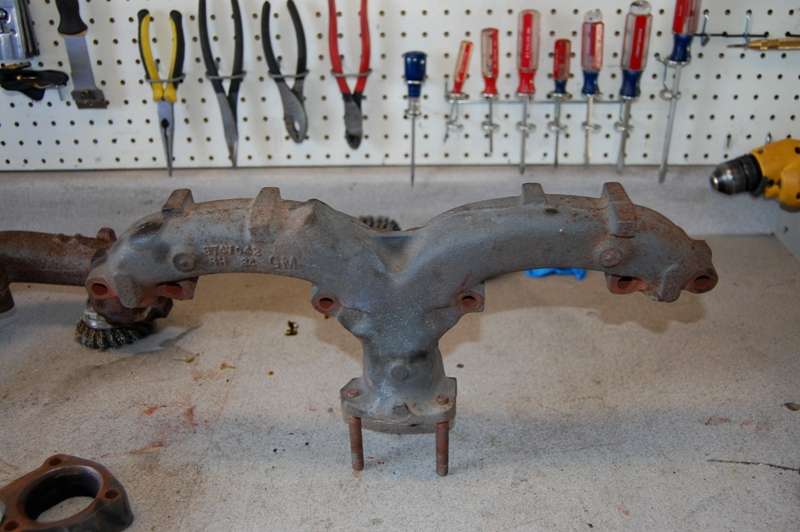  And here they are with a coat of POR15 Exhaust Manifold Gray: 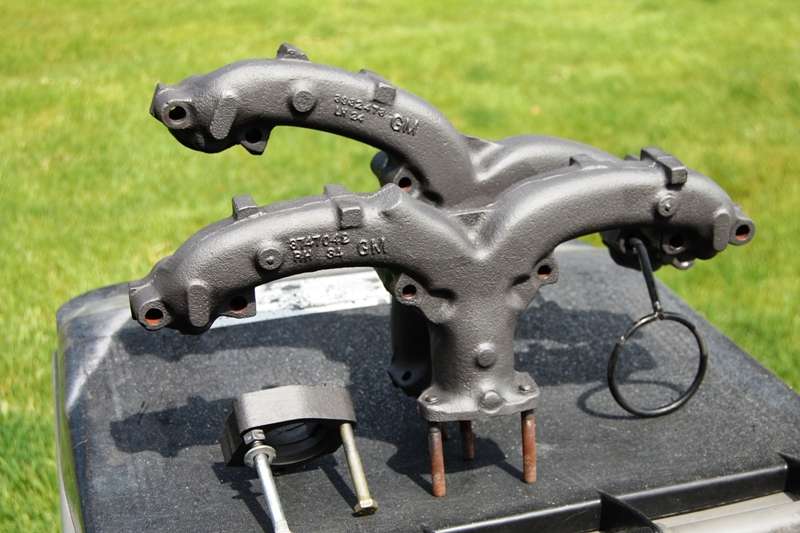 The stuff really turned out nice. These photos donít show off the manifolds very well, but they sure look nice compared to how disheveled they were before. And these two photos also show the completed installation. Everything has been done, tightening the crank bolt, greasing the rear u-joint, filling the transmission, etc: 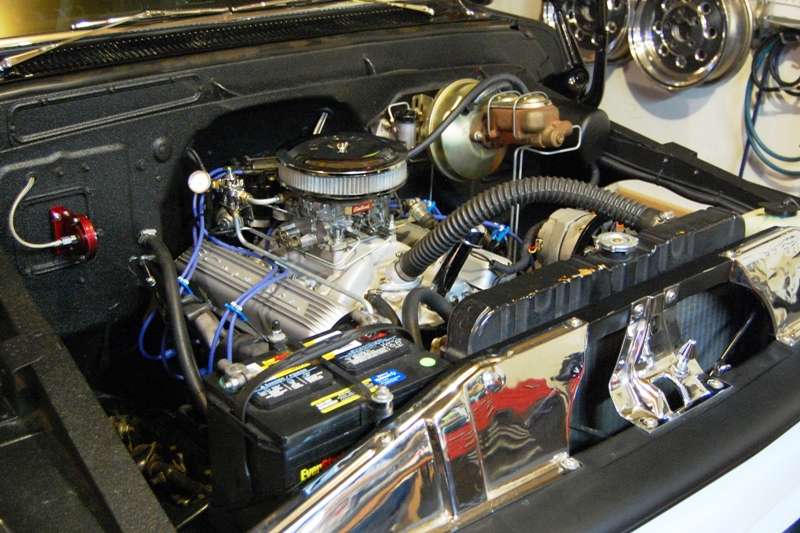 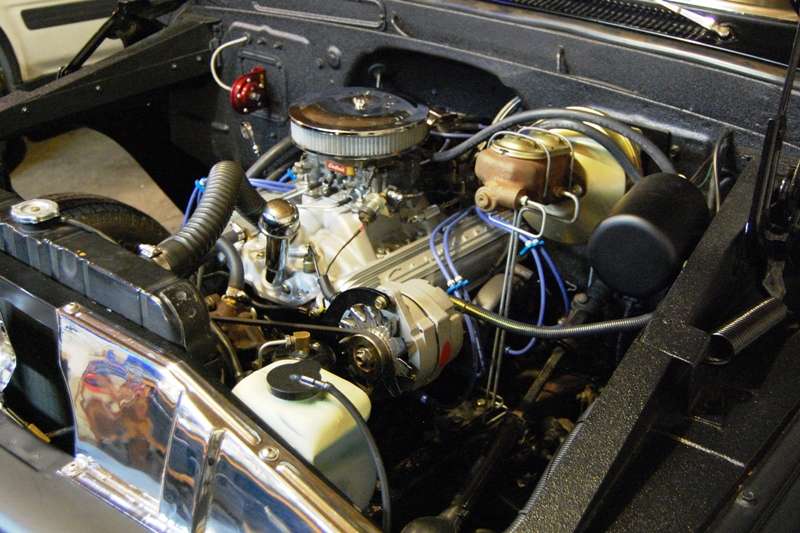 Quote:
 This evening I discovered the hard way they didnít plug the hole. I was busy filling the radiator when I heard about half a gallon of antifreeze come pouring out the driverís side cylinder head! Quote:
Quote:
Another bonus today was a B17 in the area. I kept the camera on the bench just in case. Here it is just North of my backyard: 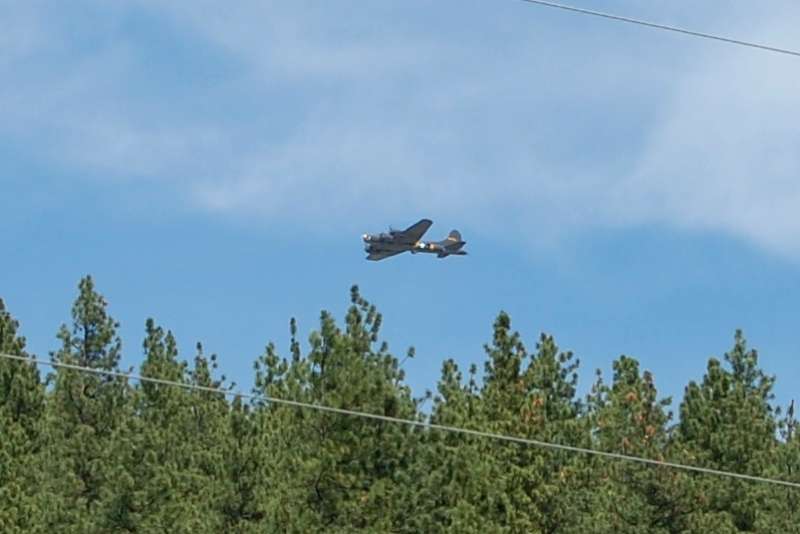 And here it is later in the day directly over my house. If you look closely the landing gear can be seen in the down position along with the oil streaks on the wings, the tail wheel, cheeck guns and rear guns: 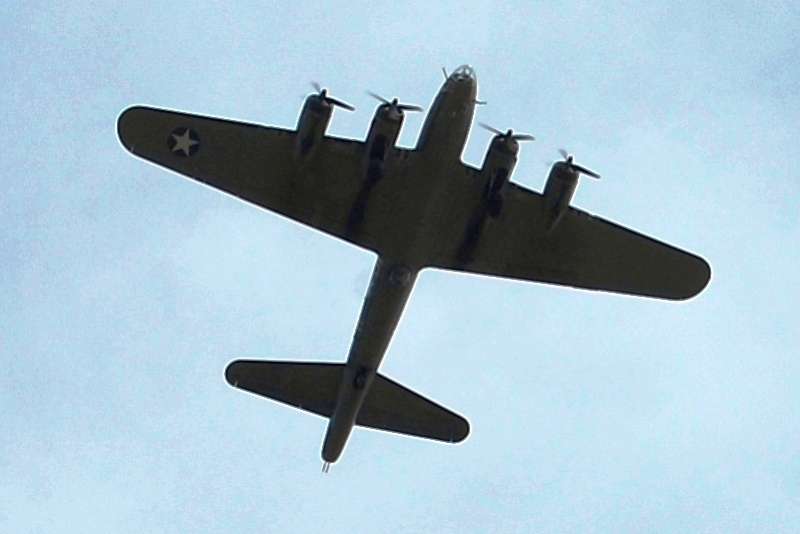 All that remains tomorrow is going over the entire check list again to make sure I havenít missed or forgotten anything. Even the electrical is connected. Iím letting it set until around noon for the manifold paint to dry, and also so I donít annoy the neighbors once the engine fires up and has to run at high idle for 20-30 minutes. It will be a while before I tackle another project of this magnitude. Itís been a lot of fun, but has also been very draining.
__________________
My Build Thread: http://67-72chevytrucks.com/vboard/s...d.php?t=444502 |
||||
|
|

|
|
|
#719 |
|
Rollin' Old Skool
Join Date: Jun 2007
Location: Hattiesburg, MS
Posts: 5,371
|
Re: Markeb01 Build Thread
The manifolds turned out great! My dad has mentioned that mine could use some attention, so maybe I can talk him into pulling them before we put it back on the road. The rest of your engine looks great as well. Looking forward to hearing it roar to life!
And I know we spoke of it once before, so I have to say cool pics of the B17. I was really bummed that I missed out on the Thunderbirds & Blue Angels shows due to the sequester budget cuts. The Thunderbirds were scheduled to be here, & I was planning a short road trip to Beaufort, SC to see the Blue Angels.
__________________
_____________________________________________ Phillip My Build threads: 1966 Chevy C-10 "Black Betty" shortbed, fleetside, BBW, 327 V8/ Powerglide (under construction) http://67-72chevytrucks.com/vboard/s...ighlight=betty 1997 Chevy Tahoe, 2dr/2wd, mild custom (Daily driver) http://67-72chevytrucks.com/vboard/s...d.php?t=601142 Pics: '66 C-10 https://flic.kr/s/aHsjHWD4h9 '97 Tahoe https://flic.kr/s/aHsjGZ7wKP '93 C-1500 https://flic.kr/s/aHskxdpdnQ '88 S-10 Blazer https://flic.kr/s/aHsjYGx4Md Previous Rides: 1993 Chevy S-10 ext. cab, 4.3L, 4/5 drop (Sold) 1993 Chevy C-1500 short/step Retro-Rod (Sold) 1988 S-10 Blazer 2dr/2wd mild custom (Sold) |
|
|

|
|
|
#720 |
|
Senior Member
 Join Date: Oct 2009
Location: Fayetteville, Arkansas
Posts: 1,923
|
Re: Markeb01 Build Thread
looks great mark. you've been bustin' butt and its about to pay off. good luck with the start-up and break-in today... then man, grab a beer and go find the couch... you definitely deserve it.

|
|
|

|
|
|
#721 |
|
Registered User
Join Date: Apr 2012
Location: Cambridge, Ontario, Canada
Posts: 1,771
|
Re: Markeb01 Build Thread
Quote:
   , okay, so, water jacket, got it!! , okay, so, water jacket, got it!!Sorry, Mark, I should have posted a picture when I asked, you may have caught that. At least we are certain what it is! Seems you are real close to cranking her over  
__________________
Craigerrr My build thread, CRGRS 66 Winter Build: http://67-72chevytrucks.com/vboard/s...09#post5638709 |
|
|

|
|
|
#722 |
|
Registered User
Join Date: Apr 2011
Location: .
Posts: 3,104
|
Re: Markeb01 Build Thread
Really great job on the motor install. Don't worry about the neighbors getting annoyed....they'll get used to the roar of the motor
 On a '69 truck motor I have, that hole on the side of the head is for a water temp sensor. Again great job on the install. |
|
|

|
|
|
#723 |
|
Registered User
Join Date: Jun 2012
Location: Selkirk Ontario Canada
Posts: 1,141
|
Re: Markeb01 Build Thread
cool shots of the B17
__________________
My 63 GMC Panel Slow Build http://67-72chevytrucks.com/vboard/s...=1#post5457281 63 
|
|
|

|
|
|
#724 |
|
Registered User
Join Date: Apr 2012
Location: Searcy, AR
Posts: 4,203
|
Re: Markeb01 Build Thread
Not much to add other than agreeing with the previous comments, also I really enjoyed seeing the B17 shots... Enjoy that first test drive!!!
Posted via Mobile Device
__________________
DON Proverbs 27:17  US Air Force Retarded errr Retired My '65 Stepper Build:http://67-72chevytrucks.com/vboard/s...d.php?t=533920 My '60 Rusty Patina Build:http://67-72chevytrucks.com/vboard/s...66#post7402266 My '72 http://67-72chevytrucks.com/vboard/s...59#post7204359 SOLD |
|
|

|
|
|
#725 |
|
Registered User
Join Date: Sep 2011
Location: Tacoma, WA
Posts: 2,425
|
Re: Markeb01 Build Thread
Love the pictures of the B-17 Mark !! I bet that was just cool as hell to see that flying around our little neck of the woods
 A small tid-bit of cross history that most folk dont know: Paul Tibbets flew a B-17 in Europe, then made his stamp on history by flying the B-24 Enola Gay over Japan. Robert Morgan flew a B-24 in combat in the Pacific, but left his stamp on history by being the pilot of the B-17 Memphis Belle. One thing I think the world has lost with its shifting methodology of combat was some of these dichoctomies of relationshilps between the men who fight with, and against each other. If they ever made another movie about Patton, I would hope they spent more time on his relationship with Rommel. You know, stuff like that..... LOL I hope you get your truck fired up ..... after you get some rest buddy !!!
__________________
Michael McMurphy My 66 Stepside My 64 Tow Truck My 66 Tempest Table Of Contents Added to Page1 |
|
|

|
 |
| Bookmarks |
| Thread Tools | |
| Display Modes | |
|
|