
 |
|
|
#976 |
|
Senior Member
 Join Date: Oct 2009
Location: Fayetteville, Arkansas
Posts: 1,923
|
Re: Markeb01 Build Thread
your truck looks great at the show... i'm looking for a source on the 3 bar spinners to go on some TTD wheels that are on my hotrod. Wasn't sure i wanted them but after seeing the pic of yours, i gotta have'em... they look tough.
perfect stance on the lawn... looking forward to the pro pics. |
|
|

|
|
|
#977 |
|
Senior Enthusiast
Join Date: Feb 2007
Location: Spokane Valley, WA
Posts: 8,356
|
Re: Markeb01 Build Thread
For what itís worth, I got mine from this guy on Ebay:
http://www.ebay.com/usr/lugnutkingiv2005 You just need to measure the distance between the cap screws to make sure you pick the early or late size. I think the early ones are 2 1/8Ē and the late versions are 2 ľĒ What got me interested in the first place were these spinners offered by American Racing, but at $500 a set I lost interest real quick:  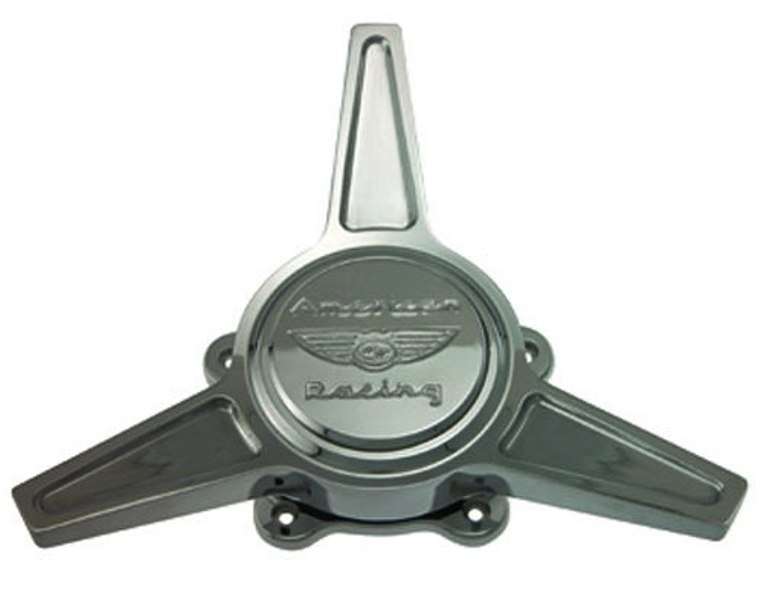
__________________
My Build Thread: http://67-72chevytrucks.com/vboard/s...d.php?t=444502 |
|
|

|
|
|
#978 |
|
Registered User
Join Date: Dec 2012
Location: Rochester, KENT
Posts: 10,572
|
Re: Markeb01 Build Thread
Looking at the pics of the car show, I really am glad we do not all like the same stuff.
Thanks for posting.
__________________
MY BUILD LINK: http://67-72chevytrucks.com/vboard/s...585901]Redneck Express - 1966 C10 Short Fleetside MY USA ROADTRIPS http://forum.retro-rides.org/thread/...2018-humdinger IF YOU CAN'T FIX IT WITH A HAMMER, YOU'VE GOT AN ELECTRICAL PROBLEM MATE. |
|
|

|
|
|
#979 |
|
Registered User
Join Date: Jun 2012
Location: Selkirk Ontario Canada
Posts: 1,141
|
Re: Markeb01 Build Thread
second pic looks like it was painted or is it just my eyes
__________________
My 63 GMC Panel Slow Build http://67-72chevytrucks.com/vboard/s...=1#post5457281 63 
|
|
|

|
|
|
#980 |
|
Senior Enthusiast
Join Date: Feb 2007
Location: Spokane Valley, WA
Posts: 8,356
|
Re: Markeb01 Build Thread
Last Wednesday I started removing both the old cruise control and all its wiring, and the high intensity amber wig wag lights mounted at the top of the rear stake pockets. They prevented many night collisions at a very dangerous corner we had to contend with every day. But we moved to another state 10 years ago and they have only been used once since. Along with the cruise control, they added a lot of extra wire under the dash. So I decided to remove anything that was no longer needed.
That took until mid-day Friday, just about the time FedEx showed up with the new cruise control kit. I’ll post a separate thread shortly showing the details of the installation. It went fairly well with no big surprises, but still took until noon yesterday. I had my wife check out the wiring (I’m color blind). She discovered I had reversed a brown and red wire, so that was corrected. We ran through the diagnostic testing, with her watching the LED on the module as I couldn’t see it from the driver’s seat. Everything checked out perfectly. After the dash was completely reassembled I went out to clean the tools and debris from the truck and was almost overwhelmed by the smell of ether. It’s a vulgar and extremely distinctive odor I haven’t smelled since the early 1950’s when it was used as an anesthetic before surgery. It was so strong I had to leave the doors open with a fan running for almost an hour to clear it out. I couldn’t imagine where it came from. Once the smell dissipated we hopped in and went for a test drive. Within a couple of minutes I realized where the smell came from. The manual temperature gauge was providing no reading at all. That could only mean I fractured the bourdon tube leading from the gauge to the engine, releasing whatever type of gas is used in this type of mechanical gauge. Apparently I removed the instrument cluster one too many times and folding it flat for working clearance broke the tube. A new electric gauge was ordered and should arrive Tuesday. An electric gauge eliminates any risk of future tube breakage. So we arrived at the test area, only to find the cruise system won’t engage. I’m sure the problem is something simple, but after 4 ten hour days wrenching my back bending and twisting under the dash in 90+ degree heat I’d had enough. No work on the truck until tomorrow, when the temperature is finally supposed to be down to a seasonal temperature in the 70’s. At least the truck is back in service and “almost” everything works. Yesterday the “professional” church car show pictures showed up in the mail. I do appreciate the effort that was volunteered, but I think their professional photographer was just a nice guy with a camera. The photos showed little understanding of how to take car pictures. The location was ideal with acres of lawn and a ladder to eliminate any background clutter. But alas the background clutter was captured, along with trees growing out of the roof of the truck. While not exactly artwork, they do show the truck with knock offs and will be nice snapshots to remember the fun we had at the event: 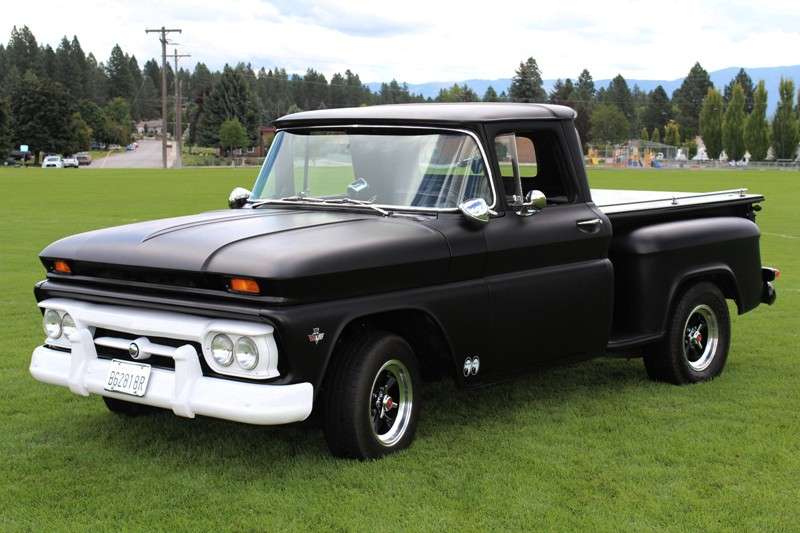 The one thing I like about this shot is showing how nicely a 33 gallon tank can tuck up under the back of the bed:  And one feature I still love about the Moon Equipped decals – because they are mounted on a panel that curves under, when viewed from the rear they lean forward (as they do in real life). When viewed from the front, they lean backwards. It’s just a fun detail to notice in photos. And this has been sitting in a local driveway for the last few days. It appears to be a 1960 or 61 GMC: 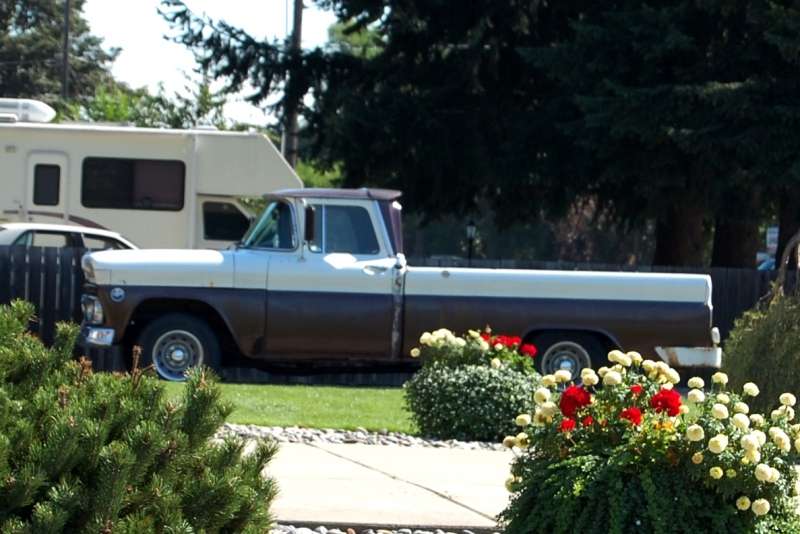 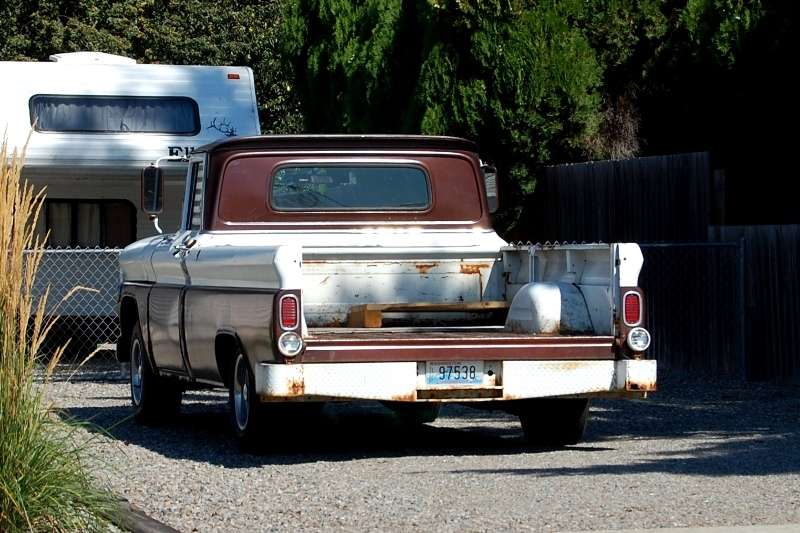
__________________
My Build Thread: http://67-72chevytrucks.com/vboard/s...d.php?t=444502 Last edited by markeb01; 09-15-2013 at 09:54 PM. |
|
|

|
|
|
#981 |
|
Registered User
Join Date: Apr 2012
Location: Searcy, AR
Posts: 4,203
|
Re: Markeb01 Build Thread
Awesome Pics, Really like the 2cd one...
Never noticed the Mooneyes detail before, thanks for pointing that out... Praying for a quick recovery from the dash work!!! The local driveway truck looks good too... I'm sure you'll have the cruise issues resolved soon!
__________________
DON Proverbs 27:17  US Air Force Retarded errr Retired My '65 Stepper Build:http://67-72chevytrucks.com/vboard/s...d.php?t=533920 My '60 Rusty Patina Build:http://67-72chevytrucks.com/vboard/s...66#post7402266 My '72 http://67-72chevytrucks.com/vboard/s...59#post7204359 SOLD |
|
|

|
|
|
#982 |
|
Registered User
Join Date: Aug 2013
Location: Ma.
Posts: 169
|
Re: Markeb01 Build Thread
That bites that the cruise is giving you such a hard time. I've been down that road too many times. Keep the never say die attitude, try not to throw too many tools and you'll get there.
__________________
Nice EASY project, no problem....until I get home  why is that? My build: http://67-72chevytrucks.com/vboard/s...d.php?t=595078 why is that? My build: http://67-72chevytrucks.com/vboard/s...d.php?t=595078
|
|
|

|
|
|
#983 |
|
Senior Enthusiast
Join Date: Feb 2007
Location: Spokane Valley, WA
Posts: 8,356
|
Re: Markeb01 Build Thread
Thanks for the encouraging words guys. That's why I took today off. I was getting a bit "testy" yesterday, and I just don't want to deal with replacing a windshield with a wrench stuck in it!
__________________
My Build Thread: http://67-72chevytrucks.com/vboard/s...d.php?t=444502 |
|
|

|
|
|
#984 |
|
Senior Enthusiast
Join Date: Feb 2007
Location: Spokane Valley, WA
Posts: 8,356
|
Re: Markeb01 Build Thread
Shoveling the last 4 tons of rock for my wifeís landscaping project left me a little beat up, so my biggest truck project for today was redoing the shifter boot/upper chrome plate again. The epoxy designed for rubber didnít work at all, and the plate promptly popped out of the upper surface again. So the boot was removed, the plate pulled out and all traces of the adhesive removed from the cavity and plate.
It occurred to me that nothing works better on vinyl that 3M weather strip adhesive. And since I had a left over tube of the yellow gorilla snot, it was applied exactly per the instructions to both pieces, allowed to dry and another thin coat added. Weíll see how well this works. The new water temp gauge is due to arrive tomorrow. Hopefully that will be an easy install.
__________________
My Build Thread: http://67-72chevytrucks.com/vboard/s...d.php?t=444502 |
|
|

|
|
|
#985 |
|
Senior Enthusiast
Join Date: Feb 2007
Location: Spokane Valley, WA
Posts: 8,356
|
Re: Markeb01 Build Thread
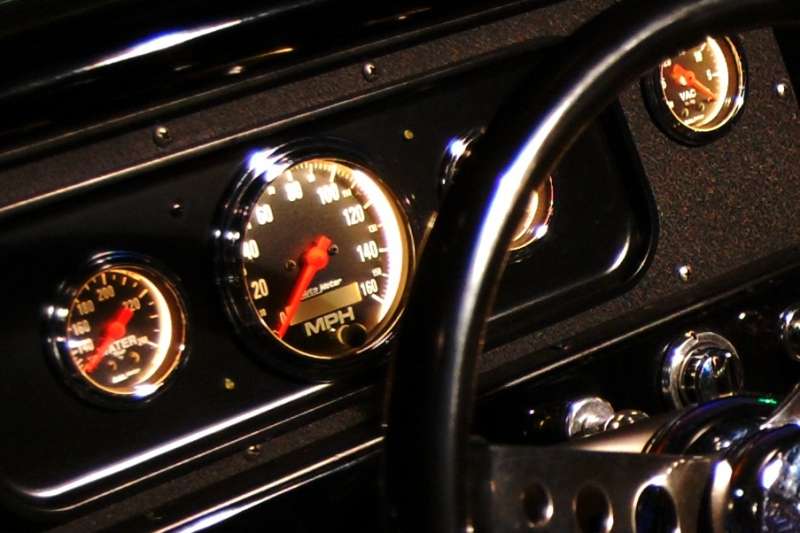
The project for yesterday was installing the new electrical water temperature gauge. The Autometer mechanical gauges in this series are all full sweep. Hereís an earlier shot of the old gauge:
 The electric version is only available in the half sweep layout. I donít actually have a preference for either. I like them both. Hereís the new one in place: 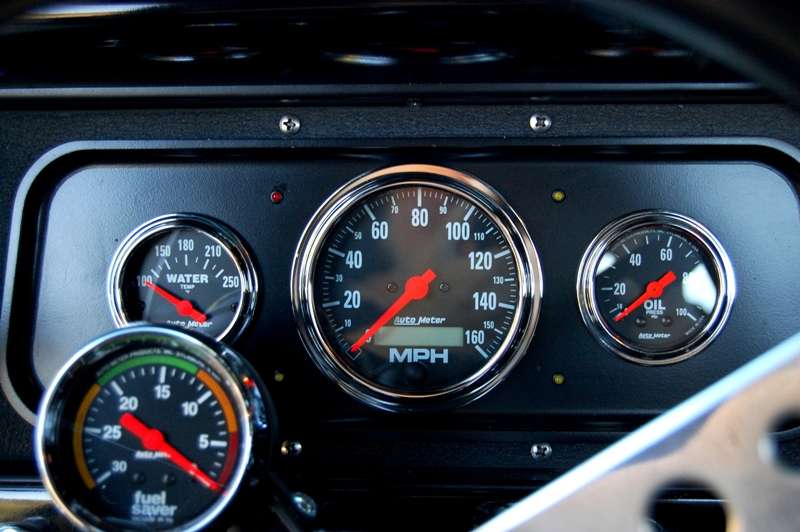 About the only point of interest might be a tip on how I got the wires routed from the new gauge to the front of the engine. It was a particularly difficulty routing since the wires had to travel through a rather dense wire bundle inside the firewall, through a tight grommet, and then through the loom that is essentially inaccessible beneath the brake system vacuum tank: I wasnít looking forward to all the bending and twisting that was going to be required, so I tried one of my old tricks and it worked. In the photo below, a length of the damaged bourdon tube can be seen at the upper left: 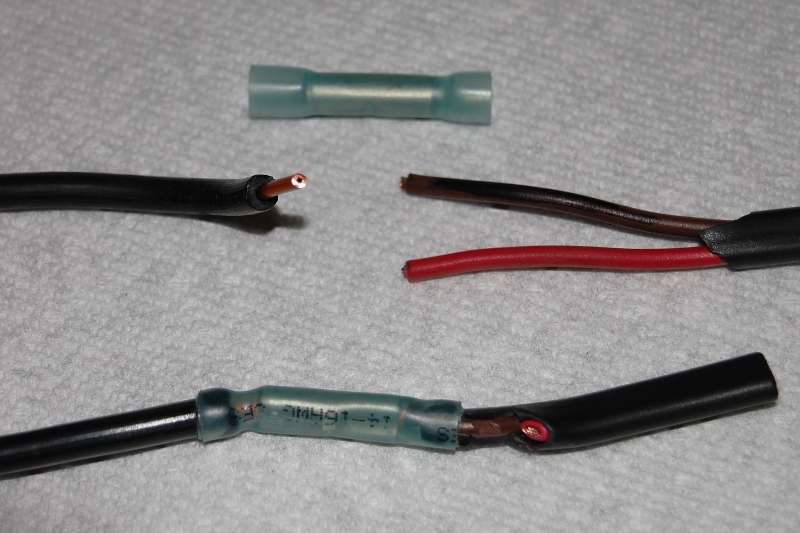 Rather than running two separate wires for the new gauge, I had a brand new length of duplex wire left over so I decided to use that for the sender wire and engine ground. The opening through the firewall grommet is very tight so I knew it would be difficult to push the new wire into place from either side. The upper pieces in the photo above show the items used to join the tube to the duplex wire. The lower piece is the actual joint I created to pull the new wire into position (after it had completed its mission). I simply stripped the tube like a piece of wire, stripped only one lead in the duplex wire, and joined them with a waterproof butt connector. More than just shrinking to make the joint water tight, they actually glue the pieces together making for a very strong joint. I then angle cut the ground wire so it would fit through the grommet easier. The baloney sliced jacket of the ground wire actually got caught in the grommet, but the joint was strong enough to survive the pull, and the duplex wire made it all the way to the intake manifold in a matter of minutes. I cut off the ends, attached terminals and this is what the finished connections look like: 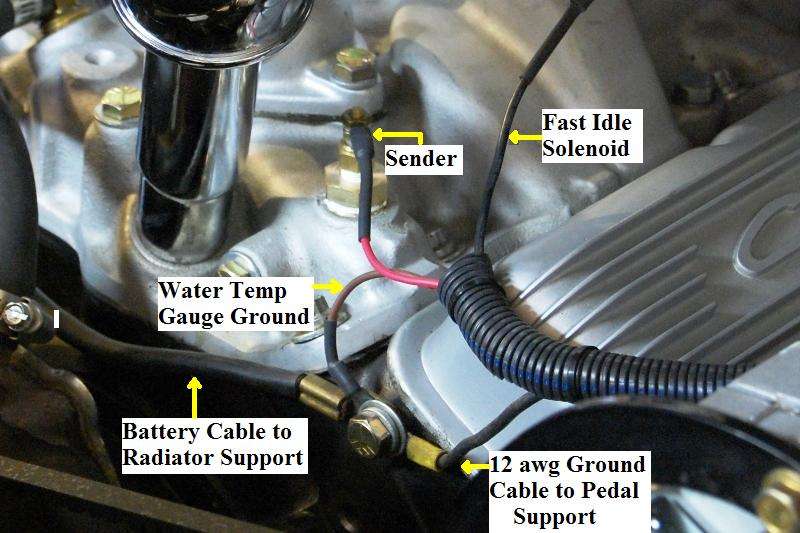 That second battery cable connects the engine block to the radiator support and all front lighting grounds to the other end of the cable. The 12 gauge cable going to the pedal support grounds all dash wiring to a common bolt leading directly back to the engine block. Tomorrow Iíll start again on the cruise control testing.
__________________
My Build Thread: http://67-72chevytrucks.com/vboard/s...d.php?t=444502 |
|
|

|
|
|
#986 |
|
Registered User
Join Date: Apr 2012
Location: Searcy, AR
Posts: 4,203
|
Re: Markeb01 Build Thread
Very Nice...

__________________
DON Proverbs 27:17  US Air Force Retarded errr Retired My '65 Stepper Build:http://67-72chevytrucks.com/vboard/s...d.php?t=533920 My '60 Rusty Patina Build:http://67-72chevytrucks.com/vboard/s...66#post7402266 My '72 http://67-72chevytrucks.com/vboard/s...59#post7204359 SOLD |
|
|

|
|
|
#987 |
|
Registered User
Join Date: Aug 2013
Location: Ma.
Posts: 169
|
Re: Markeb01 Build Thread
Great idea, it holds the wire making it less likely to get lost in a tight spot. The only thing I'd add would be a piece of tape over the butt connector so the edges don't get caught when pulling. So many times I've yanked something first before thinking "how am I going to route the replacement?" when I do think first, I usually use tape and that wouldn't have worked in your situation. I wouldn't have thought of a butt connector on the tube, I'll put that in my mental rolodex thank you.
__________________
Nice EASY project, no problem....until I get home  why is that? My build: http://67-72chevytrucks.com/vboard/s...d.php?t=595078 why is that? My build: http://67-72chevytrucks.com/vboard/s...d.php?t=595078
|
|
|

|
|
|
#988 |
|
Senior Enthusiast
Join Date: Feb 2007
Location: Spokane Valley, WA
Posts: 8,356
|
Re: Markeb01 Build Thread
The good news is the truck is back in service and the new electric water temp gauge is working perfectly.
The other news being - after roughly a week of diagnosing the cruise control system, Iíve confirmed the module itself is defective. So itís been removed and is being sent in for warranty replacement. While that is dragging on Iím also removing the turn signal lever/cruise switch and replacing it was a standard lever and ball knob matching the other dash controls. Iím going to see how I like having the cruise control absent for a while, and when the module comes back Iíll decide whether to reinstall it or pull the harness and cable and do without cruise control (in the truck) permanently. Iím completely burned out from the amount of hours invested - discovering the provided test procedures are both incomplete and conflicting. Just the write up to explain all the defects in their documentation is going to take hours. The truck is supposed to be fun and rewarding, and the result of this project has been nothing but frustration. My enthusiasm is admittedly impaired because Iím also not convinced having cruise control is all that imperative any longer. We did however get to go for a couple of nice rides today and had fun playing with the exhaust cutouts!
__________________
My Build Thread: http://67-72chevytrucks.com/vboard/s...d.php?t=444502 |
|
|

|
|
|
#989 | |
|
Registered User
Join Date: Apr 2012
Location: Searcy, AR
Posts: 4,203
|
Re: Markeb01 Build Thread
Quote:
 Playig with the Exhaust Cutouts... 
__________________
DON Proverbs 27:17  US Air Force Retarded errr Retired My '65 Stepper Build:http://67-72chevytrucks.com/vboard/s...d.php?t=533920 My '60 Rusty Patina Build:http://67-72chevytrucks.com/vboard/s...66#post7402266 My '72 http://67-72chevytrucks.com/vboard/s...59#post7204359 SOLD |
|
|
|

|
|
|
#990 |
|
Registered User
Join Date: Aug 2013
Location: Ma.
Posts: 169
|
Re: Markeb01 Build Thread
Don't sweat the small stuff. Gauge is working, gas pedal is working, sounds fun to me! I'm still cutting out rust and welding...lightyears away from fun! No cruise control...enjoy the gas and go skinny pedal and exhaust cut-outs for awhile, I'm sure that's gotta at least crack a smile here and there! Good luck with it.
__________________
Nice EASY project, no problem....until I get home  why is that? My build: http://67-72chevytrucks.com/vboard/s...d.php?t=595078 why is that? My build: http://67-72chevytrucks.com/vboard/s...d.php?t=595078
|
|
|

|
|
|
#991 |
|
Senior Enthusiast
Join Date: Feb 2007
Location: Spokane Valley, WA
Posts: 8,356
|
Re: Markeb01 Build Thread
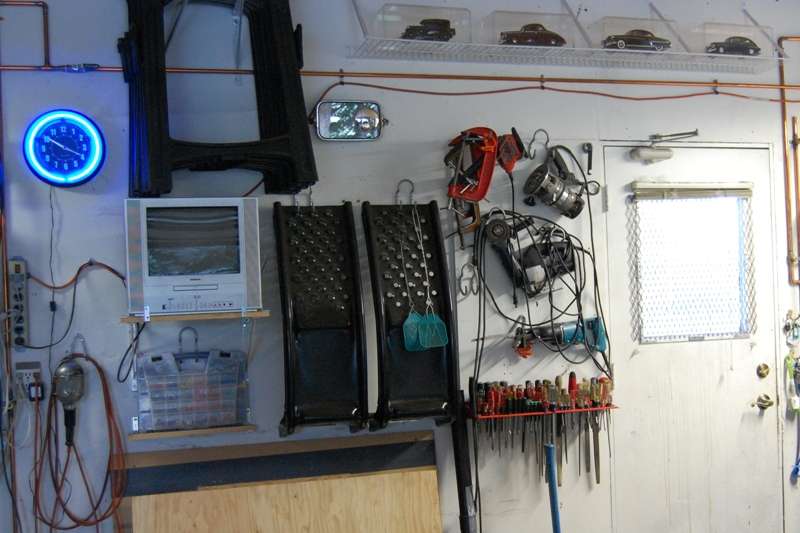
This turned out to be a rather productive week. My son gave me a fancy garage magazine which inspired me to do a bit more creative organizing in my own garage. I had some left over wire shelves in the basement that were installed near the ceiling to give some of my 1/18th scale models a permanent home.
 This area normally well lit at the top but I shut off the overhead lights as they were glaring on the model cases. Those are a pair of Batmobiles on the right. And the license plate collection now includes a few from my buddy Grizz in England: 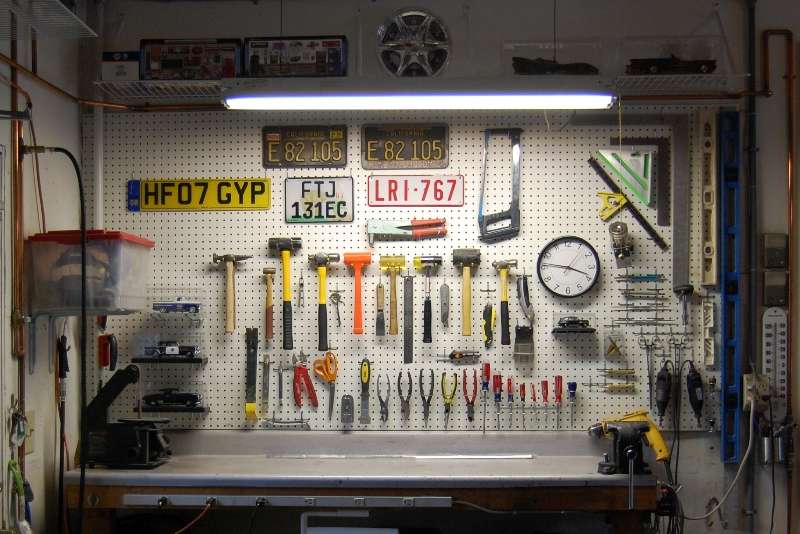 I also mounted a few of the odd ball scales directly on the pegboard: 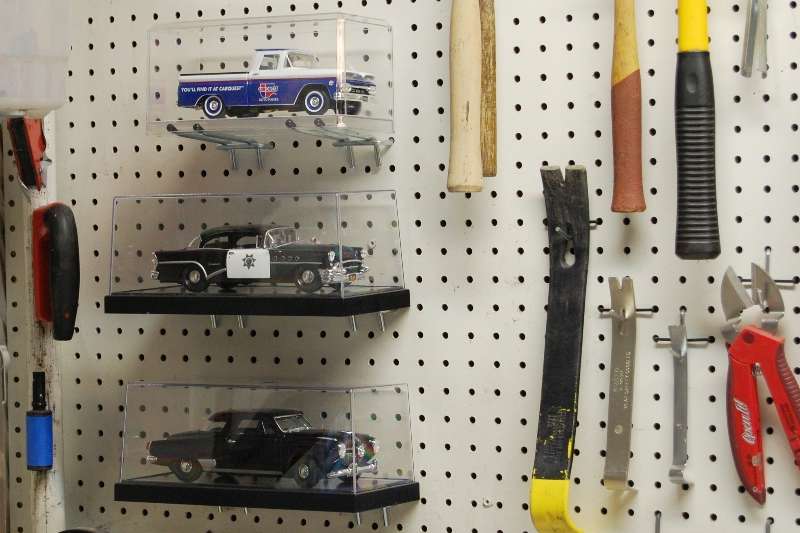 And this one is a 1/43rd scale of my previous ride, a 1946 Ford fordor sedan: 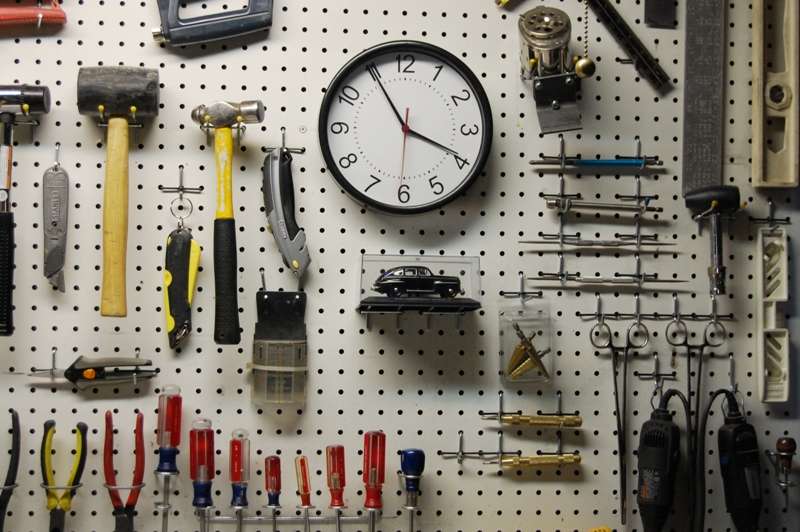 While I was at it I also reorganized all the tools, freeing up space for all my spare or collectible truck parts: 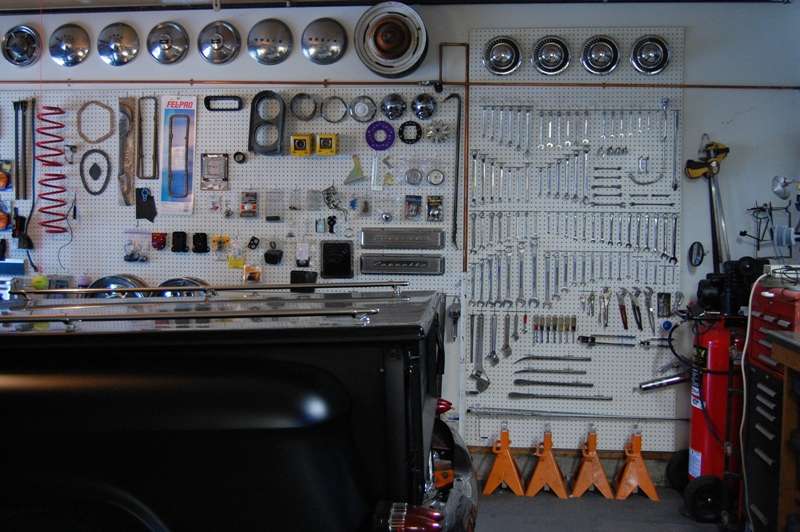 Once all that was accomplished it was time for the next truck project. This one was simple and would only take a few minutes(!?) I was simply going to remove this: 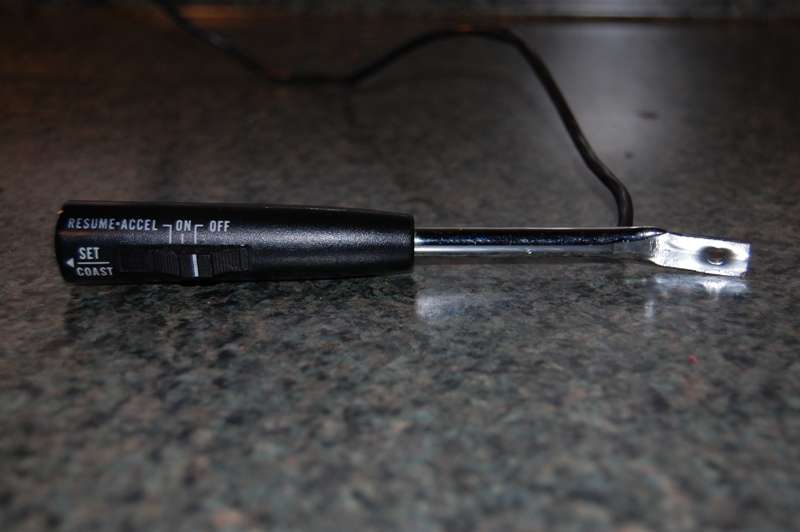 And replace it with these: 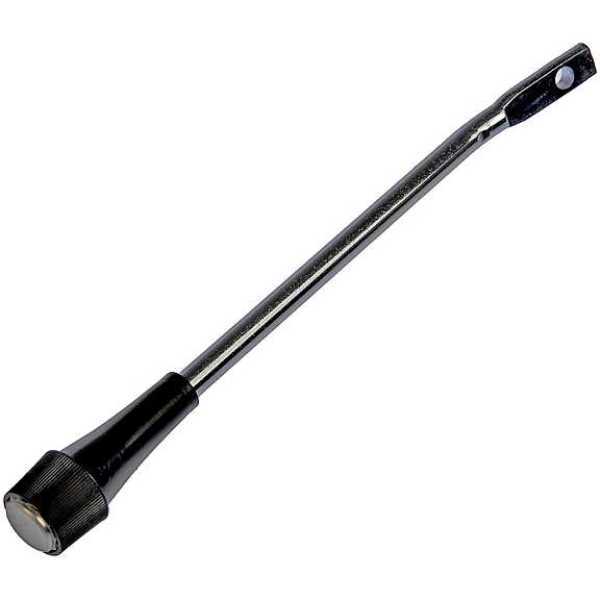 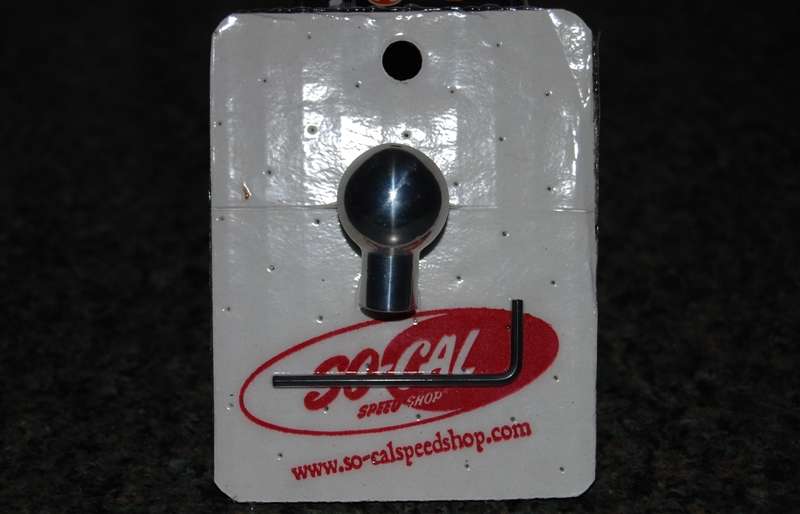 In typical fashion, it didn’t go quite that easy. First thing I found was the new handle would not tighten up. More disassembly turned up the reason, a shattered cavity in the turn signal switch: 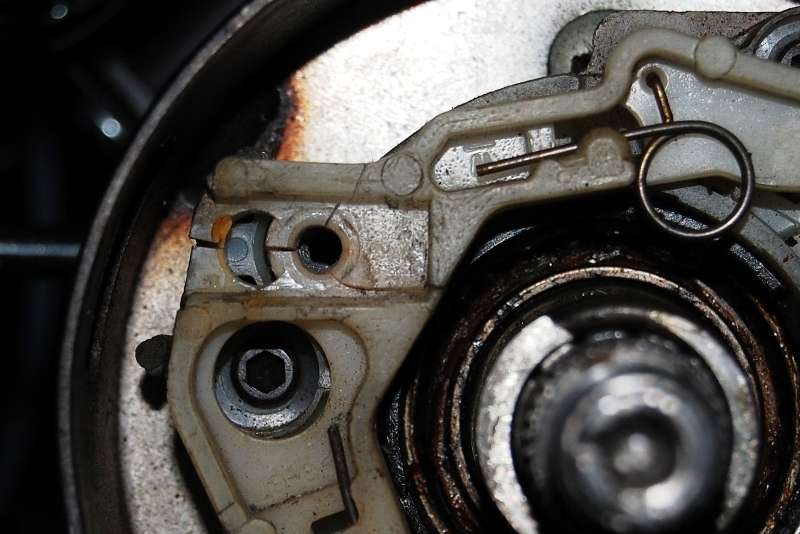 And this was the culprit. The attaching blade was at least 1/8th inch too wide for the slot, so (years ago) I ground it down on an angle as much as I dared, and since it was a nice tight fit I figured all was good. It wasn’t. Over time the excess pressure broke the switch cavity resulting in very sloppy operation. 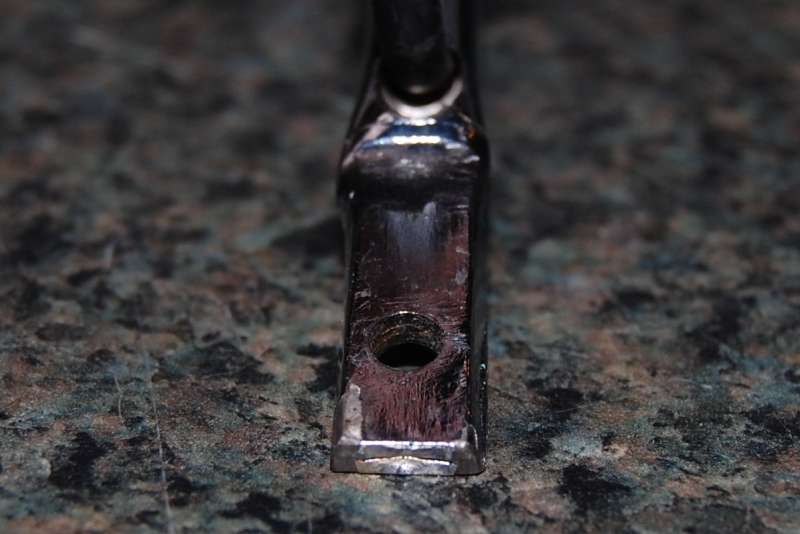
__________________
My Build Thread: http://67-72chevytrucks.com/vboard/s...d.php?t=444502 |
|
|

|
|
|
#992 |
|
Senior Enthusiast
Join Date: Feb 2007
Location: Spokane Valley, WA
Posts: 8,356
|
Re: Markeb01 Build Thread
A quick trip to Napa produced the correct switch. Rather than dealing with all the electric business I disassembled the switch and simply replaced the broken piece. I also discovered during the assembly process the new operating springs were way too strong and were likely to break the switch cavity again, so they were replaced with my originals.
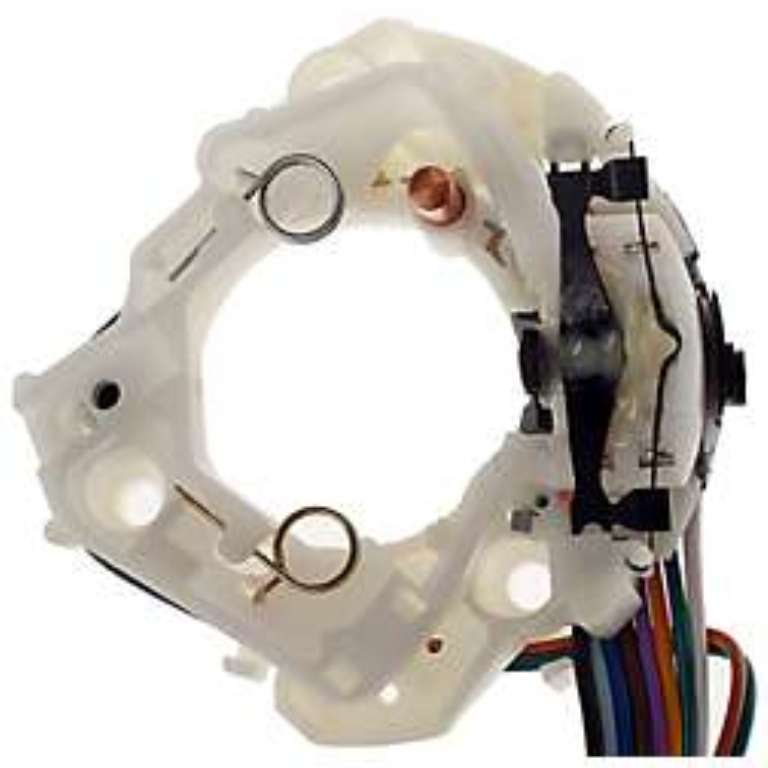 Everything was put back together and considered done when it occurred to me I also had a perpetual problem with the orientation of the cancelling cam. The left turn cam lobe was right next to the disengagement spring. The result being a minor left turn on the wheel would cancel the signal, and I would routinely hold the lever down to keep the signal running. Following is what caused the problem: 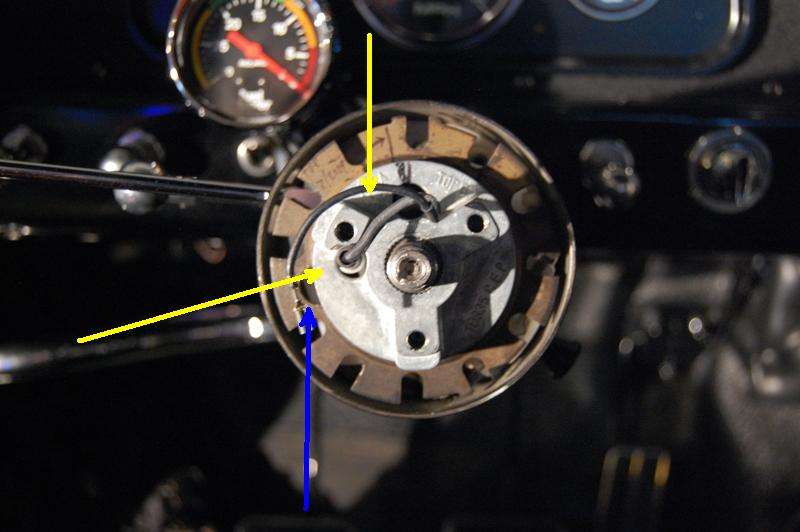 I meant to take more detail photos at this point but got caught up in what I was doing. The cancelling cam is hidden beneath the steering wheel adapter, but the orientation of the horn wire as seen here is at about 8:45 on the clock position. It needed to be rotated to the right to about 10:30 as indicated by the second arrow. This would center the cam between the left and right release mechanisms. Also when positioned correctly, the hole indicated by the blue arrow would be directly over the turn signal attaching screw allowing easy maintenance. When the column was first installed back in 1992 I didn’t have the tool necessary to remove the locking plate and correct the problem. But since I do have one now, I pulled everything back apart and fixed this problem too. All I had to do was drill another hole as indicated, and rotate the adapter 120 degrees counter clockwise, and rotate the cam cancelling piece up to 10:30 where the two parts lined up: 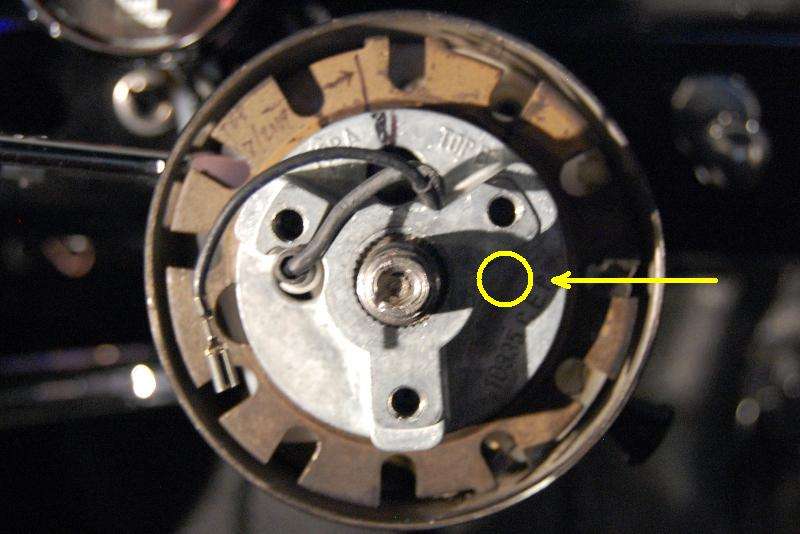 A little filing on the locking plate allowed it to pop right back in and everything now works perfectly. The new unbroken switch is nice and crisp. The turn signal handle looks great, and the turn signal cancelling mechanism works perfectly requiring about 90 degrees of rotation in both directions! Here’s what it looks like all back together, hopefully for the last time: 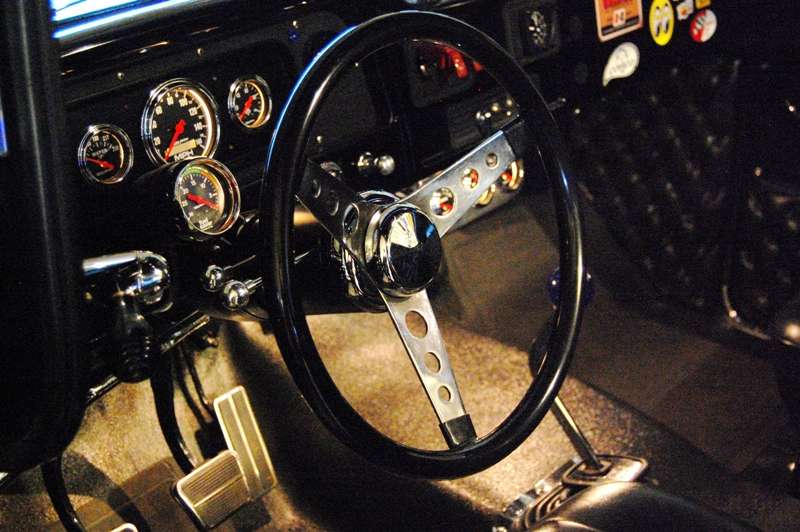 And here’s a close up of the two matching knobs and levers: 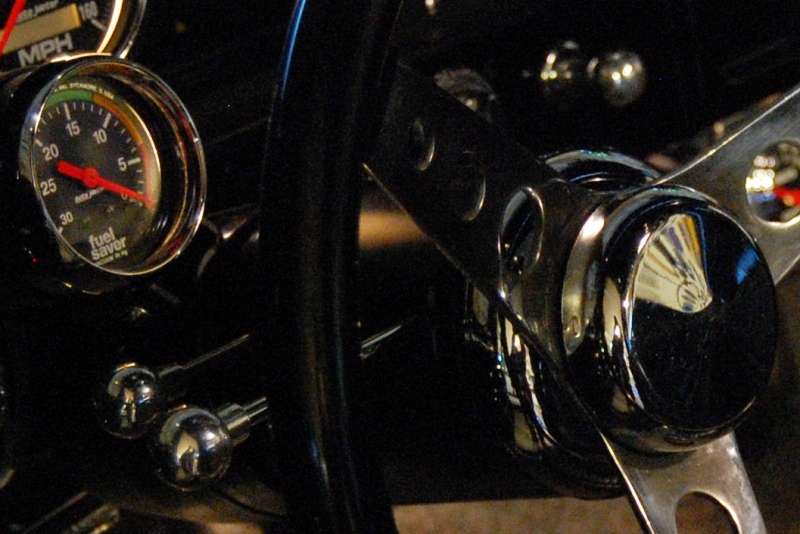 Until next time.
__________________
My Build Thread: http://67-72chevytrucks.com/vboard/s...d.php?t=444502 |
|
|

|
|
|
#993 |
|
Rollin' Old Skool
Join Date: Jun 2007
Location: Hattiesburg, MS
Posts: 5,371
|
Re: Markeb01 Build Thread
Great write-up as always Mark, & that garage looks great! If I ever get a house with a garage/shop, I'm sure my relatives would agree that it'll look like yours (extremely organized with a touch of OCD
 ) Those knobs & levers tie in nicely with your interior as well. ) Those knobs & levers tie in nicely with your interior as well.
__________________
_____________________________________________ Phillip My Build threads: 1966 Chevy C-10 "Black Betty" shortbed, fleetside, BBW, 327 V8/ Powerglide (under construction) http://67-72chevytrucks.com/vboard/s...ighlight=betty 1997 Chevy Tahoe, 2dr/2wd, mild custom (Daily driver) http://67-72chevytrucks.com/vboard/s...d.php?t=601142 Pics: '66 C-10 https://flic.kr/s/aHsjHWD4h9 '97 Tahoe https://flic.kr/s/aHsjGZ7wKP '93 C-1500 https://flic.kr/s/aHskxdpdnQ '88 S-10 Blazer https://flic.kr/s/aHsjYGx4Md Previous Rides: 1993 Chevy S-10 ext. cab, 4.3L, 4/5 drop (Sold) 1993 Chevy C-1500 short/step Retro-Rod (Sold) 1988 S-10 Blazer 2dr/2wd mild custom (Sold) |
|
|

|
|
|
#994 |
|
Registered User
Join Date: Dec 2012
Location: Rochester, KENT
Posts: 10,572
|
Re: Markeb01 Build Thread
Good to see the plates up Mark
Just a word of warning...... It can become a problem, collecting plates. The only solution is then to get rid of them.... Well, I gave away about 300 plates a few years ago and started again and guess I am up to near 500 again but now try to "specialize" collecting mostly Emergency, Government, Disabled and Veterans plates unless its from places I do not have, like a Lithuanian plate I got last week. Your tidying looks highly impressive though, showed my wife and she said " thats how it should look" Posted via Mobile Device
__________________
MY BUILD LINK: http://67-72chevytrucks.com/vboard/s...585901]Redneck Express - 1966 C10 Short Fleetside MY USA ROADTRIPS http://forum.retro-rides.org/thread/...2018-humdinger IF YOU CAN'T FIX IT WITH A HAMMER, YOU'VE GOT AN ELECTRICAL PROBLEM MATE. |
|
|

|
|
|
#995 |
|
Registered User
Join Date: Aug 2013
Location: Ma.
Posts: 169
|
Re: Markeb01 Build Thread
I WISH I could make my garage that nice and clean. That looks so relaxing. My garage has everything in it, all my shop tools, all my construction tools, a blown apart 46 chevy pickup, a blown apart 66 chevy pickup, probably at least half a Harley, and shelves all around filled with totes of whatever. I think my ocd is collecting projects and tearing them apart. That and I can't get rid of anything....you know, just in case.

__________________
Nice EASY project, no problem....until I get home  why is that? My build: http://67-72chevytrucks.com/vboard/s...d.php?t=595078 why is that? My build: http://67-72chevytrucks.com/vboard/s...d.php?t=595078
|
|
|

|
|
|
#996 |
|
Registered User
Join Date: Apr 2012
Location: Searcy, AR
Posts: 4,203
|
Re: Markeb01 Build Thread
Awesome Write-Up!!!
 As for your Garage...  Admittedly, I'd never be able to find anything in that Clean and Organized Operating Room! 
__________________
DON Proverbs 27:17  US Air Force Retarded errr Retired My '65 Stepper Build:http://67-72chevytrucks.com/vboard/s...d.php?t=533920 My '60 Rusty Patina Build:http://67-72chevytrucks.com/vboard/s...66#post7402266 My '72 http://67-72chevytrucks.com/vboard/s...59#post7204359 SOLD |
|
|

|
|
|
#997 |
|
Registered User
Join Date: Jul 2006
Location: Willis, Texas
Posts: 754
|
Re: Markeb01 Build Thread
Next thing we know Mark's garage is going to be featured on the Garage Journal. Great job as usual.
Posted via Mobile Device
__________________
65Gregg Blue long bed White TBSS 61 Impala ďThe two most important days in your life are the day you are born and the day you find out why.Ē Mark Twain |
|
|

|
|
|
#998 |
|
Senior Member
 Join Date: Mar 2011
Location: Tucson, Arizona
Posts: 2,084
|
Re: Markeb01 Build Thread
Will you come over and organize my garage?

__________________
Sanity'66 http://67-72chevytrucks.com/vboard/s...d.php?t=515110 Long bed, Fleetside, Small back window I've Done So Much, With So Little, For So Long, That Now I Can Do Anything With Nothing. 
|
|
|

|
|
|
#999 | |
|
Registered User
Join Date: Apr 2012
Location: Searcy, AR
Posts: 4,203
|
Re: Markeb01 Build Thread
Quote:
  
__________________
DON Proverbs 27:17  US Air Force Retarded errr Retired My '65 Stepper Build:http://67-72chevytrucks.com/vboard/s...d.php?t=533920 My '60 Rusty Patina Build:http://67-72chevytrucks.com/vboard/s...66#post7402266 My '72 http://67-72chevytrucks.com/vboard/s...59#post7204359 SOLD |
|
|
|

|
|
|
#1000 |
|
Senior Enthusiast
Join Date: Feb 2007
Location: Spokane Valley, WA
Posts: 8,356
|
Re: Markeb01 Build Thread
Thanks for the comments and stopping by guys. I donít think my garage will find acceptance with the big dogs. There was a story on the news the other day about man caves and statistically how all the best ones have a flat screen TV, DVD player, refrigerator, recliner, and a bar. I have an old flat screen CRT TV, but the room needed for all the other stuff is filled up with a car and truck!

__________________
My Build Thread: http://67-72chevytrucks.com/vboard/s...d.php?t=444502 |
|
|

|
 |
| Bookmarks |
| Thread Tools | |
| Display Modes | |
|
|