
 |
Register or Log In To remove these advertisements. |
|
|
|
|||||||
 |
|
|
Thread Tools | Display Modes |
|
|
#51 |
|
Registered User
 Join Date: Oct 2012
Location: Burnet, Tx
Posts: 332
|
Re: Tucker69 "Project No-Name"
Looking good, it's hard to beat shiny parts.
|
|
|

|
|
|
#52 |
|
Registered User
Join Date: Sep 2013
Location: Evansville, IN
Posts: 1,774
|
Re: Tucker69 "Project No-Name"
Nice progress, work and collection of parts!
__________________
Ryan 1967 Red Stepside..."Laymond" http://67-72chevytrucks.com/vboard/s...40#post6441840 1972 Medium Olive SWB-Chester http://67-72chevytrucks.com/vboard/s...d.php?t=759628 1967/71 Blue SWB C10..SOLD 1977 SWB K10..my grandpa's.....never should have sold |
|
|

|
|
|
#53 |
|
Registered User
Join Date: Jun 2015
Location: shreveport, la.
Posts: 160
|
Re: Tucker69 "Project No-Name"
finished longblock assembly & put some chevy orange on her, hope to get installed this coming weekend. I did get my Boyd tank installed(forgot to take picture) I will update some more in a few days.
 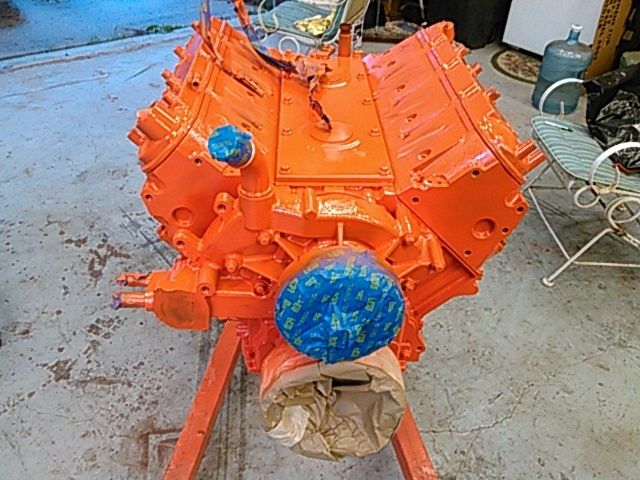 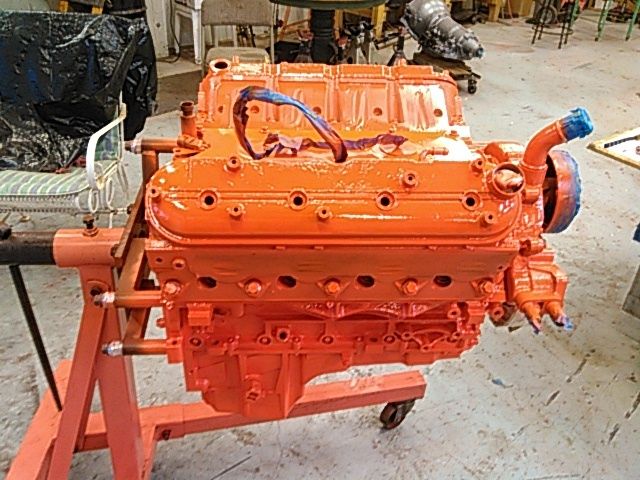 still have not decided on valve covers yet, due to placement of coilpacks, probably swap to different valve covers at that time.... it just keeps adding up doesn't it. I had a little savings before I started this. |
|
|

|
|
|
#54 |
|
Registered User
Join Date: Jun 2015
Location: shreveport, la.
Posts: 160
|
Re: Tucker69 "Project No-Name"
On another note as I stated already I installed Boyd fuel tank this weekend. I was very impressed with the fit & quality on the tank. It had small wave in top of tank. I'm sure this was from where the heat from baffle welding. it's on the top and is small enough I am not worried about.. I will say every vendor I have used from this site has been outstanding, all products satisfactory and delivered on or ahead of time. Also, I was referred to "Durabuilt" out of Jackson, miss. for my torque converter. I can't attest for the quality of the converter yet, but the people there were great and I had my converter in 2 days. They build each converter to your specs or helps you decide. Anyway you might think of them if you have converter needs....thanks for listening and viewing.. have a good day
|
|
|

|
|
|
#55 |
|
Registered User
Join Date: Jun 2015
Location: shreveport, la.
Posts: 160
|
Re: Tucker69 "Project No-Name"
As promised i got my new fuel tank installed, i decided to slide the mounting tabs between the top & bottom frame rails. My thought was all weight would be on the tabs rather than just the bolts. it would be more trouble later if i had to remove the tank for service, but thats what i done...
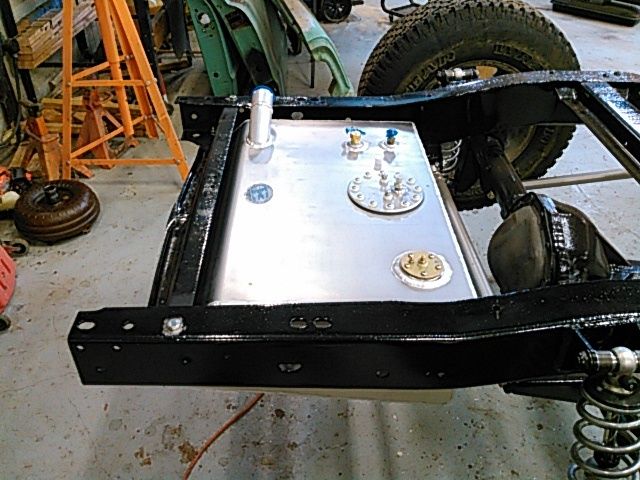 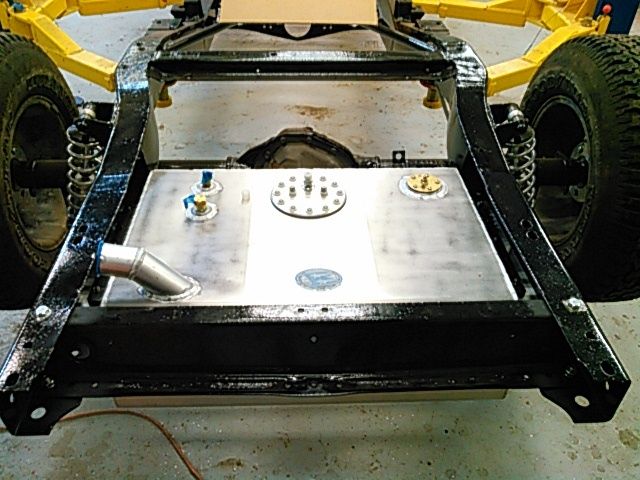 i paid extra for the harware mounting brackets, it would have been easy to fabricate something, but what the heck!!!! 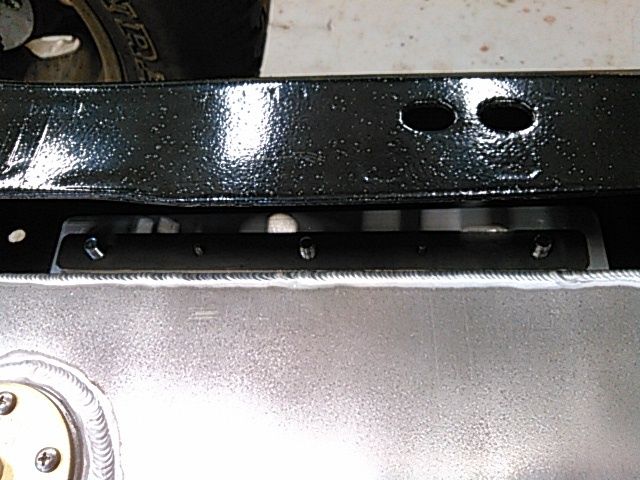
|
|
|

|
|
|
#56 |
|
Registered User
Join Date: Jun 2015
Location: shreveport, la.
Posts: 160
|
Re: Tucker69 "Project No-Name"
I also finally got my torque converter from "Durabuilt". there out of Jackson, ms. So, i installed converter bolted transmission to engine and set out installation in there new home.
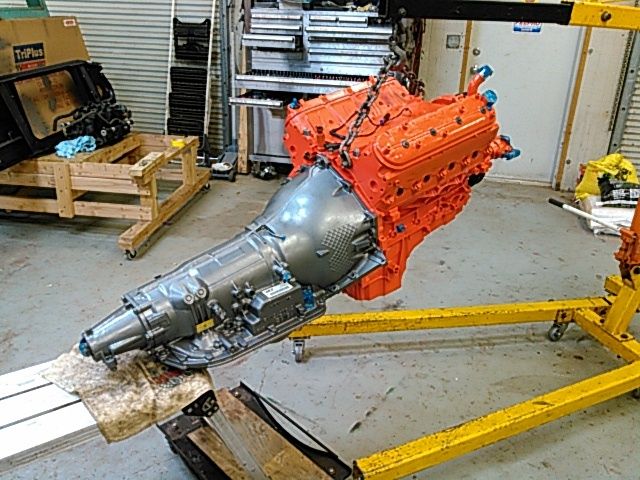 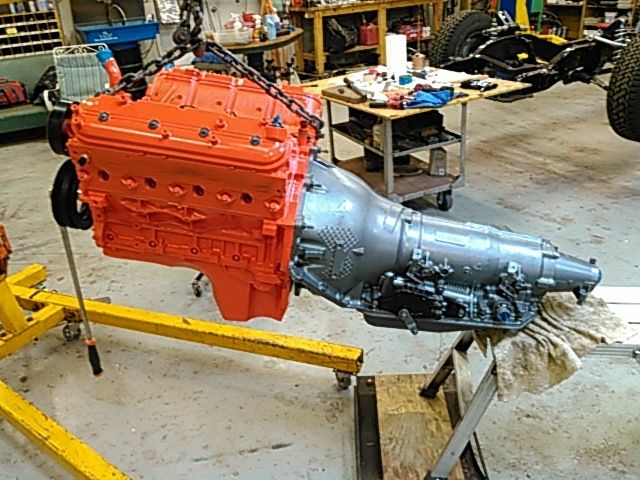 Next was installation of the sdapter plates, i went with the "Dirty Dingo", these have 3 different bolt patterns to mount in different locations. It looks to me like you could flip sides with the plates and have even more options. I knew i wanted my engine set back so will see how it works out... 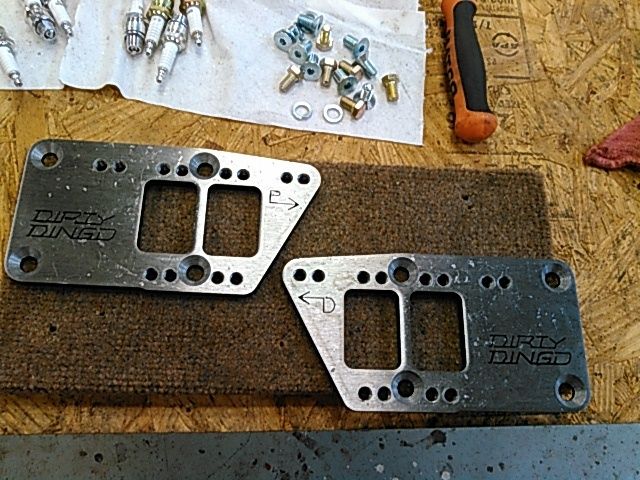 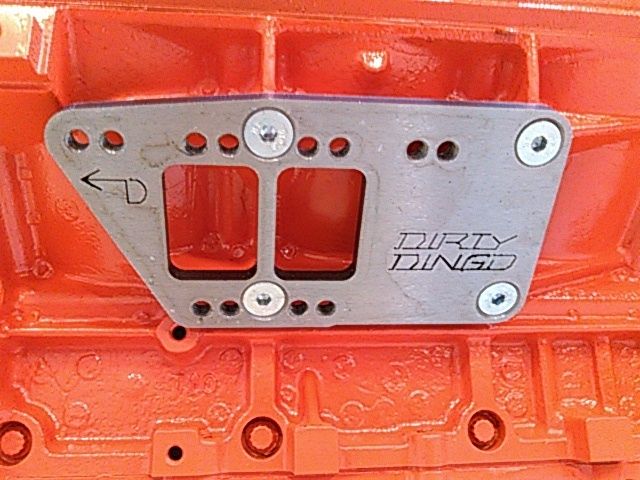 Next i bolted the poly mounts to adapters... 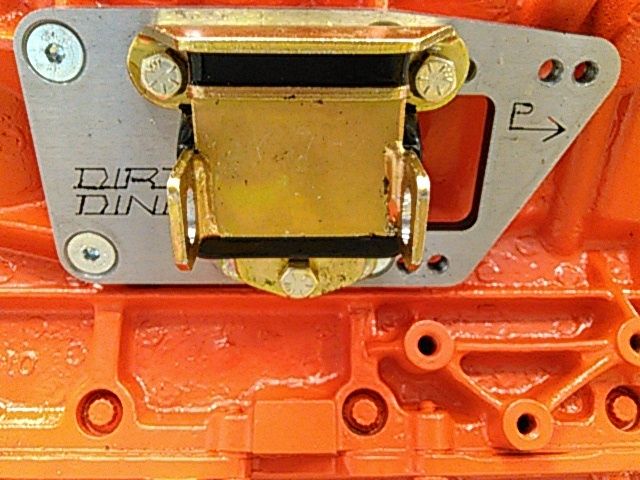 Now i was ready to bolt into the "NoLimit" cradle/crossmember.. of course its never that easy, i was under the impression that i could use my original 6.0 oil pan with the "NoLimit" crossmember....WRONG, it hit the engine plate upright on bottom of pan prior to seating in the motor mounts, so i pulled it back out made some measurements & reshaped the crossmenber. as you can see by photo this gave me about 3/8'' clearance between pan and upright, i spoke to Rob@NoLimit prior to doing this. 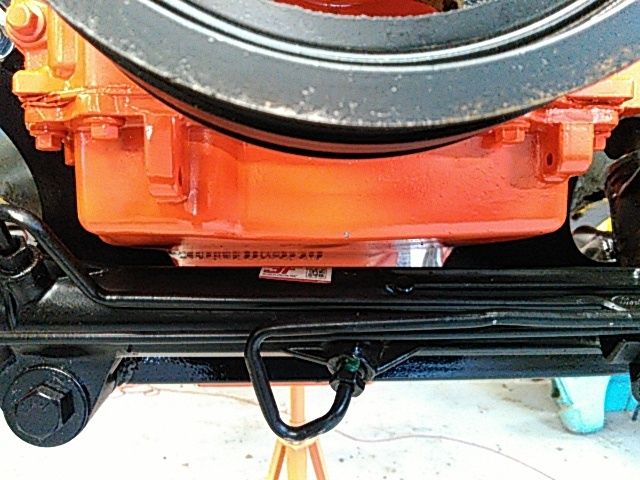 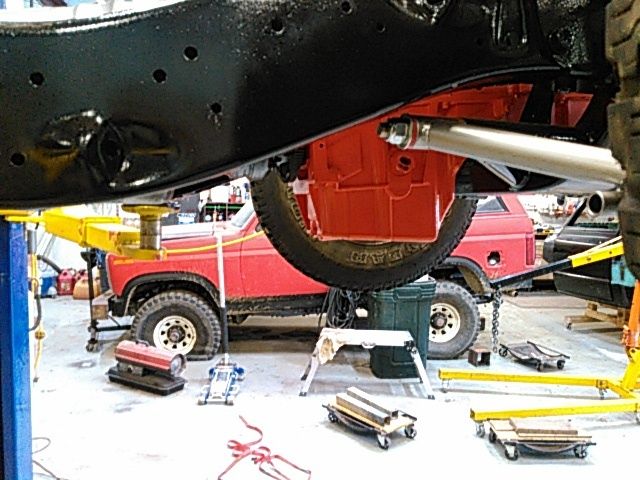 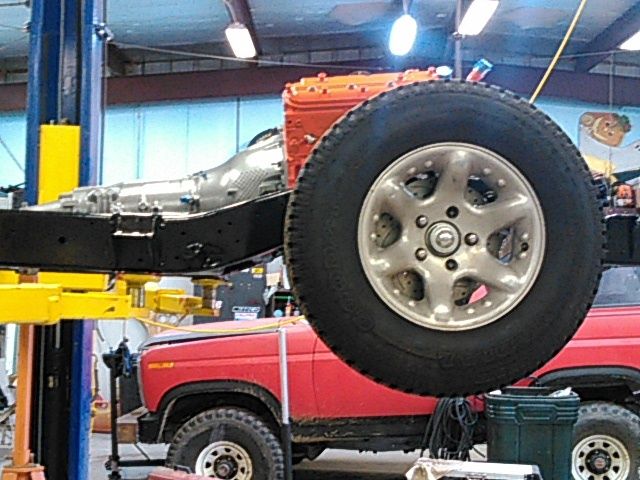 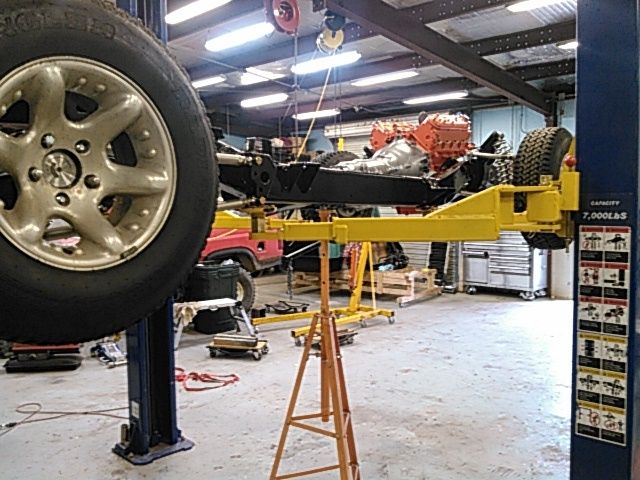 next was mockup of transmission crossmember, NoLimit sent one with the chassis pack kit when i purchased my suspension. however, its designed to hang down from bottom of frame and would still have to be modified due to not being tall enough were the trans mount goes.. after mockup i wasn't happy with the crossmember hanging down about 3''. I felt like this would eventualy drag/snag on something since this is about center of chassis. i stopped here this evening and will start fresh in the morning with some new ideas for a different crossmember. even if i was to modify this crossmember, i feel like it is goint to be competing for area where my exhaust would be going thru my exhaust cut-outs in center crossmember. i will update you guys when i have tackled this issue to my satisfaction..Good Night & God Bless...oops, thats not politicaly correct. |
|
|

|
|
|
#57 |
|
Registered User
 Join Date: Oct 2012
Location: Burnet, Tx
Posts: 332
|
Re: Tucker69 "Project No-Name"
Man you're making good progress, modifying these aftermarket parts seems to fairly common. All great parts made by good companies but sometimes the exact combo just doesn't work the same. Gotta love it lol.
It helps to keep the grey matter fresh! |
|
|

|
|
|
#58 |
|
Registered User
Join Date: Jun 2015
Location: shreveport, la.
Posts: 160
|
Re: Tucker69 "Project No-Name"
Thanks Blown06, yeah, its always something. As stated before I wasn't happy with trans crossmember. crossmember & "X" bracing were competing for area I needed to run my exhaust..so we decided to build a crossmember that would mount off of "X" braces. This would allow area closes to frame rails open for my exhaust.. Here is a pic of what we came up with..
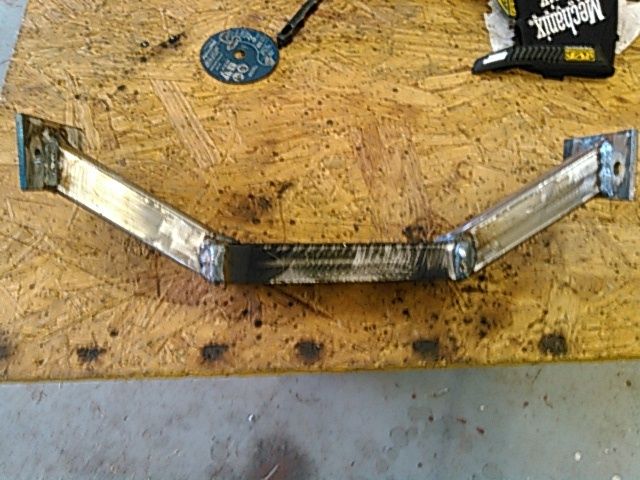 Here it is mocked-up before final welding.. 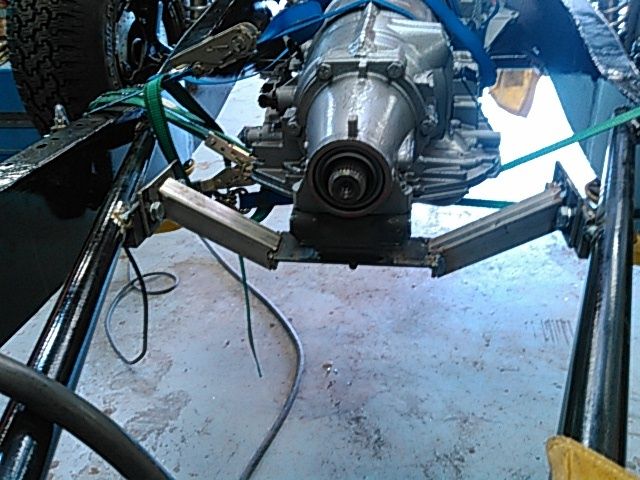 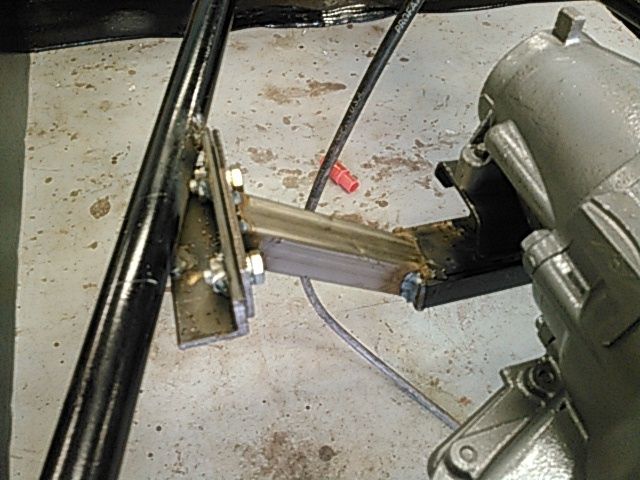 and here she is all done... 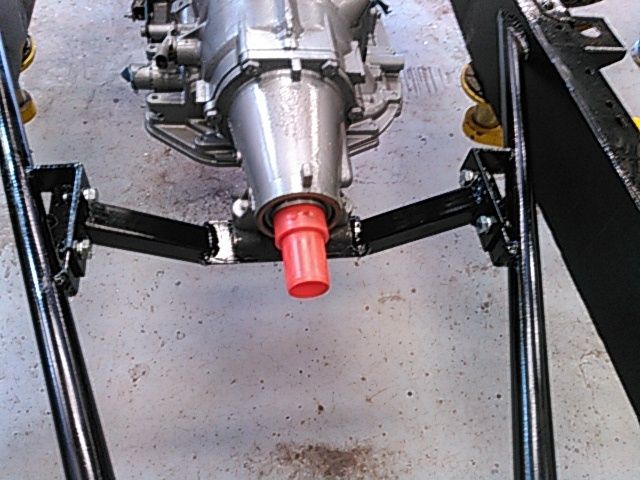
|
|
|

|
|
|
#59 |
|
Registered User
Join Date: Jun 2015
Location: shreveport, la.
Posts: 160
|
Re: Tucker69 "Project No-Name"
|
|
|

|
|
|
#60 |
|
Registered User
Join Date: Jun 2015
Location: shreveport, la.
Posts: 160
|
Re: Tucker69 "Project No-Name"
SO AT THIS POINT I WANTED TO SIT MY CAB ON THE FRAME TO SEE HOW BAD THE TRANSMISSION WAS GOING TO HIT THE CAB TUNNEL...THATS WHEN I REALIZED I HAD MADE A ROOKIE MISTAKE...SOMEWHERE IN MY MEASURMENT TAKING MY CALCULATOR/RULER MUST HAVE BEEN OFF.
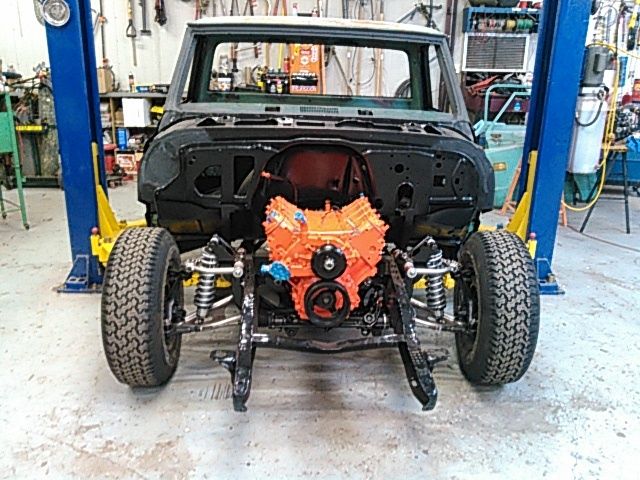 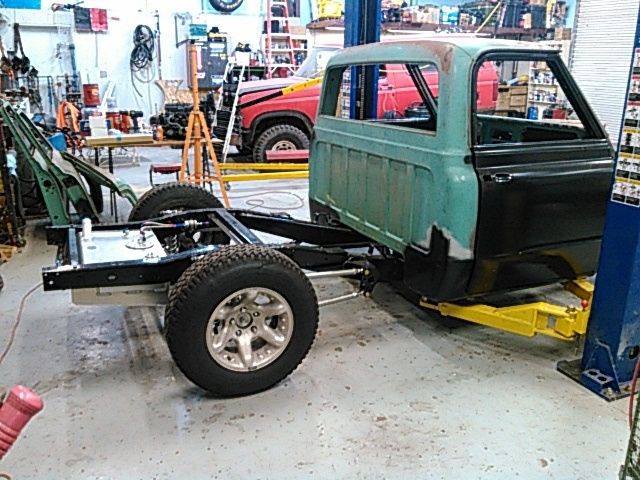 HERE IS MY ISSUE, I AM GONNA HAVE TO CLEARANCE MY TUNNEL. BUT I DID NOT GET MY MOTOR.TRANS BACK AS FAR AS I THOUGHT, SO THE TRANS MOUNT I WAS SO HAPPY WITH WILL HAVE TO BE REWORKED WHEN I PUSH MOTOR BACK SOME MORE...OH WELL WE LEARN... 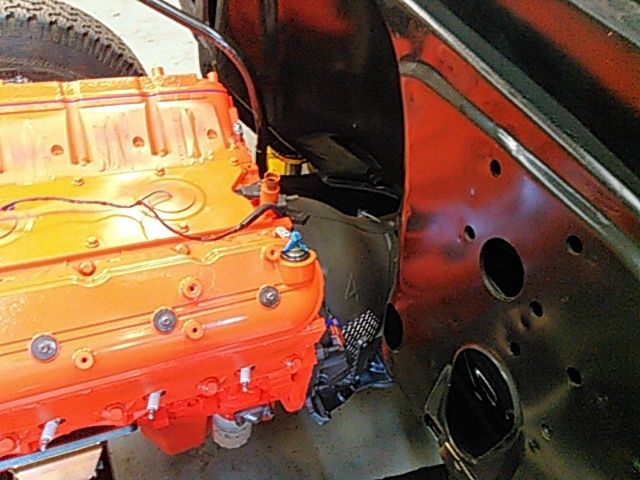
|
|
|

|
|
|
#61 |
|
Registered User
Join Date: Jun 2015
Location: shreveport, la.
Posts: 160
|
Re: Tucker69 "Project No-Name"
SO I PULLED THE POWERTRAIN BACK OUT TO SLIDE THE MOTOR MOUNTS TO THE FORWARD MOST POSITION, TO PUSH ASSEMBLY BACK FURTHER....
HERE IS A PIC OF THE FORWARD POSITION... 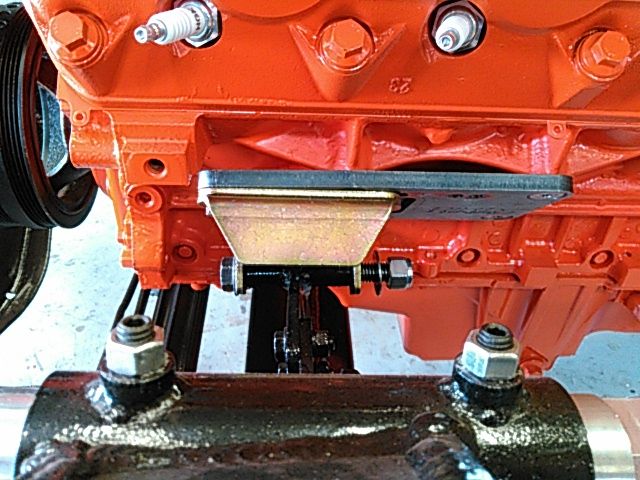 OF COURSE I HAD TO EXTEND MY TRANS CROSSMEMBER.. 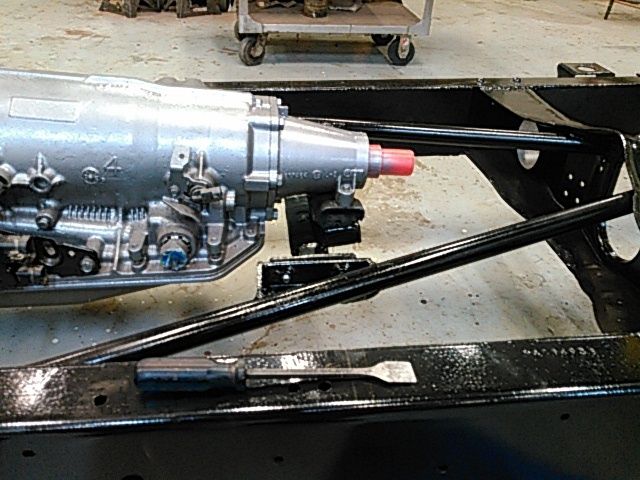 WHILE I HAD ENGINE OUT I WENT AHEAD AND INSTALLED THE "F" BODY OIL PAN. I DIDNT HAVE ANY CLEARANCE ISSUES OTHER THAN THE TRUCK PAN SUMP WAS LOWER THAN I WANTED WITH MY TRUCK SITTING LOW.. HERE IS PIC OF THE NEW PAN, YOU NOTICE IT IS SITS ABOVE THE CROSSMEMBER NOW... 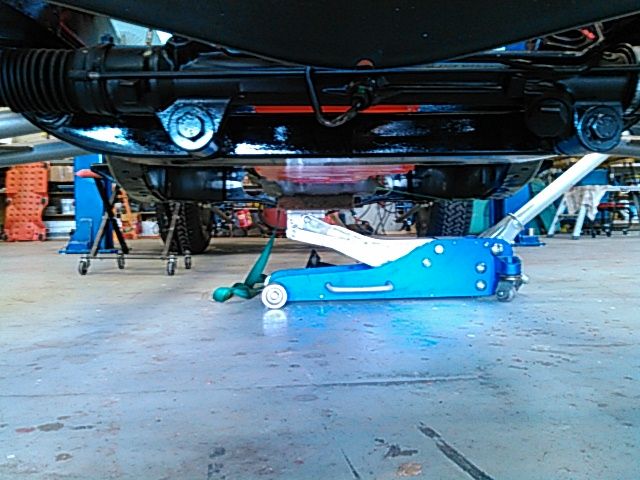
Last edited by tucker69; 11-30-2015 at 02:57 PM. Reason: WRONG PICTURE |
|
|

|
|
|
#62 |
|
Registered User
Join Date: Jun 2015
Location: shreveport, la.
Posts: 160
|
Re: Tucker69 "Project No-Name"
SO I WAS BACK IN WITH THE ENGINE WHERE I WANTED IT..I DECIDED TO GO WITH THE "TBSS" MANIFOLDS FOR NOW, HERE THEY ARE INSTALLED, I HAD A LITTLE CLEARANCE ISSUE AT THE EXHAUST FLANGE & TRANS BELL HOUSING( THE 4L80E TRANS HAS ENOUGH BOLT HOLES ALREADY FOR THE INSPECTION COVER SO I JUST CUT THE EARS OFF THE BELLHOUSING FOR THE SPACE NEEDED..
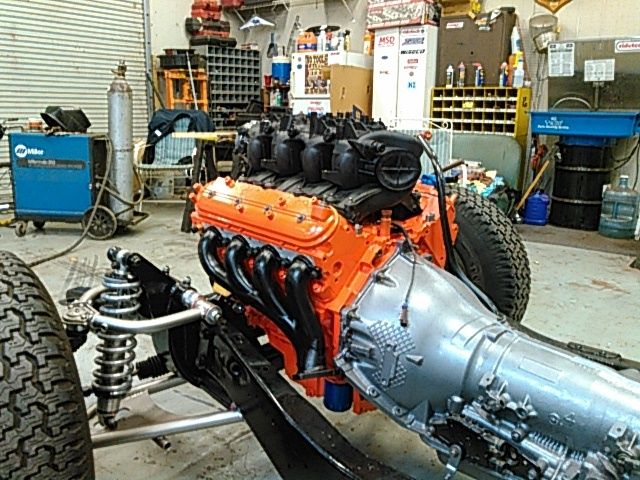 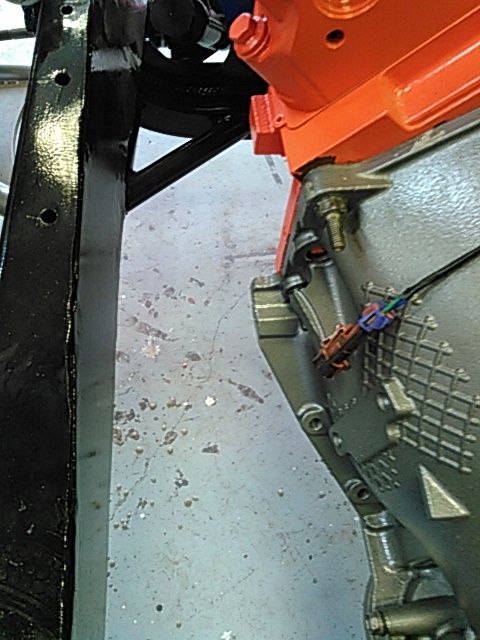 NEXT, I STARTED WITH HARNESS INSTALL: 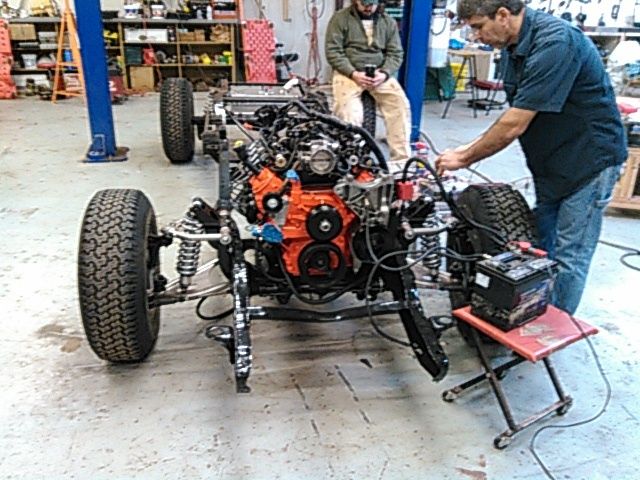 ONCE WIRED WE PUT ON A HOT BATTERY, PUT A FEW GALLONS OF GAS AND BOOM....SHE'S A RUNNER... I LOWERED CAB BACK DOWN TO SEE WHERE I WAS GONNA CUT MY NEW FLOOR FOR CLEARANCE AROUND TRANS TUNNEL.. 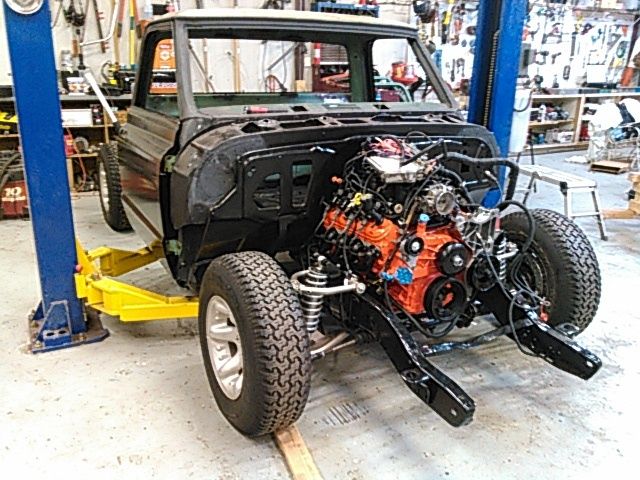 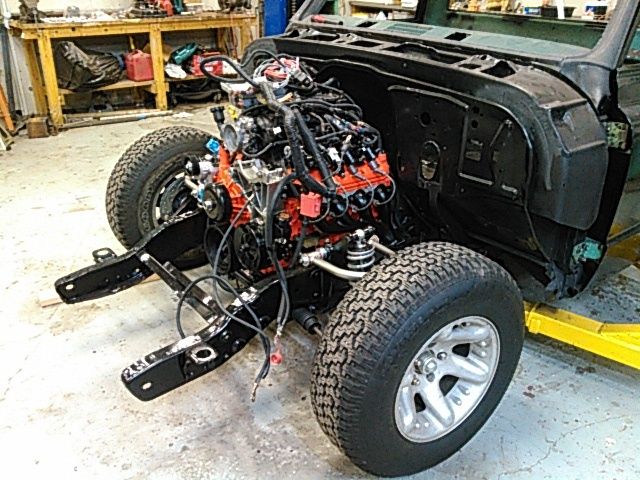
|
|
|

|
|
|
#63 |
|
Registered User
Join Date: Jun 2015
Location: shreveport, la.
Posts: 160
|
Re: Tucker69 "Project No-Name"
If i had thought about the ugly harness issue earlier, i would have lengthened harness to make for a much cleaner install...i have plans to use a different intake manifold & fuel rails i may reroute/lengthen the harness at that time. I wanted to hear this thing run for a little much needed inspiration.. Hard to believe its been almost 7 mos. Ago when started this project..
|
|
|

|
|
|
#64 |
|
Registered User
Join Date: Jun 2015
Location: shreveport, la.
Posts: 160
|
Re: Tucker69 "Project No-Name"
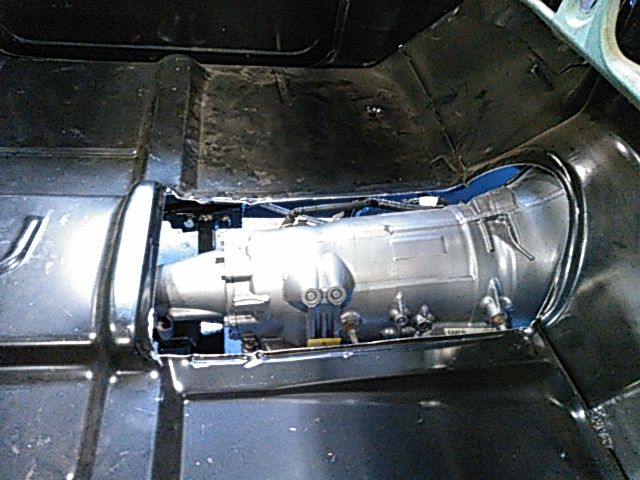
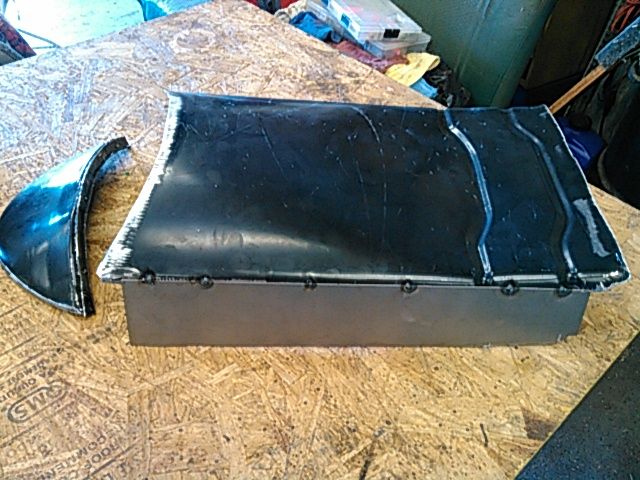
NOW WITH THE ENGINE SITTING WHERE I WANTED IT WAS TIME TO TRY THE CAB BACK ON FRAME AND SEE HOW BAD TRANSMISSION WAS GOING TO RUB ON FLOOR TUNNEL.. IT REALLY WAS NOT THAT BAD, IF YOU DIDNT CARE YOU COULD HAMMER A LITTLE AND MAKE IT WORK. I LOOKED INTO THE 4X4 TUNNEL, BUT WAS UNABLE TO LOCATE ONE QUICK SO I JUST GOT OUT THE SAW BLADE AND WENT TO CUTTING. I STARTED FAB ON THE ORIGINAL. I DID NOT LIKE WHERE IT WAS GOING, SO I AM GONNA START FROM SCRATCH THIS WEEKEND AND TRY TO FAB A COMPLET NEW ONE. I MAY GO BACK TO OLD ONE BEFORE ITS THRU.
Last edited by tucker69; 12-09-2015 at 01:03 PM. Reason: MISSING PIC |
|
|

|
|
|
#65 |
|
Registered User
Join Date: Jun 2015
Location: shreveport, la.
Posts: 160
|
Re: Tucker69 "Project No-Name"
I DID GET MY FRONT ACCESSORIES BOLTED ON. I AM GOING TO USE AN OLDER METAL RADIATOR THAT CAME WITH THE TRUCK FOR NOW. IT HAD A HEATER HOSE FITTING AT THE TOP CORNER THAT I AM ADAPTING FOR THE STEAM LINE OFF OF THROTTLEBODY. RADIATOR IS AT SHOP BEING CLEANED & PRESSURE TESTED NOW. I WILL GET SOME PICS ONCE I GOT INSTALLED.
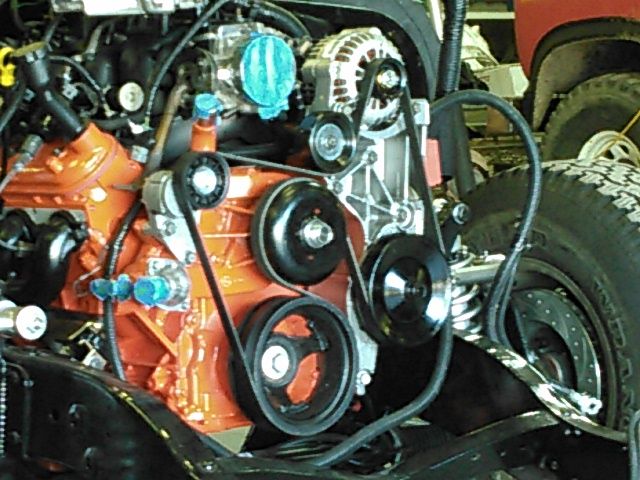 I HAD THE STEERING PUMP THAT WAS OFF OF THE DONOR TRUCK THAT HAD HYDROBOOST BRAKES, THIS PUMP HAS EXTRA LINE THAT I WOULD NOT NEED SO I SWAPED PUMPS FOR ONE OFF TRUCK WITH POWER BRAKES FOR A CLEANER LOOK. THE RACK & PINION SUPPLIED FROM "NO LIMIT" WAS FOR A 1986 THUNDERBIRD. SO I GOT NEW LINES FOR THE LS PUMP AND GOT NEW LINES FOR THE THUNDERBIRD AND AM HAVING MY LOCAL SHOP HERE BUILD MY P/S LINES. HAD THE SAME ISSUE WITH TRANSMISSION COOLER LINES, I USED THE 4L80 TRANS ENDS AND THE ORIGINAL RADIATOR COOLER LINE ENDS AND HAVE THEM REMADE ALSO. SHOULD BE READY TODAY. MY PLANS FOR THIS WEEKEND IS TO FAB UP NEW TUNNEL, INSTALL P/S LINES, INSTALL TRANS COOLER LINES, PULL CAB BACK OFF(HOPEFULLY FOR THE LAST TIME) SO I CAN UNDERCOAT FLOOR AND INSTALL BRAKE LINES ON FRAME. IF TIME ALLOWS I WILL ALSO INSTALL FRONT CORE SUPPORT & RADIATOR. HERE IS LAST PIC OF CAB ON FRAME, REAR DIFF PINION ANGLE ADJUSTED, TRANSMISSION/ENGINE ANGLE ADJUSTED AND MY FRONT AND REAR COILOVERS FLIPPED, I FORGOT TO MENTION THAT ONCE POWERTRAIN WAS IN THE FRONT COILOVER SPRING WAS RUBBING THE FRONT CROSSMEMBER TOWARDS THE TOP. I CALLED ROB @ NO LIMIT AND WE AGREED THE BEAT SOLUTION WAS TO FLIP THE COILOVERS. THIS PUTS THE SPANNERS ON THE TOP( WHICH IS A LITTLE HARDER TO ADJUST, BUT PUTS THE RIDE/RBOUND ADJUSTMENT KNOB AT THE BOTTOM WHICH IS EASIER TO ACCESS. 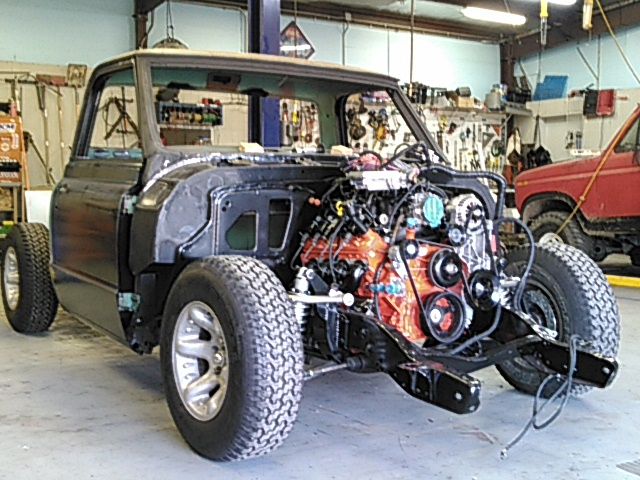 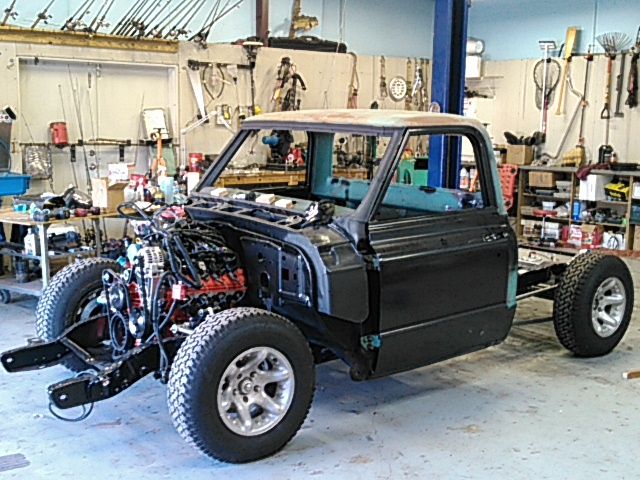 THIS SETUP HAS THE BOTTOM OF THE ROCKERS ABOUT 9'' FROM THE GROUND, I AM SURE THERE WILL BE SOME MORE COILOVER ADJUSTMENT TO DO ONCE I GET THE BED AND THE REST OF THE BODY BACK ON..ANYWAY ENJOY AND EVERYONE HAVE A GREAT CHRISTMAS. |
|
|

|
|
|
#66 |
|
Registered User
Join Date: Jun 2015
Location: shreveport, la.
Posts: 160
|
Re: Tucker69 "Project No-Name"
|
|
|

|
|
|
#67 |
|
Registered User
Join Date: Jun 2015
Location: shreveport, la.
Posts: 160
|
Re: Tucker69 "Project No-Name"
WHEN I POSTED LAST WEEK I SAID I WAS TO TRY AND FABRICATE FROM SCRATCH A NEW TRANSMISSION TUNNEL( I DIDNT LIKE THE WAY THE OLD HUMP WAS GONNA LOOK AFTER I HAD IT RAISED. I BENT UP A NEW ONE FROM A METAL SHEET, MARKED, CUT AND CHECKED CLEARANCE. IT TURNED OUT PRETTY GOOD I THOUGHT, I REALLY DID NOT LOOSE ANY NOTICABLE FLOOR SPACE...
HERE IT IS MOCKED-UP PRIOR TO WELDING... 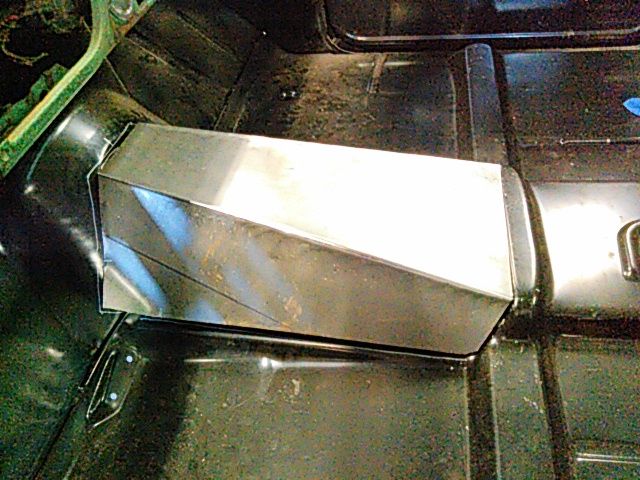
|
|
|

|
|
|
#68 |
|
Registered User
Join Date: Jun 2015
Location: shreveport, la.
Posts: 160
|
Re: Tucker69 "Project No-Name"
Im back with some updates, I had ordered a stainless brake line kit from LMC. not thinking on my part that the engine crossmember from "No Limit" is completely diff than stock, so the brake line kit was worthless in my application. I bought some tubing and "went to town" with my benders. brake lines done. swapped out master cylinder for corvette m/c. we decided it was time for some sheet metal fitment...here is some pics of the assembly....
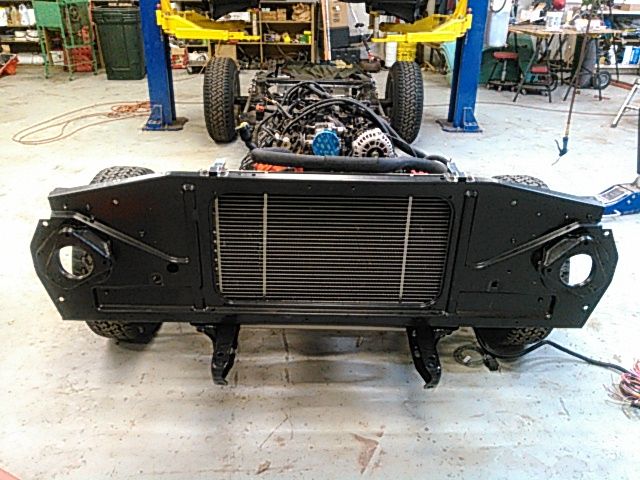 her she is with the fenders hanging.... 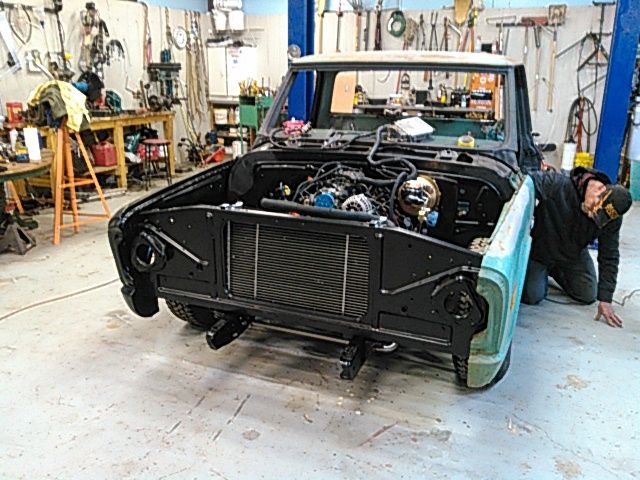 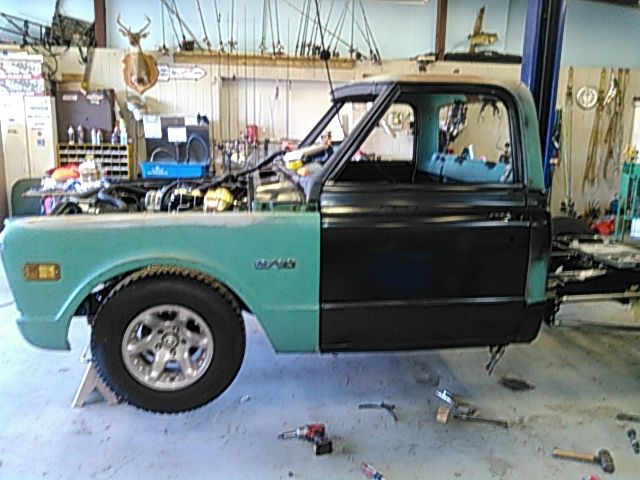 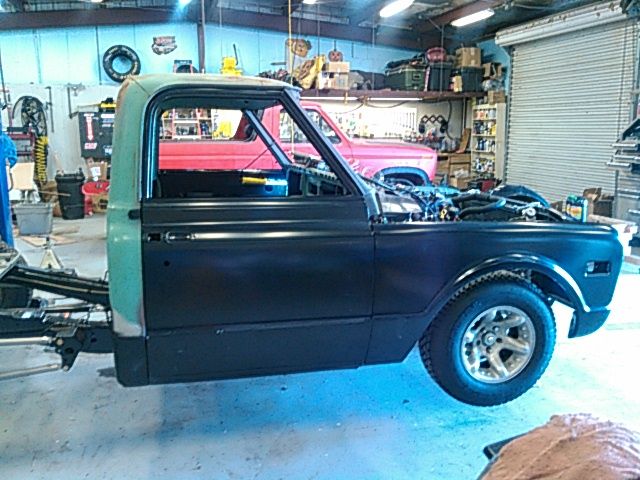 we got the drivers door pretty close after reworking the rocker. time ran out this weekend before we could get to passenger side door. I will get some more pics as we go along...Happy New Year!!!! to all you guys, and keep truckin... |
|
|

|
|
|
#69 |
|
Registered User
Join Date: Mar 2015
Location: Washington State
Posts: 1,654
|
Re: Tucker69 "Project No-Name"
very nice build, ill be following this one.
|
|
|

|
|
|
#70 |
|
Registered User
Join Date: Jun 2015
Location: shreveport, la.
Posts: 160
|
Re: Tucker69 "Project No-Name"
Thanks man, in some ways it seems like these 7 months went by fast and other ways it feels like years. Either way, it's been 30 hours a week of work for 7 months. Getting those fenders and core support bolted on gave me such a "shot in the arm". Starting to see a little light in the tunnel. Anyway, thanks and enjoy, let me know if you have questions
|
|
|

|
|
|
#71 |
|
Registered User
Join Date: Jun 2015
Location: shreveport, la.
Posts: 160
|
Re: Tucker69 "Project No-Name"
|
|
|

|
|
|
#72 |
|
Registered User
Join Date: Jun 2015
Location: shreveport, la.
Posts: 160
|
Re: Tucker69 "Project No-Name"
|
|
|

|
|
|
#73 |
|
Registered User
Join Date: Jun 2015
Location: shreveport, la.
Posts: 160
|
Re: Tucker69 "Project No-Name"
|
|
|

|
|
|
#74 |
|
Registered User
Join Date: Jun 2015
Location: shreveport, la.
Posts: 160
|
Re: Tucker69 "Project No-Name"
|
|
|

|
|
|
#75 |
|
Registered User
Join Date: Jun 2015
Location: shreveport, la.
Posts: 160
|
Re: Tucker69 "Project No-Name"
|
|
|

|
 |
| Bookmarks |
| Thread Tools | |
| Display Modes | |
|
|