 |
|
|
#1 |
|
Registered User
Join Date: May 2004
Location: Ontario Canada
Posts: 164
|
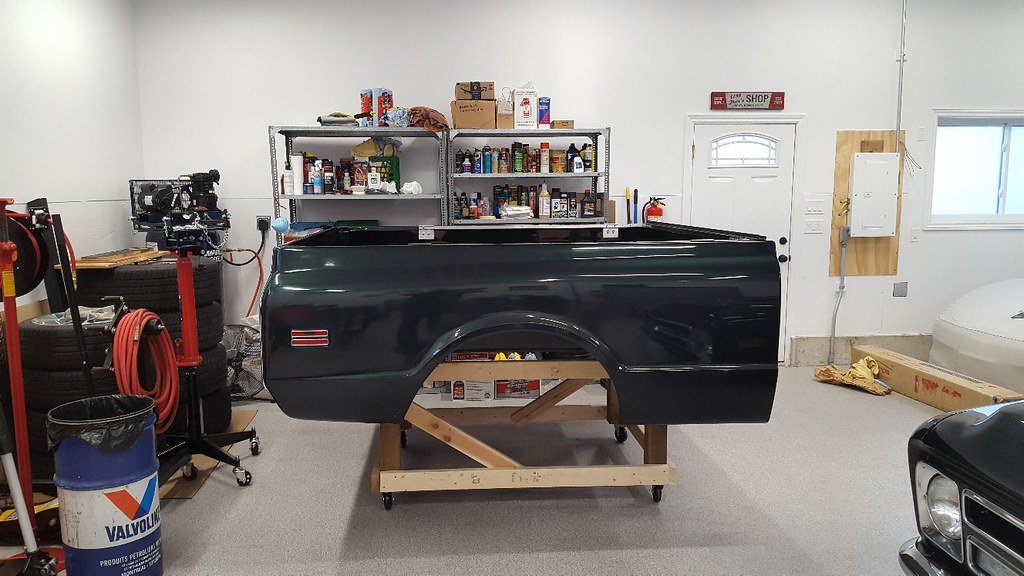
My new Bed Lift Rig
I welded up some tubing to lift the bed off my 68 C10. Worked very well!! Some people are using wood but after pricing out some 4X4's and hardware I decided to buy some metal. It was a little more money than the wood but lighter, stronger and easily reusable or sell it when no longer needed. If you have a welder or access to one this is a simple project.
     I'm fortunate to have a lift but an engine cherry picker works well too. Last edited by GMJimmy; 12-09-2020 at 07:58 PM. |
|
|

|
|
|
#2 |
|
6>8 Plugless........
 Join Date: Sep 2007
Location: Prairie City, Ia
Posts: 17,143
|
Re: My new Bed Lift Rig
Very nice! The shop and truck are super sweet too! Your lifting device is better than mine. I used ratchet straps and my engine crane.

__________________
Ryan 1972 Chevy Longhorn K30 Cheyenne Super, 359 Inline 6 cylinder, Auto Trans, Tilt, Diesel Tach/Vach, Buckets, Rare Rear 4-link and air ride option Build Thread 1972 GMC Sierra Grande Longhorn 4x4 1972 Chevy Cheyenne Super K20 Long Step side tilt, tach, tow hooks, AC, 350 4 speed 1972 C10 Suburban Custom Deluxe 1969 Chevy milk truck 1971 Camaro RS 5.3 BTR STG3 Cam Super T10 1940 Ford 354 Hemi 46RH Ford 9" on air ride huge project Tired of spark plugs? Check this out. |
|
|

|
|
|
#3 |
|
Registered User
Join Date: Aug 2007
Location: Corona, California
Posts: 7,998
|
Re: My new Bed Lift Rig
That is real slick.
Kim |
|
|

|
|
|
#4 |
|
Registered User
Join Date: May 2004
Location: Ontario Canada
Posts: 164
|
Re: My new Bed Lift Rig
Thanks for the comments. If you want a materials list and measurements, let me know.
|
|
|

|
|
|
#5 |
|
Registered User
Join Date: May 2012
Location: moose jaw, sk
Posts: 92
|
Re: My new Bed Lift Rig
Just came across your thread awesome bed lift. I would love to get the material list, dimensions for the bed lift that would great. you can PM me
Thanks Blaine |
|
|

|
|
|
#6 |
|
Registered User
Join Date: May 2004
Location: Ontario Canada
Posts: 164
|
Re: My new Bed Lift Rig
|
|
|

|
|
|
#7 |
|
Registered User
Join Date: Aug 2011
Location: Montrose, CO
Posts: 972
|
Re: My new Bed Lift Rig
I would love to get the materials and plans list, pleas.
|
|
|

|
|
|
#8 |
|
Registered User
Join Date: May 2004
Location: Ontario Canada
Posts: 164
|
Re: My new Bed Lift Rig
|
|
|

|
|
|
#9 |
|
Registered User
Join Date: May 2004
Location: Ontario Canada
Posts: 164
|
Re: My new Bed Lift Rig
Rather than sending out the materials list and instructions individually I'm posting it here for those who would like it.
The following tubing will telescope into each other. The supplier I bought it from has a short form name for it. "HOLL STRUCT TUBE SQ". Make sure your tubing will telescope. Don't buy tubing that has the joint weld on the inside as this won't allow it to telescope. 2 PC CHS 2" X 2" X .100 wall X 60" (5 feet) 1 PC CHS 2" X 2" X .100 wall X 48" (4 feet) 4 PC CHS 1-3/4" X 1-3/4" X .100 wall X 18" 2 PC CHS 1-3/4" X 1-3/4" X .100 wall X 12" 4 PC CHT 3" X 1-1/2" X 1/8" (.125") wall X 8" you can use .100 wall for this. My supplier did not have any in stock. 1 PC 2-1/2" X 2-1/2" X .186" wall X 8" This piece with .186 wall thickness will slide over the main 4 foot tube nicely. 1 piece hot rolled 1/2" dia. round bar 14" long for the hook point. 13 - 3/8" nuts 9 - 3/8" X 1" bolts 4 - 3/8" X 2-1/2" bolts 4 - 3/8" lock washers As far as the drilling goes I think it's best to refer to how it goes together by the lengths. So the main 4 foot piece (down the middle) is drilled at 2" and 4" from each end. The 1 foot long 1-3/4" X 1-3/4" that slides into the 4 foot piece are welded to the center of the 5 foot cross piece. This one foot piece has 5 holes drilled in it at 2" increments for length adjustment. The two 5 foot cross pieces have 3/8" nuts welded at 2" and then 8" from EACH END. The 1-3/4 X 1-3/4" 18" long pieces slide into the 5 foot cross pieces have the 3" X 1-1/2" welded at the ends on top of the tubing not on the butt end. With these notes and the pictures you should be able to put this together. Any questions just ask. Cheers! Jim |
|
|

|
 |
| Bookmarks |
| Thread Tools | |
| Display Modes | |
|
|