
 |
Register or Log In To remove these advertisements. |
|
|
|
|||||||
 |
|
|
Thread Tools | Display Modes |
|
|
#326 |
|
Registered User
Join Date: Oct 2017
Location: Northeast, Pa
Posts: 287
|
Re: "Midnight Rider" 1970 C10 SWB Fleetside
Looking great. I really like that rear interior cab panel. I need to do something like that, one day.
|
|
|

|
|
|
#327 |
|
Registered User
Join Date: Feb 2015
Location: Atlanta, GA
Posts: 38
|
Re: "Midnight Rider" 1970 C10 SWB Fleetside
Awesome work on that pedal assembly!
|
|
|

|
|
|
#328 | |
|
Senior Member
 Join Date: Jul 2010
Location: Race City U.S.A.
Posts: 1,036
|
Re: "Midnight Rider" 1970 C10 SWB Fleetside
Quote:
Appreciate that Danyo!
__________________
Board Member #87725 My build thread... http://67-72chevytrucks.com/vboard/s...d.php?t=813848 Last edited by omodified; 08-07-2023 at 10:58 AM. |
|
|
|

|
|
|
#329 |
|
Senior Member
 Join Date: Jul 2010
Location: Race City U.S.A.
Posts: 1,036
|
Re: "Midnight Rider" 1970 C10 SWB Fleetside
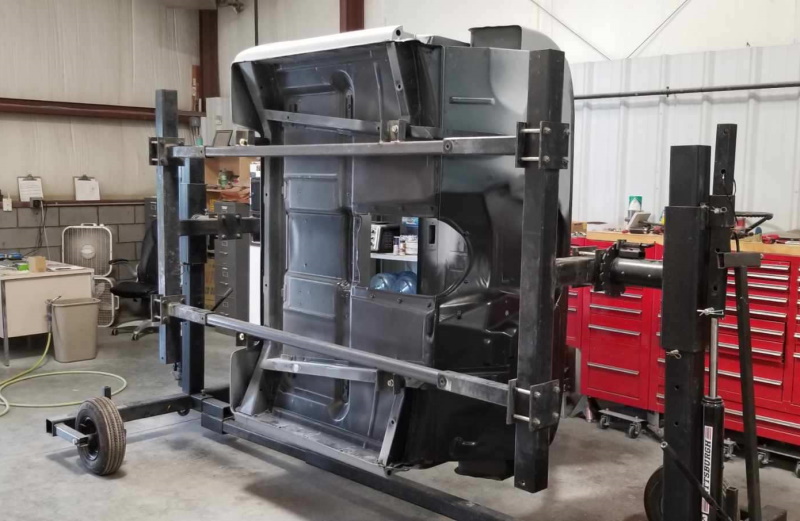
Had to take some time off but things are rolling again. Finally got the cab on the rotisserie. It's time to mount the sport bucket seats and console.
 I read through a lot of information on these boards about this process. In the end, there were two threads that had all of the info I needed. To start, you definitely need mounting braces. There are a total of five. You can find them used sometimes from any truck that had factory buckets installed, but they are hard to find. Luckily for me, there are two board members that sell the correct reproduction braces. RogerKoop sells the rear braces. They already have weld nuts in place for the 5/16-18 seat mounting bolts. 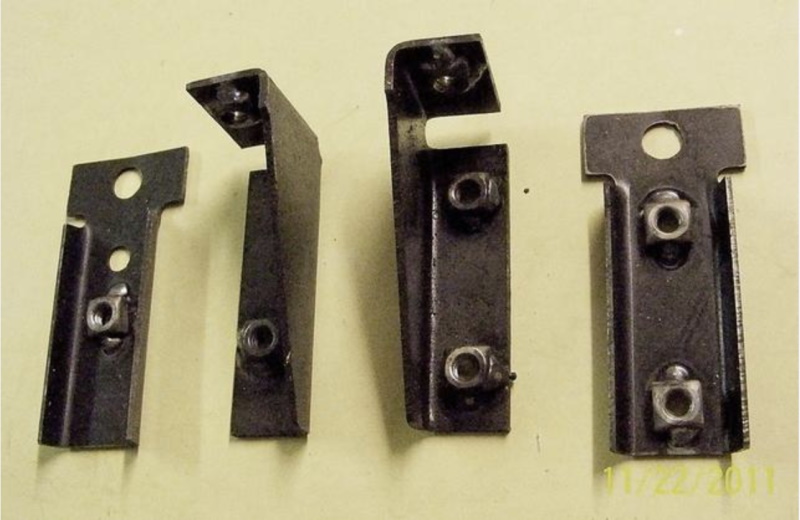 Old_Truck_Fan sells the front brace. This reproduction is made from the same thickness steel as the original and looks almost identical to the original. 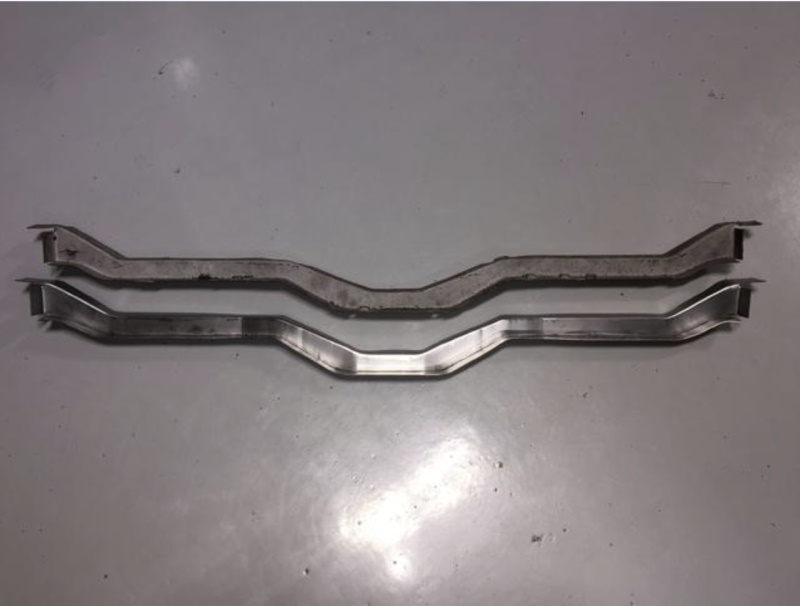 The front brace came with enough weld nuts to mount the front seats and the console. Apparently, the factory used sheet metal screws to mount the console, but I think the weld nuts in this case will just be a lot cleaner. Unlike the rear brackets, you have to weld them in place yourself. This kit comes with a super nice set of installation instructions. There are measurements scattered throughout but nothing simplified. I found some other measurements scattered around these forums, but again nothing complete. So, I took notes from all of these sources and came up with my own. I borrowed this next photo from the instructions, but I added my measurements to it. 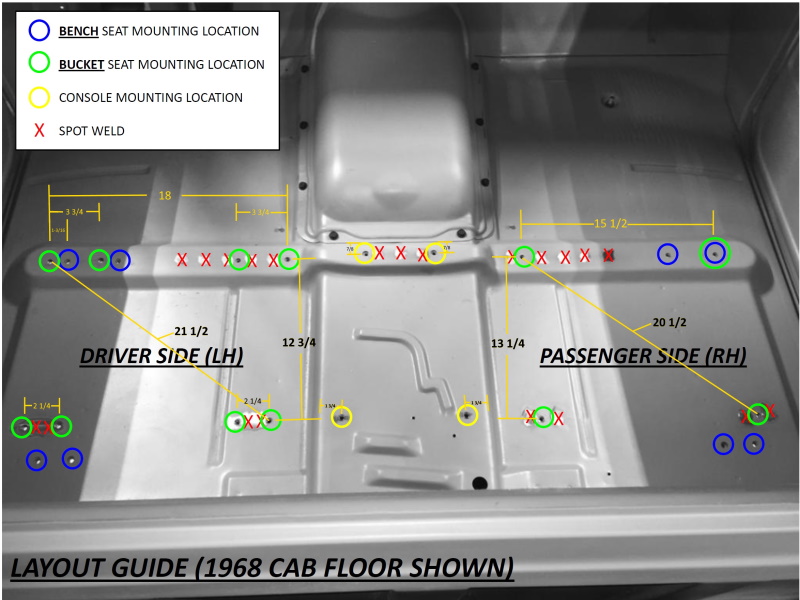 Now, to install all this stuff...
__________________
Board Member #87725 My build thread... http://67-72chevytrucks.com/vboard/s...d.php?t=813848 Last edited by omodified; 05-04-2024 at 11:20 AM. |
|
|

|
|
|
#330 |
|
Senior Member
 Join Date: Jul 2010
Location: Race City U.S.A.
Posts: 1,036
|
Re: "Midnight Rider" 1970 C10 SWB Fleetside
I wanted to get the braces in epoxy primer before they are installed. Since the rear brackets are small enough, I was able to blast those in the cabinet. The front brace is too big so I used a scotchbrite pad to prep the surface for paint. Last, was two coats of epoxy primer.
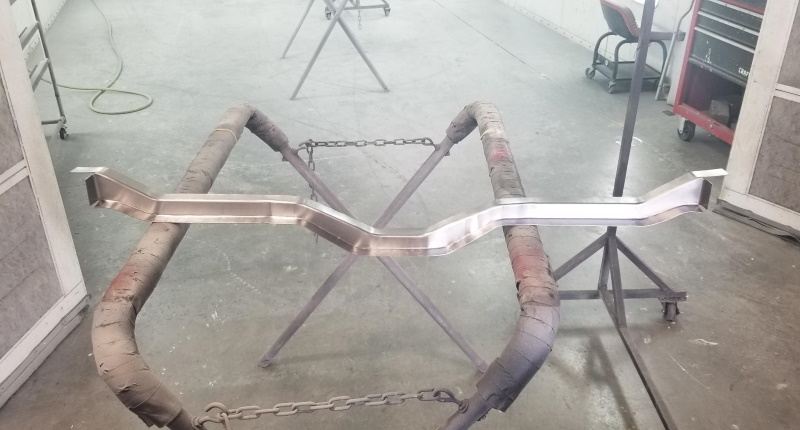 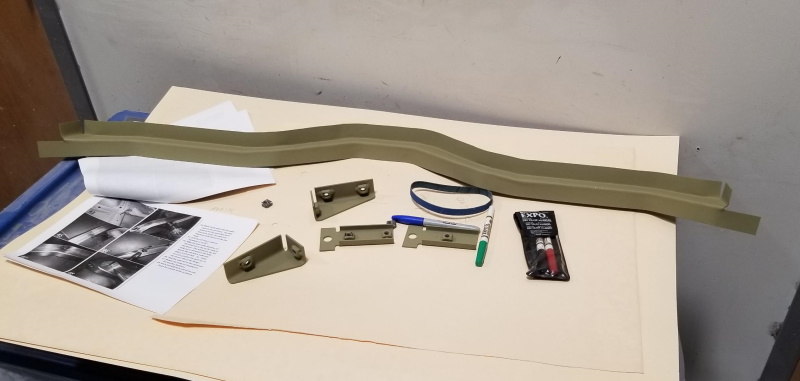 Next was mapping out the holes on the floor of the cab. I think we measured every way possible, fifty times each way. Once there was a high level of confidence, each bolt hole was drilled to 11/32". When each side was finished, the seats went in to check the fit. The seats fit perfectly so we drilled the holes for the console. 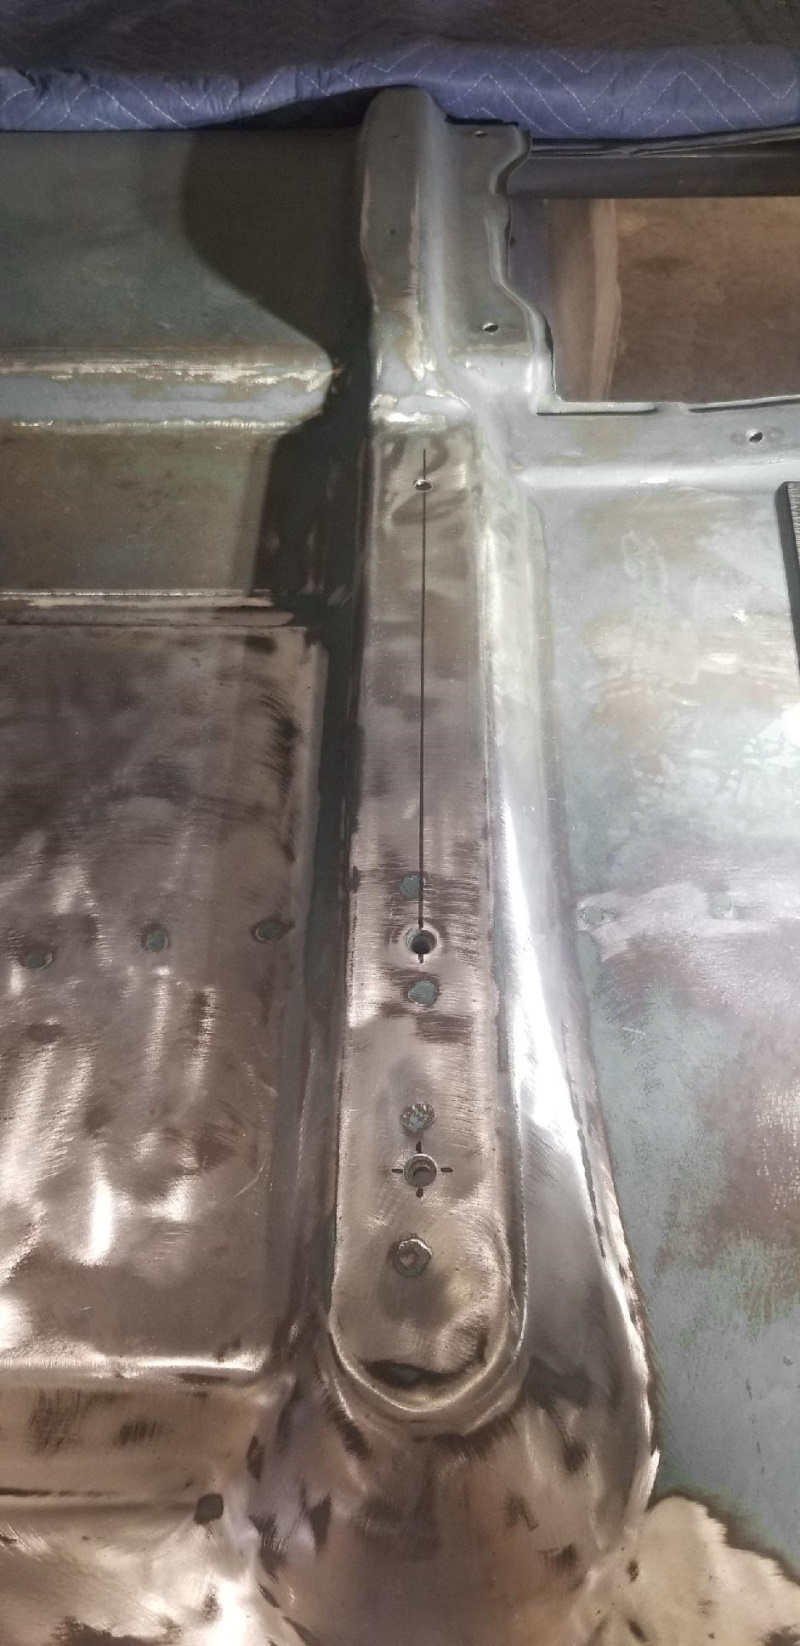 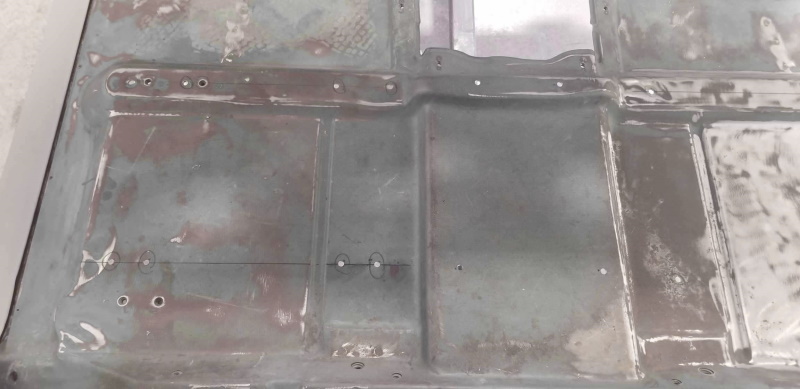 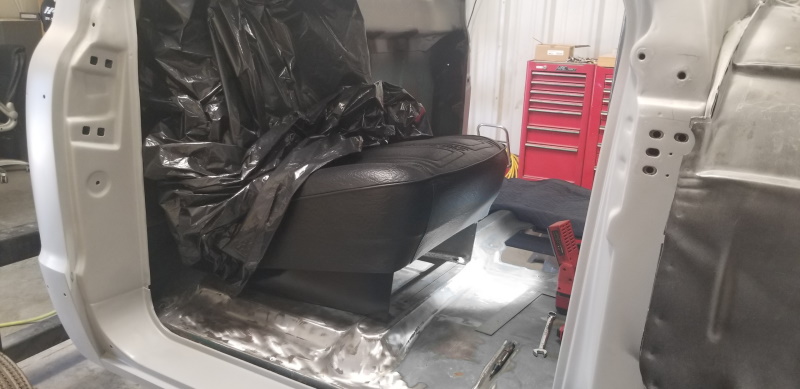 After drilling the holes, I started vacuuming. I then realize by rotating the cab around it was shaking stuff loose between the sheet metal. All sorts of stuff was coming out from every hole, mostly dirt from mud dobbers and stones. I probably spent an hour with a blow tool and the vacuum to get it all out. I always used to hear stuff rattling/rolling around but I could never figure out where it was coming from. 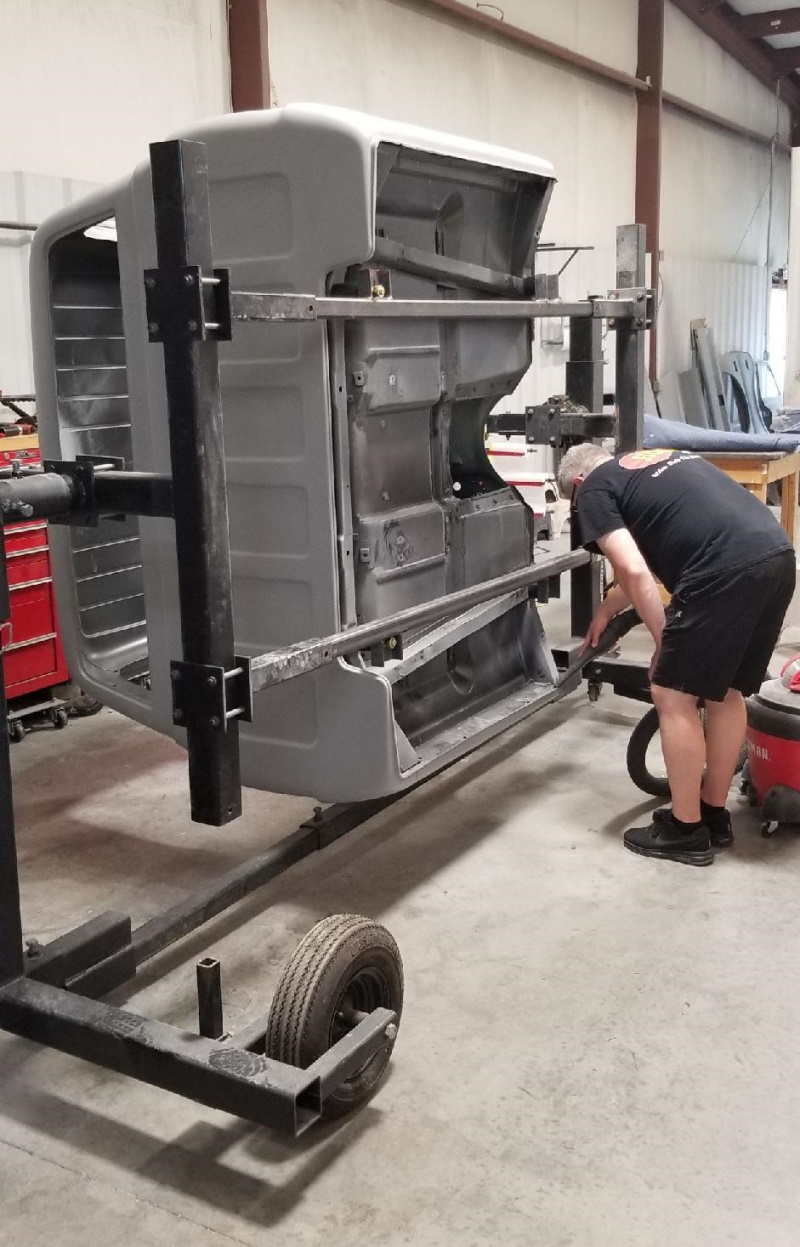 Back to the install... Unfortunately, the rear brackets didn't quite fit. It appeared to be a mixture of the weldnuts already being welded onto the brackets, and maybe the factory manufacturing tolerances of the cab itself. The fix was just cutting the weldnuts off, an installing new ones where things end up being happiest. This made things line up perfect. 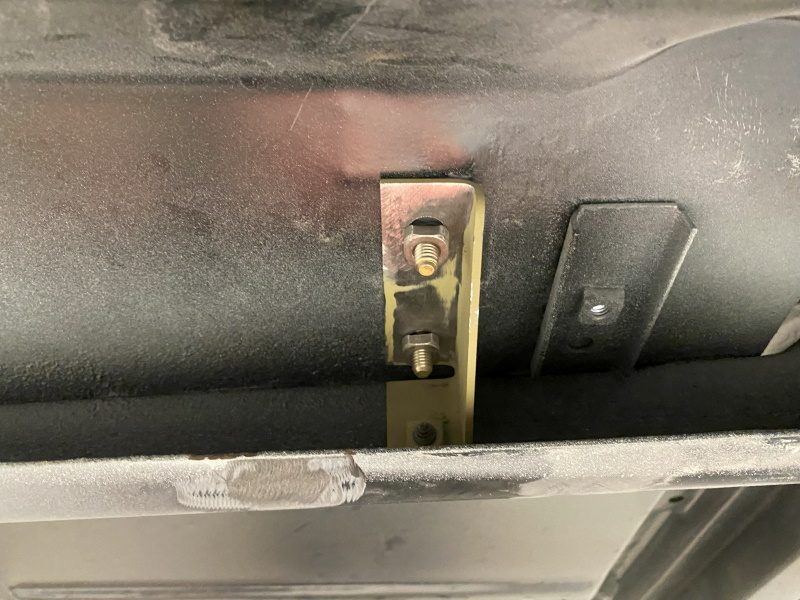 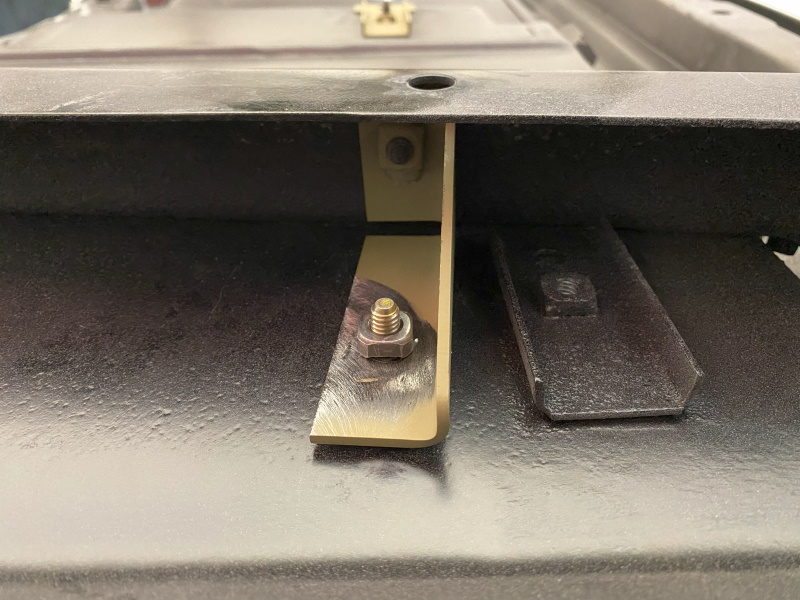 Next, the front brace was clamped down so the holes from the cab could be transferred and drilled into the brace. Once the holes were drilled, weldnuts were tightened down into place. Then all of the wlednut were welded into place, including weldnuts for the console. 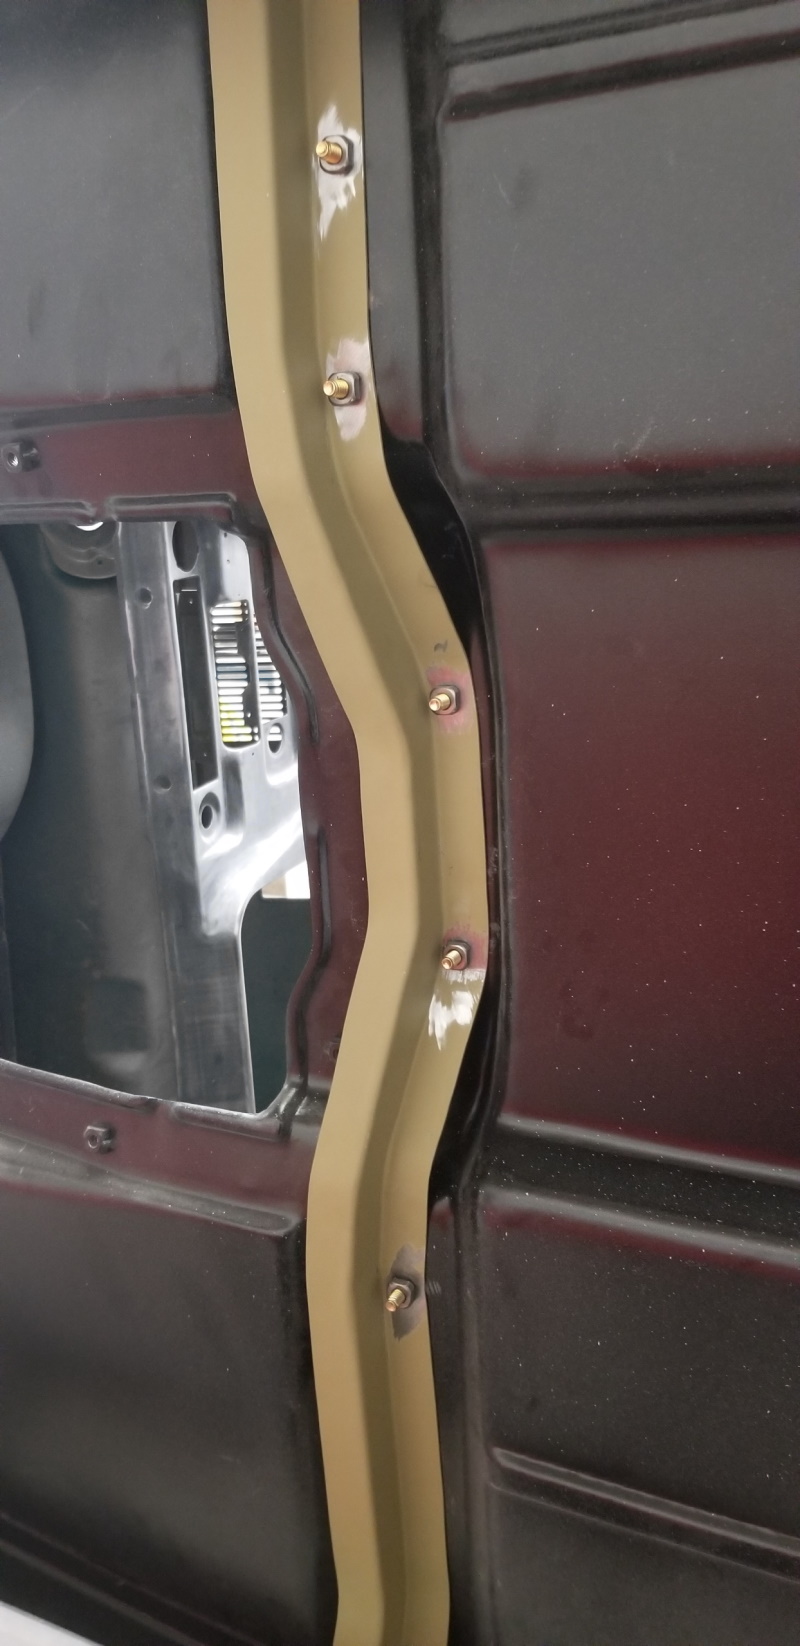 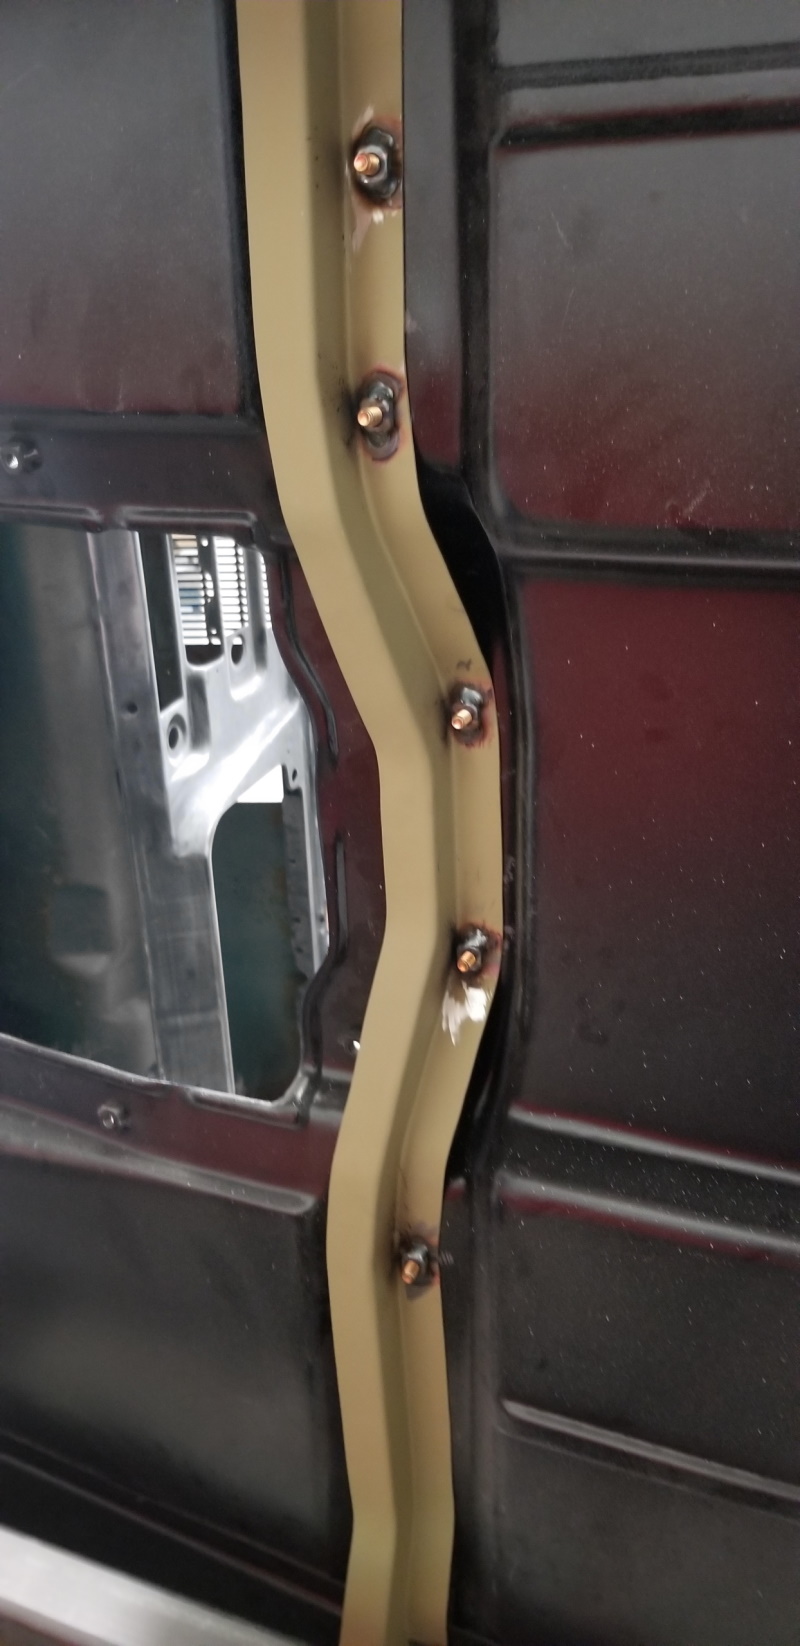 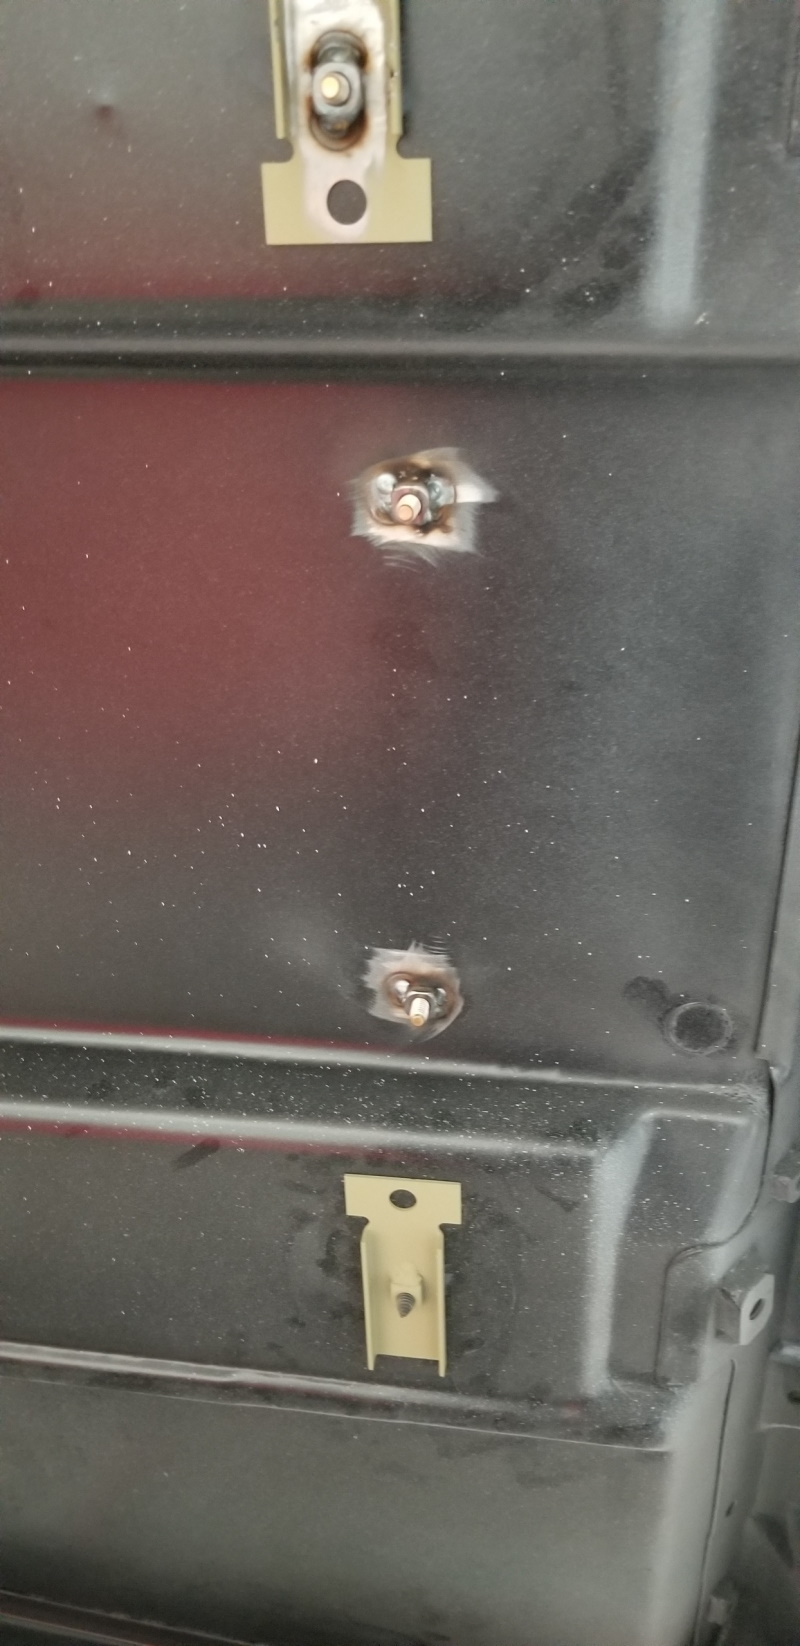 Next, the holes were drilled for the spot welds (plug welds) and the welds were made. 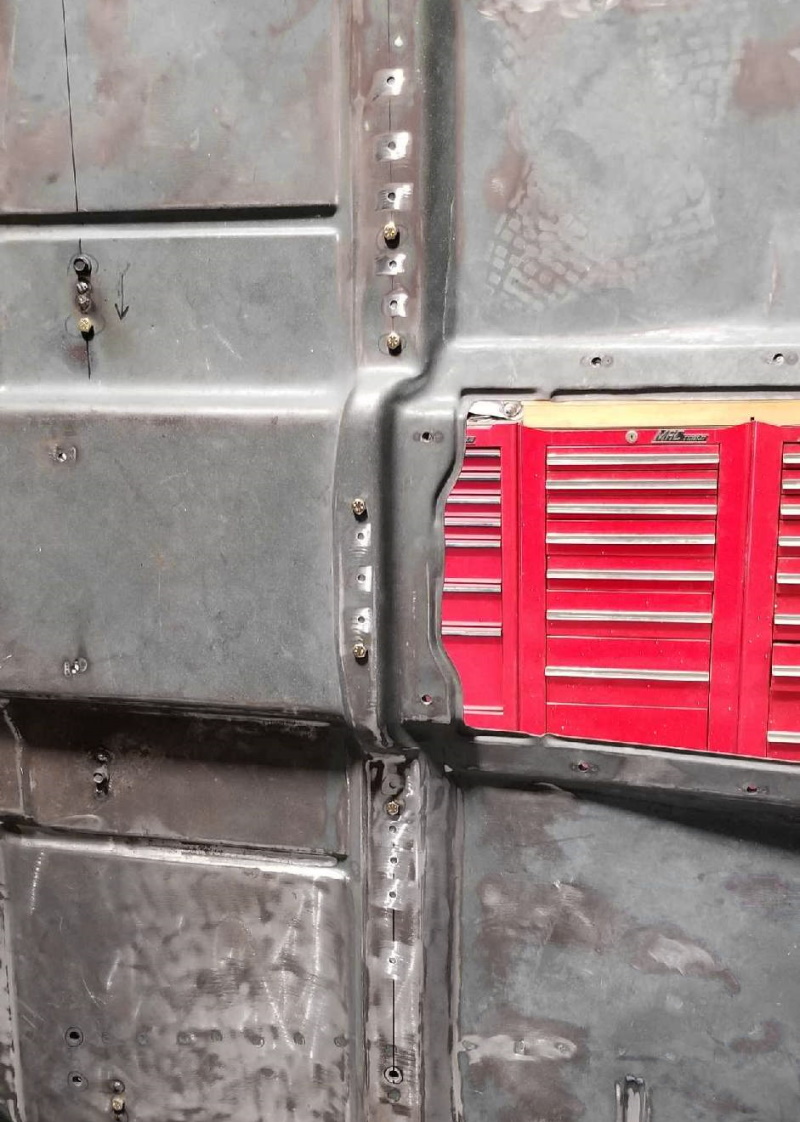 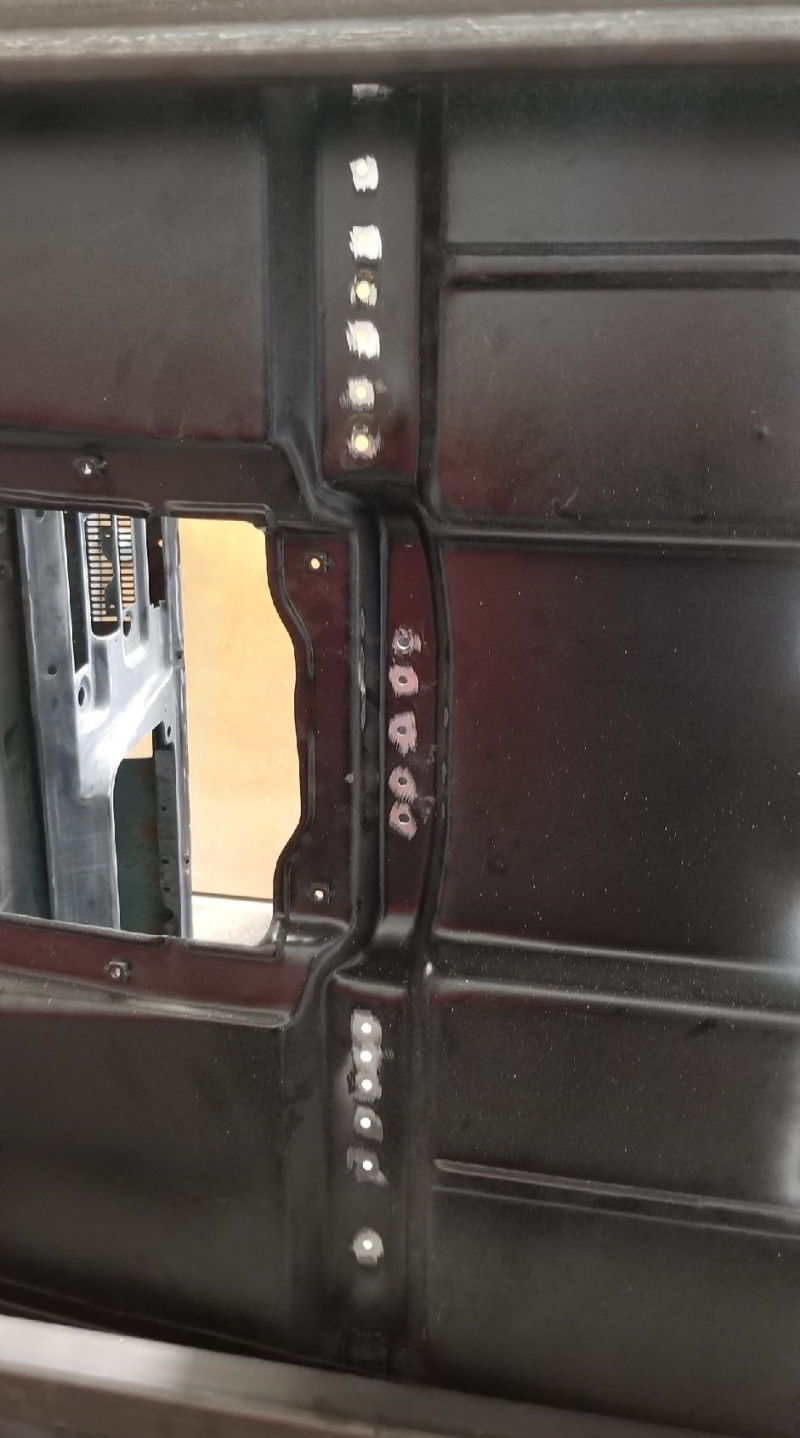 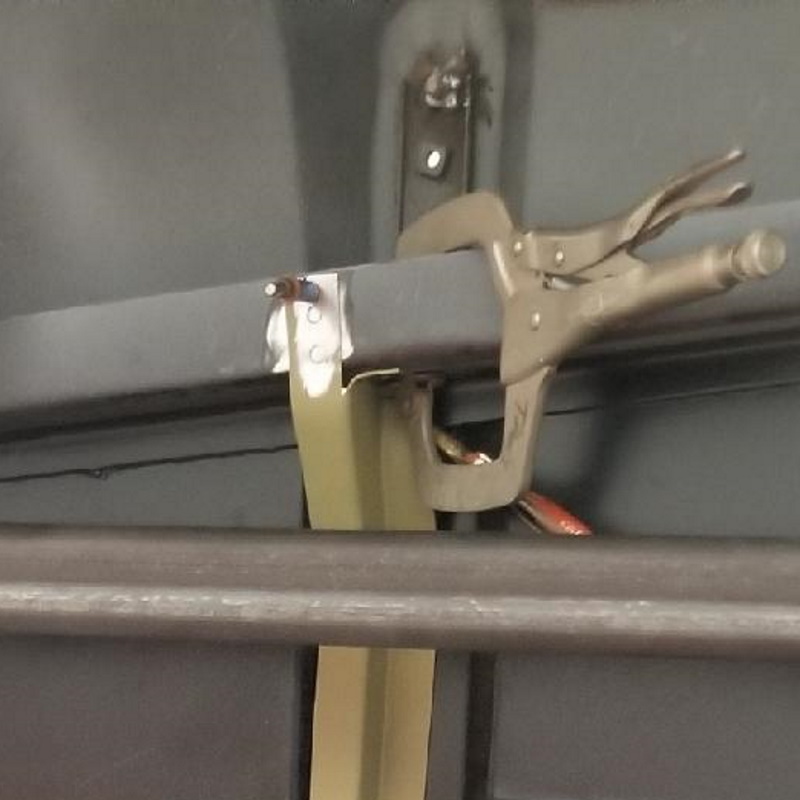 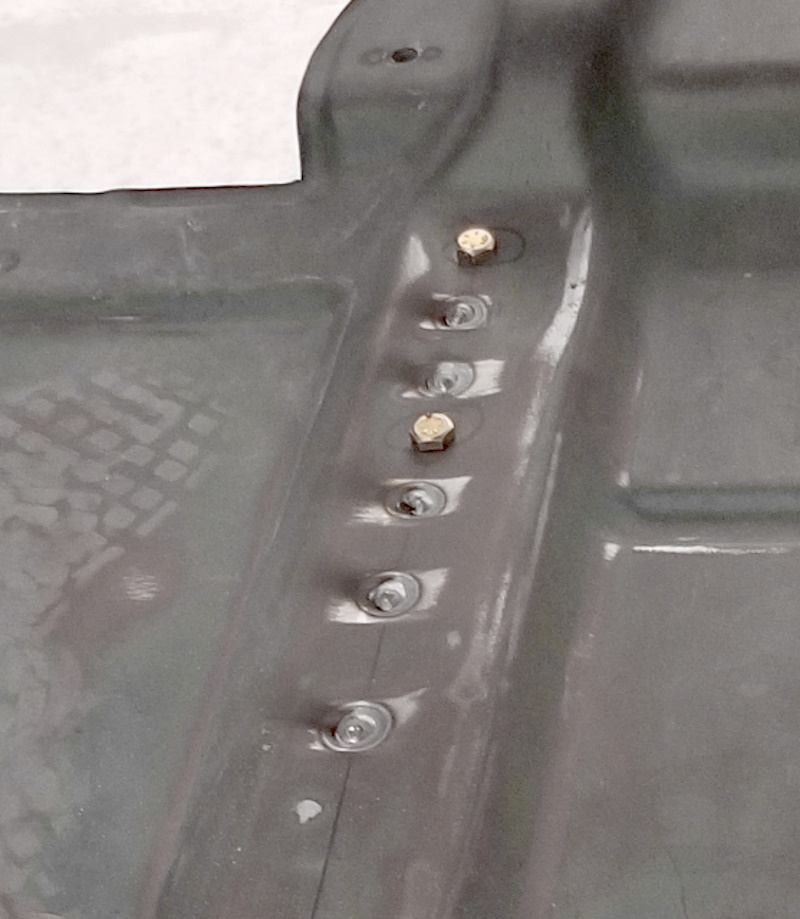 Last, was grinding all of the welds flush. 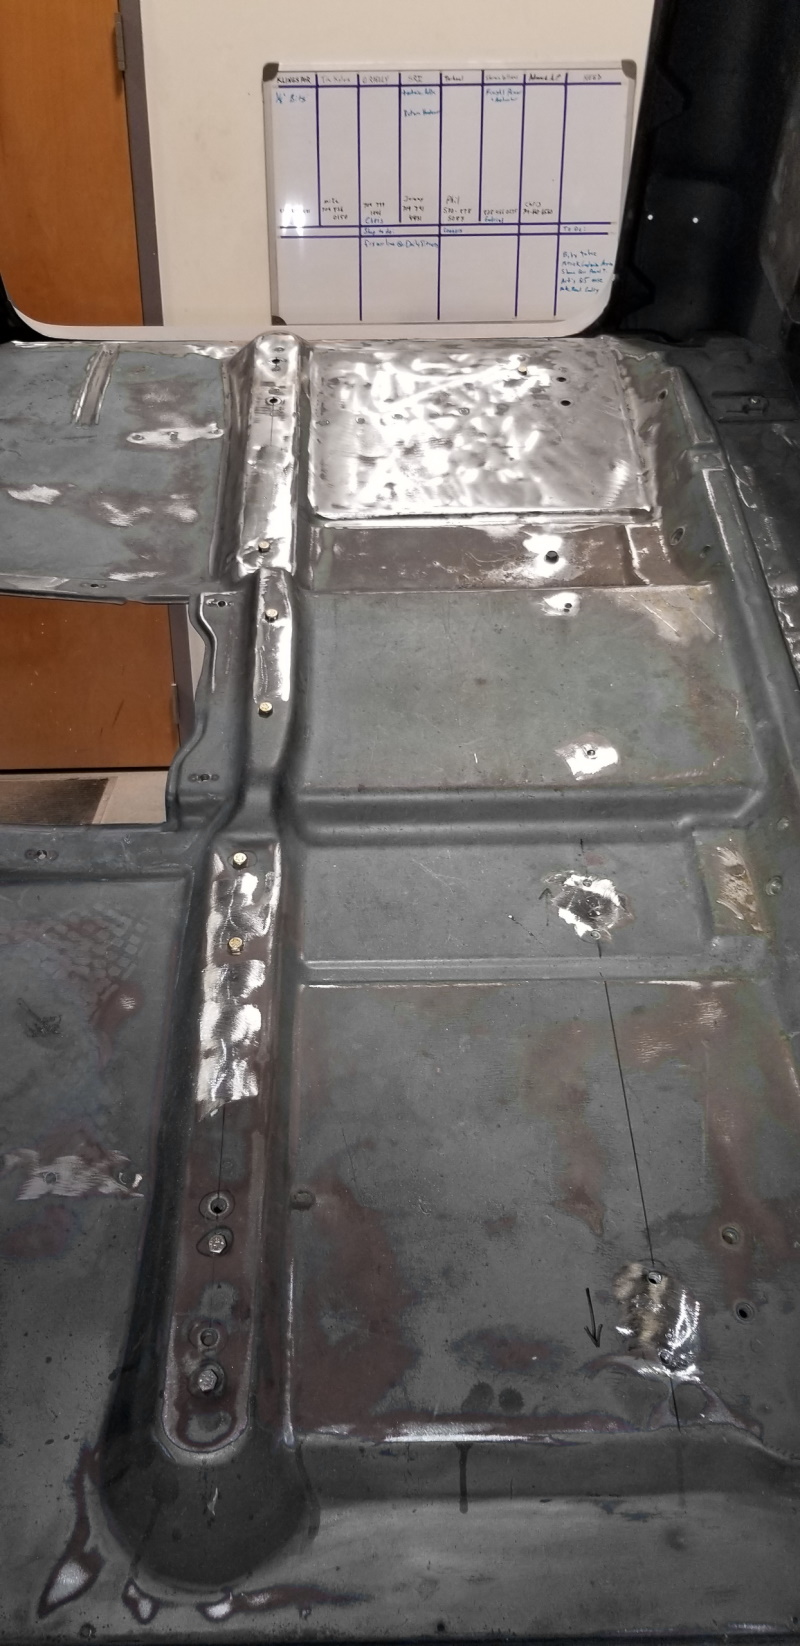 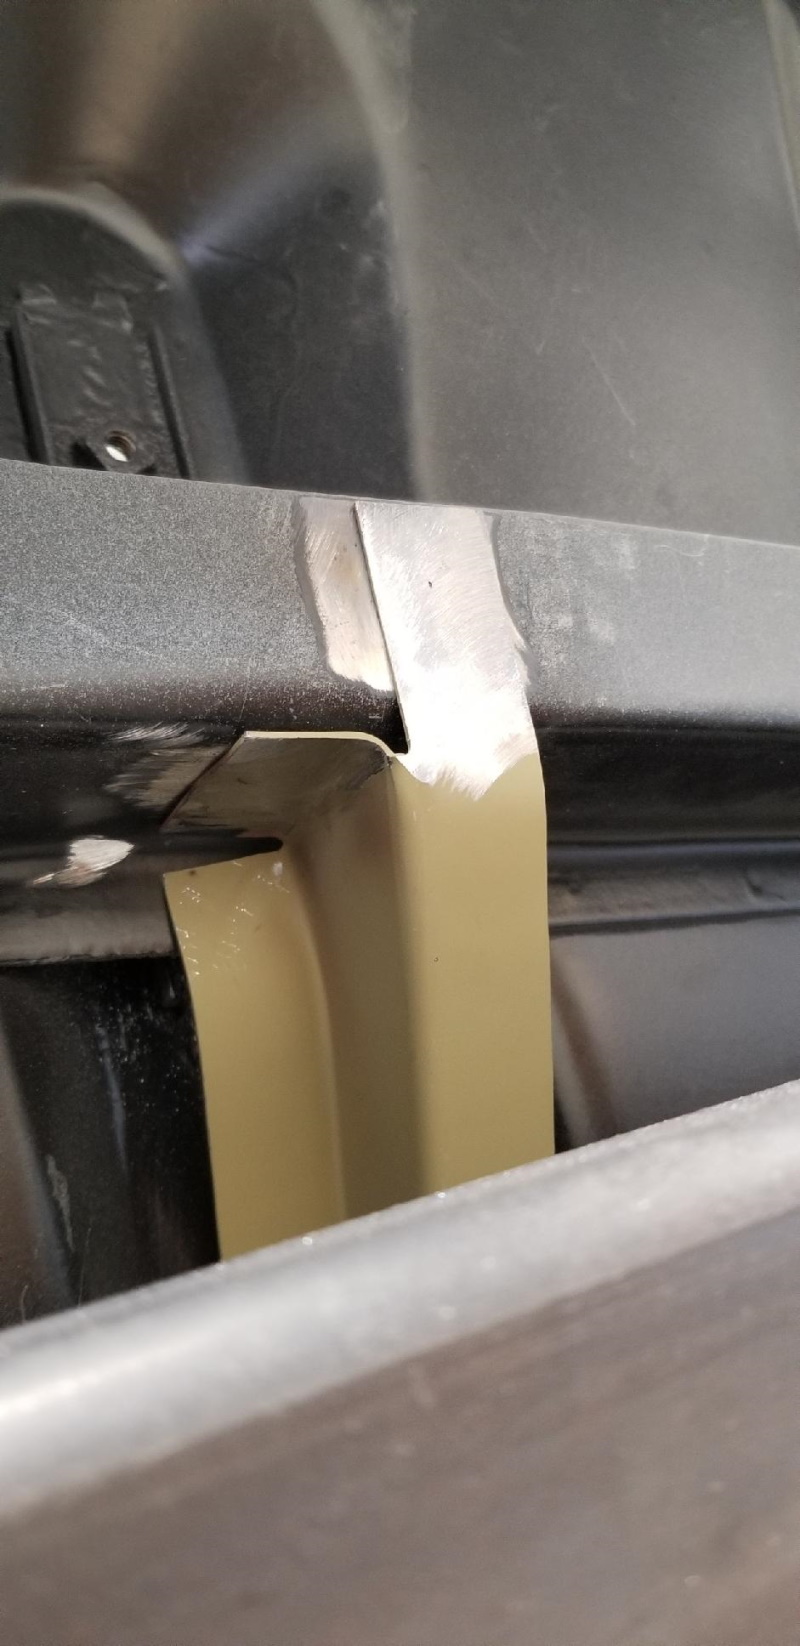 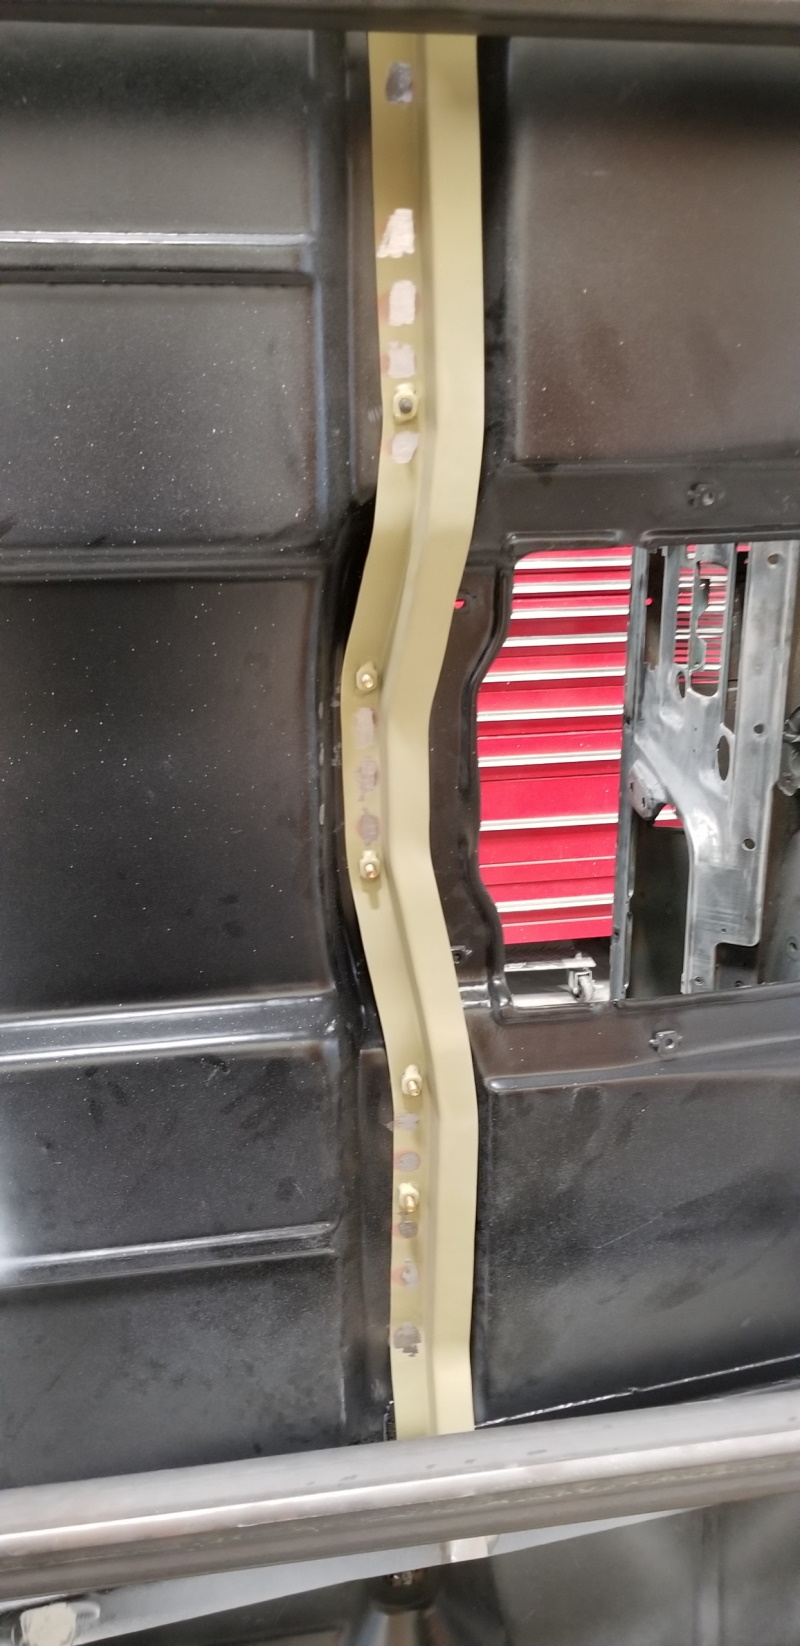 Everything is finished and back in primer. Now onto some more body work. I found a few pinholes on the inside rocker.  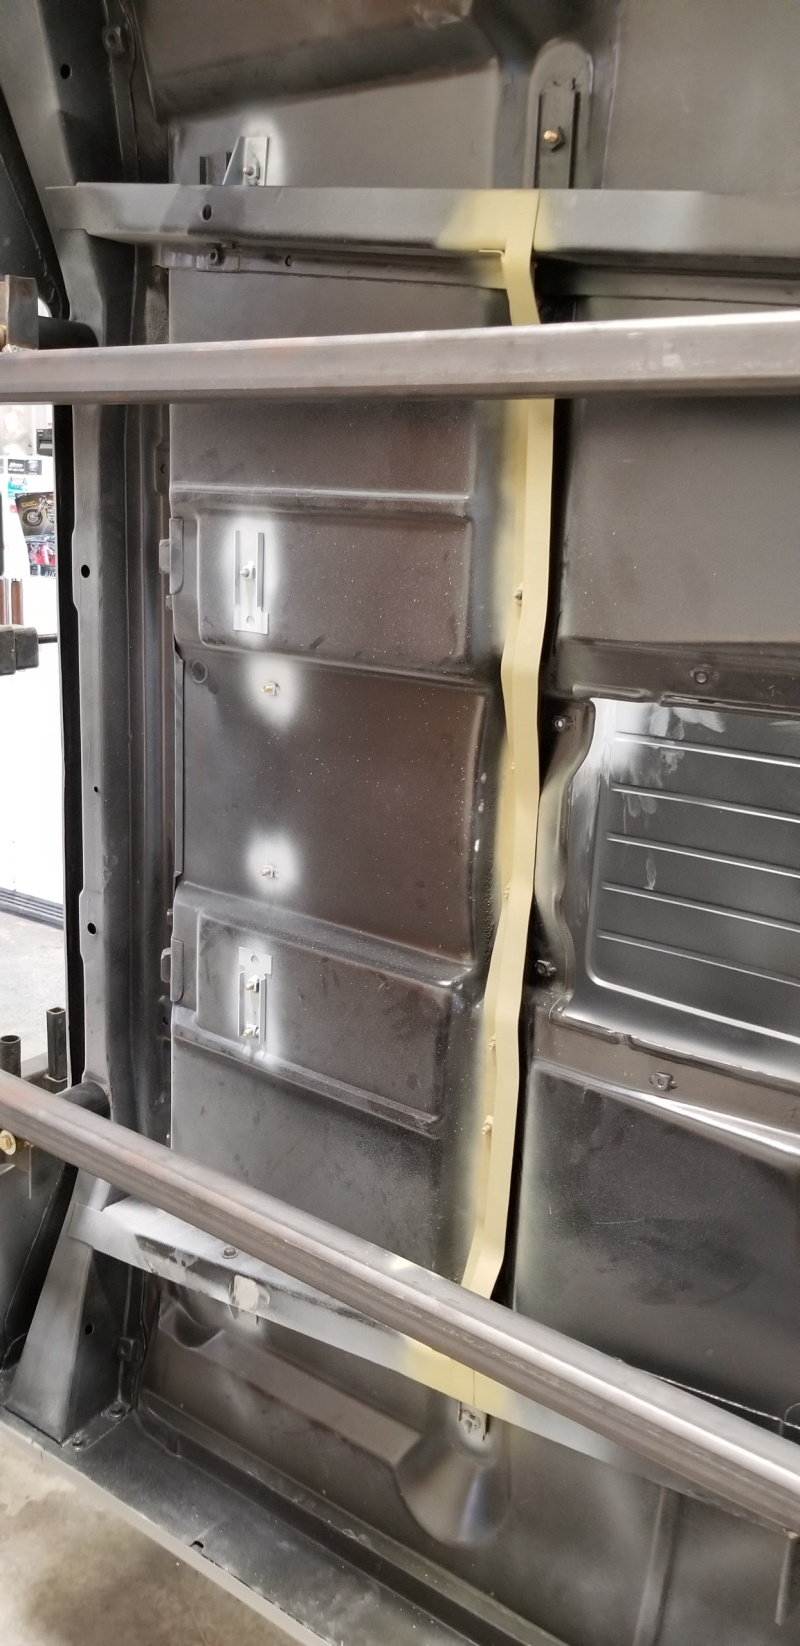
__________________
Board Member #87725 My build thread... http://67-72chevytrucks.com/vboard/s...d.php?t=813848 Last edited by omodified; 05-04-2024 at 04:14 PM. |
|
|

|
|
|
#331 |
|
Registered User
Join Date: Apr 2014
Location: Azle,Texas
Posts: 2,248
|
Re: "Midnight Rider" 1970 C10 SWB Fleetside
You have one sweet rotisserie sir, I may have to make one like it if I ever do another truck. You're doing an exceptionally clean work to boot, thanks for showing so many details.
__________________
Brian 1972 C10, "Loyd", LWB to SWB, 5.3, L83/6L80e, 4:11 Tru Trac, Air Ride, VA, DD, 20" Coys, 4 wheel disc, A quick LS swap turned into a 6 year frame off resto-mod. |
|
|

|
|
|
#332 |
|
Senior Member
 Join Date: Jul 2010
Location: Race City U.S.A.
Posts: 1,036
|
Re: "Midnight Rider" 1970 C10 SWB Fleetside
In my last post, I mentioned finding some pinholes on the back side of the rockers. Yes Cornerstone, thank goodness for the rotisserie. The driver side was worked on today. Ground the primer down to see what is really there. It's not too bad I guess.
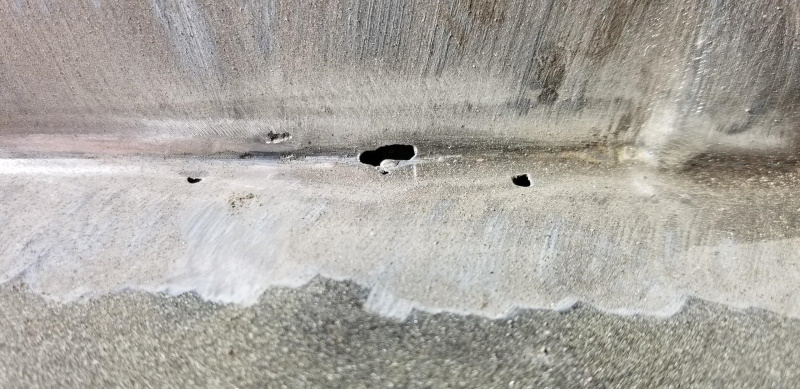 Used a carbide bit to open all of the holes until there was good metal. Then welded up the holes. Then grounded it all flush. On to the driver side tomorrow. 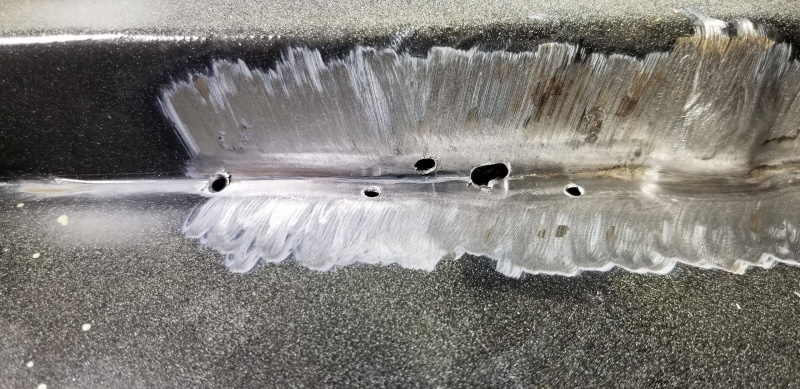 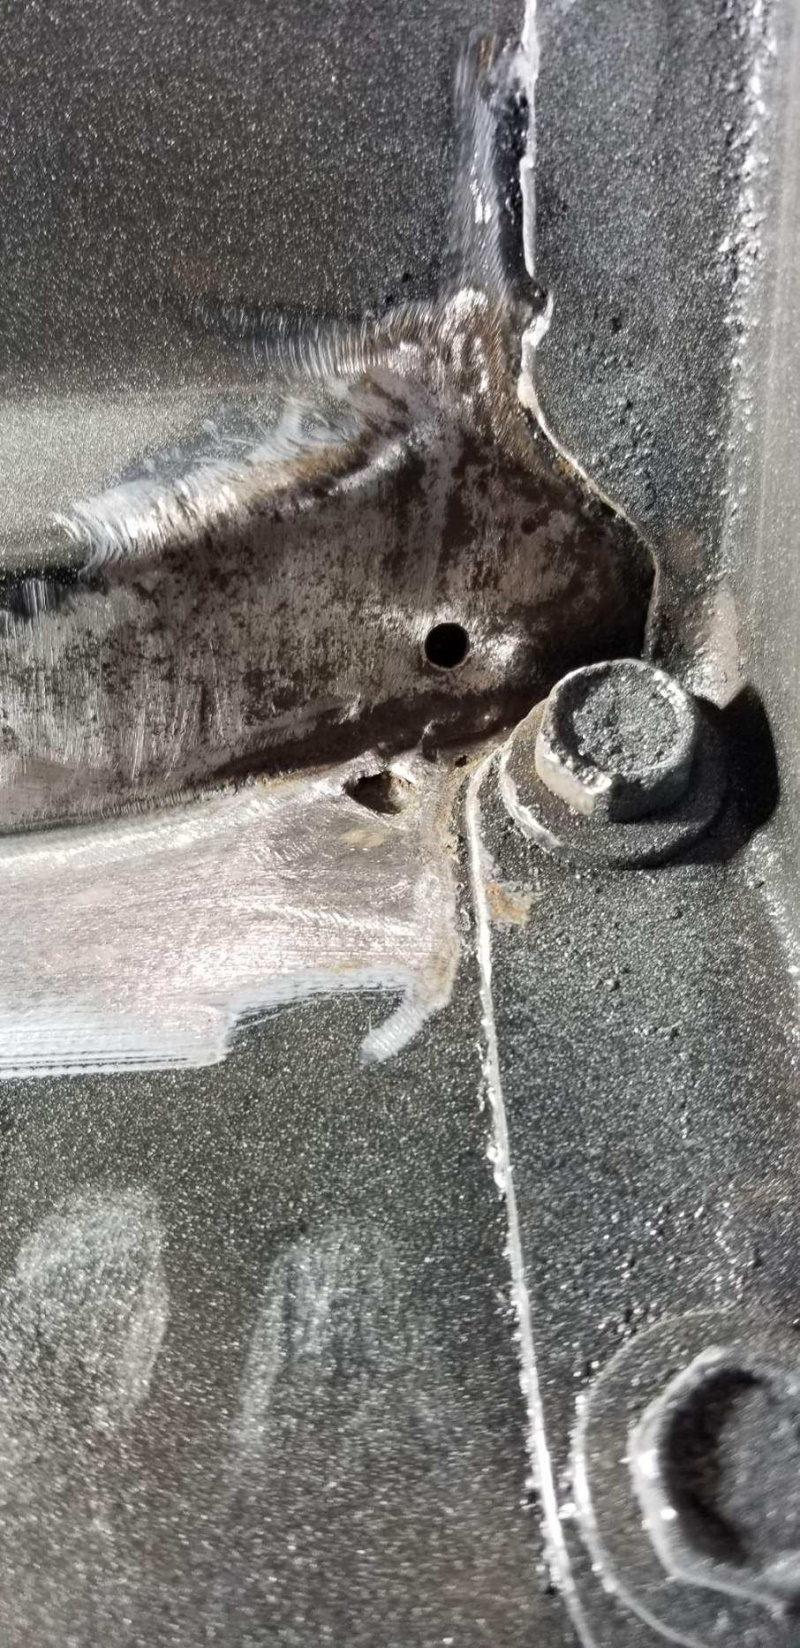 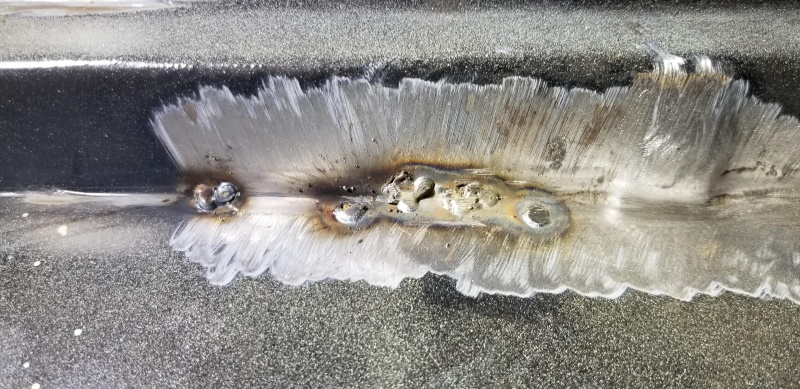 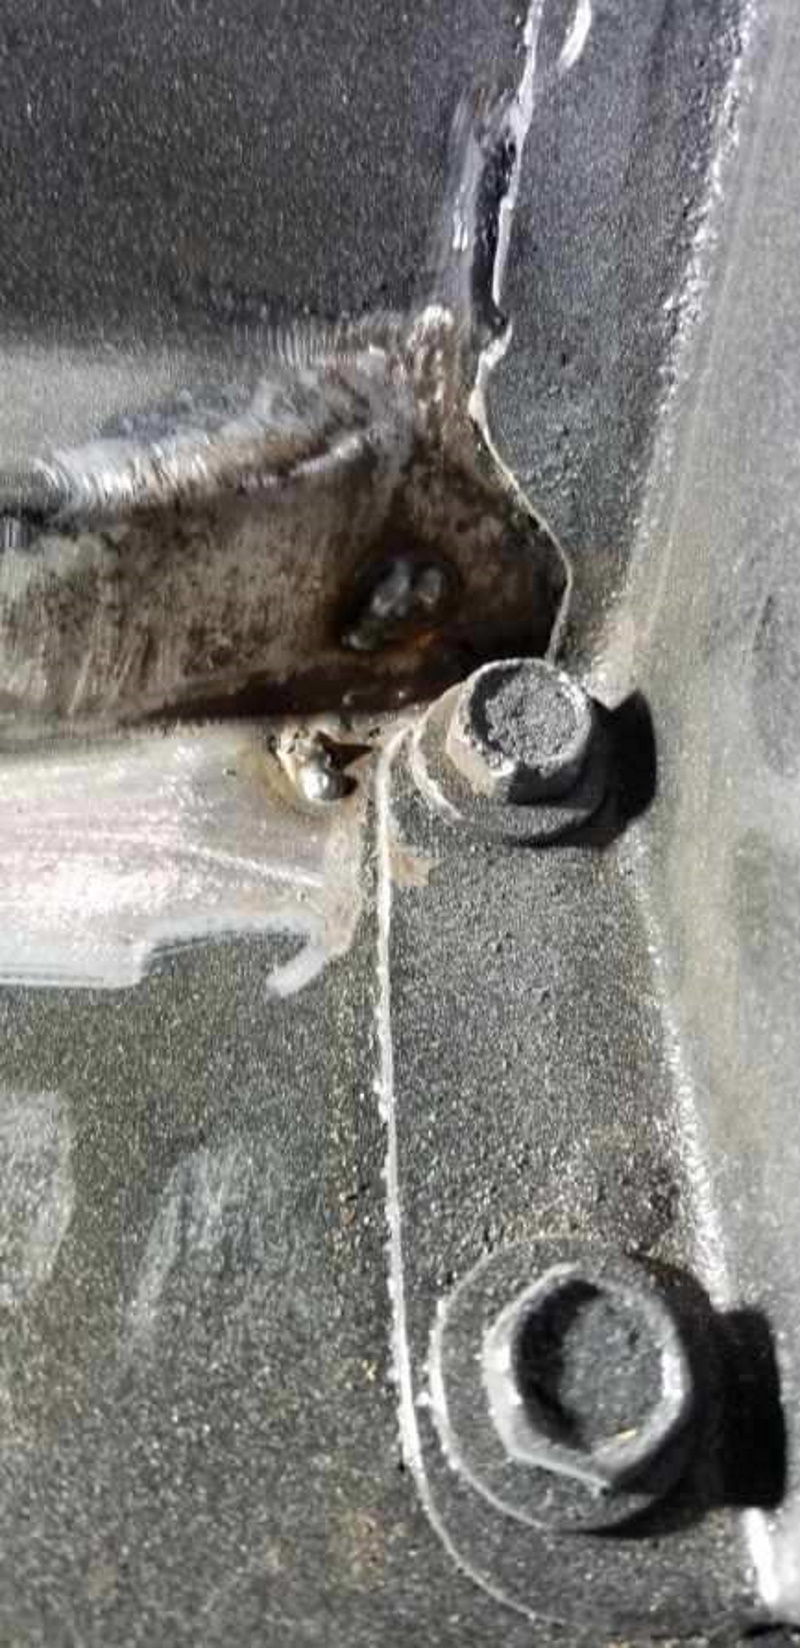 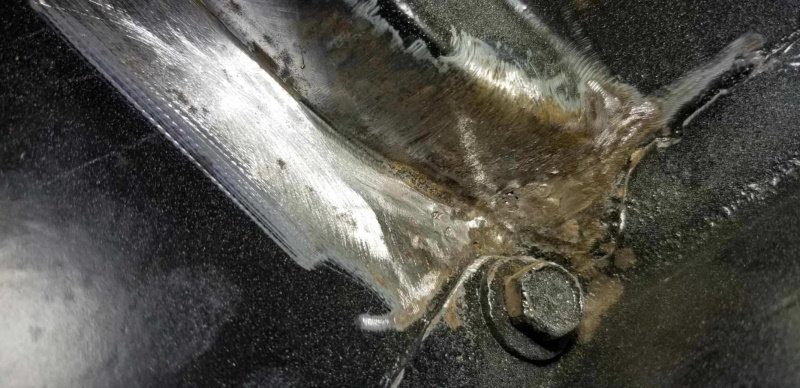 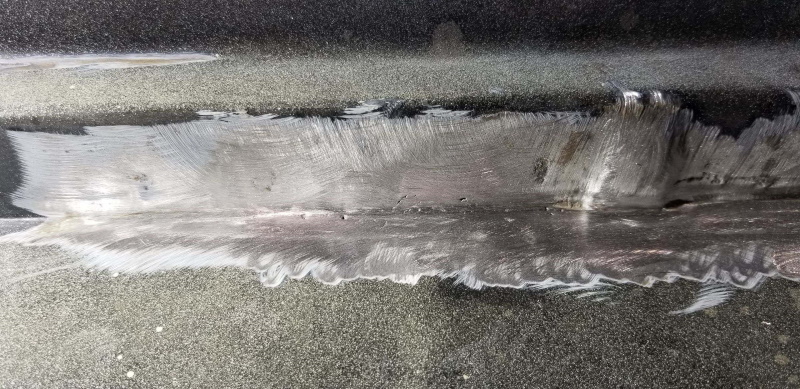
__________________
Board Member #87725 My build thread... http://67-72chevytrucks.com/vboard/s...d.php?t=813848 Last edited by omodified; 05-04-2024 at 04:15 PM. |
|
|

|
|
|
#333 |
|
Senior Member
 Join Date: Apr 2005
Location: Columbus,IN
Posts: 273
|
Re: "Midnight Rider" 1970 C10 SWB Fleetside
Great work on the bucket seat cab conversion. I always like to see those cab brace installs.

__________________
1968 SWB C10 http://67-72chevytrucks.com/vboard/s...d.php?t=508675 2011 Dodge Ram 1500 2012 Camaro ZL1 |
|
|

|
|
|
#334 |
|
Senior Member
 Join Date: Jul 2010
Location: Race City U.S.A.
Posts: 1,036
|
Re: "Midnight Rider" 1970 C10 SWB Fleetside
Thanks Old Truck Fan. The more I read about this mod, the more I realized how important these were to have. I'm not trying to shortcut anything at this point!
__________________
Board Member #87725 My build thread... http://67-72chevytrucks.com/vboard/s...d.php?t=813848 |
|
|

|
|
|
#335 |
|
Senior Member
 Join Date: Jul 2010
Location: Race City U.S.A.
Posts: 1,036
|
Re: "Midnight Rider" 1970 C10 SWB Fleetside
The passenger side inner rocker was also repaired today. The findings were similar to the other side, in similar locations.
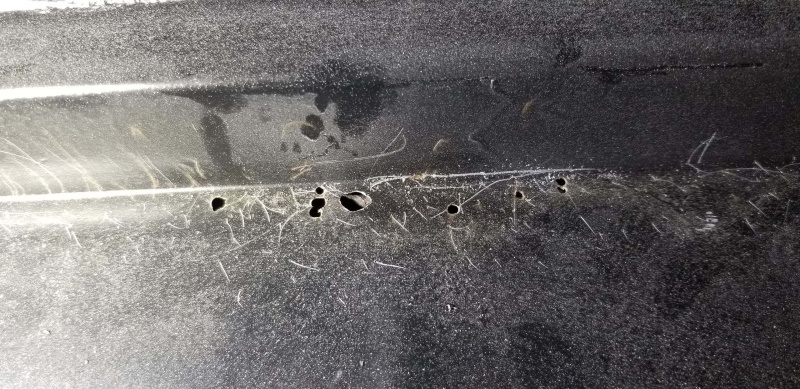 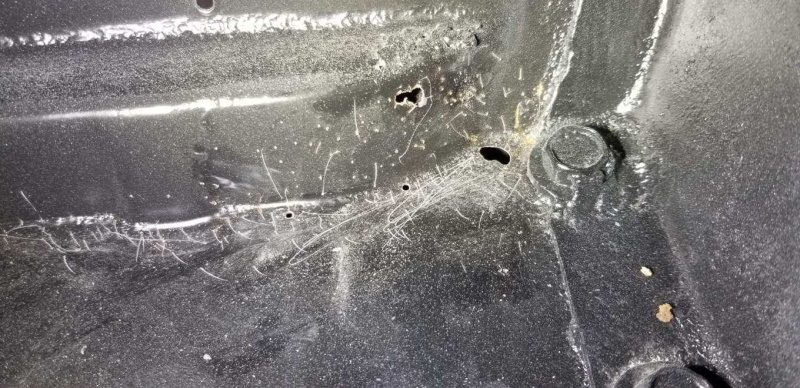 Once the area was ground down for welding, found this little nugget from a previous repair? Will clean this up after these holes are plugged up. 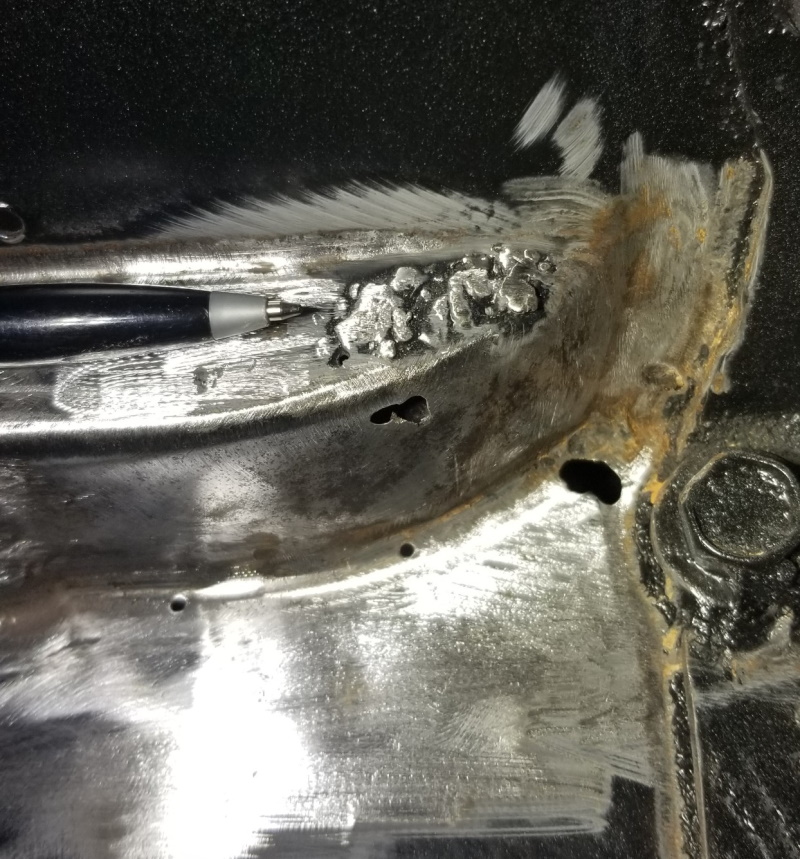 Here, everything is welded and ground flush. 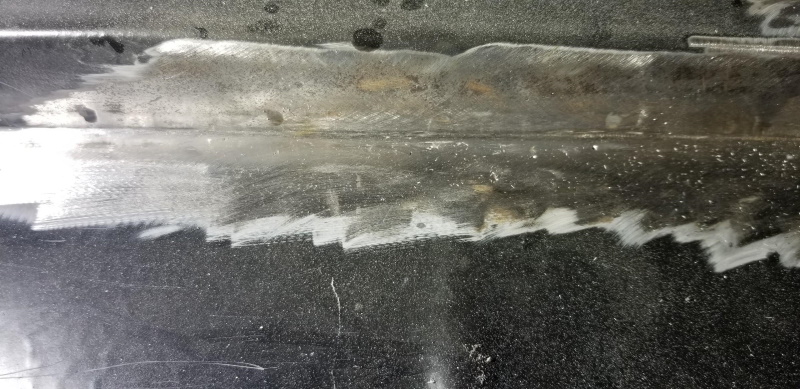 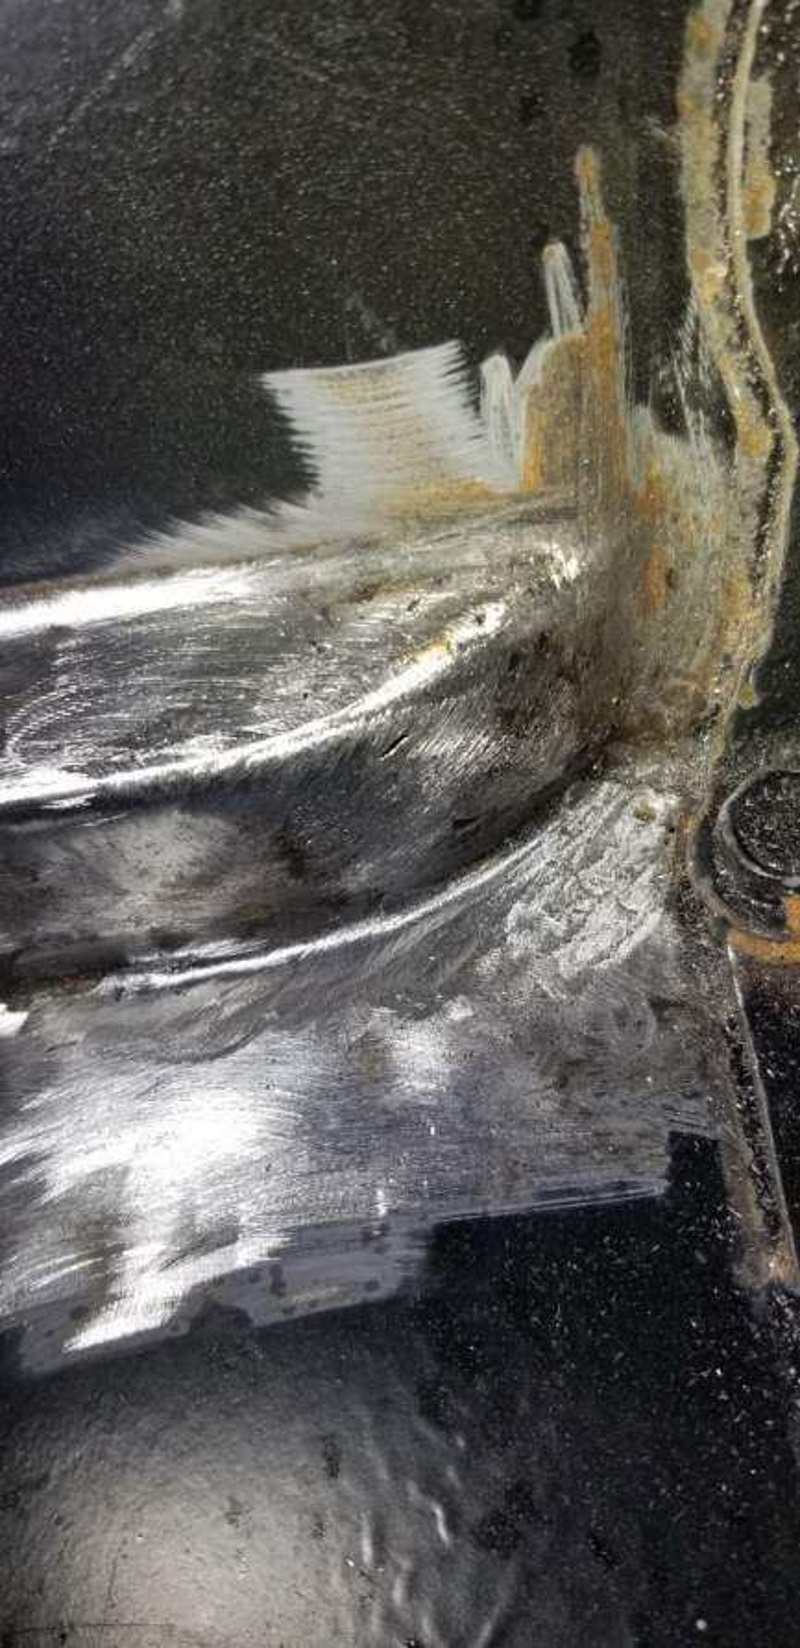 All rust repairs are finished and put back in black epoxy primer. 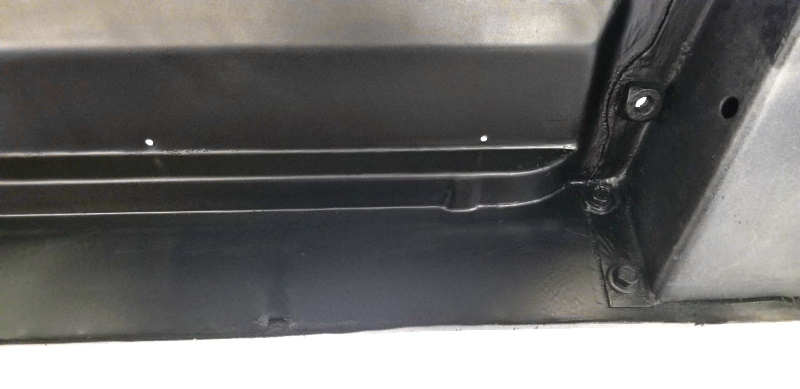 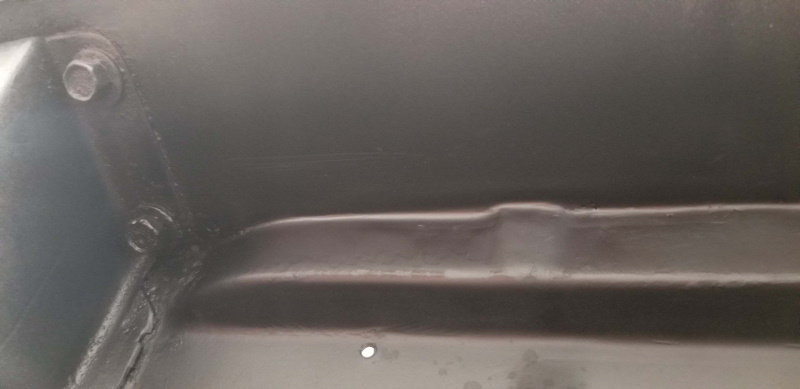
__________________
Board Member #87725 My build thread... http://67-72chevytrucks.com/vboard/s...d.php?t=813848 Last edited by omodified; 05-04-2024 at 04:16 PM. |
|
|

|
|
|
#336 |
|
Registered User
Join Date: Jun 2014
Location: Mocksville, NC
Posts: 1,766
|
Re: "Midnight Rider" 1970 C10 SWB Fleetside
Nice job on the repairs! Looks like there were never holes there.
__________________
Builds: Green Gus the 68 C10 | Bluey the 72 1500 | Lowly the 70 C10 - Instagram: @dr.hewitt - C10 Concept/Development Photos: Master Thread |
|
|

|
|
|
#337 |
|
Senior Member
 Join Date: Jan 2009
Location: Logansport,In
Posts: 561
|
Re: "Midnight Rider" 1970 C10 SWB Fleetside
This build is insane!! But in a good way!! Your attention to detail and documenting everything is incredible, not to mention time consuming! Love it!
|
|
|

|
|
|
#338 |
|
Senior Member
 Join Date: Jul 2010
Location: Race City U.S.A.
Posts: 1,036
|
Re: "Midnight Rider" 1970 C10 SWB Fleetside
I have been working on the bed wood again. I came up with a variant of the black with silver grain highlight. Right now, I am trying to understand if this technique will actually accept an automotive clear coat. I wasn't super happy with the 2 part clear epoxy. This finish was nice and smooth, but it looked a little on the yellow instead of crystal clear, which did not look good over the silver. Here is the new color I tried.
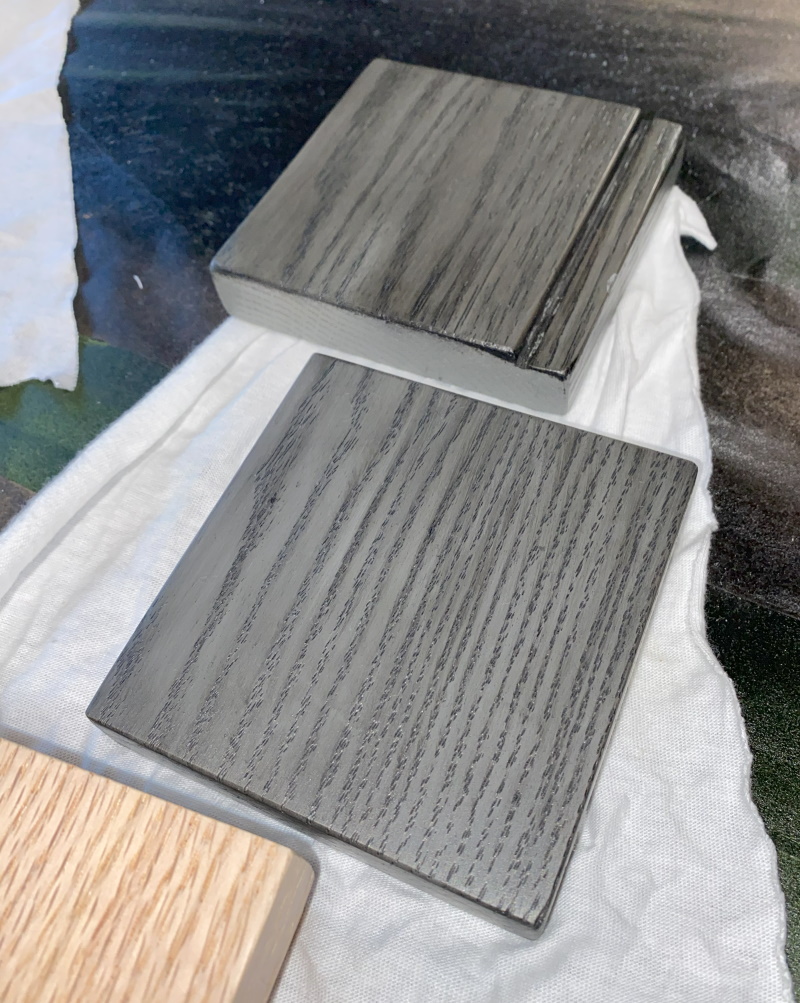 I picked the better of these two samples and I made another sample of the black with silver grain to use for the clear coat test. For the clear coat, I decided on House of Color. After two coats, the clear was absorbed by the wood. The finished is shiny but not smooth. 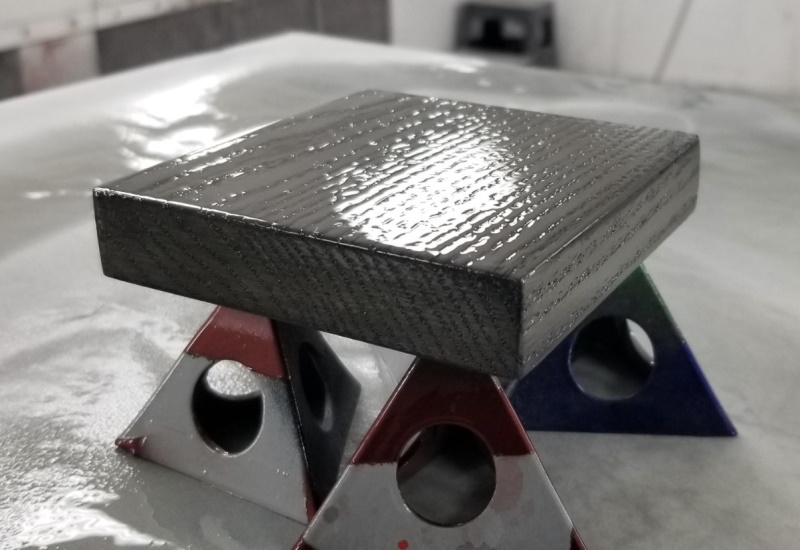 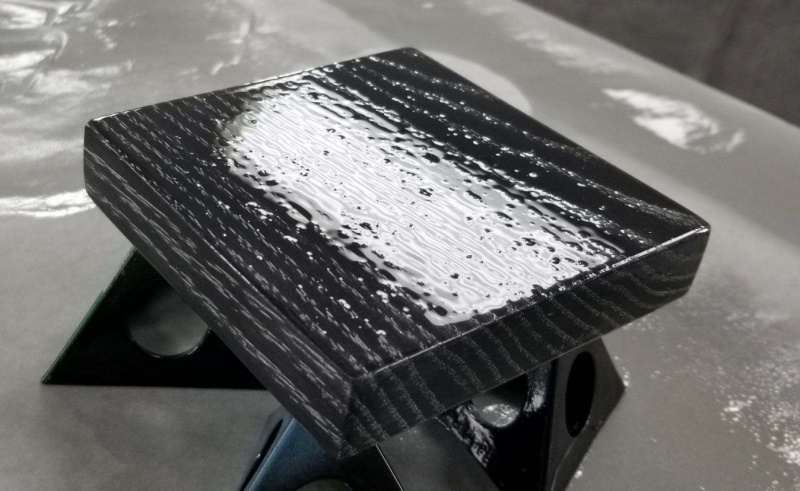 After two more coats of clear, the surface is now very shiny but still not completely smooth. 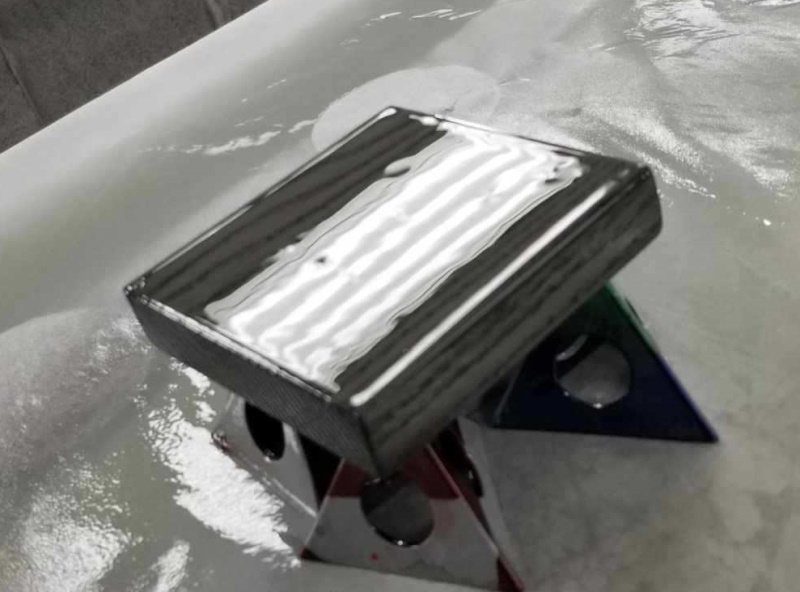 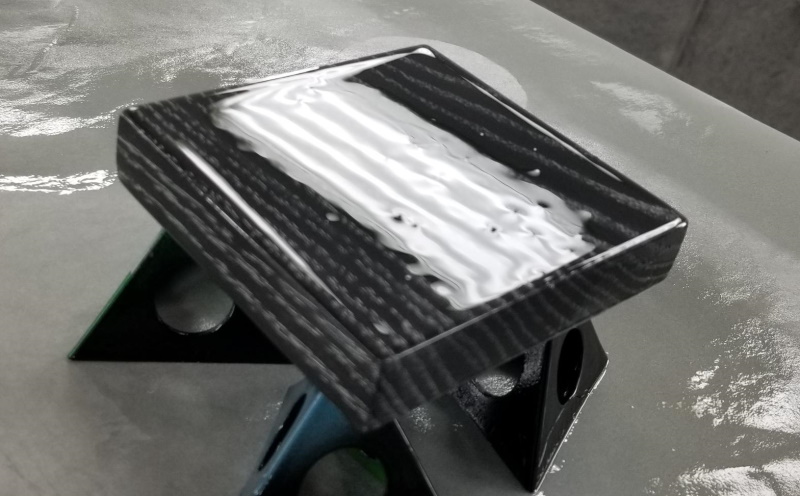 After one more coat, the surface is now very smooth. One more coat would ideal, but it will need to be wet sanded first. Will let this dry over the weekend. These turned out as good as I hoped. However, I think the color needs to be somewhere between these two, with less contrast. I'll work on that over this weekend. 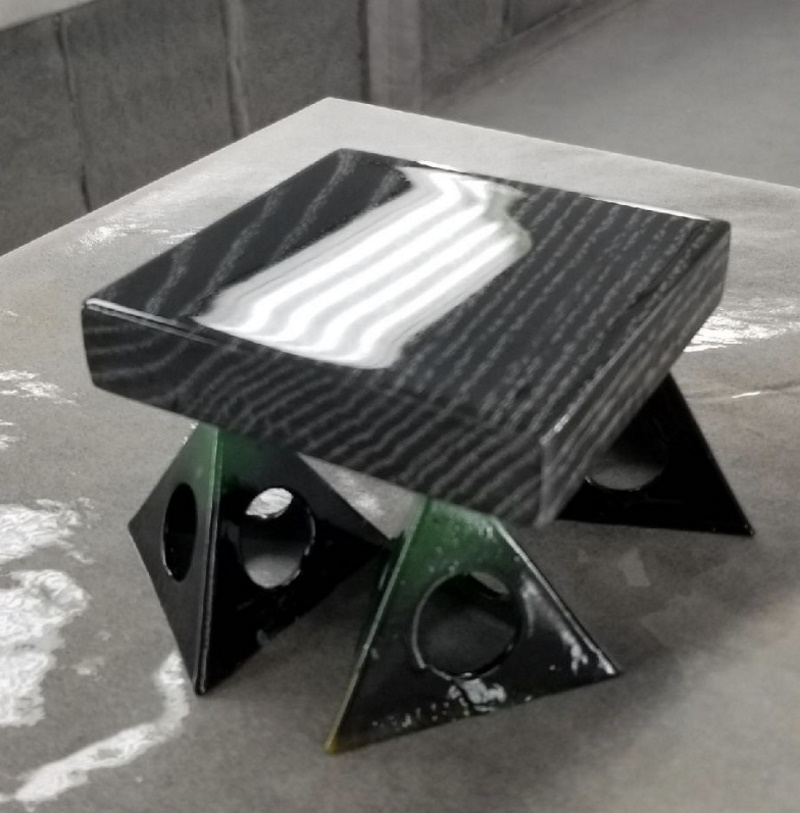 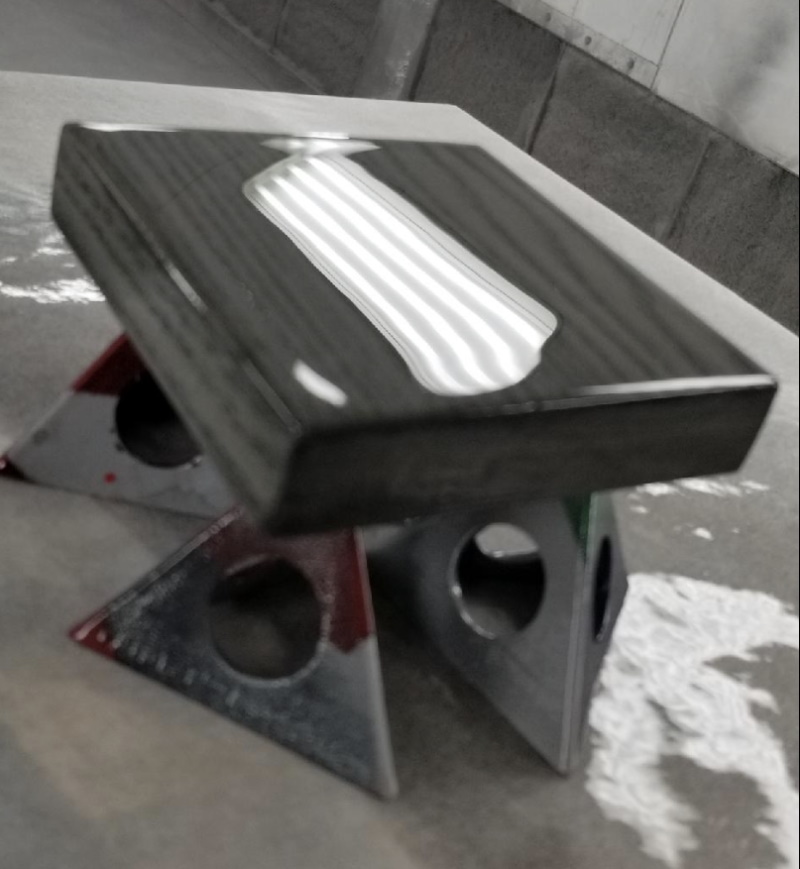 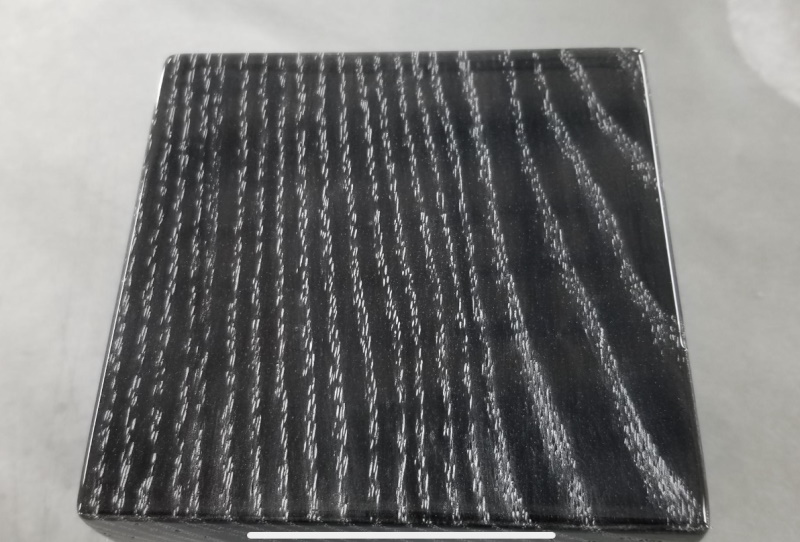 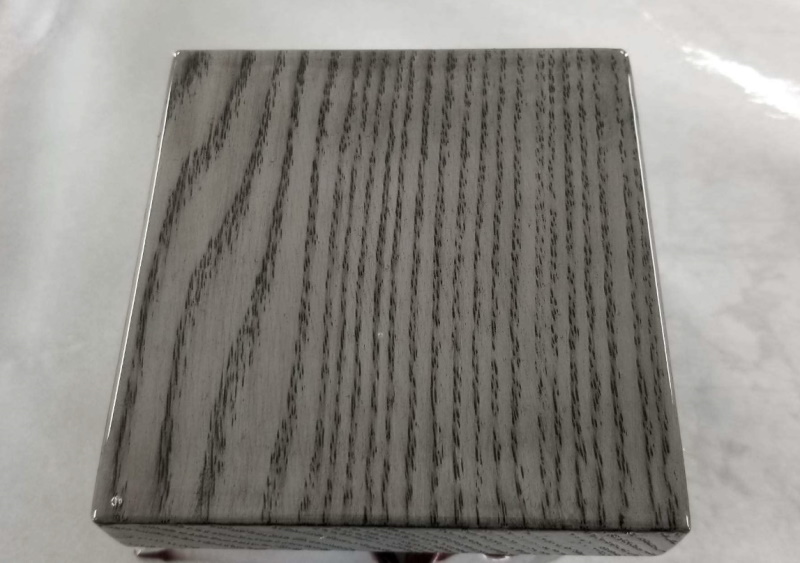
__________________
Board Member #87725 My build thread... http://67-72chevytrucks.com/vboard/s...d.php?t=813848 Last edited by omodified; 05-04-2024 at 04:17 PM. |
|
|

|
|
|
#339 |
|
Senior Member
 Join Date: Jul 2010
Location: Race City U.S.A.
Posts: 1,036
|
Re: "Midnight Rider" 1970 C10 SWB Fleetside
I worked on the stain color for the bedwood. This ended up being the exact shade I was looking for. Its not quite black and not quite gray. In fact the finish ended up being gunmetal. I love the way it changes color in the sun depending on the angle you look at it from. I hope I can duplicate it when the time comes!!!
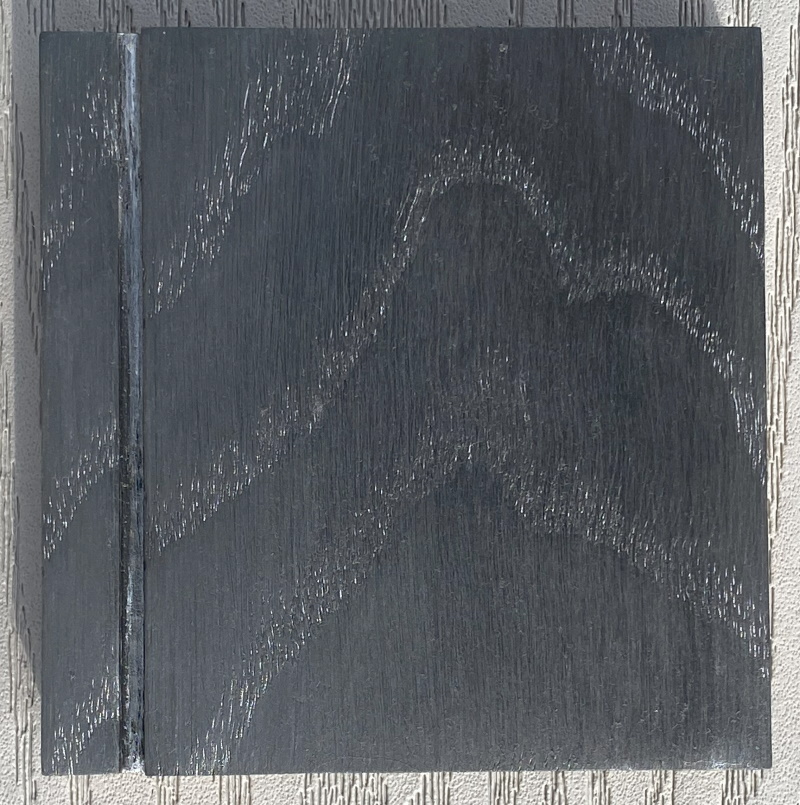 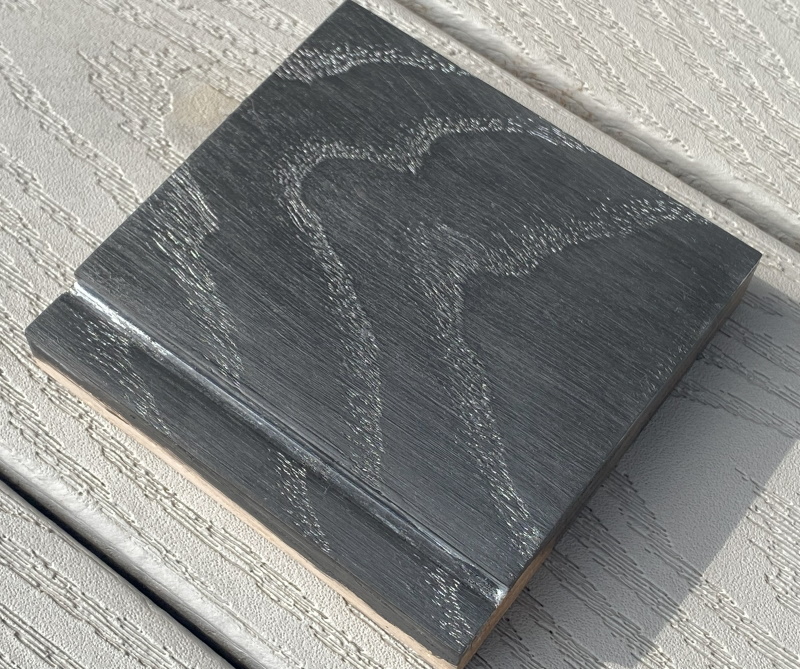 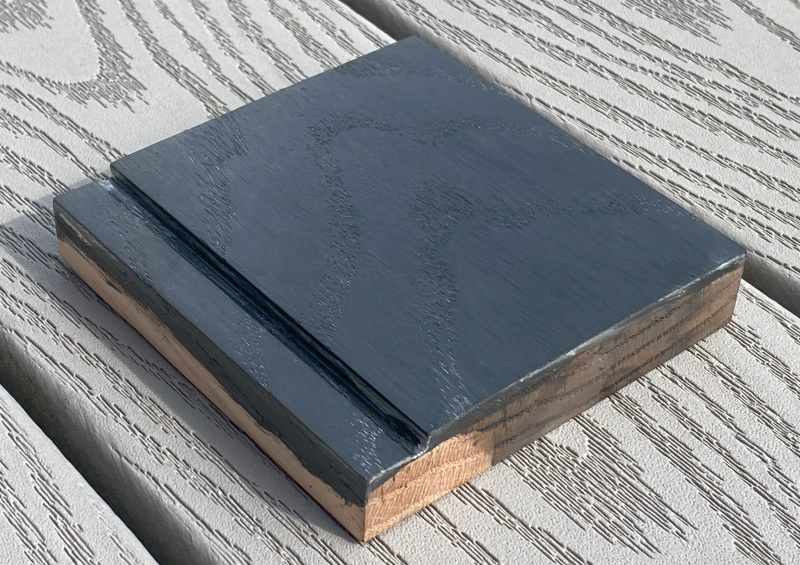 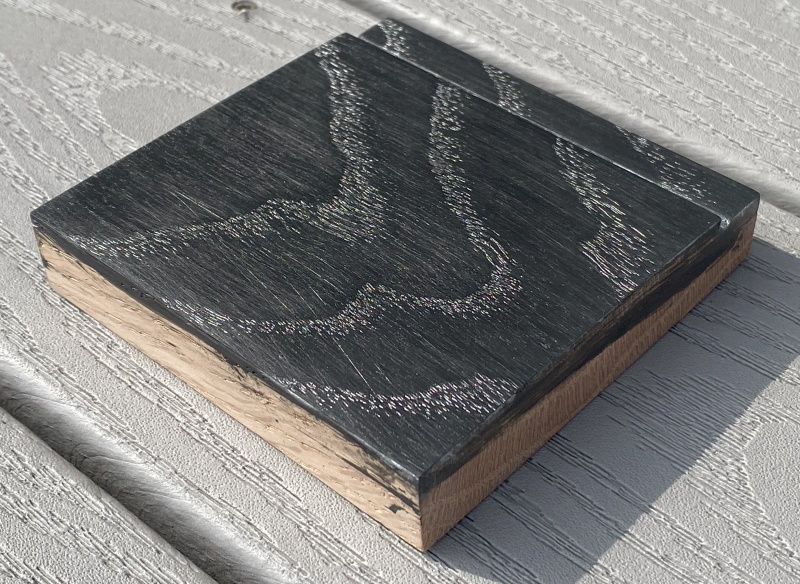 Here are the final two samples that I will test with clearcoat. Same finish as above, but the the grain highlighted in silver. 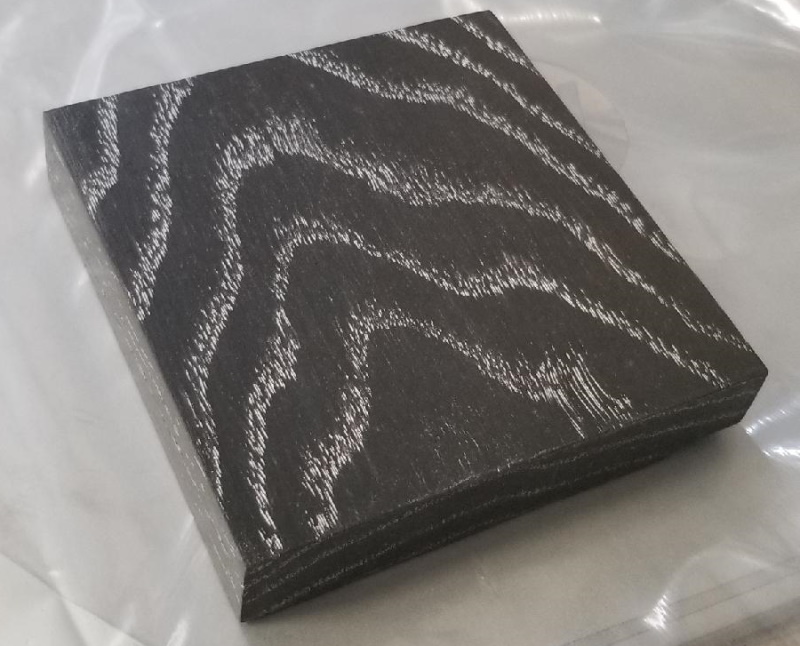 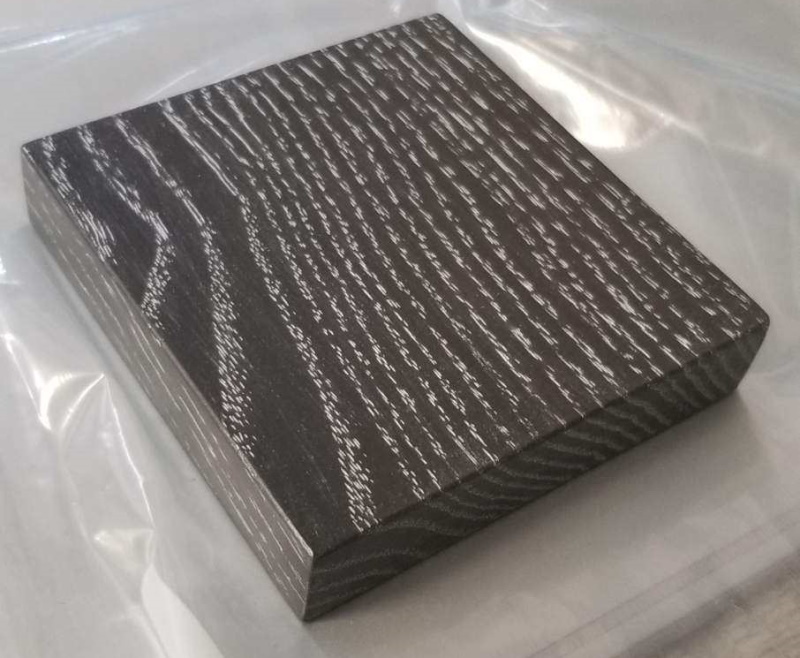
__________________
Board Member #87725 My build thread... http://67-72chevytrucks.com/vboard/s...d.php?t=813848 Last edited by omodified; 05-04-2024 at 04:17 PM. |
|
|

|
|
|
#340 |
|
Senior Member
 Join Date: Jul 2010
Location: Race City U.S.A.
Posts: 1,036
|
Re: "Midnight Rider" 1970 C10 SWB Fleetside
Got my new truck and trailer today. Super excited!!!
 Ahhhh...just kidding. I got something even more incredible than that. The bed wood samples are cut and buffed and they couldn't have turned out any better. This is way more exciting than some old tow rig!!! Now that I know the clear will hold, it's time to clear the latest samples and start prepping the actual bed wood.  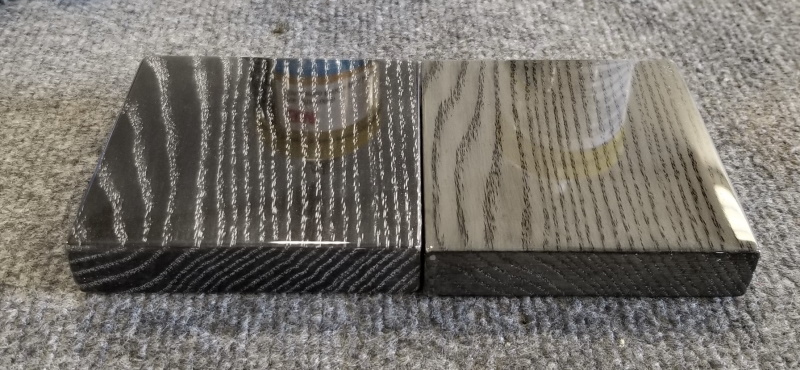 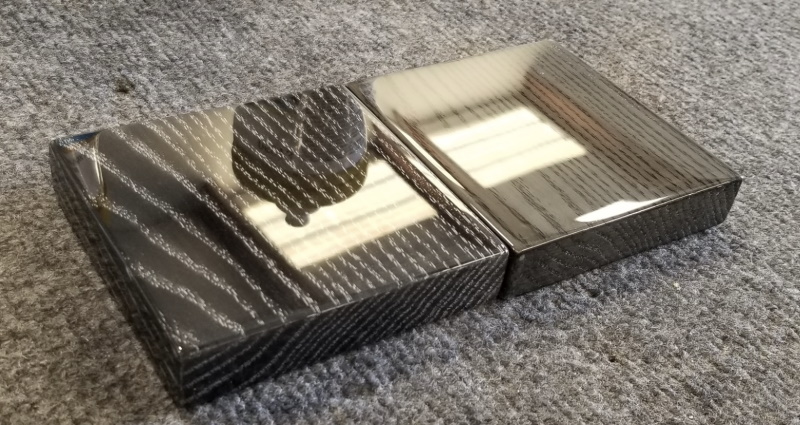
__________________
Board Member #87725 My build thread... http://67-72chevytrucks.com/vboard/s...d.php?t=813848 Last edited by omodified; 05-04-2024 at 04:17 PM. |
|
|

|
|
|
#341 |
|
Registered User
 Join Date: Sep 2015
Location: Martensville, Saskatchewan
Posts: 969
|
Re: "Midnight Rider" 1970 C10 SWB Fleetside
Wow! That is crazy. Nice finish

|
|
|

|
|
|
#342 |
|
Senior Member
 Join Date: Jul 2010
Location: Race City U.S.A.
Posts: 1,036
|
Re: "Midnight Rider" 1970 C10 SWB Fleetside
I had to take a few steps back on the build again. I was looking over the doors, fenders and bedsides and I just wasn't happy with the radius of the body lines. None of them matched. So, the best thing to do was to mock everything up again so the lines could be worked out better. But this post isn't necessarily about that. I want to back up to June of this year, right as the cab went on the rotisserie. The front end was mocked up to check the fitment of the grille. I never mentioned it because I wasn't happy with the outcome. The grille was the first NOS purchase I ever made. I'm guessing I bought that thing back in 2015 on EBAY. I basically bought it and placed it directly into storage. When we mocked it up, the fitment wasn't bad. What was bad though, was the black paint for the outlines and the lettering. The letters were all shifted downward and weren't 100% inside the embossment. The outlines around the headlights had the same issue and the LH side was sprayed very thin. For this build, I just couldn't accept this quality.
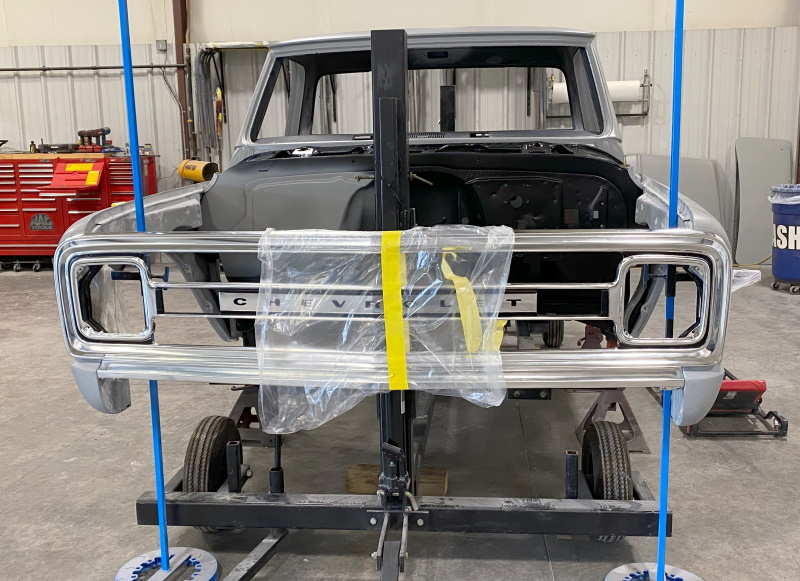 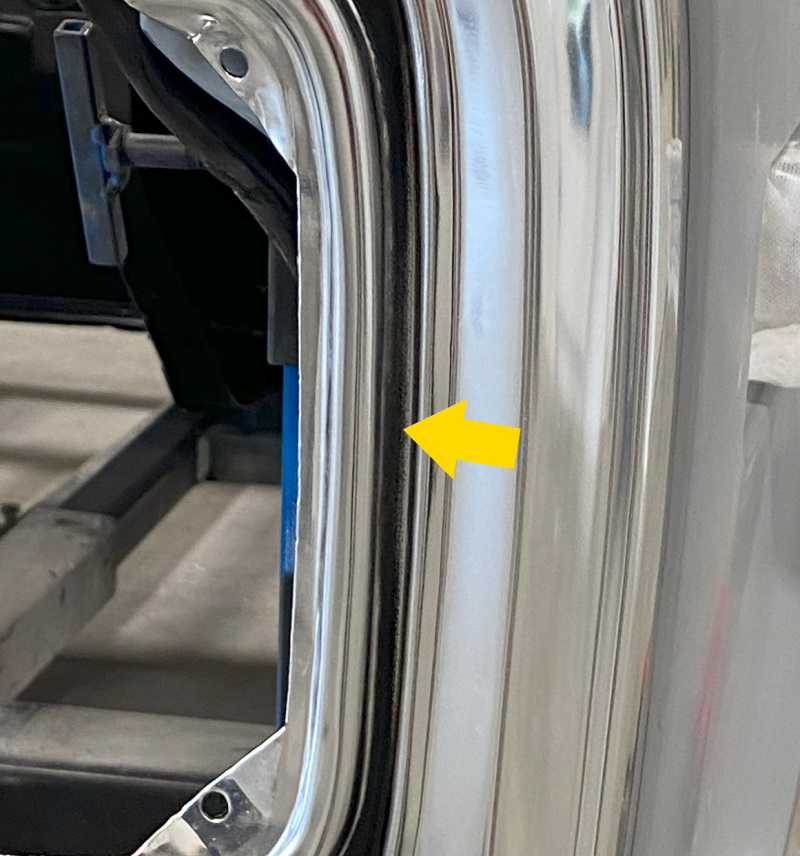 I kicked around the idea of touching it up or even repainting the black. But this kind of defeats the purpose of using NOS. So, I set out to find another grille shell to buy. I found somebody local that had a few of them. They were willing to trade with me plus cash. I picked through their stash and a few of them had the same issue as mine. I did manage to find one that was beautiful. Or so I thought. I got it home and started polishing it up. It was then that I discovered a decent size dent on the crossbar, right by where the parking light mounts. I tried to gently push the bend out, but it really wouldn't budge. I stuck a flat edge across the surface to show the depth of the dent. Too much for me... 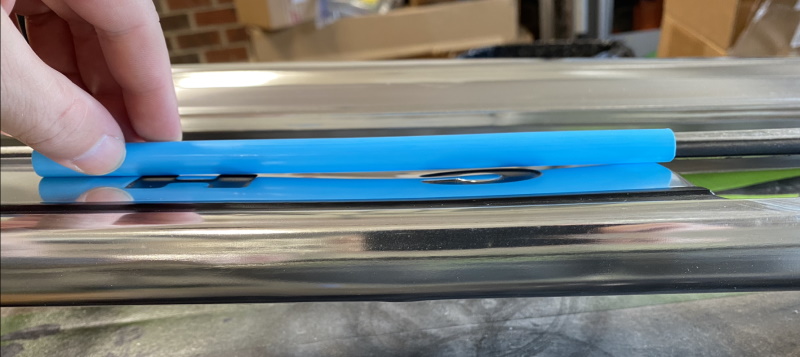 These last few months, I have been trying to locate another NOS grille shell. There weren't any for sale and there haven't been any for sale for months. I sent a message to somebody on Facebook from a 10 month old post. I'm glad I took that chance. I was able to buy the grille and pick it up in Tennessee. It is absolutely gorgeous too with zero imperfections. So, since everything was getting mocked up again, this was a great time to check the grille fitment with everything installed around it. Using NOS center and outer braces I bought on EBAY years ago, things lined up really well. The gaps couldn't look any better. Now, time to work on these body lines. 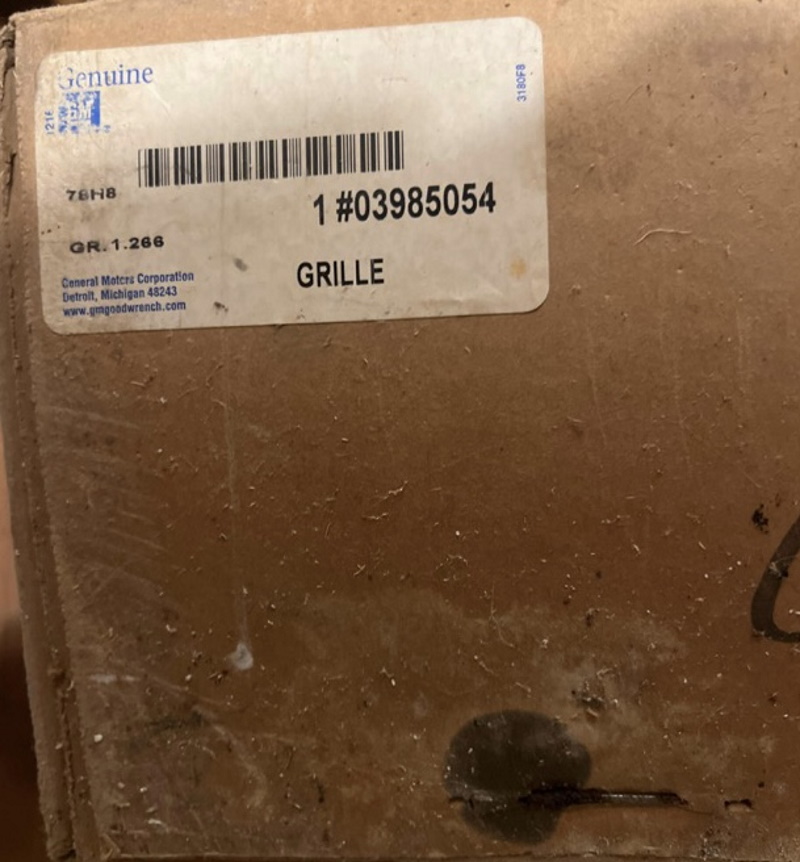 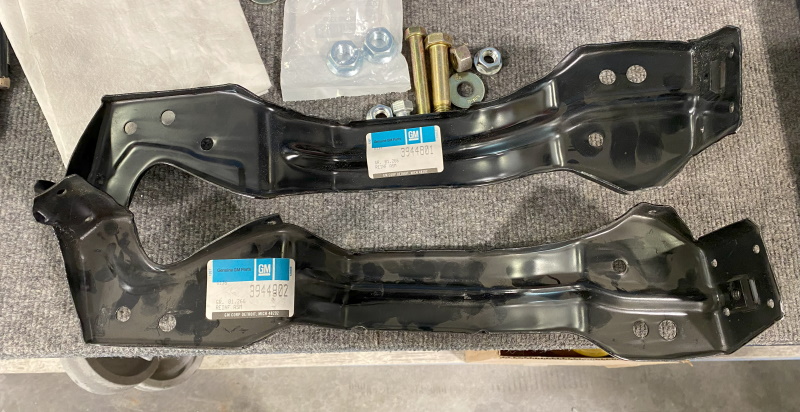 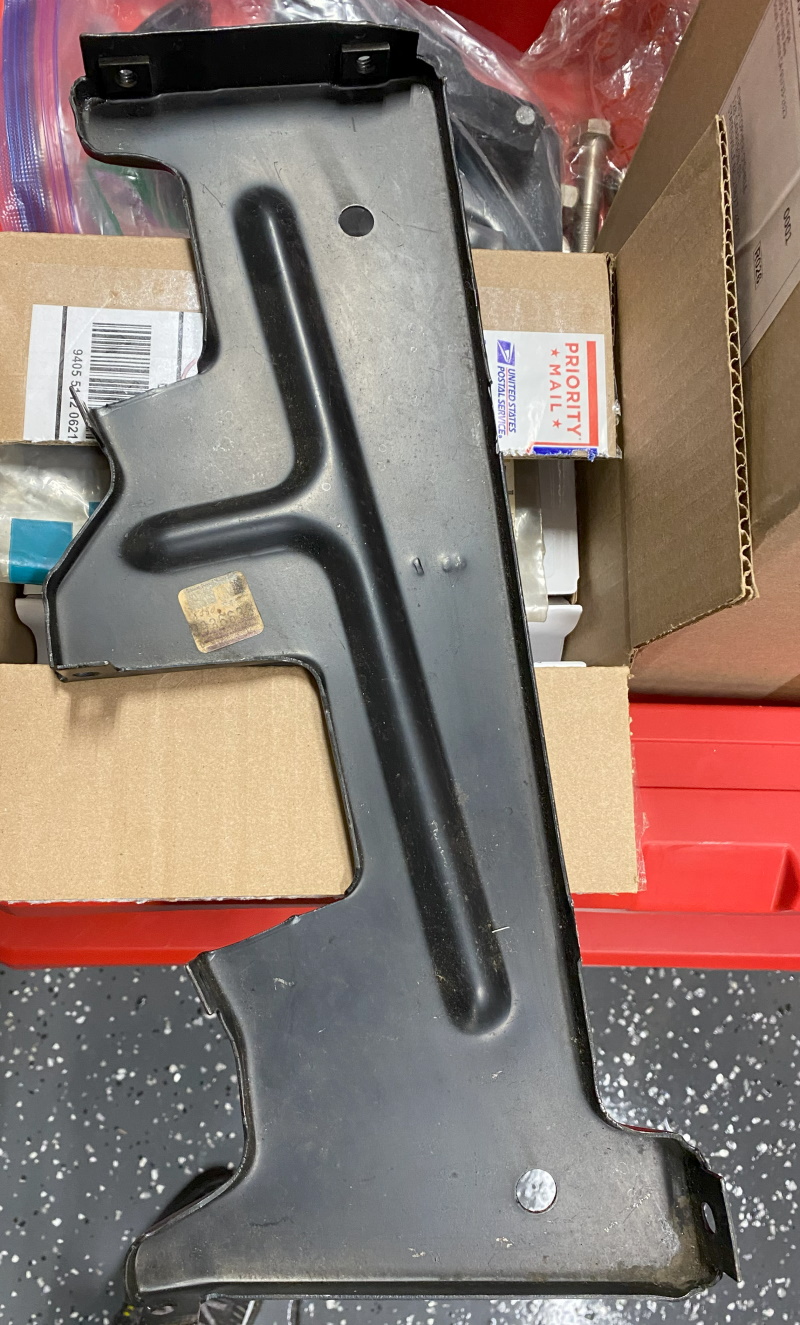 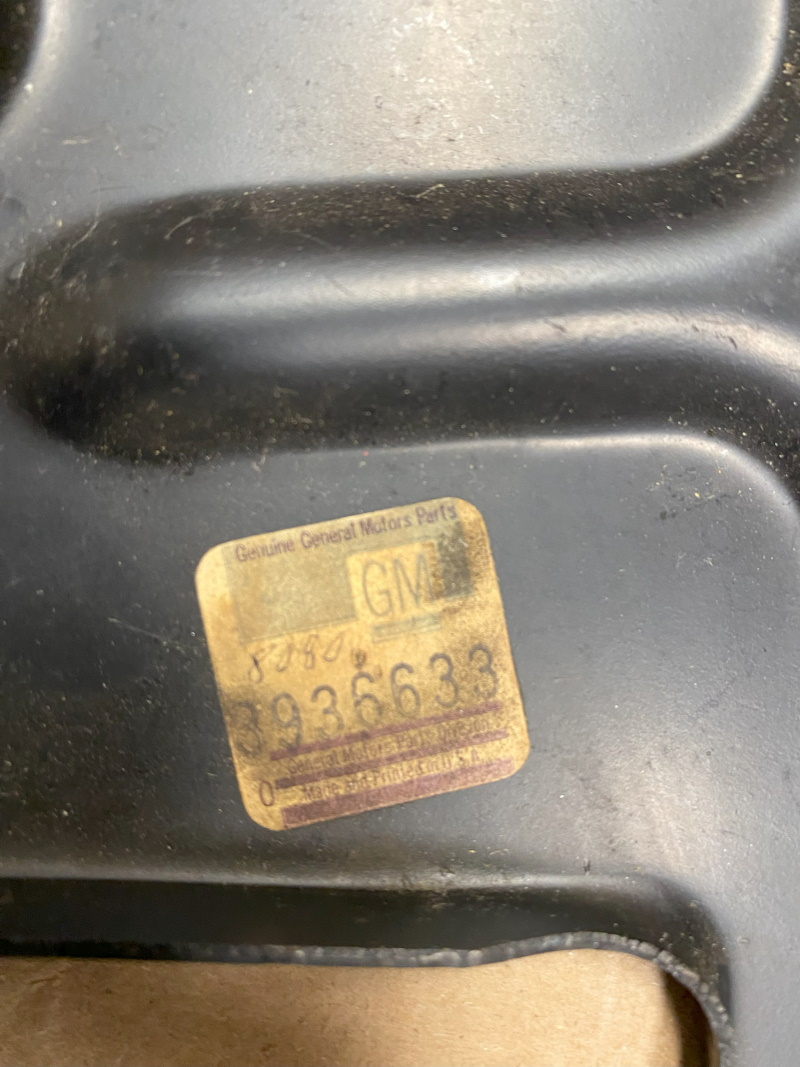 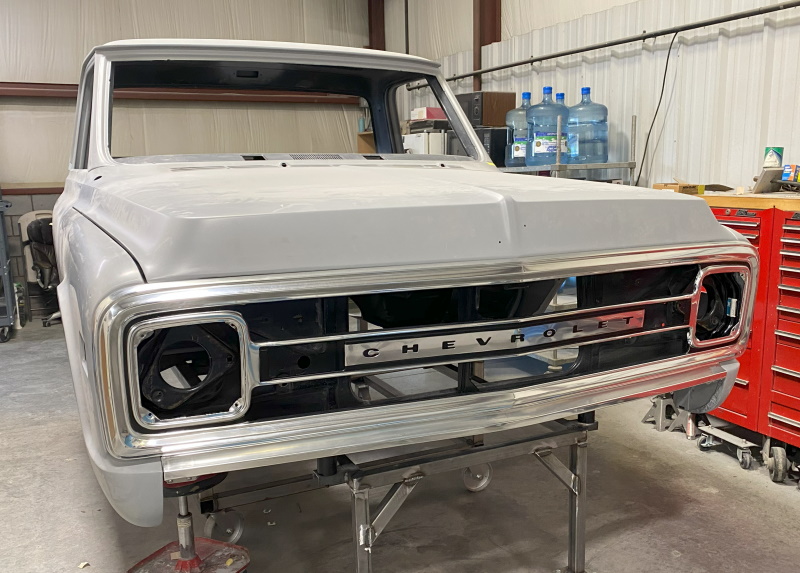 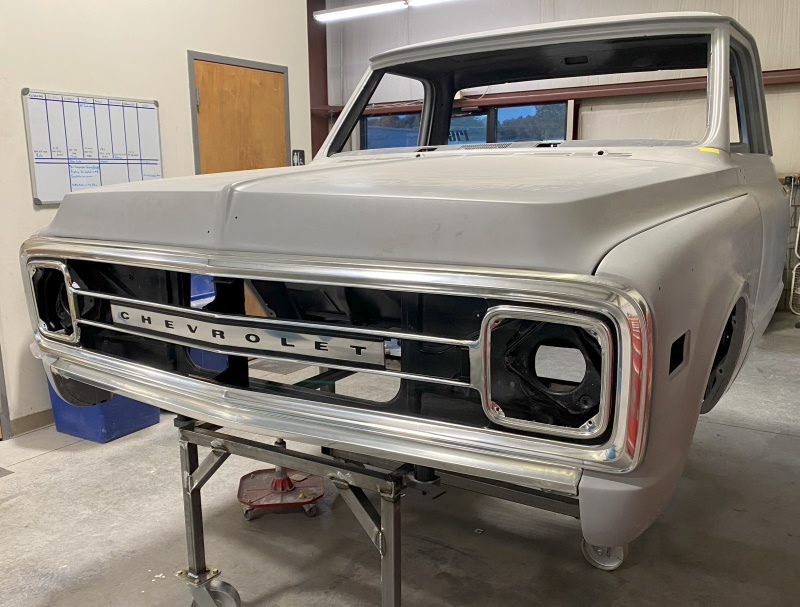 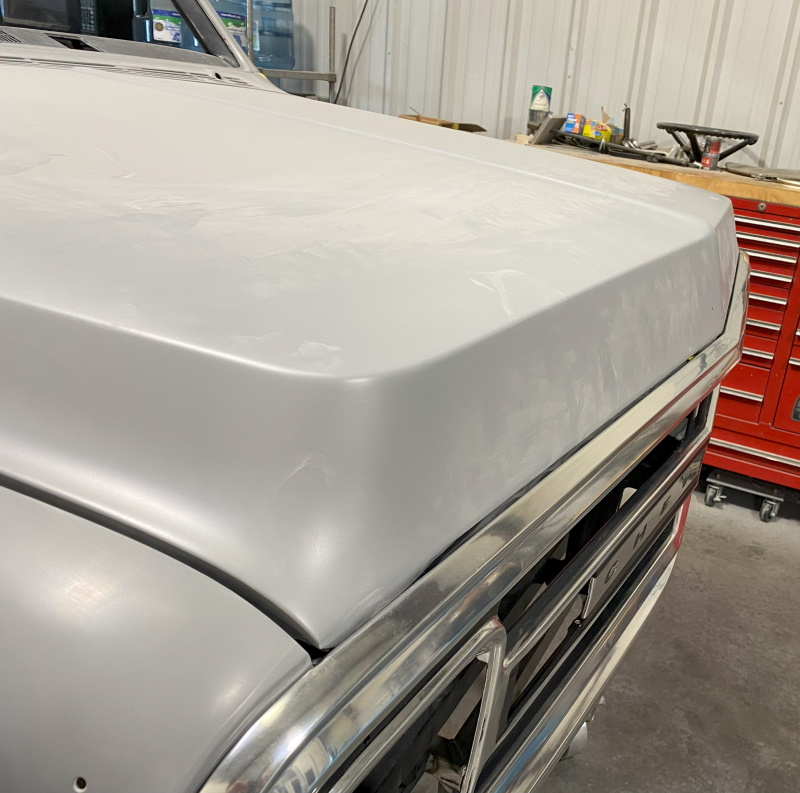
__________________
Board Member #87725 My build thread... http://67-72chevytrucks.com/vboard/s...d.php?t=813848 Last edited by omodified; 05-04-2024 at 04:18 PM. |
|
|

|
|
|
#343 |
|
Registered User
 Join Date: Jul 2021
Location: Keller, Texas
Posts: 571
|
Re: "Midnight Rider" 1970 C10 SWB Fleetside
What some of us will go through for perfection. Very, Very nice build!!
|
|
|

|
|
|
#344 |
|
Registered User
Join Date: Dec 2014
Location: Tucson, AZ
Posts: 755
|
Re: "Midnight Rider" 1970 C10 SWB Fleetside
The level of awesome is extreme!
 I can't wait to see the finished product. Just one thing though, are you actually going to drive it on the crappy streets nowadays? 
__________________
1987 V20 farm-hand rescue 1998 C2500 lot-rot rescue |
|
|

|
|
|
#345 |
|
Senior Member
 Join Date: Jul 2010
Location: Race City U.S.A.
Posts: 1,036
|
Re: "Midnight Rider" 1970 C10 SWB Fleetside
Thanks for the compliments DB and Shifty One. I do plan to drive it, but it will be after we show it for a year or so. However, if I'm going to drive it, I'll need an emergency brake. When I tore the truck down to the frame, I noticed the original e-brake assembly was twisted and bent out of shape. Just like the brake assembly, it was covered in surface rust too. I tried to bend it back, but the metal seemed fatigued. I was able to find an NOS e-brake assembly and decided to replace the original.
 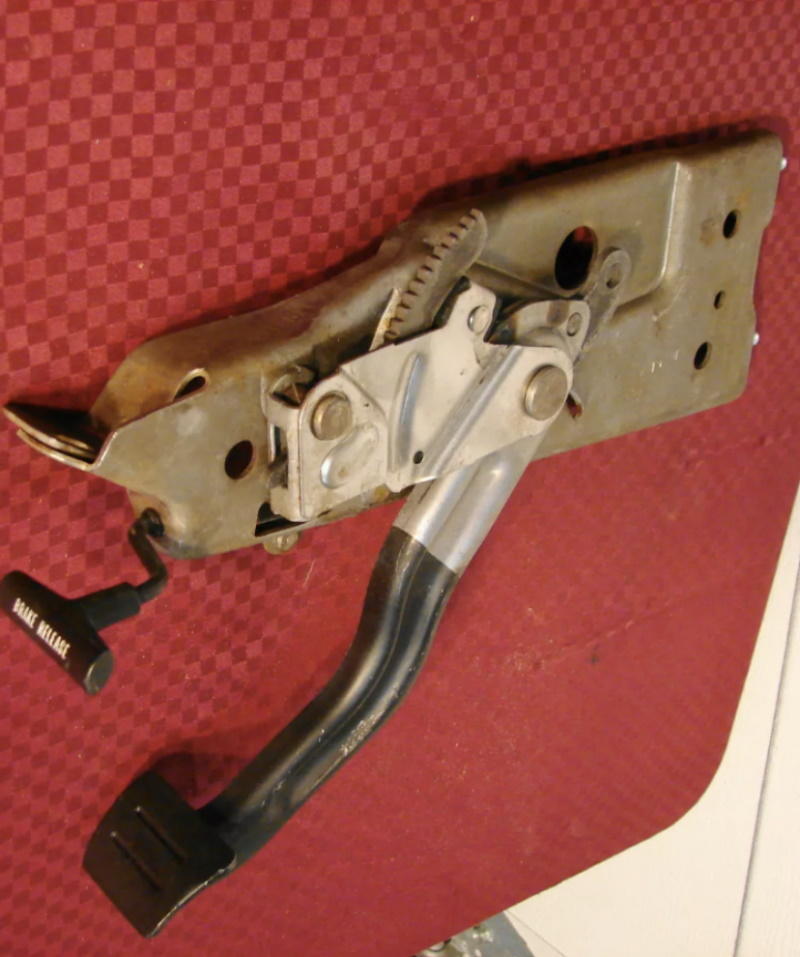 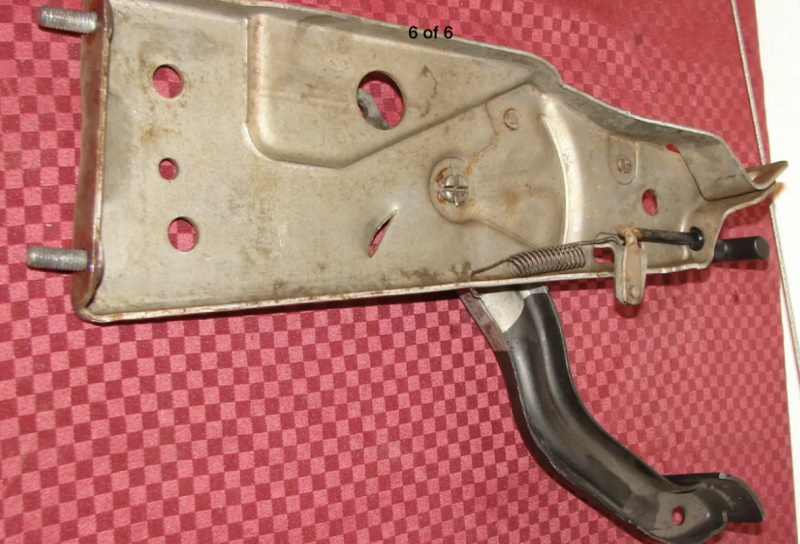 I disassembled what I could and soaked everything in Evaporust. 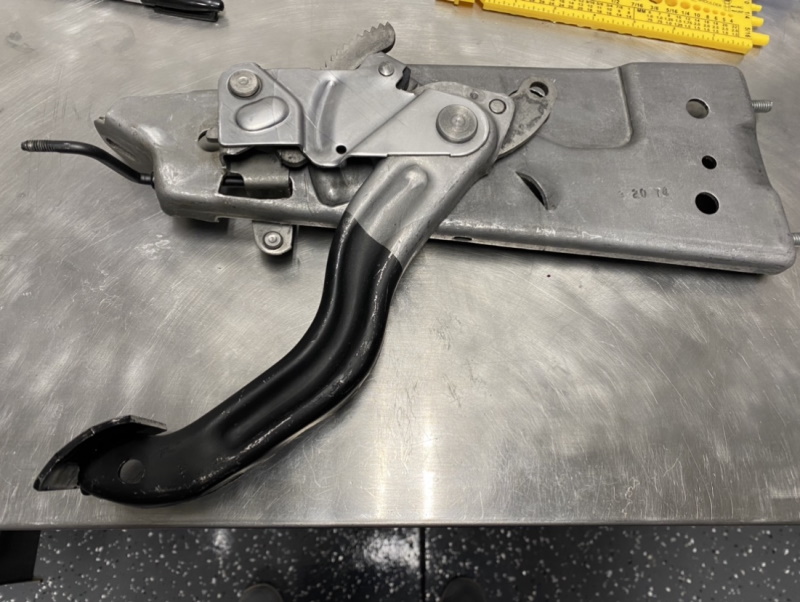 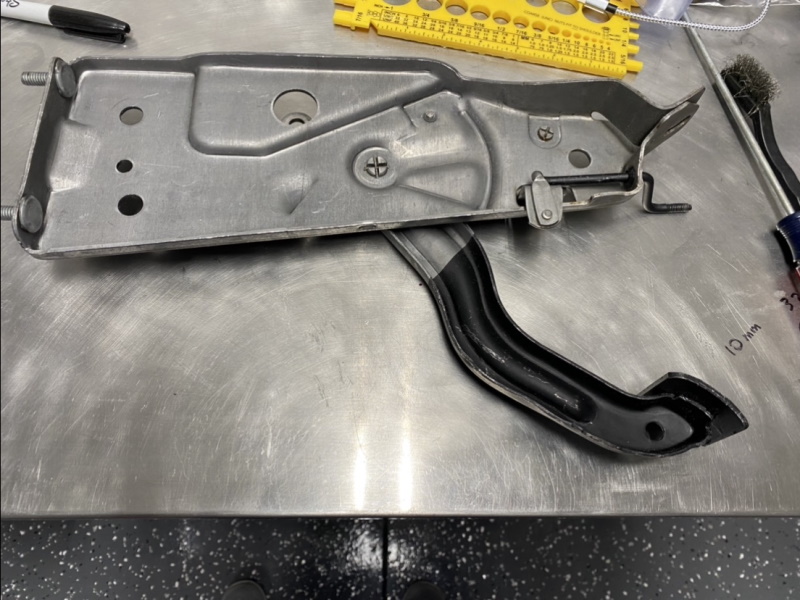 I couldn't easily remove the black paint from the handle or the pedal stem. So I ended up have to use the blast cabinet. I sent the assembly off to be nickel plated with my second large batch a few years ago. Here it is when I got it back. 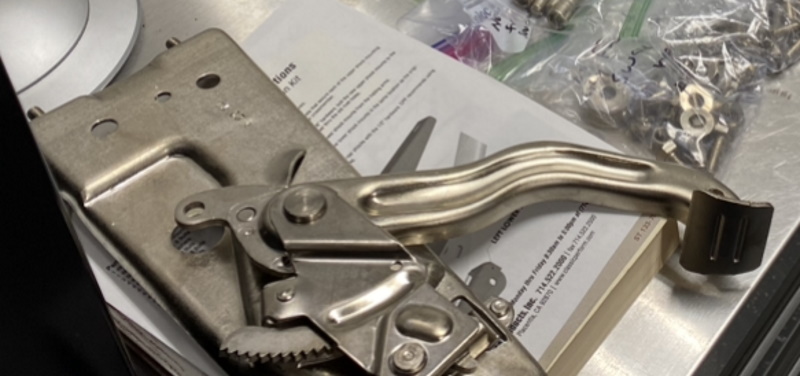 I could still hear blasting media in the rotating portion of the pedal. I probably spent an hour with the blow tool getting everything out. Once it operated without any grinding, I used a needle to apply grease to the assembly, especially in the hard to reach places. Next, I replaced the original return spring. 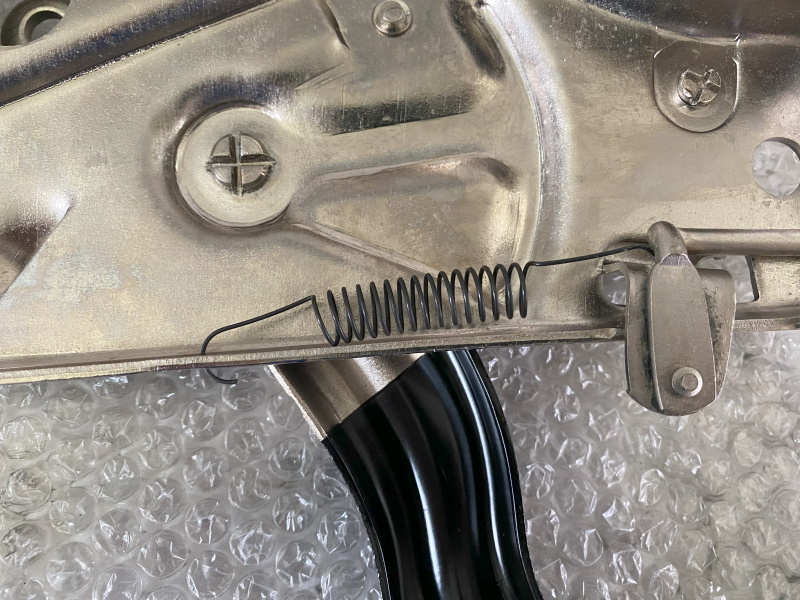 The release handle that came with the assembly was a bit faded. So I will replace that with a new one that I found on EBAY. I was also able to buy an NOS pedal pad from board member 402Bowtie and NOS deluxe pad trim I found on EBAY. That all gets installed now. 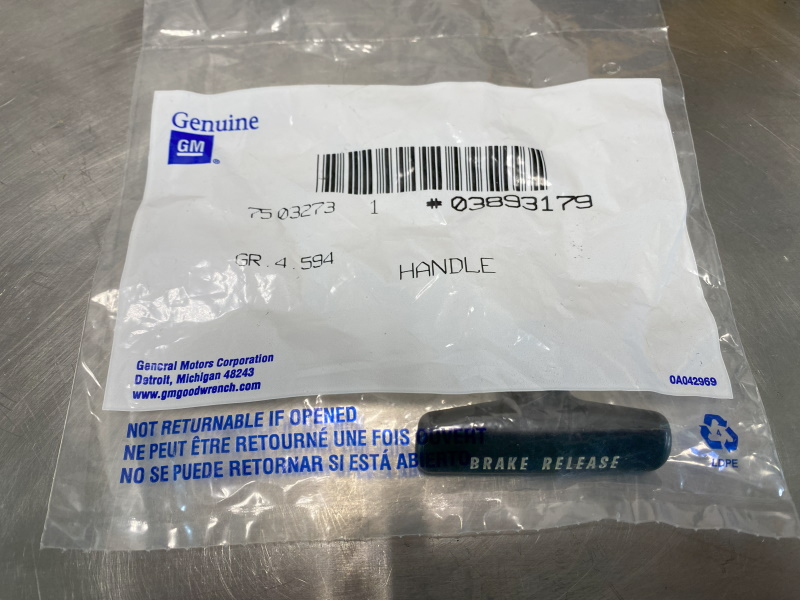 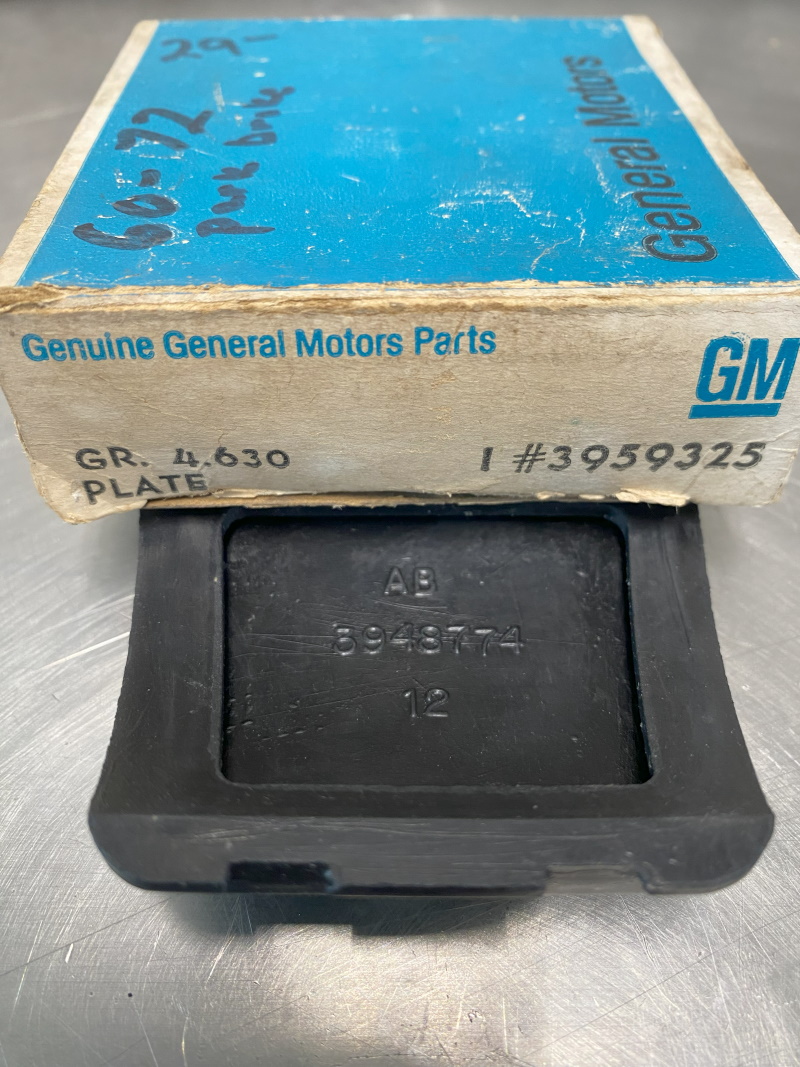 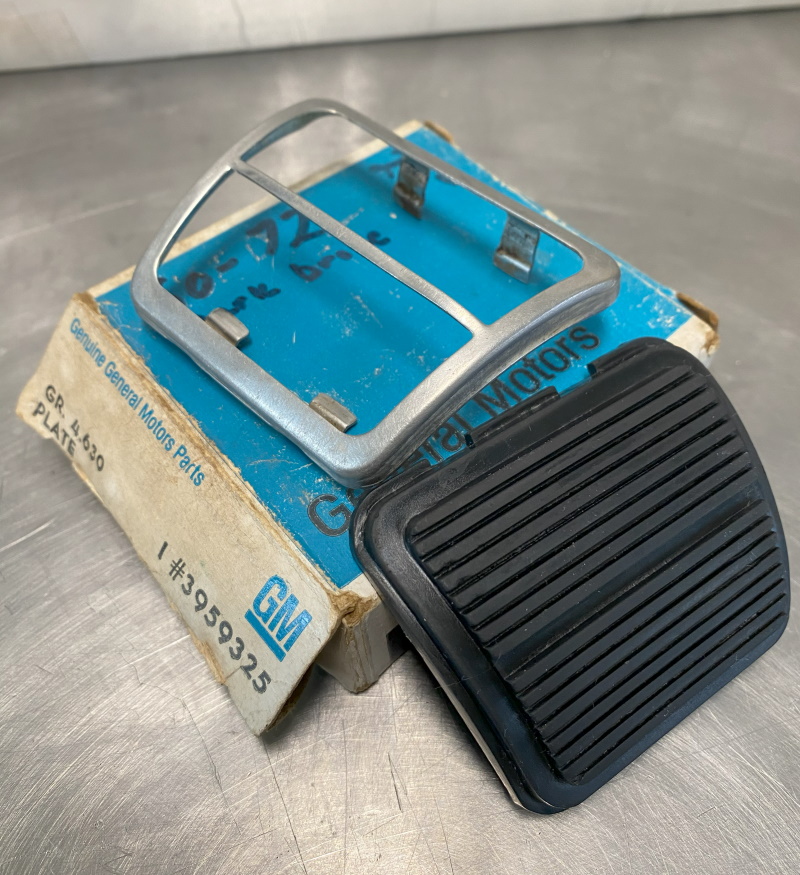 I polished the deluxe pedal trim with a dremel and installed. Here is the completed assembly. This will look great next to the brake assembly. Will package this up and store away for later. 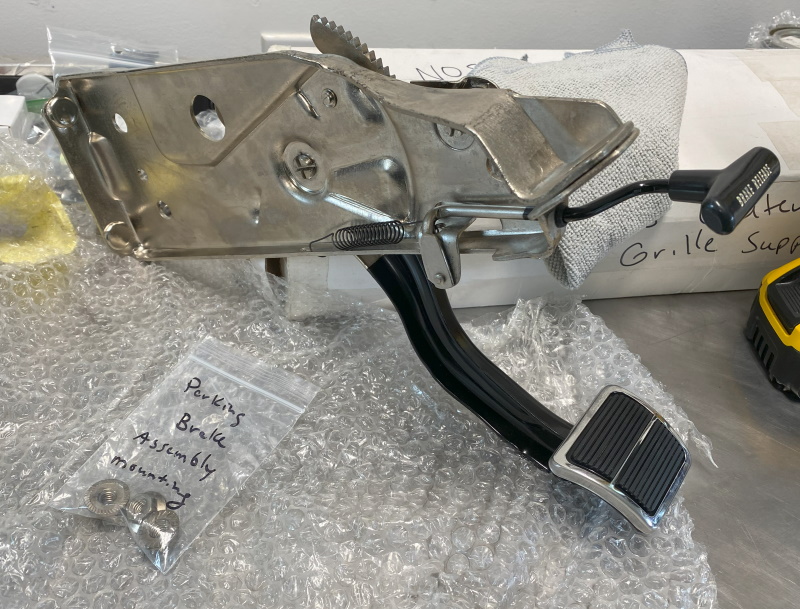 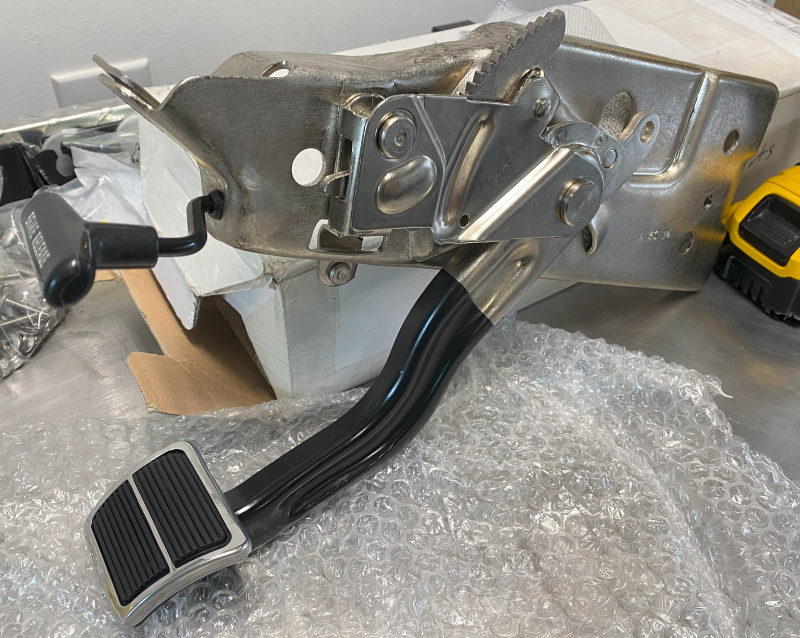
__________________
Board Member #87725 My build thread... http://67-72chevytrucks.com/vboard/s...d.php?t=813848 Last edited by omodified; 05-04-2024 at 04:18 PM. |
|
|

|
|
|
#346 |
|
Registered User
 Join Date: Sep 2015
Location: Martensville, Saskatchewan
Posts: 969
|
Re: "Midnight Rider" 1970 C10 SWB Fleetside
That looks excellent 👍 I didn't realize there was a deluxe trim package for the park brake as well. That's too cool. Keep up the amazing work!
|
|
|

|
|
|
#347 |
|
Senior Member
 Join Date: Jul 2010
Location: Race City U.S.A.
Posts: 1,036
|
Re: "Midnight Rider" 1970 C10 SWB Fleetside
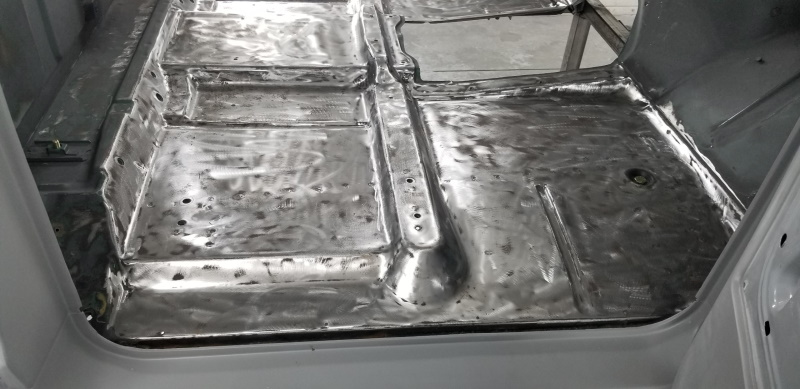
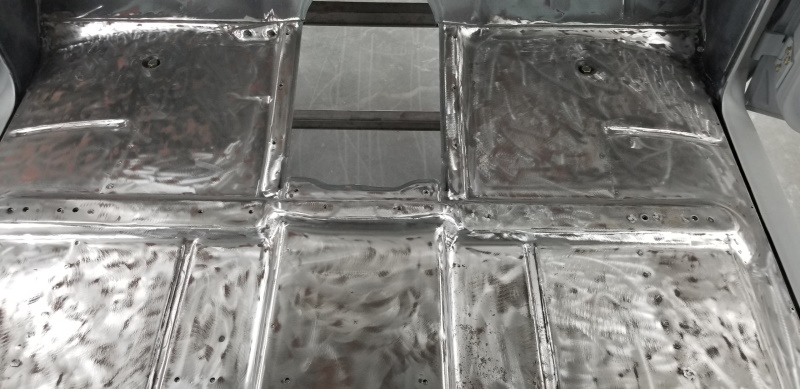
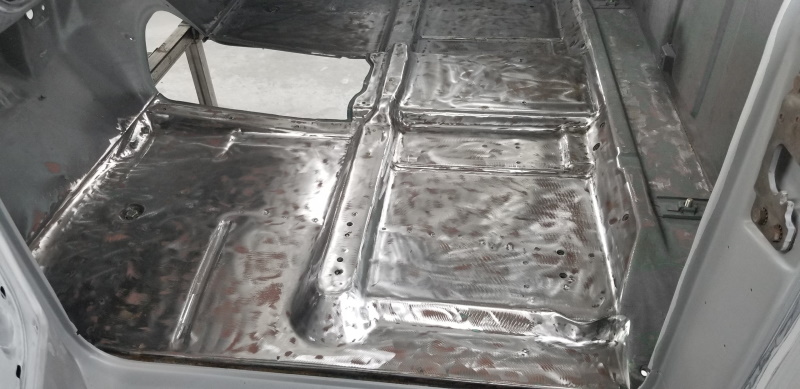
Decided sanding the floor of the cab is a good idea, just to make sure nothing gets missed. So far, so good.
__________________
Board Member #87725 My build thread... http://67-72chevytrucks.com/vboard/s...d.php?t=813848 Last edited by omodified; 05-04-2024 at 04:19 PM. |
|
|

|
|
|
#348 |
|
Senior Member
 Join Date: Jul 2010
Location: Race City U.S.A.
Posts: 1,036
|
Re: "Midnight Rider" 1970 C10 SWB Fleetside
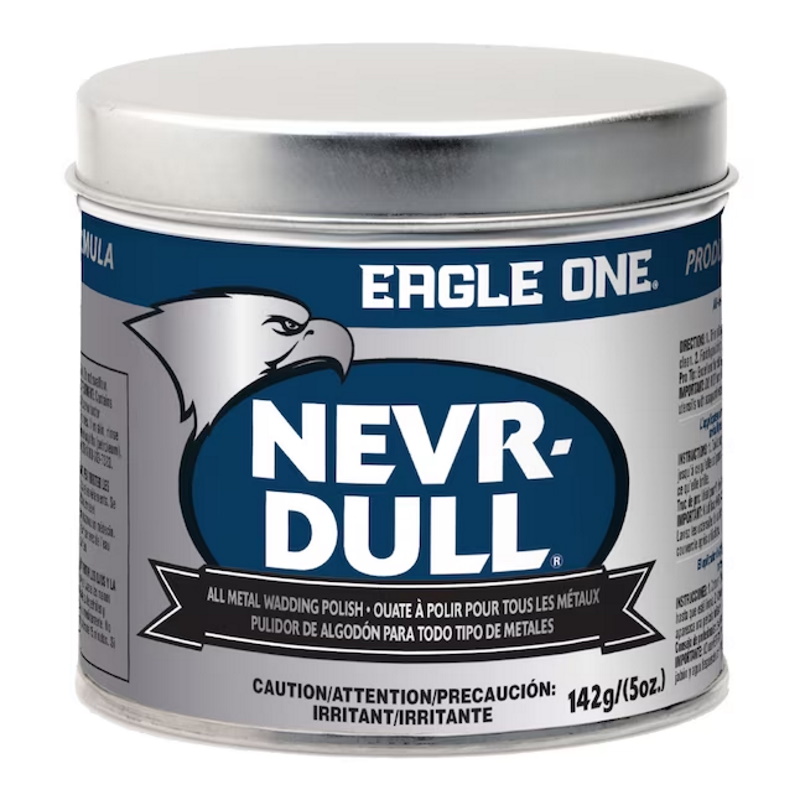
Since the grille was mocked up successfully, it was time to store it away. This is also a good time to consolidate some more parts. Before I start with that, I decided to polish the grille. A friend taught me a trick to working with this anodization. You can use wadding polish and it cleans the surface perfectly without scratching it. I went over the entire grille with polish. I was even able to remove some black overspray. I used a microfiber towel to final wipe everything. Unfortunately, I did find a few tiny blemishes here and there. I'll have to downgrade the grille to a 8.5/10, but that is crazy good for 35+ year old NOS.
 Next up, was installing the inner grille. I bought an NOS inner grille many years ago, but I learned later that the one I bought was actually for a 1969. Apparently, when GM made service parts of the inners, they mass produced the 1969 version for 69/70. I was told it was next to impossible to find an actual 1970 inner. Well, board member Mike Coefield came through for me. He finds all the good stuff! 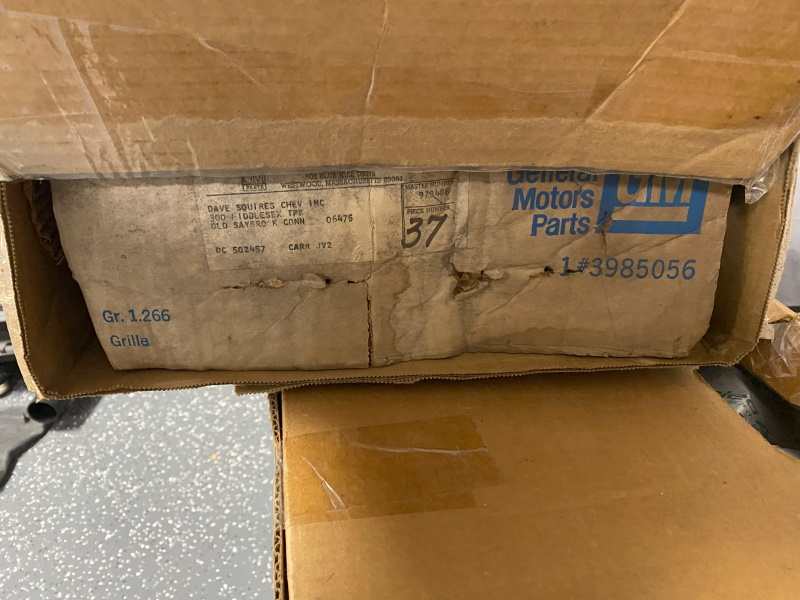 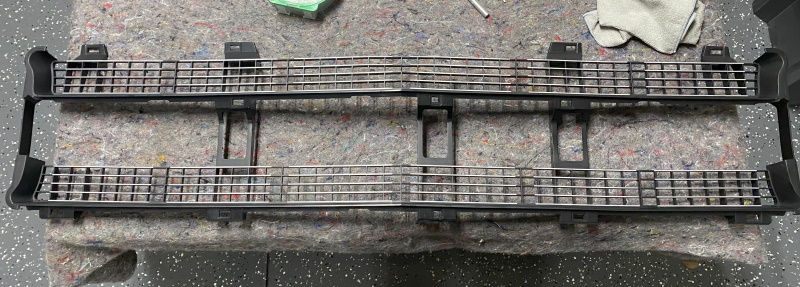 I think the hardest part of putting this assembly together was attaching the inner to the outer. I had to tape together a stack of washers for the plastic clip to recess into as I used pliers to install the clips thru both grilles. A few of them were at a really bad angle for the pliers. In the end, it just took some patience. Once all the clips were in, I installed nickel plated screws hand tight with a 1/4" ratchet. 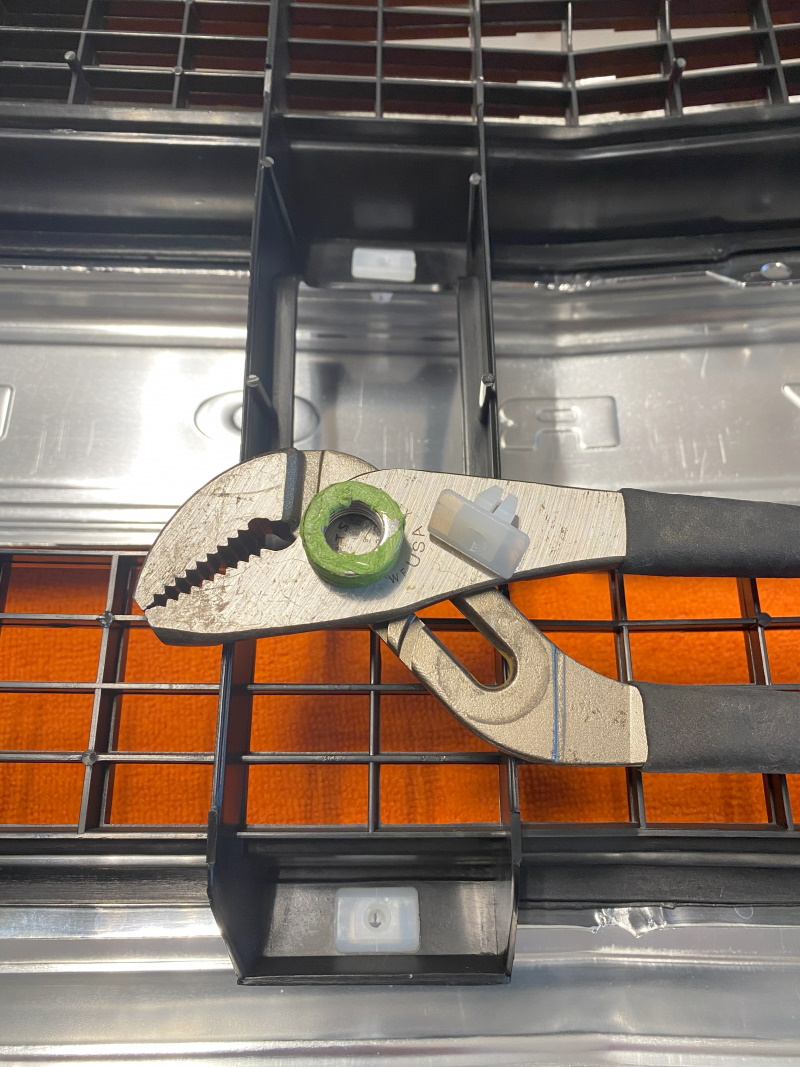 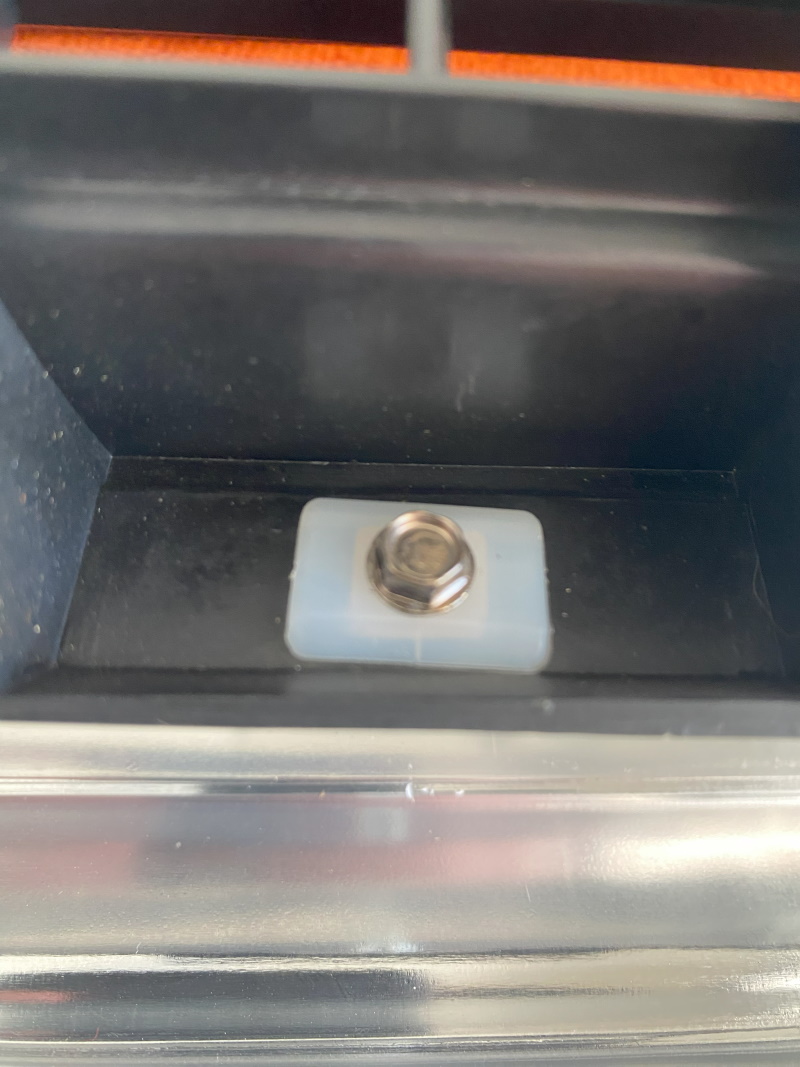 Last thing was the parking lights. This wasn't hard, just a pain. I found NOS parking light assemblies on EBAY years ago. I actually bought each side at different times. What I didn't realize was that one side was made of galvanized steel and the other side was not. When I realized that this past week, I tried to find something that matched one of my sides. Everything I could find looked just like this. It really isn't a big deal because the housings will be hidden. However, with the lenses on, one light appeared to be way darker than the other. So, I decided to spray the inside of the housings bright silver. 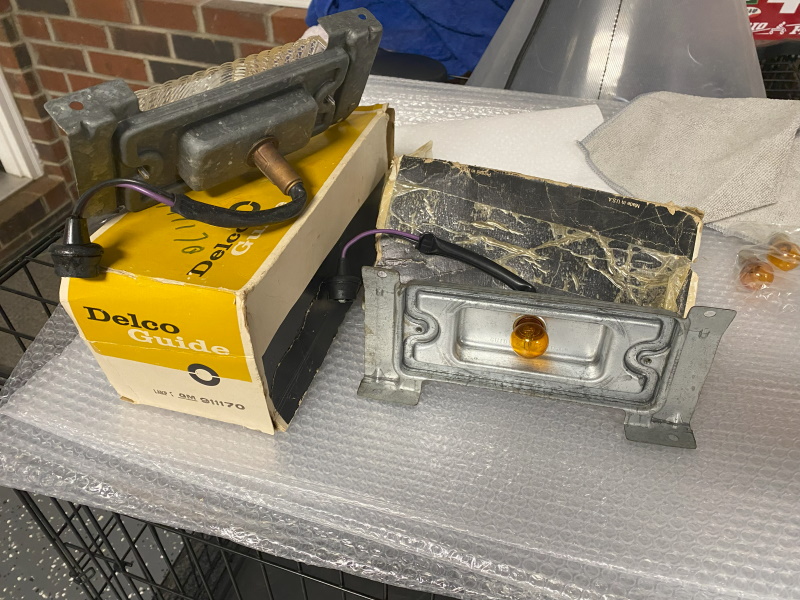 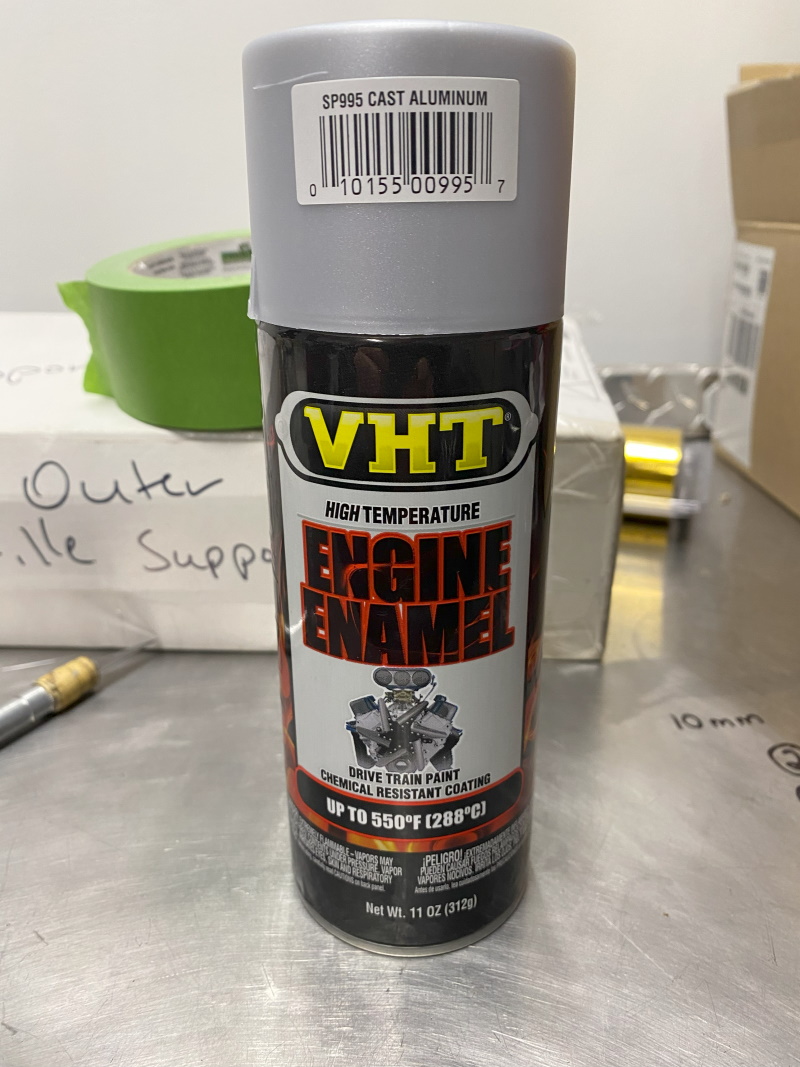 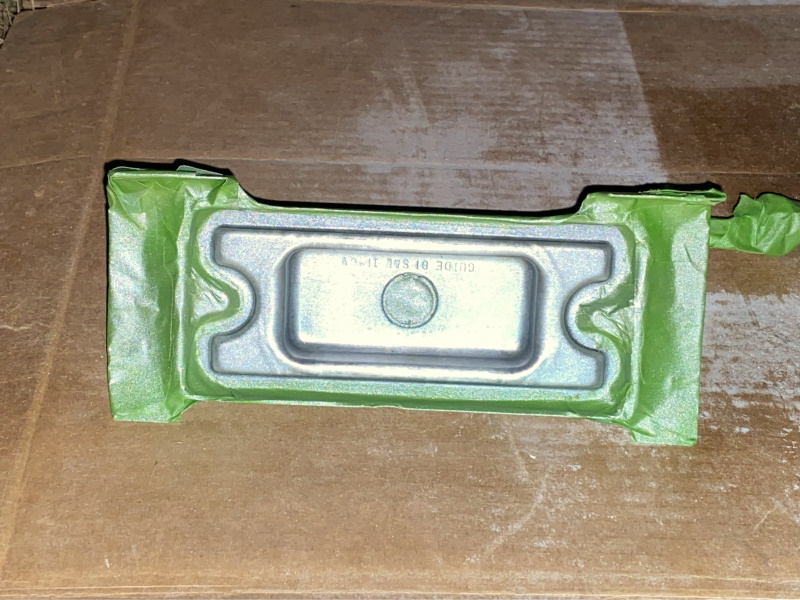 The next issue I had were the gaskets. The NOS assemblies come with a really nice rubber gasket that I would've preferred to use. However, age had started to turn them yellow. I was able to clean them up a bit but once the lens was on, you could see the color of the gasket around the edge of the lens, which just didn't look right to me. I found some black foam gaskets local. However they didn't quite fit and when I tried to stretch them, they tore right away. I did keep the felt plugs that came with them as the NOS plugs were not in good shape. I was able to find some grey foam gaskets from board member QualityClassicParts (Seth Doulton). These gaskets are really nice and can be stretched to fit how you need them to. The color matches the housing perfect and looks great with the lens installed. 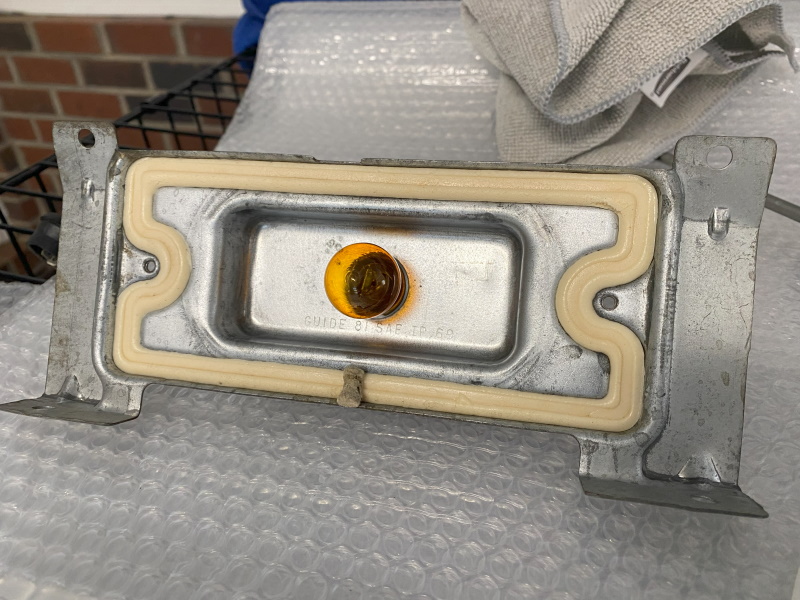 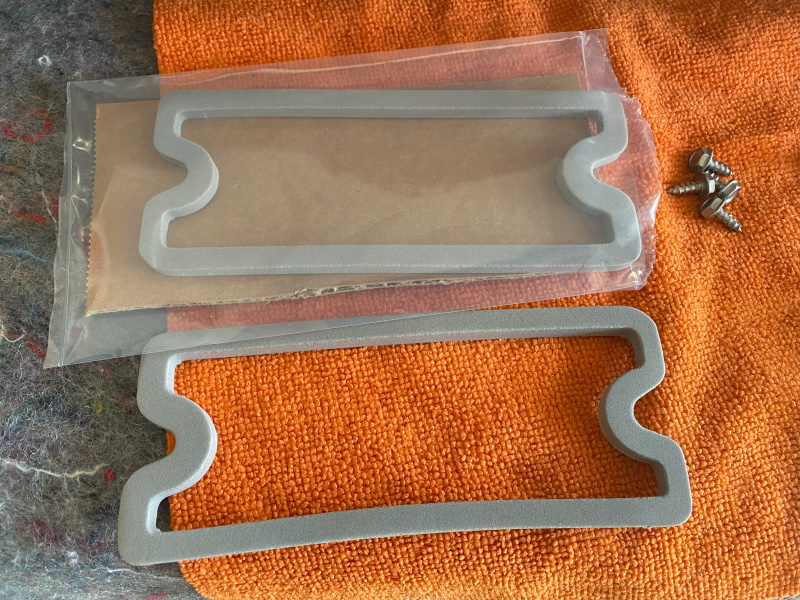 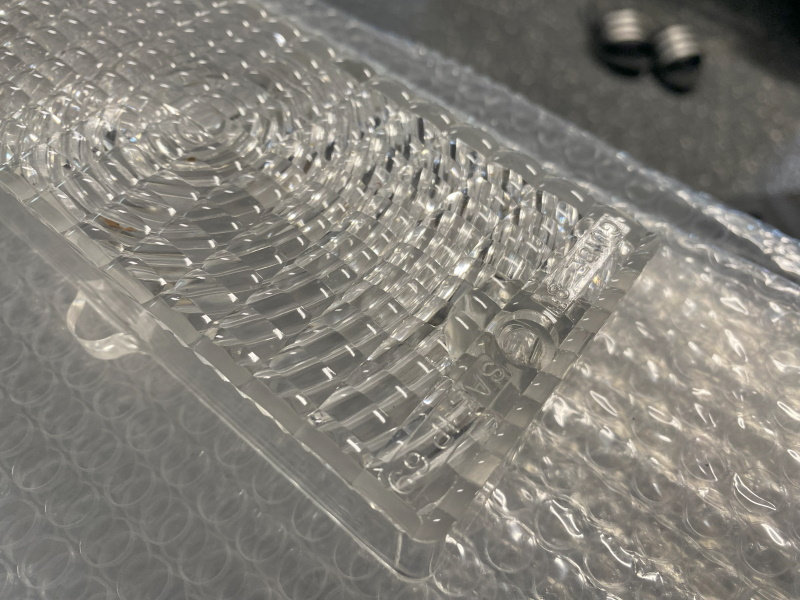 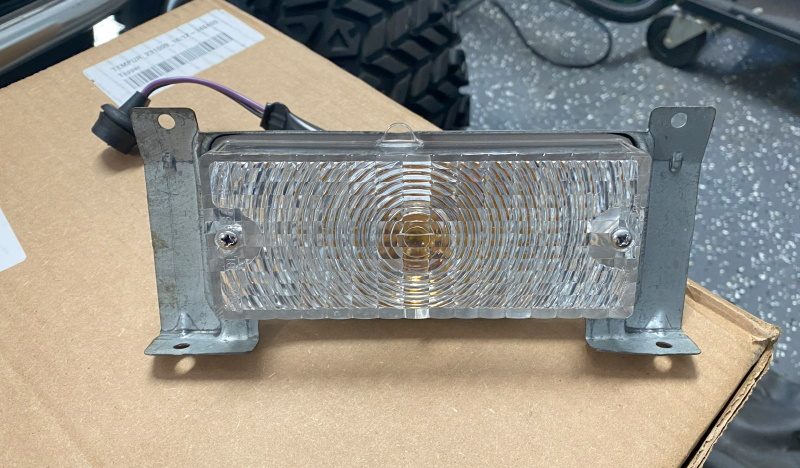 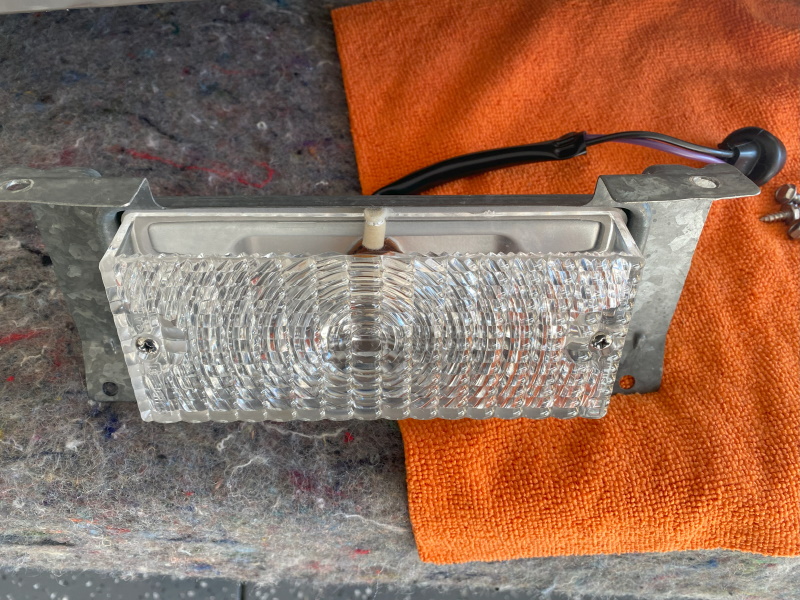 I could never find a hardware kit to install the parking light housings. So I sourced some #10 stainless sheetmetal screws and some #10 u-nuts. This finished everything off nicely. Now that the grille assembly is together, I think I'll upgrade this thing to a 9.5/10! 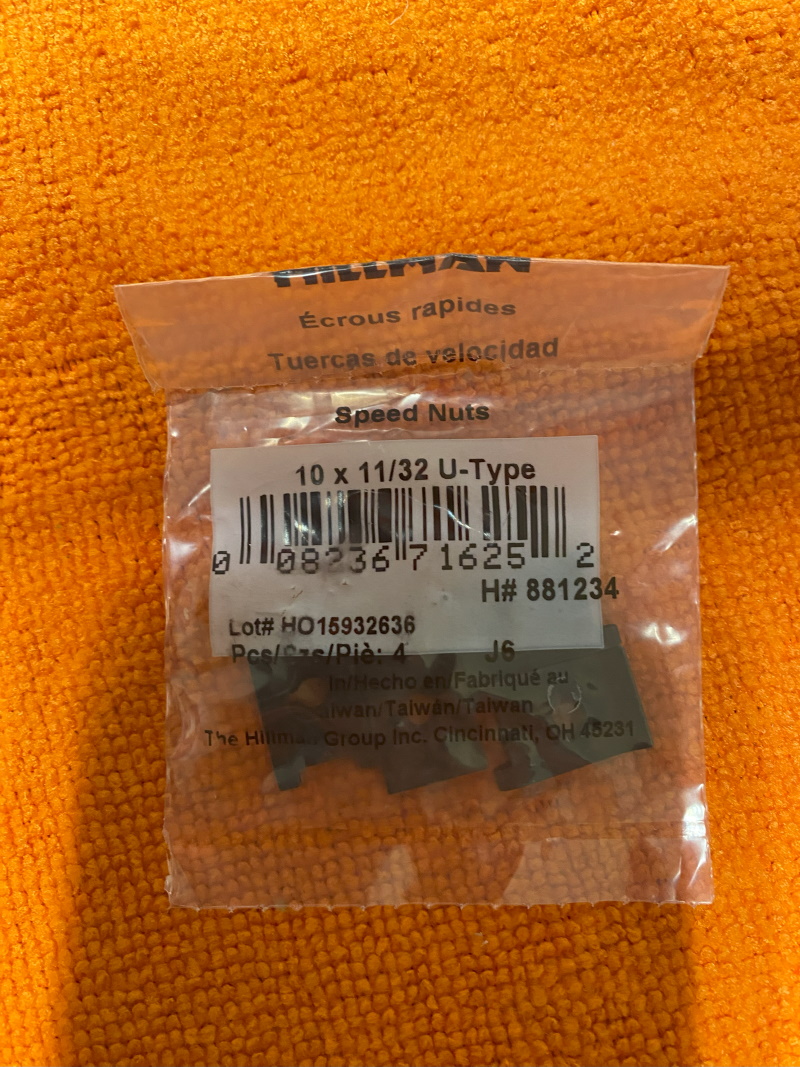 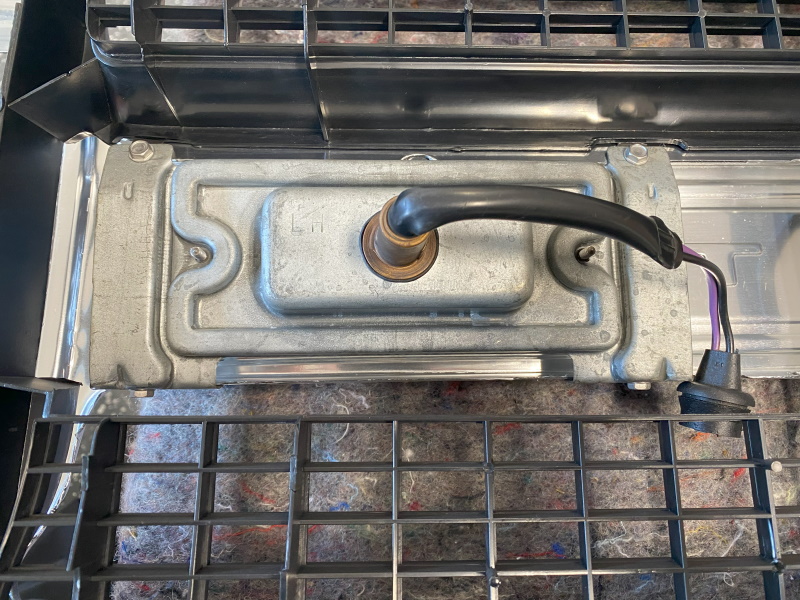 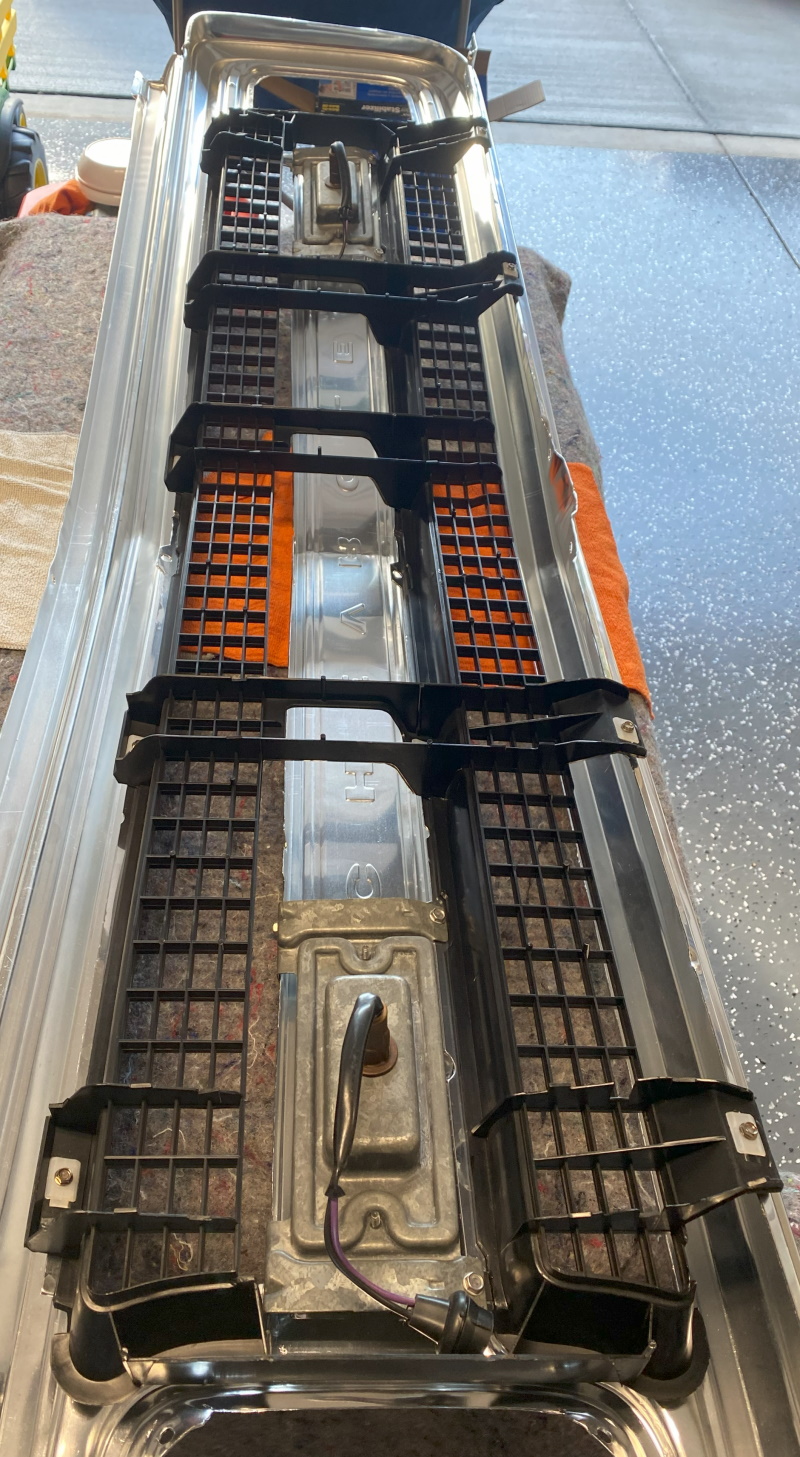 
__________________
Board Member #87725 My build thread... http://67-72chevytrucks.com/vboard/s...d.php?t=813848 Last edited by omodified; 05-04-2024 at 04:20 PM. |
|
|

|
|
|
#349 |
|
Registered User
 Join Date: Dec 2020
Location: Joggins Nova Scotia
Posts: 1,597
|
Re: "Midnight Rider" 1970 C10 SWB Fleetside
very nice work.the little things make a big difference.
|
|
|

|
|
|
#350 |
|
Senior Member
 Join Date: Oct 2012
Location: Phx, AZ
Posts: 339
|
Re: "Midnight Rider" 1970 C10 SWB Fleetside
I had to go through and read this whole build and it is sick! The amount of parts coming out of Genuine GM boxes is insane. The attention to details and your organization is equally insane. All the hardware being plated tops it all off.
Well done, I can't wait to see this finished. Nice work, Sir. 
__________________
Scott 1970 C10 LWB-->SWB Under Construction https://67-72chevytrucks.com/vboard/...d.php?t=847605 2014 2500HD DirtyMax|Daily Driver|Stock 2003 Tahoe Stock 1985 K5 5.3LS/4L60E|8Lug 4:56|3/4 Ton Front|14BFF Rear|Roll Cage|Dove-tailed & Bobbed |
|
|

|
 |
| Bookmarks |
| Thread Tools | |
| Display Modes | |
|
|