
 |
|
|
#1 |
|
Registered User
Join Date: Mar 2005
Location: tampa florida
Posts: 776
|
Finished Bucket Seats
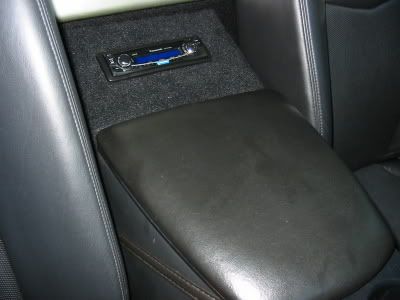 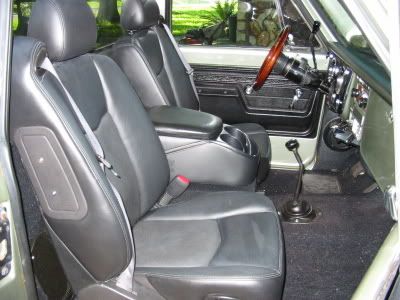 This is the finished product. Lots more comfortable than the bench seat. I kinda hated to take the old seat out but since this is my daily driver I went for the comfort. The seats are 8 way power so you can put them where you feel best. Its kinda hard to see but the first shot is of the radio on top of the console between the seats. Oh yeah, underneath the cup holder console is a large storage area. Now I have enough room to hide my extra junk. Last edited by gator2511; 09-03-2006 at 10:29 AM. |
|
|

|
|
|
#2 |
|
Registered User
Join Date: Jun 2006
Location: Pennsylvania
Posts: 84
|
Re: Finished Bucket Seats
What are those out of? they look pretty sweet
__________________
'65 Chevy 1/2 ton Longbed  '71 Chevy 1/2 ton Longbed '71 Chevy 1/2 ton Longbed 
|
|
|

|
|
|
#3 |
|
Registered User
Join Date: Mar 2005
Location: tampa florida
Posts: 776
|
Re: Finished Bucket Seats
Thank You! They came out of a 05 Caddy SRX suv. The photo has a ghost flaw in the seats but they are perfect. I got them on ebay for $217. The guy I bought them from said I should have brought my gun cause I stold them! It got better when my wife paid for them as a birthday gift to me.
Last edited by gator2511; 09-03-2006 at 10:27 AM. |
|
|

|
|
|
#4 |
|
Where's my beer?
Join Date: Aug 2002
Location: I live in the state of denial....
Posts: 5,620
|
Re: Finished Bucket Seats
They sure look nice

__________________
Paul How do you make the invisible, visible?.........You take it away. |
|
|

|
|
|
#5 |
|
Looks good at 20-ft .....
Join Date: Apr 2005
Location: Mtn Home, AR
Posts: 707
|
Re: Finished Bucket Seats
Looks Great !!!
I have a very similar-looking tan leather set which came out of an '05 Buick LeSaber, and am in the planning stages (spelled: avoiding) my install until I know more, so that I do this right, and only have to do it once, safely. Don't want to hijack the thread, but did you take any pix of how you fabbed the floor-mount brackets, and what you did to reinforce the floor pan both above &/or below ??? I've been concerned about that issue by the guys talking previously about the risk of serious floor pan failure in (God-forbid) a major head-on collision accident, due to the leverage-loading downward tilt at the point of the front bolt attachments, caused by the seat-attached seat bets. "Seat fronts punching down through the floor" is how it's been described. Scary !!! Also curious about how you wired the electric circuitry. Thanks in advance. |
|
|

|
|
|
#6 |
|
Registered User
Join Date: Jul 2006
Location: Central PA
Posts: 12,201
|
Re: Finished Bucket Seats
better questions is, are you gonna rig the airbags on the side to work! doubt it but had to ask...
|
|
|

|
|
|
#7 | |
|
Registered User
Join Date: Mar 2005
Location: tampa florida
Posts: 776
|
Re: Finished Bucket Seats
Quote:
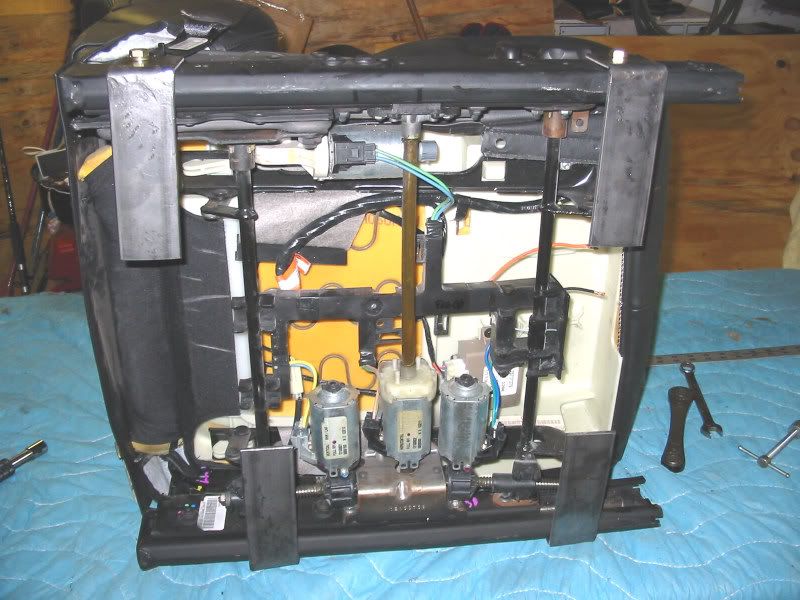 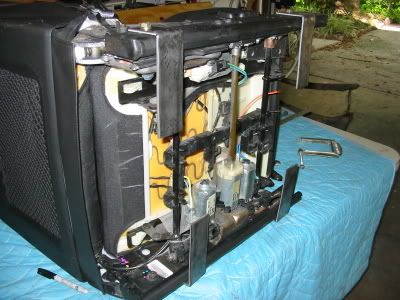 Here is a shot of the seat rails without any brackets. Please ignore the bottle of Bud. I can't imagine who put that there! 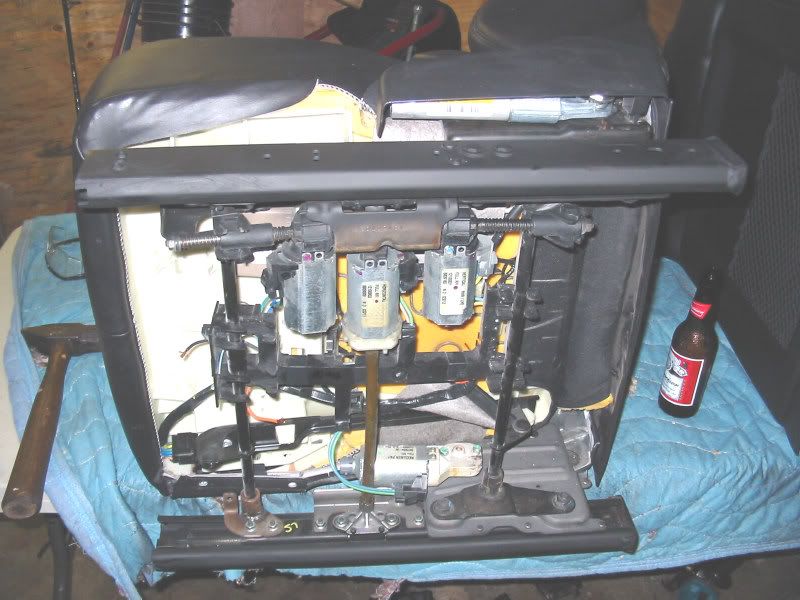 The wiring got a little silly cause the driver's seat was computer operated and I removed all that and re-wired it to work with a home made switch panel. I sorta made up my own wiring diagram and just eliminated the computer. It works great and its simple. 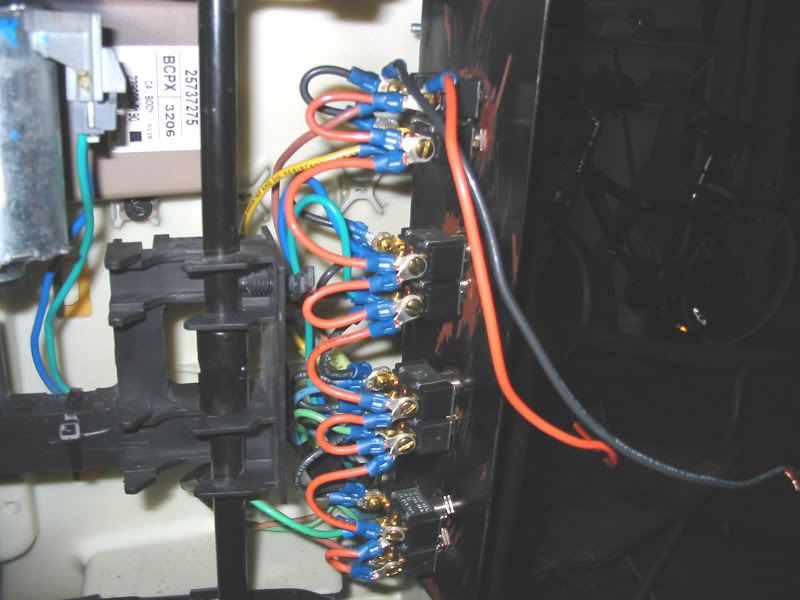 I figure if I hit something hard enough to pull or punch these brackets through the floor, its gonna be goodbye baby anyhow. I put 3/16 x 2" plates under the cab floor to reinforce the floor from pulling thru. I have added some electrical stuff to the truck so it was time to add another fuse block in parallel to the original block. I added a 6 circuit fuse block and put the seats and radio on that so I wouldn't overload the original block. The airbags were deployed in the Caddy wreck so I just put the covers on the holes. I'm gonna paint the screws black so they don't stand out so much. You know, the pre-tensioner devices and the air bags are pyrotechnic explosives. I have heard of people having trouble with the seat belts getting so tight in a crash that they had to cut the belts off of them. I figure the fewer explosive devices I have in my truck the better off I am. Call me silly but I think being in a crash is bad enough with having charges going off all around you. |
|
|
|

|
|
|
#8 |
|
Registered User
Join Date: Jun 2006
Location: Pennsylvania
Posts: 84
|
Re: Finished Bucket Seats
OK I have two more questions, How tall are you and how much room do you have?
__________________
'65 Chevy 1/2 ton Longbed  '71 Chevy 1/2 ton Longbed '71 Chevy 1/2 ton Longbed 
|
|
|

|
|
|
#9 |
|
Registered User
Join Date: Mar 2005
Location: tampa florida
Posts: 776
|
Re: Finished Bucket Seats
I'm 6' tall and weigh 260 lbs. My driving position is closer to the wheel than with the bench seat but I can move the seat bottom forward and lean the seat back. Its nice and I'd do it again in a heartbeat. Lots more comfort.I have a smaller Grant steering wheel but it has an adapter that moves it 3 inches closer. I'd say the wheel is about 4 inches from my stomach.
Last edited by gator2511; 09-04-2006 at 07:36 PM. |
|
|

|
|
|
#10 |
|
Looks good at 20-ft .....
Join Date: Apr 2005
Location: Mtn Home, AR
Posts: 707
|
Re: Finished Bucket Seats
Gator2511: Thanks for the good photos. Gives me some ideas about how to do mine. I like the wide steel plate L brackets for stiffening the floor & as a way to make a simple bolt-on seat attachment via the sides of the track rails.
I hadn't considered cutting those nasty hook-catches off the bottom & sides of the seat track rails that the GM design engineers obviously used to speed assembly-line drop-in of these VERY heavy seats. Fortunately, my seats have the eletrical controls right on each seat, so probably not a whole lot of re-wiring needed. Just confused about the dozen or so wires going thru the factory pigtails. I've had an open Bud sitting close by while scratching my head over mine, too. Thanks again. |
|
|

|
|
|
#11 |
|
Registered User
Join Date: Mar 2005
Location: tampa florida
Posts: 776
|
Re: Finished Bucket Seats
The electrical folks at the factory will definately muddy up the water with a simple thing. I got rid of a lot of the air bag and seat position controls. I just kept it simple. The passenger seat was wired with heavy enough wire and control switches to just leave alone and it worked fine.
I drilled and tapped the seat rails and used short bolts to bolt the brackets to the seat rail without having the bolts sticking through and interfering with the seat guides and levers. |
|
|

|
 |
| Bookmarks |
|
|