
 |
|
|
#101 |
|
Registered User
Join Date: Jan 2011
Location: Redmond, OR
Posts: 763
|
Re: Project: Over My Head
I know the feeling on the wiring harness - I think I have opened mine (Speedway 20 circuit) about four times and keep putting it away for another day (did finally find a Ford steering column wiring diagram to use with it though).
On the welder, my only suggestion would be to get one that has the option of running gas if you can. The flux core only welder is cheaper to buy, but most end up wanting gas later. I had a Century125 for a while, then went to a Hobart 175 (220V) last year and am much happier. Keep up the good work and progress.
__________________
68 Chev C20- son has it now 83 K20 - bought from son 70 C20 - in progress |
|
|

|
|
|
#102 |
|
Registered User
Join Date: Sep 2011
Location: Nevada City, CA
Posts: 908
|
Re: Project: Over My Head
Well, I meant to finish the shift linkage, bleed the brakes, re-pin some things on the ECM connectors & mount the trans cooler.
When I went to mount the trans cooler, though, I realized that I'd put the fan in sans bodywork. I went to put the sheet metal that joins radiator support & grill back in place (the thing with the hood striker & latch) and whaddayaknow, I have to move the fan. Again. So, with $10 worth of steel to go across the radiator support, a few bolts & a few hours time, I get this 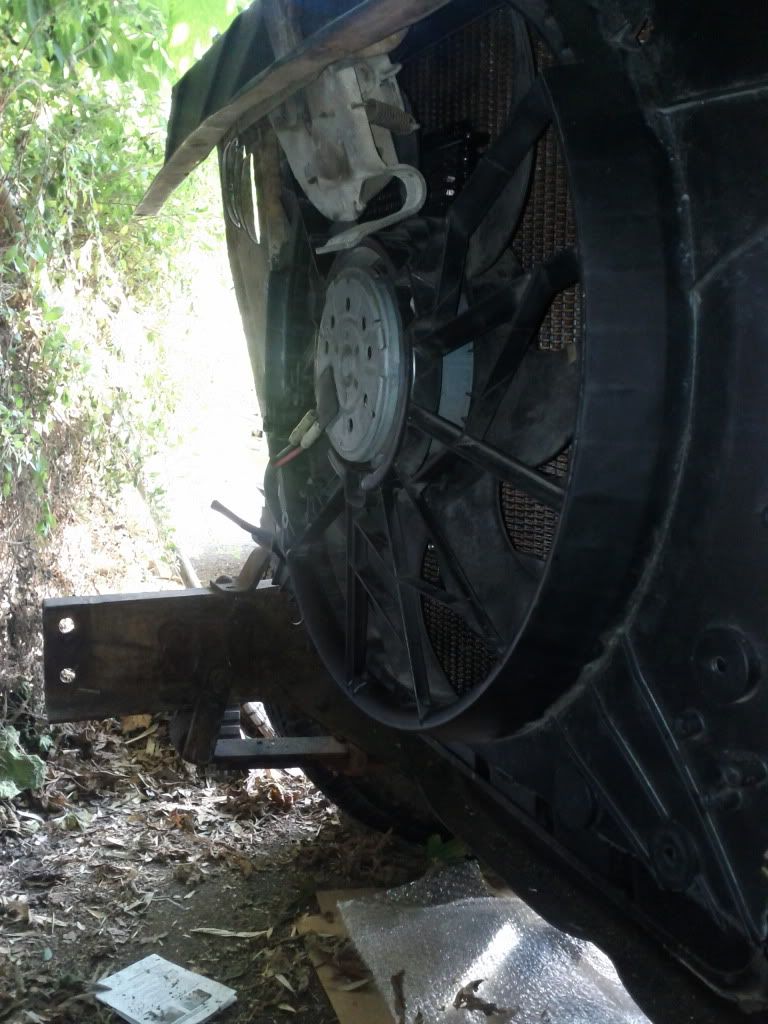 The thing of it is, now that the trans cooler is in place and the fan fits nice... I still don't think its going to clear the grill at the lower front edge. We'll see. I'm done for now, though. Might need a different fan altogether. At least the trans cooler is in place... I can run it Model T style, I suppose. In other news, I'd measured the linkage *before* modifying my shift arm. To get the throw between column & trans to match I had to lengthen the trans shift arm. Now, of course, the linkage is too long. So that $55 worth of linkage becomes $115 now that I'm paying a machine shop to chop, drill & re thread it. I could smack myself, but it wouldn't help. Here's the offending shift arm : 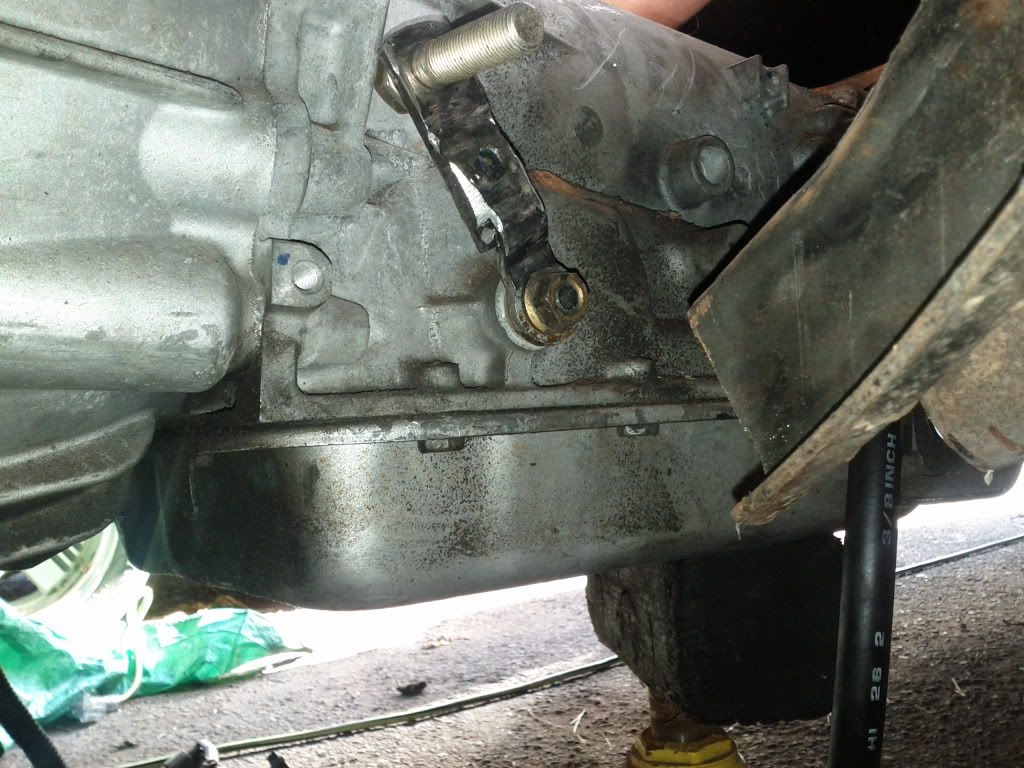 In the good news column, though, I did get all the loose wires labeled & the ECM connectors re pinned. I got as far as I could with the fan & trans cooler, even if I'm not 100% there. The linkage was a learning experience but it will be done & together before the weekend, I think. So, I'm not real sure I'll have it running by August 9th like I've been hoping / trying - but maybe. If not, hey, I've towed it before. Can do it again. Oh - and in other news - the fiance and I got approve for a rental up in Nevada City. It's a real nice place with a big garage & room to park outside of it, too. So whether I tow it or drive it there, I'll soon have the '57 in a proper work space. We'll be moving in Mid-August, living there full time by September 1. |
|
|

|
|
|
#103 |
|
Registered User
Join Date: Feb 2013
Location: Lakeside Ariz
Posts: 445
|
Re: Project: Over My Head
The little things seems to take the longest time.
Rich |
|
|

|
|
|
#104 |
|
Registered User
Join Date: Aug 2007
Location: Corona, California
Posts: 7,998
|
Re: Project: Over My Head
What he ^ said.
Kim |
|
|

|
|
|
#105 |
|
Registered User
Join Date: Sep 2011
Location: Nevada City, CA
Posts: 908
|
Re: Project: Over My Head
Well, I accidentally name-dropped my former employer (Berkeley Bob's) at the machine shop (Bob's Machine Co) when I came by to see if it was ready. Guy said "Oh, you worked there? Cool. It's not ready yet, come back around 1". So I run to the hardware store, talk to this guy with a Camaro-clipped '56 short step (saw him in the parking lot), come back & voila - not only did Bob's Machine Co shrink the linkage, but he shrank the price as well. So it was only another $30 - call it $65 total in the shift linkage. I didn't realize i was such a big deal...
Anyway, here's how the linkage turned out 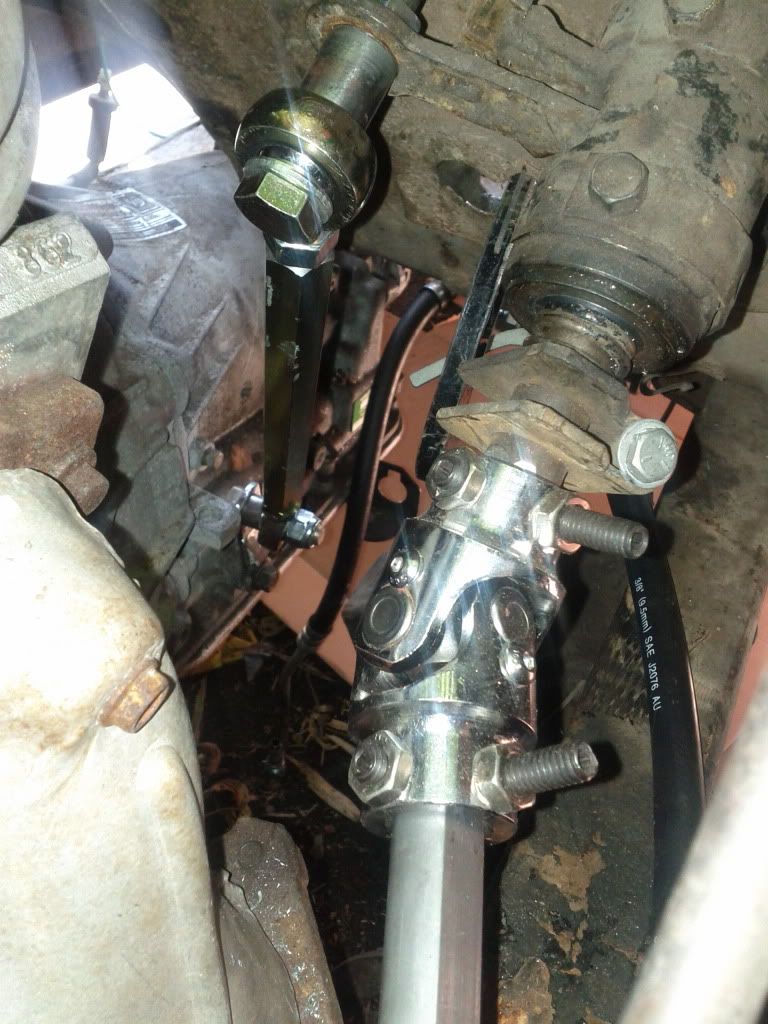 I had to add the spacer between joint and column to reduce the angle from column to trans. It was too steep at first to come out of park. Now it goes through all of them just fine & has a nice detent feel coming out of park. I also bled the MC, again, but who needs pictures of that? Somewhere around this time, my former boss walks over with my engine management fuse box from Current. I highly recommend it for LS swaps. You can find it here. Sure, you could build it yourself, cut one out from a junkyard car, etc - but this saves time and energy. So, i pulled out the soldering iron & got busy. Here's how I left it: 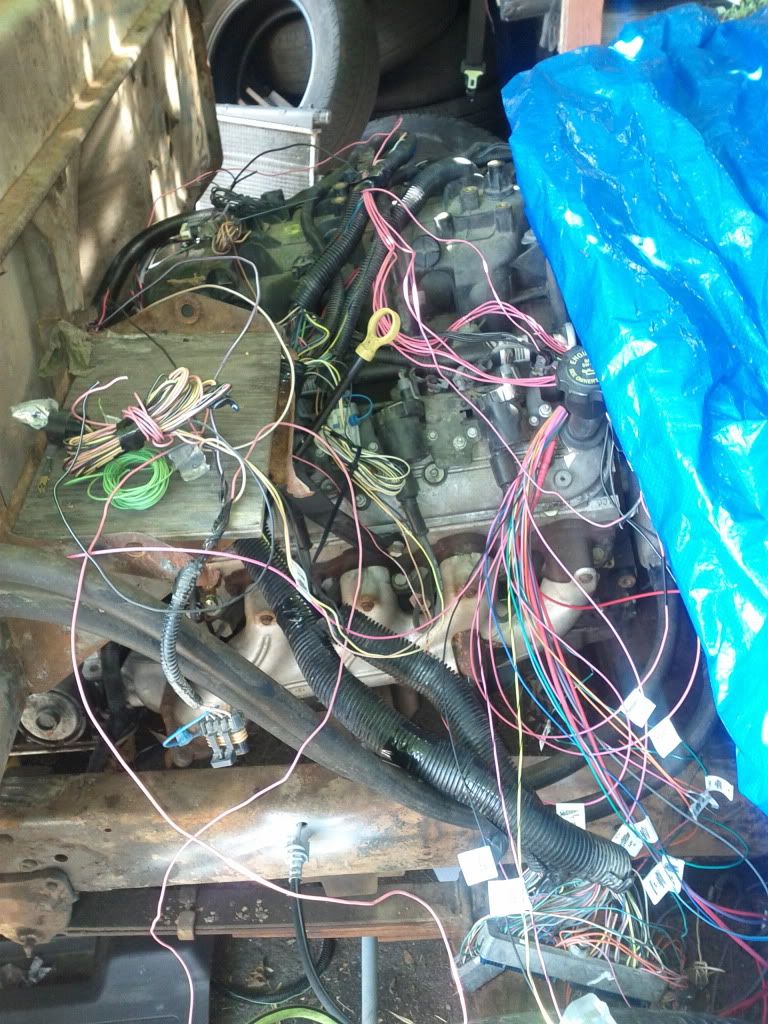 Left to do: bleed the brake lines, fluids & filters, body / dash wiring, solder MAF / 02s, exhaust, connect power & ground to fan, put the body on it, mount gas tank / filler somehow (even if its just in the bed, I need it to not hit the pavement), PS lines & transmission mount needs some shim for Ujoint angle. Oh, and plumb the trans cooler + anything else I've forgotten. Rough guess, 10 hours at a leisurely pace if I outsource the metalwork I'm not up for + the exhaust. Three weeks to the day until deadline, when my ex-boss wants his parking space back. I'm hoping to avoid the dreaded trailer rental. |
|
|

|
|
|
#106 |
|
Registered User
Join Date: Sep 2011
Location: Nevada City, CA
Posts: 908
|
Re: Project: Over My Head
More wiring today, though I went to a barbecue for a few hours and lost some productivity. Se las vis - and the pig was worth it.
I did, though, verify all yesterday's work. It's ready to heat shrink & wrap up now. I also got the gauges assembled (actually, that was a while ago) and the ign-b+ & B- wires done. Gauge senders have connectors on them. Still have to do the engine compartment side of that, but hey, at least the dash looks good (even if it doesn't work yet) 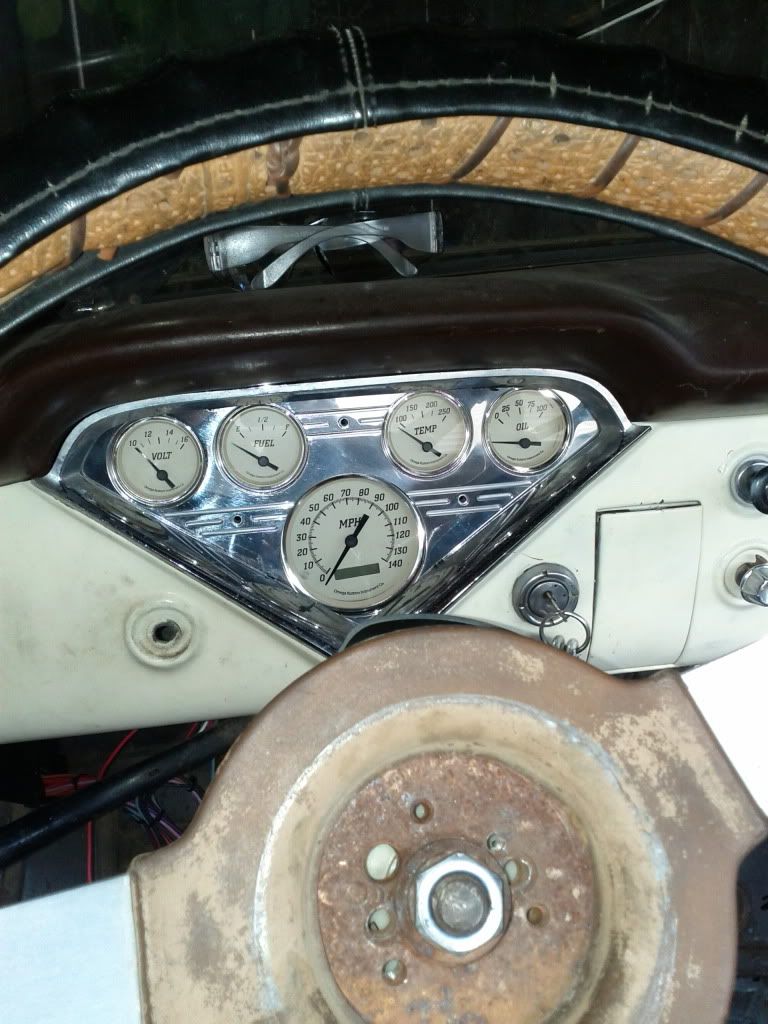 The hole left by the choke cable will get filled with a push-button starter switch, I think. |
|
|

|
|
|
#107 |
|
Registered User
Join Date: Jan 2011
Location: Redmond, OR
Posts: 763
|
Re: Project: Over My Head
After looking at your shift linkage, I am feeling totally inadequate (normal unfortunately). What size heim joints are you using? I just ordered some 5/16" 90 degree heims for mine yesterday, but after looking at yours, I am wondering if they will hold up.
__________________
68 Chev C20- son has it now 83 K20 - bought from son 70 C20 - in progress |
|
|

|
|
|
#108 |
|
Registered User
Join Date: Sep 2011
Location: Nevada City, CA
Posts: 908
|
Re: Project: Over My Head
My first thought was to use 3/8 heims & all-thread. A friend pitched me on Midwest Controls, where I looked for 3/8 parts to build a linkage at the length I thought I needed. They didn't have a long enough turnbuckle, though, so I went with 1/2-20" zinc plated steel.
I think 3/8 would hold up fine in aluminum or steel, either one. 5/16" probably would too. I mean, how much force are we putting on these? Only enough to change gears. |
|
|

|
|
|
#109 |
|
Registered User
Join Date: Jan 2011
Location: Redmond, OR
Posts: 763
|
Re: Project: Over My Head
That was my thought too, and the one's I have seen from Lokar and similar all appear to be 1/4" or 5/16", but when I saw yours I was second-guessing myself. I will throw it together with some all-thread when they get here and see what happens.
Nice to see you making such progress. Keep it up and good luck on the move.
__________________
68 Chev C20- son has it now 83 K20 - bought from son 70 C20 - in progress |
|
|

|
|
|
#110 |
|
Registered User
Join Date: Sep 2011
Location: Nevada City, CA
Posts: 908
|
Re: Project: Over My Head
Well, I need to buy another roll or two of wire wrap but the engine compartment is 95% there. The gauges should all work just as soon as I can figure out the ignition switch & how to mate it to the Speedway wiring harness. It's been fun figuring out how to adapt 4 different wiring schemes (Current Performance, Chevrolet circa 2002, Chevrolet circa 1957 & Speedway Motors) together. Tomorrow I'll try and get the ignition switch & fuel pump / gauge done. Getting *real* tired of wiring.
|
|
|

|
|
|
#111 |
|
Registered User
Join Date: Sep 2011
Location: Nevada City, CA
Posts: 908
|
Re: Project: Over My Head
I'm not so naive as to think it will be this easy, but I think all that remains before I can fire the engine is to put gas in the tank & attach the battery cables. Ignition switch, fuel pump / gauge wiring, starter button & all are done
What with fluids, filters & PS plumbing it might be Friday before I see if she's willing. I still have to order air intake stuff, too. I'd planned on waiting till the body was back on but now I'm thinking "hey, this looks promising. Better get parts on hand ASAP." |
|
|

|
|
|
#112 |
|
Registered User
Join Date: Sep 2011
Location: Nevada City, CA
Posts: 908
|
Re: Project: Over My Head
Hah! Sure enough, the battery held a charge with no load. When I went to crank the motor, though, it dropped to 4 volts after a single compression stroke. So it needs a battery.
Also, the starter motor had to be given some love with the wooden end of a hammer to free up the solenoid. It works now but will probably give me trouble in the future. Also, when I went to fill the radiator I noticed that the water pump that came on the engine leaks from the weep hole. So, it's either time for Bar's Stop-Leak or a new water pump. That being said... the motor did crank when I turned the key & hit the button, the throttle pedal got installed, the engine has fresh oil & filter on it, the gauges work & I've got power everywhere I'd expected to have power. So... for financial reasons it may or may not get driven when I'd hoped to drive it, but work is going pretty well on the things I can control. |
|
|

|
|
|
#113 |
|
Registered User
Join Date: Jan 2011
Location: Redmond, OR
Posts: 763
|
Re: Project: Over My Head
Good to hear it isn't any major problems, just the minor ones that keep eating up the budget. Keep at it.
__________________
68 Chev C20- son has it now 83 K20 - bought from son 70 C20 - in progress |
|
|

|
|
|
#114 |
|
Registered User
Join Date: Sep 2011
Location: Nevada City, CA
Posts: 908
|
Re: Project: Over My Head
Well, I did indeed crack the front pump rotor on the transmission. Lesson learned (the hard way) : you need to seat the torque converter all the way down before you bolt anything up.
That said, I got the transmission out & apart yesterday and I'm waiting on a new-to-me front pump. While I was waiting... Well, I got the inner fenders trimmed to clear the new additions (power steering, relocated shock absorbers) and did some more damage on the wiring. Hung the inner fenders & the truck looks a lot more truck like. Also replaced the leaking water pump & refilled her with coolant. Haven't pressure tested yet but no drips, at least. If tomorrow goes like it's planned, I'm maybe an additional 1/2 hour's work and I could drive it around the block. And still spend the next 10 years screwing with it, chasing details & making it pretty. |
|
|

|
|
|
#115 |
|
Registered User
Join Date: Sep 2011
Location: Nevada City, CA
Posts: 908
|
Re: Project: Over My Head
Update:
The transmission "experts" across the street ordered me the wrong pump. Or they were sent the wrong pump. Whichever way it happened, the wrong part showed up & now I'm waiting on try #2. Frustrating, since I could have had the right part at 1/2 their price by now, but I didn't know that at the time. I called four vendors and drove as much as 45 miles to get power steering lines done. Mind you, I'd told a local builder that I wanted him to do the lines & he agreed that yes, I'd give him money & he'd do the lines. Two weeks worth of excuses later, I spent all of today driving, talking & cussing about it. Finally, though, I found a guy at the local hydraulics shop who knew his business. $37 later, I've got it plumbed up. So now, all that remains (I think) Put the trans back together & reinstall it, plumb the MAF / air filter (arrives tomorrow) Mount the tank / filler for what I hope is the last time and then I should be ready to drive it onto the trailer with power steering, brakes & a shade under 300 horsepower. |
|
|

|
|
|
#116 |
|
Registered User
Join Date: Jan 2012
Location: Motown
Posts: 7,680
|
Re: Project: Over My Head
i'm feeling your pain.
i bought a new battery when i started my project, 6 yrs later bought another battery so i could start it it's been there 4 yrs and i still cross my fingers when it starts  i should post my trans linkage for you my shifter was on the other side of the column and stuck out over the frame took me 10 hrs to get the rod bent and length right and uses a wheel swivel off my broken creeper for a pivot on the frame
__________________
cool, an ogre smiley  Ogre's 58 Truk build Ogre's 58 Truk buildhow to put your truck year and build thread into your signature shop air compressor timer |
|
|

|
|
|
#117 |
|
Registered User
Join Date: Sep 2011
Location: Nevada City, CA
Posts: 908
|
Re: Project: Over My Head
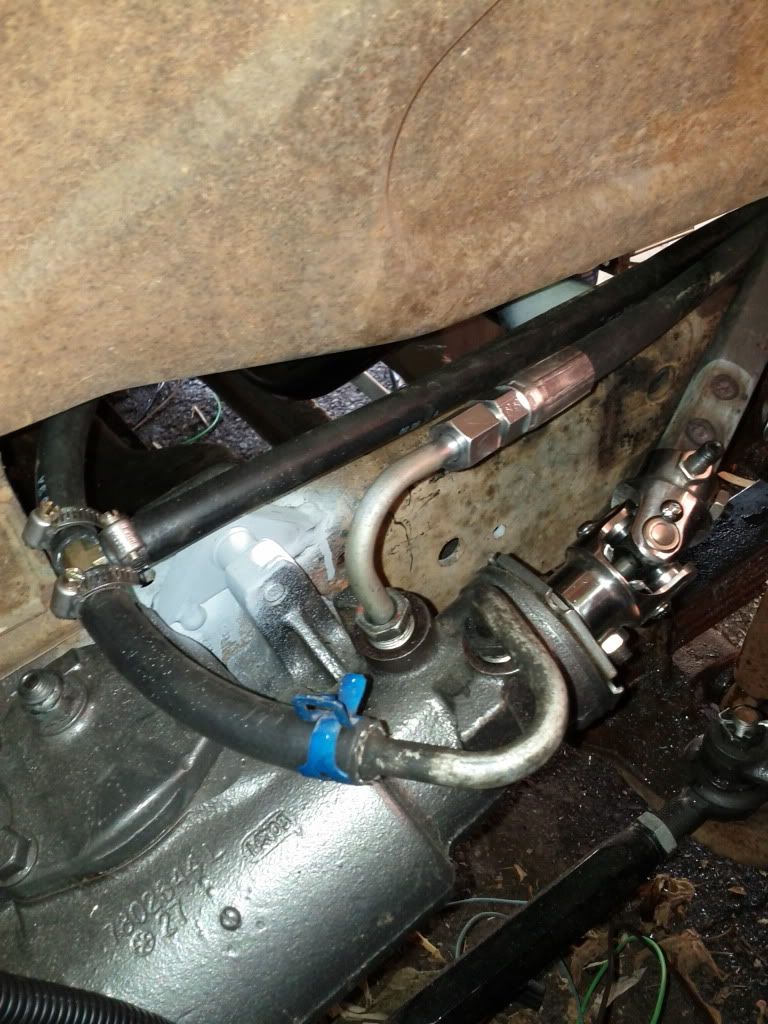
So, I "T"ed the hydro boost return lines. I'd heard not to do it because you run the risk of PS box return pressure backing up into the hydro boost, applying the brakes. I'd heard from my old man "Uhh, bull****, I did it on mine, no trouble" I suspect that different model hydro boost units will give different results. I'll be sure and post my experience with it. In the mean time, you can see the $37 worth of power steering line in this pic...
 And I'm just a fender and a hood away from a full bodied rig... 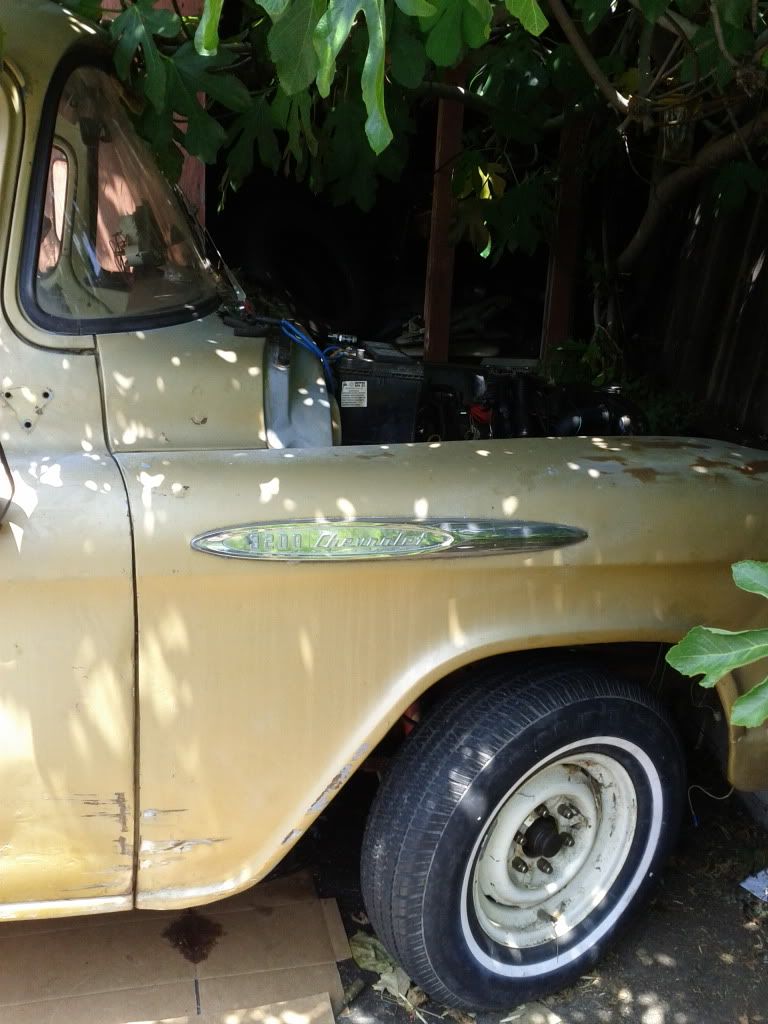 For anyone who's reading and doesn't already know, Yes, the front body work is one of those assemblies where you must start every bolt before you tighten any bolt. Tomorrow I'll get pictures of my 3x modified Mustang gas tank (modified by a buddy of mine who is hell on metal & drums alike), mounted. I'll also see about the air intake, the driver's fender & the hood. After that it's shoot a few screws to secure the fuse boxes and call it a day.. unless the transmission pump gets here, in which case I'll be working a bit later. |
|
|

|
|
|
#118 |
|
Registered User
Join Date: Aug 2007
Location: Corona, California
Posts: 7,998
|
Re: Project: Over My Head
Sounds like you're making good progress.
Kim |
|
|

|
|
|
#119 |
|
Registered User
Join Date: May 2000
Location: Flin Flon, Manitoba, Canada
Posts: 8,853
|
Re: Project: Over My Head
you're making some great progress man. Thanks for keeping us up to date on things
__________________
My name's Tim and I'm a truckaholic My 56 Chevy shop truck build http://67-72chevytrucks.com/vboard/s...d.php?t=562795 |
|
|

|
|
|
#120 |
|
Registered User
Join Date: Jan 2011
Location: Redmond, OR
Posts: 763
|
Re: Project: Over My Head
Keep at it - you are getting close. I think I beat you on my PS hose (F*rd pump to Toyota PS box) as it was only a couple of hours searching for a hydraulic shop and $35.
Started on my Speedway 20 circuit harness yesterday - looks like a spagetti factory explosion. Hope you get to drive it soon.
__________________
68 Chev C20- son has it now 83 K20 - bought from son 70 C20 - in progress |
|
|

|
|
|
#121 |
|
Registered User
Join Date: Sep 2011
Location: Nevada City, CA
Posts: 908
|
Re: Project: Over My Head
Well, yet another day has gone by and two of my local experts are continuing to disappoint. On the other hand, Brett Reed of Reed's Vintage Fabrication & Silvio over at Hoses Unlimited are kick-ass. So, beyond wiring, beyond fabrication, beyond anything automotive what this project is teaching me is two things
One: Good help is hard to find (and it usually isn't cheap) Two: If you want it done right, do it yourself (and if it isn't right, at least you didn't pay for labor) Now, as for the actual work I got done today: The intake piping is Really tight. 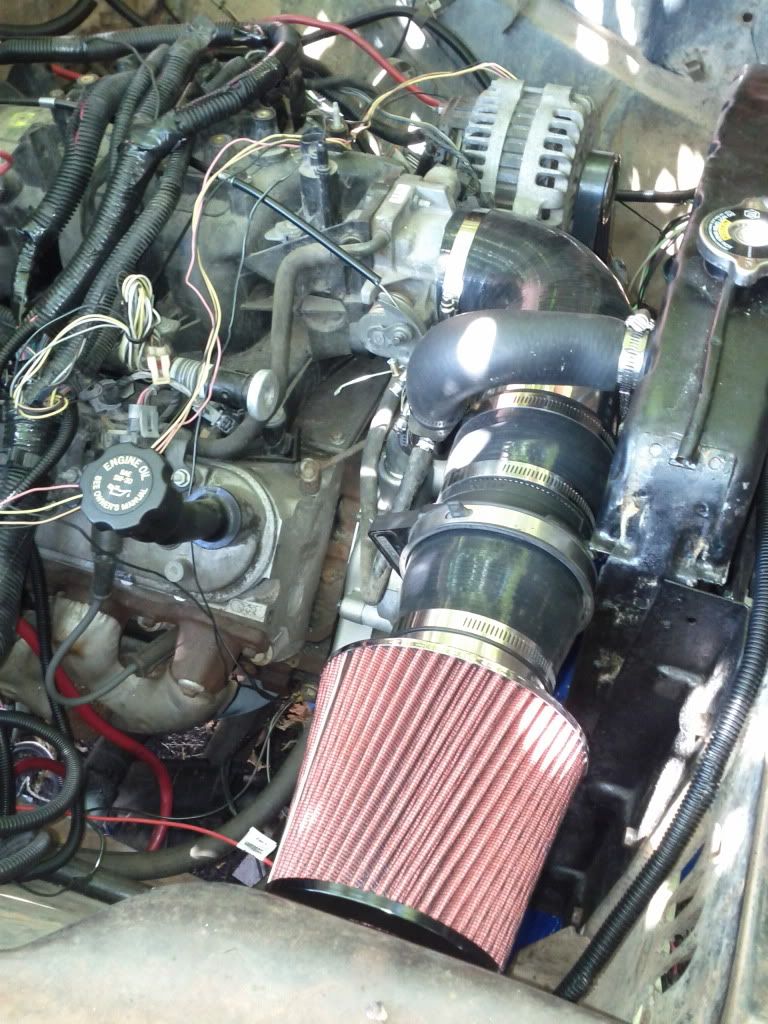 I'll probably get around to using a 4" U bend & laying the intake back along the intake manifold at some point, or doing something else. Right now, it's more or less wedged in place. Not a long term solution but I'm settling for "good enough", since I need this truck to be moving by this Tuesday. Here's (more) work I had done to the Mustang tank to make it fit my needs 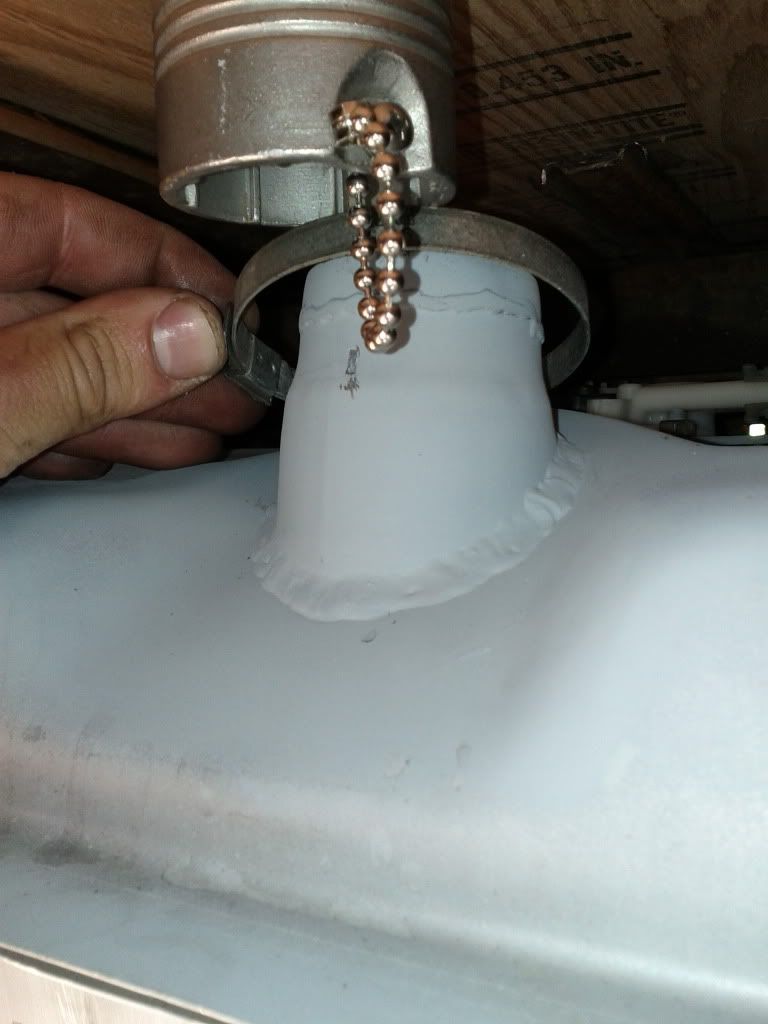 I had an exhaust shop make a 2 1/4" to 2" adapter piece, and had my buddy Brett (another local hot rod builder, but a reliable one) cut off the old filler neck which was at a 45 degree angle & weld this one in straight up & down. It now matches my 2" marine gas filler, which is screwed down to the bed. A short section of tanker truck gas transfer line to seal the two & I'm done there. Tomorrow I'll finish the straps that will hold the tank in place and hopefully get the trans back together & installed. Might even install the computer & fire her up after an extended session of prayer. Thanks for the encouragement, guys. |
|
|

|
|
|
#122 |
|
Registered User
Join Date: Feb 2013
Location: Lakeside Ariz
Posts: 445
|
Re: Project: Over My Head
That is a tight fit. Hope it works for you.
Rich My build http://67-72chevytrucks.com/vboard/s...d.php?t=576185 |
|
|

|
|
|
#123 |
|
Registered User
Join Date: Sep 2011
Location: Nevada City, CA
Posts: 908
|
Re: Project: Over My Head
It only has to work for a few miles at most. I'm going to re-do the air intake and probably a few other things before I get insurance and registration done; I just need the MAF connected so I can drive it onto the trailer (I'm moving)
|
|
|

|
|
|
#124 |
|
Registered User
Join Date: Sep 2011
Location: Nevada City, CA
Posts: 908
|
Re: Project: Over My Head
I got the transmission pump and *think* I put everything back together correctly. I'm now waiting on a former co-worker to take lunch & help me put it back in place. I *might* be able to he-man it but don't want to take chances.
Here's a picture of a good trick I learned somewhere... 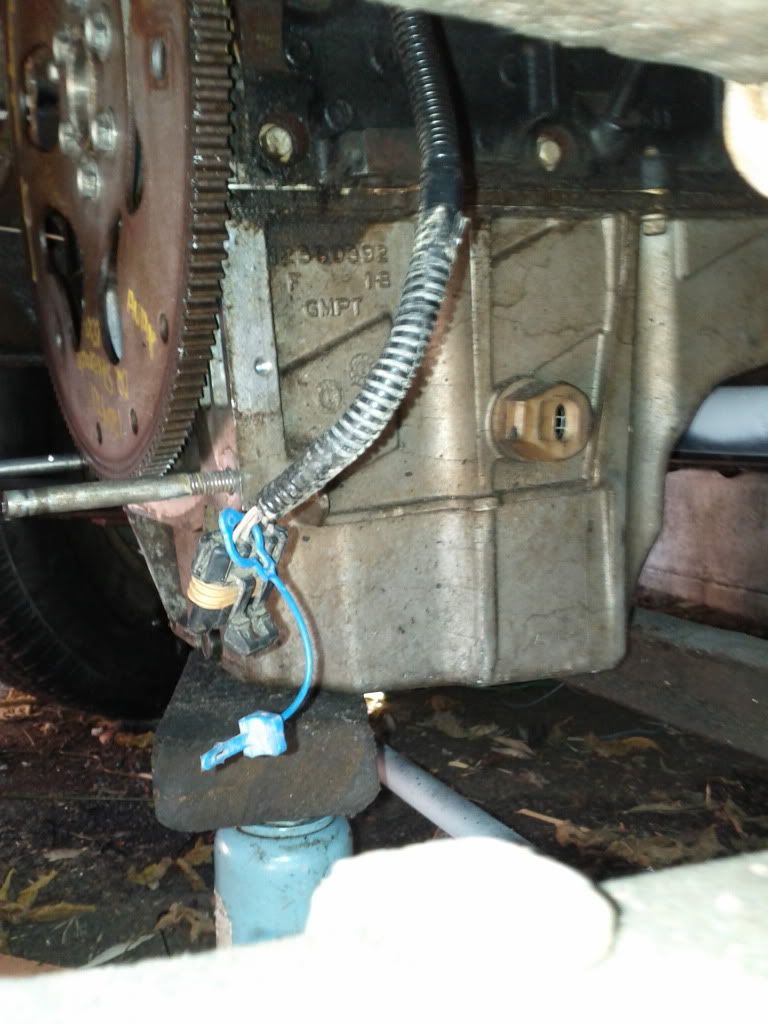 Before you remove any other bolts on the bell housing, take two of the lower ones off & replace with 4" long bolts of the same pitch. Cut the heads off & grind off any sharp edges. You now have guide dowels. Thread them in a ways by hand, remove trans as normal. You can now see exactly when the whole mess is coming off, and when you put it back in you have guides to make sure everything is lining up. Lift it onto the easy-to-see pins, slide it back, start your bolts. I also got the gas tank sorted out (for now) but am waiting on my phone to upload... |
|
|

|
|
|
#125 |
|
Registered User
Join Date: Sep 2011
Location: Nevada City, CA
Posts: 908
|
Re: Project: Over My Head
Well, after a scary few minutes without oil pressure I hooked up the battery charger & hit the starter button until I got a small puddle of oil that had puked out from the sender unit (which I'd removed for the purpose). Probably 2 minutes of total cranking time. Added oil to the filter, too. Hook it all back up & I've got 25 psi while cranking. Pre-oiling: check.
I purged all the air from the fuel system, keyed on / off several times, get a healthy output of fuel from the test port. Fuel to rails: check. Hooked up a test light to cyl #4. It blinks as I crank. Spark : Check. It coughs while cranking, it sounds like only one cylinder is firing. Since the injectors have sat for at least a year, I'm assuming it is because only one injector is actually opening. I added a can of sea foam to the tank of gas & am hoping it does the trick. I'd really rather not have to take the rails off & either replace or soak the injectors. Call me lazy. Anyway, it's getting pretty close to running I think / hope. I mean, it's always possible I've got other problems, but I think it's down to the injectors sticking... |
|
|

|
 |
| Bookmarks |
|
|