
 |
|
|
#201 |
|
Registered User
Join Date: Apr 2003
Location: Indep, MO
Posts: 5,893
|
Re: What I can afford, when I can afford it... 70 Chevy LWB
It's lookin' good! Hope to see Y'all at Riverside in Sept.! Interior looks great. Post up a LOT on the air install, Dad wants one in Yeller and I have NO clue about AC stuff.
PS- Awwwwww.... Cute Baby! I'm a huge sucker for babies.
__________________
Boppa's Old Yeller Truck Build, Old Yeller's New Heart! Project Buzz Bomb Flyin' Low! |
|
|

|
|
|
#202 | |
|
Registered User
Join Date: Dec 2011
Location: Ottawa, KS
Posts: 337
|
Re: What I can afford, when I can afford it... 70 Chevy LWB
Quote:
Really liking the interior coming together exactly how I was picturing it in my head. And the Wife can start to see the light at the end of the tunnel and is getting more excited to see the truck done. I'll do a thorough write up on the AC install with pictures. Since my firewall is smooth it'll be a little different than a stock install. I had to call them and order my kit without block off plates and a different bracket set up since I'm using a late model accessory drive. I'll install everything and since the hoses are cut to fit, I'll have to find someone to get the hoses crimped. Might let a shop charge the system while they're at it. But I'll do the rest myself. I have most of the stuff to do a factory set up and strongly considered doing it on the truck when I first bought the truck. But as much as it would have cost me for the R12 and to have it charged at a shop. it would have been a crap shoot with my condenser and evaporator. If I had a leak and had to recharge twice I'd have been half way to a new system. Not to mention a new compressor, dryer, and lines. And from everything i hear Vintage air and Old air set ups cool so much better than what the factory put in these trucks and the Sanden compressors they use are more efficient. So less $$$ on gas. Talked to a really nice guy at Old Air who knew exactly what I was needing with a little description of how I was planning to set it up. I looked at Vintage Air stuff too and they both have really solid reputations so for a little lower price I chose "Old Air" Hope they throw in a ball cap for me! Should be ready to start installing the wire harness this weekend and will do a thorough documentation of that process also. Everything that needs to be wired is in place other than the AC stuff but I'll do that last anyway. |
|
|
|

|
|
|
#203 | |
|
Registered User
Join Date: Dec 2011
Location: Ottawa, KS
Posts: 337
|
Re: What I can afford, when I can afford it... 70 Chevy LWB
Quote:

|
|
|
|

|
|
|
#204 |
|
Registered User
Join Date: Dec 2011
Location: Ottawa, KS
Posts: 337
|
Re: What I can afford, when I can afford it... 70 Chevy LWB
Seat belts got installed over the weekend. Pretty straight forward although I had to drill holes for retractors and had to figure out the way to put the belts so they would be oriented correctly when you buckle up and not be twisted.
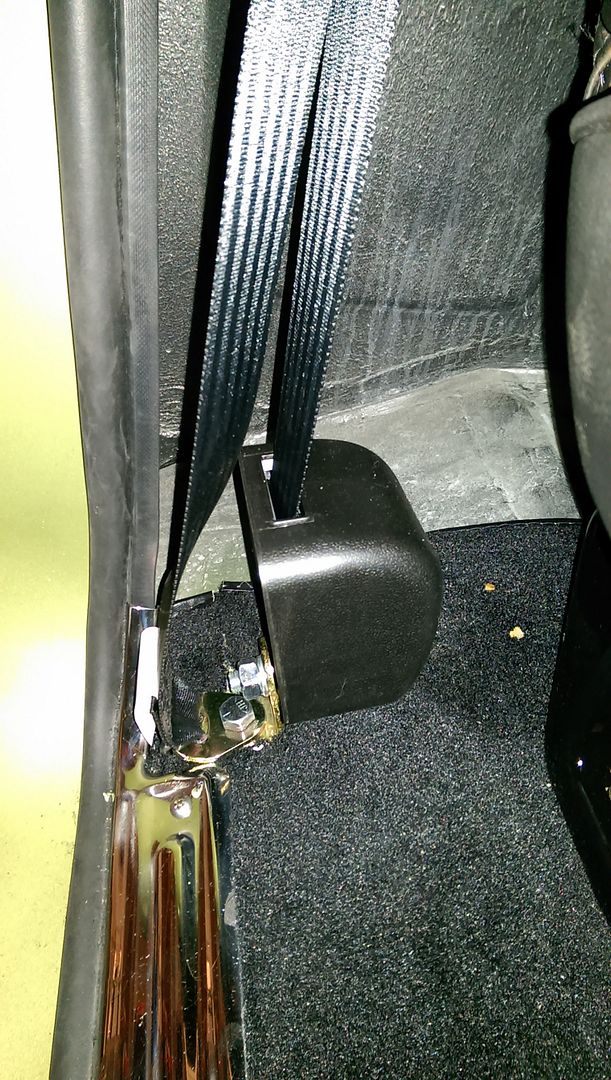 The Way it bolts up here looks a little odd but the belts lay flat against you when you're buckled up. It's just a universal kit I ordered from www.wescoperformance.com they offer buckles with the GM logo for the same price you pay for the generic one's from LMC. Seem to be pretty good quality. 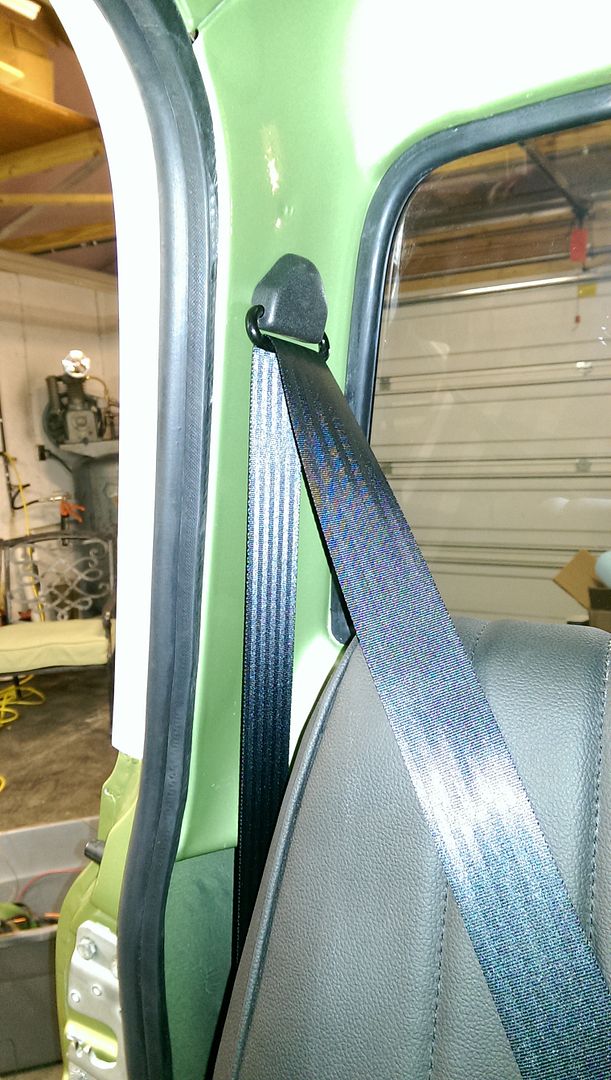 |
|
|

|
|
|
#205 |
|
Registered User
Join Date: Dec 2011
Location: Ottawa, KS
Posts: 337
|
Re: What I can afford, when I can afford it... 70 Chevy LWB
This will be Part One Of The Old Air AC Install (Factory AC Cab, with Factory Controls)
And take note that the kit I ordered is for a smoothed firewall and I'll be routing my hoses out the passenger kick panel. A much easier route would have been to run my hoses through the firewall the way the standard kit comes. I don't regret ordering it the way I did but it requires a little more fabrication and tweaking to make it work the way I want it to And the instructions don't cover all aspects of this install. A pretty nice box of parts, I'm sure when it's hot out this summer we'll be very happy we spent the money. 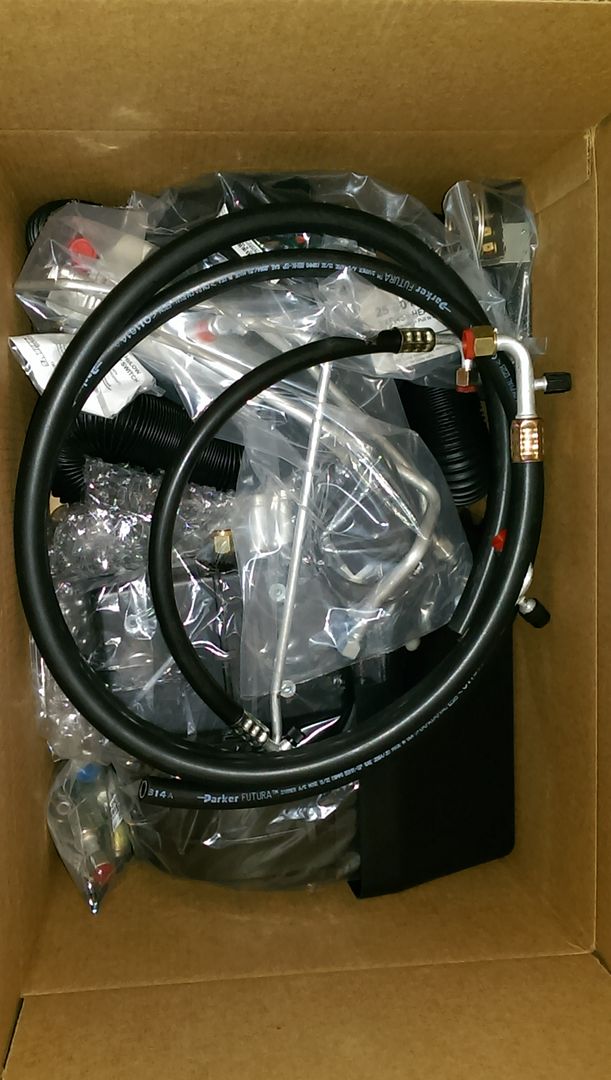 And They did throw in a hat no charge. I didn't even have to ask. Very nice of them.  Front of the instructions. 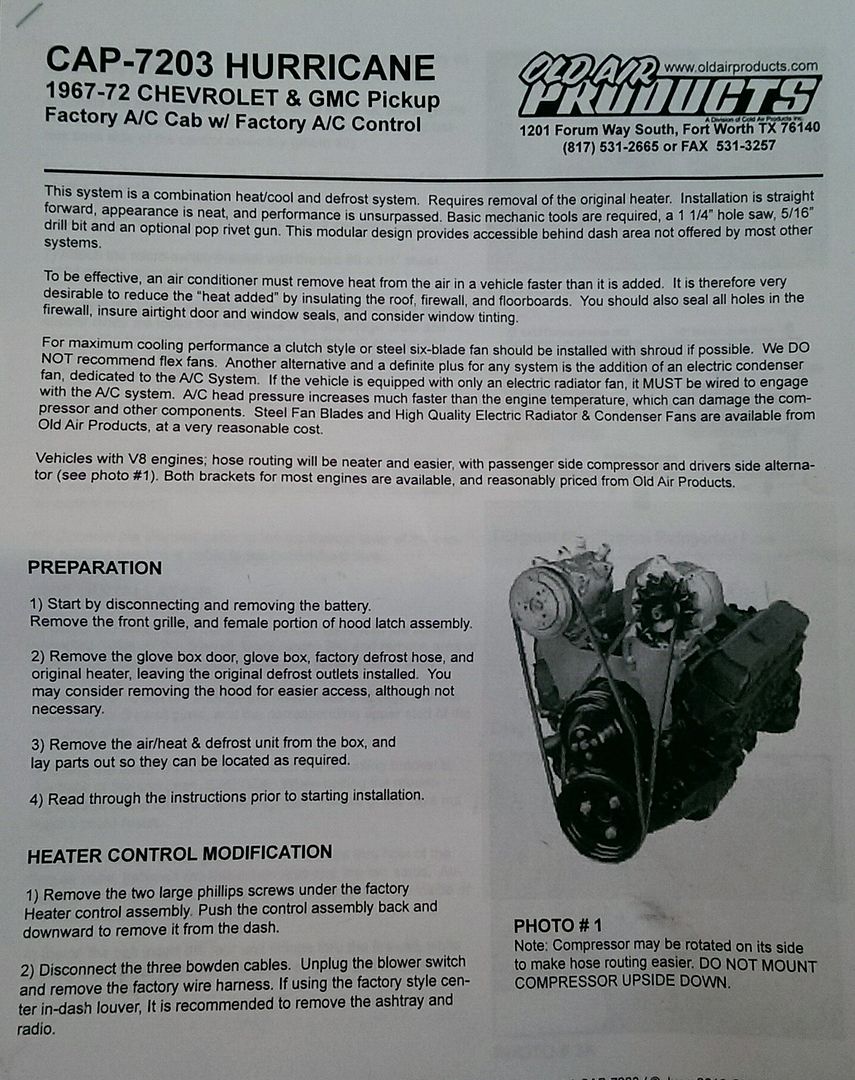 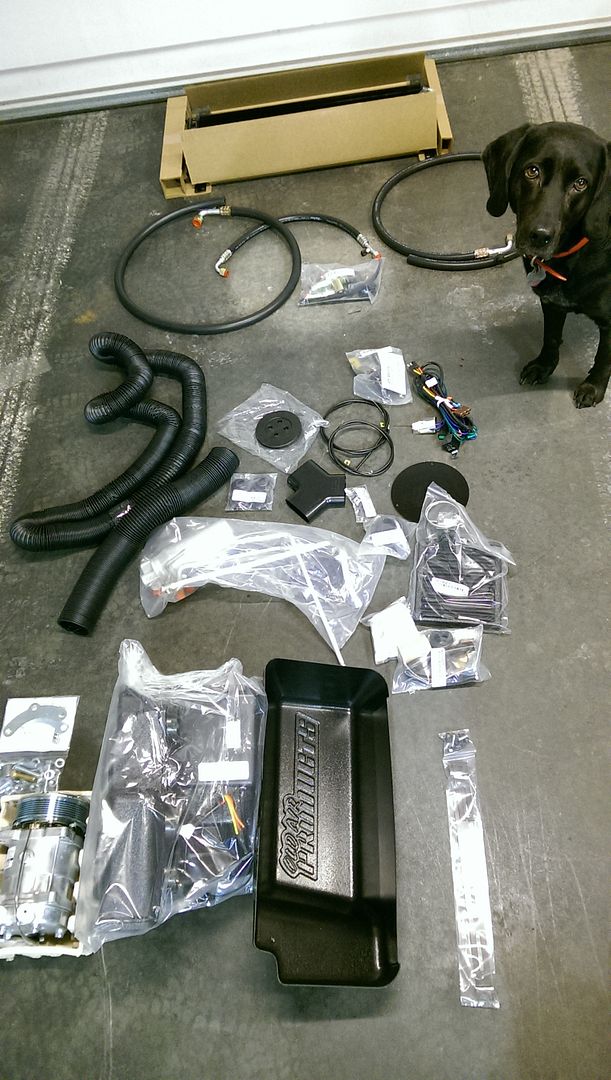 My brother had never installed one of these so I didn't have to twist his arm too hard to swing by for a bit to help. We started by checking the fitment inside the cab of the evaporator unit. Since we're routing the hoses out of the kick panel we had to space out the box away from the firewall so we'll be able to connect the freon lines. (Note if you buy the standard kit it will bolt directly the firewall using your existing air box mounting holes.) 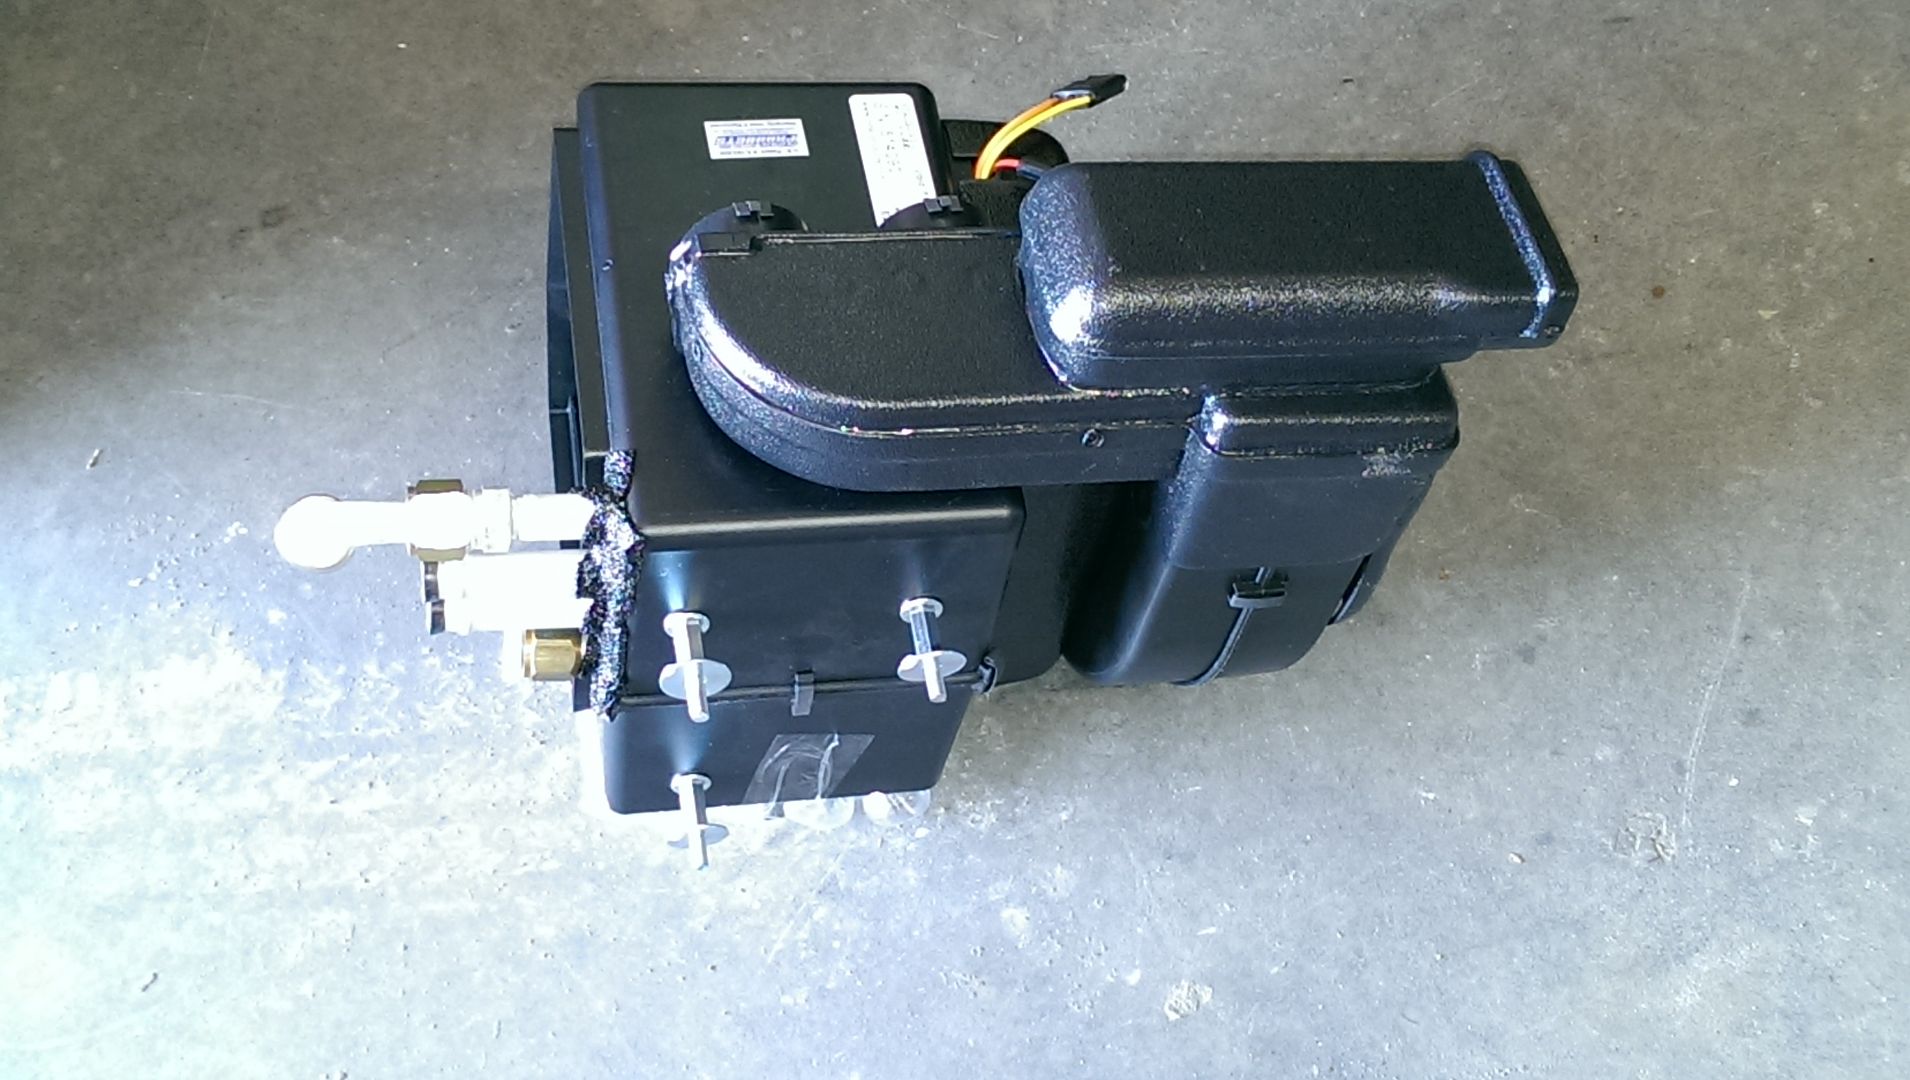 We also had to drill some holes to mount it to the fire wall (again since I don't have the standard kit evaporator.) 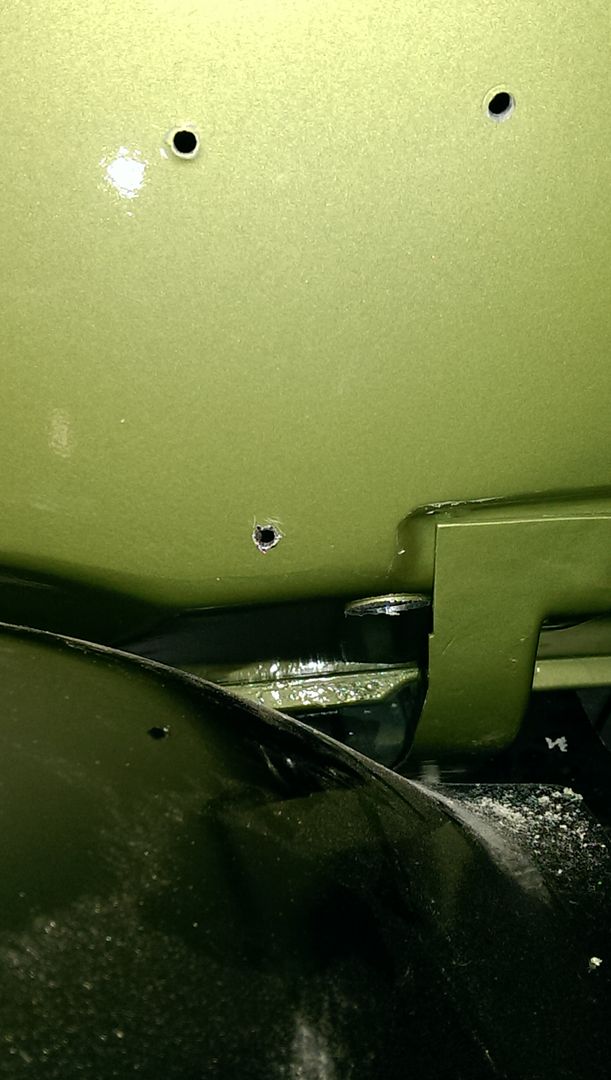 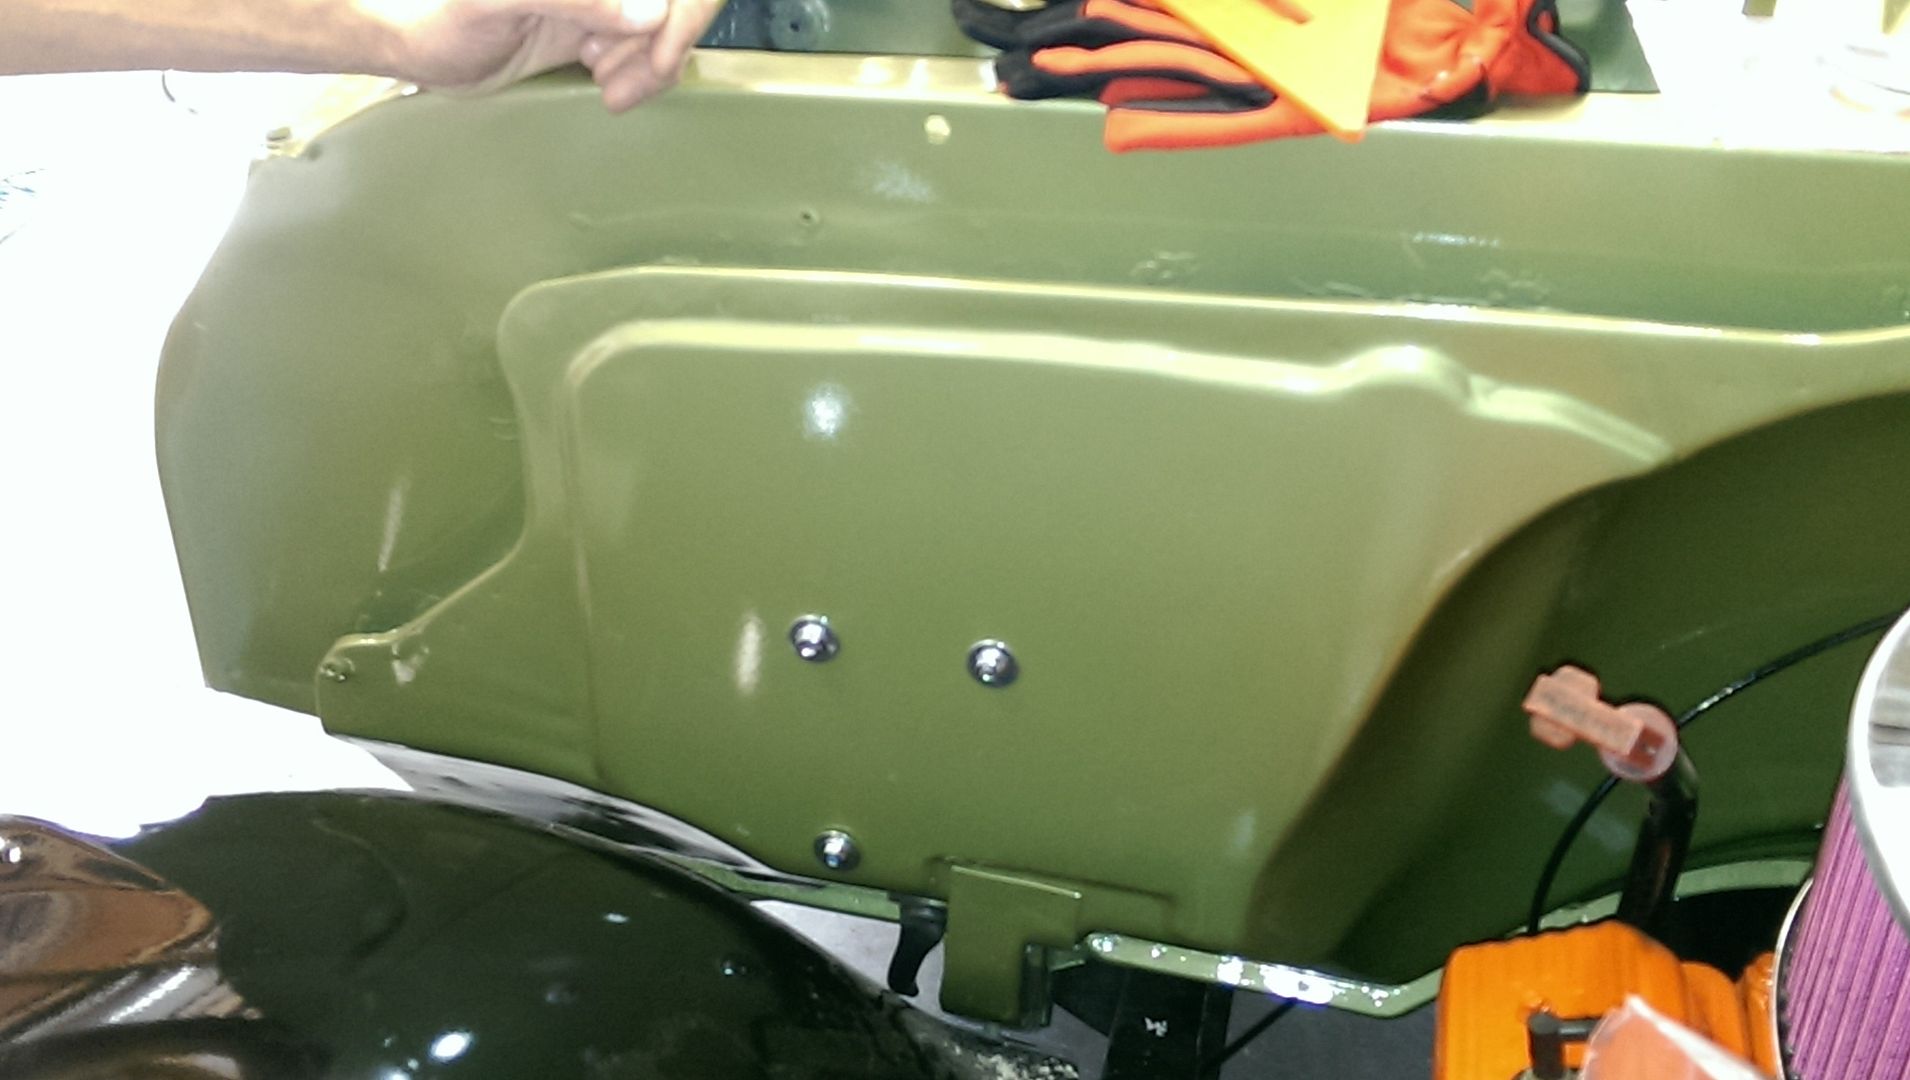 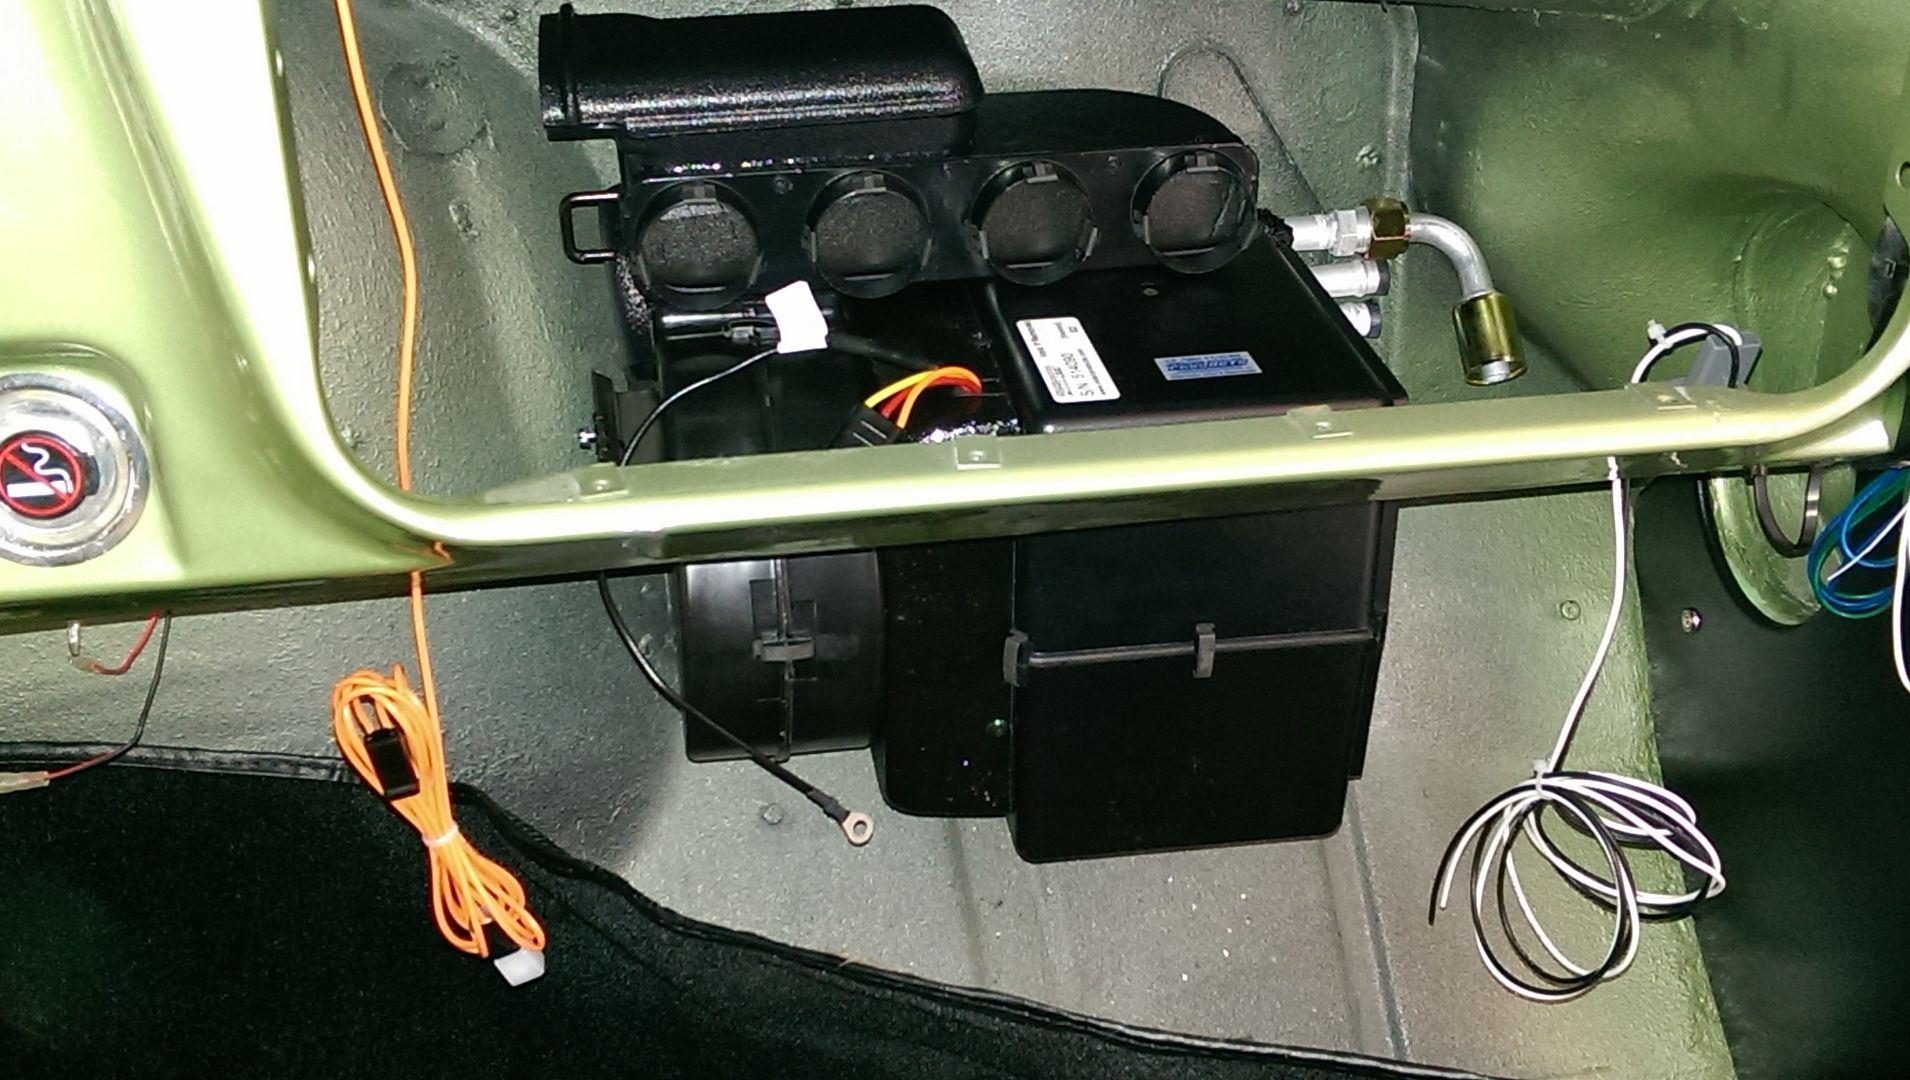 Grommet for the condensation drain. 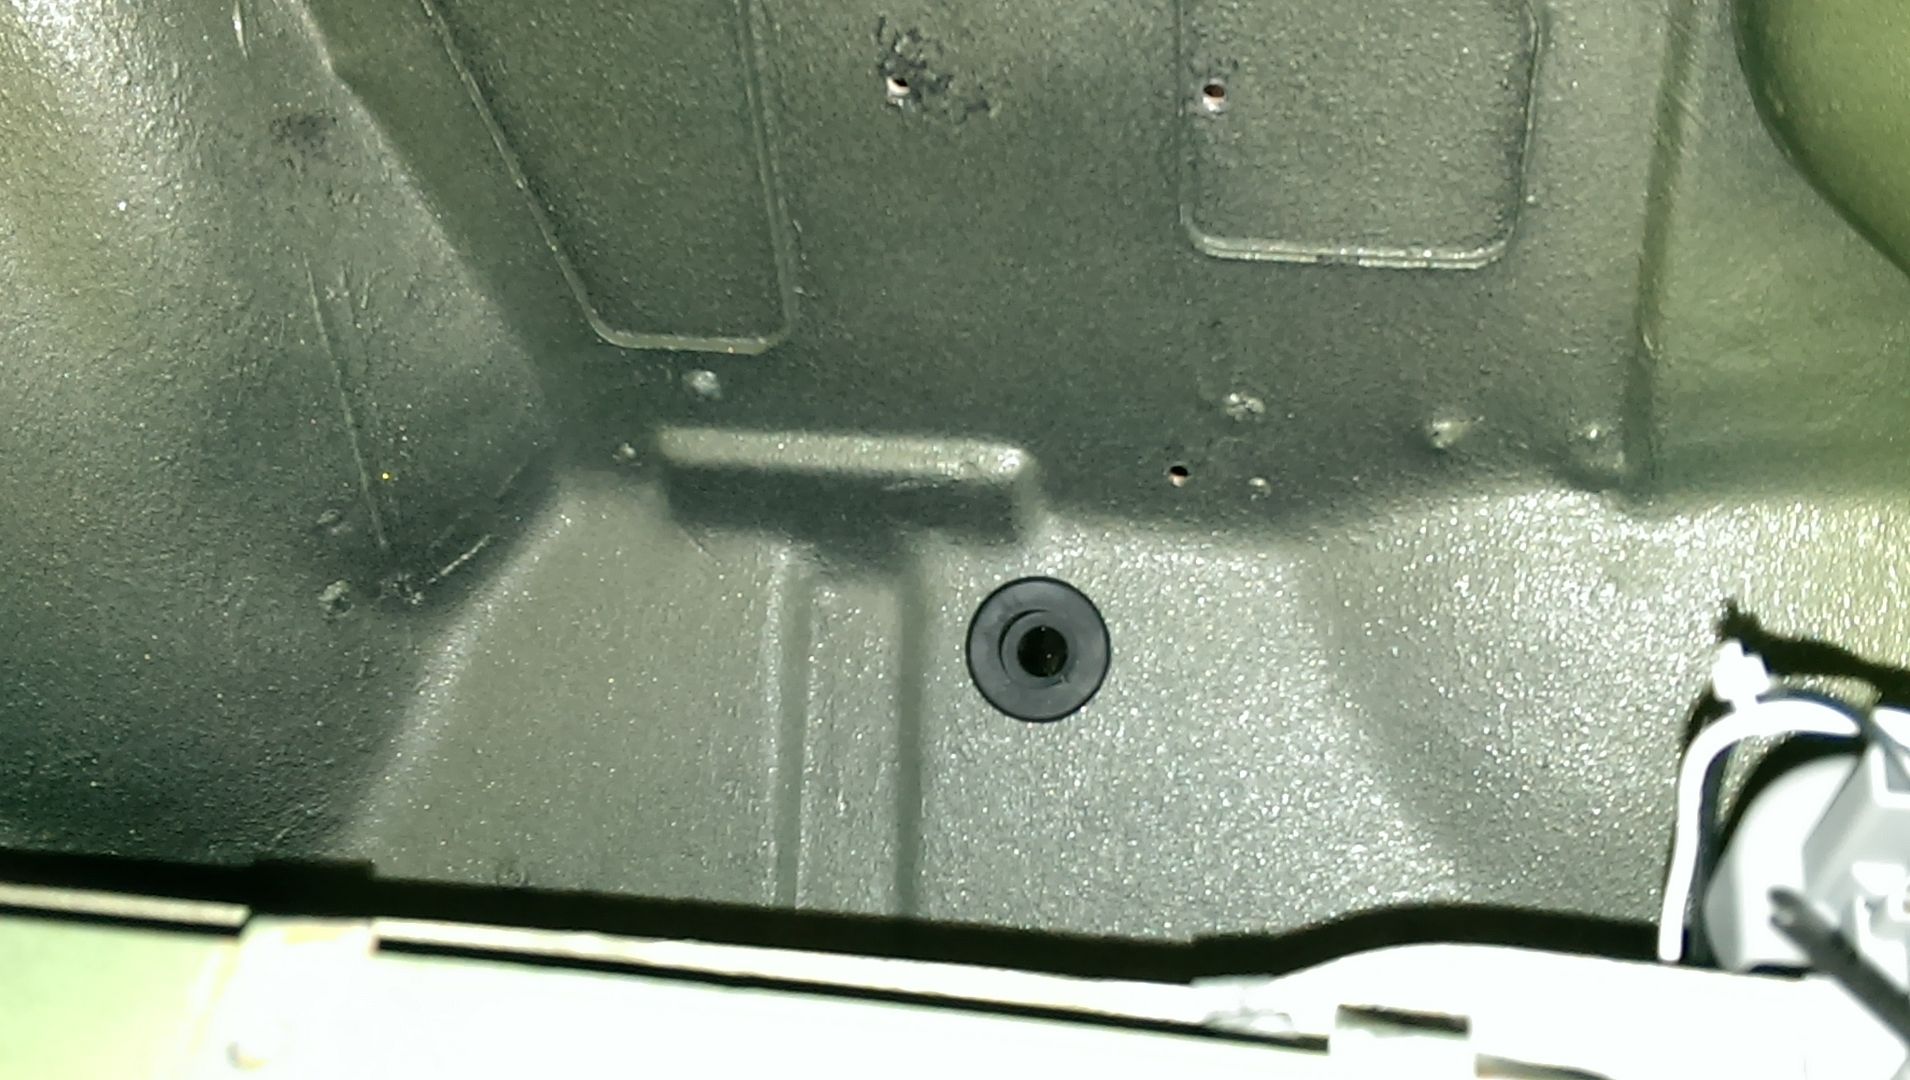 Once we test fit the box we felt like there was a little too much play in the box since it's plastic it just felt a little flimsy. So we decided to make a metal plate to go up against the air box to stiffen up the mounting area and it worked very well.  What we used to space it out was 1/4-20 all thread and some coupling nuts, along with some good fender washers. Worked well and should be very secure. My Brother had to take off so I moved on to other parts of the install. Since I'm using a late model serpentine drive system I had to get a different adapter to mount the Sanden compressor This is the instructions for that bracket. and it was designed to perfection, installed without any issues at all.  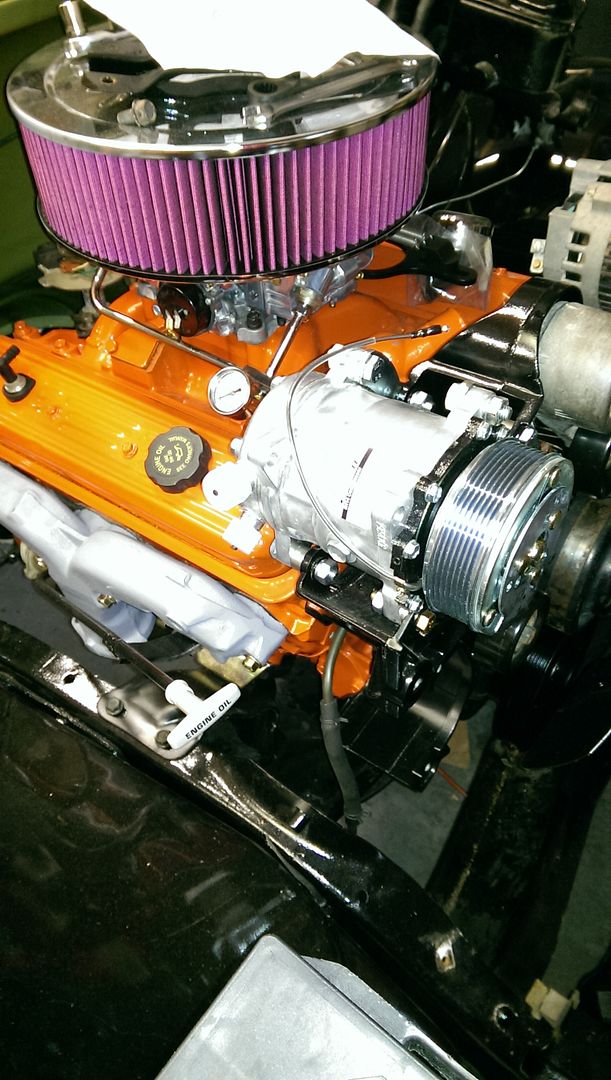 As I was doing this and installing the belt I realized I put a fan and clutch on for a 70 truck; and the light bulb went off that my water pump spins in a CCW direction now. So had to take back the clutch and fan and order one for an astro van with a 4.3 so I could get the 18 in. fan blade I need so it will fit inside the fan shroud. So now I'm waiting on the fan so I can get the radiator installed so then I can proceed with the new AC condenser. In the mean time I got busy on the AC/Heater controls. 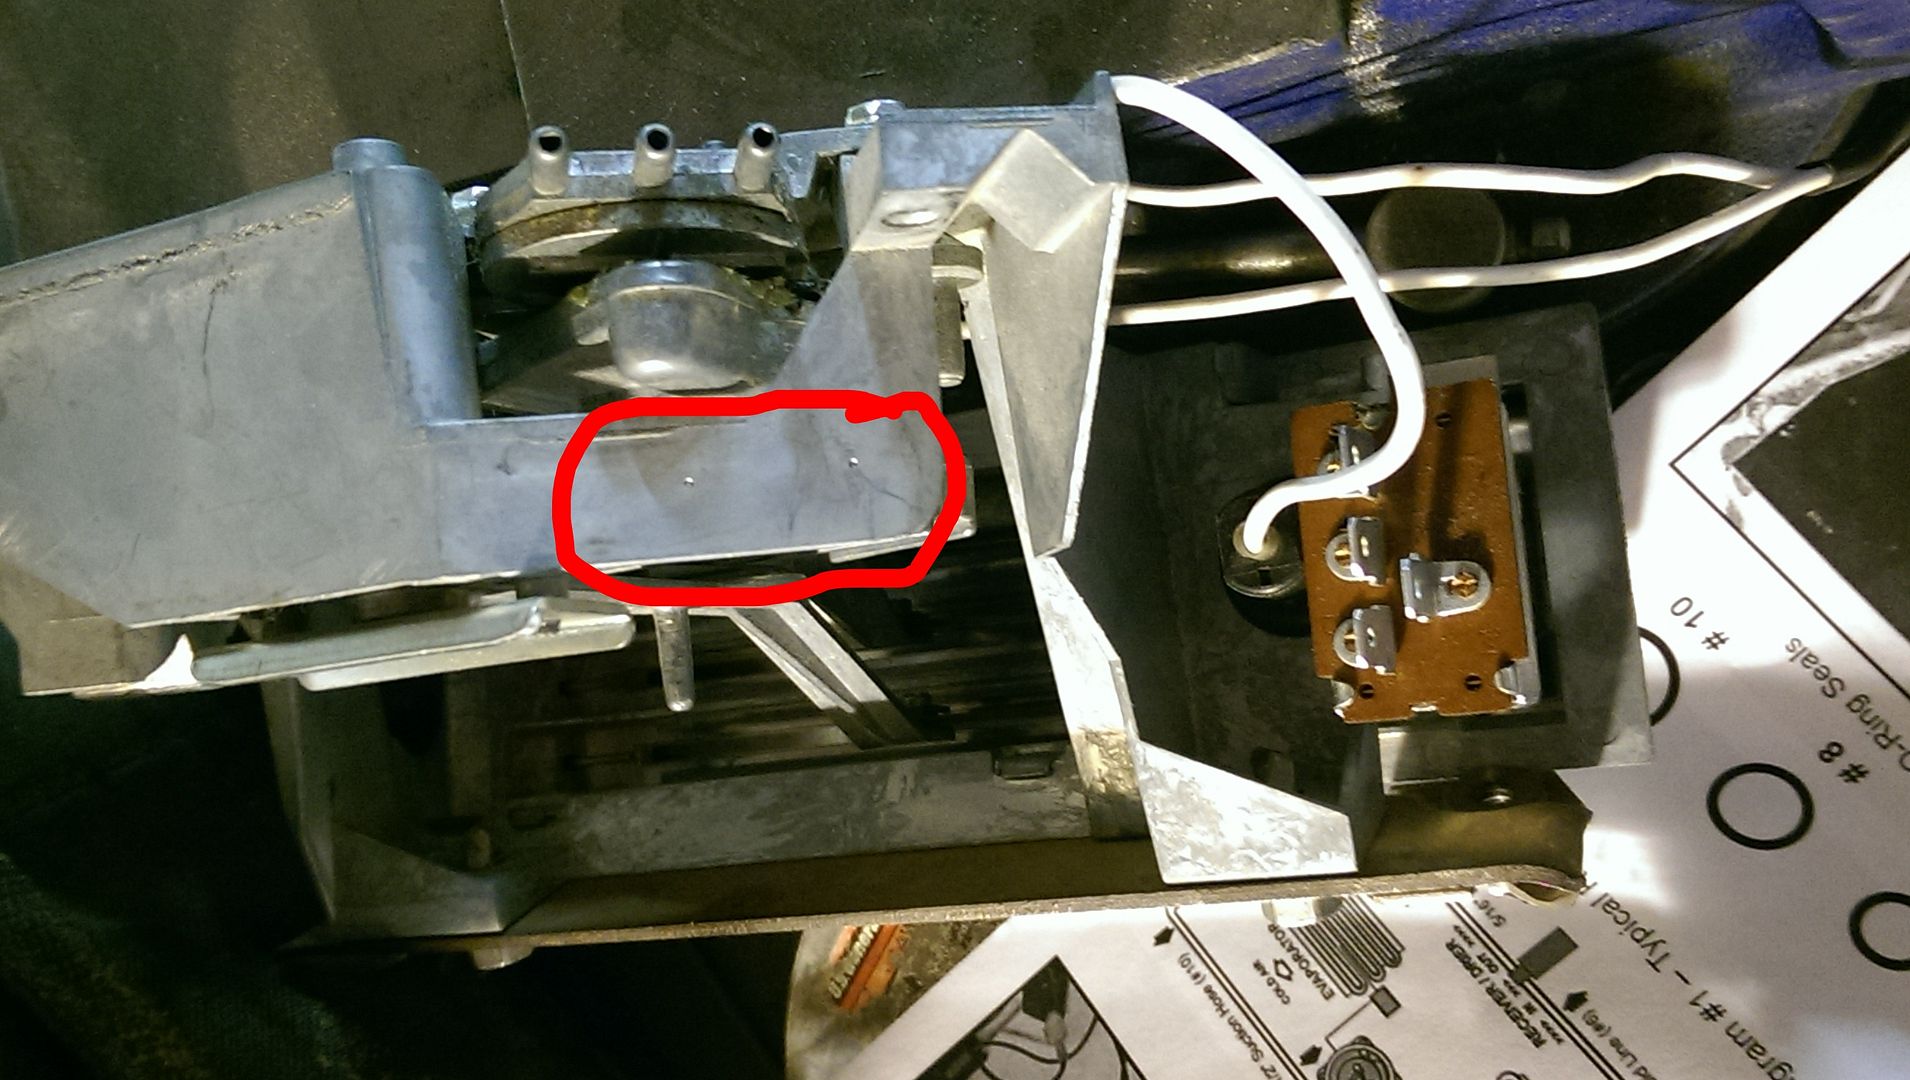 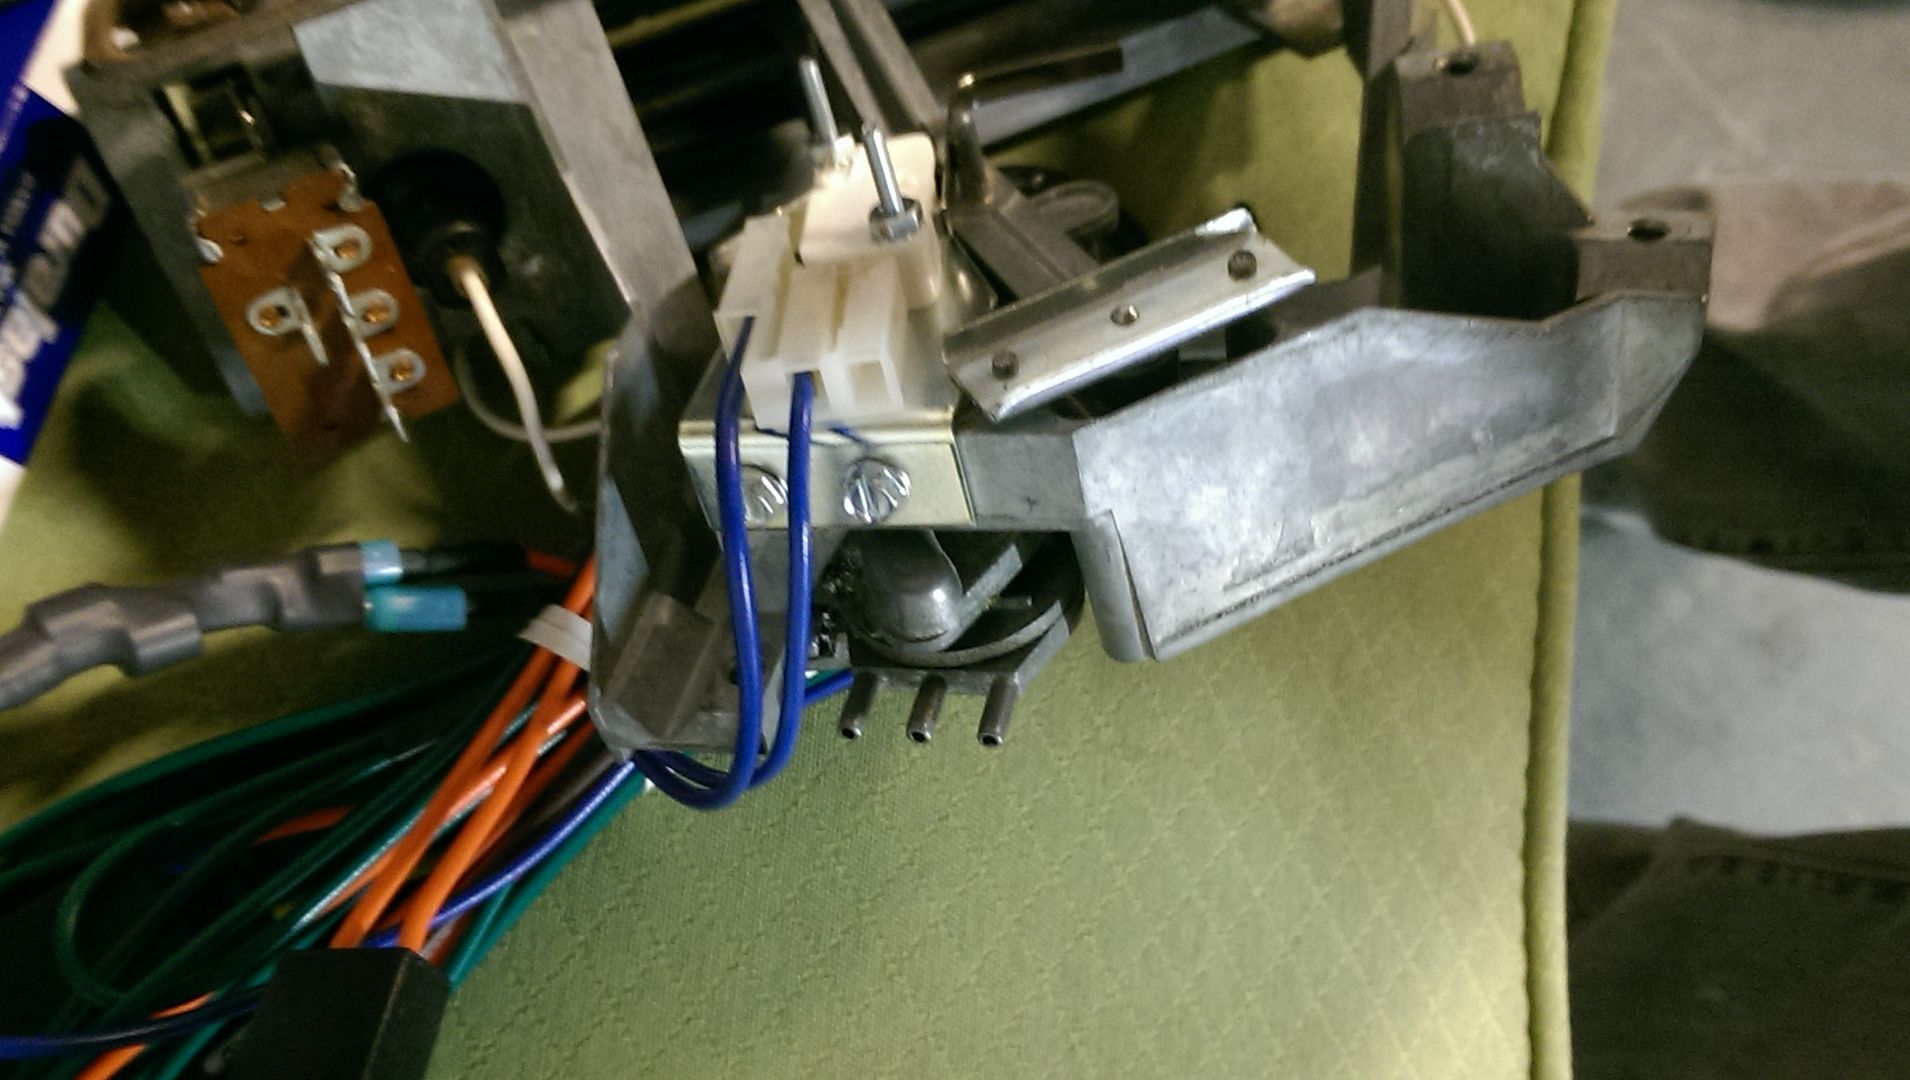 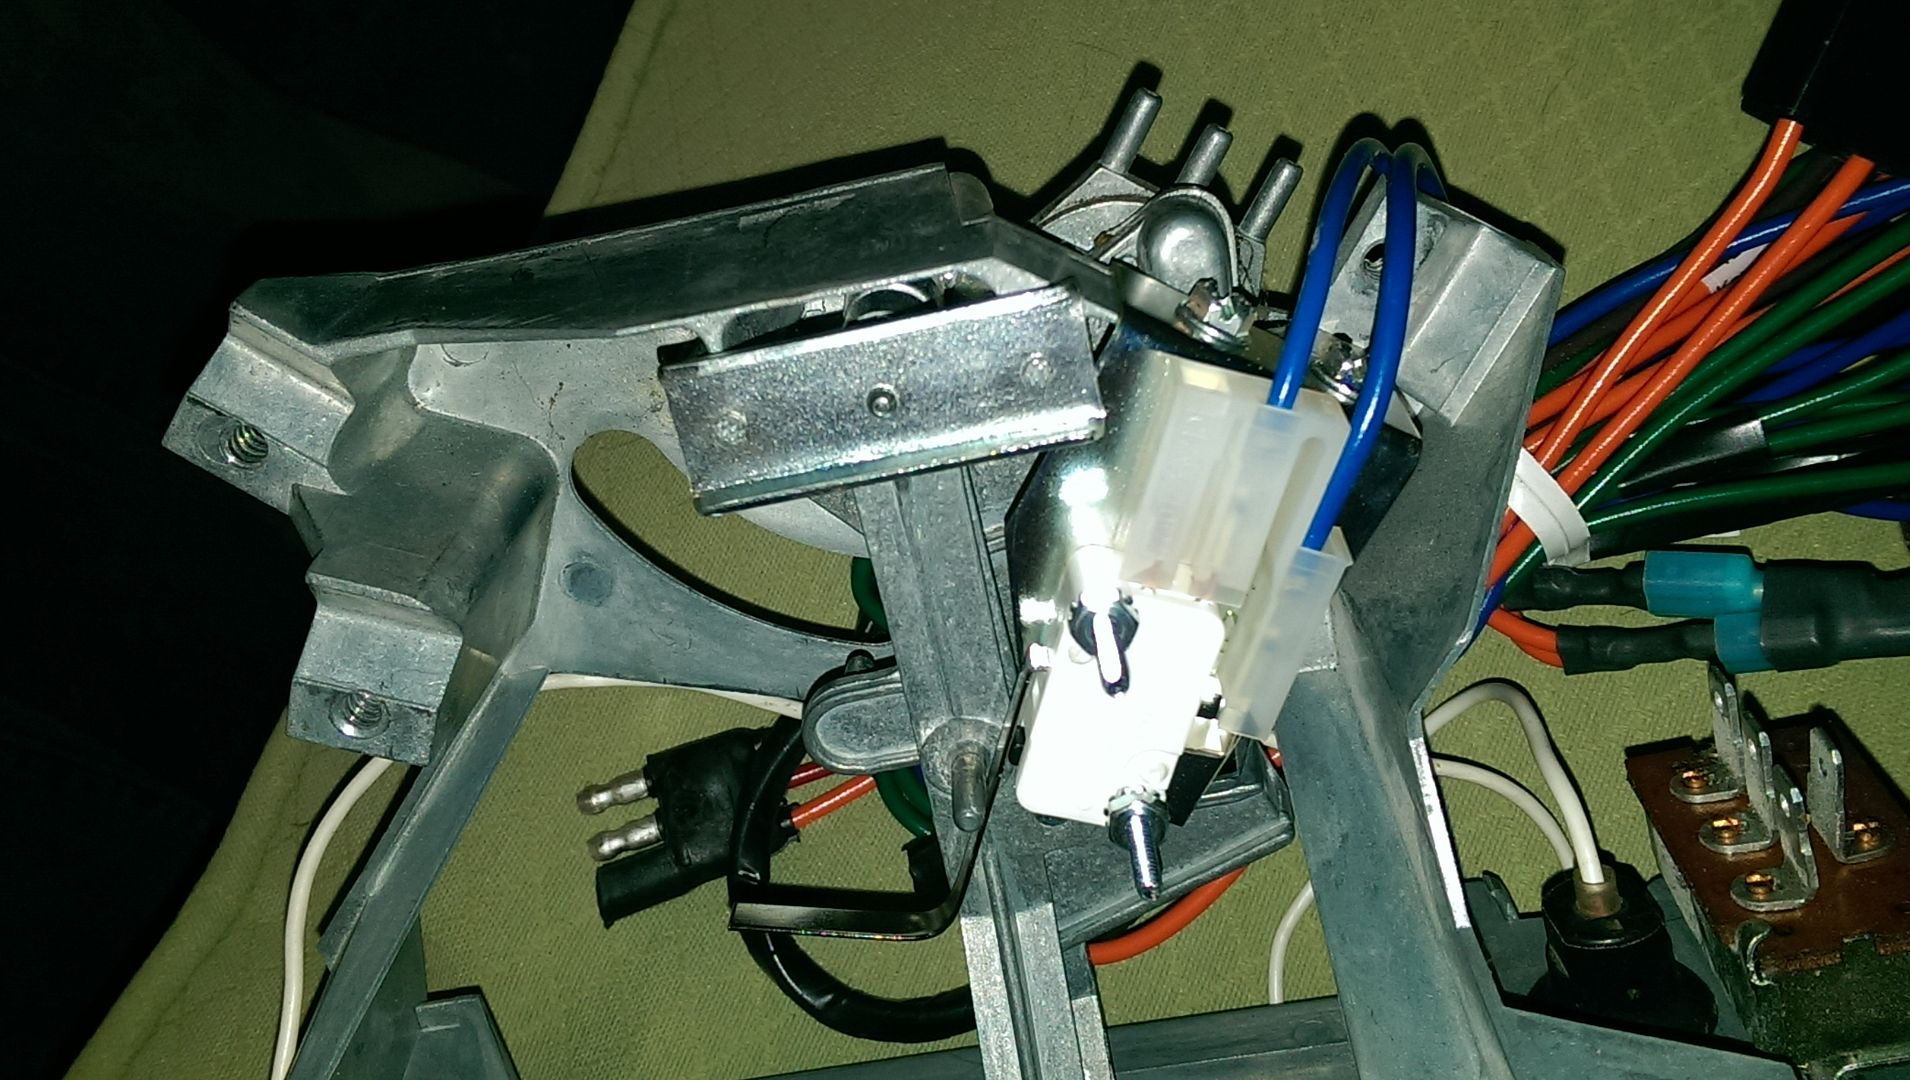 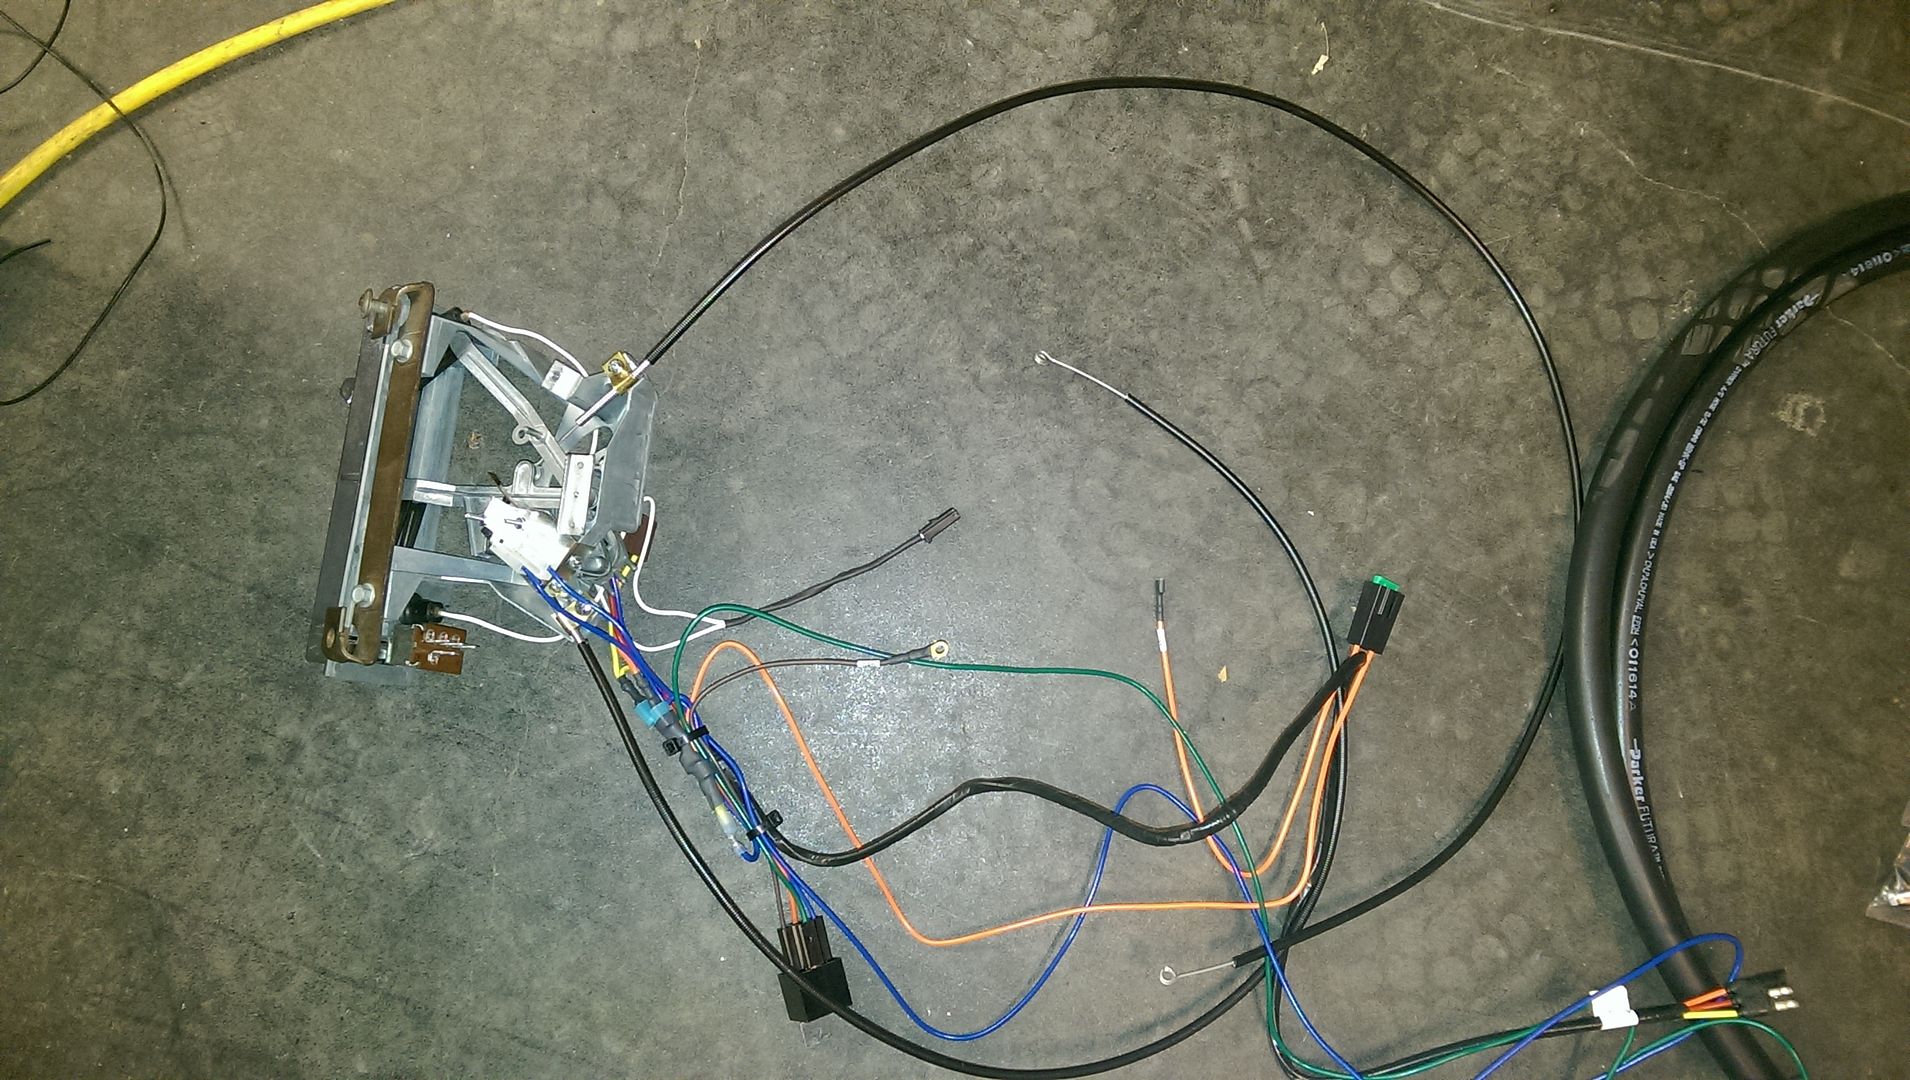 That's pretty much it for the moment, If I get more time to get out in the garage this week to be able to make more progress I'll add a part two. Most likely it'll be the weekend before I can really make much more progress. and Next week before I can get Part 2 up. And these are the parts left in the pile for now. 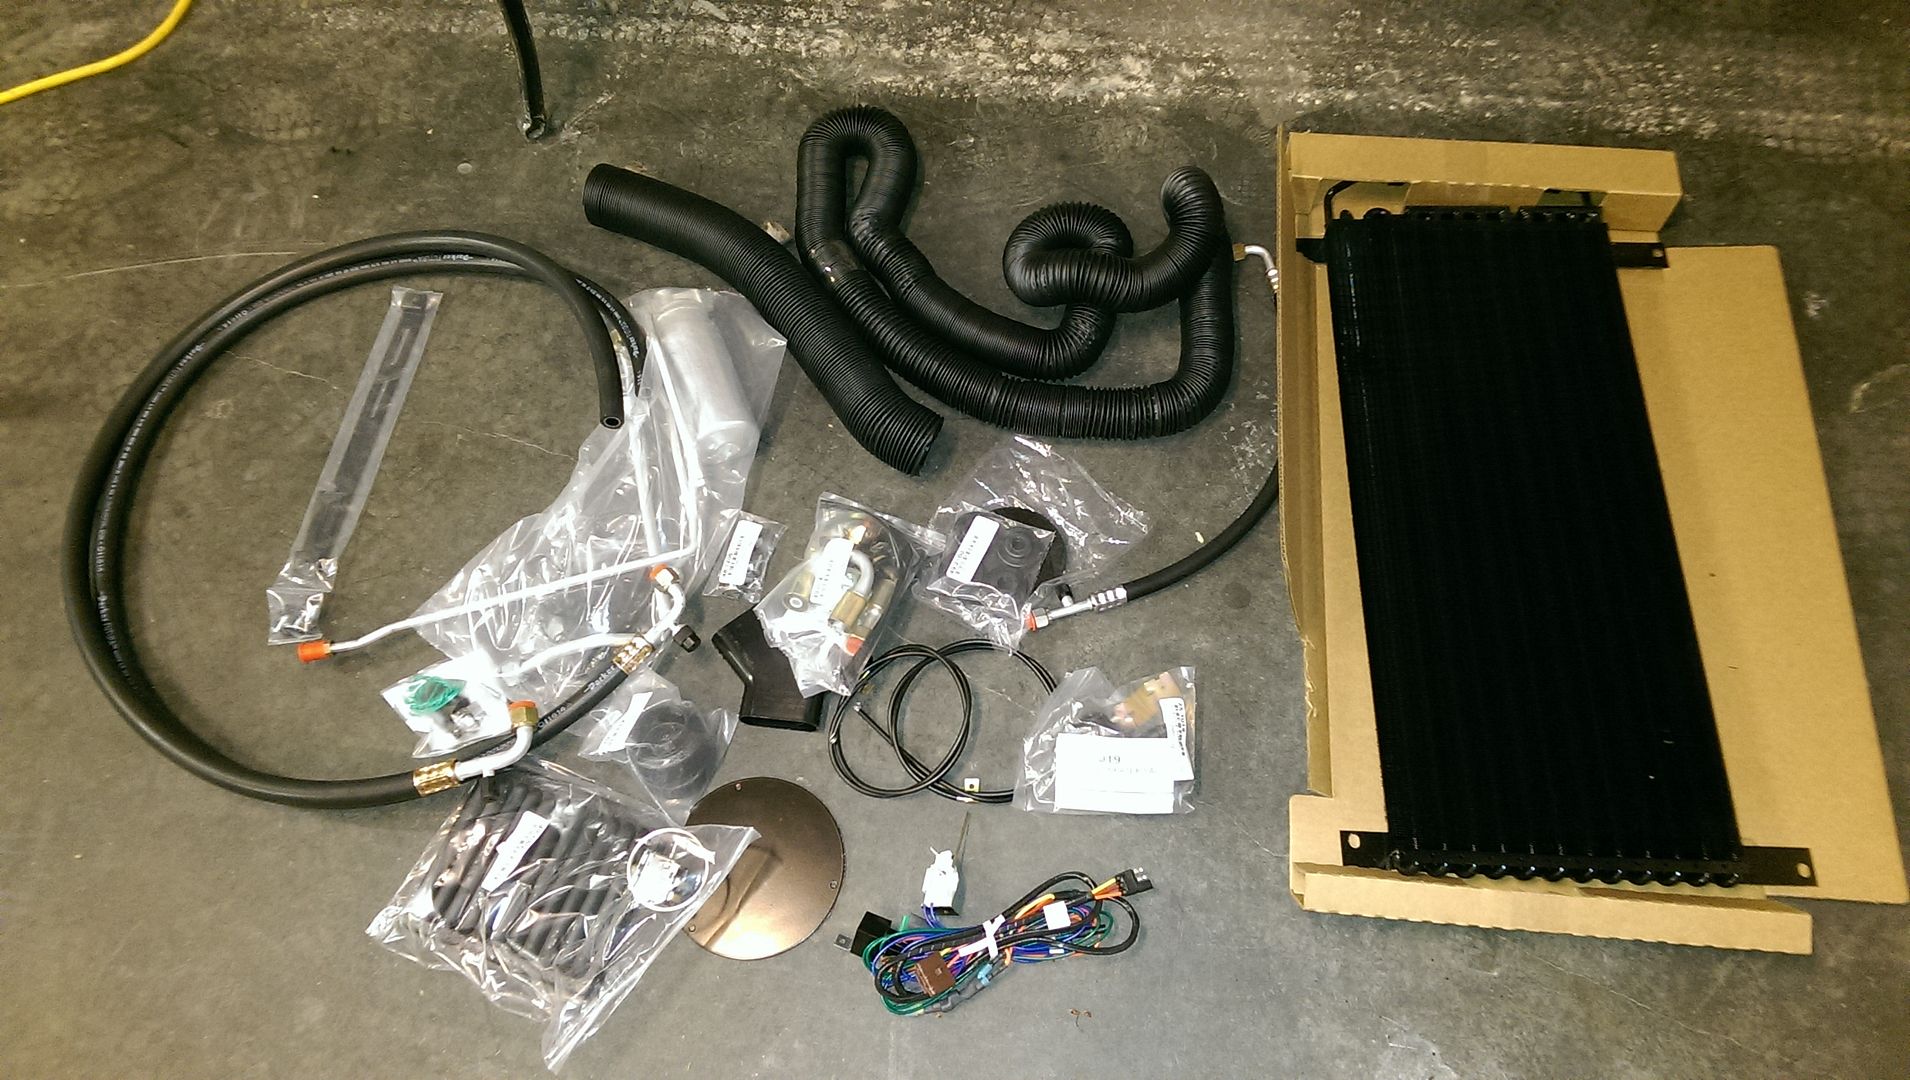 |
|
|

|
|
|
#206 |
|
Registered User
Join Date: Apr 2003
Location: Indep, MO
Posts: 5,893
|
Re: What I can afford, when I can afford it... 70 Chevy LWB
Thank you for this! Wonder if they make a kit to integrate an LS factory compressor.
__________________
Boppa's Old Yeller Truck Build, Old Yeller's New Heart! Project Buzz Bomb Flyin' Low! |
|
|

|
|
|
#207 | |
|
Registered User
Join Date: Dec 2011
Location: Ottawa, KS
Posts: 337
|
Re: What I can afford, when I can afford it... 70 Chevy LWB
Quote:
I do believe factory LS compressors are compatible right out of the box with either Old Air or Vintage Air. I know they don't recommend the older GM compressors R4 and A6's with their systems though. So I'm sure they can put together whatever you want, they offer adapters for LS compressors if I remember correctly from snooping around on their site, and if you don't need the compressor and brackets that should save you a couple hundred bucks, I would think. I looked at my set up about as many ways as I could imagine, trying to figure out how to squeeze out a dime or two, by getting different parts from different sources and Frankensteining something together but at the end of the day I decided to just go with a full kit because I know it will function properly when I'm done. |
|
|
|

|
|
|
#208 |
|
Registered User
Join Date: Dec 2011
Location: Ottawa, KS
Posts: 337
|
Re: What I can afford, when I can afford it... 70 Chevy LWB
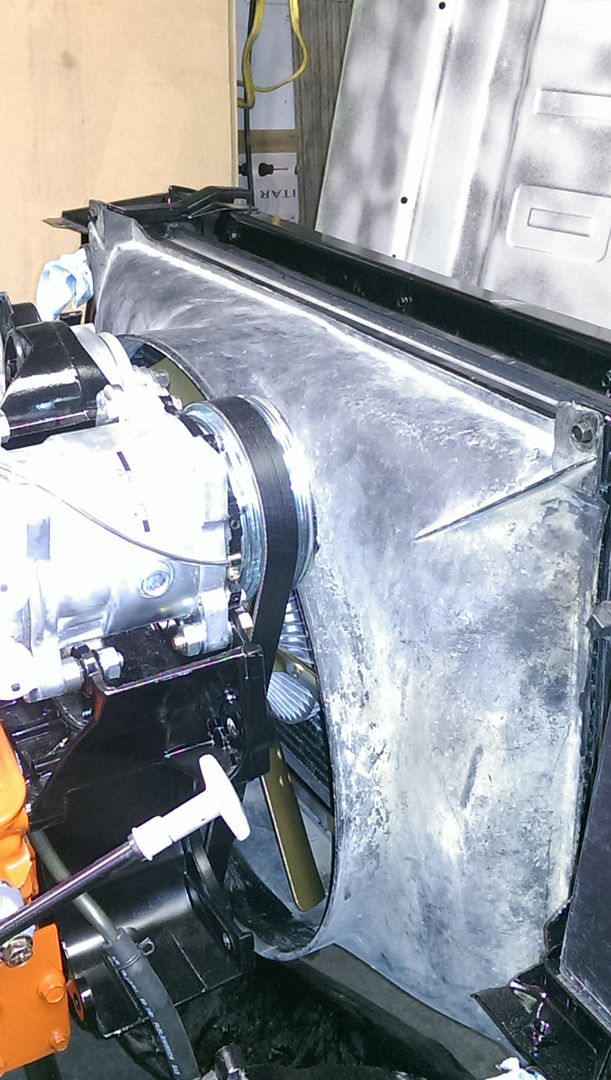
Got side tracked from the AC over the weekend. I got my fan and fan clutch installed over the weekend since I had to order different parts. Worked like a charm I have a cracked fan shroud and it's kinda irritating to see a beat up cracked shroud in an engine bay that is mostly refurbished. But the nickle and dime stuff has been a challenge so from this point on, if it's functional I'm going to use it and worry about replacing it down the road when I don't have big ticket stuff still left to cover.
 Put the AC on the back burner for a little bit once I got the fan done. I wanted to make some progress on the wiring harness install over the weekend. I'm using the American Autowire Power Plus 20 Series. Comes with pretty much everything you need other than an open barrel crimping tool. I picked one up on Amazon for pretty reasonable that seems to be working pretty well so far. 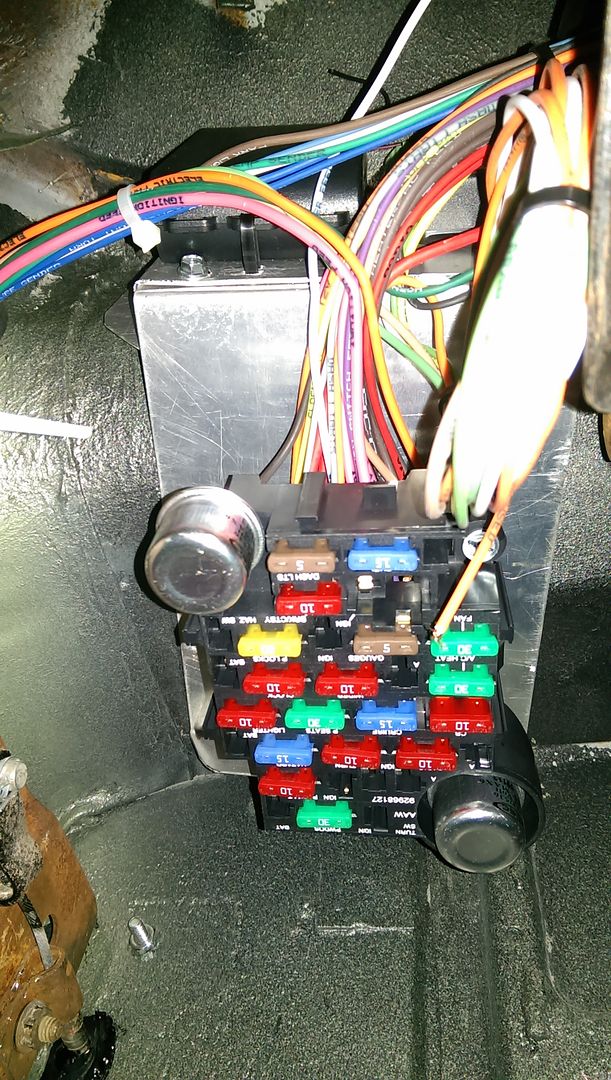 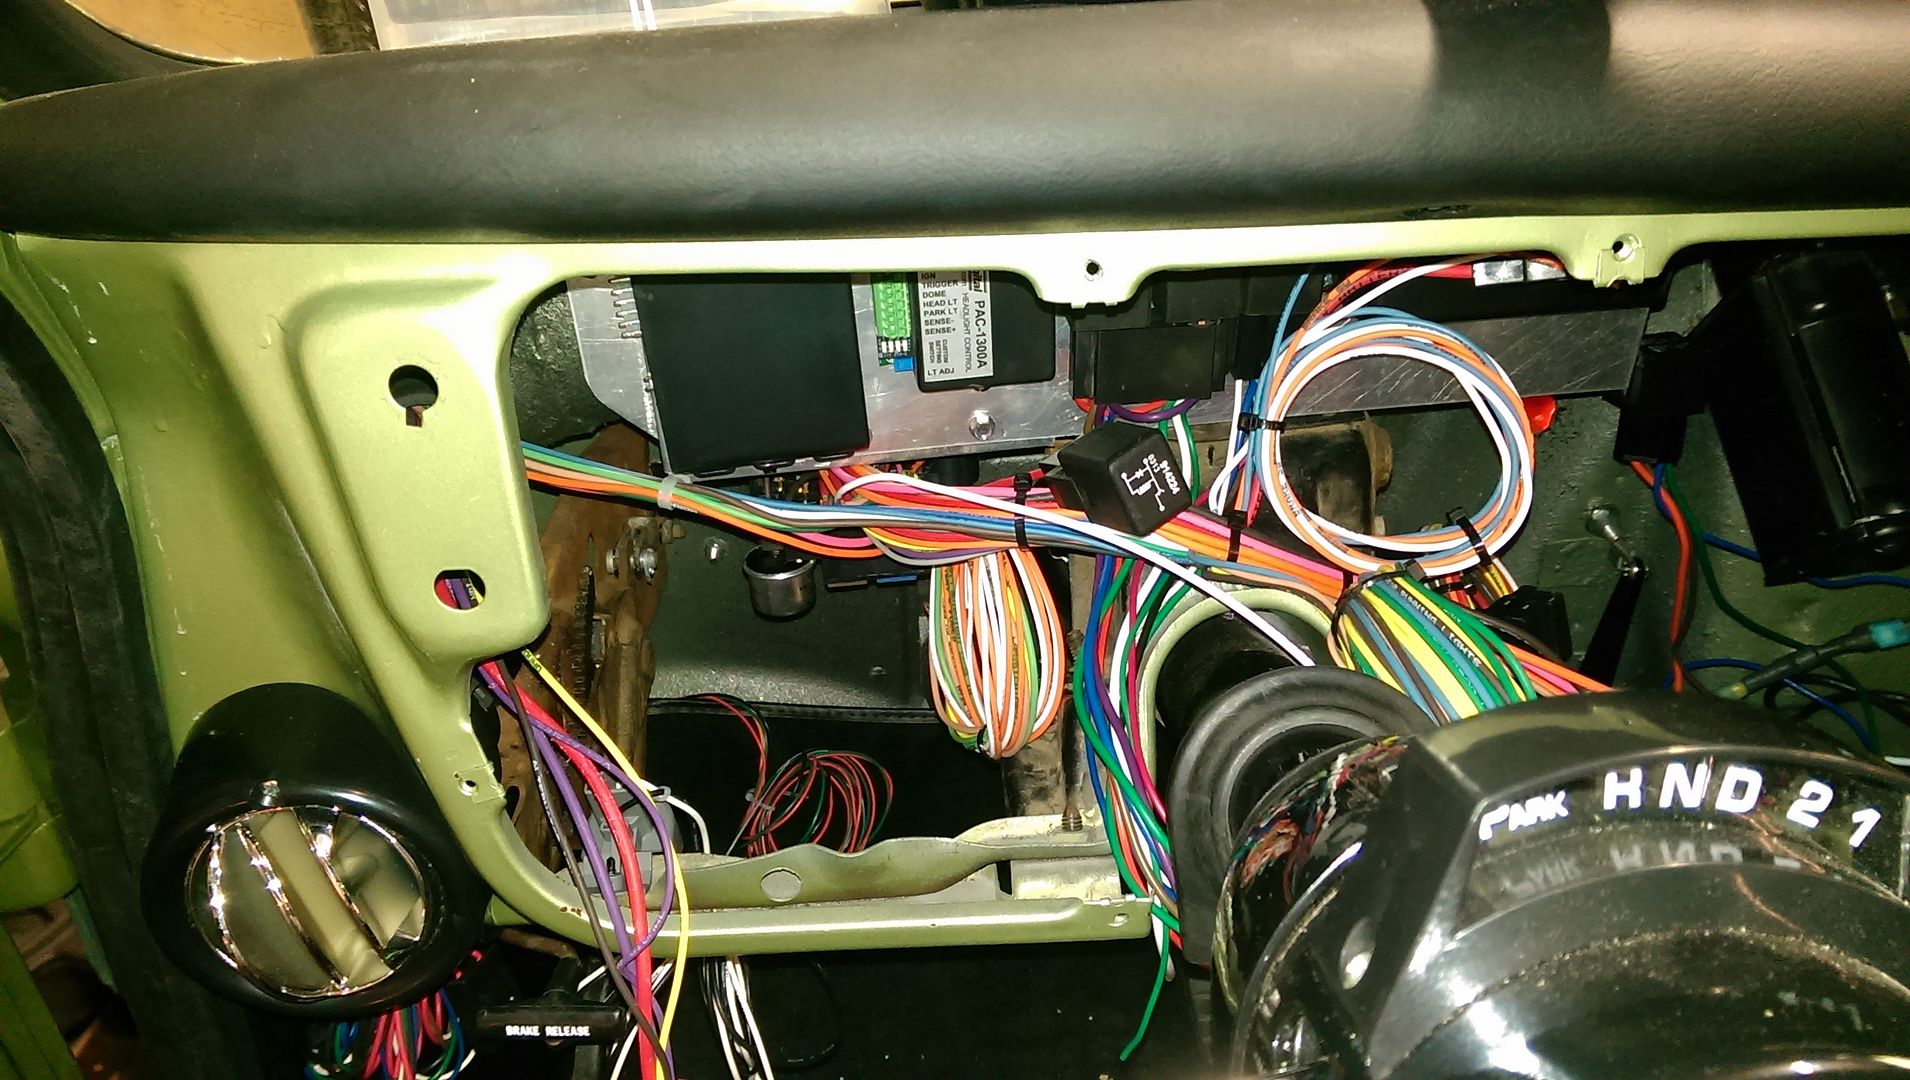 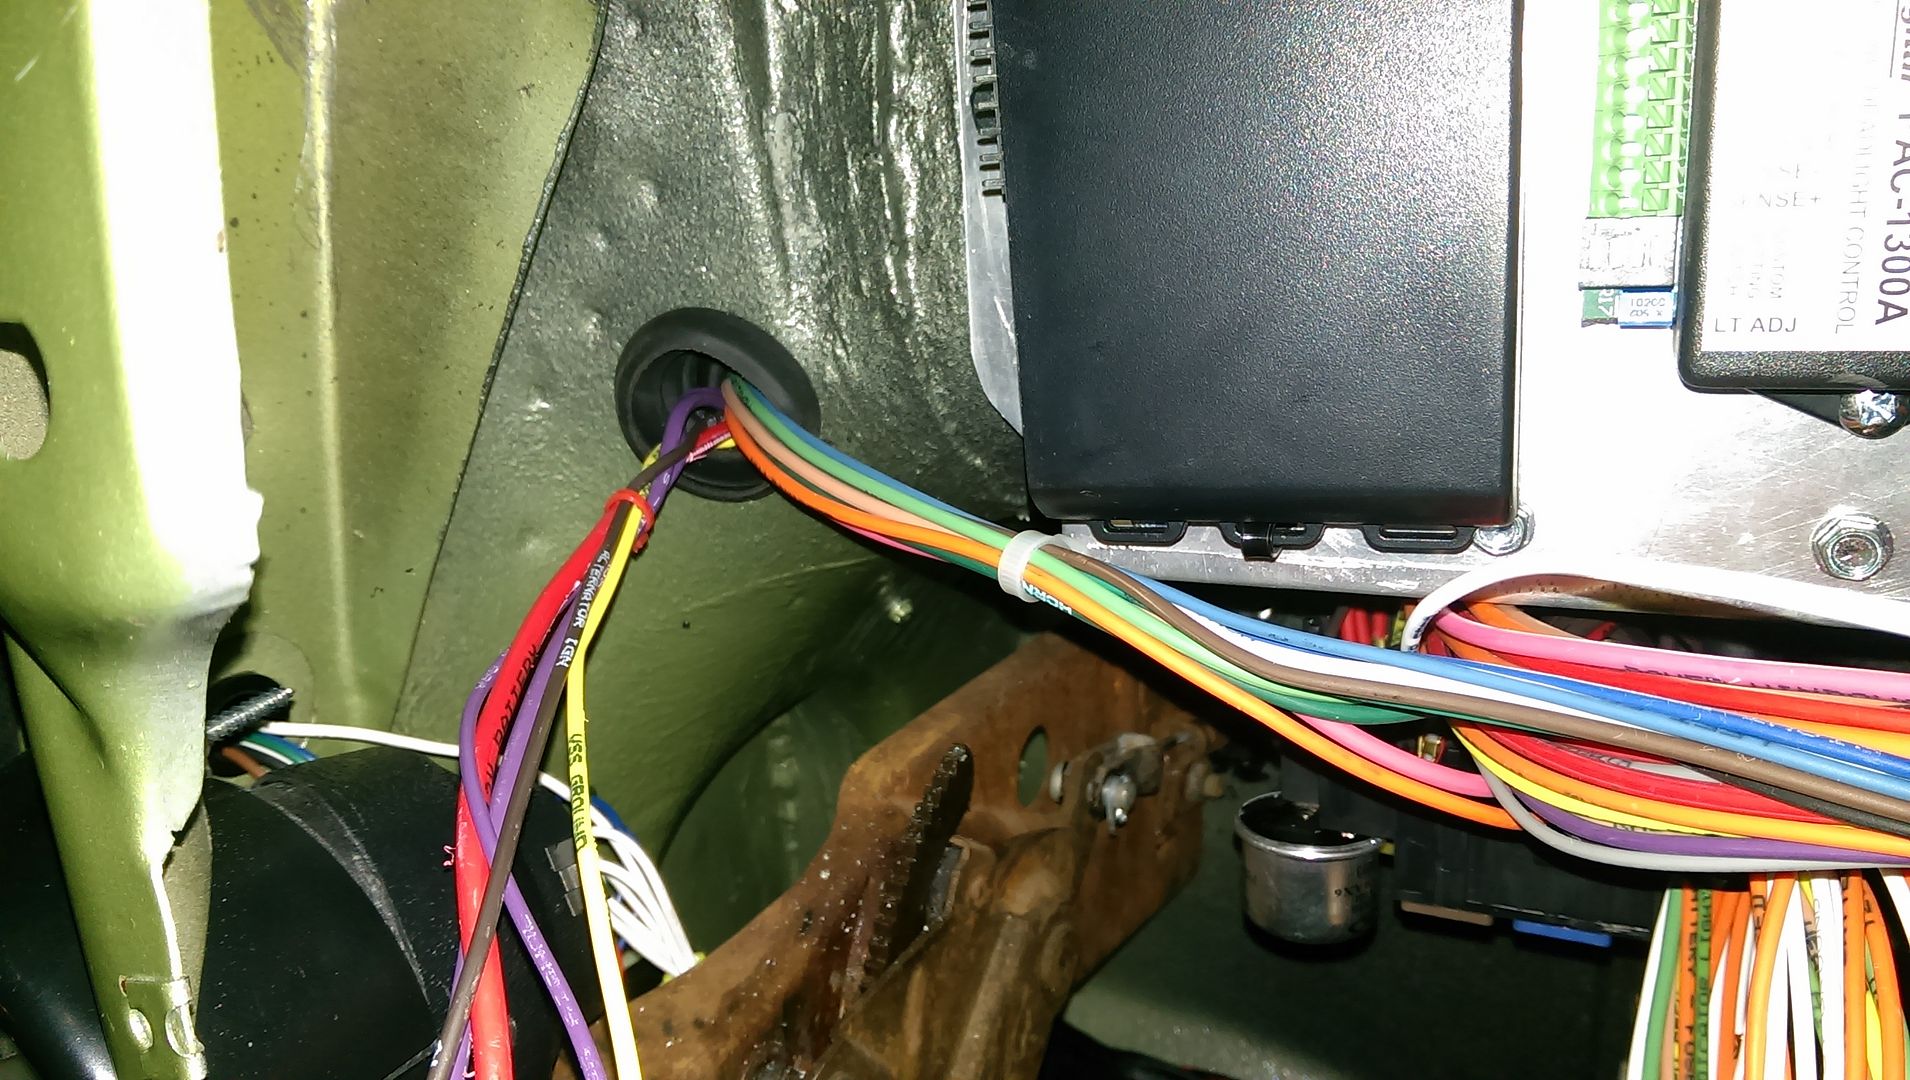  The wires run into the vent cowl area that is no longer a vent so it makes a good hidden wire chase. 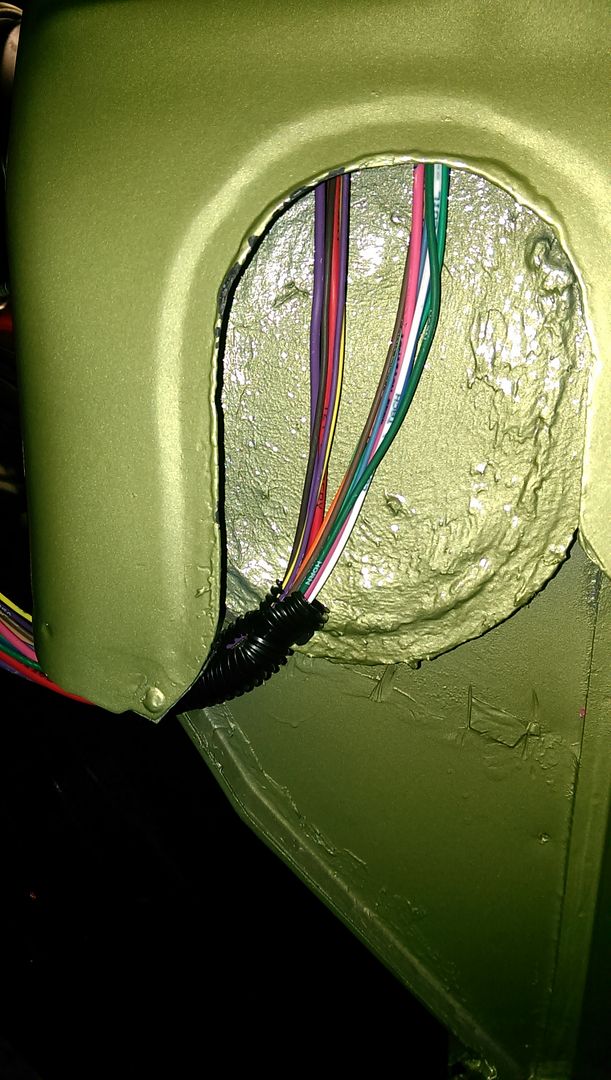 The convoluted tube you see there won't be permanent just there during install to keep the wires from chaffing. When done it'll have tubing covering all the wires up to the firewall. Wires will come from the drivers side and go across to the firewall and also run up to core support along the drivers side fender. Looks like a rats nest at the moment but I can see it in my head done and it looks great!   |
|
|

|
|
|
#209 |
|
Still Learning
Join Date: Jul 2009
Location: Central Oklahoma
Posts: 10,108
|
Re: What I can afford, when I can afford it... 70 Chevy LWB
Awesome work on that A/C install and my least favorite truck subject.....wiring.
|
|
|

|
|
|
#210 |
|
Registered User
Join Date: Dec 2011
Location: Ottawa, KS
Posts: 337
|
Re: What I can afford, when I can afford it... 70 Chevy LWB
Thanks Mike gotta get back on it. Yard work and house stuff has had me tied up.
|
|
|

|
|
|
#211 |
|
Registered User
Join Date: Apr 2003
Location: Indep, MO
Posts: 5,893
|
Re: What I can afford, when I can afford it... 70 Chevy LWB
Great work!
__________________
Boppa's Old Yeller Truck Build, Old Yeller's New Heart! Project Buzz Bomb Flyin' Low! |
|
|

|
|
|
#212 |
|
Registered User
Join Date: Dec 2011
Location: Ottawa, KS
Posts: 337
|
Re: What I can afford, when I can afford it... 70 Chevy LWB
Thanks Chip, I'm enjoying the wiring puzzle. I only have one issue with this wiring harness so far. It comes with a circuit for a CB Radio but not one for backup lights. Gonna have to use an aux. Makes me scratch my head.
|
|
|

|
|
|
#213 |
|
Registered User
Join Date: Dec 2011
Location: Ottawa, KS
Posts: 337
|
Re: What I can afford, when I can afford it... 70 Chevy LWB
In the middle of wiring and it's a slow process. The wiring harness I have is a great harness, however I am having to add on a lot of things and incorporate other things into the system. Like power door locks, car alarm, headlight controller. Some gauges that aren't included in the wiring harness. I've been enjoying the work, because it's not dirty and I can pick up where I left off easily. So a few pics of the progress but nothing much that's pretty to look at, still looks like multi colored spaghetti everywhere.
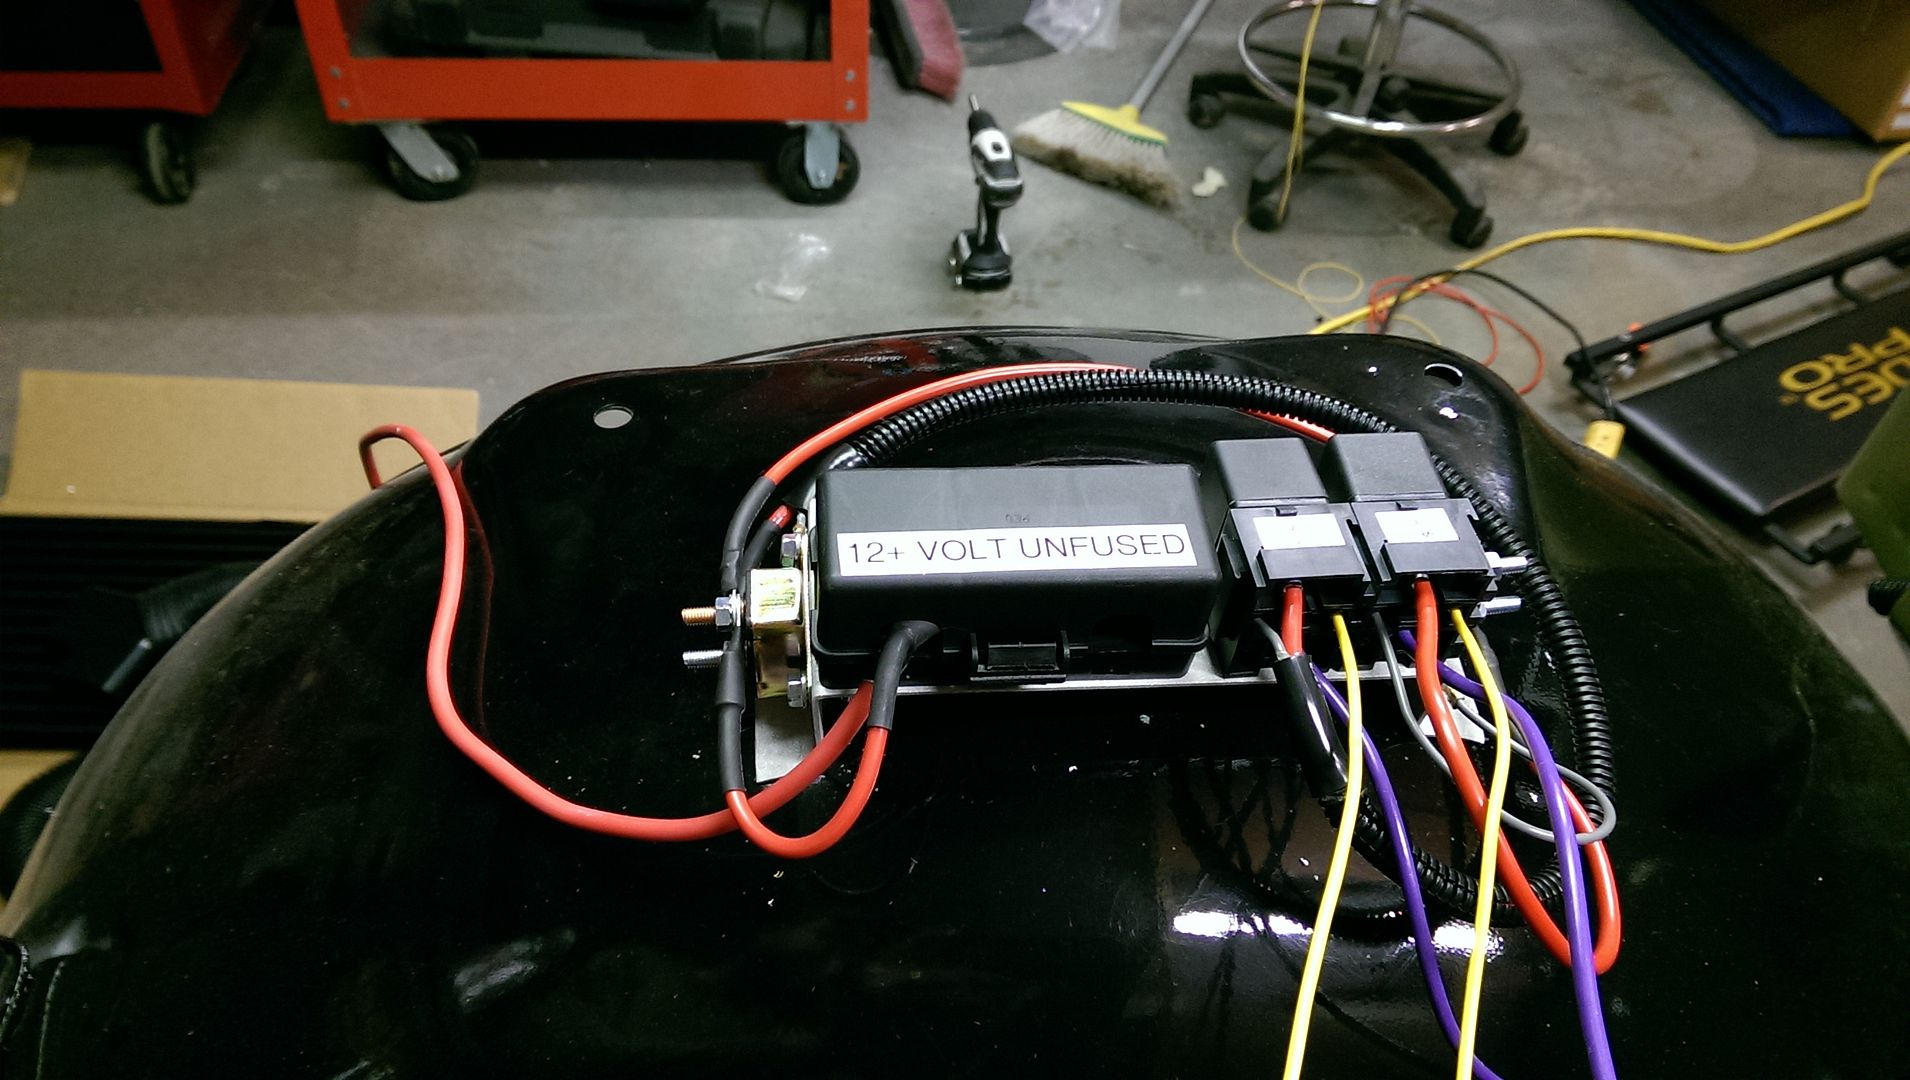 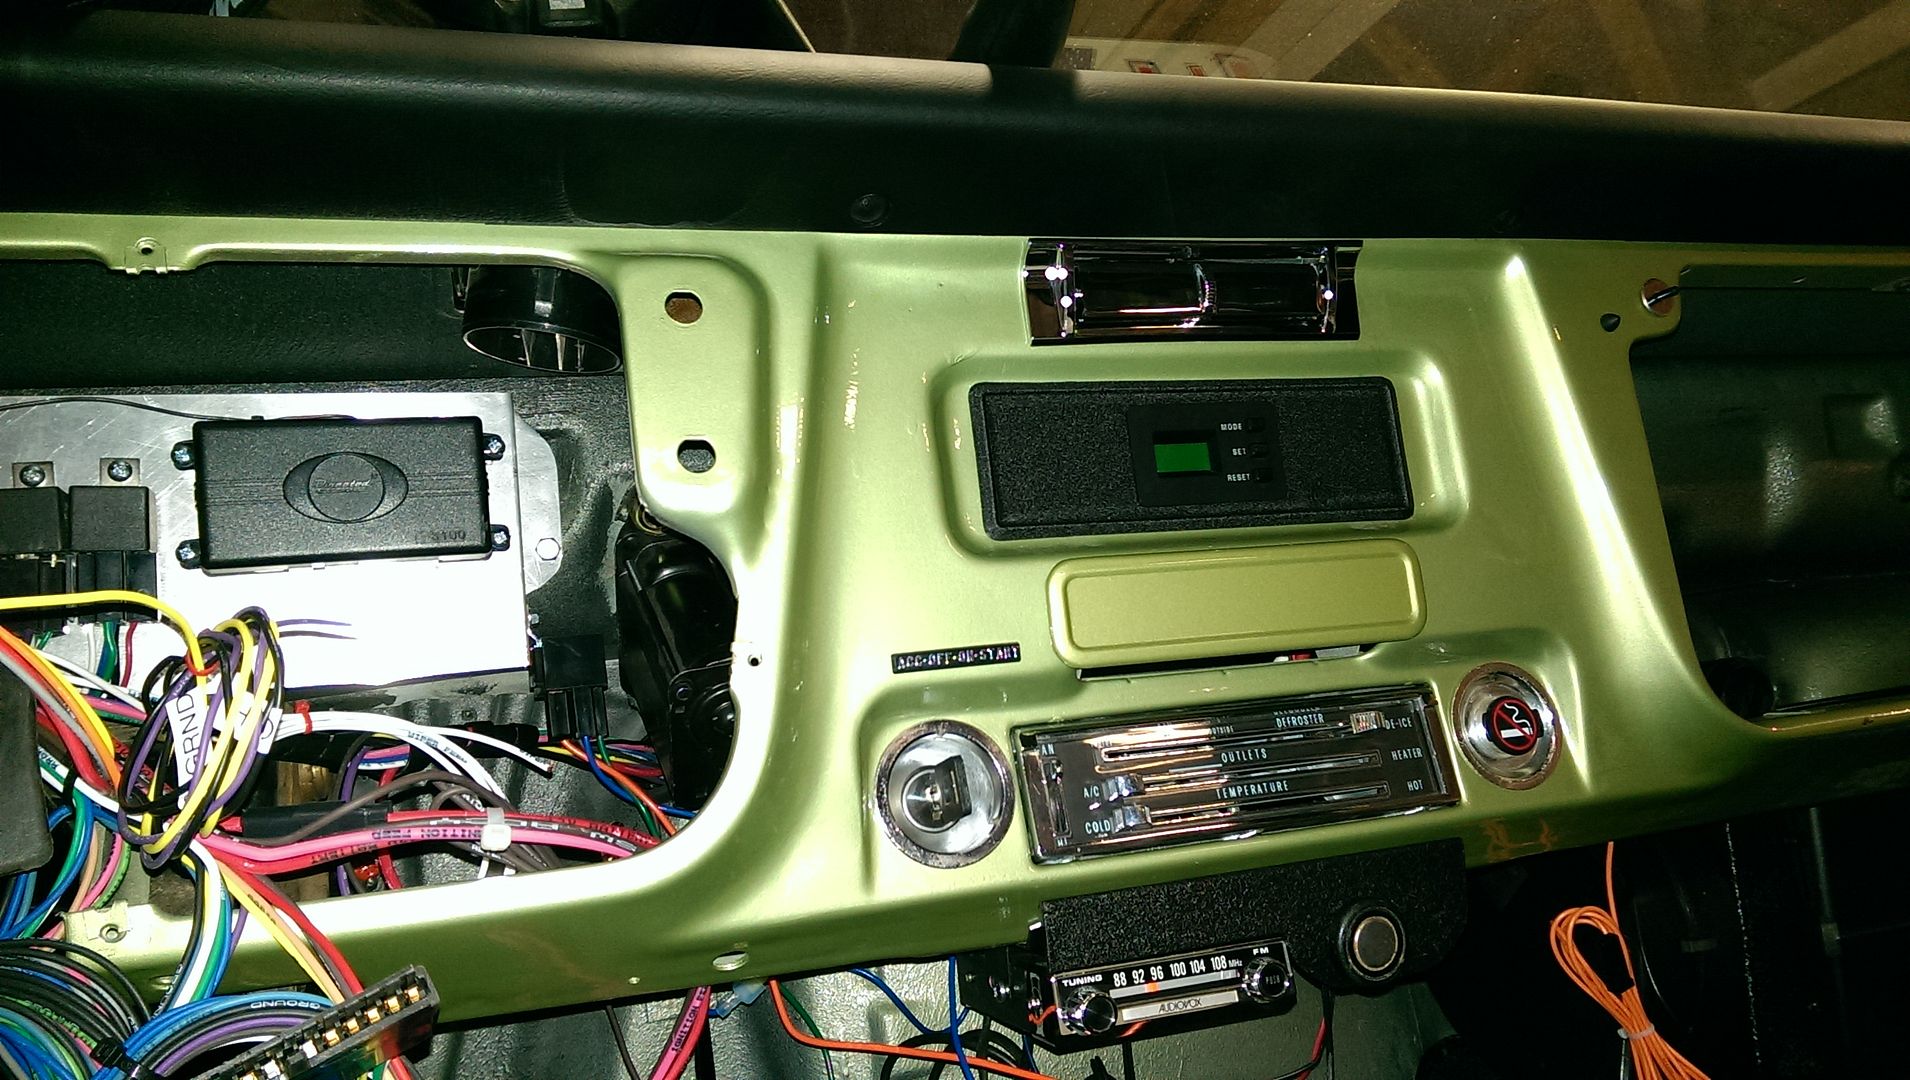 Dash coming together a little at a time. 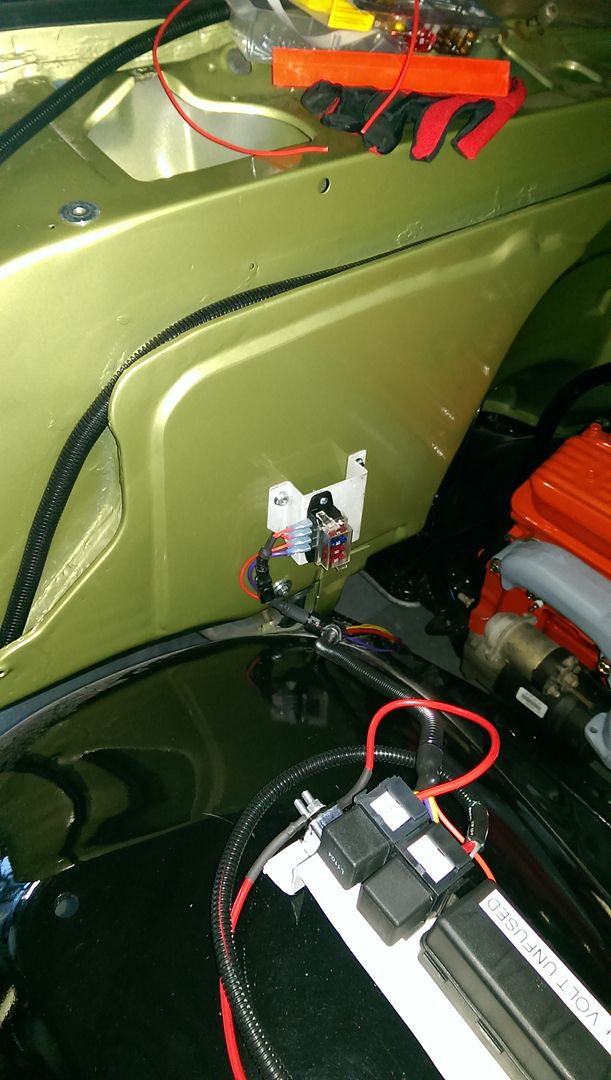 Needed a small fuse block under the hood for a few things. (Windshield washer pump, fuel pump, under hood lights, and one extra fuse position for expansion later if needed.) 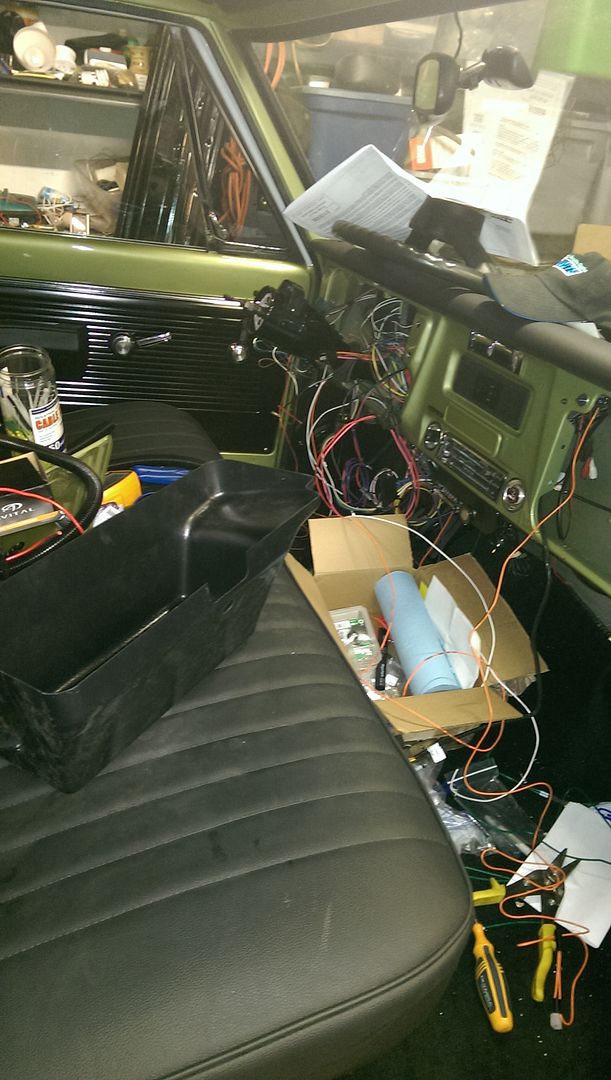 And one that looks like a bomb went off. This will be the Before of the before and after picture of the interior.  And a new favorite pic of the baby. |
|
|

|
|
|
#214 |
|
Still Learning
Join Date: Jul 2009
Location: Central Oklahoma
Posts: 10,108
|
Re: What I can afford, when I can afford it... 70 Chevy LWB
You are doing some really clean work on the wiring. I'm glad somebody enjoys it. I think I'd prefer to grind and weld on something
 Nice shot of the baby. Start them off young. |
|
|

|
|
|
#215 | |
|
Registered User
Join Date: Dec 2011
Location: Ottawa, KS
Posts: 337
|
Re: What I can afford, when I can afford it... 70 Chevy LWB
Quote:
The baby will be with us on the trucks maiden voyage. I'm betting she'll be into the classic cars and trucks. My wife and I love antiques and other old stuff so she's going to grow up around it whether she likes it or not. It's been getting a little harry a couple different times with about 4 different schematics trying to figure out how everything will tie together. Sometimes I just gotta step back and stare at it for a while before it clicks. I'll bet you when I'm done and I connect the battery I'll have a few bugs but hopefully no fires. 
|
|
|
|

|
|
|
#216 |
|
Registered User
Join Date: Apr 2003
Location: Indep, MO
Posts: 5,893
|
Re: What I can afford, when I can afford it... 70 Chevy LWB
Awwww.....Baby! Too cute!
Keep the smoke in! Fought the wiring demon myself last night. You're doin' the Lord's work!
__________________
Boppa's Old Yeller Truck Build, Old Yeller's New Heart! Project Buzz Bomb Flyin' Low! |
|
|

|
|
|
#217 | |
|
Registered User
Join Date: Dec 2011
Location: Ottawa, KS
Posts: 337
|
Re: What I can afford, when I can afford it... 70 Chevy LWB
Quote:
 Got everything terminated for the door locks and for the headlight retained acc. controller. Alarm system, and other than the gauge cluster and connecting the radio stuff. I'm just about done inside the cab other than tidying up everything with tubing and wrap to make it look like a monkey didn't install it. After that it should be a pretty quick process to finish up the engine compartment and rear chassis wiring. Hoping I can get it done this weekend, and maybe if I'm lucky hook up the battery and see if it will fire up. Fingers crossed. Got everything terminated for the door locks and for the headlight retained acc. controller. Alarm system, and other than the gauge cluster and connecting the radio stuff. I'm just about done inside the cab other than tidying up everything with tubing and wrap to make it look like a monkey didn't install it. After that it should be a pretty quick process to finish up the engine compartment and rear chassis wiring. Hoping I can get it done this weekend, and maybe if I'm lucky hook up the battery and see if it will fire up. Fingers crossed. 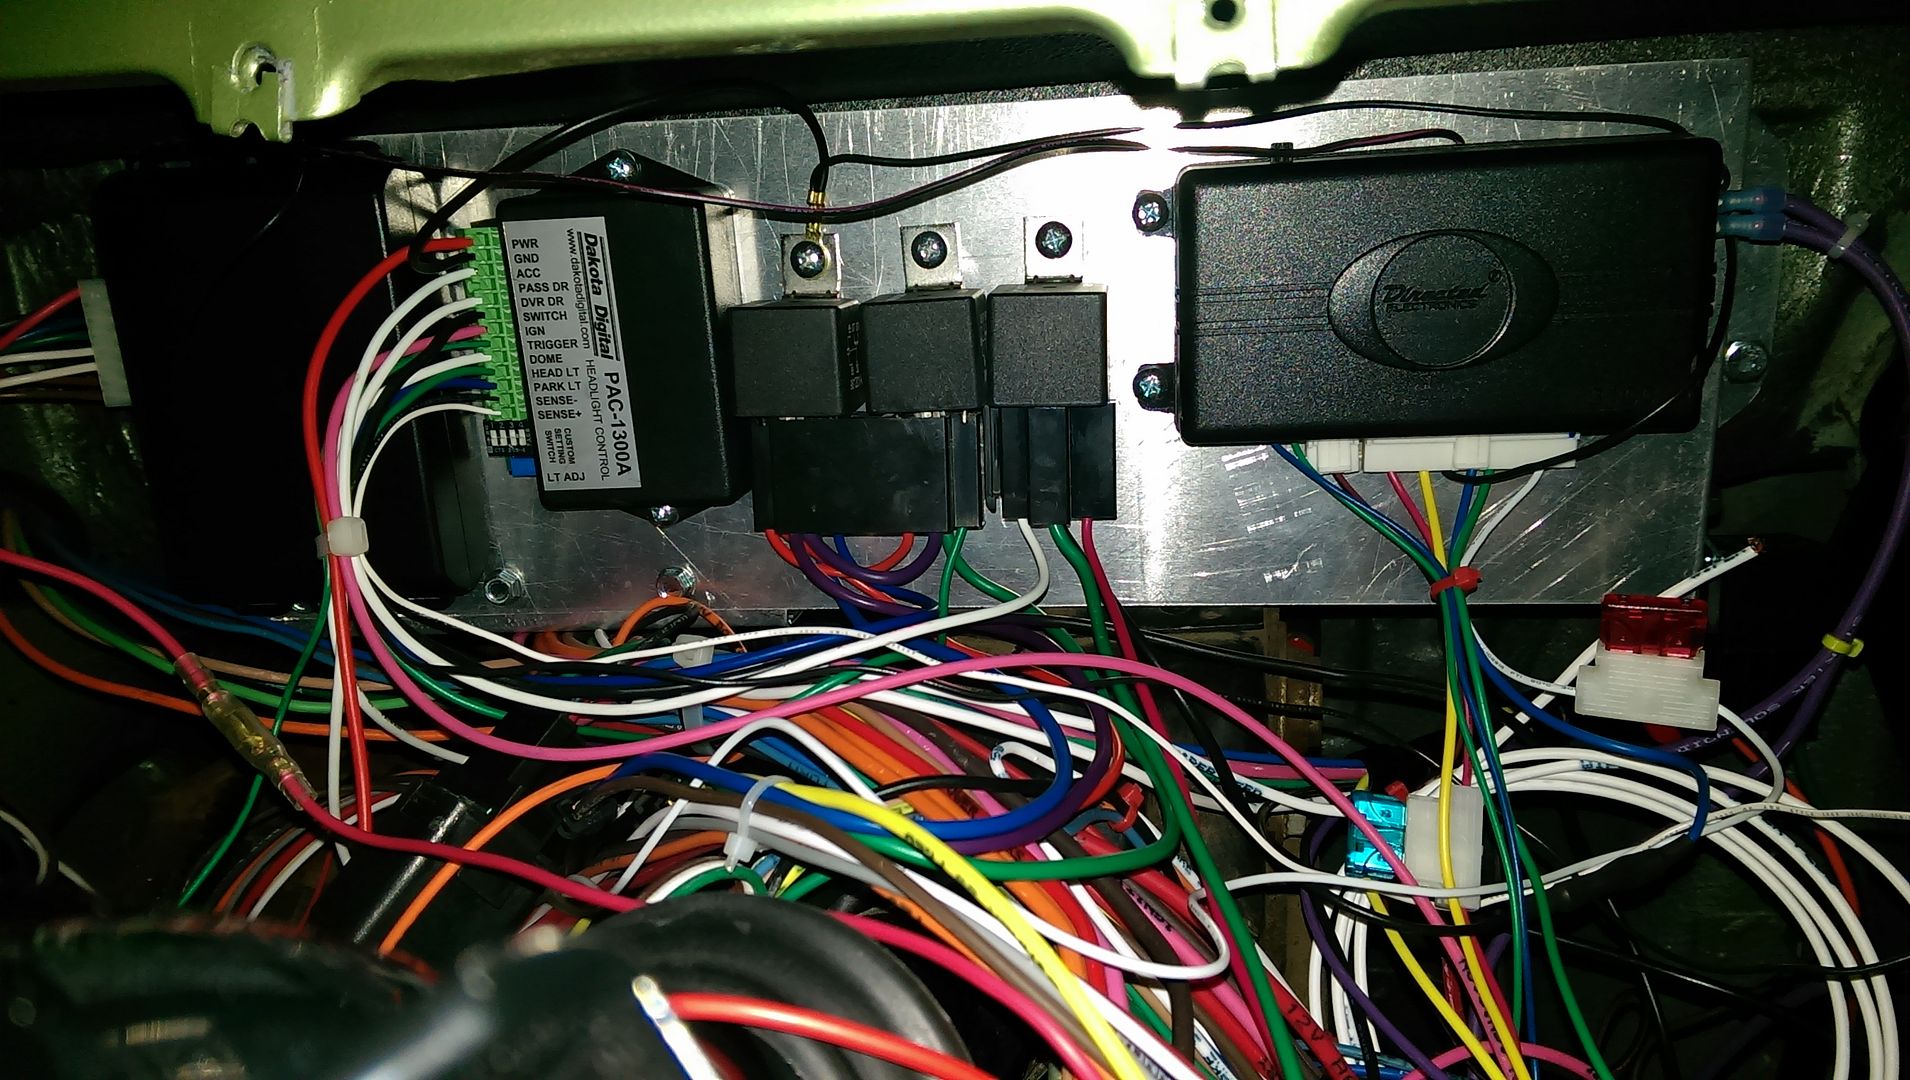 |
|
|
|

|
|
|
#218 | |
|
Registered User
Join Date: Apr 2003
Location: Indep, MO
Posts: 5,893
|
Re: What I can afford, when I can afford it... 70 Chevy LWB
Quote:
Work looks nice!
__________________
Boppa's Old Yeller Truck Build, Old Yeller's New Heart! Project Buzz Bomb Flyin' Low! |
|
|
|

|
|
|
#219 |
|
Registered User
Join Date: Dec 2011
Location: Ottawa, KS
Posts: 337
|
Re: What I can afford, when I can afford it... 70 Chevy LWB
I reward myself with a night cap when I'm done, tends to help in the motivation department.
|
|
|

|
|
|
#220 |
|
Registered User
Join Date: Dec 2011
Location: Ottawa, KS
Posts: 337
|
Re: What I can afford, when I can afford it... 70 Chevy LWB
Air Conditioner Install Part 2
My brother came down and picked up where he left off. And primarily this part is just installing the condenser and the dryer. The kit uses existing holes to mount everything. You will also need to make sure your battery box is for a truck with AC because you will use that mount with this kit. 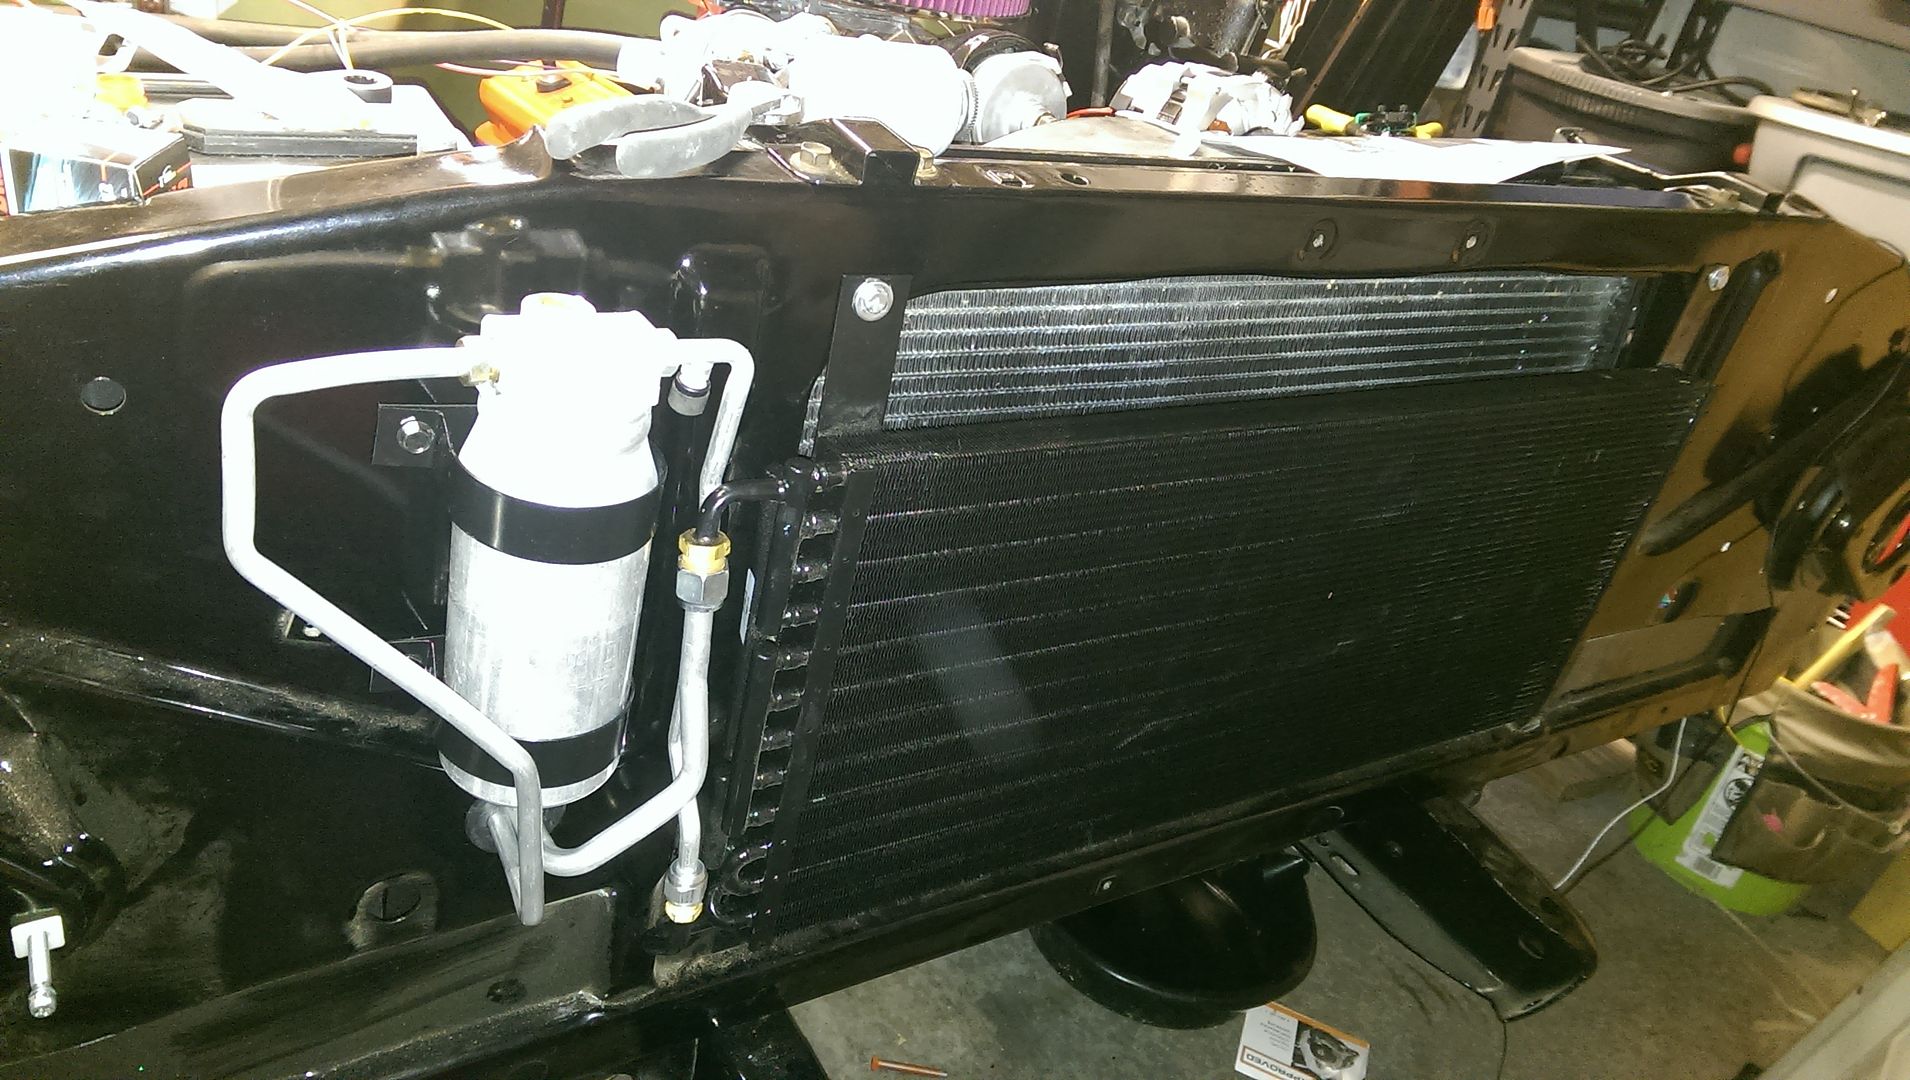 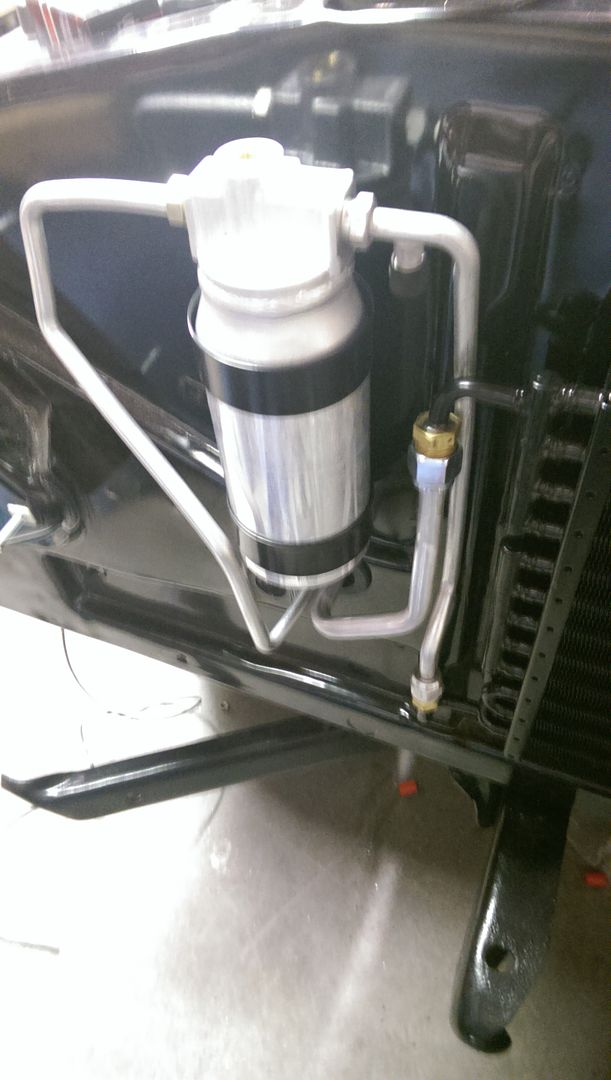 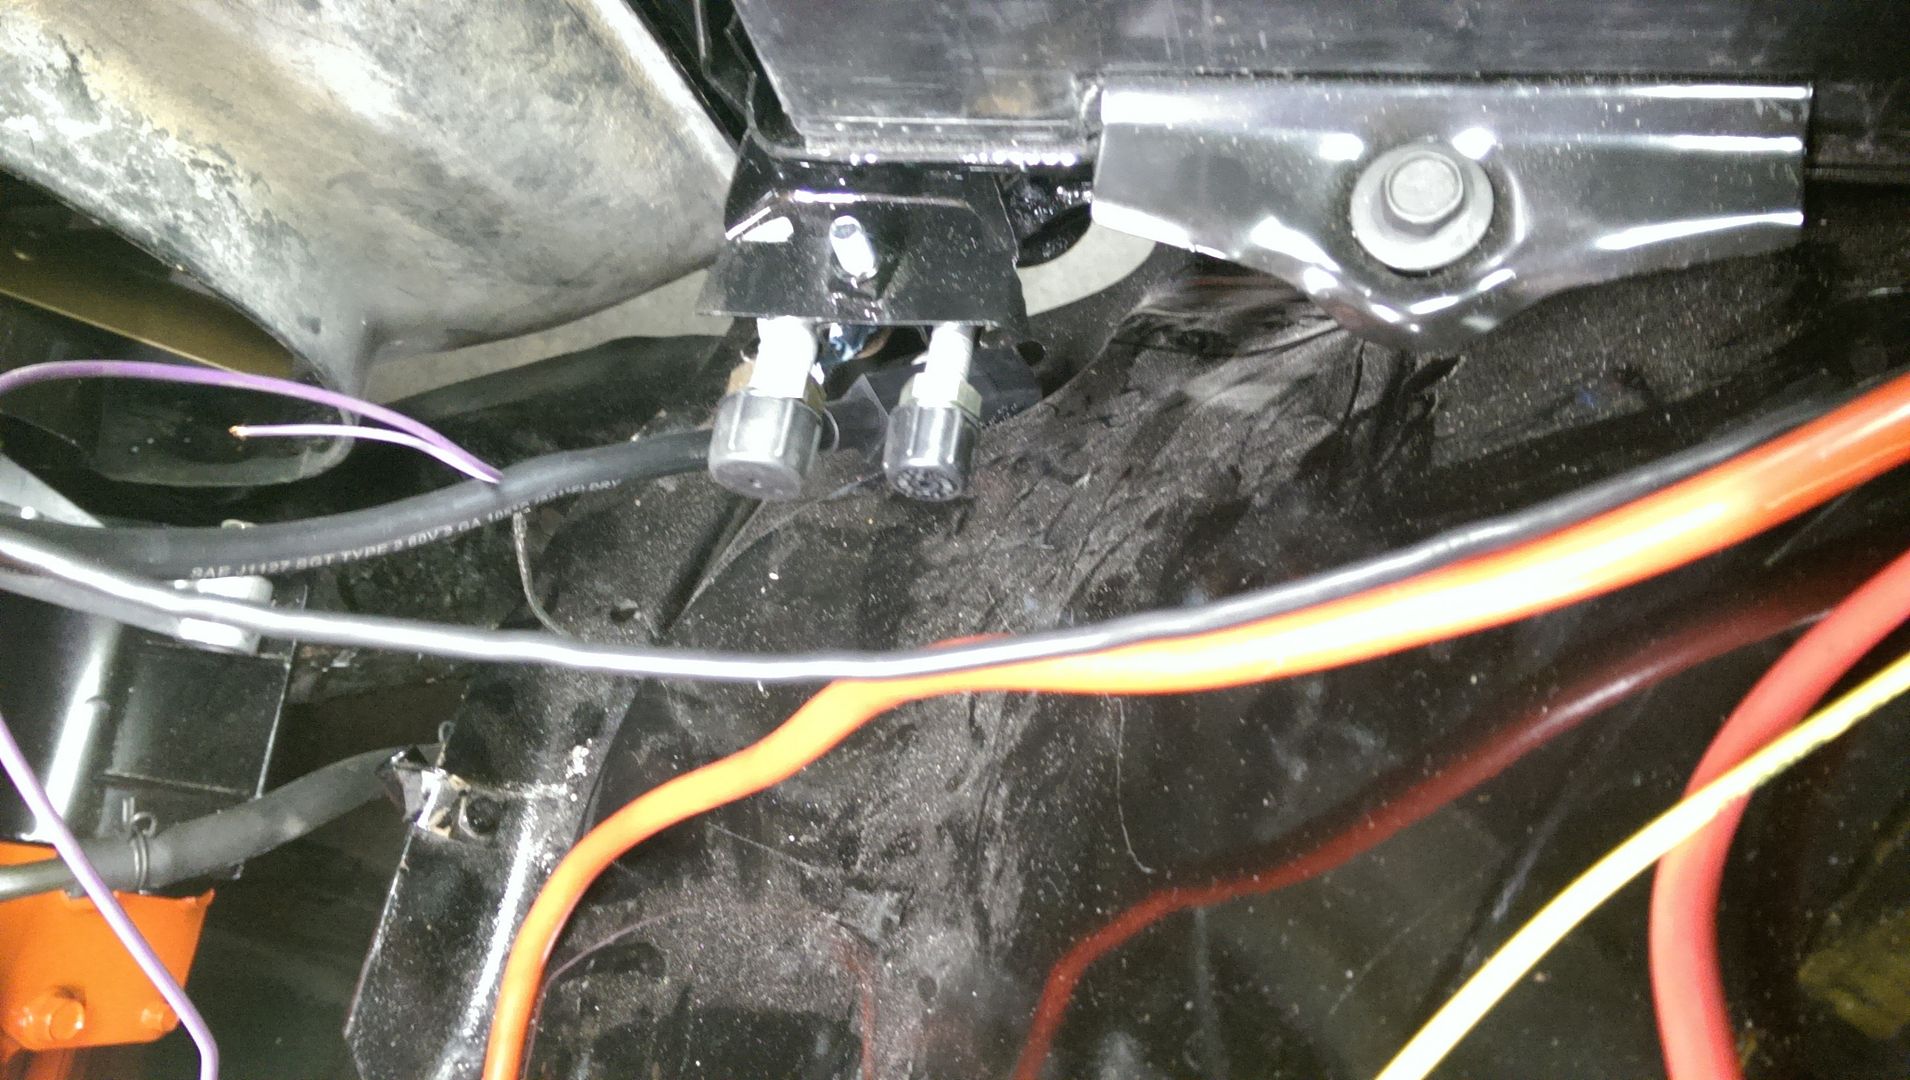 Pretty self explanatory, when you look at it and when you read the instructions. As we were preparing the hose routing we had to make a couple decisions to make, where were the hoses going to come through.  We'd either come in right on top of the inner fender under the lip of the vent cowl. Or option number two was to drill holes in the firewall on the far right (passenger) side of the engine compartment. We decided that would be the way to go however there is some inner structure that was in there that had to be dealt with. It would have been better to have some of this stuff worked out before it had paint on it. We were careful and it turned out fine, If I had it to do over again I would have just bought the standard kit and not worried about a few holes in the smoothed firewall what would have come through the firewall is very minimal. But it will look good the way we're doing it also. Just more time and a little more creative cutting. Coming through the far right on the firewall required more grommets so I had to order two more from Old Air. The sent a liquid line that was too short for the run I have so I had more than one reason to call. 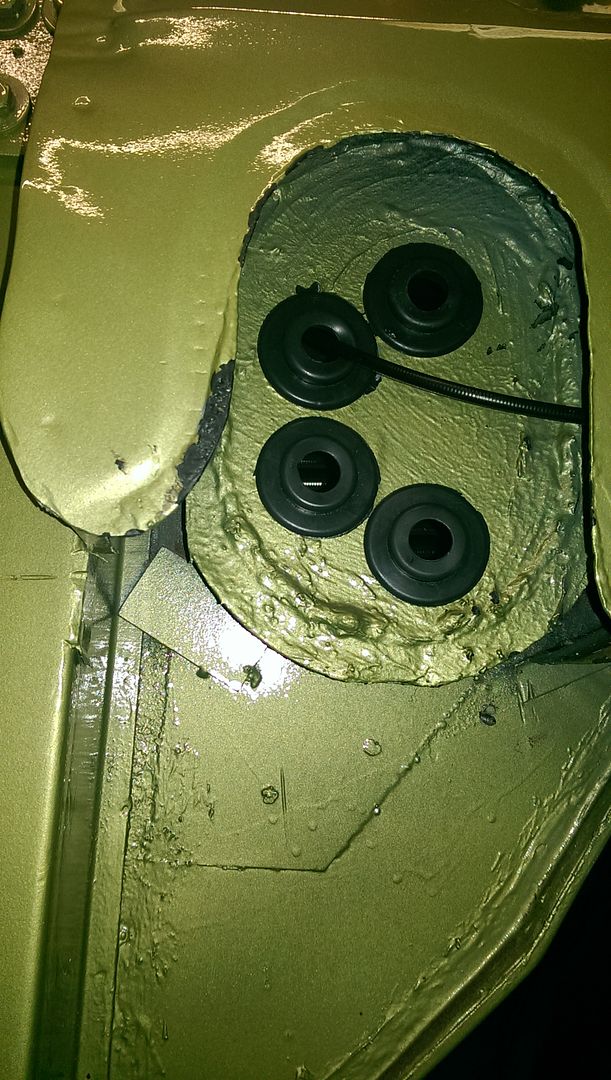 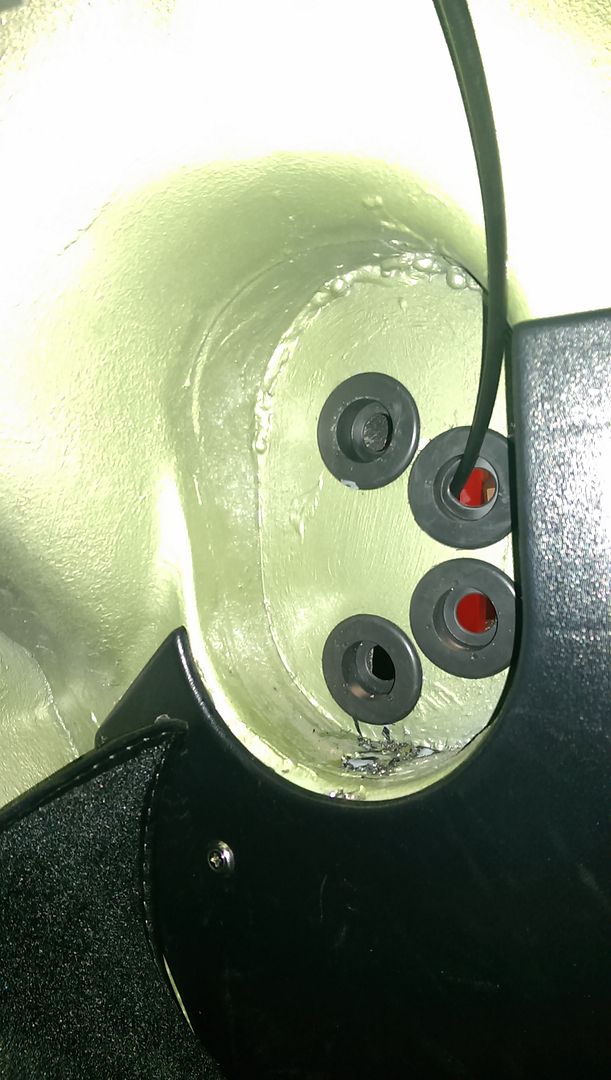 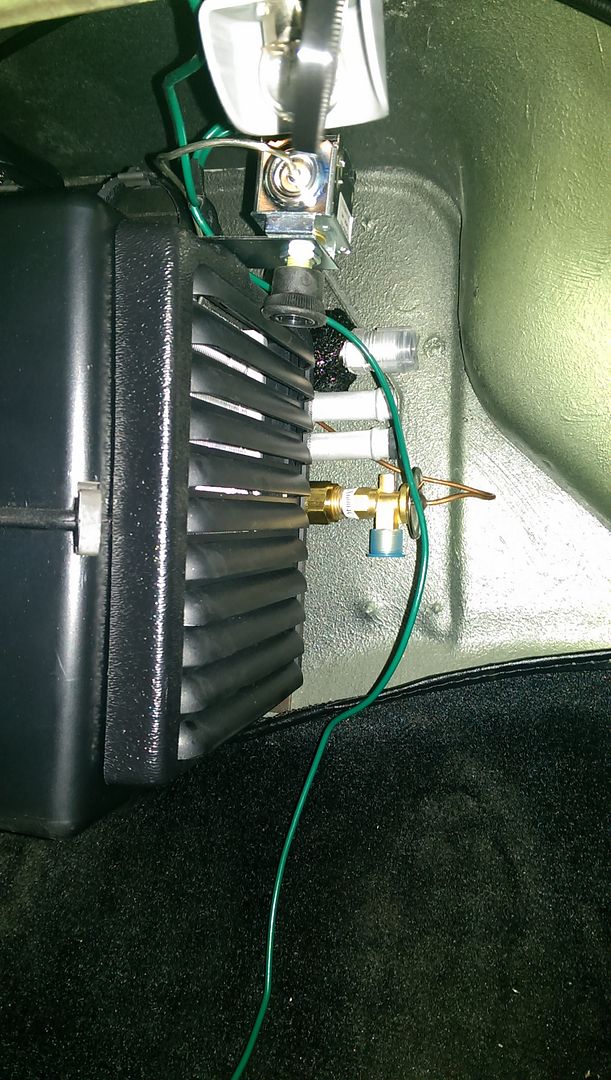 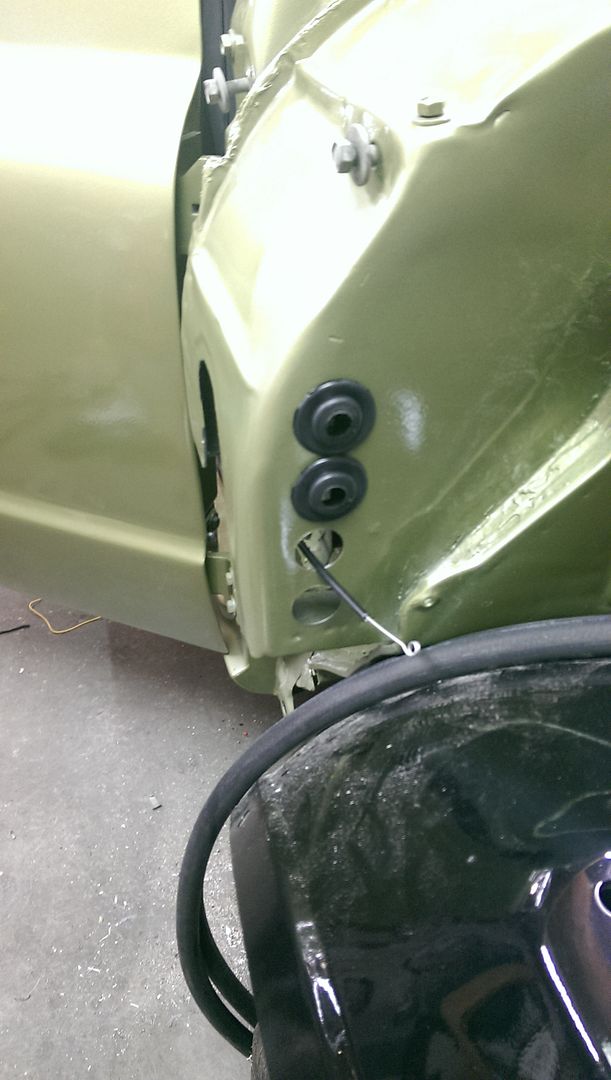 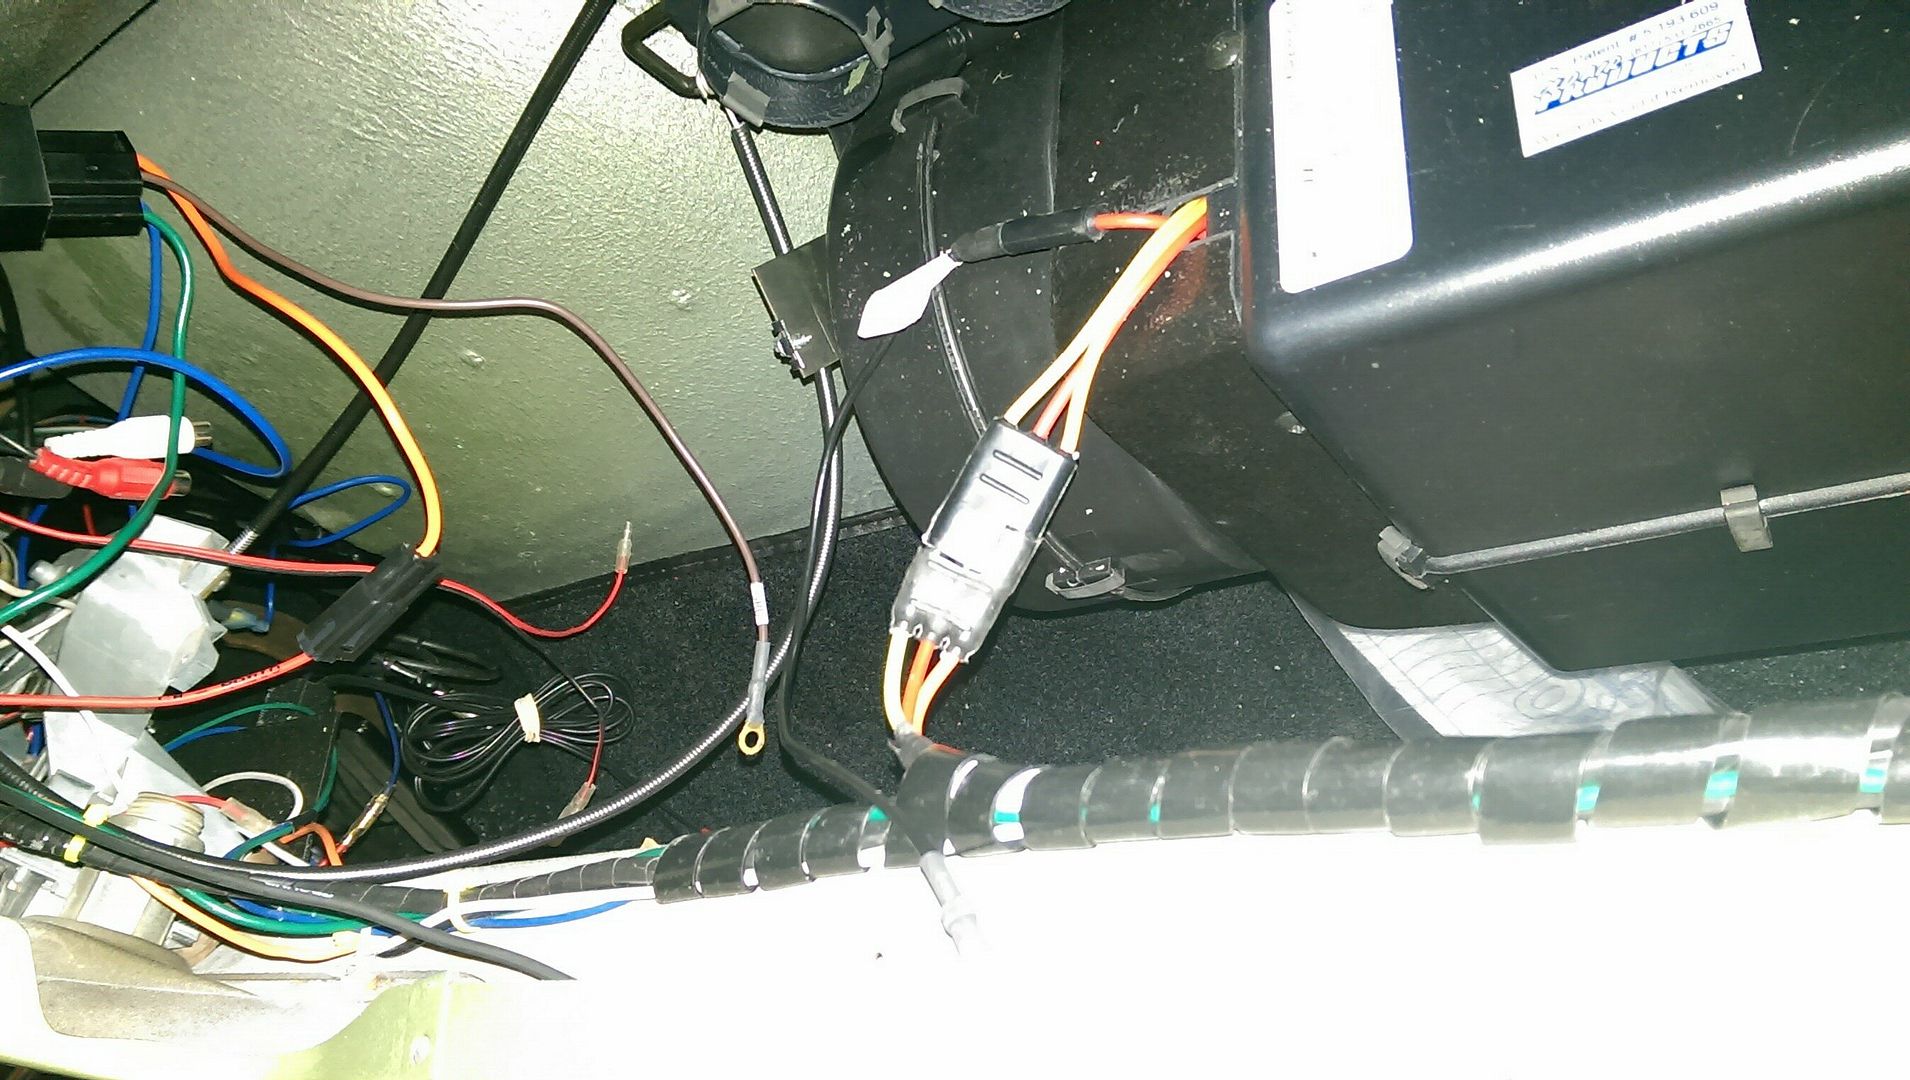 Last pictures of the AC Wires Routed. I have to find somewhere that will crimp the fittings for the AC lines since they are cut to fit. It's on my list of things to do. The next AC Update will be the vents and hose connections etc. and installing the glove box. |
|
|

|
|
|
#221 |
|
Registered User
Join Date: Dec 2011
Location: Ottawa, KS
Posts: 337
|
Re: What I can afford, when I can afford it... 70 Chevy LWB
A little further along with the wiring also.
I'm pretty proud of my grounding blocks for inside the cab. Got a small brass bar and drilled and tapped some holes for reliable grounding locations. 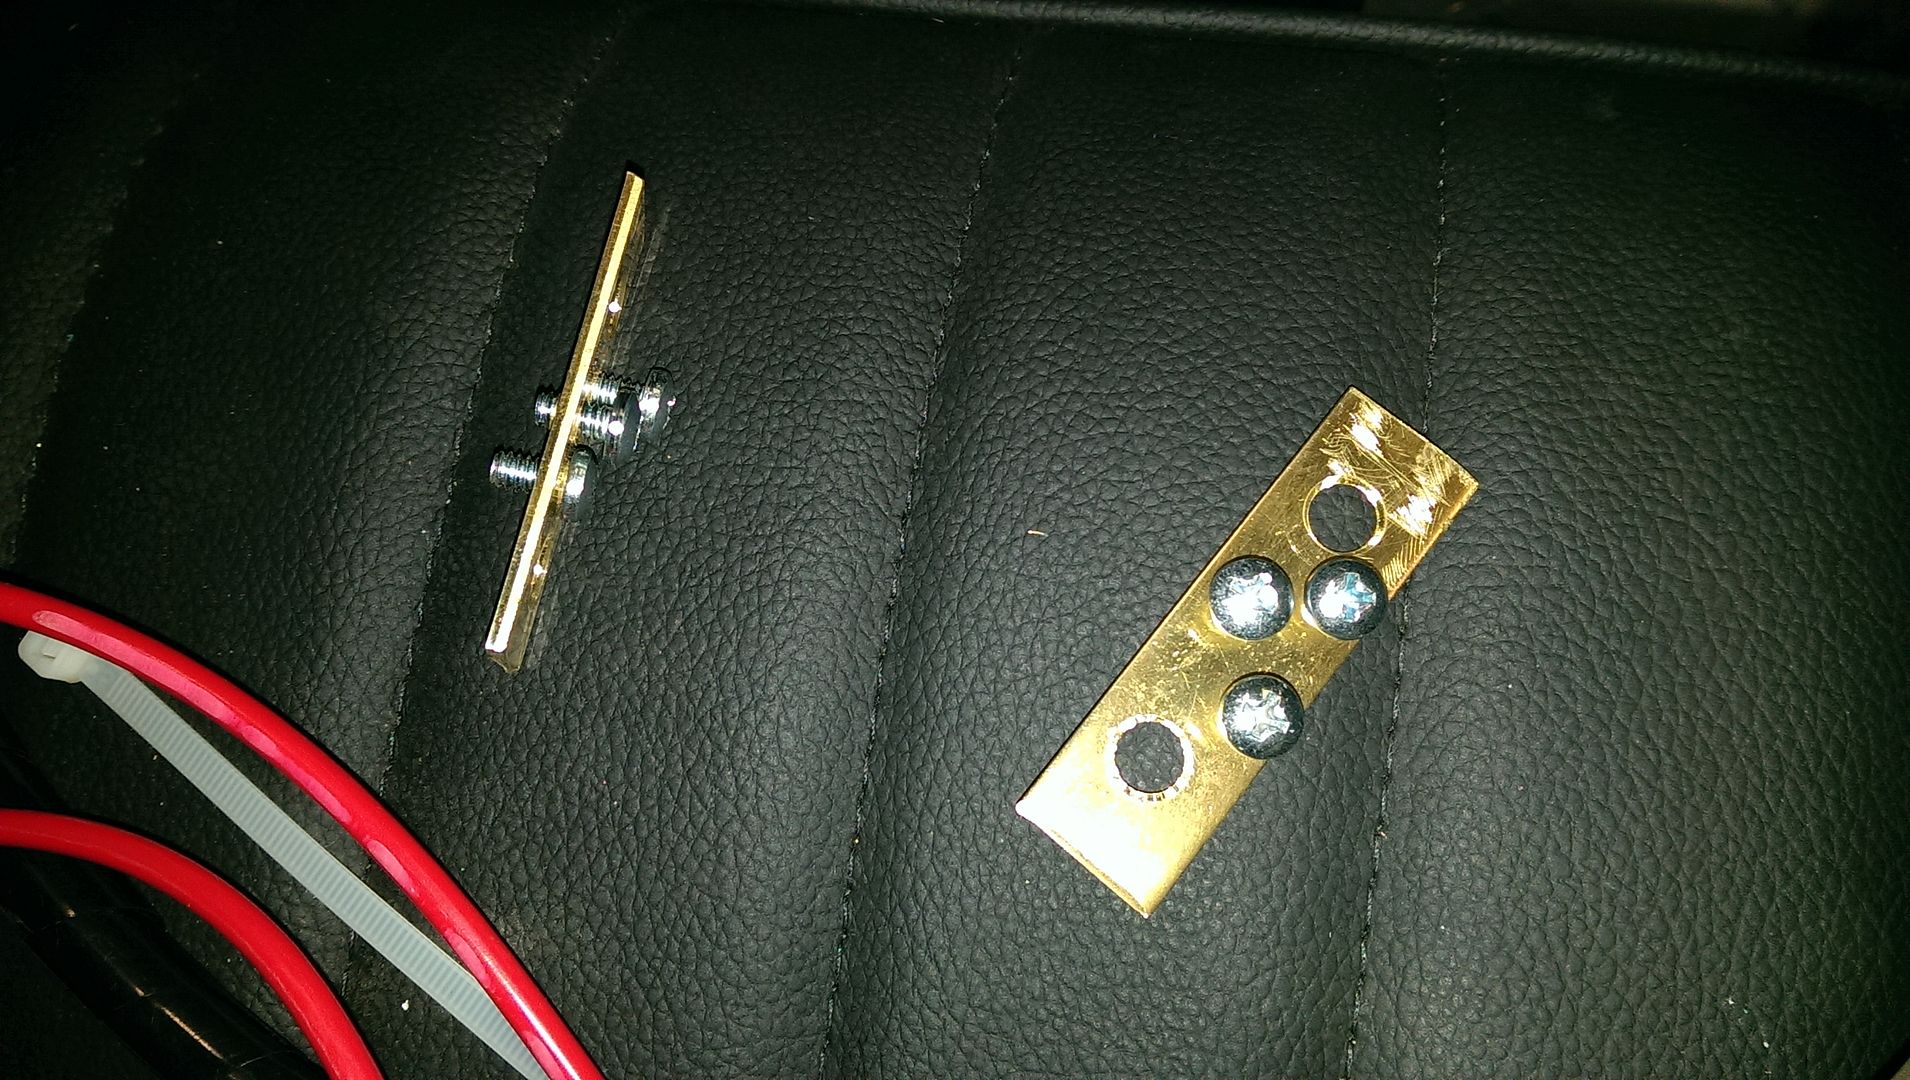 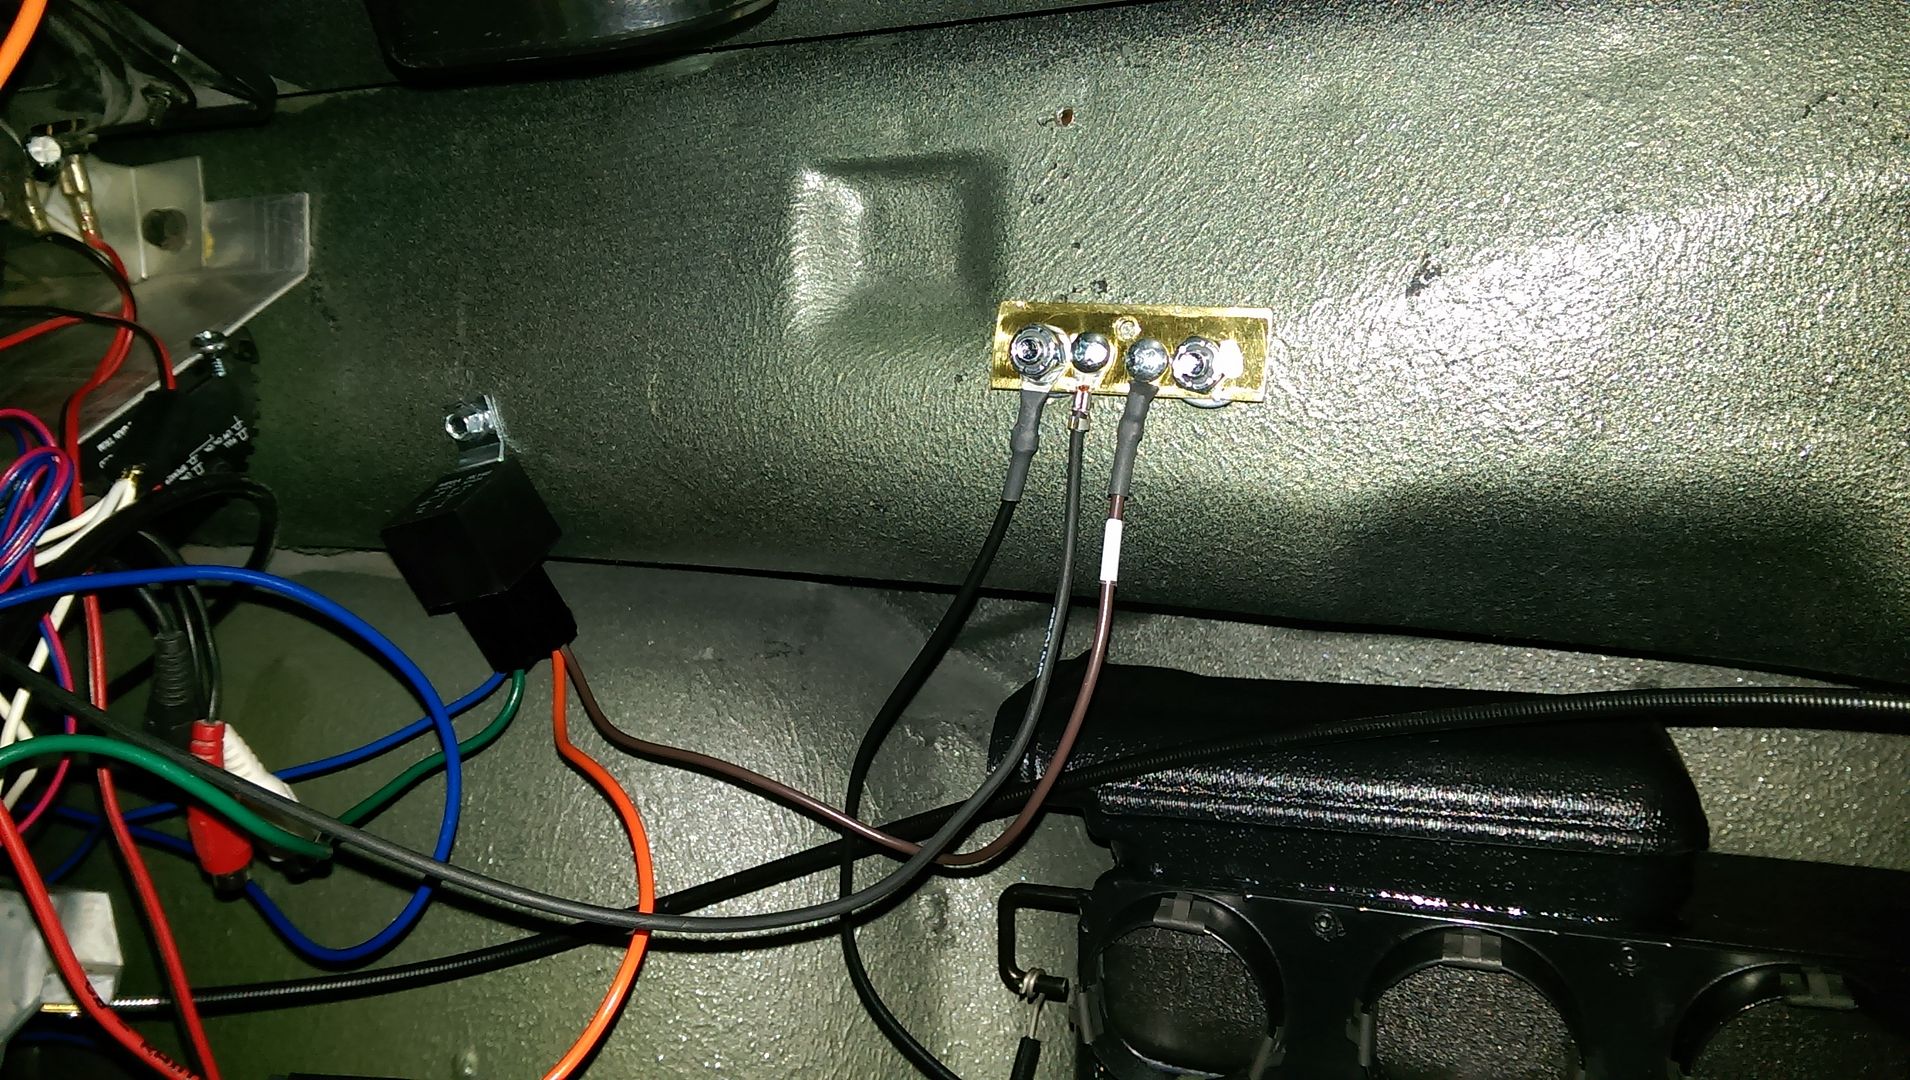 I used 1/4-20 bolts through the firewall with a couple nuts as standoff's for the plate so the screws wouldn't hit the firewall. Used nylock nuts on the front of the plate so it wouldn't come loose. I have one on the drivers side and one on the passenger side behind the dash. They're linked with 10 gauge wire with a 10 Ga. wire going directly to the negative wire on the battery. I'm just checking things off the list. Not much inside the cab left to do. Instrument Cluster finish wiring. Transmission Torque converter wiring and tidying up the wires in wire looms and tucking things out of site. A couple small things wiring items left under the hood and tidying up those wires. Dumping in the oil in the engine and transmission. Trans. cooler lines. Power steering lines, antifreeze, some gas in the tank and I should be ready to hook up the battery. I really want to have this thing cranking this weekned. |
|
|

|
|
|
#222 |
|
Registered User
Join Date: Apr 2003
Location: Indep, MO
Posts: 5,893
|
Re: What I can afford, when I can afford it... 70 Chevy LWB
Work looks great! I like the ground bar idea, Might have to whip a couple up myself. Hope you get the first firedone with no problems. don't forget to check your oil pressure line in and out of the cab, it's easy to forget, ask me how I know!
__________________
Boppa's Old Yeller Truck Build, Old Yeller's New Heart! Project Buzz Bomb Flyin' Low! |
|
|

|
|
|
#223 | |
|
Registered User
Join Date: Dec 2011
Location: Ottawa, KS
Posts: 337
|
Re: What I can afford, when I can afford it... 70 Chevy LWB
Quote:
I know I've been saying for the past three weekends that I felt like I'd be able to fire up the truck. My list of things that need to get done keeps growing when I remember 5-6 more things that need to be done before I can fire it up.  Wiring inside the cab is done except for a little more work to tidy up with loom and tie up loose wires. Instrument cluster is all done except for the speedo which is on back order at Summit. Wiring inside the cab is done except for a little more work to tidy up with loom and tie up loose wires. Instrument cluster is all done except for the speedo which is on back order at Summit. 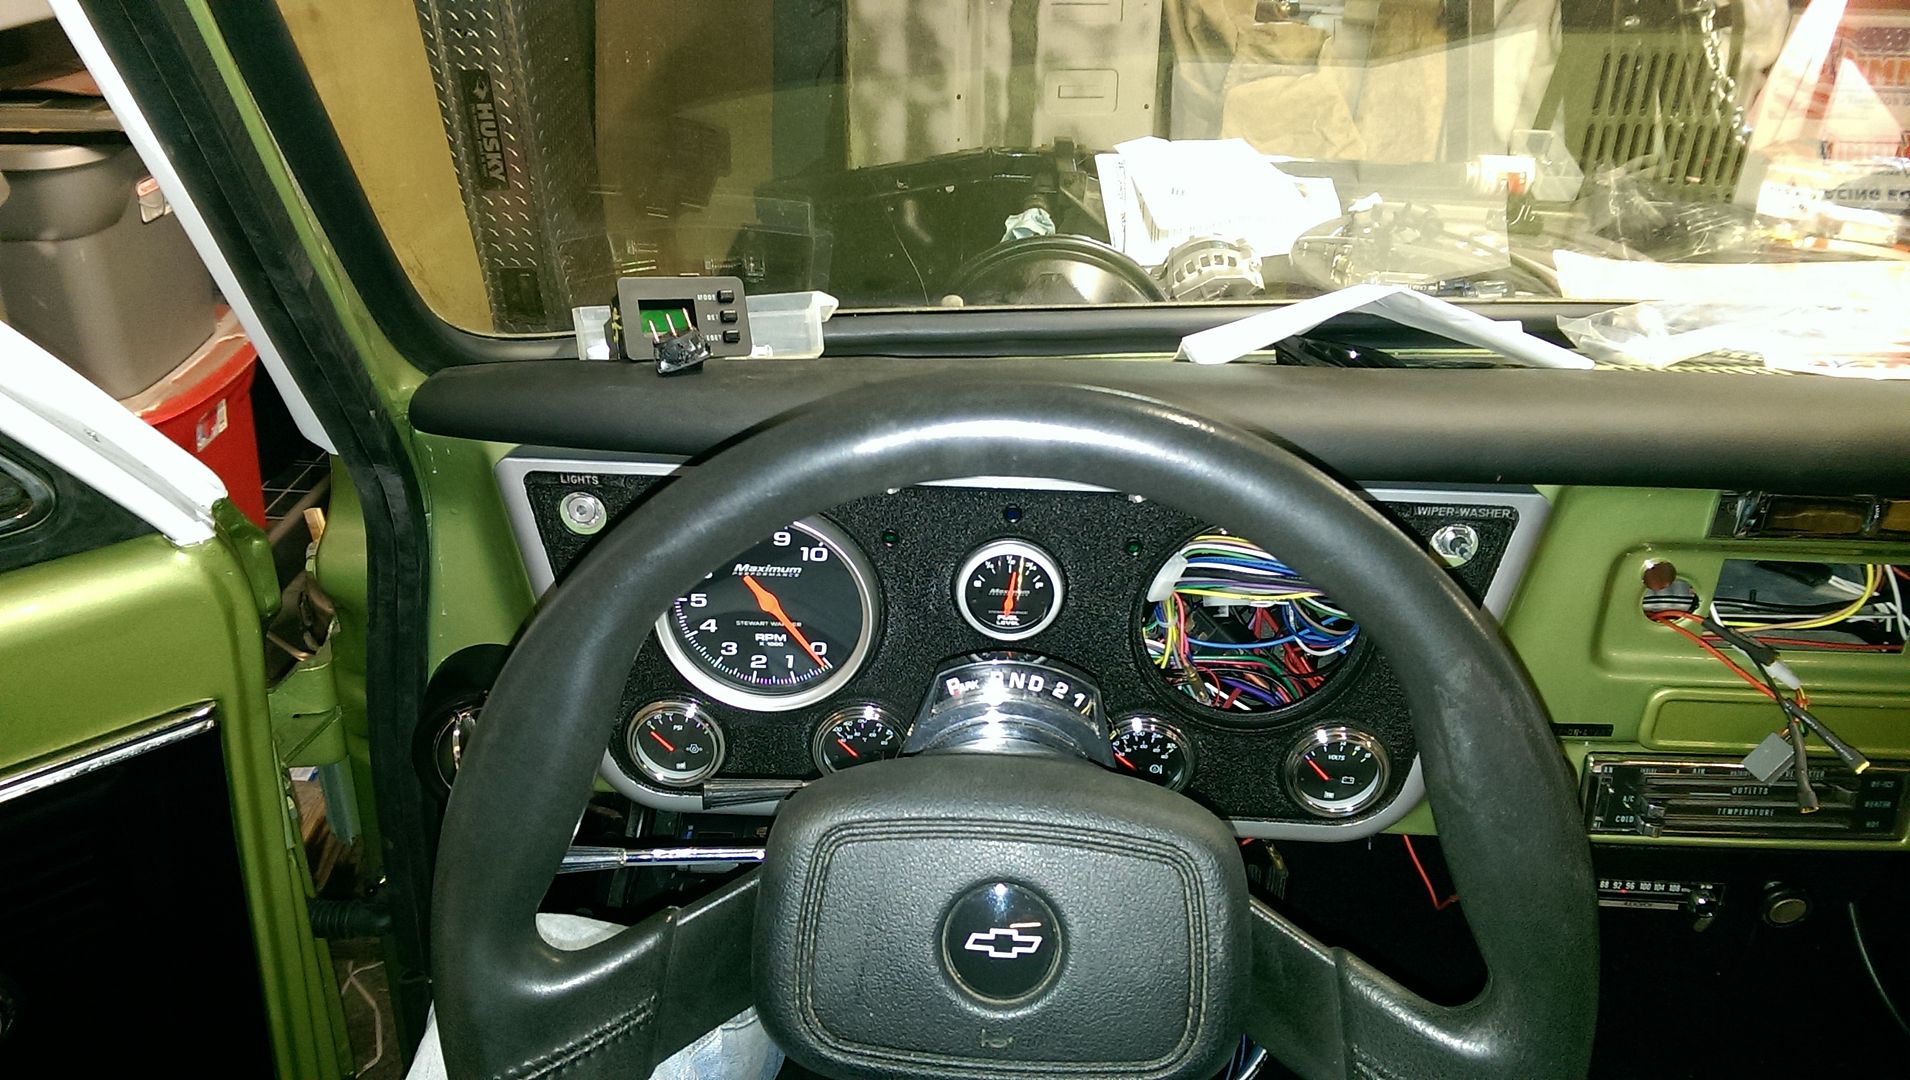 Had to get the drive shaft shortened and re balanced for the 700R4 had that done at Inland Truck picked that up last week so it'll go in this week. So when I do get it started it'll move.   |
|
|
|

|
|
|
#224 |
|
Registered User
Join Date: Apr 2003
Location: Indep, MO
Posts: 5,893
|
Re: What I can afford, when I can afford it... 70 Chevy LWB
Inching...steadily.....closer..... Can't wait!
__________________
Boppa's Old Yeller Truck Build, Old Yeller's New Heart! Project Buzz Bomb Flyin' Low! |
|
|

|
|
|
#225 |
|
Registered User
Join Date: Dec 2011
Location: Ottawa, KS
Posts: 337
|
Re: What I can afford, when I can afford it... 70 Chevy LWB
|
|
|

|
 |
| Bookmarks |
|
|