
 |
|
|
#1 |
|
Registered User
Join Date: Mar 2014
Location: Wichita Ks
Posts: 40
|
70 C-30 build thread
I give up! Damn this thing has taken over my life and nearly ended some good friendships. Personally, I do not have the fortitude to go through with this to the end. Besides, My friend Richard has done most of the work, been my adviser and has prevented me from doing things the hard way, more times than I would have thought.
I am selling my truck to Richard. It has been at his house nearly from the start, I spend far to much time away to make much progress and more importantly, my project has consumed far too much of his time. My account here is on his computer since I have done much of the online search work while he rebuilt my wiring harnesses, sanded and rattle canned. He says he will keep the thread updated or possibly start a new account as (I'm certain) he wouldn't want to post under my name. So, as I will be leaving this in far more capable hands, I would like to say thank you all for your help and the many threads that have helped resolve many circumstances that I was not prepared for. I will post some pictures of the start of the project (mostly clean-up work) and update it to current. Beyond that, Richard will have to keep you updated as he goes forward. |
|
|

|
|
|
#2 |
|
Registered User
Join Date: Mar 2014
Location: Wichita Ks
Posts: 40
|
Re: 70 C-30 build thread
The beginning.
After looking at a '69 and being unable to obtain it (from Utah) I settled on this '70 from Oklahoma. The ad said, "runs and drives". During a conversation on the phone the owner told be it had been through a brush fire and I know that is true because when It arrived here in Kansas (I had it towed) everything that could have melted, had. Moreover, the windshield was cracked from the heat. Nevertheless, I was growing tired of looking for a classic truck and this one would do fine as a base. [IMG] 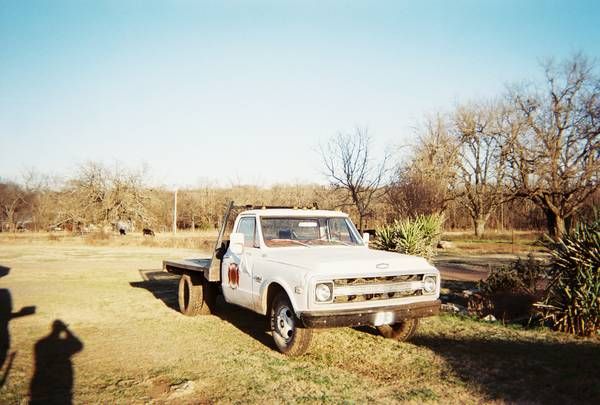 [/IMG] [/IMG]
|
|
|

|
|
|
#3 |
|
Registered User
Join Date: Mar 2014
Location: Wichita Ks
Posts: 40
|
Re: 70 C-30 build thread
Last edited by JennCat; 02-14-2015 at 11:18 PM. |
|
|

|
|
|
#4 |
|
Registered User
Join Date: Oct 2009
Location: canton ga
Posts: 12,724
|
Re: 70 C-30 build thread
Looks good ,what are your plans for it ?
|
|
|

|
|
|
#5 |
|
Registered User
Join Date: Mar 2014
Location: Wichita Ks
Posts: 40
|
Re: 70 C-30 build thread
|
|
|

|
|
|
#6 |
|
Registered User
Join Date: Mar 2014
Location: Wichita Ks
Posts: 40
|
Re: 70 C-30 build thread
|
|
|

|
|
|
#7 |
|
Registered User
Join Date: Mar 2014
Location: Wichita Ks
Posts: 40
|
Re: 70 C-30 build thread
A view of the interior. Under the dash was toast, the wires burned and the heat claimed every grommet through the firewall. The dash pad was history and the burn mark are evident in the photo. The seat was typical, worn and torn. The only thing in reasonable condition was the mouse nest behind the fuel tank but the three occupants didn't survive. Time to begin clean-up.
Richard pulled the tank and flushed it 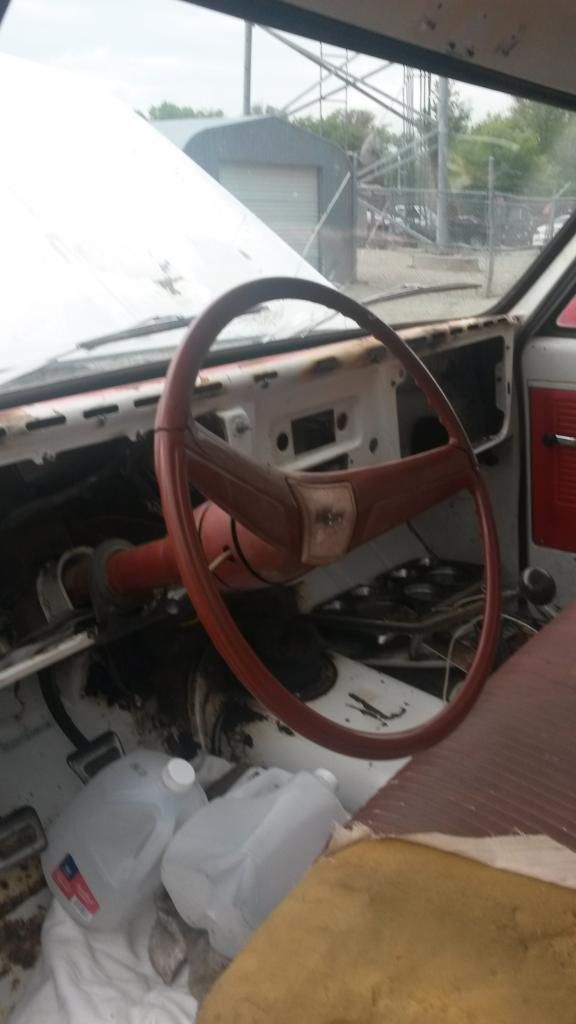
Last edited by JennCat; 02-14-2015 at 11:43 PM. |
|
|

|
|
|
#8 |
|
Registered User
Join Date: Mar 2014
Location: Wichita Ks
Posts: 40
|
Re: 70 C-30 build thread
This is what remain of the composite heater box under the hood. Of interest here is that this truck is built such that removing the heater fan requires removing the hinge from the passenger side of the hood.
Richard wasn't pleased with that so he rebuilt the heater box in two sections. Now, changing the heater core does not require also removing the fan or its section of housing. Also, the fan portion can be removed without taking the hinge off the hood. First, cutting away the decomposed portions and fitting the remains to a cardboard template of the mounting surface at the firewall. 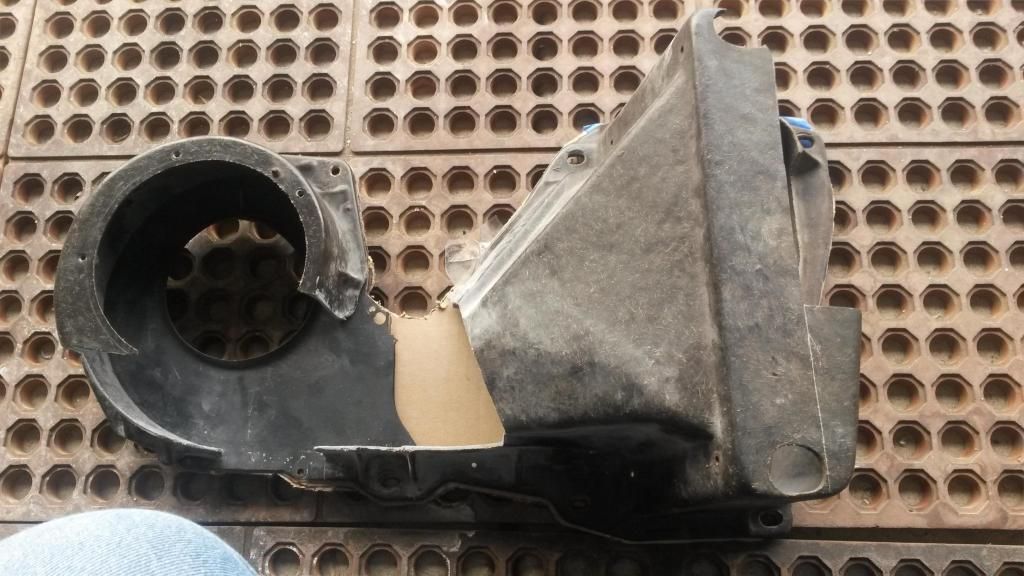 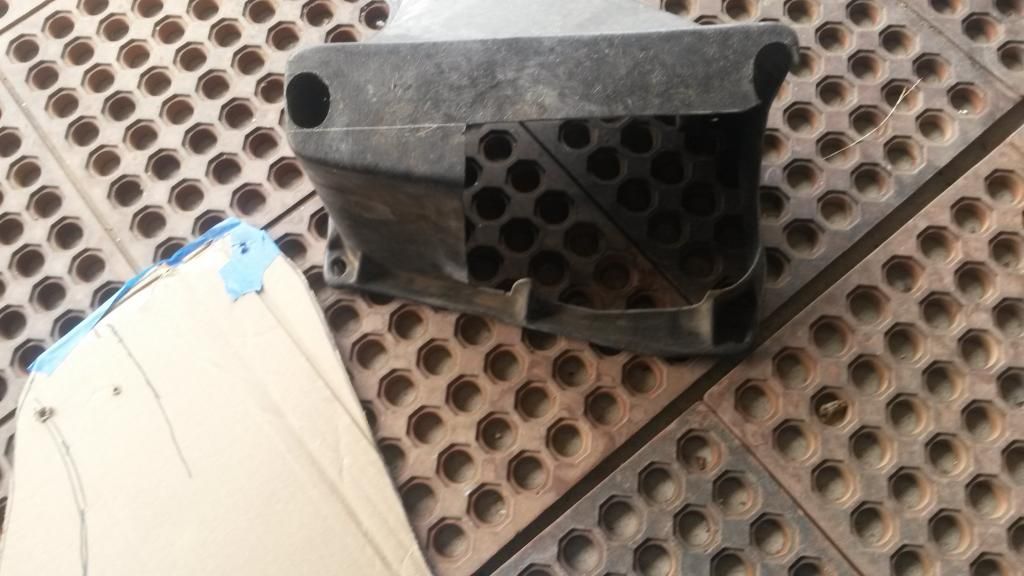 Then making a rough cardboard template if the missing portions 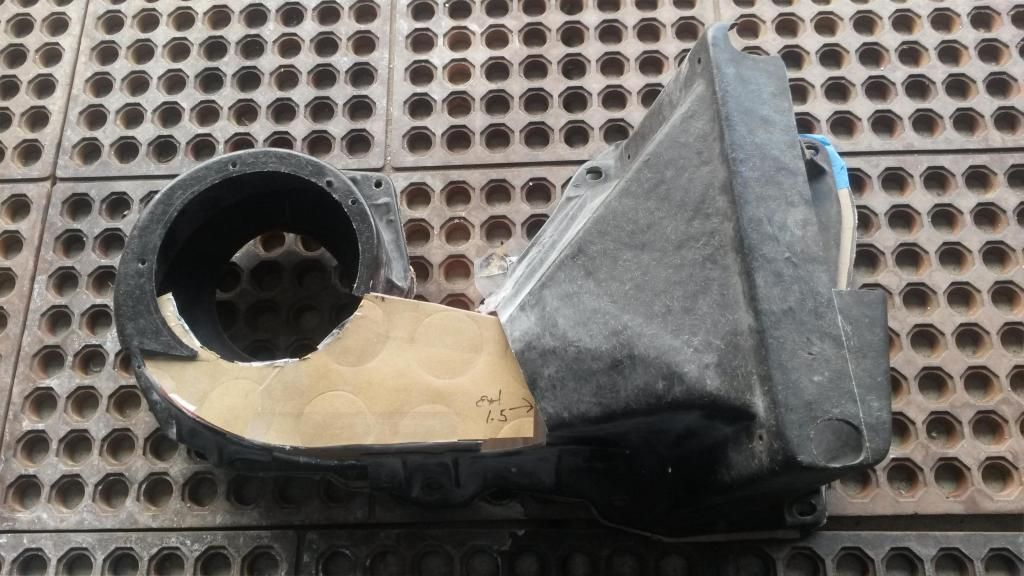 Then, flattening the rough cardboard template and transferring the pattern to sheet metal to produce a form for a fiberglass lay up. 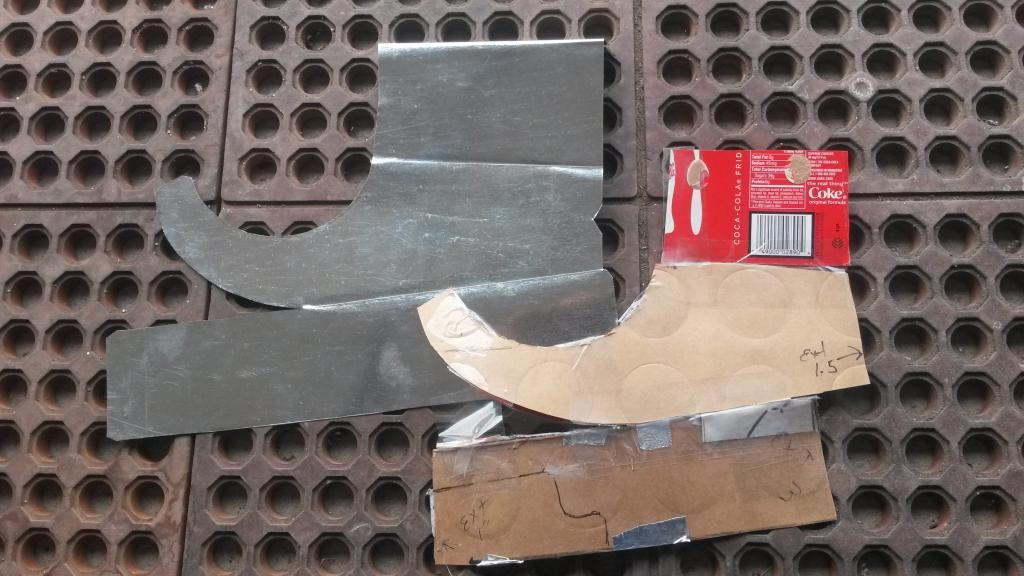 Fitting the form. The metal worked as a base to lay-up glass and it had a plastic separator between it and the fiberglass so the form could be removed. 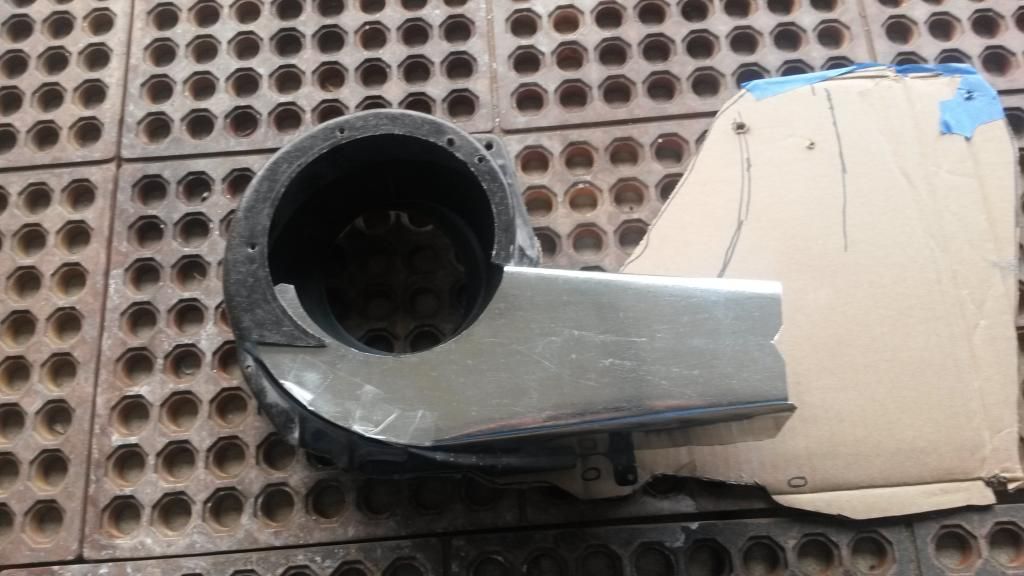 Richard finishing the fiberglass repair on one half of the heater box (fitting the chute) 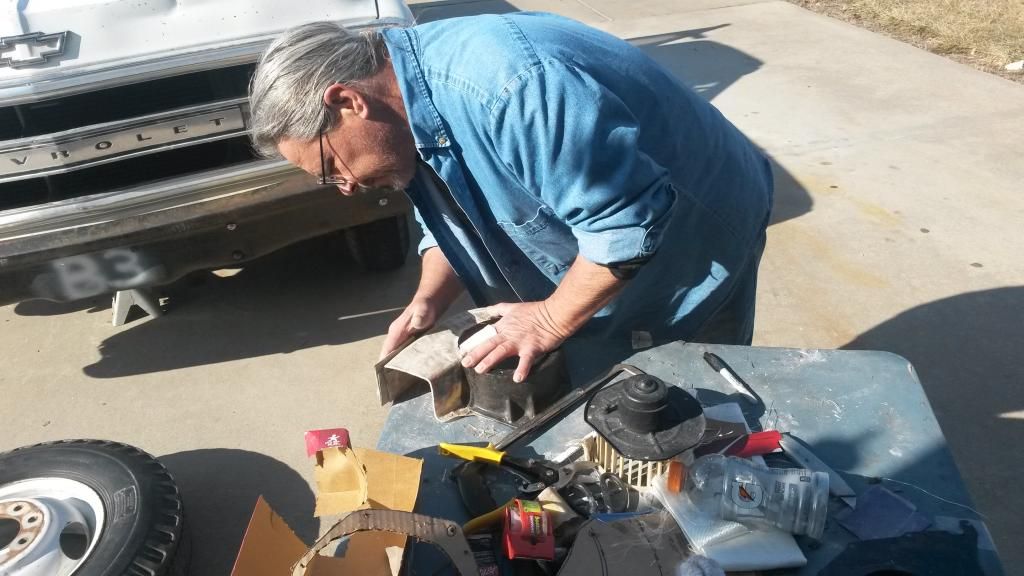
|
|
|

|
|
|
#9 |
|
Registered User
Join Date: Mar 2014
Location: Wichita Ks
Posts: 40
|
Richard built both halves using the same techniques as described above. The final adjusting occurred at the firewall with the pieces bolted in. I will post pictures of the final heater box and more clean-up progress tomorrow.
|
|
|

|
|
|
#10 |
|
Registered User
Join Date: Oct 2014
Location: Mesa AZ (Near Phoenix)
Posts: 2,303
|
Re: 70 C-30 build thread
Sometimes it is prudent to "know when to say enough". Sometimes (ok, actually quite often) I wish I had that ability. Oh No, not me, too dang stubborn, cheap, whatever.
Anyhow, a friendship is a cherished thing. Maybe you can still help out now and then as you can and stay involved. Maybe sometime in the future you can get another one, possibly more in a condition that works with your work/family schedule.
__________________
"Life is too short to drive a boring vehicle". Later, Wayne 
|
|
|

|
|
|
#11 | |
|
Registered User
Join Date: Mar 2014
Location: Wichita Ks
Posts: 40
|
Re: 70 C-30 build thread
Quote:
Also, I am trying to post things in chronological order so much of this stuff has happened months ago despite the idea that I am just getting around to posting this. More pictures coming. I still search this forum for him and post questions occasionally (when I'm in the area), but he is going to have to keep the thread updated as I find it is nearly impossible to restore a vehicle from a distance and make any meaningful progress. He doesn't have an account here because he hasn't needed one. I have made the account while perched at his computer, imposing on his weekends and generally being a pain. The truck, purchased over a year ago, has never made it to my residence but has been at his friends garage and at Richards house. And though we have made some good progress, he has done nearly everything (hell, he even found the truck for me and had it towed to Wichita). Yes, I would have liked to restore the truck but circumstances simply do not allow. Last edited by JennCat; 02-15-2015 at 10:22 AM. |
|
|
|

|
|
|
#12 |
|
Registered User
Join Date: Mar 2014
Location: Wichita Ks
Posts: 40
|
Re: 70 C-30 build thread
|
|
|

|
|
|
#13 |
|
Registered User
Join Date: Mar 2014
Location: Wichita Ks
Posts: 40
|
Re: 70 C-30 build thread
|
|
|

|
|
|
#14 |
|
Registered User
Join Date: Mar 2014
Location: Wichita Ks
Posts: 40
|
Re: 70 C-30 build thread
|
|
|

|
|
|
#15 |
|
Registered User
Join Date: Mar 2014
Location: Wichita Ks
Posts: 40
|
Re: 70 C-30 build thread
|
|
|

|
|
|
#16 |
|
Registered User
Join Date: Mar 2014
Location: Wichita Ks
Posts: 40
|
Re: 70 C-30 build thread
|
|
|

|
|
|
#17 |
|
Registered User
Join Date: Mar 2014
Location: Wichita Ks
Posts: 40
|
Re: 70 C-30 build thread
Being tested for final fitment, it resembles the early Amana radar range. Richard made a reinforcement bracket to go across the underside the box, put a reinforcement bar across the inside, two corner brackets in the back (inside) and coated it with bed liner. Then lined the inside with a non-reflective rubber and installed a light.
I insisted that he use nuts, bolts and washers instead of rivets because it looks more mechanical. And with over a hundred pieces of hardware, it performs more like a safe than a glove box. Here it is in raw form 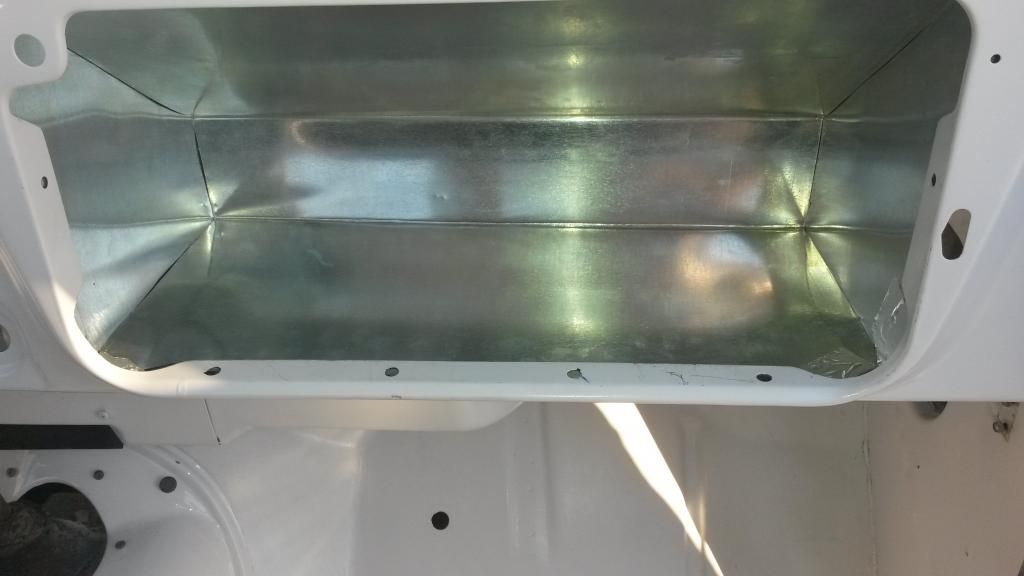 ...and here it is almost finished. 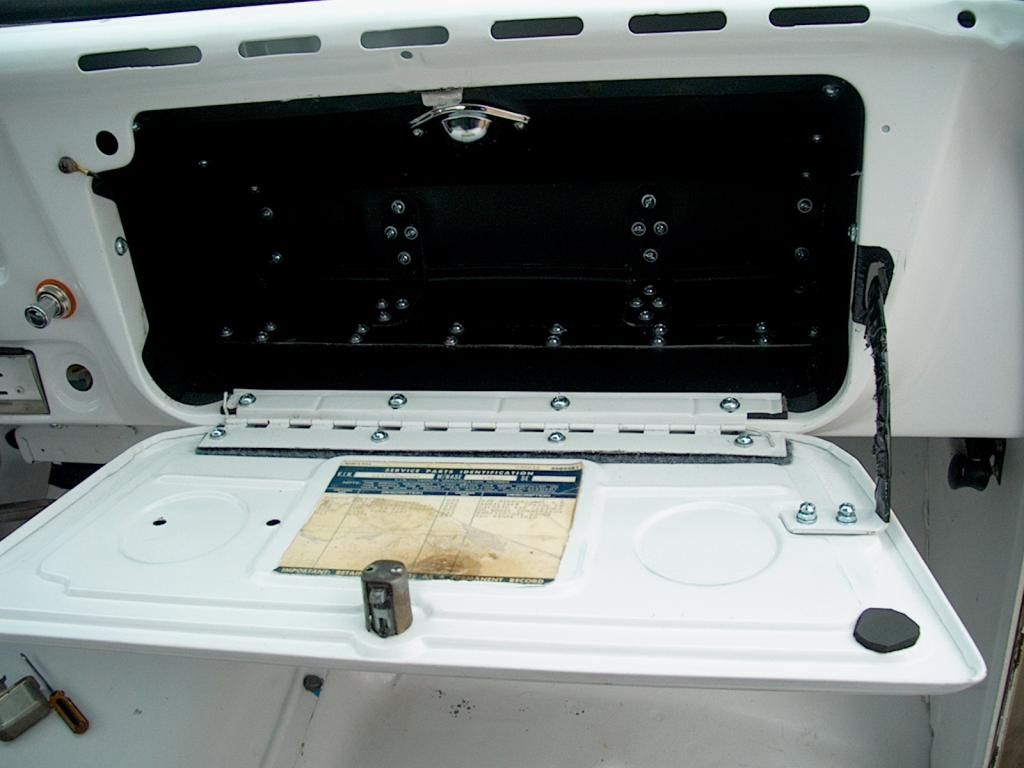
|
|
|

|
|
|
#18 |
|
Registered User
Join Date: Mar 2014
Location: Wichita Ks
Posts: 40
|
Re: 70 C-30 build thread
Before the dash components went back in, Richard found a different bench seat (minus the optional rodent nest). It is green and the interior door panels are faded red. There has been no final decision on color so right now it doesn't matter. It's just going through the clean up stage anyway.
Wiring harnesses were yanked and rewiring and cabling begins. The wiring is a disaster but I know someone who can fix it.  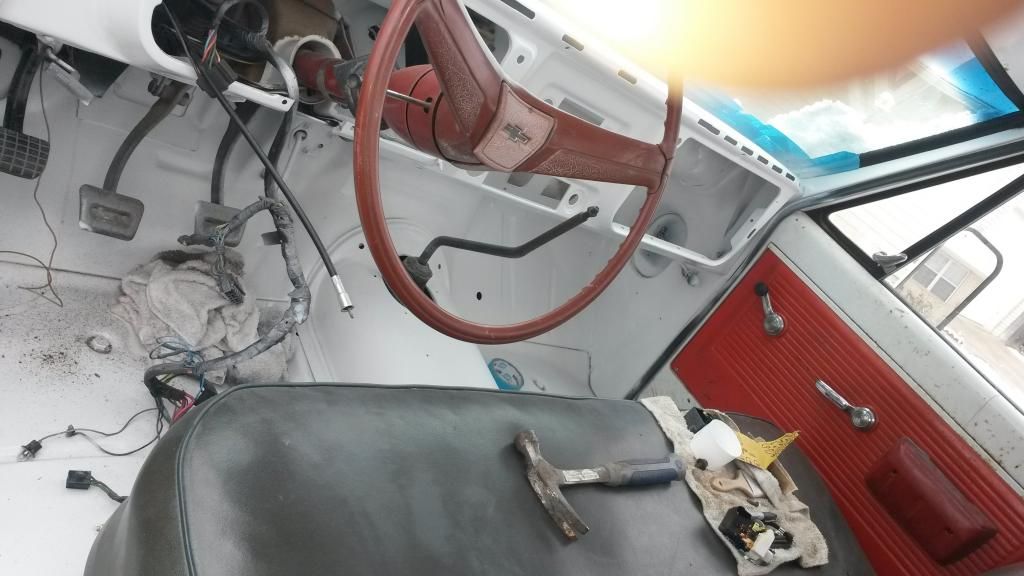
|
|
|

|
|
|
#19 |
|
Registered User
Join Date: Mar 2014
Location: Wichita Ks
Posts: 40
|
Re: 70 C-30 build thread
|
|
|

|
|
|
#20 |
|
Registered User
Join Date: Mar 2014
Location: Wichita Ks
Posts: 40
|
Re: 70 C-30 build thread
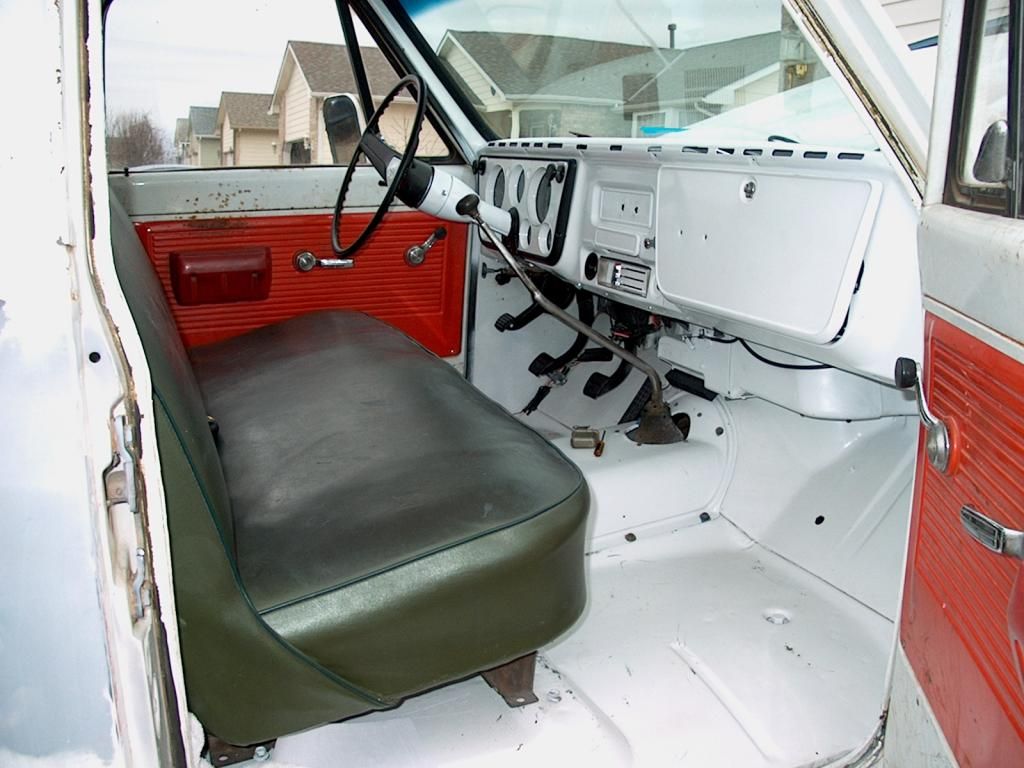
A picture from the passenger side. Someone got really happy with a drill and there are holes everywhere. In the previous picture there are holes drilled in the lower left corner of the dash. In this picture there are holes in the glove box door and in the radio blank. There are holes through the roof where emergency lights were once installed.
|
|
|

|
|
|
#21 |
|
Registered User
Join Date: Mar 2014
Location: Wichita Ks
Posts: 40
|
Re: 70 C-30 build thread
Finally got to test the new wiring. Lights all work, engine starts, runs well. Richard is in the process of starting work under the hood. A new alternator is going in (105 amp for a 91 c2500) and the old voltage regulator is going away. Burned wires need to be pulled and it needs a serious cleaning.
But i'll let him tell you about that because as I have stated, it's far more work than I am able to do. I have gained a new respect for those here who have accomplished this type of project and also for my friend Richard who has worked tirelessly to help me get this far. Many thanks to all.  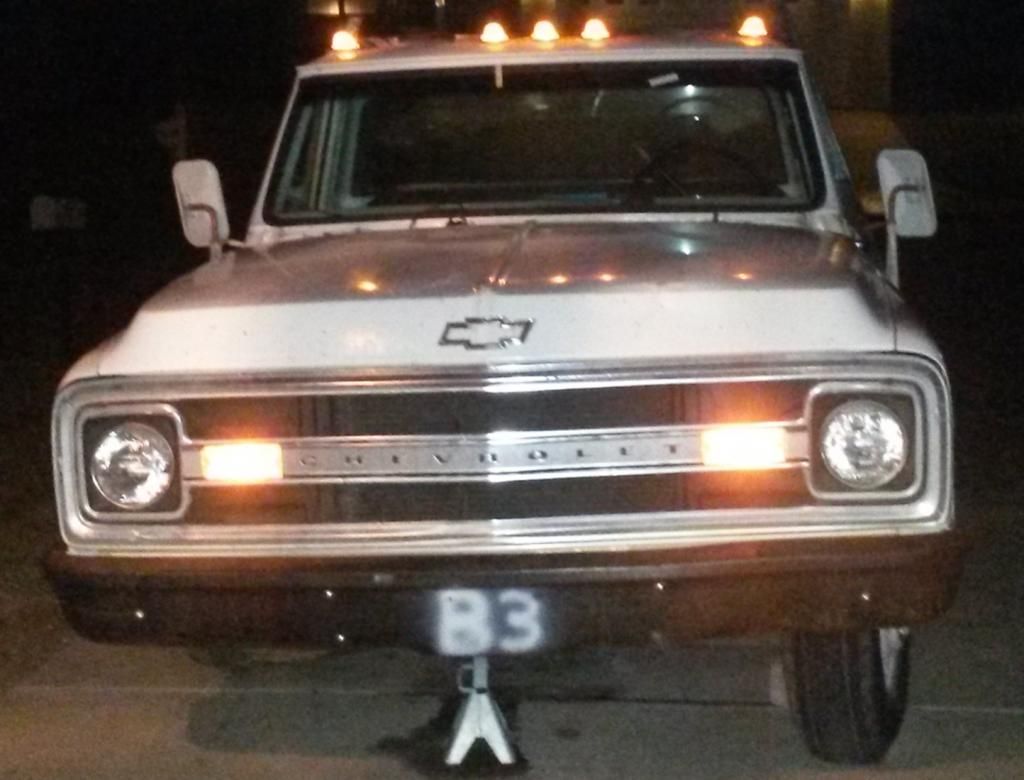
|
|
|

|
 |
| Bookmarks |
|
|