
 |
|
|
#151 |
|
Registered User
Join Date: Nov 2013
Location: Lawrence Kansas
Posts: 229
|
Re: Project "You thought yours was bad!" '78 C10 Stepside
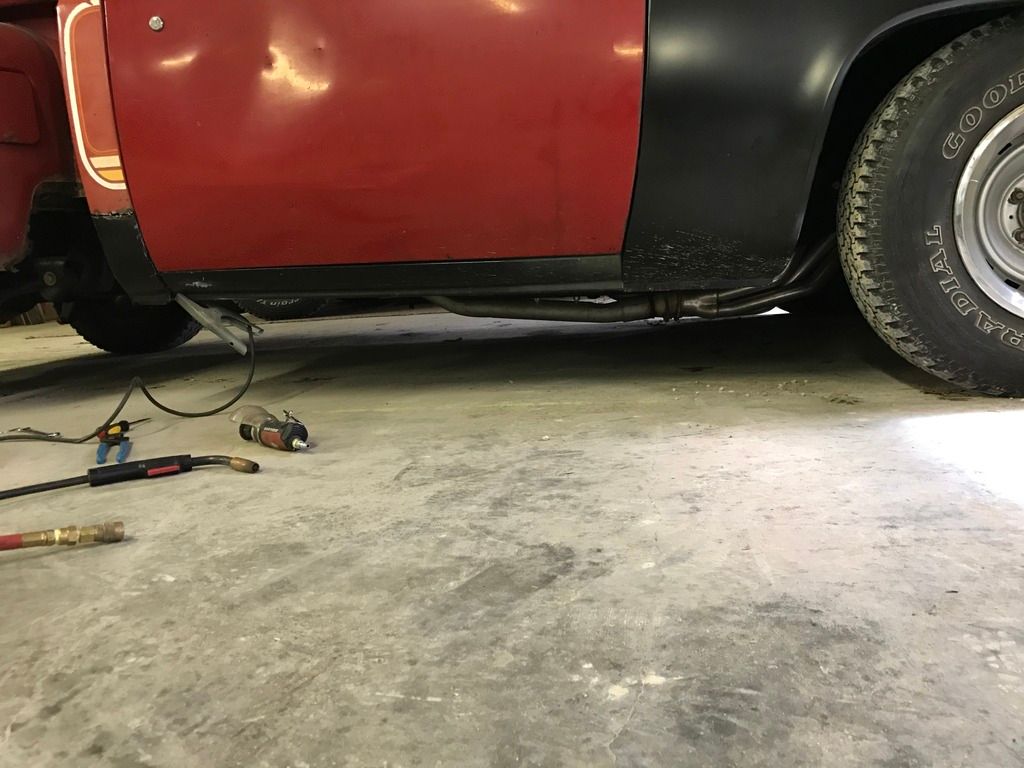
Just a couple hundred. It's still being built. But I've driven gravel and some shaky roads and it works out alright. 5/6 drop.
__________________
|
|
|

|
|
|
#152 |
|
Camaro Club
Join Date: Jun 2007
Location: ohio
Posts: 472
|
Re: Project "You thought yours was bad!" '78 C10 Stepside
yep. that just seems to be how most long tube headers are for these trucks. I had the same issues on my old 68 with Summit brand headers.
|
|
|

|
|
|
#153 |
|
Registered User
Join Date: May 2016
Location: Willow, Alaska
Posts: 881
|
Re: Project "You thought yours was bad!" '78 C10 Stepside
Wow Shucks, I think yours hangs down almost twice as far as mine does! I think (mostly) everywhere I go is paved now, but our roads are not stellar by far.
I guess if that's just how they are I shouldn't have any issues. Not getting too crazy with it. I also called Holley and got a status update on the Sniper kits. Looks like stock is being pushed out even farther until about mid February. Grrr. I was told 6 weeks (end of January) back in December, but now it's 8 or 9. Hopefully there won't be more delays. I think the remaining fuel tank and exhaust parts should also be here mid to late sometime this week, and the rear bumper can also go on next! |
|
|

|
|
|
#154 |
|
Registered User
Join Date: Nov 2013
Location: Lawrence Kansas
Posts: 229
|
Re: Project "You thought yours was bad!" '78 C10 Stepside
Yeah they're low. But my headers are a headman brand for my truck specifically and they're that low which I don't understand. Luckily they were cheap at a swap meet but I think it kinda looks cool. But that's just me.
__________________
|
|
|

|
|
|
#155 |
|
Registered User
Join Date: May 2016
Location: Willow, Alaska
Posts: 881
|
Re: Project "You thought yours was bad!" '78 C10 Stepside
Same boat, I got mine for "free" (traded a tach gauge cluster for them out of the old cab), although I'm unsure of the brand. The passenger side I'm really happy with and overall the drivers side one is great other than the weird outlet angle. But they clear everything very nicely and no reason to spend $7-800 on a higher end set if I have these ones.
I'm toying with the idea of having the whole exhaust ceramic coated. I'd imagine that would be EXPENSIVE though! |
|
|

|
|
|
#156 |
|
Camaro Club
Join Date: Jun 2007
Location: ohio
Posts: 472
|
Re: Project "You thought yours was bad!" '78 C10 Stepside
they do have high temp powdercoat that might work for the exhaust. My boss had some black put on the generator exhaust on his RV and it has held up great.
|
|
|

|
|
|
#157 |
|
Registered User
Join Date: May 2016
Location: Willow, Alaska
Posts: 881
|
Re: Project "You thought yours was bad!" '78 C10 Stepside
I'll probably just leave it as is, it's a summer only truck so I don't think it'll get into too many bad conditions to ruin the exhaust.
I finally got the last fuel line fitting I needed to get my sending unit assembly finished up! Started by cutting the line on the sending unit 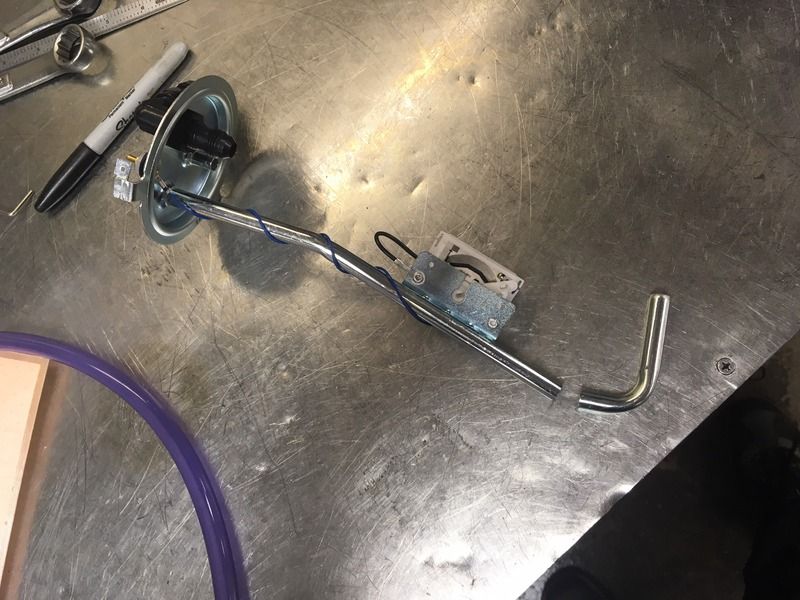 Torqued the new fitting into the Hydramat 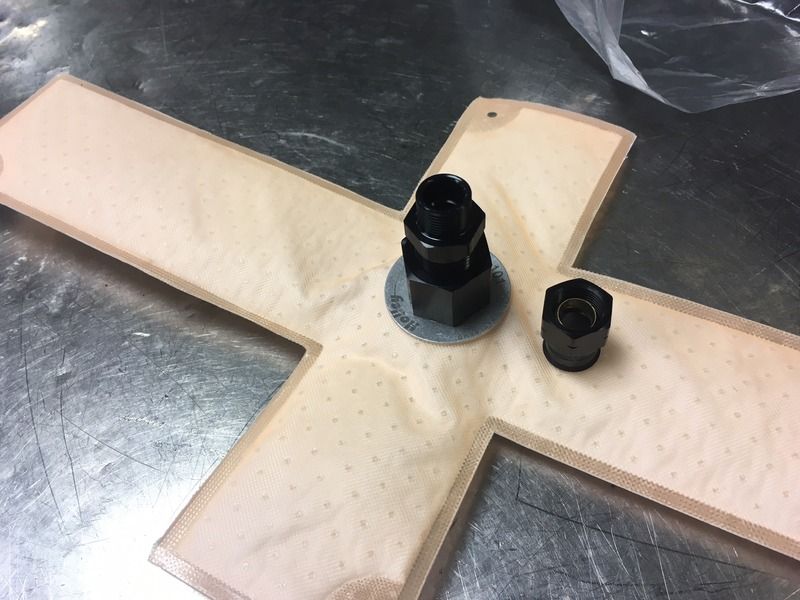 Fitting and crimp slid onto the tube 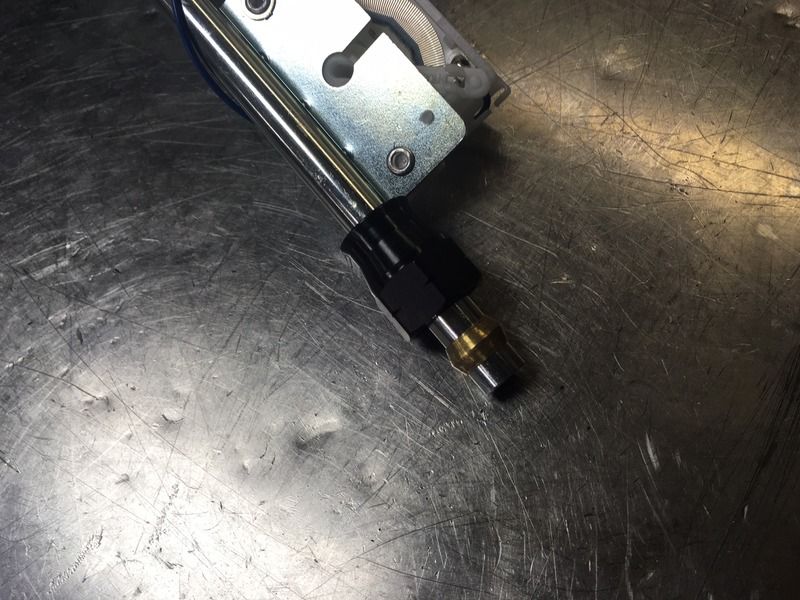 Everything torqued together  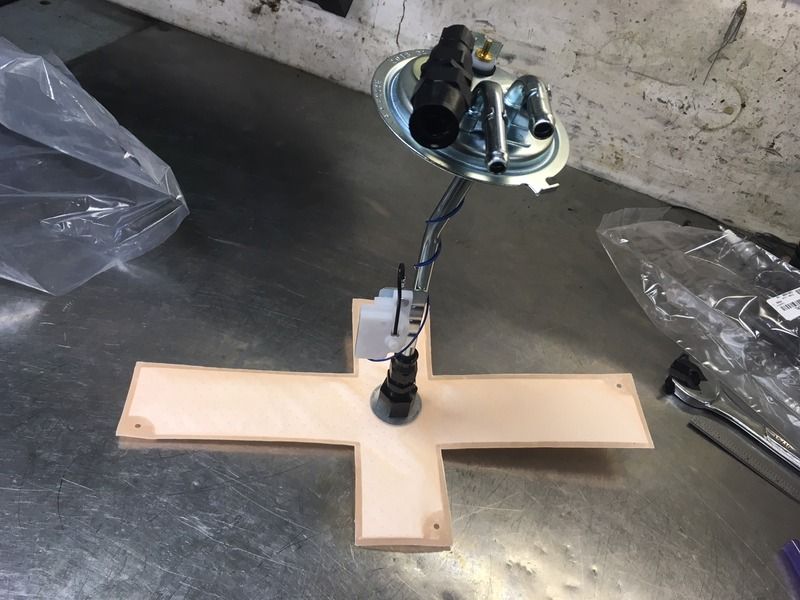 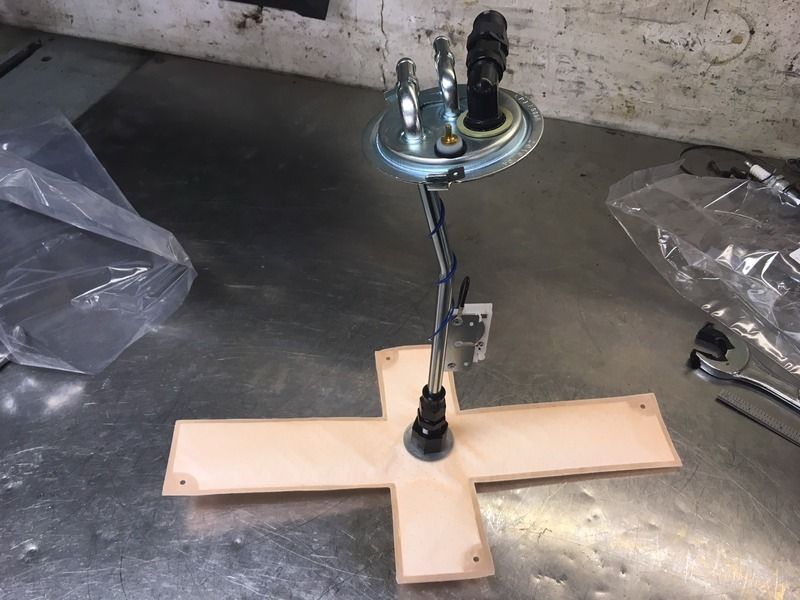 And finally, the return line and float arm installed to complete the unit. 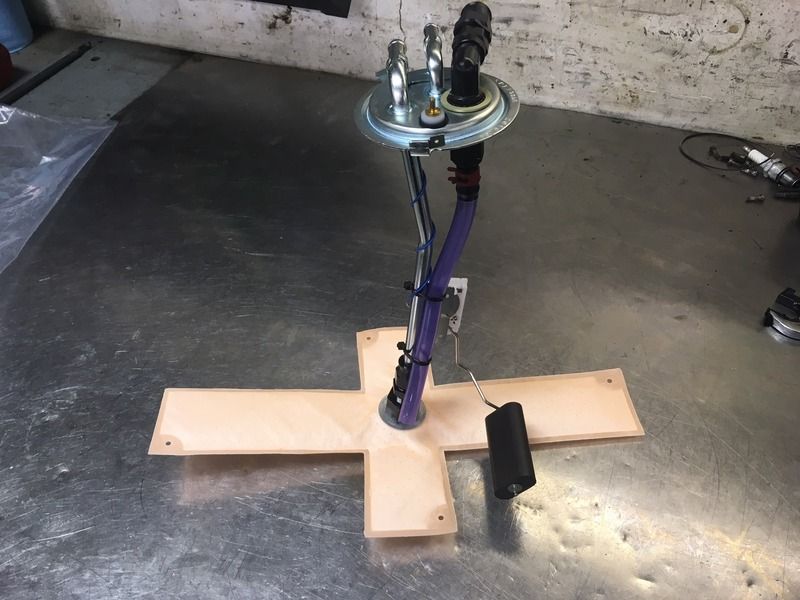
|
|
|

|
|
|
#158 |
|
Registered User
Join Date: May 2016
Location: Willow, Alaska
Posts: 881
|
Re: Project "You thought yours was bad!" '78 C10 Stepside
The last few pieces of the exhaust system I've been waiting for came in today! I received the last pair of Header Buddies and the turndowns. The turndowns had a nice sleeve and good bend, but the metal was very thin compared to the rest of the system (the rest of the Summit and Dynomax pieces have been excellent!), and were difficult to get a good weld on without burning though. Being they are just "tips", they will be fine, but if they were anything structural within the exhaust system I would have sent them back. I don't think I would use this brand of turndowns again. Other than that, it's turned out well!
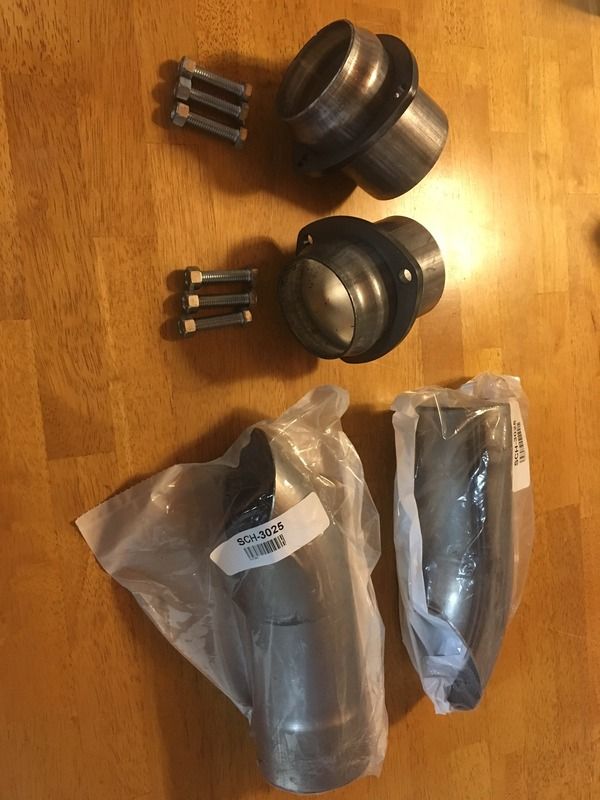 Mocked up 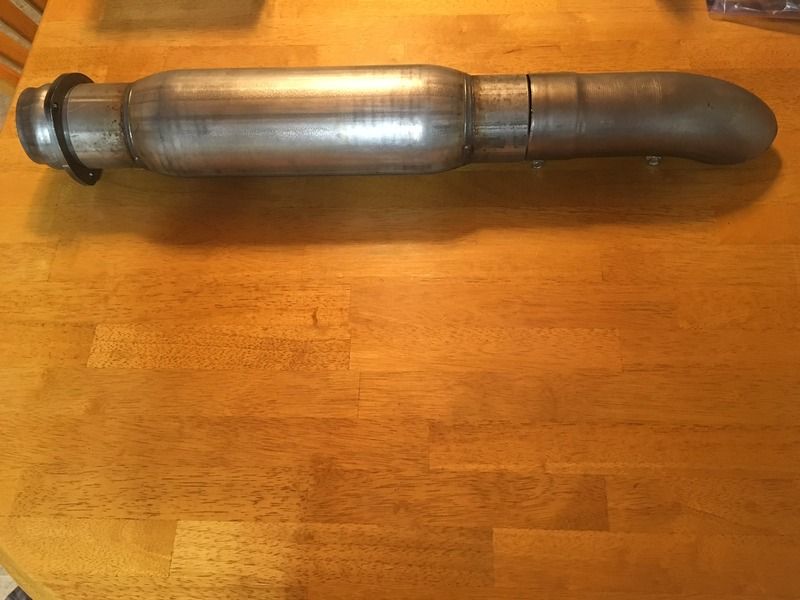 Here they are fully welded and ready to install 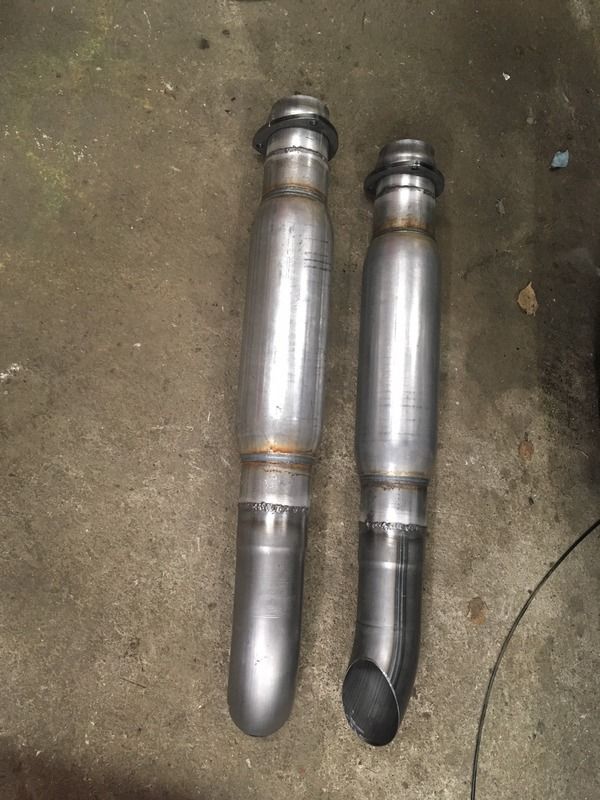 I mounted them to the rest of the system. Everything is hand tight here. I need to build some type of crossmember ahead of the rear axle to give the very rear exhaust hangers a place to mount. Without one there, there just isn't really a great spot. 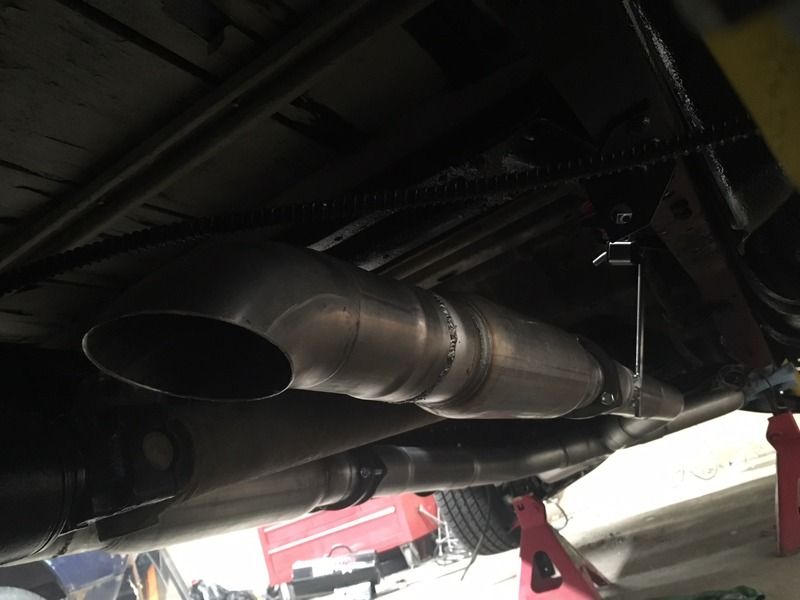 These look so menacing under there  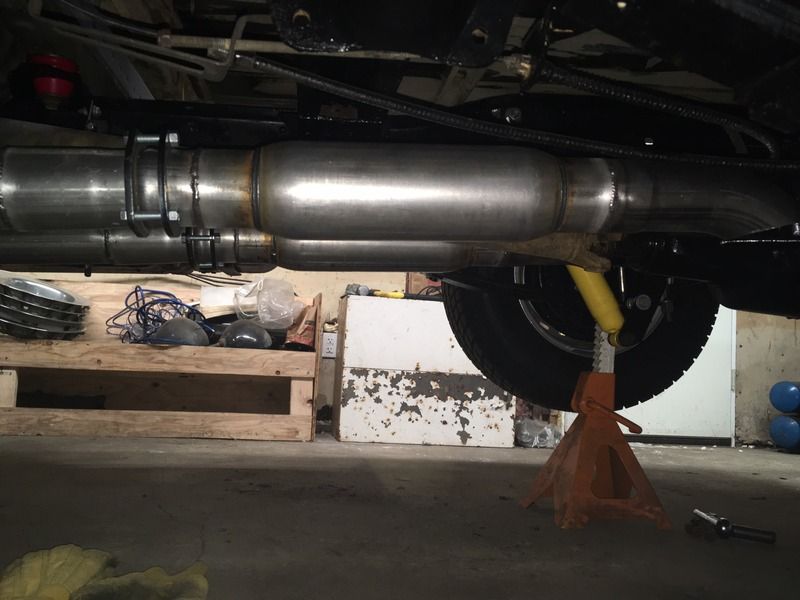 And the money shot! 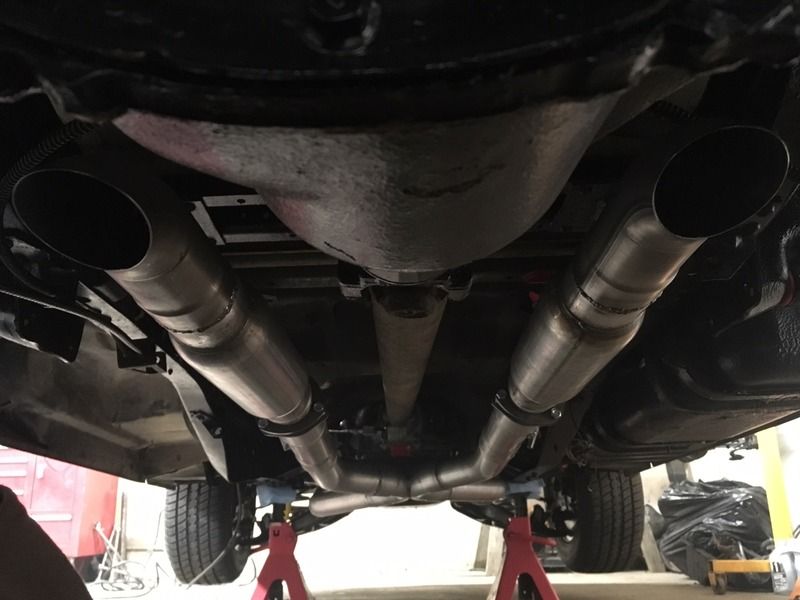
|
|
|

|
|
|
#159 |
|
Registered User
Join Date: Nov 2013
Location: Lawrence Kansas
Posts: 229
|
Re: Project "You thought yours was bad!" '78 C10 Stepside
Exhast does look good. I don't think I'll run my exhaust like that again though, that's the way mine is but boy does it stir up a lot of dust. I park in a gravel garage and it just about coats my truck in dust every time I start it up. I should have angled them out more. Its not like I have a fancy paint job to worry about though but I also don't have windows installed on a decent interior...
__________________
|
|
|

|
|
|
#160 |
|
Registered User
Join Date: May 2016
Location: Willow, Alaska
Posts: 881
|
Re: Project "You thought yours was bad!" '78 C10 Stepside
Thanks. I'm okay with it, but I've ran turndowns on other vehicles before so I guess I know what to expect. Nothing stays clean in Alaska so kicking up some dust isn't a big deal. But no windows would make that tough!
I started putting the fuel lines together now that I have nearly all of the fuel system in. I won't know the length or what angles I'll need on the EFI end of things until I actually have the system bolted in, but I can get the fuel tank ends taken care of now.  I also picked up some carriage bolts for the rear bumper from the hardware store. They were longer than I liked, but it was what was in stock. It's pretty amazing how having a bumper mounted on there changes the look of the truck. This one looks just right with them IMO. Brackets mounted 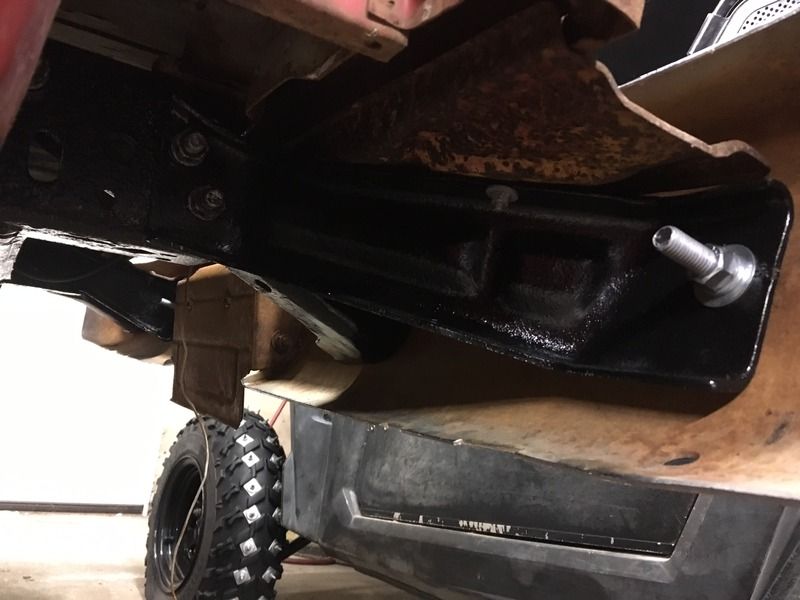 Did a quick cleanup on the bumper, mounted, and license plate on 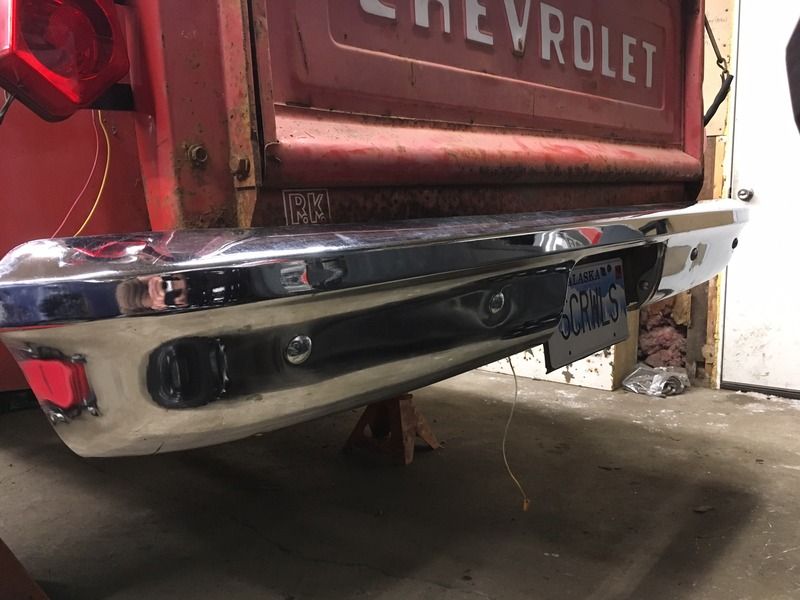 There's even less room to walk now!  Also hard to see, but the filler plates are in too. Also hard to see, but the filler plates are in too.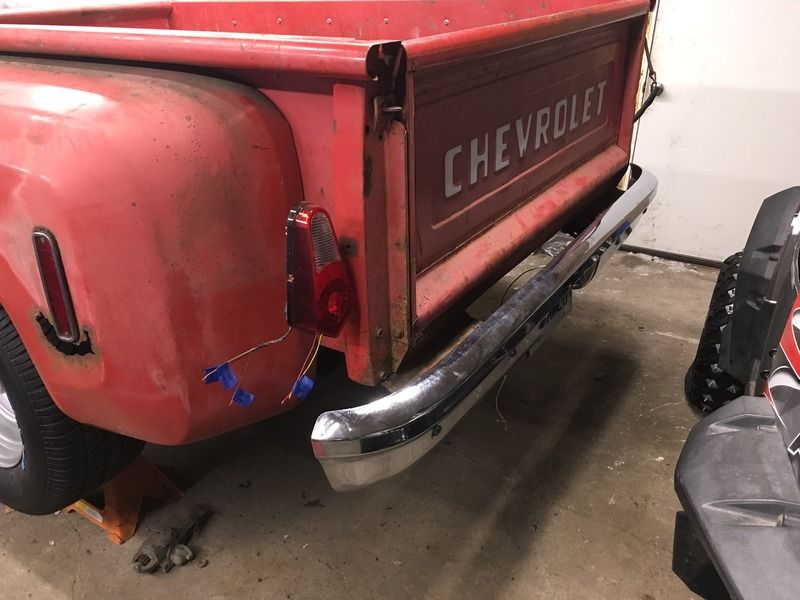 It looks mean even off the ground! 
|
|
|

|
|
|
#161 |
|
Registered User
Join Date: May 2016
Location: Willow, Alaska
Posts: 881
|
Re: Project "You thought yours was bad!" '78 C10 Stepside
I also built a mini-crossmember for underneath the truck, that will be a mounting point for the rear section of my exhaust. I wasn't happy with mounting it any other place so I decided to just make my own out of a few pieces of scrap metal.
First arm  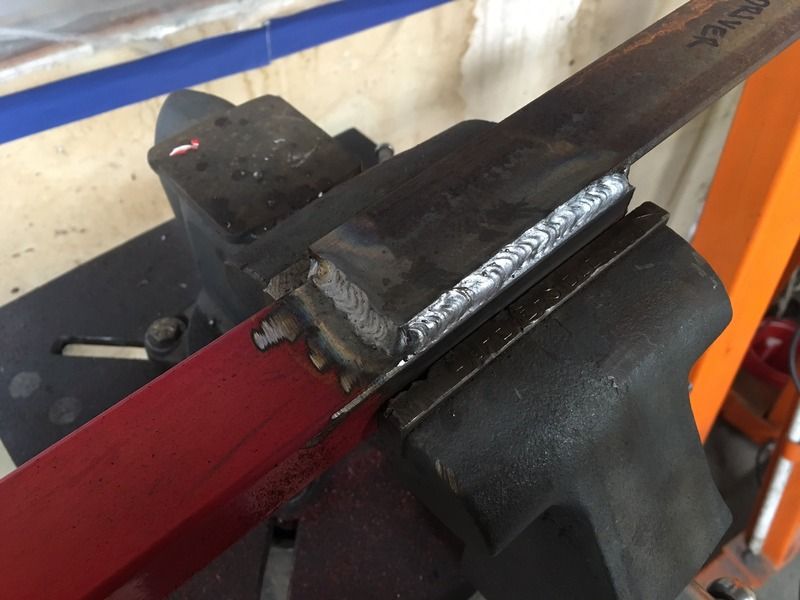 Second arm, test fitting 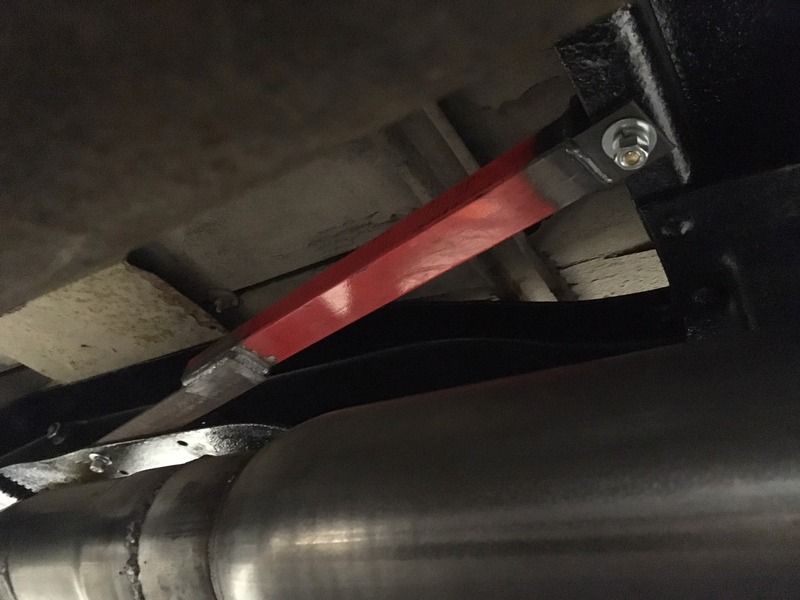 Both sides are fitting well 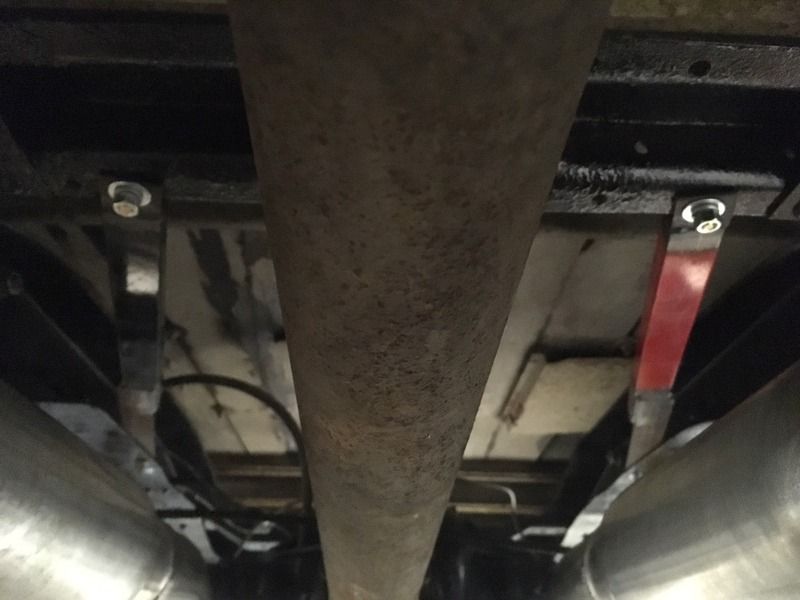 Cross brace tacked on 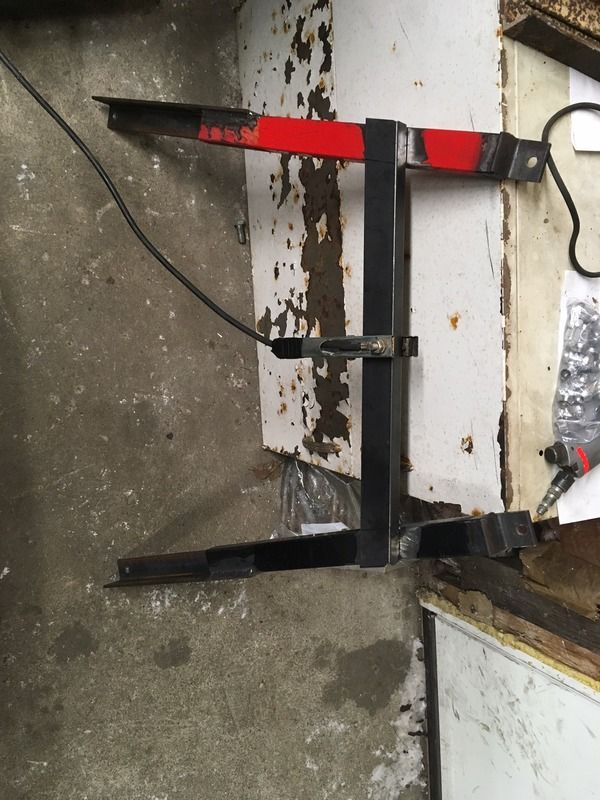 More weld porn. Not too bad for a little 110v welder running on a 15A outlet  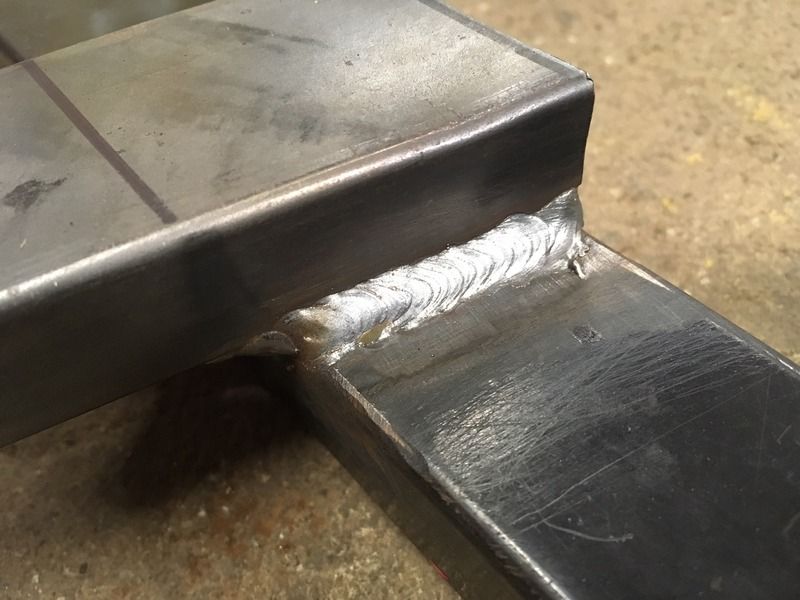 All fabbed up, and mounting tabs welded on 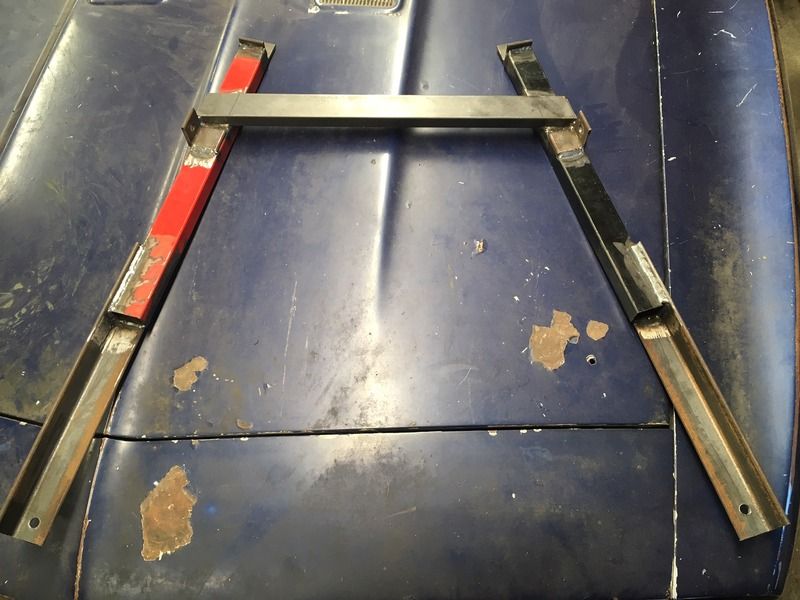 And going in for paint! 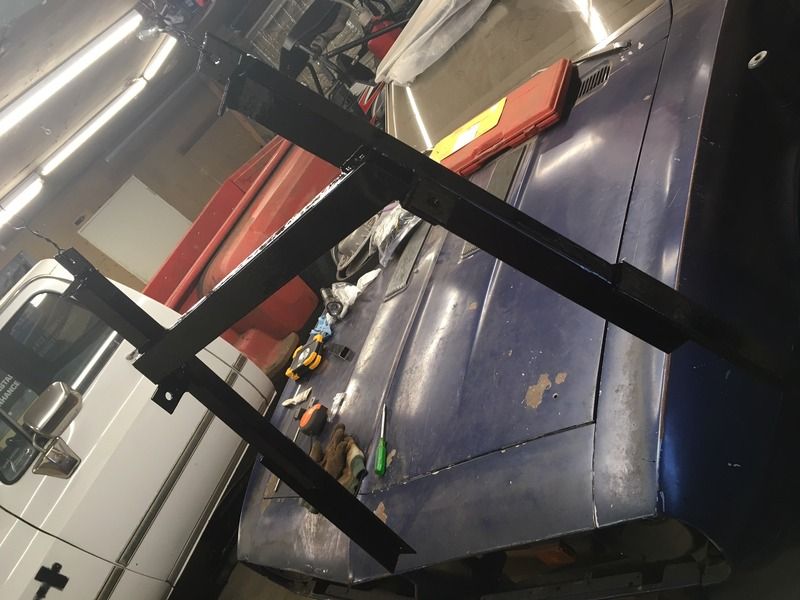
|
|
|

|
|
|
#162 |
|
Registered User
Join Date: May 2016
Location: Willow, Alaska
Posts: 881
|
Re: Project "You thought yours was bad!" '78 C10 Stepside
|
|
|

|
|
|
#163 |
|
Registered User
Join Date: May 2016
Location: Willow, Alaska
Posts: 881
|
Re: Project "You thought yours was bad!" '78 C10 Stepside
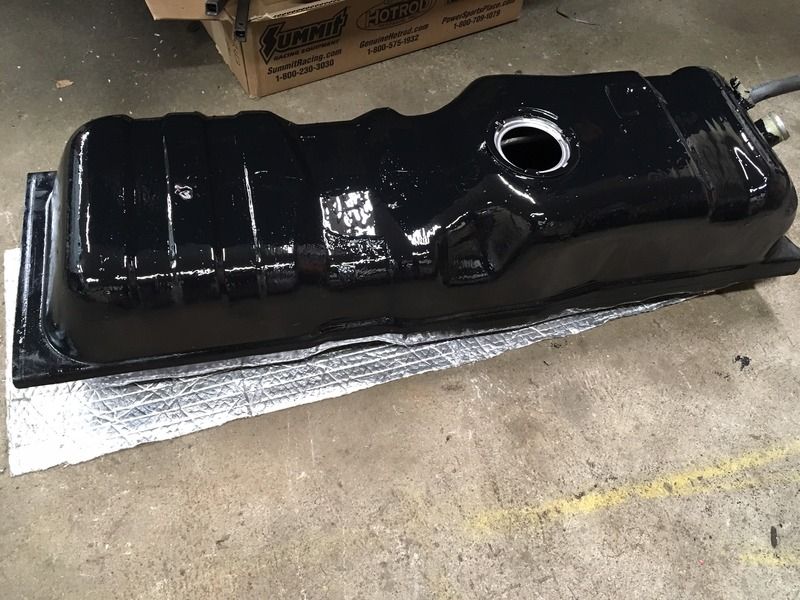
Minor update, I've been super busy with other things going on, so I haven't had much time to tinker on the truck. I did however get the 86 fuel tank cleaned up and painted, and it is outside drying the in the garage now. I should be able to get the old tank out, brackets touched up, fuel sending unit installed, and the new tank mounted up hopefully by the end of the weekend!
|
|
|

|
|
|
#164 |
|
Registered User
Join Date: May 2016
Location: Willow, Alaska
Posts: 881
|
Re: Project "You thought yours was bad!" '78 C10 Stepside
Finally some fuel system progress! Tank is painted and tape applied around the flange to prevent damage to the Hydramat
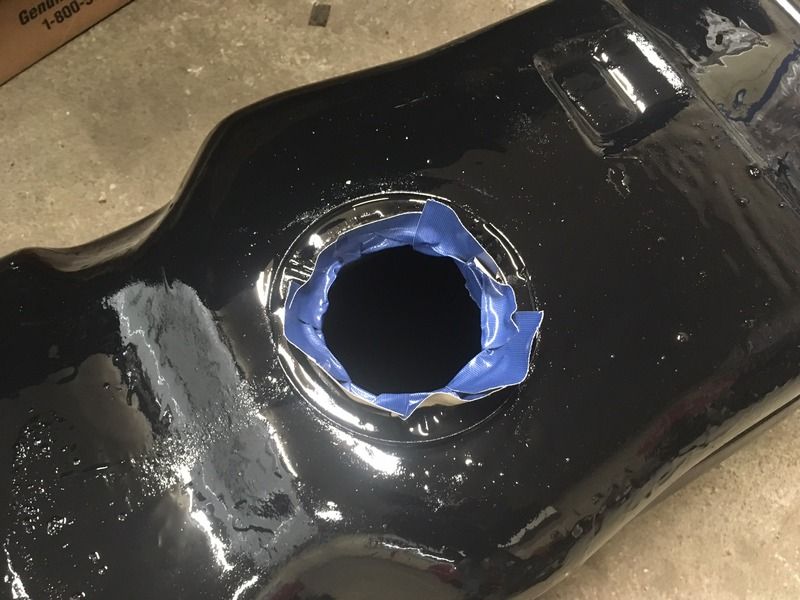 Be gentle, it's her first time  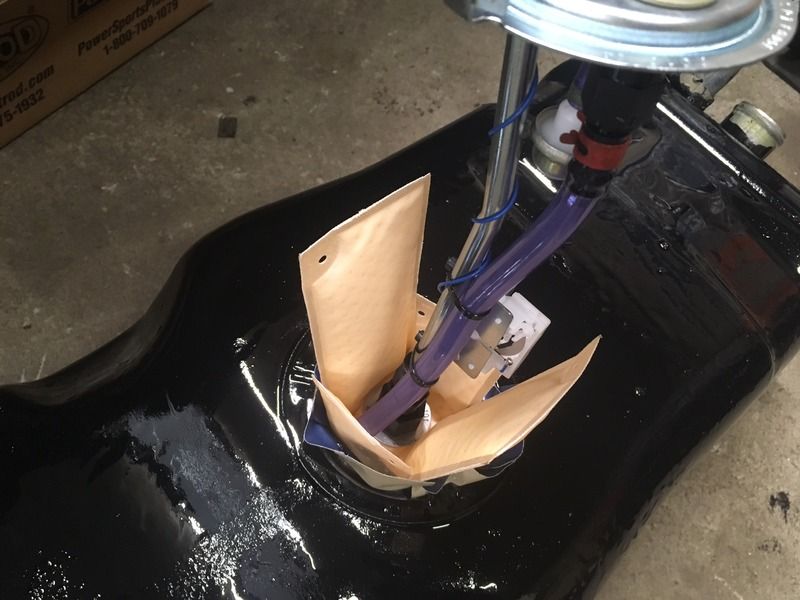 And here is an example of a homemade claw tool when you drop the float into the tank trying to install it. 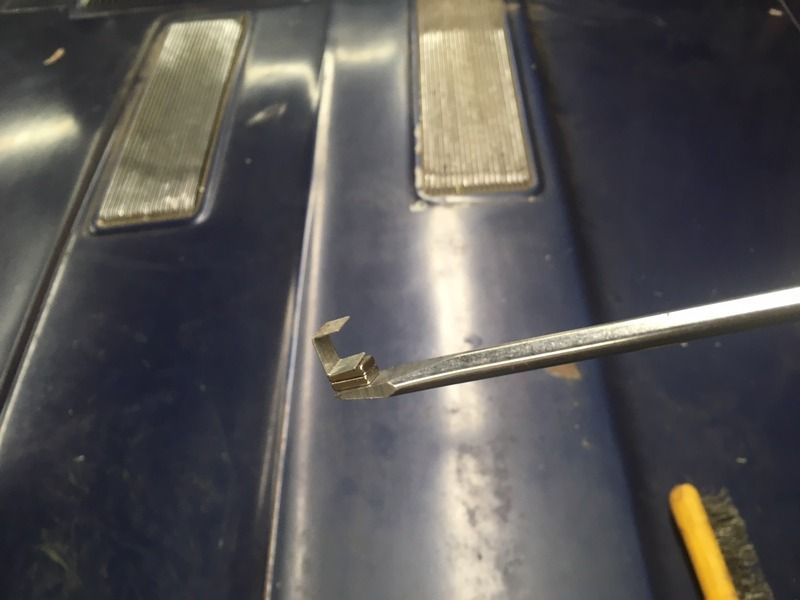 O-ring, and then locking ring installed, the tank is completed 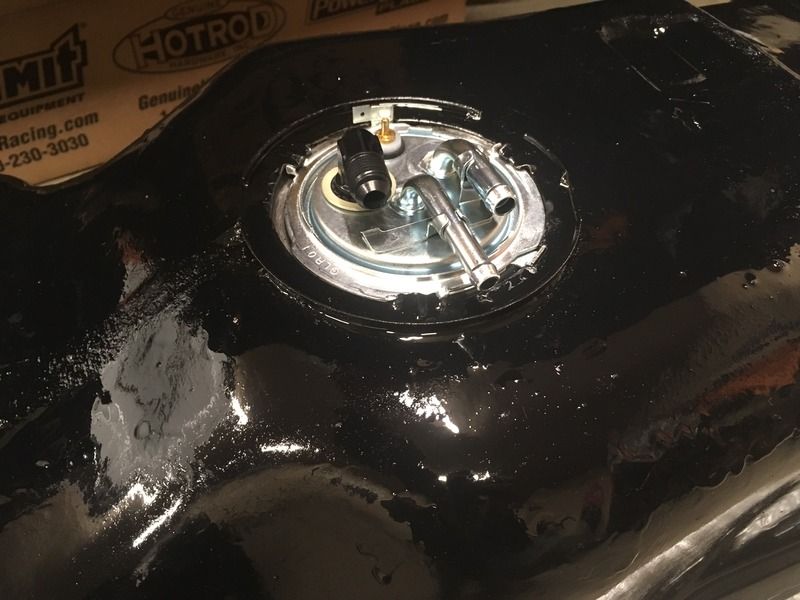 I also got the old tank pulled and a few spots on the frame touched up. This tank is still half full of gas! I wonder if it will even burn?  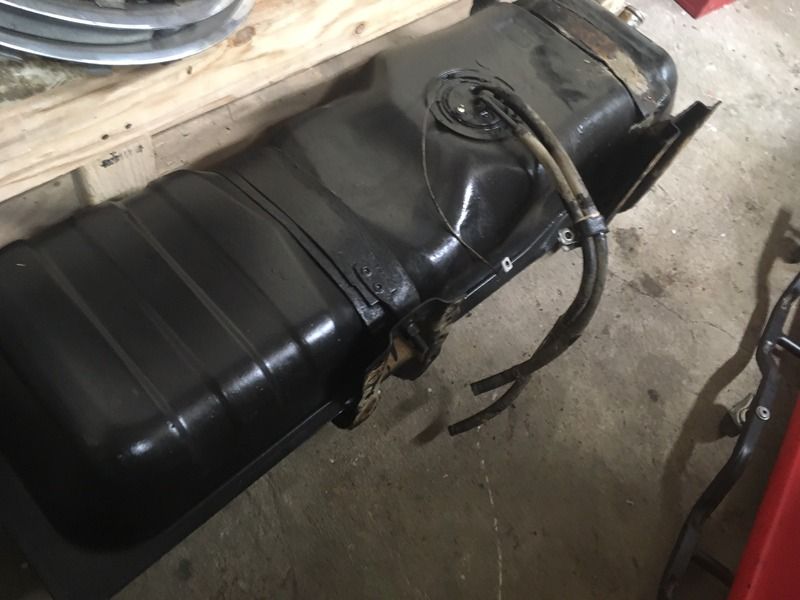
|
|
|

|
|
|
#165 |
|
Registered User
Join Date: May 2016
Location: Willow, Alaska
Posts: 881
|
Re: Project "You thought yours was bad!" '78 C10 Stepside
New tank is up and mounted inside the frame. Lots of fun trying to hold that sucker up with my knee while running wires and hoses over the frame and trying to get bolts started! Finally got it all in though.
 I also mounted the fuel pump just inside the frame rail. It is nearly level with the bottom of the tank and has a pretty short pickup hose, so I think this is as good as I can get things for pump longevity. Hopefully it will last quite a while! I might also fab up some sort of heat shield for the pump and lines. It doesn't appear so in the picture, but the exhaust sits closer than I would like it to. It's far enough away where it likely wouldn't cause any problems, but it's always better to prevent them now! 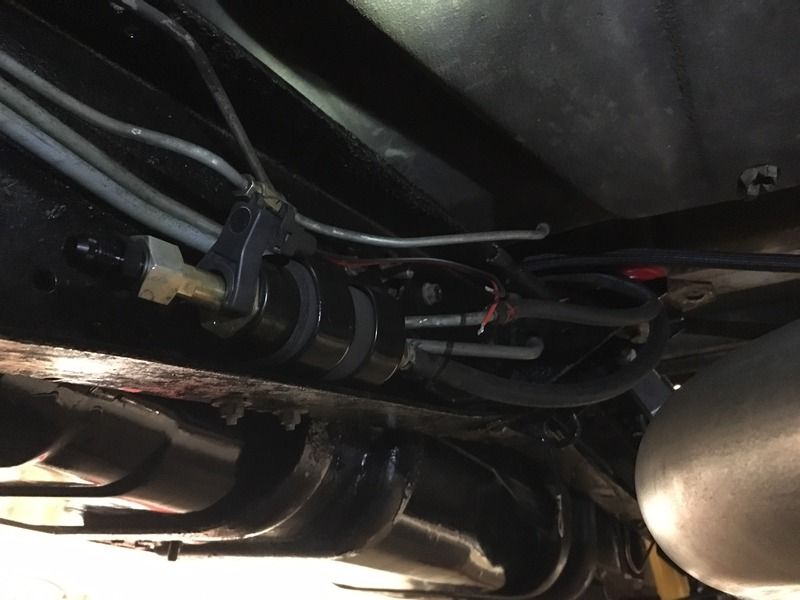
|
|
|

|
|
|
#166 |
|
Registered User
Join Date: Feb 2017
Location: New brunswick Canada
Posts: 20
|
Re: Project "You thought yours was bad!" '78 C10 Stepside
I just went true your complete build Looks really good
__________________
1980 Chevy Short step 5.3 Manual Instagram:https://www.instagram.com/chris.s.custom/?hl=en Youtube:https://www.youtube.com/channel/UCzh...vuHKm04yVK4X9w |
|
|

|
|
|
#167 |
|
Registered User
Join Date: May 2016
Location: Willow, Alaska
Posts: 881
|
Re: Project "You thought yours was bad!" '78 C10 Stepside
Thank you, I appreciate it!
|
|
|

|
|
|
#168 |
|
Registered User
Join Date: May 2016
Location: Willow, Alaska
Posts: 881
|
Re: Project "You thought yours was bad!" '78 C10 Stepside
So after nearly 11 weeks now, I put another call in to Holley about my EFI kit status. I ordered this December 15th of last year, and was told 6 weeks lead time (end of Jan) is when I would see it. After no word at that time, I called and was told it should be in at 8 weeks (mid Feb). That date has passed and now we're over 11 weeks, and I'm being told it will be 3 more, for 14 weeks total! I am NOT very happy about this, as I've had $1100 tied up on my card this entire time, not to mention that I was planning on having this truck running weeks ago.
I'm on the edge now in whether or not I want to wait out the remaining 3 weeks and hope that things will finally be ready to go, or just cancel the order entirely and go with a FiTech unit. I'm hesitant about going with these guys too, because their service is about 50/50 according to reviews. But at least I might have something I can install! 
|
|
|

|
|
|
#169 |
|
Camaro Club
Join Date: Jun 2007
Location: ohio
Posts: 472
|
Re: Project "You thought yours was bad!" '78 C10 Stepside
I have been very interested in the Fitech unit. I've read a few reviews where it needed a little manual fine tuning to the tune beyond what it does on its own but for most vehicles it seems to work well. One shop did an experiment on youtube and did a few dyno runs on the same engine with a carb and then with the fitech unit and the fitech unit picked up a few numbers on horsepower and torque and it made max torque at a lower RPM.
|
|
|

|
|
|
#170 |
|
Registered User
Join Date: May 2016
Location: Willow, Alaska
Posts: 881
|
Re: Project "You thought yours was bad!" '78 C10 Stepside
|
|
|

|
|
|
#171 |
|
Registered User
Join Date: May 2016
Location: Willow, Alaska
Posts: 881
|
Re: Project "You thought yours was bad!" '78 C10 Stepside
Now we're making progress! I got the Sniper kit bolted down so I could start seeing how things will route and lay out.
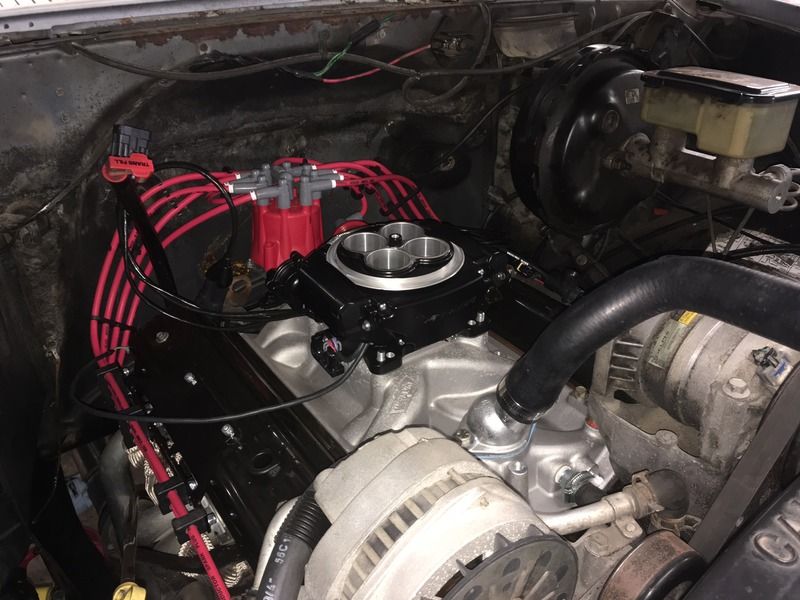  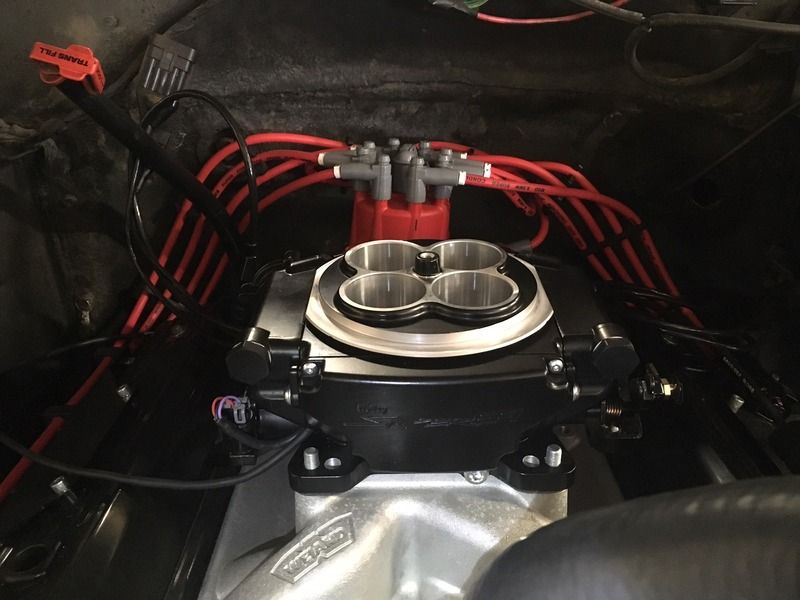 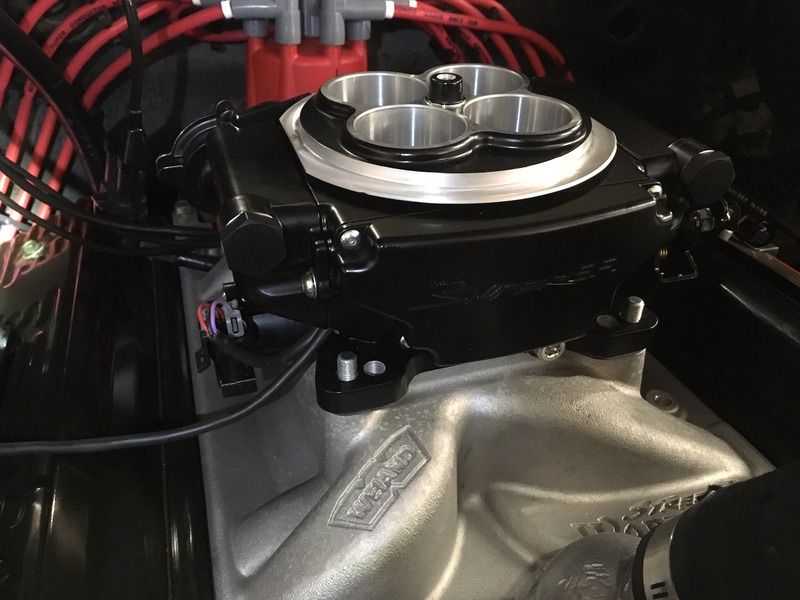  The Temp Sensor location is a little bit tight with the A/C compressor, but it does clear and fit fine. 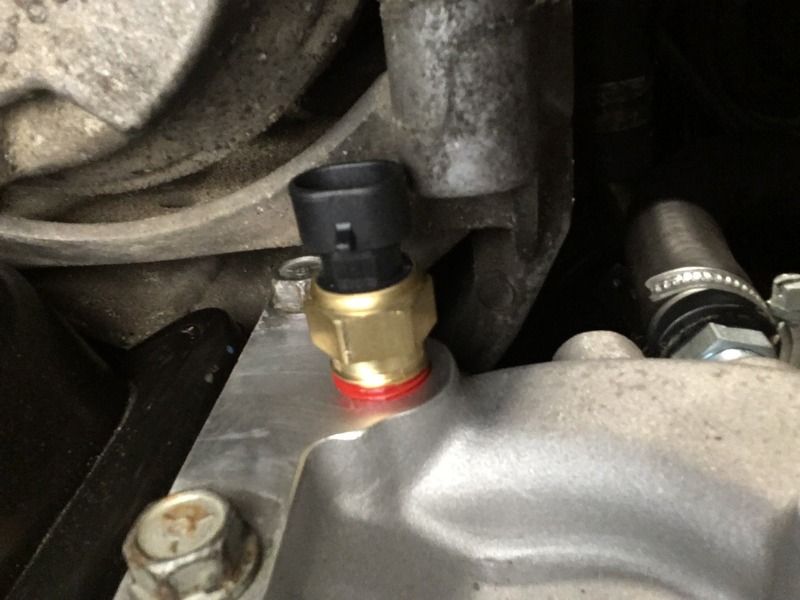 The throttle and TV cable bracket interferes with where I had the coil mounted, however. So I removed the coil and will need to find a different place to mount it. My next hang up was the throttle cable itself. Installed as-stock on the Sniper bracket, the cable was extremely loose! The pedal would go about halfway to the floor before it engaged the cable, so all the way pegged was barely half throttle on the EFI unit. My solution to this was to cut a thin slice in the plastic retainer cup on the cable, and move it back to the next clip. This gave me almost a perfect tension, but it was still just a hair tight on the cable. I removed the pedal and bent the top of the arm in just slightly, so now I have about 1/8"+ of free play on the cable, and it bottoms out on the carpet right at full throttle. I may do some research and see if there is a shorter throttle cable available, such as a V6 or TBI cable, as this one is pretty long and has a good loop in it. It works fine as is, but I would be more comfortable if I could take some of that out.  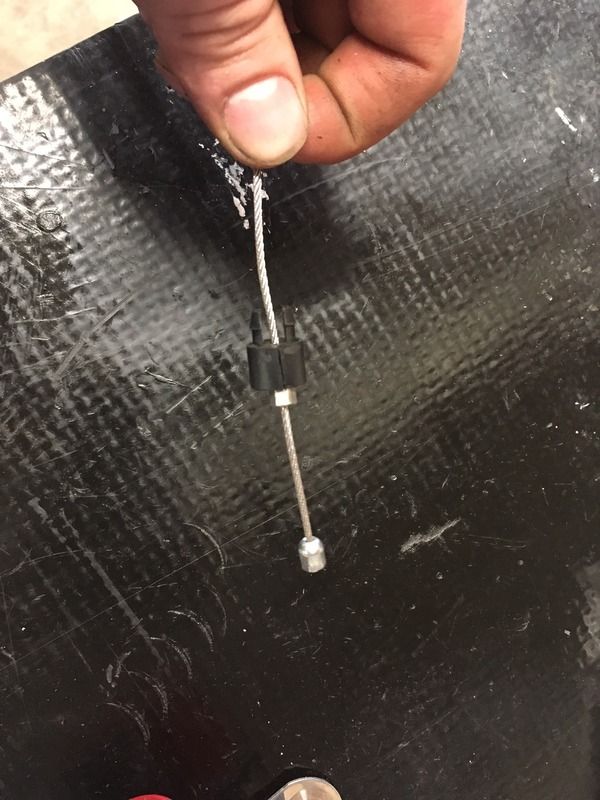  The last thing I did for the day was fab up a quick little heat shield for the fuel lines and pump where they exit the tank. I made a smaller one for the pump itself too, but apparently I'll need to get a picture of it next time I'm out there. This should alleviate any potential heat issues as well as hopefully extend the life of the pump!  
|
|
|

|
|
|
#172 |
|
Registered User
Join Date: Feb 2017
Location: New brunswick Canada
Posts: 20
|
Re: Project "You thought yours was bad!" '78 C10 Stepside
Looking good
__________________
1980 Chevy Short step 5.3 Manual Instagram:https://www.instagram.com/chris.s.custom/?hl=en Youtube:https://www.youtube.com/channel/UCzh...vuHKm04yVK4X9w |
|
|

|
|
|
#173 |
|
Registered User
Join Date: May 2016
Location: Willow, Alaska
Posts: 881
|
Re: Project "You thought yours was bad!" '78 C10 Stepside
Thank you!
 I picked up a bag of cable clamps today and ran my fuel lines. I decided to run them along the frame and figured out a nice, clean way to run them up to the EFI without much hassle. Starting at the fuel pump. You can see the extra small heat shield for the pump here too.  Tried to get as much light down here as I could. Lines are ran up the frame. 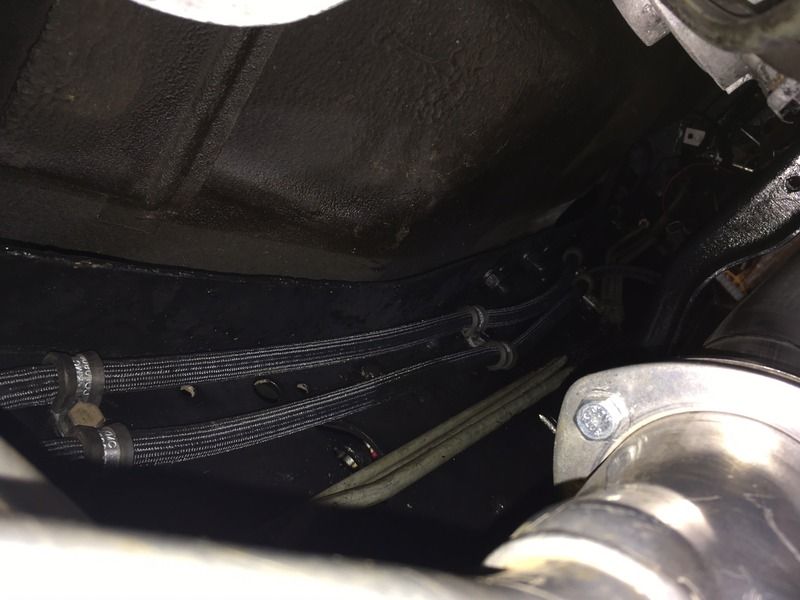 Here is the underside of the frame, looking up at the engine. I ran out of cable clamps here so only the one line is secured, but this is generally how they will come up and out of the frame. I'm going to run some conduit on the lines where they pass through the frame stands, as they pass through freely, but there's quite a few possible rub points in there.  And generally, how the routing will look from the top. They will be secured on the extra clip on the heater hose bracket. Now that I know how the lines are ran, I'm ordering the last two hose end fittings that I need, as well as a few other small parts to finish a couple of things up! 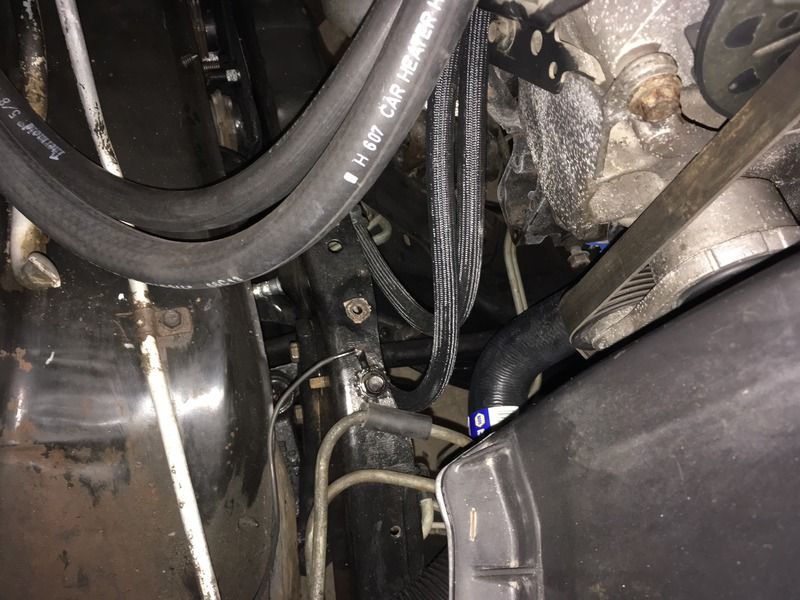
|
|
|

|
|
|
#174 |
|
Active Member
 Join Date: Jul 2015
Location: Anchorage, AK
Posts: 145
|
Re: Project "You thought yours was bad!" '78 C10 Stepside
Good work! Glad you ended up with the Sniper kit. Looking forward to seeing how it works out.
__________________
'75 C10 SWB 454 '75 K10 SWB "The Gilded Turd" '77 K5 Blazer Chalet #0661 Build thread:http://67-72chevytrucks.com/vboard/s...d.php?t=776072 '79 K10 Bonanza |
|
|

|
|
|
#175 |
|
Registered User
Join Date: May 2016
Location: Willow, Alaska
Posts: 881
|
Re: Project "You thought yours was bad!" '78 C10 Stepside
Thank you! I'm excited too, hopefully there won't be any major issues with it. So far my only complaint is that the throttle bracket is kind of cheesy...it has a little room to rotate, and when the trans cable bracket is bolted to it, the bolt interferes with the throttle cable. It works, but could be better. Everything else I'm happy with though.
I spent most of the weekend doing nothing but wiring, wiring, and more wiring. Mostly trying to get things routed to make it look as clean as possible while keeping things from rubbing on each other. It's always surprising how many things still need to be hooked up, even with a "barebones" build! I started off with cleaning the harness and applying new conduit. I left a few of the small wires uncovered because I wanted to be able to lay the harness in and see where the best place to bring them out would be. 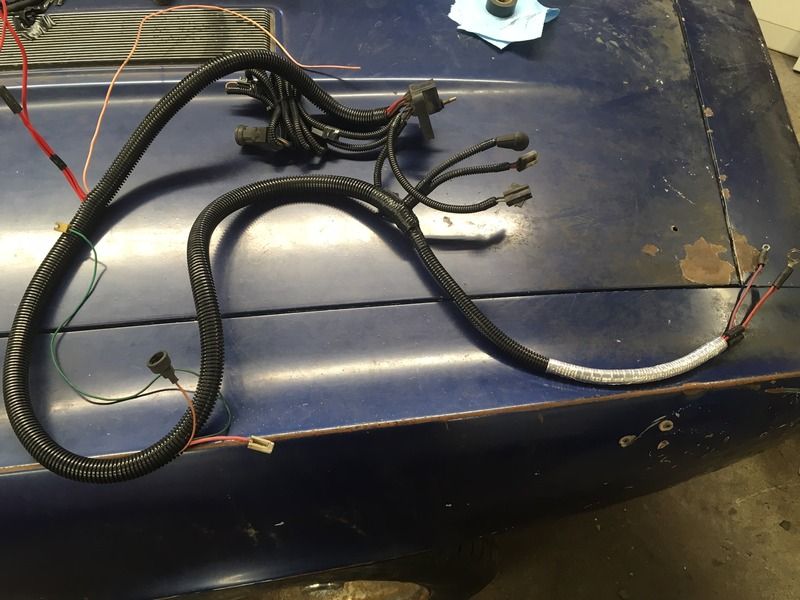 Also got the rest of my P-clips and ran the fuel lines up to the throttle body. This is the best way I could run them so they won't rub anywhere. I still need to get a separator for the lower side though. Coming up from the frame, plenty of radius for engine movement:  As they come up onto the engine (notice my high tech spacer): 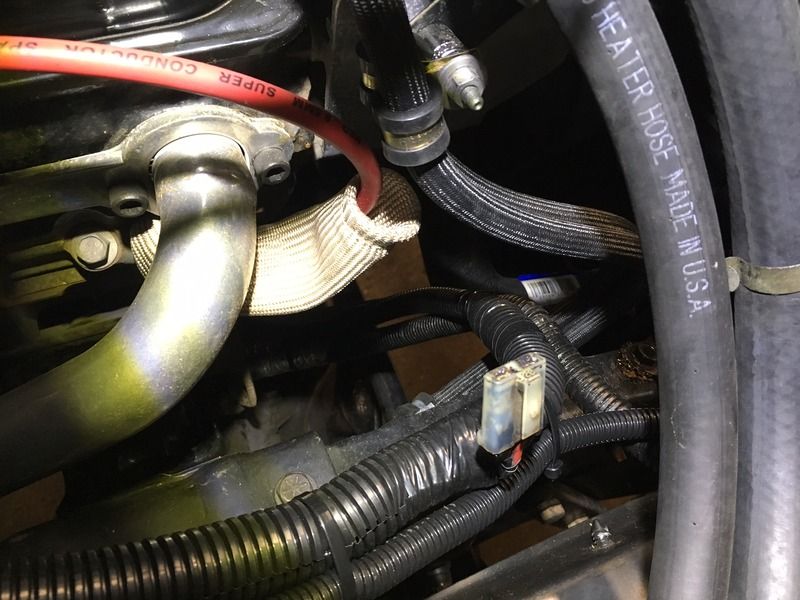 And up over the valve cover. This bracket I robbed off the old Vortec intake, I have a clamp to go here, it should show up today.  Wires coming from the battery: 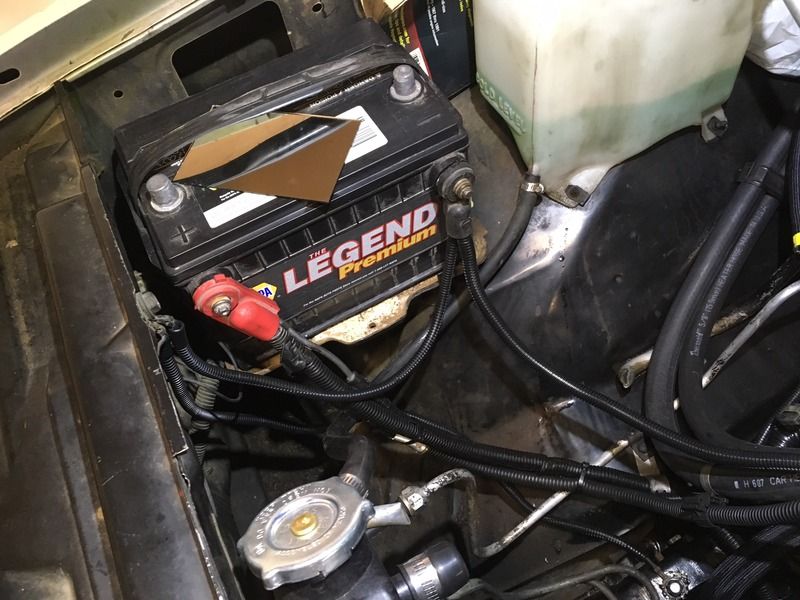 Harness coming up onto the valve cover (will be secured later on): 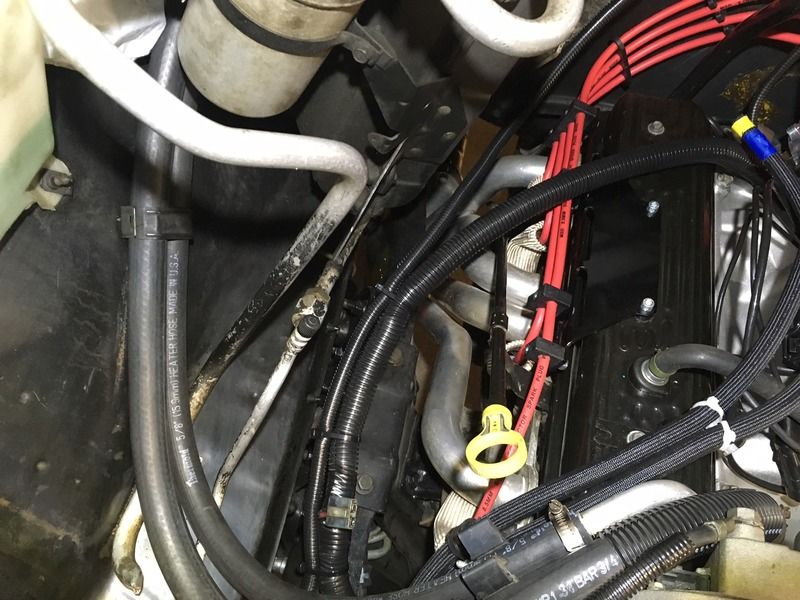 You can also spot a few of the vacuum lines running to the back of the throttle body: 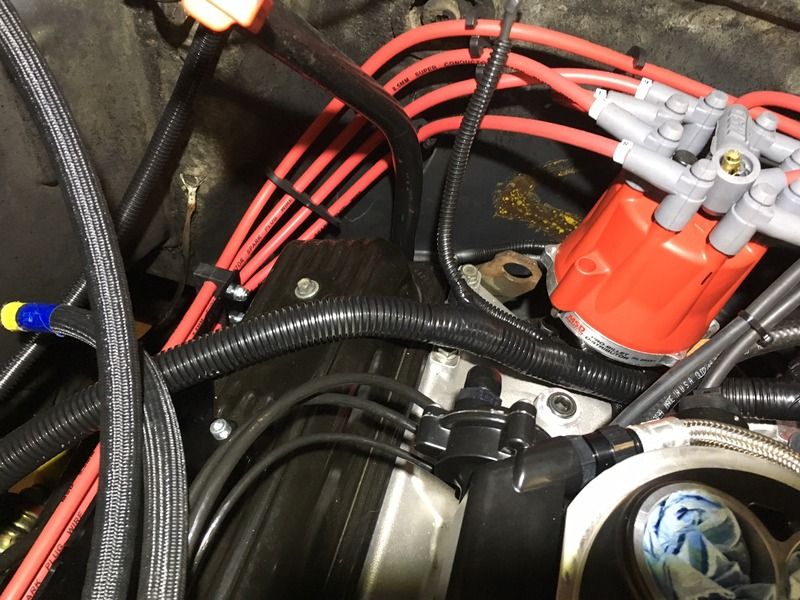 Out the other side. I also installed the transmission harness at this time too, as well as the brake booster line. 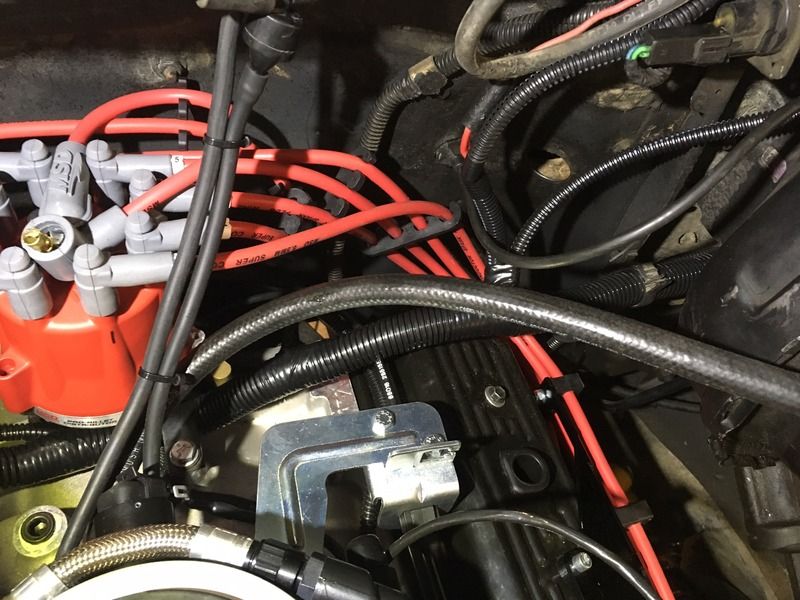 And finally, wires for the alternator, and a general lookover: 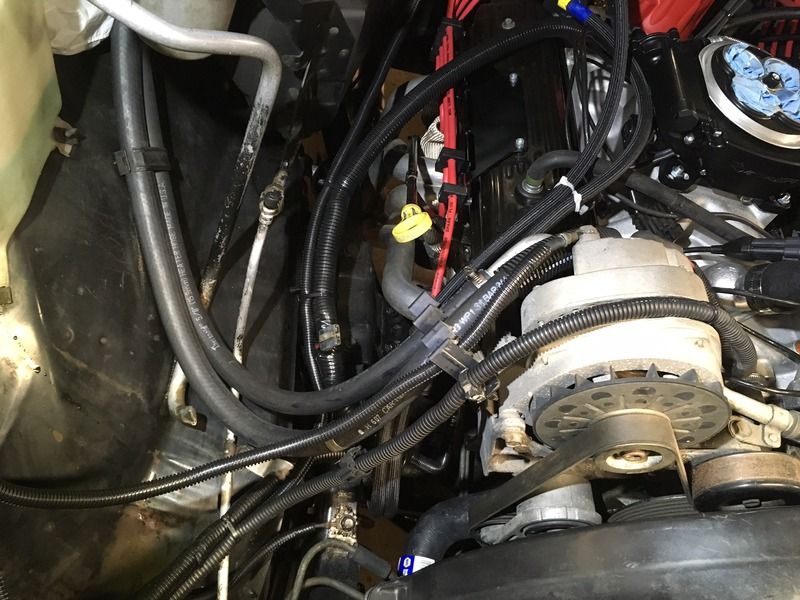 Hey look at that, something actually works! 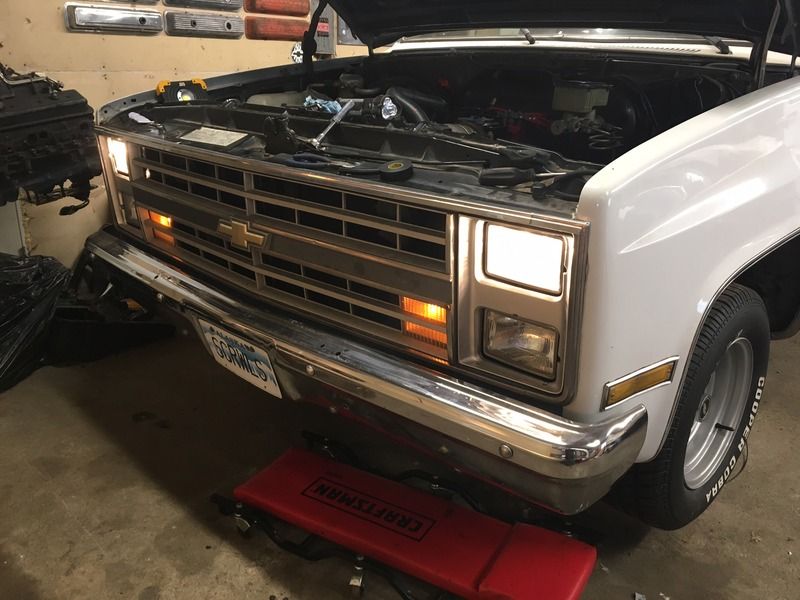 I also picked up a fitting for the PCV inlet 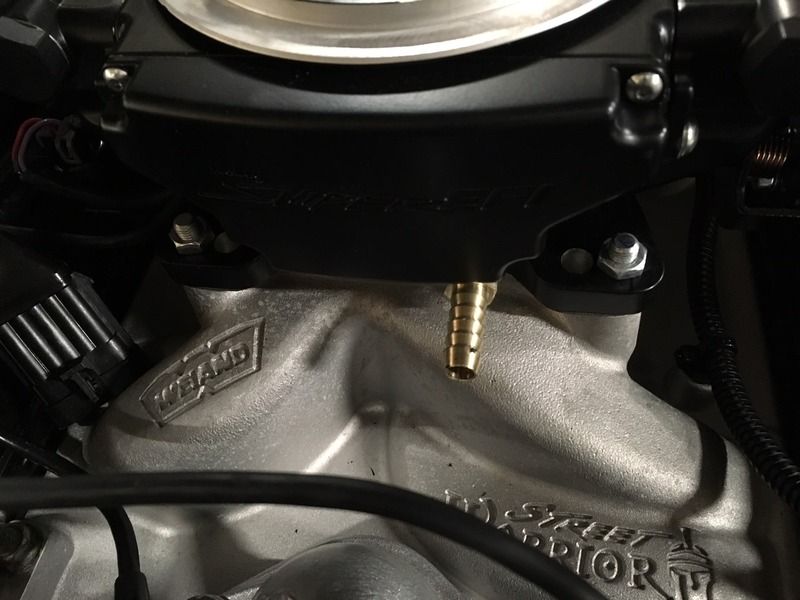 Finally, I picked up some light duty battery clamps. These will be used strictly for the EFI main power wires, as Holley is very specific about running those wires directly to the battery. This will guarantee me a good connection as well as prevent me from having to cut up the stock battery cables. 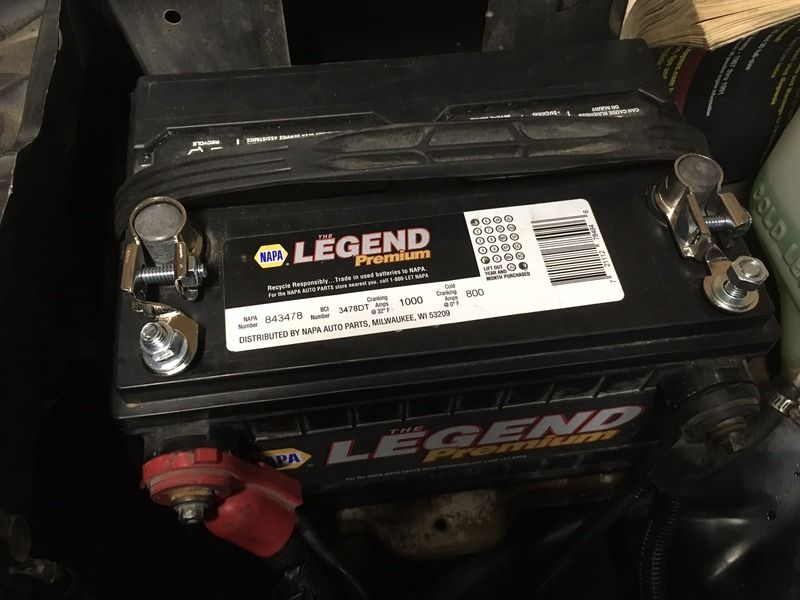 One final note, I hooked up the charcoal canister from the TBI truck I pulled it from. I did a lot of research and as best as I could tell, it simply plugs directly into a vacuum port with no solenoids at all. I ran this line to ported vacuum on the EFI kit, so it will only be pulling fumes when the throttle is open. I also installed a one-way valve inline so nothing can go back to the canister. I assume this is the correct way to install this style? There was not a lot of information out there concerning these. |
|
|

|
 |
| Bookmarks |
|
|