
 |
Register or Log In To remove these advertisements. |
|
|
|
|||||||
 |
|
|
Thread Tools | Display Modes |
|
|
#1 |
|
Registered User
Join Date: Jan 2015
Location: Prior Lake MN
Posts: 87
|
Project Eugene: 1949 5 Window (Part 2)
This is a second build thread- started over again since photobucket screwed me. Mods- feel free to delete the other build thread since it doesn't make any sense without pics! Bummer to lose that history, but what can you do...
This build started years ago in my head. I have been a Jeep guy for years- this is our current family rig. It's sort of a 1949 Willys. Although the windshield is a 3b, the cowl and hood are from a 2a, the grill is an MB, and the tail gate is a repro. Everything else I fabbed. Rear axle is from a dodge, front is from a Ford, Chevy 4.3 V6 from an S10, and a TH350 with a manual valvebody. It gets around. 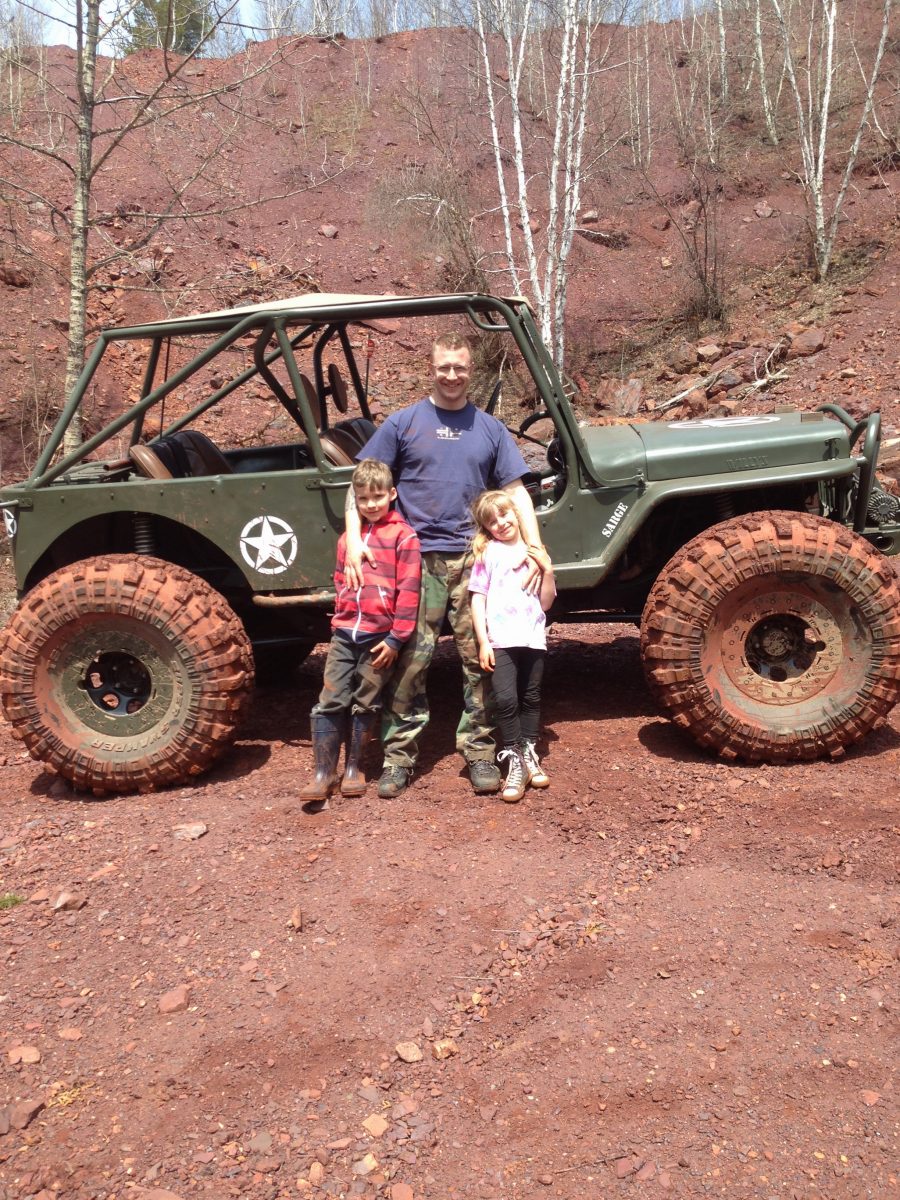 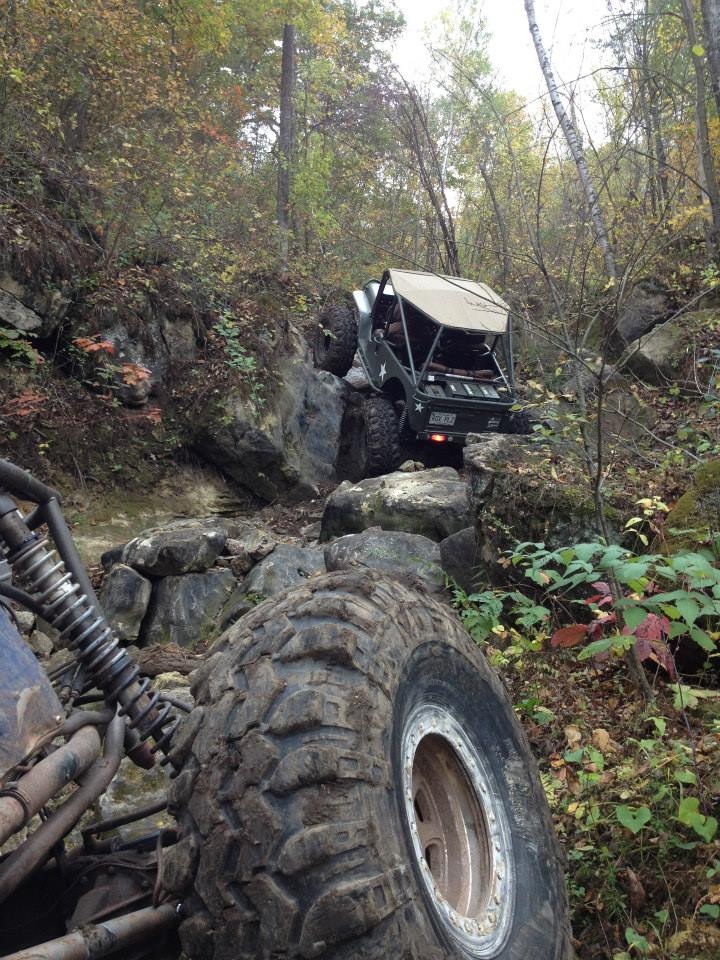 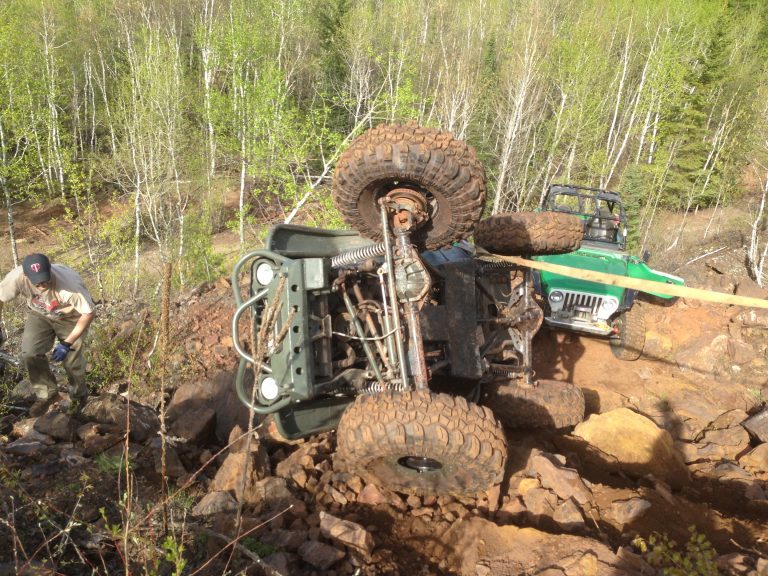 Wifey loves to drive it too. 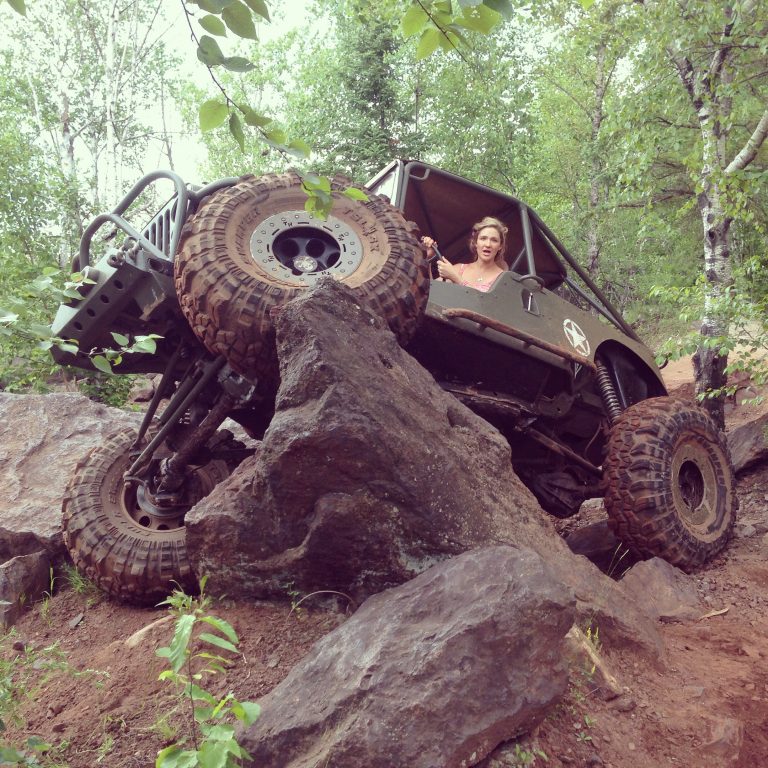 I built that rig in a standard 2 stall garage at my old house, and covered EVERYTHING in grinding dust and welding slag. So, wifey said no more major projects until I have a dedicated space to build in. That required a new house, so eventually we moved and originally the contractor that was flipping our house was going to build the shop for us as part of the deal- well, he backed out 2 weeks away from closing, so then it became a waiting game of when rates were right that we could take out the money to build it ourselves. Here's the house prior to getting started. 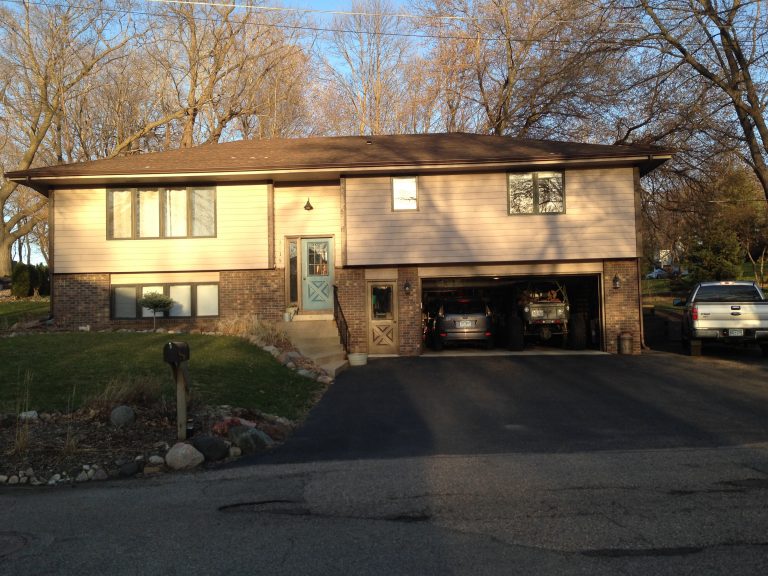 Cut down the trees and dug a BIG hole. 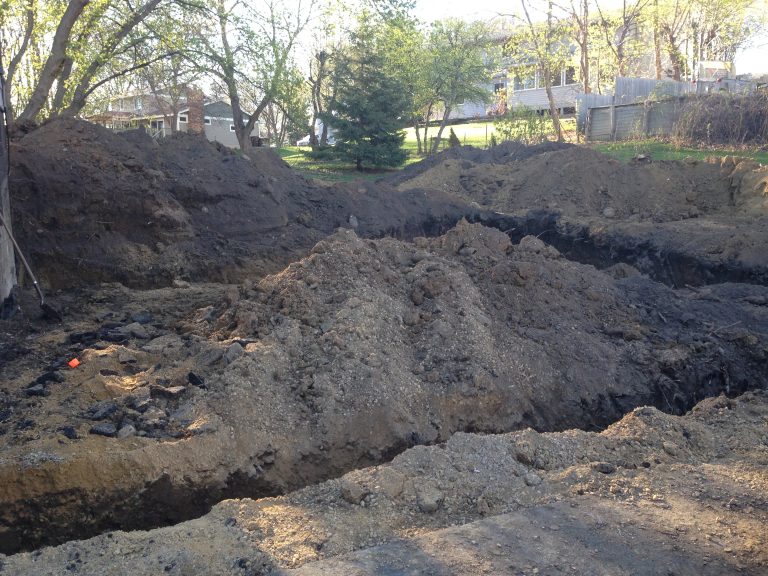 I had the excavating and concrete/ block work hired out. Did everything else myself with some friends that were very generous with their time. 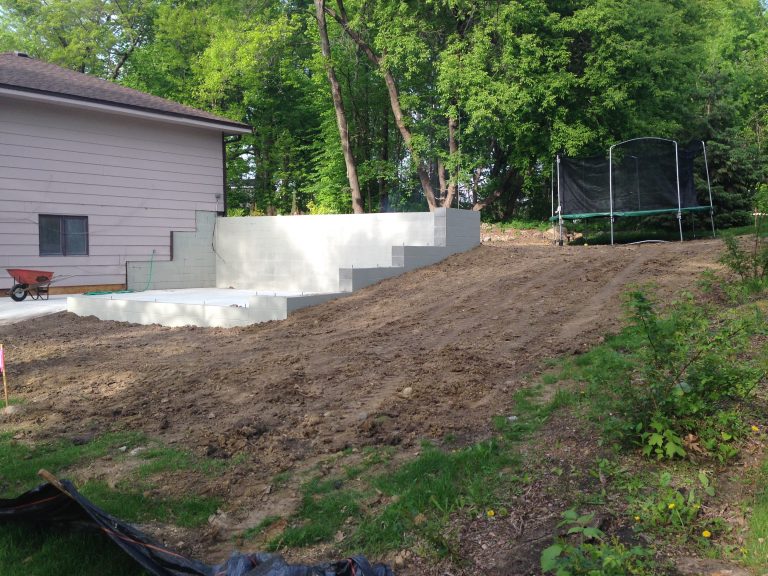 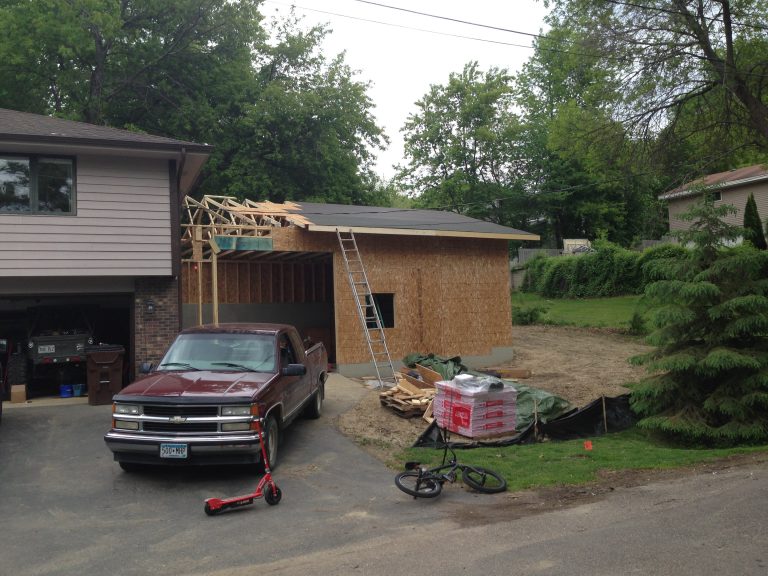 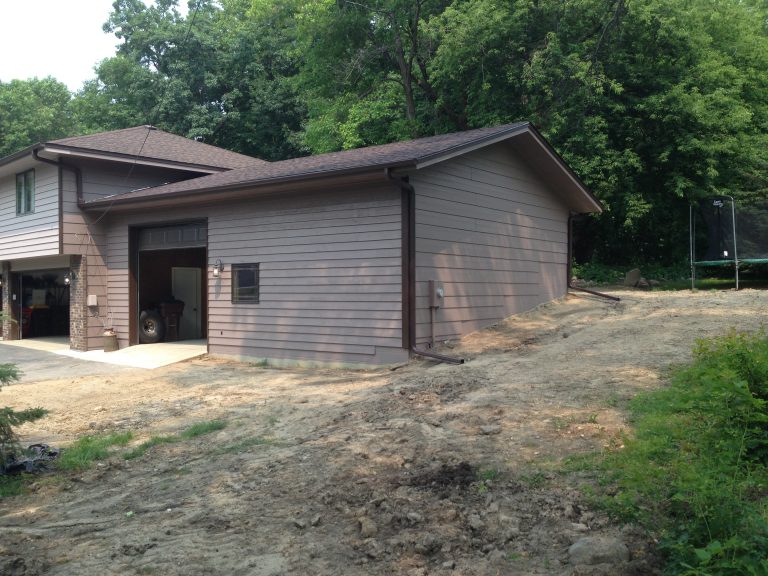 Then momma had to have landscaping 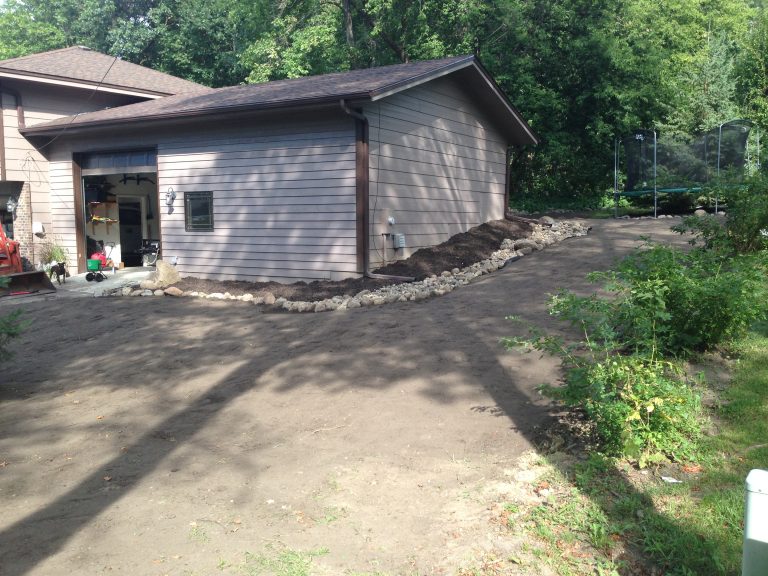 The kids "helped" quite a bit actually. My daughter is pretty good with a roofing nailer.  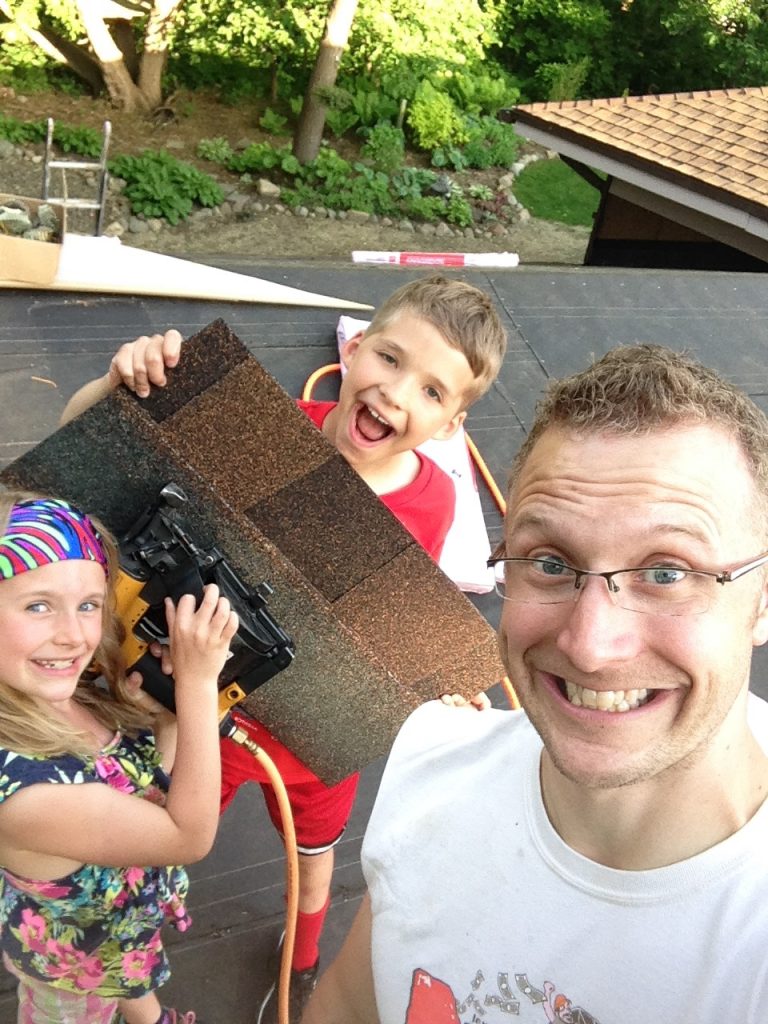 Then we moved in. 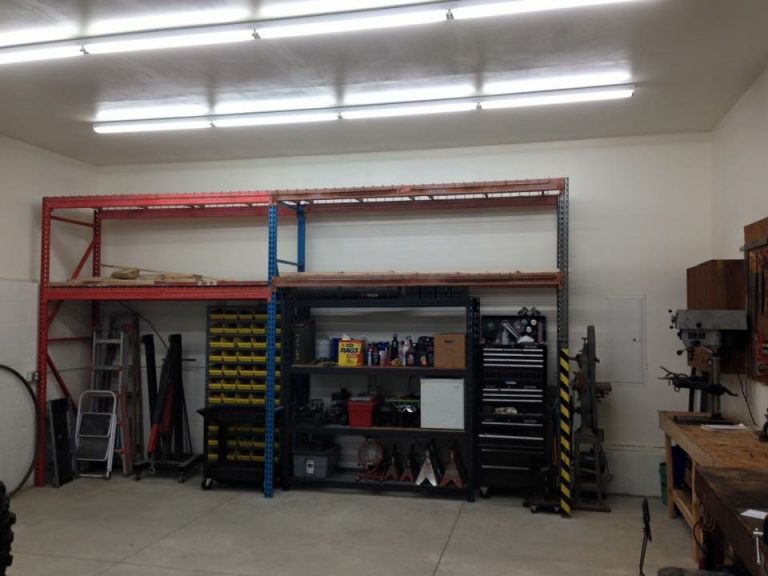 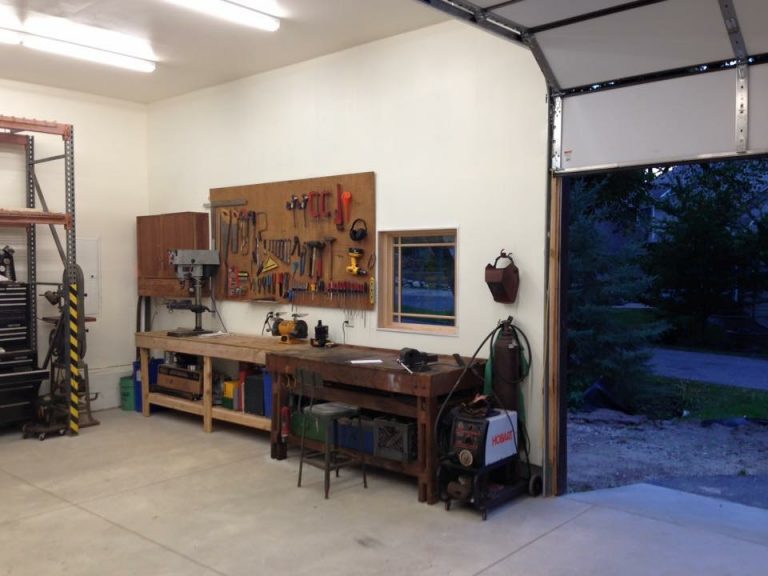 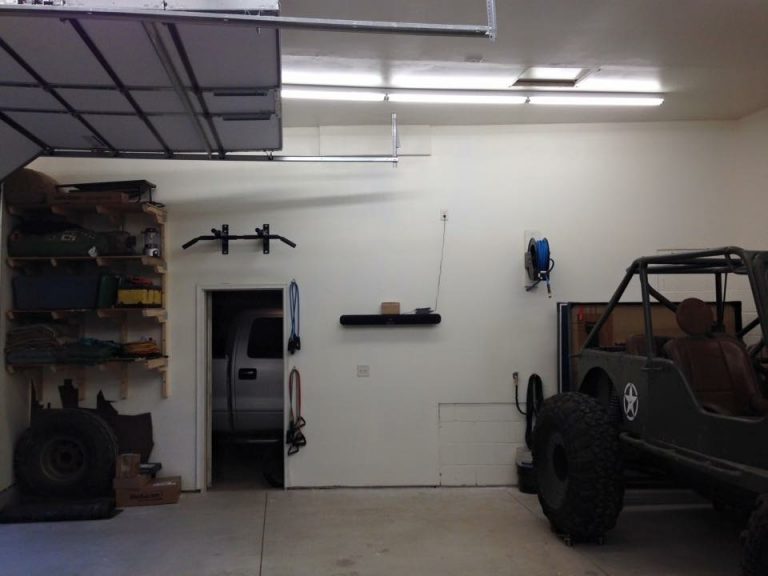 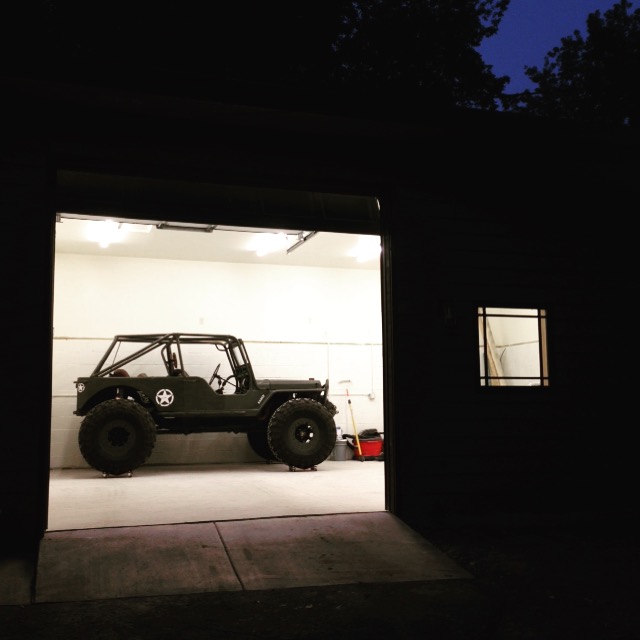 Here's the backstory behind why we named the project as we did, and why this all means so much to me and my family. When I was 18, my father committed suicide. There were a lot of things we didn't get to do together, and I have always wished we could have built something as a father/ son project. Well, the shop was phase one of my plan to do that with my kids- which was the natural lead into phase 2. This is Eugene. My dad's name was Robert Eugene Sutherland, so it's a fitting tribute to him and the legacy we are continuing despite his absence. The goal being to teach the kids to turn wrenches, cut metal and weld, and see a project through from start to finish. Eugene is a 49 5 window that needs a lotta work, but the price was right- so it followed me home 2 days after getting final sign off on my building permit for the shop. LOL 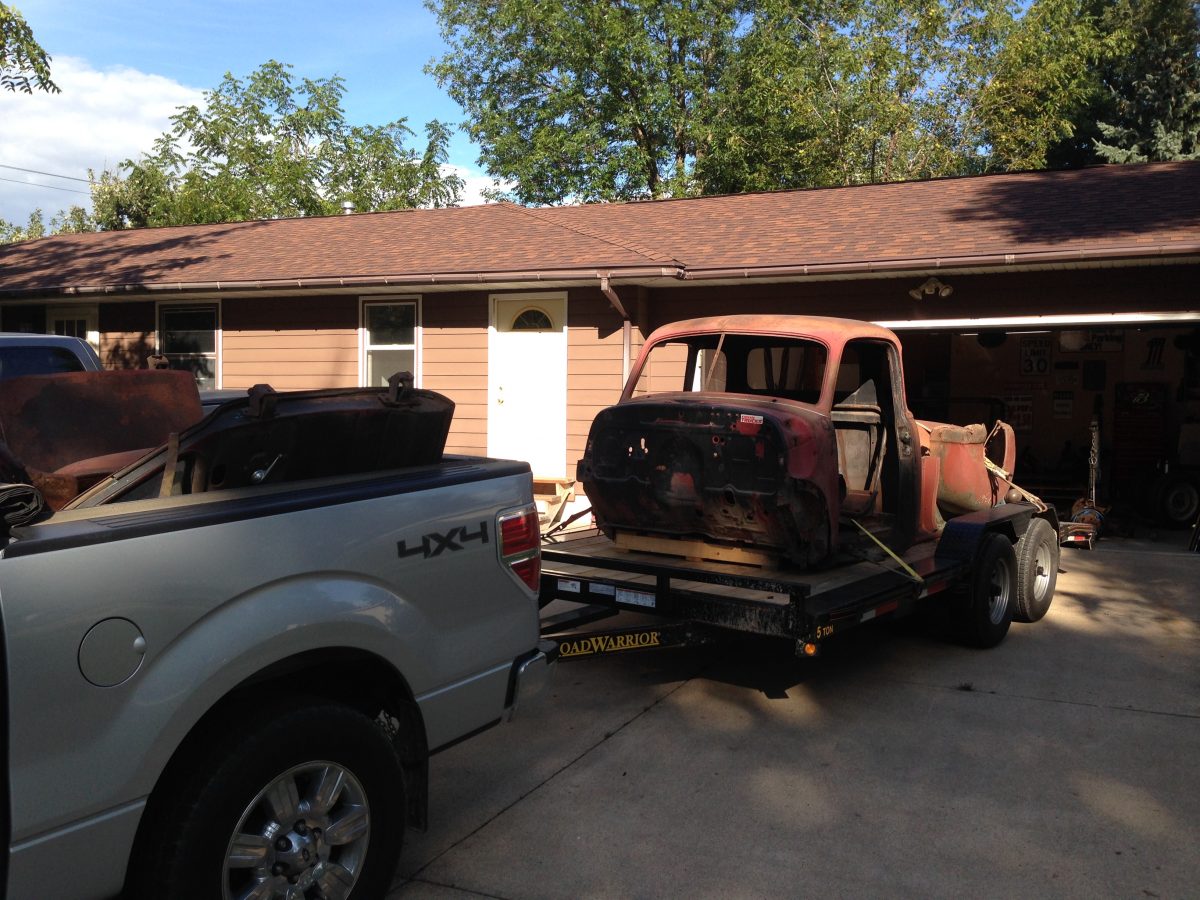 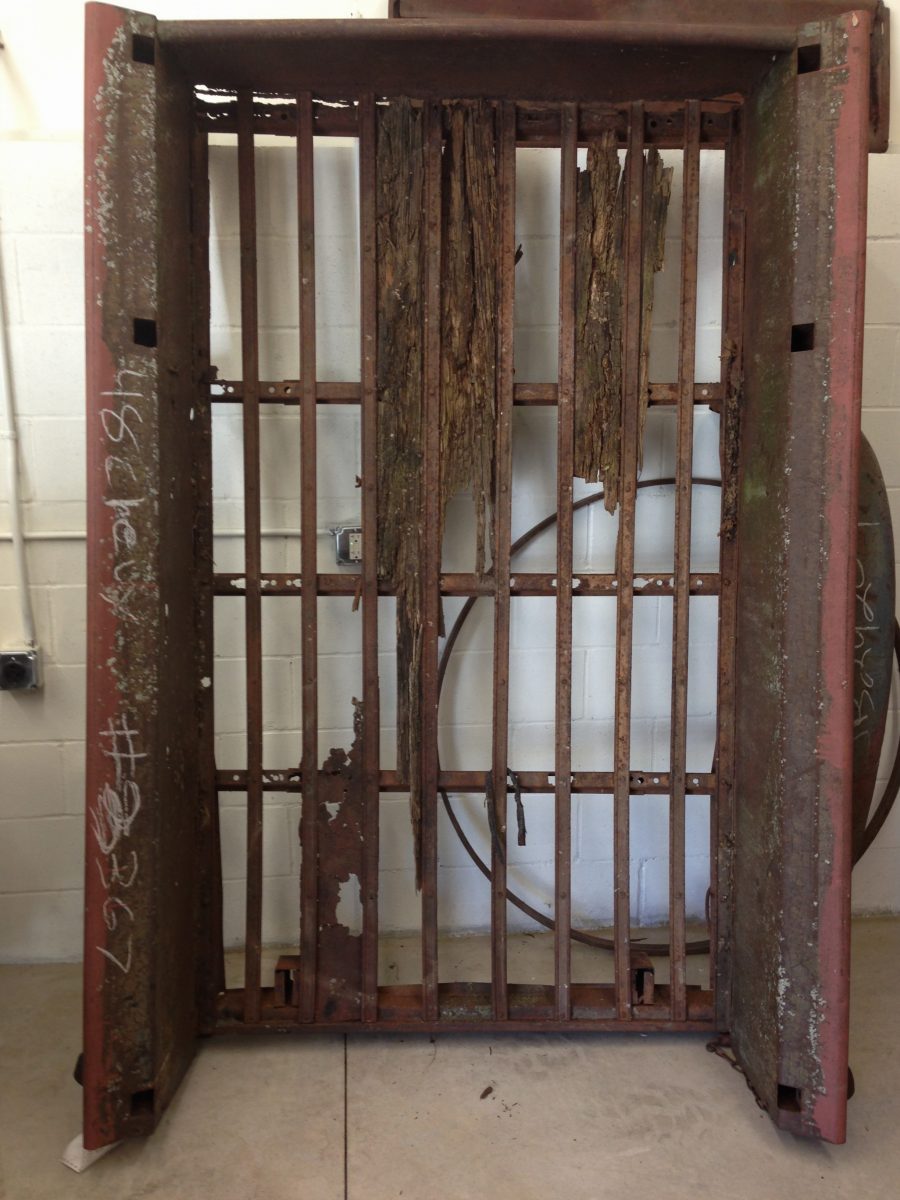 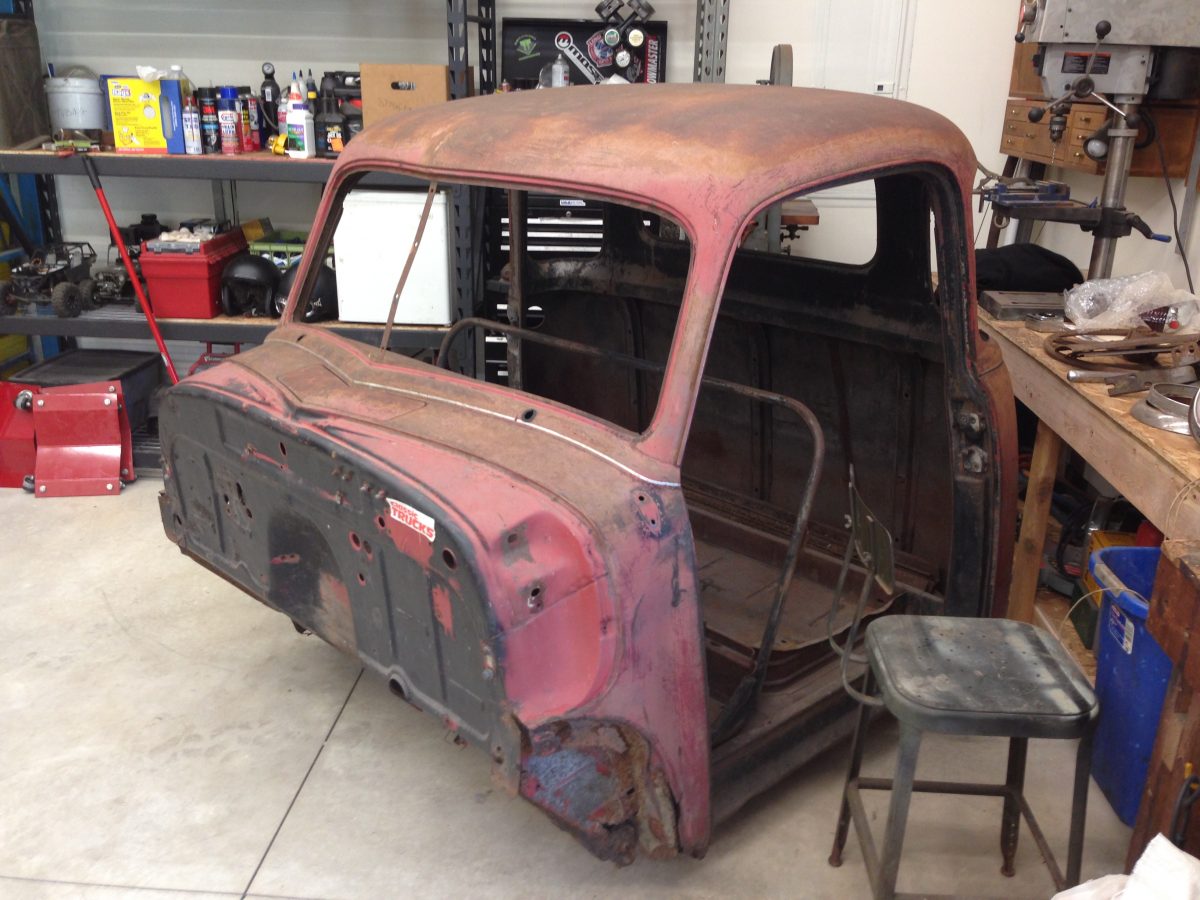 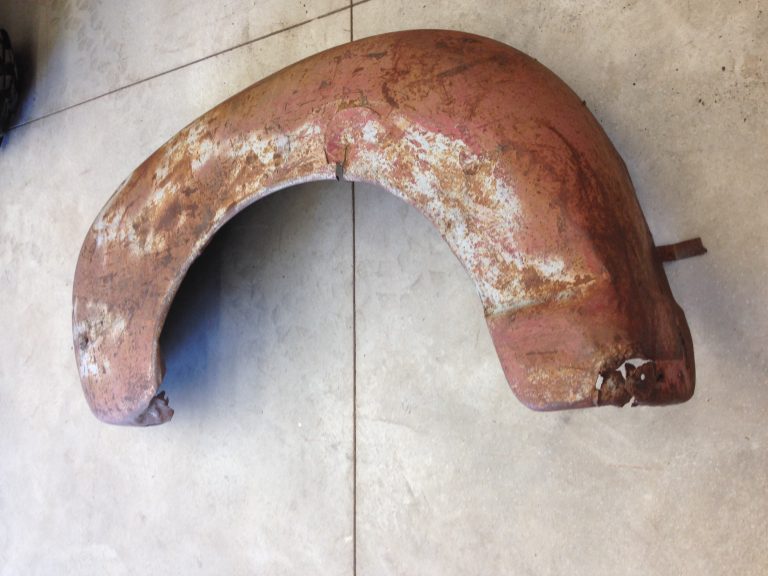 The cab is in decent shape, along with the doors, front fenders, hood, grill, and bed sides. But I spend the rest of this years budget on patch panels for everything, so that will be what we work on for the winter. The plan is an S10 frame, bags, cut the 3600 to a 3100 (I know, I know) and an LS drivetrain. Nothing fancy, just solid sheet metal and a lot of love. I will be asking LOTS of questions when I can't find answers on this wealth of knowledge site. I have never been too proud to ask questions or act like I know all the answers- cuz I sure dont. Here come more pictures... Last edited by HULK64; 09-10-2017 at 10:19 PM. |
|
|

|
|
|
#2 |
|
Registered User
Join Date: Jan 2015
Location: Prior Lake MN
Posts: 87
|
Re: Project Eugene: 1949 5 Window (Part 2)
First project was rebuilding the bedsides. I tried patching only the holes- and I didn't quite go slow enough (And forgot to change to .023 wire, and didn't move frequently enough, and was trying to go fast, etc.) and warped the snot out of the first one. Ouch.
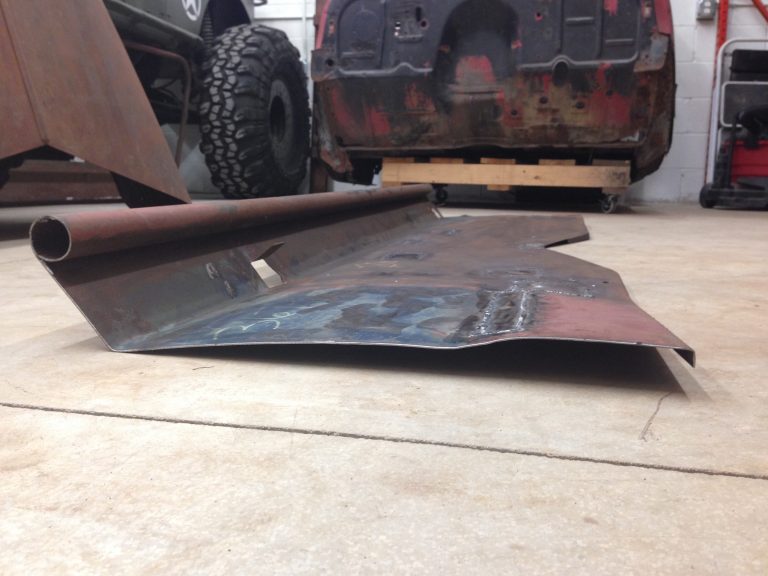 At first I super pissed, but I regrouped and cut the spot welds on the stake pockets and chopped the top angle and rolled edge off length wise and bought a 4x8 sheet of 16 gauge to start over on the bottoms with right sized wire, and a more patient mindset. I also cut them down from 3600 length to 3100 length- so I relocated the stake pockets at the same time. 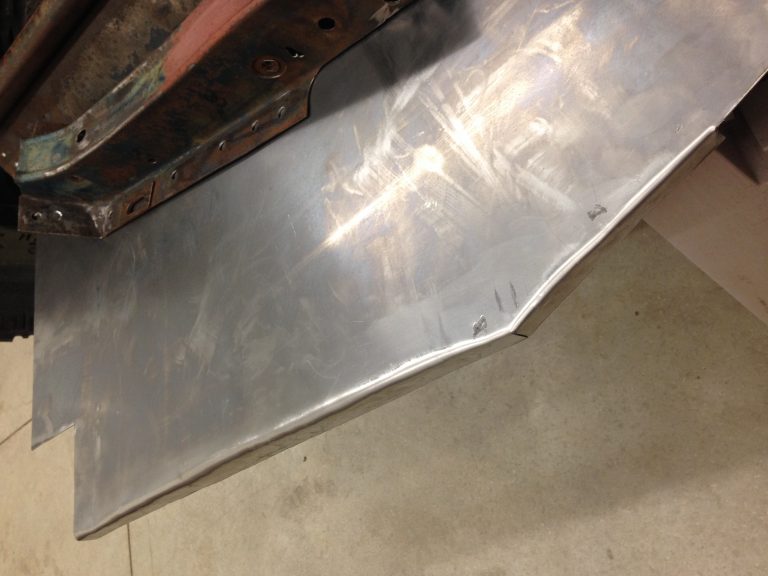 Much less warped> LOL 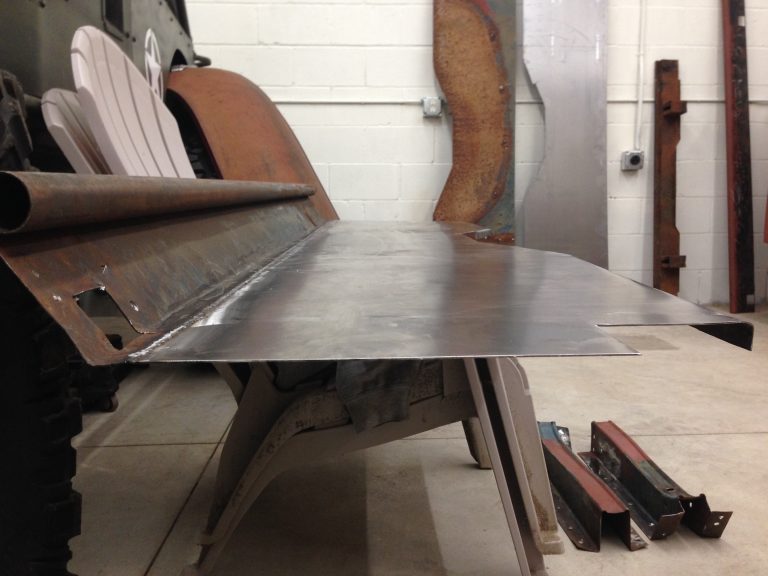 Honestly, the best part was getting my son involved. Here, he didn't want to go put his boots on so this was his solution to no sparks in his socks. Loving getting his hands dirty. 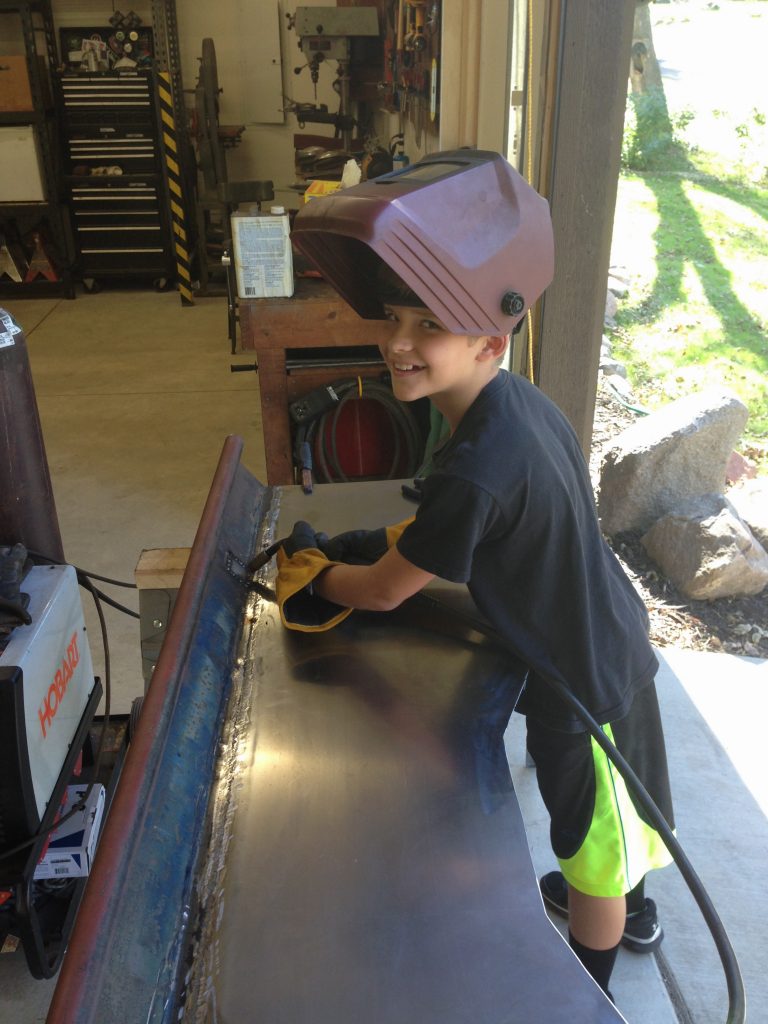 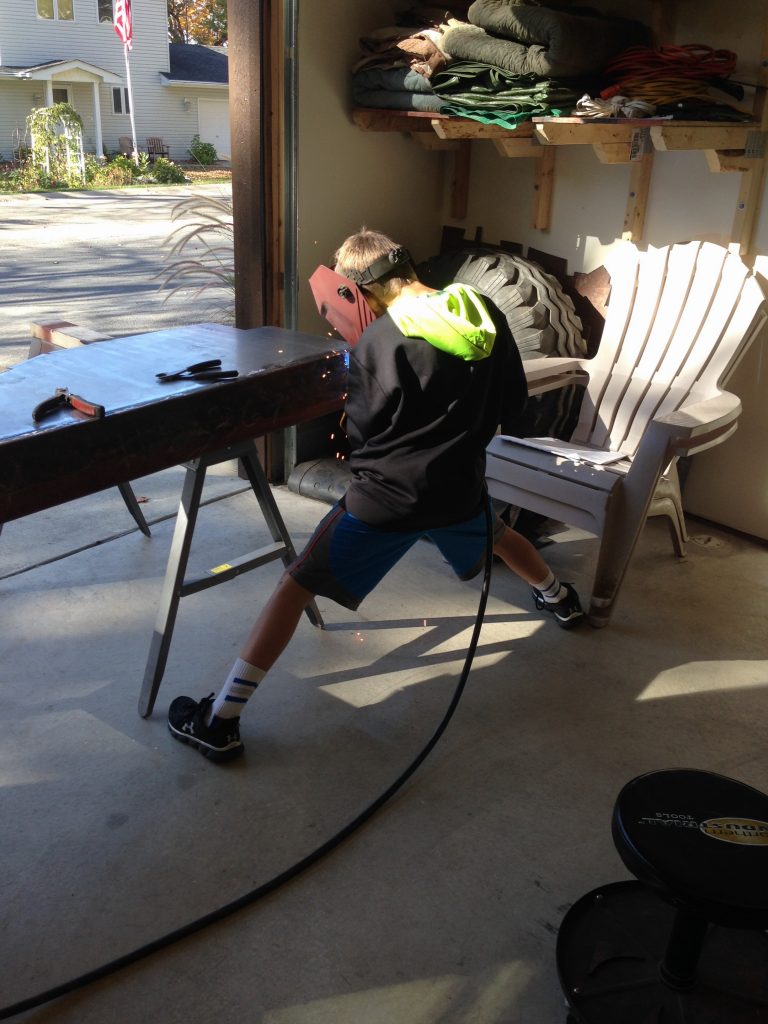 The good news is that all the cool patina on the top rail is still under there and this primer is close to the stock color, so when I run through the new paint it will still come through as patina, but all the metal will be solid. I test fit the doors and the gaps are ok, so I got to bracing the cab last weekend so I could roll it on its back and start chopping out the rot, and there is PLENTY of it. 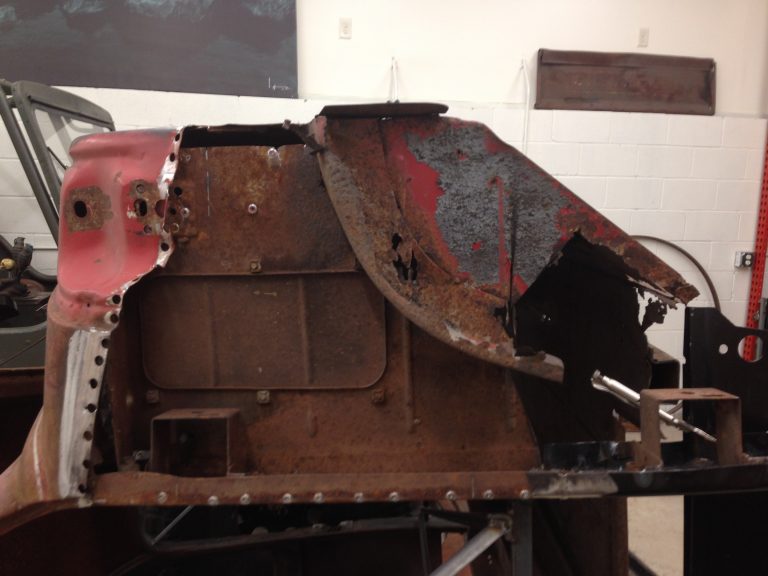 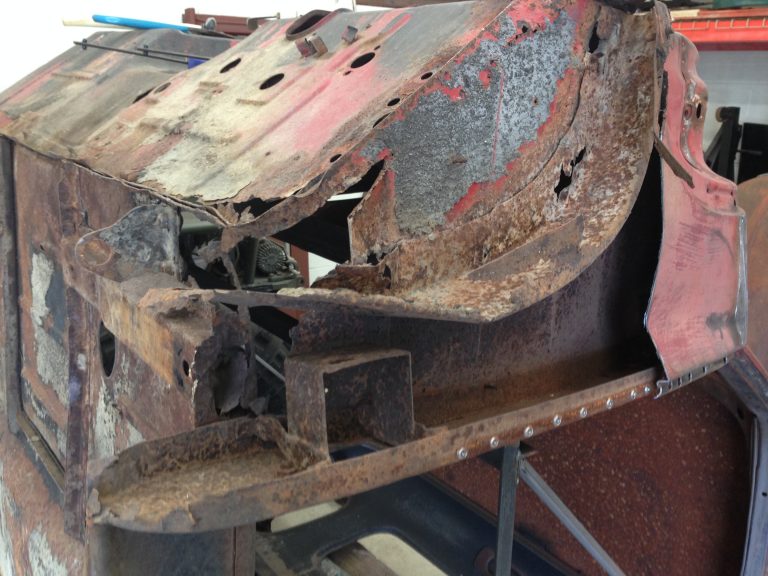 I got some of the panels put in, most of them are even straight! 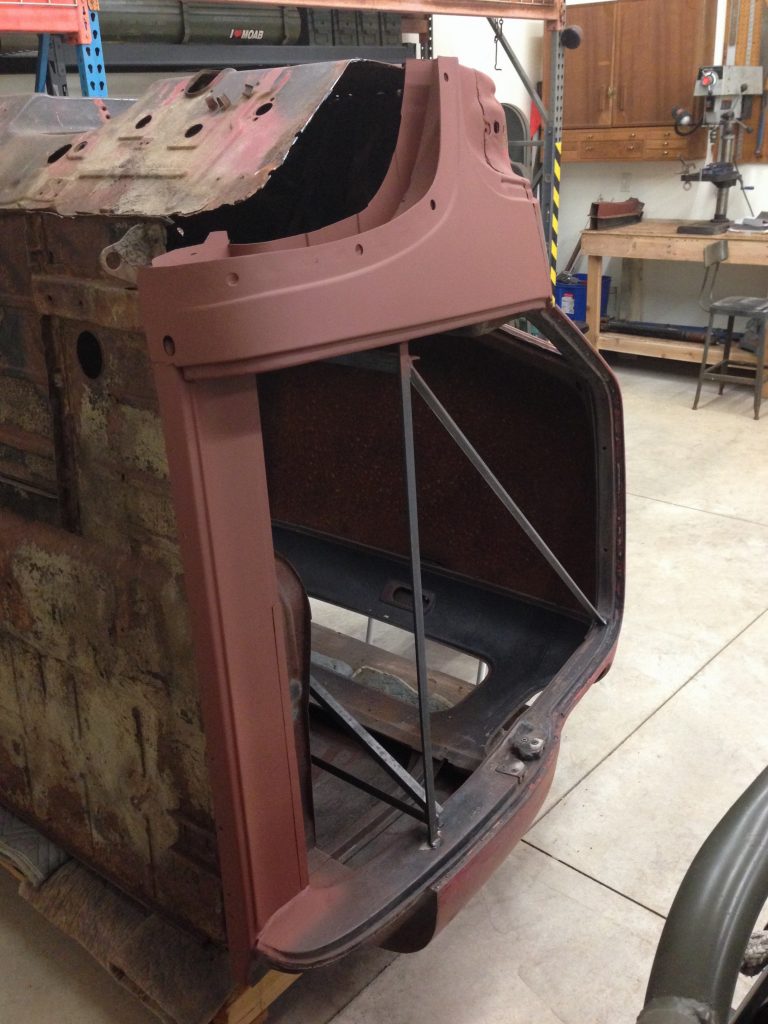 So then we had an ugly firewall and Flintstones worthy floor to deal with. 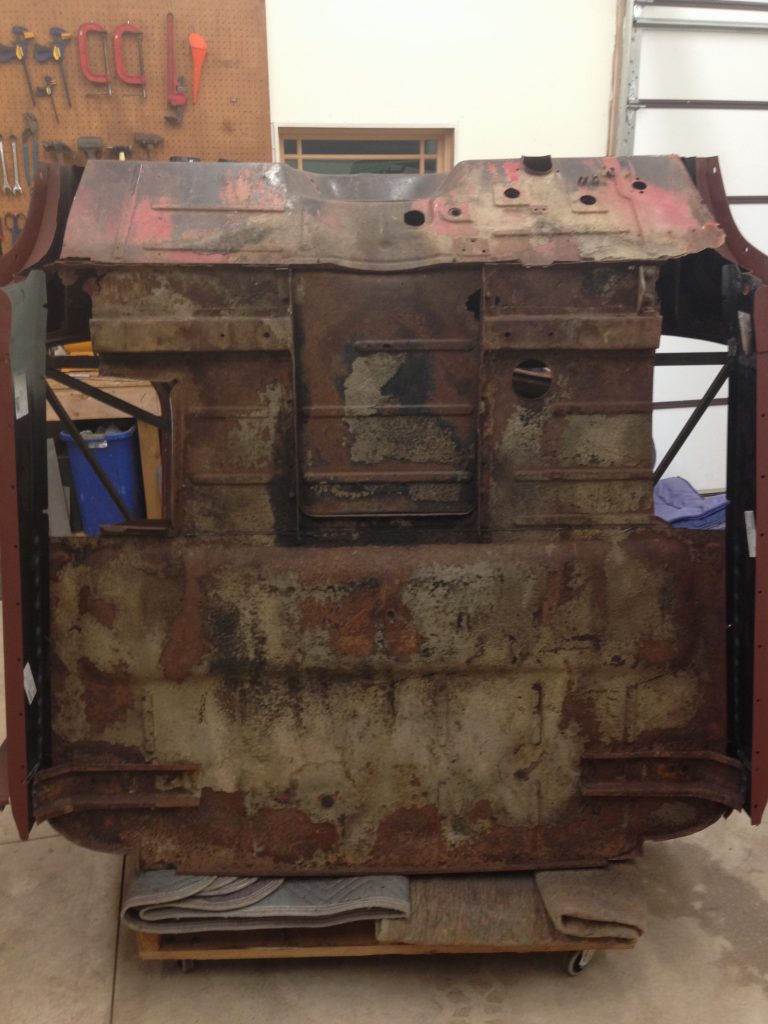 Time to fire up the grinder. 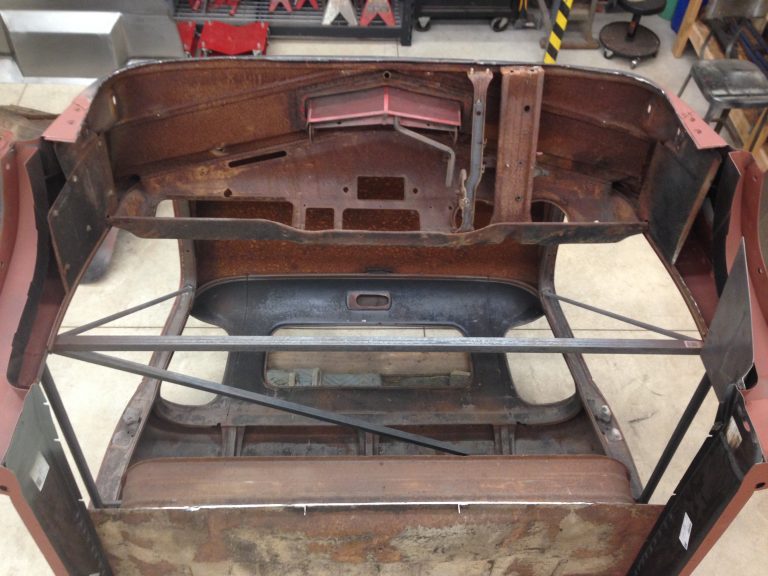 And bippity boppity boo- it all fell into place flawlessly... (Eyeroll) 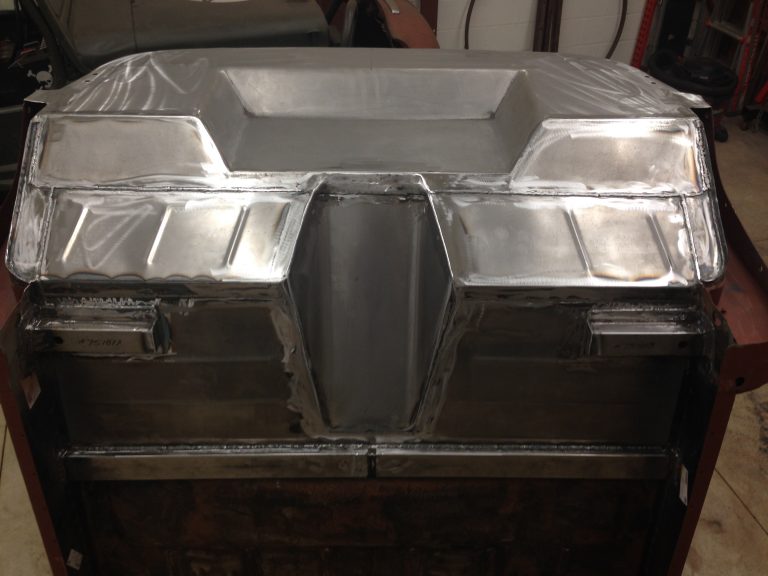 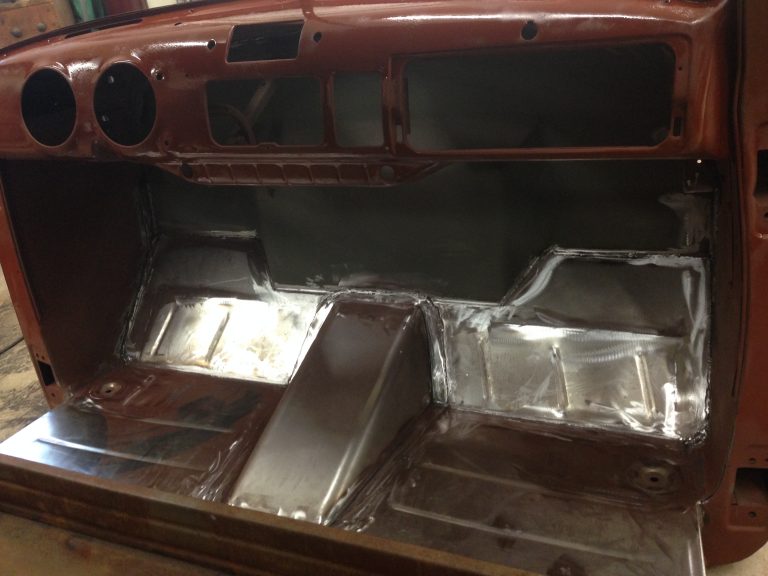 Had some gaps to take care of based on what to get cut out from rot. It's shocking how long this kind of stuff takes. About 4 hours into filling both sides, and no one will ever see them! 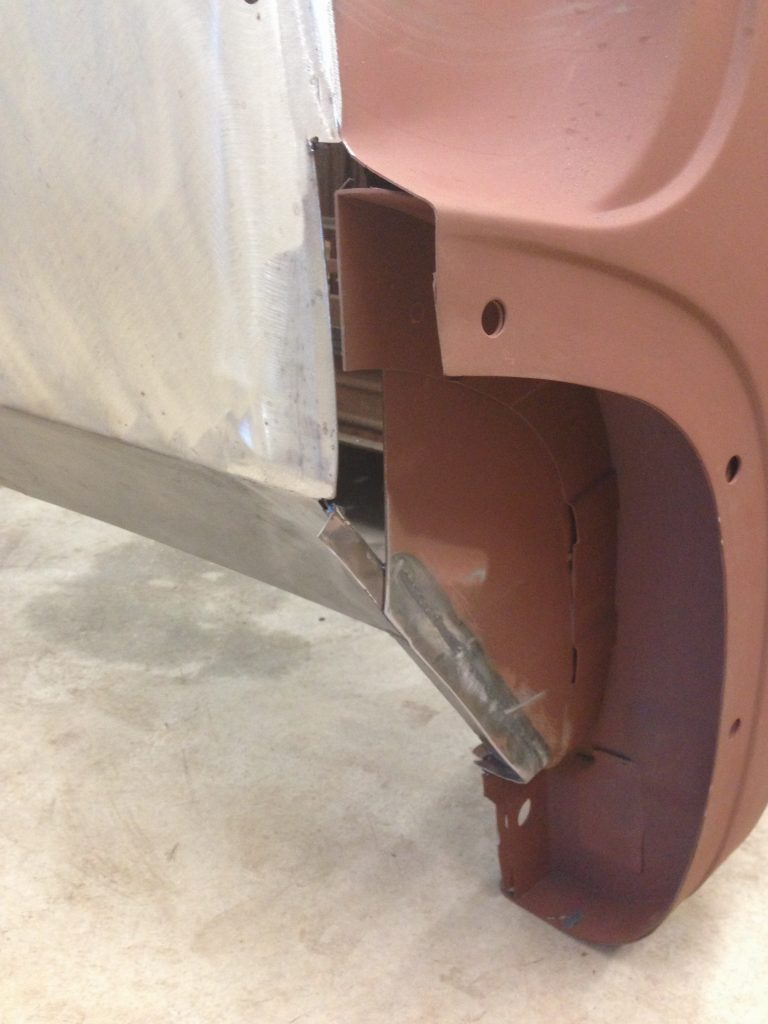 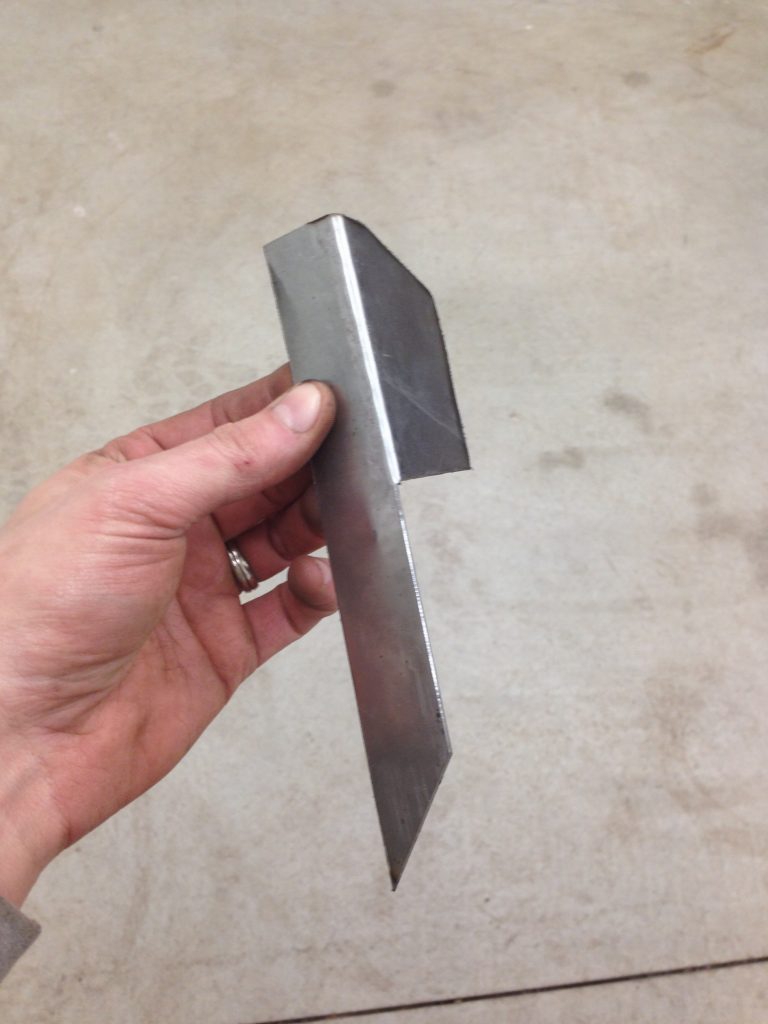 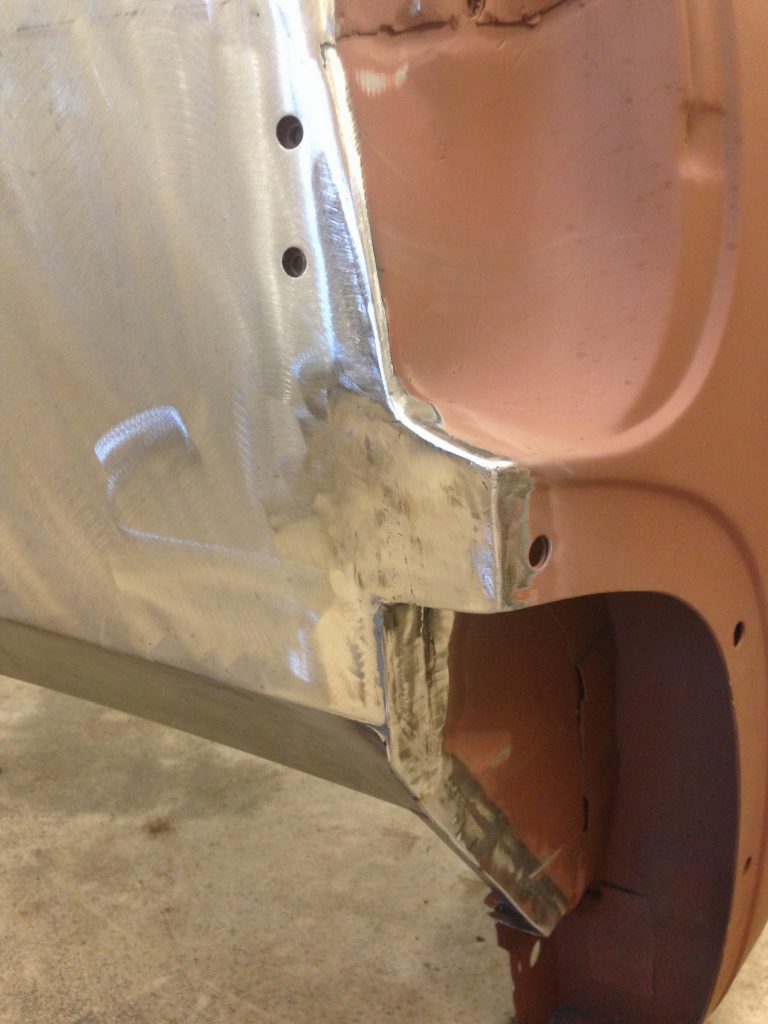 Instead of spot welding and seam sealing everything, I stitched all the edges and finish welded everything. I feel better about the seal and structural integrity of everything. Then everything got etching and base primer. Felt REALLY good to have gotten to this point... 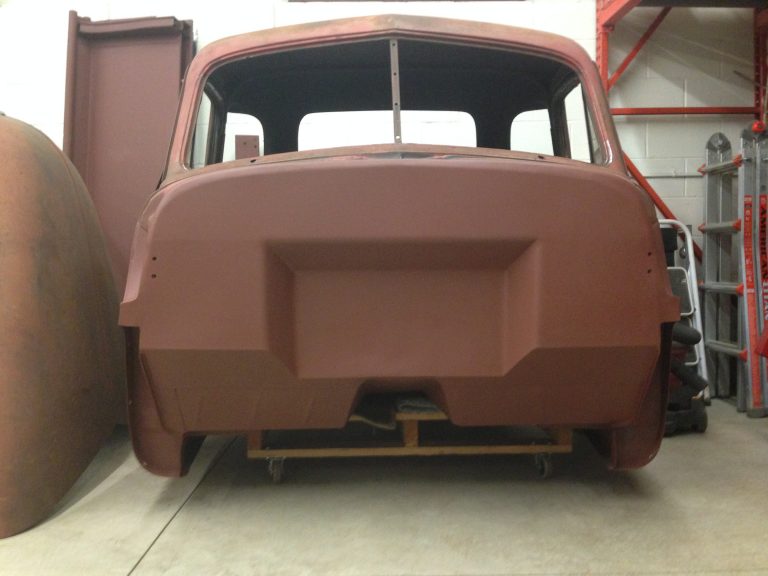 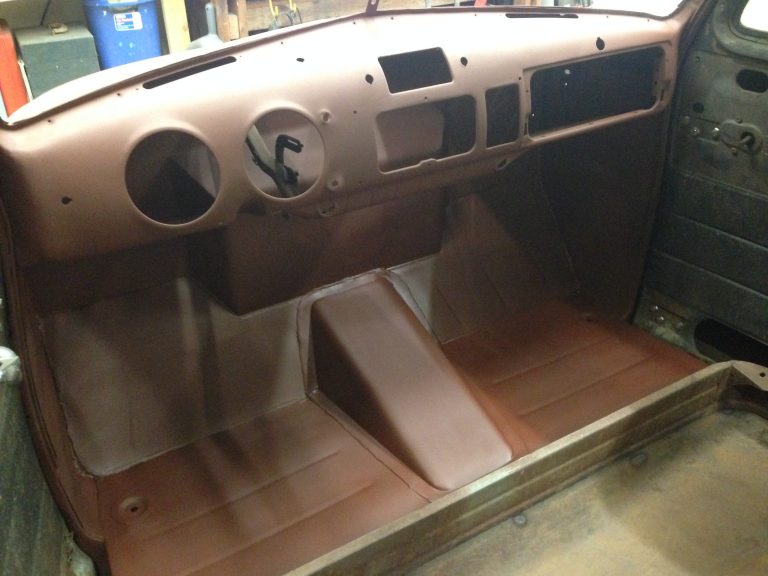 The passenger door is original to the truck. It went back in perfect. 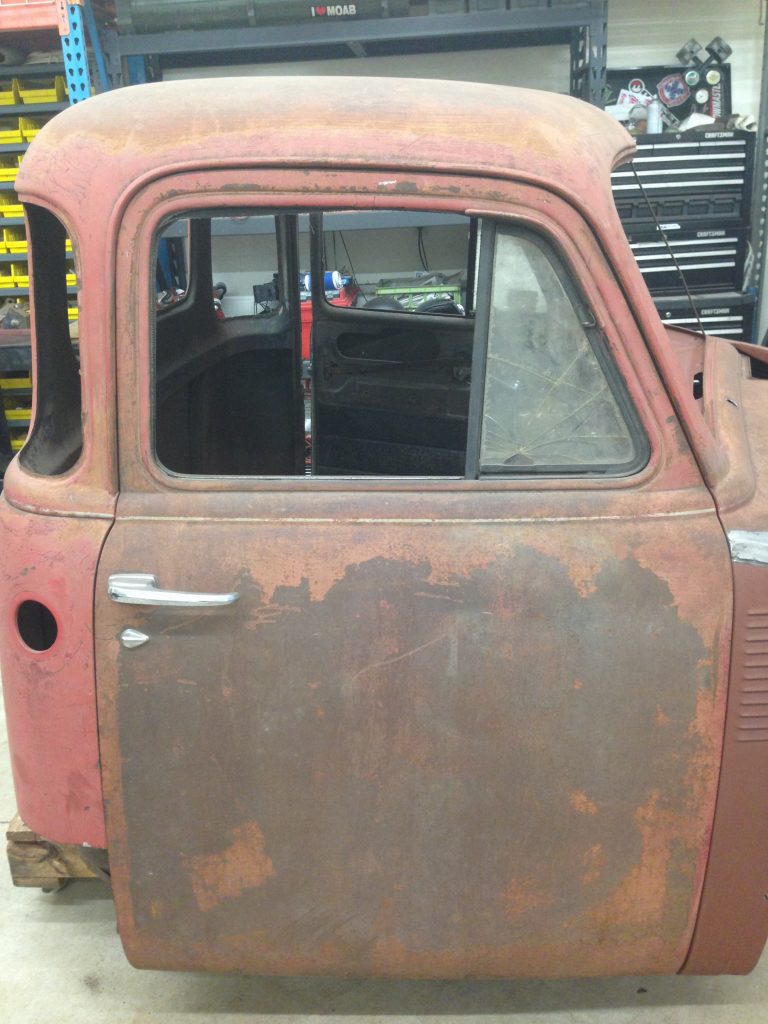 The drivers door is a replacement. Since I put the lower cowl and hinge pocket back to their original spot, this door didn't fit well at all. Crap. Luckily, I am well acquainted with my grinder, and I would rather be taking off than adding on! Corners came out next. 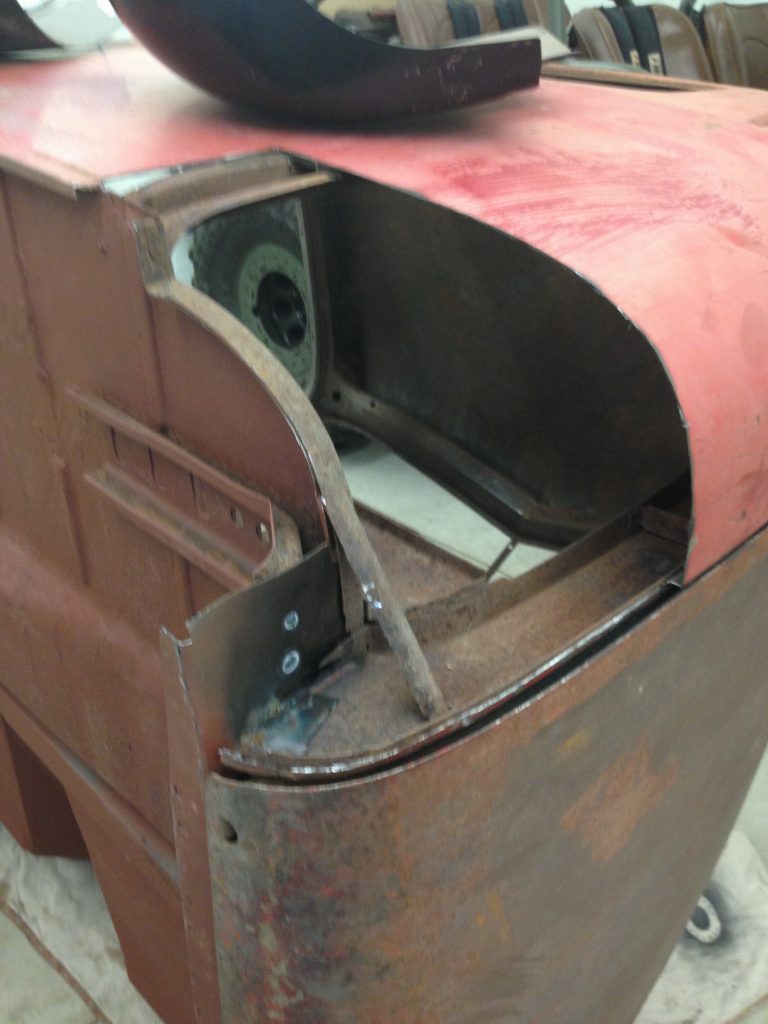 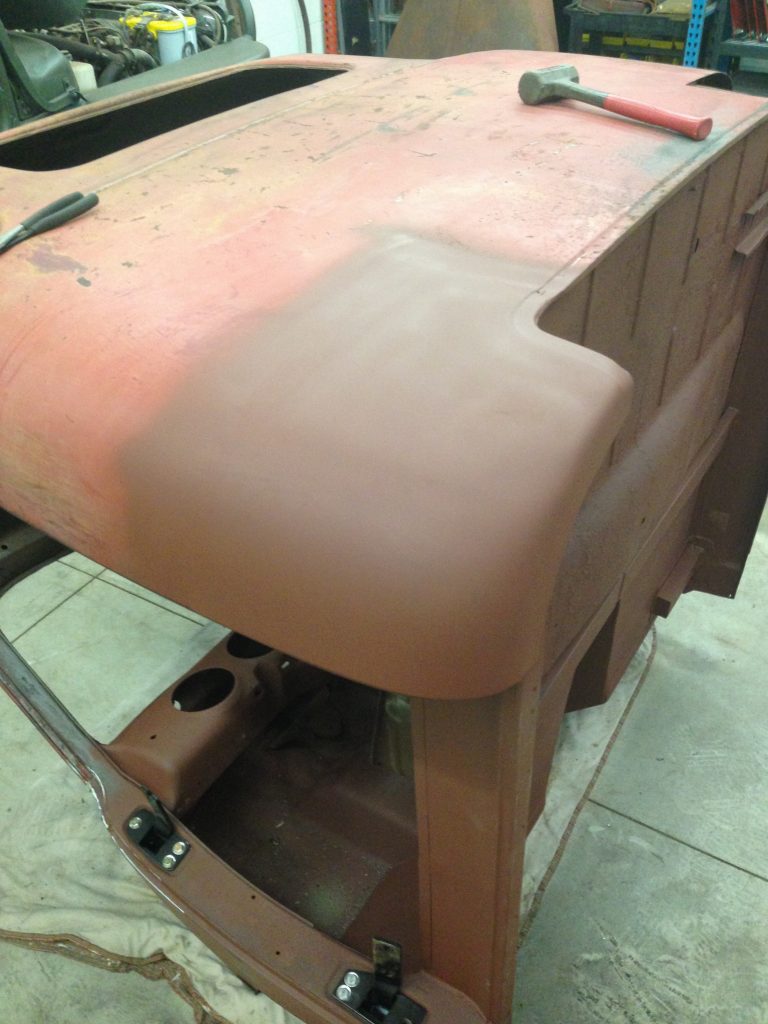 Stay tuned for more! Last edited by HULK64; 09-10-2017 at 10:26 PM. |
|
|

|
|
|
#3 |
|
Registered User
Join Date: Jan 2015
Location: Prior Lake MN
Posts: 87
|
Re: Project Eugene: 1949 5 Window (Part 2)
Filled the filler neck hole went away:
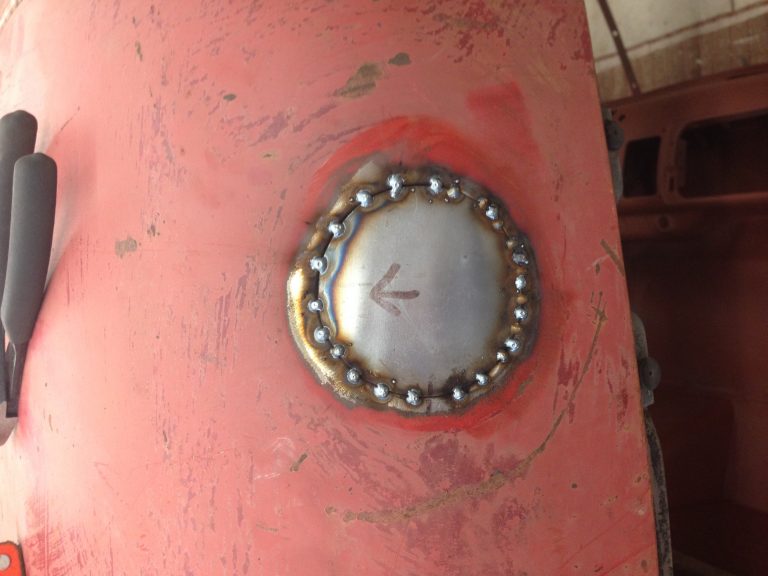 I spent my cold winter months enjoying having heat in the shop for the first time in...forever and working on the fenders and remaining tin work. Front fenders: 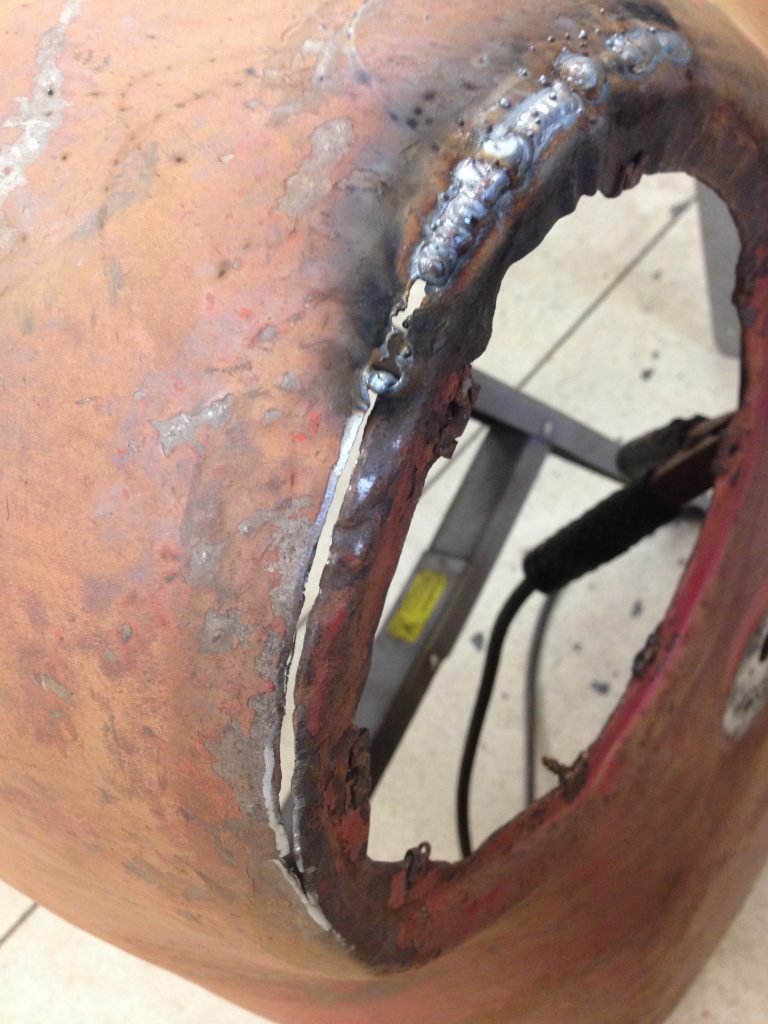 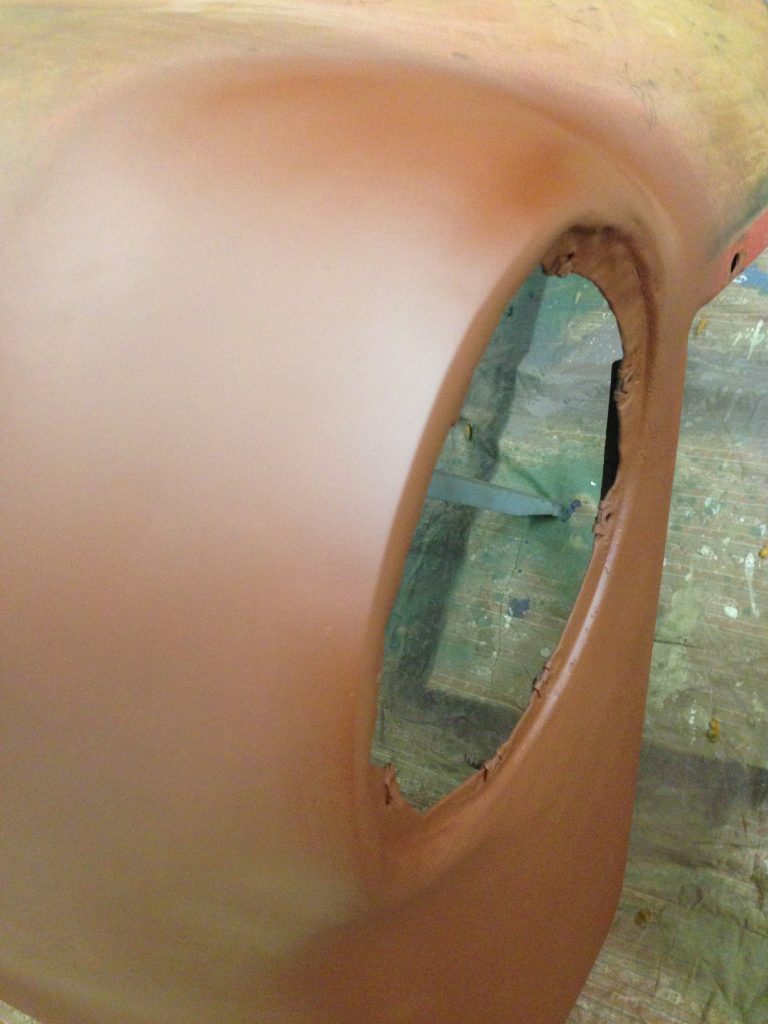 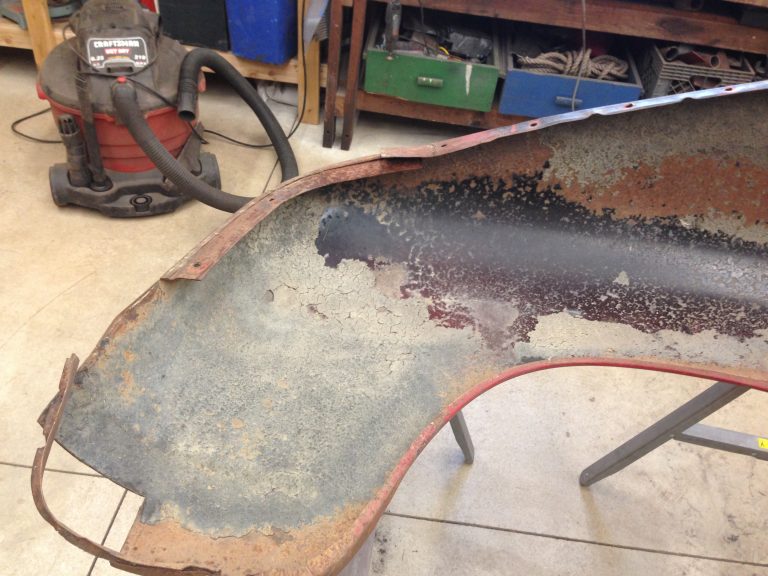 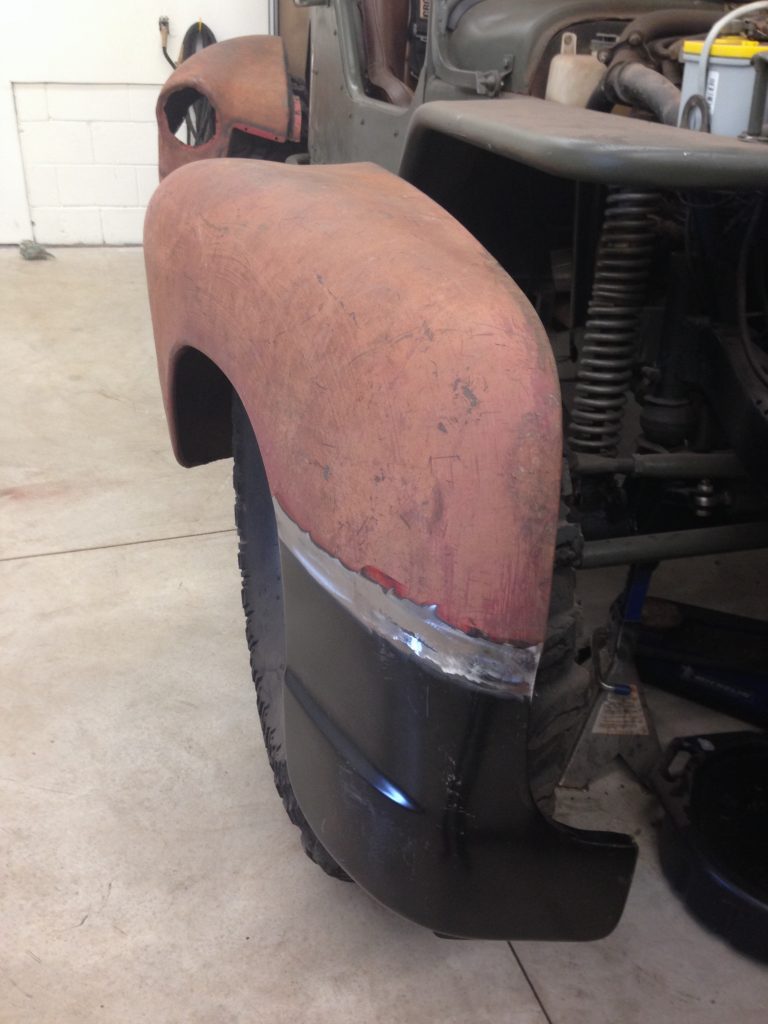 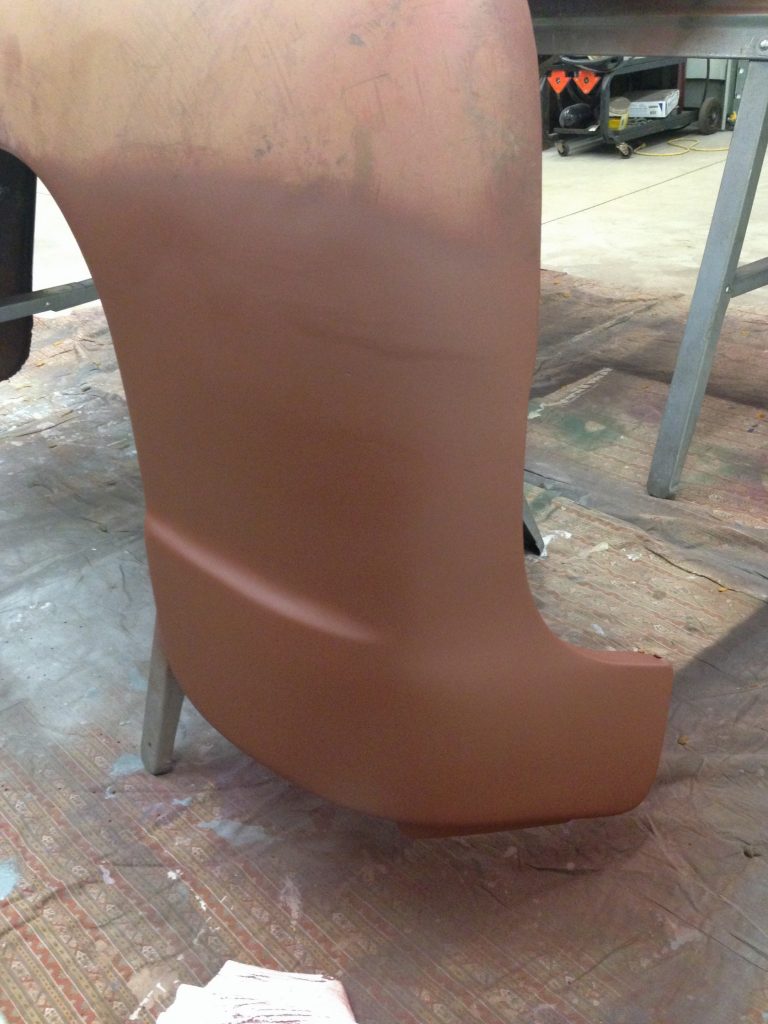 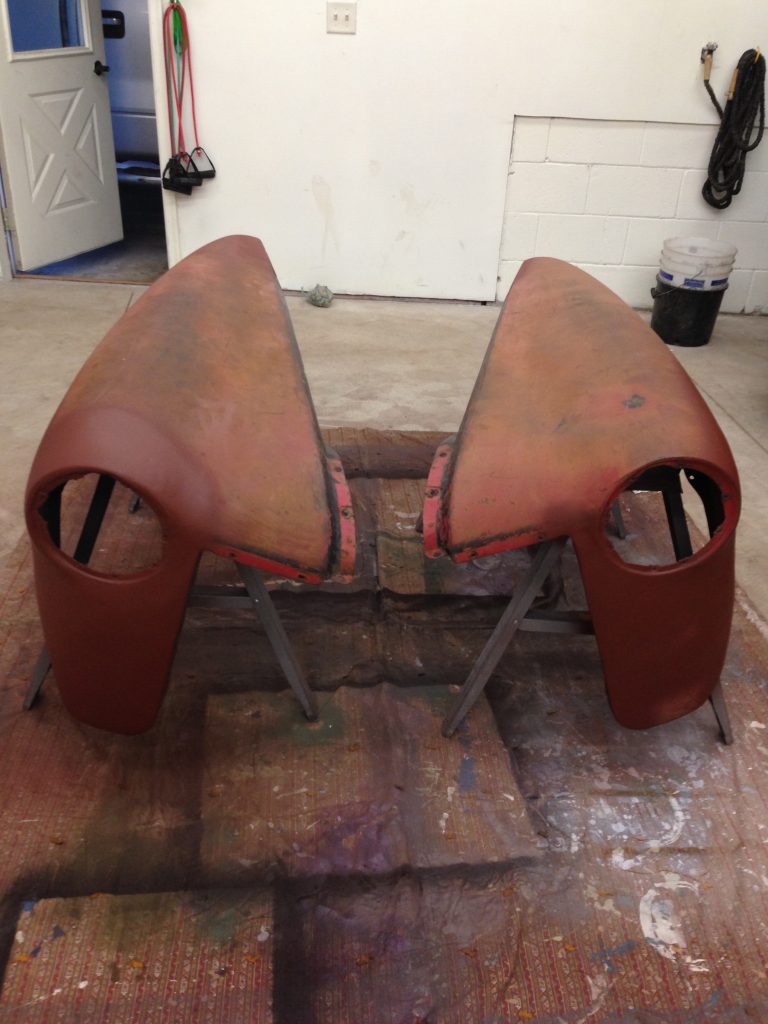 Rear Fenders- So much rot... 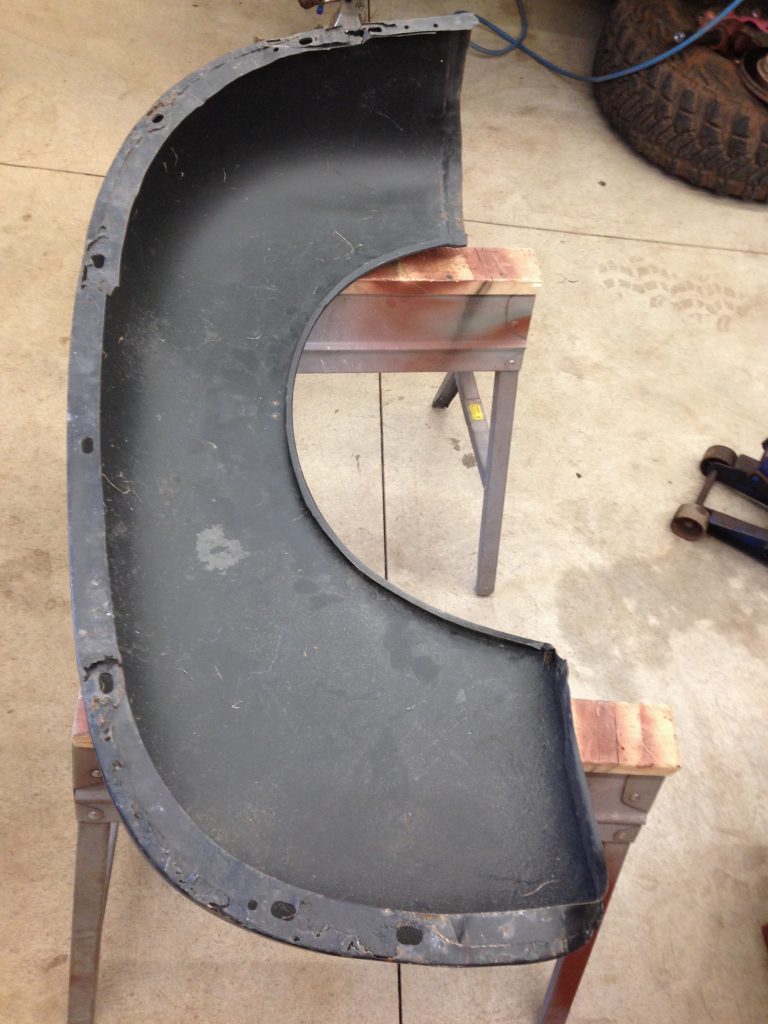 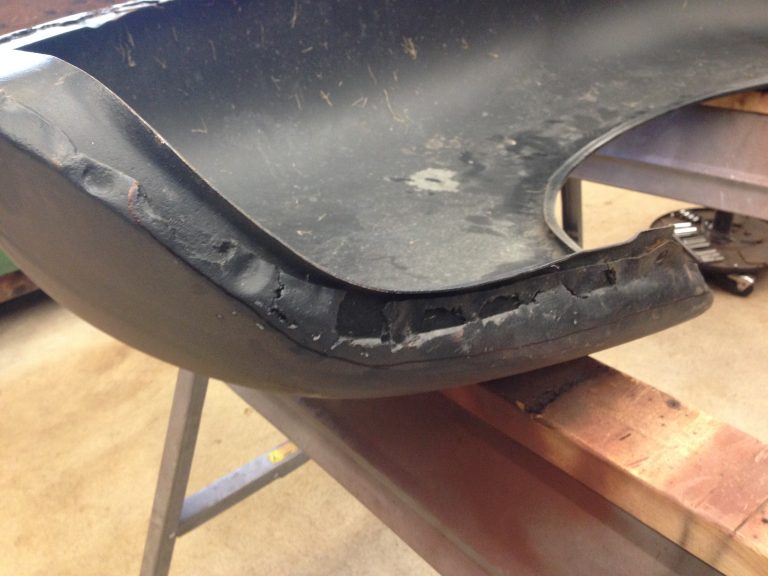 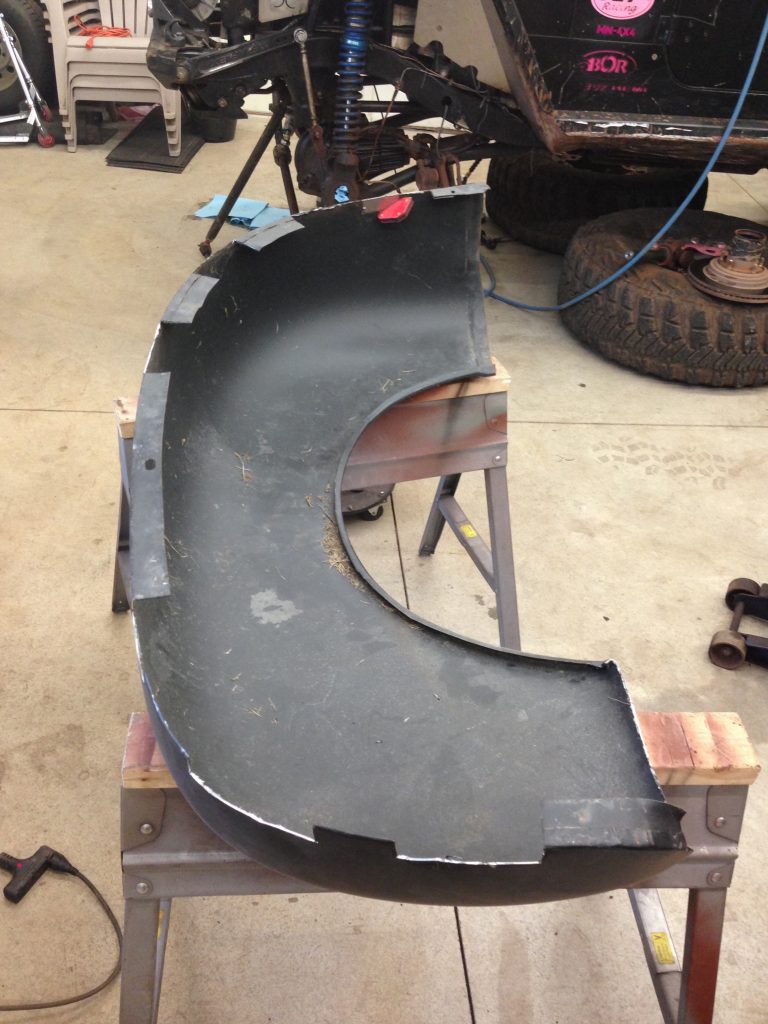 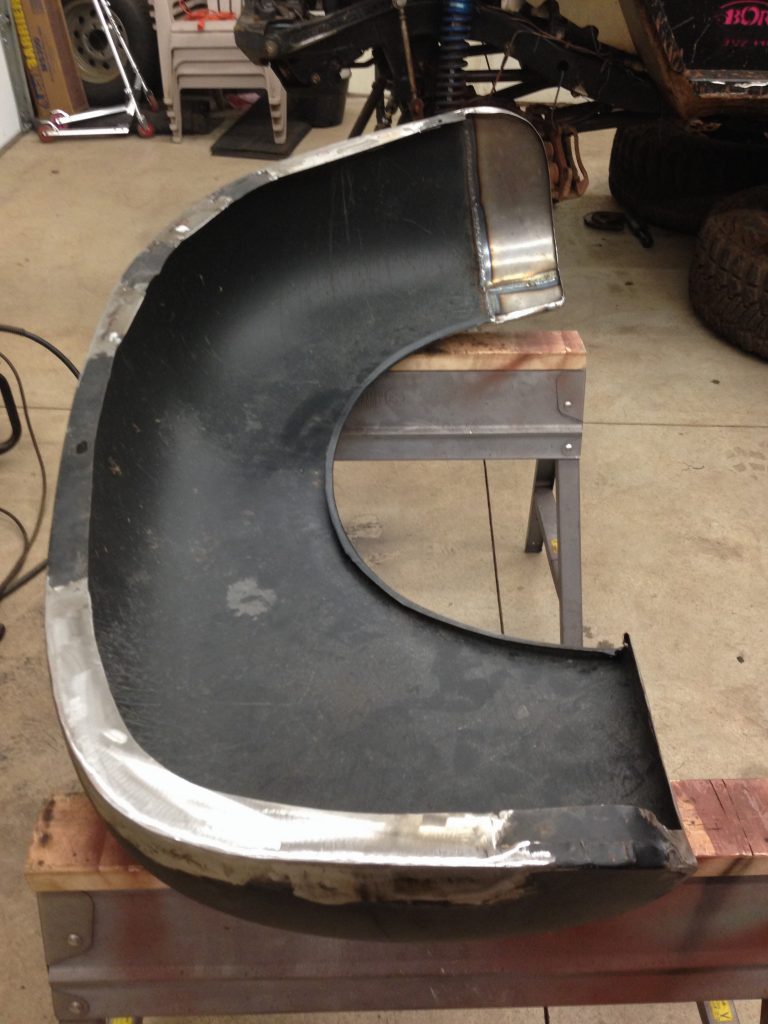 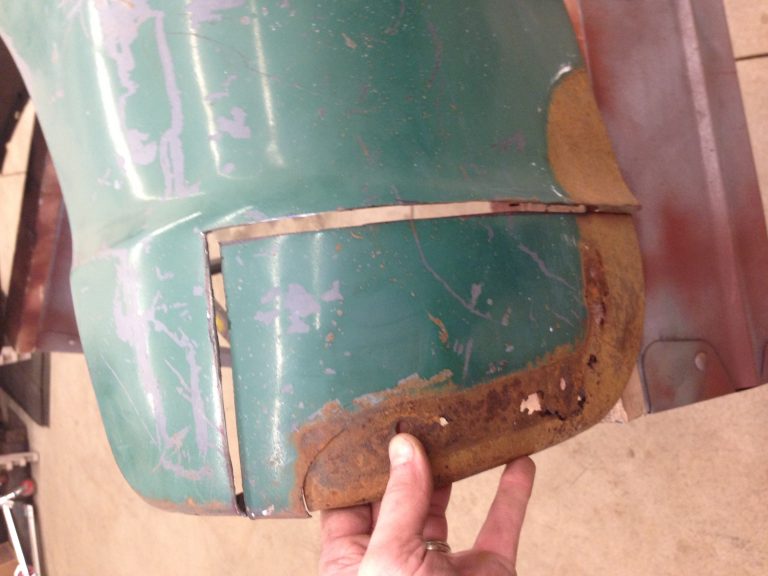 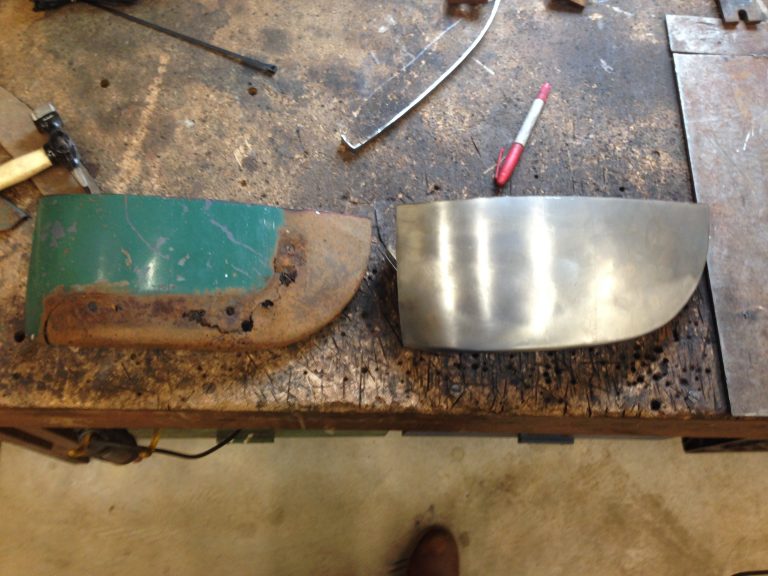 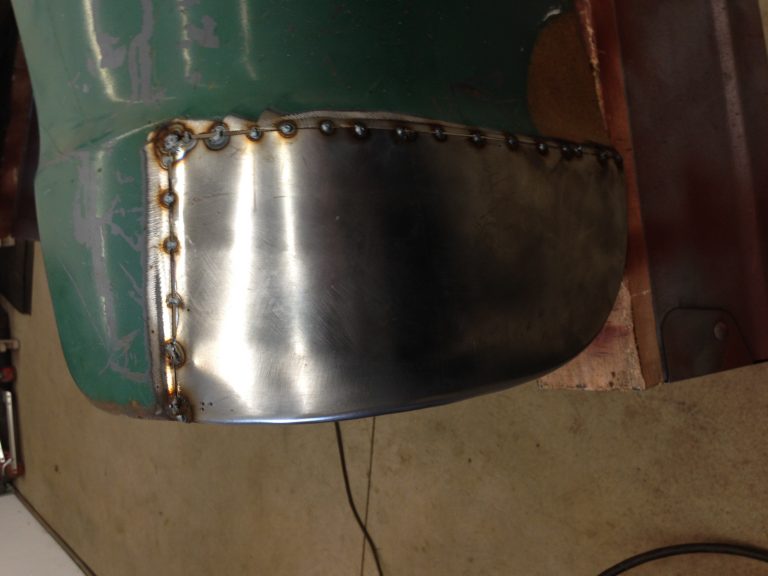
|
|
|

|
|
|
#4 |
|
Registered User
Join Date: Jan 2015
Location: Prior Lake MN
Posts: 87
|
Re: Project Eugene: 1949 5 Window (Part 2)
Next, I stripped the frame, and got the Code504 kit mounted up. Kit is nice- HUGE time saver.
Cab mounted, running boards fit: 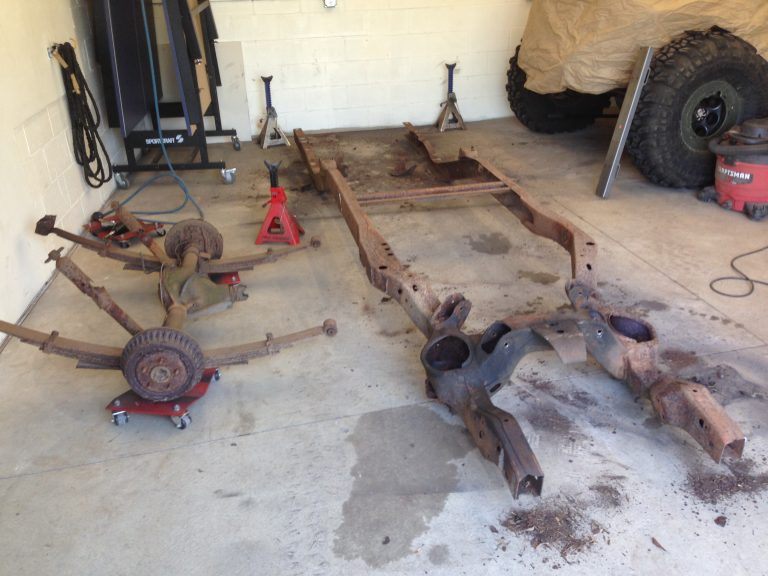 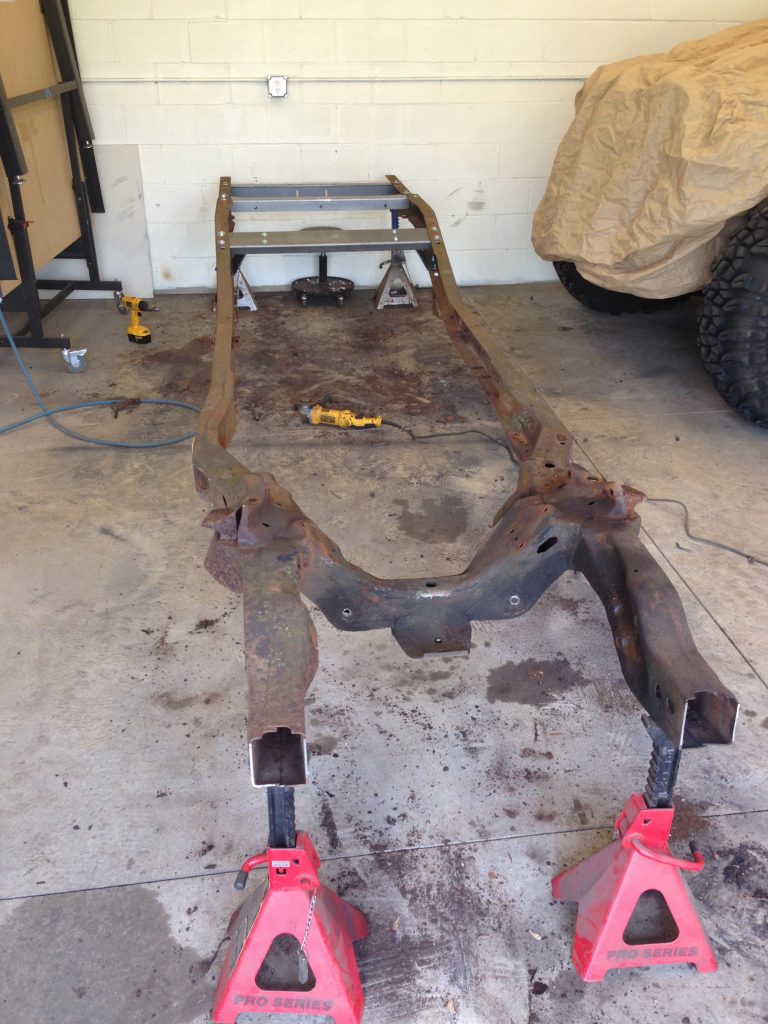 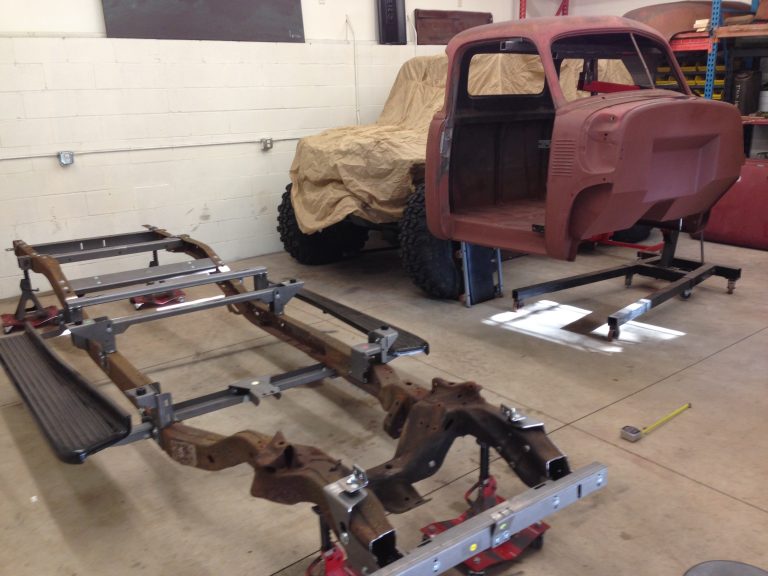 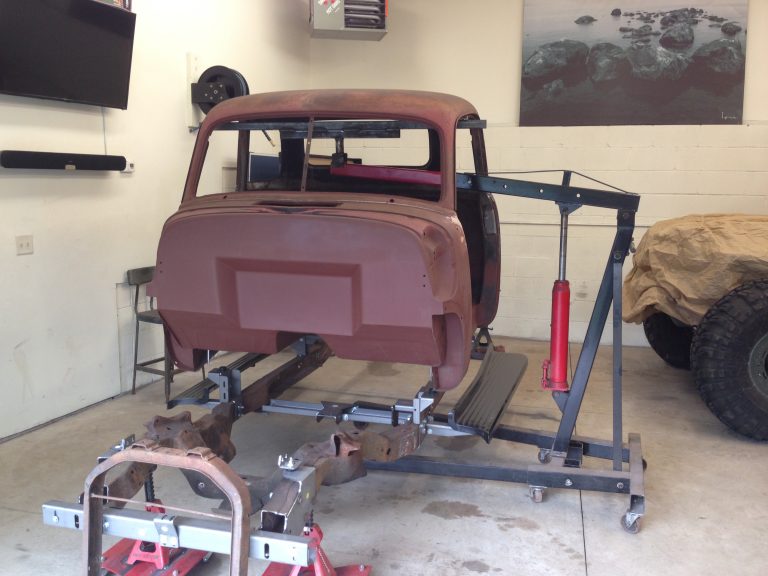 First time in the cab on the frame- it was exciting... 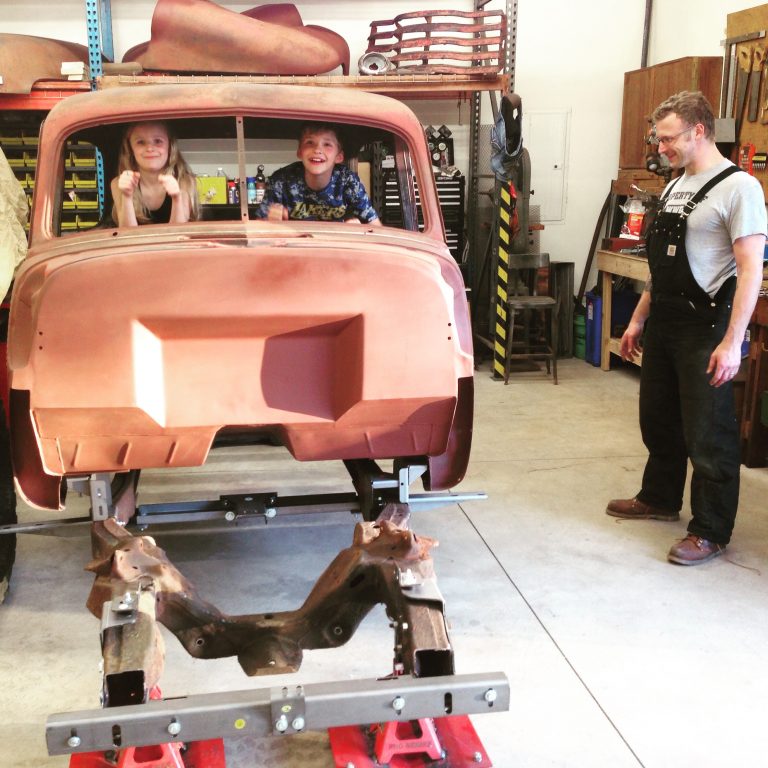 Then we had to mount the bed to see where we were headed... 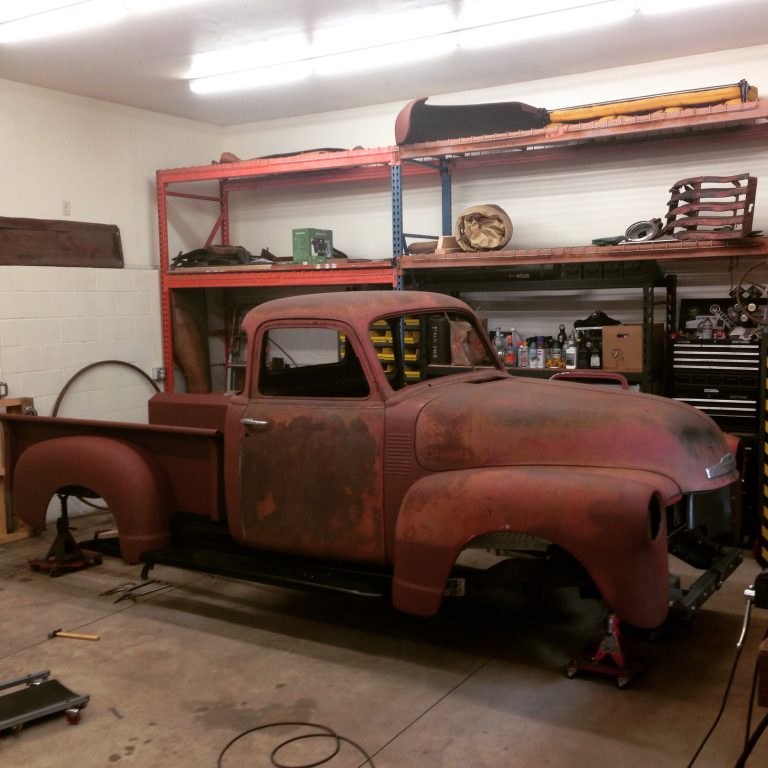 Mounted the Plymouth tail lights. 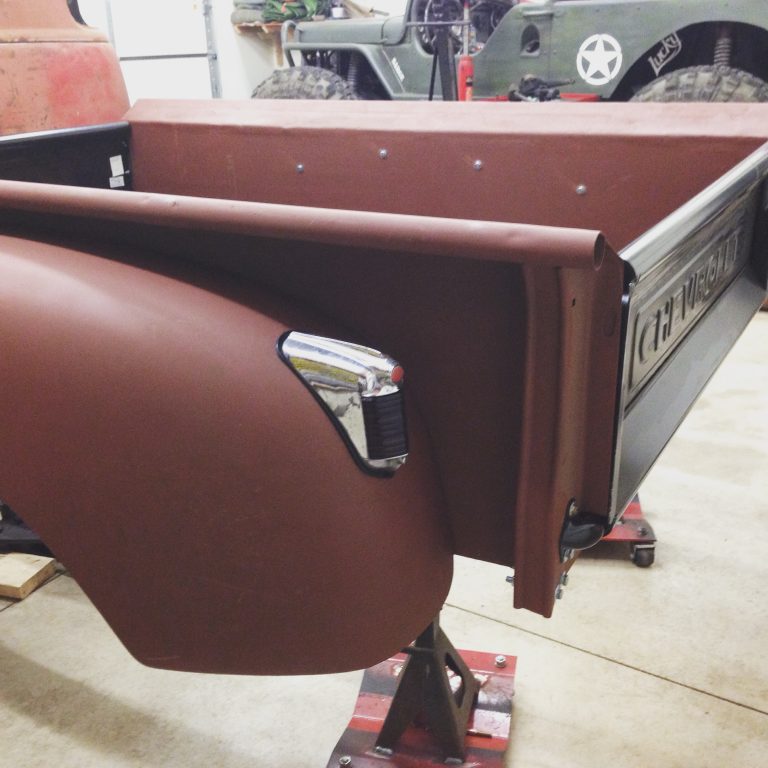 Grill clean up with diet coke 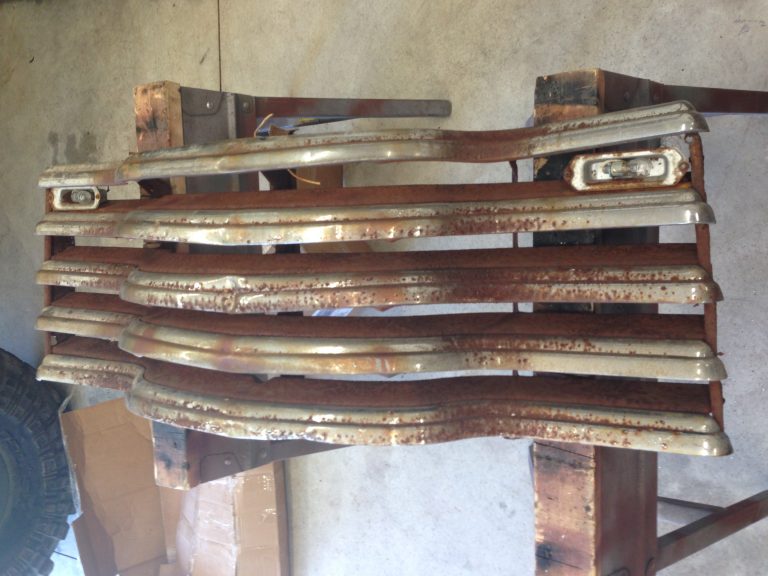 Little one helped install it 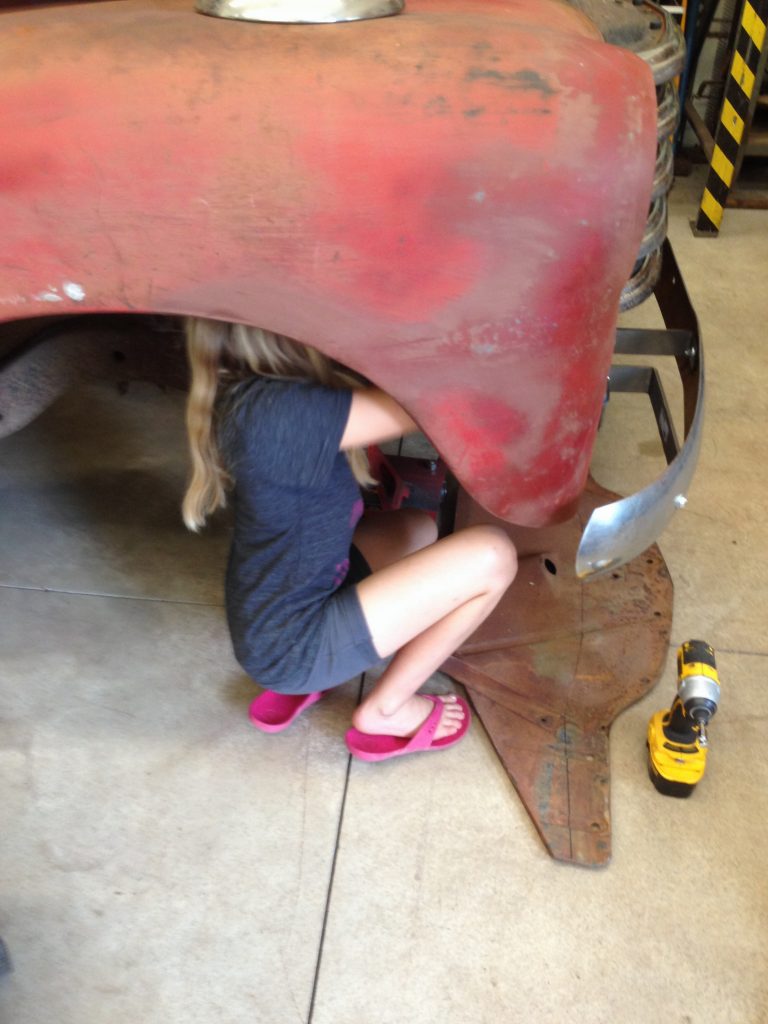 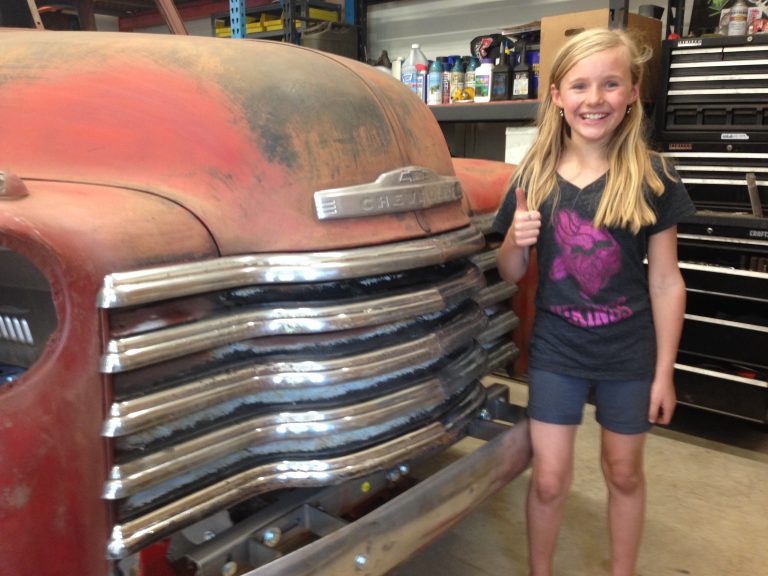 And after fighting the front gaps for WAY too long- it started to look like a truck again. 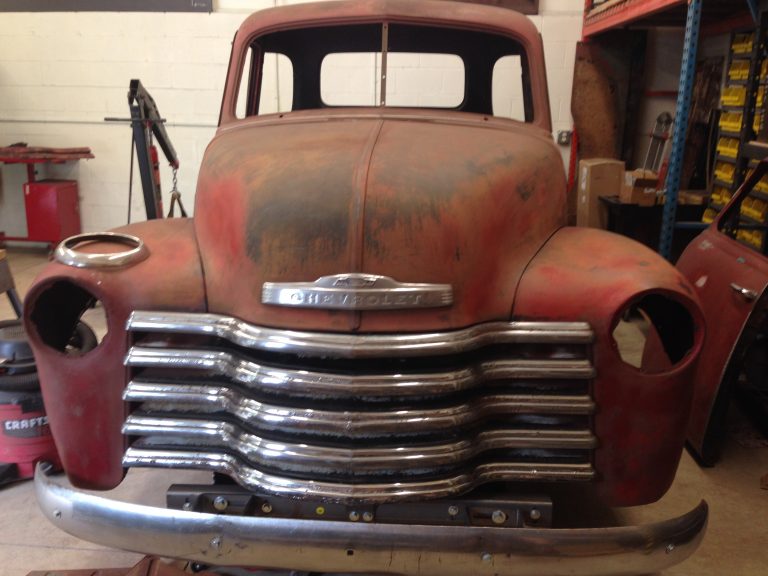
|
|
|

|
|
|
#5 |
|
Registered User
Join Date: Jan 2015
Location: Prior Lake MN
Posts: 87
|
Re: Project Eugene: 1949 5 Window (Part 2)
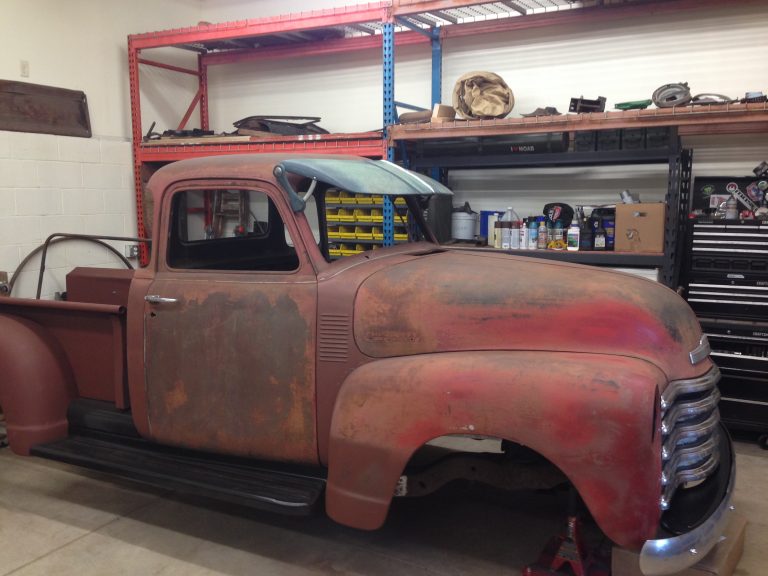
Next I found a fulton visor - finally.
 Got the rear suspension mocked up. Lower rider depot- great fab pieces 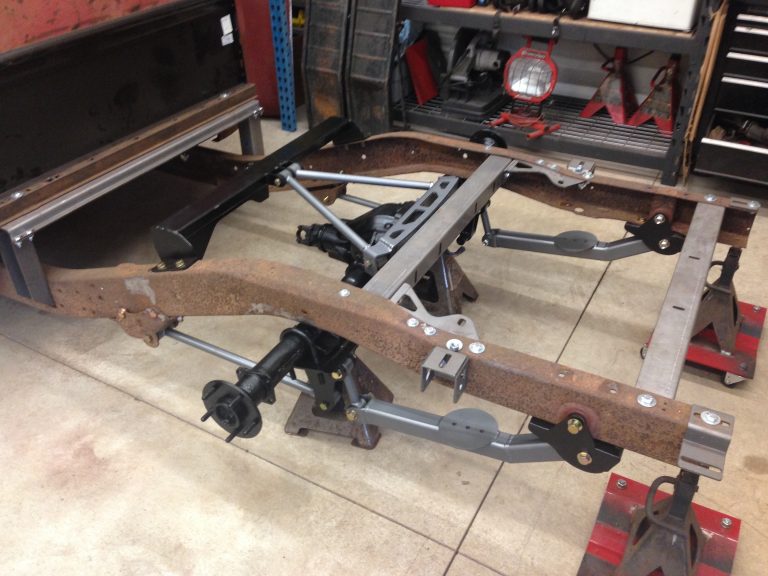 And I'll be dadgum- the wheel is actually centered. 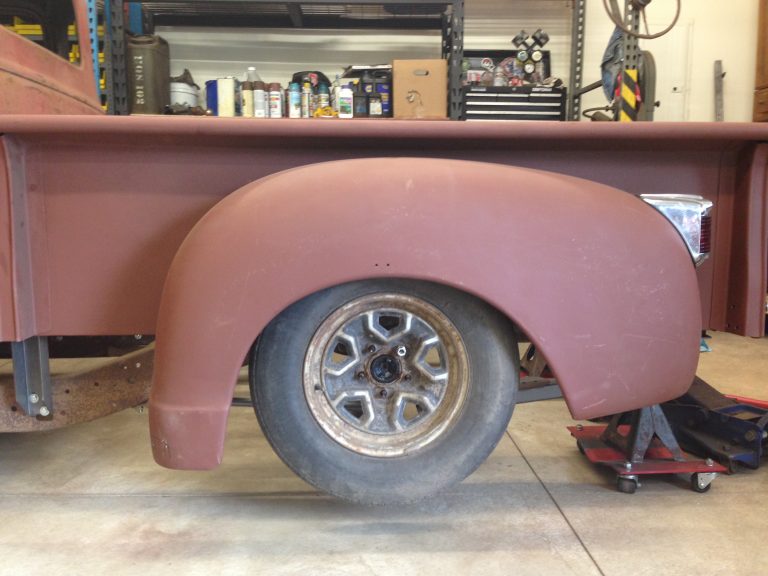 And got the notches in place. Funny story- I got the initial cuts done to cut out the old frame piece for the notch, and as I got through on one side- the whole thing shifted up about 1/2" real fast. I was convinced the frame had twisted or something terrible- turns out the Ebrake cable brackets was touching the bottom of the frame and I didn't know it- putting pressure up. Scared me to death, but all is well! 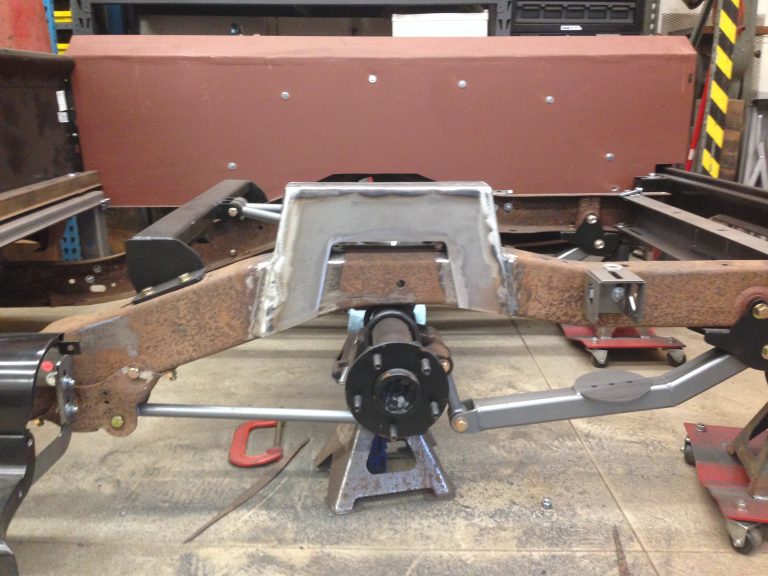 Mounted the bumpstop up inside it, worked out fine. 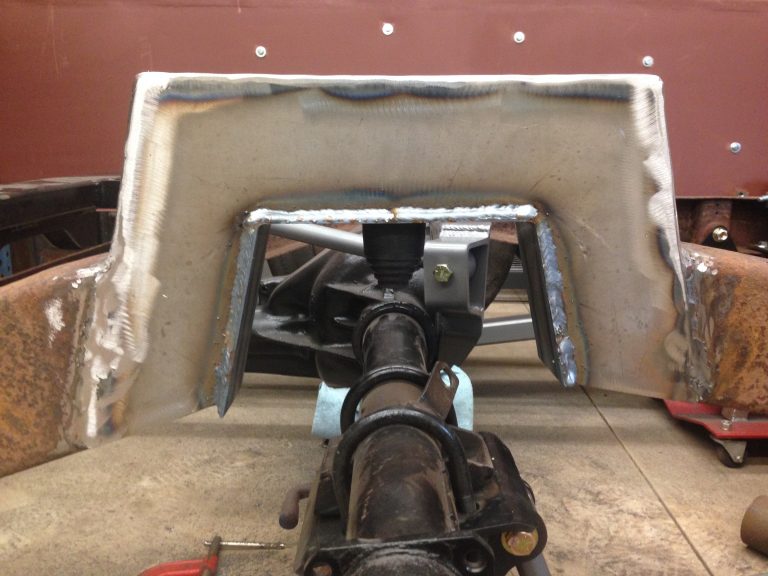 Welds 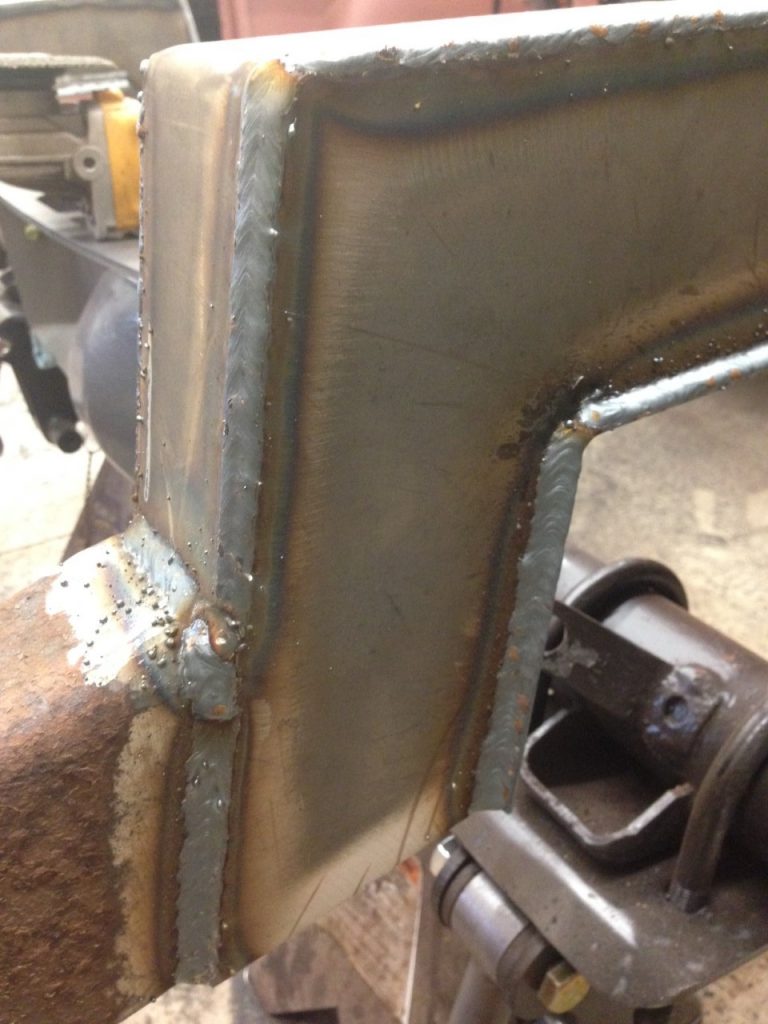 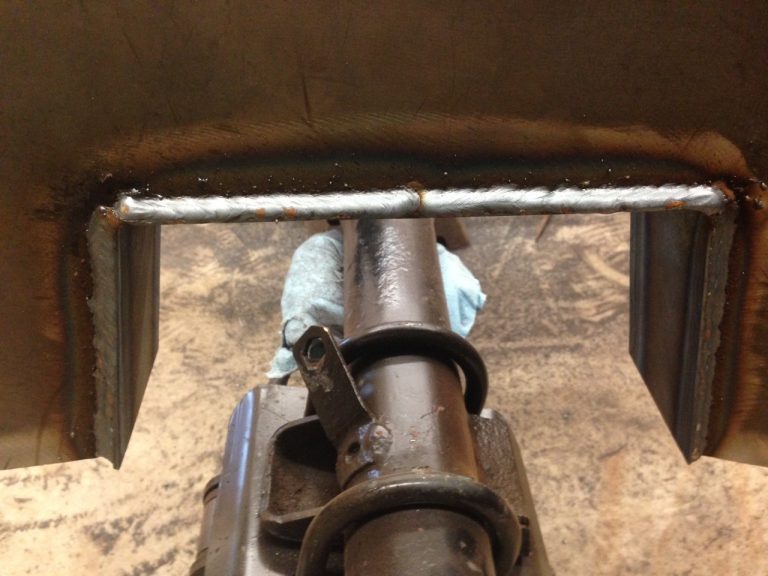 All happy in primer and between the bedsides. 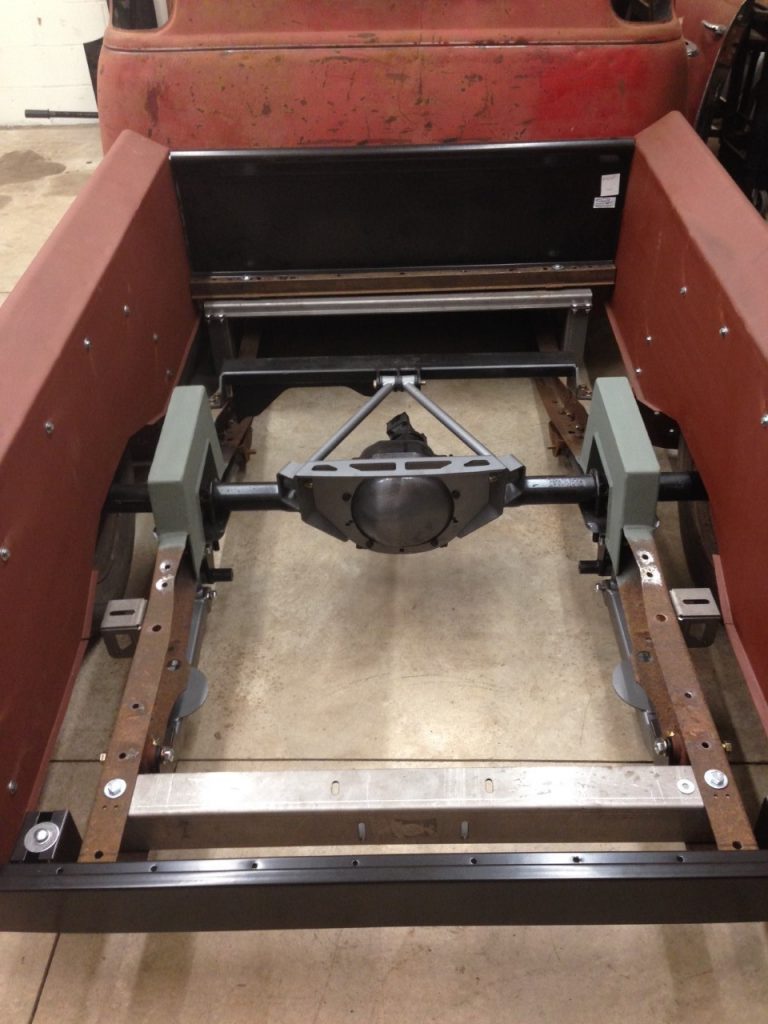 And where we sit now as we wait for a drivetrain! The front will still come down another 1-2" as it's sitting on the bolts for the trans crossmember right now... 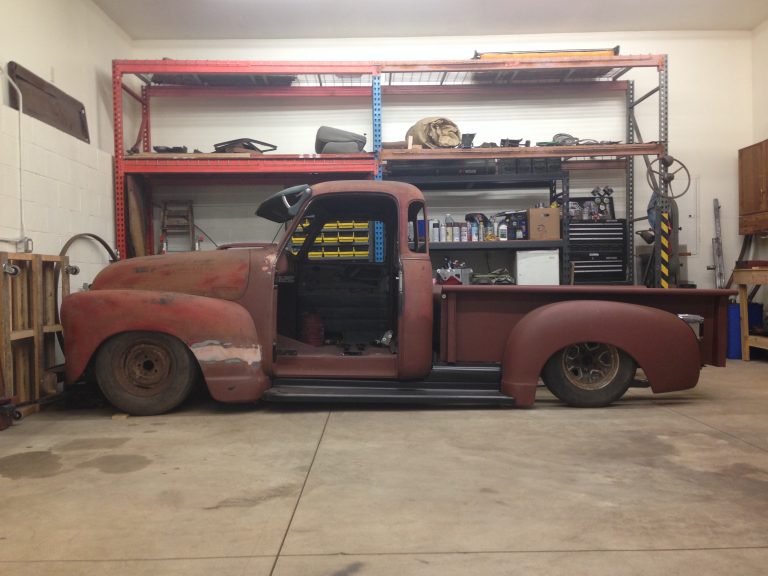 We have had an interesting go in October of last year- as one of my best shop helpers got bitten in the face by a dog. 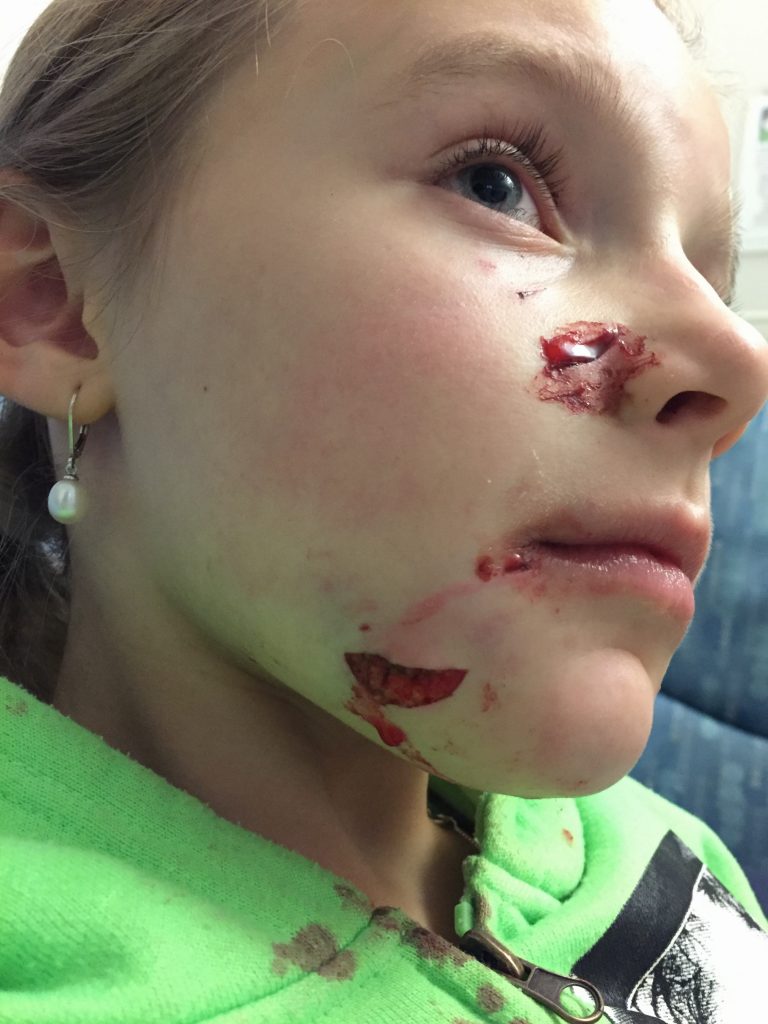 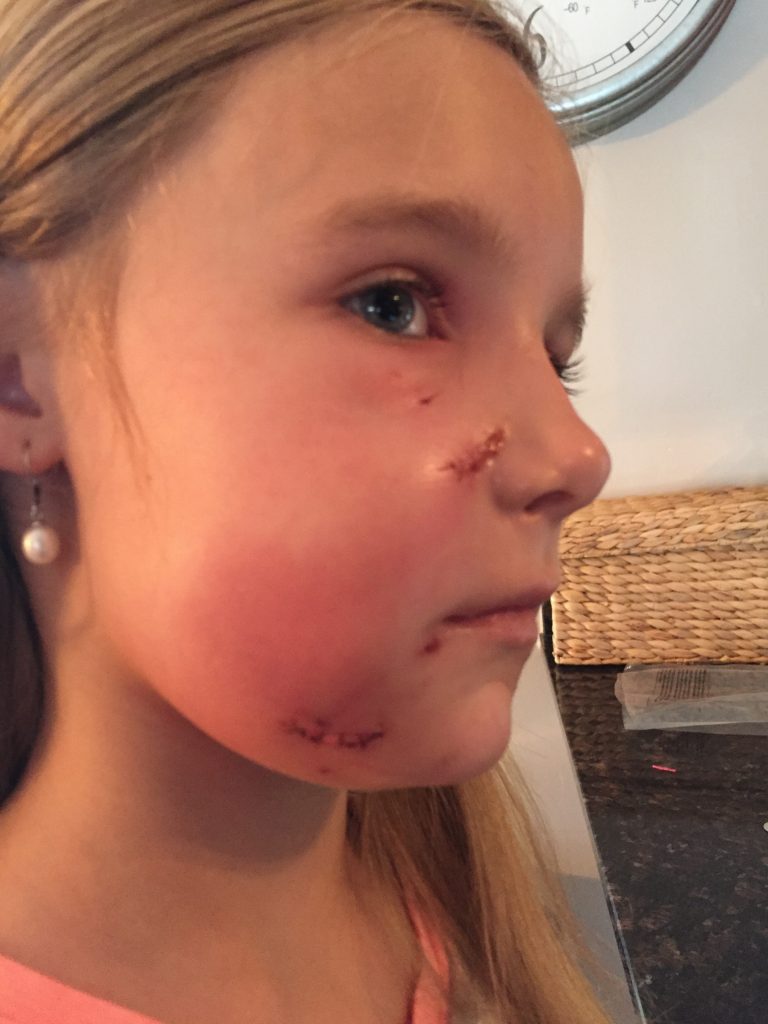 Plastic surgery, over 30 stitches, most of them internal- and lots of hugs later- and she is doing OK. Still a ways to go- she's a tough little chick. We have still been staying after it on the project, even as it gets cold here in MN. Had to make a decision on what to do with the inner fenders, since the ones I bought were designed to be used with a stock frame. My S10 didn't line up with the bottom of the fenders at all. So, I ended up chopping off the bottom bend and moving the louvers up into the top half since I thought they were coolest part. 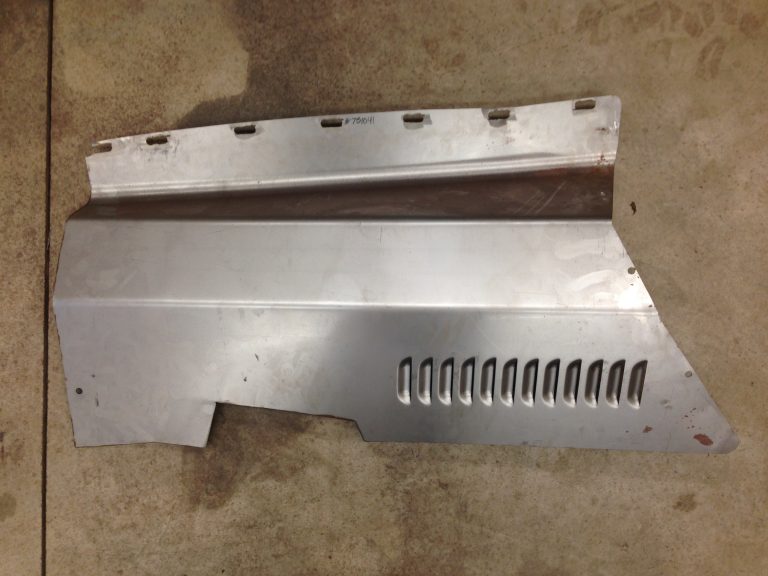 After: 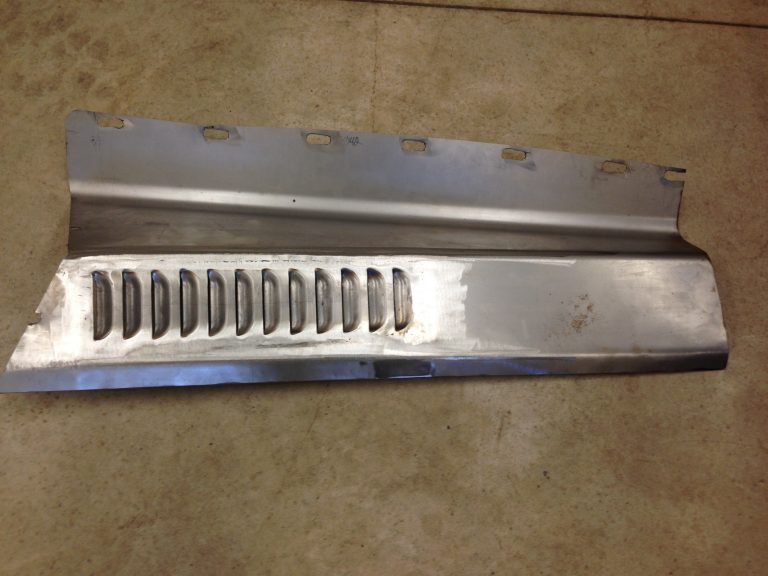 This way the headers aren't an issue, the steering won't be a problem, and the heater lines can sneak underneath these as well. Before: 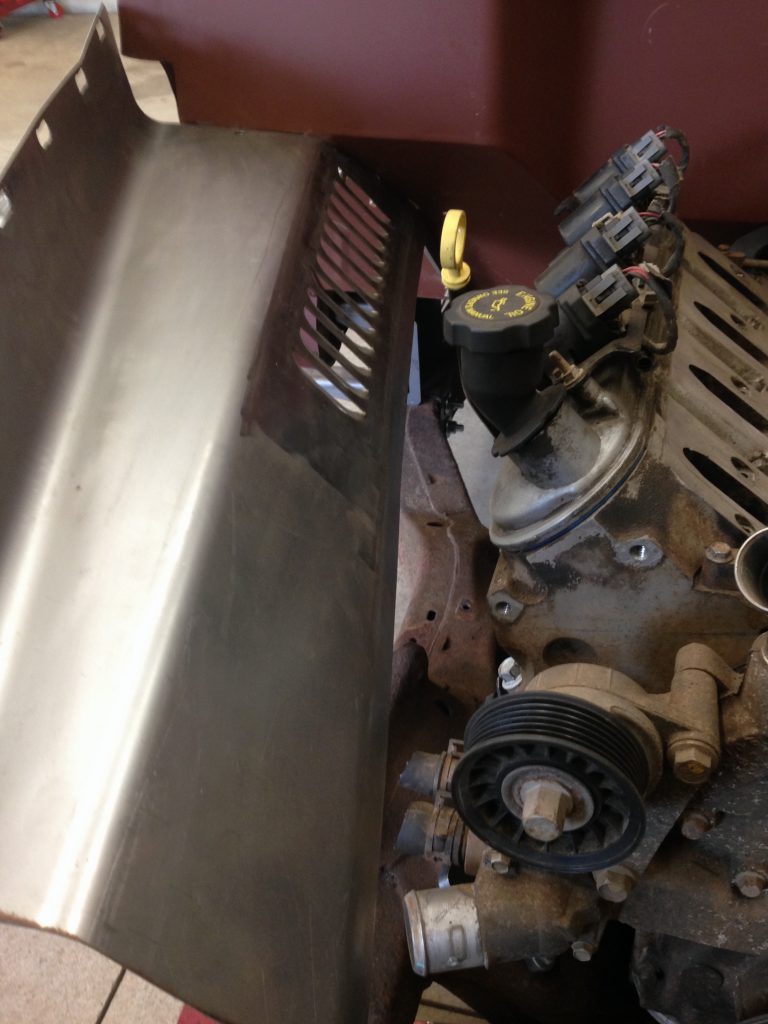 Then I stripped the whole thing down and got it sandblasted. Best money I have spent so far. It was perfectly clean- so I welded the important body mount pieces in, and painted it before it got too cold. 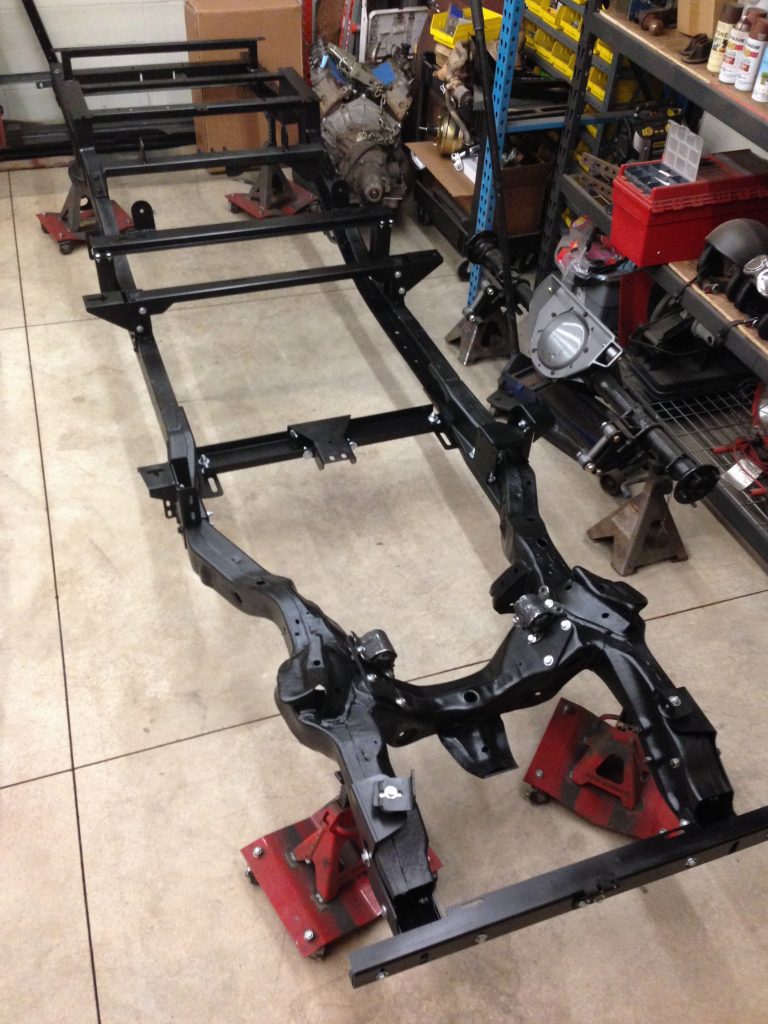 Well that was HUGELY motivating, so my son and I got the motor cleaned up and installed pretty quick after that, rapidly followed by headers and exhaust build. The summit builder kit is awesome- makes it so easy. Dynomax super turbo mufflers and 2.5" from front to back. Just need to install the bed and rear bumper to finish up the exits. 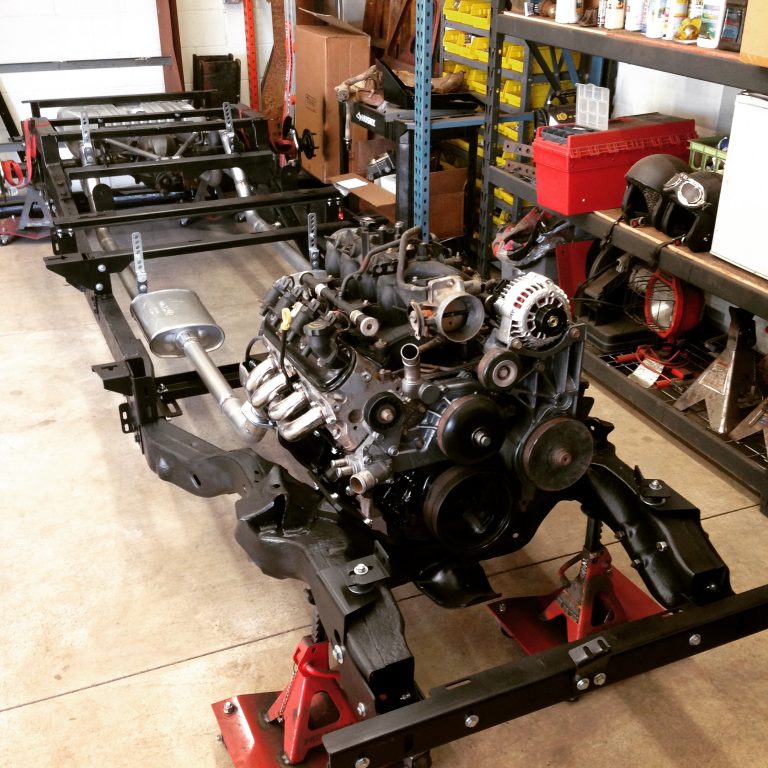 Gas tank is mounted and exhaust got done as well. 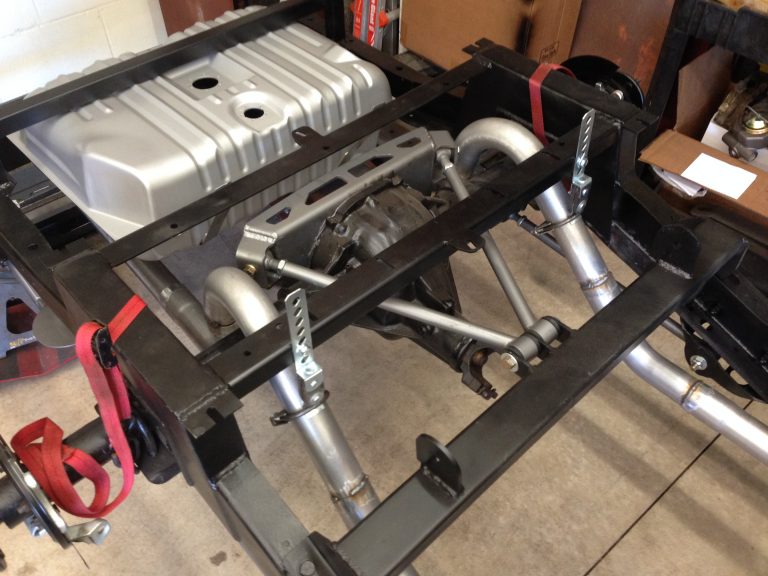 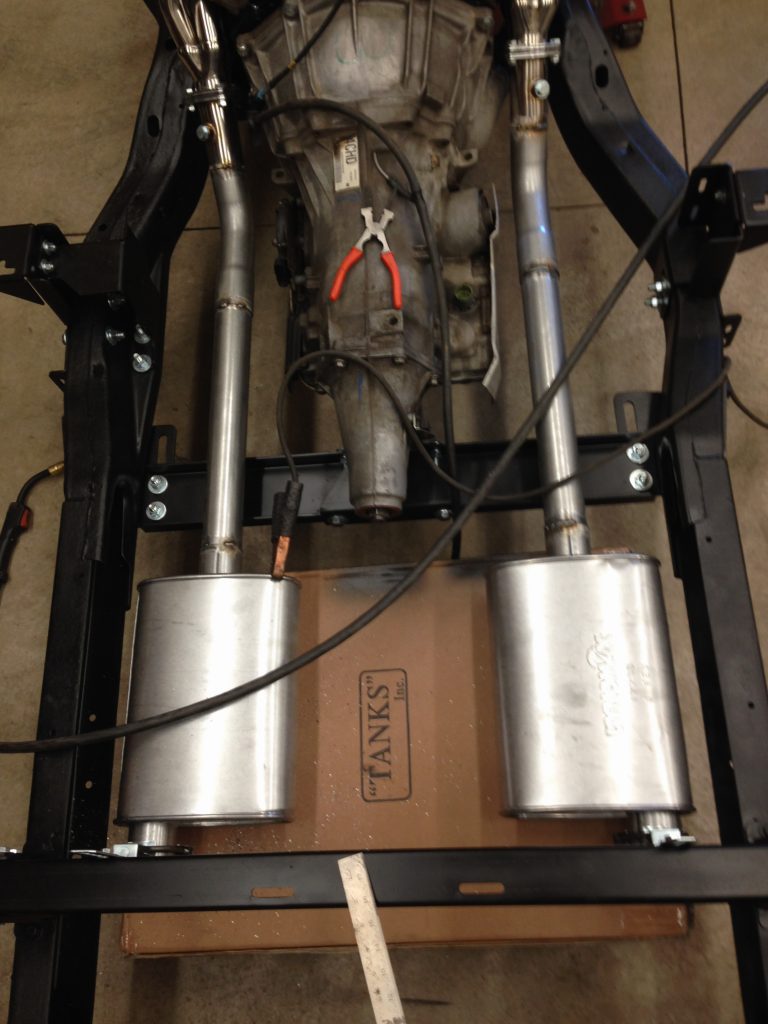 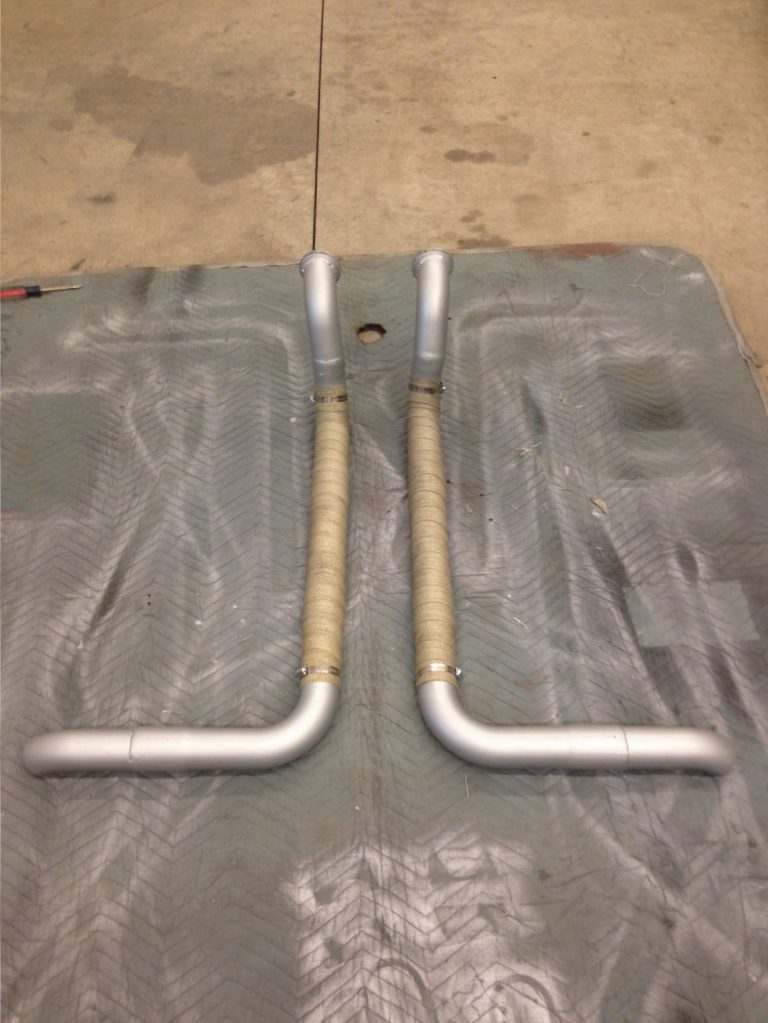 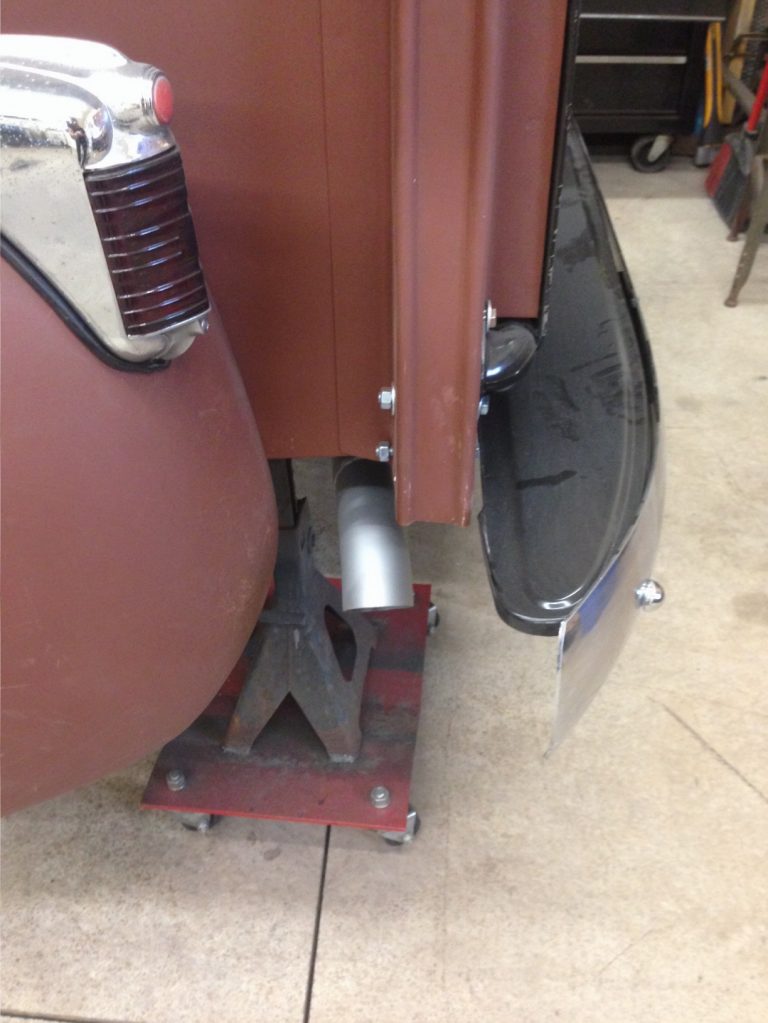 Then I found some shoe cobbler molds used to make shoes back in the day and fabbed up some mounts so they can be my pedals. 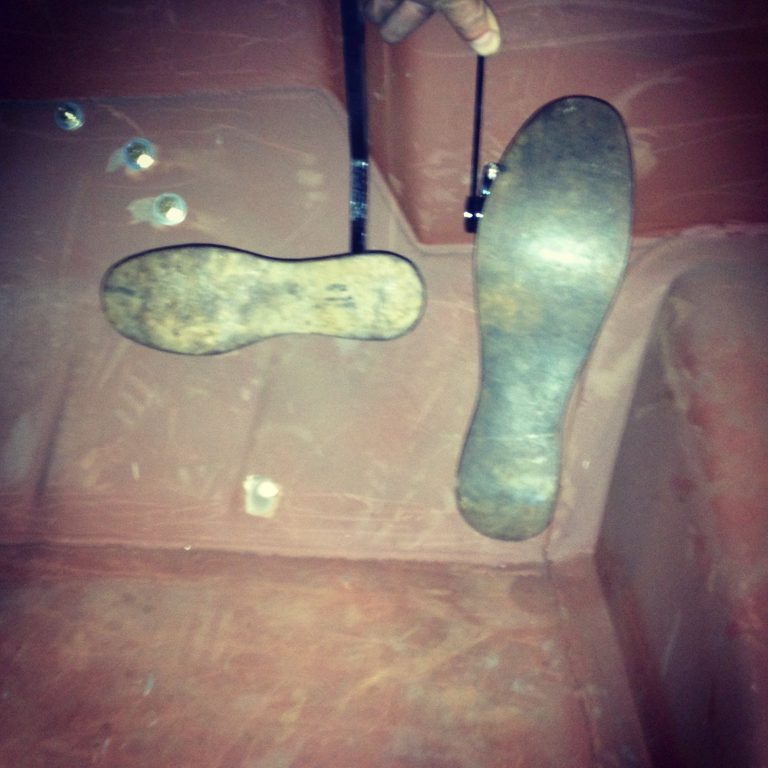
|
|
|

|
|
|
#6 |
|
Registered User
Join Date: Jan 2015
Location: Prior Lake MN
Posts: 87
|
Re: Project Eugene: 1949 5 Window (Part 2)
Well then I FINALLY got a rear bumper and got it mounted- I never liked how they dropped the rear bumper down so far from the factory, so I raised mine up and chopped up a filler piece and I think it cleaned up quite nicely. Just welded the rear bumper mounts right to the frame.
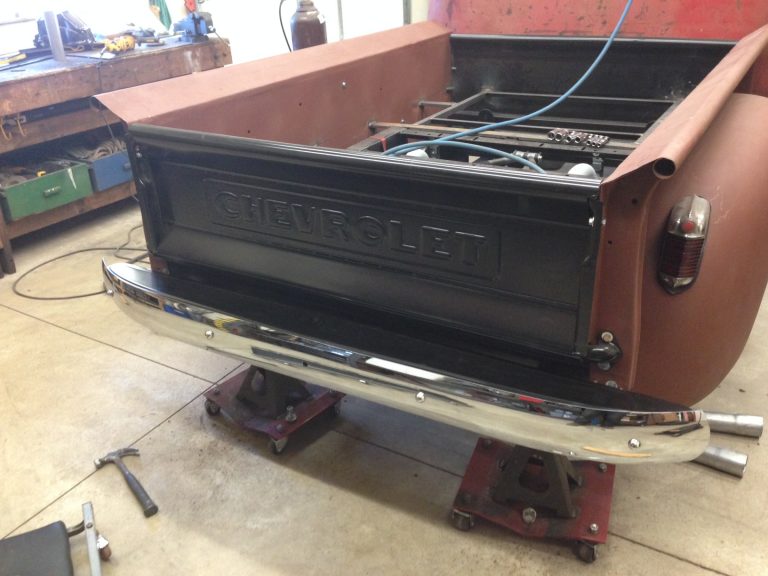 Only problem was that then I realized that I mounted the rear exhaust behind the axle way too low- and getting the tank out was going to be a nightmare if I raised them. Nuts. So I added some Vclamps to make it possible to move them up. It was a pain, but everything is where I like it now. 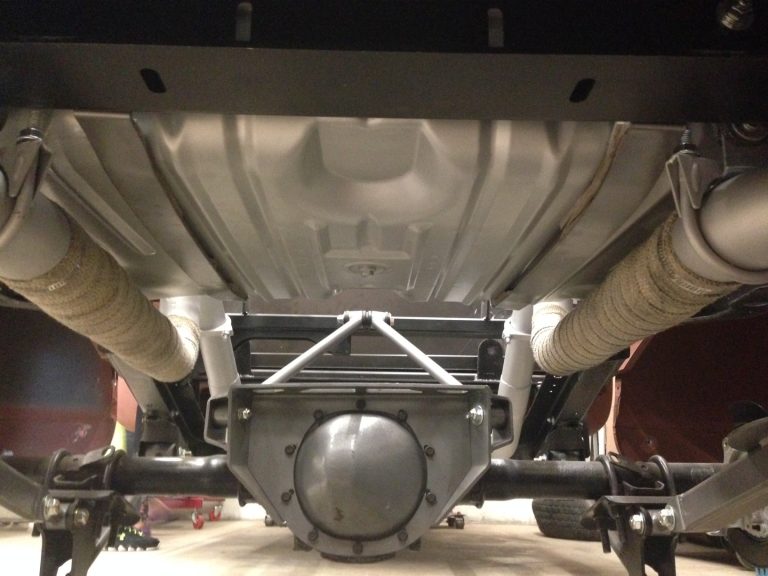 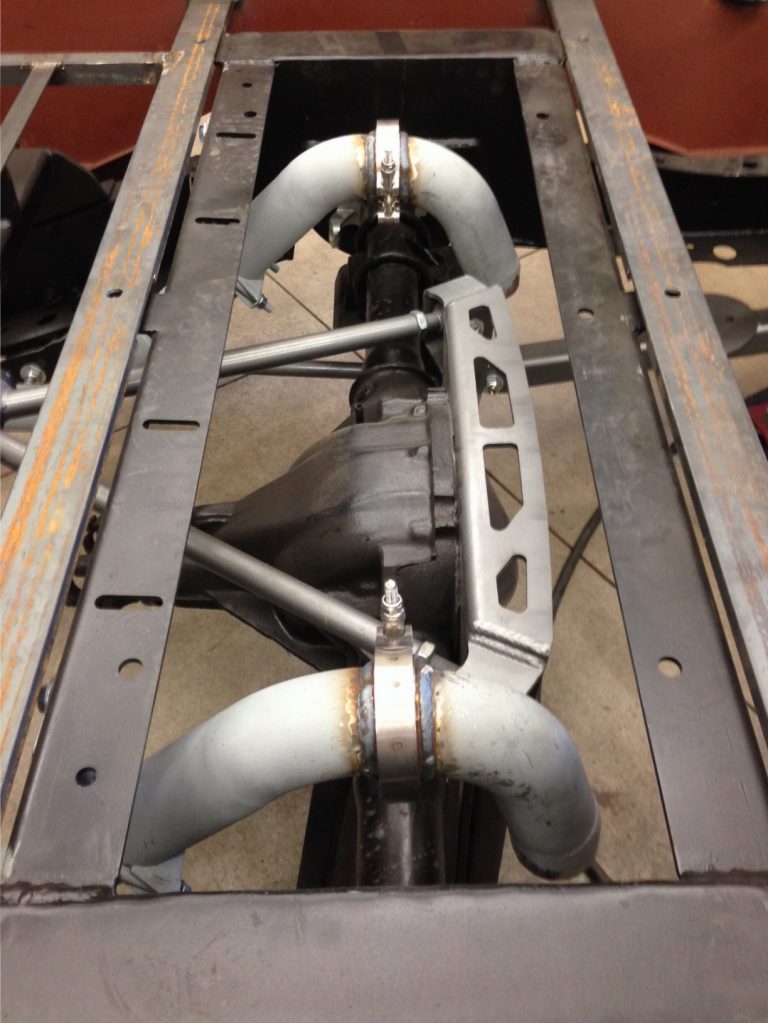 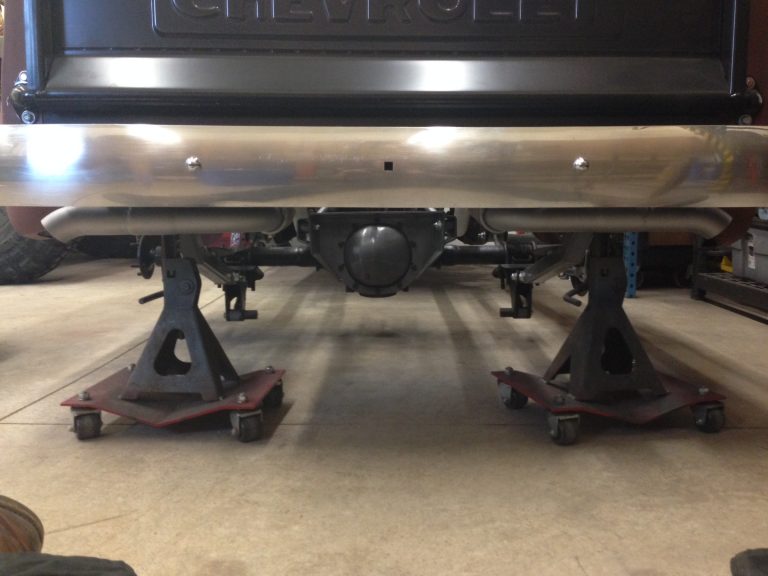 I got the rear shock mounts done, which means that all the fab on the rear end is DONE. While saving up for front end and steering parts, I got after fabbing up the bed. I laid down a plywood base and lined the top with barn wood: Nice and snug around the rear seat: 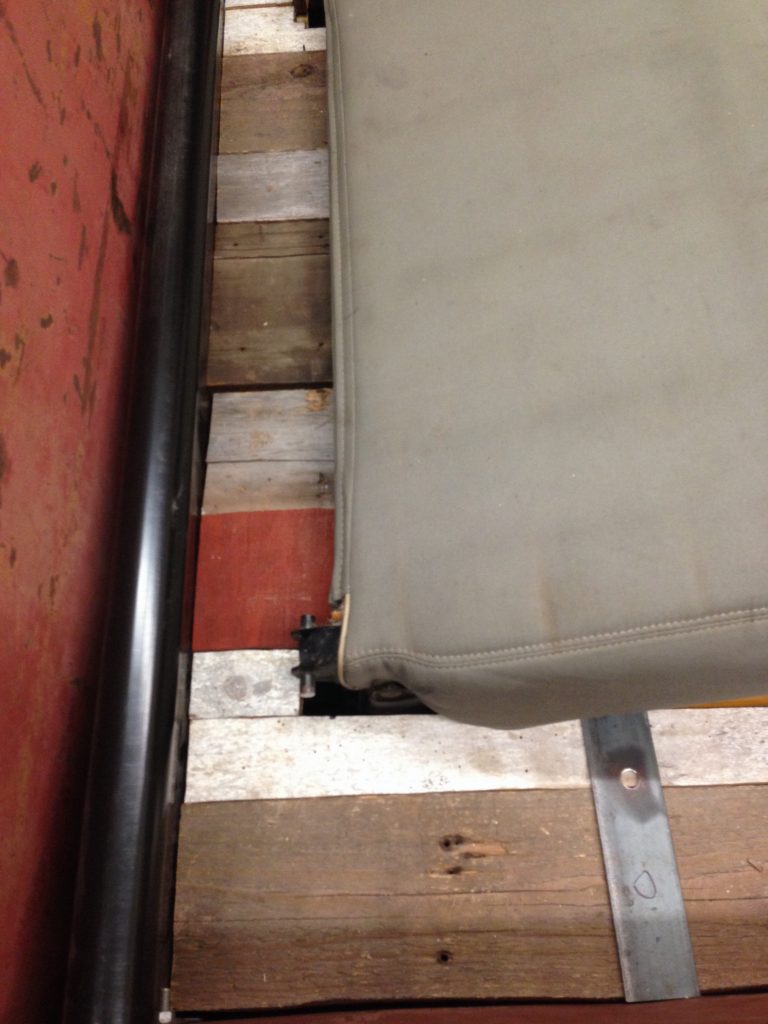 The boy and I made a crate out of pallet wood: 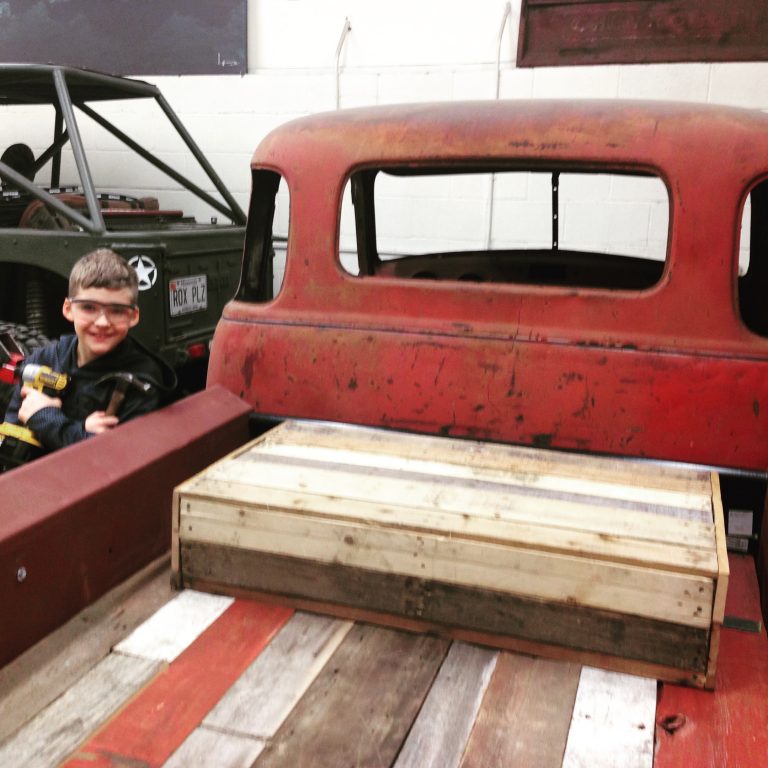 Then I paint/ stained it- and glued/ pinned all the barn wood in up from the bottom so there's no screw heads and mounted the straps: 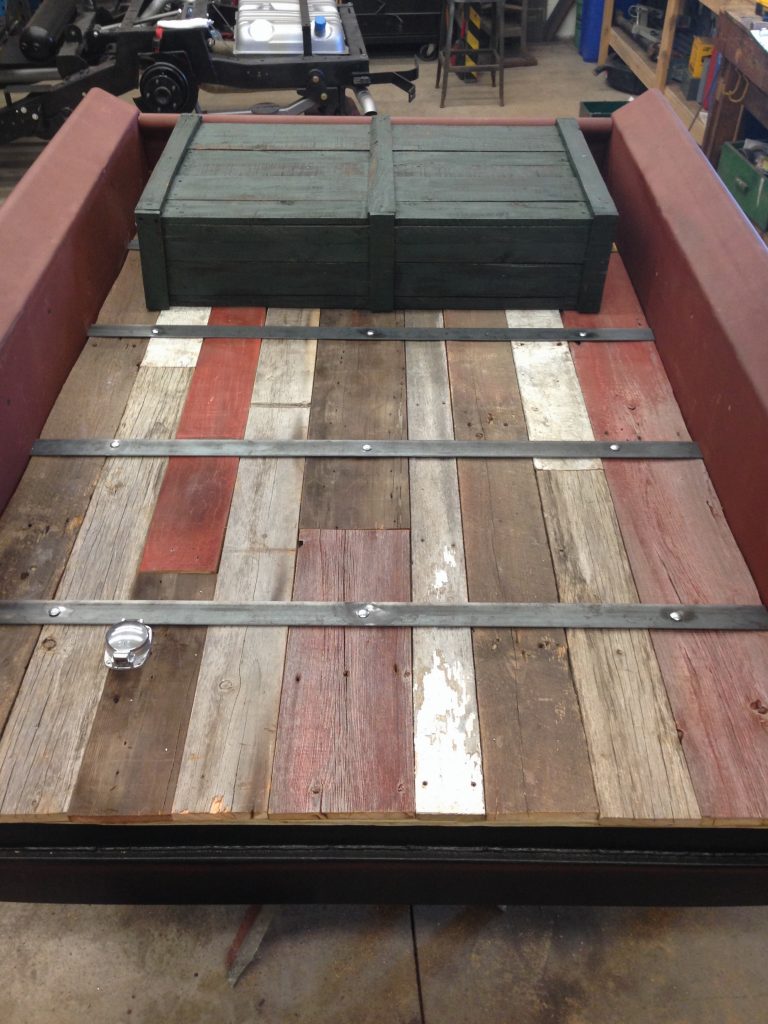 The crate is latched down with some 90* boat latches: 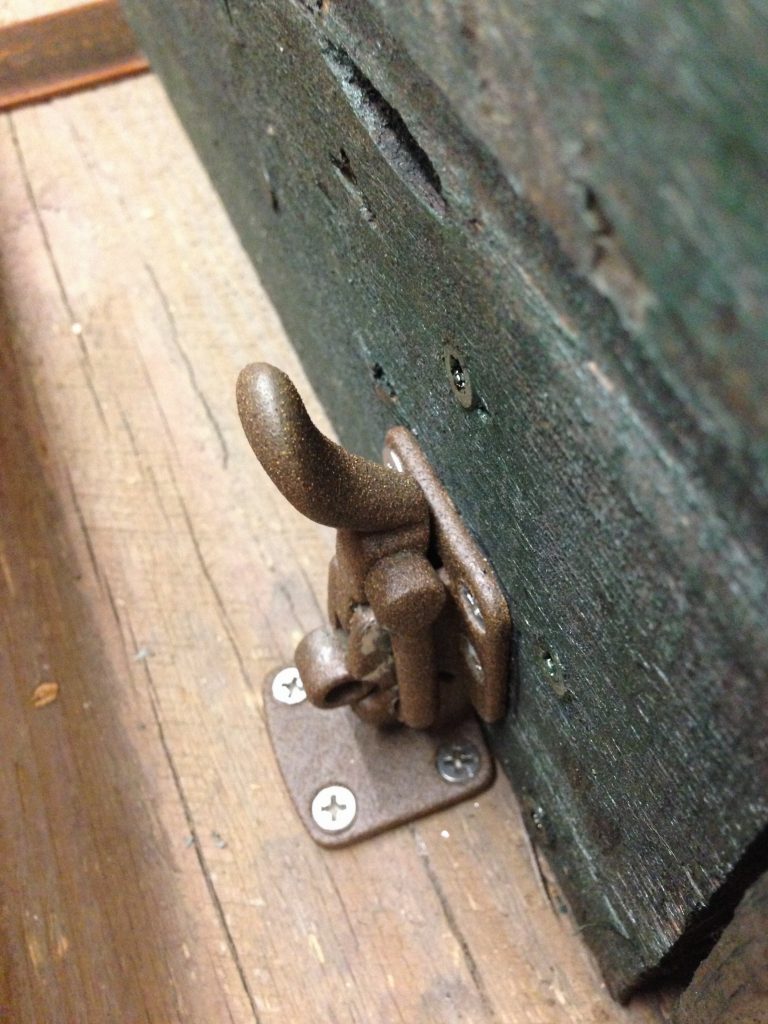 Bed Straps 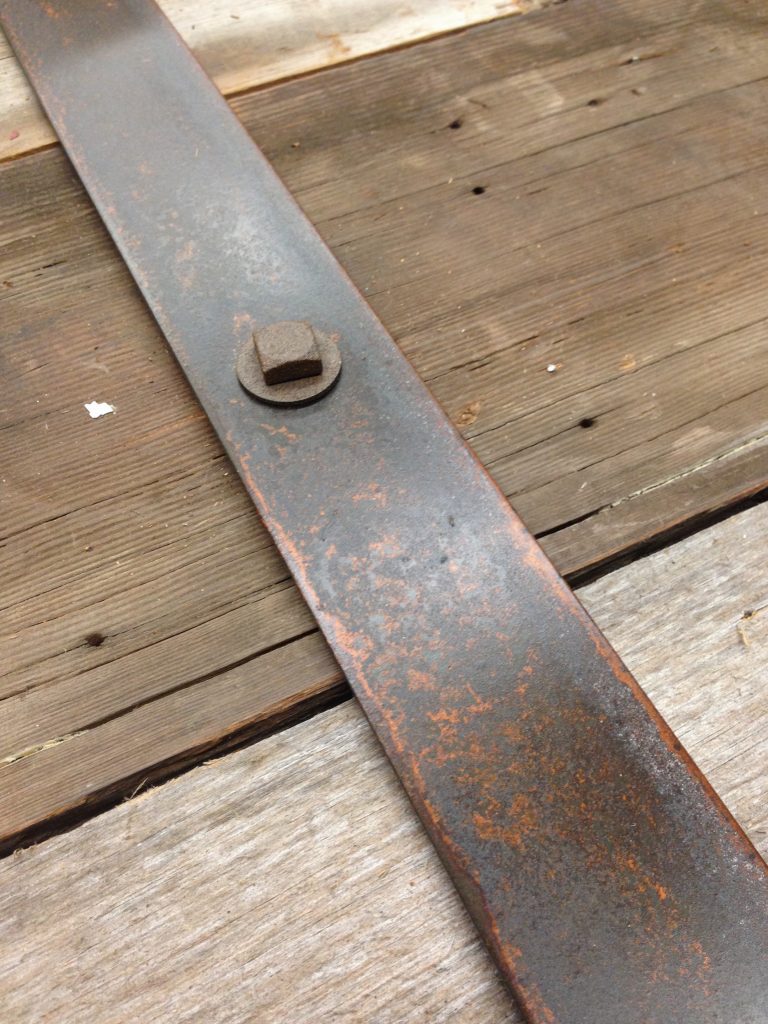 The flip top gas fill is now hidden by the antique gas can that has a hole in the bottom and is stuck to the rear strap with some crazy strong magnets: 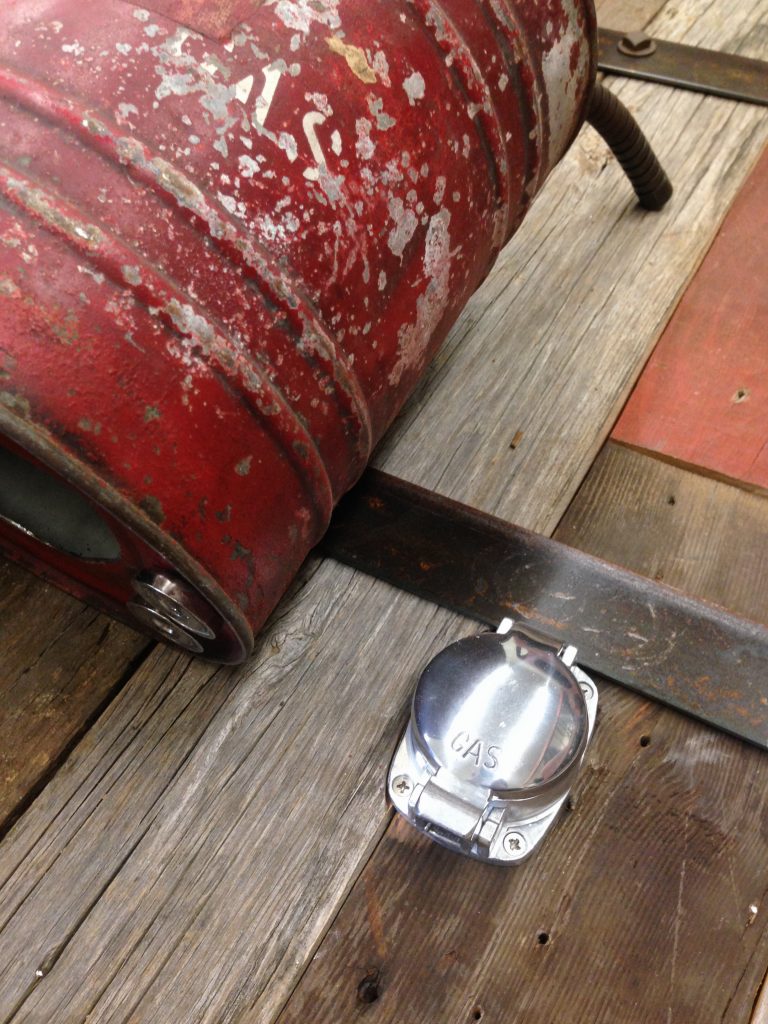 I sprayed the underside with some bedliner, and with that, the bed was ready for paint! |
|
|

|
|
|
#7 |
|
Registered User
Join Date: Jan 2015
Location: Prior Lake MN
Posts: 87
|
Re: Project Eugene: 1949 5 Window (Part 2)
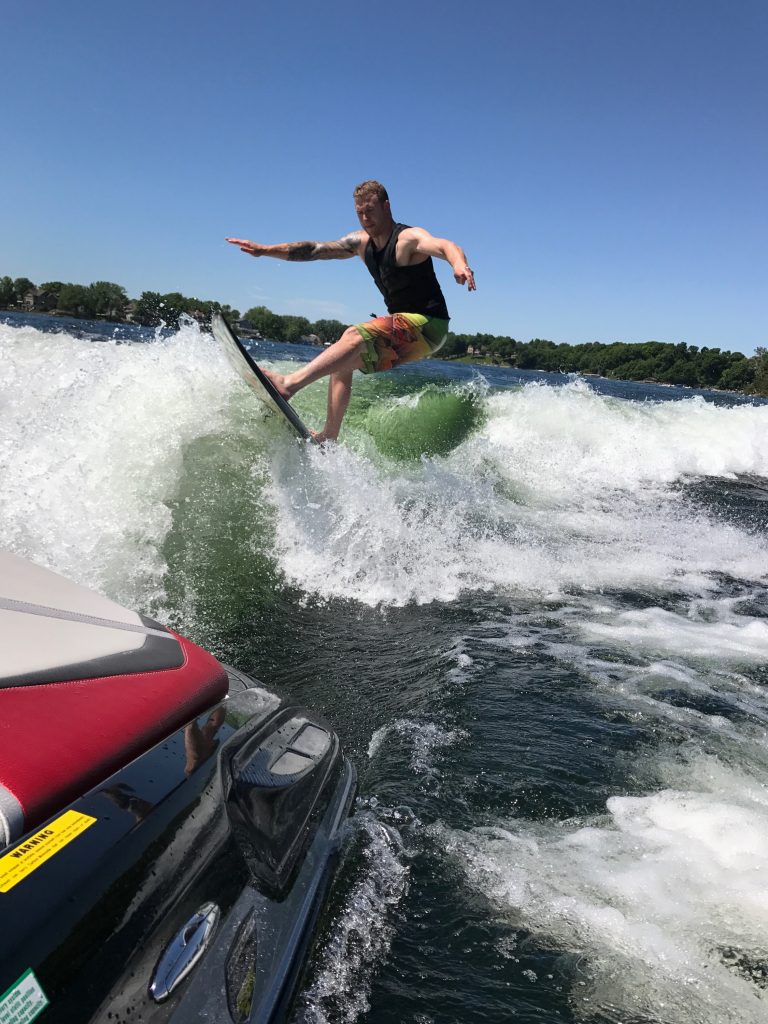
Well, progress has been slow this past summer as I have been busy wakesurfing and building furniture/ knocking out side jobs to make money to buy more parts!
 The good news is that I'm back on track and getting stuff done. Bought some engine covers. It's not a 6.0 so I need to shave that... 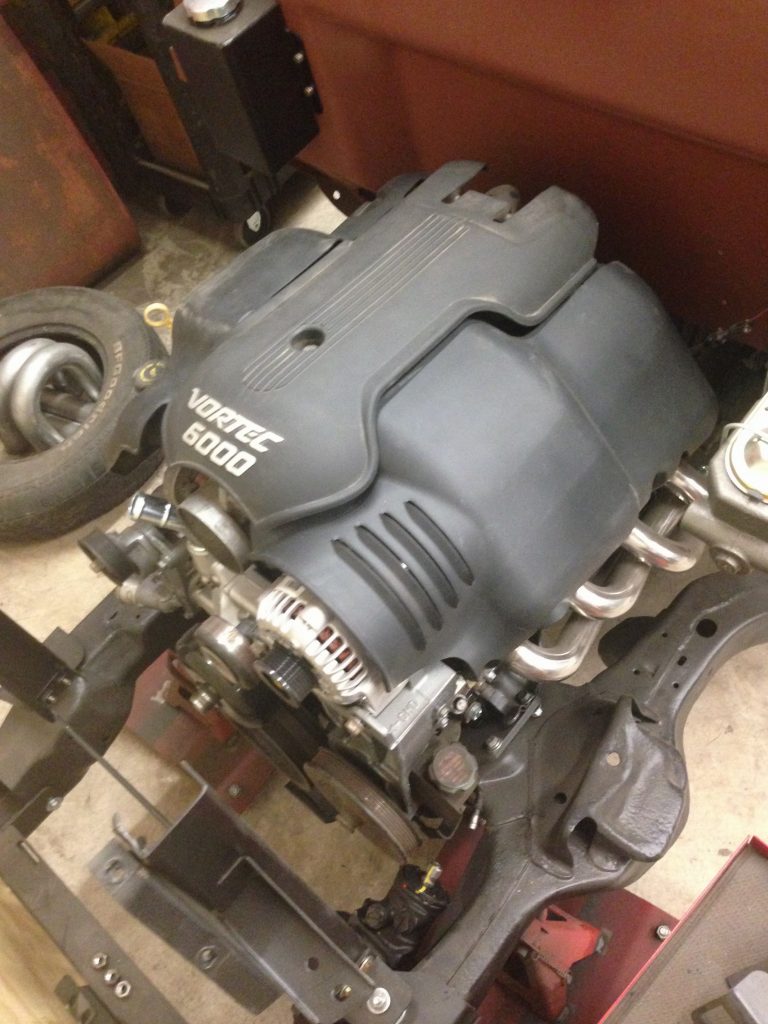 Steering parts finally arrived after a two month backorder. Borgeson joints and all new TRE's for safety. The connections fit like a glove! 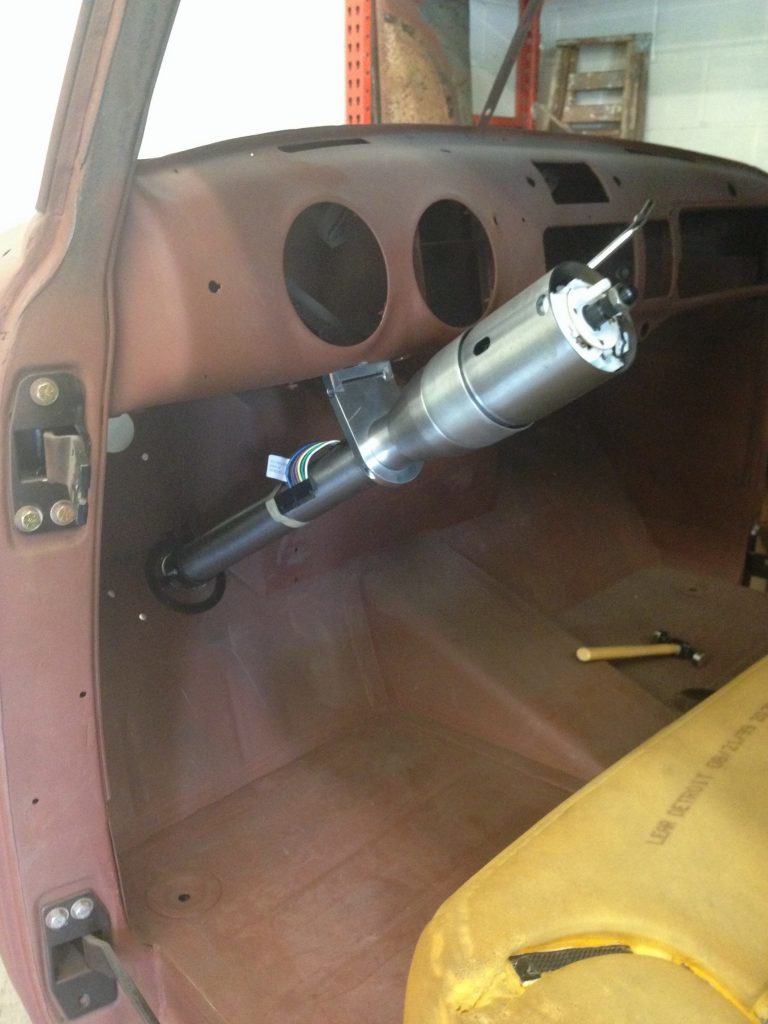 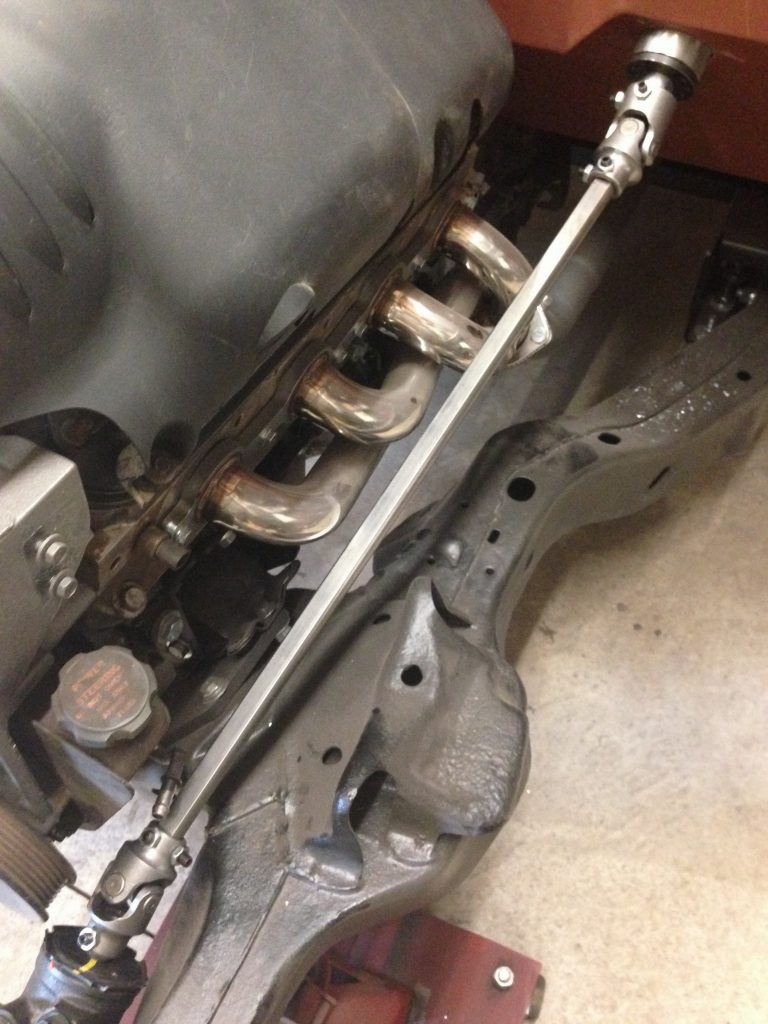 The next big step is paint. Tricky part for me is that I have some GREAT original patina that I want to preserve, but LOTS of new sheetmetal that I replaced- so I am trying to find a balance of new paint that looks old and leaving some of the old stuff showing through. I know fauxtina is a touchy subject, but it's my truck- so everybody that doesn't like it can kick rocks. Started by building up some layers on the brand new stuff, Then we spray on the blue/ green and wet sand a LOT until we feel like we have the right amount of old showing through, and spray on the matte clear. Rear fenders were first. 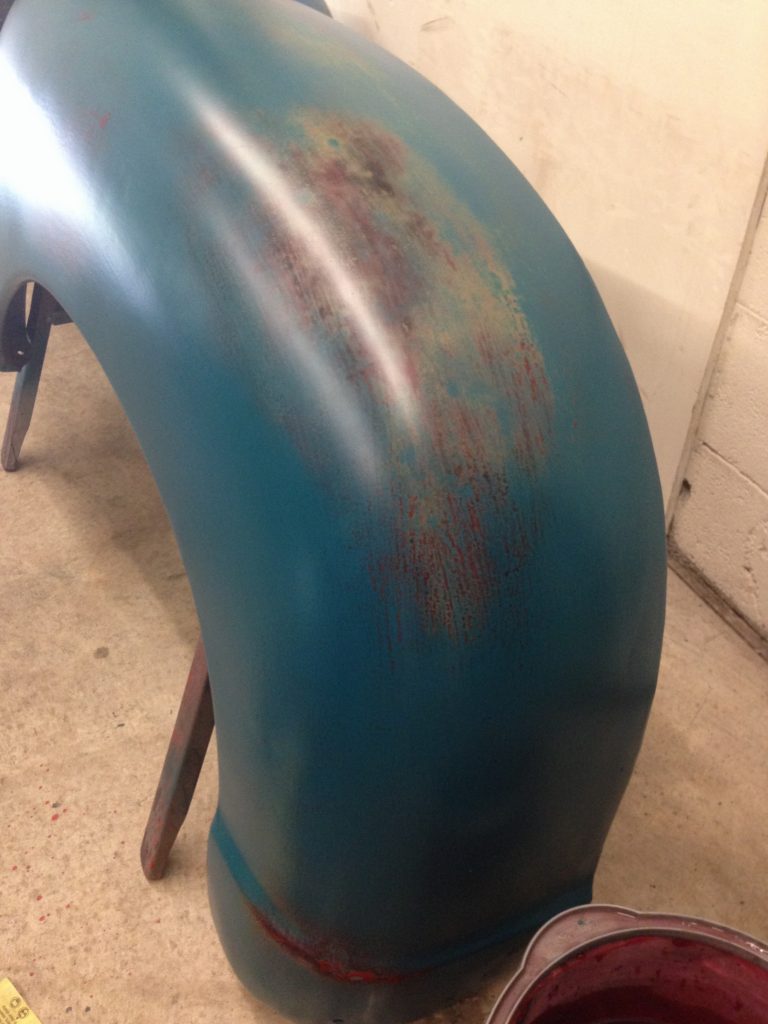 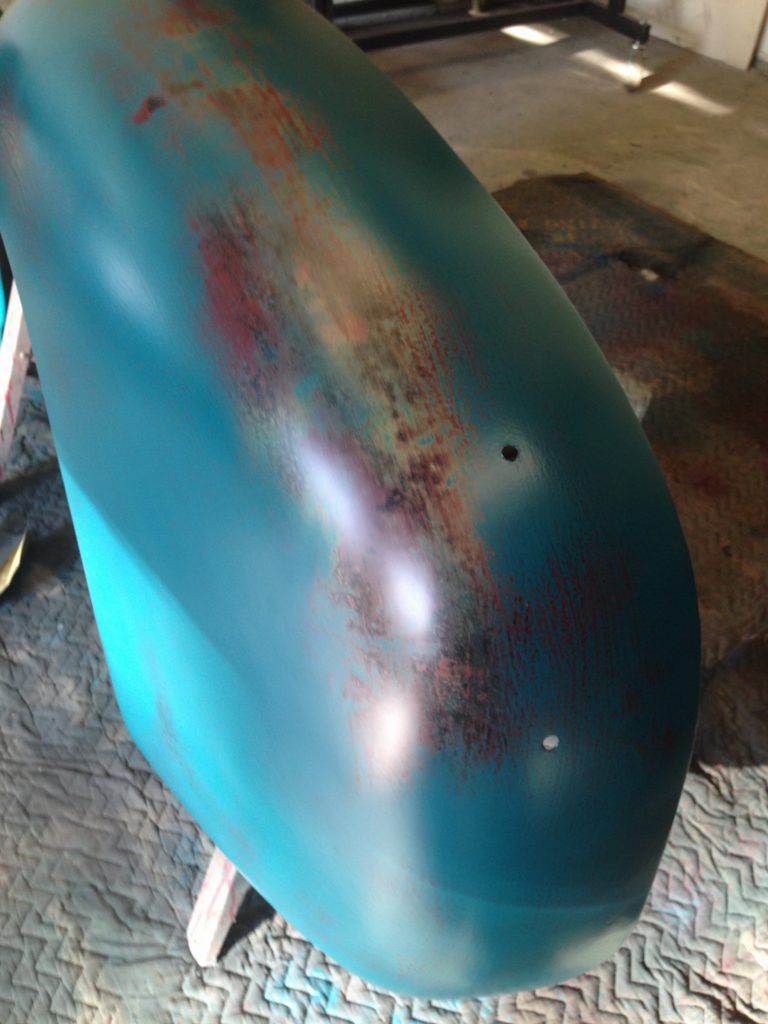 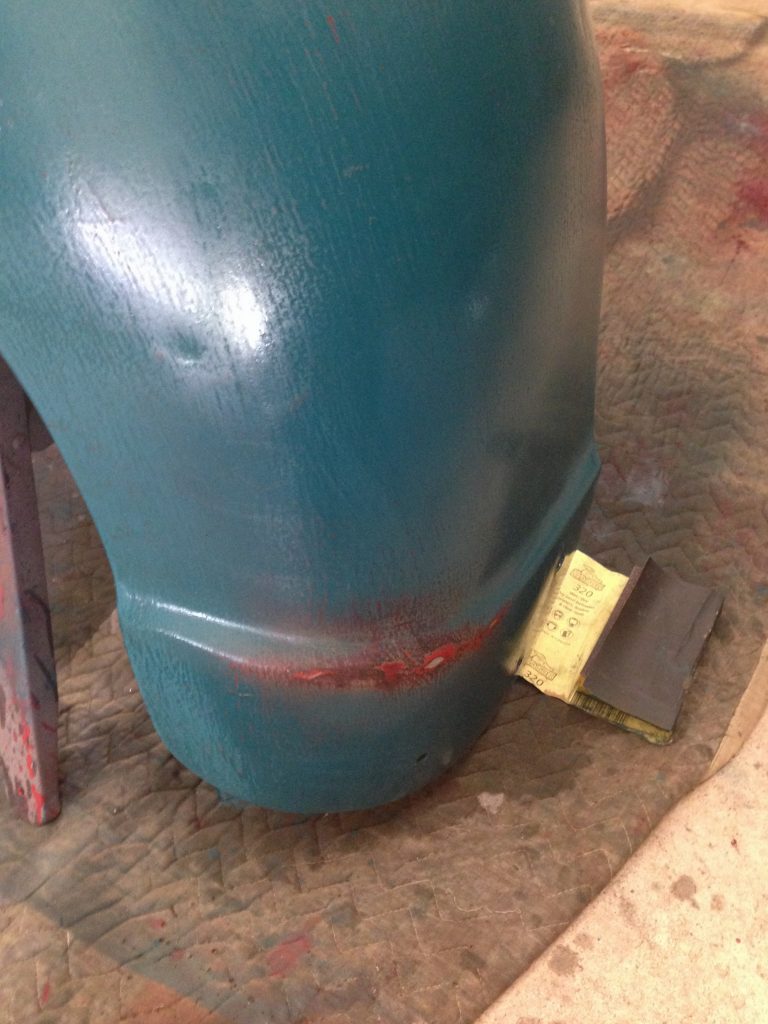 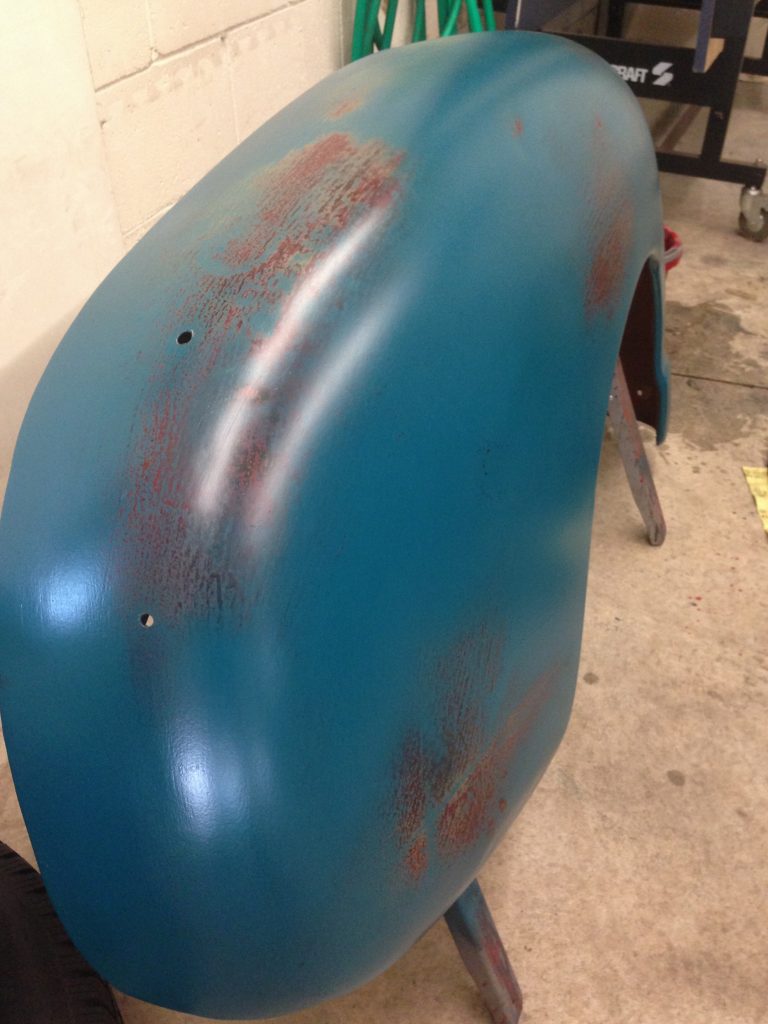 Filler panels and running boards 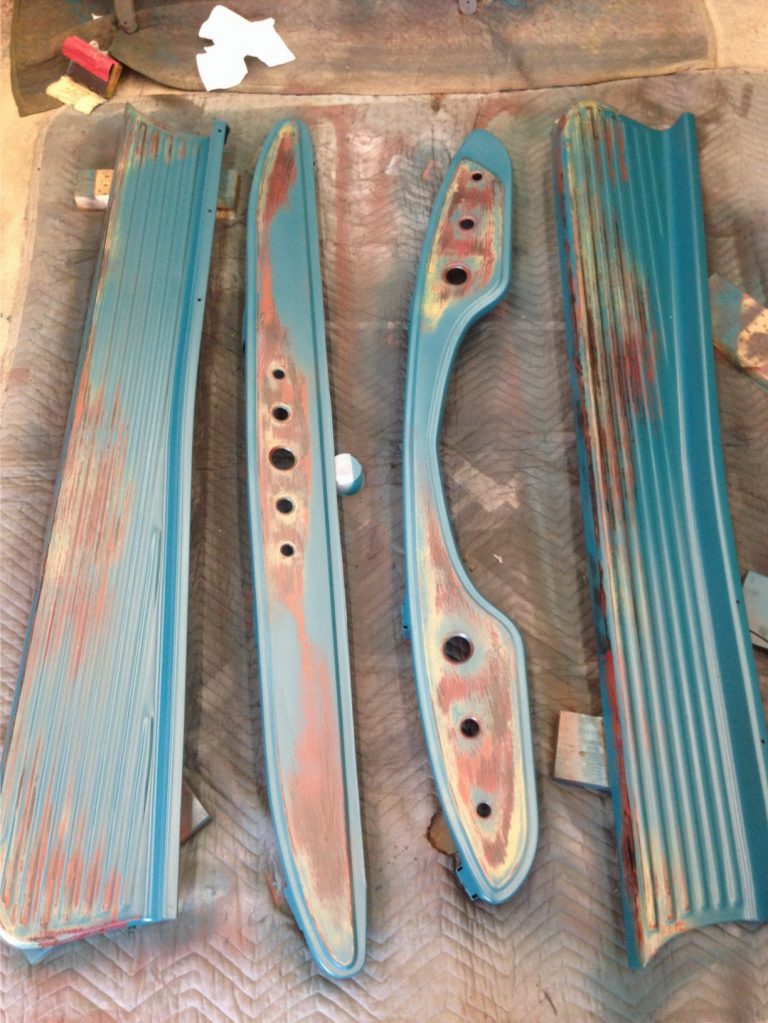 Then hood and front fenders: 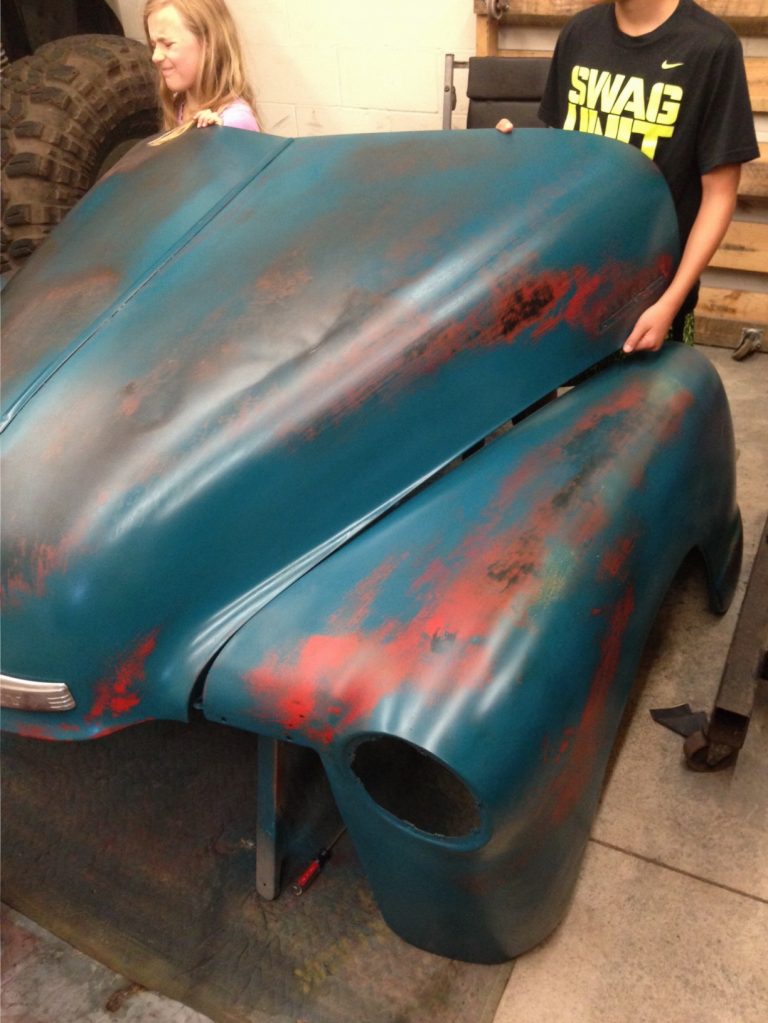 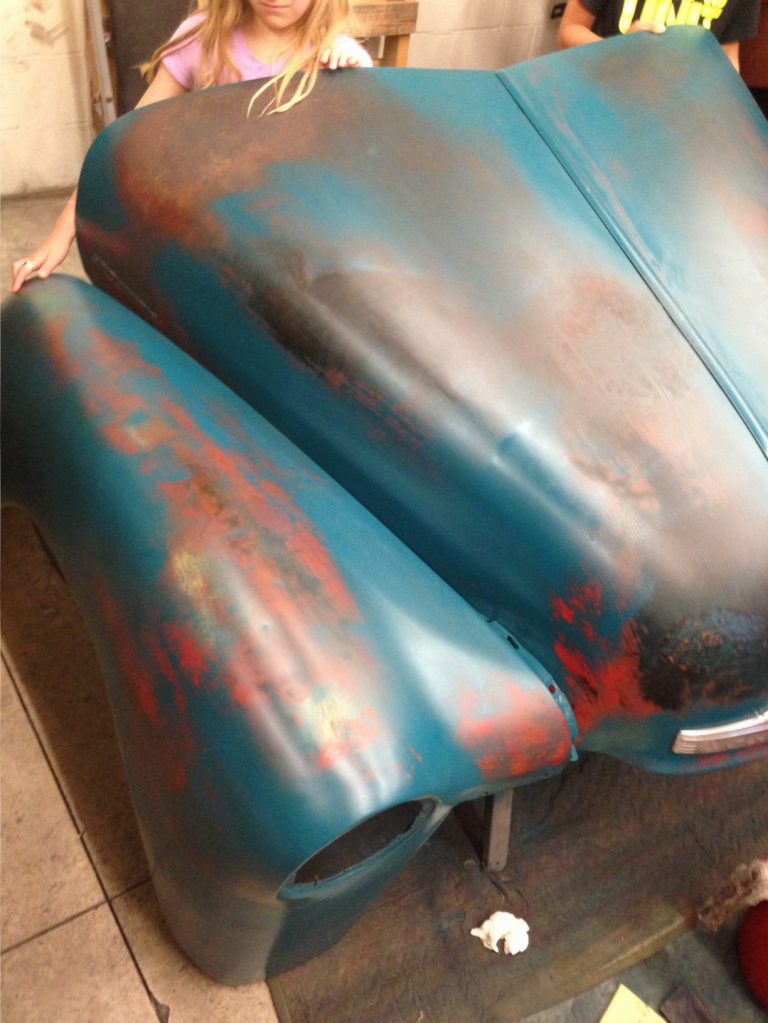 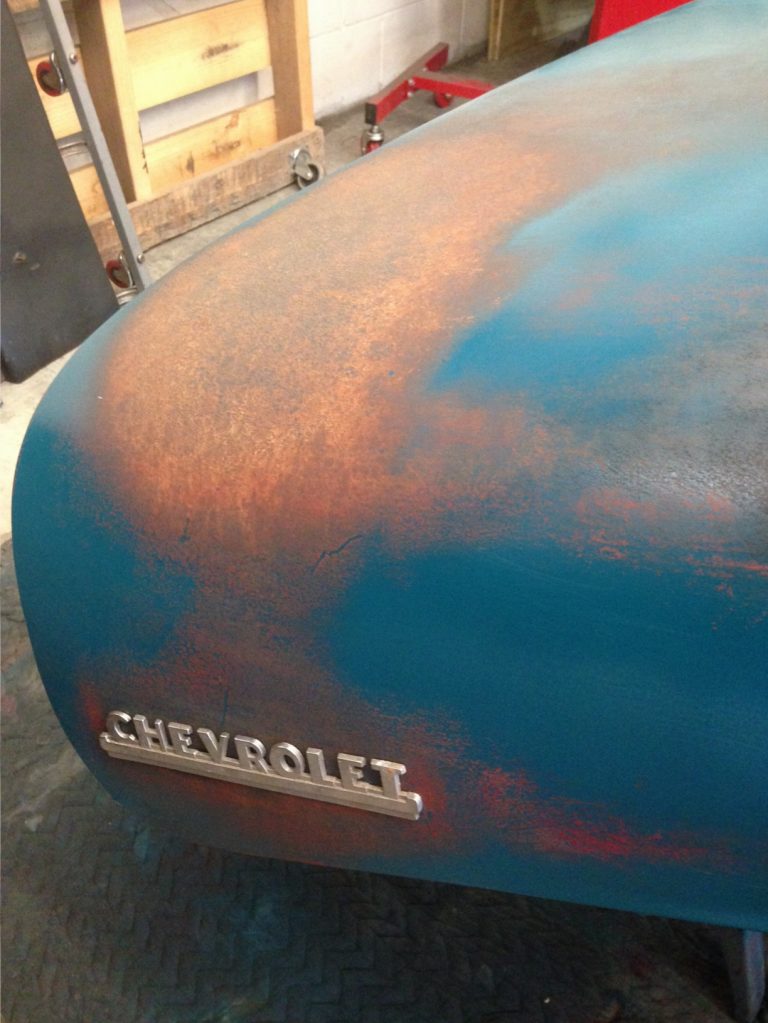 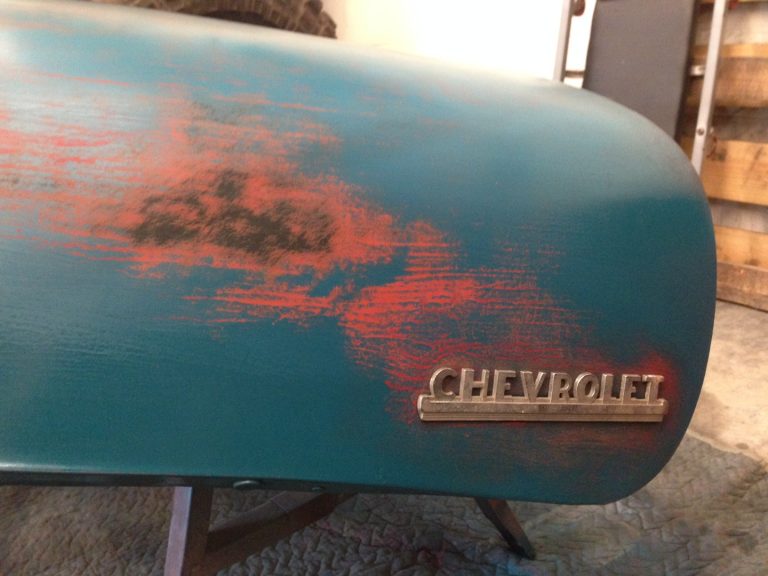 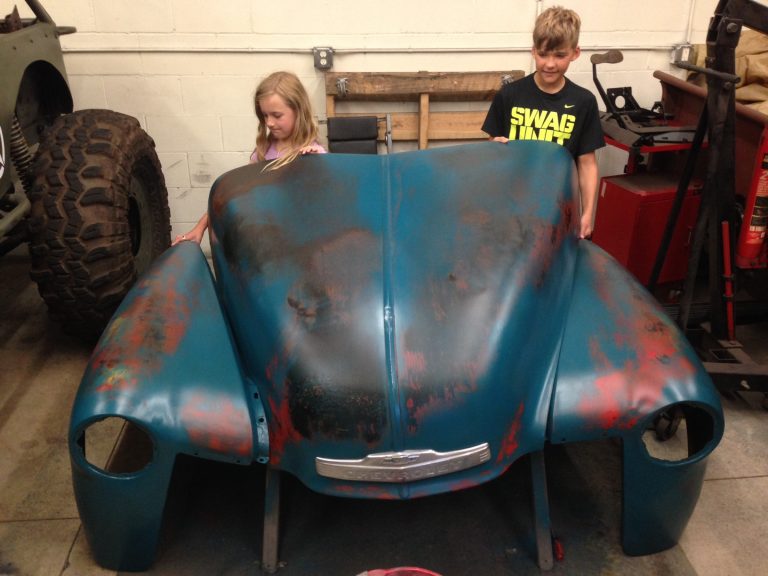 Then the cab: 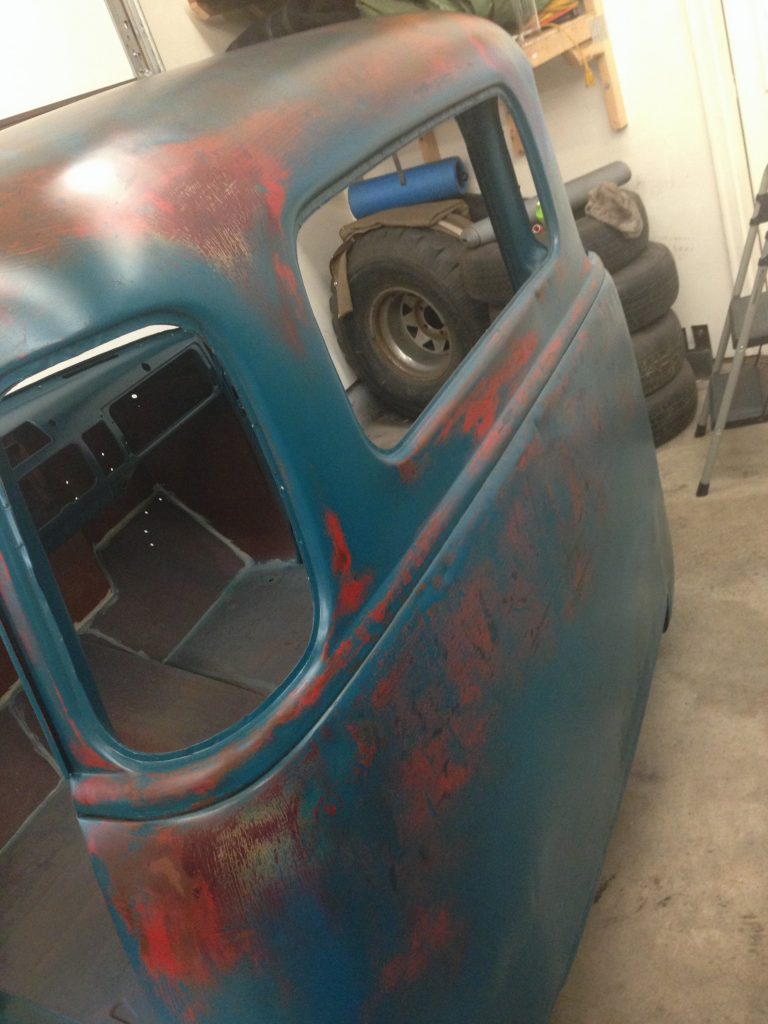 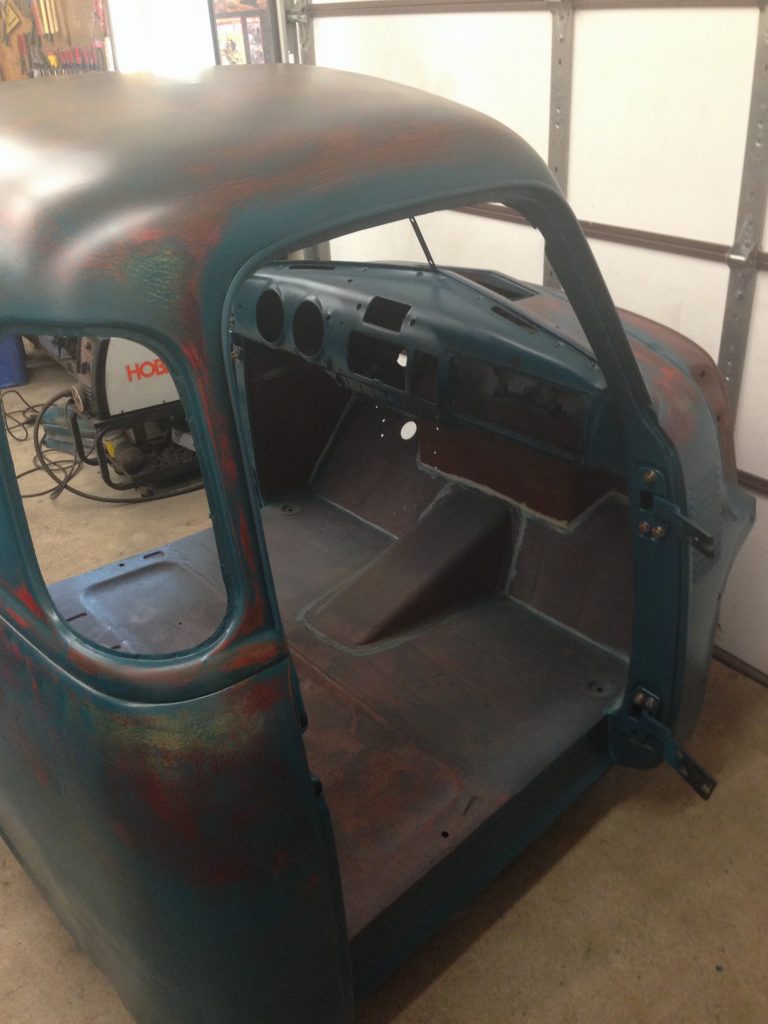 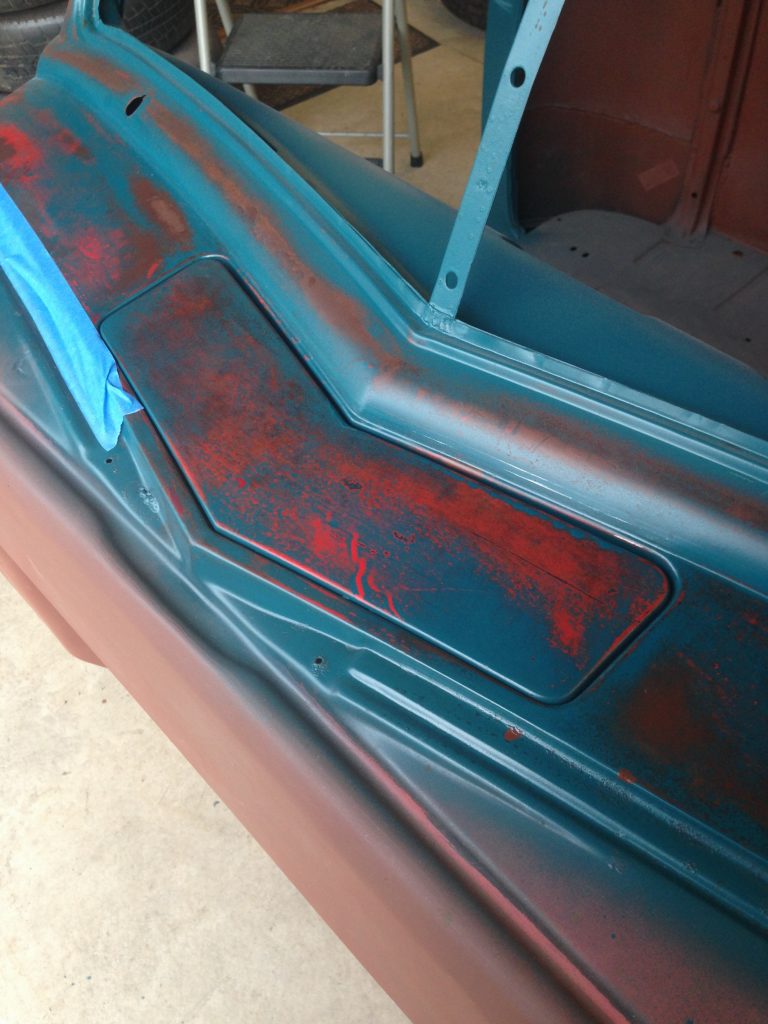 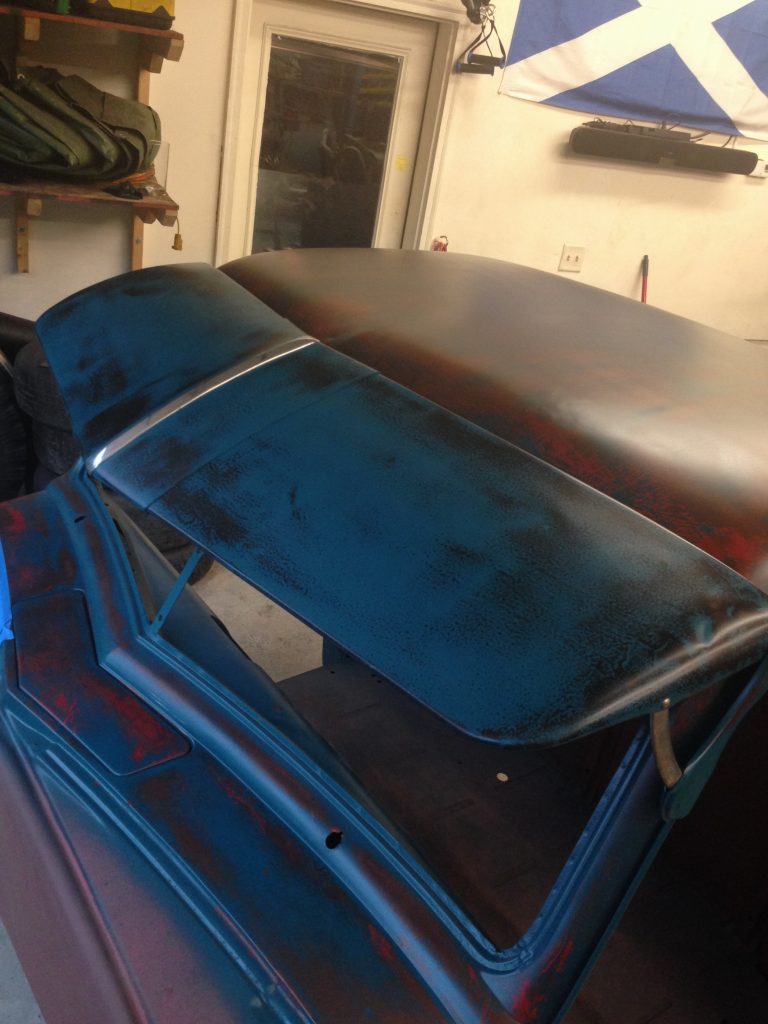 Doors: 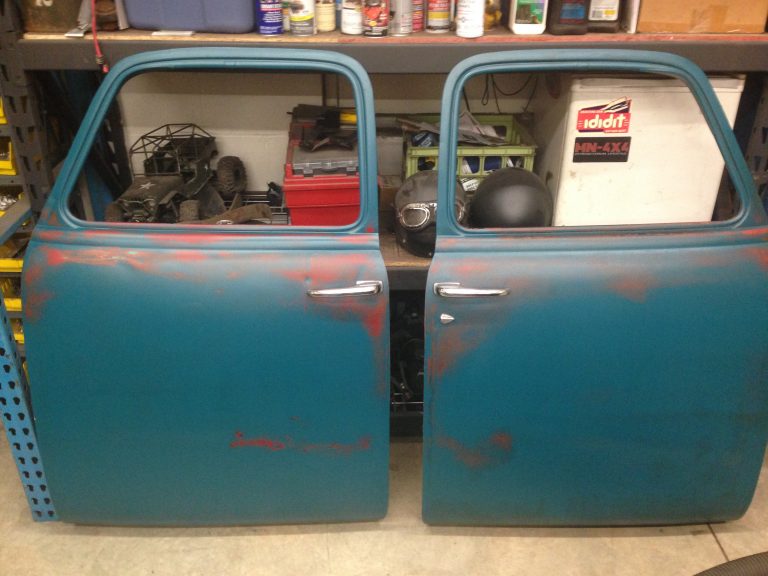 Bed: 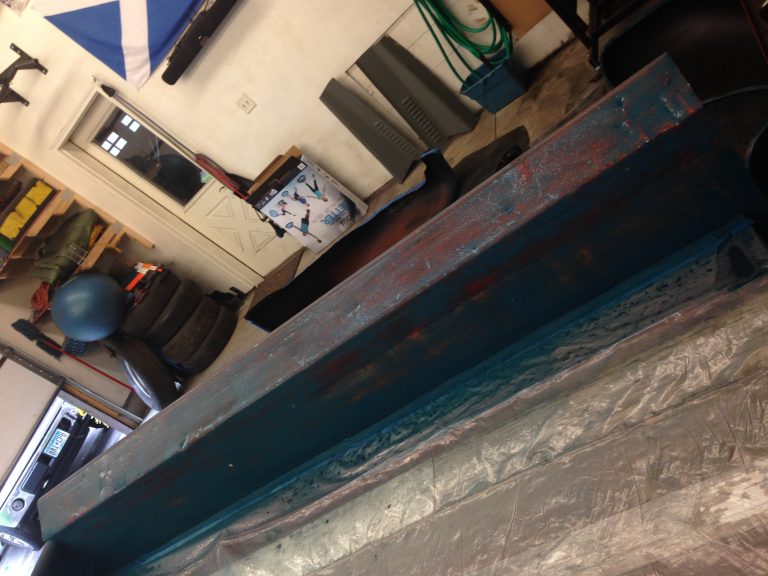 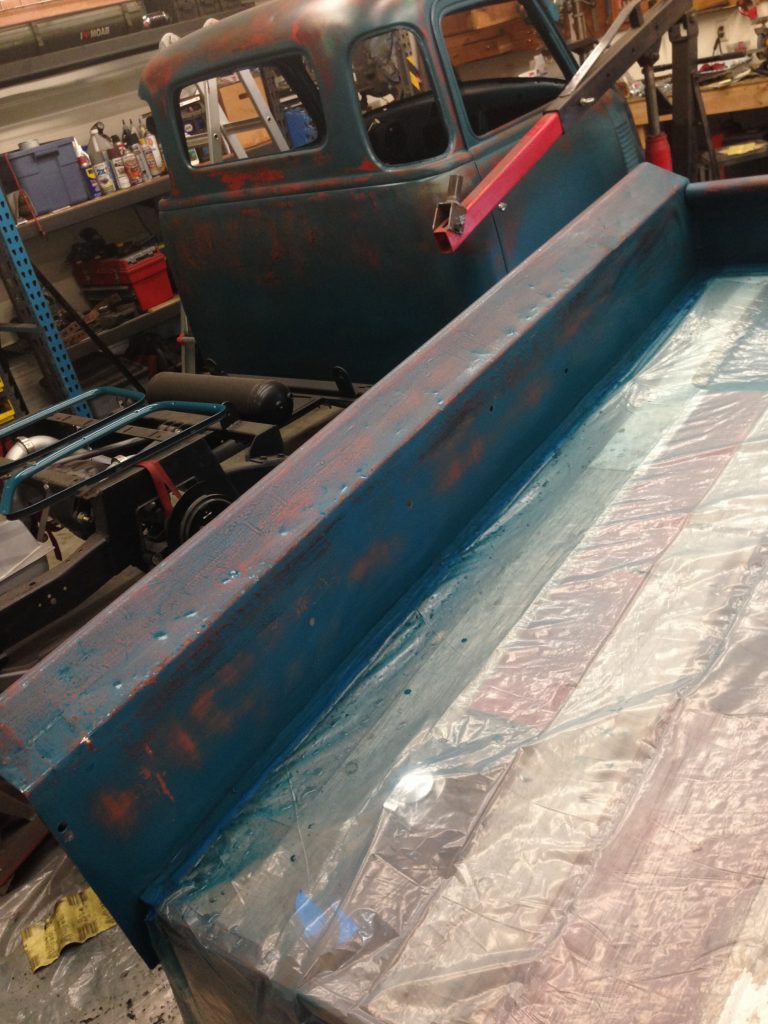 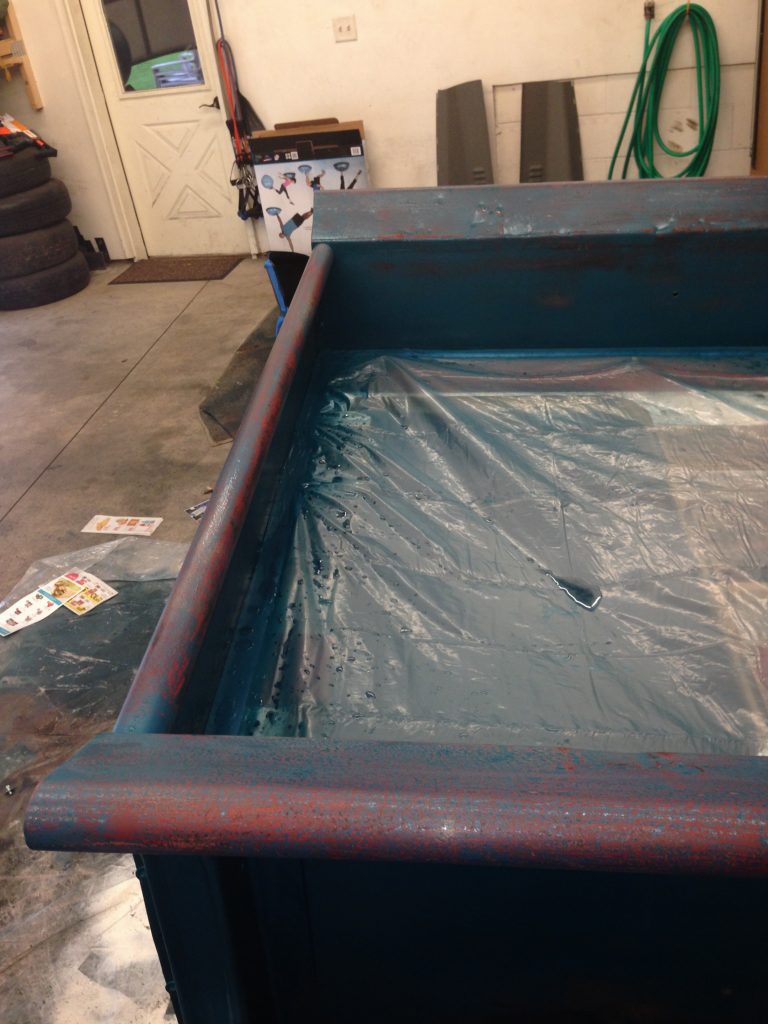 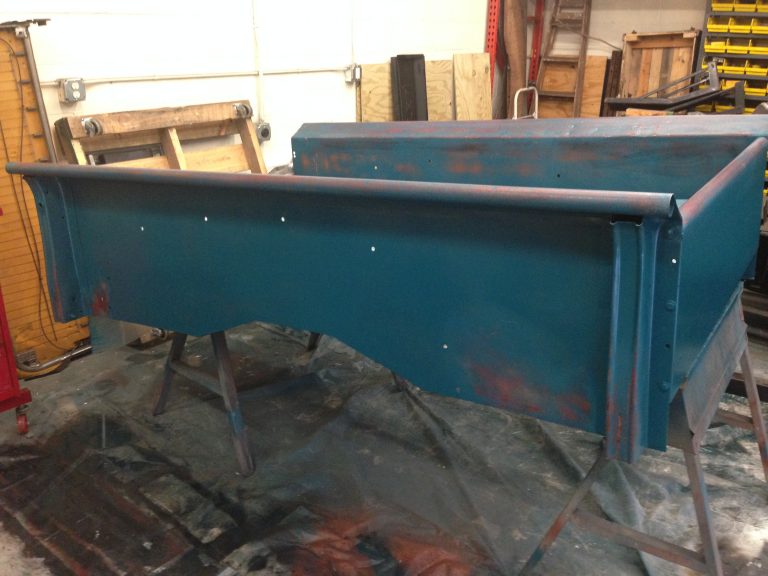 Tailgate: 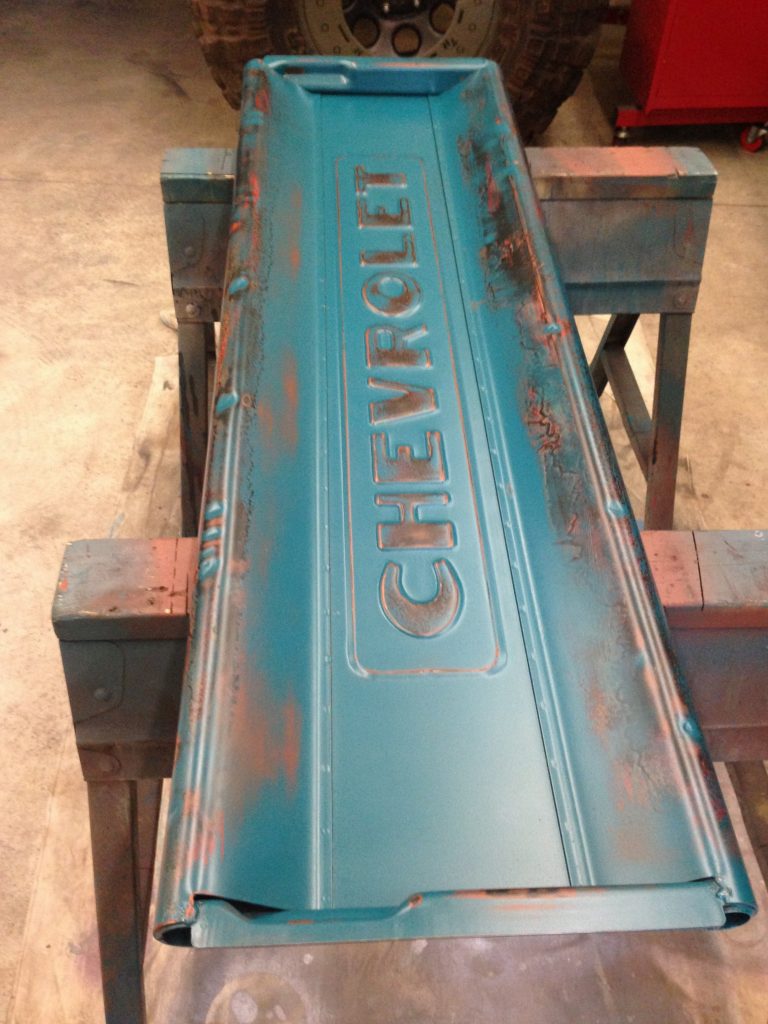 Then I went crazy with raptor liner: 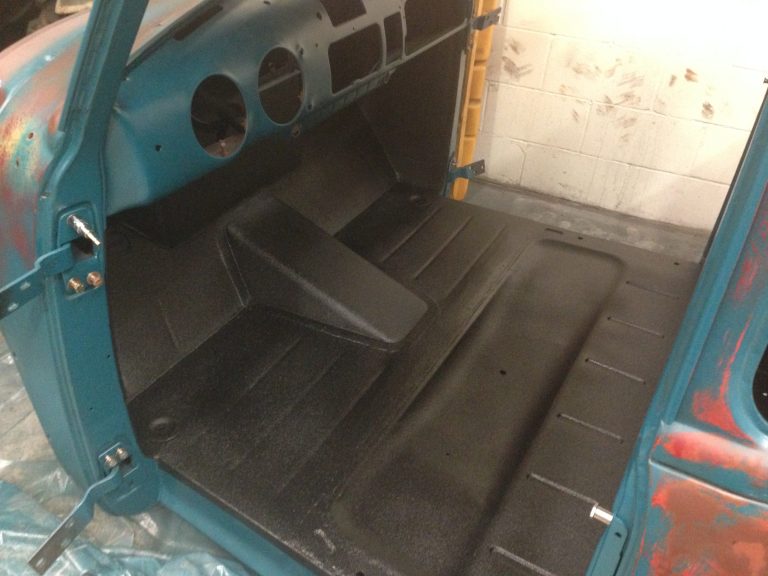 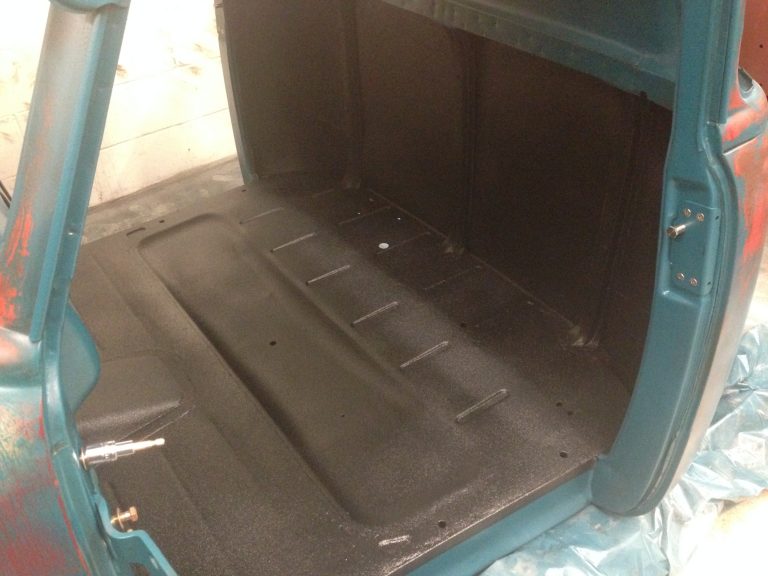 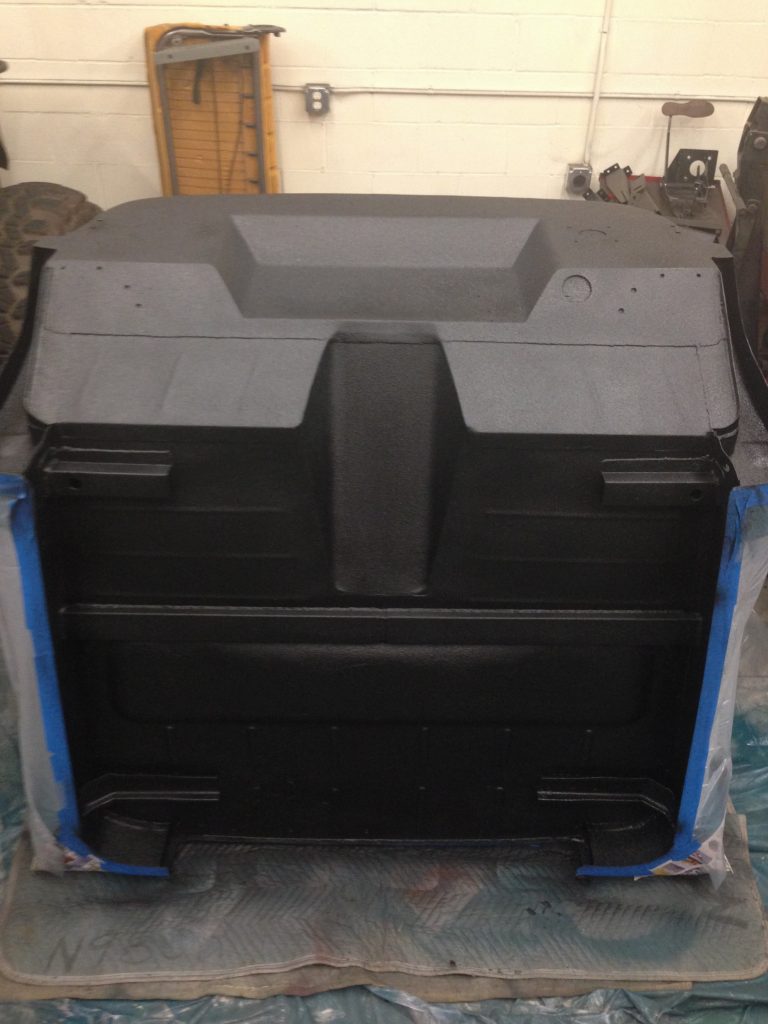 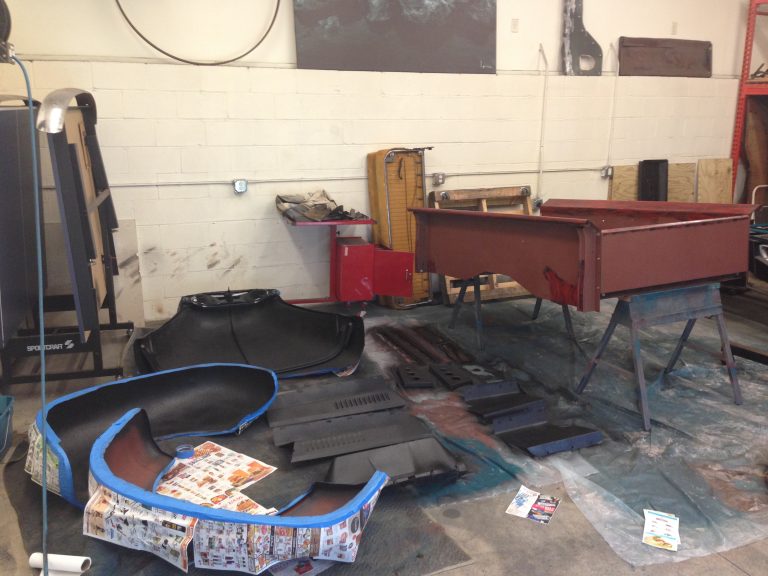 Looks pretty rad against the engine. 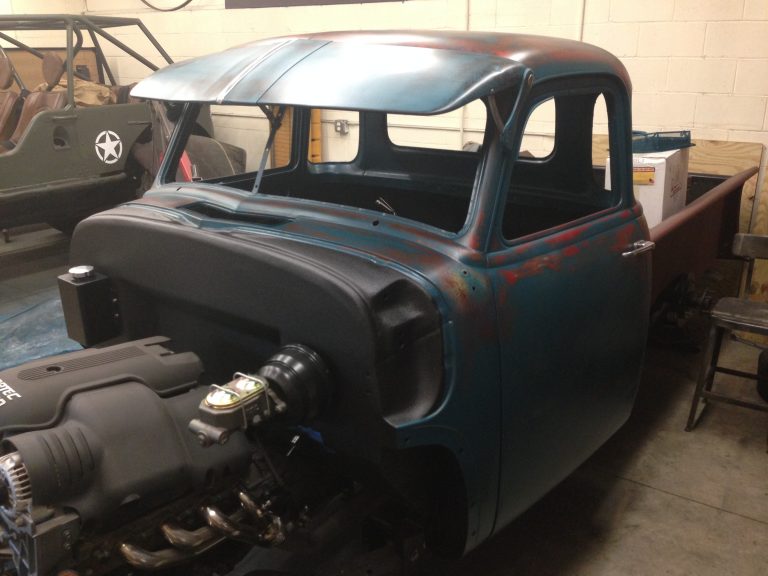 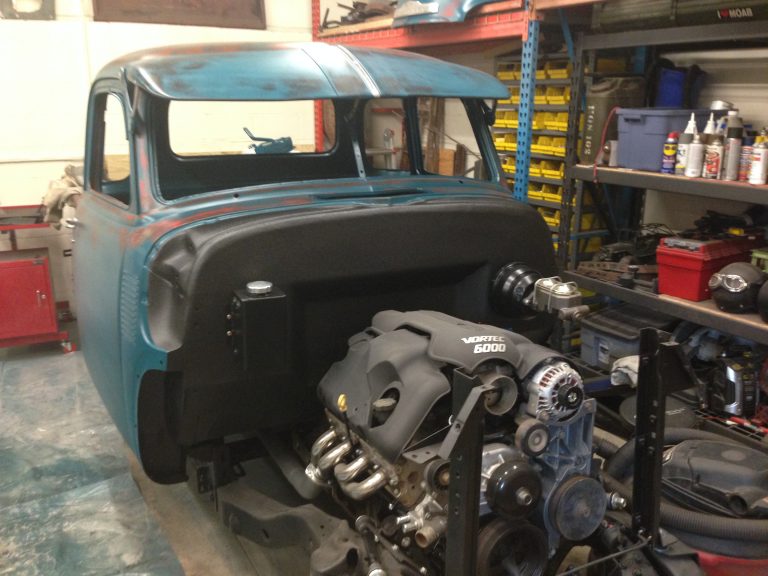 And kinda sorta put together. 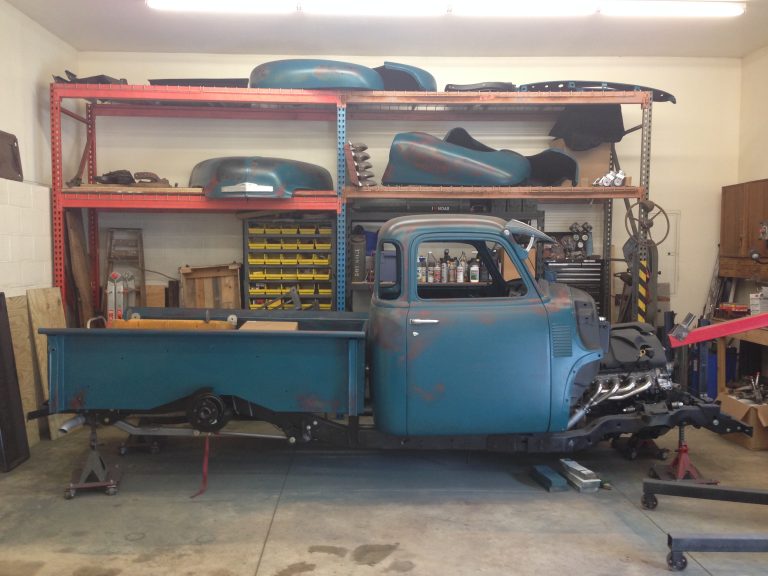 Air ride parts started trickling in- so that's next... Last edited by HULK64; 09-10-2017 at 11:45 PM. |
|
|

|
|
|
#8 |
|
Senior Member
 Join Date: Mar 2011
Location: West Plains, Missouri
Posts: 7,559
|
Re: Project Eugene: 1949 5 Window (Part 2)
Was following your other thread, so I'll tag along now in this new one...Jim
__________________
my build thread: http://67-72chevytrucks.com/vboard/s...d.php?t=459839 Jimbo's long bed step build:http://67-72chevytrucks.com/vboard/s...t=464626<br /> |
|
|

|
|
|
#9 |
|
Registered User
Join Date: Jan 2015
Location: Prior Lake MN
Posts: 87
|
Re: Project Eugene: 1949 5 Window (Part 2)
This brings us to this weekend, and my brother setting me up with new web hosting for all my pics- which means you all get the abridged version of this build and I burned my evening reposting all of this madness...over two years of work into a few pages of pics!
Paint matched the steering column: 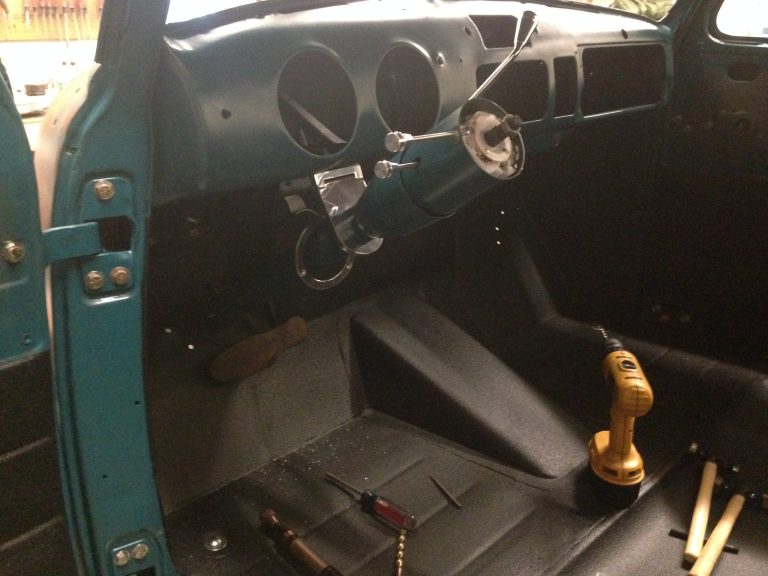 Installed front and rear bags and air lines in the LRD suspension parts: 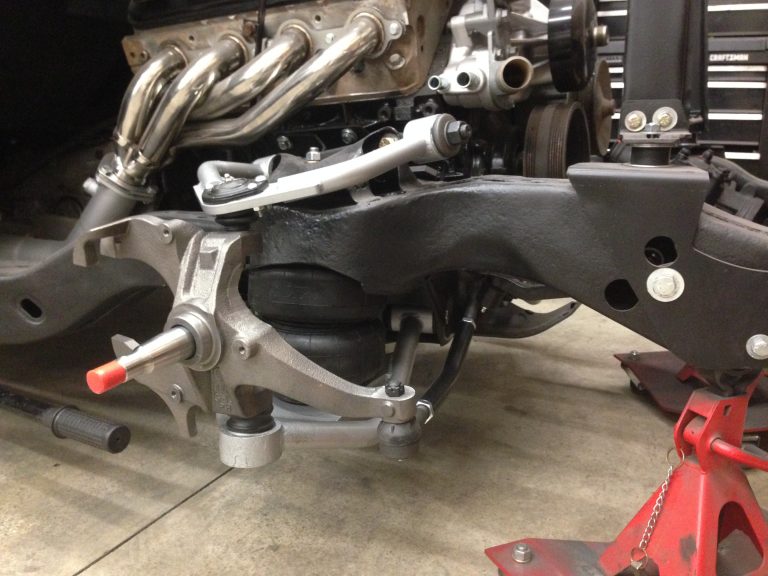 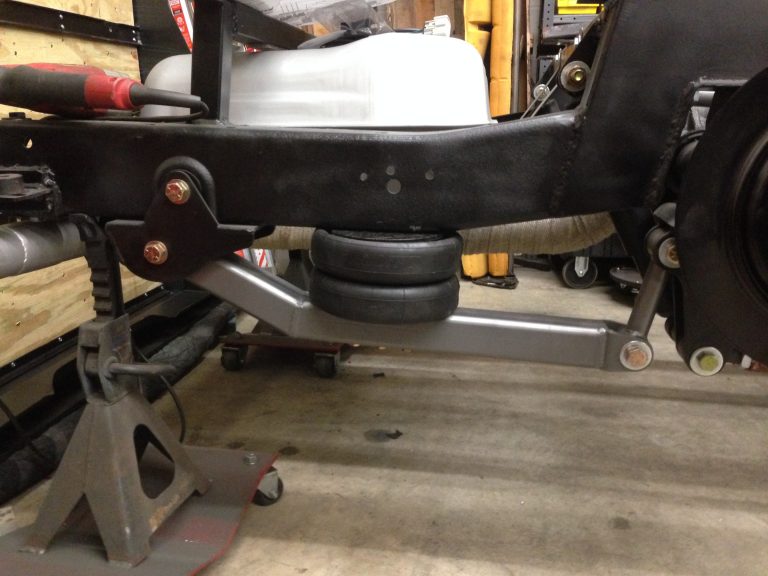 And started working on the wiring...(I hate wiring) 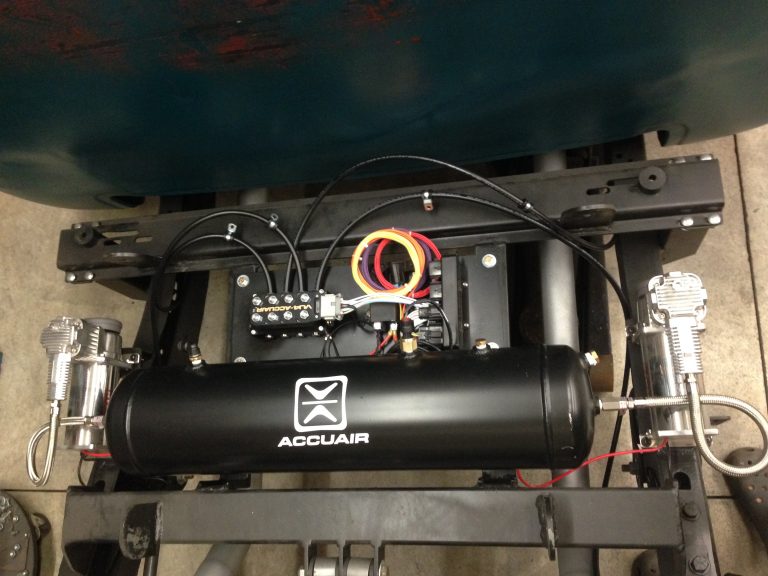 All of this lives under the bed, beneath the rear facing rumble seat so it's easy to get at it anything goes wrong. Brings me to question for the night. I got 2600 bags and they are SNUG in the front spring pockets- from what I can see nothing is rubbing now, but there's no air in them yet- should I get a smaller bag that I KNOW will never rub? 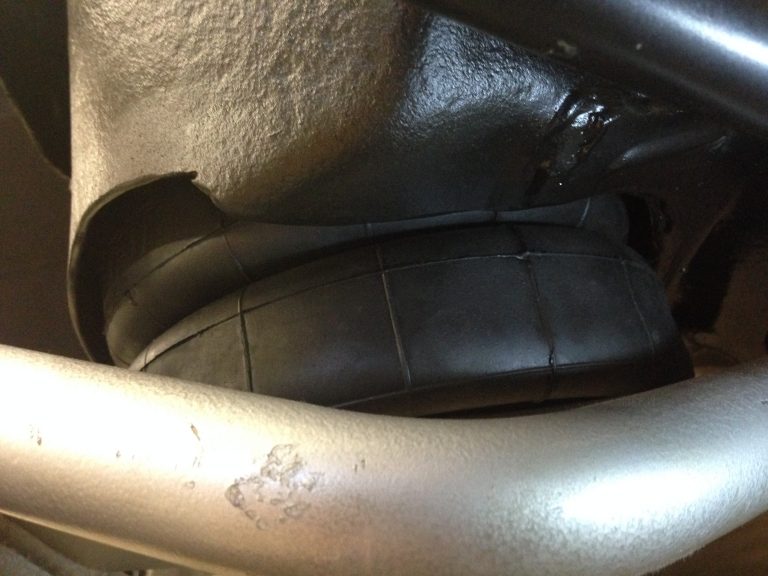 Also, is this enough of a gap between air line and exhaust? I don't wanna deal with melting... 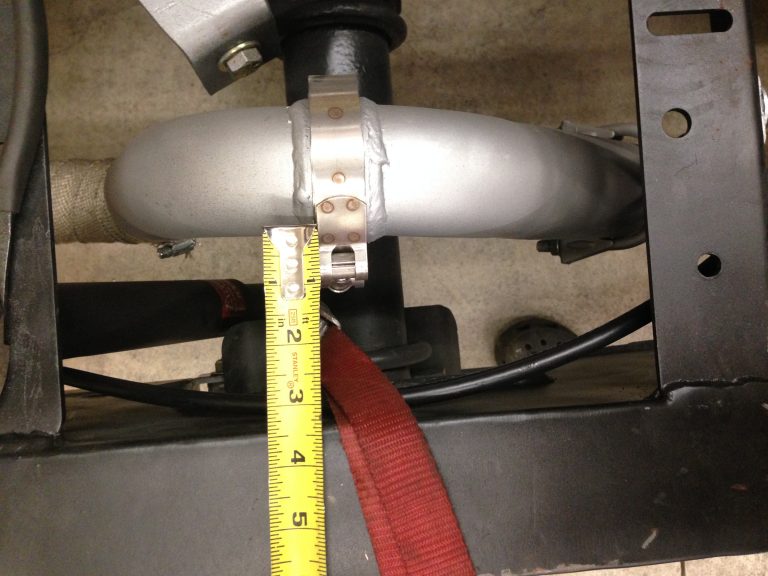
|
|
|

|
|
|
#10 |
|
Registered User
Join Date: Aug 2012
Location: Northeast KS
Posts: 1,789
|
Re: Project Eugene: 1949 5 Window (Part 2)
Very cool project. You're welds look amazing! Nice work on the "patina".
__________________
1999 GMC Suburban K2500 SLT, 454/4L80E 1991 Z/28, 6.0L/T56 1949 GMC 250, S10 Frame, 6.0L/4L80E Instagram @aceshighspeedshop |
|
|

|
|
|
#11 |
|
Registered User
Join Date: Jan 2015
Location: Prior Lake MN
Posts: 87
|
Re: Project Eugene: 1949 5 Window (Part 2)
Been staying after it. Accuair system is wired and plumbed- the sensors are installed as well. I also installed front shocks and figured out a new sway bar link setup.
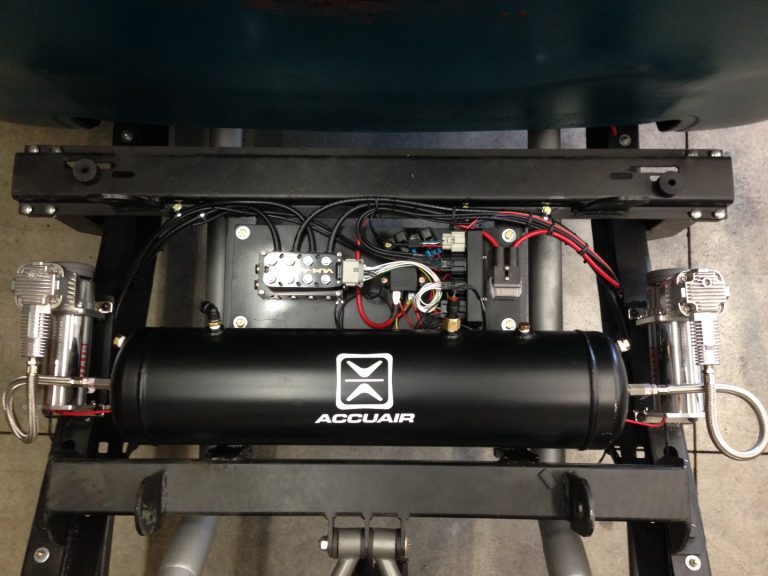 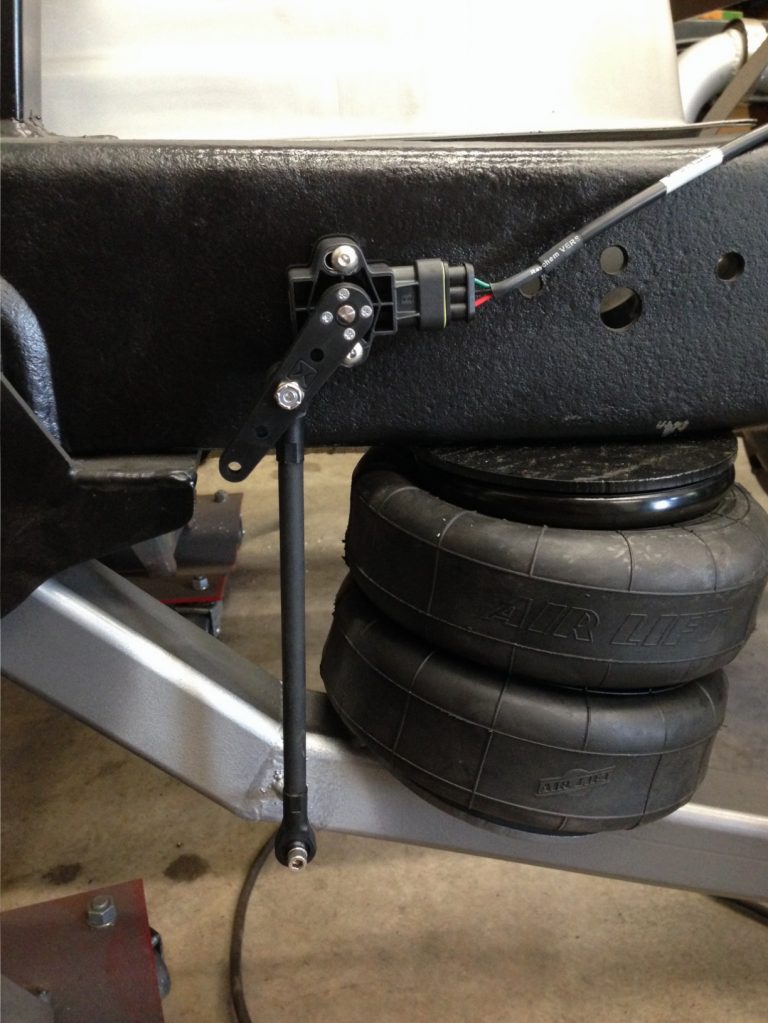 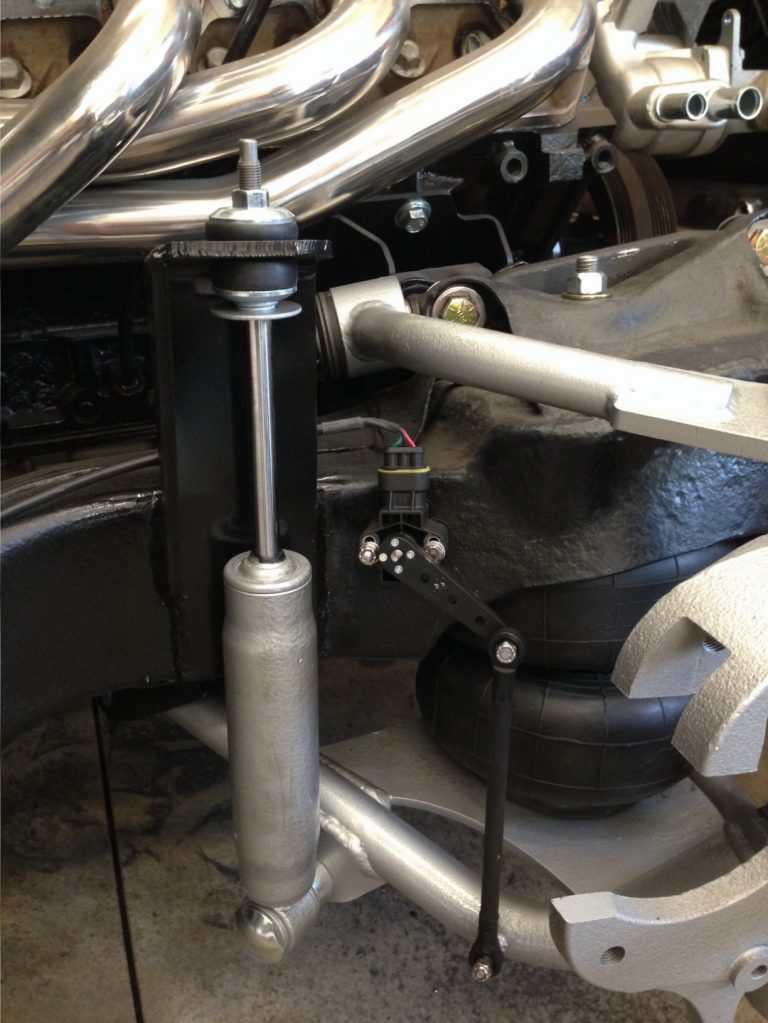 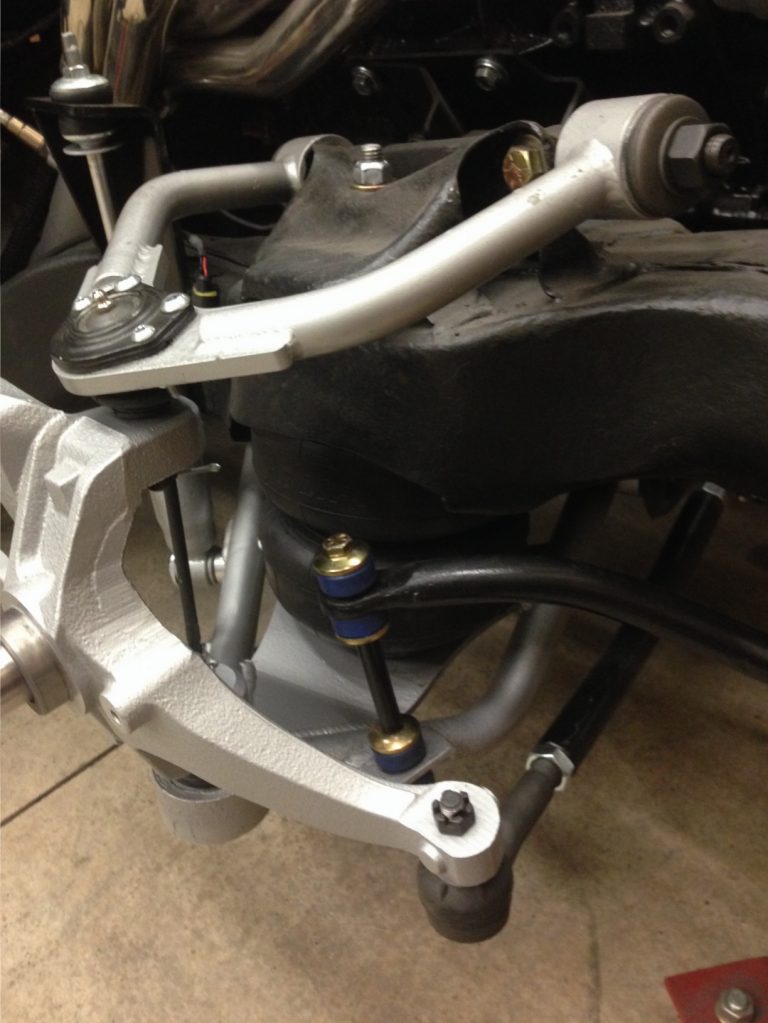 I am horrible at wiring so I paid someone to deal with my harness. Sure was nice to lay it on the motor and have everything fall right into place. Just gotta mount the computer, fuses, and relays, and the motor is wired! Before 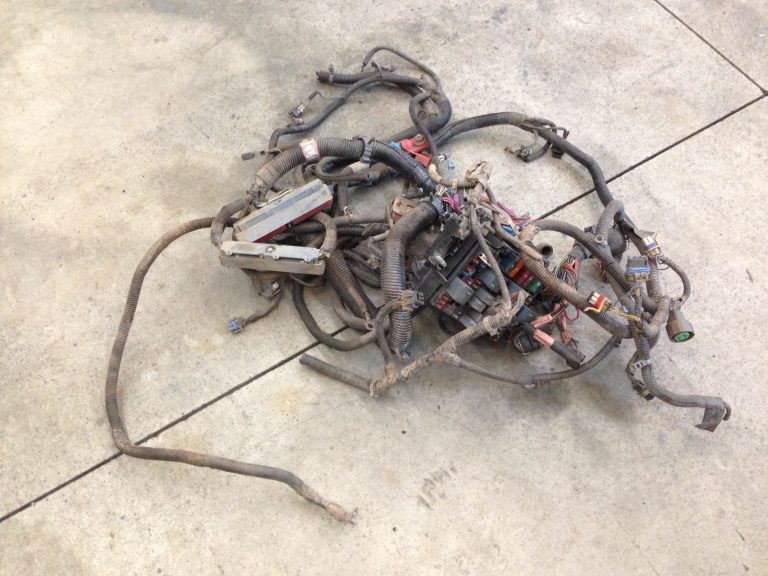 After 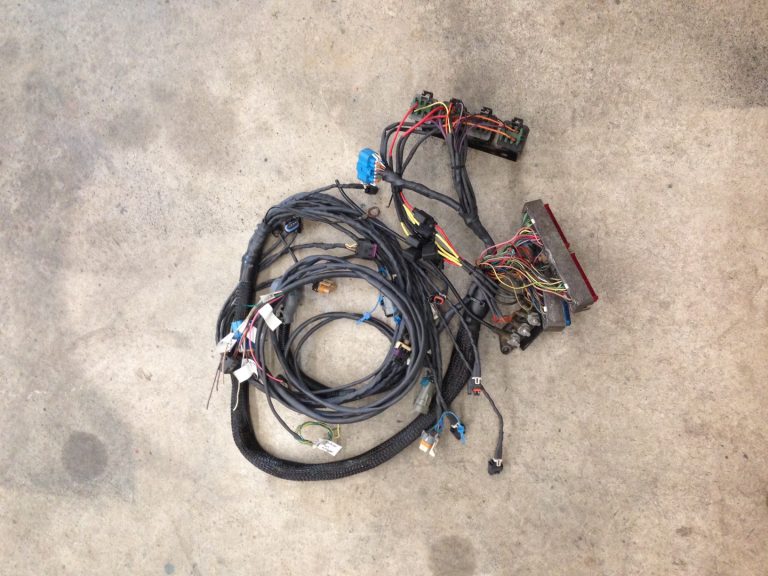 And on Saturday the boy and I spent some time building an all metal blaster. 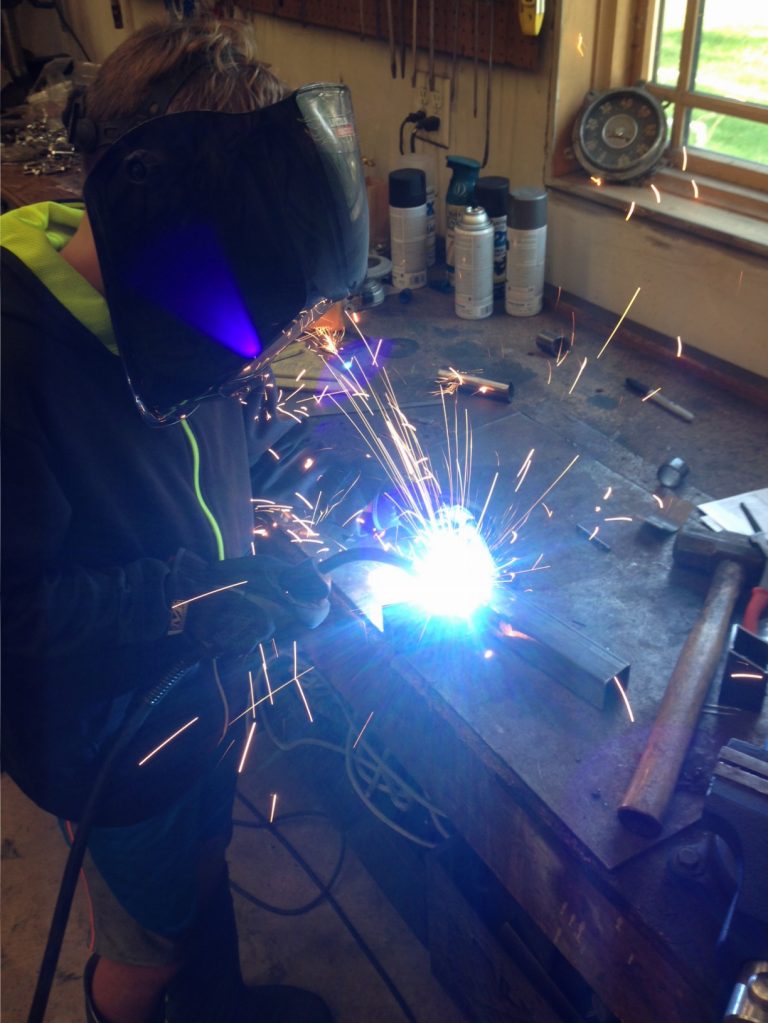 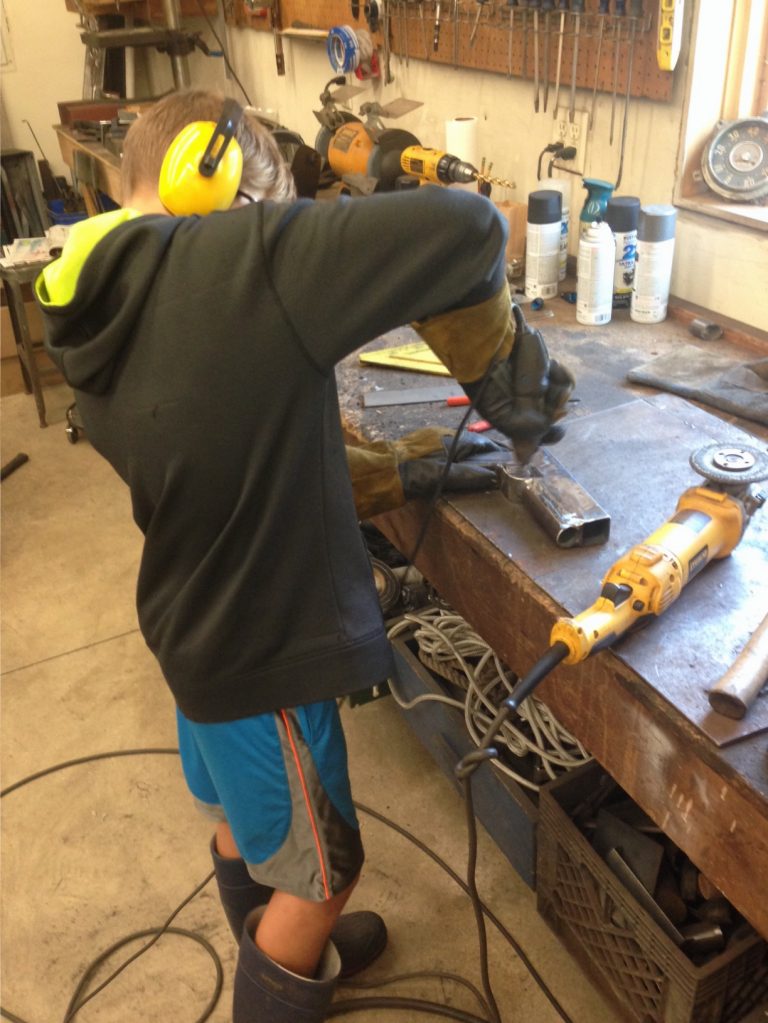 Mounting the motor wiring is this weekend's job, along with rebuilding my gas tank mounts. I dont like the straps I used- so I am rebuilding them out of angle iron for strength. The gas tank plumbing and wiring will hopefully lead to getting the bed on for good. It's getting exciting! I just need to plant more money trees... |
|
|

|
|
|
#12 |
|
Registered User
Join Date: Jan 2015
Location: Prior Lake MN
Posts: 87
|
Re: Project Eugene: 1949 5 Window (Part 2)
Still after it. I got the whole thing plumbed and pre-wired. That was exhausting. But now it's starting to get really fun...
Trimming where we need to. 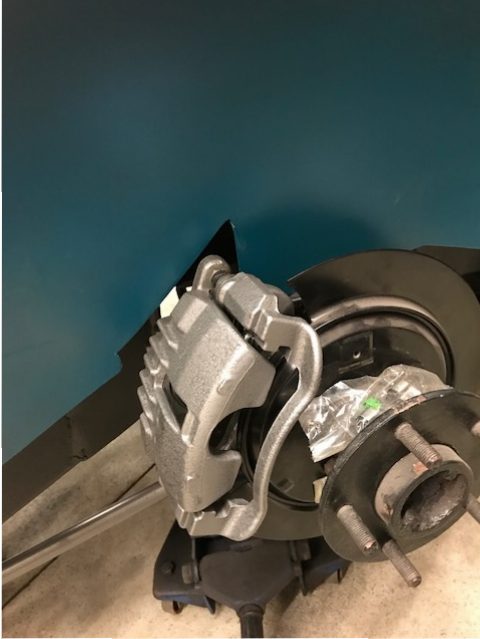 Poly on the bed wood 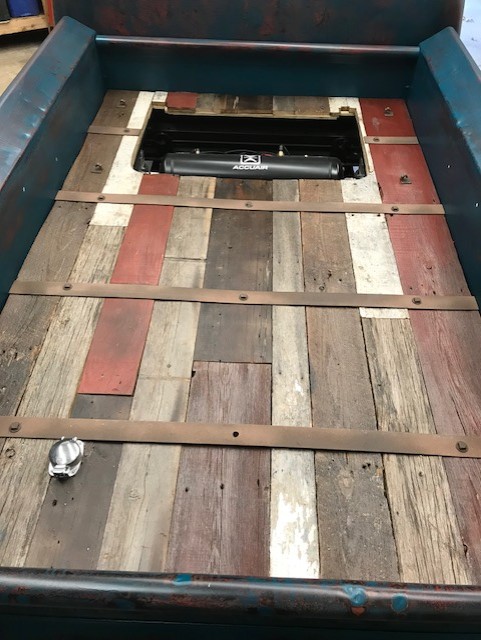 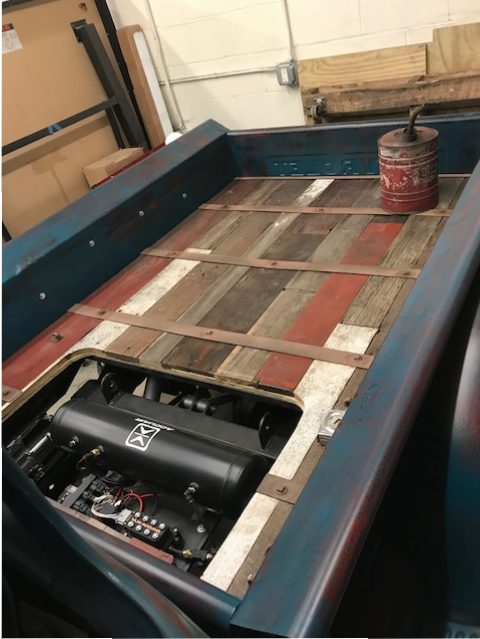 Tailgate and bumper/ filler installed 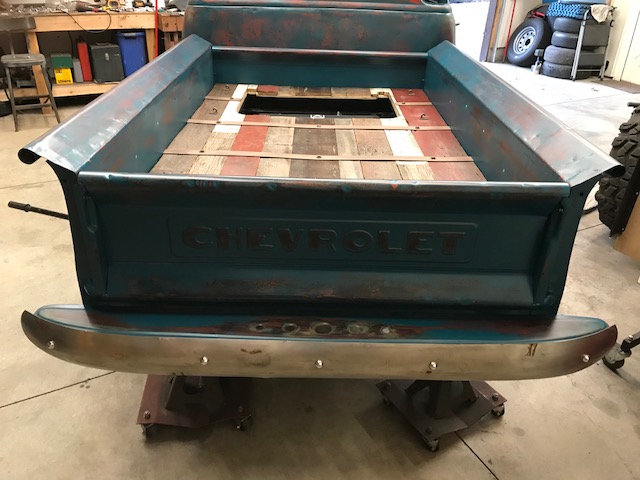 Rear fenders, running boards installed 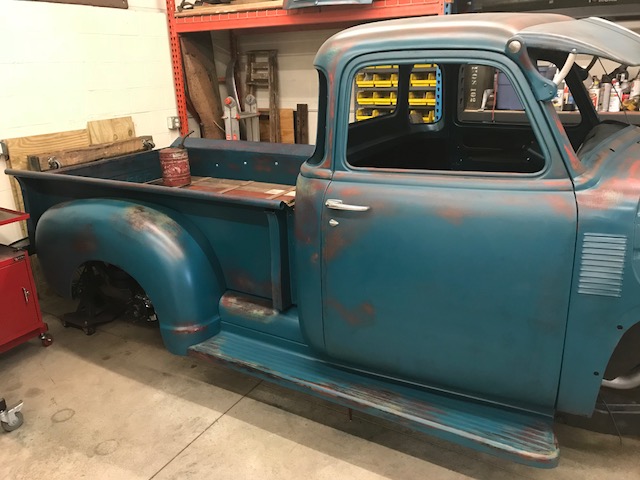 Engine bay is all cleaned up 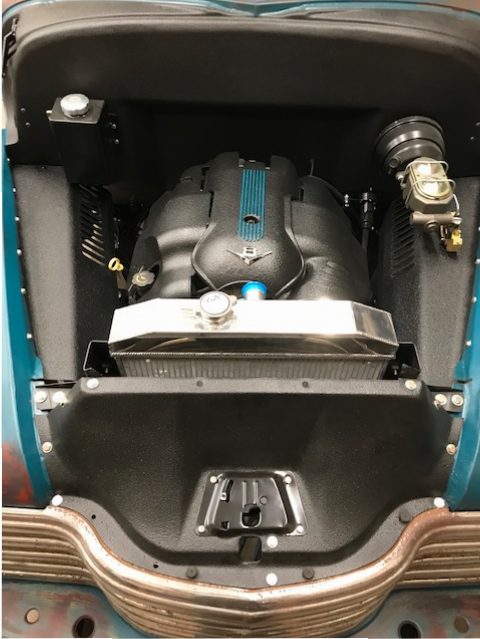 Motor is dressed up 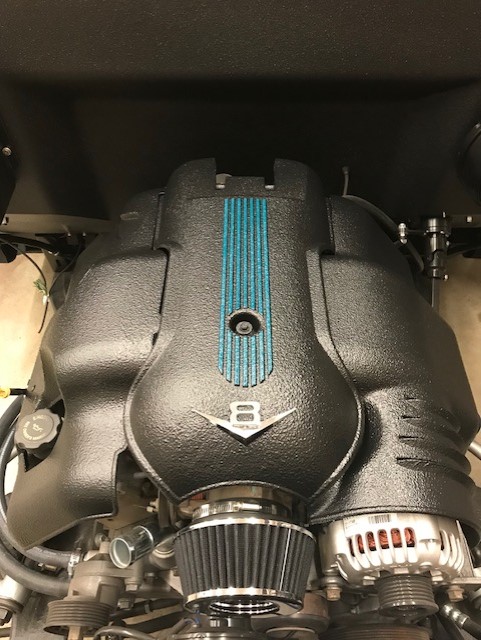 Grill, front bumper/ filler installed 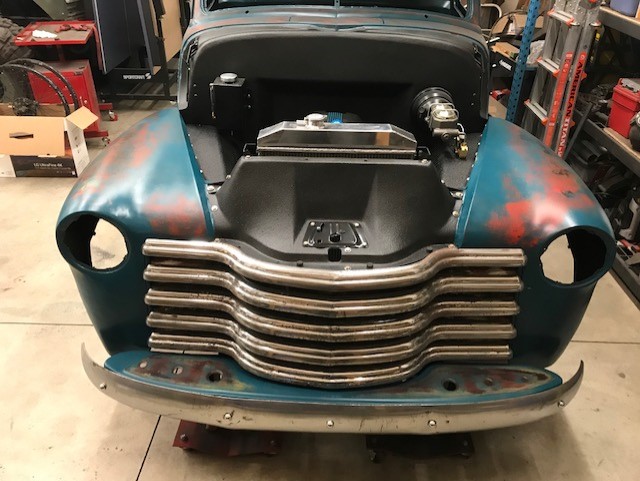 Front fenders 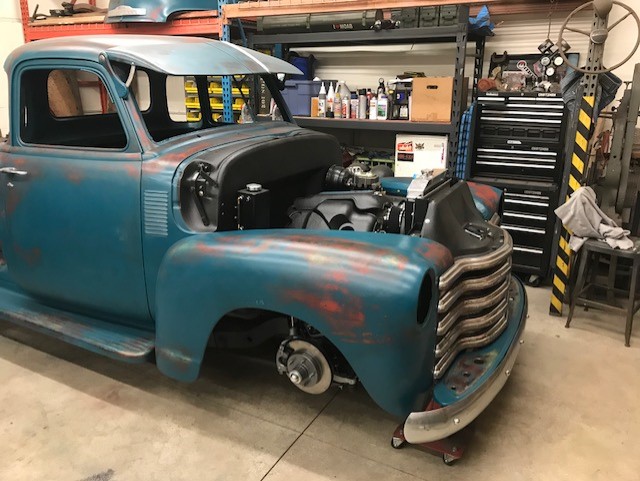 Hood went on 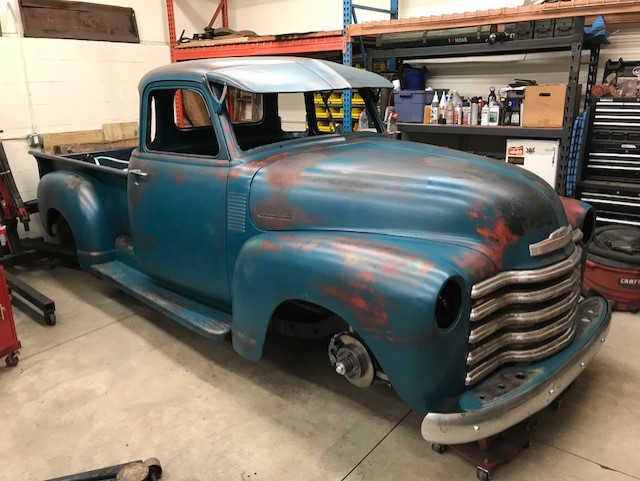 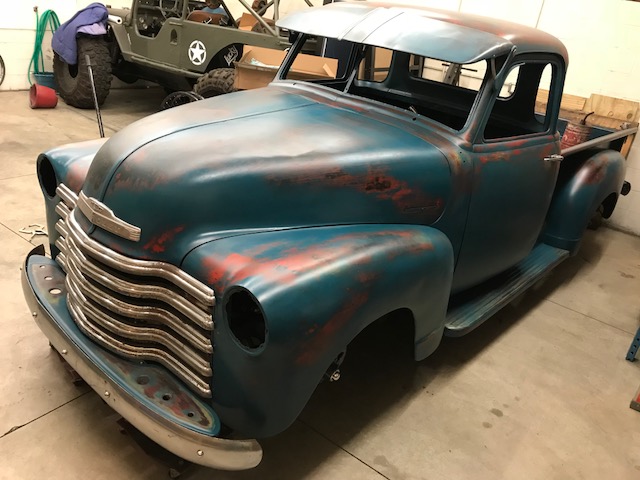 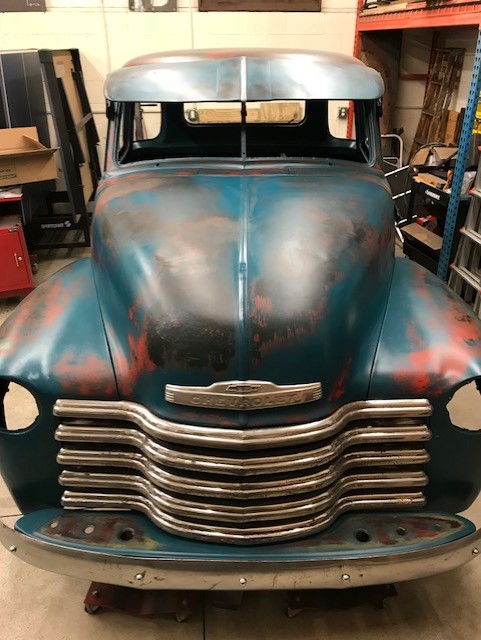 Next up, let's make it RUN... |
|
|

|
|
|
#13 |
|
Registered User
Join Date: Jul 2014
Location: Clear and Still Idaho
Posts: 509
|
Re: Project Eugene: 1949 5 Window (Part 2)
HULK64
Strong work, your welding is great. Fun project You can never go wrong spending time with your kids. Keep on keepin on NC
__________________
Been there, wrecked that 
|
|
|

|
|
|
#14 |
|
Registered User
 Join Date: Mar 2007
Location: Scotts, Michigan
Posts: 3,774
|
Re: Project Eugene: 1949 5 Window (Part 2)
Great progress....I like how the engine bay turned out.
Marc
__________________
…………...........__________ .................. ((__|__||___\____ ..;.;;.:;:;.,;..;((_(O))____ (_(O)) 1948 Chevy Truck - Finished SOLD!! 1953 Chevy Suburban "Family Truckster" Completed: Spring of 2021 http://67-72chevytrucks.com/vboard/s...d.php?t=605484 1994 4x4 Blazer - "Field Find" https://67-72chevytrucks.com/vboard/...ferrerid=30857 |
|
|

|
|
|
#15 |
|
Registered User
Join Date: Mar 2013
Location: Edmonton, AB
Posts: 298
|
Re: Project Eugene: 1949 5 Window (Part 2)
Nice progress! Did you ditch the hood springs?
|
|
|

|
|
|
#16 |
|
Senior Member
  Join Date: Nov 2008
Location: Glendora, CA
Posts: 6,344
|
Re: Project Eugene: 1949 5 Window (Part 2)
Wow! I am really impressed with your project. Tough to do when you have small children but GREAT that you got them involved.
Hope your daughter’s experience with the dog won’t put her off dogs for life. Can you tell what paint you used. It appears you put some red, some gold or yellow and something dark - dark gray or black under the blue green. Were these automotive paints or more like Rustoleum? Common enamels? You're a very very good welder, fabricator and painter. Your truck minus the airbag suspension is what I originally INTENDED to build my ‘55 like.... I just got carried away - DOH!
__________________
'55 Big Window Shortbed, Drive-It-&-Work-On-It slid down the "slippery slope" to a Frame-Off Rodstoration! LQ4/4l85e/C4 IFS/Mustang 8.8 rearend w/3.73's Dan's '55 Big Window "Build" - Well, Kinda! Last edited by Dan in Pasadena; 11-11-2017 at 11:36 AM. |
|
|

|
|
|
#17 |
|
Registered User
Join Date: Feb 2014
Location: Sunnyvale, CA
Posts: 605
|
Re: Project Eugene: 1949 5 Window (Part 2)
WOW! You are doing great work. Like the look of the truck overall. Great to see your kids helping some also.
Paint looks great, bed is a nice idea and engine bay looking nice
__________________
1950 3100 5 window |
|
|

|
|
|
#18 |
|
Registered User
Join Date: Jan 2015
Location: Prior Lake MN
Posts: 87
|
Re: Project Eugene: 1949 5 Window (Part 2)
Thanks for the feedback guys! Always fun to connect with other builders.
Yes- I ditched the springs all together because I couldn't get the hood to fit right. I might try them one more time now that it is gapped right, but I dunno- they are a pain. My daughter is a trooper, and she isn't afraid of dogs now at all- which is good. She really just connected the accident to the one dog- and he was put down. As for the paint, it's kind of a combo of all kinds of things. The bottom layer on the cab is the original paint that the former owner brushed on there. I loved the look of it so the rest of the truck was just trying to emulate it. So, I layered on a rust primer spray- then I rolled on a black duplicolor automotive paint, then I brushed on some red and mixed it to change the tones a bit, then sprayed some tan and yellow, and finally the teal color was a rustoleum spray product. After all that was down I wet sanded til I thought it looked natural and then clear coated it all with a satin spray. I'm curious to see how it holds up....but I am happy with the end result! |
|
|

|
|
|
#19 | |
|
Senior Member
  Join Date: Nov 2008
Location: Glendora, CA
Posts: 6,344
|
Re: Project Eugene: 1949 5 Window (Part 2)
Quote:
Thanks for the details. Sounds like you've got a lot of paint on there. For what it’s worth, my 55.2 had some totally oxidized gray primer on it when I bought it in ‘11. I didn't want “standard” flat black or red oxide primer, so I looked around and found Duplicolor in light green. It didn’t hold up well AT ALL. Light surface rust started showing through quickly. I went to my local Home Cheapo and found Rustoleum Sage Green in satin finish. It matched the green primer pretty well. I sanded off all the surface rust and reshot it. It held up great until I tore the whole thing down in ‘15 for the build. And I never put any clear over it so yours should last fine for quite awhile.
__________________
'55 Big Window Shortbed, Drive-It-&-Work-On-It slid down the "slippery slope" to a Frame-Off Rodstoration! LQ4/4l85e/C4 IFS/Mustang 8.8 rearend w/3.73's Dan's '55 Big Window "Build" - Well, Kinda! |
|
|
|

|
|
|
#20 |
|
Registered User
Join Date: Jan 2015
Location: Prior Lake MN
Posts: 87
|
Re: Project Eugene: 1949 5 Window (Part 2)
Thanks Dan- the spots that have original paint on it still have the original base coat from the factory, and any of the new parts I got came with a base coat on them that I scuffed before applying primer. Anywhere I had bare metal was shot with an etching primer prior to anything else. So, I am "hoping" I have a solid foundation that I built on top of....but time will tell.
I was going to cobble together an upper radiator hose with a bunch of connectors and hose clamps and my buddies convinced me that was a terrible idea. So, AN fittings it is! I will admit it, I am really happy with the finished product even though it was WAY more expensive than I was planning on. 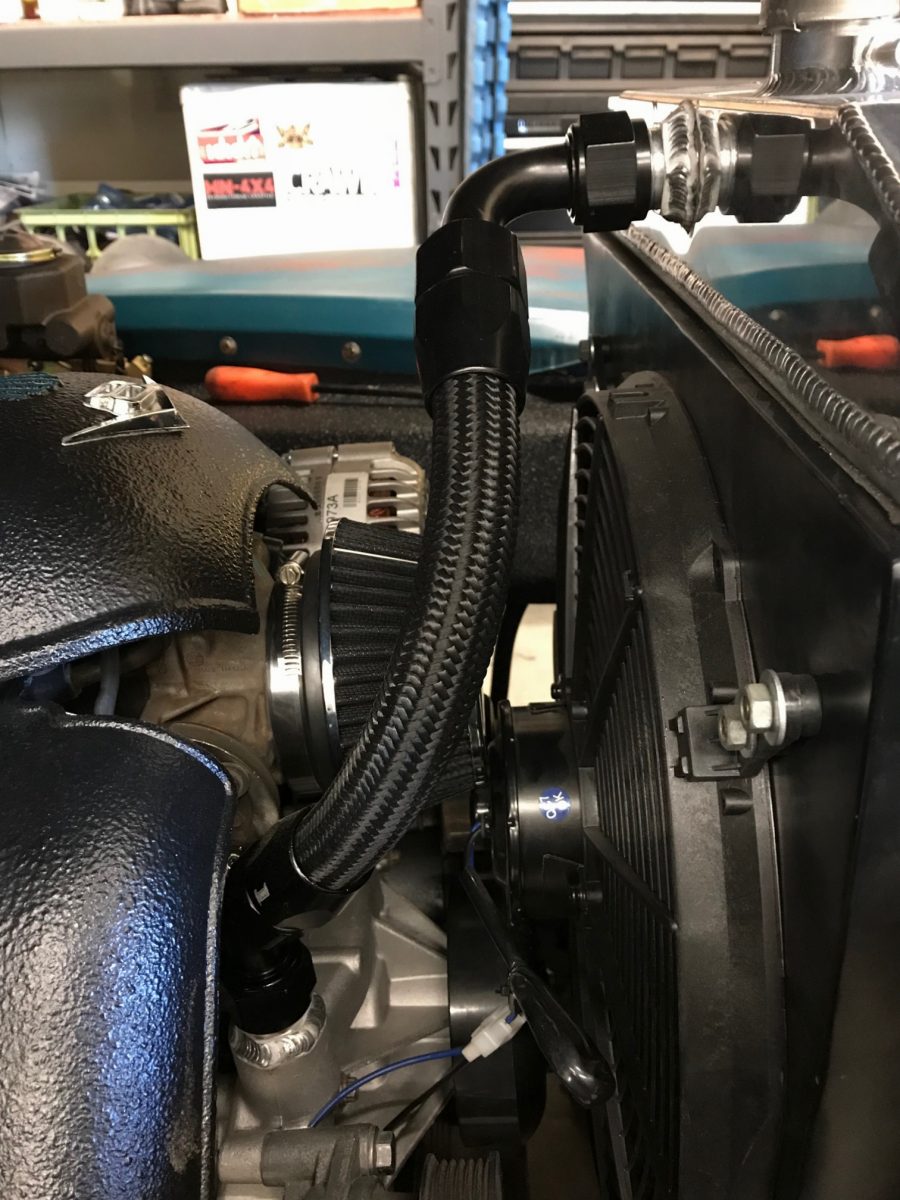 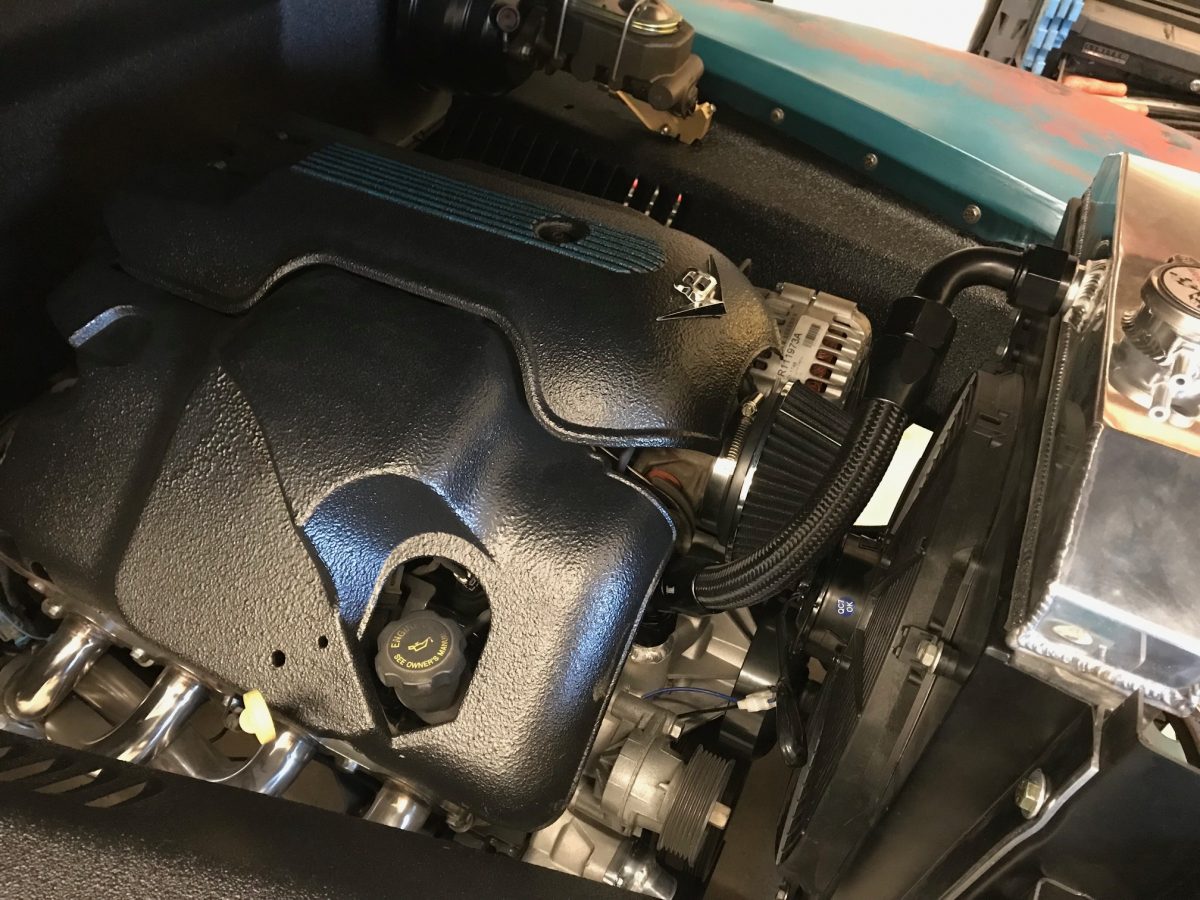 Got the trans disptick installed 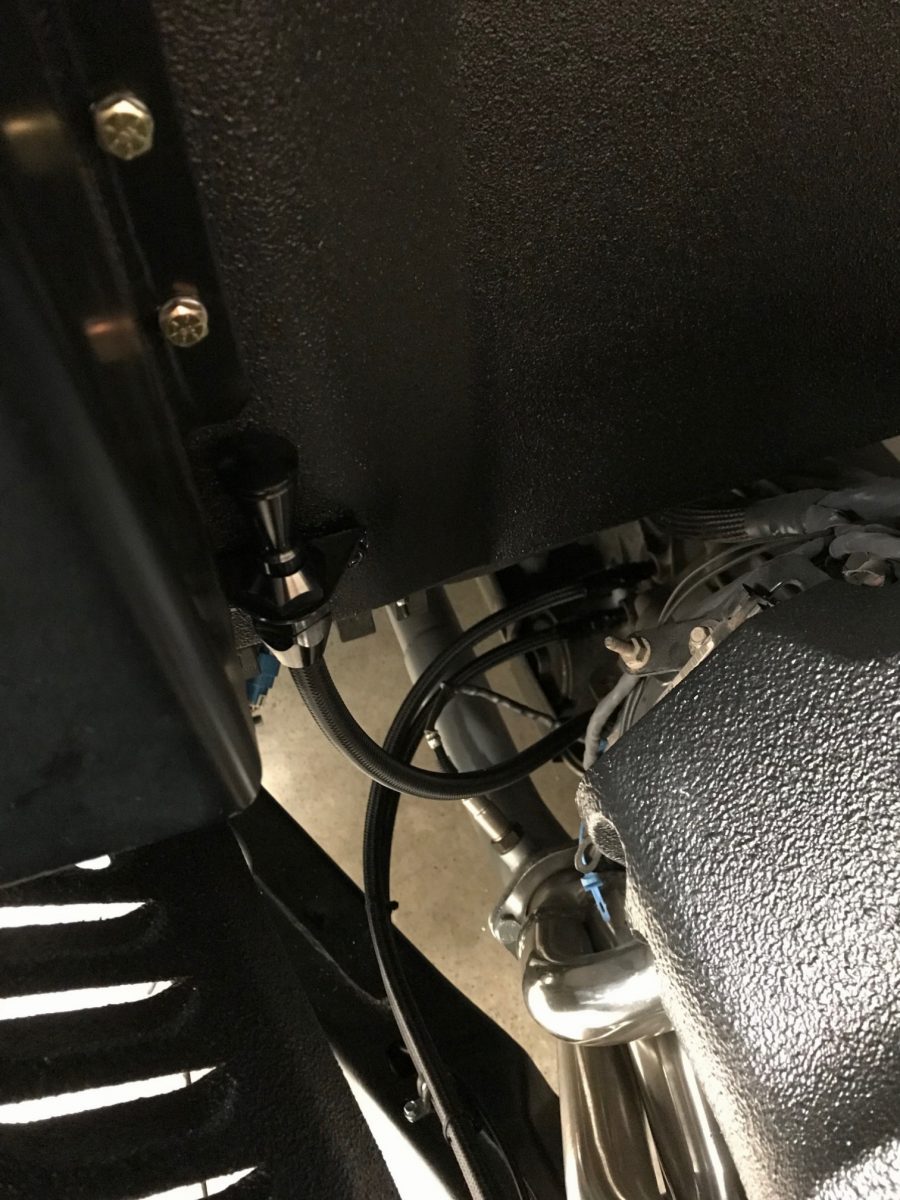 And the trans cooler lines got the AN treatment as well. 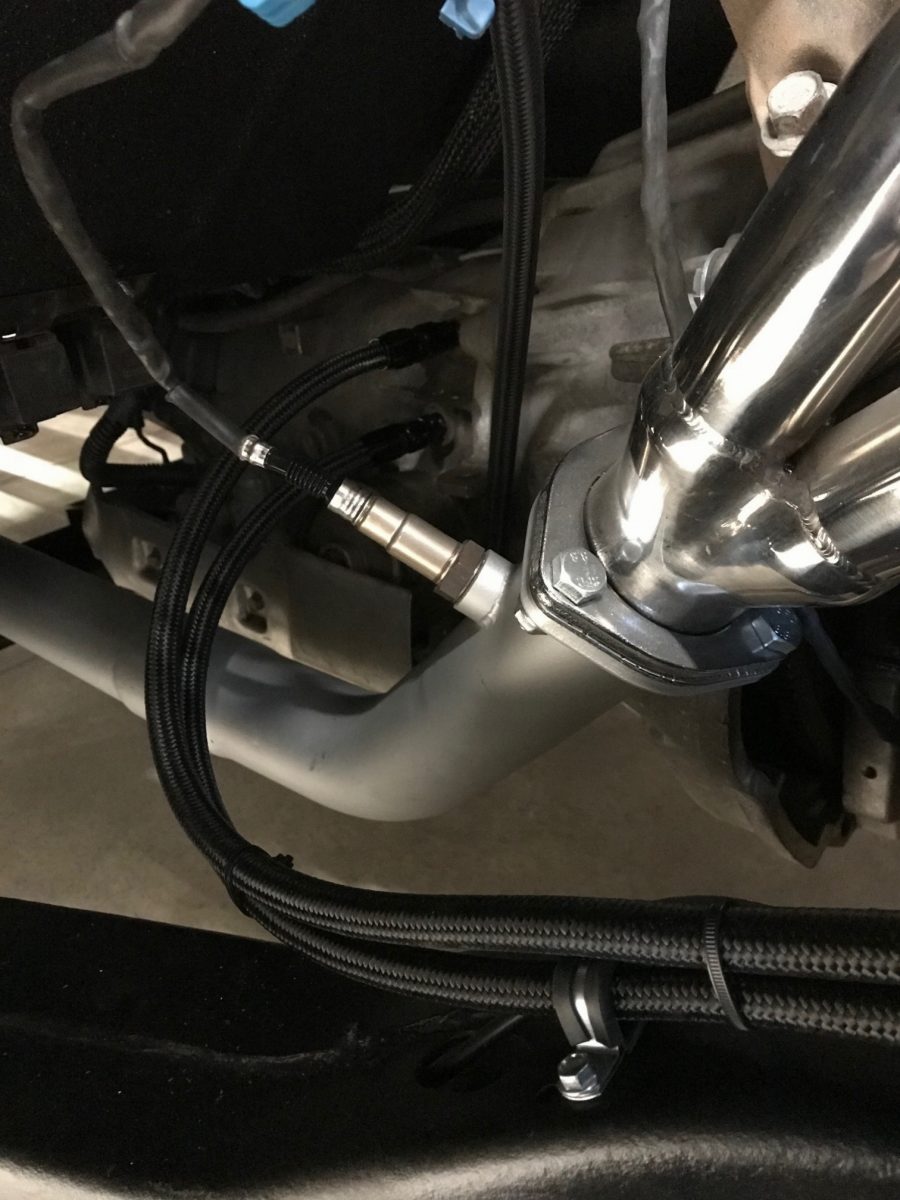 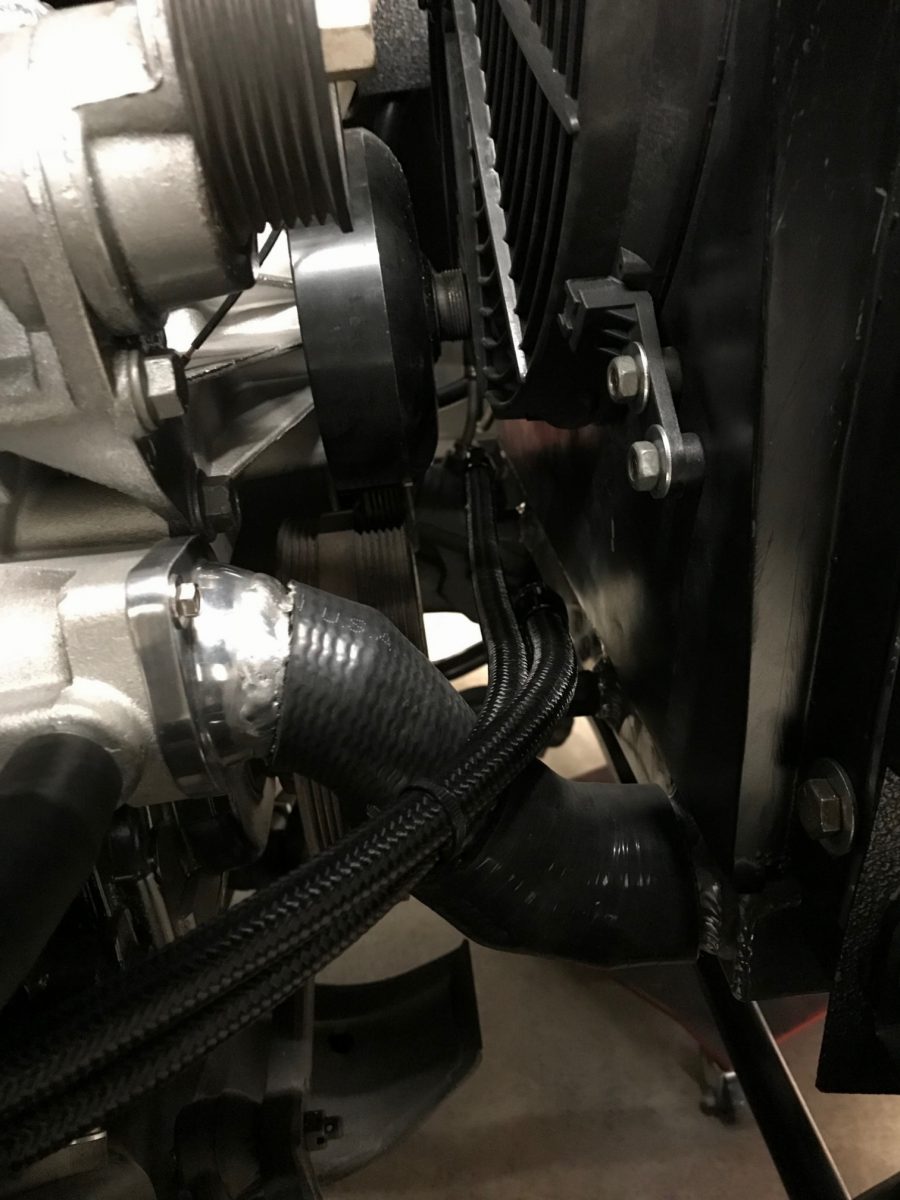 I know the lower rad hose still needs clamps...lol I got the starter installed as well- and next I want to get the battery lines run. Then we can start prepping to fire the motor! I still have to get the ECU tuned- so that's next. ONWARD! |
|
|

|
|
|
#21 |
|
Senior Member
 Join Date: May 2007
Location: Doodah Kansas
Posts: 7,774
|
Re: Project Eugene: 1949 5 Window (Part 2)
looking great! such clean work!
__________________
the mass of men live lives of quiet desperation if there is a problem, I can have it. new project WAYNE http://67-72chevytrucks.com/vboard/s...d.php?t=844393 |
|
|

|
|
|
#22 |
|
Registered User
Join Date: Jan 2015
Location: Prior Lake MN
Posts: 87
|
Re: Project Eugene: 1949 5 Window (Part 2)
We have been staying after it through the winter cold. The heater in the shop has stayed busy up her in MN these last few months!
Wiring has been the name of the game, but the best part about wiring is that exciting things start happening, like this...needless to say I was thrilled. https://www.facebook.com/josh.suther...6041556028390/ I hate wiring so I called in backup- my buddy Pete and I have gotten almost everything done, and shockingly, it even works. Battery box behind the seat. 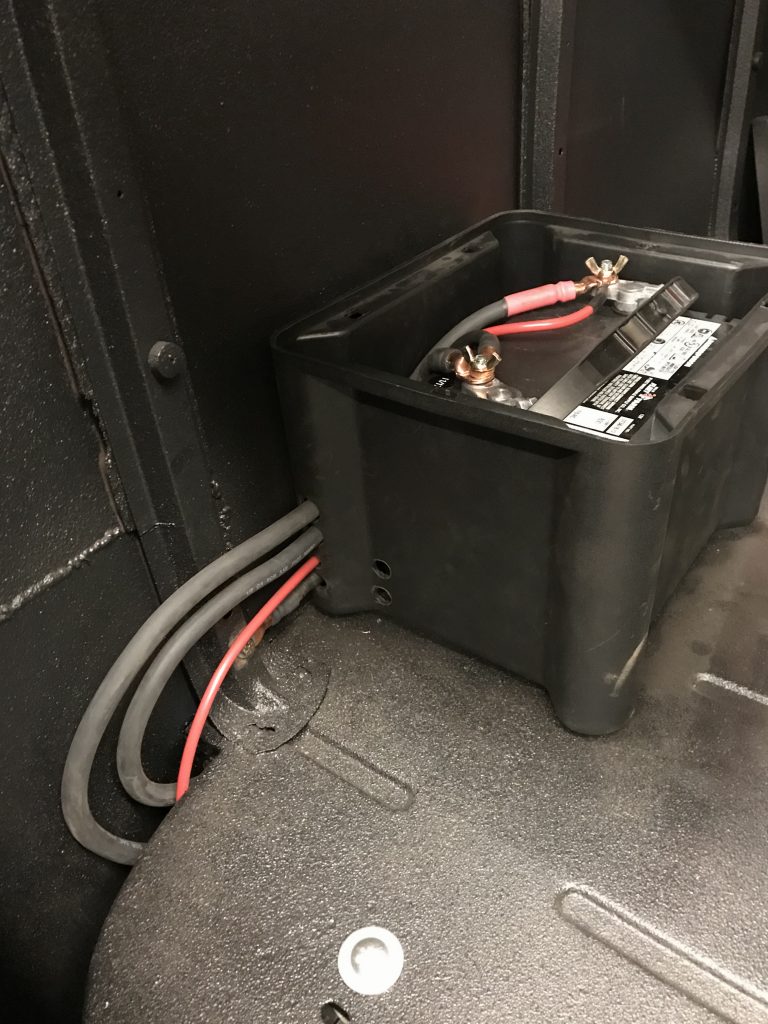 Lit! 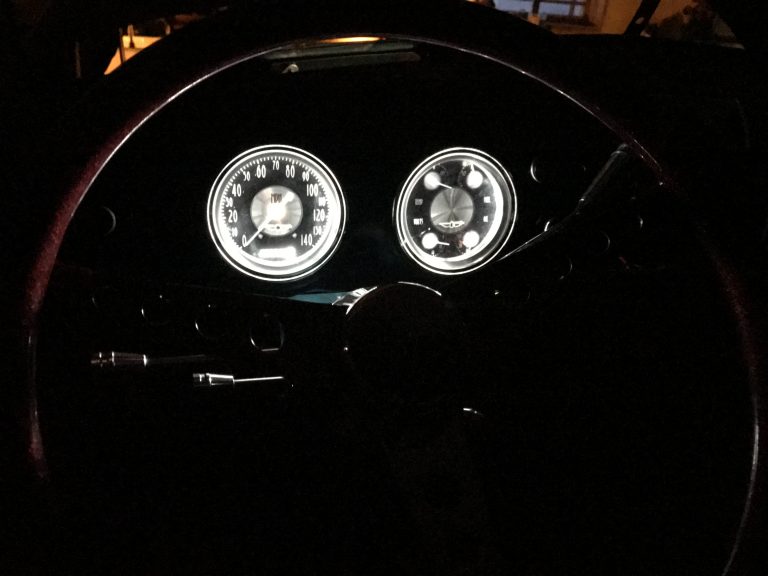 Dash 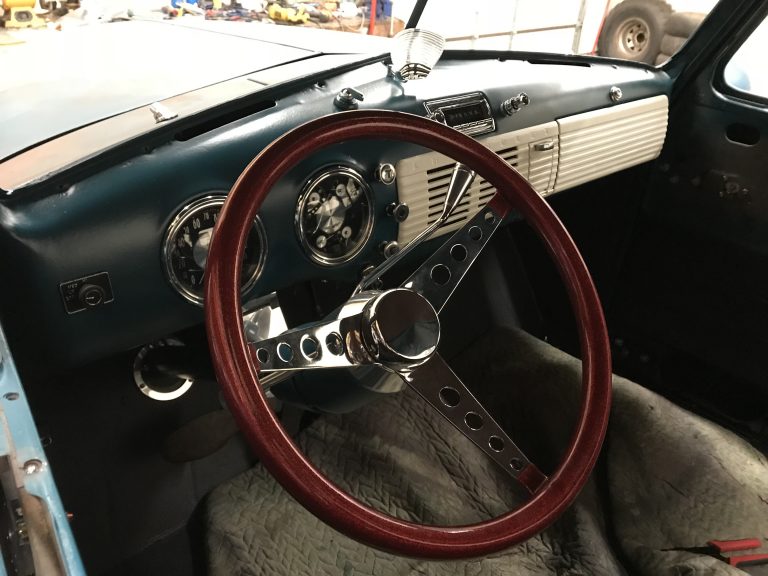 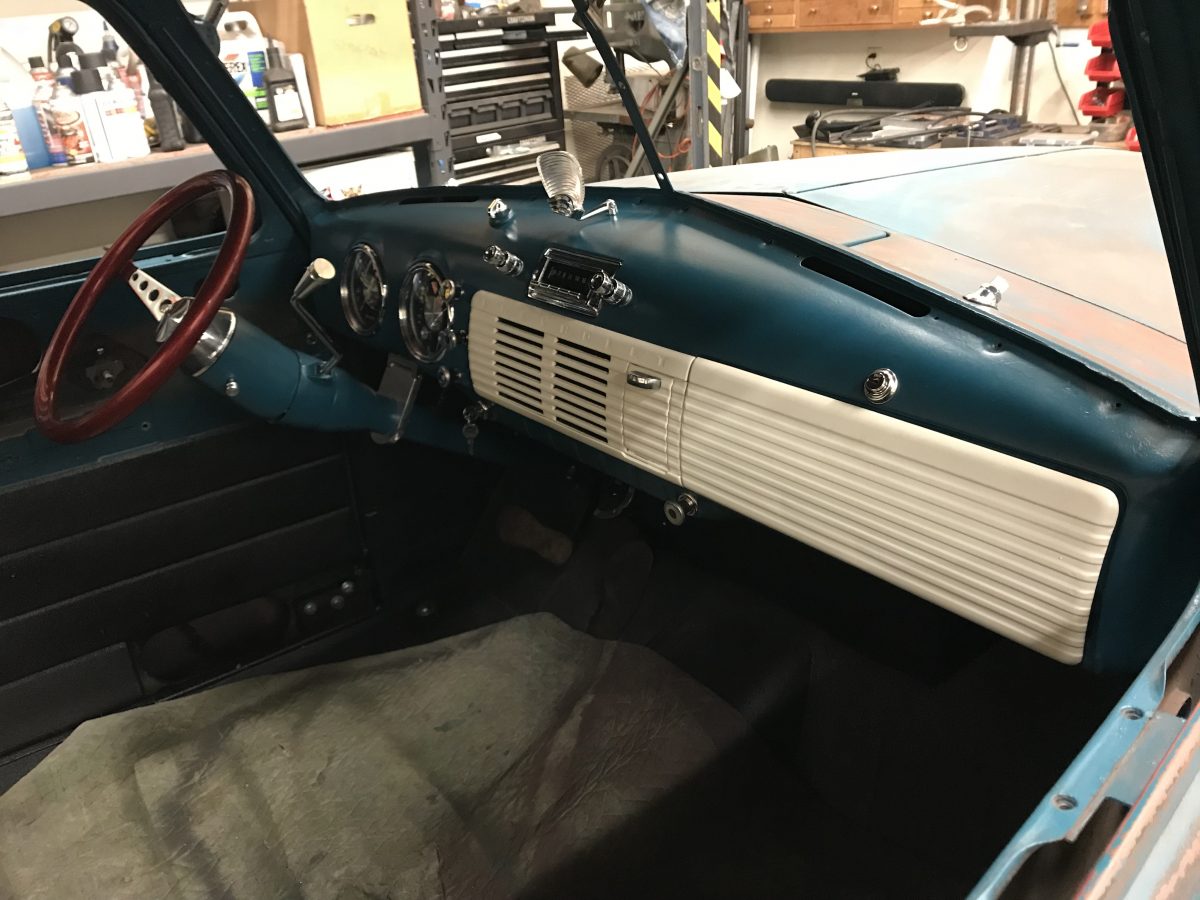 Finally got a chance to see if my idea for the air ride controller works- luckily it does! The stock choke cable actuates the ash tray to pop open....works pretty slick! 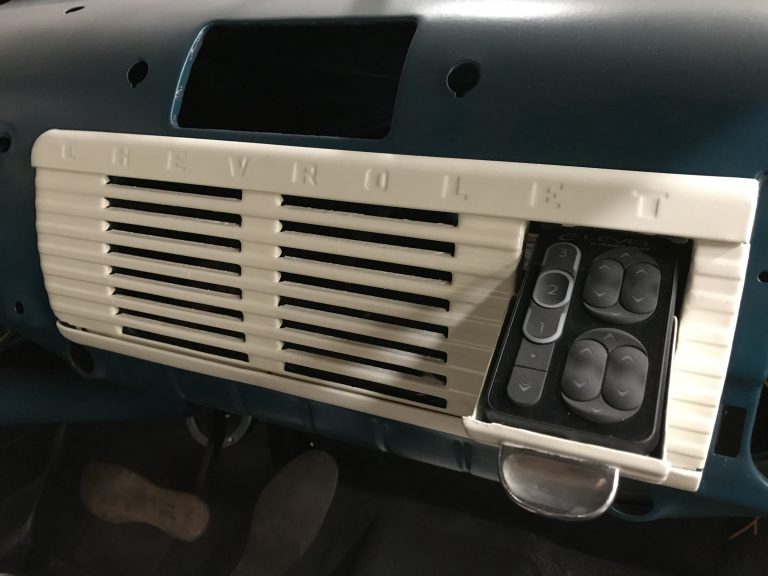 https://www.facebook.com/josh.suther...6097892658390/ Killing lots of time building little tabs like these to keep the wires away from the headers, pluggin vac holes, running tubes and wires everywhere, etc. 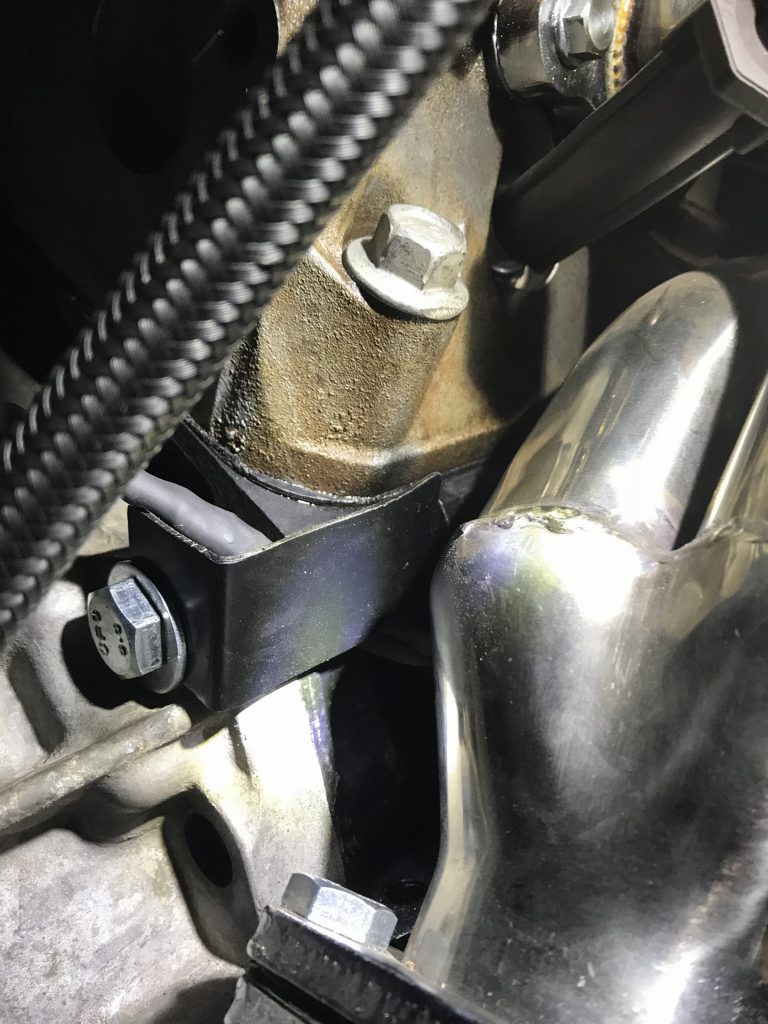 Figured out a return spring to deal with my heavy ass cobbler's shoe mold for a gas pedal- lol 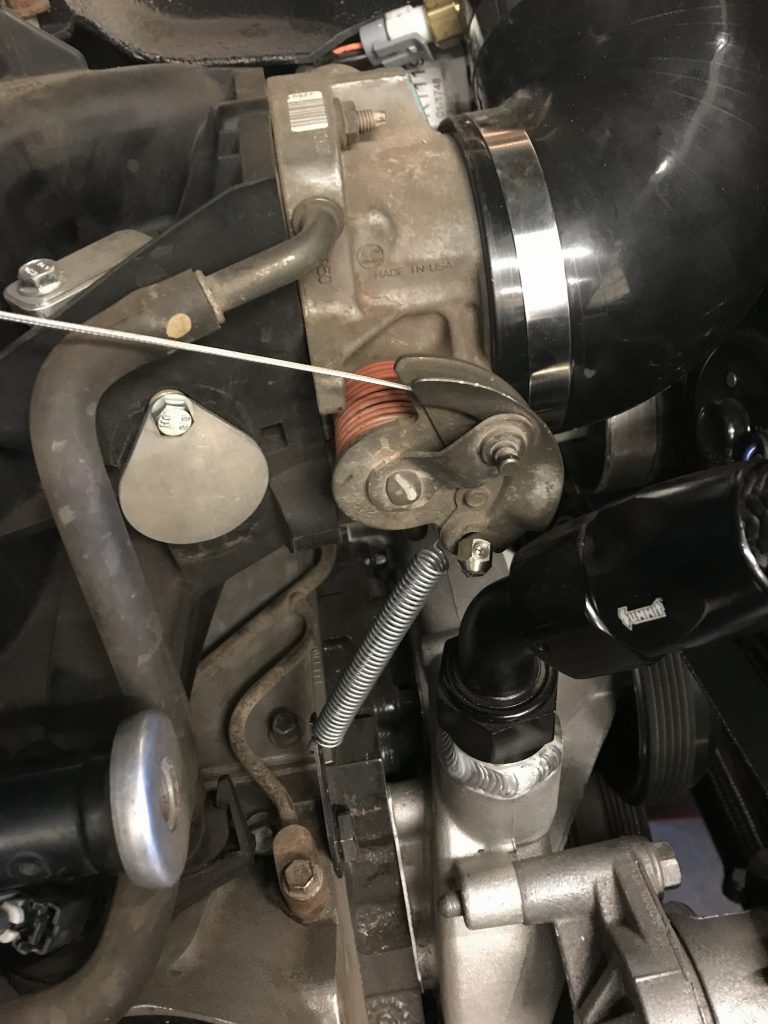 Having that done motivated me to figure out how to final mount the engine covers. Turned out pretty clean! 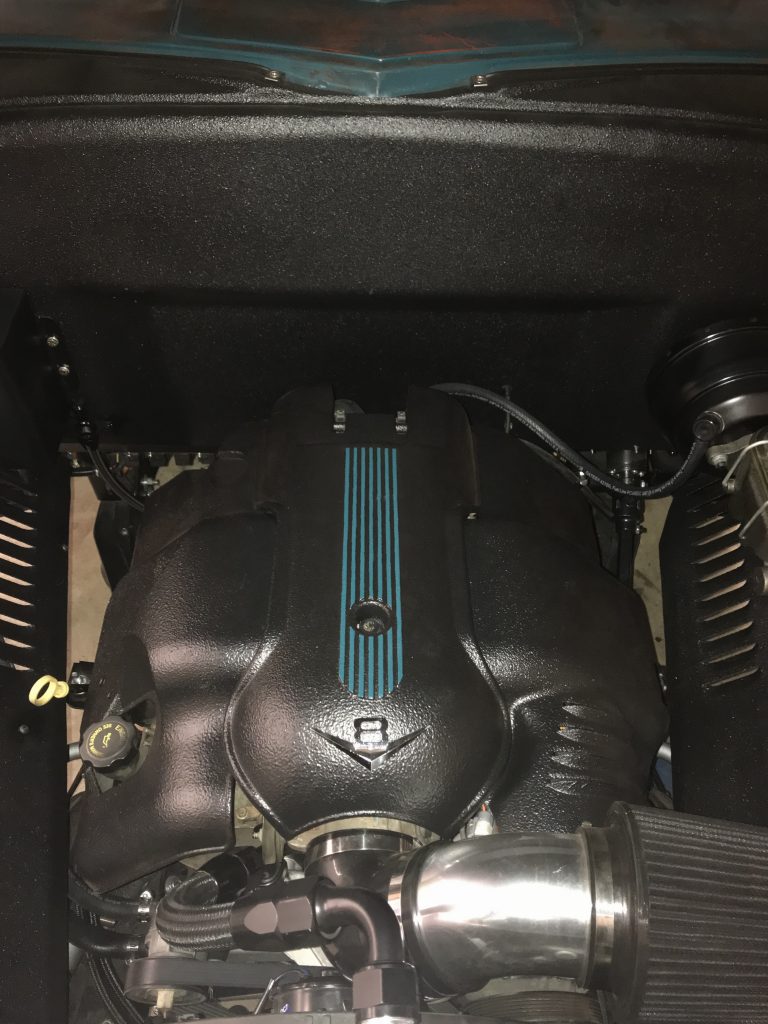 Time to vote on wheel color. We call it a decision between classy and badassy. Please forgive the really rough photoshop... 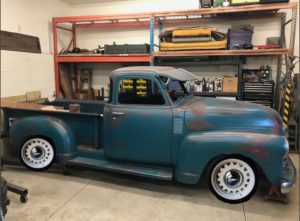 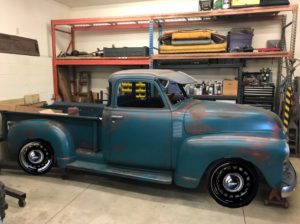 And finally, a question. I had this headlight bezel from the last owner and wanted a second. When I asked online, a guy sent me the second one- which fits like crap and doesn't look the same at all. What gives? I am told that the nice rounded one is possibly off a car? Who has another nice rounded one they can sell me? 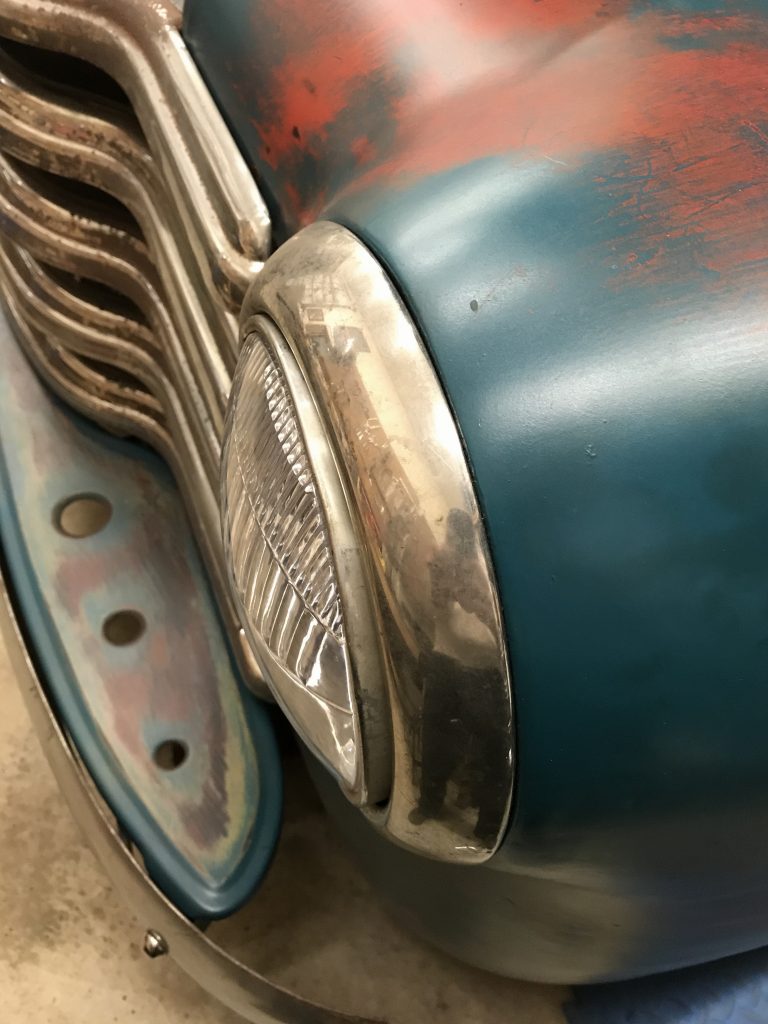 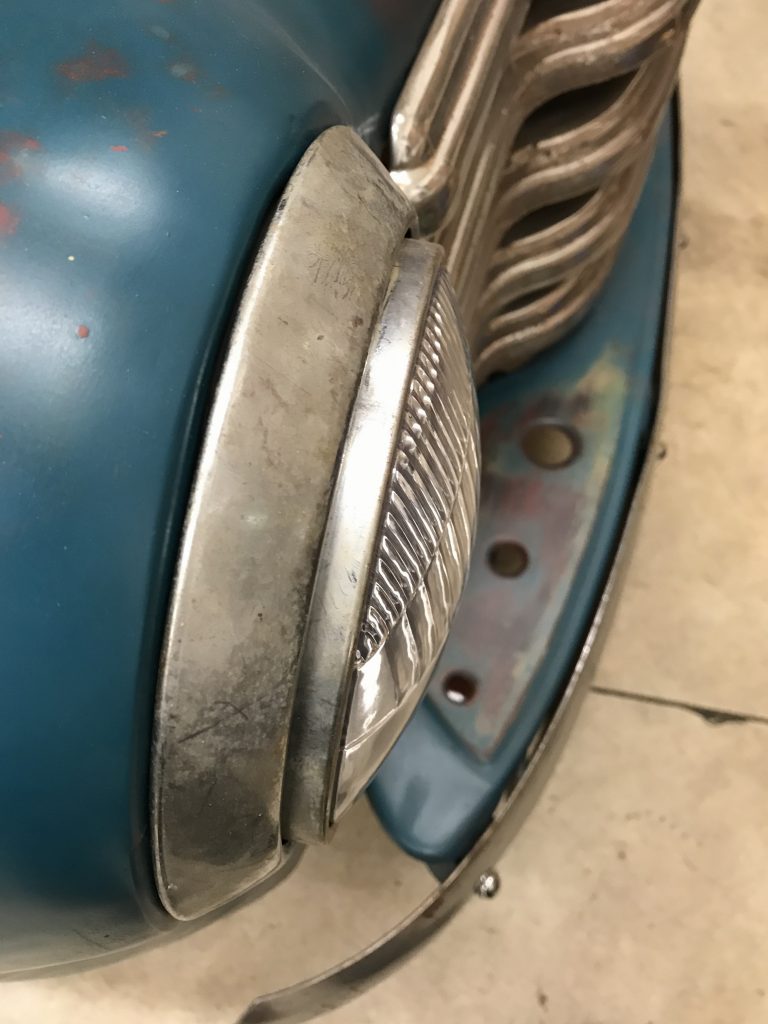 The last bit of news is that I have a few fellas interested in buying my jeep (since it doesn't get used anymore- time for a change) and that will free up enough cash to finish this thing by spring. Getting closer! Last edited by HULK64; 01-26-2018 at 07:11 AM. |
|
|

|
|
|
#23 |
|
Registered User
Join Date: Aug 2012
Location: Northeast KS
Posts: 1,789
|
Re: Project Eugene: 1949 5 Window (Part 2)
Good work...white/cream on the wheels....or try a flat gunmetal.
__________________
1999 GMC Suburban K2500 SLT, 454/4L80E 1991 Z/28, 6.0L/T56 1949 GMC 250, S10 Frame, 6.0L/4L80E Instagram @aceshighspeedshop |
|
|

|
|
|
#24 |
|
Registered User
Join Date: Jan 2015
Location: Prior Lake MN
Posts: 87
|
Re: Project Eugene: 1949 5 Window (Part 2)
I agree on the cream- thanks for the vote!
Only one vote? |
|
|

|
|
|
#25 |
|
Registered User
Join Date: Feb 2014
Location: Sunnyvale, CA
Posts: 605
|
Re: Project Eugene: 1949 5 Window (Part 2)
Truck is looking Very Nice. I say the Cream looks better.
__________________
1950 3100 5 window |
|
|

|
 |
| Bookmarks |
|
|