
 |
|
|
#176 |
|
Senior Member
 Join Date: May 2007
Location: Doodah Kansas
Posts: 7,774
|
Re: 1941 1/2 ton project Hannah
got some transfer paper and stuck the chevrolet stickers on the smoothie caps.
 IMG_9073 by Joe Doh, on Flickr IMG_9073 by Joe Doh, on Flickr IMG_9074 by Joe Doh, on Flickr IMG_9074 by Joe Doh, on Flickrstarted working on the running board mod. the fender needed to move back 2" and that helped but doing the cuts in 3d on the multiple stair steps requires chipping away at it. I got within about an inch of the right spot tonight, I made a pattern of the fender and transferred it. one thing is, these are 37-38 fenders so they are slightly narrower than the 41-46, so I will have to fab a nice end for the running board.  IMG_9078 by Joe Doh, on Flickr IMG_9078 by Joe Doh, on Flickr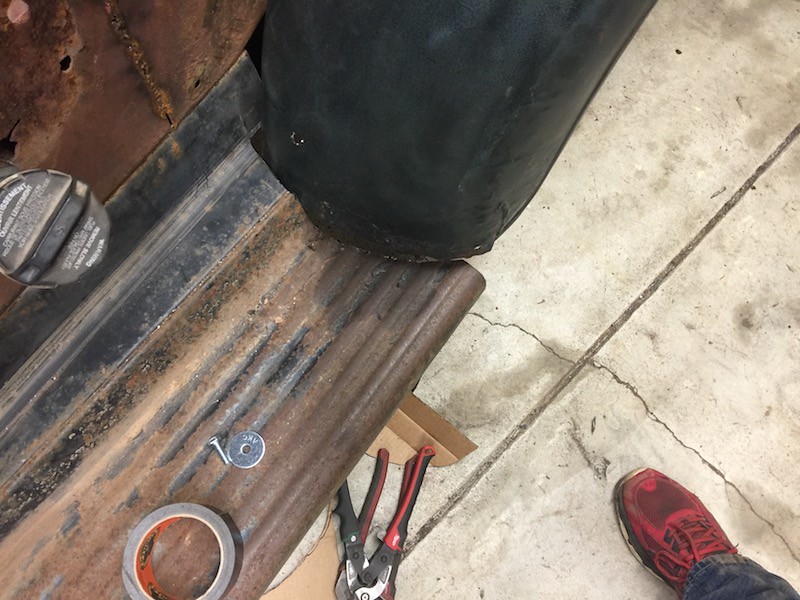 IMG_9079 by Joe Doh, on Flickr IMG_9079 by Joe Doh, on Flickr IMG_9080 by Joe Doh, on Flickr IMG_9080 by Joe Doh, on Flickrmaybe some more tomorrow.
__________________
the mass of men live lives of quiet desperation if there is a problem, I can have it. new project WAYNE http://67-72chevytrucks.com/vboard/s...d.php?t=844393 |
|
|

|
|
|
#177 |
|
Registered User
Join Date: Aug 2012
Location: Northeast KS
Posts: 1,783
|
Re: 1941 1/2 ton project Hannah
I haven't been commenting, but I have been watching!
I like how the baby moons turned out, and the running boards are coming along nicely. I wish they made wide whites in the rear size i'm running, in a true street radial.
__________________
1999 GMC Suburban K2500 SLT, 454/4L80E 1991 Z/28, 6.0L/T56 1949 GMC 250, S10 Frame, 6.0L/4L80E Instagram @aceshighspeedshop |
|
|

|
|
|
#178 |
|
Senior Member
 Join Date: May 2007
Location: Doodah Kansas
Posts: 7,774
|
Re: 1941 1/2 ton project Hannah
hey man thanks! I dont mind watchers, I love doing this stuff and posting about it to maybe help guys out. most guys who have done s10 swaps on these trucks dont really share info for whatever reason. it should be open source, like how skymangs did his 47-53 stuff. if I can have a problem and post about it maybe it helps someone!
I was having trouble with my taped on bolts so I chewed out the bedside for the tub, that way I could put a bolt through and get a nut on it. I cleaned it up with a grinder after this picture.  IMG_9134 by Joe Doh, on Flickr IMG_9134 by Joe Doh, on Flickrwent much better that way, I cut a little more than I needed (pray twice cut once!). what actually happened is I thought the 37-38 fenders had the same mounting pattern because they were on a 41 when I bought it, so I redrilled the fender holes 2" further back. when I was trying to get the running boards cut enough I measured the distance away I was and transferred to to the running board. but since the 37-38 is slightly smaller mounting arc I missed it by just a scant 1/4 inch in the corner. you can see my new hole just forward of the fender, and the small gap in the corner. I will fix both. otherwise looks good enough to me! 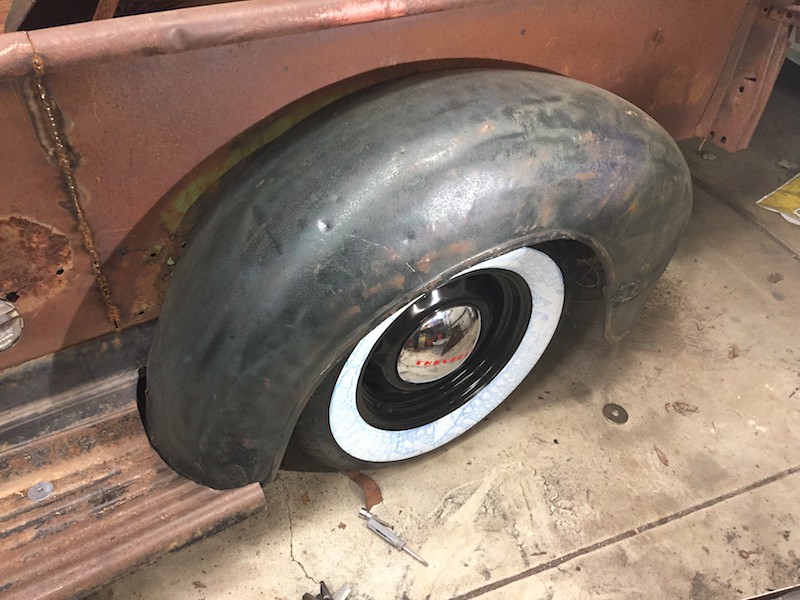 IMG_9137-1 by Joe Doh, on Flickr IMG_9137-1 by Joe Doh, on Flickr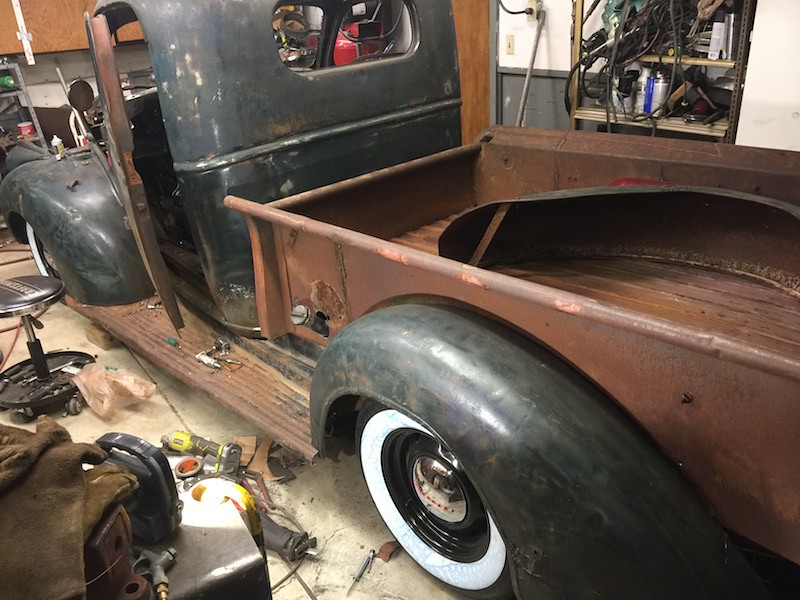 IMG_9139 by Joe Doh, on Flickr IMG_9139 by Joe Doh, on Flickrpassenger side tomorrow, then back to the interior. I ordered a fan switch, everyone seems to go with the 185 on 175 off, but the thermostat in these trucks is a 185 stock and most run a 190. so I ordered a 200 on 185 off, I figure it will work better not turning on all the time and cycling the thermostat. if I remember the gauge runs right under 200 in the middle.
__________________
the mass of men live lives of quiet desperation if there is a problem, I can have it. new project WAYNE http://67-72chevytrucks.com/vboard/s...d.php?t=844393 |
|
|

|
|
|
#179 |
|
Senior Member
 Join Date: May 2007
Location: Doodah Kansas
Posts: 7,774
|
Re: 1941 1/2 ton project Hannah
learning from the drivers side I was able to knock out the passenger side pretty quickly.
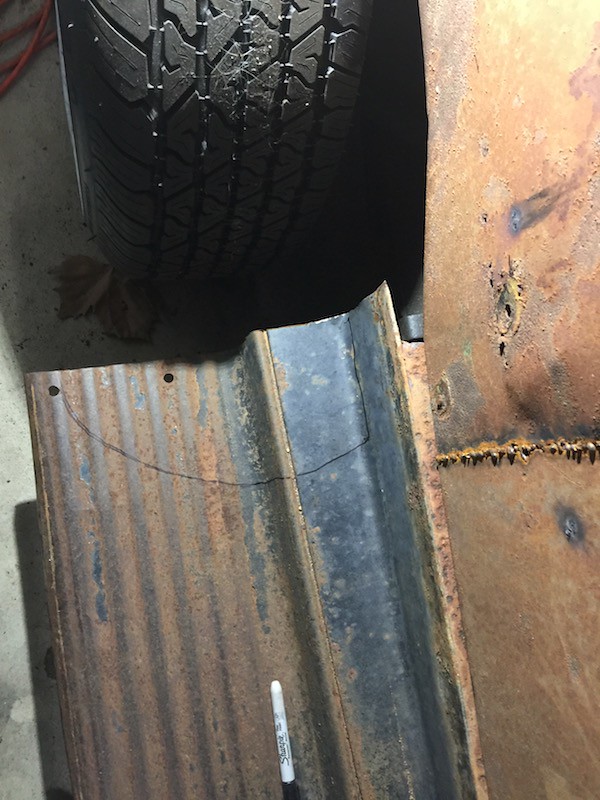 IMG_9146 by Joe Doh, on Flickr IMG_9146 by Joe Doh, on Flickr 54491292003__B96E3997-7E77-4EBE-9936-99E53351A299 by Joe Doh, on Flickr 54491292003__B96E3997-7E77-4EBE-9936-99E53351A299 by Joe Doh, on FlickrI thought you might like to see what kind of room I have to work with on the right side. :/  IMG_9148 by Joe Doh, on Flickr IMG_9148 by Joe Doh, on Flickrnot for much longer though! oh and I seemingly and impossibly misplaced my sharpie in the 4 cubic feet I was working in. I borrowed a green one from my wife and said "I lost the one I was working with". she was understandably concerned about me losing hers too, until I explained that you FIND the first one by USING the second one and paying attention to where you lay it down. 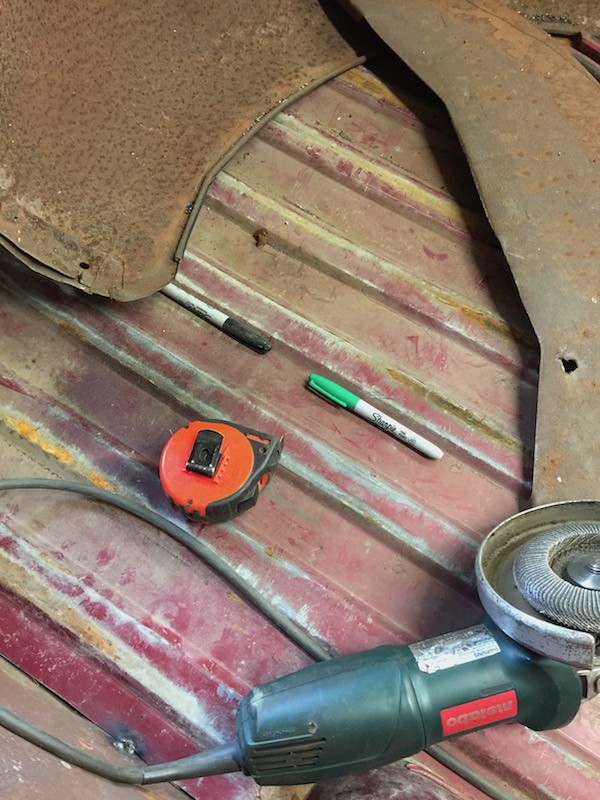 54490992436__8C275E98-7DF6-44FB-A118-150E90FCE038 by Joe Doh, on Flickr 54490992436__8C275E98-7DF6-44FB-A118-150E90FCE038 by Joe Doh, on FlickrI was dying to roll it out and get an overall, but it was raining, so here is the bonus outside picture taken inside.  IMG_9153-1 by Joe Doh, on Flickr IMG_9153-1 by Joe Doh, on FlickrI laid in the harnesses next since I couldnt weld outside.  IMG_9156 by Joe Doh, on Flickr IMG_9156 by Joe Doh, on Flickr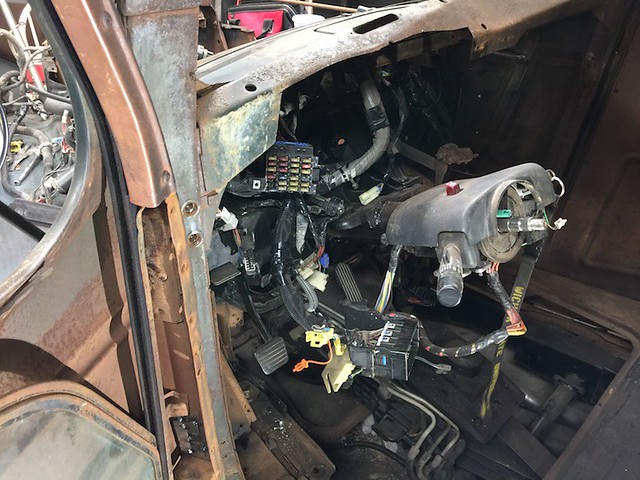 IMG_9157 by Joe Doh, on Flickr IMG_9157 by Joe Doh, on Flickr IMG_9158 by Joe Doh, on Flickr IMG_9158 by Joe Doh, on FlickrI was able to get the entire engine harness and pcm inside the dash, which I was worried about because there isnt a lot of room for it under the hood. I need to put the AC box in next, then its dash and gauges.
__________________
the mass of men live lives of quiet desperation if there is a problem, I can have it. new project WAYNE http://67-72chevytrucks.com/vboard/s...d.php?t=844393 |
|
|

|
|
|
#180 |
|
Registered User
Join Date: Aug 2012
Location: Northeast KS
Posts: 1,783
|
Re: 1941 1/2 ton project Hannah
Looking good sir! I did the full build in my Z28 in one garage bay...so I understand the space confinement. You'll love the new shop!
__________________
1999 GMC Suburban K2500 SLT, 454/4L80E 1991 Z/28, 6.0L/T56 1949 GMC 250, S10 Frame, 6.0L/4L80E Instagram @aceshighspeedshop |
|
|

|
|
|
#181 |
|
Senior Member
 Join Date: May 2007
Location: Doodah Kansas
Posts: 7,774
|
Re: 1941 1/2 ton project Hannah
yeah I am pretty over it. although I started out doing it all in the driveway so today instead of griping about space I cleaned the space. someone actually ordered a spring day and I partook with great excitement.
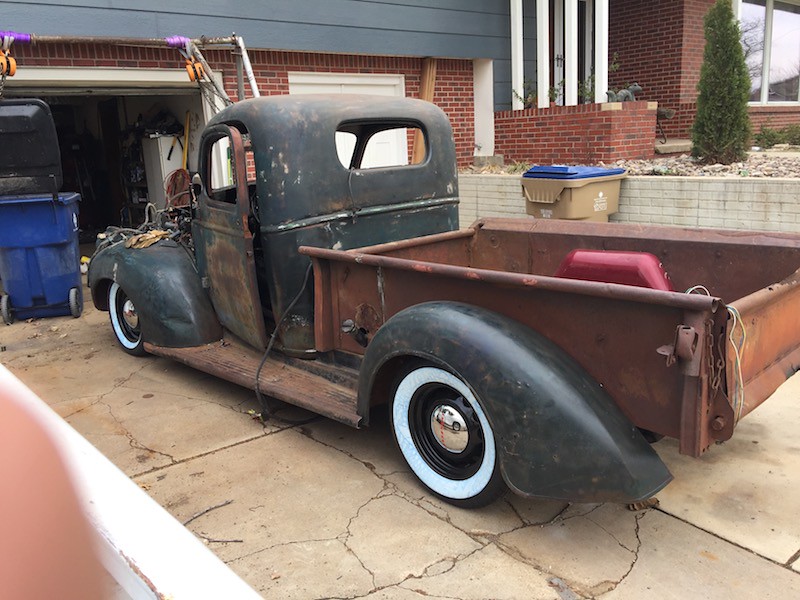 54499958519__23365792-E1A9-47A8-AA08-62FAE06E371F by Joe Doh, on Flickr 54499958519__23365792-E1A9-47A8-AA08-62FAE06E371F by Joe Doh, on Flickr 54499959626__44CC4CDD-1874-4B4B-B2A9-75D95F35985E by Joe Doh, on Flickr 54499959626__44CC4CDD-1874-4B4B-B2A9-75D95F35985E by Joe Doh, on Flickrhere is something that bothered me on the last one, and bothers me again on this one. you can see plainly that the front clip is level and square and evenly mounted, look for a clue on the frame rails (the spacing is the same) but look at the flare of the passenger fender compared to the drivers. some of it is that the drivers fender was wiped liberally with a fence post somewhere in history but I have yanked most of it back. there is literally 2-3" more space wheelarch-to-tire in the passenger front fender. the last 41 was the same and I thought maybe I just mounted it crooked.  IMG_9165 by Joe Doh, on Flickr IMG_9165 by Joe Doh, on Flickrahhh so clean again. and some of the tools are actually in the toolbox too.  IMG_9169 by Joe Doh, on Flickr IMG_9169 by Joe Doh, on Flickrso the day wasnt a complete loss I did the lower rad mounts. need some padding and to install the hoses but that went faster than I thought. got my temp switch in the mail 3 days early too woop woop. need a tap, the hole in the sensor dealie is 1/8 and the switch is 3/8 so I need add at least 2 more 1/8 holes  IMG_9188 by Joe Doh, on Flickr IMG_9188 by Joe Doh, on Flickr
__________________
the mass of men live lives of quiet desperation if there is a problem, I can have it. new project WAYNE http://67-72chevytrucks.com/vboard/s...d.php?t=844393 |
|
|

|
|
|
#182 |
|
Senior Member
 Join Date: Jul 2012
Location: Oblong, Illinois
Posts: 7,028
|
Re: 1941 1/2 ton project Hannah
Moving right along! Yes, a little shop picking up always is nice.
|
|
|

|
|
|
#183 |
|
Registered User
Join Date: Sep 2012
Location: Midway, NC
Posts: 3,275
|
Re: 1941 1/2 ton project Hannah
You getting there.
__________________
http://67-72chevytrucks.com/vboard/s...d.php?t=581873 The low buck build threads. Check'em out! http://67-72chevytrucks.com/vboard/s...d.php?t=666022 My build thread Crossmembers CC |
|
|

|
|
|
#184 |
|
Senior Member
 Join Date: May 2007
Location: Doodah Kansas
Posts: 7,774
|
Re: 1941 1/2 ton project Hannah
thanks!
picked up some neoprene at the yard store for the lower mounts but they did not have a tap (the drawer was EMPTY, unheard of at the yard store), so once again I had to go to ace. $^&%^ $18 (all taps are $3 at the yard). and the dril bit size was a princely 37/64ths. another $19. uhh, not for me. I used a 9/16 and knew the aluminum would be my friend. 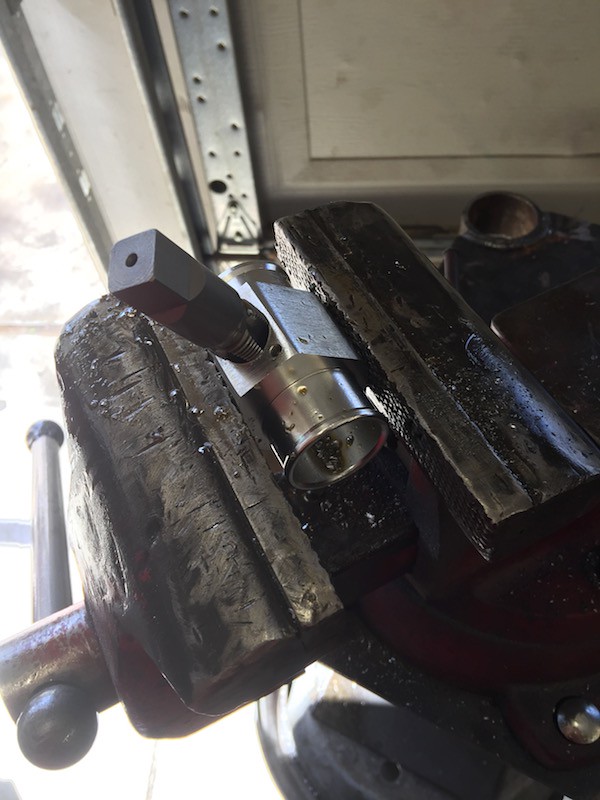 IMG_9172 by Joe Doh, on Flickr IMG_9172 by Joe Doh, on Flickr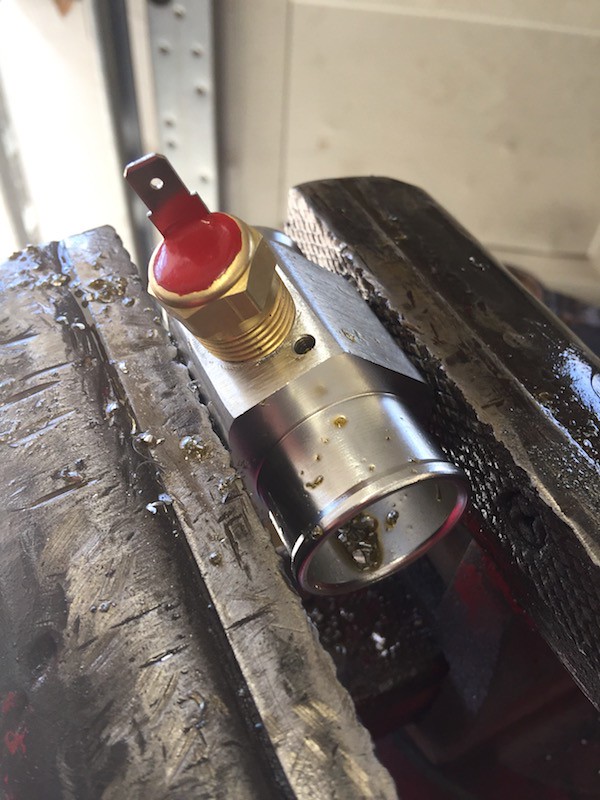 IMG_9173 by Joe Doh, on Flickr IMG_9173 by Joe Doh, on Flickr IMG_9174 by Joe Doh, on Flickr IMG_9174 by Joe Doh, on Flickrgot the rad mounts done too. the little clip looking parts with the screws just hold the kydex I use as an air director. 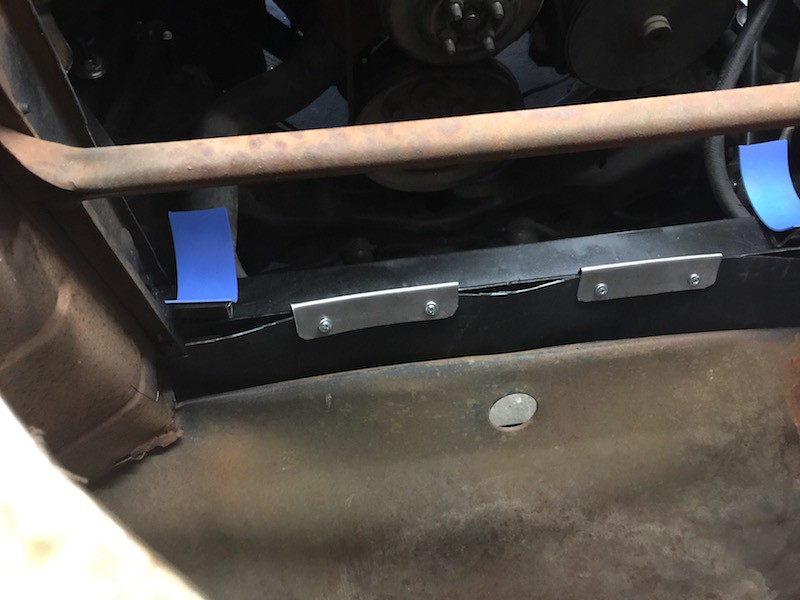 IMG_9176 by Joe Doh, on Flickr IMG_9176 by Joe Doh, on Flickr IMG_9177 by Joe Doh, on Flickr IMG_9177 by Joe Doh, on FlickrI cut up the speedway rad mounts to make them, in the future I will just make my own. I spent a while laying out the rad hoses, looks like the stock s10 hoses will work perfectly, but the bottom outlet is a little big for the stock hose so I need to grease it up or get a larger hose. update 4/11 got the rad in and the hoses lined out. not perfect yet but good enough! I was grunting and fighting trying to get the hoses on, the rad inlet and outlet were just slightly too large and I couldnt get the last edge up over the lip. my wife heard my stream of obscenities and said "hmm try some coconut oil". it made me laugh out loud, until her terse expression made me realize she wasnt joking. so I humored her and wiped a little coconut oil on the hose, and it slipped on almost without effort. lesson learned. 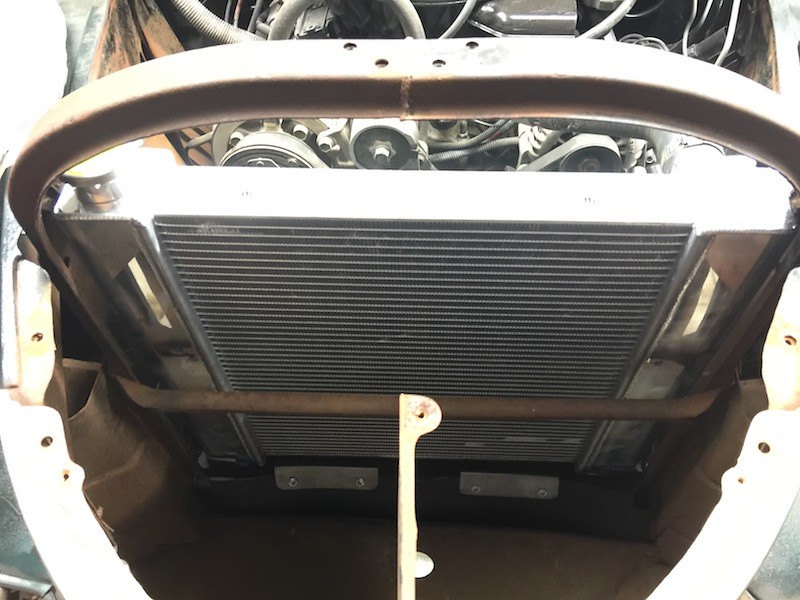 IMG_9194-1 by Joe Doh, on Flickr IMG_9194-1 by Joe Doh, on Flickr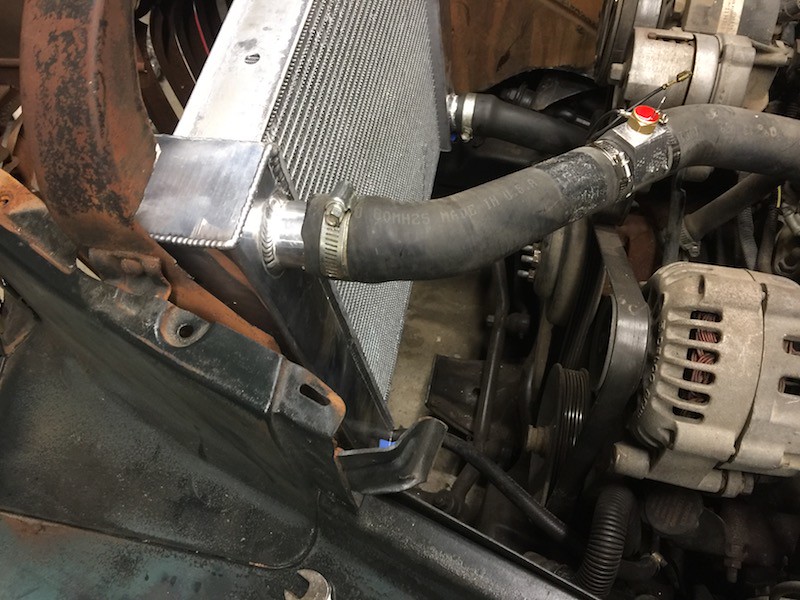 IMG_9195 by Joe Doh, on Flickr IMG_9195 by Joe Doh, on Flickrafter staring at the drivers door pranged open all week, I decided to take it back off and twist on the hinges. but while I was looking for my punch I realized it wouldnt solve anything, the sheetmetal was bent, not the hinges, so bending the hinge would compound the problem. my father in law was a ride noise vibration and harshness guy at the chevy dealer for 22 years and taught me a trick about doors that didnt seal to the weatherstrip and had wind noise on the highway, he would wrap an old tire in a blanket and put it in the door jamb and push around on the window surround, just a little, till the surround hit the weatherstrip when the door was closed (and the tire wasnt there). I figured since it was over-opened, I could use his trick and over-close it. worked good! needs to come up a little in the back and the job will be done  IMG_9198-1 by Joe Doh, on Flickr IMG_9198-1 by Joe Doh, on Flickrstarted to run the light harness under the hood and hit a snag, the bulbs dont fit the 41 housings. the last one I did had 46 housings and fit, but these are too small. I can either put the small park light in there and the big turn up top, or find a small LED turn for inside the glass. I am leaning toward the second, I want the little cab lights to be BARELY on, 5w is fine, not a turn signal bulb. 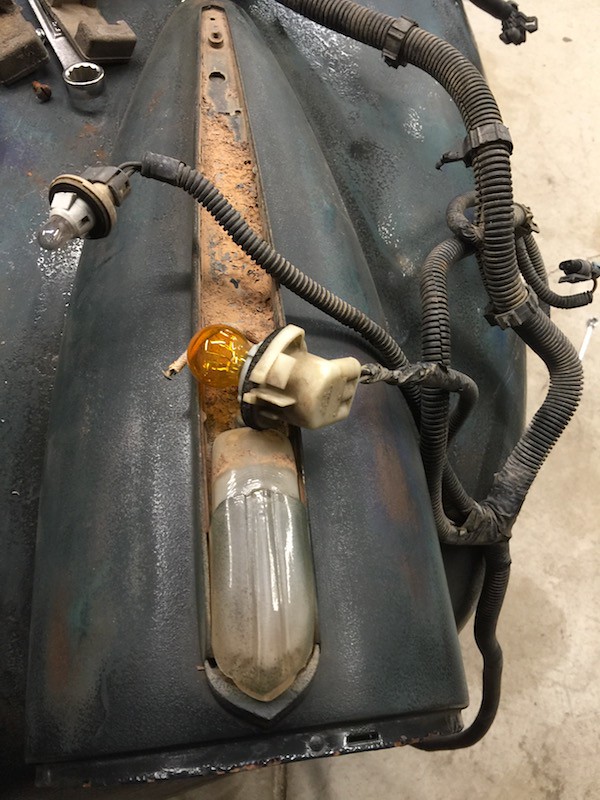 IMG_9199-1 by Joe Doh, on Flickr IMG_9199-1 by Joe Doh, on Flickr
__________________
the mass of men live lives of quiet desperation if there is a problem, I can have it. new project WAYNE http://67-72chevytrucks.com/vboard/s...d.php?t=844393 Last edited by joedoh; 04-12-2018 at 12:24 AM. |
|
|

|
|
|
#185 |
|
Senior Member
 Join Date: May 2007
Location: Doodah Kansas
Posts: 7,774
|
Re: 1941 1/2 ton project Hannah
finished laying in the harnesses today, on the last 41 I drilled holes for the fenders which was a pain in the tuchus because I needed to pare the individual fender harness from its plugs to pass through. on ths truck I decided to use the wiring pass through holes behind the rad support.
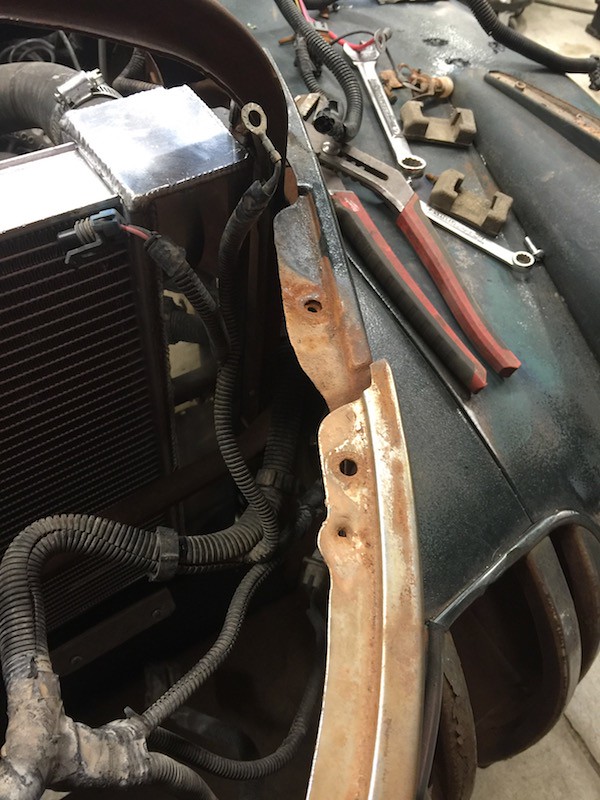 54551522768__5EB443AC-277D-4588-8AB9-3C63F70CE0E4 by Joe Doh, on Flickr 54551522768__5EB443AC-277D-4588-8AB9-3C63F70CE0E4 by Joe Doh, on Flickr 54551605792__6A3D5B7D-4901-486B-80BE-B2A17C47B331 by Joe Doh, on Flickr 54551605792__6A3D5B7D-4901-486B-80BE-B2A17C47B331 by Joe Doh, on Flickrwhile I was doing that I noticed a plug at the end of the harness I couldnt account for, a couple actually. turns out it was the last ECM connector I had forgotten.  54551523224__3A8B4277-EB0F-41F9-BB53-207FC2BB056F by Joe Doh, on Flickr 54551523224__3A8B4277-EB0F-41F9-BB53-207FC2BB056F by Joe Doh, on Flickr 54551524975__C97159E4-EB57-4ADB-BF8D-495371C13A84 by Joe Doh, on Flickr 54551524975__C97159E4-EB57-4ADB-BF8D-495371C13A84 by Joe Doh, on Flickrso I ran it to the big pass through I had created (and luckily had not sealed). It is very nice to just plug stuff in when you lay it out in the same rough configuration.  54551606140__6D8FCD55-6795-4DE6-AAD2-D21A431EF765 by Joe Doh, on Flickr 54551606140__6D8FCD55-6795-4DE6-AAD2-D21A431EF765 by Joe Doh, on Flickr 54551602900__531D7E93-C6BE-484D-A113-E5CE0D6DC62A by Joe Doh, on Flickr 54551602900__531D7E93-C6BE-484D-A113-E5CE0D6DC62A by Joe Doh, on Flickrthen I mounted the vintage air system. after doing the last one this was a very fast operation.  IMG_9266 by Joe Doh, on Flickr IMG_9266 by Joe Doh, on Flickr IMG_9267 by Joe Doh, on Flickr IMG_9267 by Joe Doh, on Flickreverything is hooked up now (except the lights front and rear) so tomorrow I will get the bed off for finish welding and maybe try a start while its outside.
__________________
the mass of men live lives of quiet desperation if there is a problem, I can have it. new project WAYNE http://67-72chevytrucks.com/vboard/s...d.php?t=844393 |
|
|

|
|
|
#186 |
|
Senior Member
 Join Date: May 2007
Location: Doodah Kansas
Posts: 7,774
|
Re: 1941 1/2 ton project Hannah
I fixed the hinge I drilled out, my tap collection keeps growing, now I have a 3/8 18 :/
 IMG_9274 by Joe Doh, on Flickr IMG_9274 by Joe Doh, on Flickrpushed it out and hooked up the last of the connectors. look how nice the door shuts! except the window arms hit the inside handle arm. 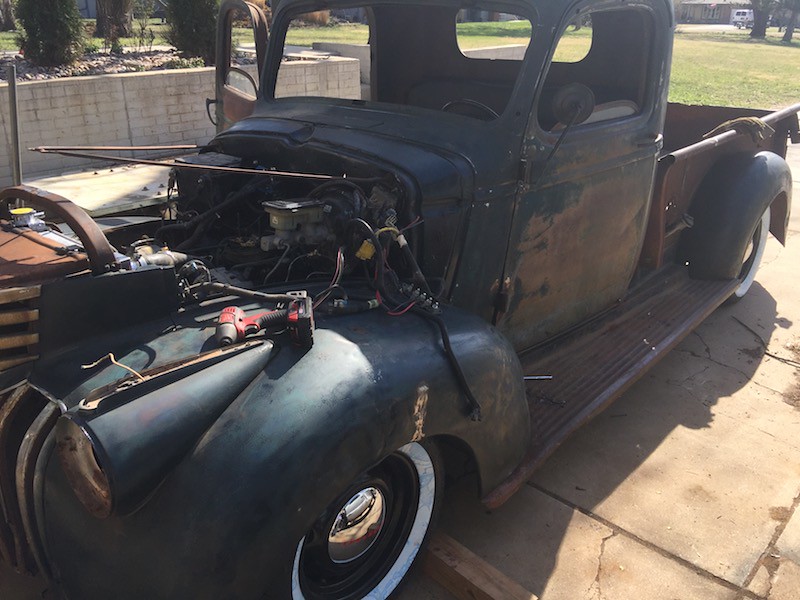 IMG_9277 by Joe Doh, on Flickr IMG_9277 by Joe Doh, on FlickrI was in such a hurry I forgot until the last second it didnt have any oil in it, I had peeled the reminder off the air cleaner when I painted it. cranked it with the fuel pump relay out then put it back in, and... no fuel pump. click for vid, this is with a little gas in the tbi. 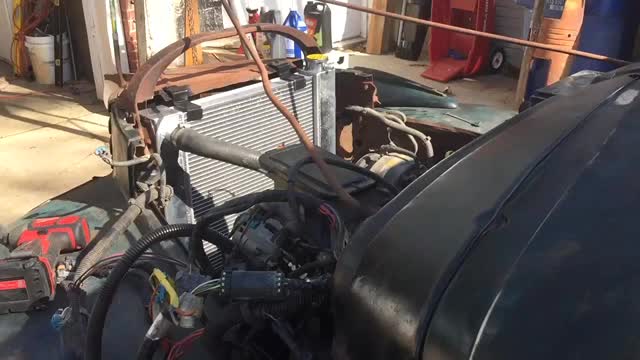 IMG_9276 by Joe Doh, on Flickr IMG_9276 by Joe Doh, on Flickrgood oil pressure, voltage at the pump connector, so its the pump. the pump of a working running driving truck taken apart in october. I suppose you think hubris is funny. well wait I am not done. 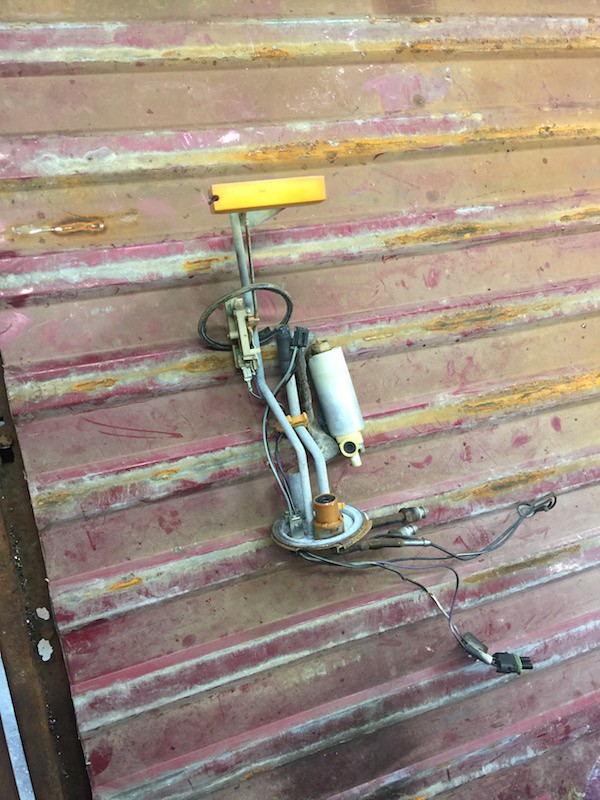 IMG_9278 by Joe Doh, on Flickr IMG_9278 by Joe Doh, on FlickrI got the bed on the dolly and pushed in, love that dolly. 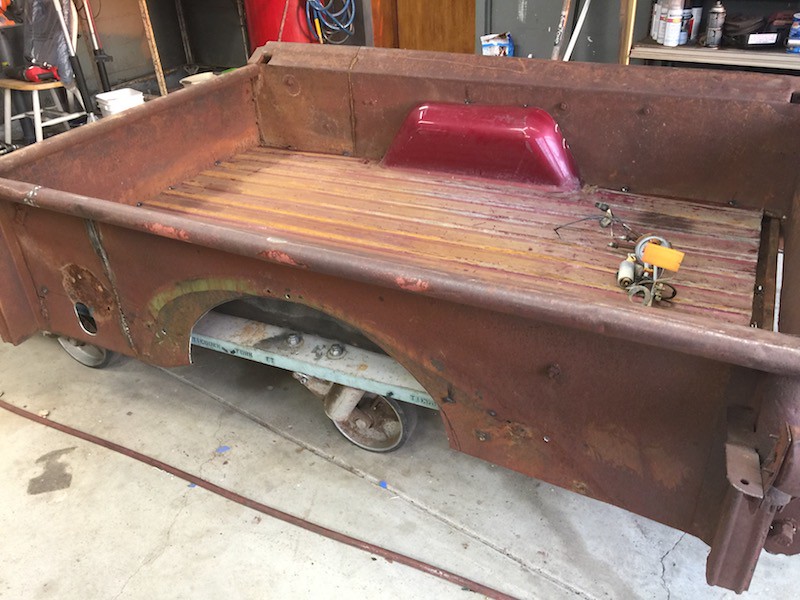 IMG_9279 by Joe Doh, on Flickr IMG_9279 by Joe Doh, on Flickr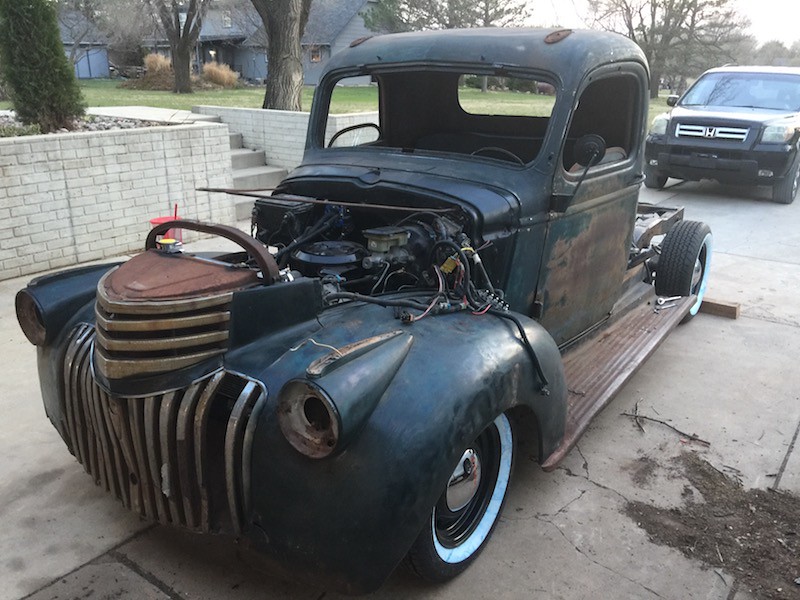 IMG_9280 by Joe Doh, on Flickr IMG_9280 by Joe Doh, on Flickr IMG_9281 by Joe Doh, on Flickr IMG_9281 by Joe Doh, on Flickrstarted to finish up the bed weld since I didnt feel like running for a pump, on the second tack the wire fused to the tip. my last tip. I invented a few words after that. pump tomorrow! I liked what I heard of the smithys, for that second they were barking.
__________________
the mass of men live lives of quiet desperation if there is a problem, I can have it. new project WAYNE http://67-72chevytrucks.com/vboard/s...d.php?t=844393 |
|
|

|
|
|
#187 |
|
Senior Member
 Join Date: May 2007
Location: Doodah Kansas
Posts: 7,774
|
Re: 1941 1/2 ton project Hannah
its alive!
 IMG_9293-1 by Joe Doh, on Flickr IMG_9293-1 by Joe Doh, on Flickrhas a weak cylinder, probably a fouled plug from sitting. and the gas is old and stinky, and all the gauges quit. so I have stuff to do. like I can go to home depot for the third time in two days and see if I can forget the speaker wire again. I need it to hook up the little cab lights to the harness out by the headlight.
__________________
the mass of men live lives of quiet desperation if there is a problem, I can have it. new project WAYNE http://67-72chevytrucks.com/vboard/s...d.php?t=844393 |
|
|

|
|
|
#188 |
|
Senior Member
 Join Date: Jul 2012
Location: Oblong, Illinois
Posts: 7,028
|
Re: 1941 1/2 ton project Hannah
Congrat’s on the start! No doubt you will have it hitting on all cylinders soon.
|
|
|

|
|
|
#189 |
|
Senior Member
 Join Date: May 2007
Location: Doodah Kansas
Posts: 7,774
|
Re: 1941 1/2 ton project Hannah
thanks doug, soon was today!
 IMG_9327.TRIM by Joe Doh, on Flickr IMG_9327.TRIM by Joe Doh, on Flickrkind of a funny story, the last TBI 4.3 I did needed a thorough cleaning so I got some berrymans and went to town. I forgot berrymans doesnt evaporate though, at least not very quickly, so I actually had to pull the plugs and crank out all the excess. which was ok because I was putting new plugs in anyway, when I pulled number 3 the carb cleaner was all over the plug and clued me in that I should probably purge the cylinders. I also installed a new cap and rotor and like I thought they were in poor shape, carbon everywhere and rust on the rotor tip. when I put the rotor on I noticed how easy it was to get it slightly crooked, so I checked the cap and you can see (maybe, the bottom ones in the picture have a groove worn in them) the rotor made lots of collisions with the cap terminals because the PO had it on crooked. 'cest la vie!  IMG_9326 by Joe Doh, on Flickr IMG_9326 by Joe Doh, on Flickrfound my gauge problem I think 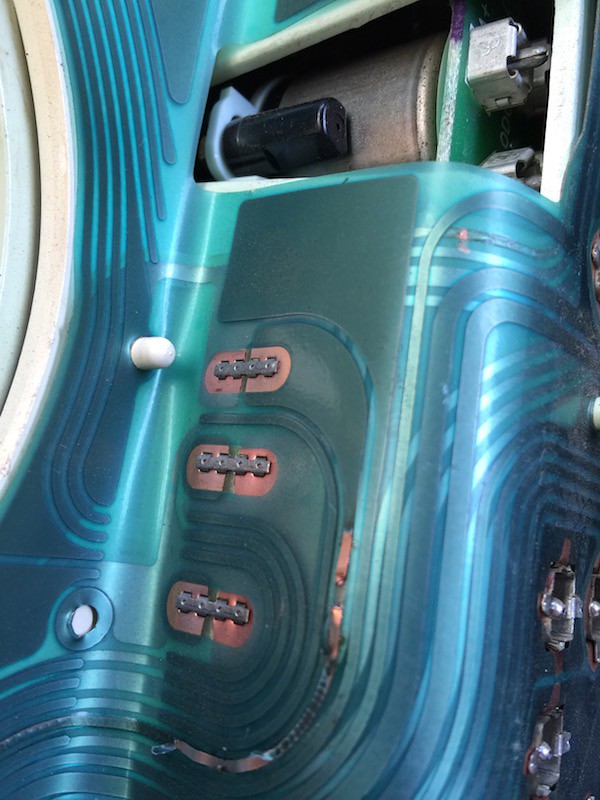 IMG_9304 by Joe Doh, on Flickr IMG_9304 by Joe Doh, on Flickrprobably from the first start, I had the plug in the gauges upside down for a second. easy enough to fix. got the bed all welded up too. we arent tilting at perfection, but it looks appropriate to me. this bed I found upside down in the side yard of a 200 year old farm, it has a lot of farmer inspired repairs, including one that I wish I had noticed earlier. the drivers rear corner is outboard of place about an inch. maybe later, I still need to do the rear floor mount and then wood bed.  IMG_9303 by Joe Doh, on Flickr IMG_9303 by Joe Doh, on Flickr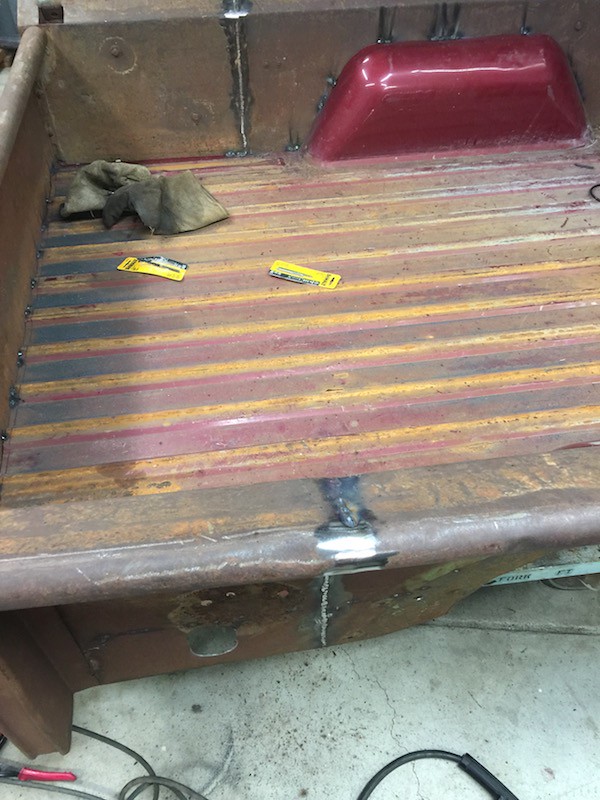 IMG_9305 by Joe Doh, on Flickr IMG_9305 by Joe Doh, on Flickr IMG_9306 by Joe Doh, on Flickr IMG_9306 by Joe Doh, on Flickr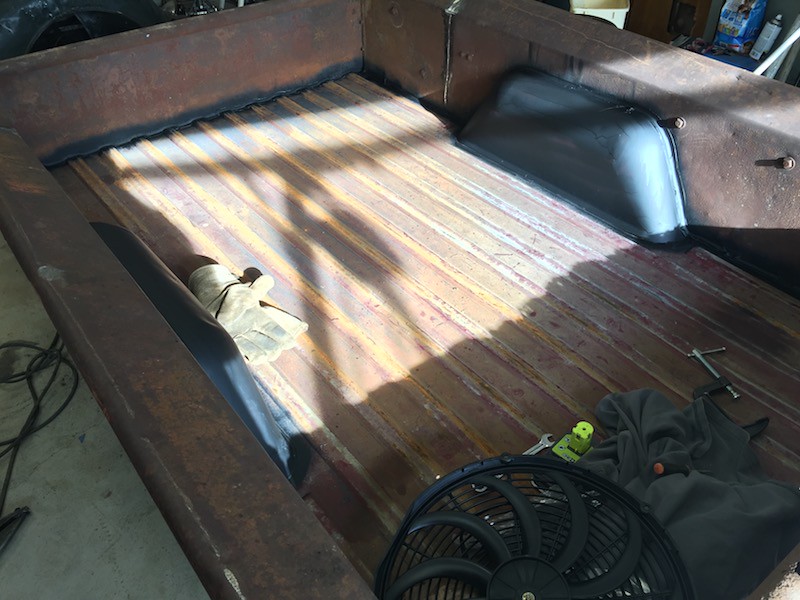 IMG_9338 by Joe Doh, on Flickr IMG_9338 by Joe Doh, on Flickrgot all the engine wiring tucked away, and went to install the fan. I want to know what kind of clodpated citified moron orders a radiator fan combo (sold together as a combo!) and doesnt check the fit until he is ready to install?  IMG_9334 by Joe Doh, on Flickr IMG_9334 by Joe Doh, on Flickr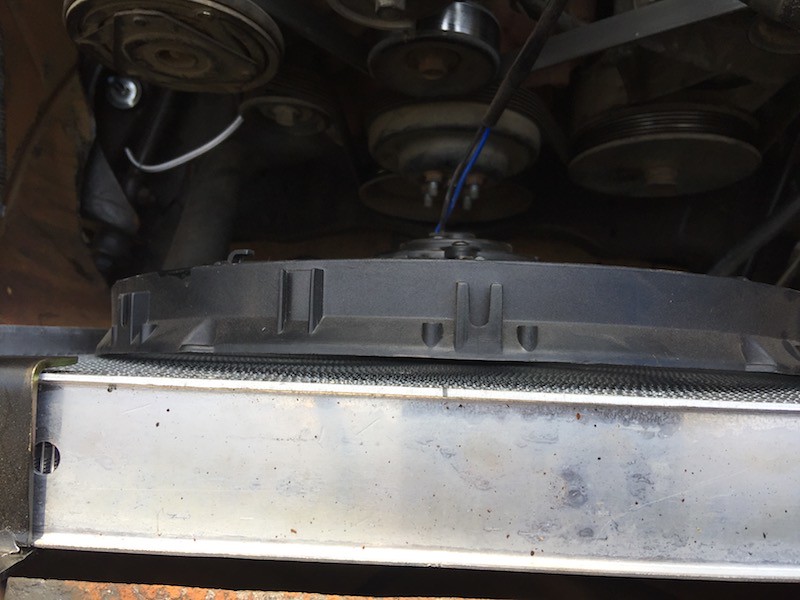 IMG_9335 by Joe Doh, on Flickr IMG_9335 by Joe Doh, on Flickrit doesnt fit. its about an inch too big. probably that inch I saved ordering a 21x19 instead of a 22x19. I feel like a real dumb ****, but in a real "ha ha" kind of way. should have more to show tomorrow.
__________________
the mass of men live lives of quiet desperation if there is a problem, I can have it. new project WAYNE http://67-72chevytrucks.com/vboard/s...d.php?t=844393 |
|
|

|
|
|
#190 |
|
Registered User
Join Date: Aug 2012
Location: Northeast KS
Posts: 1,783
|
Re: 1941 1/2 ton project Hannah
joedoh you are killing it! we have nice weather up here today and tomorrow. looks like rain for the weekend. seems like every time i get the pickup ready for something it rains.
i bet that 4.3l sounds nice and deep with the "smitty's". i'm going to add in an h-pipe to mine at some point to get rid of the top end blatty noise.
__________________
1999 GMC Suburban K2500 SLT, 454/4L80E 1991 Z/28, 6.0L/T56 1949 GMC 250, S10 Frame, 6.0L/4L80E Instagram @aceshighspeedshop |
|
|

|
|
|
#191 |
|
Senior Member
 Join Date: May 2007
Location: Doodah Kansas
Posts: 7,774
|
Re: 1941 1/2 ton project Hannah
you are right for sure, a crossover pipe would help, it sounds AMAZING at idle and revving but when you let of the gas its not crackly like I like, its like a PAAAAWWWWWWW and then one or two pops.
by the way the first picture is a video, you can hear the idle! I have the floor out still and the pipes are right there.. hmmmm I saw the rain coming saturday, I will be inside installing the glass that day. hope to get more done tomorrow, like drilling the rest of the holes for the fenders and maybe even getting the hood on and headlights/turn signals in.
__________________
the mass of men live lives of quiet desperation if there is a problem, I can have it. new project WAYNE http://67-72chevytrucks.com/vboard/s...d.php?t=844393 |
|
|

|
|
|
#192 |
|
Registered User
Join Date: Mar 2014
Location: Skiatook, OK
Posts: 33
|
Re: 1941 1/2 ton project Hannah
Just read the whole thread you are doing a great job.
|
|
|

|
|
|
#193 |
|
Post Whore
  Join Date: May 2015
Location: Alabama
Posts: 14,662
|
Re: 1941 1/2 ton project Hannah
[clodpated citified moron]...hahaha....ive heard of those...just never seen one...kinda like bigfoot...hahahaha...
its coming together nicely though...wont be long and youll be ready for the next build....
__________________
Mongo...aka Greg RIP Dad RIP Jesse 1981 C30 LQ9 NV4500..http://67-72chevytrucks.com/vboard/s...d.php?t=753598 Mongos AD- LS3 TR6060...http://67-72chevytrucks.com/vboard/s...34#post8522334 Columbus..the 1957 IH 4x4...http://67-72chevytrucks.com/vboard/s...63#post8082563 2023 Chevy Z71..daily driver |
|
|

|
|
|
#194 | |
|
Senior Member
 Join Date: May 2007
Location: Doodah Kansas
Posts: 7,774
|
Re: 1941 1/2 ton project Hannah
Quote:
I fixed the widow mechanism, now it goes up AND down and doesnt get stuck on the door latch mechanism any more.  IMG_9371 by Joe Doh, on Flickr IMG_9371 by Joe Doh, on Flickr IMG_9372 by Joe Doh, on Flickr IMG_9372 by Joe Doh, on Flickrpicked these LED up local after a fruitful search for something small enough to fit. these should work great  IMG_9376 by Joe Doh, on Flickr IMG_9376 by Joe Doh, on Flickr IMG_9377 by Joe Doh, on Flickr IMG_9377 by Joe Doh, on Flickrthis is looking straight down the bedside, the tailgate is to the right, you can see the wag the bedside has away from the floor that I had cut square. 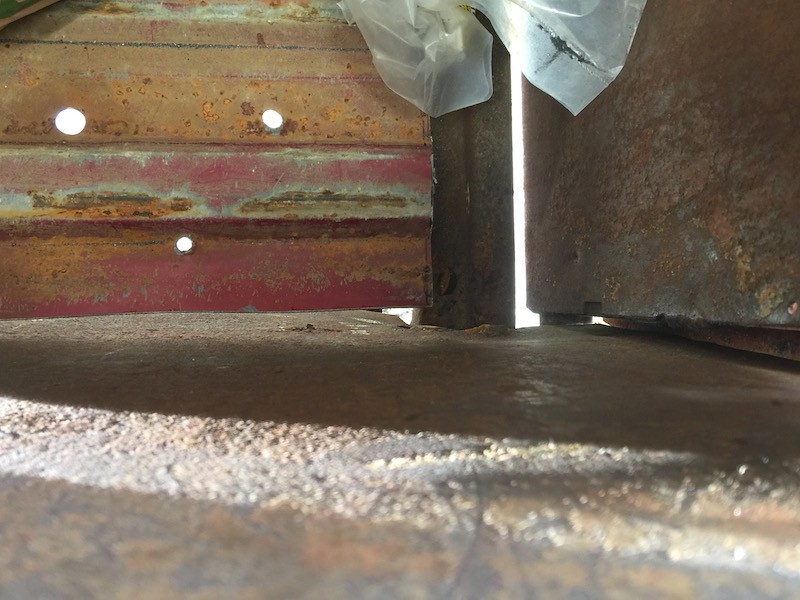 IMG_9365 by Joe Doh, on Flickr IMG_9365 by Joe Doh, on Flickrthis picture shows the real problem, its welded up in the wrong place. I tried cutting it loose but no luck yet, its farmer poop welded six different ways. need a time machine to put it in the right spot.  IMG_9367 by Joe Doh, on Flickr IMG_9367 by Joe Doh, on Flickrneed to straighten the fenders too. these things are like baby goats, always falling over for no reason at all. that bend in the bottom, I put the fender on a cart and a minute later it fell off all by itself. got the fenders mounted solid though, need the pieces welded to the running boards and the bed is ready to go back on. 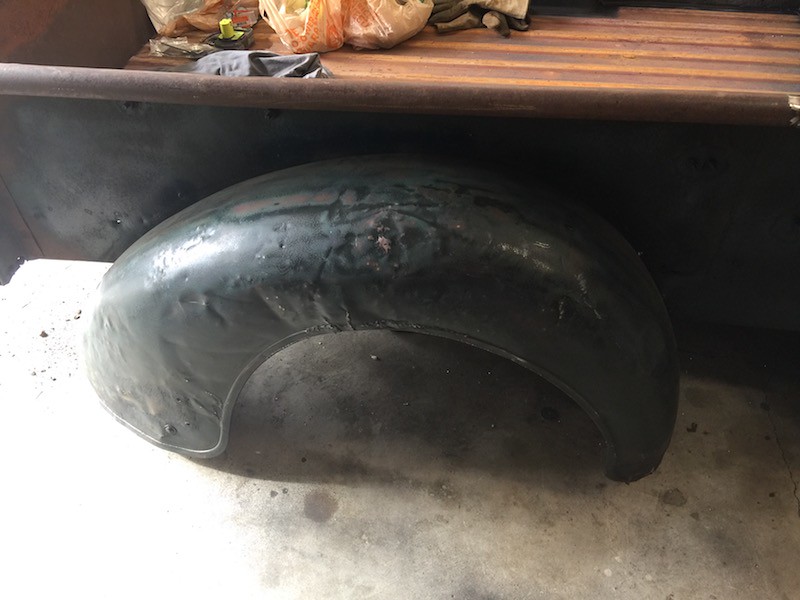 IMG_9363 by Joe Doh, on Flickr IMG_9363 by Joe Doh, on Flickr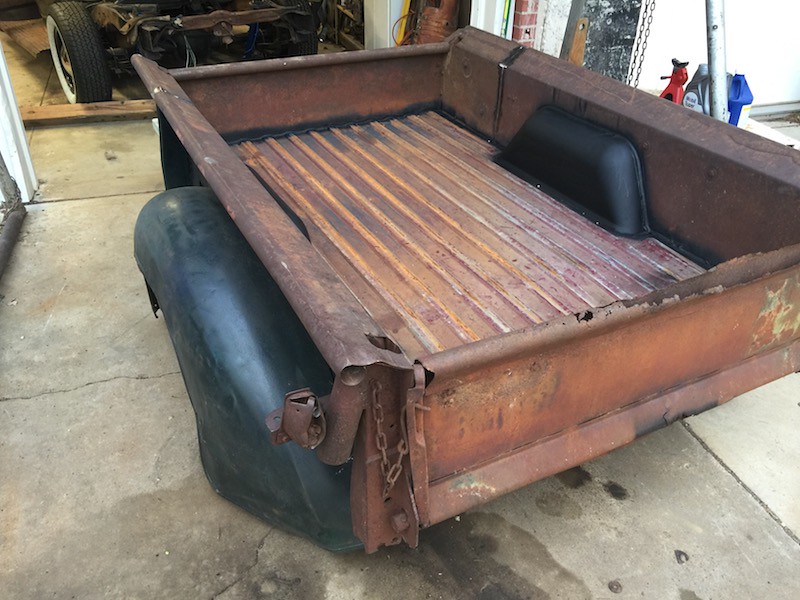 IMG_9369 by Joe Doh, on Flickr IMG_9369 by Joe Doh, on Flickr
__________________
the mass of men live lives of quiet desperation if there is a problem, I can have it. new project WAYNE http://67-72chevytrucks.com/vboard/s...d.php?t=844393 |
|
|
|

|
|
|
#195 |
|
Senior Member
 Join Date: May 2007
Location: Doodah Kansas
Posts: 7,774
|
Re: 1941 1/2 ton project Hannah
I have been prejudiced against black cats since my old neighbors cat would camp out on our porch and take meaningful swipes at us just trying to leave the house. he was a real butthole. but mabel (maybee) is just the nicest cat I have ever seen, serious claws but never uses them on us, ever, she is gentle and sweet. morris is a big ol tank, definitely maine coon in him.
 IMG_9408 by Joe Doh, on Flickr IMG_9408 by Joe Doh, on Flickrenough about the cats. when I got the hood for this truck it was in two pieces, the wind had bent it and ripped it loose. I straightened it out and welded the hinge back on the ripped side, but I just could not get it to fit right.  IMG_9402 by Joe Doh, on Flickr IMG_9402 by Joe Doh, on Flickr IMG_9403 by Joe Doh, on Flickr IMG_9403 by Joe Doh, on Flickrbut I have a deep bench, and spares to spare. this one almost fell on, once I got the hinges and latches all lubed up.  IMG_9410 by Joe Doh, on Flickr IMG_9410 by Joe Doh, on Flickr IMG_9413 by Joe Doh, on Flickr IMG_9413 by Joe Doh, on Flickrits even the right color... sort of.  IMG_9416 by Joe Doh, on Flickr IMG_9416 by Joe Doh, on FlickrI will paint the smooth parts and sand it back. it will look right. I did the passenger door today too, the inside handle rod was in the bottom of the door and rusty, it broke the first time I used it. but the latch took grease and did not require a rebuild so potato potatto. 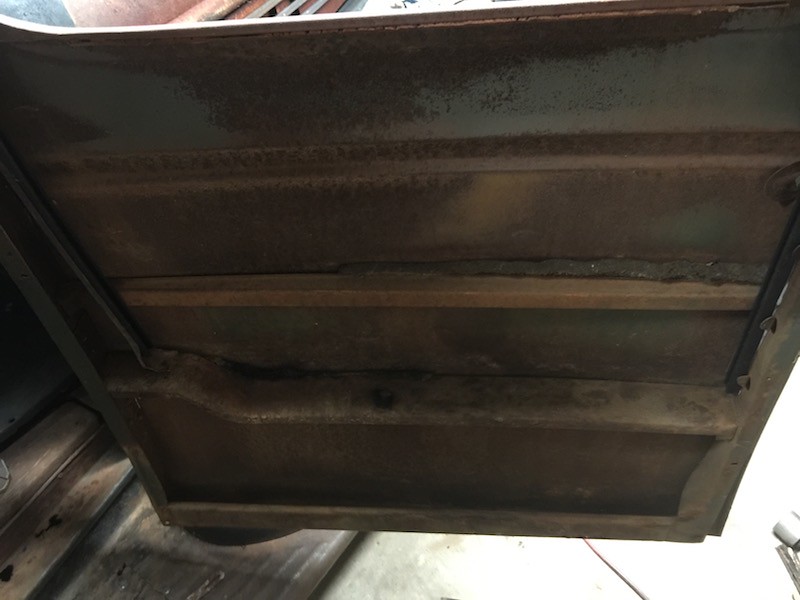 IMG_9414 by Joe Doh, on Flickr IMG_9414 by Joe Doh, on FlickrI had to grab a window from the farm team, I was planning to leave the cracked one but there was a piece missing. 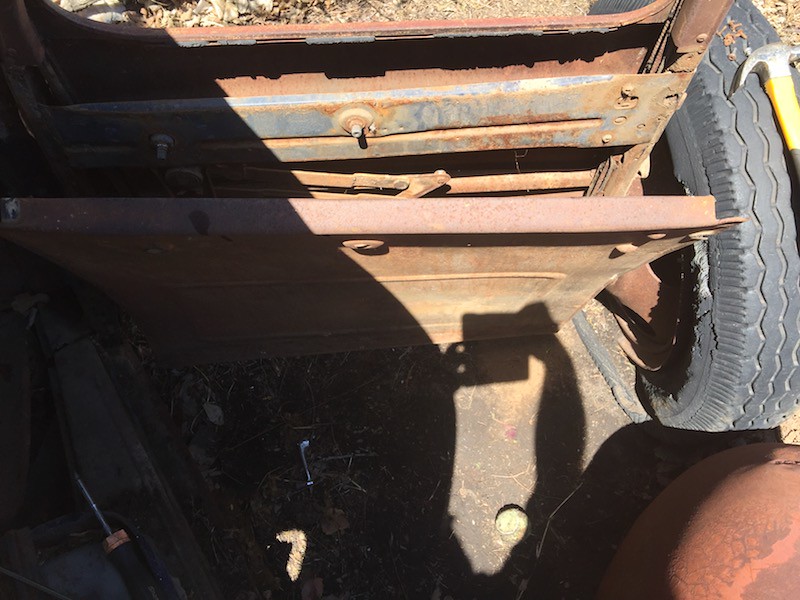 IMG_9412 by Joe Doh, on Flickr IMG_9412 by Joe Doh, on Flickr IMG_9411 by Joe Doh, on Flickr IMG_9411 by Joe Doh, on Flickr IMG_9418 by Joe Doh, on Flickr IMG_9418 by Joe Doh, on Flickr IMG_9417 by Joe Doh, on Flickr IMG_9417 by Joe Doh, on FlickrI mentioned it before in another thread but the days of me grunting big stuff around with the (lack of) help from the fairer sex are over and done with. I bring this home in a week!  IMG_1086 by Joe Doh, on Flickr IMG_1086 by Joe Doh, on Flickrits a smooth tire so just driveway use right now, but I will put down a packed limestone path to the back forty (yards) and that will allow me almost unlimited mischief! if my brother in law is reading, thanks again!
__________________
the mass of men live lives of quiet desperation if there is a problem, I can have it. new project WAYNE http://67-72chevytrucks.com/vboard/s...d.php?t=844393 |
|
|

|
|
|
#196 |
|
Registered User
Join Date: Jul 2014
Location: Clear and Still Idaho
Posts: 509
|
Re: 1941 1/2 ton project Hannah
As usual great work, forklift good on ya.
Shop details? Guestimated timeline? Nutty Case
__________________
Been there, wrecked that 
|
|
|

|
|
|
#197 |
|
Senior Member
 Join Date: Jul 2012
Location: Oblong, Illinois
Posts: 7,028
|
Re: 1941 1/2 ton project Hannah
Yep, the second hood fit way better. Good call.
And the fork lift, handy and fun all at the same time! |
|
|

|
|
|
#198 |
|
Senior Member
 Join Date: May 2007
Location: Doodah Kansas
Posts: 7,774
|
Re: 1941 1/2 ton project Hannah
nut I am not sure on the shop. some guys want more than we paid for our addition (two bathrooms, HVAC, full basement, 24x44) for a 30x 40 bare shop. I am toying with the idea of being my own contractor (15% savings right away) and building in the front yard off the driveway (more useful for forklifting). I dont know. I have a lot of time constraints right now so it may wait.
closed out the running boards. this is before grinding and painting.  IMG_9430 by Joe Doh, on Flickr IMG_9430 by Joe Doh, on Flickr IMG_9431 by Joe Doh, on Flickr IMG_9431 by Joe Doh, on FlickrI did a lot of little stuff, like cutting off the rear bumpstops and tying up wiring, tapped the holes for the windshield, installed the gasket. but I had to quit, a nice local guy came by yesterday and is building a 46 on s10 chassis so I cut him a set of mounts. he wanted to use s10 bushings so I changed the mounts slightly.  IMG_9433 by Joe Doh, on Flickr IMG_9433 by Joe Doh, on Flickrused the 11ga on his set more hannah work tomorrow.
__________________
the mass of men live lives of quiet desperation if there is a problem, I can have it. new project WAYNE http://67-72chevytrucks.com/vboard/s...d.php?t=844393 |
|
|

|
|
|
#199 |
|
Registered User
Join Date: Jul 2014
Location: Clear and Still Idaho
Posts: 509
|
Re: 1941 1/2 ton project Hannah
Check your local zoning regs to make sure your desires can be done legally.
You have the smarts to restore trucks you can surly be your own contractor. I've had a general contractors lic for the past 42 years. I'm only a e-mail away, for any questions you might have. Nut Case
__________________
Been there, wrecked that 
|
|
|

|
|
|
#200 |
|
Senior Member
 Join Date: Jul 2012
Location: Oblong, Illinois
Posts: 7,028
|
Re: 1941 1/2 ton project Hannah
Did you free hand the plasma cuts? Nicely done!
|
|
|

|
 |
| Bookmarks |
|
|