
 |
Register or Log In To remove these advertisements. |
|
|
|
|||||||
 |
|
|
Thread Tools | Display Modes |
|
|
#1 |
|
Registered User
Join Date: Jul 2013
Location: albemarle, nc
Posts: 42
|
drivabeater 4.0 the truck i should have built last time
Budget first:
truck: 1200 front brake pads: 29.99 drop shocks, clear headlights, springs, spare rotors, etc: free glove box:14.15 instrument bezel: 19.61 ash tray and sockets: 12.58 trim panel under dash: 13.06 bumper: 51.93 trailer hitch and 7 pin connector: 37.21 factory trans cooler and lines: 27.25 rockauto order (4 tie rods, lower ball joints. Pitman, idler, plugs, cap and rotor, idler bracket, antenna bezels: 235.21 turn signal switch: 39.99 mirrors: 55.50 fuel filter: 4.99 trans filter: had. Plug wires: had fog lights and wiring harness: had various bulbs: had oil filter: had ATF/oil/gear lube: not counting it, because I dont want to. But, not much! Had the gear oil already. total to date: 1741.47 so, its time to do a real deal build thread post on this truck. Instead of haphazard comments and incoherent ramblings. The story starts like many others: I already have a cool truck. 95 silverado regular cab shortbed. My daughter, who is 11, has claimed this as her first car. Im ok with it. Its a savage title, high mileage, fully depreciated sport truck that is tired and needs some minor tlc.  20180530_075258 by Michael Crawford, on Flickr 20180530_075258 by Michael Crawford, on FlickrSo I started truck shopping on craigslist and marketplace for an 09ish extended cab shortben half ton silverado. They are still commanding an insane price in my area. Figured id save for a while, or build a copart truck. So I mentioned to my body-man buddy that does copart to keep his eyes open for one in black with a tan interior that could be put back together over the course of a couple years. We got to talking about why, when I had a good truck already, I would want to do that. The conversation progressed, and I explained it all to him. I also said that I had slight buyers remorse at not getting a fleetside extended cab version of my truck, as otherwise I had the perfect blend of utility and style. Couple days later he sends me these pictures, telling me that he told the seller that I was buying this one for me. I could have strangled him. I had no idea it existed. 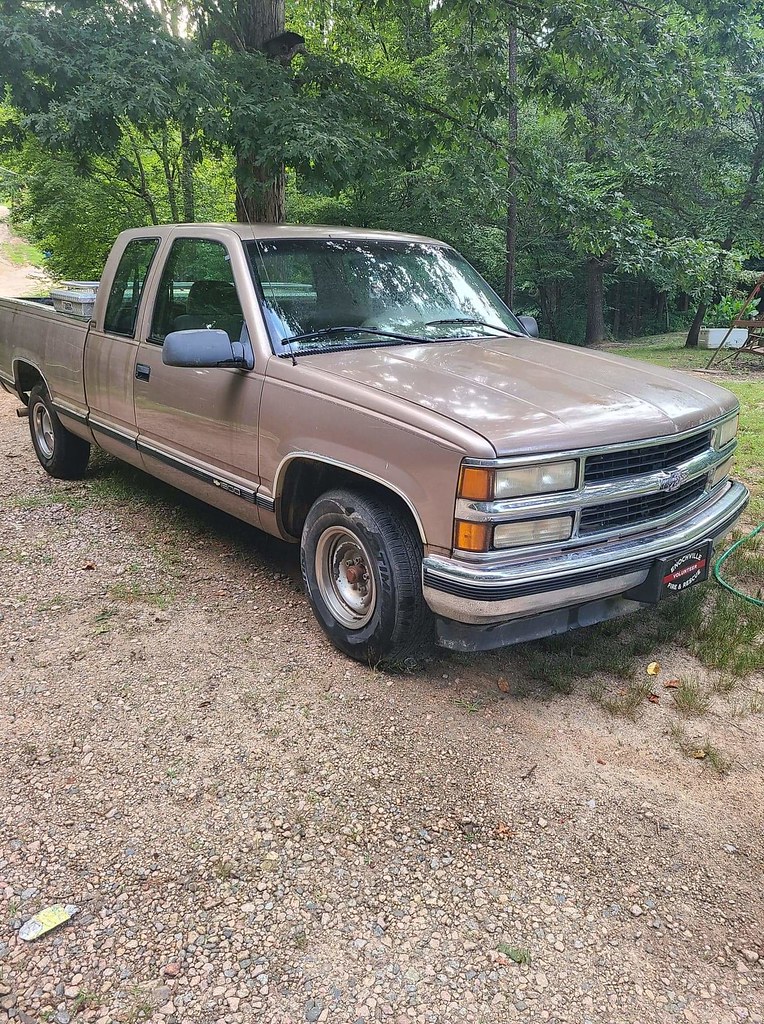 received_359717505041349 by Michael Crawford, on Flickr received_359717505041349 by Michael Crawford, on Flickr received_761625161071684 by Michael Crawford, on Flickr received_761625161071684 by Michael Crawford, on Flickr received_330317444832724 by Michael Crawford, on Flickr received_330317444832724 by Michael Crawford, on Flickrstory was that the truck wass owned by a old coworker of his from 20 years ago. It had been in this part of NC all its life, had 136k, 5.7 4l60e, 2wd. Been parked a couple of years, and $1200. supposedly able to be driven home. So, I didnt kill him instantly, cause that sounded like a pretty good deal! I agreed to go look at it, with the full understanding that I would throw him under the bus if I chose not to buy it. When we got there, these two younger, very heavyset girls were trying to get the door open. Apparently, someone came to test drive the truck a month or two ago, and locked the keys inside. They were the only set, and sitting plain as day on the seat. My buddy and I took over getting into the locked truck (we've had more practice. No further comment) while the girls cleaned out the toolbox and bed. They filled a curbside trashcan from the bed, and a contractor trashcan as well. With garbage and unwanted stuff. Another contractor can with stuff they wanted to keep. When we managed to break in and get the keys, they filled another curbside can of garbage and made a not insignificant pile of keep. This cleared enough room I was willing to test drive it. The truck fired up with no issue after being parked for a month or two, blowing a little oil smoke that cleared up pretty quick. I went for a test drive, noted that the front end was loose, AC inop, violent brake shake and no pedal to speak of, and a hard shifting trans. But truck ran strong, 1t was straight, the fluid dint smell burned, etc. I bought it, as brother Dustin told me he'd buy it if didn't. Worst case, Dustin buys it from me at break even was my thought. The girls finished filling the last trashcan they had while we did title work and paid. Apparently the girls were the owners daughter and her best friend, and the daughter was the last caretaker of the truck, so dad made it her problem to clean out. Cant say I blame him. They claimed the truck has a shift kit, and they used to pull heavy trailers with it. There's an aftermarket cooler and extra large radiator, so maybe. Also, there was a master cylinder core in the back, and some other evidence of someone chasing brake issues. we finished the transaction, stopped at the first gas station to clean the windshield, put 10 gallons of fresh gas in it, and shovel out more trash. These are the gas station pictures. 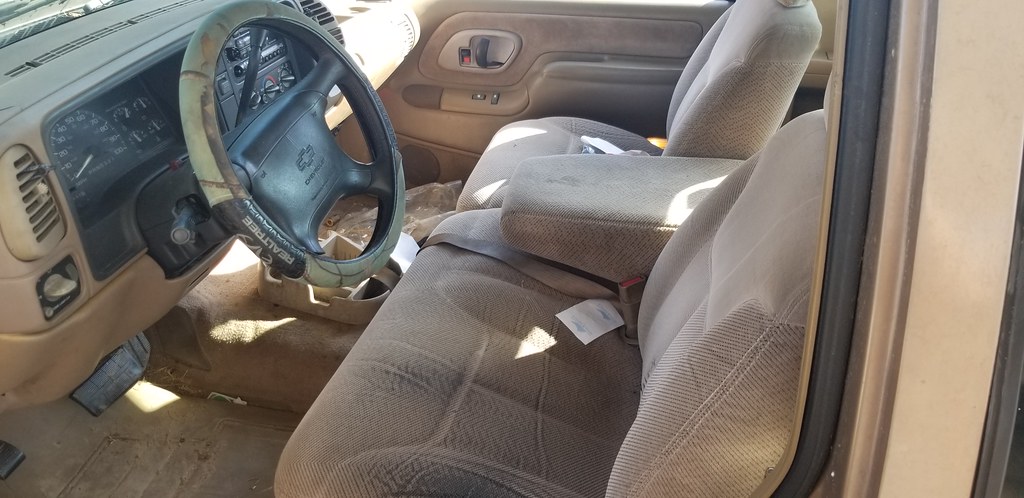 20200829_170710 by Michael Crawford, on Flickr 20200829_170710 by Michael Crawford, on Flickr 20200829_170719 by Michael Crawford, on Flickr 20200829_170719 by Michael Crawford, on Flickr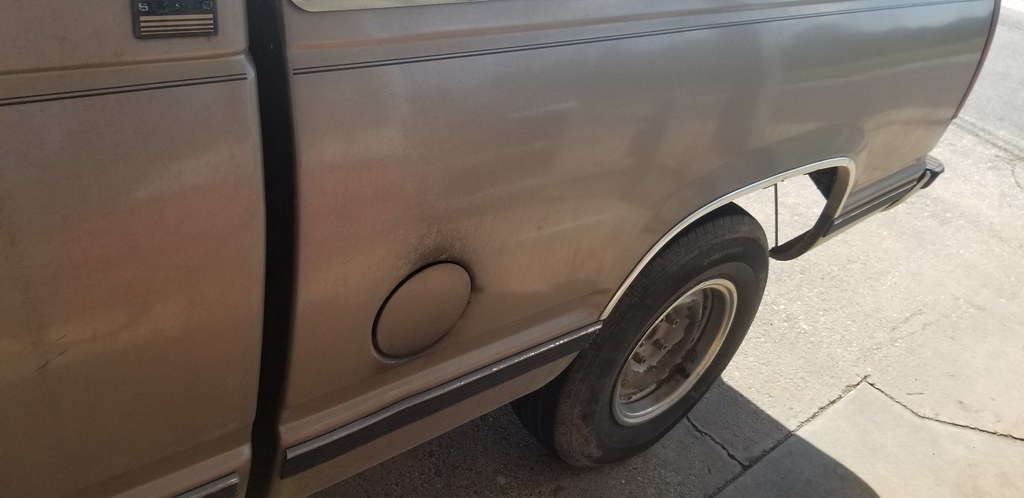 20200829_170722 by Michael Crawford, on Flickr 20200829_170722 by Michael Crawford, on Flickr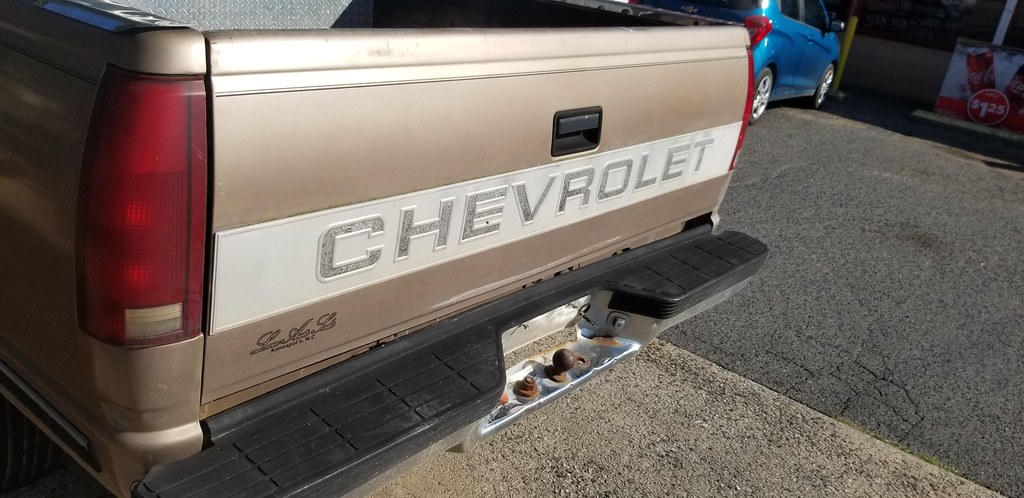 20200829_170729 by Michael Crawford, on Flickr 20200829_170729 by Michael Crawford, on Flickr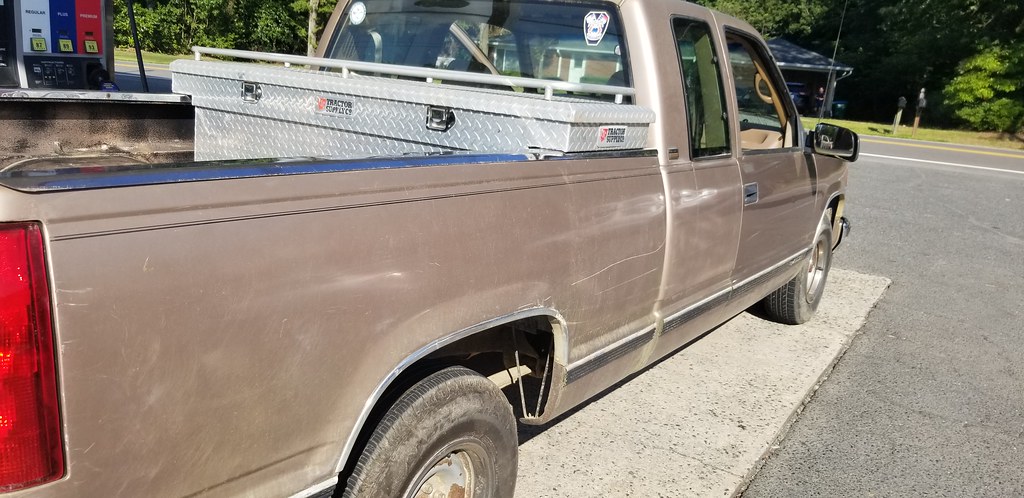 20200829_170736 by Michael Crawford, on Flickr 20200829_170736 by Michael Crawford, on Flickrwe got it home, and parked it next to my red truck so they could get acquainted. I also killed a few wasp nests, and mostly filled the green can from stuff from under the seats and in the bed. I pulled the gm rubber floor mats to clean them, and get the trash from under them. Just staggering....  20200831_091631 by Michael Crawford, on Flickr 20200831_091631 by Michael Crawford, on Flickrnext stop was to get the first layer of filth off. Started by removing the toolbox and bed rail caps. Then went to the local full service car wash and spent $28 worth of the good money. They washed it, vacuumed it, cleaned the windows, etc. its not clean. Not even close. Hell, the roof is still mostly black. But, its clean enough to clean and work on! Except their undercarriage wash that I paid extra for didn't do a damn thing on all the mud and filth underneath from the trucks years of living on that rutted, red dirt road to the trailer a mile in....  20200902_125700 by Michael Crawford, on Flickr 20200902_125700 by Michael Crawford, on Flickr 20200902_125706 by Michael Crawford, on Flickr 20200902_125706 by Michael Crawford, on Flickrtook it down to dads after this. Its too long to fit in my shop, and I didn't feel comfortable working in the gravel for an unknown length of time with the truck on jackstands. Just have visions of it sinking and falling. Anyway, we decided that the violent brake shake was multiple issues. Drums out of round, warped rotors, and badly worn steering linkage. Step one was the get the spinny bits round again. Turned both drums and both rotors on the brake lathe at my friendly local parts store. The drums were really bad. Like oval bad. Rotor was slight. Other rotor was fine!  20200904_103557 by Michael Crawford, on Flickr 20200904_103557 by Michael Crawford, on FlickrWent ahead and bought fresh pads for thoroughness sake. We greased the slides for the front calipers that had probably never been greased, cleaned and repacked bearings, etc. the brake shake was gone! Pedal steel feels like crap though. Plan is to adjust and re-lube and double check everything, bleed the brakes for fresh fluid, and see what I think. I believe I will ultimately do the gmt800 master swap like I did on the stepside. So, next stop was parts procurement. Needed to go to the junkyard anyway, so I figured id shop for the new truck while there. But before that, I met up with Brett, whom I had given my leftovers from the stepside to. He used what he needed, sold his truck, and gave me back what was left. Spare brake rotors, lowering springs, headlights and turn signals, etc. all good stuff! My junkyard run netted me a good suburban bumper and trailer hitch (spoiler: suburban don't fit truck), factory trans cooler, gauge bezel, glovebox, knee panel, ash tray, etc. not safety related at all, but stuff to make the truck much nicer.  20200908_134500 by Michael Crawford, on Flickr 20200908_134500 by Michael Crawford, on Flickr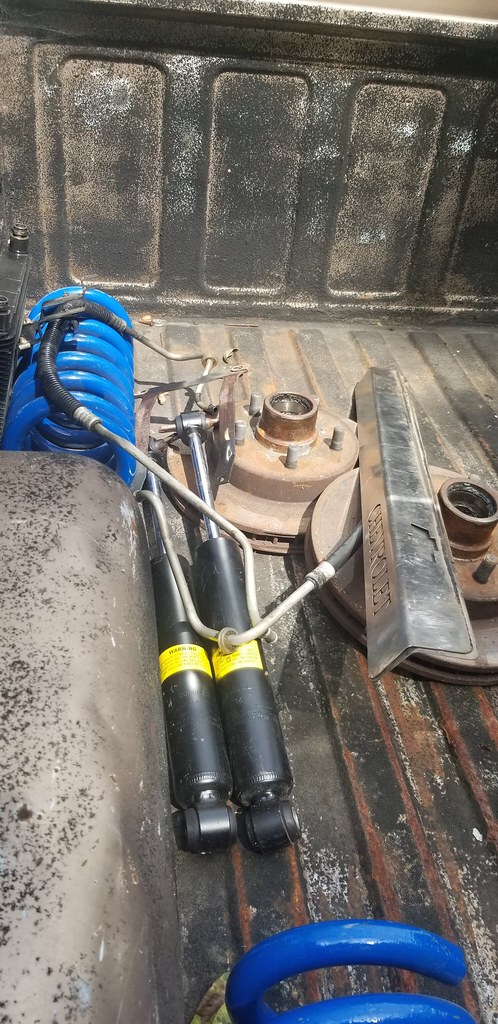 20200908_134507 by Michael Crawford, on Flickr 20200908_134507 by Michael Crawford, on Flickr 20200908_134546 by Michael Crawford, on Flickr 20200908_134546 by Michael Crawford, on Flickr 20200908_134629 by Michael Crawford, on Flickr 20200908_134629 by Michael Crawford, on Flickrafter we did the brakes, I brought it back to my house to do basics like get it registered and inspected, etc. so obviously, that ACTUALLY meant make it nicer by doing unnecessary stuff instead of fixing whats broken that relates to safety or reliability. First up was more cleaning. With superclean and a pressure washer. The underside picture on the lift is out of order, but a good example. Thing cleaned up reasonably well! I'm not sure what the gray damage is on the black plastics. The texture of the plastic is actually different in those spots. I'm thinking acid or something ate into it at some point in its life. Ill probably not worry about it. Probably. 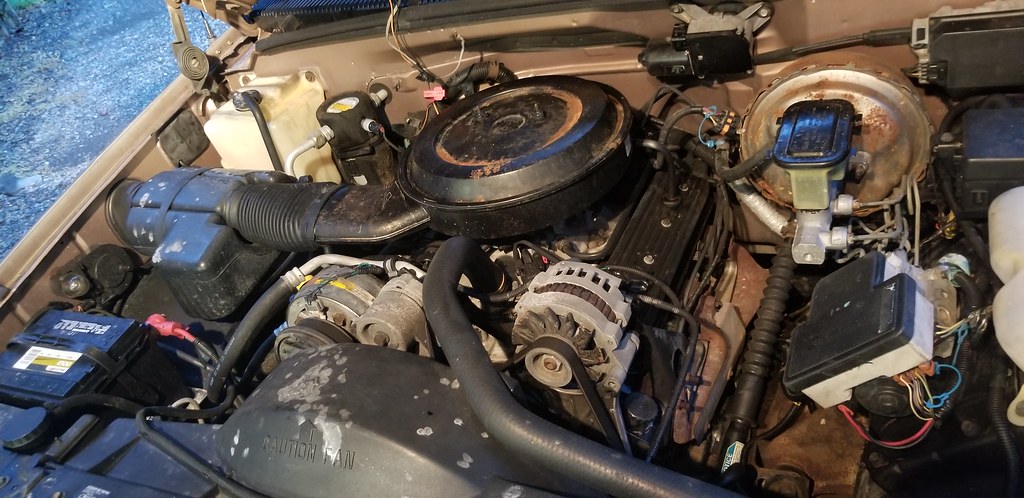 20200910_070312 by Michael Crawford, on Flickr 20200910_070312 by Michael Crawford, on Flickr 20200919_092652 by Michael Crawford, on Flickr 20200919_092652 by Michael Crawford, on Flickrthen, I moved on to the back bumper. The old one was pretty mangled.  20200911_161305 by Michael Crawford, on Flickr 20200911_161305 by Michael Crawford, on Flickr 20200911_172054 by Michael Crawford, on Flickr 20200911_172054 by Michael Crawford, on Flickrsuburban one bolted right up. I did adjust it better later.... 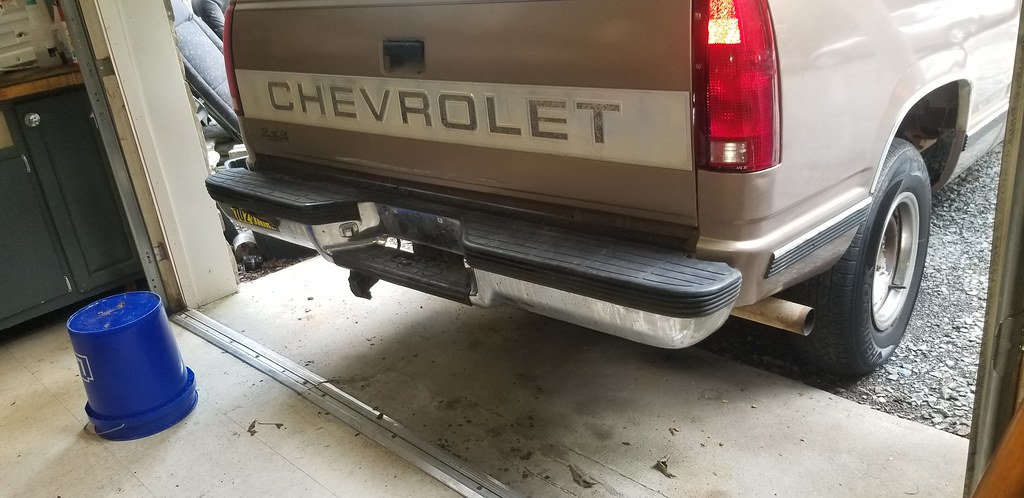 20200911_172039 by Michael Crawford, on Flickr 20200911_172039 by Michael Crawford, on Flickrmoved on to the nasty ass interior next. Mostly to get the fragile interior plastics put in their home. The first thing I tackled was the broken glove box. Now, the tan parts I got from the 99/00 Yukon at the junkyard are a different shade of tan. Very obvious. Also, the glovebox outer cover was in worse shape than mine. So I took two, used the best parts of both, and made a good glovebox. I peeled the Yukon RPO label off the box, and used my bandsaw to cut the RPO codes off the original glovebox so I wouldn't lose them.  20200913_083845 by Michael Crawford, on Flickr 20200913_083845 by Michael Crawford, on Flickr 20200913_083849 by Michael Crawford, on Flickr 20200913_083849 by Michael Crawford, on Flickrmoved on to cleaning ac vents, installing non broken pieces, etc. cleaning parts as I go. I did successfully break my turn signal switch though! Score one for captain hamfist... 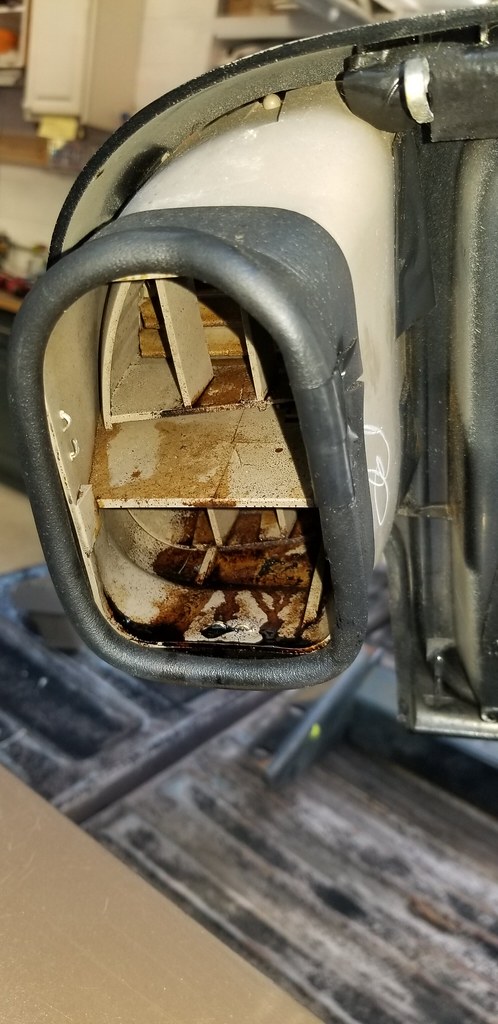 20200913_095503 by Michael Crawford, on Flickr 20200913_095503 by Michael Crawford, on Flickr 20200913_080201 by Michael Crawford, on Flickr 20200913_080201 by Michael Crawford, on Flickr 20200913_080149 by Michael Crawford, on Flickr 20200913_080149 by Michael Crawford, on Flickrin the process, I failed to figure out how to adjust the ignition switch and shifter to work better for the column lock out. To turn the key to the lock position always requires juggling the shifter. Hopefully its obvious once I pull the turn signal assembly I broke. Lastly for this post, I grabbed new power mirrors from amazon. The passengers was completely FUBAR, and it was just as cheap to buy two.  20200914_111119 by Michael Crawford, on Flickr 20200914_111119 by Michael Crawford, on Flickrdad and I started in yesterday. Got all the steering linkage replaced with fresh (pitman, idler, idler bracket, all four tie rod ends), oil changed, and everything greased. Next is trans service and factory cooler install. |
|
|

|
|
|
#2 |
|
Registered User
Join Date: Jul 2013
Location: albemarle, nc
Posts: 42
|
Re: drivabeater 4.0 the truck i should have built last time
previously: 1741.47
new stuff: returned trailer hitch and socket, trans cooler and lines. -64.46 correct hitch, front tow hooks, gmt800 master cyl: 15.00 power mirror switch: 14.99 amazon stereo adapter harness 3.98 stereo dash kit: 4.99 pullapart blaupunkt Tennessee stereo: free belltech 4 inch rear drop kit: 161.30 inner door handles autex from amazon: 19.69 infinity reference speakers: had door sound deadening: had used belltech spindles: 50 15x8 truck rallys and center caps: 50 new chrome grille/lights 100 overhead console form a blazer: 22.96 new total 2119.92 so, ive been busy! Well, not very busy, but busy enough I guess. I like this truck, and its all been fairly simple maintenance and repairs so far, with a little fun stuff thrown in. because I like fun stuff. Anyway, when we left off last time, dad and I had done the steering linkage and given the truck a good once over. I didn't have a picture, so I took a crappy one to make up for that. 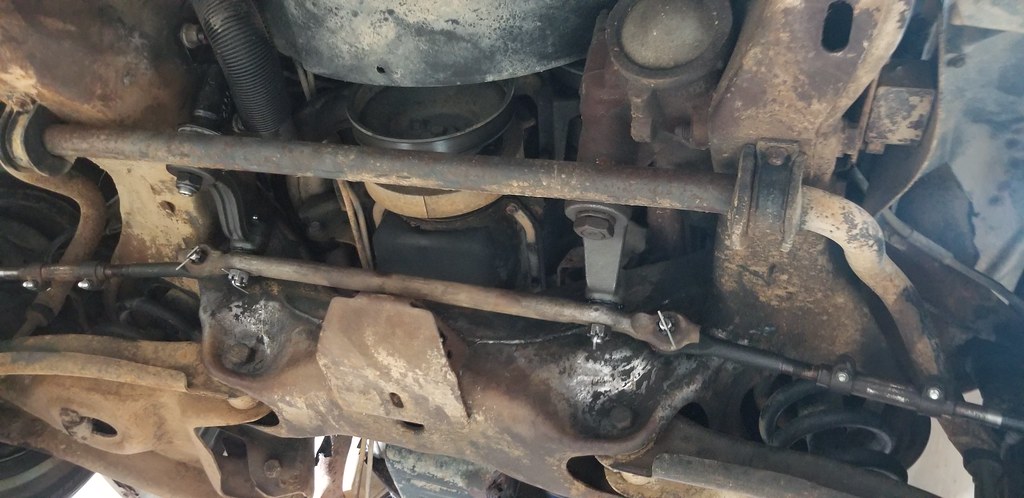 20200925_180506 by Michael Crawford, on Flickr 20200925_180506 by Michael Crawford, on FlickrI went ahead and changed the rest of the fluids and filters. I had planned while the trans pan was down to replace the 1-2 accumulator due to hard shifting, but saw no appreciable wear or any issues with the one in the truck. So I left it alone, hoping fresh fluid would fix it. I also found that the used cooler and lines I picked up were not usable, so I returned them. Same with the suburban trailer hitch (hint: apparently the freaking frames are different! ) I eventually got the factory in radiator trans cooler hooked up and the hacked in aftermarket one out of the system. Unfortunately, none of this fixed the hard shifts. But it did give me a warm and fuzzy feeling. So I have that going for me. 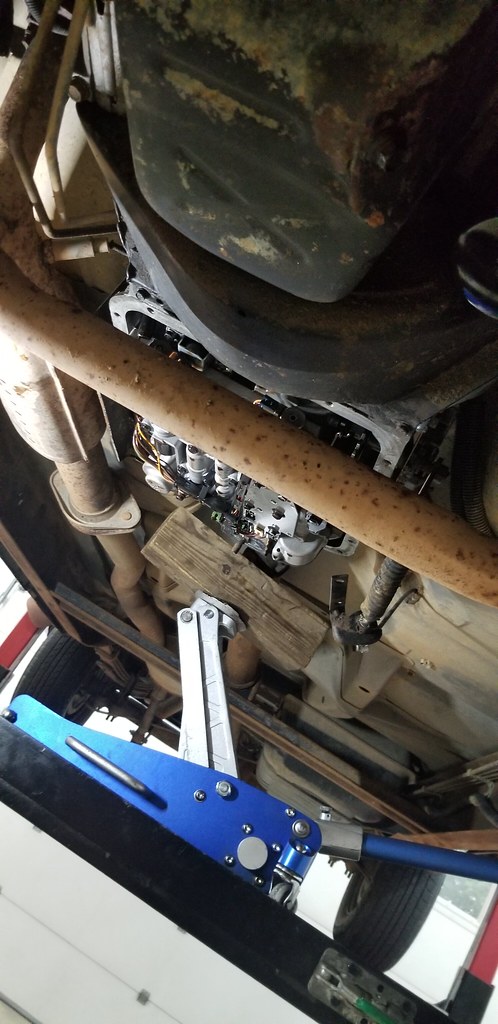 20200925_180454 by Michael Crawford, on Flickr 20200925_180454 by Michael Crawford, on Flickrwe also fluched the brake fluid, chenged the diff fluid, lubed all the hinges, greased all the zerk fittings. You know, normal maintenance. When I brought it home, I went ahead to go after the broken passengers side door handle. I swear it worked when I bought it, but stopped. Anyway, ordered a nice pair from amazon, and cracked the filthy freaking doors open. I didnt take a before picture, but the nicotine and filth was appalling. The factory door speakers were surprisingly intact though! Regardless, I swapped them for a pair of infinity reference 6.5 speakers I pulled from a parts car. They are my favorite speakers of all time, and I try to put them in everything. I also have a pair of nice sounding 6.5 from a different parts car for the rear speakers if I ever dig that deep.  20200926_181058 by Michael Crawford, on Flickr 20200926_181058 by Michael Crawford, on Flickrso, I cleaned and lubed all the window mechanisms and latches, added some peel and seal sound deadening, replaced broken door panel fasteners, tightened loose fasteners, etc. just cleaning and maintenance, with replacing the broken handles and upgrading the speakers. 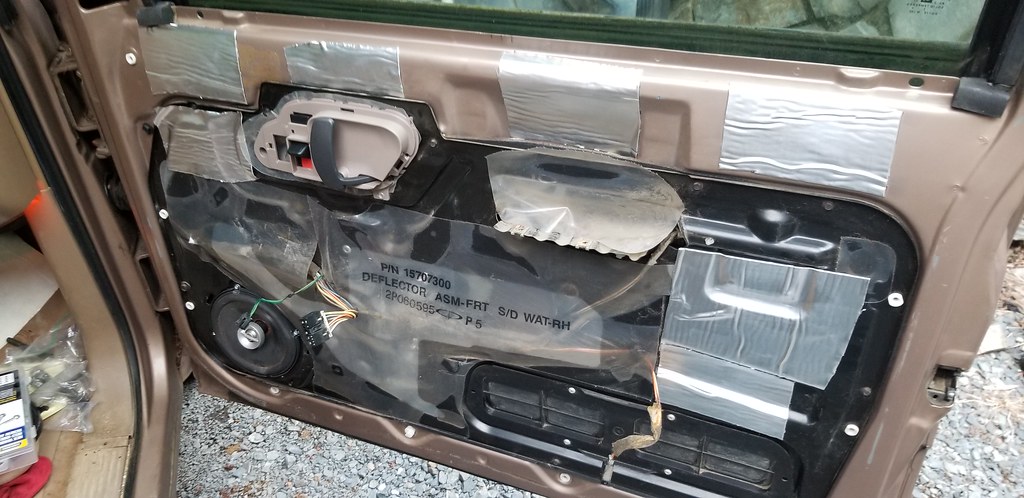 20200926_181839 by Michael Crawford, on Flickr 20200926_181839 by Michael Crawford, on FlickrI also cleaned up the door panels. Castrol superclean, a scrub brush, and a hose. Passengers side (done) vs drivers side (not). Both were done. Before re-installation. The difference was hard to photograph, but easy to see.  20200928_081050 by Michael Crawford, on Flickr 20200928_081050 by Michael Crawford, on Flickrwent ahead and did the same stuff to the drivers door, in addition to replacing the dead power mirror switch. 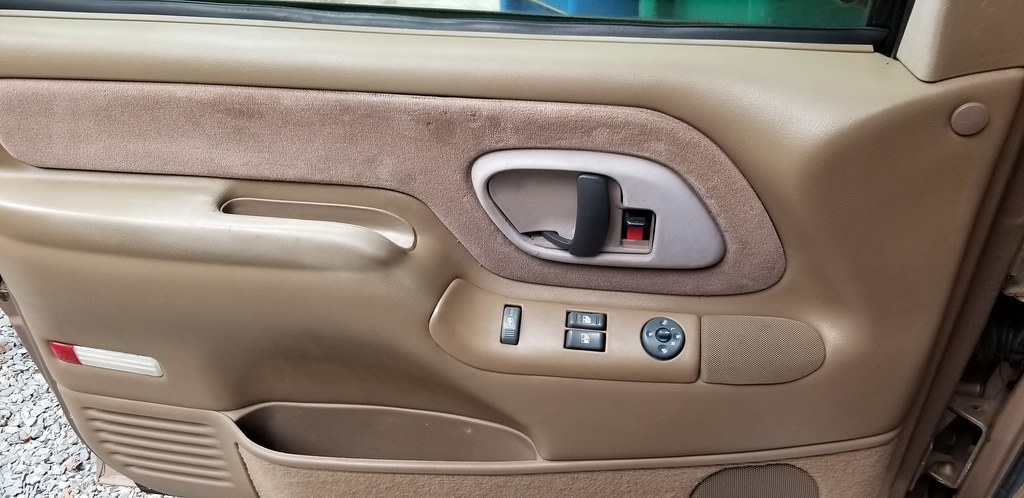 20200928_132816 by Michael Crawford, on Flickr 20200928_132816 by Michael Crawford, on Flickrthen moved on to the turn signal switch. Pulled the steering wheel and airbag, replaced the switch, and glued the column covers back together in the hops of making it better. No good picture of the switch, but you can mostly see it in the picture here. You can also see the funky and collapsed drivers seat. If anyone withing a reasonable drive if Charlotte NC has a tan 60/40 bench with armrest in good shape, please let me know. Reasonable is 5 hours each way.....  20200929_074931 by Michael Crawford, on Flickr 20200929_074931 by Michael Crawford, on Flickr 20200930_123116 by Michael Crawford, on Flickr 20200930_123116 by Michael Crawford, on Flickr 20201003_185106 by Michael Crawford, on Flickr 20201003_185106 by Michael Crawford, on Flickrwhile I had it all apart, I went ahead and installed the free stereo my scrap guy gave me. Works really good! Grabbed the dash kit from the junkyard, the antenna adapter came with the stereo, and the wiring harness adapter was cheap on amazon. So, roughly $10 stereo upgrade!  20200928_132812 by Michael Crawford, on Flickr 20200928_132812 by Michael Crawford, on Flickrsince were talking about interior stuff, I went ahead and grabbed the long console from a blazer. The DIC supposedly reads the data stream for instant MPG and stuff on the obd2 trucks. However, this one isn't obd2 yet. Eventually it will work properly when I swap an LS in. after the tbi dies.  20201001_115959 by Michael Crawford, on Flickr 20201001_115959 by Michael Crawford, on FlickrI also grabbed a proper hitch for a truck, instead of the suburban one that doesn't clear the bumper. It has a neat setup for wiring, and i'll show that when I utilize it. This came off a service body truck over at my scrap guys house.  20200930_080046 by Michael Crawford, on Flickr 20200930_080046 by Michael Crawford, on Flickrwent ahead and did a tune up as well, since we did everything else. Somebody had put motorcraft platinum plugs in it. Dunno how that seemed like a good idea, but apparently it was at the time....  20201001_074728 by Michael Crawford, on Flickr 20201001_074728 by Michael Crawford, on Flickr 20201001_073921 by Michael Crawford, on Flickr 20201001_073921 by Michael Crawford, on Flickr 20201003_185146 by Michael Crawford, on Flickr 20201003_185146 by Michael Crawford, on Flickrlastly, I have made a plan and goal for the truck. Stock appearing, 2/4 drop on 15s, and black. I found this truck in a thread somewhere and it speaks to me. Its what I want to own. 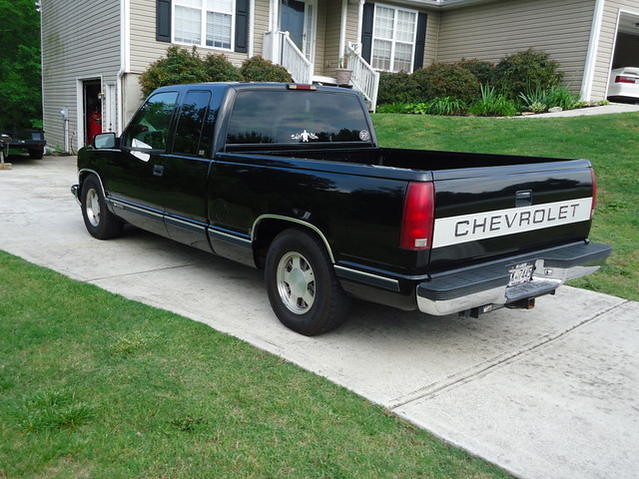 Pic9913[1] by Michael Crawford, on Flickr Pic9913[1] by Michael Crawford, on Flickrso, I worked out a trade. Beige bed for a straight black one, beige hood for a straight black one, and fix a honda for paint and body labor. I have a gallon of matrix black basecoat and good clear like I used on the neon on the shopping list for next week. This week, I got the belltech four inch drop parts (wifes birthday present to me!) and dropped off the bed with steve. When I dropped it off, we noted that despite multiple rounds of undercarriage washing, this thing still look like a swamp truck. Also, the rear cab wall is pretty banged up.  20201003_151314 by Michael Crawford, on Flickr 20201003_151314 by Michael Crawford, on Flickr 20201003_151319 by Michael Crawford, on Flickr 20201003_151319 by Michael Crawford, on Flickr 20201003_185051 by Michael Crawford, on Flickr 20201003_185051 by Michael Crawford, on Flickrso, pressure washer. Again. For the umpteenth time.  20201003_153827 by Michael Crawford, on Flickr 20201003_153827 by Michael Crawford, on Flickr 20201003_153833 by Michael Crawford, on Flickr 20201003_153833 by Michael Crawford, on Flickrnext up, rear hangars install and frame paint, along with bodywork on the back of the cab. Im not looking forward to removing the rivets on this..... |
|
|

|
|
|
#3 |
|
Registered User
Join Date: Apr 2008
Location: Md
Posts: 2,482
|
Re: drivabeater 4.0 the truck i should have built last time
Good looking truck after all your hard work. Amazing that people use their trucks for garbage bins. Yikes....You probably know this already....Several ways to remove rivets, Center punch and drill thru the center, then chisel off. Sawzall a + in the heads if you can get to them, chisel and punch....Grinder is my least favorite. Good progress on the Beater.
__________________
http://67-72chevytrucks.com/vboard/s...d.php?t=635605 |
|
|

|
|
|
#4 |
|
Registered User
Join Date: Feb 2016
Location: Trenton,Ontario & South Carolina
Posts: 755
|
Re: drivabeater 4.0 the truck i should have built last time
If at all possible, I used a grinder and a thin cut off wheel,make a X on the rivit and air chisel them,will be watching,When I can get back down to S.C. I would love to work on my truck,stuck here in Canada till this covid crap blows over.
|
|
|

|
|
|
#5 |
|
Registered User
Join Date: Oct 2015
Location: PNW
Posts: 3,634
|
Re: drivabeater 4.0 the truck i should have built last time
Looks like you got to this rig just in time. We probably all leave off the cleaning for a while on our trucks from time to time, but 338.47 cubic meters of trash? That sounds more difficult to me than just throwing stuff away where it belongs. I guess it's all a matter of perspective. Helped you get a good deal on a truck, and you're breathing new life back into it. I always like to see that. I have come to terms with the idea that I'm like some people are with rescue dogs. That truck has been underappreciated for a long time, so I'm glad it gets to be a cool one now.
|
|
|

|
|
|
#6 |
|
Registered User
Join Date: Jul 2013
Location: albemarle, nc
Posts: 42
|
Re: drivabeater 4.0 the truck i should have built last time
Thanks for the warm welcome back y'all.
The stepside is a great truck, that i brought back from the brink. This will hopefully be similar in its success. My buddy the bodyman just left. He plans to be coming by this week off and on to begin preparing for paint. Filling flaws, scuffing, etc. This is not a bare metal show truck job. this will be a highly decent ten footer done in a gravel driveway. Pretty excited, honestly. |
|
|

|
|
|
#7 |
|
Registered User
Join Date: Jul 2013
Location: albemarle, nc
Posts: 42
|
Re: drivabeater 4.0 the truck i should have built last time
Previously: 2119.92
new stuff: 3m filler (75 a gallon, used 2/3) 50 high build primer gallon: 60 (to be prorated) reducer: 30 (to be prorated) gallon black base: 74 (to be prorated) can rustoleum gloss black: 5.98 4x cans rustoleum semigloss black:17.94 rear sway bar: had wiper motor pulse board: 25.99 new total: 2383.83 welcome to full blown snowball! When we left off, I had the bed off and the pressure washer out. Well, got that all cleaned up, and the frame painted. Took a bunch of spray cans, and honestly would have been easier and better with a brush. I learned this time. Anyway, went ahead and did the belltech hangars and shackle kit. Way that I did it was to grind the heads off the rivets, grab my Georgia toothpick, pry the factory hangars off the rivets, grind rivets flush with frame, and drive the stub through. Was actually way less work that it sounds, and FAR easier than when I did the longbed with the bed on.  20201005_121057 by Michael Crawford, on Flickr 20201005_121057 by Michael Crawford, on Flickr 20201005_163234 by Michael Crawford, on Flickr 20201005_163234 by Michael Crawford, on Flickrthen, I chose to attack the bent cab wall. The dent was too deep to just fill, and I dont have a stud gun. Sheetmetal screw and slide hammer was an option, but I decided to get at it from the back. Measured the deepest parts of the dent from the window channel. Marked them on the glass in sharpie and tape. Pulled the rear cab wall plastic off, and used a hole saw to make some clearance at the marks.  20201007_092229 by Michael Crawford, on Flickr 20201007_092229 by Michael Crawford, on Flickrthen, using an oak dowel, 3 lb hammer, and pry bars, I made it a heck of a lot better.  20201007_092237 by Michael Crawford, on Flickr 20201007_092237 by Michael Crawford, on Flickrused some old bondo from the shelf, some rustoleum rattle can primer and gloss black from the shelf, and got it good enough for being hidden by the bed.  20201009_120025 by Michael Crawford, on Flickr 20201009_120025 by Michael Crawford, on Flickr 20201009_133554 by Michael Crawford, on Flickr 20201009_133554 by Michael Crawford, on Flickr 20201009_134442 by Michael Crawford, on Flickr 20201009_134442 by Michael Crawford, on Flickrwhile doing something else, I tripped over the rear sway bar ive had since 2011. ive given it away twice, and its been given beck unused both times. I decided to finally use the freaking thing. I think its from a 2500 suburban, but don't hold me to it. Ive slept since then. The poly bushings I had in my suspension box, used. Muffler clamps were also on hand. So, 3 inch muffler clamps, ¾ poly bushings, a couple 5/16 bolts and nylocks, and done! 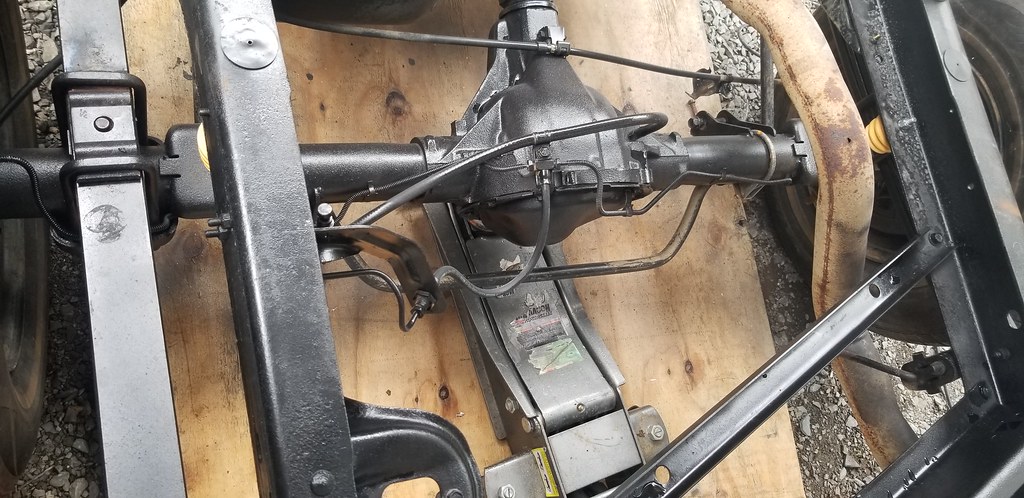 20201009_120023 by Michael Crawford, on Flickr 20201009_120023 by Michael Crawford, on Flickrgot the black bed on, and noticed that a 3 inch rear drop really doesn't look like much on this truck. This truck is DOWNHILL of the red one, on a pretty significant slope. 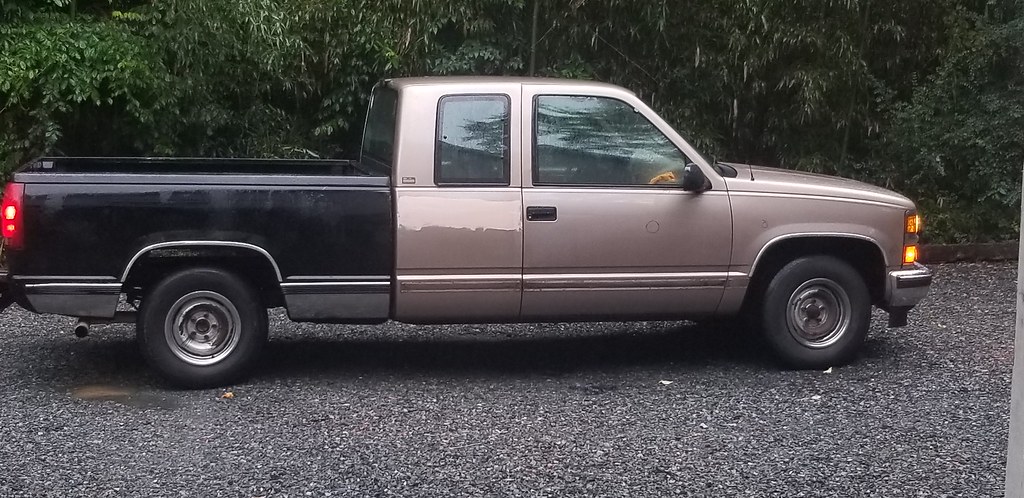 20201010_175936 by Michael Crawford, on Flickr 20201010_175936 by Michael Crawford, on Flickr 20201011_083404 by Michael Crawford, on Flickr 20201011_083404 by Michael Crawford, on Flickrwent down to dads to do the carrier bearing spacer, trans spacer, and plasma cut the floor for clearance.  20201010_171420 by Michael Crawford, on Flickr 20201010_171420 by Michael Crawford, on Flickron the way home from grabbing the bed, the wipers developed a mind of their own. Pulse board went bad. Grabbed one, and installed. Simple, even in the rain!  20201012_102953 by Michael Crawford, on Flickr 20201012_102953 by Michael Crawford, on Flickrsince I cant seem to rive multicolored, in progress stuff, I decided to roll forward with paint and body. And do it ok enough to be proud of. Lots of filler work and hammer and dolly proceeded....  20201016_175854 by Michael Crawford, on Flickr 20201016_175854 by Michael Crawford, on Flickr 20201018_082953 by Michael Crawford, on Flickr 20201018_082953 by Michael Crawford, on Flickrrust repair on the extended cab section. Decided that I wanted to try a glue in panel. Made a panel, glues in with jb weld. Sheetmetal screws as clamps.  20201020_093119 by Michael Crawford, on Flickr 20201020_093119 by Michael Crawford, on Flickr 20201020_100241 by Michael Crawford, on Flickr 20201020_100241 by Michael Crawford, on Flickr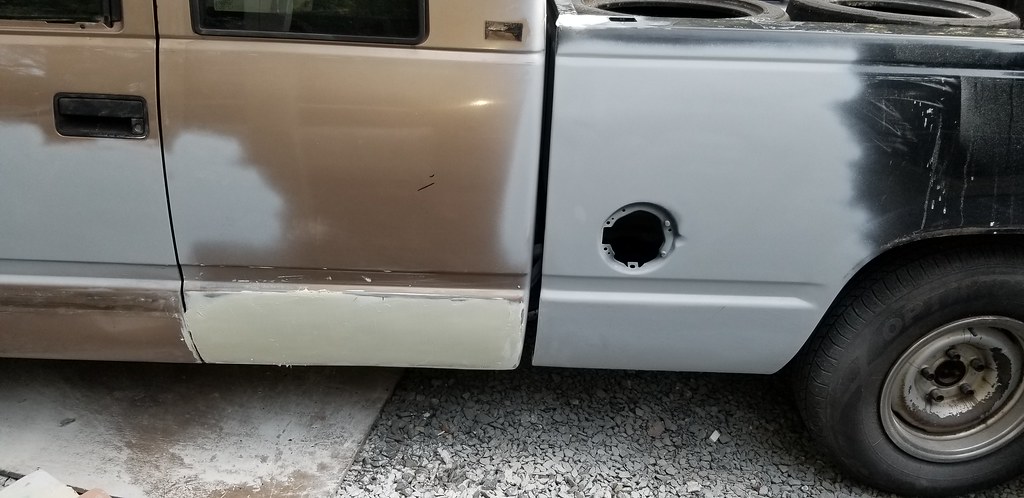 20201021_172227 by Michael Crawford, on Flickr 20201021_172227 by Michael Crawford, on Flickrfinished up filler work, primed, blocked, and then shot with high build and guide coat  20201022_120318 by Michael Crawford, on Flickr 20201022_120318 by Michael Crawford, on Flickr 20201022_172952 by Michael Crawford, on Flickr 20201022_172952 by Michael Crawford, on Flickr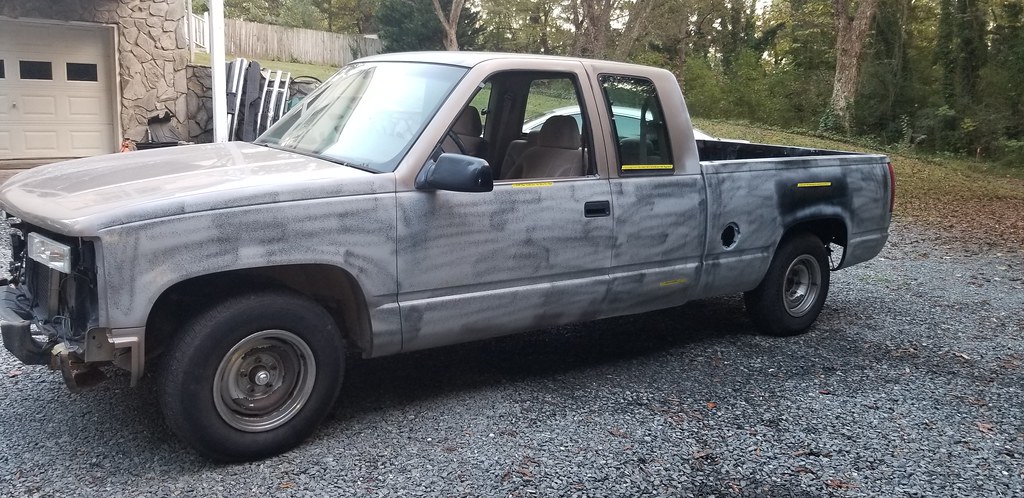 20201022_175918 by Michael Crawford, on Flickr 20201022_175918 by Michael Crawford, on Flickrthe yellow tape is arts notes to me  20201022_175944 by Michael Crawford, on Flickr 20201022_175944 by Michael Crawford, on Flickrthen, after a lot more blocking and spot putty and filler work and....  20201024_115708 by Michael Crawford, on Flickr 20201024_115708 by Michael Crawford, on Flickr 20201024_142558 by Michael Crawford, on Flickr 20201024_142558 by Michael Crawford, on Flickr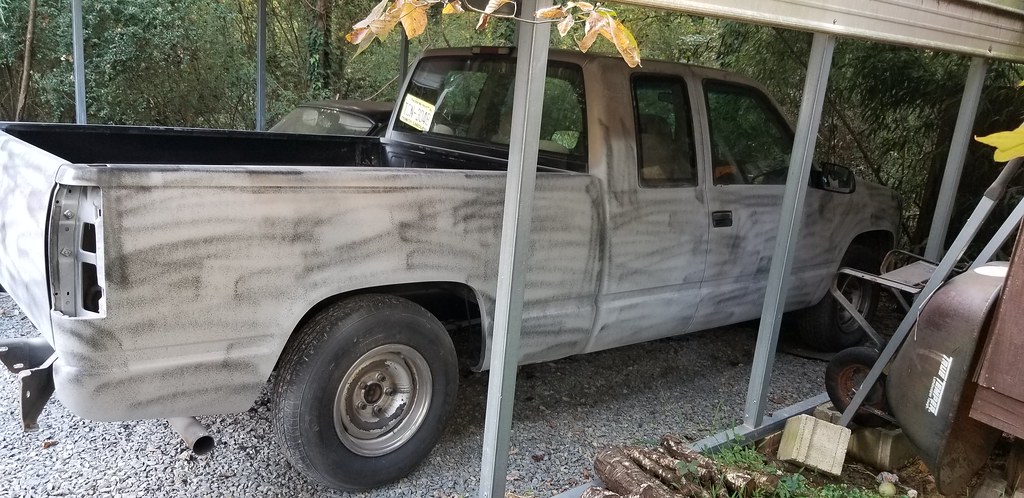 20201024_164237 by Michael Crawford, on Flickr 20201024_164237 by Michael Crawford, on Flickrwill hopefully paint this week |
|
|

|
|
|
#8 |
|
Registered User
Join Date: Aug 2012
Location: Northeast KS
Posts: 1,789
|
Re: drivabeater 4.0 the truck i should have built last time
Nice progress so far!
__________________
1999 GMC Suburban K2500 SLT, 454/4L80E 1991 Z/28, 6.0L/T56 1949 GMC 250, S10 Frame, 6.0L/4L80E Instagram @aceshighspeedshop |
|
|

|
|
|
#9 |
|
Registered User
Join Date: Jul 2013
Location: albemarle, nc
Posts: 42
|
Re: drivabeater 4.0 the truck i should have built last time
Previously: 2288.83
new: window mounting buttons and screws, friendly chevy: 12.92 gallon sealer (48, used ¼) 12 8 quarts sprayable clear (140, used ½) 70 amp wiring kit 24.95 third brake light 25.79 mtx amp had mtx 10 inch sub and box in unknown condition: 10 MSD 6N box had heddman headers, y pipe, cat, exhaust: 100 nifty stainless sill plates: free from scrap guy self traded kenwood hd stereo from my race car for the free blaupunkt I had in here self traded new stock tails from parts haul for aftermarket in stepside hidden hitch, wiper cowl, and roll pan: free new brake calipers: free new total: 2544.49 left off with the truck in high build and guide coat. We used ½ gallon of high build, ½ gallon of reducer, and ¼ gallon of sealer. Then, 1/3 gallon base, and ½ kit of clear coat. But, whole truck is black now. Art touched up a few spots for me that he didn't like, we sprayed high build and guide coat again, I blocked with 500 grit. 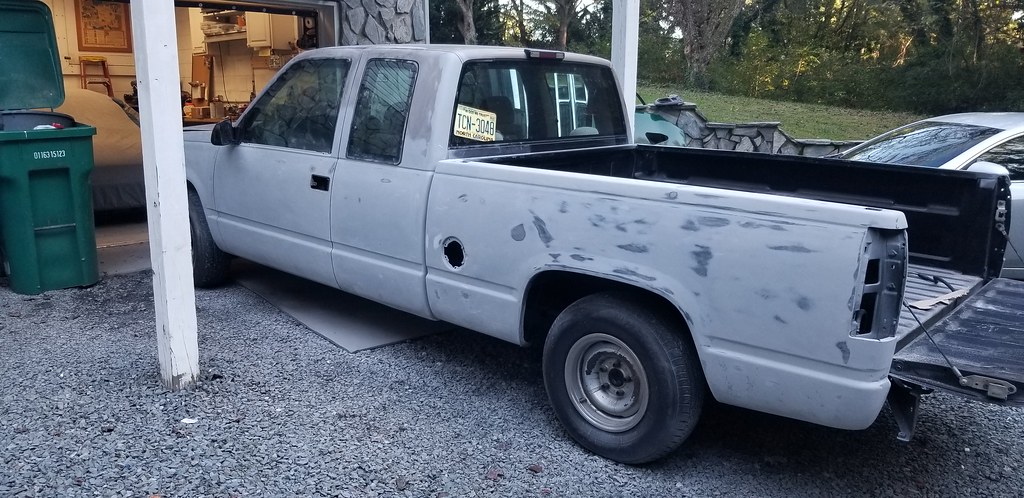 20201026_171143 by Michael Crawford, on Flickr 20201026_171143 by Michael Crawford, on Flickr 20201026_122301 by Michael Crawford, on Flickr 20201026_122301 by Michael Crawford, on Flickrim going to take this opportunity to discuss making cheap paint look great. I know that most of us could, but wont, paint in their gravel driveway. Most guys will at least take it to maaco or earl shibe. Pay for the $299 special, or whatever it costs these days. Now, nothing wrong with that at all! But the thing to remember, with any paint job, is that the end result is all in the prep. Prep is more than just sanding. The biggest thing is the tape process. Most shops will tape off anything that isn't supposed to be painted. Every tape line is a place for chips, missed spots, etc. especially like this with a color change. For example, the door handles. You can see exactly where the tape and door handles were before I removed them, so you can see what would have been if we shot it like that. I promise you it was an eyesore waiting to happen. Pulling the parts also allows that edge to be sanded and cleaned properly. 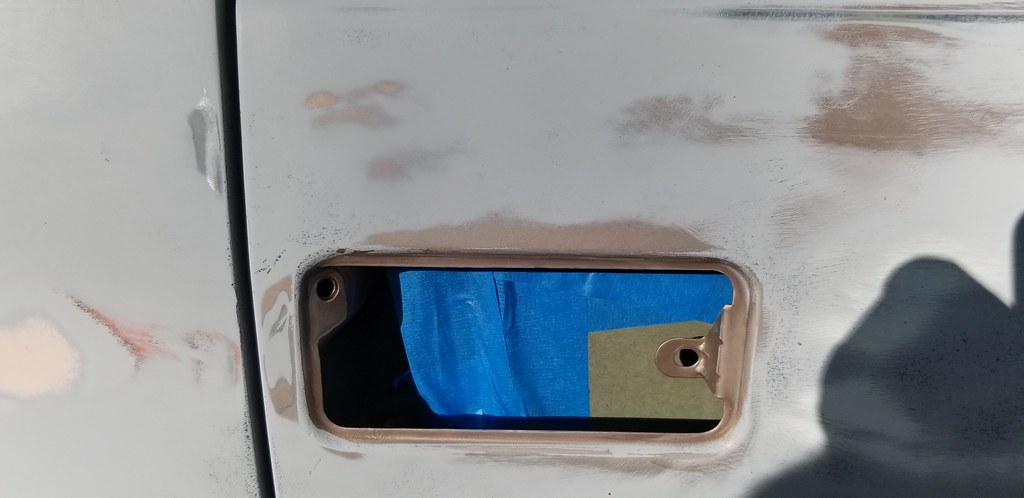 20201030_101830 by Michael Crawford, on Flickr 20201030_101830 by Michael Crawford, on Flickranother thing this disassembly before paint does is allow for a good cleaning. Again, prep. Behind the handles, mirrors, and weatherstipping was filthy on this, and it was better than others we've done. I prefer, as a final step before taping up to spray, to wash the vehicle a few times. I used scotchbrite pads and dawn dish soap and warm water and a hose. Every nook, cranny, edge, seam, cavity. Wash the wheel wells, the engine bay, everywhere. Take off everything you can that you don't want painted, do it again, and again. Then go for tape. We even pulled the extended cab glass to get a better job.  20201030_101912 by Michael Crawford, on Flickr 20201030_101912 by Michael Crawford, on FlickrI also try to jig up loose parts. Make it simpler for a good coverage with less screwing around by the painter. For this, I used spray paint can lids to sit the door handles on, and a piece of scrap plywood with holes drilled to stand the mirrors up on. Sat these on a sawhorse. Sat the hood, tailgate, and front bumper filler on body sawhorses.  20201031_084825 by Michael Crawford, on Flickr 20201031_084825 by Michael Crawford, on Flickr 20201031_140109 by Michael Crawford, on Flickr 20201031_140109 by Michael Crawford, on Flickrwhen it comes time to tape up, make every effort to reduce and eliminate areas that the dried paint particles can collect and become dust that gets blown back into the paint. We tend to do the engine bay in a wrap of plastic for this reason. We also, make sure to fully tape every edge, and avoid wrinkles.  20201030_121852 by Michael Crawford, on Flickr 20201030_121852 by Michael Crawford, on Flickr 20201030_121905 by Michael Crawford, on Flickr 20201030_121905 by Michael Crawford, on Flickrup next was a coat of sealer. 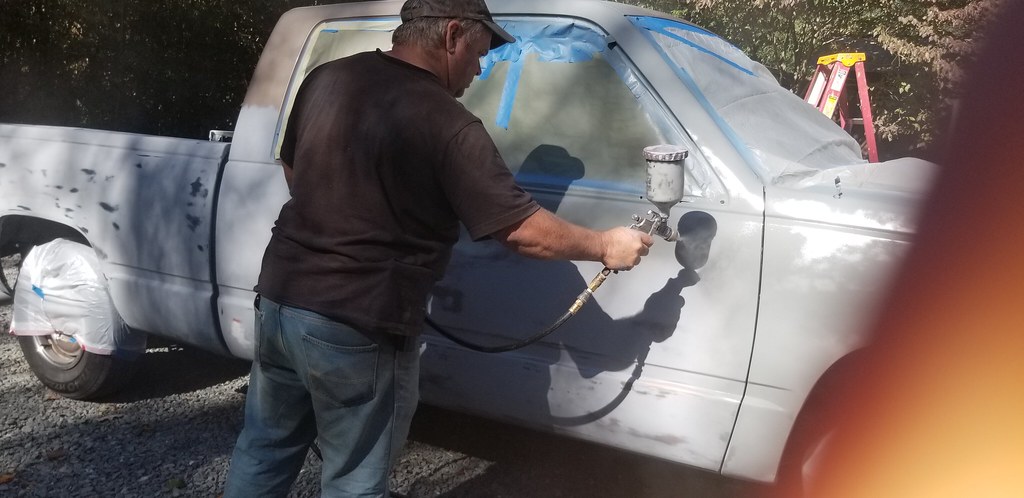 20201030_122035 by Michael Crawford, on Flickr 20201030_122035 by Michael Crawford, on Flickrthen, black!  20201030_163432 by Michael Crawford, on Flickr 20201030_163432 by Michael Crawford, on Flickrwe had a bunch of trouble with the initial base coats. So, we stopped. Wetsanded out the issues, and redid it the next morning when conditions and tempers were better. A few heavy coats of base, followed by a few heavy coats of clear.  20201031_090004 by Michael Crawford, on Flickr 20201031_090004 by Michael Crawford, on Flickr 20201031_131930 by Michael Crawford, on Flickr 20201031_131930 by Michael Crawford, on Flickr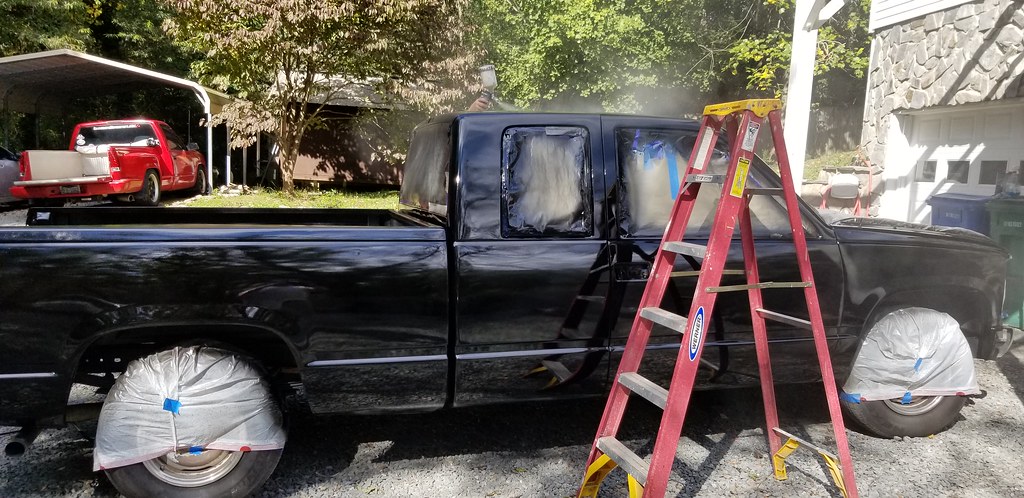 20201031_140055 by Michael Crawford, on Flickr 20201031_140055 by Michael Crawford, on Flickr 20201031_140117 by Michael Crawford, on Flickr 20201031_140117 by Michael Crawford, on Flickr 20201031_142813 by Michael Crawford, on Flickr 20201031_142813 by Michael Crawford, on Flickrwaited for it to dry enough, and pulled it under the carport to cure for the night  20201031_155702 by Michael Crawford, on Flickr 20201031_155702 by Michael Crawford, on Flickrnext, I put the tailgate on to keep it out of harms way. Best place for it. I also stole the nifty aftermarket taillights from the stepside to put in new stock stuff.  20201101_153409 by Michael Crawford, on Flickr 20201101_153409 by Michael Crawford, on Flickrim going to break from paint and body for a second. During the first round of basecoat spraying, when everything went wrong, stampie brought the miata back to me from the challenge, along with a truckload of parts. I was not expecting a lot of what showed up, to be honest. The drop spindles came with refreshed upper and lower control arms attached, along with calipers and rotors. The headlights lights came in boxes that also had brand new front calipers, new stock tail lights, wiring pigtails, etc. the headers and exhaust were as expected if not way better than anticipated for the $100 investment, and 759rng brought me a fiberglass roll pan, hidden hitch, wiper cowl, and some part I cant identify. Waaay more stuff than I expected, and ALL of it will get used between the two trucks.  20201030_160740 by Michael Crawford, on Flickr 20201030_160740 by Michael Crawford, on Flickr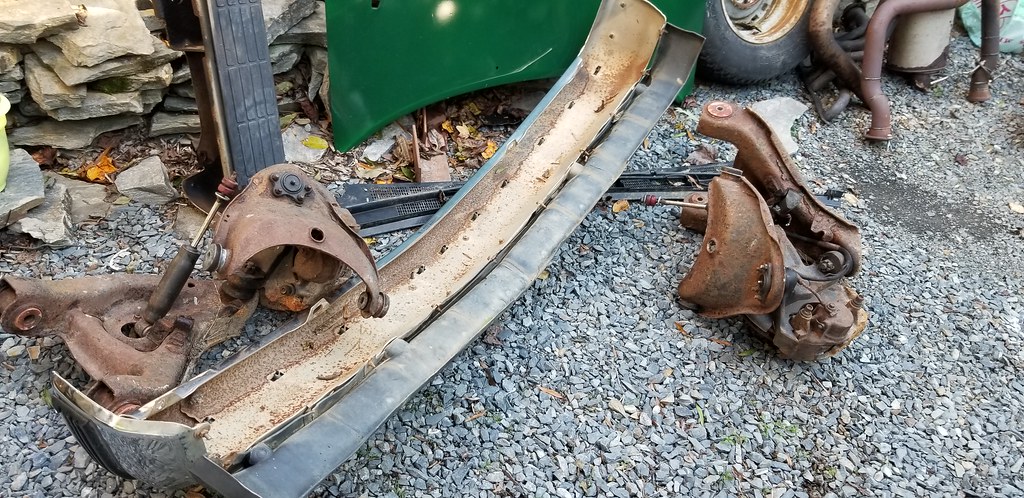 20201030_160753 by Michael Crawford, on Flickr 20201030_160753 by Michael Crawford, on Flickr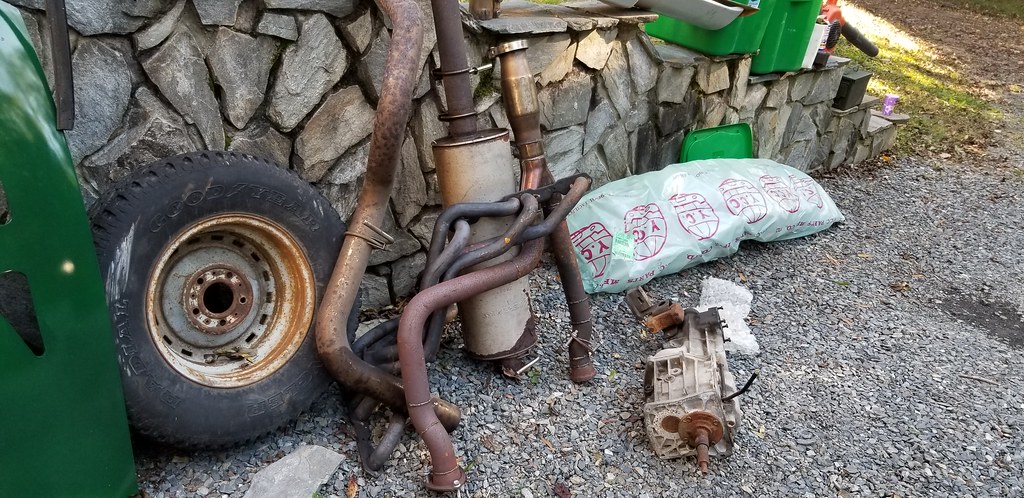 20201030_160757 by Michael Crawford, on Flickr 20201030_160757 by Michael Crawford, on Flickranyway, back to paint and body. When we got it untaped, I wanted to finish up the jambs and such before reassembly. Every paint job ive done has gotten overspray into the jambs no matter what ive tried. So ive resigned myself to refinishing jambs. On this one, I used rattle cans to go from tan to black. Taped the bejeeus out of everything, prep with scotchbrite, wipe down with wax and grease remover, shoot.  20201102_105049 by Michael Crawford, on Flickr 20201102_105049 by Michael Crawford, on Flickr 20201102_105055 by Michael Crawford, on Flickr 20201102_105055 by Michael Crawford, on FlickrI did the wiper cavity and engine bay jambs as well, but no pictures. I also did a refresh of the window rubbers. A trick ive learned is to wipe clean with lacquer thinner, let dry. Then, use the kiwi edge and sole stuff in the sponge applicator. Works well for a long time. 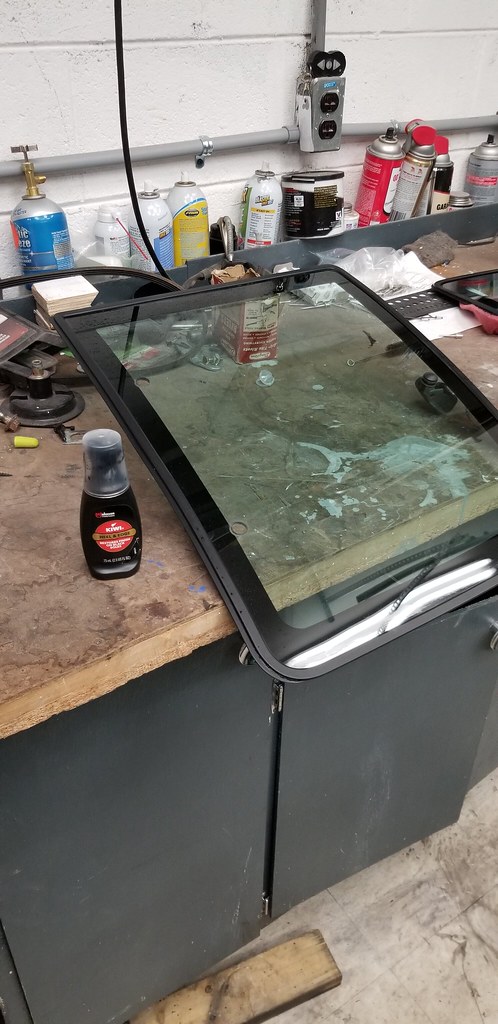 20201101_073149 by Michael Crawford, on Flickr 20201101_073149 by Michael Crawford, on Flickrduring removal of the rear windows, I had to drill out two of the retainers. Picked them up at the local chevy dealer. Went ahead and reinstalled the bumpers, freshly painted side mirrors, freshly painted door handles, re-polished sill plates I got from the scrap guy, the tailgate emblem, and the painted trailer hitch.  20201102_105039 by Michael Crawford, on Flickr 20201102_105039 by Michael Crawford, on Flickr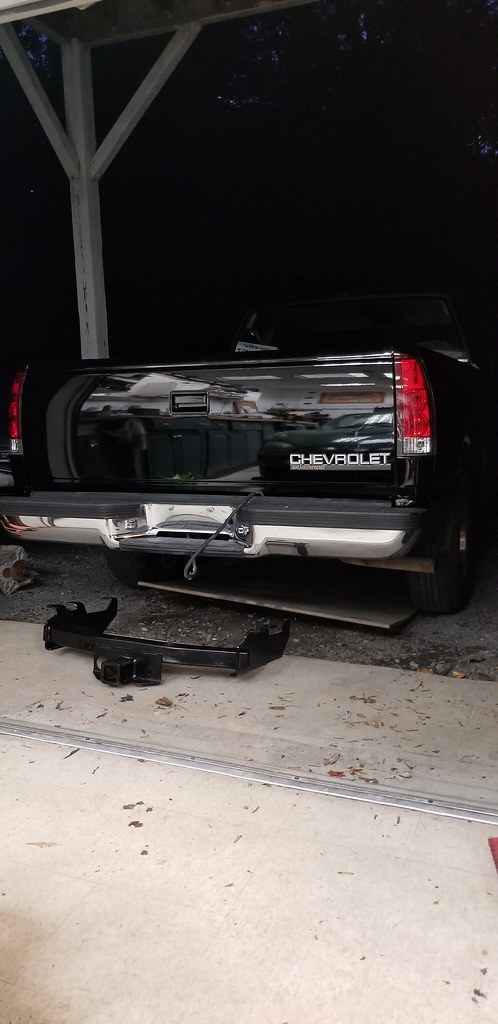 20201103_175418 by Michael Crawford, on Flickr 20201103_175418 by Michael Crawford, on Flickr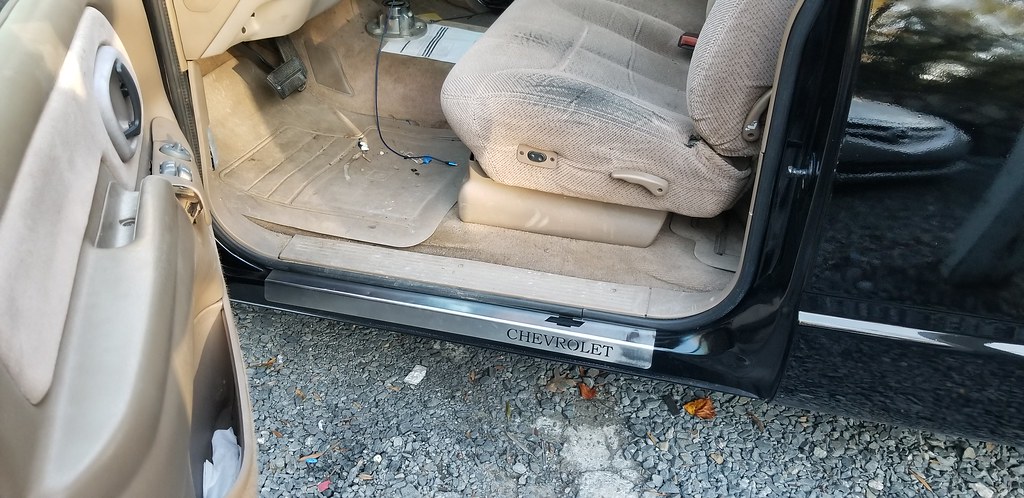 20201104_080951 by Michael Crawford, on Flickr 20201104_080951 by Michael Crawford, on FlickrI spent an insane amount of time taping up and painting the new grille. But it, with the factory emblem shot in black, and the new lights, turned out pretty awesome. Need to adjust the lights, black out the side marker bulb plugs, do the four high mod, and repaint the AC condenser and core support. But, I really, really like it.  20201102_105035 by Michael Crawford, on Flickr 20201102_105035 by Michael Crawford, on Flickrbefore we put the painted hood on (traded the bent and rusty stock to the scrap guy for a black one to repaint) I went ahead and fixed more fire damage, loomed up the plug wires, mounted the MSD box and ran the power wire for the amp. I also pulled out the trailer brake wiring from the loom, and gave things a once over. The TBI needs rebuilt badly, grounds need cleaned, vacuum lines need freshened. I also deleted the failed closed flapper door in the intake snorkel. Step at a time.  20201108_084721 by Michael Crawford, on Flickr 20201108_084721 by Michael Crawford, on Flickr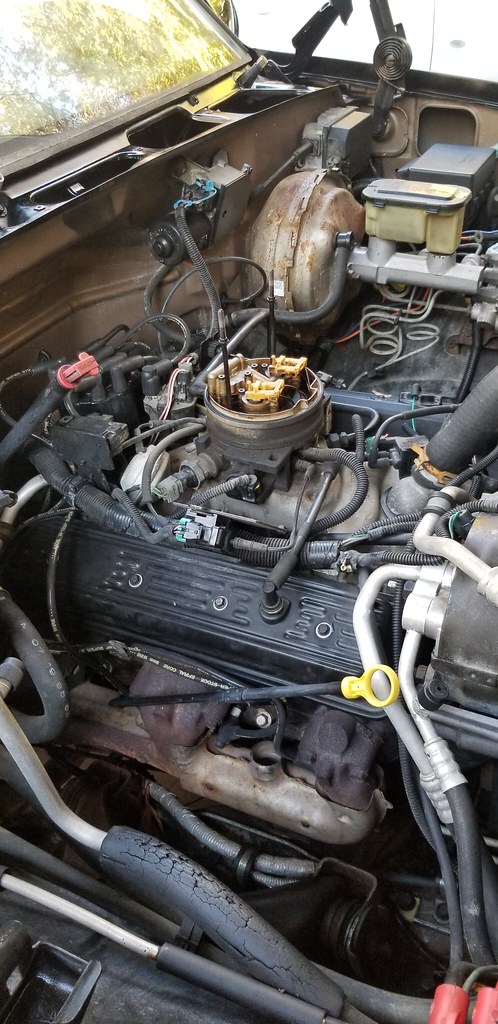 20201108_084747 by Michael Crawford, on Flickr 20201108_084747 by Michael Crawford, on Flickrgot the new hood on, and realized we forgot to paint the filler door. Again. But, the thing is back together! I drove it around! And it looks fairly OK. Soon, will be better with the new wheels, and a touch lower. And window tint. But, still.  20201108_104037 by Michael Crawford, on Flickr 20201108_104037 by Michael Crawford, on Flickr 20201108_104042 by Michael Crawford, on Flickr 20201108_104042 by Michael Crawford, on Flickr 20201108_104052 by Michael Crawford, on Flickr 20201108_104052 by Michael Crawford, on Flickr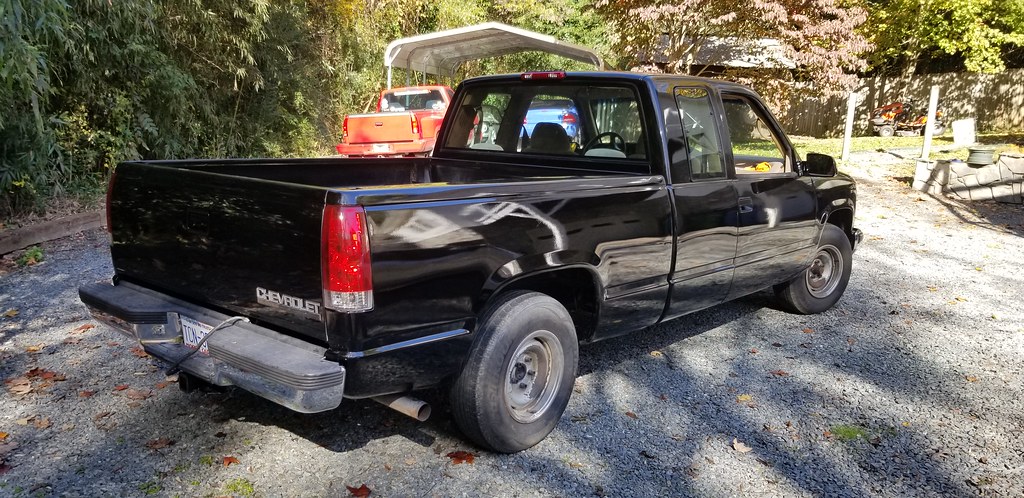 20201108_104104 by Michael Crawford, on Flickr 20201108_104104 by Michael Crawford, on Flickr 20201108_104112 by Michael Crawford, on Flickr 20201108_104112 by Michael Crawford, on Flickr 20201108_104133 by Michael Crawford, on Flickr 20201108_104133 by Michael Crawford, on Flickr
|
|
|

|
|
|
#10 |
|
State of Confusion!
  Join Date: Jul 2002
Location: Gulfport, MS USA
Posts: 47,262
|
Re: drivabeater 4.0 the truck i should have built last time
Truck looks good!
__________________
Bill 1970 Chevy Custom/10 LWB Fleetside 2010 Toyota Tacoma PreRunner SR5 Double Cab - DD Member of Louisiana Classic Truck Club (LCTC) Bill's Gallery Life isn't tied with a bow, but it's still a gift. Live simply. Love generously. Care deeply. Speak kindly. Leave the rest to God! |
|
|

|
|
|
#11 |
|
Registered User
Join Date: Jul 2013
Location: albemarle, nc
Posts: 42
|
Re: drivabeater 4.0 the truck i should have built last time
Thanks! Im REALLY digging it. Looks almost as good in person as it does in pictures, and is getting close to what i had in my head as a goal.
|
|
|

|
|
|
#12 |
|
Registered User
Join Date: Jul 2013
Location: albemarle, nc
Posts: 42
|
Re: drivabeater 4.0 the truck i should have built last time
Budget first:
previously: 2544.49 new money: sem quart: 102 headliner/visors refresh: 115 3 rolls peel and seal: 53.04 reflectix 48x25ft: 40.69 locktite spray adhesive 9.98 outside temp sensor: 5.41 front brake hoses: 31.08 usb outlet: 7.99 2 cans duplicolor wheel paint (silver and clear) 15.98 4 gmc center caps and nuts:15.28 tire mount and balance: 40 alignment and ac charge: 110 window latch: 43 park brake release cable: 10.87 total to date: 3144.81 when we left off, it was on stock scruffy wheels, lowered 3 inches in the back, freshly panted, and needing a good interior cleaning and finishing of the suspension and brakes. So, I did that. First-ish was the suspension finishing. When I did the rear suspension, the belltech directions had the shims going one way in writing, and the other in pictures. I picked the wrong one initially. So I swapped it around, and the vibrations went away! I also set the back end to 4 inches, as the three wound up looking like too much rake with the drop spindles. Speaking of drop spindles, I went after them. When I pulled the old, I realized that the upper ball joints were garbage. So I cleaned and painted the uppers that came with the drop spindles. I also installed the new lowers I had bought from rockauto a while ago. Cleaned and spray bombed the LCA, spring, frame, and wheelwells after popping out the knockouts for alignment. Turned out pretty OK!  20201119_124855 by Michael Crawford, on Flickr 20201119_124855 by Michael Crawford, on Flickrwhile I was in there, I pulled the new calipers that came in the parts pile out pf their boxes, cleaned them, painted them red, grabbed some new hoses cause the ones on this truck were scary, and got it all put together. No pictures of painted or installed calipers....  20201119_113941 by Michael Crawford, on Flickr 20201119_113941 by Michael Crawford, on Flickr 20201119_114538 by Michael Crawford, on Flickr 20201119_114538 by Michael Crawford, on Flickrsince were on the topic of suspension, ill talk about wheels. I had purchased a set of 15x8 truck rallys with the stock center caps from my friend patrick. I cleaned and shot the two he had primed, and wasnt really happy with them. So, I figured some hand sanding was in order. I took the worse of the two I had spray bombed, some 150 grit, and went to work. When it felt smoothish, I grabbed the can of duplicolor silver and the wheel clear and shot it. Sanded with 150 on the left, unsanded on the right.  20201119_162218 by Michael Crawford, on Flickr 20201119_162218 by Michael Crawford, on Flickr 20201119_162232 by Michael Crawford, on Flickr 20201119_162232 by Michael Crawford, on Flickrthis reinforced the lesson I have apparently failed to learn, which is that everything needs sanded between coats. Regardless. I sanded the two unblasted wheels, 80 grit on rusty parts then 150 overall. Then I test fit to make sure the color was close 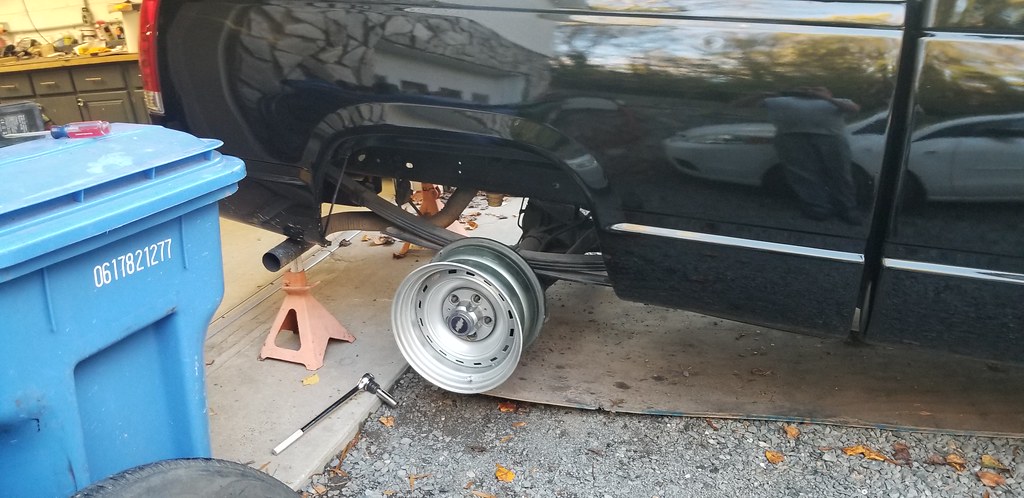 20201116_080334 by Michael Crawford, on Flickr 20201116_080334 by Michael Crawford, on Flickrthe stock caps were killing it for me. The fit, color, and style was dead on, but those caps.... when I bought the truck, it came with 3 plastic chrome center caps, and no plastic lug nuts. I test fit one, and liked it. So on the next pullapart run, I went hunting a fourth and some plastic caps. As luck would have it, I came across a full set on a 98 sierra. Bought them all! Had my tire guy swap the existing craptastic 235/75/15 on the wheels and bolted them on.  20201201_091936 by Michael Crawford, on Flickr 20201201_091936 by Michael Crawford, on Flickr 20201202_171222 by Michael Crawford, on Flickr 20201202_171222 by Michael Crawford, on Flickrabsolutely nailed the look I had in my head. The visual package will be further refined with window tint, a 4x4 air dam, mud flaps like on my red truck, and a tonneau cover. Also, a set of 255/70/15 tires. That added rubber should really visually beef up the wheels and truck. To finish us out for this update, I did an interior overhaul. What happened was that I figured out the passengers side seat has a two stage slider to allow rear seat access. Mine only had one stage working. So I went to adjust the cable, and stuck to the seat. There was so much tar and nicotine and filth buildup that there were actually filth stalagmites off the bottom. So I pulled it. And found the carpet not much better....  20201116_151839 by Michael Crawford, on Flickr 20201116_151839 by Michael Crawford, on Flickr 20201116_151846 by Michael Crawford, on Flickr 20201116_151846 by Michael Crawford, on Flickrso it all came out and got pressure washed. Except the headliner. I took that to the local upholstery shop.  20201120_101037 by Michael Crawford, on Flickr 20201120_101037 by Michael Crawford, on Flickrwhile it was out, I did peel and seal and radiant barrier over the roof, floors, rear cab wall, ans extended cab panels. 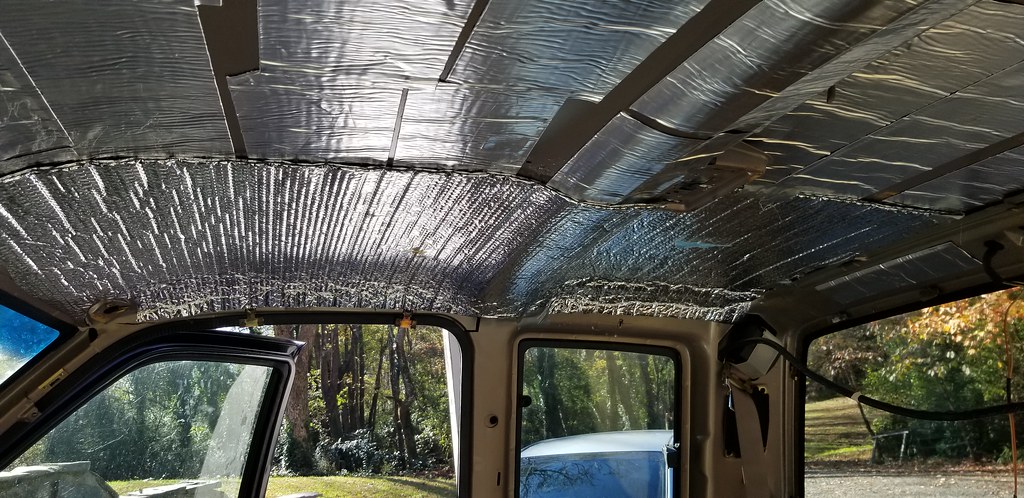 20201120_095902 by Michael Crawford, on Flickr 20201120_095902 by Michael Crawford, on Flickr 20201120_112623 by Michael Crawford, on Flickr 20201120_112623 by Michael Crawford, on FlickrI couldn't bring myself to put the plastics in all different shades due to fading over the years. I had rousers in Salisbury mix me up a close match to the factory tan, and sell me a quart. Loaded into my 4oz harbor freight detail gun, cleaned and prepped all the plastics, and dyed them.  20201121_075012 by Michael Crawford, on Flickr 20201121_075012 by Michael Crawford, on Flickr 20201121_162341 by Michael Crawford, on Flickr 20201121_162341 by Michael Crawford, on Flickrwe did the dash too, as well as the door panels. All of it. I added a usb charge port to the ash tray assembly to make things simpler. Done this in almost all my cars, and it requires a little bore job on the factory hole to clear.  20201124_093430 by Michael Crawford, on Flickr 20201124_093430 by Michael Crawford, on Flickrto finish off the “well, hell, im here.....” work, I did the stereo. The mtx sub and box was purchased from the junkyard, the mtx amp and random 4x10 speakers were bought from a fellow GRM guy who was cleaning out his garage. I built a couple simple brackets to mount the amp on the back cab wall, put the rear speakers in, hooked up the amp, swapped in the kenwood from my autocross car, and generally made the stereo kick ass in this thing. I really want a downfire under seat box, and im pretty sure my wife is getting me that and a trailer brake controller for Christmas 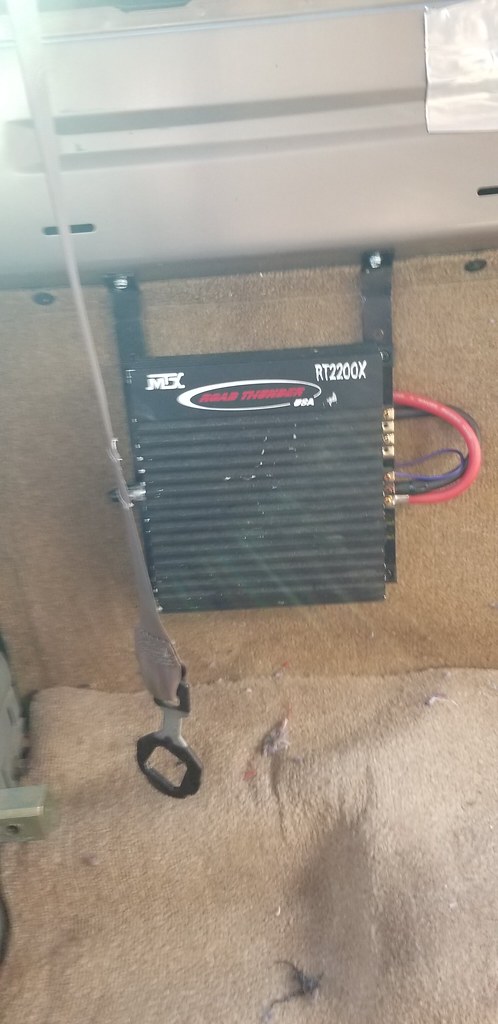 20201121_141036 by Michael Crawford, on Flickr 20201121_141036 by Michael Crawford, on Flickr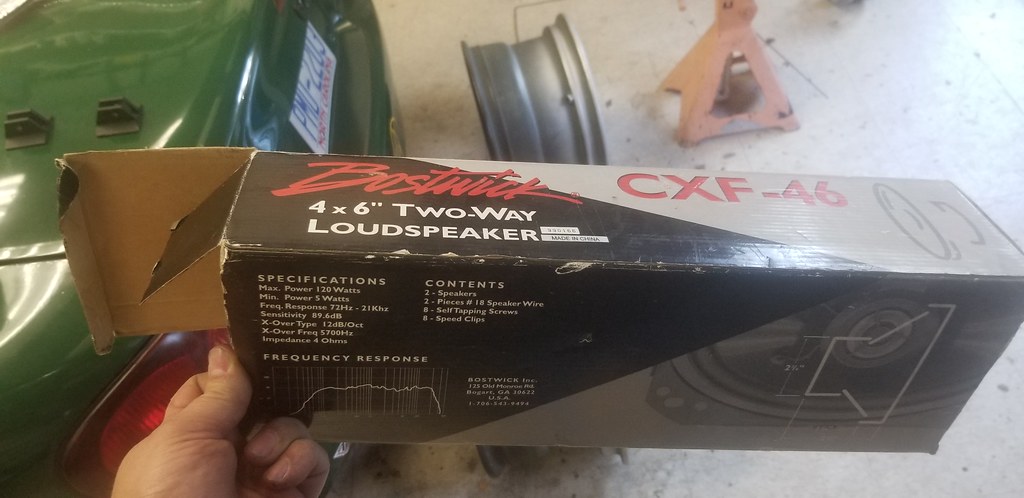 20201121_152841 by Michael Crawford, on Flickr 20201121_152841 by Michael Crawford, on Flickr 20201121_141043 by Michael Crawford, on Flickr 20201121_141043 by Michael Crawford, on Flickr 20201121_145541 by Michael Crawford, on Flickr 20201121_145541 by Michael Crawford, on Flickrso this is generally what it looks like reassembled! Pretty happy with it overall. Been driving it quite a bit since I got all this done. Its comfortable, quiet, and pleasant. Everything my truck should be.  20201124_160525 by Michael Crawford, on Flickr 20201124_160525 by Michael Crawford, on Flickr 20201124_160532 by Michael Crawford, on Flickr 20201124_160532 by Michael Crawford, on Flickr 20201124_160704 by Michael Crawford, on Flickr 20201124_160704 by Michael Crawford, on Flickr 20201124_160724 by Michael Crawford, on Flickr 20201124_160724 by Michael Crawford, on Flickr 20201202_171222 by Michael Crawford, on Flickr 20201202_171222 by Michael Crawford, on Flickr
|
|
|

|
|
|
#13 |
|
Registered User
Join Date: Oct 2010
Location: Ocean Springs, MS
Posts: 1,746
|
Re: drivabeater 4.0 the truck i should have built last time
That truck looks great, I really like the look of older rally wheels on it!
__________________
Gary 1971 Chevrolet C/10 1951 GMC 100 1977 GMC C15 1955 Chevrolet 3100 |
|
|

|
|
|
#14 |
|
Registered User
Join Date: Jul 2013
Location: albemarle, nc
Posts: 42
|
Re: drivabeater 4.0 the truck i should have built last time
Thanks! The have just the right amount of utility to look stock. But enough lip and design to look upmarket. I love billet wheels, and would absolutely LOVE to do a vintage set of 16x8 centerlines, but these fell in my lap for $50 and some effort. Cant beat it!
|
|
|

|
|
|
#15 |
|
Registered User
Join Date: Aug 2012
Location: Northeast KS
Posts: 1,789
|
Re: drivabeater 4.0 the truck i should have built last time
Nice execution, looks good!
__________________
1999 GMC Suburban K2500 SLT, 454/4L80E 1991 Z/28, 6.0L/T56 1949 GMC 250, S10 Frame, 6.0L/4L80E Instagram @aceshighspeedshop |
|
|

|
|
|
#16 | |
|
Registered User
Join Date: Oct 2010
Location: Ocean Springs, MS
Posts: 1,746
|
Re: drivabeater 4.0 the truck i should have built last time
Quote:
__________________
Gary 1971 Chevrolet C/10 1951 GMC 100 1977 GMC C15 1955 Chevrolet 3100 |
|
|
|

|
|
|
#17 |
|
Registered User
Join Date: Feb 2016
Location: Trenton,Ontario & South Carolina
Posts: 755
|
Re: drivabeater 4.0 the truck i should have built last time
Love the look on my 1994 C1500
|
|
|

|
|
|
#18 |
|
Registered User
Join Date: Jul 2013
Location: albemarle, nc
Posts: 42
|
Re: drivabeater 4.0 the truck i should have built last time
Budget first:
previously: 3144.81 new money: 1998 2500hd parts truck (vortec accessories, 4l80e trans, crossmember, driveshaft, dash, ac syste, that held charge, door panels, a pillar, radiator, shroud, PS/trans/oil coolers, wiring, front sway bar, other stuff im forgetting) 250 window tint: 150 downfire box, tonneau cover, floor mats, rearview camera, trailer plug, brake controller: Christmas presents plastic bedliner: 40 d rings: 12.69 rally armor mudflaps 26.90 torque converter bolts: 10.98 flexplate bolts: 11.82 prom adapter and chips from moates: 68.50 4l80e external seal kit 23.49 plug boot insulators: 19.25 thermostatic fan switch 21.35 copper header gaskets 13.43 rockauto order: o2 sensor, oil cooler gaskets, upper and lower radiator hoses, 170&180 thermostats, flexplate, trans mount, ac orifice tube/o rins/drier, trans filter, oil and trans cooler lines: 234.74 stage 8 locking header bolts: had total to date: 4027.96 well, we have hit the ski jump portion of the slippery slope, I believe. Lets see if I can do this in chronological order. No promises. First off, got the truck tinted. Went 18 on the extended cab, and 35 on the front doors. Looks good!  20201218_112444 by Michael Crawford, on Flickr 20201218_112444 by Michael Crawford, on Flickrthen, I picked up a plastic drop in bedliner and tailgate protector piece. Used my heat gun to bend it a bit and make it fit properly, and installed a TON of d rings that are through bolted through the plastic with nylock nuts and large fender washers on the back side. Should be good!  20201221_145926 by Michael Crawford, on Flickr 20201221_145926 by Michael Crawford, on Flickrthem Christmas came. With it, truck goodies! My wife and daughter got me a downfiring sub box, trailer connector (7&4 pin combo) and brake controller. Mom and dad got me a backup camera system and tonneau cover. In-laws did floor mats. I'm blessed! All I have installed so far is the sub box (no picture, its under the back seat), trailer wiring, and tonneau. 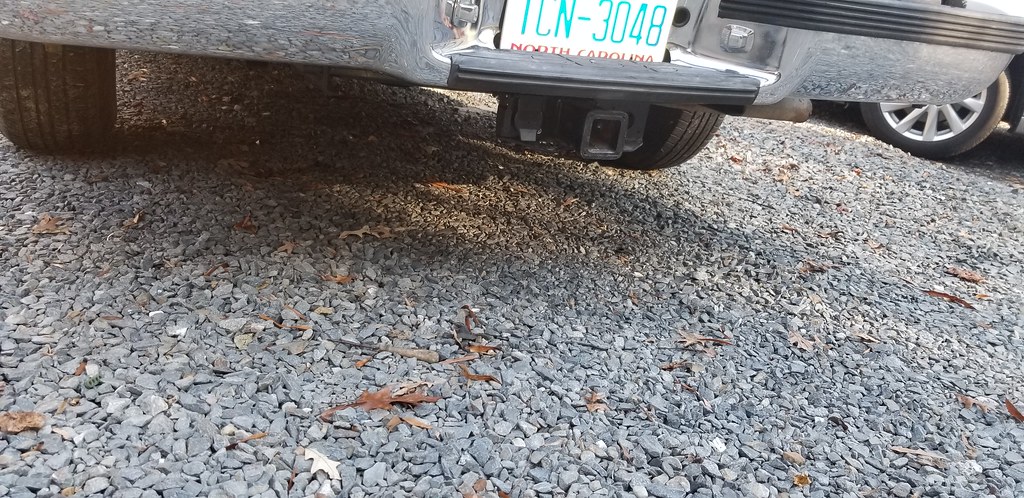 20201221_145933 by Michael Crawford, on Flickr 20201221_145933 by Michael Crawford, on Flickr 20201231_093507 by Michael Crawford, on Flickr 20201231_093507 by Michael Crawford, on Flickrso, everything was pretty awesome! Except that I keep popping the courtesy circuit fuses. No dome lights. That sucks. But could wait for diagnosis until it warms up. And then, a few weeks ago, I was driving home with a bed full of girlscout cookies (wifes a girlscout leader, and its easier to put cookies in a truck than a minivan) when the 4l60e decided to commit suicide. Turned into a big bucket of failure and slipping and neutrals. With this being a 95, it has a one year only valve body. Which is ludicrously priced. The 4l60e is also deserved of the reputation of failure. Its actually rumored that they may be made by dodge they're so bad! (flame suit on) regardless, im not going to pat 1500-2k to build a 95 only 4l60e. So I started looking at options, such as converting to other years, other transmissions, etc. the 4l80e was the ultimate swap in my mind, but requires a LOT of parts. However, a parts truck would make that problem easier to overcome. So I called my scrapper buddy steve. He had a 1997 2500hd service body that was taken out by electrical issues. He said it was good, and hes never steered me wrong. So, for $250, I bought the drivetrain, most of the interior, the wiring, the exhaust, the front sway bar, that AC...... smoking deal. Even if the trans is junk, its STILL a good deal! That $250 included him dropping iyt off at my house and picking it up. I love a friend with a rollback. Brother dustin came to help me get the engine and trans out. In the dark, uphill, in the rain. Not a fun pull, but we got it!  20210212_160604 by Michael Crawford, on Flickr 20210212_160604 by Michael Crawford, on Flickr 20210213_163547 by Michael Crawford, on Flickr 20210213_163547 by Michael Crawford, on Flickr 20210216_172733 by Michael Crawford, on Flickr 20210216_172733 by Michael Crawford, on Flickrengine turned out to be seized from water getting in it. Which meant we had to get aggressive to get the torque converter off the flexplate. Between pry bars, BFH, and grinder, we got it. Destroyed the bolts and flexplate in the process though, necessitating replacements. Grabbed new flexplate bolts for good measure to go with the new rockauto flexplate....  20210216_191405 by Michael Crawford, on Flickr 20210216_191405 by Michael Crawford, on Flickrpulled the oil cooler, heads, roller cam parts, accessories, and everything else I could save from the engine. Sold the sensors, emissions stuff, and other misc parts to stampie for $30 stuffed the garbage short block back in.  20210217_080453 by Michael Crawford, on Flickr 20210217_080453 by Michael Crawford, on Flickrthe dash and door panels and seat tracks and drivers side a pillar were all I great shape. So I got those too! Crack free no airbag dash is in storage for if I ever need it. Also, there were ducts to the rear sets for HVAC. I got them while I was in there, and the blower motor to replace mine that squeaks.  20210217_083528 by Michael Crawford, on Flickr 20210217_083528 by Michael Crawford, on Flickr 20210217_161814 by Michael Crawford, on Flickr 20210217_161814 by Michael Crawford, on Flickr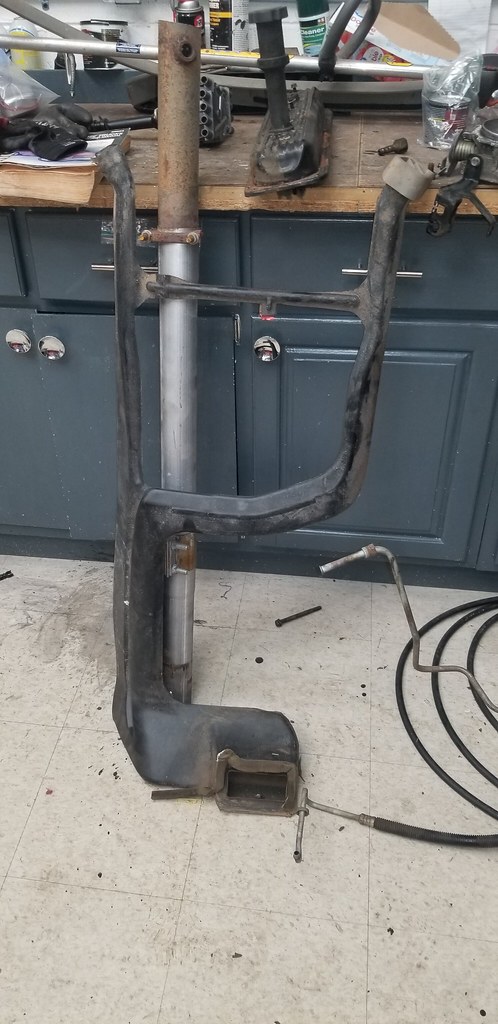 20210217_175757 by Michael Crawford, on Flickr 20210217_175757 by Michael Crawford, on Flickrdad came by with the plasma cutter and got the doors off for the sheet metal for his 49 ford. We officially got all the good from this thing. 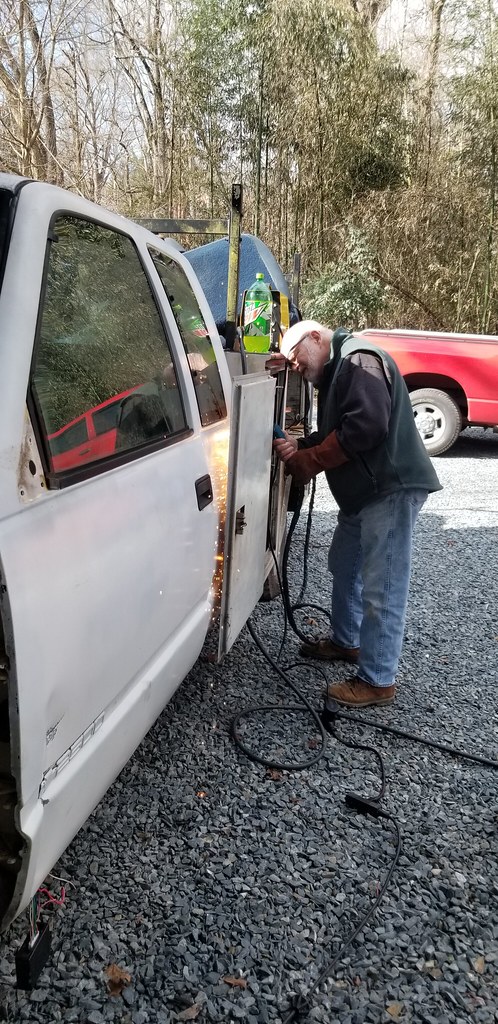 20210217_094350 by Michael Crawford, on Flickr 20210217_094350 by Michael Crawford, on Flickr 20210217_161758 by Michael Crawford, on Flickr 20210217_161758 by Michael Crawford, on Flickrso, this whole thing boils down to this: 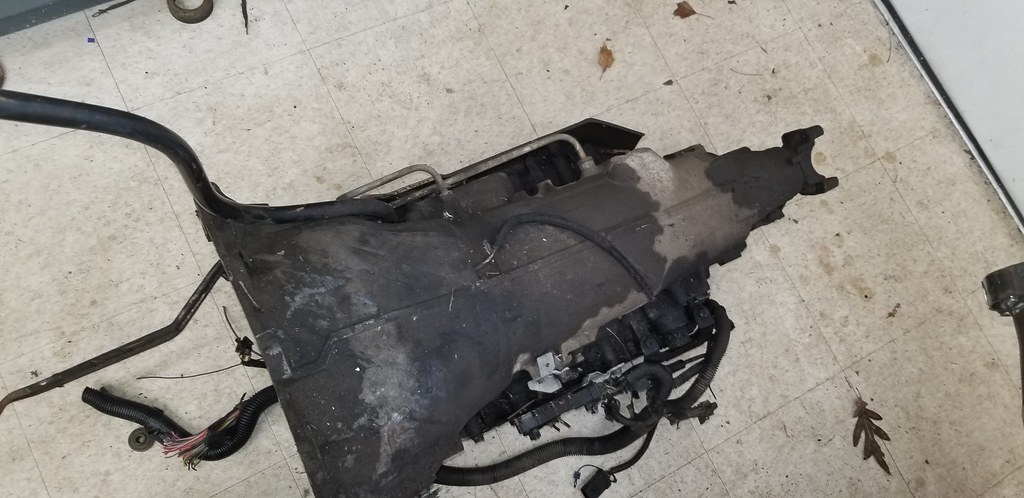 20210220_095056 by Michael Crawford, on Flickr 20210220_095056 by Michael Crawford, on Flickrafter pressure washing:  20210220_165734 by Michael Crawford, on Flickr 20210220_165734 by Michael Crawford, on FlickrI decided that since im in this deep, im going to do the headers, exhaust, trans and oil coolers all at the same time. So I orderd new lines, gaskets, filters, etc. headers are getting copper gaskets, stage 8 fastners, and por15 paint. Exhaust got some eastwood exhaust paint. Yes, the muffler is pretty scabby, and will probably be replaced with either a magnaflow or dynomax super turbo. But the price was SOO right. 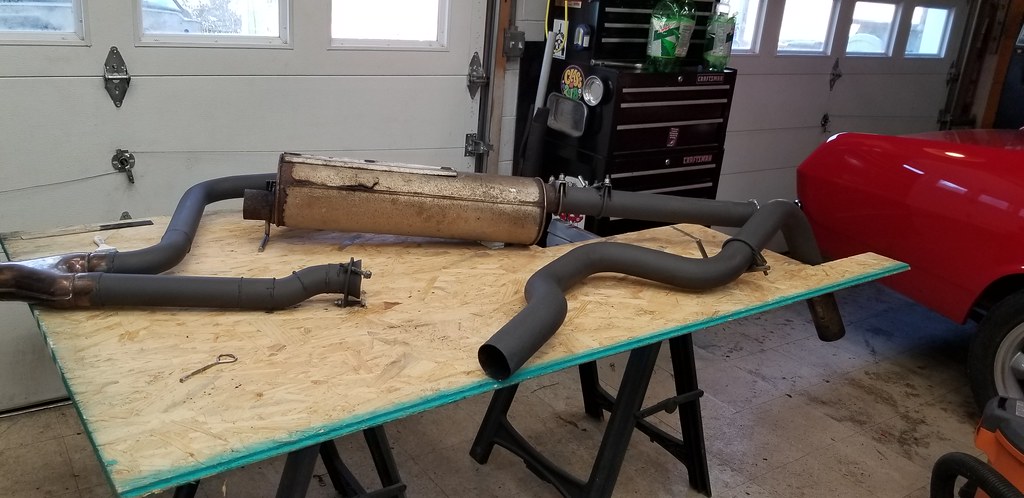 20210220_095051 by Michael Crawford, on Flickr 20210220_095051 by Michael Crawford, on Flickr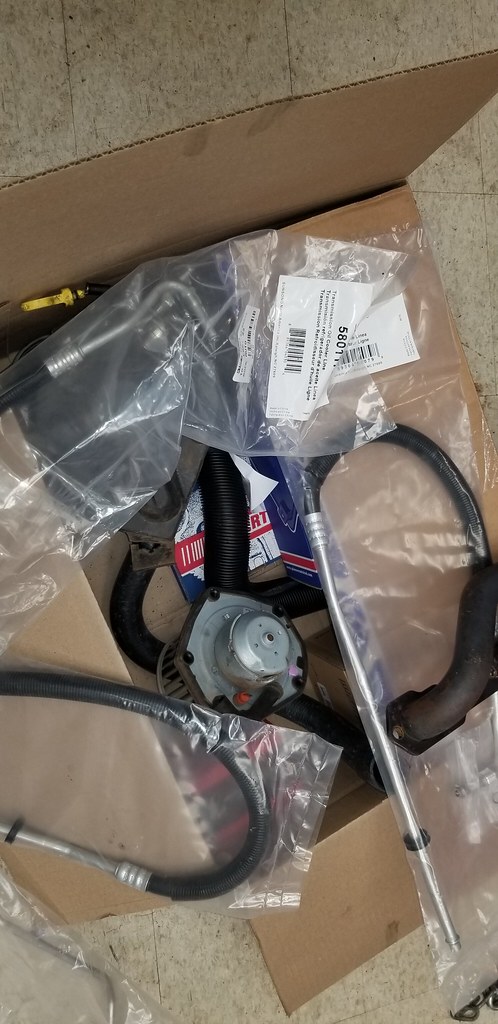 20210220_095108 by Michael Crawford, on Flickr 20210220_095108 by Michael Crawford, on Flickrto finish out this update, well talk about the trans swap itself. To go from 4l60e to 4l80e (this is research, and internet lore. Not a completed swap yet) requires a shorter driveshaft (from parts truck), a few pins moved around in the wiring, different flexplate, different program in the computer, different cooler lines, and potentially a different crossmember. I have all these parts on hand except the computer. All the yards around here list them by ECM service code interchange, and without opening them up and checking the code, no idea what they are out of. I HAVE to have a 5.7 TBI 4l80E 7427 ECM code. Which is apparently unobtainuim from jet, hypertech, or www.car-part.com so I have to make my own. I dusted off my old copy of tunerpro RT and borrowed back my chip burner and ALDL cable from stampie, and ordered the parts to burn my own chips. This is a learning curve to re-learn how to do all this. Its been a long time. And honestly, the only part of the swap im really concerned about. However, im certain we can do it, as other people have proved its possible. |
|
|

|
|
|
#19 |
|
Registered User
Join Date: Jul 2013
Location: albemarle, nc
Posts: 42
|
Re: drivabeater 4.0 the truck i should have built last time
Budget first:
previously: 4027.96 new money: another, correct flexplate: 40, advance exhaust clamps, amazon: 37.50 driveshaft rebuild and mods: 125 rear main seal: 24.99 billet wheels: 250 fluids, crimp connectors, locktite, etc were generally on the shelf. Cooper discoverer HT tires in 245/75/16, pretty new: 100 total to date: 4605.45 the last couple of weeks have been pretty nuts, between work and trying to thrash this thing together. However, ill do my best to cover the work we did. I may miss something, or a lot of somethings. So please, don't consider this comprehensive by any means. Anyway, we took it down to dads, and disassembled. Drained the fluid, took the driveshafts to the shop for modification, removed the cooler lines, exhaust, manifolds, etc. this thing has been apart before. They RTV'd the converter cover on, missed half the bolts, etc. the cat was also gutted at some point, and the muffler replaced with a two inch in/out piece. Not a lot of pictures, so take my word for it.  20210222_200425 by Michael Crawford, on Flickr 20210222_200425 by Michael Crawford, on Flickr 20210223_201226 by Michael Crawford, on Flickr 20210223_201226 by Michael Crawford, on Flickrwhen we went to drop the actual trans, we learned that the truck is shaped exactly wrong for our lift and shop arrangement. The back of the cab lined up EXACTLY with the garage door opener, and we couldn't go up the whole way. Which meant that we couldn't get the trans jack and trans under and out of the truck. So, doing the trans swap on the lift resulted in me pulling it with a floor jack on my back after having dad lower the lift down once I was underneath. Not fun. But, we did it. Left the converter bolted to the flexplate when we did it to reduce weight id have to handle. 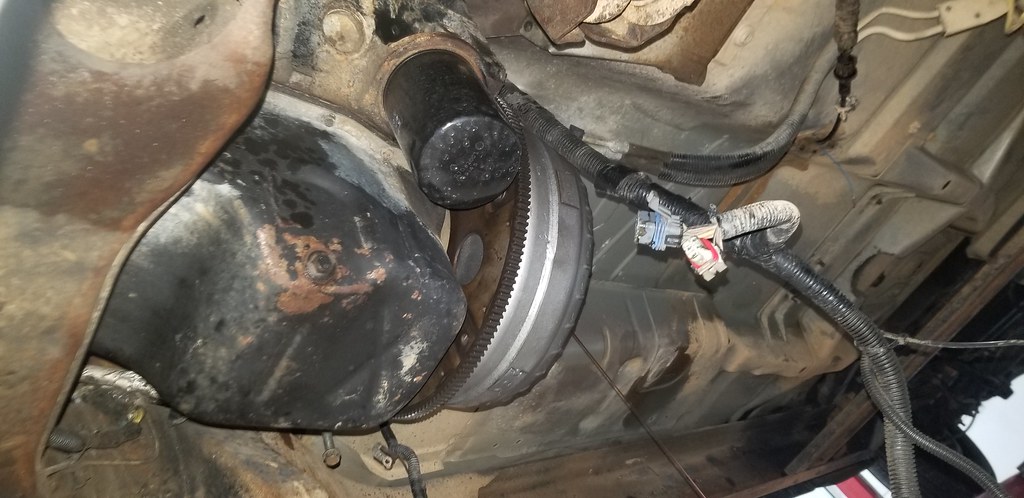 20210223_201232 by Michael Crawford, on Flickr 20210223_201232 by Michael Crawford, on Flickrgot the converter and flexplate pulled, found a leaking rear main. Replaced the leaking rear main. My those have gotten expensive from the FLAPS.  20210224_190256 by Michael Crawford, on Flickr 20210224_190256 by Michael Crawford, on Flickr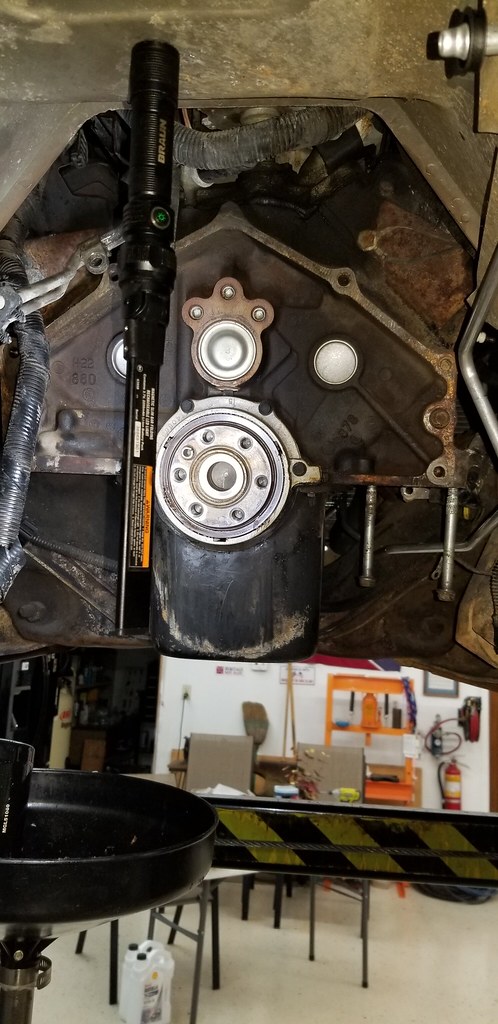 20210225_181059 by Michael Crawford, on Flickr 20210225_181059 by Michael Crawford, on Flickrwent ahead and cleaned up the vortec oil cooler adapter, resealed all the threads, etc, really went the whole way on it in hopes of a long, leak free life. I even did it twice! Improper install first time, used the dorman kit from the FLAPS the second time, following some guidance I got online. Success! I also got the new hoses in, the hole in the motor mount for the line clips, cleaned the cooler out in the radiator, etc. you can also see the new trans cooler lines fo rthe 4l80. Well, one new line, one cleaned parts truck line. 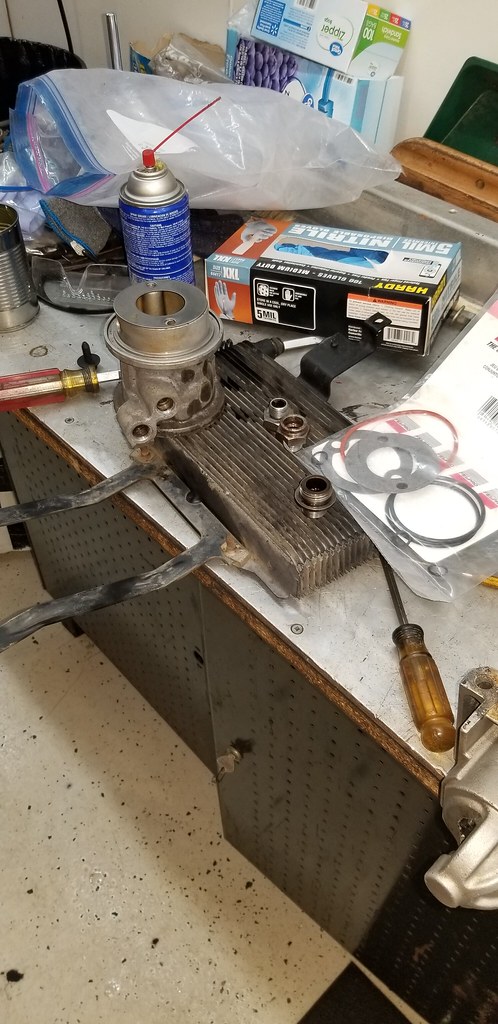 20210225_181046 by Michael Crawford, on Flickr 20210225_181046 by Michael Crawford, on Flickr 20210228_171049 by Michael Crawford, on Flickr 20210228_171049 by Michael Crawford, on Flickrabout this time we put the new trans in. we figured out that the two of us could move it from the tailgate to the rolling cart, roll the trans on the cart under the truck, get the trans jack under the truck, then manhandle the trans onto the jack from the cart under the truck that we couldn't fully stand up under. Yes, it was as sketchy and painful and difficult as it sounds. But that mother****er went in!!! 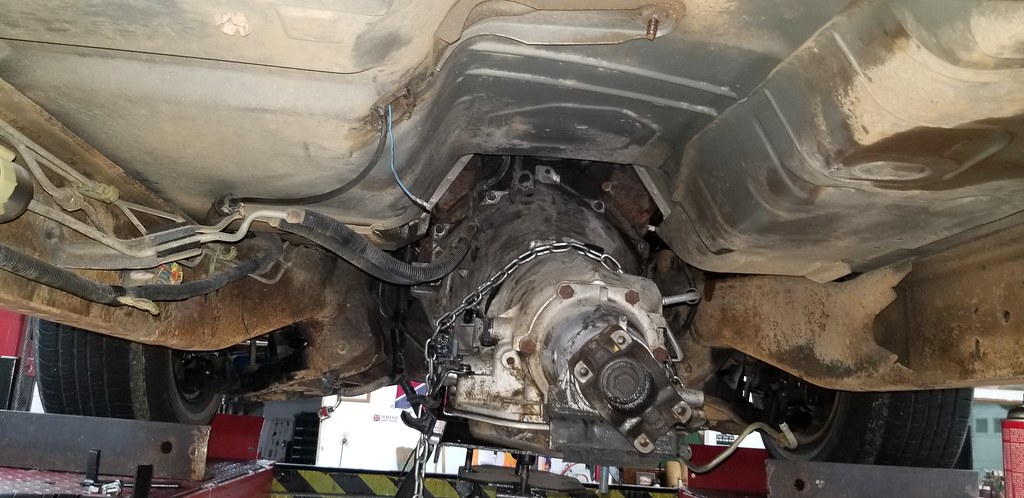 20210226_185254 by Michael Crawford, on Flickr 20210226_185254 by Michael Crawford, on Flickrwent ahead and got the long tubes in next. The drivers side fell in, passengers put up a bit of a fight but finally went in with brute force and leverage. Got the copper gaskets in, and the insulation on the plug wires. Getting all the header bolts in was definitely tough, especially with carpal tunnel. But after a few hours of aggravation, we got them all in and tight. After a few heat cycles, I put the locks on the bolts. Needed to tweak a couple, and there were two bolts that COULD NOT get locks due to tube proximity. But, done.  20210226_204057 by Michael Crawford, on Flickr 20210226_204057 by Michael Crawford, on Flickr 20210226_205513 by Michael Crawford, on Flickr 20210226_205513 by Michael Crawford, on Flickr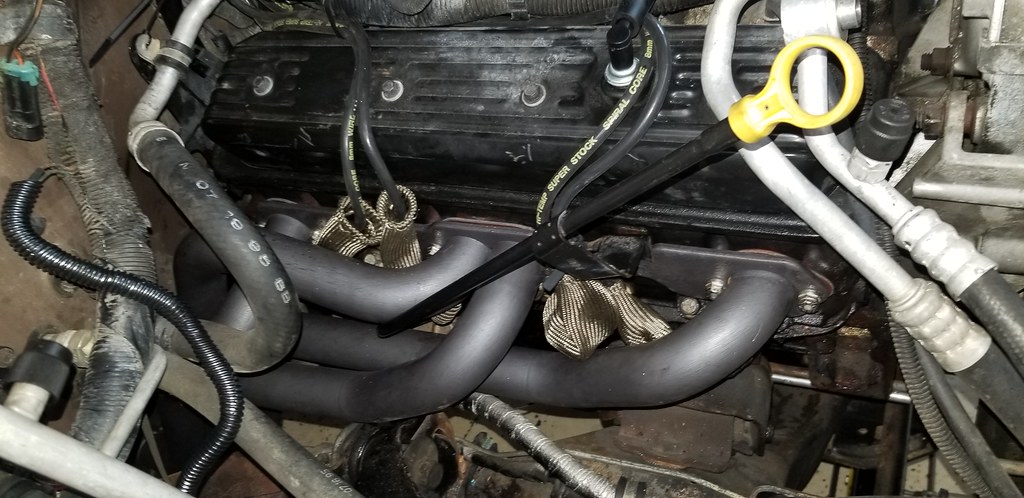 20210228_151811 by Michael Crawford, on Flickr 20210228_151811 by Michael Crawford, on Flickr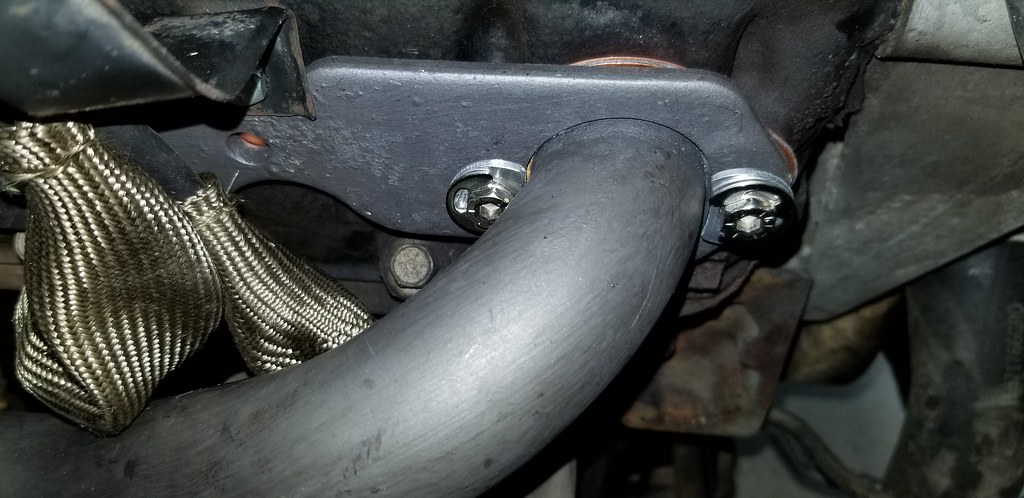 20210308_181210 by Michael Crawford, on Flickr 20210308_181210 by Michael Crawford, on Flickrthe exhaust came next. Unfortunately, the y pipe met with the crossmember pretty hard. Solution was to cut the pipes, shorten a few inches, and clamp back together with the stainless band clamps. Worked out just fine. Sounds good as well! Seems like we make more power with the headers, but too many variables have changed for me to know for sure.  20210228_171008 by Michael Crawford, on Flickr 20210228_171008 by Michael Crawford, on Flickr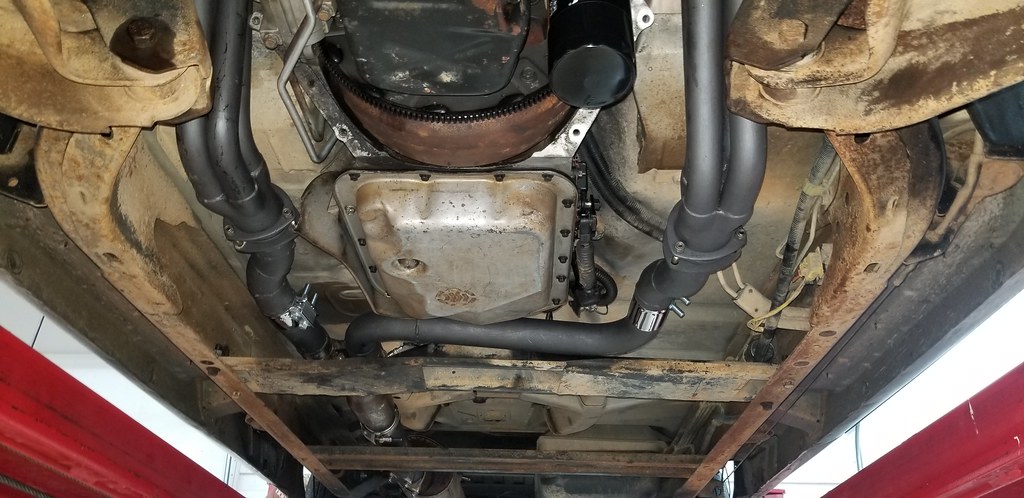 20210304_190307 by Michael Crawford, on Flickr 20210304_190307 by Michael Crawford, on Flickrim a little out of chronological order here. Sorry. Just too much going on at one time here to really do things justice. Sorry.... anyway, I resealed the trans. New o rings on the sensors, new output shaft seal, filter, trans pan gasket, etc. swapped out the wiring that needed changed and altered, extended the oxygen sensor leads to reach the new location. No sludge in the pan, and it seemed like a great trans. No concerns noted. Went ahead and pulled the grille and front bumper to hook up the auxiliary cooler, as well as the in radiator cooler. And I finally installed the sensor for the outside temp in the overhead console. I was there after all.... the behind bumper air guide was different to clear the cooler lines, FYI. Also the 2500 crossmember was significantly different fron the 1500, so I reused the 1500 piece. I also added the temp sensor in the test port on the trans, and reused the range switch from the 4l60 as I knew it worked.  20210228_170959 by Michael Crawford, on Flickr 20210228_170959 by Michael Crawford, on Flickr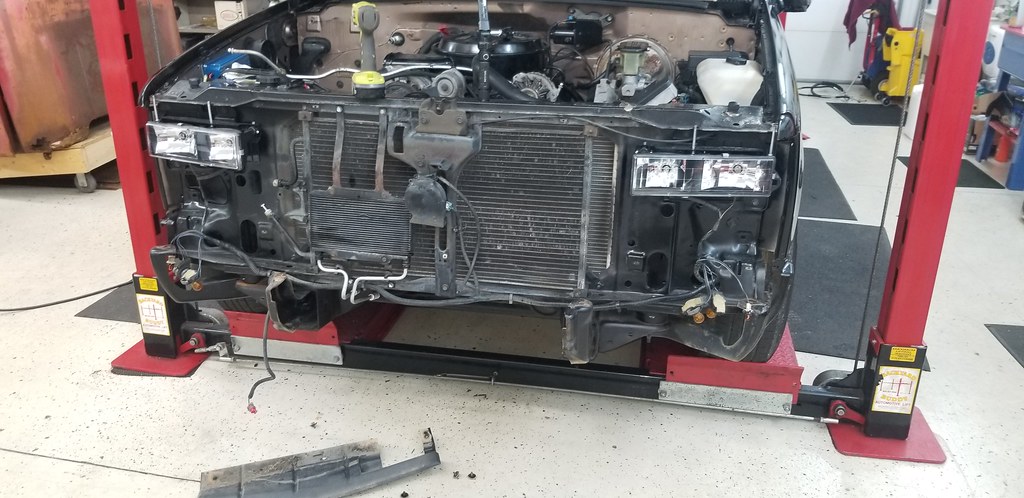 20210301_183146 by Michael Crawford, on Flickr 20210301_183146 by Michael Crawford, on Flickrwhile I was in there, I went ahead and converted to the later AC system parts, except for the compressor and brackets. Just haven't gotten there yet. But its on the short list, cause im fat, live in the south, and drive a black truck.... anyway, getting stuff buttoned up, I noticed that the intake tube to the fender has a restriction at the end. My bet is for NVH reasons, and I could see it choking off power. So I cut it off. 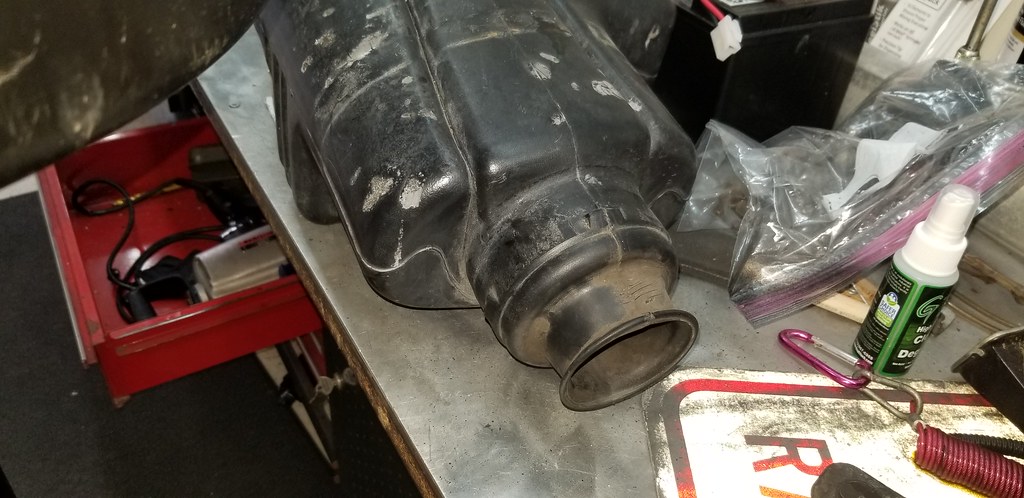 20210228_171109 by Michael Crawford, on Flickr 20210228_171109 by Michael Crawford, on Flickr 20210308_181240 by Michael Crawford, on Flickr 20210308_181240 by Michael Crawford, on Flickr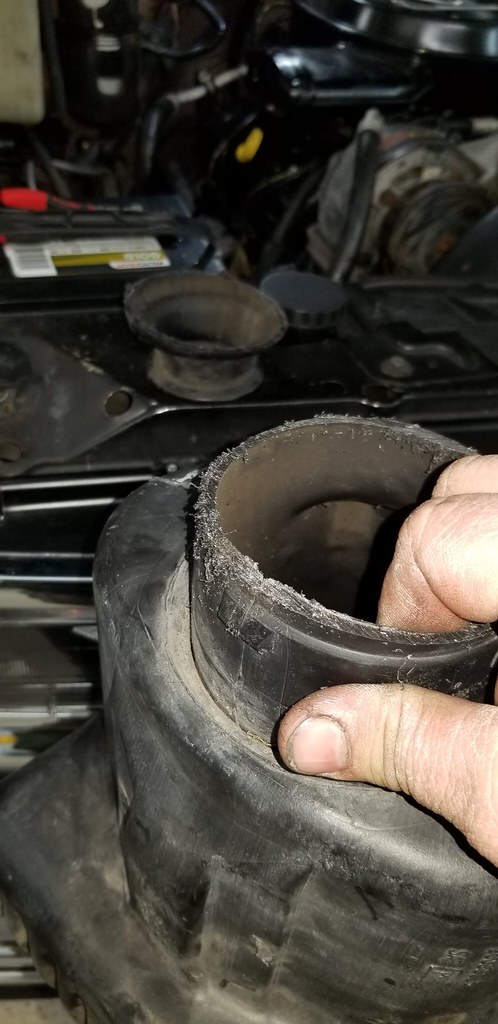 20210308_181336 by Michael Crawford, on Flickr 20210308_181336 by Michael Crawford, on Flickrsome point in here, I trimmed up the new floor mats. Not mission critical, but felt good to do.  20210228_172008 by Michael Crawford, on Flickr 20210228_172008 by Michael Crawford, on Flickranyway, today the replacement chip burner came in. the one I had died of old age. Got the new prom burned, put in, and proceeded to do this: 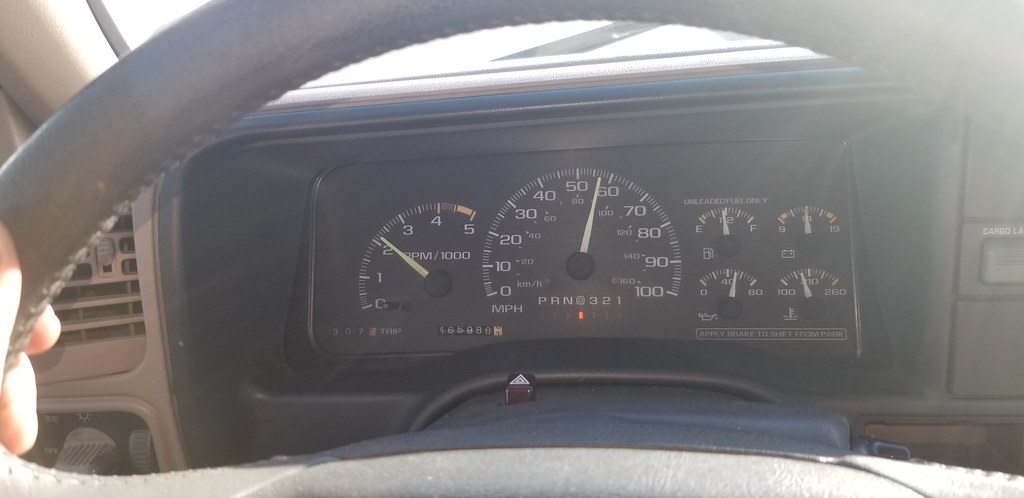 20210311_164521 by Michael Crawford, on Flickr 20210311_164521 by Michael Crawford, on Flickr 20210311_164518 by Michael Crawford, on Flickr 20210311_164518 by Michael Crawford, on Flickrruns good, shifts FANTASTIC. Seems slower on takeoff, but thats probably due to the different gearing in the trans. To finish out this update: I love billet wheels. Im a 90s kid, sue me. Id been hunting a set for this truck, and came across a fair deal on some eagle alloy 206 wheels, 16x8, wrong center caps, dead tires, and scruffy. $250, which was CHEAP in my area. So I bought them.  Screenshot_20210226-104309_Messages by Michael Crawford, on Flickr Screenshot_20210226-104309_Messages by Michael Crawford, on Flickr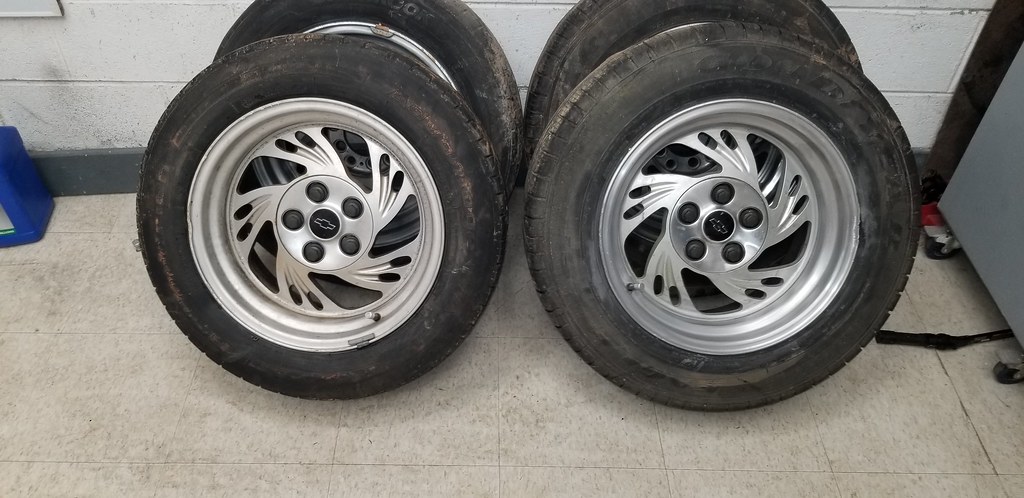 20210226_144536 by Michael Crawford, on Flickr 20210226_144536 by Michael Crawford, on Flickrspent some time with some 1500, 2000, 3000, 4000, and various compounds, and got here. 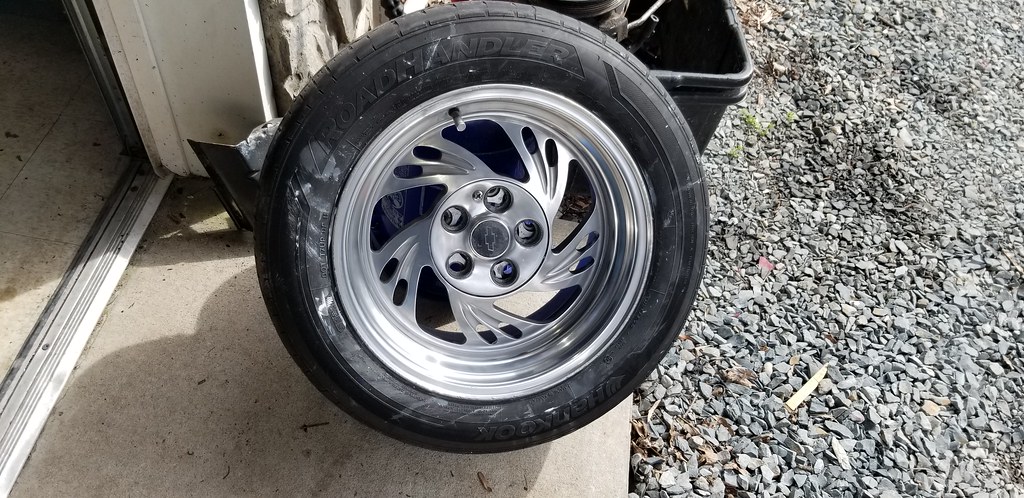 20210306_141211 by Michael Crawford, on Flickr 20210306_141211 by Michael Crawford, on Flickrmounted up, found the caps didn't even come close to fitting, and started hunting another set. Not about to spend 75 each on ebay, so I went trolling factory caps that may work. Came across these from impala ss. Well see....  20210306_170736 by Michael Crawford, on Flickr 20210306_170736 by Michael Crawford, on Flickr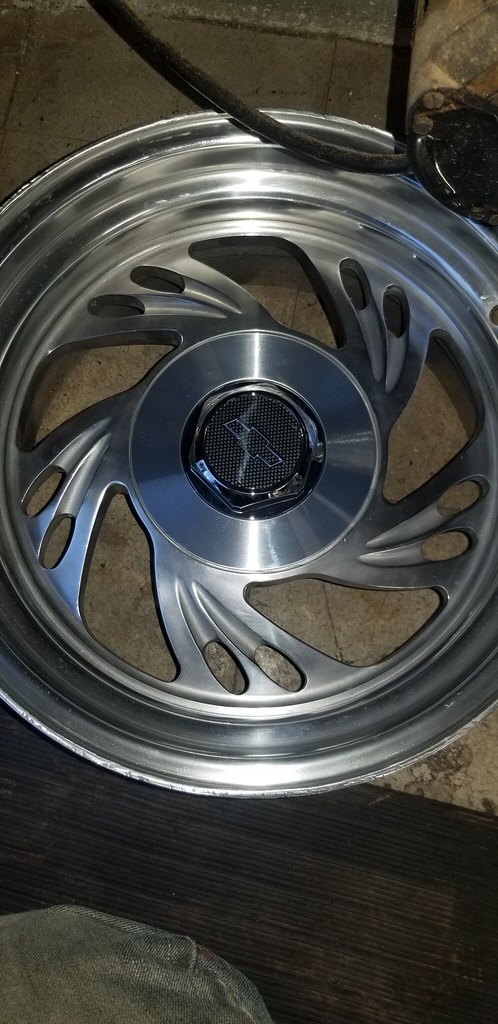 20210311_182609 by Michael Crawford, on Flickr 20210311_182609 by Michael Crawford, on Flickrnegotiated a deal for the tires off the service body, which are cooper discoverer Hts, in 245/75/16. should fill out nicely on here with the mudflaps and such. Stay tuned, more to come later. |
|
|

|
 |
| Bookmarks |
|
|