
|
 09-10-2025, 04:38 AM
|
#401 | |
|
Registered User
Join Date: Jan 2022
Location: Conn.
Posts: 297
|
Re: Long Time Coming......
Quote:
__________________
Glenn 1951 3100, Area51 1955 BelAir, 4EVER17 1987 R10, Ethel Copper Hill Rod & Custom http://67-72chevytrucks.com/vboard/s...d.php?t=829856 |
|

|

|
|
09-13-2025, 02:52 PM
|
#402 |
|
Registered User
Join Date: Jan 2022
Location: Conn.
Posts: 297
|
Re: Long Time Coming......
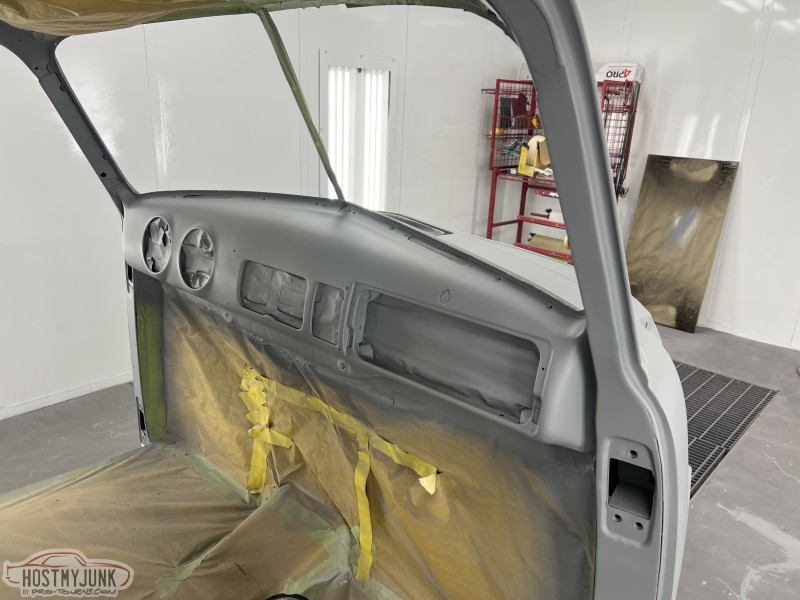
I spent about four hours today blocking the firewall and doors. This first picture shows how the built in guide coat works. As you can see, any low spots, or where ther heavy orange peel still is remains the pinkish color while the highs are now grey.
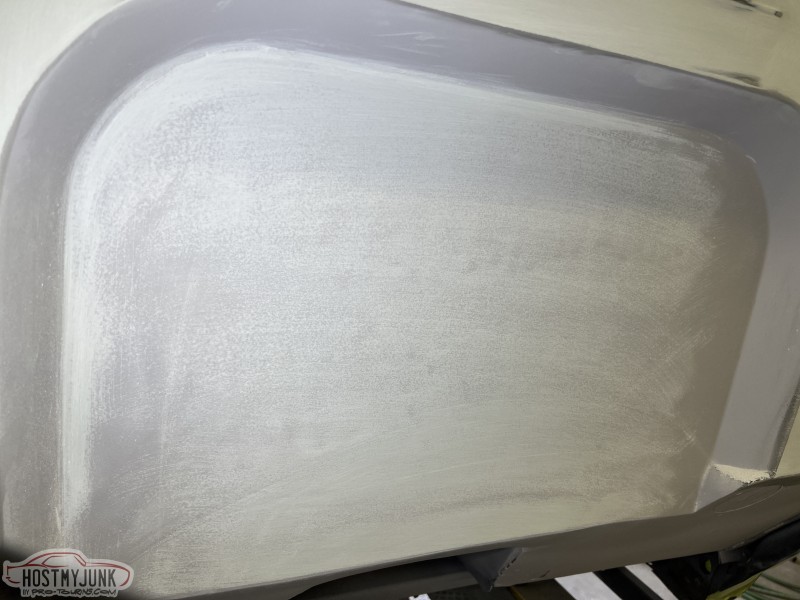 I started with 100, then applied a dark guide coat and sanded again with 150. That is fine enough for final primer. 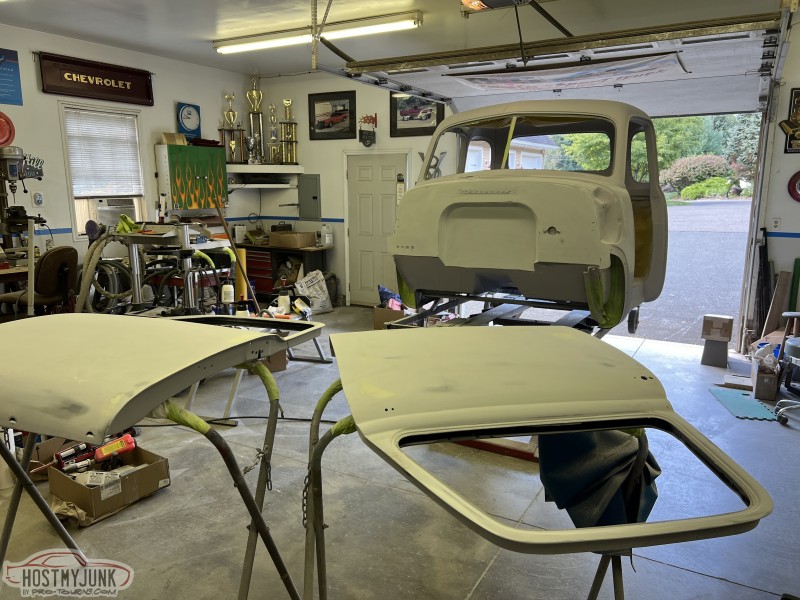 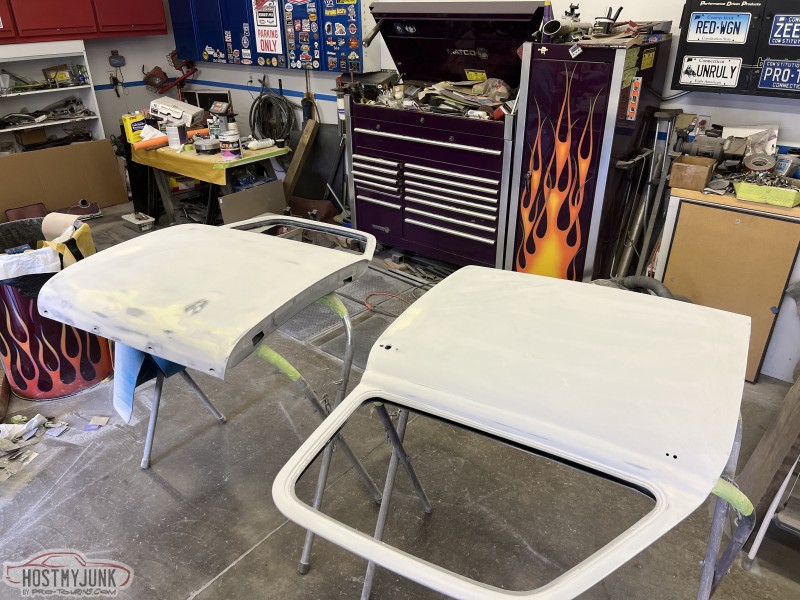 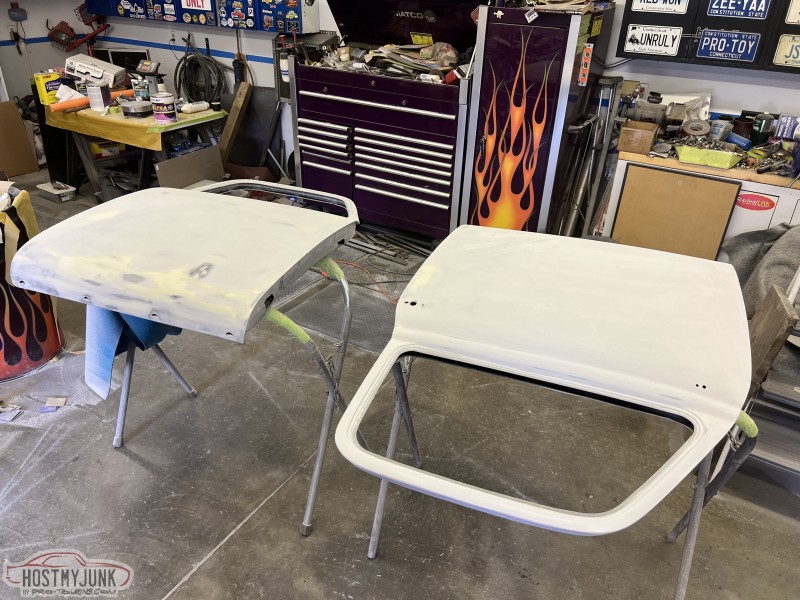 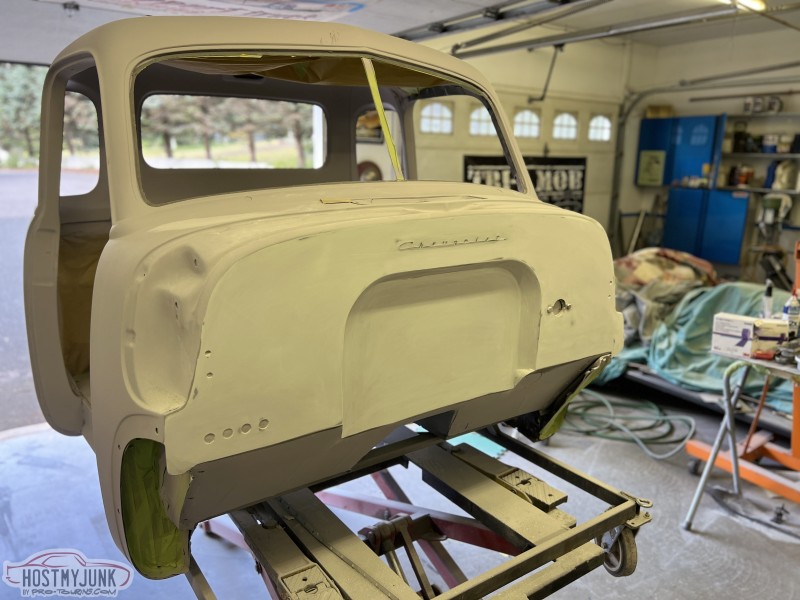
__________________
Glenn 1951 3100, Area51 1955 BelAir, 4EVER17 1987 R10, Ethel Copper Hill Rod & Custom http://67-72chevytrucks.com/vboard/s...d.php?t=829856 |
|
|
|
|
09-14-2025, 11:56 AM
|
#403 | |
|
Registered User
Join Date: Oct 2009
Location: Hoskins nebraska
Posts: 410
|
Re: Long Time Coming......
Quote:
Just like you said, hose clamps facing up before the body goes on, zip tie retainers on the back of the intake manifold instead of the old style you could release with a pick or screwdriver, tow hooks that the bolts won't come out right a sawzall because they hit the bumper brackets. Or my personal favorite on the 2010 and up Camaros. First step in removing the heater case is to remove the windshield to access the bolts for the case that come in from the top. Best thing i ever did was get out of the dealership in 20 and got on with the restoration shop 20 min from my house.
__________________
Fast, Cheap, Reliable. You may pick two My 47/S10 build http://67-72chevytrucks.com/vboard/s...d.php?t=679723 |
|
|
|
|
|
09-14-2025, 12:06 PM
|
#404 |
|
Senior Member
 Join Date: Sep 2017
Location: Bryan, Texas
Posts: 2,522
|
Re: Long Time Coming......
That is some nice work. Thanks for sharing it.
__________________
8man-aka Robert 1948 on a S10 Frame, small block with a carb 1954 Cab, 53 Front and Bed, 50 Doors, S10 Frame, Power TBD Build thread: "]http://67-72chevytrucks.com/vboard/showthread.php?t=746899&highlight=wife%27s+48[/URL] [/URL]http://67-72chevytrucks.com/vboard/showthread.php?t=840204 |
|
|
|
|
09-14-2025, 12:07 PM
|
#405 |
|
Registered User
Join Date: Oct 2009
Location: Hoskins nebraska
Posts: 410
|
Re: Long Time Coming......
The hours you put into the body work show. Very nicely done.
__________________
Fast, Cheap, Reliable. You may pick two My 47/S10 build http://67-72chevytrucks.com/vboard/s...d.php?t=679723 |
|
|
|
|
09-14-2025, 01:40 PM
|
#406 | |
|
Registered User
Join Date: Jan 2022
Location: Conn.
Posts: 297
|
Re: Long Time Coming......
Quote:
Having been in this trade for my entire career I wholeheartedly agree with you. Not a single thought goes into anything but ease of assembly at the factory. How something can be repaired or replaced is Never on their mind. My father-in-law had a 2007 Bentley GT coupe. The headlight went out so he called the dealer to find out how much because at a glance he couldn't see how to do it. He was told the cost was $2500!! Why you ask, becasue in order to access it the fender and front bumper assembly need to be removed first, then change the bulb and reassemble. Being a retired mechanical engineer he just took his time and did it himself carefully. Crazy!
__________________
Glenn 1951 3100, Area51 1955 BelAir, 4EVER17 1987 R10, Ethel Copper Hill Rod & Custom http://67-72chevytrucks.com/vboard/s...d.php?t=829856 |
|
|
|
|
|
09-14-2025, 01:46 PM
|
#407 | ||
|
Registered User
Join Date: Jan 2022
Location: Conn.
Posts: 297
|
Re: Long Time Coming......
Quote:
Quote:
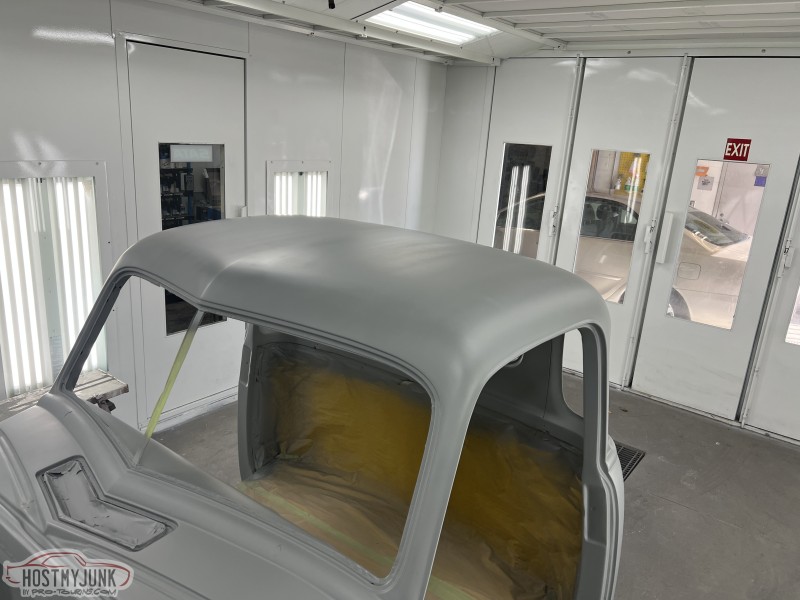
Today was another five-hours block of sanding! Cowl, door jambs and roof are now done with the first 100, then 150 grit. I have a couple pin holes and minor things to touch up. But all in all I'm very happy with what I am seeing. 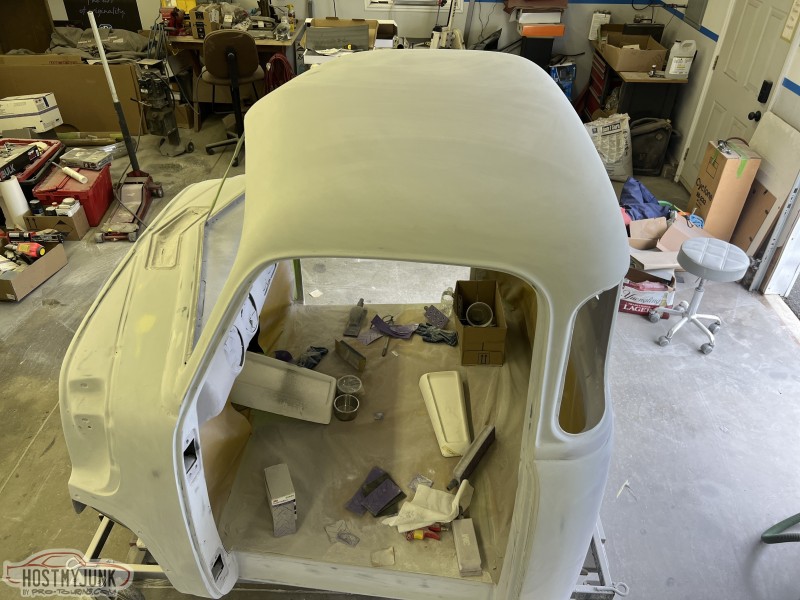 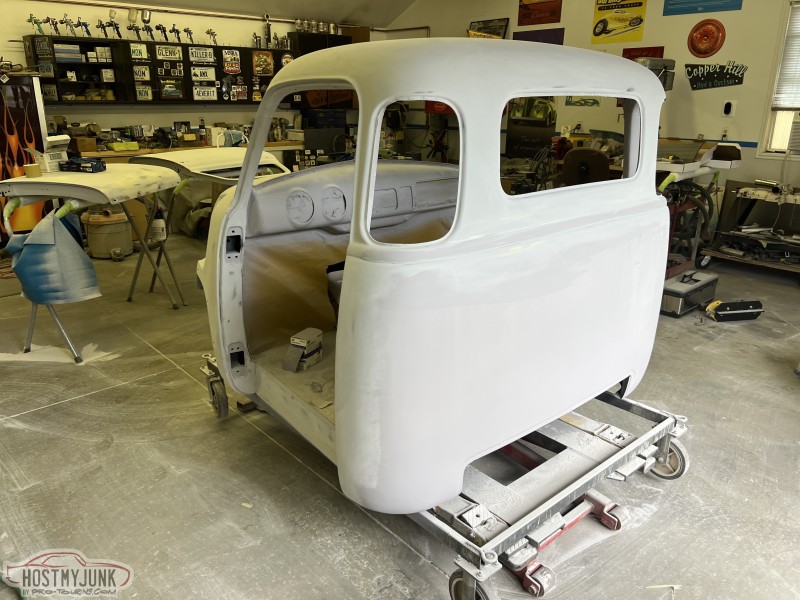 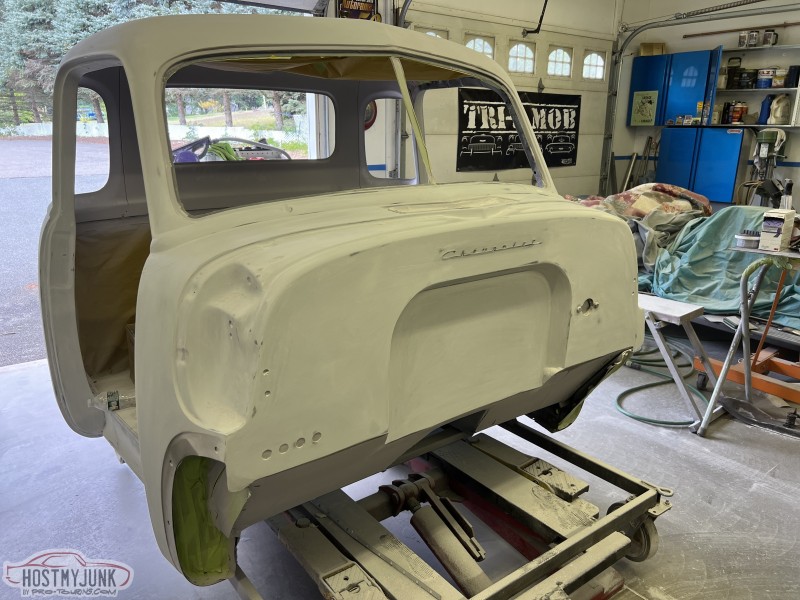 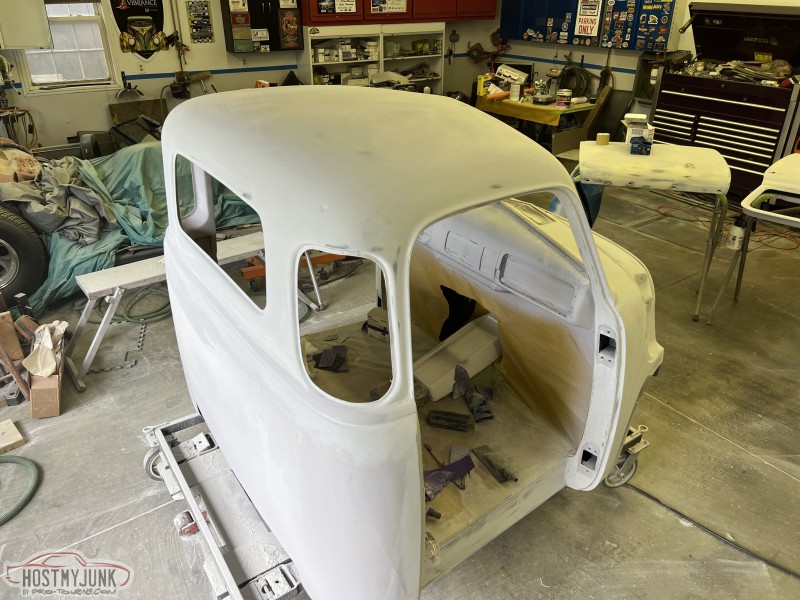 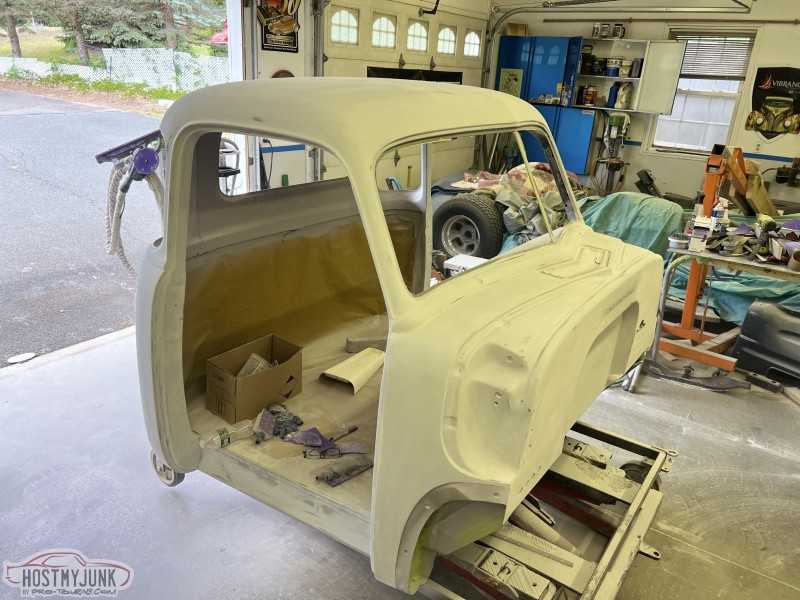 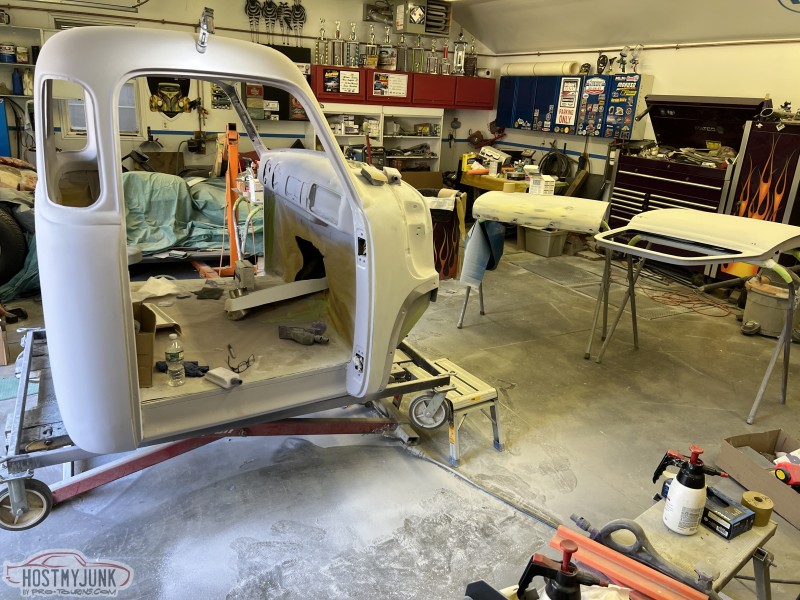 .
__________________
Glenn 1951 3100, Area51 1955 BelAir, 4EVER17 1987 R10, Ethel Copper Hill Rod & Custom http://67-72chevytrucks.com/vboard/s...d.php?t=829856 |
||
|
|
|
|
09-28-2025, 01:11 PM
|
#408 |
|
Registered User
Join Date: Jan 2022
Location: Conn.
Posts: 297
|
Re: Long Time Coming......
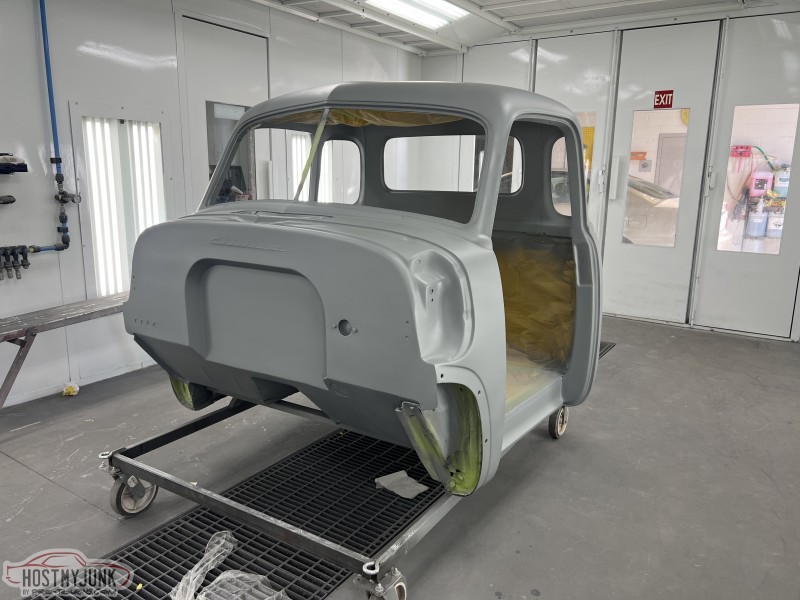
The cab and doors are now fully block-sanded and ready to go back to the booth for what I expect is the final primer application. I spent the better part of yesterday and another 6 hours today finishing it up. I then pushed the cab outside to clear some space and get a good look at it.
  With the cab outside and out of the way, I spent some time cleaning and rearranging things in preparation for the cab returning home. The next step, when back home, will be to install it on the chassis to start fitting the nose. With that, I got everything out of the way and swept, vacuumed, and cleaned as best I could. I then moved the chassis into the center bay of the shop so I will have the best access to work on the nose. 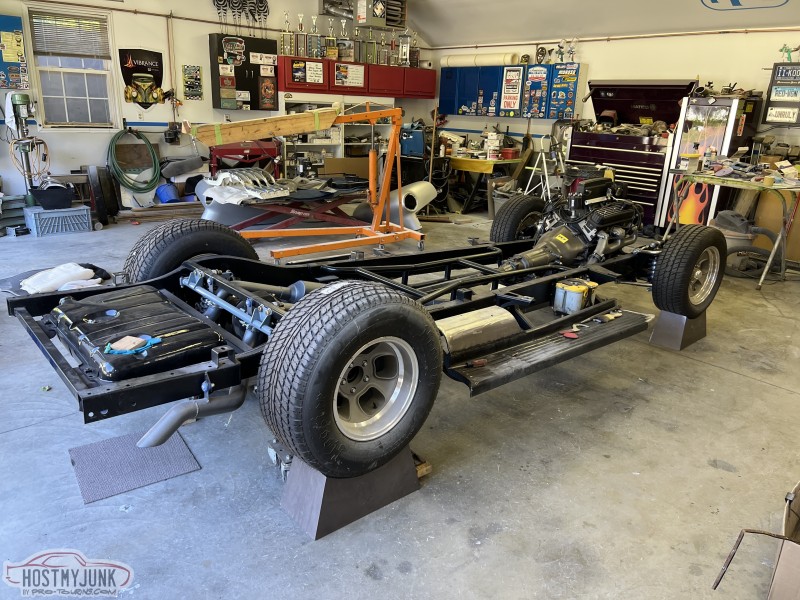 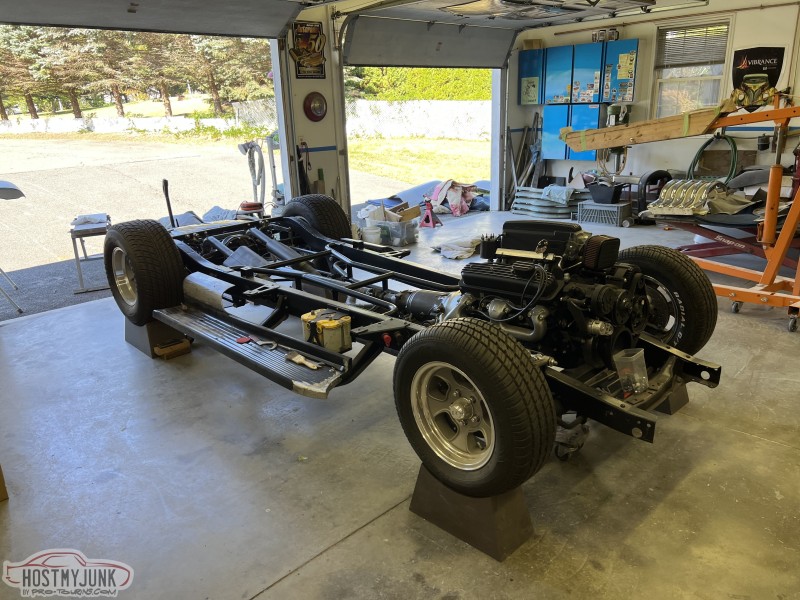 With that in place I wiped down the nose parts and brought them into the shop. Having things cleaned and arranged better always gives me satisfaction. I hate a cluttered, messy shop, but when in the middle of a project, it's hard to keep it clean and nice. Especially when doing body work. 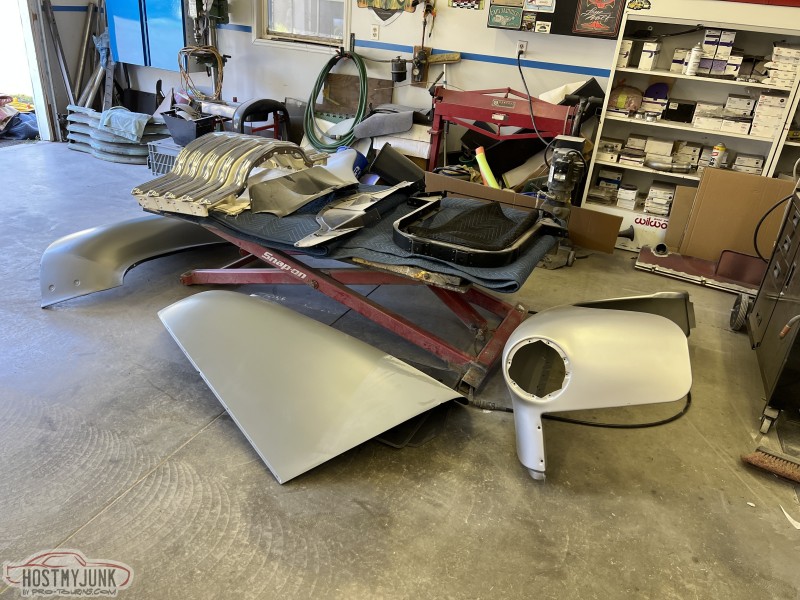 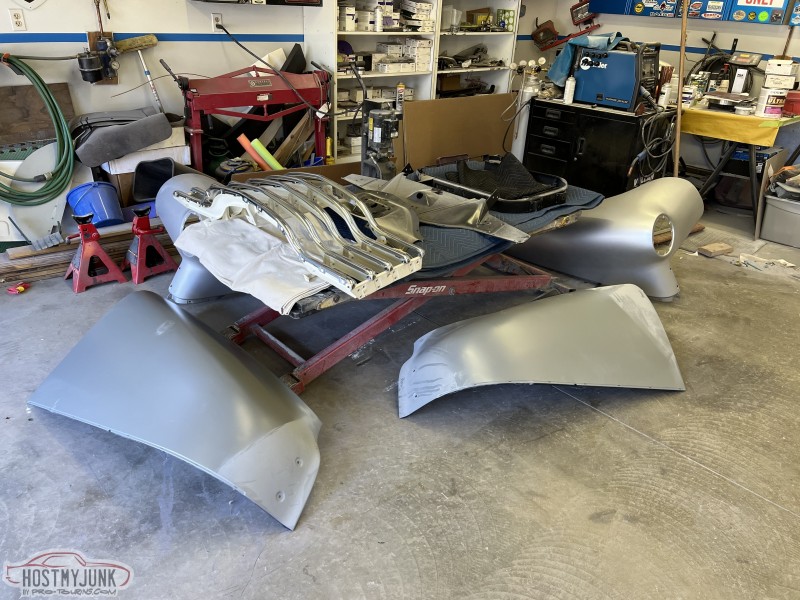 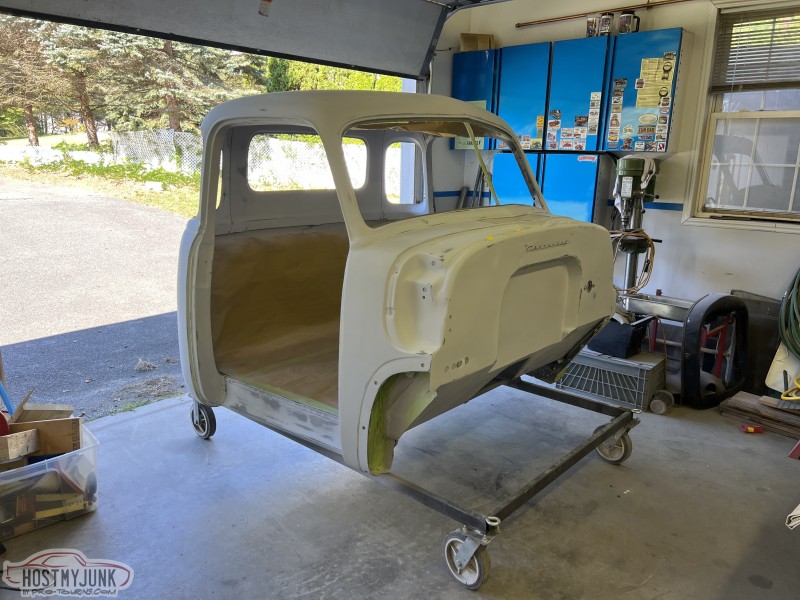 .
__________________
Glenn 1951 3100, Area51 1955 BelAir, 4EVER17 1987 R10, Ethel Copper Hill Rod & Custom http://67-72chevytrucks.com/vboard/s...d.php?t=829856 |
|
|
|
|
09-29-2025, 09:14 AM
|
#409 |
|
Registered User
Join Date: Nov 2010
Location: calgary alberta
Posts: 9,039
|
Re: Long Time Coming......
nice to be at that stage. gonne feel great to get that last coat of primer on and start assembling.
curious how big is your shop? looks spacious compared to my 26x30, but then maybe I just need to have less stuff in mine. lol. |
|
|
|
|
09-29-2025, 03:42 PM
|
#410 | |
|
Registered User
Join Date: Jan 2022
Location: Conn.
Posts: 297
|
Re: Long Time Coming......
Quote:
I have two garages at my house. The attached is a 36x26, and it has all the typical household items like daily drivers, lawn mowers and the like. My back yard shop is 36x28 and is strictly for my hot rod projects: no rakes, bikes or anything like that. When I bought this house in 2006, it already had the attached garage, and we had a separate savings account ready for the new shop in the backyard. We moved in on May 1st, and broke ground on August 1st. Having grown up in an apartment until I was in the 7th grade, it is not lost on me how lucky I am to have the things I do.
__________________
Glenn 1951 3100, Area51 1955 BelAir, 4EVER17 1987 R10, Ethel Copper Hill Rod & Custom http://67-72chevytrucks.com/vboard/s...d.php?t=829856 Last edited by gsinon; 09-30-2025 at 03:23 PM. |
|
|
|
|
|
09-30-2025, 03:27 PM
|
#411 |
|
Registered User
Join Date: Jan 2022
Location: Conn.
Posts: 297
|
Re: Long Time Coming......
While the cab isn't going to the shop until Monday, I was able to bring the doors in and get them in primer.
Here they are with three coats of a final round of primer surfacer. I'm thrilled with how they came out. 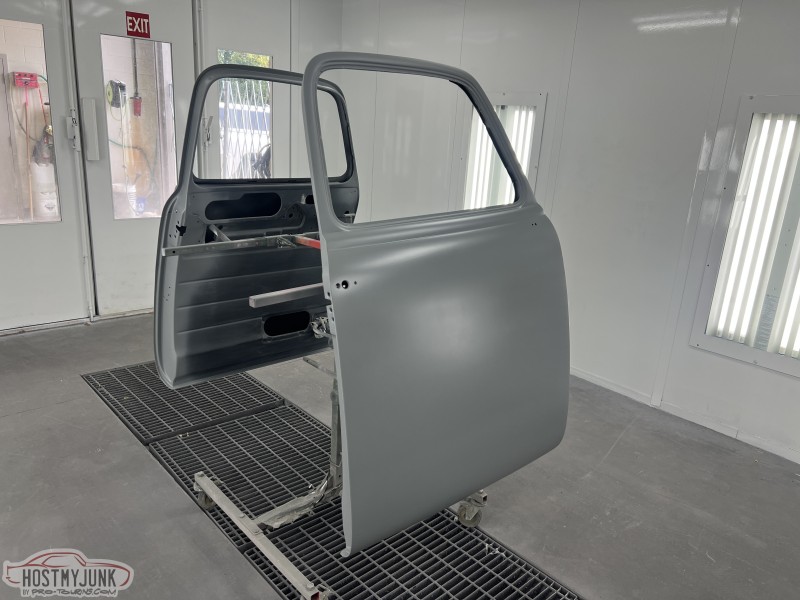 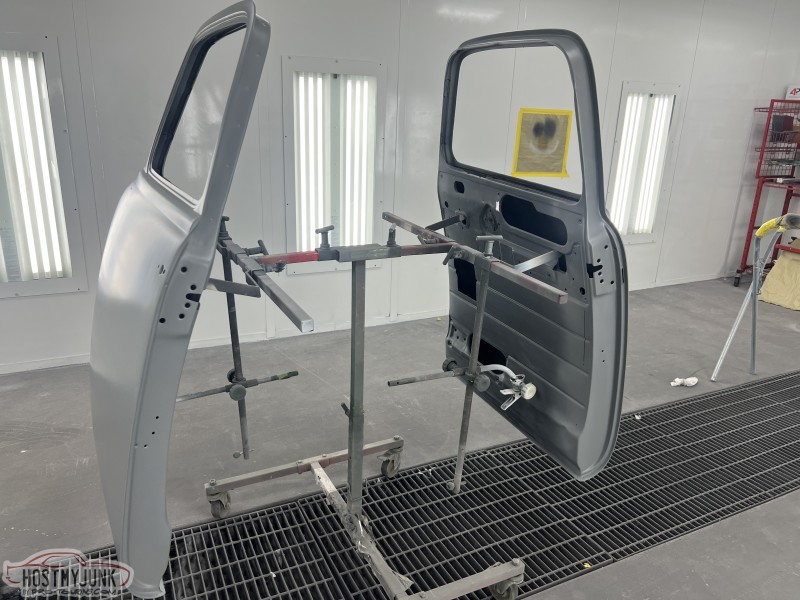 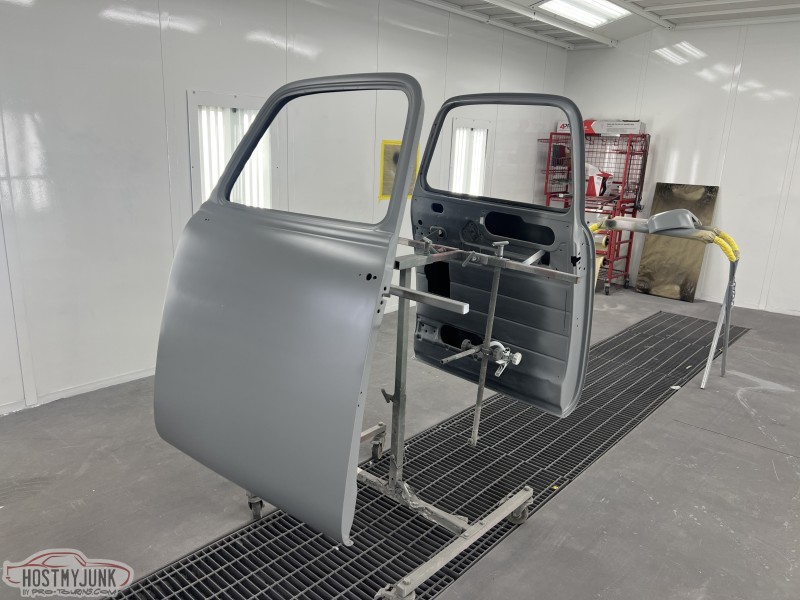 A little bit of a detail picture of where I welded and then molded in the latch plates from Trique Manufacturing. We all know they sell them as bolt in kit, but it just looks unfinished that way to me. I wanted it to look as factory-like as possible. 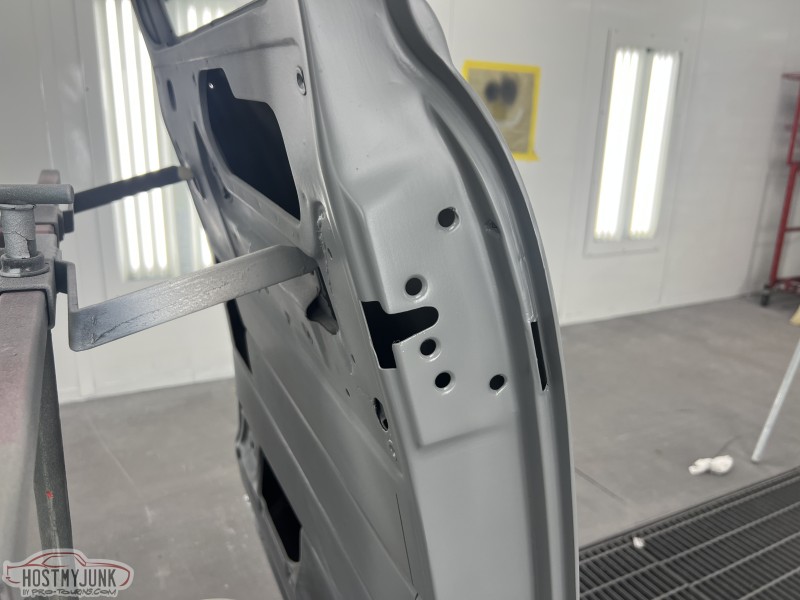 .
__________________
Glenn 1951 3100, Area51 1955 BelAir, 4EVER17 1987 R10, Ethel Copper Hill Rod & Custom http://67-72chevytrucks.com/vboard/s...d.php?t=829856 |
|
|
|
|
10-07-2025, 04:59 AM
|
#412 |
|
Registered User
Join Date: Jan 2022
Location: Conn.
Posts: 297
|
Re: Long Time Coming......
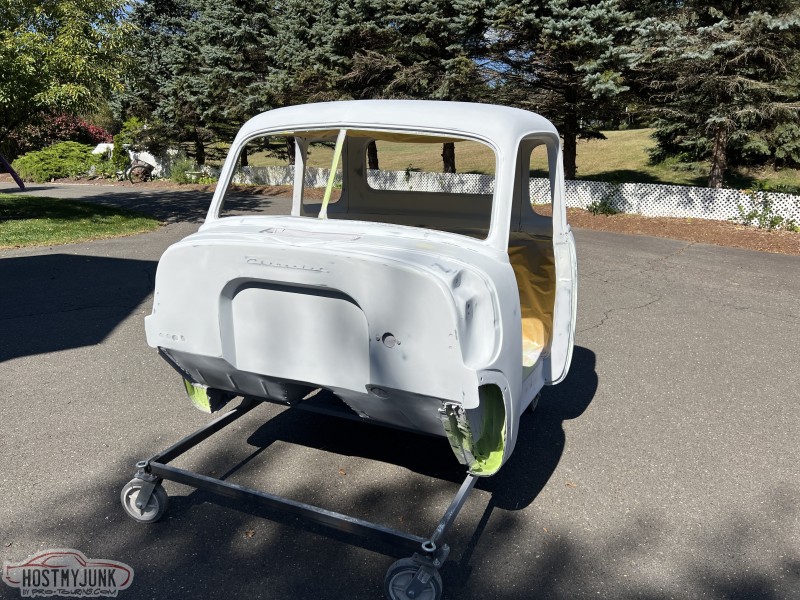
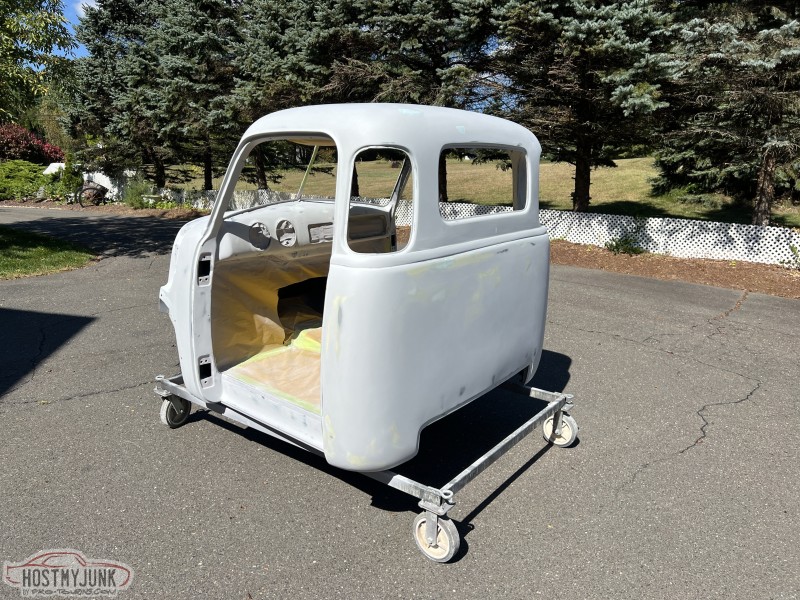
Yesterday was the day where I brought the cab to school and rolled it into the booth for its final round of primer. Three coats, a bake cycle and then loaded back into the trailer for the trip home.
   And back home in the light of day. Next step is to get it back on the chassis and start the process of lining up the front end sheet metal. 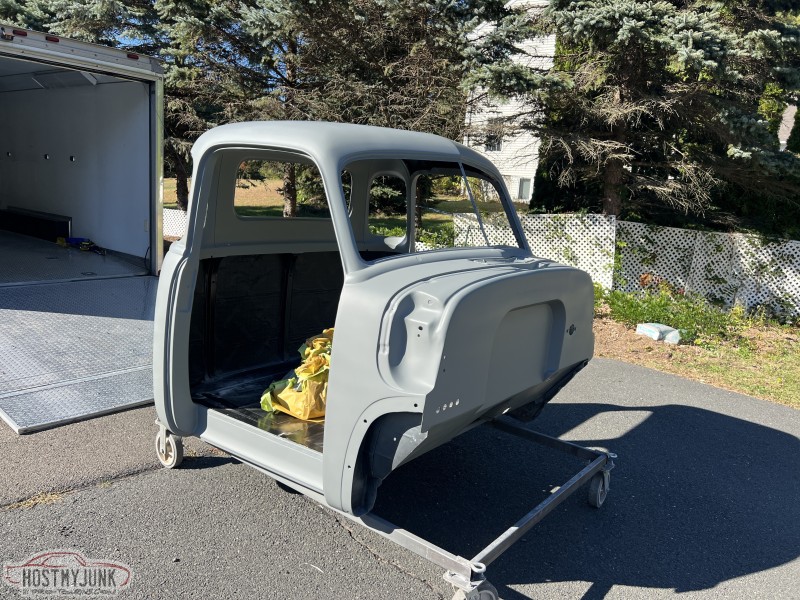 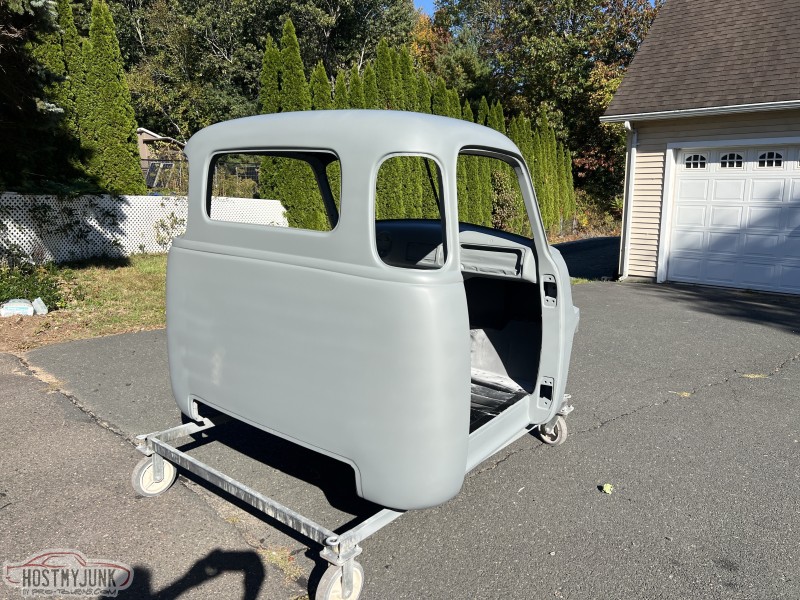 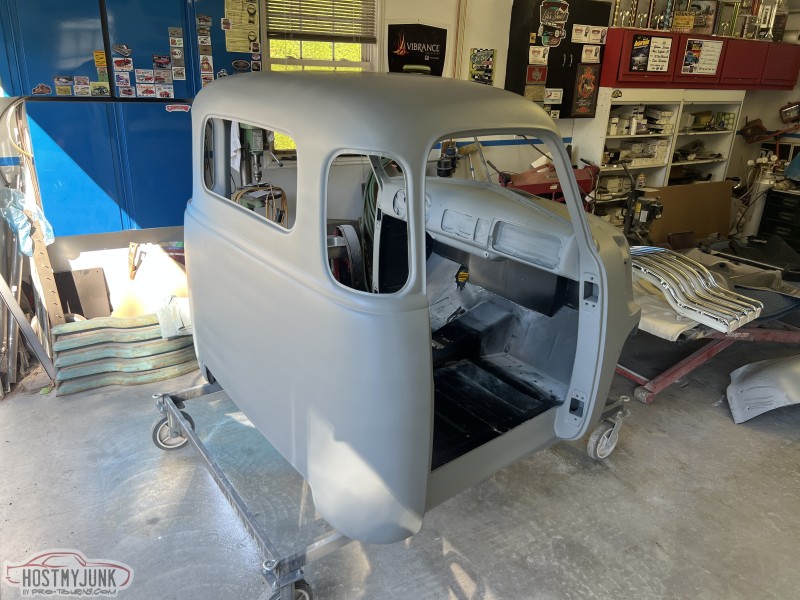 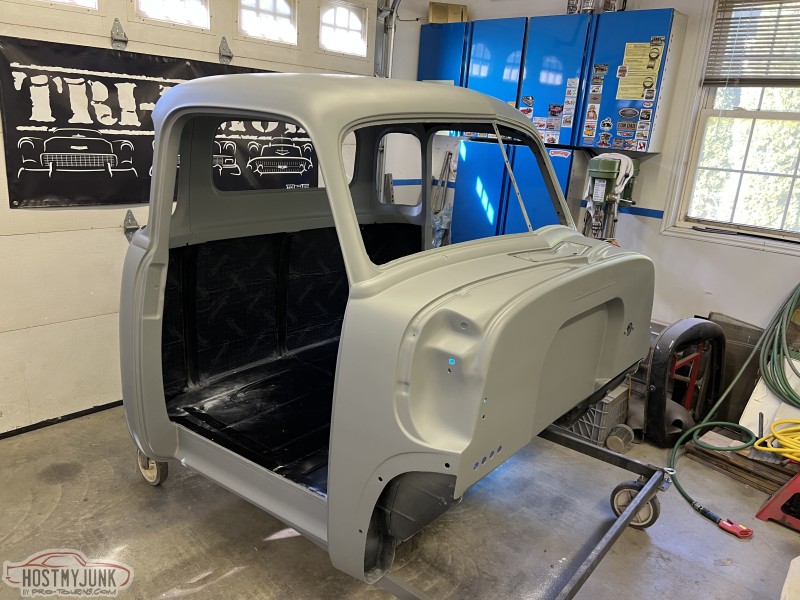 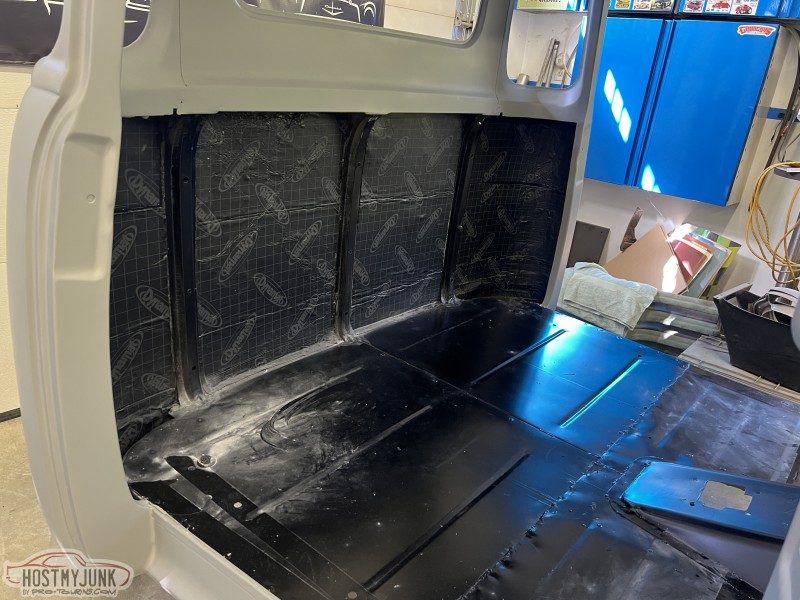 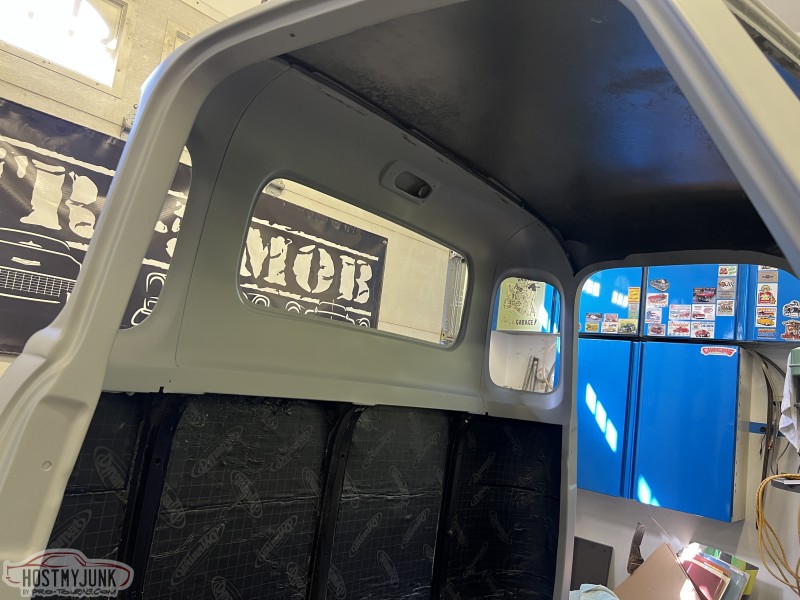 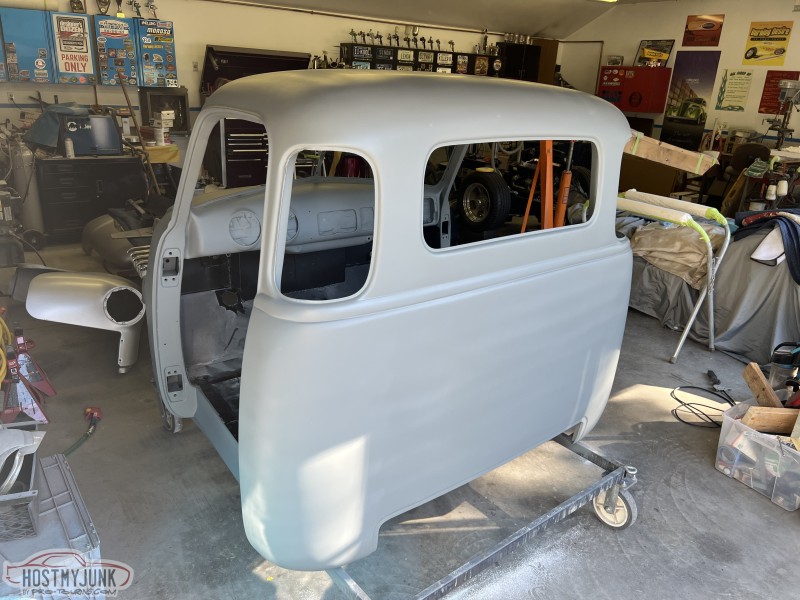
__________________
Glenn 1951 3100, Area51 1955 BelAir, 4EVER17 1987 R10, Ethel Copper Hill Rod & Custom http://67-72chevytrucks.com/vboard/s...d.php?t=829856 |
|
|
|
|
10-07-2025, 05:13 PM
|
#413 |
|
Registered User
Join Date: Jan 2022
Location: Conn.
Posts: 297
|
Re: Long Time Coming......
Title this one as.... Good News, Bad News.
The Good.... I got home from work today at 3 pm, and by 4, the cab was back on the chassis and bolted down solid. 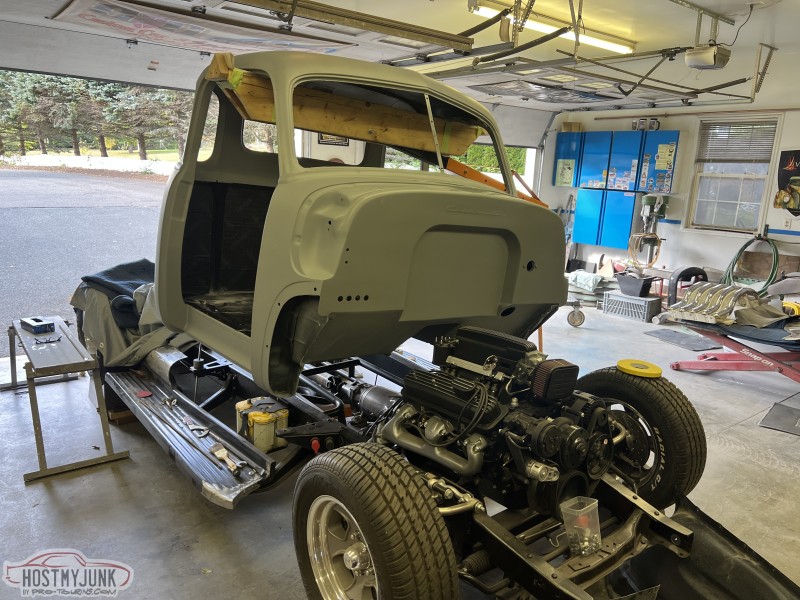 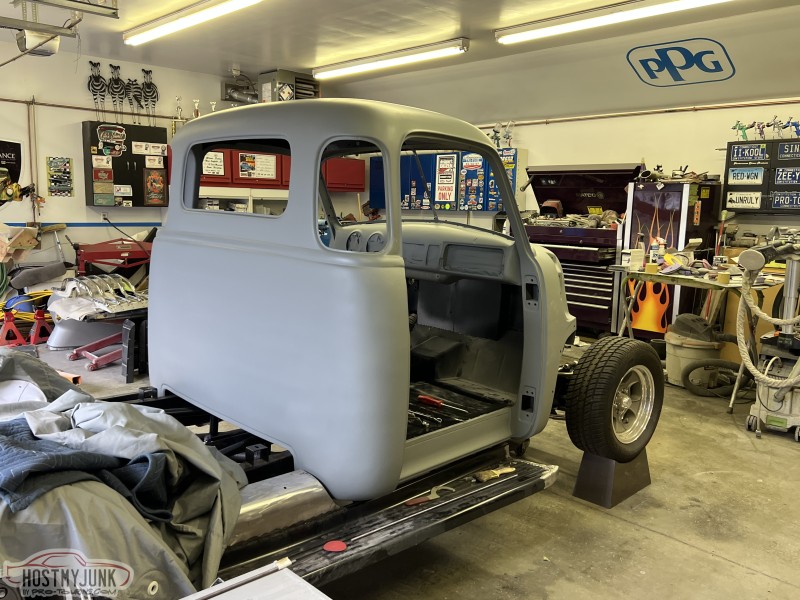 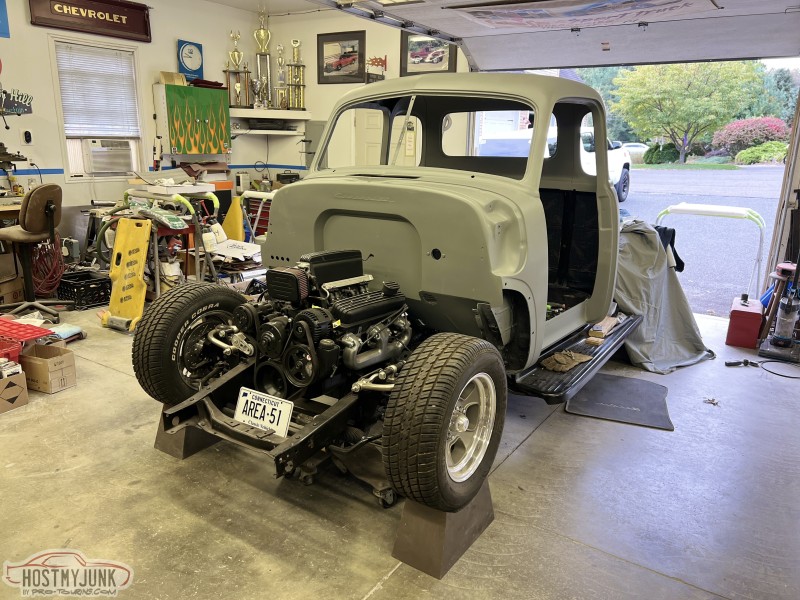   And the bad.... When I installed the new firewall this past spring I measured what felt like 100 times and everything told me I had the clearance for the distributor. I KNOW that I should have bolted the cab back on the chassis to make sure, but I went against my better judgment and didn't. The chassis was buried under covers and stacked with other sheetmetal and crap. I know, I know, I should have...... And now I find that the distributor is right up against the firewall recess. Ugh. I am going to have to now make a small impression behind it so the dizzy can rotate and do what it needs to. Won't take much, but I am annoyed nonetheless. 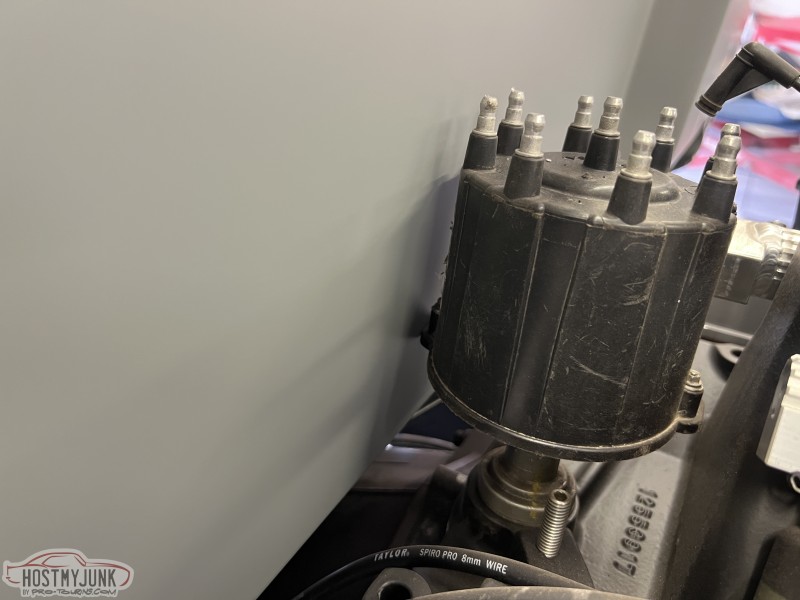 .
__________________
Glenn 1951 3100, Area51 1955 BelAir, 4EVER17 1987 R10, Ethel Copper Hill Rod & Custom http://67-72chevytrucks.com/vboard/s...d.php?t=829856 |
|
|
|
|
10-07-2025, 05:22 PM
|
#414 |
|
Senior Member
Join Date: Sep 2017
Location: Bryan, Texas
Posts: 2,522
|
Re: Long Time Coming......
Those tape measures lie! I've had them do it to me. You are lucky it can be fixed pretty easily, once you get over the emotions of that lying tape measure.
__________________
8man-aka Robert 1948 on a S10 Frame, small block with a carb 1954 Cab, 53 Front and Bed, 50 Doors, S10 Frame, Power TBD Build thread: "]http://67-72chevytrucks.com/vboard/showthread.php?t=746899&highlight=wife%27s+48[/URL] [/URL]http://67-72chevytrucks.com/vboard/showthread.php?t=840204 |
|
|
|
|
10-07-2025, 10:40 PM
|
#415 |
|
Registered User
Join Date: Nov 2010
Location: calgary alberta
Posts: 9,039
|
Re: Long Time Coming......
how about this? cut a good sized hole that will give ample room to do anything needed around the dizzy. then fab up a bolt on cover.
just a thought as no bodywork to do after except to touch up the cut edges with primer. you could use rivnuts on the back side and they would be under the carpet where nobody is gonna notice the small bump. use a fancy fastenermon the side you see from under the hood. it would be like, yeah, this builder was thinking ahead. lol looks like it fit pretty well other than that hiccup |
|
|
|
|
10-08-2025, 08:50 AM
|
#416 |
|
Senior Member
 Join Date: Oct 2014
Location: Eagle, ID
Posts: 3,406
|
Re: Long Time Coming......
While I understand the frustration you probably are feeling, all things considered, I think this is only a small bump in the road for you. Look at the skill set you have! You'll have that whipped out in no time.
|
|
|
|
|
10-08-2025, 11:07 AM
|
#417 |
|
Registered User
Join Date: Nov 2010
Location: calgary alberta
Posts: 9,039
|
Re: Long Time Coming......
what if you build a cover the same basic shape as the existing depressed part of the firewall, just a smaller size but in scale and centered to the existing depression, and make it tall enough to pull the dizzy out if required. leave a flat flange around the outside edge for attaching, possibly with a small lip around the edge for strength, similar to a diff cover. cut the firewall hole smaller than the new cover, obviously, and then bolt the cover on from the engine side of the firewall to make it easier to access. a corresponding removable flap would be needed in the floor covering inside but that part isn't built yet anyway.
just a thought that would save you redoing a bunch of bodywork |
|
|
|
|
10-08-2025, 03:45 PM
|
#418 | ||||
|
Registered User
Join Date: Jan 2022
Location: Conn.
Posts: 297
|
Re: Long Time Coming......
Quote:
Quote:
Quote:
Quote:
Thanks for the comments guys. I do agree that, while frustrating, it is only a minor setback once I determine how I want to fix it. I was just hoping that the cab was in my rearview mirror while now in final primer and I could focus on the front sheet metal. At the end of the day it is not life altering at all. I do like the idea of making something that will bolt on and require far less welding and body filler work too. Something to ponder for sure. Although truth be told, if I do go that route, I would seam seal it closed and not have it removable, but look the part anyway. I have my thinking cap on now.....
__________________
Glenn 1951 3100, Area51 1955 BelAir, 4EVER17 1987 R10, Ethel Copper Hill Rod & Custom http://67-72chevytrucks.com/vboard/s...d.php?t=829856 |
||||
|
|
|
|
10-08-2025, 04:33 PM
|
#419 |
|
Registered User
Join Date: Feb 2021
Location: WestCentral MN,
Posts: 50
|
Re: Long Time Coming......
The original hubcap... might look cool from the inside of the cab...
|
|
|
|
|
10-08-2025, 10:19 PM
|
#420 |
|
Registered User
Join Date: Nov 2010
Location: calgary alberta
Posts: 9,039
|
Re: Long Time Coming......
good idea on the seam sealer and keeping it closed. if, for some reason, it needs to be taken off then just cut the seam sealer and remove the cover, or pull the engine, whatver takes less time and makes more sense for the present conditions.
if it were me I would cut a hole, make a cover, bolt it in with sealer, carry on. no bodywork, primer etc. i would make it look like a smaller versio of the surrounding contours so that it blends in and isn't something that draws the eye. |
|
|
|
|
10-09-2025, 03:58 PM
|
#421 | |
|
Registered User
Join Date: Jan 2022
Location: Conn.
Posts: 297
|
Re: Long Time Coming......
Quote:
__________________
Glenn 1951 3100, Area51 1955 BelAir, 4EVER17 1987 R10, Ethel Copper Hill Rod & Custom http://67-72chevytrucks.com/vboard/s...d.php?t=829856 |
|
|
|
|
|
10-18-2025, 04:11 PM
|
#422 |
|
Registered User
Join Date: Jan 2022
Location: Conn.
Posts: 297
|
Re: Long Time Coming......
The part of the project that I have been dreading the most, hanging and fitting the front sheet metal. I have heard the horror stories and I know this will not be fun or easy. But here we go none the less.
I have the front hood brace out being media blasted so the hood is not solid and square, but I still wanted to get something done so I got it mounted today. Again, I will state that without that brace I know the hood is easily twisting and floppy for now. Nothing is set in stone yet.   In any case, it looks decent at the cowl as of right now. I then hung the fenders loosely at first. I was able to manipulate the right side fender up to where it sits nicely on the cowl side and is tucked up tight to the bottom of the hood line. 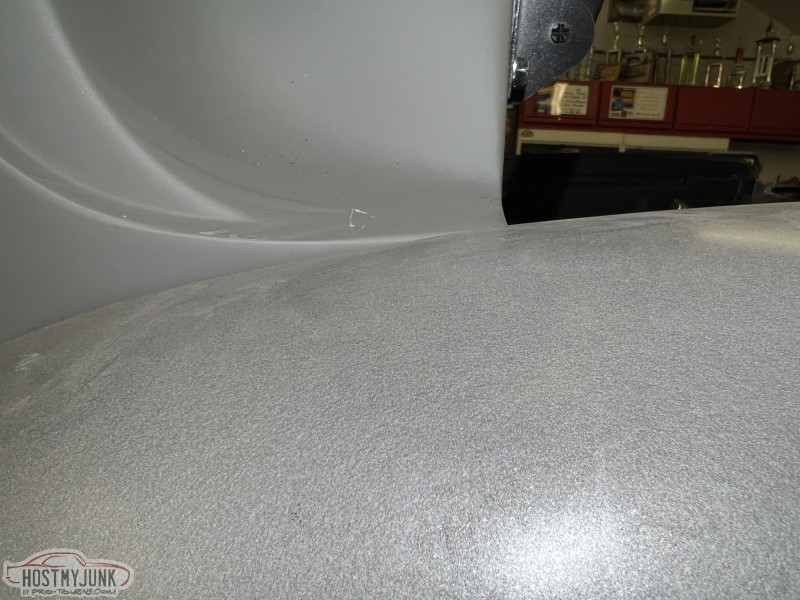 The left side isn't going up as high as it needs to be and has the step from the hood line/cowl down to the fender. Due to this, there is a decent-sized gap the whole length of the hood/fender. I need to make some adjustments and get the fender up the 1/8-1/4" it needs to be. 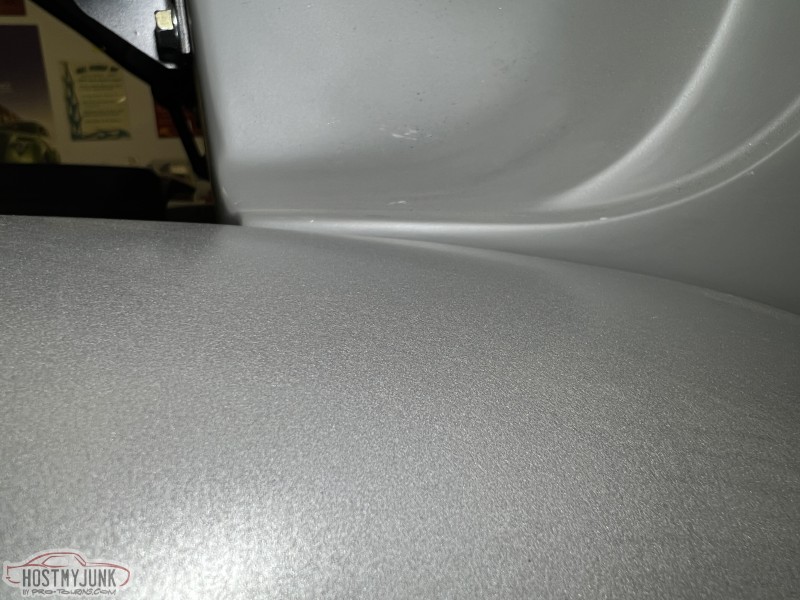 And with the hood closed you get a bit of my starting point. Still so much adjustments to make and then add in the other front end pieces like the grill, latch support and lower valance. 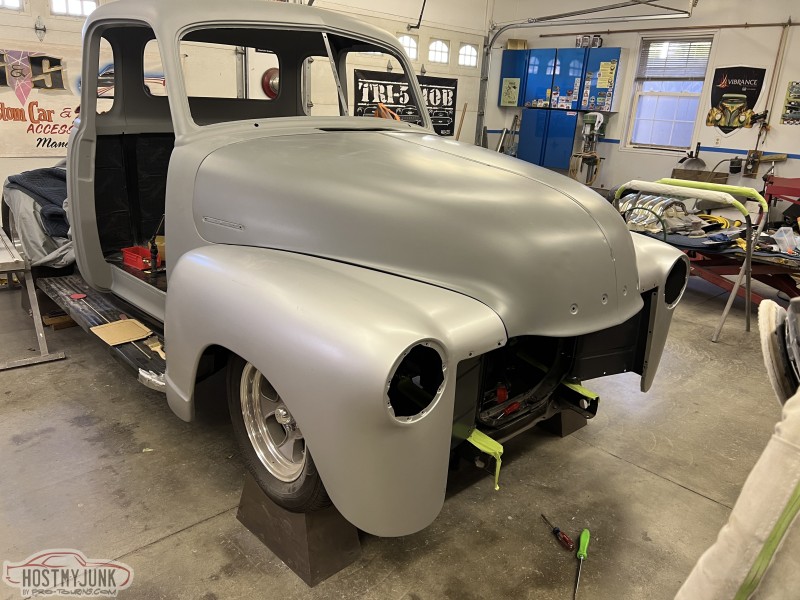 
__________________
Glenn 1951 3100, Area51 1955 BelAir, 4EVER17 1987 R10, Ethel Copper Hill Rod & Custom http://67-72chevytrucks.com/vboard/s...d.php?t=829856 |
|
|
|
|
10-19-2025, 10:50 AM
|
#423 |
|
Registered User
Join Date: Nov 2010
Location: calgary alberta
Posts: 9,039
|
Re: Long Time Coming......
can the cab be twisted on the frame to get a better alignment?
|
|
|
|
|
10-20-2025, 05:08 AM
|
#424 | |
|
Registered User
Join Date: Jan 2022
Location: Conn.
Posts: 297
|
Re: Long Time Coming......
Quote:
__________________
Glenn 1951 3100, Area51 1955 BelAir, 4EVER17 1987 R10, Ethel Copper Hill Rod & Custom http://67-72chevytrucks.com/vboard/s...d.php?t=829856 |
|
|
|
|
|
10-24-2025, 02:09 AM
|
#425 | |
|
Registered User
Join Date: Feb 2022
Location: Victoria British Columbia
Posts: 153
|
Re: Long Time Coming......
Quote:
|
|
|
|
|
 |
| Bookmarks |
|
|


 Linear Mode

