
|
 10-25-2025, 05:34 AM
|
#426 | |
|
Registered User
Join Date: Jan 2022
Location: Conn.
Posts: 297
|
Re: Long Time Coming......
Quote:
__________________
Glenn 1951 3100, Area51 1955 BelAir, 4EVER17 1987 R10, Ethel Copper Hill Rod & Custom http://67-72chevytrucks.com/vboard/s...d.php?t=829856 |
|

|

|
|
10-26-2025, 03:09 PM
|
#427 |
|
Registered User
Join Date: Jan 2022
Location: Conn.
Posts: 297
|
Re: Long Time Coming......
Another few hours in the shop today getting better fitment on the hood/fenders. I loosened the fender bolts and used a floor jack and a piece of wood to support the sheetmetal and was able to get the fender up some. What I realized then was that at the bottm rear of the fender where it wraps under the cowl it wouldn't allow the fender to go up any. So I removed the fender and cut a slit along that edge. This then created enough gap to allow the fender some upward movement.
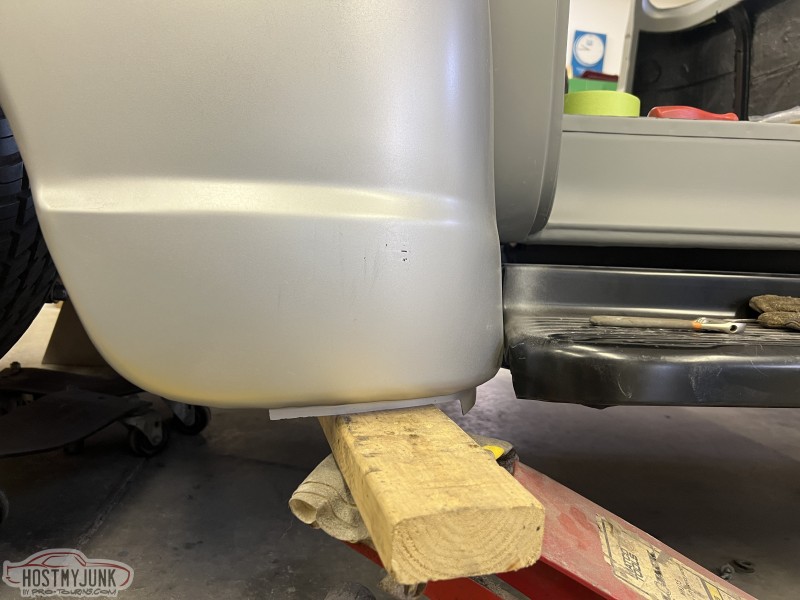 I thought I took a picture of the cut line with a marker, but apparently not. Anyway, here is the slit cut open. 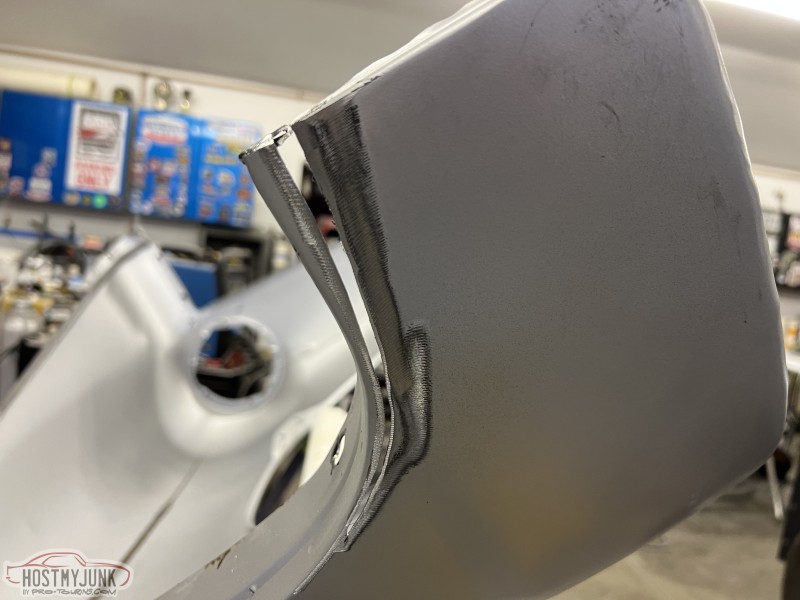 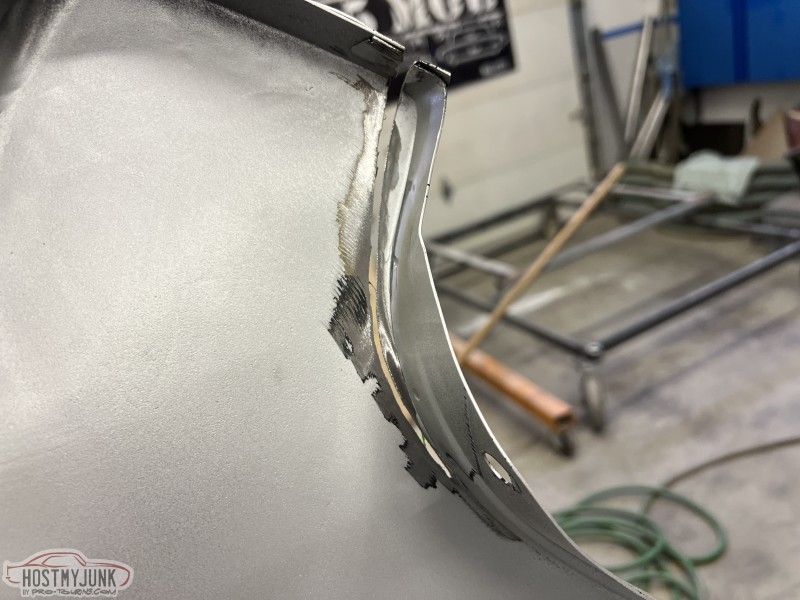 I then reinstalled the fender and was now able to get the upward adjustment I needed. 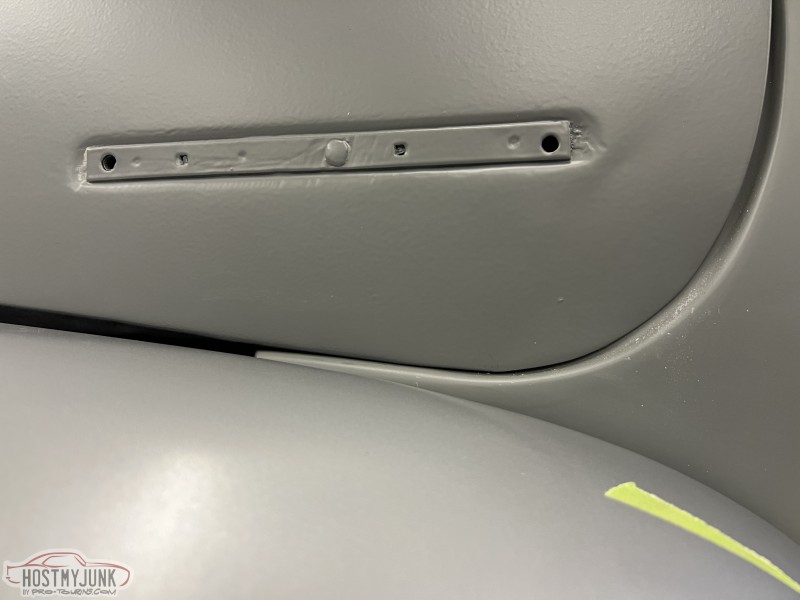 With that I tacked the slit, then removed the fender and welded the seam closed. Here is with it ground smooth and reinstalled. 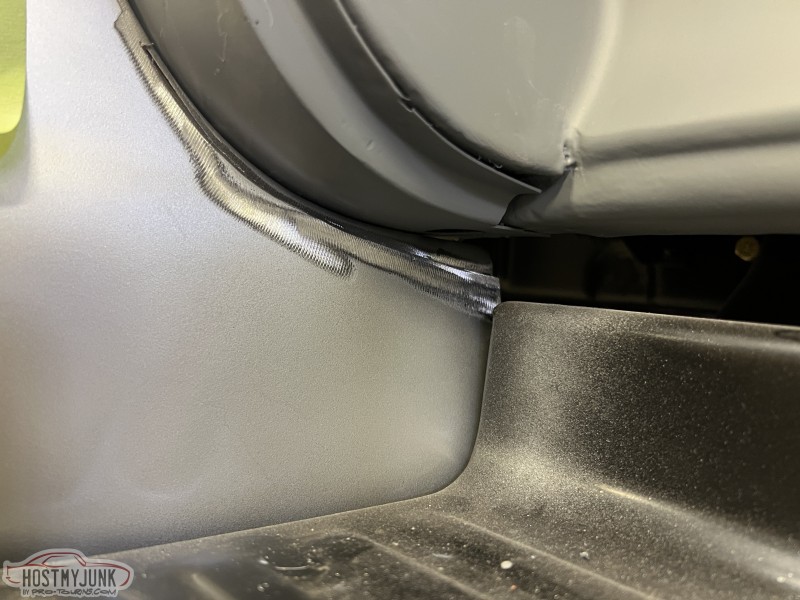 With that done, I now moved onto this big gap where the fender meets the cowl at the top and along the top. 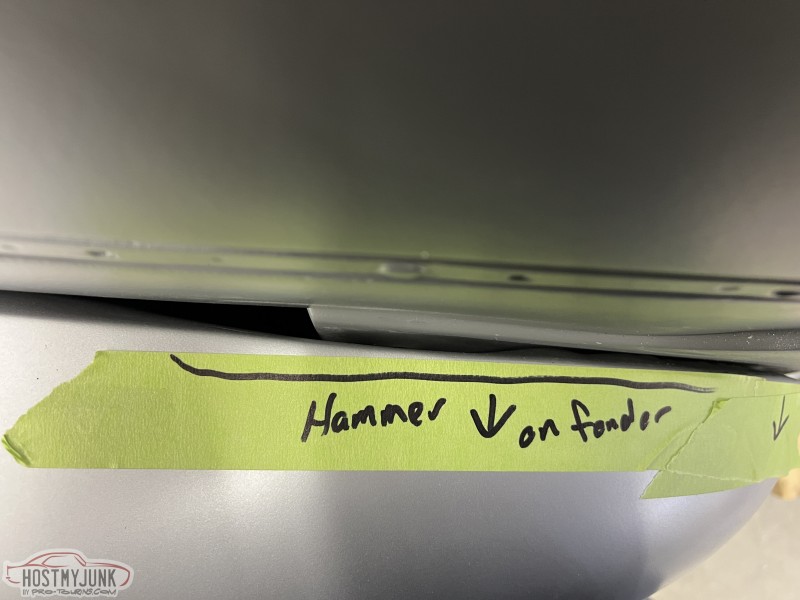 With the adjustments made I was able to again reinstall the fender and this was the outcome. Much better overall. 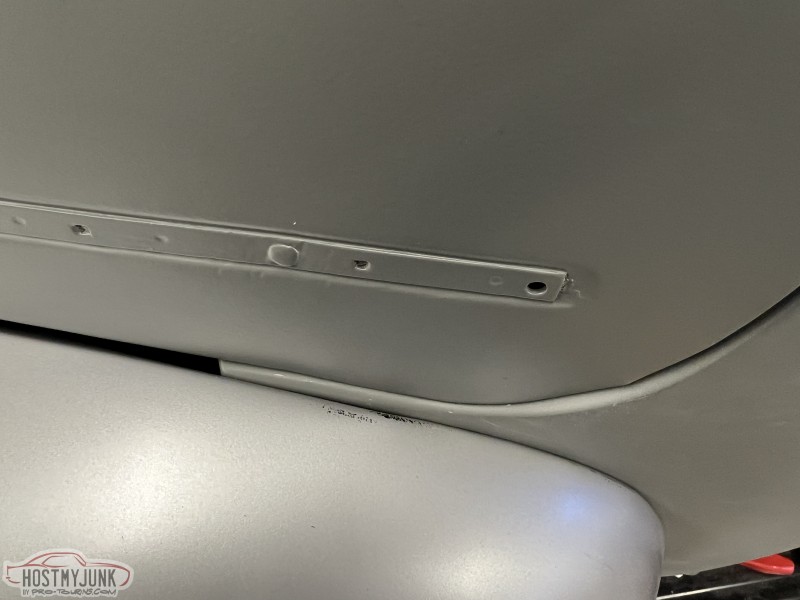 I don't like the fender to hood gap along the long stretch on top of the fender. These are aftermarket fenders, so I'm wondering if they just don't have the arc they should. Could be in the hood, but my guess is its in the fenders. I completely understand these are just old trucks and thats how they were way back when. But good enough just doesn't sit well with me. 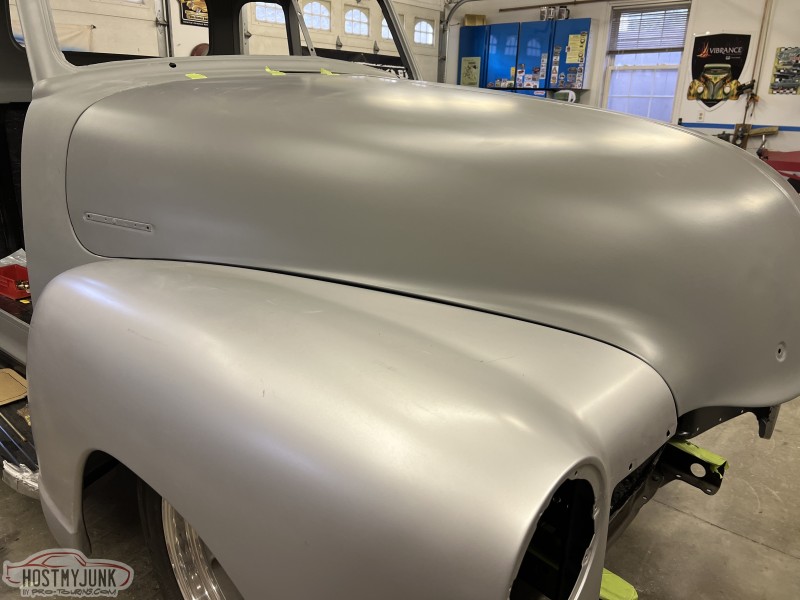 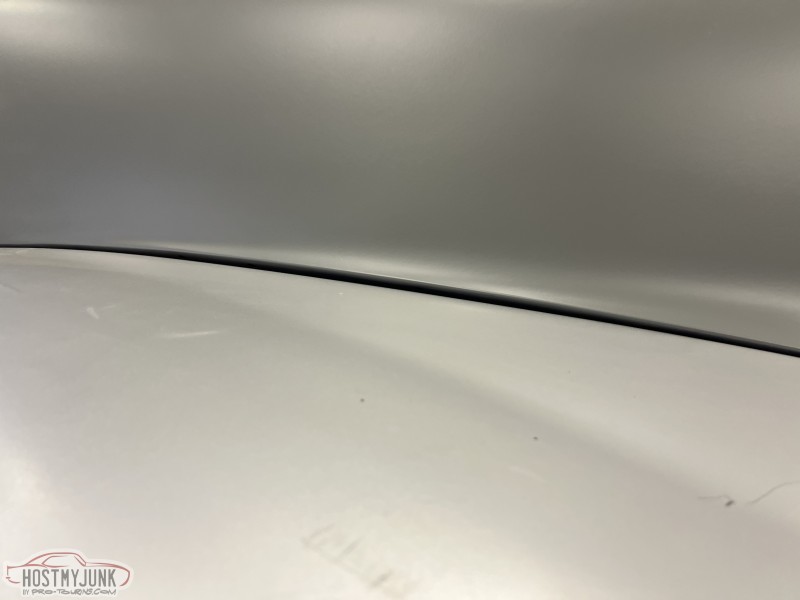 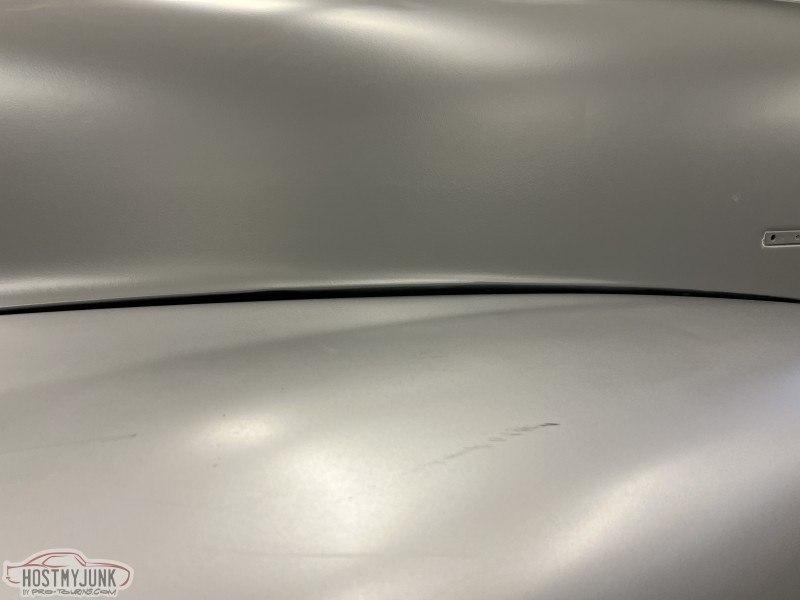 And lastly some over all pics of the hood to cowl 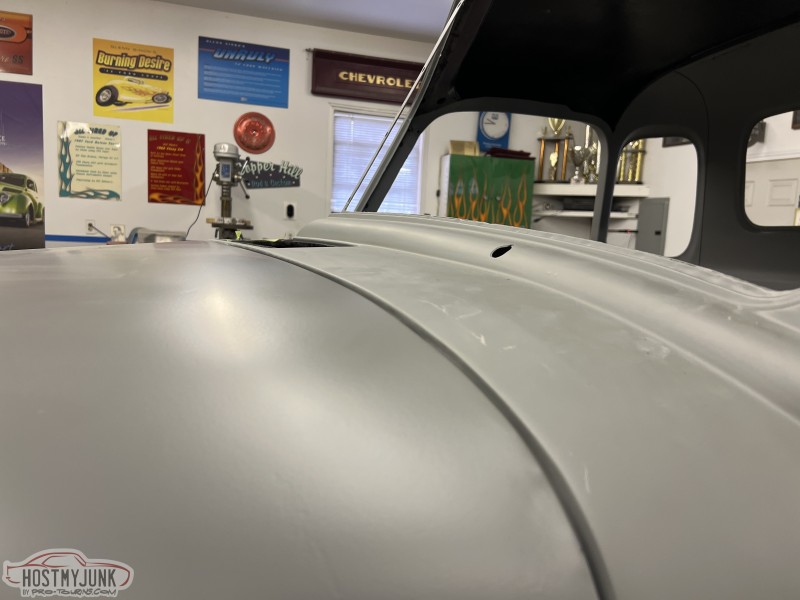  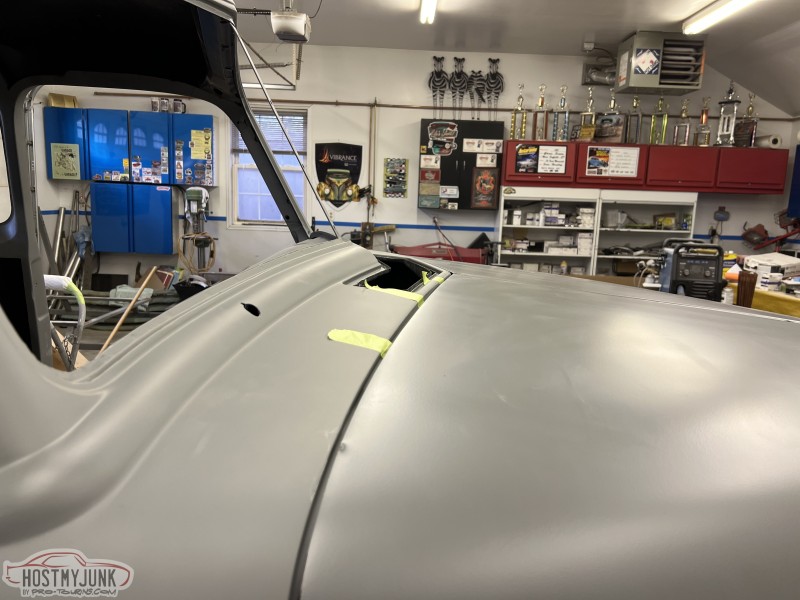 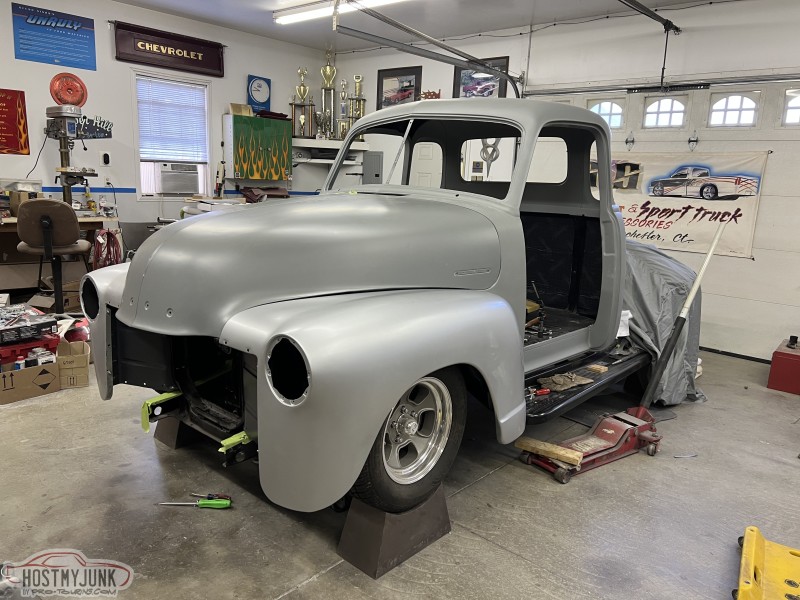 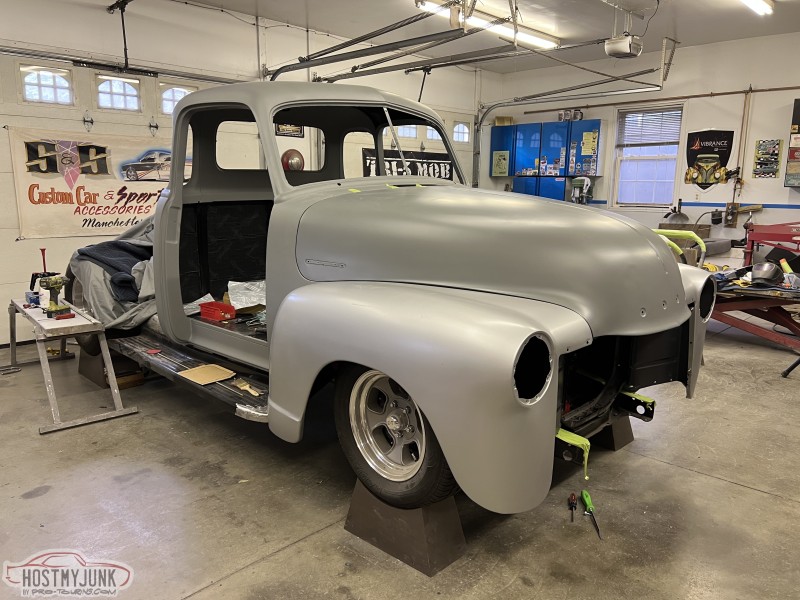
__________________
Glenn 1951 3100, Area51 1955 BelAir, 4EVER17 1987 R10, Ethel Copper Hill Rod & Custom http://67-72chevytrucks.com/vboard/s...d.php?t=829856 |
|
|
|
|
10-26-2025, 05:59 PM
|
#428 |
|
Registered User
Join Date: Nov 2010
Location: calgary alberta
Posts: 9,039
|
Re: Long Time Coming......
too bad you had to cut it up after doing the primer etc. oh well, some of us are perfectionists, lol.
nice work and good ideas. keep on posting as you go, appreciated. |
|
|
|
|
11-01-2025, 03:08 PM
|
#429 | |
|
Registered User
Join Date: Jan 2022
Location: Conn.
Posts: 297
|
Re: Long Time Coming......
Quote:
__________________
Glenn 1951 3100, Area51 1955 BelAir, 4EVER17 1987 R10, Ethel Copper Hill Rod & Custom http://67-72chevytrucks.com/vboard/s...d.php?t=829856 |
|
|
|
|
|
11-01-2025, 03:25 PM
|
#430 |
|
Registered User
Join Date: Jan 2022
Location: Conn.
Posts: 297
|
Re: Long Time Coming......
Today in the shop, the grill was installed along with the upper hood latch and lower stone guard. As you all know these are not easy to assemble at all.
I follow Appicella Design on Instagram and have noticed that they assemble to nose on the floor and then install as an assembly rather then installing one piece at a time. They say it make the assembly much easier and is less prone to chipping paint. I think after I blow this apart for final body work and prime, when I reassemble it I will try that and see how it goes. The only thing is I will need another set of hands or two as I work alone. I'll have to bug a couple of friends. I have a plan to slice the fender edge that runs along the hood and manipulate that to get the gap the way I want it. But I just ordered the hood rubber stops and don;t want to make any changes until they show up and I know exactly how the hood will sit with them installed. Here are today's pics. 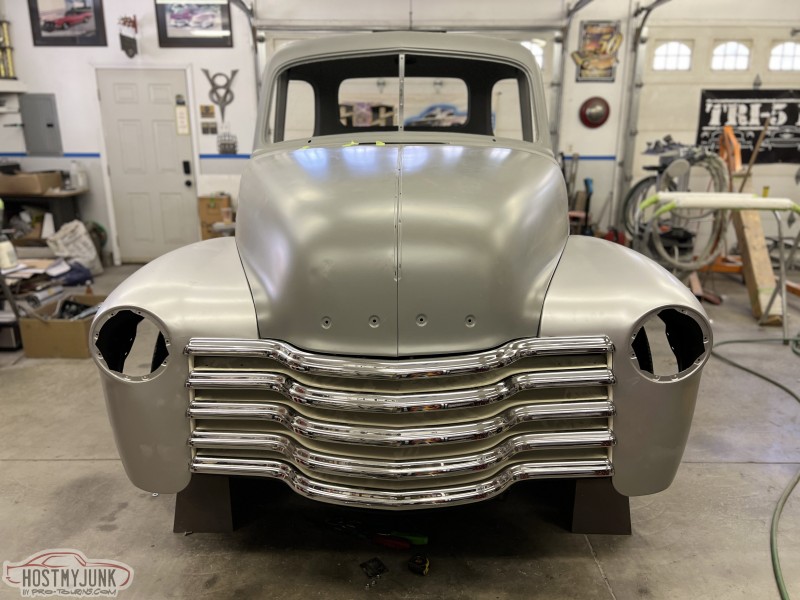 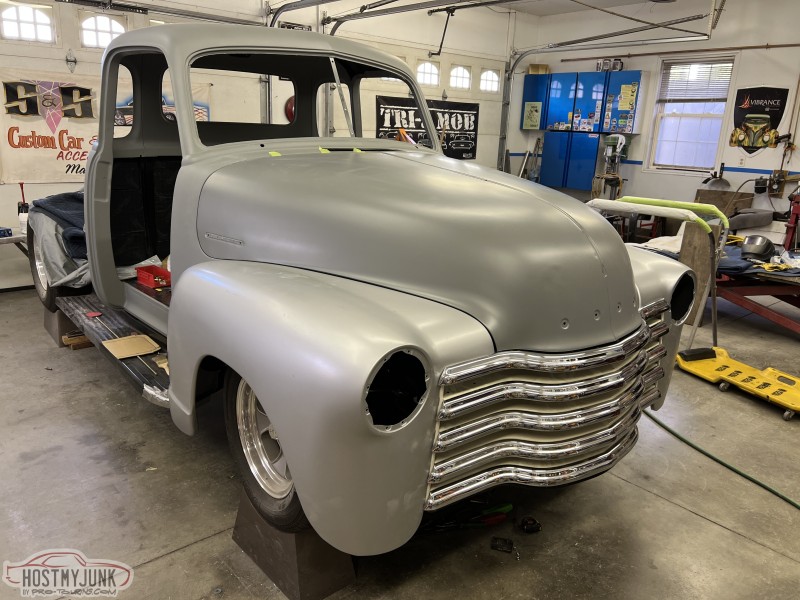 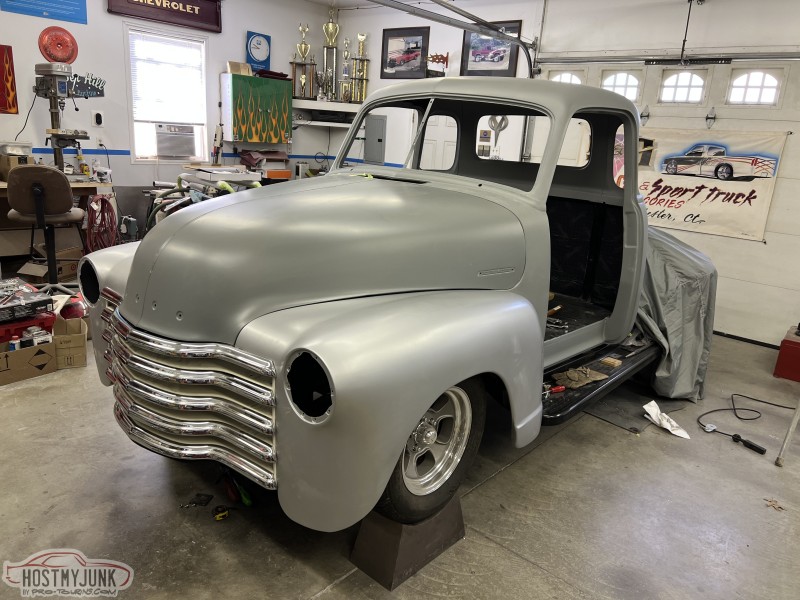 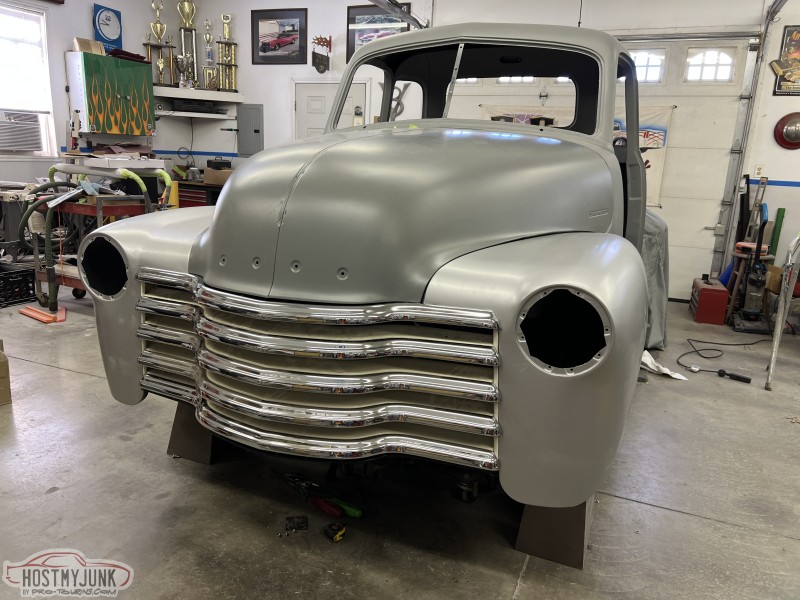 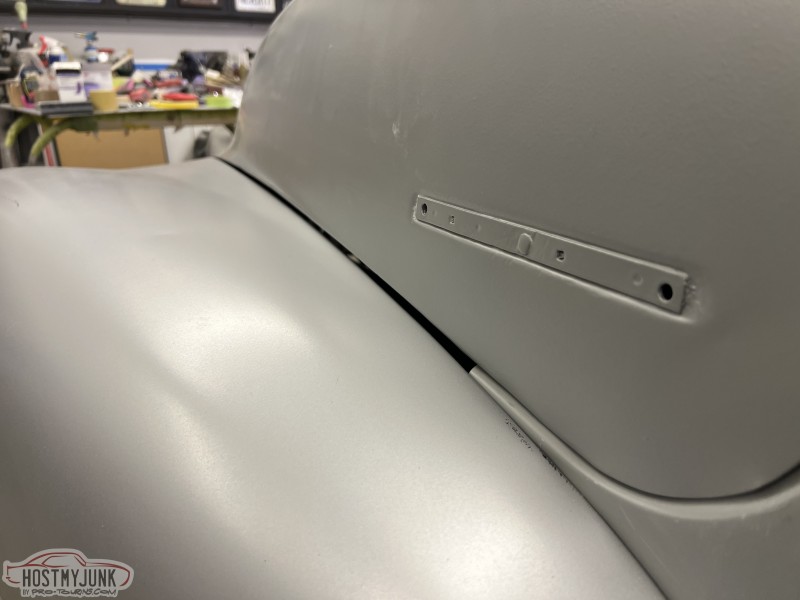
__________________
Glenn 1951 3100, Area51 1955 BelAir, 4EVER17 1987 R10, Ethel Copper Hill Rod & Custom http://67-72chevytrucks.com/vboard/s...d.php?t=829856 |
|
|
|
|
11-01-2025, 04:56 PM
|
#431 |
|
Registered User
Join Date: Nov 2010
Location: calgary alberta
Posts: 9,039
|
Re: Long Time Coming......
Taking shape again. Nice. Pretty smooth looking too.
What was you process from bare metal to where it is now? I'll be getting something to spray over my bare roof panel but it's been awhile so not up on the latest and greatest. Epoxy then skim a filler is my plan. |
|
|
|
|
11-02-2025, 08:04 AM
|
#432 | |
|
Registered User
Join Date: Jan 2022
Location: Conn.
Posts: 297
|
Re: Long Time Coming......
Quote:
Anyway. I will stipulate PPG products because that is what I know and use. All paint lines have similar products, just choose wisely and ask your jobber questions when buying. 1. The absolute best course of action on bare metal would be a wash with metal prep products. In my case I use SX579 metal wash/cleaner. Used with warm water, gloves and a red scuff pad you scrub it in and work it for about 5 minutes all the while keeping the area wet. This product worked to get rid of any micro parts of rust still on the surface. Rinse it clean. Follow that with a good scrubbing with a different red scuff pad and use SX520 metal conditioner. This leaves a phoserforic coating on the metal to protect it. Rinse and dry panel. Once done the metal might have a slight tannish appearance. Go back and look at pictures of my cab after I did this in June and you will see what I mean. 2. After completely drying all nooks and crannies, I sprayed two coats of F4921BK (Delfleet line) black epoxy. I sprayed one, let it sit for an hour then sprayed the second. I then let that sit over night. 3. This step does not have to be done, but I always do it. The next morning I sprayed two coats of a higher build primer surfacer, in my case DPS3055 from the Deltron line. 4. Once back home in my shop I let sit for about a week to fully shrink and cure up. After that I start blocking with 100-120 grit paper. I don;t need to go crazy here because I know I will be adding filler in places, but by blocking this out now I know exactly where my low spots are. This is why I spray the surfacer on top of the epoxy, it gives me something to block. It also helps to keep me from going through nthe epoxy and not having to reapply down the road. Look back at my pictures from the summer and you will see that I did indeed have some bare metal break throughs, but it was minimal. 5. Once all filler work is done I sprayed 3 coats of Evercoat Optex polyester primer. This stuff has BUILD, a friend of mine jokes that it will cover small sheep and children. What it does is give you plenty of meat to be able to really level off your surface and get the panels really straight and flat. Any low spots can be touched up with filler as needed. 6. A few coats of that same DPS3055 primer surfacer as a final topcoat. I reduce this down and try to lay it out as smooth as humanly possible so I have less block sanding prior to paint. I let this cure for a few weeks or as long as I can. Then block 320, 500, 600. 7. Sealer, I use DAS3027 for dark colors like my truck is going. One nice coat, then base and clear. I hope this helps, please feel free to ask any questions you may have.
__________________
Glenn 1951 3100, Area51 1955 BelAir, 4EVER17 1987 R10, Ethel Copper Hill Rod & Custom http://67-72chevytrucks.com/vboard/s...d.php?t=829856 |
|
|
|
|
|
11-02-2025, 09:46 AM
|
#433 |
|
Registered User
Join Date: Nov 2010
Location: calgary alberta
Posts: 9,039
|
Re: Long Time Coming......
thanks for the run down, appreciated.
somehow I have trouble putting water on bare metal, but if thats how it's done these days.....lol. |
|
|
|
|
11-02-2025, 03:17 PM
|
#434 | |
|
Registered User
Join Date: Jan 2022
Location: Conn.
Posts: 297
|
Re: Long Time Coming......
Quote:
On a scale of 1-10, using epoxy straight to bare metal is about an 8. Using the metal prep cleaner/conditioners first before epoxy is a 15. When I was at PPG we did the process on a fender and then didn't topcoat it with epoxy. Just left the phosphate coating on it. we put it outside for six months of rain, heat and northeast summer humidity. In that time it never started to show any signs of flash rust.
__________________
Glenn 1951 3100, Area51 1955 BelAir, 4EVER17 1987 R10, Ethel Copper Hill Rod & Custom http://67-72chevytrucks.com/vboard/s...d.php?t=829856 |
|
|
|
|
|
11-02-2025, 03:26 PM
|
#435 |
|
Registered User
Join Date: Jan 2022
Location: Conn.
Posts: 297
|
Re: Long Time Coming......
This morning I had four hours to kill. So I went out to the shop and decided to make some front bumper brackets that will tuck the bumper closer to the grill.
I started with some 1" wide flat 1/4" thick steel strap I had. 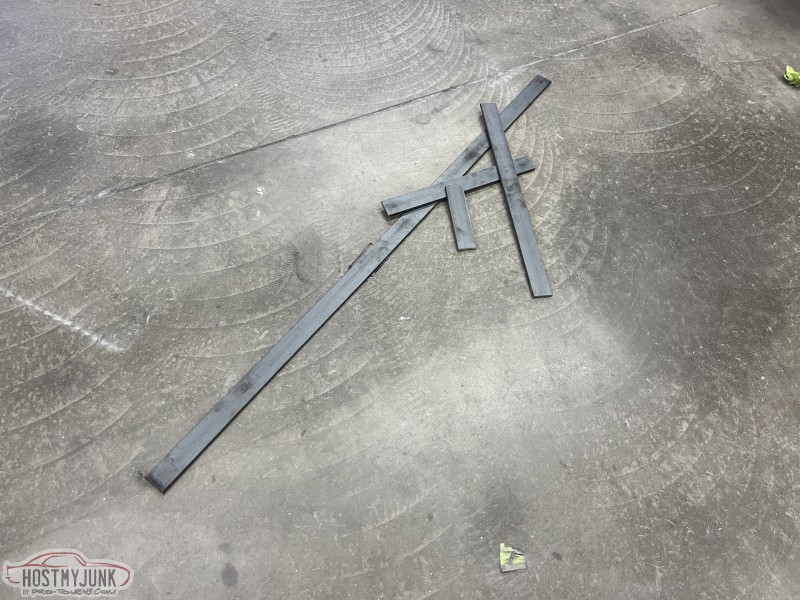 I then cut some pieces up and drilled to bolt to the frame. On the other end I made some that bolt to the bumper. Then bolted to the frame I was able to get the length I needed and tacked them to each other. Here is what I ended up with... I still have some grinding to do to dress the welds, maybe 30 minutes of work. But I ran out of time for today. 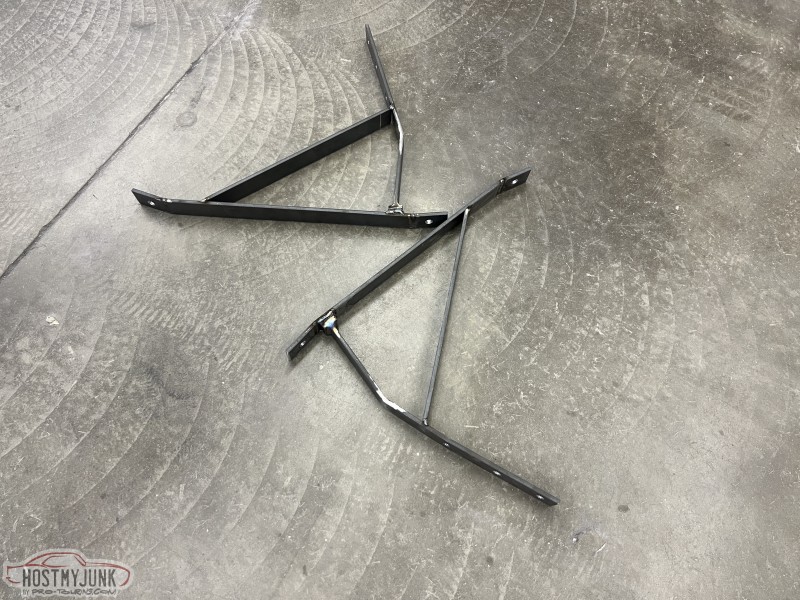 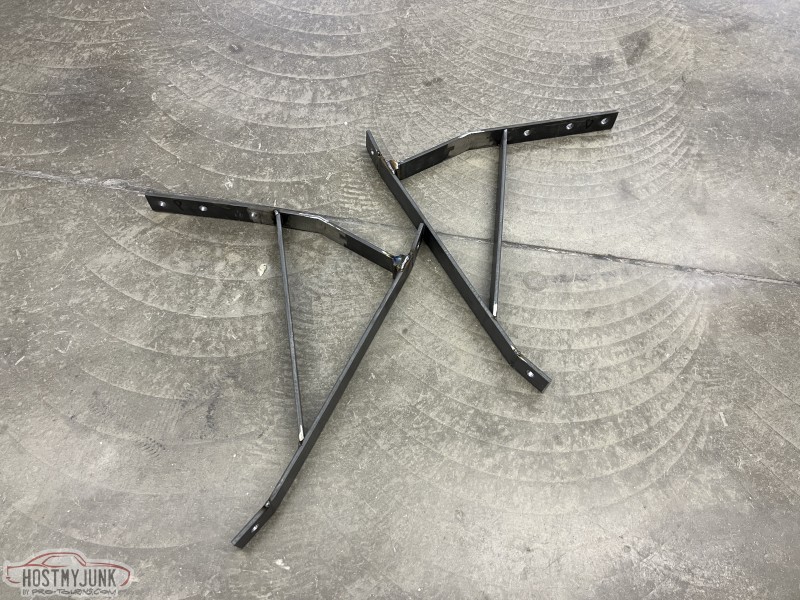 And here the bumper bolted in place.  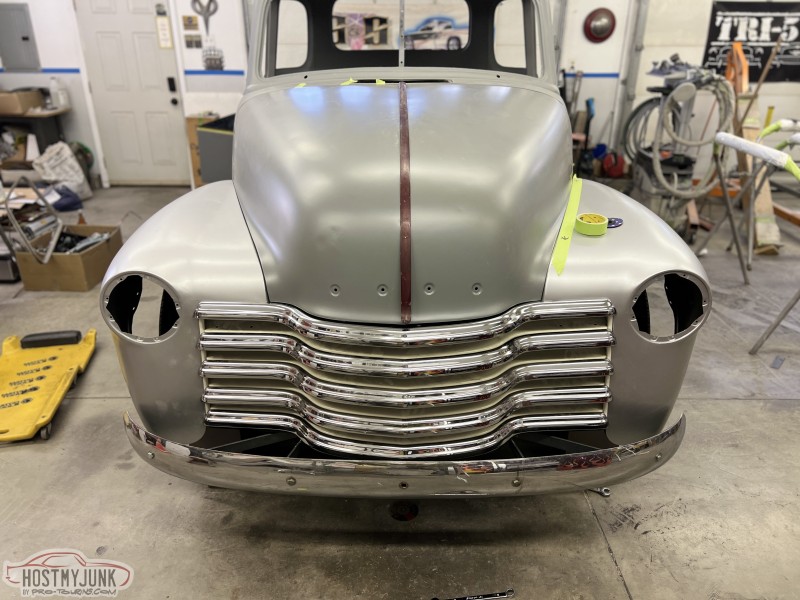 I am now at 790 hours on this project!! .
__________________
Glenn 1951 3100, Area51 1955 BelAir, 4EVER17 1987 R10, Ethel Copper Hill Rod & Custom http://67-72chevytrucks.com/vboard/s...d.php?t=829856 |
|
|
|
|
11-02-2025, 03:26 PM
|
#436 |
|
Senior Member
 Join Date: Sep 2017
Location: Bryan, Texas
Posts: 2,522
|
Re: Long Time Coming......
The mods helped the fit; it is looking good. Nice work.
__________________
8man-aka Robert 1948 on a S10 Frame, small block with a carb 1954 Cab, 53 Front and Bed, 50 Doors, S10 Frame, Power TBD Build thread: "]http://67-72chevytrucks.com/vboard/showthread.php?t=746899&highlight=wife%27s+48[/URL] [/URL]http://67-72chevytrucks.com/vboard/showthread.php?t=840204 |
|
|
|
|
11-03-2025, 04:27 PM
|
#437 |
|
Registered User
Join Date: Jan 2022
Location: Conn.
Posts: 297
|
Re: Long Time Coming......
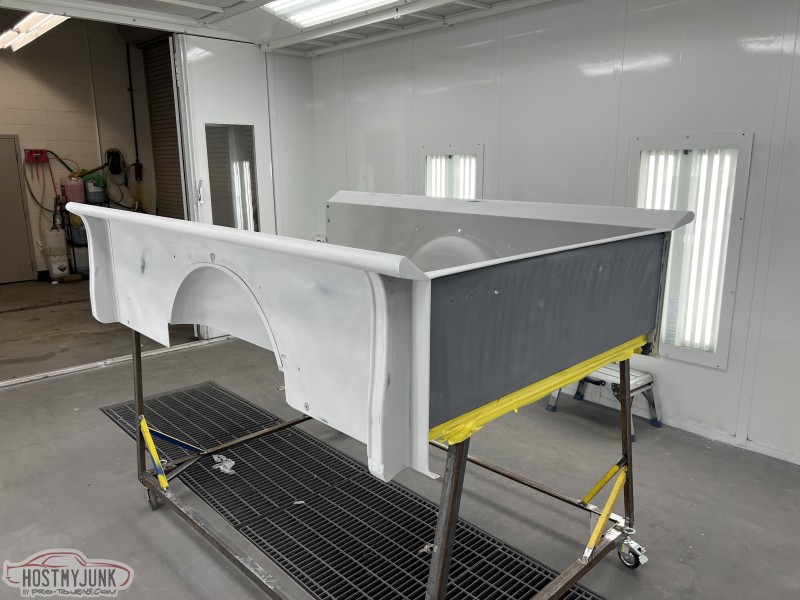
Got the bed in final primer today. Coming home Wednesday to wait until paint this spring.
__________________
Glenn 1951 3100, Area51 1955 BelAir, 4EVER17 1987 R10, Ethel Copper Hill Rod & Custom http://67-72chevytrucks.com/vboard/s...d.php?t=829856 |
|
|
|
|
11-03-2025, 07:41 PM
|
#438 |
|
Registered User
Join Date: Feb 2021
Location: WestCentral MN,
Posts: 50
|
Re: Long Time Coming......
To piggy-back that SOP... Back in the day when I worked for Ditzler(before they were PPG) we encouraged all body shops to strip the OEM factory black primer off all new sheet metal parts because the Metal-Prep + Galva-Prep 2-step process is as good as it gets for corrosion control and primer adhesion. It's labor intensive and messy but well worth it.
|
|
|
|
|
11-03-2025, 08:05 PM
|
#439 | |
|
Registered User
Join Date: Jan 2022
Location: Conn.
Posts: 297
|
Re: Long Time Coming......
Quote:
The current recommendation from PPG on OE e coat is to clean and tack and then go right to sealer without sanding! Me personally, I'm still gonna sand it as that e coat has texture and such. On aftermarket parts, well that's not a true e coat. Its just a black primer, and they don;t do the two step wash that the OE's do. So on anything aftermarket, I strip them to bare metal and go from there as I described in my previous post. When I got an aftermarket steel cowl hood for my squarebody pick up, I sanded it down and anywhere I broke through to bare metal has small rust underneath the black primer. I stripped the whole hood and never looked back. I agree, its a lot of work, but so reassuring to know its done once and done right.
__________________
Glenn 1951 3100, Area51 1955 BelAir, 4EVER17 1987 R10, Ethel Copper Hill Rod & Custom http://67-72chevytrucks.com/vboard/s...d.php?t=829856 |
|
|
|
|
|
11-08-2025, 06:04 PM
|
#440 |
|
Registered User
Join Date: Jan 2022
Location: Conn.
Posts: 297
|
Re: Long Time Coming......
After last weekends project of making new front bumper barckets to tuck the bumper I had to now move on to making the front valance fit the smaller opening. I went into this thinking it was going to be a lot harder then it was, which I could have made it. However I took the easy way out and did this.
What I mean by that, is that it might look better had I sectioned it to have the bead raised section more visible as it is from the factory. But that would require a lot of cutting, welding and body filler work. In the end, I cut off the factory mounting brackets to start and see what I would need to do, and when I slid it back toward the fenders, I realized that I could just make new mounts and call it a day with little to no major work to do. Six hours later and here are the results. After the front mounts were cut off I hammer and dollied the front edge to be uniform across the entire leading edge. I then welded a coupld tabs on the front and drilled mounting holes so the front bumper holes still holds it in place as normal. I just wasn't able to use the factory mounts with my brackets. 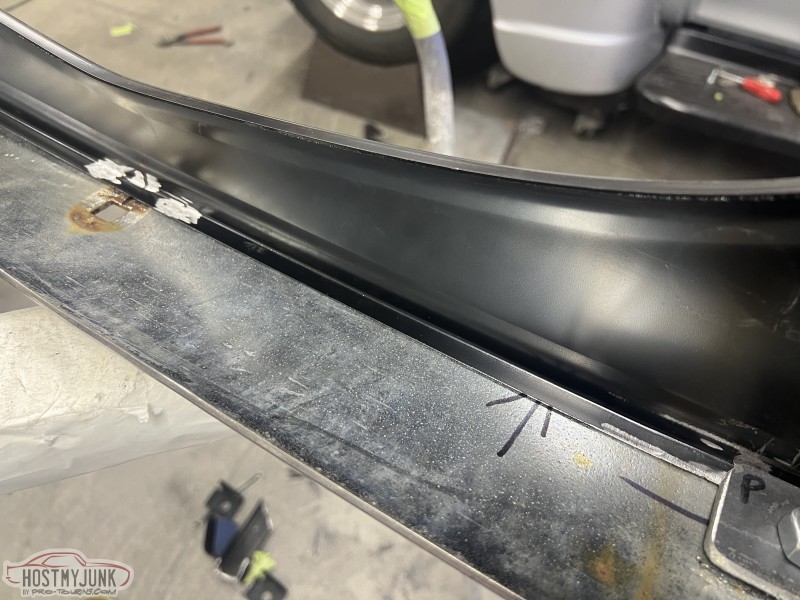 I then bent a couple of tabs and welded them in place to hold the ends in place on the bumper brackets. These will get trimmed a little shorter so they don't hang below the bracket as they do here.   Because it now sits so close the bumper I had to do some trimming of the leading edges to fit.   And here it is all bolted together and on the truck.   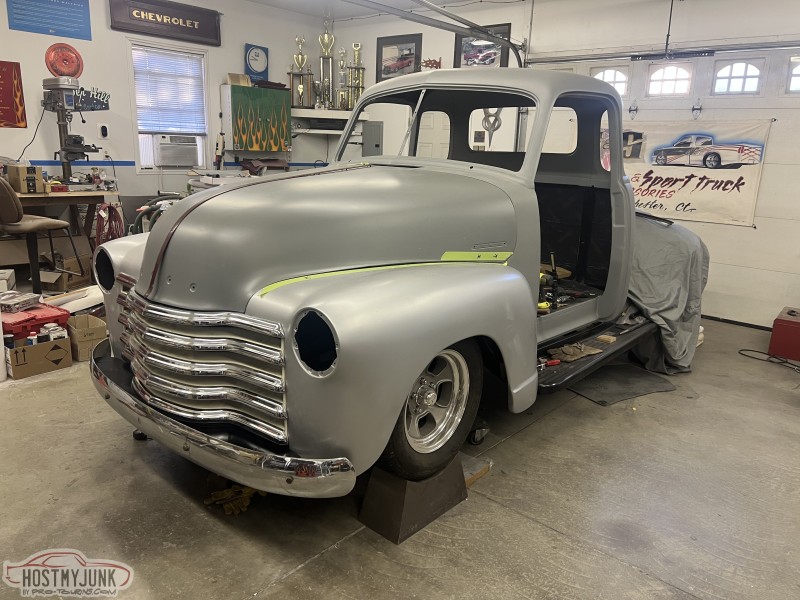 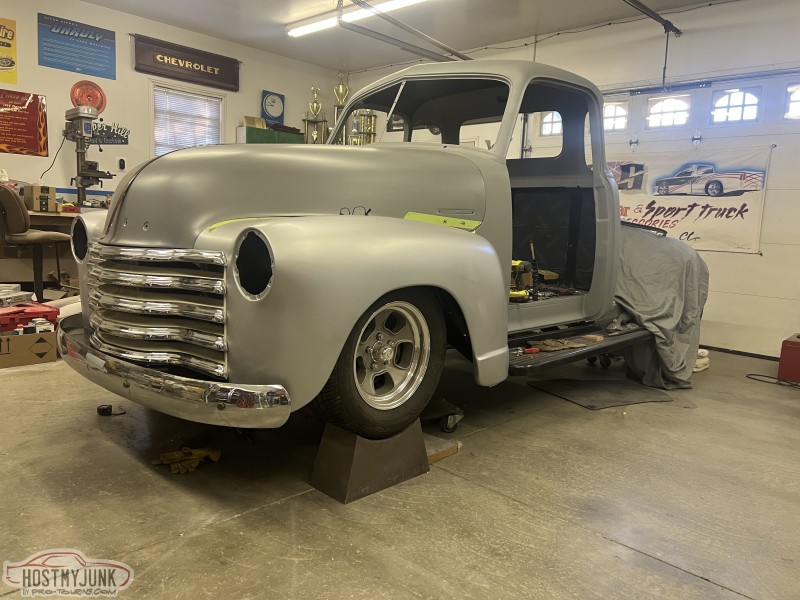 .
__________________
Glenn 1951 3100, Area51 1955 BelAir, 4EVER17 1987 R10, Ethel Copper Hill Rod & Custom http://67-72chevytrucks.com/vboard/s...d.php?t=829856 |
|
|
|
|
11-08-2025, 06:15 PM
|
#441 |
|
Senior Member
Join Date: Sep 2017
Location: Bryan, Texas
Posts: 2,522
|
Re: Long Time Coming......
Well done!
__________________
8man-aka Robert 1948 on a S10 Frame, small block with a carb 1954 Cab, 53 Front and Bed, 50 Doors, S10 Frame, Power TBD Build thread: "]http://67-72chevytrucks.com/vboard/showthread.php?t=746899&highlight=wife%27s+48[/URL] [/URL]http://67-72chevytrucks.com/vboard/showthread.php?t=840204 |
|
|
|
|
11-10-2025, 03:13 PM
|
#442 |
|
Registered User
Join Date: Dec 2018
Location: Oregon
Posts: 80
|
Re: Long Time Coming......
Very nice!
|
|
|
|
|
11-10-2025, 11:40 PM
|
#443 |
|
Registered User
Join Date: Nov 2010
Location: calgary alberta
Posts: 9,039
|
Re: Long Time Coming......
oh, now you're just gettin fancy. lol.
good job. it's gonna be great when it's done. |
|
|
|
|
11-12-2025, 04:09 PM
|
#444 |
|
Registered User
Join Date: May 2018
Location: Phoenix, AZ
Posts: 340
|
Re: Long Time Coming......
Nice with the front bumper and splash guard. I did something similar but I just slid it back and cut it the back even with the fender.
__________________
Project "Eagle Spirit" 52 Chevy http://67-72chevytrucks.com/vboard/s...d.php?t=763085 Project "LS Scout" https://67-72chevytrucks.com/vboard/...d.php?t=844133 |
|
|
|
|
11-23-2025, 02:02 PM
|
#445 |
|
Registered User
Join Date: Jan 2022
Location: Conn.
Posts: 297
|
Re: Long Time Coming......
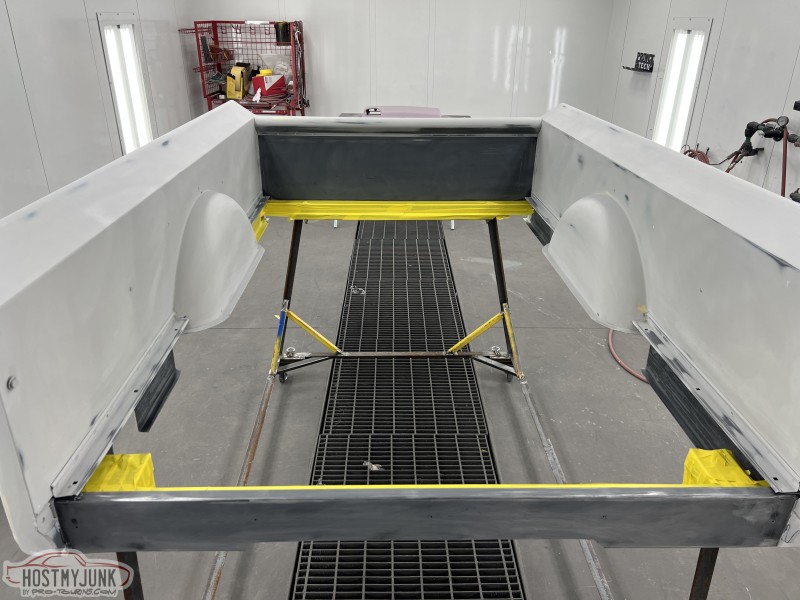
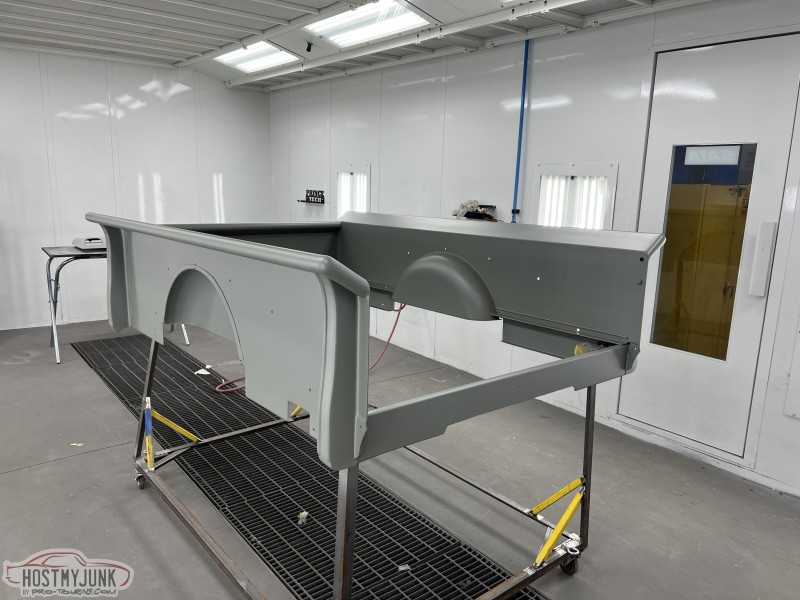
Nothing too exciting to post about of late. Still playing with front end sheetmeatl fitment.
Today I had a couple buddies stop over and give me a hand it slide the bed in place. I need to make the rear bumper brackets and the bed needs to be on to make sure everything fits. Its really cool seeing the bed and cab all in one color, even if it is only primer!  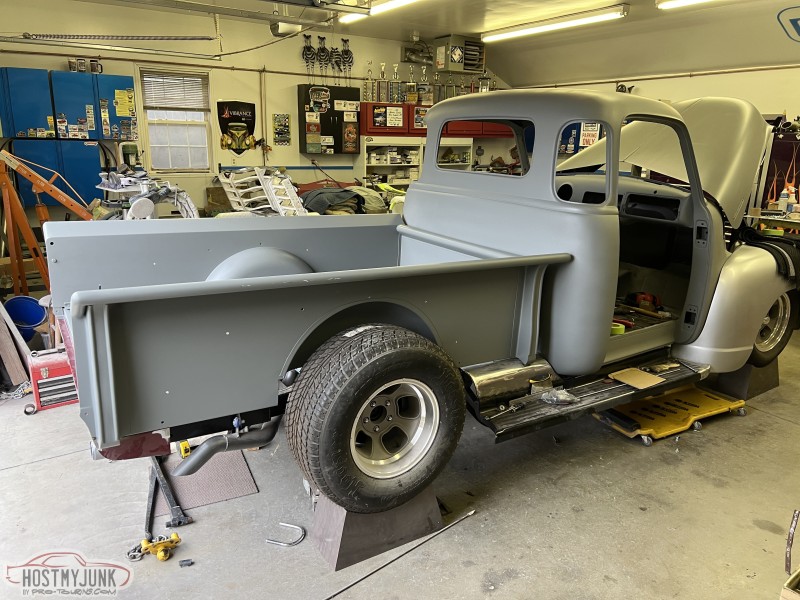 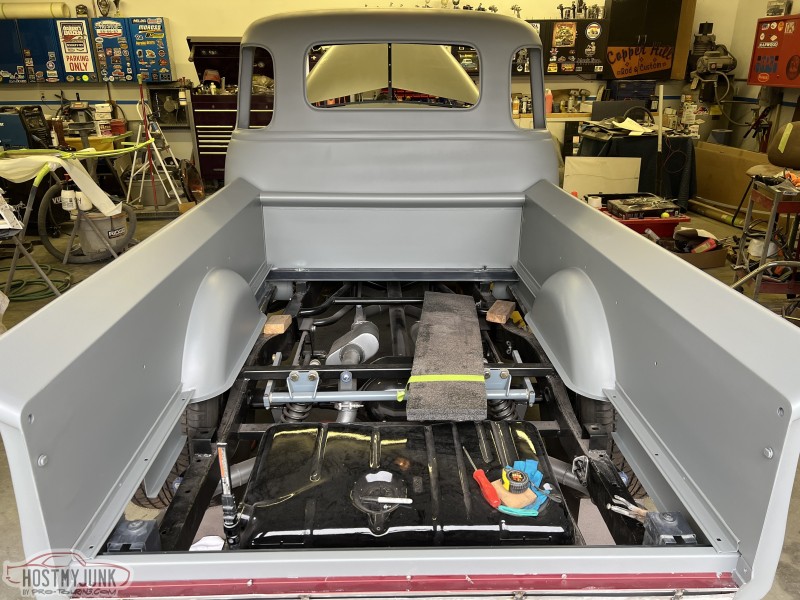 I love this picture showing all the work that went into making the top of the bed roll on the same curve as the back of the cab. This one picture is so satisfying. 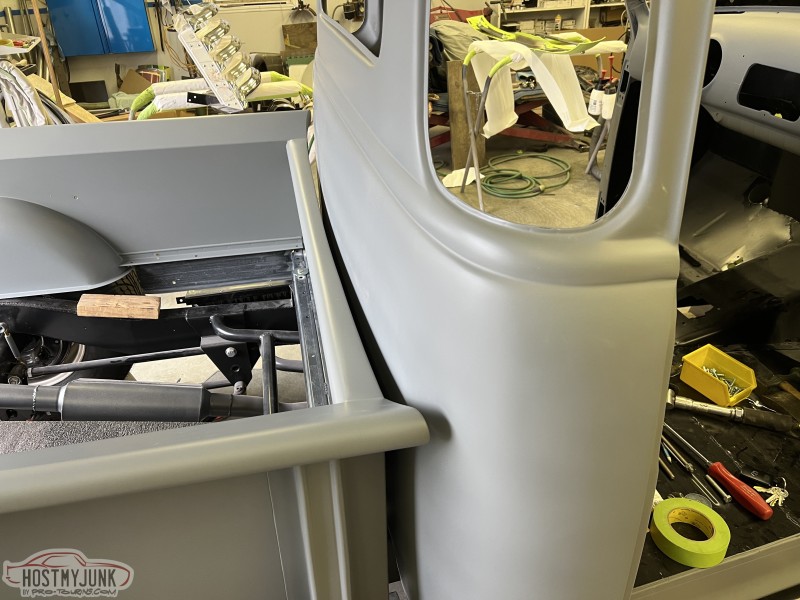
__________________
Glenn 1951 3100, Area51 1955 BelAir, 4EVER17 1987 R10, Ethel Copper Hill Rod & Custom http://67-72chevytrucks.com/vboard/s...d.php?t=829856 |
|
|
|
|
11-23-2025, 02:03 PM
|
#446 |
|
Senior Member
Join Date: Sep 2017
Location: Bryan, Texas
Posts: 2,522
|
Re: Long Time Coming......
That's really looking good, the fit is fantastic.
__________________
8man-aka Robert 1948 on a S10 Frame, small block with a carb 1954 Cab, 53 Front and Bed, 50 Doors, S10 Frame, Power TBD Build thread: "]http://67-72chevytrucks.com/vboard/showthread.php?t=746899&highlight=wife%27s+48[/URL] [/URL]http://67-72chevytrucks.com/vboard/showthread.php?t=840204 |
|
|
|
|
11-24-2025, 10:15 AM
|
#447 |
|
Senior Member
 Join Date: Oct 2014
Location: Eagle, ID
Posts: 3,406
|
Re: Long Time Coming......
The detail you did at the front of the bed, the curved portion looks really good.
|
|
|
|
|
11-24-2025, 04:44 PM
|
#448 | ||
|
Registered User
Join Date: Jan 2022
Location: Conn.
Posts: 297
|
Re: Long Time Coming......
Quote:
Quote:
__________________
Glenn 1951 3100, Area51 1955 BelAir, 4EVER17 1987 R10, Ethel Copper Hill Rod & Custom http://67-72chevytrucks.com/vboard/s...d.php?t=829856 |
||
|
|
|
|
11-24-2025, 05:02 PM
|
#449 |
|
Registered User
Join Date: Jan 2022
Location: Conn.
Posts: 297
|
Re: Long Time Coming......
Here is a little side project that I have been working on for some time. I had decided to mount a 30's era accessory trunk in the bed for a place to have things like cleaning supplies and such. With the limted room inside the cab I thought this was a nice place to store all that stuff.
I found a trunk on FB Marketplace a couple years ago that was in pretty good shape. If I remember correctly, I paid $75 for it. Sorry, no good before pictures. I had it sitting in the bed of the truck and just looking at it the way it will mount. A little while later I was going through some boxes and low and behold I found a box that my dad had bought from Hagan Accessory's some 20 years ago with a brand new 3rd brake light kit inside. I decided that they way the trunk sits in the bed this might not be a bad place to use the 3rd brake light, and its a little nod to my dad that I lost a couple years ago. Here I have it cut and rough-mounted. 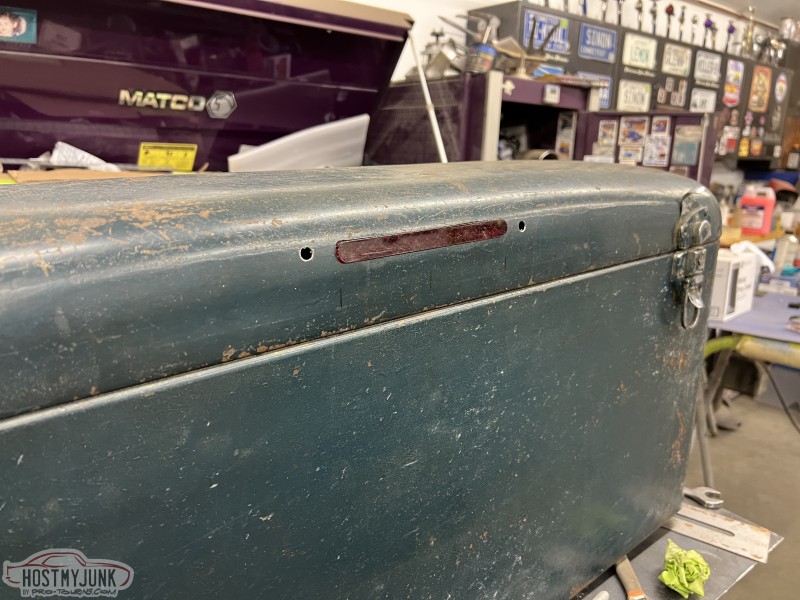  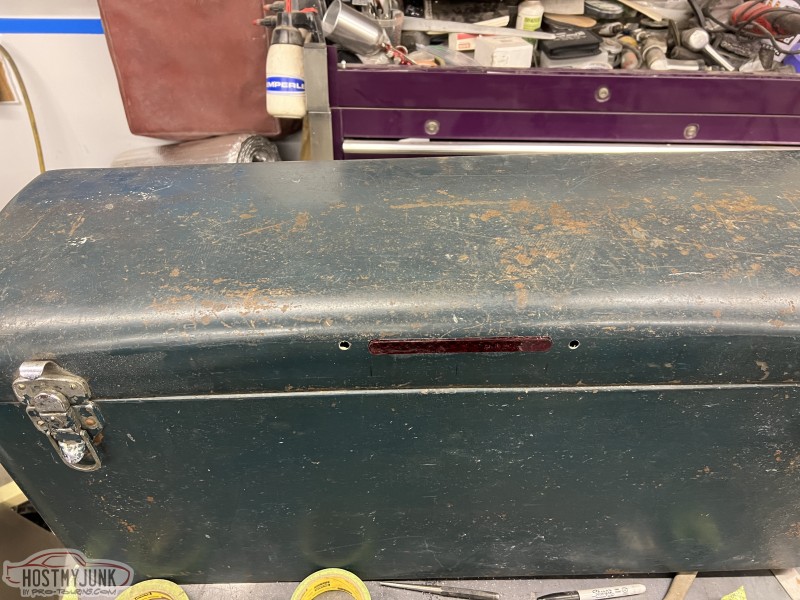 Fast forward to having stripped it to bare metal, done the body work, and had it in primer. Here, you can see the lens is now flushed in. Also, all new Chrome hardware. 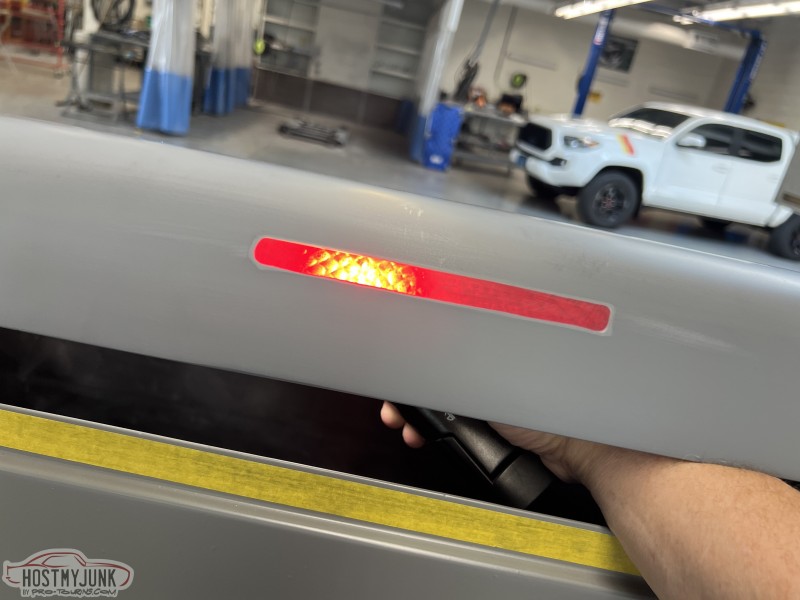    And today I got it painted, with what will be the color of the entire truck!  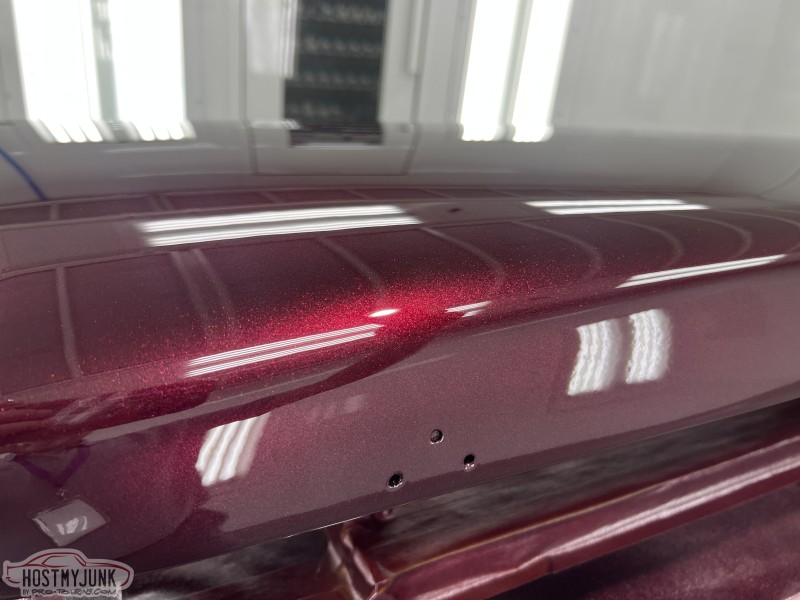 In the shade or cloud cover it will be a fairly dark maroon/plum color. As seen here:  But in full sun it will be bright and has a very strong candy tone to it. 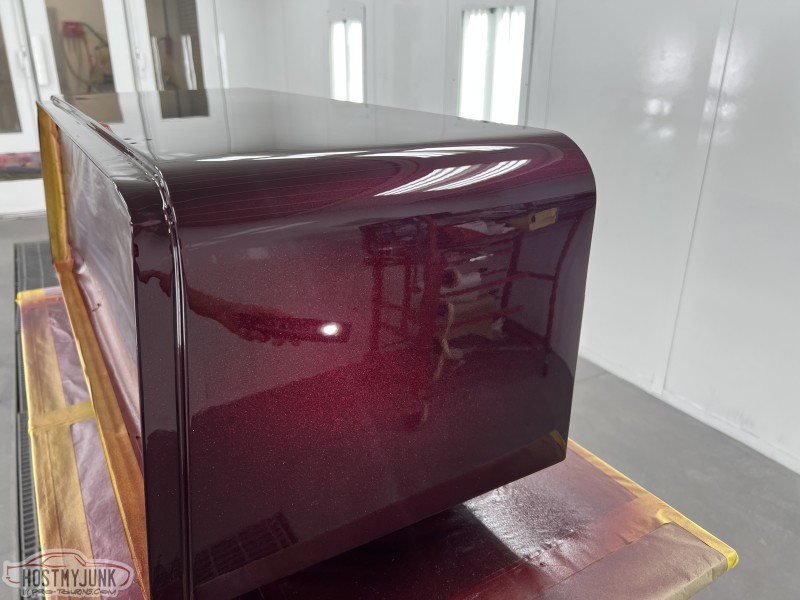 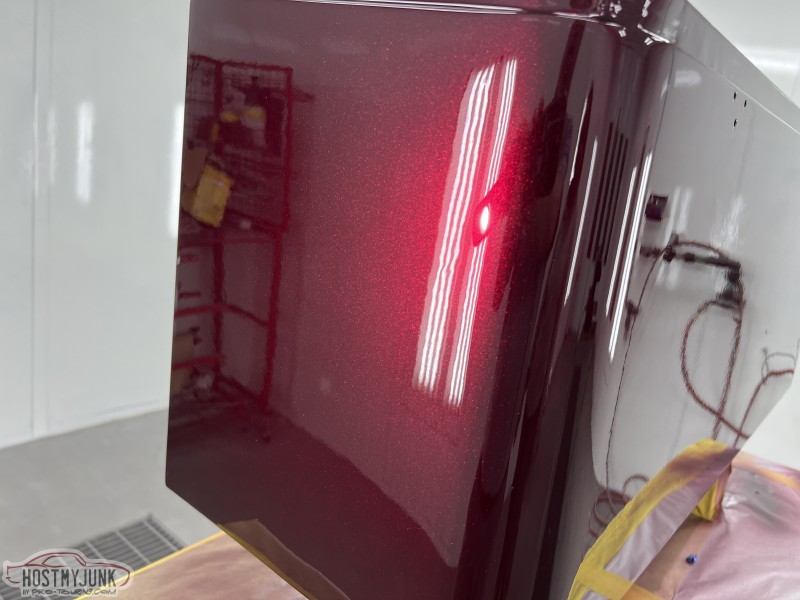  After getting full coverage on everything, I unmasked the lens and dusted on one coat of color to help hide it when the brake light is off. When lit it will still show through very brightly. 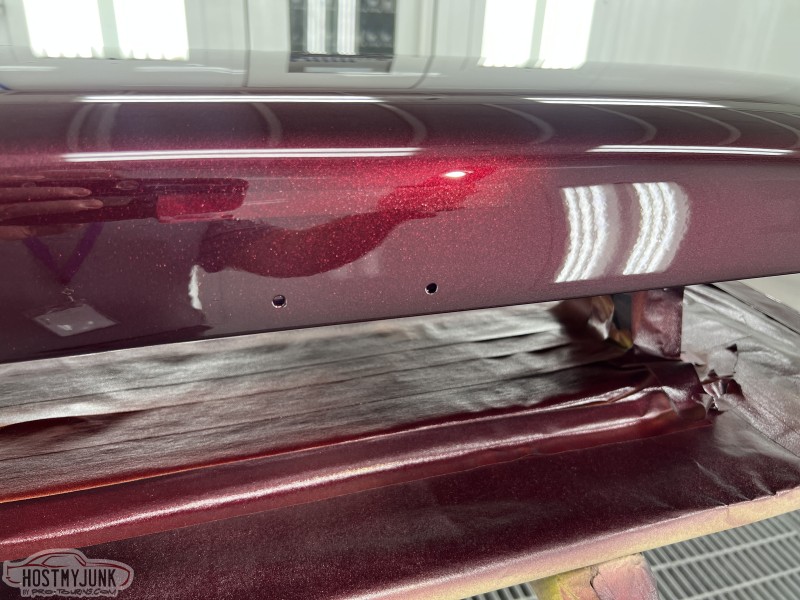 It is going to sit in the booth through the holiday weekend. Afterward I will sand and buff a couple areas and then assemble. Pics of that to come. .
__________________
Glenn 1951 3100, Area51 1955 BelAir, 4EVER17 1987 R10, Ethel Copper Hill Rod & Custom http://67-72chevytrucks.com/vboard/s...d.php?t=829856 |
|
|
|
|
11-24-2025, 06:01 PM
|
#450 |
|
Senior Member
Join Date: Sep 2017
Location: Bryan, Texas
Posts: 2,522
|
Re: Long Time Coming......
The Dad story got me. That is great.
The third brake light is a good idea; people are looking for them now. That color is a head turner for sure! You will have some stories to tell at the car shows.
__________________
8man-aka Robert 1948 on a S10 Frame, small block with a carb 1954 Cab, 53 Front and Bed, 50 Doors, S10 Frame, Power TBD Build thread: "]http://67-72chevytrucks.com/vboard/showthread.php?t=746899&highlight=wife%27s+48[/URL] [/URL]http://67-72chevytrucks.com/vboard/showthread.php?t=840204 |
|
|
|
 |
| Bookmarks |
|
|


 Linear Mode

