
 |
|
|
#1 |
|
Registered User
Join Date: Nov 2009
Location: Indy
Posts: 151
|
Hid 101
Since I myself have an interest in HID lighting, and I had trouble finding a good source of information that explained this to me in a simple manner.
Why HID is Better than Halogen HID, or "High Intensity Discharge" is a modern technology in the world of artificial lighting. It is better than traditional halogen because it is brighter, while using less energy, thus entering the ever-desired realm of technologies that are more effective AND more efficient. In a Halogen bulb, light is created by slowing down a current in order to heat up a tungsten filament, which then glows bright enough to emit light. HID's use electricity to to stimulate a mixture of Xenon gas and metallic salts, which creates a brighter, whiter light than halogens. Because HID's use Xenon gas, you will hear these lights be referred to as Xenon headlights. They're the same thing. Xenon = HID. In general, HID/Xenons are 3 times brighter than standard Halogens, they are better at withstanding shock, they last 3 times longer before needing to be replaced, and they use about 25% less power, while putting out a 70% larger beam pattern than standard Halogen bulbs. Items you will need: 1. HID Kit - Consists of (2) Bulbs, (2) Ballasts and wiring 2. Bulb Housings - Either your own stock housings if you think you can make them work, or other, more modern bulb housings that will accept a "D2S" style bulb. 3. A Set of (2) Projectors (if desired) The easiest and best way to acquire all of these items, and to make sure you're getting quality stuff is to call the folks at theretrofitsource.com - I am not an employee there. In fact, I don't even know where their store is. But if my brother were doing an HID project, that's where I would point him for equipment and expertise. Retro Fitting When people talk about Retro Fitting HID lights, they are talking about installing HID lighting in a vehicle that did not come with HID/Xenons from the factory. Usually, this involves wiring up the HID lights and fitting them into the existing stock Headlight Housings. Color Temperature The color that HID headlights glow depends on temperature. The lowest temperature available will be around 3000 Kelvin, and will glow yellow. As the temperature increases, the colors change. The most common temperature is 6000K, because this is the whitest beam available, and this is the temperature used on most cars with stock HID bulbs.  Projectors 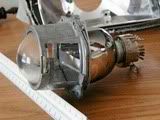 Projectors are an important aspect of HID/Xenon lighting because they serve two important purposes. 1) They magnify the light, much like you did when you were a little kid burning ants on the sidewalk using a magnifying glass to concentrate the light of the sun. 2) Projectors focus the light into a distinct beam pattern. As stated above, HID's are very powerful sources of light- much brighter than Halogens. Projectors are used to harness all of this brightness and focus it to a specific area so that the light is not wasted by glaring off into areas that you don't need to illuminate, and so that the light is aimed in a position where it won't blind oncoming drivers. The distinct, sharp cut off pattern that people associate with HID/Xenon lighting is totally due to the use of projectors. If you look up close at a 2010 Audi A4, for example, you will see that inside the headlight housings are projectors, and inside those projectors are the Xenon bulbs. Ballasts A Ballast is a little module that is wired up in between the HID bulb and the power source (car battery). HID Ballasts harness power from the battery and distribute it to the HID/Xenon bulbs in specific voltage that the bulbs need to operate. The way that the ballasts distribute power to the bulbs is why HID's "warm up" they way they do, where the turn on and glow brighter and brighter, until they finally reach their maximum brightness after 15 seconds or so. Typical Installations There are 2 basic methods of setting up your new HID headlights, and the difference between the two methods is simply whether or not to use Projectors. Like I said before, Projectors make the lights much brighter, and they give you a better grasp of control over the beam pattern of the lights. However, they are somewhat expensive, and installing them makes the project a whole lot harder because you'll have to modify your existing bulb housings perfectly in order for the projectors to fit inside them (this sometimes requires baking the housings in the oven in order to take them apart), and then you'll have to seal around the outside with some kind of epoxy in order to keep the bulbs from getting wet, and to avoid exposure to the outside world. For this reason, whenever you read "True Plug N Play" when it pertains to HID's, it means they expect you to omit the projectors. HID bulbs WILL fit perfectly in place of your existing, normal bulb, at that's a really easy install, but it eliminates the projectors. It's a much easier project, but you lose some brightness and control. Here illustrates the "full" setup for an HID kit, meaning it includes the projectors:  1. Stock Bulb Housing 2. Projector 3. HID Bulb 4. HID Ballast The Projector, in this setup, should be adjusted and aimed so that the beam pattern is set to its desired height, width, etc., before the projector is locked into place and sealed. The Stock Bulb Housing (1) is mainly for aesthetics in this setup, as it serves to keep the front end of the vehicle appearing stock. 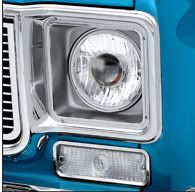 Projectors plus HID's is the brightest, most well-defined light beam that you can have for headlights on a vehicle. You get a superior focused beam pattern with a distinct cut-off at the top of the beam. 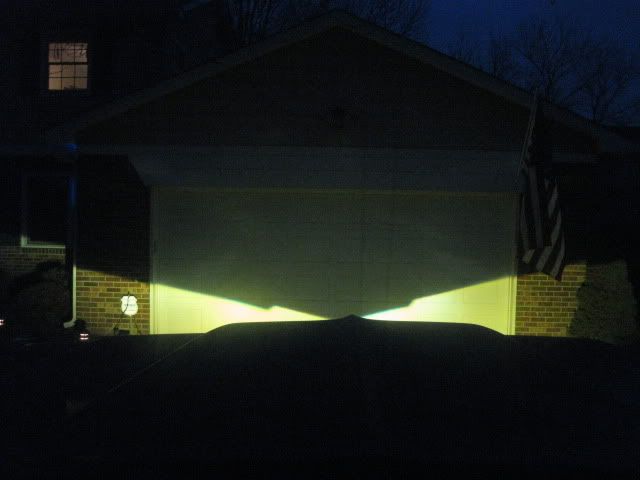 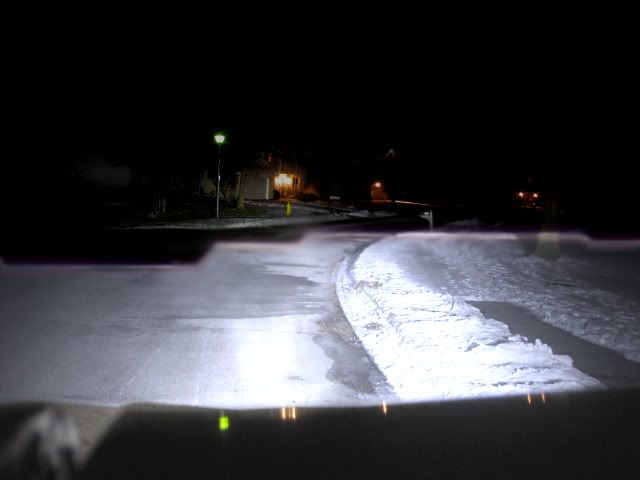 The 2nd Installation Setup, which I will call the easy method, is the same as the first method, minus the projector.  This setup eliminates the need to modify and re-seal the stock bulb housing, which is the hardest step in retrofitting HID lighting. Without the projectors, the beam pattern will be much more scattered rather than focused and well-defined, and the distinct cut-off will be lost. 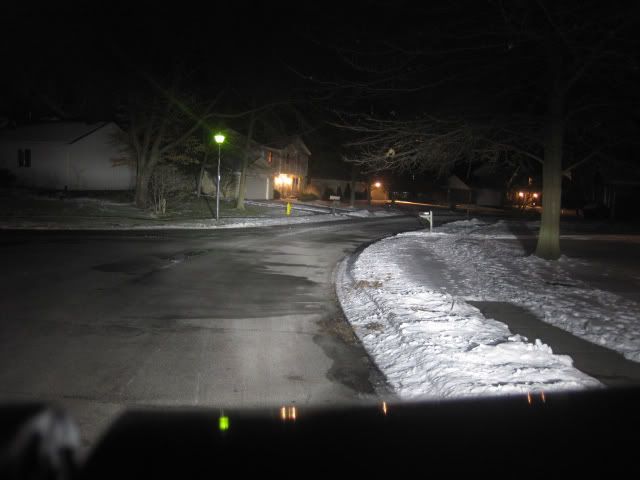 Because the projectors are omitted, you will need to adjust the stock bulb housings in order to "aim" the beam in a manner that doesn't offend oncoming motorists. You are definitely left with much less adjustment capability, and with certain vehicles, you may not have enough adjustment to keep your beam pattern out of other driver's eyes. However, the scattered light that is outside of the main beam is NOT that bright. In fact, it's not even bright enough to drive with, if that's all you had. So, I don't buy the idea that you can't run HID's without blinding other drivers unless you use projectors. While it's true that the MAIN beam would blind an on coming motorist, you just have to aim the headlights appropriately so that you're not throwing your main beam into their eyes. If all they get shined with is the secondary, scattered portion of the beam, they won't even think your headlights are any different from normal halogens. Here are two identical pictures of the beam pattern of my HID headlights with no projectors. You can plainly see that the secondary, peripheral portion of the beam isn't even bright enough for the colors to be visible on the American flag in the picture. I have no worries about this dull, dim, scattered portion of light blinding anybody, because my headlights are aimed properly: 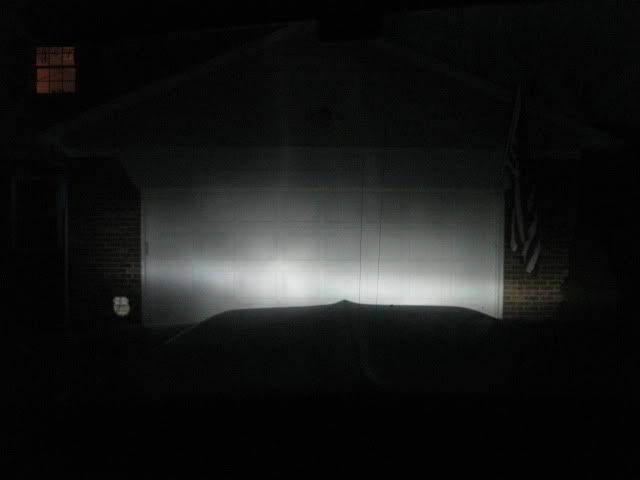 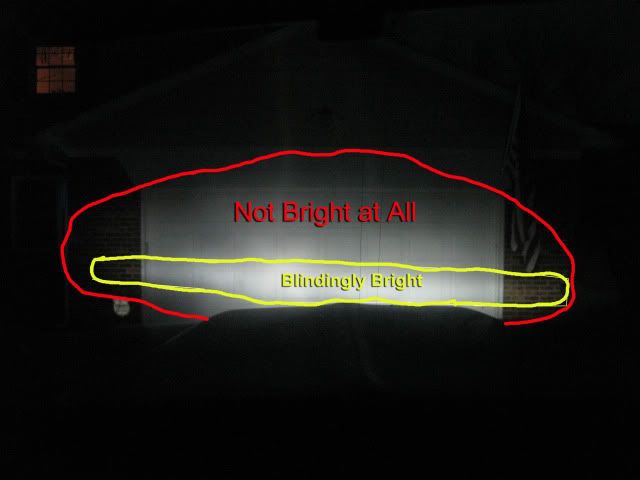 Because the bulb will plug right into the back of any modern headlight bulb housing, you will retain a completely stock look. Until the lights are turned on, nobody would be able to tell you're running HID's. Aiming Procedure Regardless of whether or not you use projectors in your HID setup, you will need to aim your headlights before you tighten them down and take to the road. Check your state's laws to see what the limitations are on headlight beam height. To aim them, you should find a flat, level surface adjacent to a vertical, white wall (a garage door is perfect). Follow the instructions found in this diagram: http://www.coolbulbs.com/HID-VISUAL-...-PROCEDURE.pdf Conclusion When I first started driving my '78 Chevy K-10, it was borderline dangerous to drive at night. The old headlights were so dim, and the stock alternator from the 70's wasn't able to recharge my batter fast enough, so all the electronics in my truck were suffering. HID/Xenon lights are an excellent way to make your vehicle easier and safer to drive at night. They are much much brighter, the light is clearer, and they actually consume less power. I currently have 2 sets of (2) HID lights on the front of my truck: 6000K Temp Headlights in the stock bulb housings with no projectors and 3000K Fog Lights in Projectors that I "Frenched" into the front bumper. I have driven around 300 miles at night with this setup, and not one person has flashed their lights at me, so I think I'm adjusted properly. With a little research, $300, and a couple hours of work, you can make the HID switch as well. I hope this thread gives you the info you need to start acquiring the equipment and installing your own HID's. Last edited by Anadrol; 02-06-2010 at 02:12 AM. |
|
|

|
| Bookmarks |
| Thread Tools | |
| Display Modes | |
|
|