
 |
Register or Log In To remove these advertisements. |
|
|
|
|||||||
|
|
Thread Tools | Display Modes |
|
|
#1 |
|
US Army Veteran
 Join Date: Nov 2008
Location: Central Texas
Posts: 1,049
|
Project Pancho Villa - 1978 SWB
I've been here a few months now and figure it was time to start a project thread. I have lots of pics and some stories to go along with the build.
I've always wanted to restore an older vehicle. In my younger days, I bought all sorts of cars (68 Camaro, 71 Chevelle, 68 Tempest, 71 Camaro and many others) with that youthful hope that somehow I'd miraculously get rich and be able to afford to make the car(s) great cars. Of course, it never worked out, but it was fun to dream! Fast forward twenty some odd years. I'm in my mid-40s now and officially a "Paw Paw" now! My mind rarely acts as though I'm this old, but one thing is for sure...the body will NOT let you forget! About six years ago, my life long best friend died. It was tough. We had been best friends since about seventh grade. After high school, we always stayed in touch and always visited each other. As we got older, we stayed in touch at least once every few weeks by phone or email. The reason I mention that, is because this build is dedicated to my life long best friend. I miss him a lot. We grew up in a small town in Texas and these trucks are what I remember the most about him. He had late seventies model SWB in HS and we used to cruise all over the place. For as long as I knew him, John always had a Chevy SWB truck. He'd live out one, and get another. So last year, with things doing very well for my wife and I, and our kids grown and off doing their own thing now, I started looking for a truck. Finally found one locally in November of last year. I had looked at quite a few trucks, but when I saw this one...it just reminded me of my best friend. I had no tools, other than a few mis-matched socket kits from Walmart. Our garage was packed half full of stuff my wife (mostly) has toted around since we've been married, never willing to quite let go of. We spent the next week or two going through all the "stuff" and I finally convinced her that it was time to let go. Some she did, the rest we moved into a spare bedroom. With the garage cleaned out, I set out to start buying tools. The guys at Sears know me by name now! I bought a compressor, a welder, a plasma cutter, socket sets, grinders, screw drivers, and Craftsman work cart and Who knows what else, over the past few months. My experiences with cars in the past was not good, mostly because I never had the right tools. I'd be right in the middle of fixing something, than have to stop, go to the store, and buy something because I didn't have it. For this project, I decided to have everything I would need. Anything is possible, with the right tools. Sorry to ramble on. Just figured I'd put a story behind the build. This is my first build and will probably be my last, but it was important to me to do in memory of my friend. So here's the truck as I bought her: 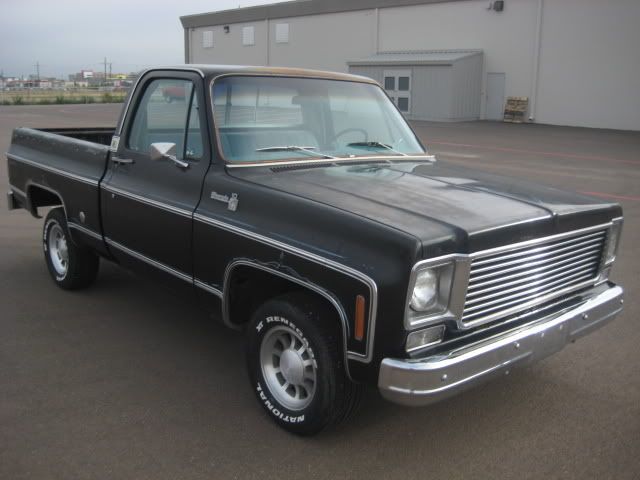 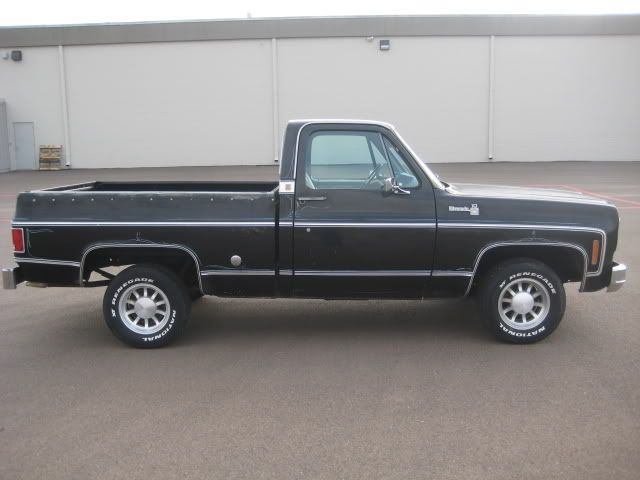 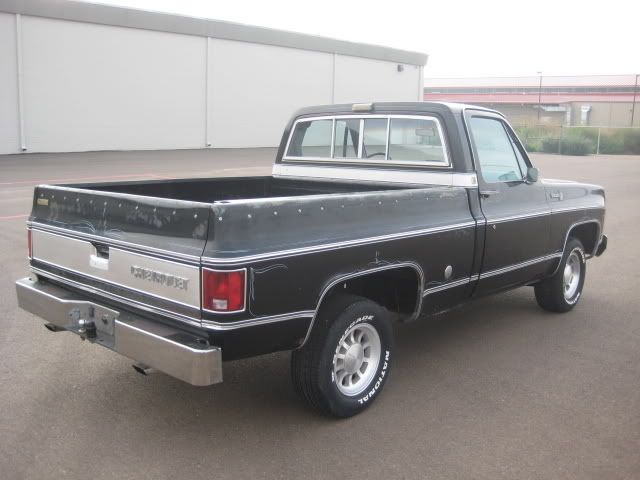  The truck originally belonged to a local dealer here. He owned a Chevrolet lot and when the truck came in, decided to make it his personal vehicle. He added the rims you see, a billet grill, had it pinstriped and a few other things. The body was straight. Two small places, one front fender and one rear fender, has some minor rust, but nothing that can't be fixed. The cab, however, had the usual rust problems. Floor pans, cab corners and rockers. No, I had never done any of these before and was quite intimidated by it, but having read some posts here, the advice I kept seeing was "just get in and do it!" And I have/am! Interior was pretty faded. I'm going to redo the set in leather. Already bought a good dash from Ebay and have most of the other stuff waiting to be installed. 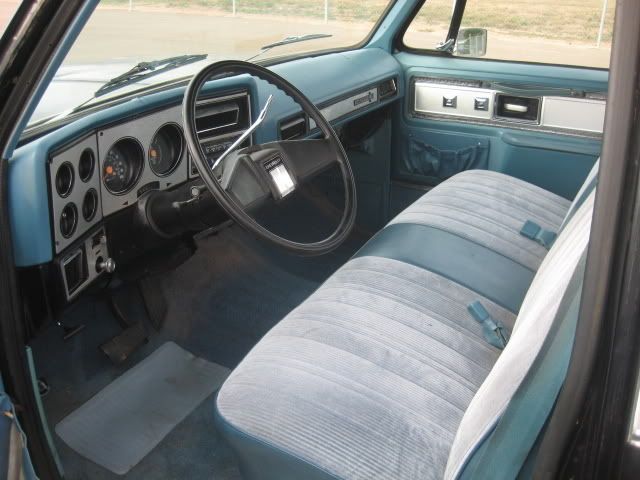 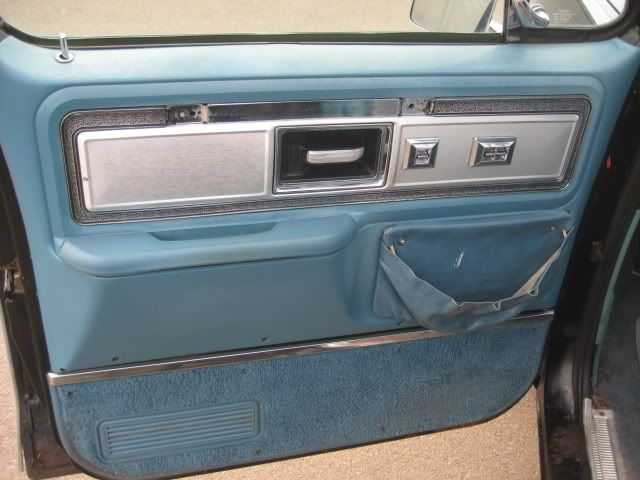 The bed isn't bad, despite the pic. Some surface rust and one area at the rear that we'll replace. Going to clean it/sand it out, and leave the inner in epoxy primer to seal it, then have it professionally spray lined. 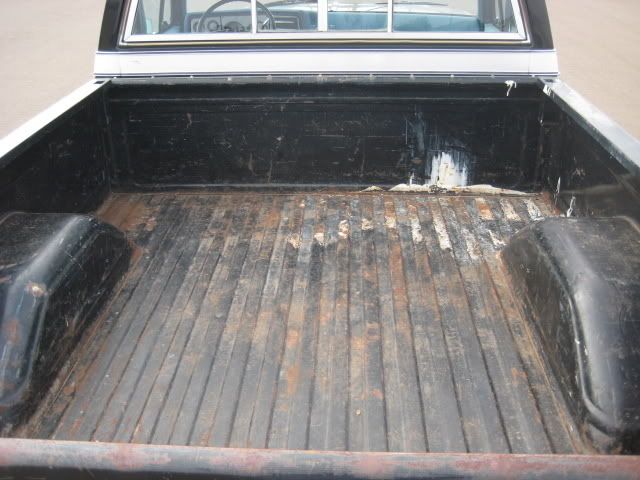 Disassembly begin Christmas day, after presents, family time and the big family lunch. We got most of the front clip off, hood, radiator support, finders, bumper, etc. A few days later, we took the engine/transmission out: 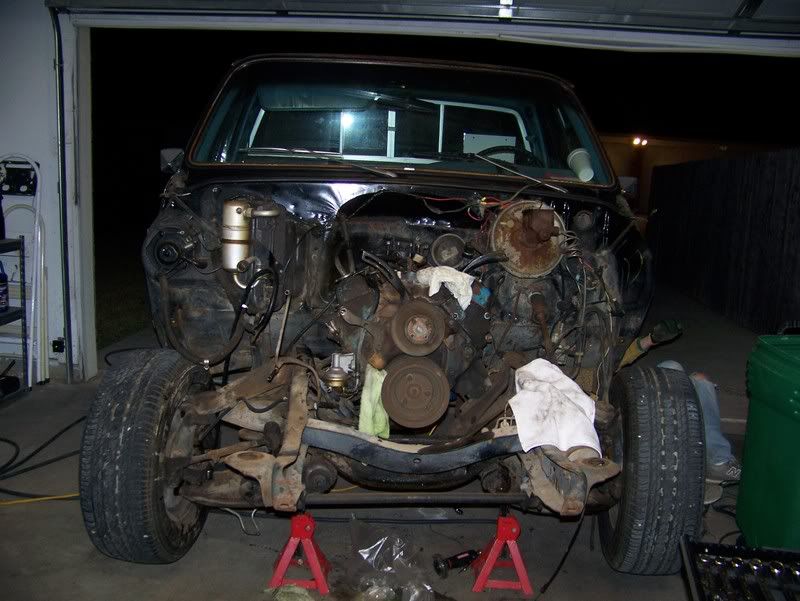 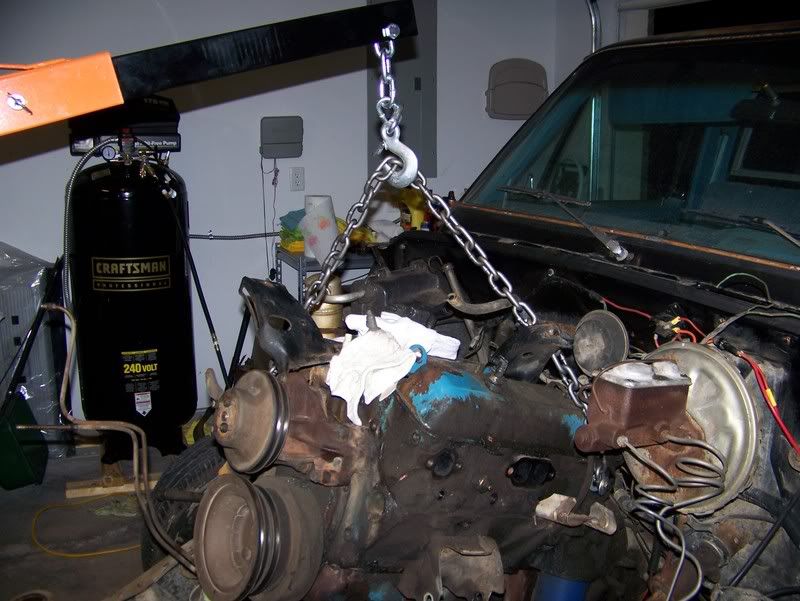 I had another motor I had bought from someone locally, that was already built. As time went by, I kept thinking "383 stroker" and read a few posts here were guys were saying "you won't be sorry!" So I finally gave in and sent the 350 block to a machinist to have a 383 stroker built. He's done me pretty good. Paid average rates for machine work, but he called and was concerned about getting it to me on time. I told him it would be a few months before I was ready to put it in, so put me on the back burner and get his backlog taken care of. In turn, he offered to build the motor for me. He's putting on the new heads, new roller rockers, intake, camshaft and basically saving me the trouble of building it. Worked for me! And here's the love of my life (well, one of four, but he lives close by and comes over to see "Paw Paw" every weekend!), my two year old grandson. The second he hits the door to our home, the first thing he says is "See Paw Paw's truck?" He loves to go out in the garage and play with the tools and work on the truck. Part two, with more images, below.
__________________
1972 C10 Highlander - The making of a daily driver |
|
|

|
| Bookmarks |
|
|