 |
Register or Log In To remove these advertisements. |
|
|
|
|||||||
|
|
Thread Tools | Display Modes |
|
|
#1 |
|
Active Member
 Join Date: Jul 2007
Location: Centrally located between Houston, Austin and Waco. BCS area.
Posts: 7,947
|
Cheap $10 overflow- how to and pics.
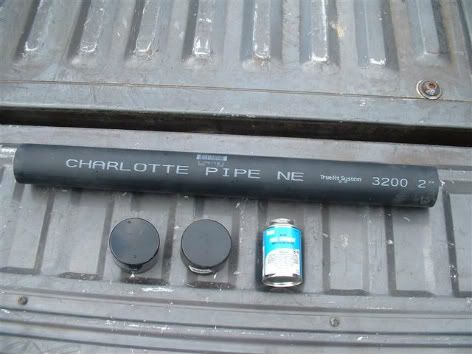
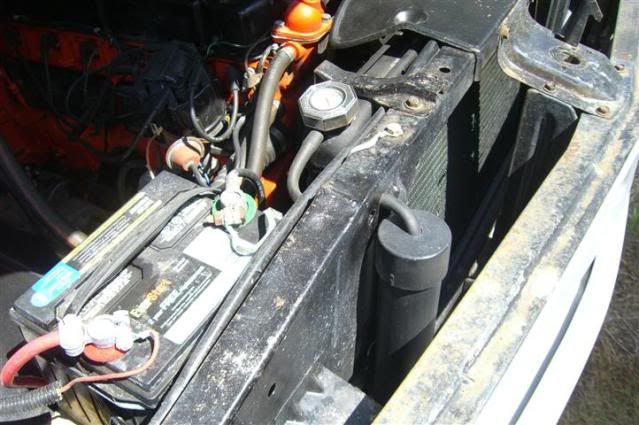
I've been asked how I made a my overflow by a few members so I'm posting some pics of what I used. Cost in parts was less than $10 at the local Lowes about 3 years ago. May be more these days. This overflow can be placed in any convenient place and painted to match if needed. Recently I've tinkered with the idea of a nylon or copper fitting on the top cap but for now it works well.
1. Two inch by 2 foot section of black pvc pipe , two end caps and a can of pvc glue at Lowes. Any 2" pvc pipe with end caps will do. 2. I cut the piece to 16" to fit between the radiator support and grill on mine (you can place in any convenient location) 3. Glued the bottom on and left the top unglued. 4. Drilled a 1/2" hole on the top cap to fit the hose (may be smaller depending on hose diameter) 5. I mounted mine using an old fire extinguisher clamp. Nylon or metal tie straps or U clamps can be used. 6. Drilled a 1/2" hole in radiator support to feed the hose through. It can be looped on top also if you don't want to drill a hole there. If you do drill make sure there's nothing obstructing it on the other side before drilling. 7. Cut the end of the hose at a slant and insert it until it just touches the bottom of the container. The top can be removed to check fluid since it's not glued. 8. Buy a cap that is rated for the engine you have and that allows fluid to be drawn back into the radiator as it cools. [IMG]  [/IMG] [/IMG][IMG]  [/IMG] [/IMG]
|
|
|

|
| Bookmarks |
|
|