
 |
Register or Log In To remove these advertisements. |
|
|
|
|||||||
|
|
Thread Tools | Display Modes |
|
|
#1 |
|
Registered User
Join Date: Nov 2007
Location: Central Minnesota
Posts: 631
|
In the following article, we'll discuss the general installation procedures for High Intensity Discharge (HID for short) lighting as well as an explanation of what HID's are, how they work, and what you'll need.
First off, if you are unfamiliar with HID's here is basically how they work and differ from the standard Halogen or sealed beam lights; HID's have no filament like a halogen bulb does, instead they have electrodes and are filled with Xenon gas and metal salts that create an arc between the electrodes within the bulb itself. That arc heats up the gas within the bulb which creates the light that the bulb puts out and you see. That is the reason a ballast is needed, because of the large amount of voltage it takes to ignite the gas and allow it to have a steady arc. 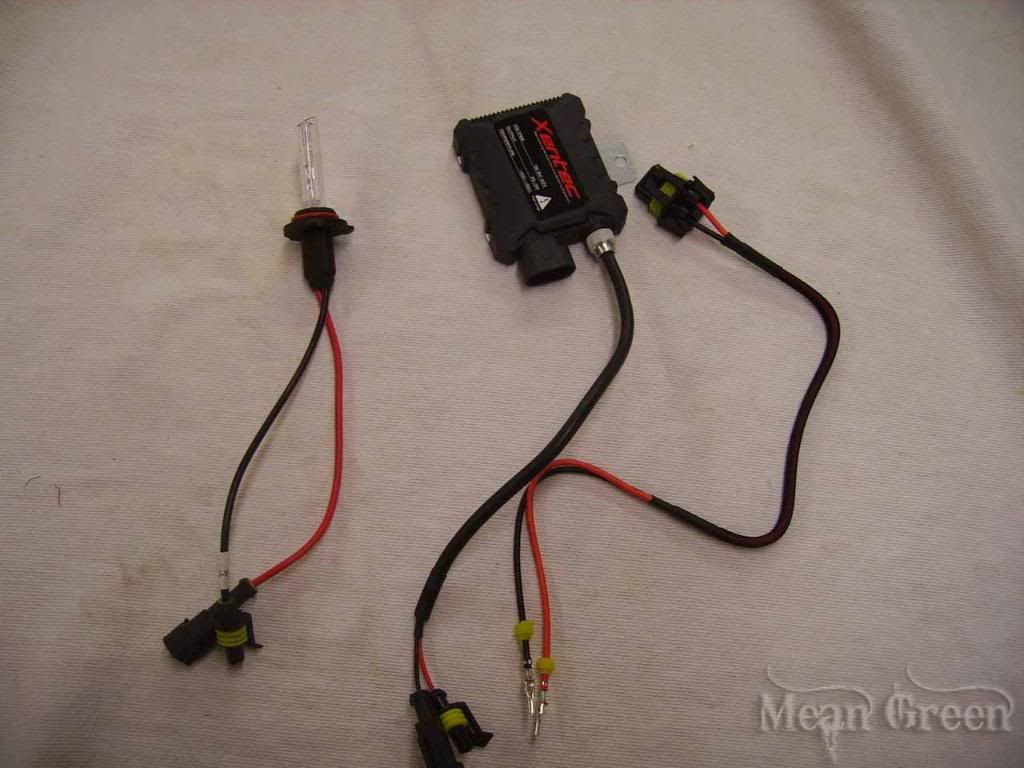 (Typical components of a HID kit) What should I buy? Alright, now when ordering a set of HID's you need to decide what Kelvin temp you want, as well as how many watts. They are available from 3000K (yellow) - all the way to 32000K (purple). A common misconception is that the higher the Kelvin number is, the more light output you will have. That is a false. For HID's, Light output is optimal right around 4200K-5000K. And the higher the Kelvin number, the less lumen's (output) they produce. To find out what bulb style your truck takes, Click Here. (GMT400's (88-98 GM Trucks) and GMT800's (99-07 GM Trucks) take a 9005 high beam bulb and a 9006 Low beam bulb) 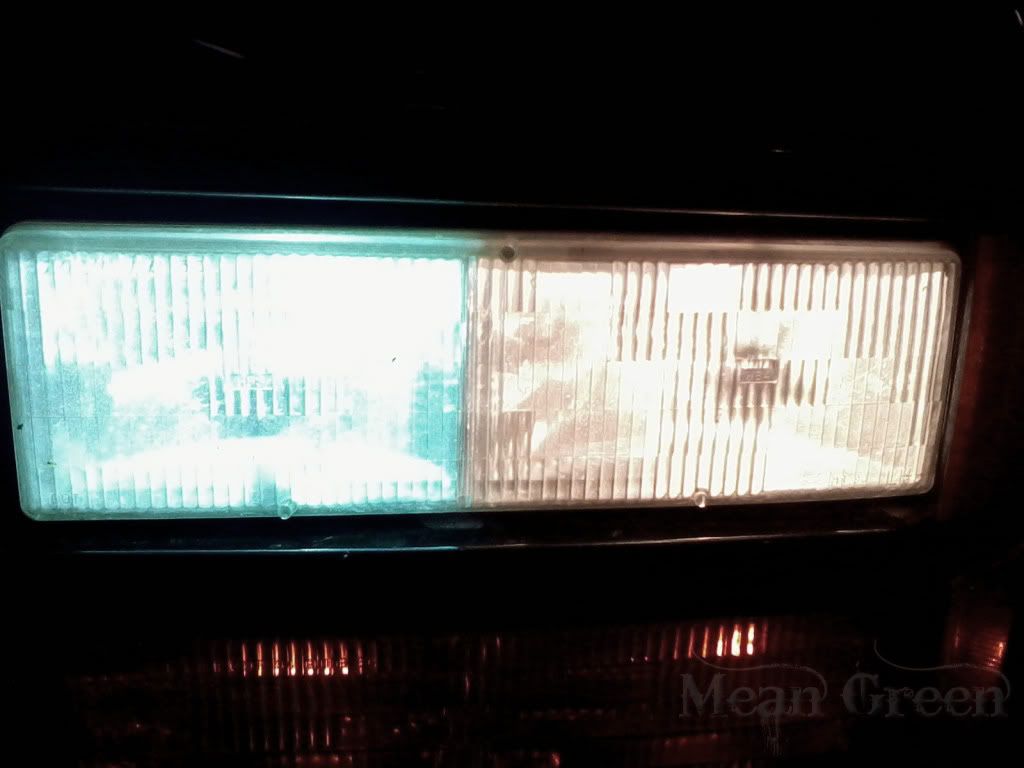 (Left side is 5000K 35W HID and right side is 9006 Sylvania SilverStar Ultras, notice how white the left side is compared to the yellow on the right) Where do I buy a HID kit? There are various Internet retailers that sell "Plug n' Play" HID kits, and they all vary in price. Ebay is a great place to buy a kit for a reasonable price. Also try to find a kit that utilizes the "Slim Ballast" as they tend to have better internals in. I have Xentrec HID kits on my trucks and have had trouble free operation for over a year. Also beware of sellers that are selling bulbs that are like $10. They use words like “HID” and “Xenon” to get people interested and try to fool them into thinking that they are legit HID's. These bulbs don't utilize ballasts and do not run like a true HIDs. They’re just a halogen bulbs with a blue tint on them to make the output a different color. Is my OE Headlight Harness going to handle the HID's? In short no, you need to upgrade your headlight harness to install HID's the right way (from an electrical standpoint). With any truck that utilizes a dual lamp set up (ex. separate bulb for the low beams, separate bulb for the high beams) a 4-High Relay kit is a necessity. As the HID's have a "warm up" period that takes anywhere from 3-8 Seconds, during that period your HID's will be omitting very little light and can be dangerous because of lack of visibility. With a 4-high kit installed, the low beams will always be on when your headlights are on, so there is no period where your lights are dim therefore increasing your safety as well as incresing your visibility being the low beams stay on with the high beams. You can purchase a 4-High kit HERE A tell tale sign of a headlight harness that is under par is an issue called "Flickering". Flickering is where one HID will ignite and the other won't. HID's take a lot of power to initially ignite the bulb, and when the OE Headlight harness is not up to the task, the HID ballast's will "starve" power from one another because of the large draw they take initially. (Ex. drivers side will light up, but the passenger side will not). A Heavy Duty Headlight harness will remedy that problem, our HD Headlight Harness' utilize relays to draw "clean" power DIRECTLY from the battery, and deliver the power to the headlights using 12 Gauge wire to ensure that the headlights are getting the full 13.8 volts. Where as the stock set up, the headlights draw there power from the headlight switch using 16-20 gauge wire, and the headlight switch draws its power from the interior fuse box. Which results in a substantial voltage drop by the time the power reaches your headlights. You can purchase and find more information on our Heavy Duty Headlight Harness's below: 1967-1972 Chevrolet HD Headlight Harness 1973-1987 Chevy & GMC HD Headlight Harness's 1988-1998 Chevy & GMC HD Headlight Harness's Fog/Driving Light HD Harness General Installation: 1. Start off by finding a suitable place underneath the hood to mount your ballast's, it's optimal to find a place that is always dry and relatively close the opening in the core support for the headlights. On GMT400's the inner fenders are a perfect location. Be sure to make sure that you mount the ballast so that the wires reach the bulb! 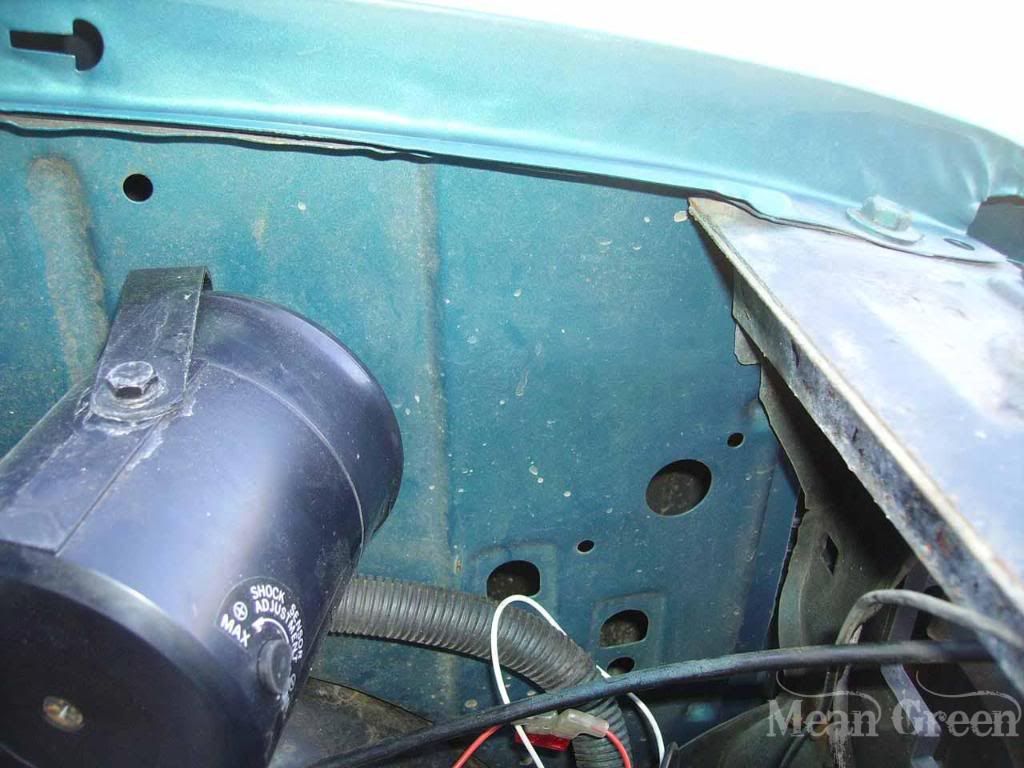 2. Now you are ready to remove your headlights, to accomplish this task is very simple. Just locate the two bolts that protrude the top of the core support near the top of the grille. The heads of these bolts are 3/16. Remove the bolts (2 bolts per headlight) and the headlights will simply pull out. (You can also remove your parking light for ease of installation, but it isn't required to do so) 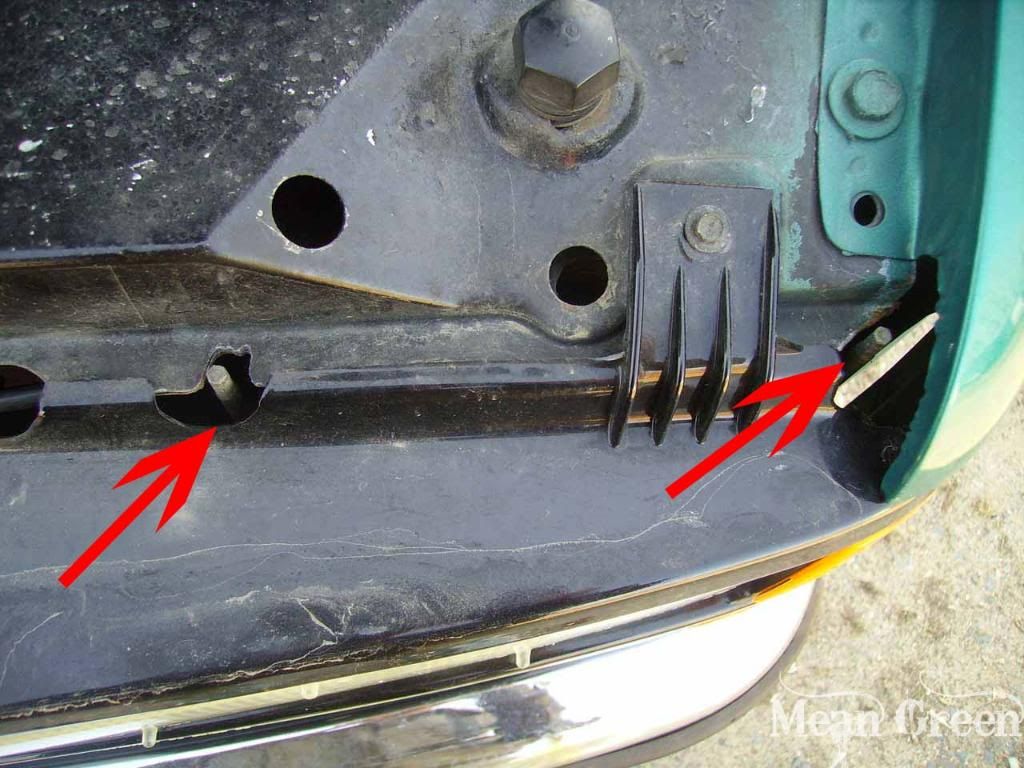 3. Now it's time to mount the Ballasts', most of the HID kit's utilize double sided tape for mounting the ballast. These Xentec slim ballast also have a metal backing plate for mounting as well. So find the location you desire to mount them and mark the hole to drill for the screw to mount the ballast. Once the hole is drilled, install the ballast with a 1/2" #8 or so metal screw. You can also elect to use both, the double sided tape AND put a screw through the eyelet in the backing plate. Also be sure to use some Lacquer Thinner or Rubbing Alcohol on a rag, where your Double Sided tape will be installed to promote adhesion. 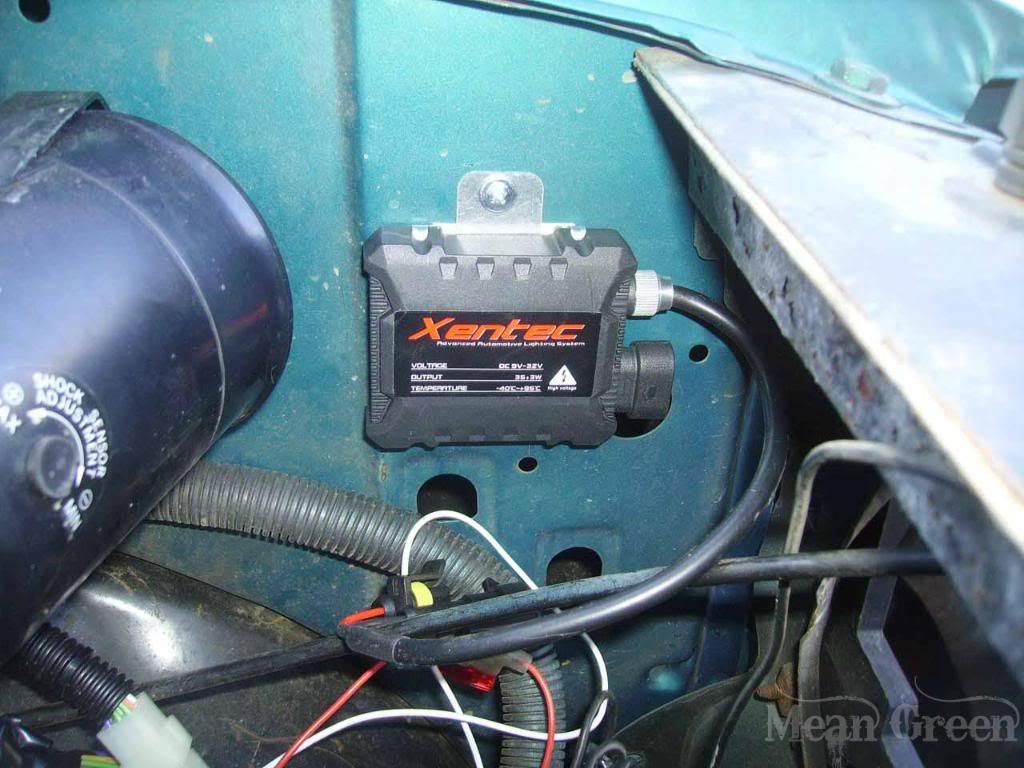 4. Now you're going to route the wires from the ballast to the bulbs, just be sure to run them UNDER the headlight assy. mounting bracket. Your going to run a total of 4 wires per bulb (2 wires plug into the original 9005 or 9006 headlight plug, the other 2 plug into the HID bulb) 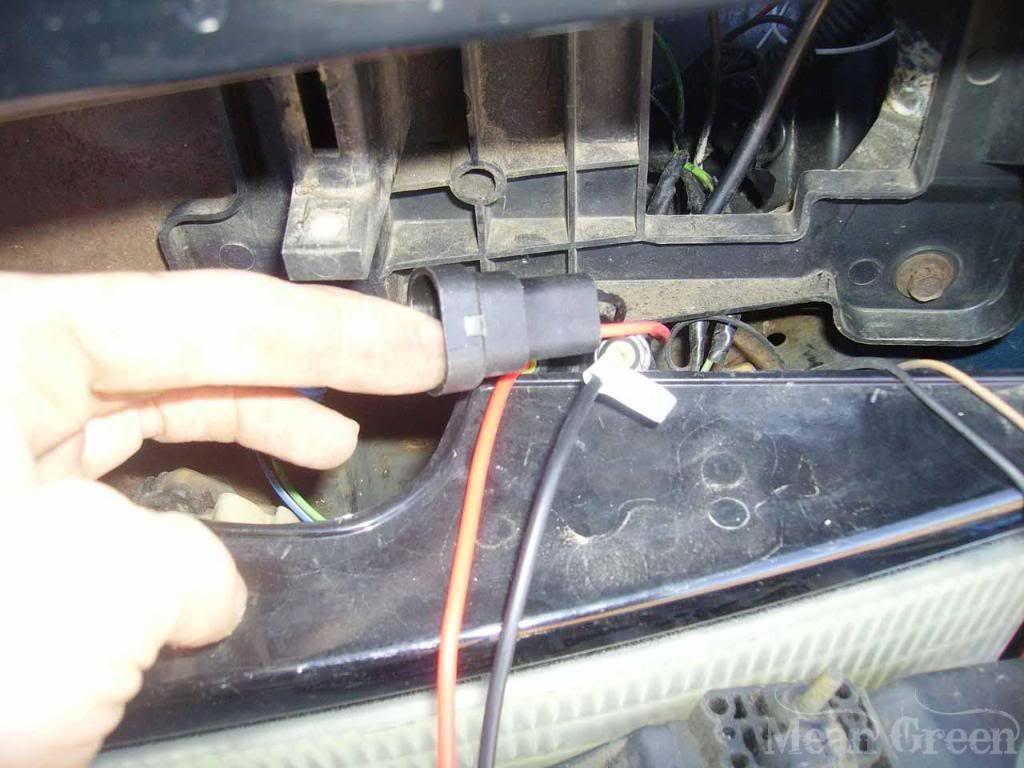 5. Now plug the wires that routed in step #4 to there appropriate locations. The 2 wires that have 1 female plug, will plug into your original headlight (9005 and/or 9006 for GMT400's) plug. Also be sure that the 12+ red wire from the ballast plugs into the 12 + side of the 9005 or 9006 plug. The other set of wires, gets plugged into the HID bulb. 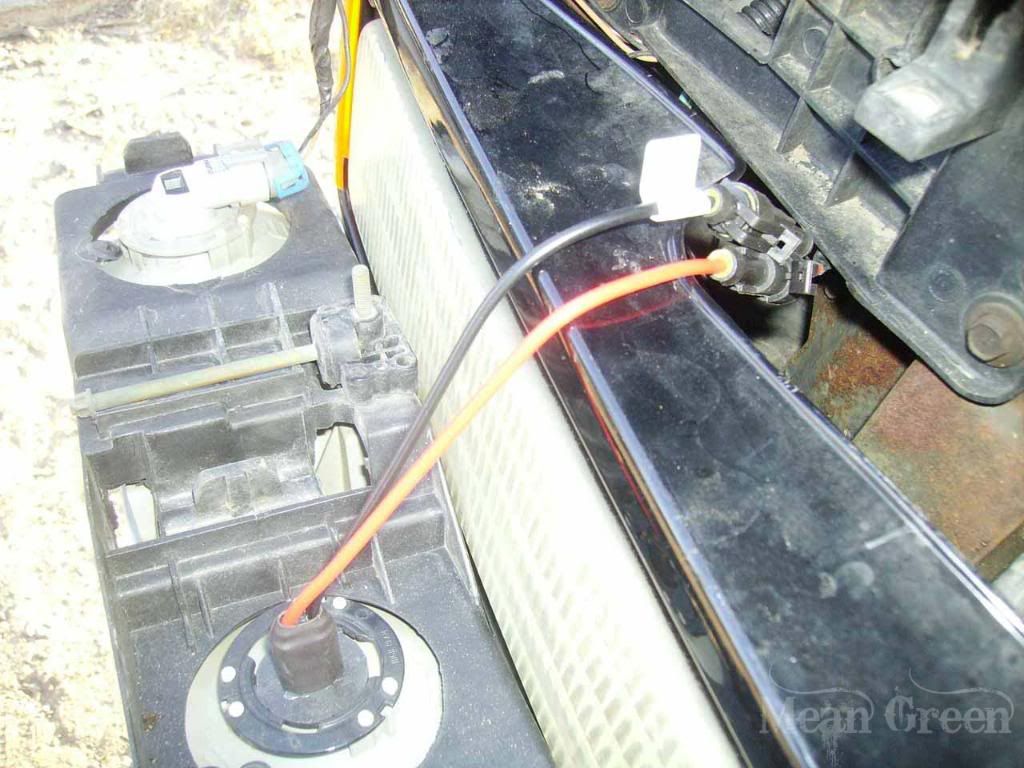 6. Remove the old halogen headlight bulb from the headlight housing, and install your new HID bulb into it's place. Be sure that you turn the bulb into the housing fully to insure a weather tight seal. 7. Now simply put your Headlight assy. back in it's place by reinstalling the 2 bolts that you took out in step number 3. Also take caution to not pinch any wires while doing this task! 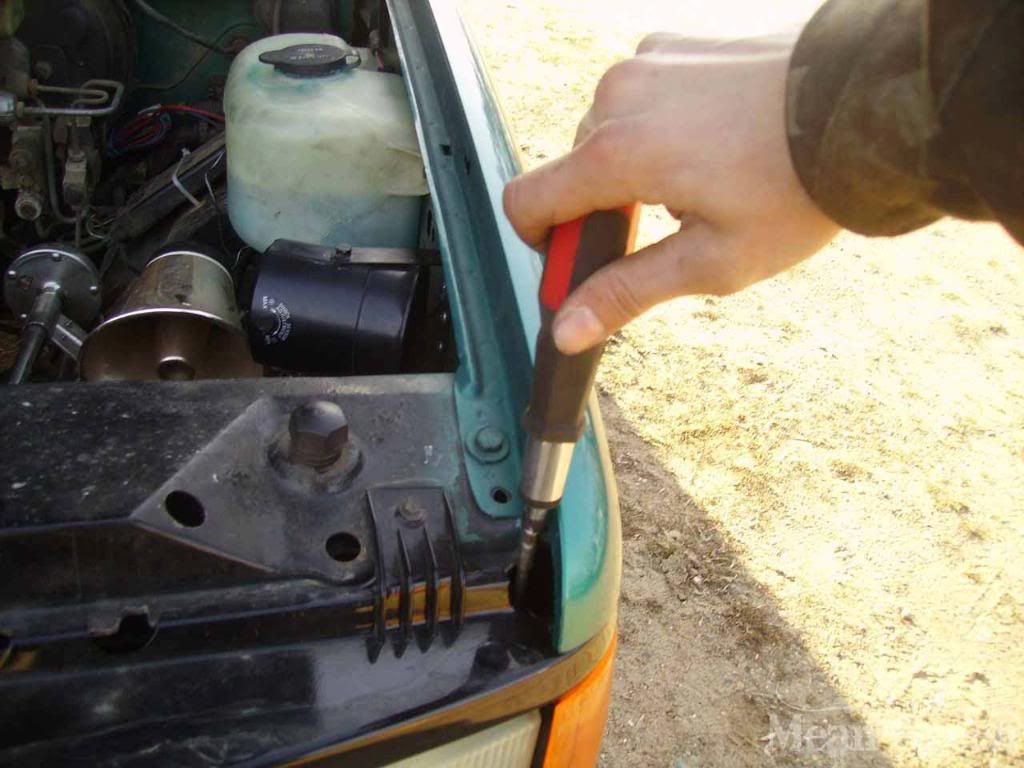 8. Now simply repeat the process for the other side, and then your done... almost! You now have HID light's in your truck! When you first get your bulbs installed, let them on for around ten minutes to "burn them in". You'll notice that it takes from 3 -8 seconds for the bulbs to get up to temp and achieve full brightness. 9. VERY IMPORTANT STEP!!!!! BE SURE TO RE-AIM YOUR HEADLIGHT HOUSINGS AFTER INSTALLING HID'S!! YOU DO NOT WANT TO BLIND ONCOMING DRIVERS!! BE KIND, AND DO NOT BLIND!! There are several other elements to consider when deciding on what is the best lighting set up for your self, HID's have become more and more popular in recent years and have a reason on why they've become so popular. The light output (lumen wise) is far superior of that of a equal wattage halogen or sealed beam head lamp. There are other ways to install HID's as well such as doing a projector retro-fit (where a OEM HID Projector is installed into a older model vehicle so the HID's can utilize the housing in which they where generally designed to) but the major con of that task is the price. Regardless of what you have for lighting now, or what you are upgrading too, the MAIN objective is SAFETY! So please take that into consideration when choosing what is best for you!! Thank you for taking the time to read this article! Have a great day, and have a bright night!!  -Baron with VH-Coachworks Last edited by VH Coachworks; 04-07-2012 at 03:05 PM. |
|
|

|
| Bookmarks |
| Tags |
| headlights, hid conversion, relays |
|
|