 |
|
|
#11 |
|
Senior Enthusiast
Join Date: Feb 2007
Location: Spokane Valley, WA
Posts: 8,356
|
Re: Markeb01 Build Thread
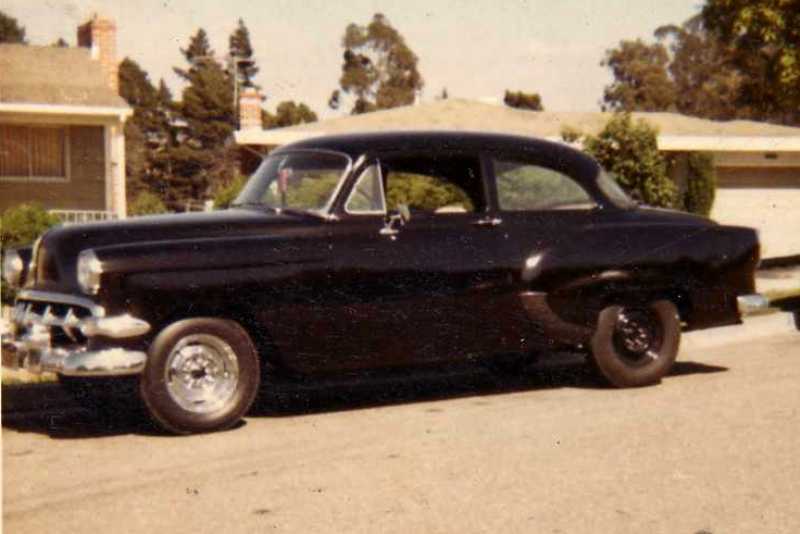
My first windshield installation was back in 1966 on my 1954 Chevy high school car. A local wrecking yard was going out of business and a friend of mine had a 430 Lincoln engine that had spent most of its life as a stationary engine. It was traded to the yard owner for anything we wanted. Along with a whole bunch of other stuff I pulled a mint condition blended windshield out of a 54 Chevy Bel Air. With no training, books, or experience I popped out the black gasket stocker and slapped in the new stainless trimmed model with no trouble whatsoever. Here are before and after photos:
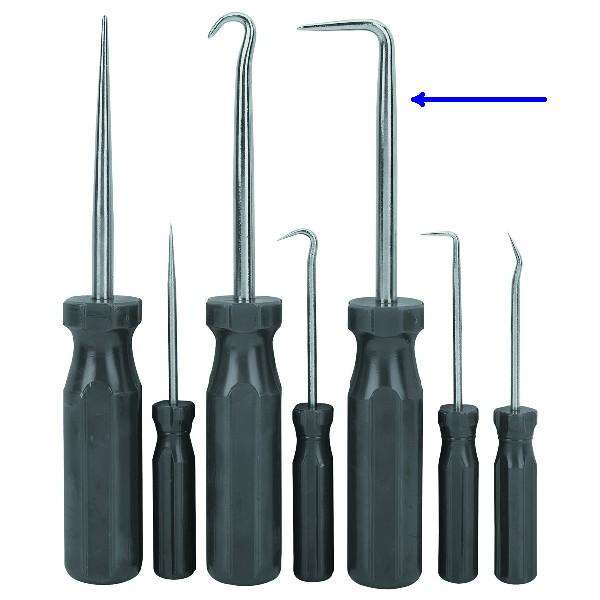
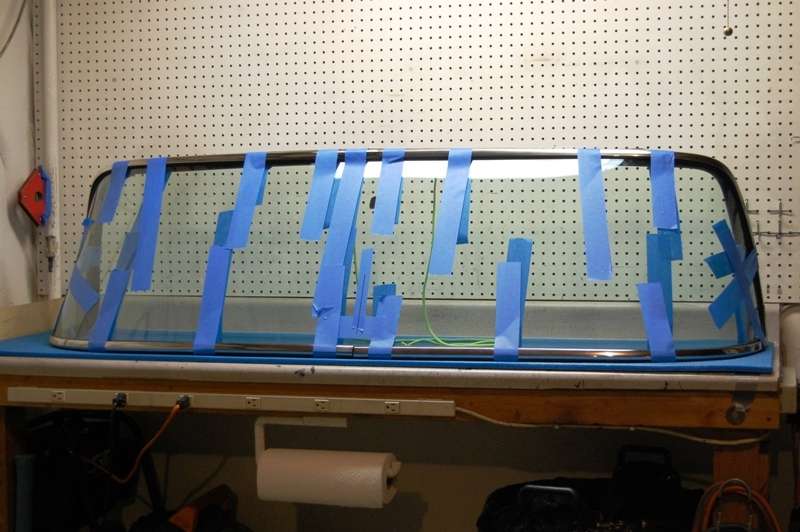
  Since then I’ve installed more windshields than I can remember, both the type with gaskets and the later models adhered with urethane. I always did them by myself because they were easy enough help just wasn’t needed. Back in 1998 I attempted to reinstall the damaged original windshield in my truck after painting the cab, and for the first time ever I broke the glass. It did crack at an existing good sized star chip, but this failure really shook my confidence. Not so much because I failed, but more because I never did figure out how it needed to be installed. Every windshield I ever installed went in bottom first. Trying the same approach with the wrap around windshield caused the top of the glass to collide with the roof overhang and before it could be worked into position it split. So for this attempt I spent months reading and watching everything I could find. And after reading every thread and comment I wasn’t remotely convinced I could pay a professional and receive a perfect installation. After watching every video I could find on the subject, I bookmarked this one and watched it a couple of more times the morning of the install. Even though it is for a newer series truck it’s the most thorough I’ve found, and extensively uses a hook tool, something I’ve never seen demonstrated before. I don’t know how long it will remain available on YouTube, but here’s the link: After watching the video I picked up this set at Harbor Freight. The tool marked with the arrow is the only one I used:  http://www.harborfreight.com/7-piece...set-93958.html For anyone interested, following are the steps we took to actually install the windshield. It took a little over an hour and ended up being one of the easiest I’ve done. Last minutes steps were removing the steering wheel and rolling down the side windows for maximum access. I had my helpers watch the above video from 14 minutes to the end, so they’d know what I was going to be doing in the cab. I also ran the last minute instructions checklist: 1. Remove all rings, wrist jewelry, and belt buckles (which they did). 2. After the windshield is located on the cab, only use open hands to press on the glass. 3. Don’t bounce the pressure. 4. Don’t apply any pressure on the sides of the (wrap around) glass. Press only on the flat face of the windshield. 5. Don’t slap the glass. If that is needed I’ll do it. 6. Don’t touch the glass with any tools. 7. Let me know immediately if a piece of trim pops out. If we don’t catch it early enough we’ll have to pull it back out for correction and start over. With the glass completely assembled with the gasket, trim, and rope as shown again here:  KY personal lubricant was smeared all over the entire windshield cavity and the gasket/rope surface of the windshield. One tube was sufficient to cover everything. This was done immediately prior to placing the glass on the truck so it wouldn’t have a chance to dry out. In retrospect, soapy water would have probably worked just as well. One benefit of the KY is it makes a nice glue once it dries. Rather than trying to install the glass bottom or top first, I had them almost place the glass flat against the cavity. With the entire gasket within an inch or so of the body, I had them tilt the top in slightly, and I started pulling in the top of the gasket with the hook tool. It pulled over the pinch weld easily. As I was doing this I kept watching the sides, as my biggest concern was the gasket would rub against the body and tend to bend the glass outward causing a stress crack. This turned out to not be a problem. As the glass was seated against the upper pinch weld, the sides slid directly into position in perfect alignment with the A posts. There was no side pressure at all. As more of the gasket seated, I reached down and pulled the lower gasket over the pinch weld again using the hook tool. The mating surfaces were so slimy everything fell right into place. I also had a spray bottle of Dawn dish soap, but didn’t use any. This process was simple, with very little pressure applied to the glass. I just kept working the sides of the gasket until almost everything was in place and eventually the windshield snugged up against the body. I finally pulled the rope out where it remained, which was almost a nuisance and unnecessary. By the time I did pull the rope the glass was almost completed seated by use of the hook tool. Final tune up was going over every inch of the gasket again (from the inside) with the hook tool to make sure I had even coverage and the second lip of the gasket flap was clearly inside the pinch flange. I spent a great deal of additional time trying to completely pull the inside gasket flap in place to completely fill the body cavity. On the upper inside corners I never did get this fully accomplished, when it occurred to me this is exactly what the old gasket looked like before I pulled the windshield. I assume this has to do with the size and shape of this particular windshield, rather than having a “bad” gasket. Regardless it is completely seated and sealed. Here are a few last minute observations: The hook tool was my best friend. I performed almost the entire installation with it. I recommend adding and using the rope, but it was virtually unneeded on this job. If the gasket is installed on the bottom edge of the glass first, it must be stretched at least one inch on each side (as shown in post #367 of the build thread photos above) to provide proper fit along the upper edge and corners. If it is not stretched it will pull off the glass taking the trim with it, and no amount of tape will help. When the trim is installed in the gasket the gap between each end should be nearly the same (about 3/8”-1/2” between each piece). If not, the trim will restrict the movement of the gasket during the windshield installation making it more difficult to fit the corners in the cab correctly. I bought suction cups but found them unnecessary. I’ve watched videos where others do the job by themselves and use the cups on the inside to pull on the glass. It worked on YouTube, but I wouldn’t attempt that on my windshield. Sorry there weren’t any photos taken during the process. All three contributors were too busy working and there wasn’t anybody left to operate the camera. That’s about all I can think of for now. If I forgot something obvious please let me know.
__________________
My Build Thread: http://67-72chevytrucks.com/vboard/s...d.php?t=444502 |
|
|

|
| Bookmarks |
|
|