 |
Register or Log In To remove these advertisements. |
|
|
|
|||||||
 |
|
|
Thread Tools | Display Modes |
|
|
#76 |
|
Luv the Crewcabs
Join Date: Aug 2006
Location: Andrews, In. 46702
Posts: 4,097
|
Re: My burbarific build thread
Good Job Andy..................
Sure Glad you updated the Build Thread, Some of the Guy's seemed to be Going into withdrawal Mode from lack of update's, All is well in Burbville for now    Rick
__________________
55 Nomad 52 Willys Truck 67 Stepper 67 Fleet 68 Wrecker 68 Suburban 76 Crewcab 79 Gmc Dumptruck 84 Blazer 86 Crewcab Stepside 87 Iroc 89 GMC Plow Truck 91 Camaro Vert 96 Z71 Stepsde |
|
|

|
|
|
#77 |
|
Official Site Guitar Shredder
Join Date: May 2006
Location: Oz
Posts: 3,955
|
Re: My burbarific build thread
Looks Damn good Andy........And with out being sweet on ya.....I am proud of ya......With all the crap that has been taking you this way or that way......Its good to see you finish the task at hand............Now its time to start the next step in the process .........Whatever that may be...........Good Luck...........
|
|
|

|
|
|
#78 |
|
State of Confusion!
  Join Date: Jul 2002
Location: Gulfport, MS USA
Posts: 47,266
|
Re: My burbarific build thread
Glad to see it moving along Andy. Can't wait to see the full view with the 68 front clip on it.
__________________
Bill 1970 Chevy Custom/10 LWB Fleetside 2010 Toyota Tacoma PreRunner SR5 Double Cab - DD Member of Louisiana Classic Truck Club (LCTC) Bill's Gallery Life isn't tied with a bow, but it's still a gift. Live simply. Love generously. Care deeply. Speak kindly. Leave the rest to God! |
|
|

|
|
|
#79 |
|
its all about the +6 inches
Join Date: Jan 2001
Location: Hilliard Ohio
Posts: 2,690
|
Re: My burbarific build thread
I still have TONS of pics to resize and post... so more updates later today/tonight.
Time to take the boy out to Ci-Ci's for some real nasty Pizza. |
|
|

|
|
|
#80 |
|
its all about the +6 inches
Join Date: Jan 2001
Location: Hilliard Ohio
Posts: 2,690
|
Re: My burbarific build thread
Wow... I just pulled out the invoices....
Engine costs; Vacuum Advance can... 22.99 Cam shaft... 53.68 Lifter set ... 35.68 8 push rods 23.76 Assembly lube ... 7.24 V belt... 12.80 V belt...12.34 V belt...10.70 Gasket kit ... 50.70 2 exhaust donuts ... 2.32 2 motor mounts ... 17.66 8 plugs (R45TS) ... 14.90 (rememberr when they were a buck a piece???) 2 sets of manifold studs and nuts ... 8.54 2 cans semi flat black ... 14.58 2 cans chevy orange ... 10.18 EOS (zink oil treatment from the dealer) ... 15.39 brass freeze plug kit ... 33.47 1 bottle of MAPP gas and torch tip ...24.82 (and yeah, it got the broken bolts out!!!) 2 cans of carb cleaner ... $3 Allen head bolts for valve covers ... 7.43 By pass hose on intake ... 4.99 battery cable... 9.99 glass fuel filter ... 9.99 Oils and filters were free, my job sucks but it has it's perks plug wires, wire loom kit, and HEI were all from before. The HEI was installed the day i got the truck, and the rest installed shortly after getting it home... these numbers not included in this total. Air cleaner free from a buddy Air filter ... free from dismantled truck (dang near new filter... off a 6.5 chevy) Chrome Chevelle valve covers... free from a buddy Total spent on motor; $440.12 (if I did the math right... which is a 50/50 shot) |
|
|

|
|
|
#81 |
|
its all about the +6 inches
Join Date: Jan 2001
Location: Hilliard Ohio
Posts: 2,690
|
Re: My burbarific build thread
Converting the truck to 1/2 ton involves drive shaft work. A lotta ppl forget this, but the 12 bolt has a U-joint that is 3/4 the size that the Dana had. I don't know the numbers and what not...
I do know you can get a conversion U-joint if you need to, but when we were loading up the burb at CG's house in washington, I saw the driveshaft tossed in the scrap pile, and I said I wanted it. Here is where I was not only shocked, but amazed too. I had the 3/4 ton shaft out, laying on the pavement, and it was laying beside the 1/2 ton shaft. I got to looking at them, and was kinda surprised at how much shorter the 3/4 ton piece was. That's when i noticed it was all in the rear shaft. So, for sh!ts and giggles, I slid the rear shaft off both pieces, and slid the 1/2 ton piece onto the 3/4 ton front shaft. IT FIT!!!! File that one away in the back of your head... it may come in handy one day! I placed a call to a buddy of mine at Columbus Joint & Clutch and he hooked me up. Charged me a discount rate. he knows i have kept my boss from going to the other drive line shop in town, and he knows i refer all my local buddys there too, so he replaced all 3 joints, new carrier bearing, ballanced, painted... all for $130.72. It was about a $225 job. I'm not sure where he cut costs... probably just didn't charge labor... but whatever he did... Brian hooked me up. |
|
|

|
|
|
#82 |
|
its all about the +6 inches
Join Date: Jan 2001
Location: Hilliard Ohio
Posts: 2,690
|
Tunes!!!
ok... for the anti dash hackers... either skip over this section, or deal with it.
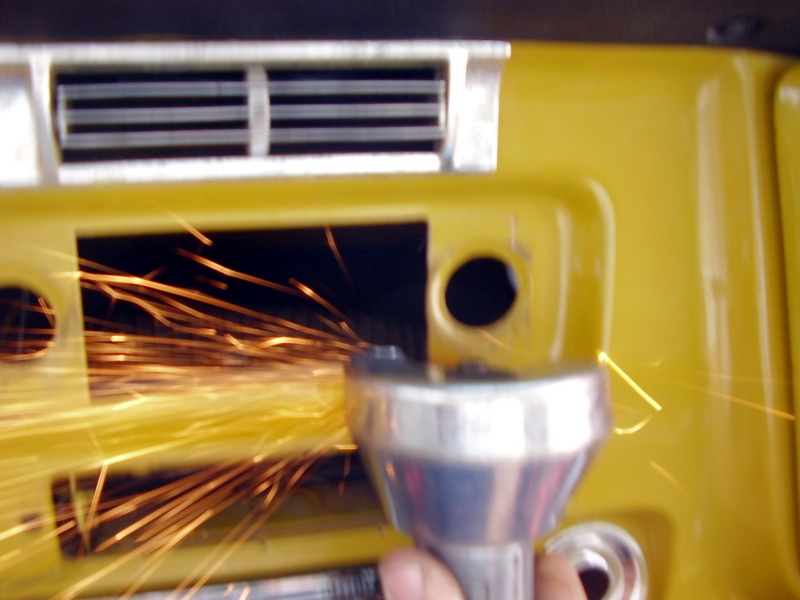
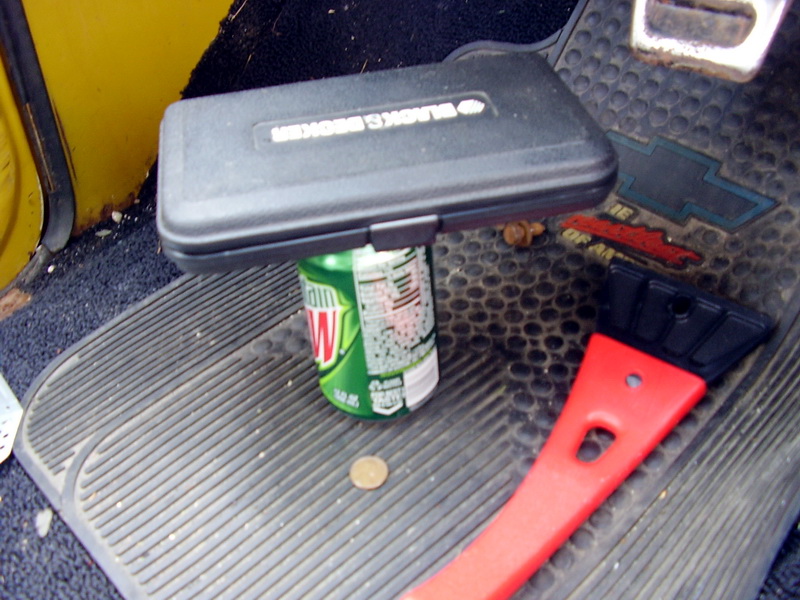
I'm about to hack my dash. If you want to tell me how stupid I am for cutting the dash... save it. Your complaints will fall on deaf ears. I look at 2 knob radios the same way I look at points ignition system. They were good in there day, but that was before my day. I want a good sounding stereo, and am not willing to pay top dollar for a mid level 2 knob just becouse it fits in the hole. Now that that is done... lets get to work! Once you rip out the old crappy 2 knob 8 track player, and find someone who is willing to take it off your hands (thanks fine69), then you can start. Now, you are starting with this;  I like taking the cage that the stereo slides in, and carving a line round it with a sharp tool. You can get them at sears, or off the tray when you are getting your teeth cleaned.  Most of these photos are out of focus... I forgot to put my digi-cam on macro setting, so I got crapo photos now. Oh well. There's a few ways you can cut it. This is the wrong way;  I've done it this way 3 times before with great resulds... that's a hacksaw in a pair of locking pliers;  I thought this time... since I paid a butt load of money for a compressor in the basement, I'd do it with air tools.  Don't forget to cover any open beverages you may be consuming at this time;  Safety items are a must. You can't tell, but I have my safety contacts in. They work great.  When you get done cutting, you should have these laying on the carpet. Be careful, they are hot!  And if you did it right, then the cage should fit in there something like this;  Now, you can't see it in these photos, but the stock radio face opening is taller than the DIN sized unit. I always line up the top of the cage with the top of the hole. There will be a small gap at the bottom, but it is not seen by 99% of the ppl, unless they are laying on the floor. Now you CAN see on the photo where I have the scribe, that the indentations for the knobs will also stick out. This is a toss up on where to locate the stereo. You can slide it a bit to the passenger side, so they won't see it. You can slide it a bit to the drivers side, so you DON'T have to see it... or you can centerr it and let it bee seen. personal choice. I considered taking a black radio delete plate I have sitting here in my desk, and cutting it out to where it'll cover all the gaps. The cage can pinch it between the radio and the dash, and if it is body color, then it'll be invisible for the best part. I may still go back and do this. |
|
|

|
|
|
#83 |
|
its all about the +6 inches
Join Date: Jan 2001
Location: Hilliard Ohio
Posts: 2,690
|
Re: My burbarific build thread
I'm not gonna tell you how to run the wires. It's simple, and if you can't figure it out, then I probably wouldn't be able to explain it to you anyways. Some ppl find it so very simple that it's a cake walk... others fear electricity like it's some voo-doo magic.
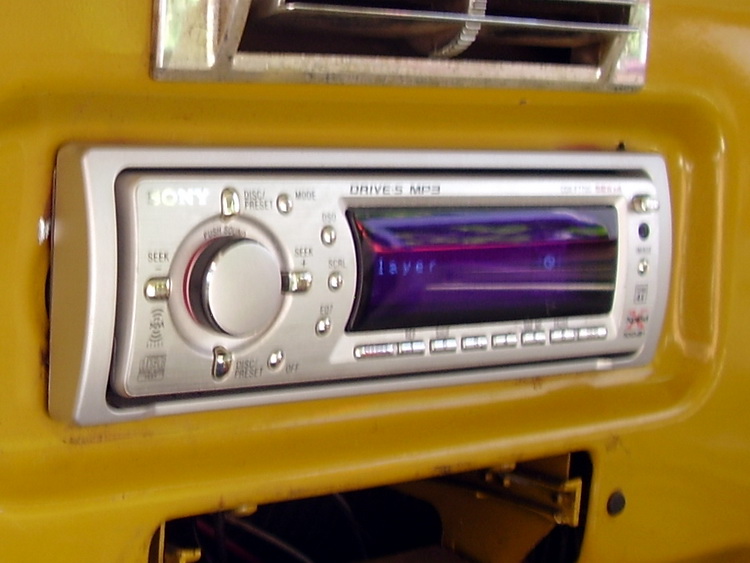
whatever. Here's how it came out... a little crooked,  I think i WILL do the delete plate install, and make this hole a tad bigger so i can make it level. I think i WILL do the delete plate install, and make this hole a tad bigger so i can make it level.If/when I do another dash... I think I'll stick with the hack saw blade. It goes slow, you aren't squinting, and you can see what you are doing BEFORE the radio goes in at an angle. Also, put masking tape on the dash outlining where to cut. it'll keep the paint from getting damaged.   This radio is neat!  I also got a 10 disk changer...   Remember to tripple chack everything befor einstalling the seat over the top of it. Say... for example the carpet and pasdding was thick enough to prevent the CD book from coming out... and you don't discover it till the seat is in... you'll feel pretty stupid when you ask the same guy that helped install the seat... to help remove it again 15 min later. We won't talk about how I know this.... just take my word for it. Sony CDX-F7700 head unit; Remote control, flip down and removeable faceplate, plays MP3s, and some other neat features like auto dim on the face lights when you turn on the headlights, it comes on at 1/2 volume... that way if you had it cranked up when you shut the engine off last time, it isn't screaming at you when you turn it on... all kinds of stuff. Now I just need to learn how to work it all. CD changer; Sony explode MP3, CDr/rw, A reman'd unit that was scored off of flea bay. Had it sitting around since X-mas. It was actually the wrong one, I wanted another model, so it's been laying around unused for a while You'll love the cost of all this.... it follows my super low buck theme I've been following... the radio was free (used) from my baby sister for my birthday back in march... the changer was a gift from my mom and dad this past X-mas. sweeeet.  I do still have a set of unused pioneer TS-G971M 6x9 speakers I scored off craigslist last november. I need to figure where I'll mount them.  Gay lookin huh? I'll probably try to locate some less flashy covers. I'll worry about this later. It's hooked to some pathetic speakers in the back already. I wanna get this sucker on the road. Total cost for the tunes.... 20 bucks. Last edited by Longhorn Man; 08-17-2008 at 01:56 AM. |
|
|

|
|
|
#84 |
|
high-Tech Red Neck
Join Date: Feb 2008
Location: Livingston, MT/On my boat WA/BC/AK
Posts: 2,294
|
Re: My burbarific build thread
heh, and another stock dash hole bites the dust.
__________________
"He used to be a pretty nice feller, now he's a welder!" |
|
|

|
|
|
#85 |
|
Account Suspended
Join Date: Mar 2007
Location: san bernardino ca. everywhere
Posts: 3,938
|
Re: My burbarific build thread
looking good longhorn man. i like it.
Last edited by project 67 sub; 08-17-2008 at 02:47 AM. |
|
|

|
|
|
#86 |
|
Camaro Club
Join Date: Jun 2007
Location: ohio
Posts: 472
|
Re: My burbarific build thread
Looking good. I just cut my dash last night. Its hard to believe a dash can last 40 years without being touched and in 5 minutes its got a big hole in it. oh well... Maybe you can sell the peices you cut out to someone that has a cut dash and wants an original dash
|
|
|

|
|
|
#87 |
|
State of Confusion!
  Join Date: Jul 2002
Location: Gulfport, MS USA
Posts: 47,266
|
Re: My burbarific build thread
Nice job Andy. The sounds make it all worth while!
__________________
Bill 1970 Chevy Custom/10 LWB Fleetside 2010 Toyota Tacoma PreRunner SR5 Double Cab - DD Member of Louisiana Classic Truck Club (LCTC) Bill's Gallery Life isn't tied with a bow, but it's still a gift. Live simply. Love generously. Care deeply. Speak kindly. Leave the rest to God! |
|
|

|
|
|
#88 |
|
Prestige Worldwide
 Join Date: Feb 2001
Location: Worldwide
Posts: 2,552
|
Re: My burbarific build thread
Coming along great man!!
|
|
|

|
|
|
#89 |
|
PROJECT 7DEUCE
 Join Date: Dec 2002
Location: GRANTS PASS OR
Posts: 21,606
|
Re: My burbarific build thread
Sweet another dash dies...... Looks good andy i got a trim ring for my stereo from the local shop to cover up the 2 outside radio knob holes they gave to me for free and I cant see the stinkin holes....
__________________
GO BIG GREEN  GO DUCKS GO DUCKSMEMBER #6377 72 k-5 daily driver 6'' lift 35'' 350-350-205 slowly getting rust free. Project "7DEUCE" check out my build http://67-72chevytrucks.com/vboard/s...d.php?t=267665 Tim Powell..R.I.P EastSideLowlife..... R.I.P.. |
|
|

|
|
|
#90 | |
|
*************
 Join Date: Apr 2005
Location: Pensacola, FL
Posts: 17,858
|
Re: Tunes!!!
Quote:
 , ,  . .
__________________
Rob - https://www.instagram.com/hart_rod_c10 As Iron Sharpens Iron, So One Man Sharpens Another. Proverbs 27:17 FOR SALE: DBW pedal bracket - http://67-72chevytrucks.com/vboard/s...d.php?t=651123 FOR SALE: Hood Brackets http://67-72chevytrucks.com/vboard/s...d.php?t=679945 1987 Silverado SWB - 34.5K original miles http://67-72chevytrucks.com/vboard/s...d.php?t=801834 1969 SuperBurb - http://67-72chevytrucks.com/vboard/s...d.php?t=200387 1968 Farm truck - http://67-72chevytrucks.com/vboard/s...d.php?t=358692 1968 SWB - http://67-72chevytrucks.com/vboard/s...d.php?t=551258 1948 Chevy - http://67-72chevytrucks.com/vboard/s...=122164&page=3 |
|
|
|

|
|
|
#91 |
|
Texas Big Wig
Join Date: Jan 2007
Location: Mineola, Texas
Posts: 5,620
|
Re: My burbarific build thread
Sweet
At least when you cut yours you cut it on the right side of the line  Ask me how I know this  Look'n bomb dude 
|
|
|

|
|
|
#92 |
|
Registered User
 Join Date: Aug 2005
Location: Hillsboro Oregon
Posts: 6,449
|
Re: My burbarific build thread
The sweet thing about the Burbs for stereos (besides all the extra room for speakers) is that you can run wires up both A-Pillars easily with the headliner out (PS requires a hole drilled in the upper kickpanel), then drop them down your choice of B, C, or D pillars. Enjoy the tunes

|
|
|

|
|
|
#93 | |
|
high-Tech Red Neck
Join Date: Feb 2008
Location: Livingston, MT/On my boat WA/BC/AK
Posts: 2,294
|
Re: My burbarific build thread
Quote:
 /that is all
__________________
"He used to be a pretty nice feller, now he's a welder!" |
|
|
|

|
|
|
#94 |
|
its all about the +6 inches
Join Date: Jan 2001
Location: Hilliard Ohio
Posts: 2,690
|
Re: My burbarific build thread
When i replace the speakers, I'll be runnin new wires too... that's good info to know, except, i hope to not remove the headliner... it's too hard to find bows in good shape.
|
|
|

|
|
|
#95 |
|
Tasty Cakes!
Join Date: Apr 2003
Location: Gilbert, AZ
Posts: 2,112
|
Re: My burbarific build thread
Is your license plate gonna read "WSTF?"
__________________
I'm a little  and a lot and a lot  Ground beef: A cow with no legs. ---------------- '66 Chevy SWB "Penny" '67 Chevy Big Window SWB- aka "Pearl" '72 Burb- "Betty" "It's not a hearse dammit" '99 Chevy Ext. cab Silverado |
|
|

|
|
|
#96 |
|
its all about the +6 inches
Join Date: Jan 2001
Location: Hilliard Ohio
Posts: 2,690
|
Re: My burbarific build thread
uh no... that's been played
|
|
|

|
|
|
#97 |
|
*************
 Join Date: Apr 2005
Location: Pensacola, FL
Posts: 17,858
|
Re: My burbarific build thread
How about I DO DEW ..........

__________________
Rob - https://www.instagram.com/hart_rod_c10 As Iron Sharpens Iron, So One Man Sharpens Another. Proverbs 27:17 FOR SALE: DBW pedal bracket - http://67-72chevytrucks.com/vboard/s...d.php?t=651123 FOR SALE: Hood Brackets http://67-72chevytrucks.com/vboard/s...d.php?t=679945 1987 Silverado SWB - 34.5K original miles http://67-72chevytrucks.com/vboard/s...d.php?t=801834 1969 SuperBurb - http://67-72chevytrucks.com/vboard/s...d.php?t=200387 1968 Farm truck - http://67-72chevytrucks.com/vboard/s...d.php?t=358692 1968 SWB - http://67-72chevytrucks.com/vboard/s...d.php?t=551258 1948 Chevy - http://67-72chevytrucks.com/vboard/s...=122164&page=3 |
|
|

|
|
|
#98 |
|
Junior Member
Join Date: Mar 2007
Location: Hideaway, TX
Posts: 4,950
|
__________________
71 Suburban 350/700R4 Project Trixie 72 CHEVY,Highlander,SWB,396,T400 |
|
|

|
|
|
#99 |
|
high-Tech Red Neck
Join Date: Feb 2008
Location: Livingston, MT/On my boat WA/BC/AK
Posts: 2,294
|
Re: My burbarific build thread
You know for all the Dew jokes I am suprised this thing aint getting painted green and yellow with a plate that says "Sub Dew"
__________________
"He used to be a pretty nice feller, now he's a welder!" |
|
|

|
|
|
#100 |
|
BlahBlahBlah
Join Date: Feb 2002
Location: Wa.
Posts: 20,043
|
Re: My burbarific build thread
|
|
|

|
 |
| Bookmarks |
| Thread Tools | |
| Display Modes | |
|
|