
 |
|
|
#1 |
|
Registered User
Join Date: Nov 2008
Location: So. Cal.
Posts: 453
|
Project "49 No Buck$"
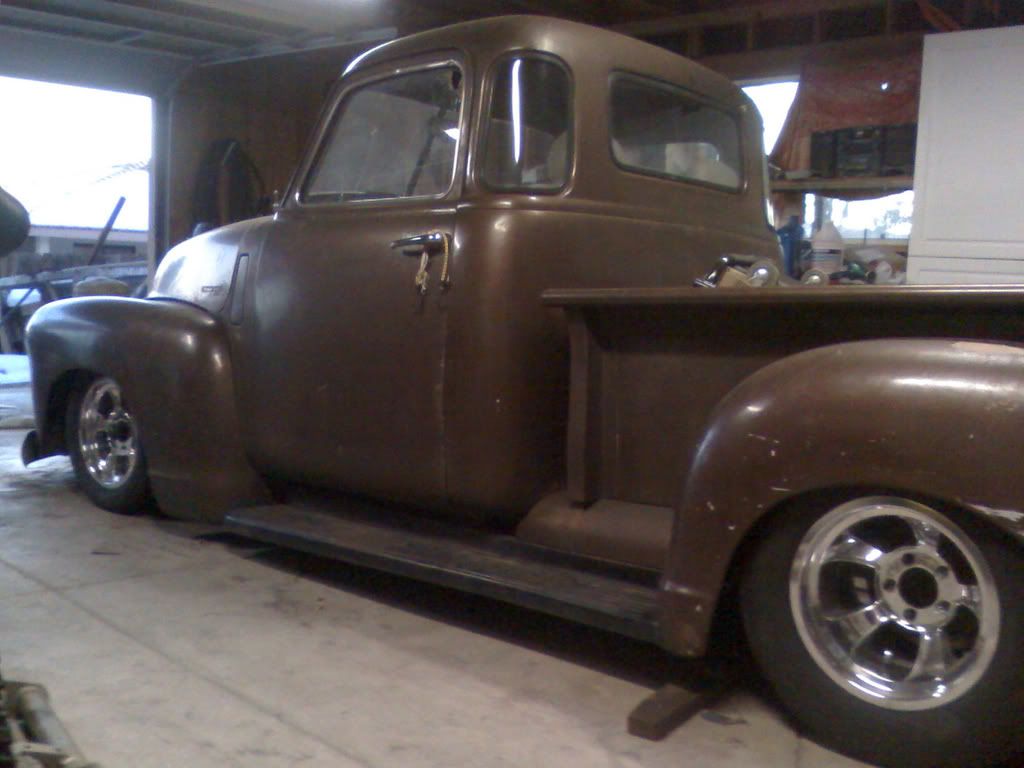
I figured I'd ask if anyone was interested in building something way on the cheap and still make something cool. I'm in So. Cal. so maybe my version is a little different from the rest of the country, but I figured I'd ask for input. I've been taking pics and keeping track of what I've spent and traded for (LOTS of trading!). Most people that use this site build their own stuff and I thought I'd kick in my 2 cents worth for a cheap little "work" truck project. This is what the truck looks like at the moment (bad phone pic as I haven't brought the chip in to download them from the camera) I see lots of VERY nice trucks in here and after a 3 1/2 year frame up on a bad nasty 72 'Camino I decided to do something quick AND cheap. I'll tell all if anyone is interested...
|
|
|

|
|
|
#2 | |
|
______________
 Join Date: Sep 2006
Location: Danville, CA
Posts: 1,285
|
Re: Project "49 No Buck$"
Quote:
For starters, what is the subframe out of? |
|
|
|

|
|
|
#3 |
|
Registered User
Join Date: Nov 2008
Location: So. Cal.
Posts: 453
|
Re: Project "49 No Buck$"
1981 Malibu wagon with some $100 AIM s-10 spindles! CHEAP!!!
|
|
|

|
|
|
#4 |
|
______________
 Join Date: Sep 2006
Location: Danville, CA
Posts: 1,285
|
Re: Project "49 No Buck$"
|
|
|

|
|
|
#5 |
|
Account Suspended
Join Date: Oct 2008
Location: Gulfport, Ms
Posts: 833
|
Re: Project "49 No Buck$"
What are you asking? If people want to know about your build?
Last edited by 1sik52; 12-24-2008 at 04:33 PM. |
|
|

|
|
|
#6 |
|
Registered User
Join Date: Nov 2008
Location: So. Cal.
Posts: 453
|
Re: Project "49 No Buck$"
I'm in the Victorville area. I was asking if anybody wanted to make a down and dirty truck that rides great and sits cool, I'd tell what I know.
|
|
|

|
|
|
#7 |
|
Registered User
Join Date: Nov 2008
Location: So. Cal.
Posts: 453
|
Re: Project "49 No Buck$"
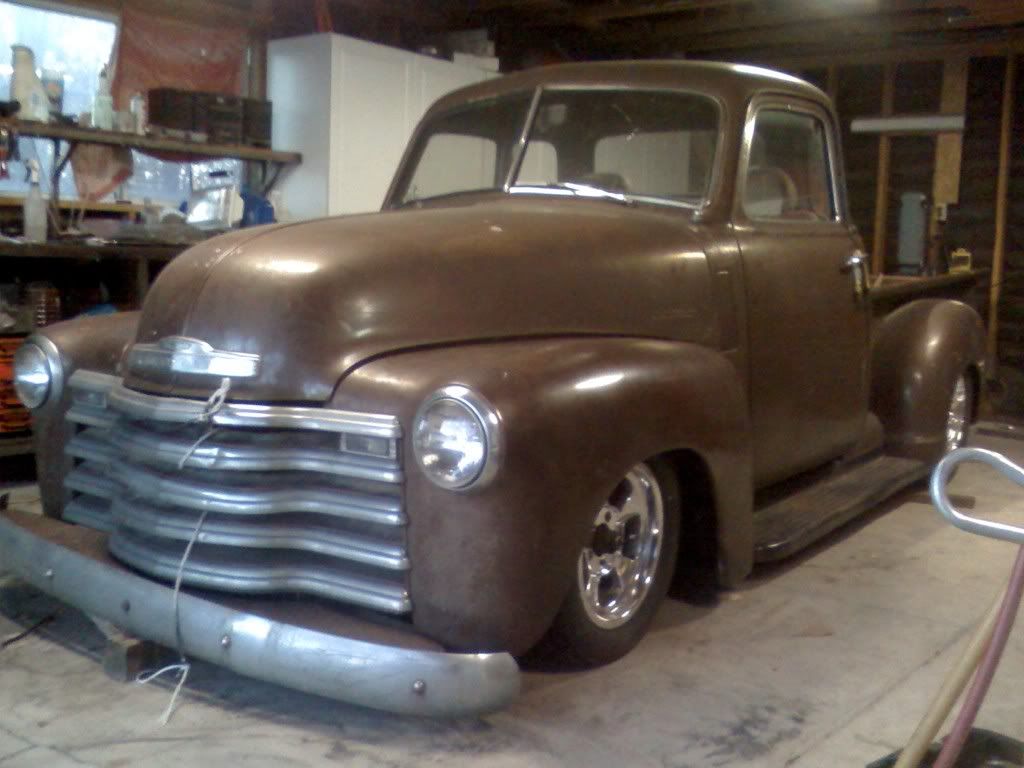
Here's a front view. The bumper and brackets are resting on some wood so I could see how it was going to look.
|
|
|

|
|
|
#8 |
|
Account Suspended
Join Date: Oct 2008
Location: Gulfport, Ms
Posts: 833
|
Re: Project "49 No Buck$"
Go ahead! Everyone loves info!
|
|
|

|
|
|
#9 |
|
Registered User
Join Date: Dec 2002
Location: Cactus Patch So. Az
Posts: 4,749
|
Re: Project "49 No Buck$"
...........Looks finished too me!!
__________________
53 TuTone Extended Cab 350 4-Spd 3:08 (SOLD) 53 Chevy Moldy pearl green ZZ-4 4L60E 9" 3:25 55 GMC 1st Black Mll (ZZ4) ZZ6 TKO 600 5 sp 3:73 62 Solidaxle Corvette Roman Red (327 340hp 4spd 3:36) C4 & C5 suspension tube chassis LS 3 4L70E 65 Corvette Coupe 327 350hp 4spd 4:11 78 Black Silverado SWB (350/350) 5.3 & 4L60E 3:42 2000 S-Type 3.0 (wife cruiser) 2003 GMC SCSB 5.3 4L60E 3:42 |
|
|

|
|
|
#10 |
|
Registered User
Join Date: Nov 2008
Location: So. Cal.
Posts: 453
|
Re: Project "49 No Buck$"
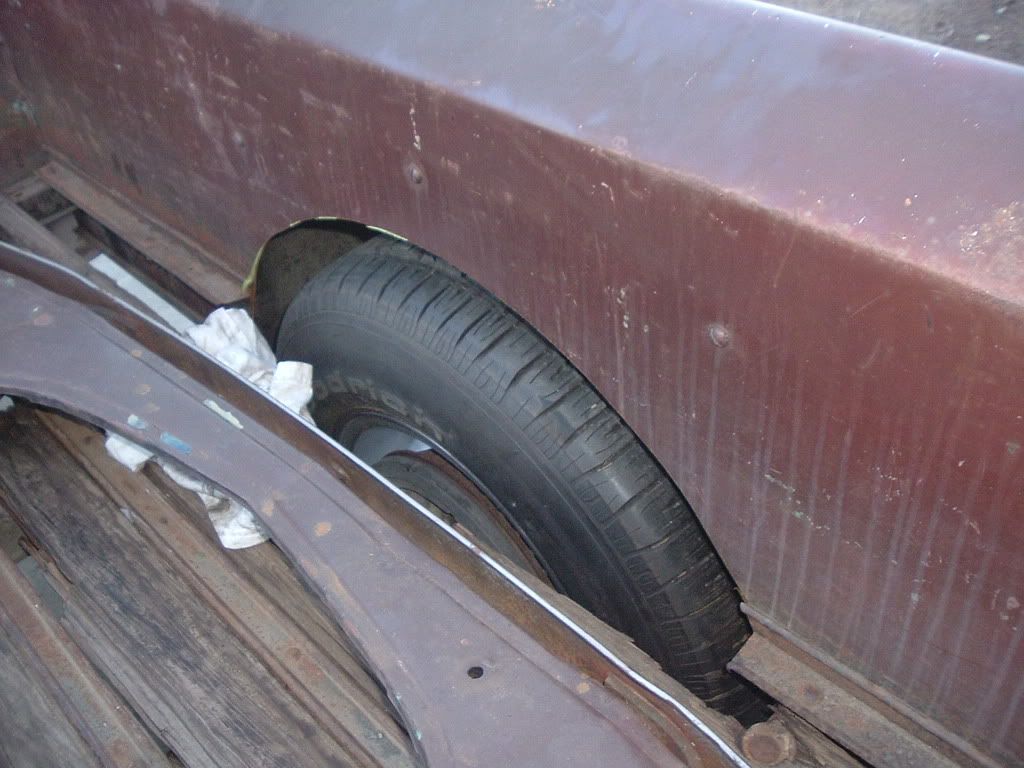
Ok... Here goes. I figured I'd start from the back and work my way forward. The wheels I used are Halibrand copies (15x10 & 15x6) I got on Ebay for a little more than $500. The tires are 275/60 & 205/60 for the right rake/look. I needed a narrowed rearend to make the tires fit, but this is where being cheap means being creative. An S-10 rearend would work, but is 1 1/2" too narrow for a wheel/tire with 4 1/2" of total backspace. So I scored a rearend with a plan. Look at the numbers on the glovebox to find out the ratio. I found one with the GU6 code (3:42) with the numbers G80 after (POSI) for next to nothing at our local Pick & Pull. I again went to Ebay for some 1/2" racing wheel studs (around 2 1/4 long about $30) and a set of 3/4" wheel spacers ($35 for the pair). I knocked out the studs with a hammer. Tapped the existing holes (KEEP THEM STRAIGHT) with a 1/2"x20 tap, removed the wheel cylinder (took out the 2 bolts and pulled it back) and screwed in the studs from the back (use washers and some red lock-tite). Now I have my poor mans narrowed rear w/posi and never removed the axles! Here's what it looks like from the inside. Since this is on the cheap, I'll share my mini tub plan as it goes together.
|
|
|

|
|
|
#11 |
|
Registered User
Join Date: Nov 2008
Location: So. Cal.
Posts: 453
|
Re: Project "49 No Buck$"
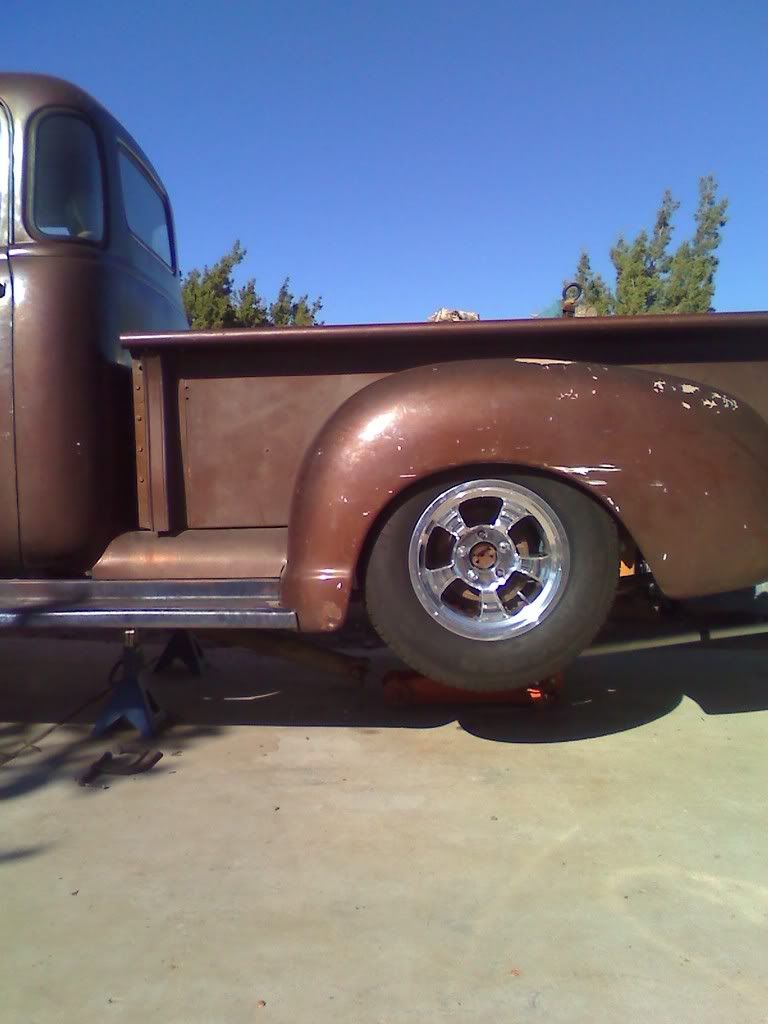
As far as the rear suspension I kind of went against my cheap plan, but the deal was too good to pass up. I scored a brand new TCI rear lowered spring kit in the local paper for $300. I know it kind of backfires my plan, but it's $500 new, so what's a guy to do? I mounted the kit w/3" lowering blocks (I scored from a 4x4 friend for free) to get my basic setup. Figured I'd get it rough and if it was too low, I could always go to a 2" block. So here's how it looked mocked up in place. Now I'm digging it!
|
|
|

|
|
|
#12 |
|
Registered User
Join Date: Nov 2008
Location: So. Cal.
Posts: 453
|
Re: Project "49 No Buck$"
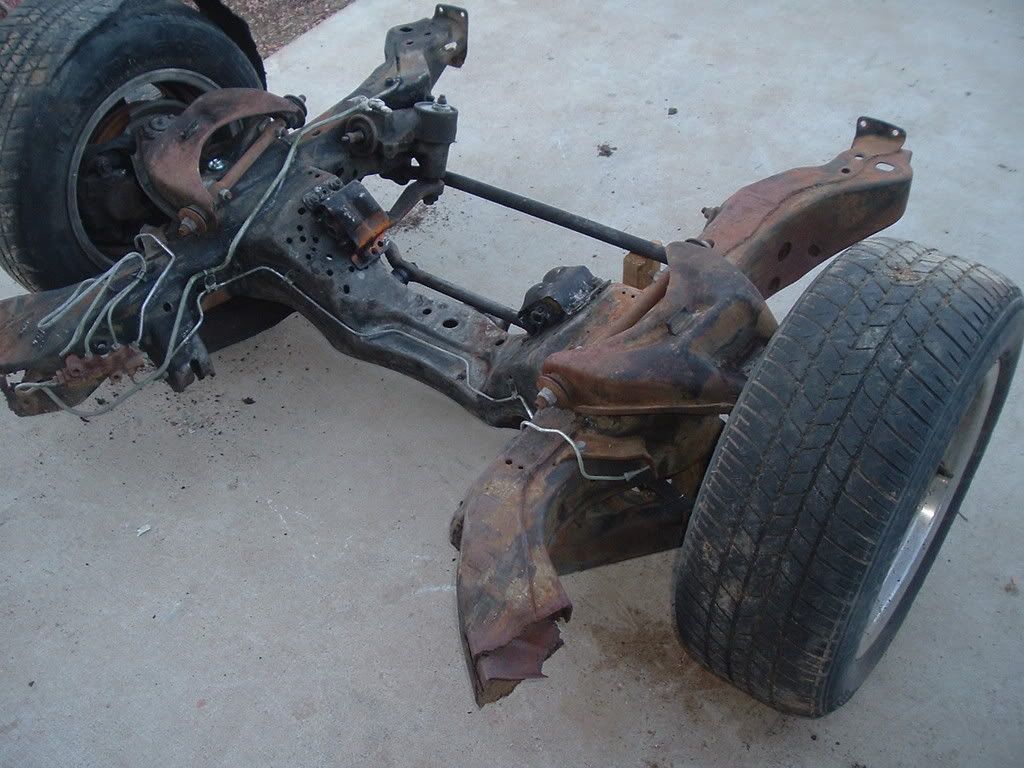
Now on to the front! Here's clip I started with after scraping and steam cleaning it. Got it for nothing and it's same suspension stuff as the S-10, so I scored some cheapie 2" drop spindles.
 Next, I took the springs out and used a piece of 12"x 3/8" all thread to set the suspension to ride height (nuts and washers in the shock hole top and some strap on both sides on the bottom. I looked under the car before I cut the front end off to see where the a-arms sat (parallel across the bottom) to have a reference point. Next, I took the springs out and used a piece of 12"x 3/8" all thread to set the suspension to ride height (nuts and washers in the shock hole top and some strap on both sides on the bottom. I looked under the car before I cut the front end off to see where the a-arms sat (parallel across the bottom) to have a reference point. 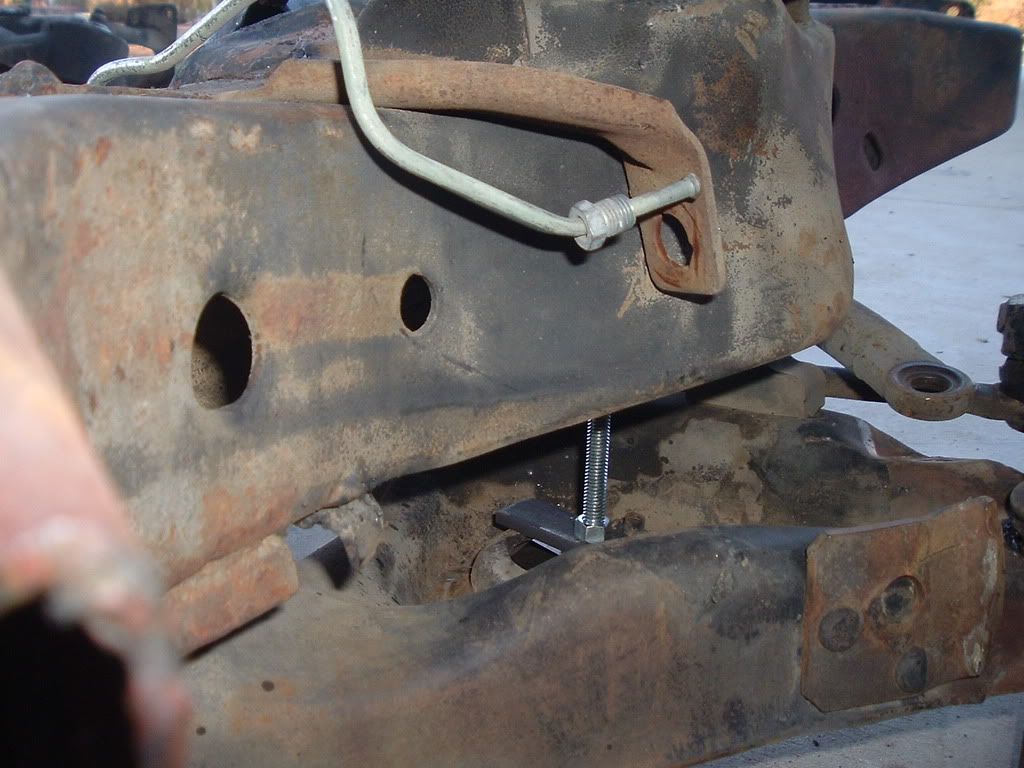 finally took a sawzall and after measuring to make the ends even, cut the stubs on the back to make the ready to weld to the stock frame rails. finally took a sawzall and after measuring to make the ends even, cut the stubs on the back to make the ready to weld to the stock frame rails. 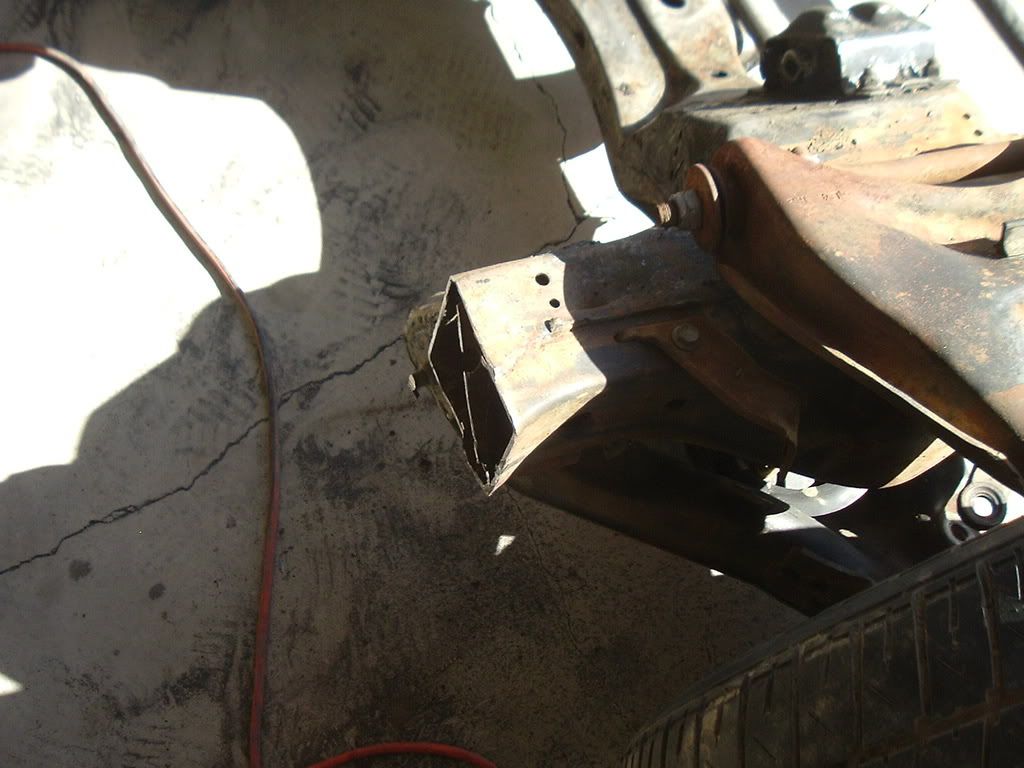
|
|
|

|
|
|
#13 |
|
Registered User
Join Date: Jun 2008
Location: Oak Forest, Ill.
Posts: 194
|
Re: Project "49 No Buck$"
More build pics-----Me Like
Jeff |
|
|

|
|
|
#14 |
|
Registered User
Join Date: Nov 2008
Location: So. Cal.
Posts: 453
|
Re: Project "49 No Buck$"
I went with the 81 Malibu front suspension for 2 reasons: it was cheap and was 3/4" narrower track width than a Camaro so the wheels would be a little more inboard. Now came the tricky part. The biggest thing on doing a clip is getting the wheelbase the same as stock. after rolling it into the middle of the garage, I put my wheels on the front of the stock axle (was easy because it was already 5 lug). I nailed a set of 2x4's in front and back of the rear wheels so they couldn't move. Next, I slid a 6' piece of 2x2" square tubing against the front and back of the front tires. Taking a black marker I put lines on the concrete to give me a reference point of where my front wheels needed to be. After cutting off the spring perches, we slid the front sheetmetal back on (left the hood in place) and lowered the jack to see where I wanted it at ride height.
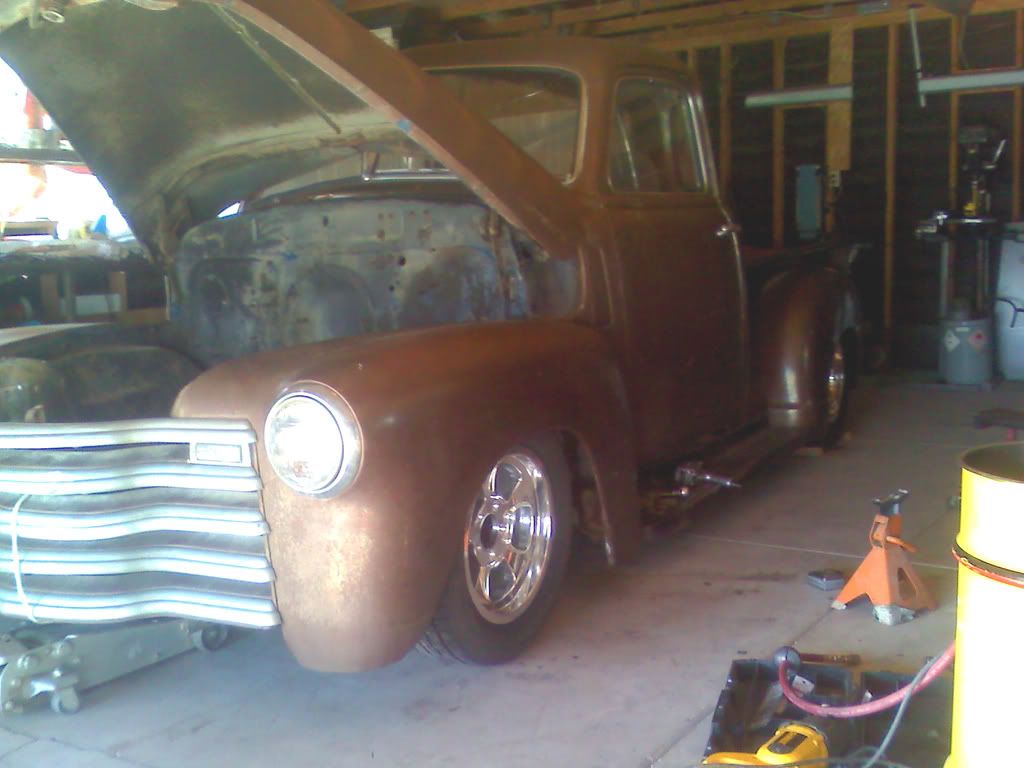 After deciding that the bottom of the fender looked *****in' at 4" from the ground (bottom of rim height) I climbed under and found a point on the frame to hold it up evenly on both sides (any spot will work as long as it's the same on both sides) so now the truck is at ride height! After deciding that the bottom of the fender looked *****in' at 4" from the ground (bottom of rim height) I climbed under and found a point on the frame to hold it up evenly on both sides (any spot will work as long as it's the same on both sides) so now the truck is at ride height! 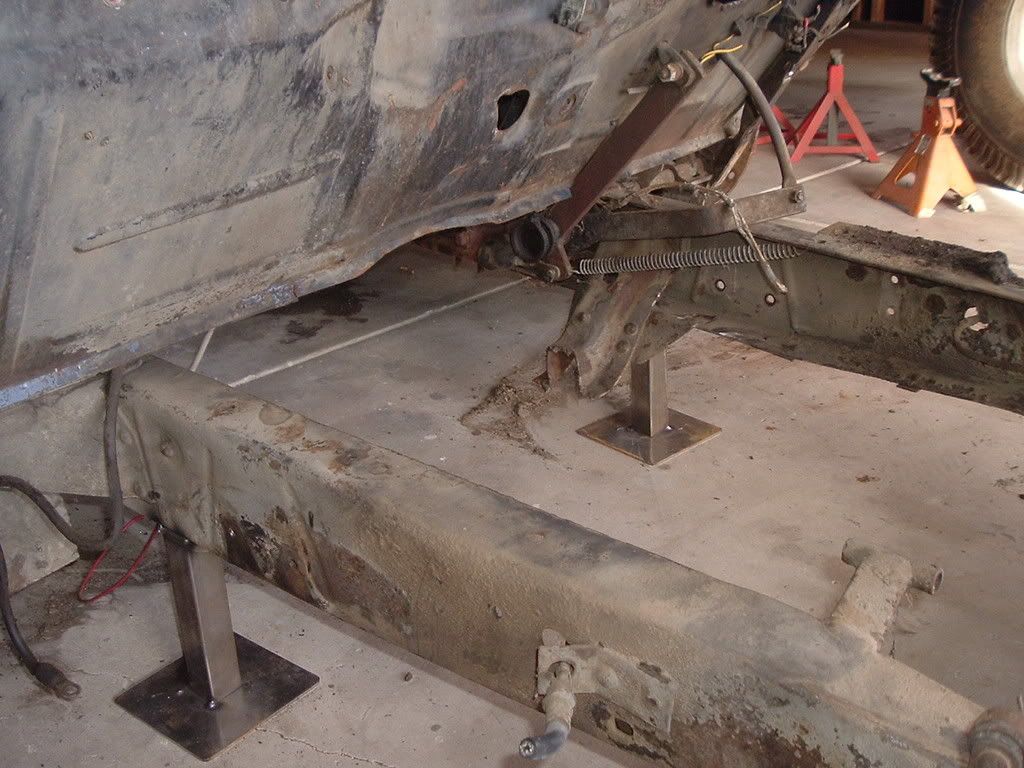 1 1/2" square tubing tack welded to the frame and some 6"x.125" pieces I had laying around worked for my supports. I'll be back after Christmas with the rest of my tale if anybody is still interested. Have a great day tomorrow! Brad 1 1/2" square tubing tack welded to the frame and some 6"x.125" pieces I had laying around worked for my supports. I'll be back after Christmas with the rest of my tale if anybody is still interested. Have a great day tomorrow! Brad
|
|
|

|
|
|
#15 |
|
Registered User
Join Date: Aug 2007
Location: Corona, California
Posts: 7,998
|
Re: Project "49 No Buck$"
 Nice looking build Brad. Everyone here likes pics. Kim |
|
|

|
|
|
#16 |
|
Registered User
 Join Date: Mar 2005
Location: apple valley, ca
Posts: 2,670
|
Re: Project "49 No Buck$"
I have personally been involved in this project since the beginning when we went down to Yucaipa, California with a rickety trailer and brought it home. Lots of projects claim to be lo-buck, but I can vouch for everything he has done with little or no money. And I thought I was a cheapskate! This is going to be a cool ride that is going to get the wheels driven off of it.
Maybe it'll motivate me to get my '55 on the road! |
|
|

|
|
|
#17 |
|
Registered User
Join Date: Jan 2007
Location: tacoma wa.
Posts: 1,037
|
Re: Project "49 No Buck$"
cool project! keep those pic's coming and blow by blow tech.
|
|
|

|
|
|
#18 |
|
Registered User
Join Date: Oct 2006
Location: Central Coast, CA.
Posts: 1,202
|
Re: Project "49 No Buck$"
With as much $ as I have invested in my '54 (and it's still not finished/driveable), I really like this "Lo-buck" approach and have thought of starting another truck with this in mind to get another DD on the road. Keep up the good work!
__________________
Mom's 1954 (TBI 5.7/700R4/14 bolt 4:10) 5 Chevrolet window 3/4 ton long bed Pick up build thread ->http://www.67-72chevytrucks.com/vboa...d.php?t=228674 My 1954 (TPI 5.7/700R4/10 bolt 3:73) Chevrolet 5 window 1/2 ton short bed Pick up build thread->http://67-72chevytrucks.com/vboard/s...3&goto=newpost 1960 (400/T350/?) Apache 10 short/fleet side-big window 1973 (TPI 5.7/700R4/14 bolt 4:10 w DANA 60 front) Chevrolet Cheyenne 4X4 2013 (Vortec 5.3/6-speed 6L90 automatic) Sierra LT CREW CAB Doing my part to warm the globe 
|
|
|

|
|
|
#19 |
|
Registered User
Join Date: Dec 2008
Location: Cornelius, North Carolina
Posts: 59
|
Re: Project "49 No Buck$"
MY KINDA BUILD!!!!!!!
Great looking truck TOO  
|
|
|

|
|
|
#20 |
|
Registered User
Join Date: Jan 2007
Location: tacoma wa.
Posts: 1,037
|
Re: Project "49 No Buck$"
looks like the 78' malibu i have sitting is going to become the "low buck build" victim for my 54' burb! do they still call it "victimville"?
|
|
|

|
|
|
#21 |
|
Registered User
Join Date: Nov 2008
Location: So. Cal.
Posts: 453
|
Re: Project "49 No Buck$"
Ok, I'm back! Hope everyone had a great Christmas and yes, it's still victimville! Now where I left off. After the truck is resting on the steel uprights on the front (firewall area) and back of the frame, I made a jig to make my front frame stubs.
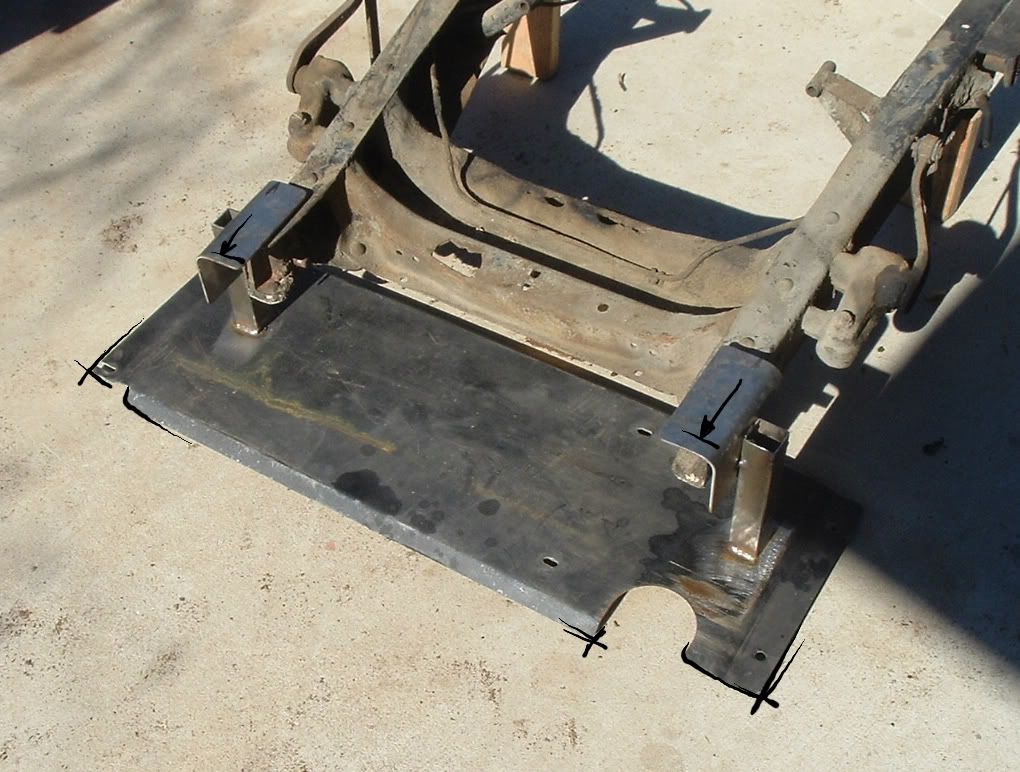 I took the pic after I cut it off but you get the idea. I bent some chunks of .125 over in a vise and tack welded them to a piece of metal I had laying around. I then took a black sharpie and traced the corners on the concrete so I could slide it back when the new clip is on, to see where my bumper stubs go! A rod builder by the name of Dave Gauss told me me these ideas of using your floor as a jig. Great idea! I took the pic after I cut it off but you get the idea. I bent some chunks of .125 over in a vise and tack welded them to a piece of metal I had laying around. I then took a black sharpie and traced the corners on the concrete so I could slide it back when the new clip is on, to see where my bumper stubs go! A rod builder by the name of Dave Gauss told me me these ideas of using your floor as a jig. Great idea!
|
|
|

|
|
|
#22 |
|
Registered User
Join Date: Nov 2008
Location: So. Cal.
Posts: 453
|
Re: Project "49 No Buck$"
The subframe was cut right at the lower a-arm bracket, which was about 12" back from the wheel center. Now we cut the truck frame the same distance back (use your marks you made on the concrete with the 2" square tubing to set your wheelbase length)
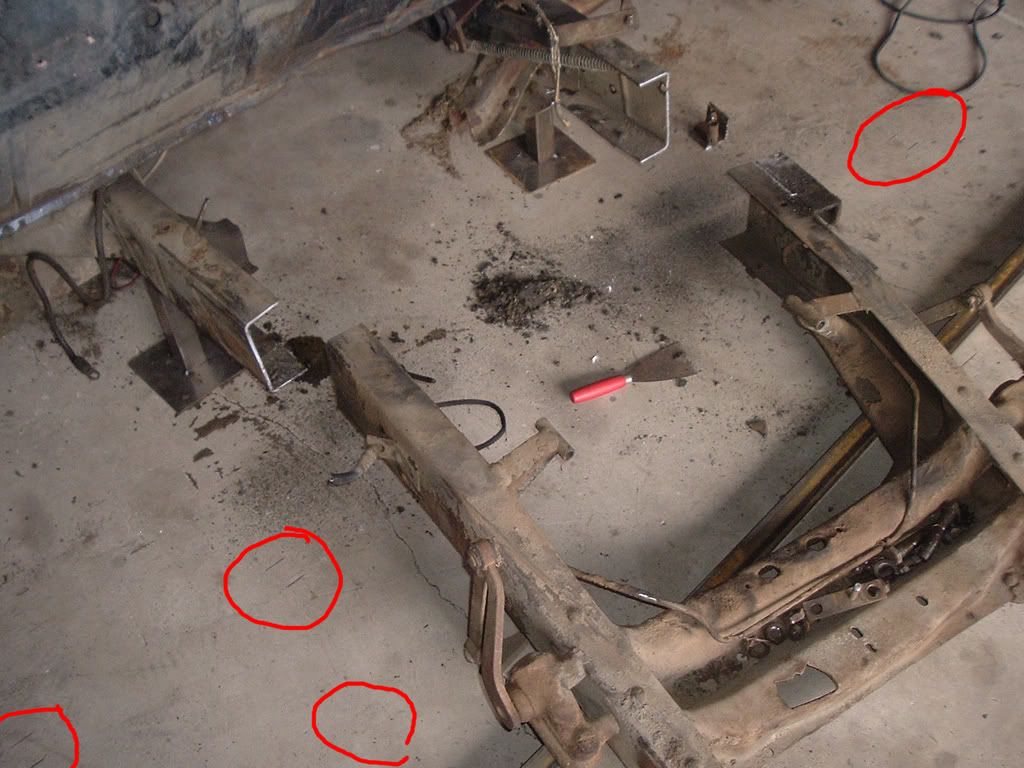 (note tubing still laying on floor and black marks on concrete for later reference) (note tubing still laying on floor and black marks on concrete for later reference)
Last edited by kustombrad; 12-30-2008 at 12:47 PM. Reason: fix tech |
|
|

|
|
|
#23 |
|
Registered User
Join Date: Nov 2008
Location: So. Cal.
Posts: 453
|
Re: Project "49 No Buck$"
Now I put the wheels on the clip and rolled it into tho hole. I layed my 2" tube behind the tires and put it on the back mark. I then rolled the clip up to where the tires hit (now it's the exact same as stock wheelbase!) and squared it up. Notice the blue circle around the bolt, that hole is the same on both sides and it was the same distance from the rear leaf spring (front hanger pivot) on both sides. I put a bolt in the hole and used that for all my cross measuring. Once I decided it was as even as I could get it, we welded a bunch of little pieces inside before we started fish plating it.
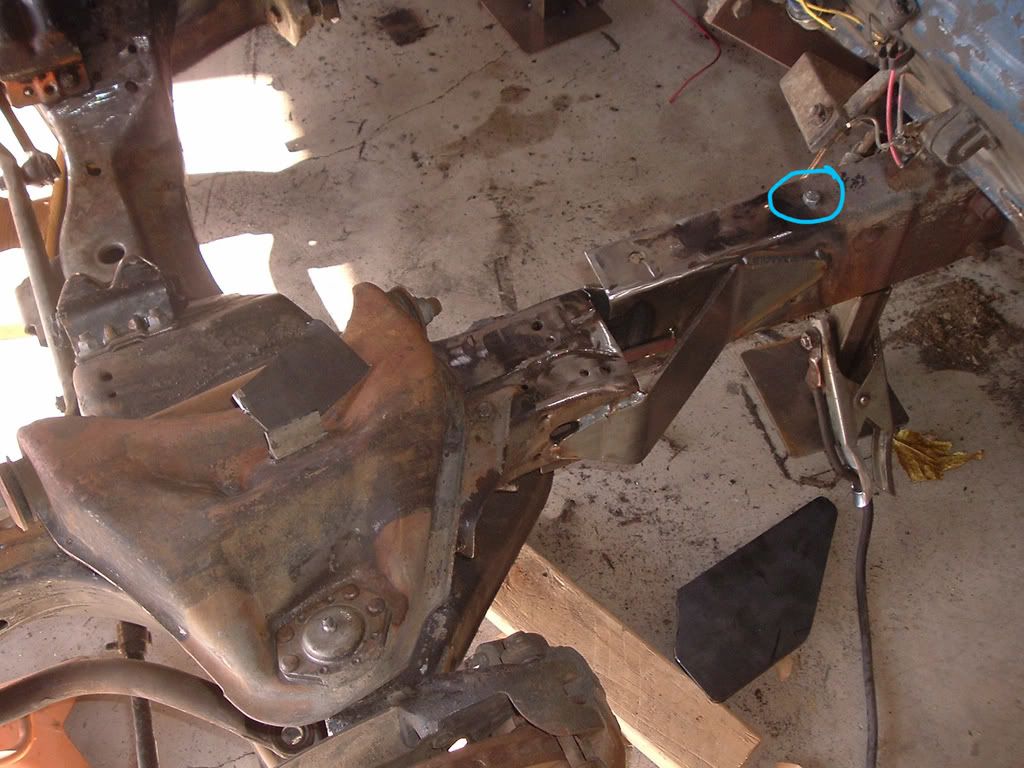 We used cardboard to make our various templates and used 3/16" cold rolled for the plates. Did most of the cutting with an electric 4" angle grinder with cutoff wheels (cheap!) We used cardboard to make our various templates and used 3/16" cold rolled for the plates. Did most of the cutting with an electric 4" angle grinder with cutoff wheels (cheap!)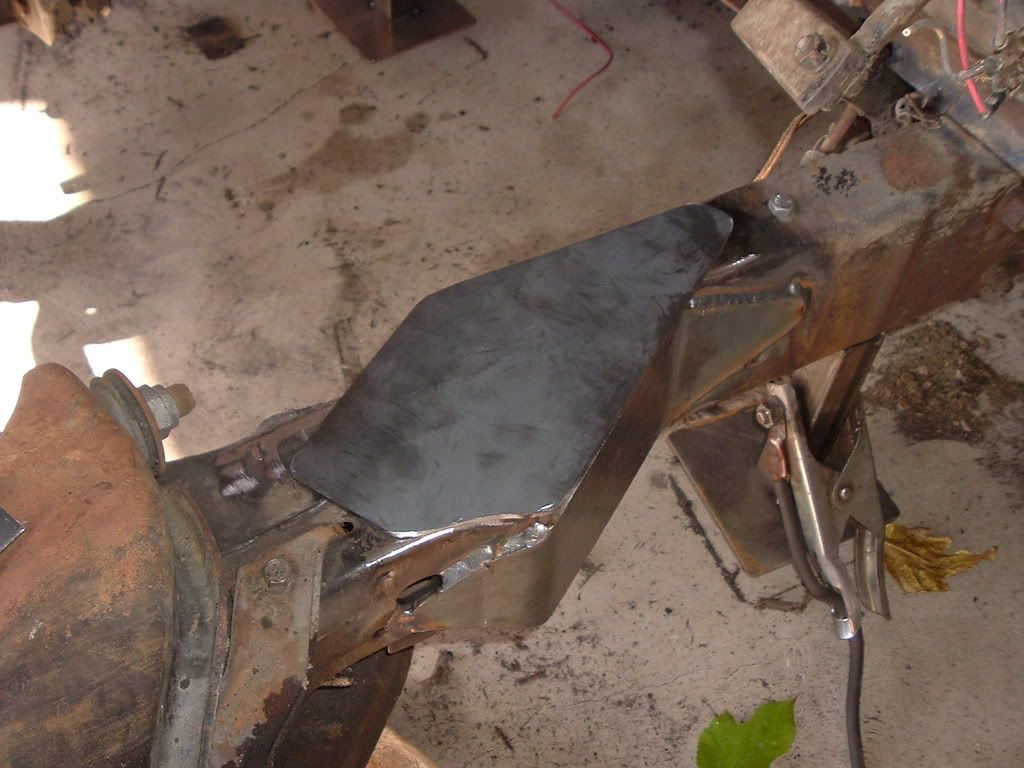
Last edited by kustombrad; 01-20-2009 at 03:42 PM. Reason: fix tech |
|
|

|
|
|
#24 |
|
Registered User
Join Date: Nov 2008
Location: So. Cal.
Posts: 453
|
Re: Project "49 No Buck$"
Here is finished welding on both sides.
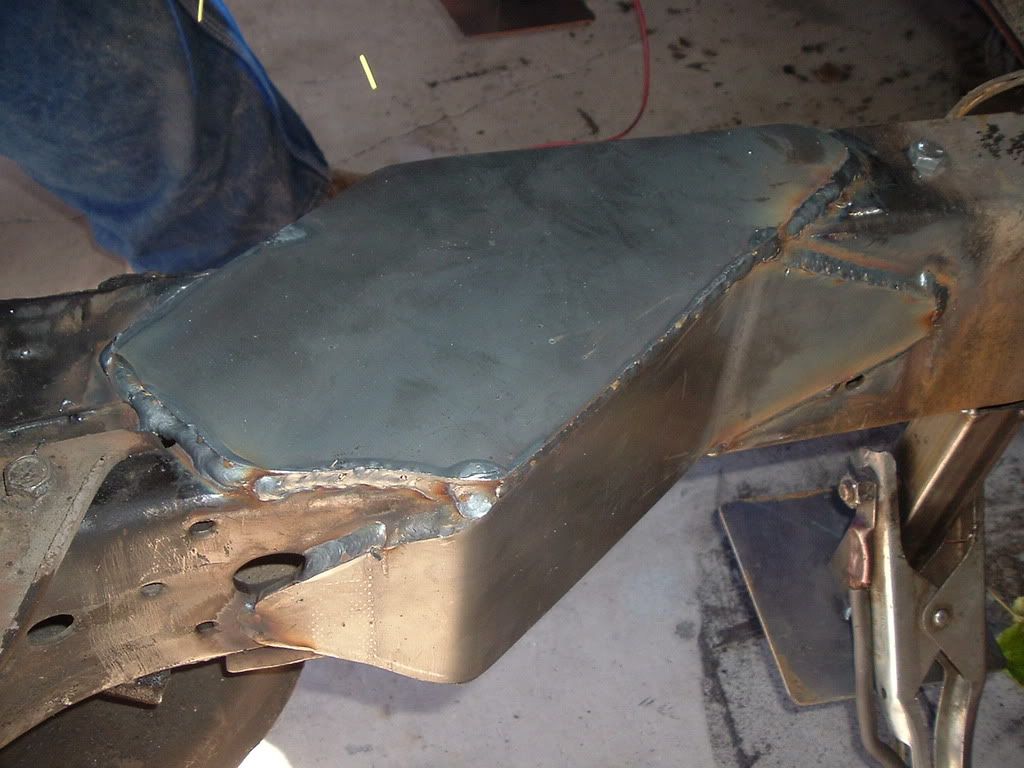 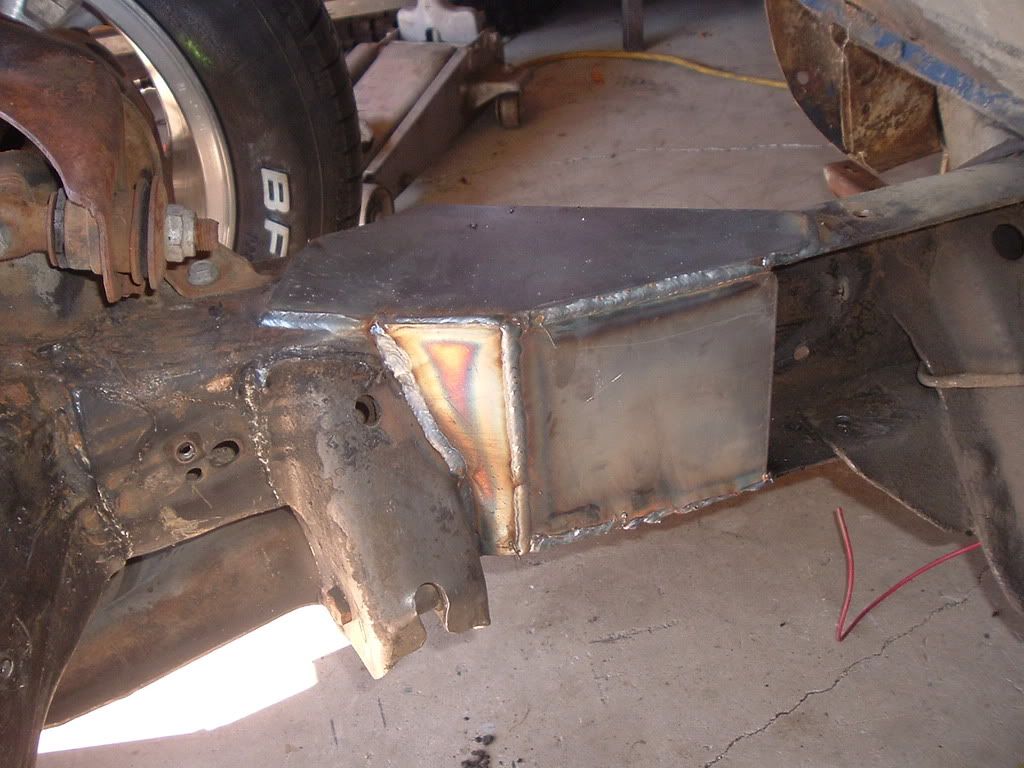 So on the next part... So on the next part...
|
|
|

|
|
|
#25 |
|
Registered User
Join Date: Nov 2008
Location: So. Cal.
Posts: 453
|
Re: Project "49 No Buck$"
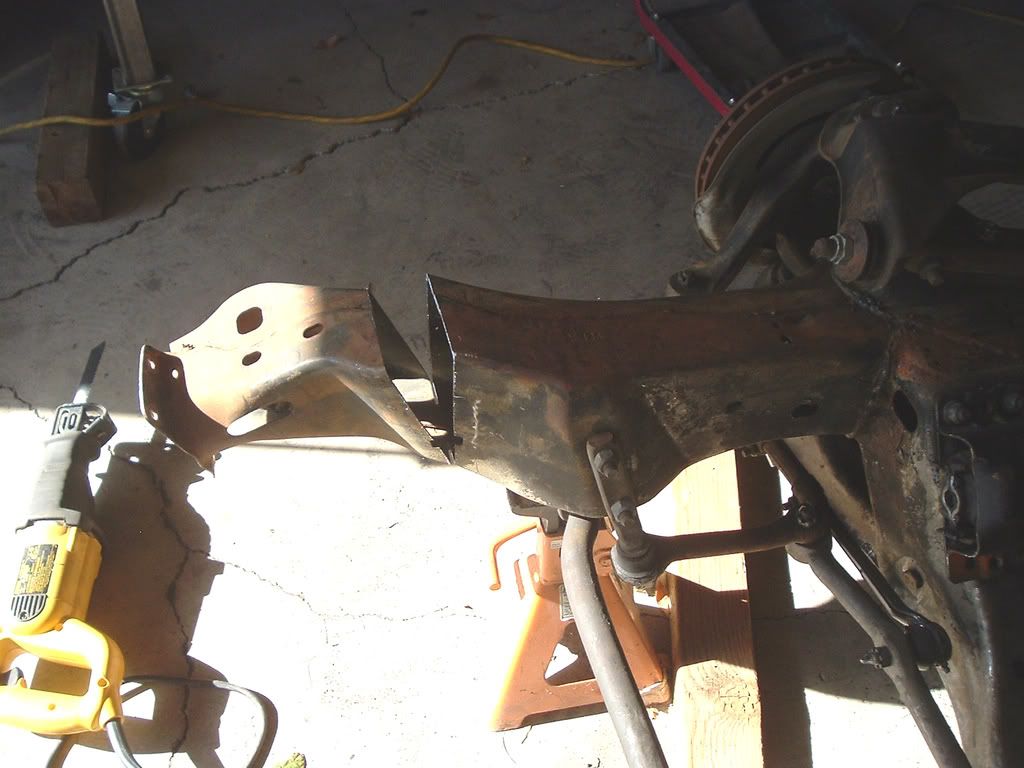
Now moving to the front of the truck, I cut off 8 1/2" of the front stub.
 Now I slid my front frame stub jig into place (slide back to marks made on concrete) to see where my frame/bumper brackets come out at. I made a crossmember out of 3/16" x 2" square tubing that I welded in place so that the bottom of the tube was the height the top of the stubs needed to be. (whew!) Now I slid my front frame stub jig into place (slide back to marks made on concrete) to see where my frame/bumper brackets come out at. I made a crossmember out of 3/16" x 2" square tubing that I welded in place so that the bottom of the tube was the height the top of the stubs needed to be. (whew!) 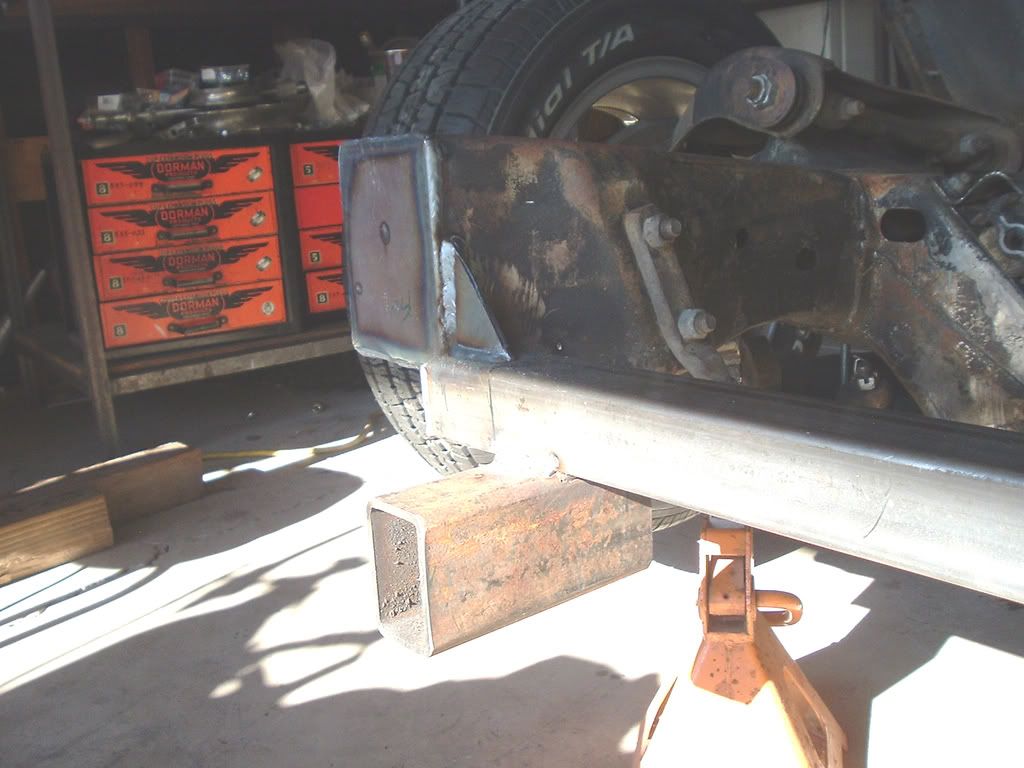 We made the bumper stubs out of some 2x3" 1/4" tubing had laying around (remember cheap!) After everything was welded into place, we welded flat plates (those actually held the truck up for layout and now have a new home!) on the front and tried to fill in everything nicely. We made the bumper stubs out of some 2x3" 1/4" tubing had laying around (remember cheap!) After everything was welded into place, we welded flat plates (those actually held the truck up for layout and now have a new home!) on the front and tried to fill in everything nicely. 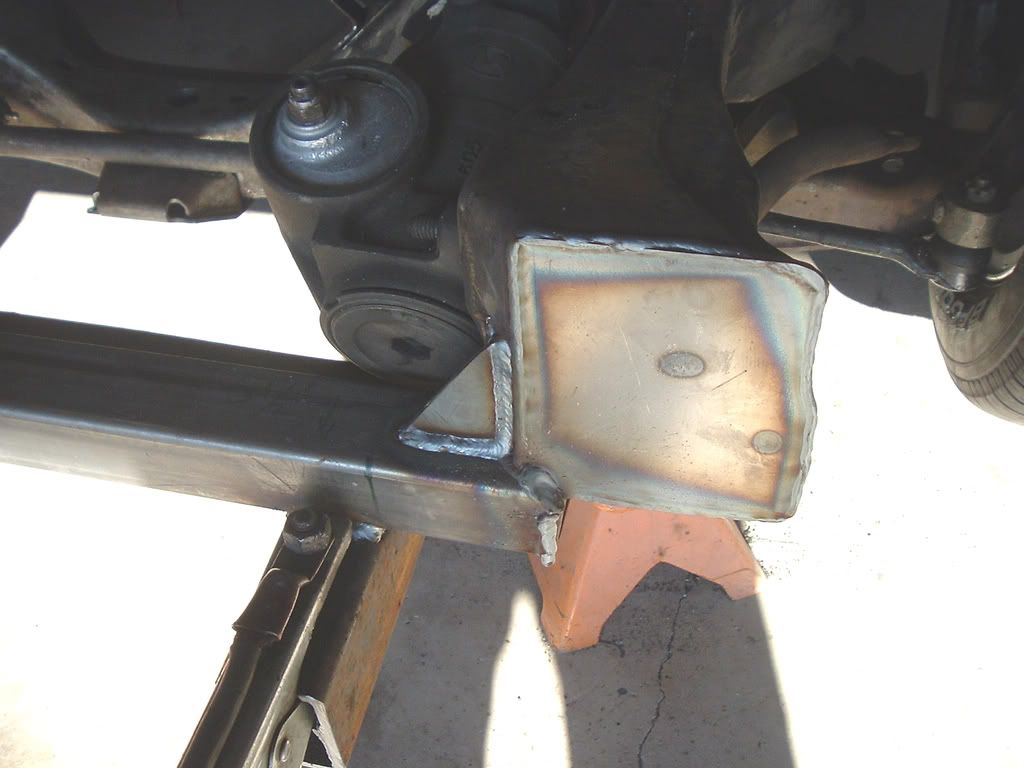 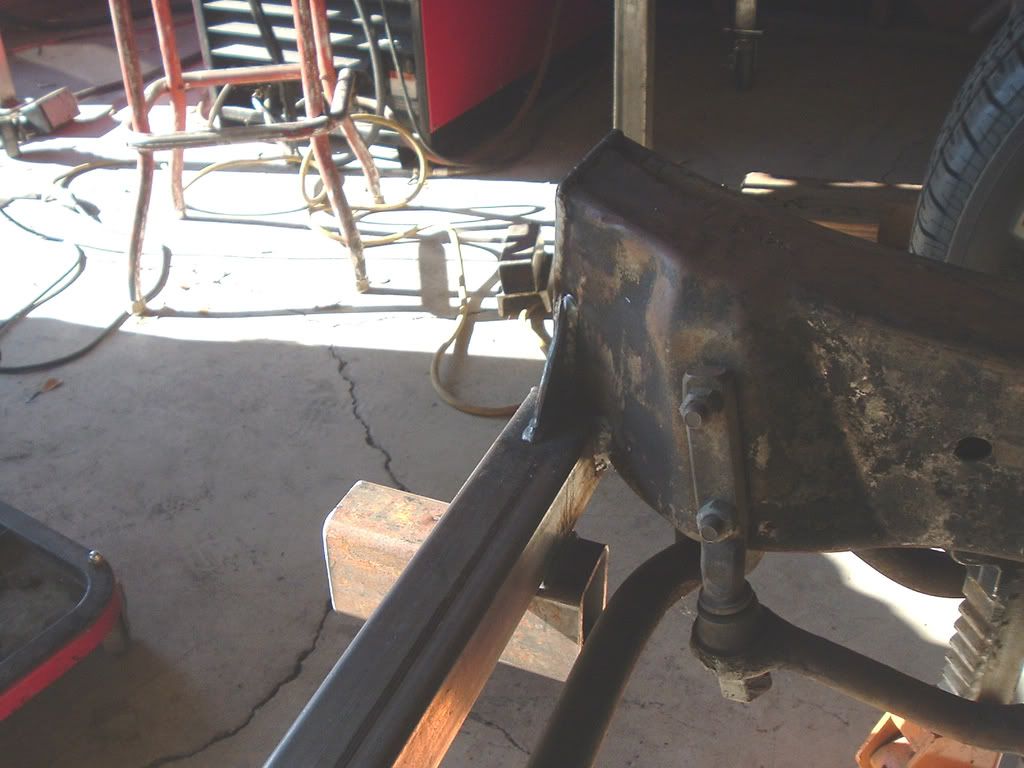 It looks a little weird, but with the sheetmetal on you can only see the bumper stubs below the grille. So far so good and waaaaay low with all the suspension travel of a stock car (I love low, but don't like my kidneys bleeding from a crappy ride)! It looks a little weird, but with the sheetmetal on you can only see the bumper stubs below the grille. So far so good and waaaaay low with all the suspension travel of a stock car (I love low, but don't like my kidneys bleeding from a crappy ride)!
|
|
|

|
 |
| Bookmarks |
| Thread Tools | |
| Display Modes | |
|
|