
 |
Register or Log In To remove these advertisements. |
|
|
|
|||||||
 |
|
|
Thread Tools | Display Modes |
|
|
#1 |
|
Registered User
Join Date: Aug 2012
Location: Hartford, TN
Posts: 56
|
jc06vmax's 71 Jimmy Build
I figured it was time to actually post up a build thread since the cutting, grinding, and welding has started.
Background: I found my Jimmy on a sketch-looking Craigs ad in Knoxville. The guy had it listed as a 71 Jimmy that needed to be restored with no other details. Drove down to check it out and ended up hauling it home the following day on the cheap. The guy I bought the Jimmy from was the second owner, who had owned it since the mid 90s but never drove it. The original owners had restored the Jimmy in the late 80s sometime, but had since gone down hill. The good news is that it had sat for about 10-12 years as opposed to being abused out in the woods like the few that you see around here have been. The PO said the motor was junk and barely had any compression at all. After swapping the rusted gas tank for a new one, rebuilding the carb, and a couple cans of Sea Foam, it came to life and was able to drive around. I ended up running around for about a month with the top off before it got too cold. Plans My overall vision for the Jimmy continues to change, but I have decided on general direction with a few specifics in mind. I don't have the budget (nor the patience) for a frame off resto, but at the same time I'm not trying to build a beater. Dependability and function are top priorities for the time being. I want to be able to take it on short trips out of town but also be able to run through the mountains on a few trails. To Do/Build Items -Fix all rust (rear wheel wells, lower doors, front floor pan, other minor areas) -New body mounts -Silverado front buckets, Tahoe 3rd row seats (keep original console) -around a 3in. suspension lift -at least 35 12.50s on rally wheels -heavy duty rear bumper with spare and gas can mounts -73+ Blazer roll bar (maybe a cage later) -bedside toolboxes for lockable storage and speakers -2 tone Hugger Orange and white with upper and lower truck trim -bedline inside of tub, then Peel-n-Seal, then carpet (sound deadener) -Al's Liner the double wall top ...and eventually (a long time down the road) a 5.3/6.0 4l60e swap. A lot of my ideas have came from RckyMntnKng's Build Thread along with some others as well. I'm open to any suggestions or comments as this is my first build and I need all the help I can get. Thanks for looking! Here's some pics before the rust repair started.  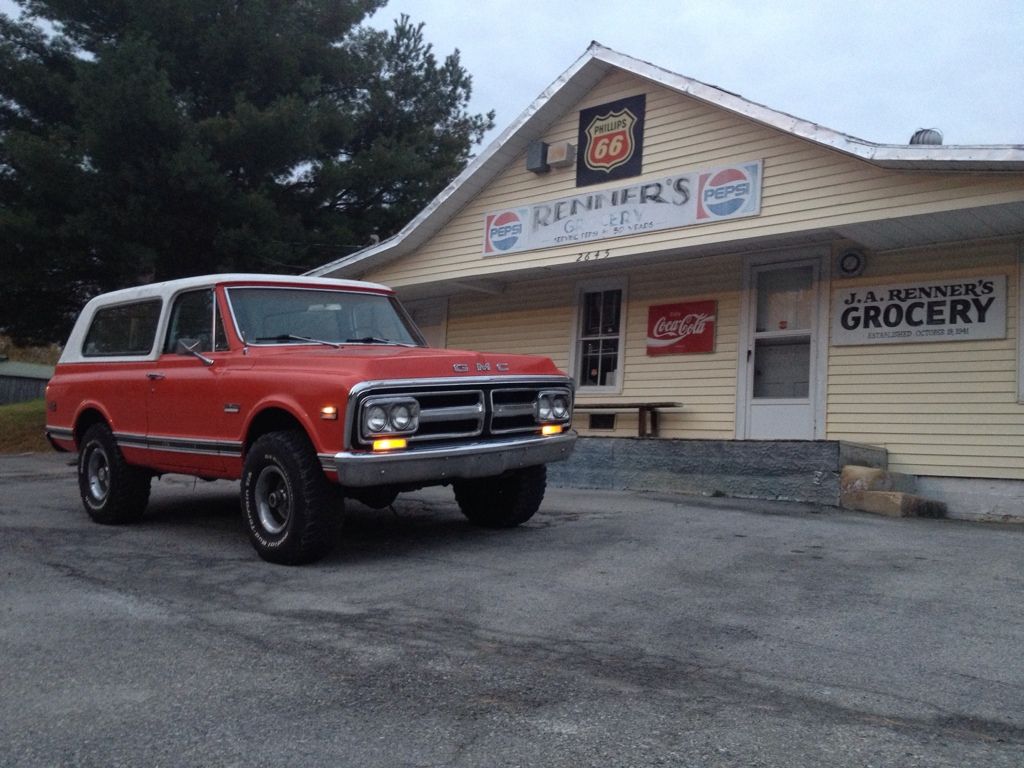 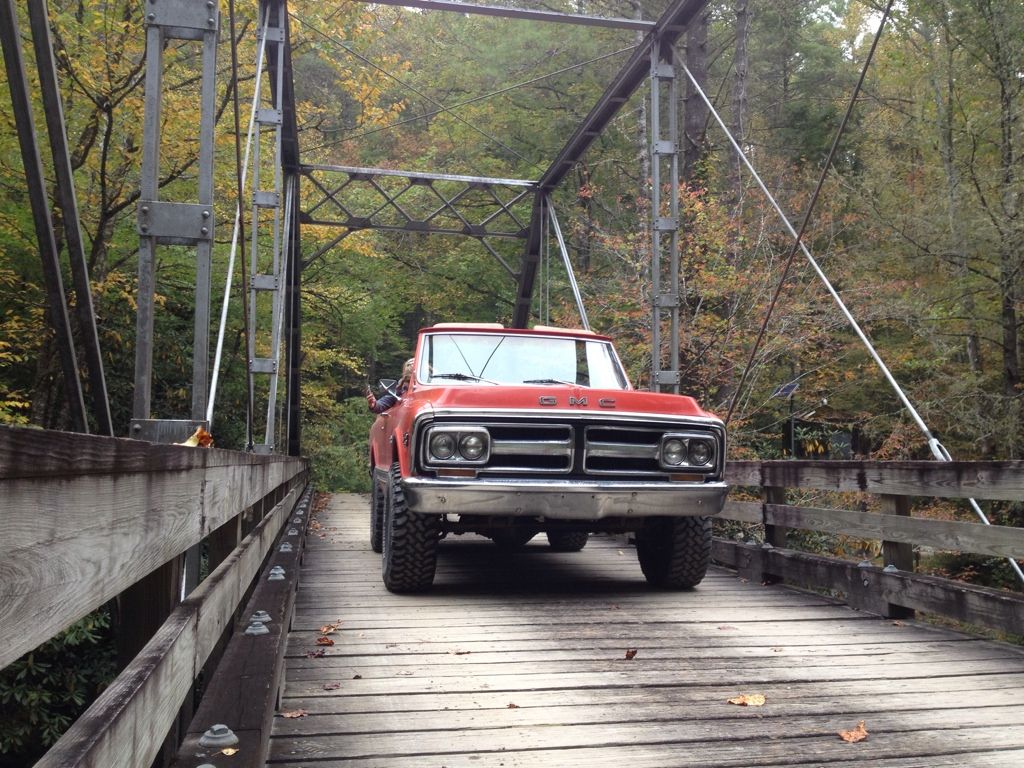  
|
|
|

|
|
|
#2 |
|
Registered User
 Join Date: Dec 2004
Location: Gypsum Kansas 67448
Posts: 1,681
|
Re: jc06vmax's 71 Jimmy Build
that looks like a heck of a good start..good lookin rig
__________________
21 2500hd duramax 58 apache HILLJOB GRAPHIX--for all your graphic needs My build thread http://67-72chevytrucks.com/vboard/s...d.php?t=542497 LS ENGINE SWAP INFORMATION THREAD http://67-72chevytrucks.com/vboard/s...d.php?t=377348 4l60 to an NP205 http://67-72chevytrucks.com/vboard/s...43#post3697343 |
|
|

|
|
|
#3 |
|
Registered User
Join Date: Aug 2012
Location: Hartford, TN
Posts: 56
|
Re: jc06vmax's 71 Jimmy Build
...and so begins the dreaded rust repair.
We cut a bedside out of a 71 c10 long bed at Pull-A-Part to use for the patches on the drivers rear side. I was lucky to pick up some body parts for no charge from a friend doing a frame off on a 72 Cheyenne SWB 4x4 that he wasn't using. Essentially, I have all the parts needed to eliminate the rust completely, minus the front floor pan which had been fiberglassed over during the first "restoration"... Here are some before and during shots.    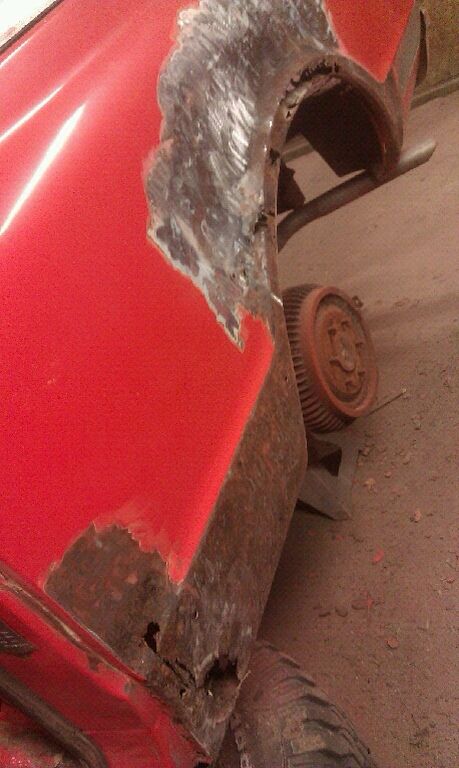    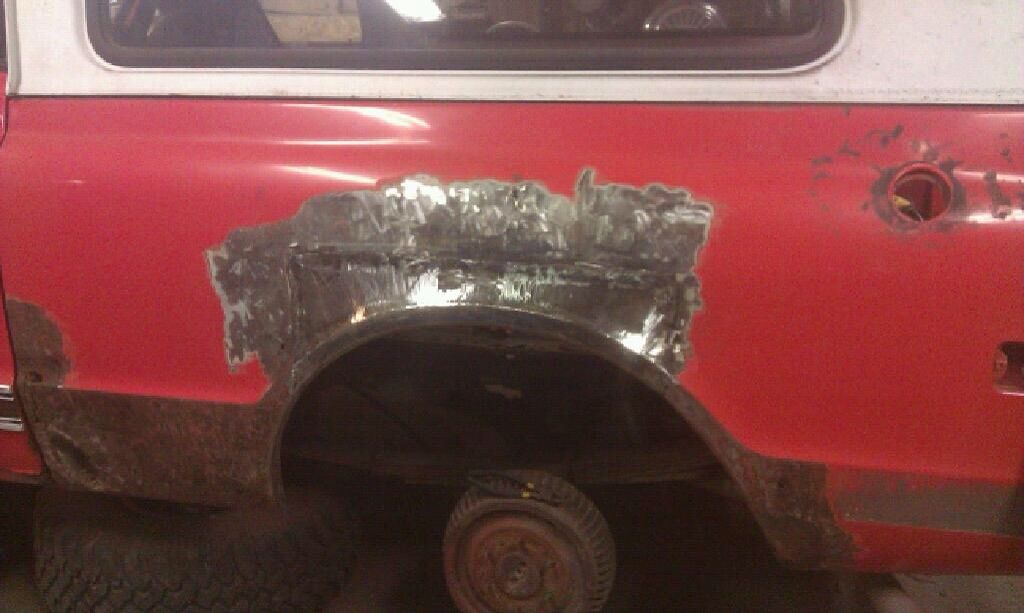 
|
|
|

|
|
|
#4 |
|
Registered User
Join Date: Aug 2012
Location: Hartford, TN
Posts: 56
|
Re: jc06vmax's 71 Jimmy Build
|
|
|

|
|
|
#5 |
|
Just a nother gear head
Join Date: Jul 2009
Location: Barrington NH
Posts: 501
|
Re: jc06vmax's 71 Jimmy Build
exactly like the one i bought just with a little less cancer. looks like your off to a good start also.
__________________
2013 HD FLHX 2000 chevy 2500 6.0l 4x4 3dr 2000 harley fxdx 71 Jimmy 4x4- future crawler/ woods rig 71 blazer (C4 2wd conv project) http://67-72chevytrucks.com/vboard/s...d.php?t=523589 
|
|
|

|
|
|
#6 |
|
Registered User
Join Date: Jul 2010
Location: Moville, IA
Posts: 21
|
Re: jc06vmax's 71 Jimmy Build
Decent find...alot like the one I found a couple years ago. Given the fact I had a tornado last year, mine hasn't made any progress yet however. Keep us updated on your project!
|
|
|

|
|
|
#7 |
|
Registered User
Join Date: Aug 2012
Location: Hartford, TN
Posts: 56
|
Re: jc06vmax's 71 Jimmy Build
Been lazy on updating the thread...but made some progress here lately.
The driver rear quarter is now rust free inside and out.  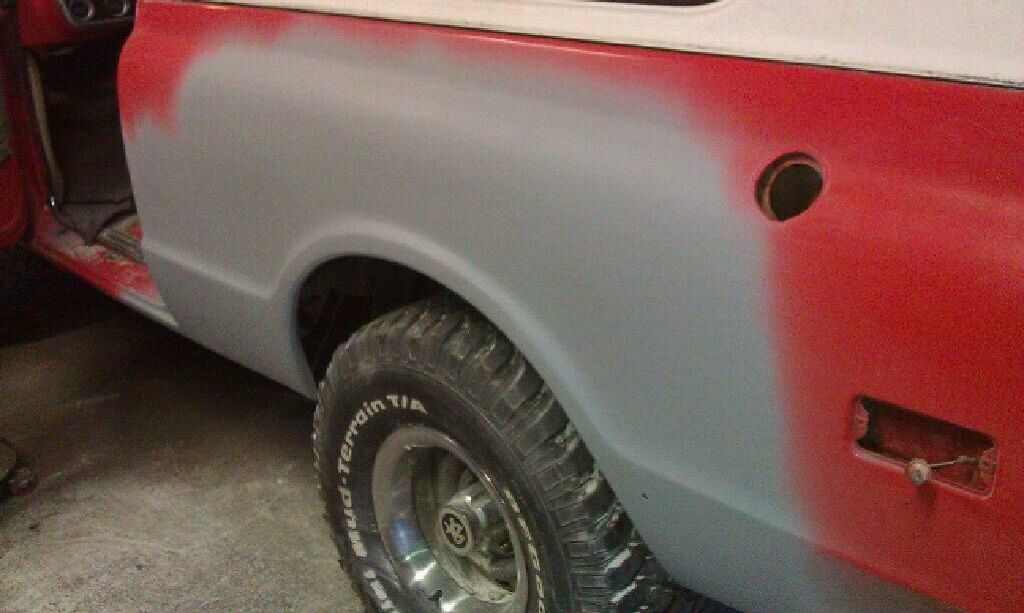 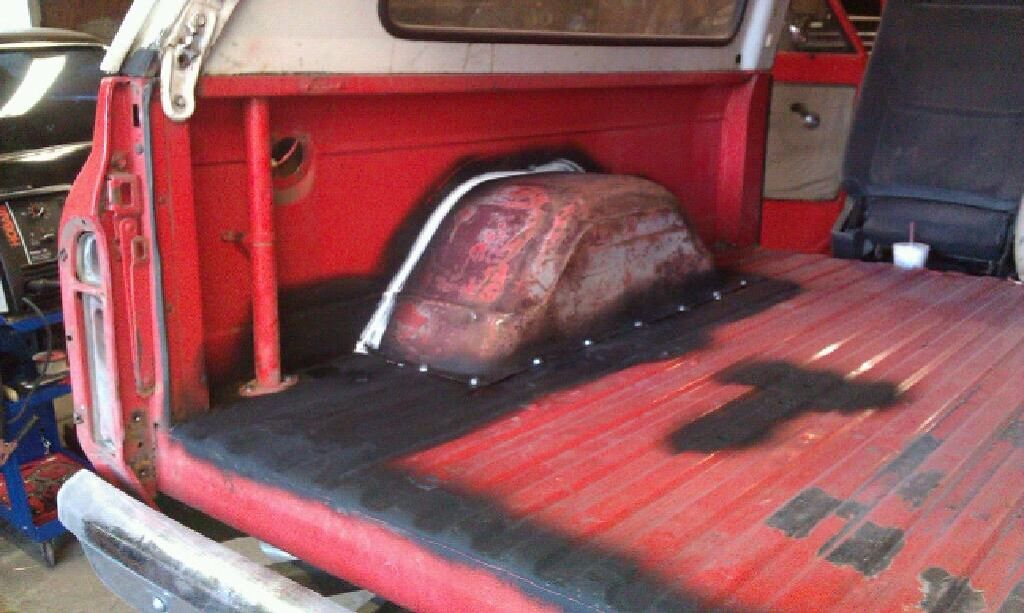 Also opted to get rid of the old seats in favor of some 01 Silverado seats. Just have them in for a test fit right now. Before: 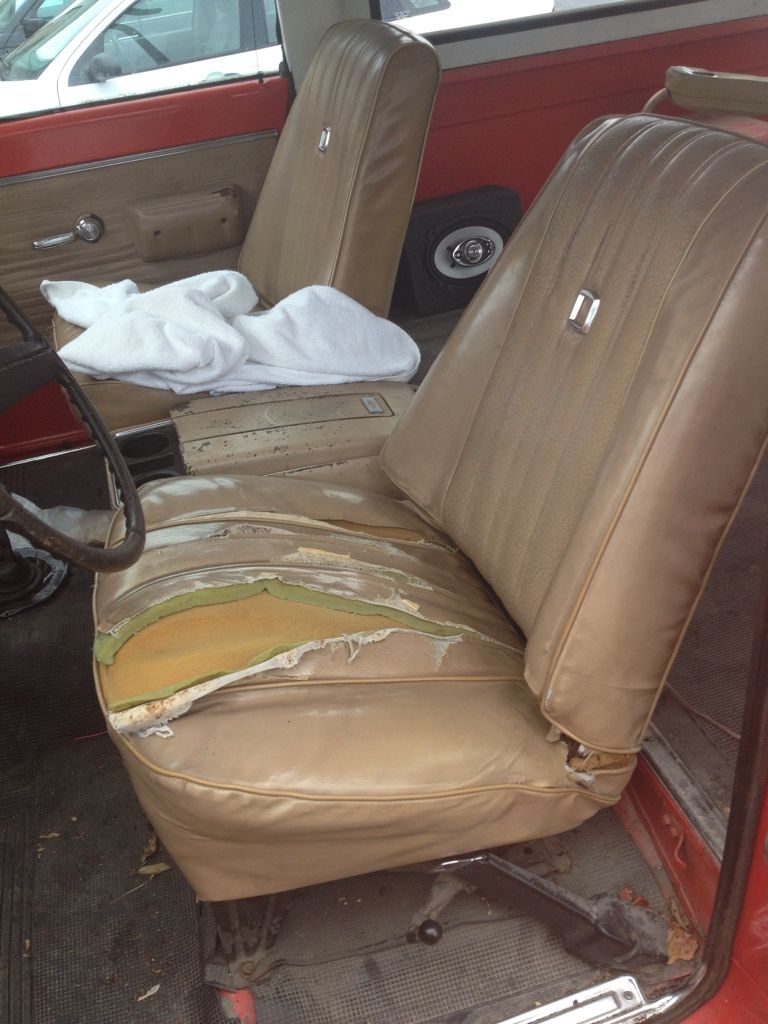 After: 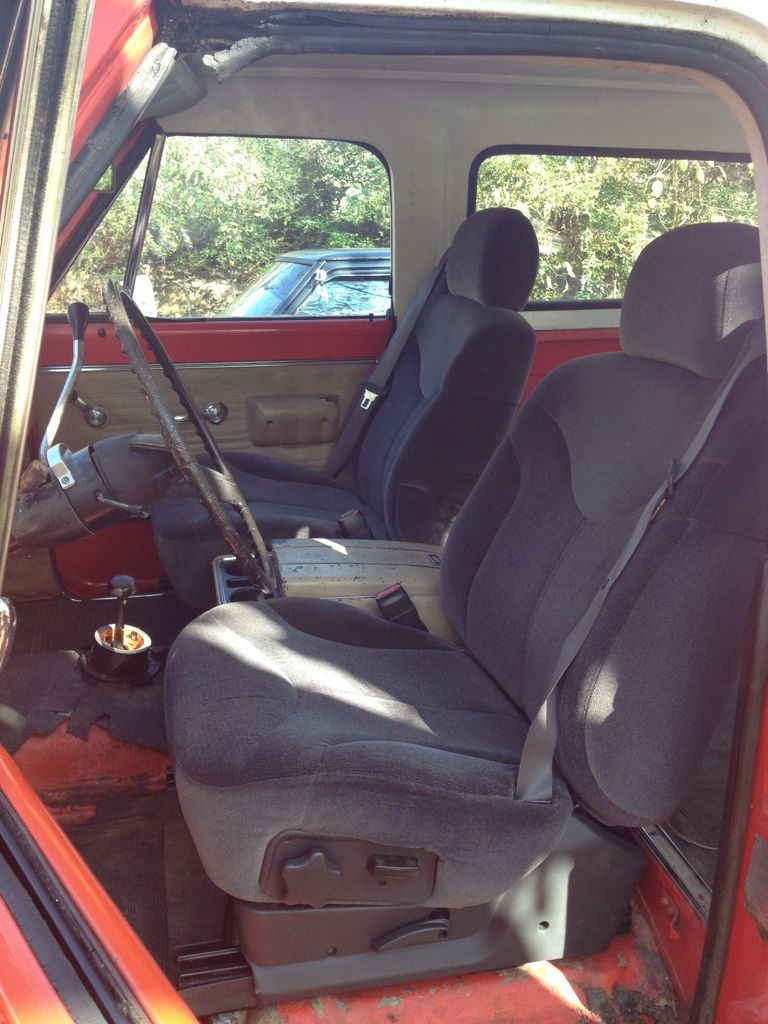
|
|
|

|
|
|
#8 |
|
Senior Member
 Join Date: May 2006
Location: Philadelphia, Pa. 19454
Posts: 9,774
|
Re: jc06vmax's 71 Jimmy Build
Nice work.....wish i had the guts to tear into my rear quarters.
__________________
Semper Fi...Uncle Sam, you da man All parts offered to help are free, unless otherwise noted Dont try this stuff in my build thread, unless you have 55 years of mechanical OTJ training SAFETY FIRST AS usual, off topic They say your mind goes second, can't remember the first Jim |
|
|

|
|
|
#9 |
|
Registered User
Join Date: Aug 2012
Location: Hartford, TN
Posts: 56
|
Re: jc06vmax's 71 Jimmy Build
|
|
|

|
|
|
#10 |
|
Registered User
Join Date: Aug 2012
Location: Hartford, TN
Posts: 56
|
Re: jc06vmax's 71 Jimmy Build
Found some old pictures before tearing into everything. PO had just fiberglassed over everything. The more we grind, the more rust we find.
Before: 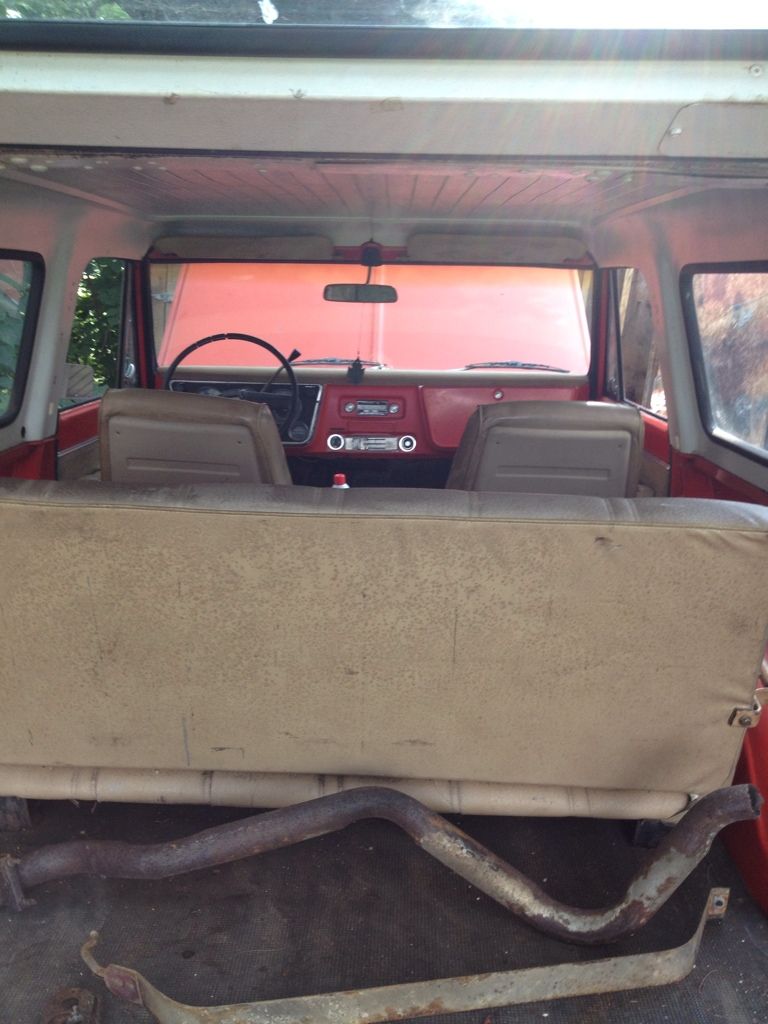 After: 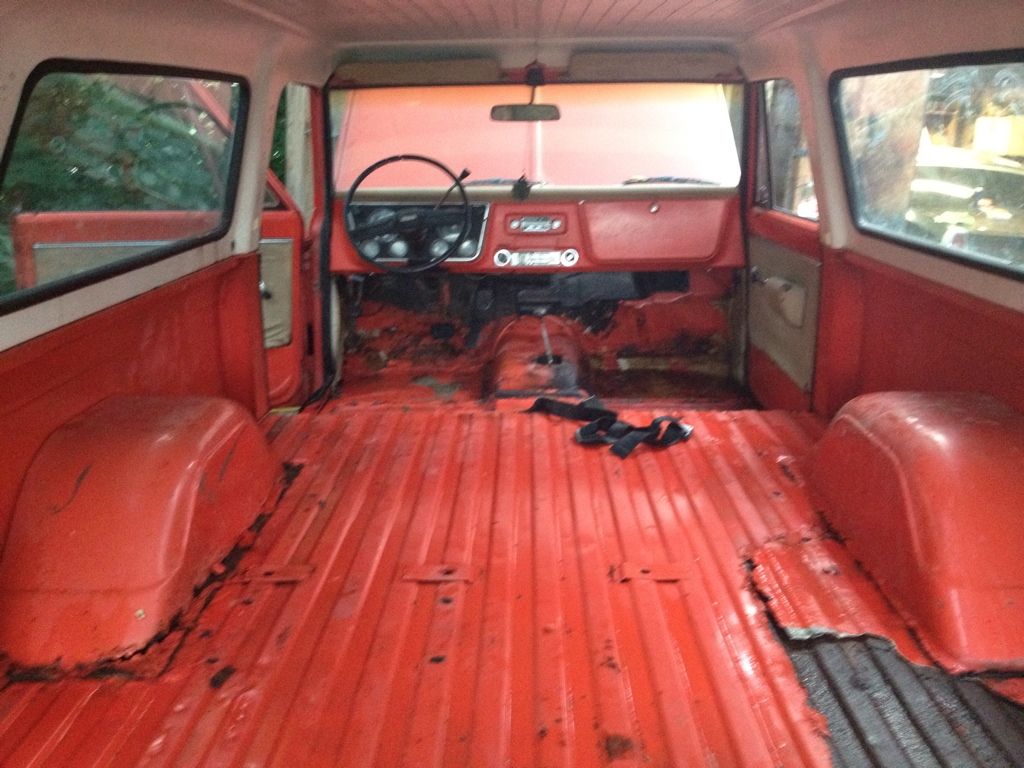 No shortage of fiberglass on the passenger side... Same story on the front floorboard... 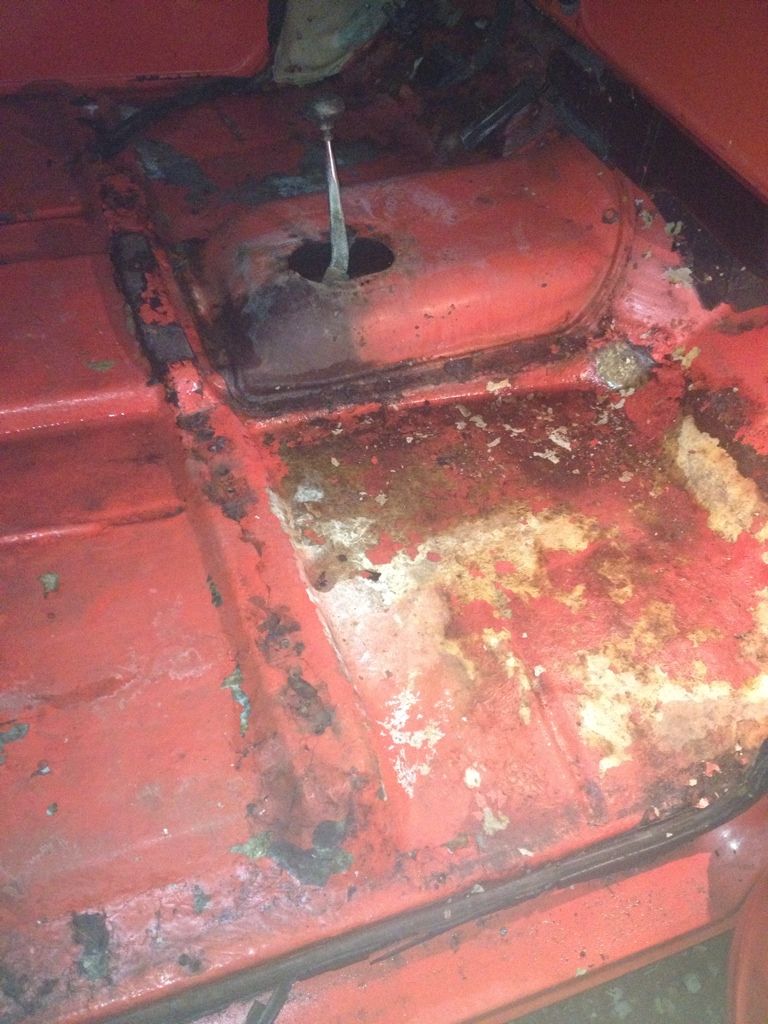 Working back to front. Hopefully the front floorboard won't look like a Fred Flintstone car after a little grinding, but that may be just wishful thinking. |
|
|

|
|
|
#11 |
|
Registered User
Join Date: Nov 2011
Location: Tustin, CA
Posts: 229
|
Re: jc06vmax's 71 Jimmy Build
Nice start and great job on the patch work. Gonna be a cool ride.
Posted via Mobile Device |
|
|

|
|
|
#12 |
|
Registered User
Join Date: Aug 2012
Location: Hartford, TN
Posts: 56
|
Re: jc06vmax's 71 Jimmy Build
Just about time to bring this thread back from the dead
 Between a job change, move, and pure old-fashioned laziness, I haven't put forth the effort to update the build thread. The Jimmy has been running great. Drove it from Newport to Murfreesboro and back several times without any major issues...round trip around 7 hours or so. Had a lot of fun with the top off and doing some camping this summer. Here's a few pics over the past 8 months.   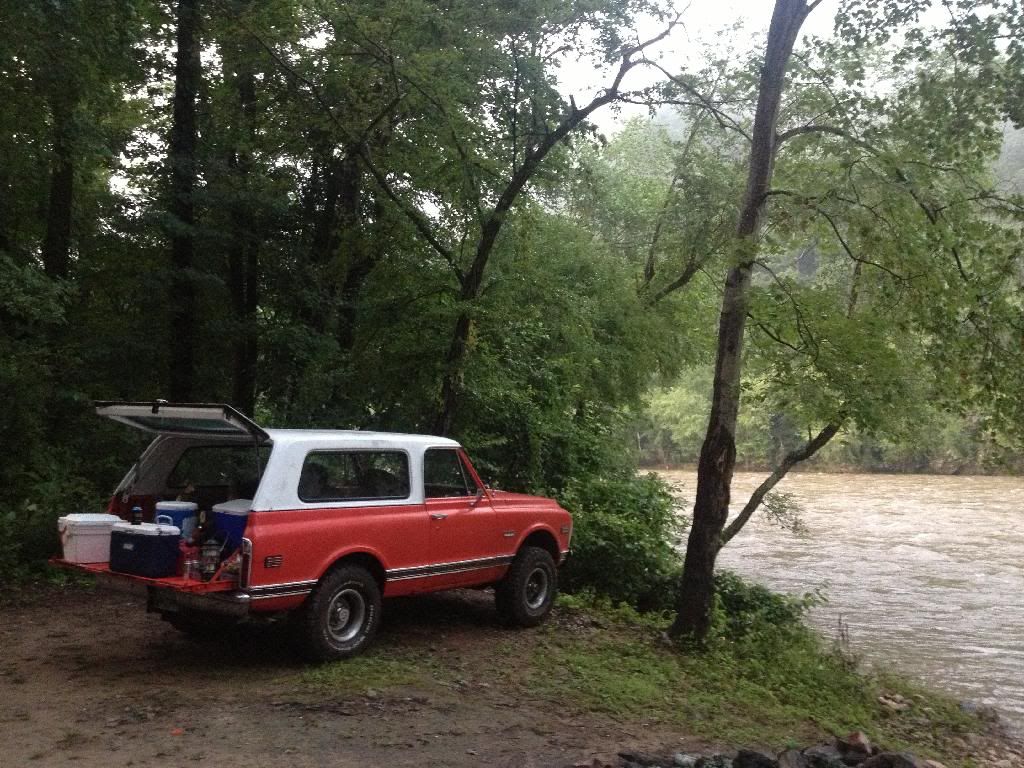 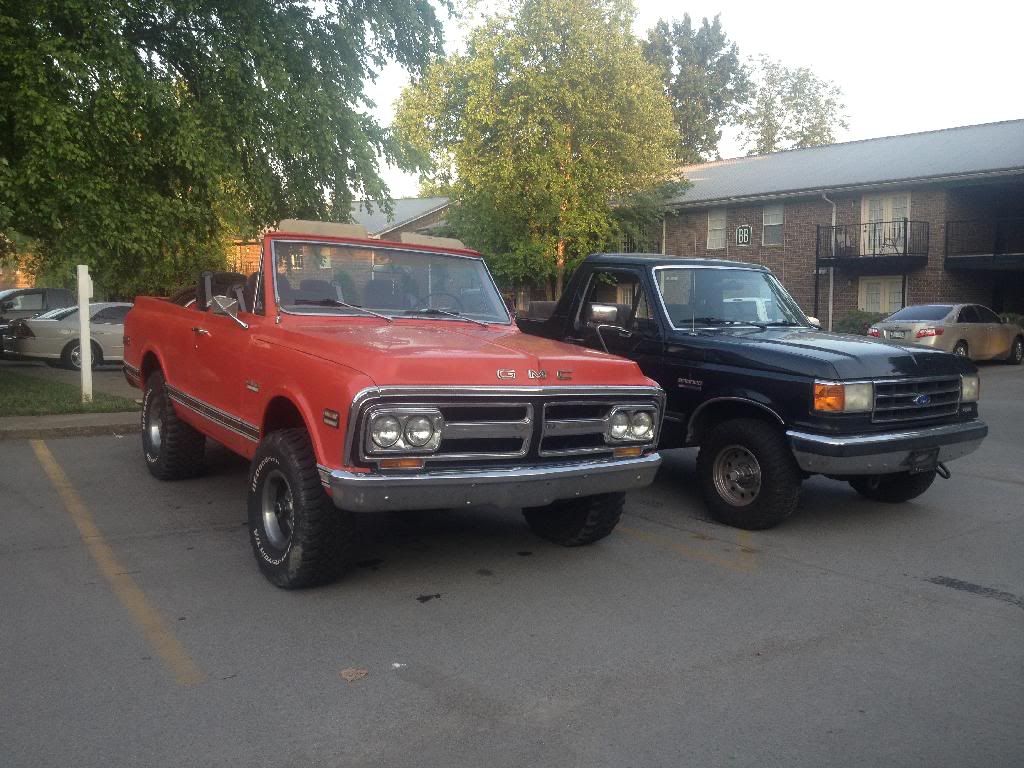
|
|
|

|
|
|
#13 |
|
Registered User
Join Date: Aug 2012
Location: Hartford, TN
Posts: 56
|
Re: jc06vmax's 71 Jimmy Build
After moving in September and finally getting settled in, I've had a little more time to work on the Jimmy and address a lot of smaller issues like u-joints, wheel bearings, etc.
Ended up putting a new starter in earlier in the year and haven't had a whole lot of luck from it. Finally decided to replace the worn and chewed up flywheel. What was supposed to be a 1 day out-and-in job to replace a $22 part has turned in to essentially a full on rebuild. Pulled the motor and ran the numbers to find out that it was not the original 350 but a 4 bolt main 350 from a '72 K10 or K20. Judging by the wear and how clean it was, the motor must have been rebuilt during the first restoration and had few miles on it. Did a complete tear down and clean up with new seals all around. Hopefully this will take care of some of the oil consumption and smoke issues its been having. Got a Lunati Bracket Master 284 duration .458 lift thats going in. Should hopefully be enough to give a it a little sound without having to put in a bigger stall. Going to go ahead and get the engine bay cleaned up and painted before the motor goes back in. Then, it's time to jump back on the bodywork and paint prep. Pre-cleanup. 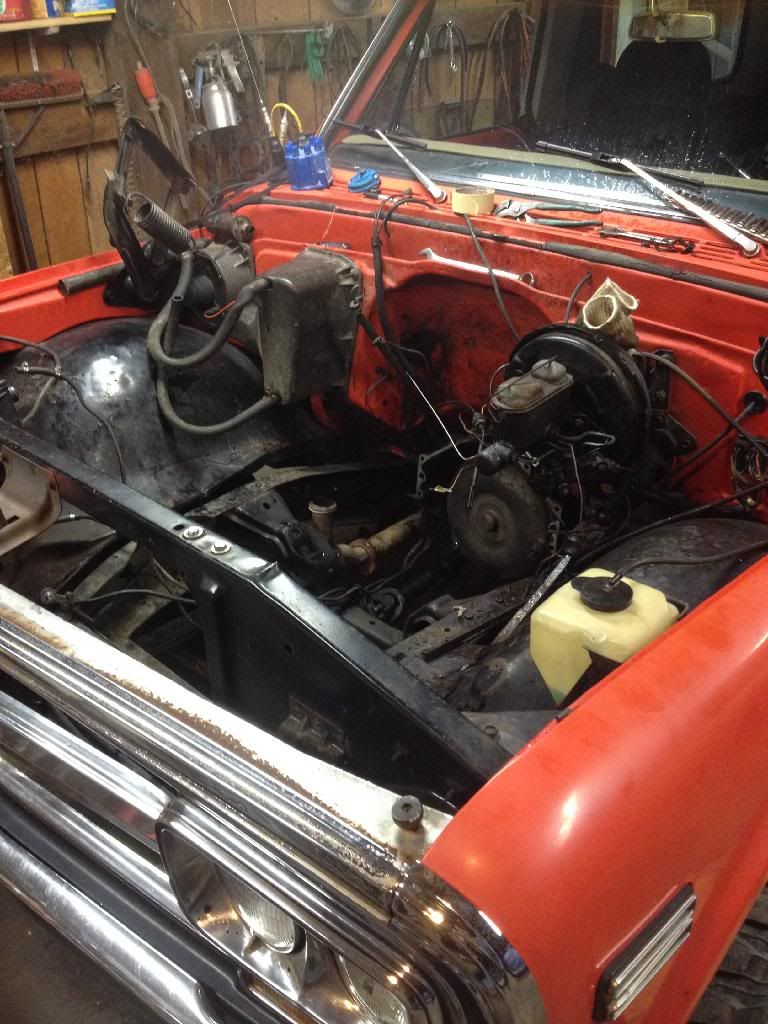 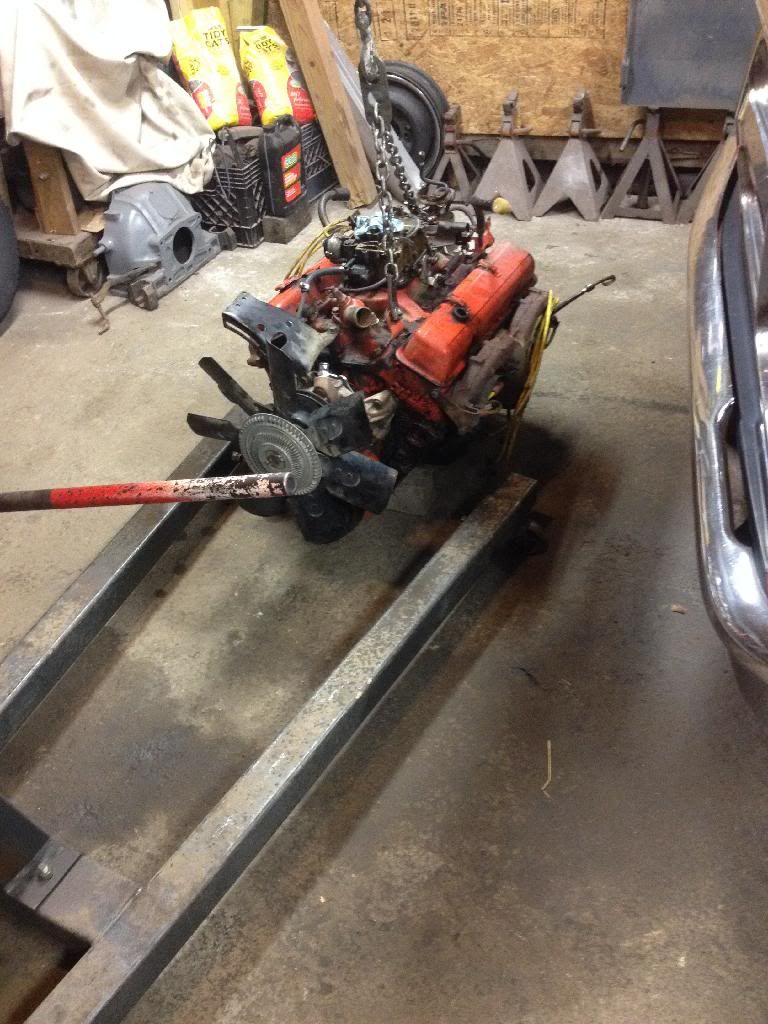 Fresh paint.  Hopefully will have it back in and fired up sometime this week. Gonna try to actually update this thread more than once or twice a year now that some more progress is happening. |
|
|

|
 |
| Bookmarks |
| Thread Tools | |
| Display Modes | |
|
|