
 |
Register or Log In To remove these advertisements. |
|
|
|
|||||||
 |
|
|
Thread Tools | Display Modes |
|
|
#26 |
|
Registered User
Join Date: Sep 2004
Location: Rancho Santa Margarita - SoCal
Posts: 1,432
|
Re: '72 C-20 Project Aztec
YeeHAW! Very cool...
Great feeling isn't it |
|
|

|
|
|
#27 |
|
Registered User
Join Date: Nov 2015
Location: San Antonio, TX
Posts: 63
|
Re: '72 C-20 Project Aztec
https://youtu.be/umCZf1TtxmY
Here's the YouTube link. It's not much but you can see it runs. My uncle who taught me all I know about automobiles is the bald guy. He came over and refreshed my mind with the basics of a carburetor and ignition timing. It takes a special kinda mechanic to fitness old school technology. Hell yeah BigMike, it feels great! Posted via Mobile Device |
|
|

|
|
|
#28 |
|
Registered User
Join Date: Apr 2008
Location: Md
Posts: 2,482
|
Re: '72 C-20 Project Aztec
Nice clean setup under the hood, truck sounds good too. You probably know this, but, original front rotors have a Vee groove on outer face.
__________________
http://67-72chevytrucks.com/vboard/s...d.php?t=635605 |
|
|

|
|
|
#29 |
|
Registered User
Join Date: Nov 2015
Location: San Antonio, TX
Posts: 63
|
Re: '72 C-20 Project Aztec
notsolo,
Thanks for the comments. Yes the truck does sound nice for such a simple and short exhaust. Thank you for the pics. I finally took one of the front wheels off and yes you're right it does have a vee groove on the rotors. Unfortunately the truck sat for about 5 years and my rotors are very rusted, have way too many deep grooves and they're very thin. The calipers are rusted and seized. I've noticed the soft lines are dry rotting and I have no brake pressure feed back in the pedal. No firmness at all, it's like a limp noodle. 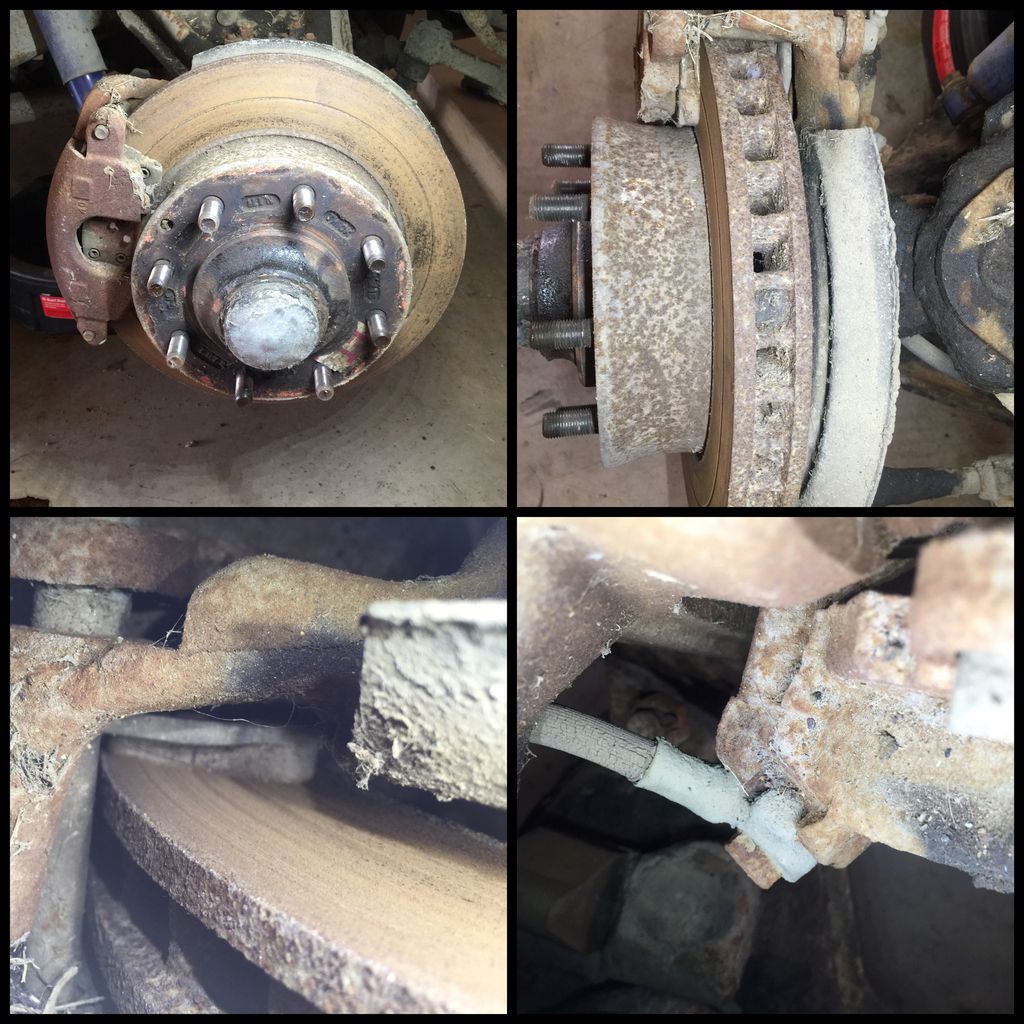 Fortunately the brake light switch works and I have the rear markers, tail lights and brake lights working now. Head lights work and I have fire to the front turn signals and front side markers. 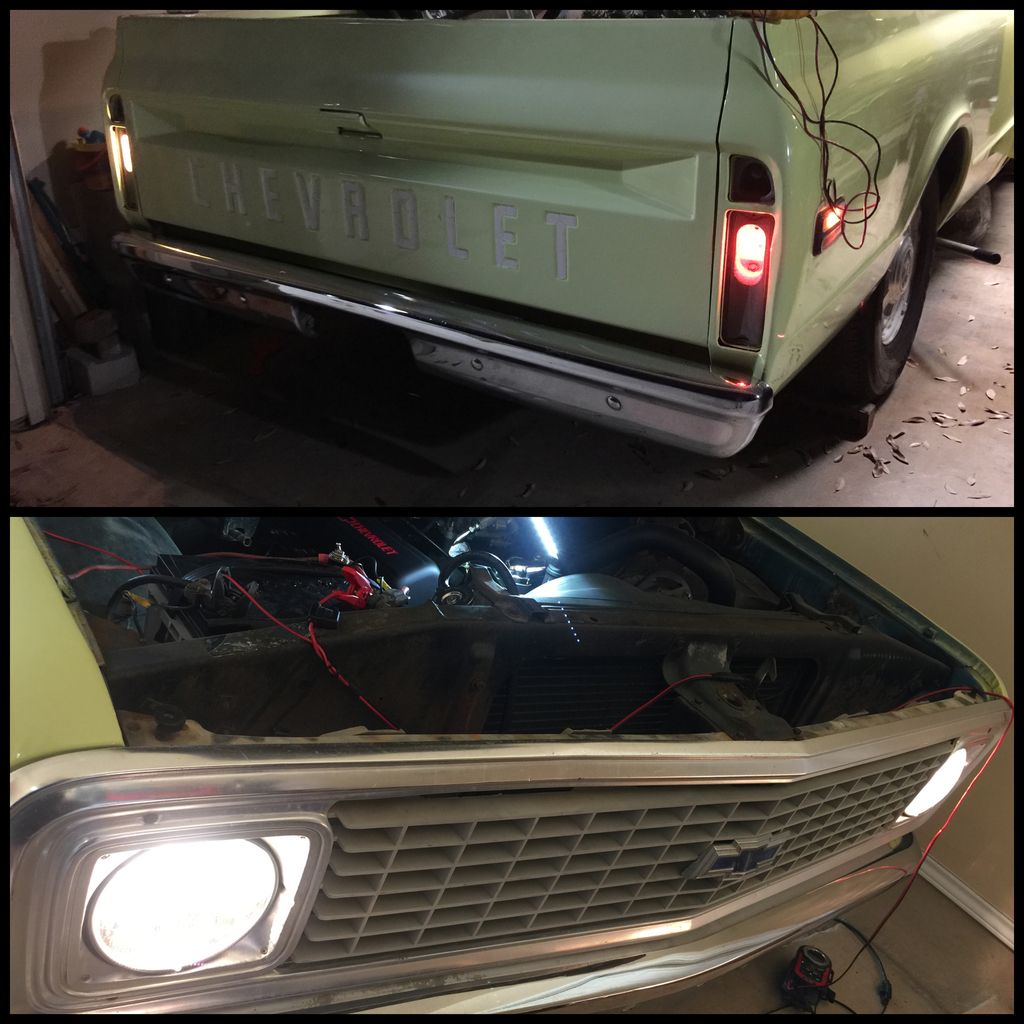 I do have a bad ground on the side markers since I'm picking up a very small voltage reading and a working set of bulbs will not spark. I'll run a separate ground to the pigtail and see if they come on. If they do it's definitely a bad ground and I'll find it. Reverse lights have no fire in the rear, I'm thinking it's in the fuse box or the hard to find switch in my steering column. New Wiring Harness from Brothers is in it's very near future. Back to the brakes. As far the rear, the drums look fine with no rust, could use a quick turn and the shoes look new. I need to figure out how to get the E-Brake working and replace the rear brake cylinders. I've made the decision to redo the entire brake system. Truck has been previously converted to power brakes. I found a company called Inline Tube. They make reproduction stainless and oem brakelines and offer replacement softlines and even make them in stainless braided! Very reasonable on prices and a lot more affordable than LMC. I really can't do much work on the truck right now since it's not movable. I have a slop in my driveway and no brakes or help to move it out. I'll attempt it when I'm ready to rebuild the braking system. I did manage to refurbish the headlight switch and this got most of the lights operable. 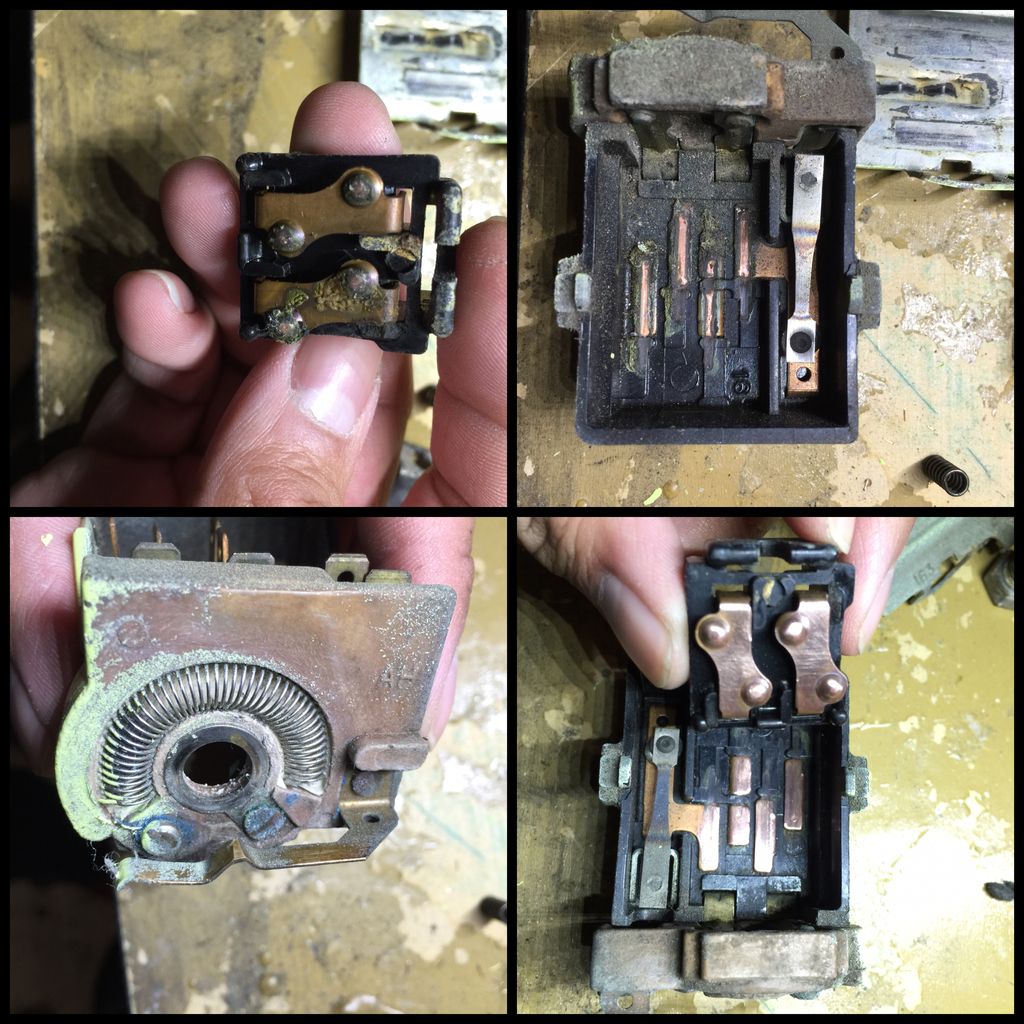 I also need to find a picture of the oem fuse box marking for fuse locations. Mine was completely covered in paint when the PO had it resprayed. So if anyone can help, I'd greatly appreciate a pic! 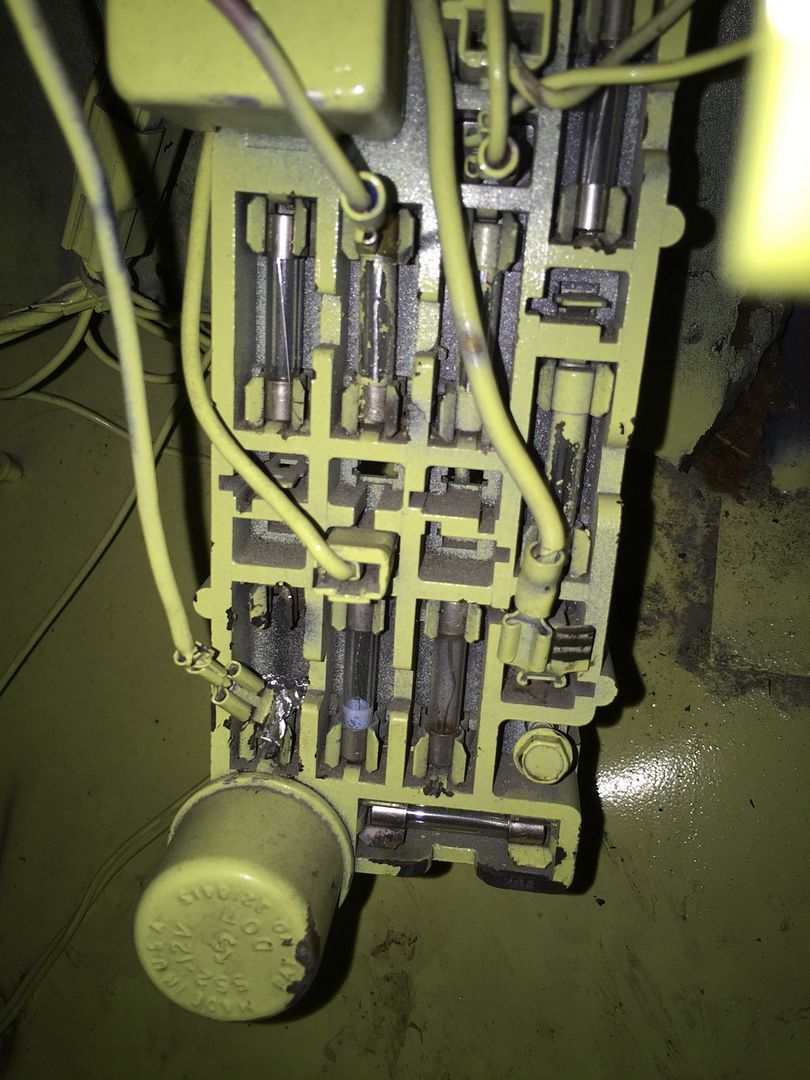
Last edited by Aztec.A; 02-23-2016 at 02:29 PM. Reason: add pics |
|
|

|
|
|
#30 |
|
Registered User
Join Date: Jan 2009
Location: San Antonio, Texas
Posts: 1,374
|
Re: '72 C-20 Project Aztec
There's a thread posted in the FAQ in the electrical section that has the labels for the fuse box.
Labled Fuse box
__________________
1972 C10 LWB, 350/350 Deconstruction began 5/2009, mostly completed restoration, 5/2017 |
|
|

|
|
|
#31 |
|
Registered User
Join Date: Nov 2015
Location: San Antonio, TX
Posts: 63
|
Re: '72 C-20 Project Aztec
|
|
|

|
|
|
#32 | |
|
Registered User
Join Date: Nov 2015
Location: San Antonio, TX
Posts: 63
|
Re: '72 C-20 Project Aztec
Quote:
|
|
|
|

|
|
|
#33 |
|
Registered User
Join Date: Nov 2015
Location: San Antonio, TX
Posts: 63
|
|
|
|

|
|
|
#34 |
|
Registered User
Join Date: Nov 2014
Location: Houston Texas
Posts: 27
|
Re: '72 C-20 Project Aztec
Engine work looks good. It's always nice to see/hear some satisfaction.
|
|
|

|
|
|
#35 |
|
Registered User
Join Date: Oct 2013
Location: Olympia, WA
Posts: 67
|
Re: '72 C-20 Project Aztec
Nice work so far! What components does yours have for the drop in suspension? That is the exact ride height that I would like to achieve for my 72 C20. It is pretty rare to see the 3/4 tons survive, much less see them lowered. Best of luck with everything else, I look forward to watching your progress!
Joe |
|
|

|
|
|
#36 |
|
Registered User
Join Date: Nov 2015
Location: San Antonio, TX
Posts: 63
|
Re: '72 C-20 Project Aztec
Thanks WTF?, I try to keep things clean and simple. Yes I came back to old Chevy's for that exact reason, satisfaction of restoring something great!
Oly72C20, thanks man I appreciate the support. As far as suspension the front only has drop spindles and lowering springs I want to say it has about a 3 inch drop with both components. The rear has 5 in lowering springs and lowering shocks. I didn't do the work to it. It was done by a local shop in San Antonio about 10 years ago when my buddy owned the truck. I asked him recently who made the spindles and he said an old company called Airbagit.com. They're from a 3/4 Ton 1973 C20 and offered 2 types based on disc brake size. The rest or the suspension came from them too. So far the suspension is good other than the rear shocks that had cheap polyurethane inserts in the shock mounts. All of it disintegrated and the sleeves are loose on the hardware. Hence why you may see them dangling in some of my pics. Thanks for following, if you have anymore questions let me know and I'll try to find out more info for you and myself. As an update I've got the gauge cluster removed and have started to restore the cluster. Interior is stripped and I have two bad gauges. An oil pressure and volt meter. Surprisingly the Fuel guage works perfect. There's an aftermarket oil pressure guage that was seeping oil on the floorboard. So far I fixed that and have to get a new printed circuit board and two gauges. If anyone has old ones in good shape and serviceable I'll gladly take them! I'll have pics up in the morning of my findings. Dave |
|
|

|
|
|
#37 |
|
Registered User
Join Date: Oct 2013
Location: Olympia, WA
Posts: 67
|
Re: '72 C-20 Project Aztec
Thank you for the info! I'll keep my eyes and ears open for if I see or hear of any gauges up my way. I do have a very good friend who does speedometer and gauge work for a living, so if you wind up needing things pulled apart and rebuilt, he is the person to do it. The business name is Tacoma Speedometer. They helped me get all of my wiring gremlins resolved very quickly.
Joe |
|
|

|
|
|
#38 |
|
Registered User
Join Date: Nov 2015
Location: San Antonio, TX
Posts: 63
|
Re: '72 C-20 Project Aztec
Sounds good Joe, thanks for the shameless plug. I checked out their website and I'm impressed.
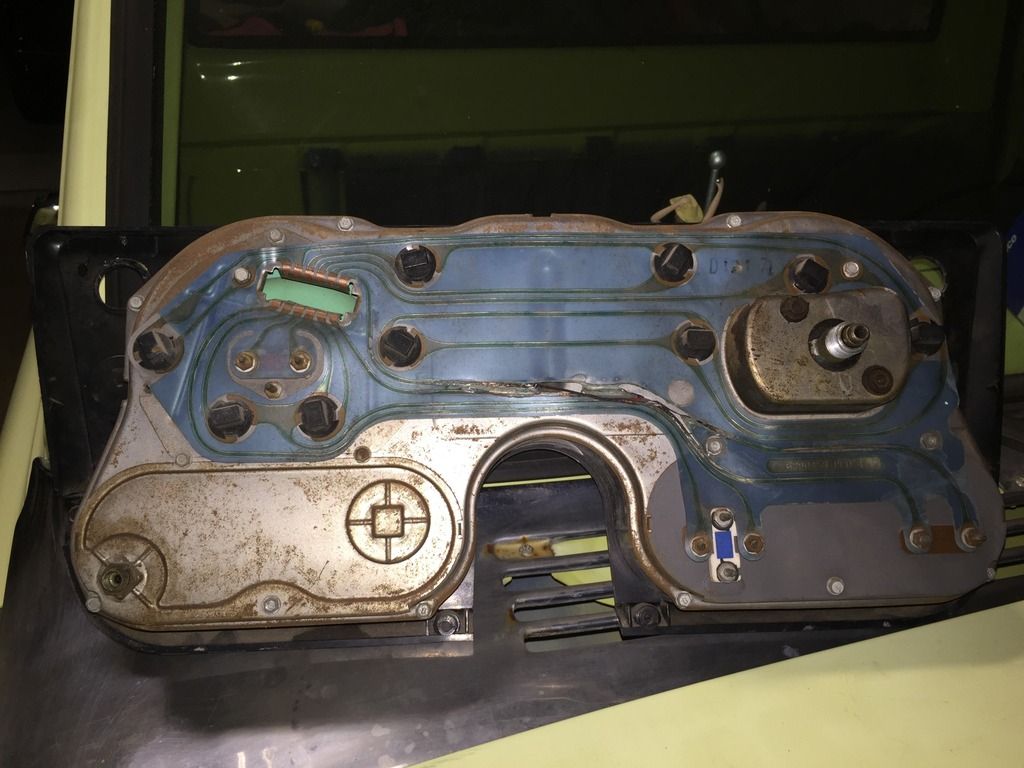 Well this can't be good! No wonder the lighting behind it doesn't work. 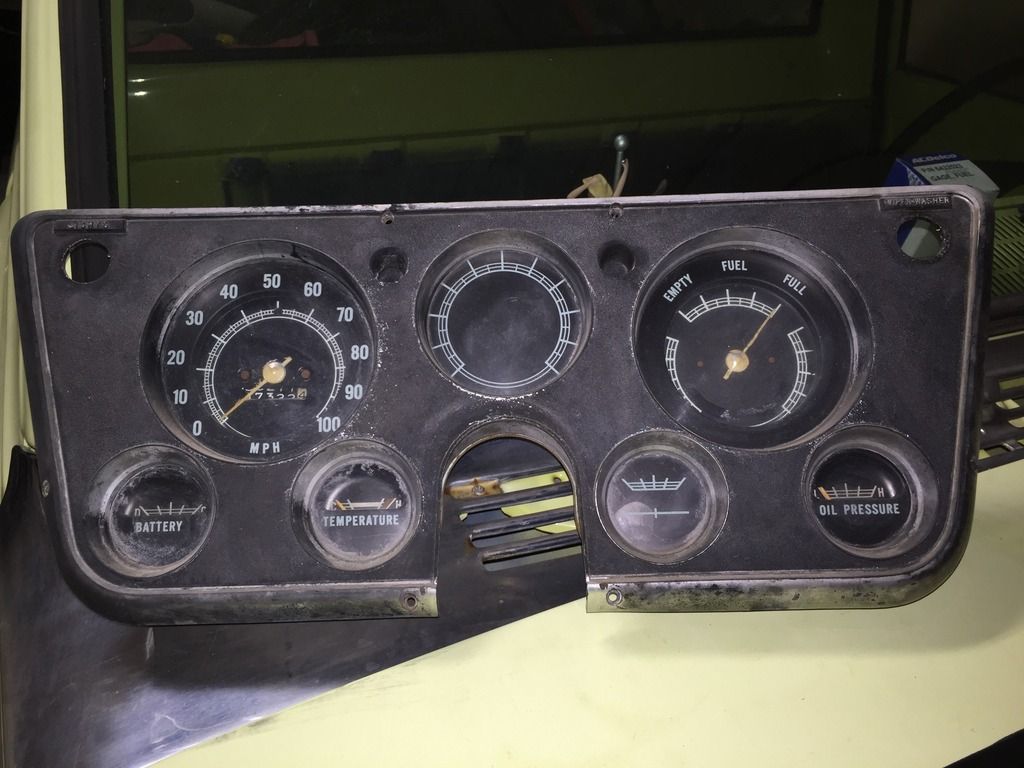 Before pics of the front. Yuck. 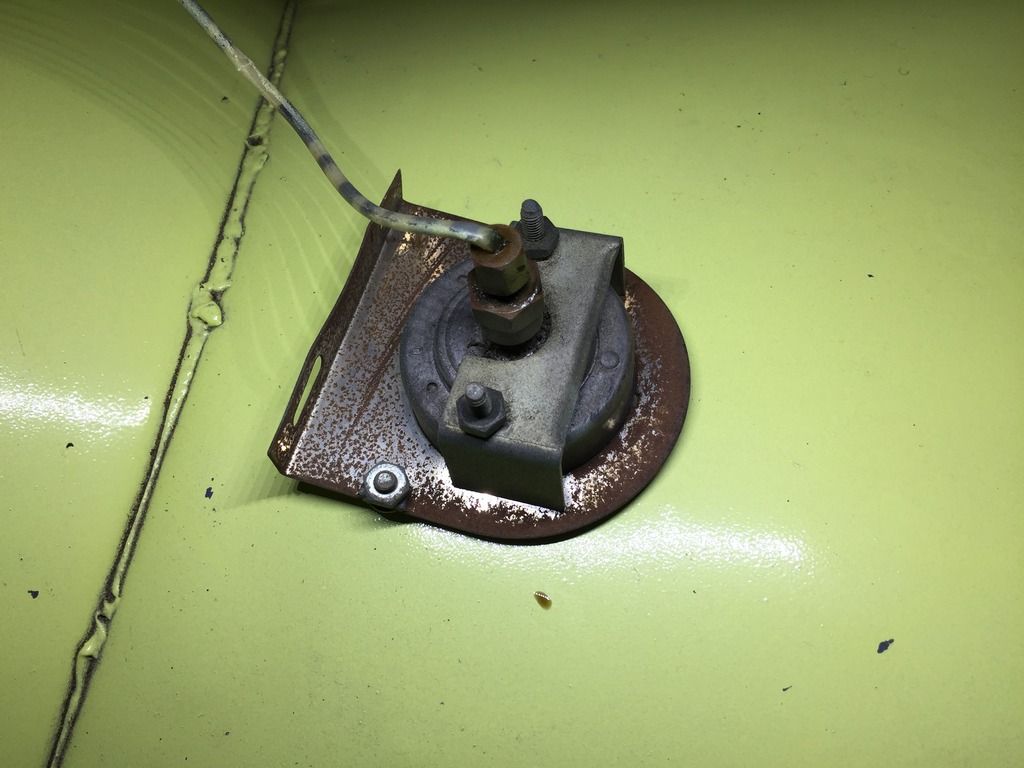 This is the aftermarket oil pressure gauge. The line had been kinked and dripped oil into the interior. 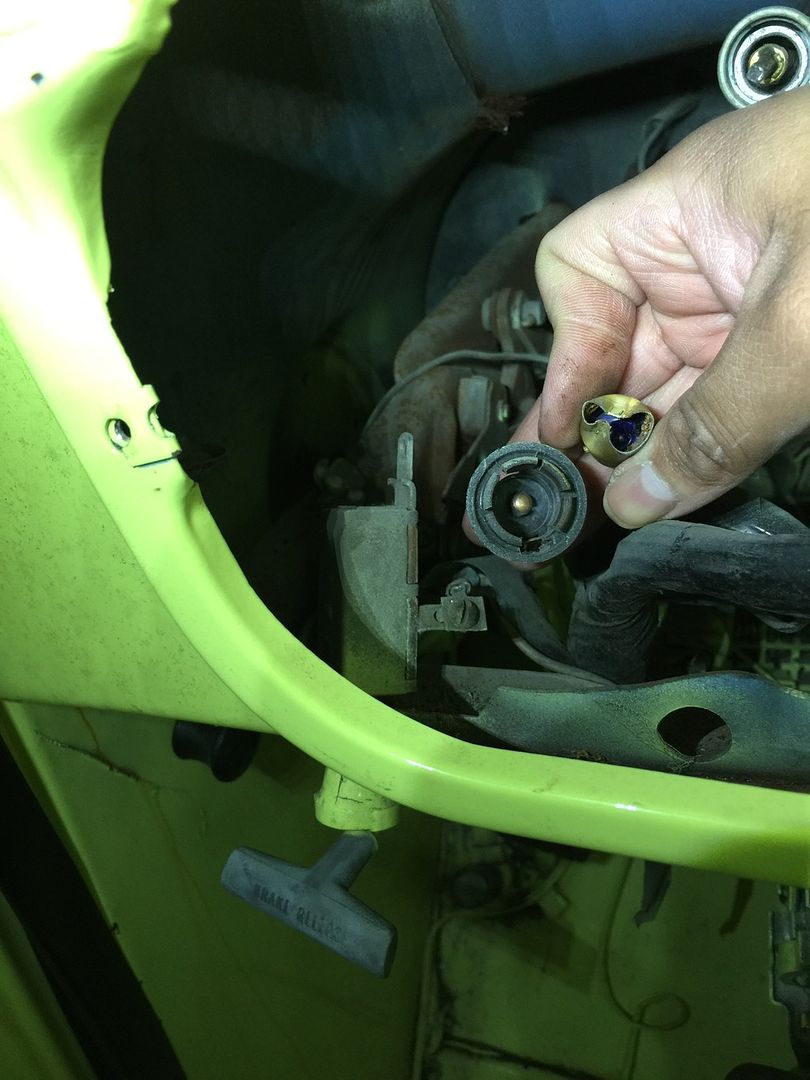 I had no idea this truck came with courtesy lighting. A nice little bulb base was stuck in here. I assume the switch on the bottom of the dash is for the cargo light? Last edited by Aztec.A; 02-29-2016 at 11:05 AM. |
|
|

|
|
|
#39 |
|
Registered User
Join Date: Nov 2015
Location: San Antonio, TX
Posts: 63
|
Re: '72 C-20 Project Aztec
|
|
|

|
|
|
#40 |
|
Registered User
Join Date: Nov 2015
Location: San Antonio, TX
Posts: 63
|
Re: '72 C-20 Project Aztec
Well I had a thread about this mystery switch under the dash. Grumpy old man (member name) was right about the switch being for auxiliary lighting. The switch had a massive stock pile of wiring plugged 2 ways from the battery to the switch and tee'd off to run power and ground to the rear of the truck where I found a hot wire dangling next to my newly installed rear tank!
I traced all the wiring and cut power to them from the battery immediately. Then I tore all the wiring and distribution blocks out. There was even live wiring under the dash and to the switch. The original owner before my friend had it did a crap job of wiring. I assume there were driving lights up front and also some in the rear maybe to light up an area to connect/load a trailer. I've seen a switch like that before but I forget where. You can see some of the gremlins I found lurking. Pretty sad to see the wiring was left live for decades. A fire waiting to happen..... 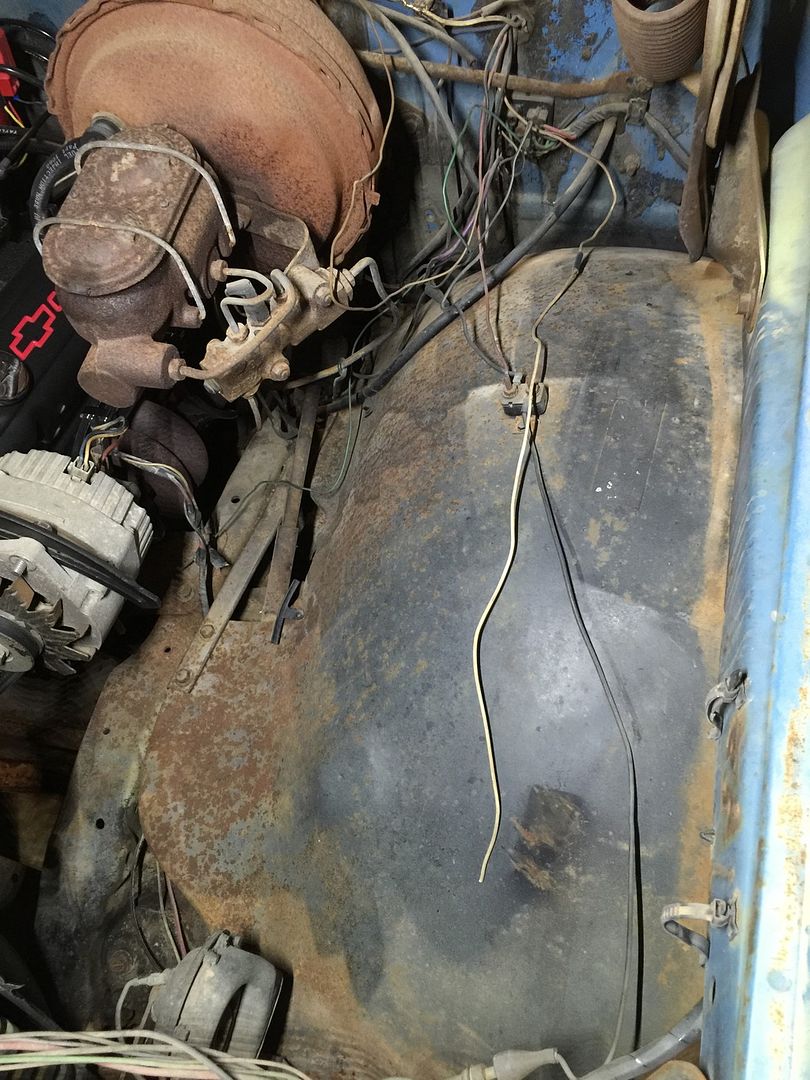 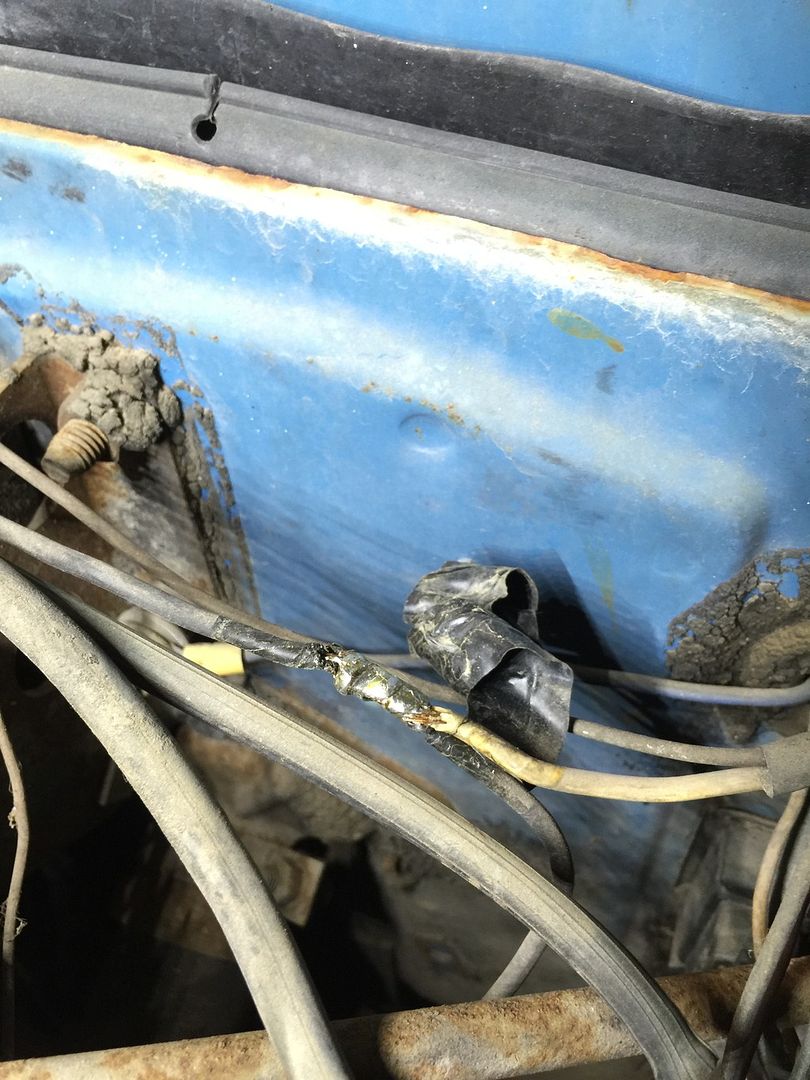 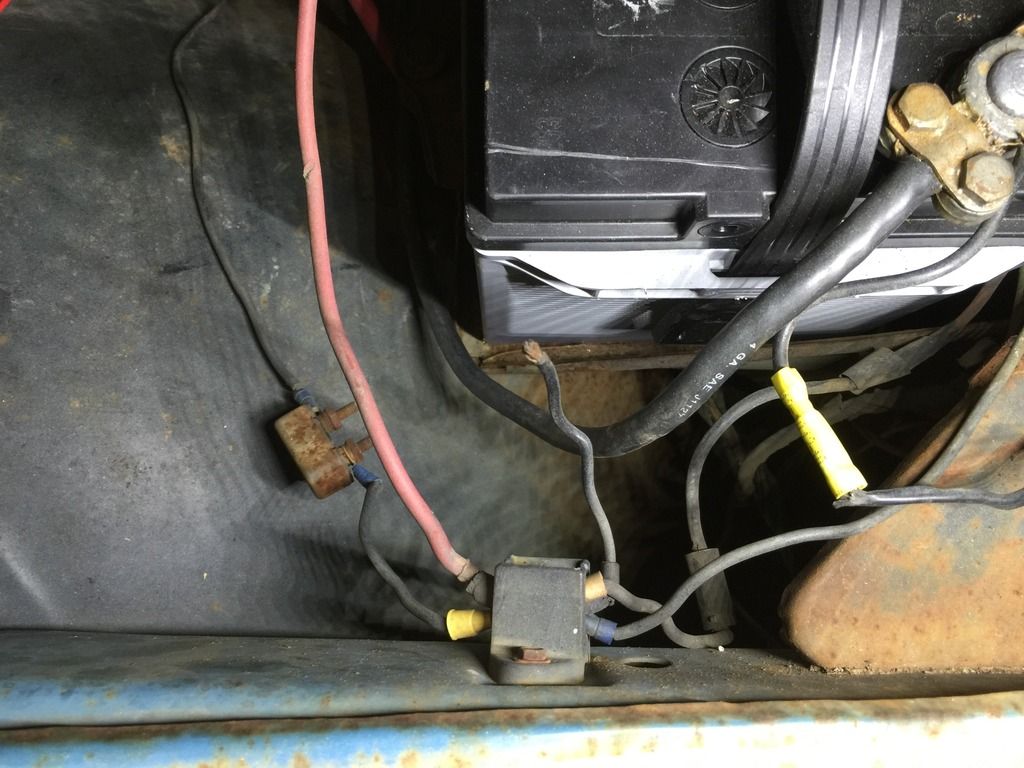 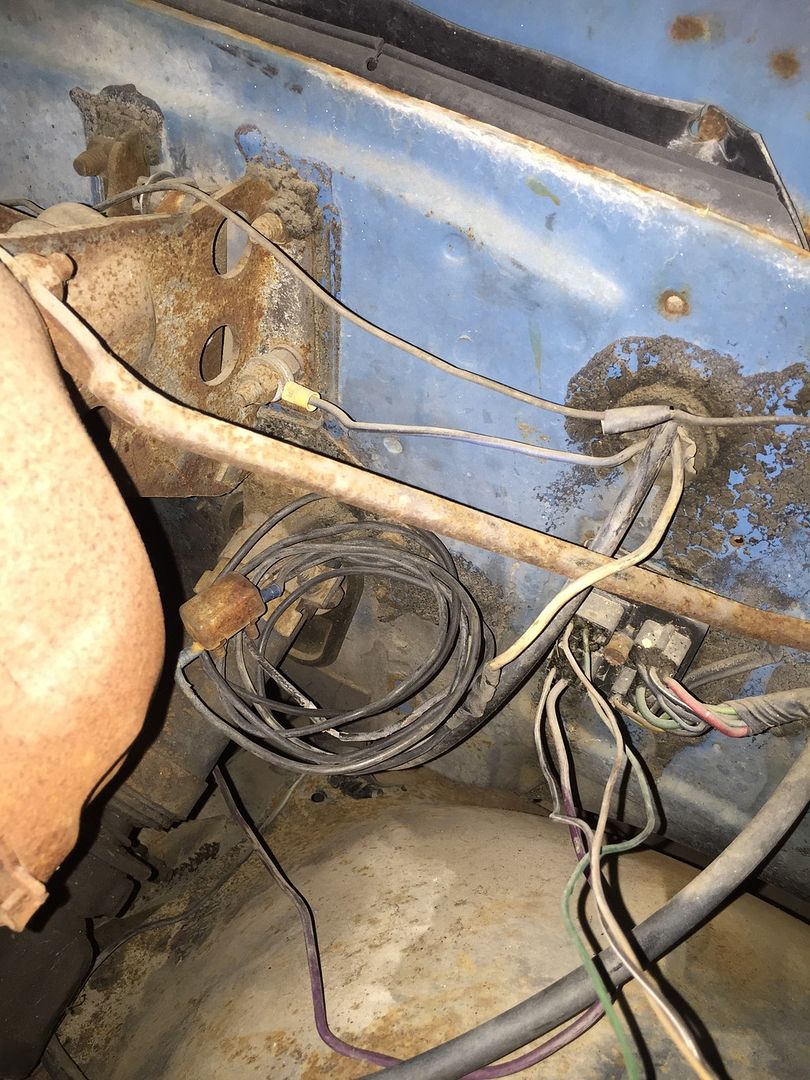 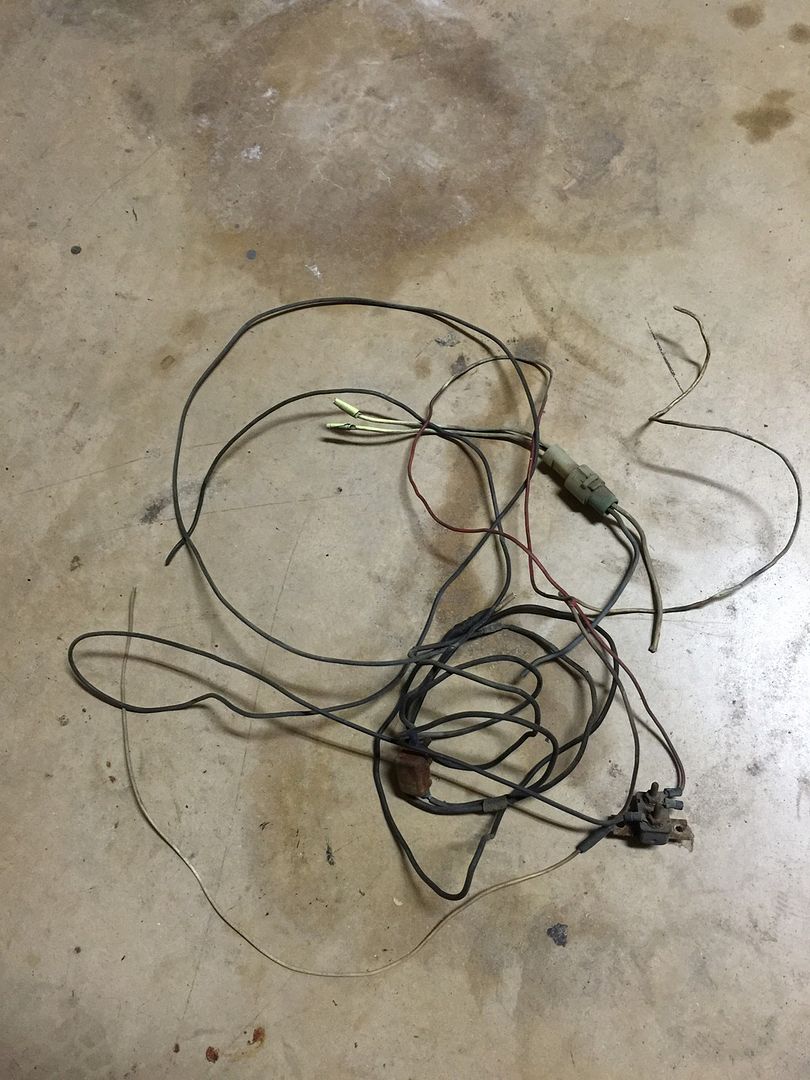 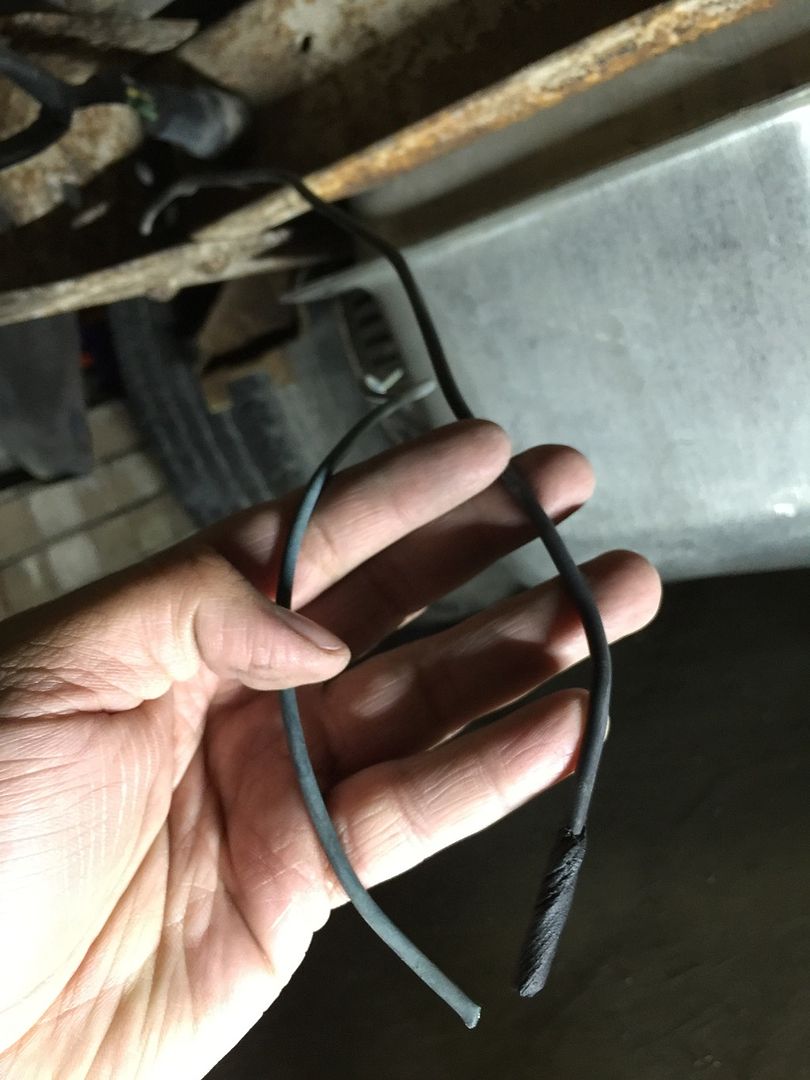 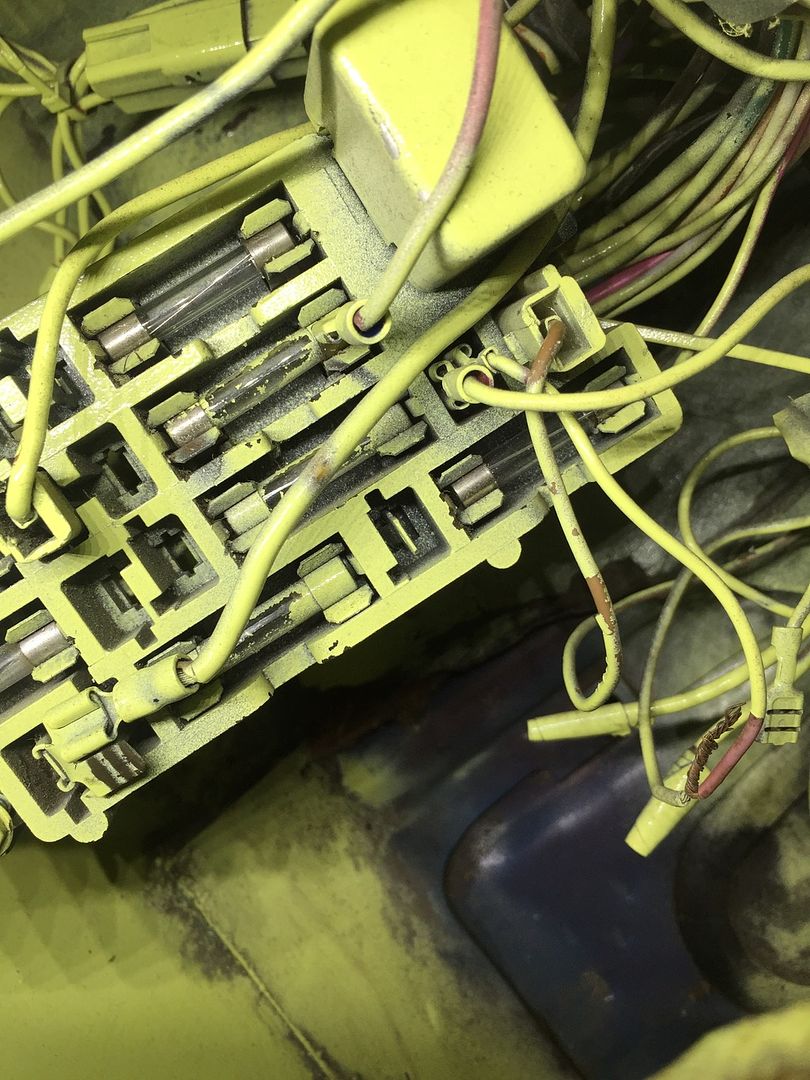 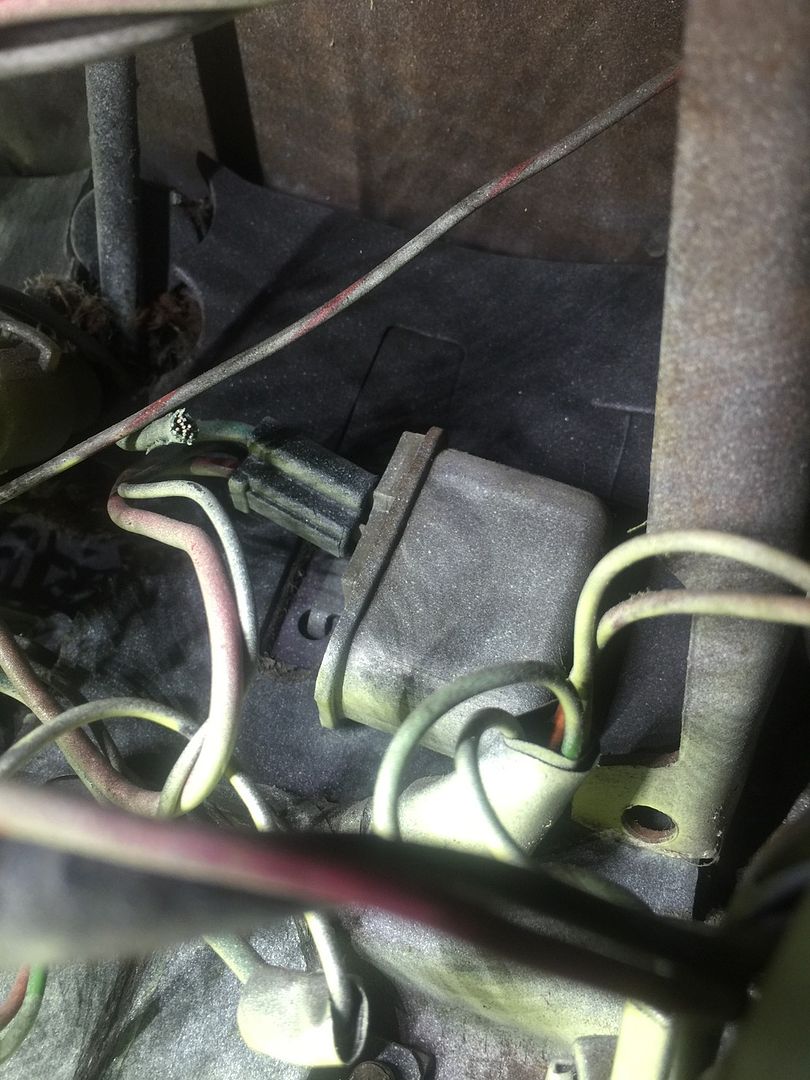 I assume this is the horn relay? |
|
|

|
|
|
#41 |
|
Registered User
Join Date: Nov 2015
Location: San Antonio, TX
Posts: 63
|
Re: '72 C-20 Project Aztec
It's been kinda quiet in my garage with the arrival of my second child.
I've had some time to budget for an LS swap and tremec t56. Any pointers and sense of direction from y'all is appreciated. |
|
|

|
|
|
#42 |
|
Registered User
Join Date: Nov 2015
Location: San Antonio, TX
Posts: 63
|
Re: '72 C-20 Project Aztec
Hey everyone, I have some big progress on getting this rig closer to hitting the road.
I'll post some pics up tonight! More good news too! |
|
|

|
|
|
#43 |
|
Registered User
Join Date: Oct 2013
Location: Olympia, WA
Posts: 67
|
Re: '72 C-20 Project Aztec
Glad to see you're still pluggin' away at it and making progress! I wish I was able to say the same thing... Unfortunately mine has been on hold for awhile... I can't wait to see the pictures!
Oly |
|
|

|
 |
| Bookmarks |
| Thread Tools | |
| Display Modes | |
|
|