
 |
|
|
#476 |
|
Registered User
Join Date: Feb 2012
Location: Grand Rapids, Michigan, otherwise known as Beer City U.S.A.
Posts: 1,081
|
Re: My own build thread
OOOOOH!!!
Sorry to hear about the hood! That had to feel tragic! It looked sooooo nice! I kinda know how you feel about taking a rest. Sometimes it feels relaxing, but my truck is sorta in "storage" for the winter, and I still get cabin fever from time to time, so I need to go look at it just to make sure that it is still there!! I cannot wait until spring rolls in!!!
__________________
My Build: http://67-72chevytrucks.com/vboard/s...d.php?t=512904 |
|
|

|
|
|
#477 |
|
Registered User
Join Date: Dec 2014
Location: Paint Bank, VA
Posts: 209
|
Re: My own build thread
|
|
|

|
|
|
#478 |
|
Registered User
Join Date: Mar 2012
Location: Hooper Ut
Posts: 466
|
Re: My own build thread
Thanks Popcorn/Modges66, glad to help someone else out!
Update - I took some time off obviously but I'm slowly getting back into things. I started upholstering my seat. I'm going to attempt to make something similar to Fatluckys seat he did on the Red Faux but with brown/gold material. Here are some pics. This new web layout doesn't work well with my phone... Grr... Posted via Mobile Device Last edited by zippeay; 05-14-2015 at 02:28 PM. |
|
|

|
|
|
#479 |
|
Registered User
Join Date: Mar 2012
Location: Hooper Ut
Posts: 466
|
Re: My own build thread
Let me see if this works.
These are the colors I'm using. Everything will be dark brown with gold piping and gold stitching. 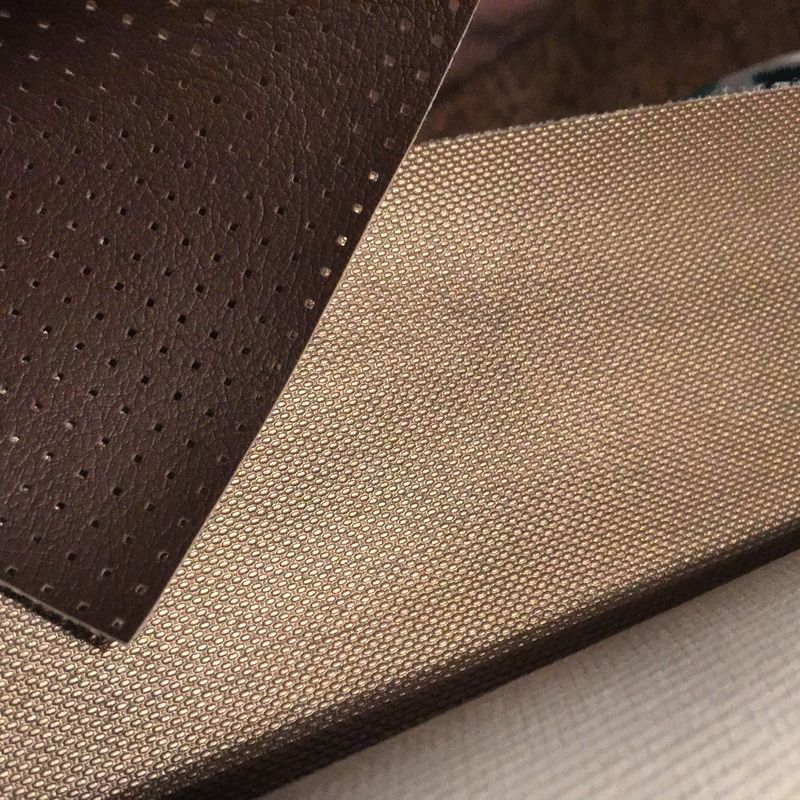 Woohoo! I figured it out! Here is the layout I drew on the foam. I also had the seat frame powder coated. 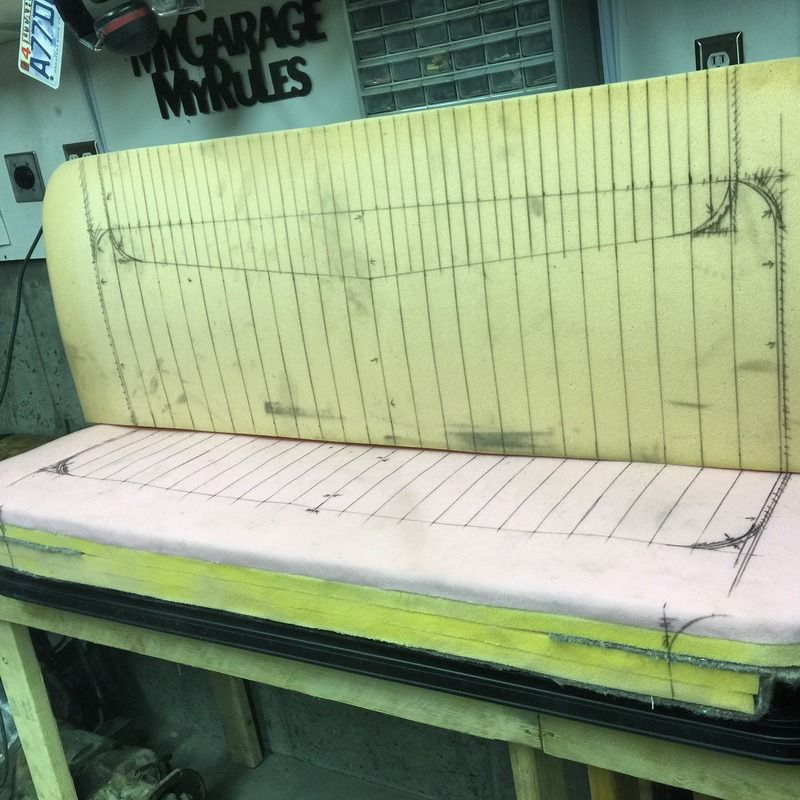 Here are the pleats 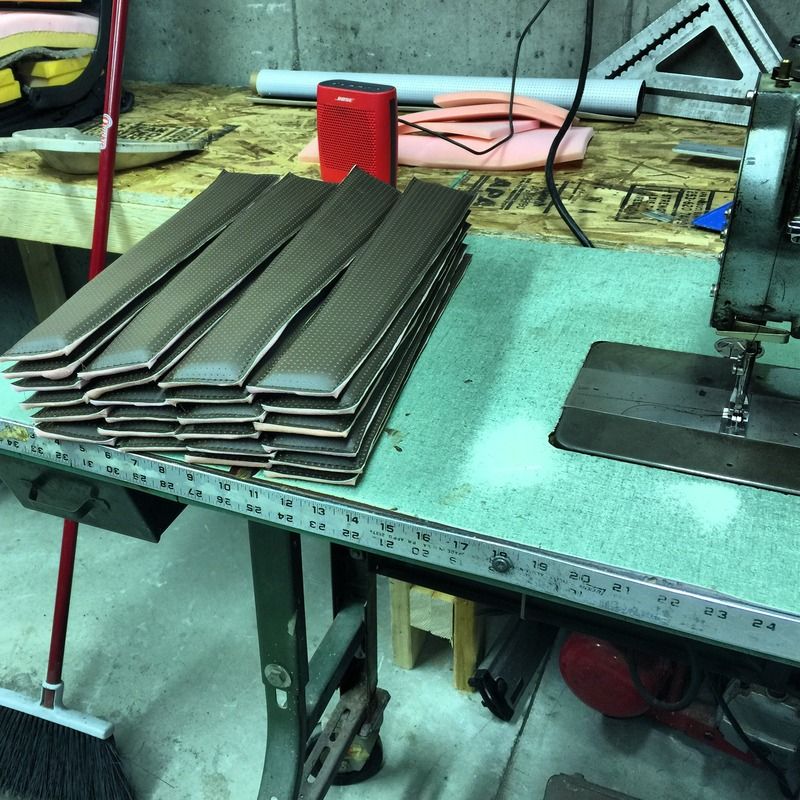 Here are the pleats sewn together. I tried to get the perforated holes to line up but if you've ever done upholstery I'm sure you know how difficult it is to do that. I've never sewn perforated material before and didn't think about that beforehand. Oh well, hopefully it will still look nice when it's finished. 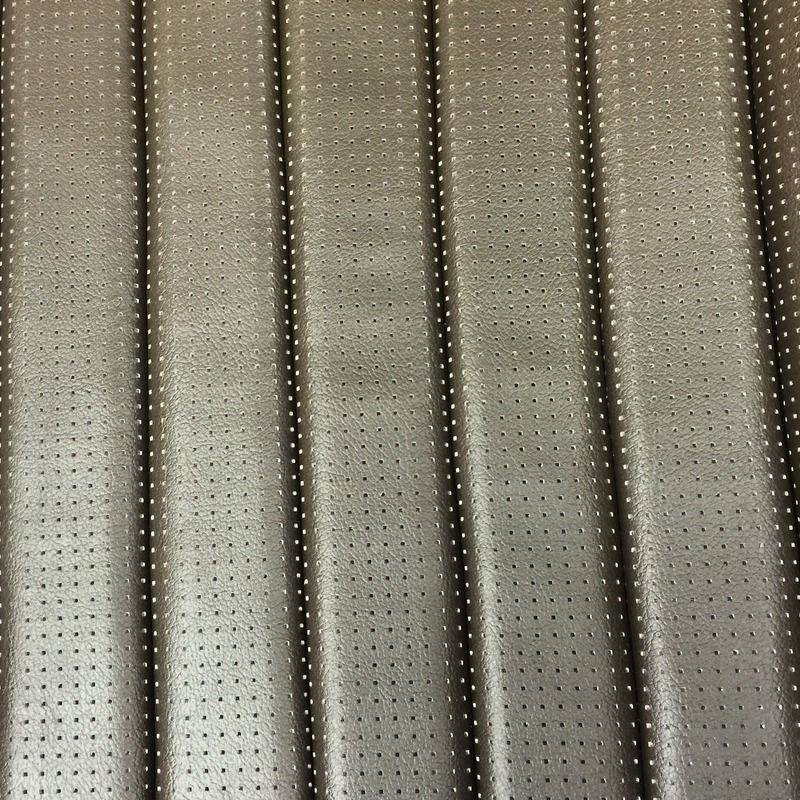 I'll post more pics when I'm finished. Hopefully I can knock this out this weekend. Posted via Mobile Device Last edited by zippeay; 05-14-2015 at 02:43 PM. |
|
|

|
|
|
#480 |
|
Registered User
Join Date: Apr 2012
Location: Searcy, AR
Posts: 4,203
|
Re: My own build thread
Looks Great from here...
 …and glad to see you and this awesome build back out here... 
__________________
DON Proverbs 27:17  US Air Force Retarded errr Retired My '65 Stepper Build:http://67-72chevytrucks.com/vboard/s...d.php?t=533920 My '60 Rusty Patina Build:http://67-72chevytrucks.com/vboard/s...66#post7402266 My '72 http://67-72chevytrucks.com/vboard/s...59#post7204359 SOLD |
|
|

|
|
|
#481 |
|
Registered User
Join Date: Mar 2012
Location: Hooper Ut
Posts: 466
|
Re: My own build thread
Thanks Don! I just hope this turns out well. I haven't done upholstery in 4-5 years so I'm pretty rusty and of course I had to choose a very difficult design to do as well. If it comes out half as good as the Red Fox seat I'll be very happy. Fatlucky does some amazing work, I know mine won't be nearly as nice as his but his design layout seemed to fit the style of my truck and I figured what the hell. I just hope mine turns out half way decent. All I can do is try, right? The guy at the upholstery place almost had me talked into doing real leather but since I haven't sewn for so long and because this seat design is so elaborate I didn't want to spend all that money and have it not turn out nice. This vinyl is nice stuff but it's much cheaper than leather.
If anyone is interest I can post more pictures of the upholstery part I just figured not many people do this on their own so I didn't go into detail but if anyone is interested I can. Posted via Mobile Device |
|
|

|
|
|
#482 |
|
Registered User
Join Date: Mar 2012
Location: Hooper Ut
Posts: 466
|
Re: My own build thread
I made progress on the seat.
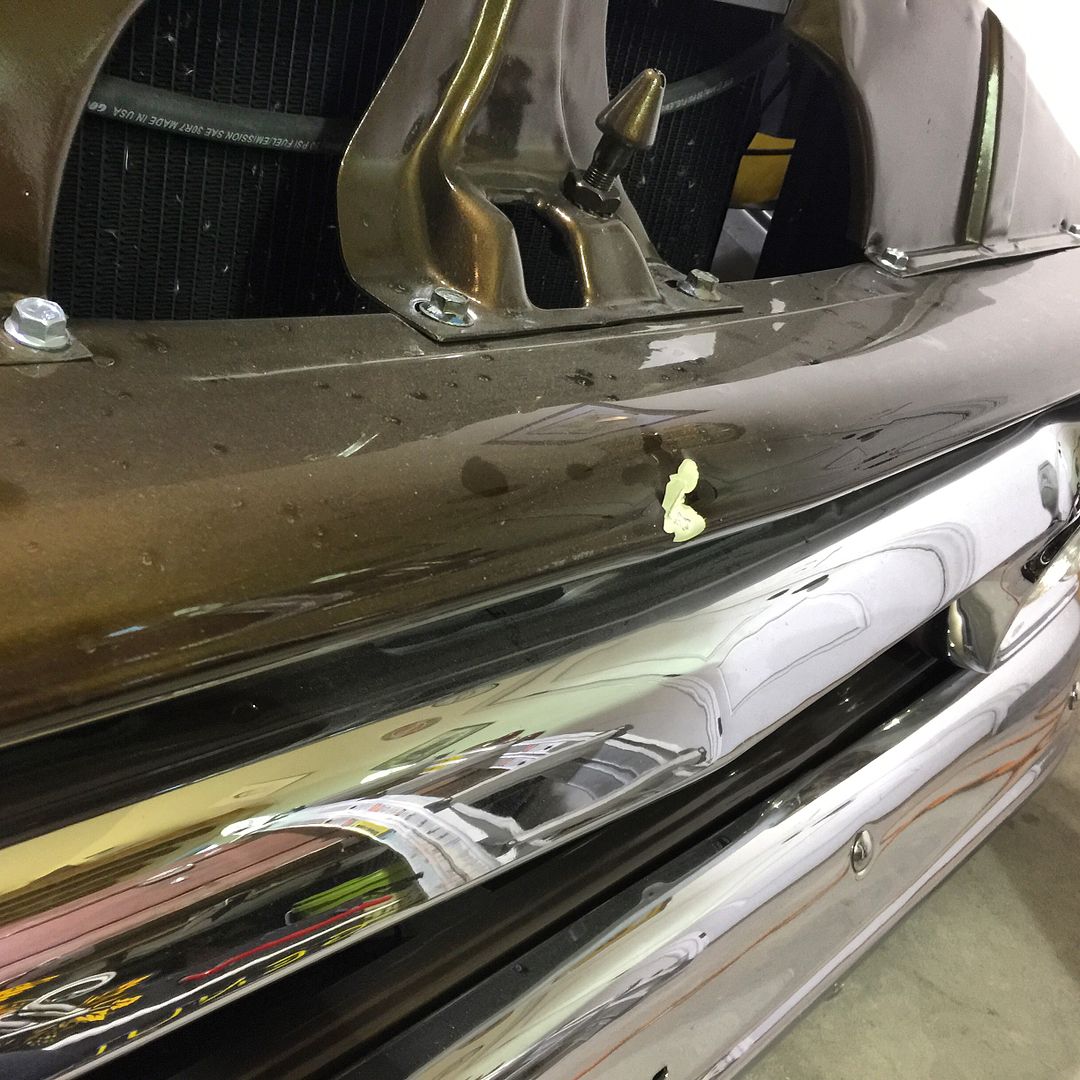 I also had an accident, we had a windstorm come through and knock over a ladder in my garage and put a pretty big dent in my truck. As bad as this sucked I'm so glad it didn't hit my grill. That would have been much more expensive... Since I have to paint the hood again it won't be much more work to paint this as well. Hard lesson learned... Here is the start of my seat. I'm pretty excited, I like the way this is turning out. 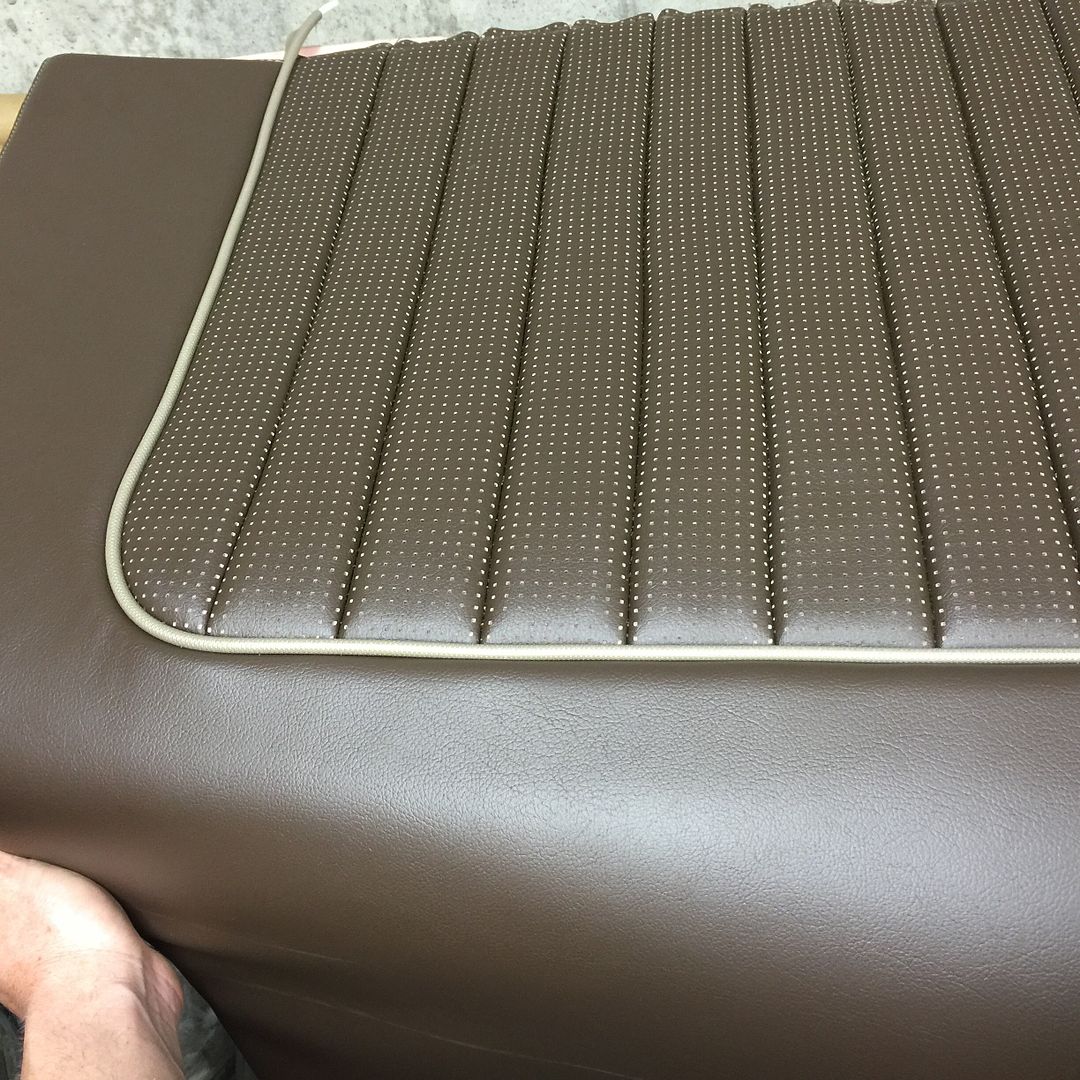
|
|
|

|
|
|
#483 |
|
The 60-66 GMC/Pontiac guy....
Join Date: Oct 2010
Location: Apache Junction, Arizona
Posts: 1,306
|
Re: My own build thread
 
__________________
 Building Genuine Pontiac Firepowered cars and trucks for several decades.  Why Pontiac?? That's just me daring to be different.  Projects.. 63 C10 Short Wheel Base fleetside (The Pro-Street) currently under reconstruction. 440CID 2X4 Pontiac 
|
|
|

|
|
|
#484 |
|
Registered User
Join Date: Mar 2012
Location: Hooper Ut
Posts: 466
|
Re: My own build thread
Well here it is! I still have to finish a few things but this these are the covers. I'm very happy with them. I honestly wasn't sure how this would turn out because it's been so long since I've sewn anything. Before anyone gets upset, I talked to 64Longbedmartin "owner of the red fox" before I did this seat to make sure he wouldn't be upset that I used a similar design and he was very cool about it. I still need to paint the feet for the frame and hog ring the seat covers down. Once I pull everything tight the wrinkles should come out.
Here are a few pics 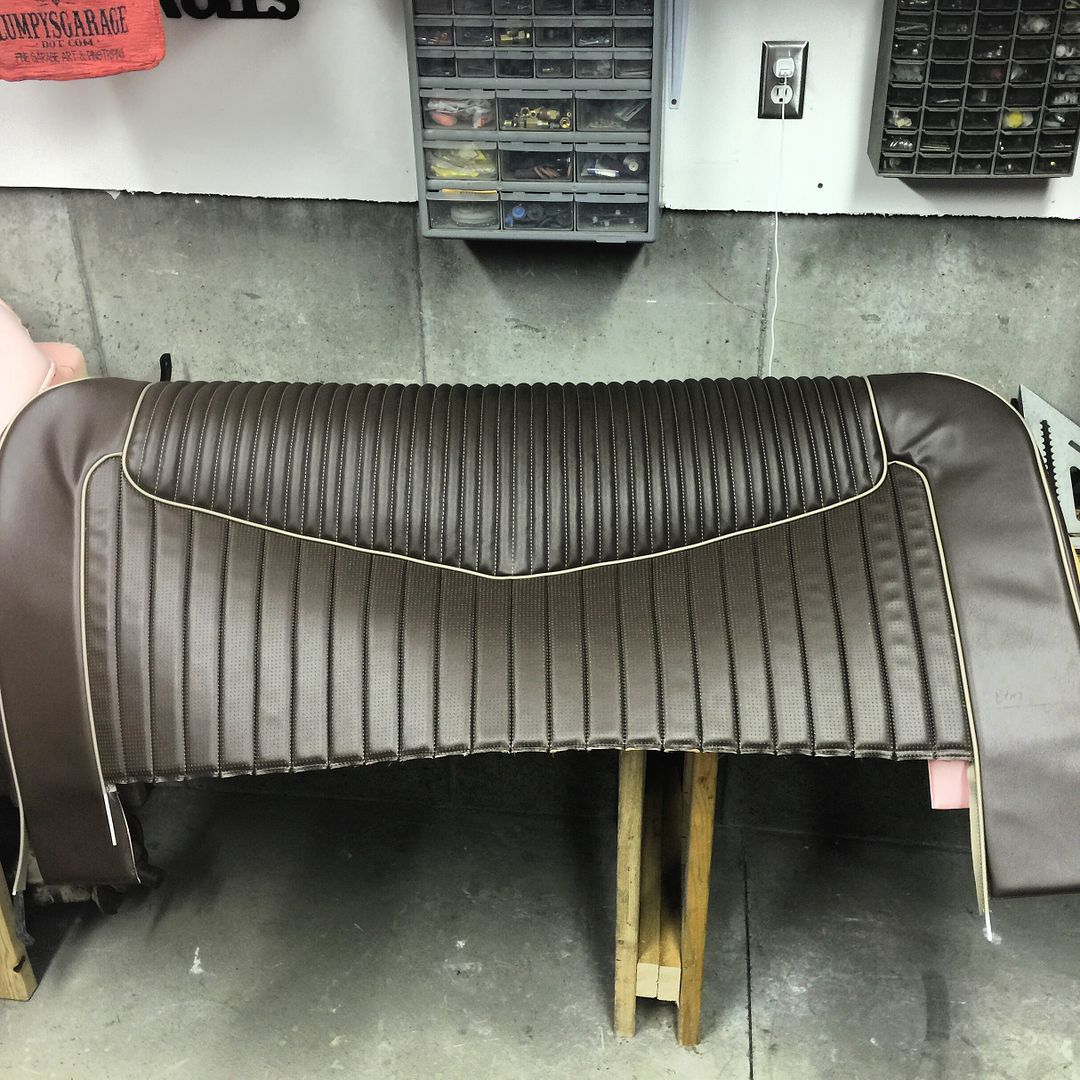 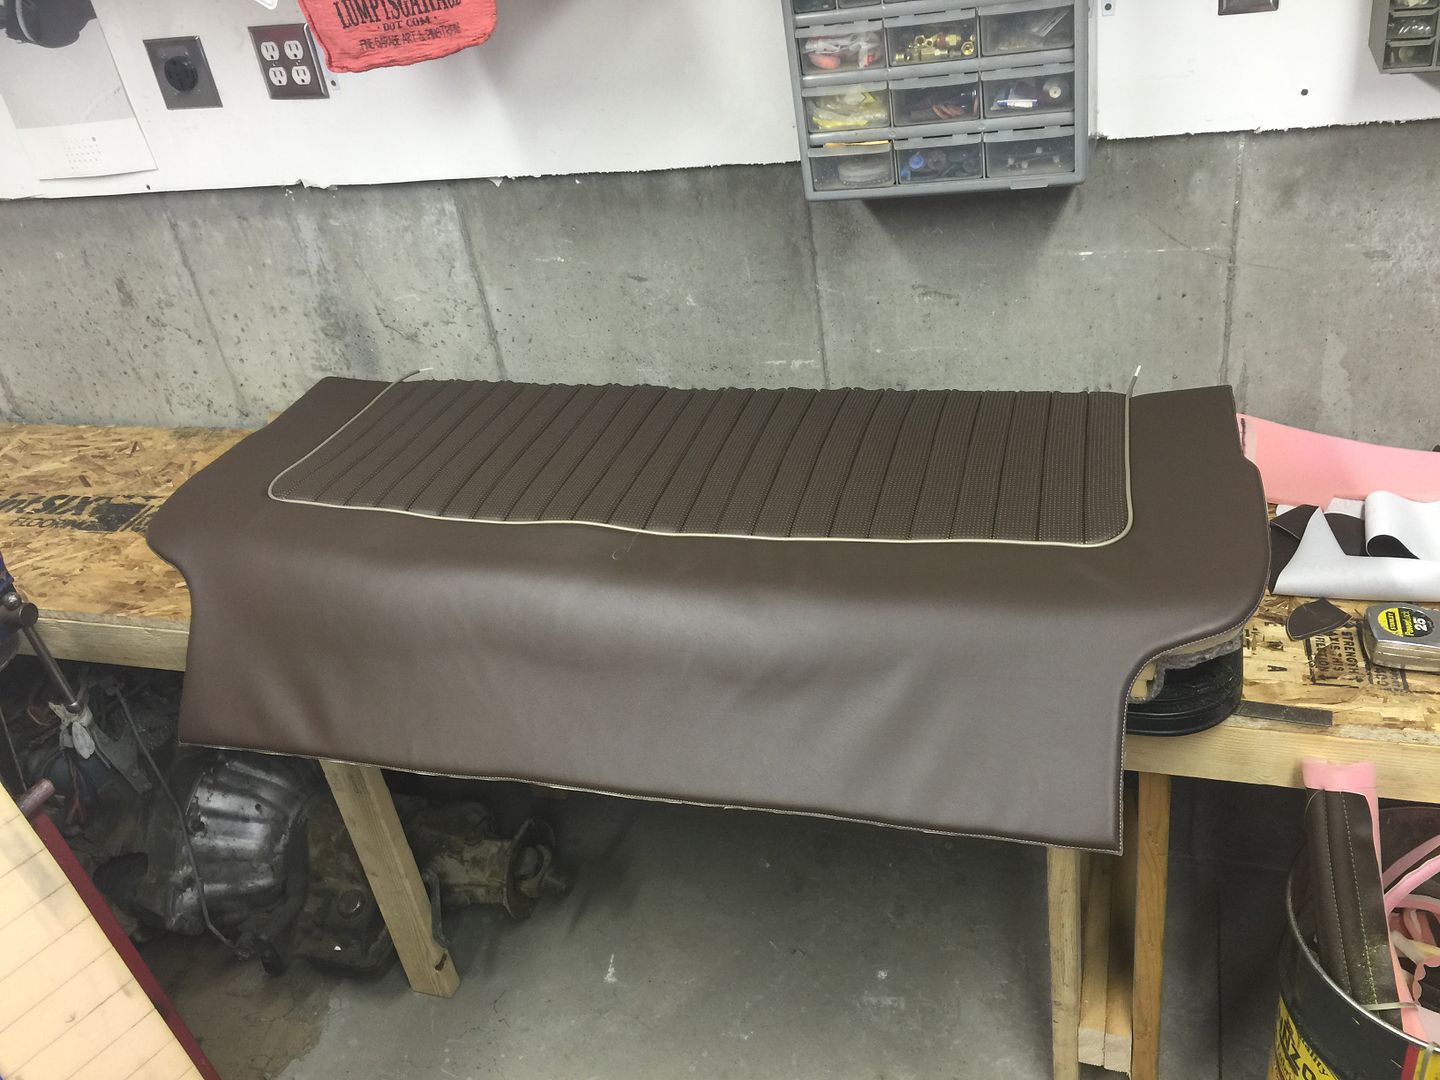 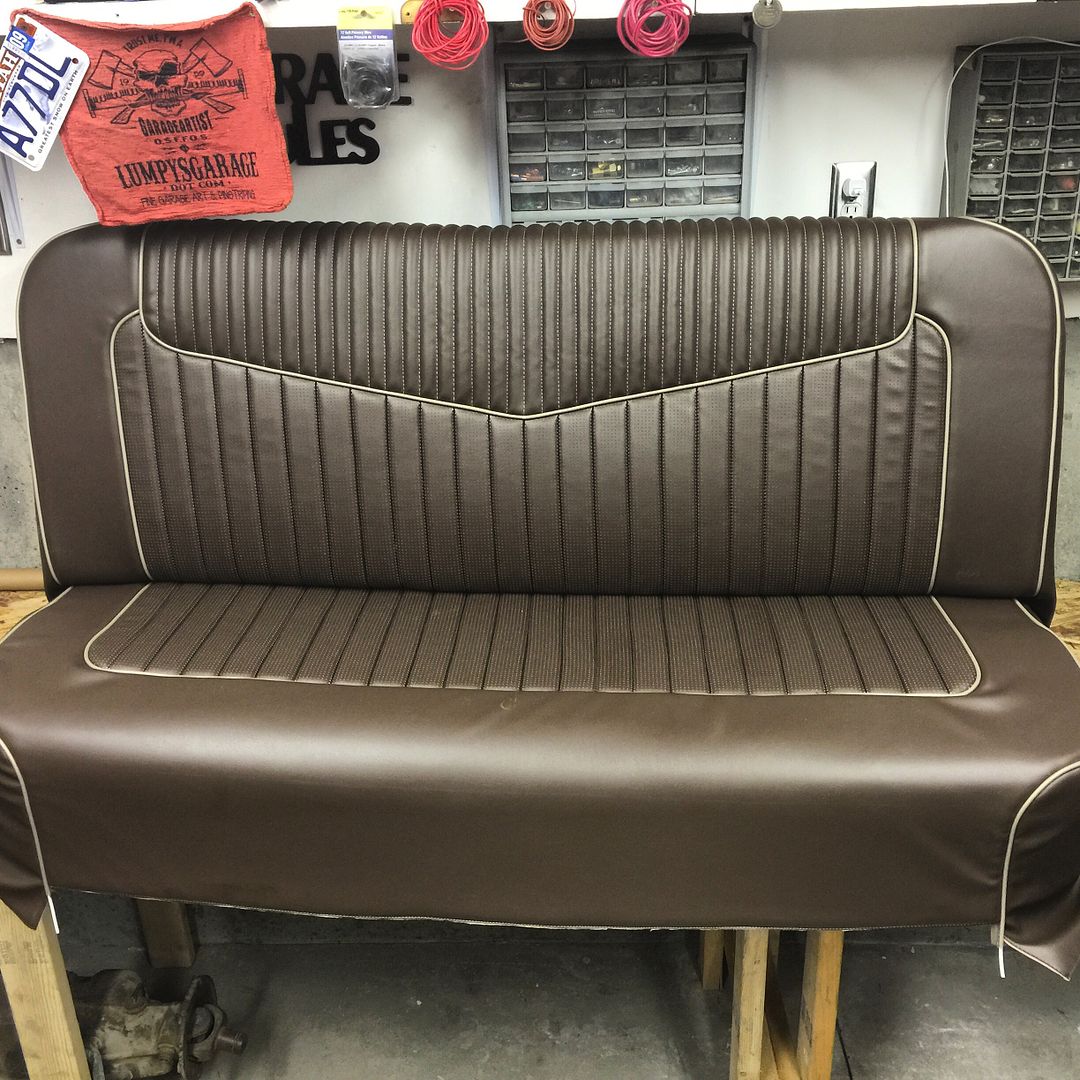
|
|
|

|
|
|
#485 |
|
The 60-66 GMC/Pontiac guy....
Join Date: Oct 2010
Location: Apache Junction, Arizona
Posts: 1,306
|
Re: My own build thread
Thats a thing of beauty
__________________
 Building Genuine Pontiac Firepowered cars and trucks for several decades.  Why Pontiac?? That's just me daring to be different.  Projects.. 63 C10 Short Wheel Base fleetside (The Pro-Street) currently under reconstruction. 440CID 2X4 Pontiac 
|
|
|

|
|
|
#486 |
|
Registered User
Join Date: Nov 2011
Location: fayetteville nc
Posts: 10,338
|
Re: My own build thread
Seat is coming along nicely!!
__________________
1963 Short bed step side SBW 427 big block and borg warner T-16 HD 3 speed manual http://67-72chevytrucks.com/vboard/s...d.php?t=519869 1963 Short bed fleetside BBW 348 1st gen big block w/Powerglide http://67-72chevytrucks.com/vboard/s...d.php?t=619024 1964 Short bed trailer |
|
|

|
|
|
#487 |
|
Registered User
Join Date: Mar 2012
Location: Hooper Ut
Posts: 466
|
Re: My own build thread
Thanks guys!
Posted via Mobile Device |
|
|

|
|
|
#488 |
|
Registered User
Join Date: Apr 2012
Location: Searcy, AR
Posts: 4,203
|
Re: My own build thread
Seat is just
 Great job... Great job...
__________________
DON Proverbs 27:17  US Air Force Retarded errr Retired My '65 Stepper Build:http://67-72chevytrucks.com/vboard/s...d.php?t=533920 My '60 Rusty Patina Build:http://67-72chevytrucks.com/vboard/s...66#post7402266 My '72 http://67-72chevytrucks.com/vboard/s...59#post7204359 SOLD |
|
|

|
|
|
#489 |
|
Registered User
Join Date: Mar 2012
Location: Hooper Ut
Posts: 466
|
Re: My own build thread
Thanks Don! I put in a lot of time and effort into this. It Feels really good when something turns out the way you hoped it would especially when you aren't sure if it you have the skill to pull it off. I wasn't sure if I could pull this off at all but I'm very proud I stuck with it and it turned out like this. It isn't perfect but I can honestly say it's the best I can do. Doing this seat really made me remember how difficult and how much work upholstery is. There's a reason why nice upholstery is so expensive.
|
|
|

|
|
|
#490 |
|
Registered User
Join Date: Mar 2012
Location: Hooper Ut
Posts: 466
|
Re: My own build thread
Well... After spending a lot more time than I'd like to admit it's finally finished. I just have to put the feet back on the seat when I get off work tonight. I'm going to a car show tomorrow and my truck hasn't moved or really been touched in months. So after I wash it and clean it up I'll stick the seat in it. I can't wait to see it in the truck.
I'll probably take the heat gun to it tonight and try to work the wrinkles out hopefully. 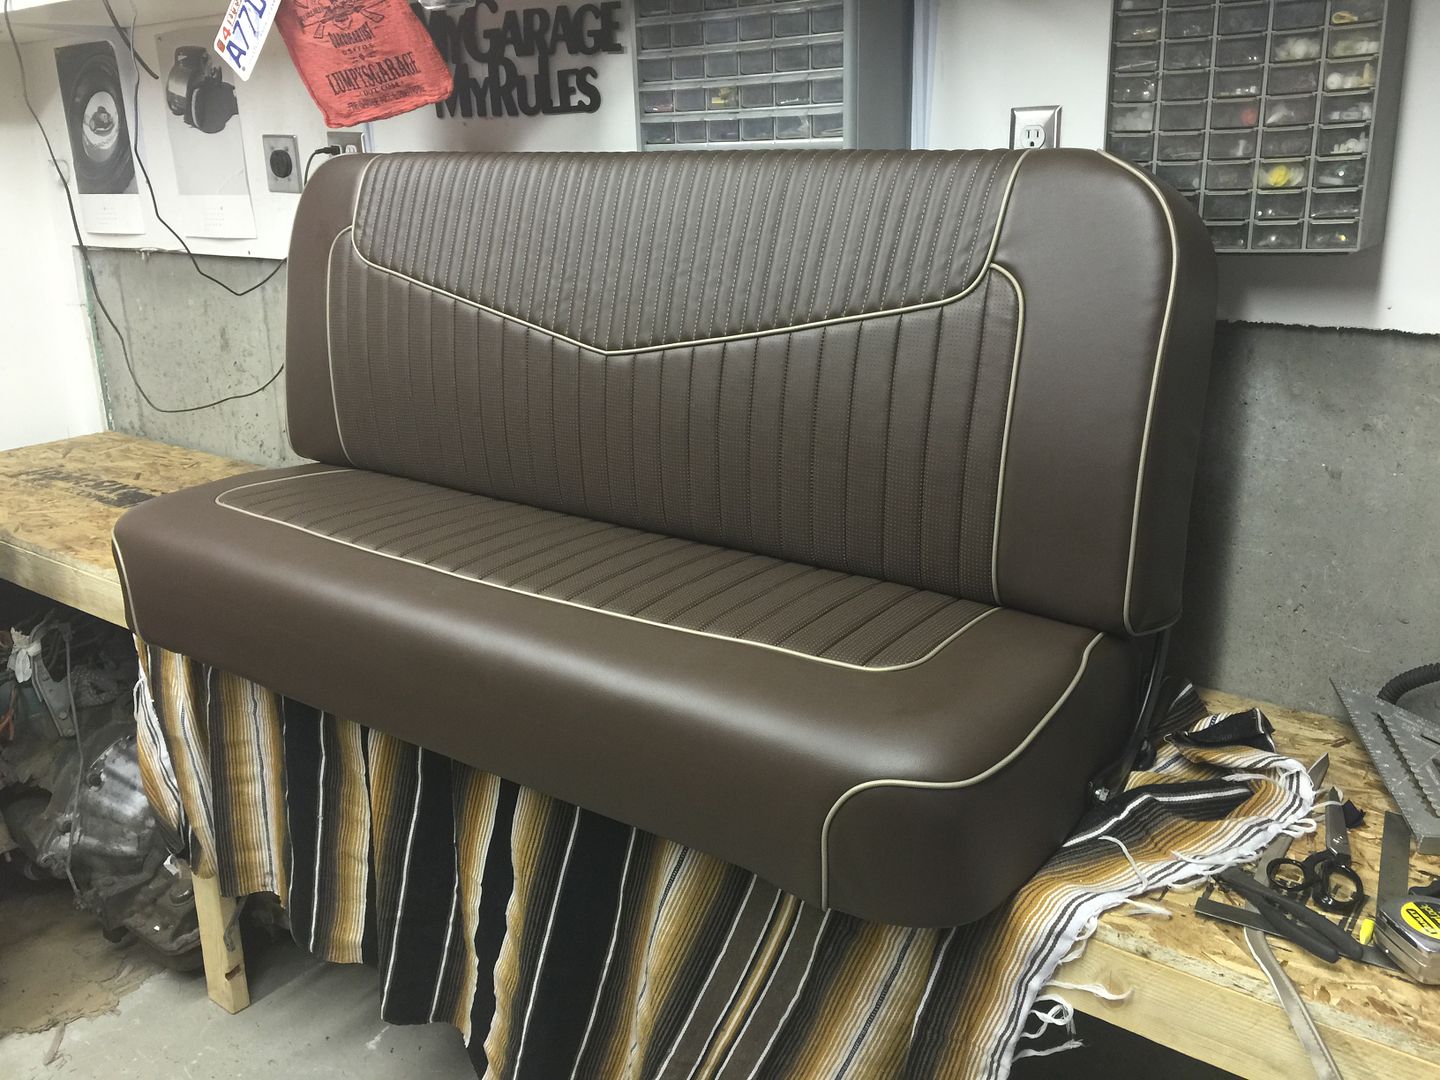 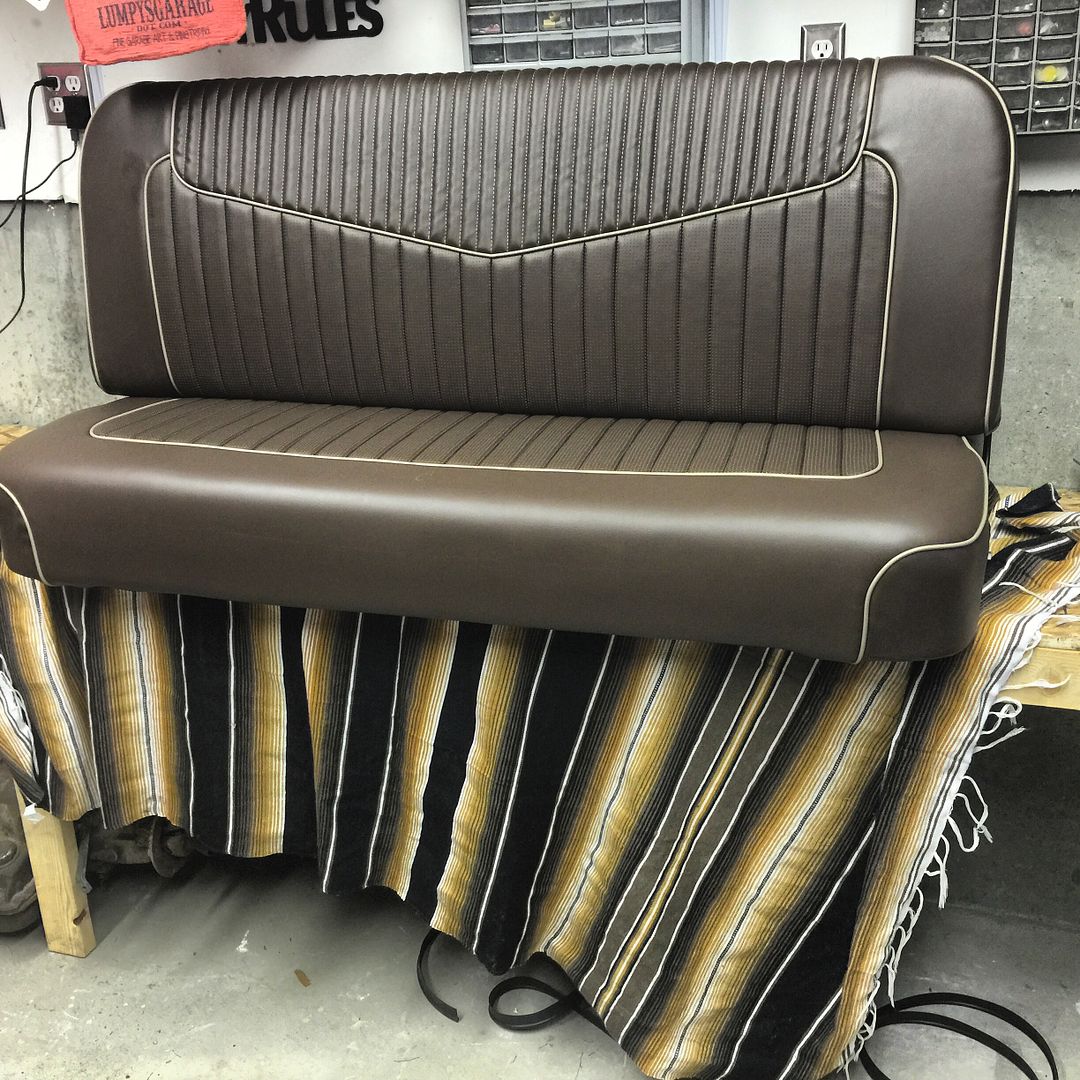
|
|
|

|
|
|
#491 |
|
Registered User
Join Date: Apr 2011
Location: .
Posts: 3,104
|
Re: My own build thread
Good luck at the show. Seat is Killer!!!
|
|
|

|
|
|
#492 |
|
Registered User
Join Date: Mar 2012
Location: Hooper Ut
Posts: 466
|
Re: My own build thread
Finished one of the visors. I've never sewn visors before and I read on upholstery forums that they suck... Yep they do but I'm pretty happy with how it turned out. I've never hand stitched anything before either and I'm really glad the cross stitching came out nice but it was very time consuming.
Thanks Bomp! I won an award for "best under construction vehicle", not bad for a show with over 400 cars especially around here. Not many low rider/bagged cars here. 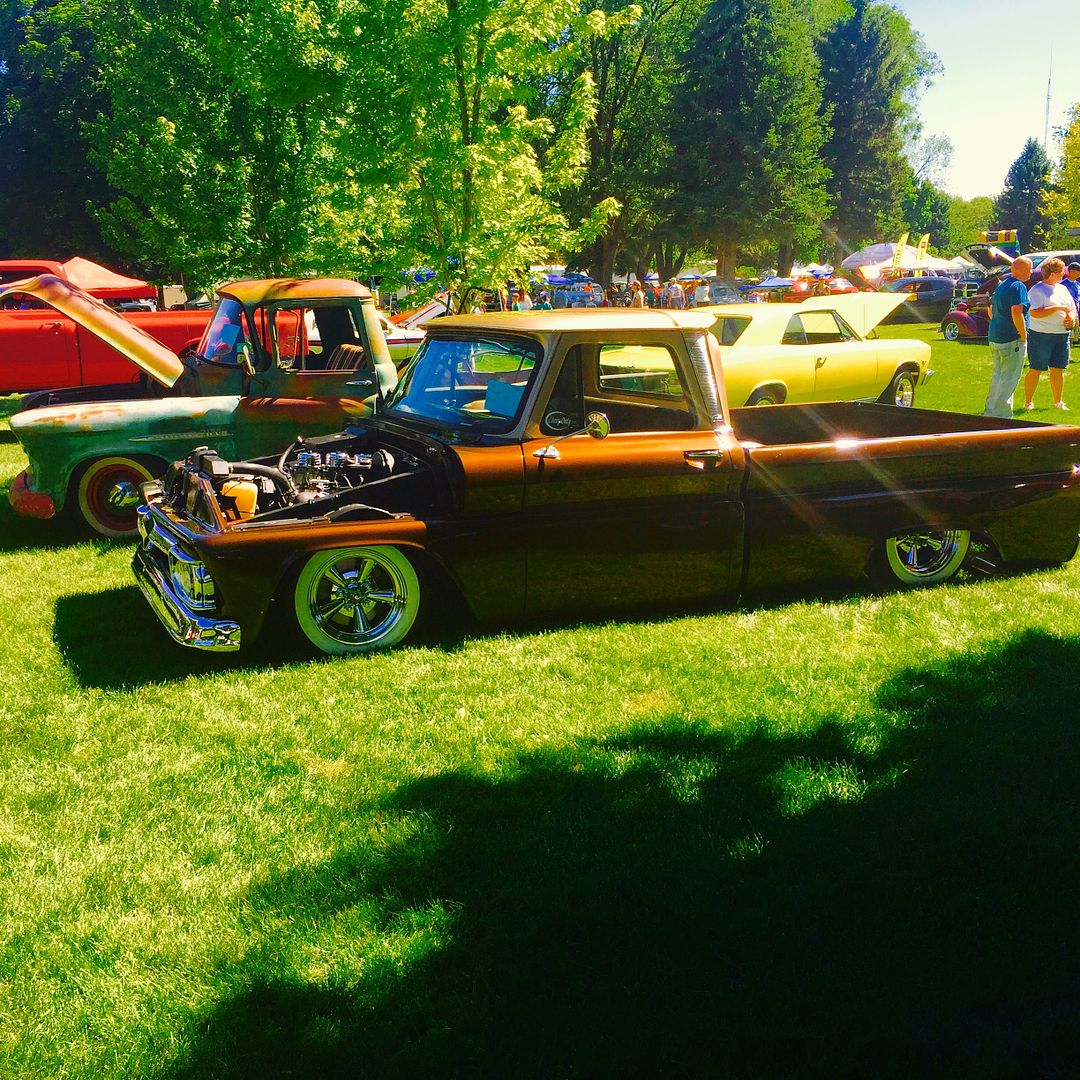 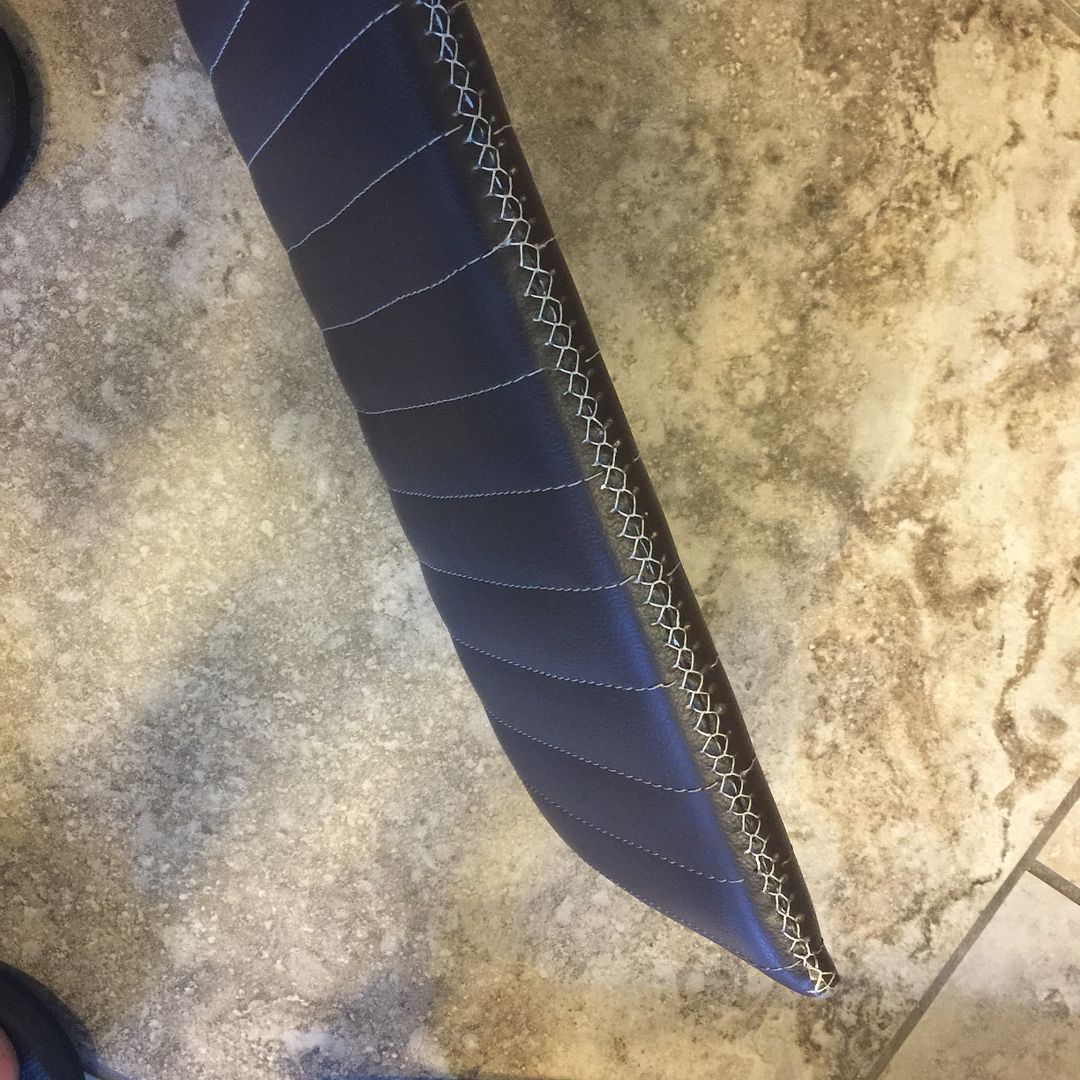 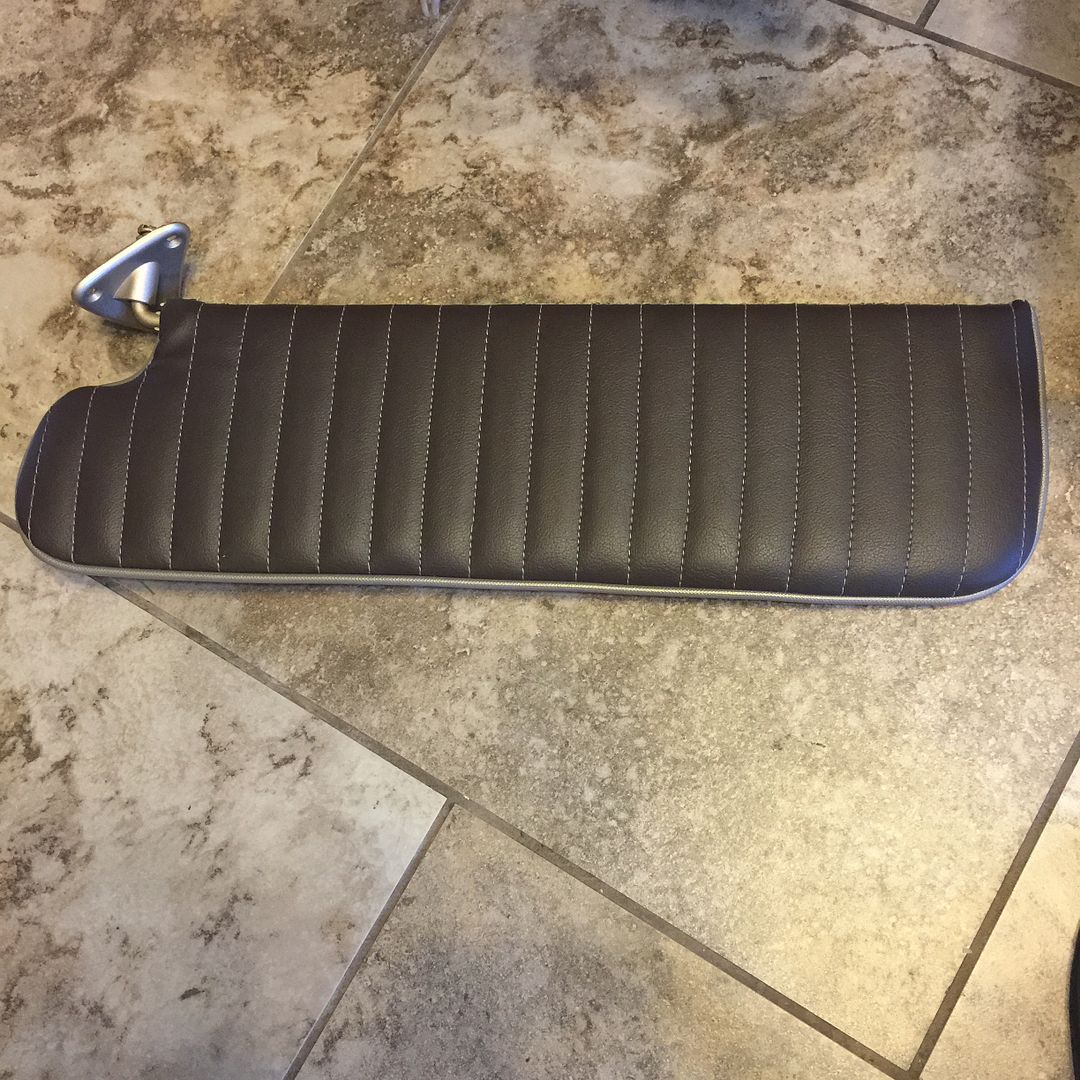
|
|
|

|
|
|
#493 |
|
Registered User
 Join Date: Feb 2014
Location: Stephens City, VA
Posts: 326
|
Re: My own build thread
Cangrats! That upholstery work is beautiful!
__________________
1962 Chevy C-10 Stepside 383 Stroker, Turbo 400 1966 Chevy C-10 Stepside 250 6Cyl, 3OTT- Daily Driver John 3:16 |
|
|

|
|
|
#494 |
|
Registered User
Join Date: Mar 2012
Location: Hooper Ut
Posts: 466
|
Re: My own build thread
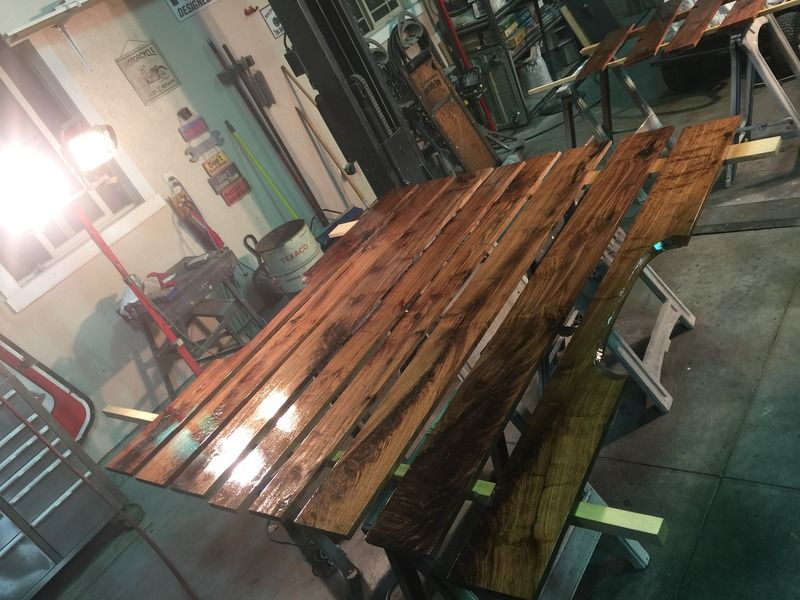
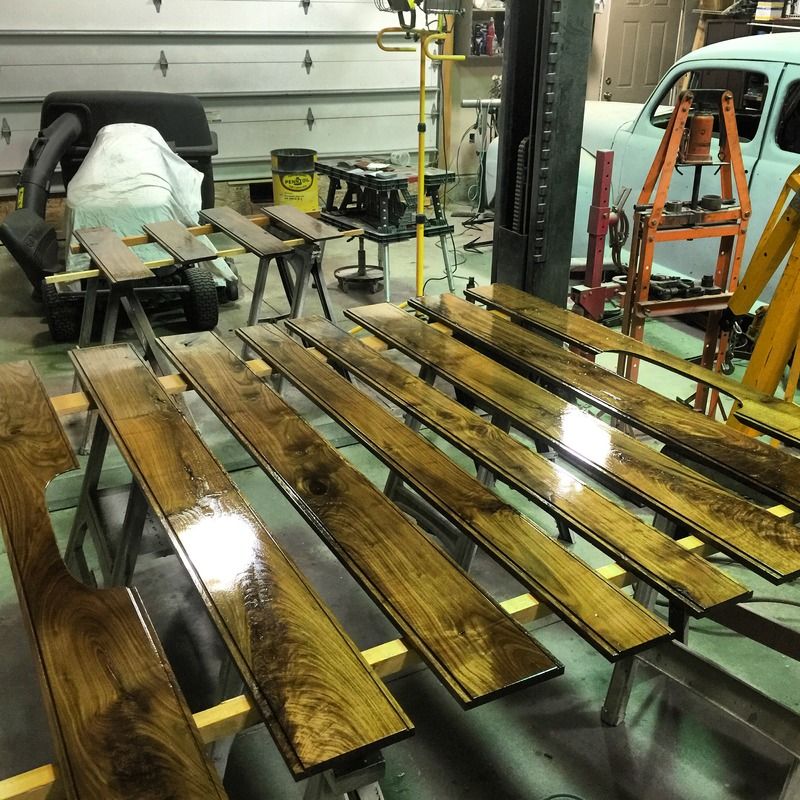
It's been far too long since I've posted anything on this. I've been really busy trying to finish off my basement in my house. I honestly haven't done a whole lot to the truck. I still have to paint the hood and fix a few other things but I did finally get the wood for my bed installed.
I'm pretty happy with it but I did have a lot of problems when I cleared the wood originally. I found out the hard way that if you use automotive clear on wood DO NOT CLEAR THE BOTTOM FIRST! I thought that by clearing the bottom sides first then I wouldn't have to worry about scratching the tops of the boards once I turned the boards over to finish the tops. It seem logical at the time... But... The first coat I did on the bottom side looked amazing and I let it dry for about a day and flipped the boards over to clear the top sides... That's when the problems began... The first coat of clear looked outstanding at first... I cleaned up everything and went into the house to eat lunch and went back out into the garage about an hour later and every board looked like a kid had blew bubbles all over the tops of the boards. I've never seen anything like it before... I haven't cleared a lot of wood before but I have done it on small plaques when I was in the military. I wasn't sure what caused this. I tried looking up info online but I didn't find much. Basically I sanded the tops smooth again and re cleared everything again. The same thing happened again... Everything looked fine for about a 15-20 mins then the bubbles started popping up everywhere. I was beyond frustrated because automotive clear is not cheap. I let everything dry again and then I had a thought "maybe by clearing the bottoms first, possibly the wood was trapping air/moisture in the wood?" Could it be that by cleared the tops after the bottom sides that it was causing the clear to pull out whatever was trapped in the wood once the clear started to dry? Obviously I'm no expert so I could be completely wrong but it seemed to make some sort of sense because everything else was obviously not working... My solution was to then sand off most of the clear on the bottoms of the boards to open the pores in the wood to hopefully prevent the bubbles again. I also sanded the tops again as smooth as I could get them. Then I cleared the tops again... FINALLY! They turned out pretty decent with no bubbles. I wish they would have looked as nice as the first time I cleared them before the bubble problem but they look pretty nice. Once the tops dried for about two days I turned them over and sprayed a light coat on the bottom to protect the bottom side. The strange thing is I really expected the bottoms to bubble up but they didn't??? I'm not sure why, maybe by cleared the wood so many times it had sealed everything well enough that it didn't cause the same problem? I don't know, I can't explain it.... All I know is they looked pretty good and I was sick of sanding and I didn't really care anymore... Haha! Hopefully this experience can help someone else if they read it. Sorry, I know that was long. Anywho here are the picture of bed. I still have to paint the hood and fix a few things but I did finally get this part finished. Oh, and I also added another air compressor because one just wasn't filling the tank fast enough. 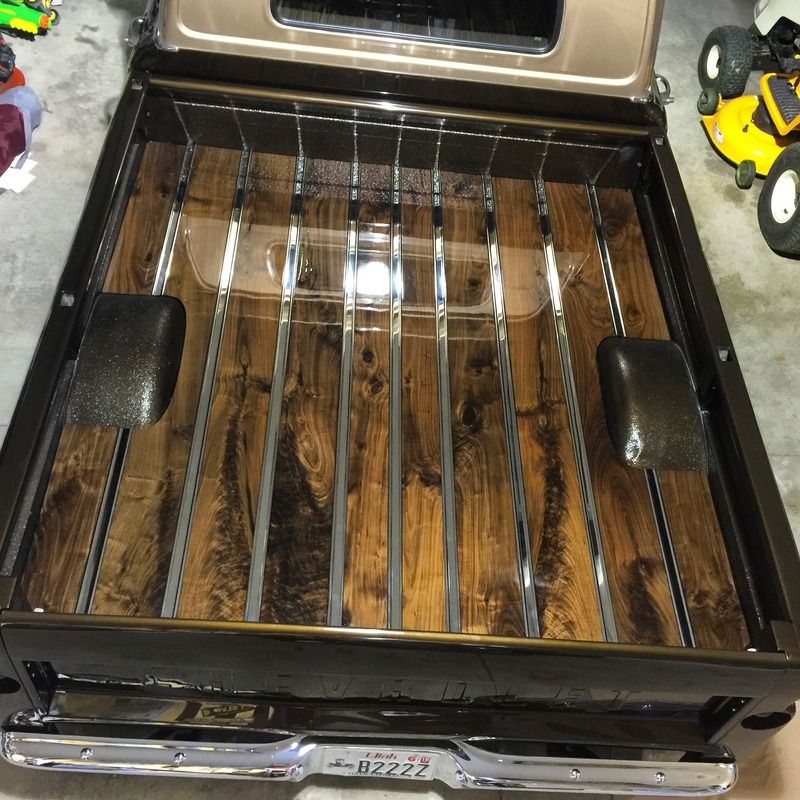
|
|
|

|
|
|
#495 |
|
Registered User
Join Date: Mar 2012
Location: Hooper Ut
Posts: 466
|
Re: My own build thread
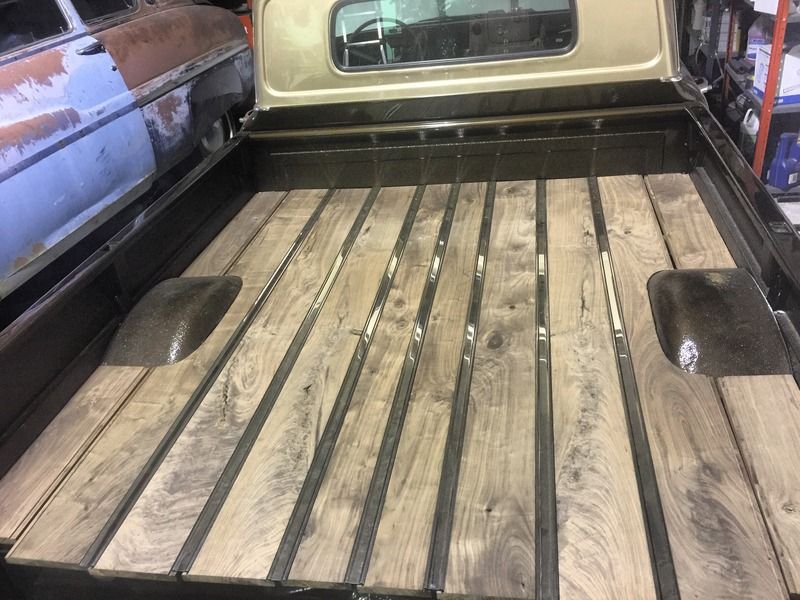
Here's some pics from when I was clearing everything and laying the boards out etc.
|
|
|

|
|
|
#496 |
|
Registered User
Join Date: Apr 2011
Location: .
Posts: 3,104
|
Re: My own build thread
Bed looks great. Sorry to hear about the ladder issues. Thanks for the write up on the bubbling clear issues.
Glad to see you back. |
|
|

|
|
|
#497 |
|
Registered User
Join Date: Mar 2012
Location: Hooper Ut
Posts: 466
|
Re: My own build thread
Thanks Bomp! Like I said hopefully it's useful to someone out there.
|
|
|

|
|
|
#498 |
|
Registered User
Join Date: Nov 2017
Location: Nashville
Posts: 62
|
Re: My own build thread
Now that is an amazing truck and amazing work you have done! You truly are a Picasso in your own right!
Loved watching this build |
|
|

|
|
|
#499 |
|
Junior Member
 Join Date: Jan 2008
Location: glendale, az
Posts: 31
|
Re: My own build thread
Hi -
You have a beautiful truck. I'm very impressed with the work you did on the bed. Would you mind sharing with me what type of wood you used. It looks so good. Any information would be appreciated. Thanks, Don 
|
|
|

|
 |
| Bookmarks |
| Thread Tools | |
| Display Modes | |
|
|