
|
Register or Log In To remove these advertisements. |
|
|
|
|||||||
|
|
Thread Tools | Display Modes |
 06-23-2020, 01:45 AM
|
#11 | |
|
Registered User
Join Date: Sep 2017
Location: Patriot IN
Posts: 163
|
Re: 1970 C30 Car hauler Buildish thread.
Quote:
I have been slacking on uploads. I ended up making a set of Diy led turn signals. I needed a way to make more room behind the turn signal housings to clear my cummins intercooler. The intercooler mounting brackets where hitting the turn signal bulb sockets. At first I tried using a set of sockets from a 1990s mazda that I had laying around. They were a little more low profile but they were still too long. I ended up ordering a set of cheap led Surface Mount Oval Amber Turn Signal lights for a truck or trailer. https://www.amazon.com/gp/product/B0...?ie=UTF8&psc=1  IMAG3010 by jarrod vanwinkle, on Flickr IMAG3010 by jarrod vanwinkle, on Flickr IMAG3011 by jarrod vanwinkle, on Flickr IMAG3011 by jarrod vanwinkle, on FlickrI started bending the black housing away from the clear lense with my hands, the lense if just glued on. Once it started to separate I went in with a flat head and popped the lense off. 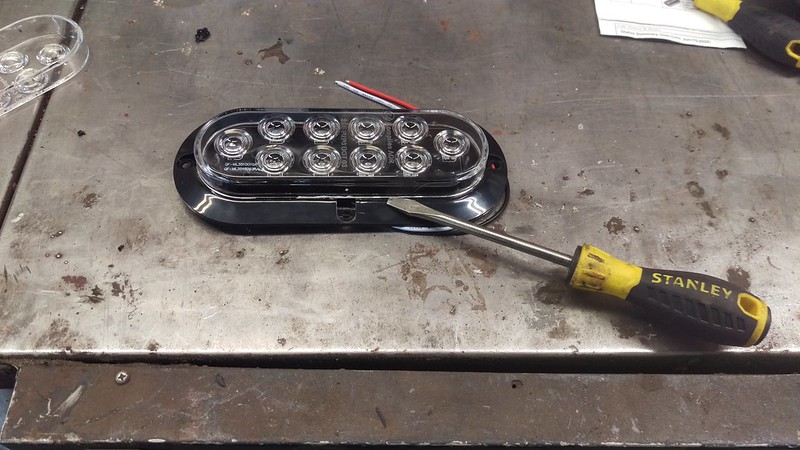 IMAG3022 by jarrod vanwinkle, on Flickr IMAG3022 by jarrod vanwinkle, on FlickrI then trimmed the black bousing to fit in the turn signals.  IMAG3013 by jarrod vanwinkle, on Flickr IMAG3013 by jarrod vanwinkle, on FlickrI ended up putting the turn signal lense from the c30 in the mill and milled out a little bit of the lense to fit the leds as the two outer leds are just a little two wide to fit in the lense. You could do the same with a dremel or a grinder.  IMAG3012 by jarrod vanwinkle, on Flickr IMAG3012 by jarrod vanwinkle, on FlickrIts sits flush in the lense now.  IMAG3014 by jarrod vanwinkle, on Flickr IMAG3014 by jarrod vanwinkle, on Flickr IMAG3015 by jarrod vanwinkle, on Flickr IMAG3015 by jarrod vanwinkle, on FlickrTesting the lights. 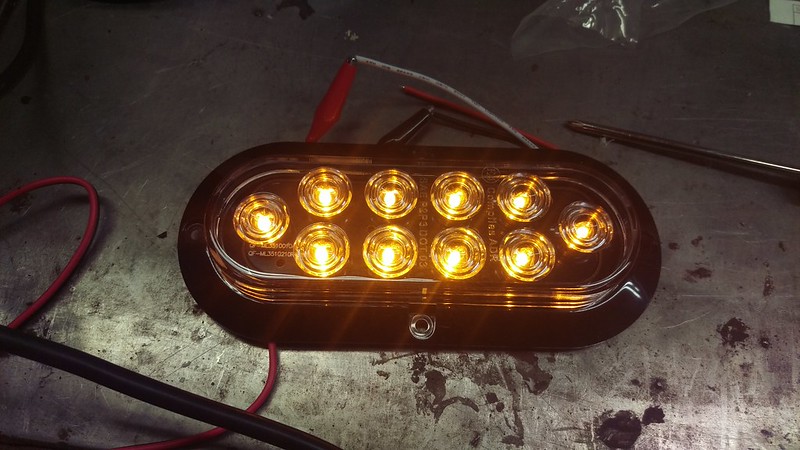 IMAG3016 by jarrod vanwinkle, on Flickr IMAG3016 by jarrod vanwinkle, on Flickr IMAG3017 by jarrod vanwinkle, on Flickr IMAG3017 by jarrod vanwinkle, on Flickrhigh or flash  IMAG3019 by jarrod vanwinkle, on Flickr IMAG3019 by jarrod vanwinkle, on Flickrlow or running lights  IMAG3020 by jarrod vanwinkle, on Flickr IMAG3020 by jarrod vanwinkle, on FlickrI trimmed the second one a little bit better.  IMAG3023 by jarrod vanwinkle, on Flickr IMAG3023 by jarrod vanwinkle, on Flickr IMAG3025 by jarrod vanwinkle, on Flickr IMAG3025 by jarrod vanwinkle, on FlickrI'm just going to connect my stock connecter to the lights. you can see how much room I have now the stock bulb sockets stuck out like a inch and a half.  IMAG3027 by jarrod vanwinkle, on Flickr IMAG3027 by jarrod vanwinkle, on FlickrIf you wanted to make it plug and play you could get a set of 2057 or 1157 Male Head Extension Connector Plug Socket with Wire Harness and make them plug and play. https://www.amazon.com/Redcolourful-...omotive&sr=1-1 I plan on getting a set of new lenses as mine are the originals and one is cracked. After I do that I plan on apoxing them in to make them a bit more waterproof. At the moment they just have tape on the back. They still use the stock seal but mine lenses had dirt in them when I took them off. I also started on my engine bay harness. The new lay out  cummins c30 alt wiring by jarrod vanwinkle, on Flickr cummins c30 alt wiring by jarrod vanwinkle, on FlickrStock  stock v8 c30 engine bay wiring by jarrod vanwinkle, on Flickr stock v8 c30 engine bay wiring by jarrod vanwinkle, on FlickrI wired up a Dedicated under hood relay box. It houses 10 40 amp relays and 15 blade fuses. I need to add a lot of accessories and do a few upgrades. Things I am adding to the box 1. Electric Fan 1 2. Electric Fan 2 3. Headlight high 4. Headlight Low 5. Starter 6. Fog lights 7. Flat bed work lights 8. Headache rack bed light bar 9. Roof rack work lights 10. Open for now Things I am going to add to the mounting panel I built to mount the box. 4 heavy duty 100 amp relays 2 for the grid heater and 2 for my onboard air. One 200 amp relay for the switched power items. Finished up the wiring all the main power wire are 12 gauge, except the two fan wires are 10 gauge. The trigger wires and ground wires are 18 gauge.  IMAG2986 by jarrod vanwinkle, on Flickr IMAG2986 by jarrod vanwinkle, on Flickr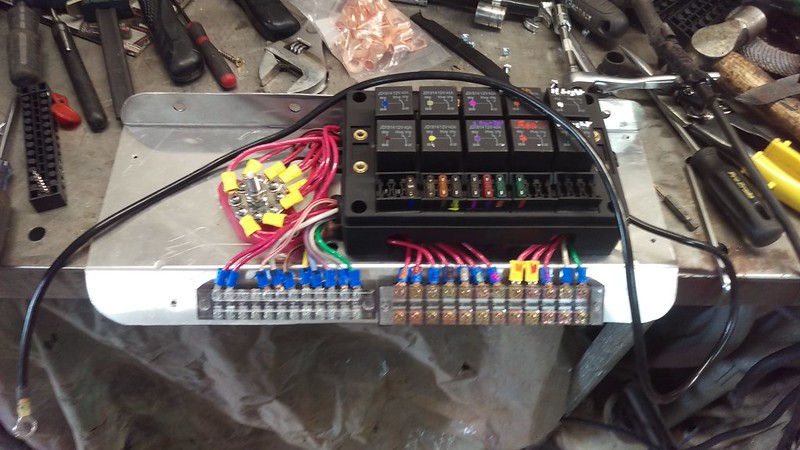 IMAG2996 by jarrod vanwinkle, on Flickr IMAG2996 by jarrod vanwinkle, on Flickr IMAG2997 by jarrod vanwinkle, on Flickr IMAG2997 by jarrod vanwinkle, on FlickrI used nutserts on the fender 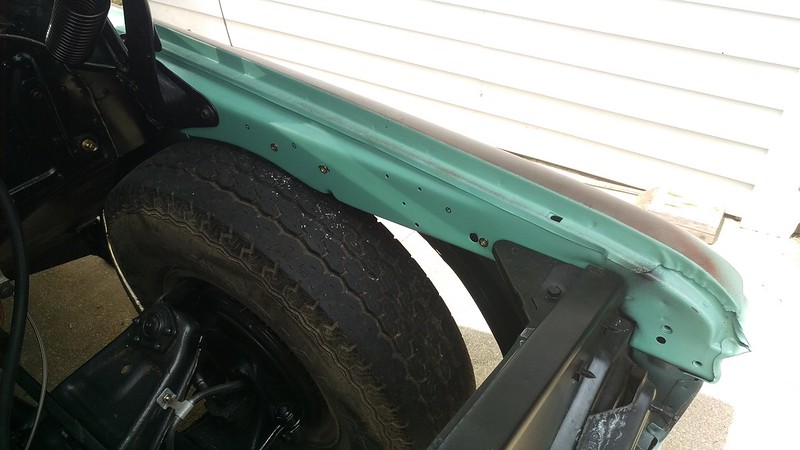 IMAG2998 by jarrod vanwinkle, on Flickr IMAG2998 by jarrod vanwinkle, on Flickr IMAG2999 by jarrod vanwinkle, on Flickr IMAG2999 by jarrod vanwinkle, on FlickrA little intermission gardon up date A few weeks ago we got a load of fill dirt for the raised beds  Screensho1 by jarrod vanwinkle, on Flickr Screensho1 by jarrod vanwinkle, on Flickr IMG_18601 by jarrod vanwinkle, on Flickr IMG_18601 by jarrod vanwinkle, on Flickrit took 7 loads for each bed of the fill dirt.  IMAG2958 by jarrod vanwinkle, on Flickr IMAG2958 by jarrod vanwinkle, on Flickr IMAG2961 by jarrod vanwinkle, on Flickr IMAG2961 by jarrod vanwinkle, on Flickr IMAG2962 by jarrod vanwinkle, on Flickr IMAG2962 by jarrod vanwinkle, on Flickr IMAG2963 by jarrod vanwinkle, on Flickr IMAG2963 by jarrod vanwinkle, on Flickr IMAG2964 by jarrod vanwinkle, on Flickr IMAG2964 by jarrod vanwinkle, on Flickr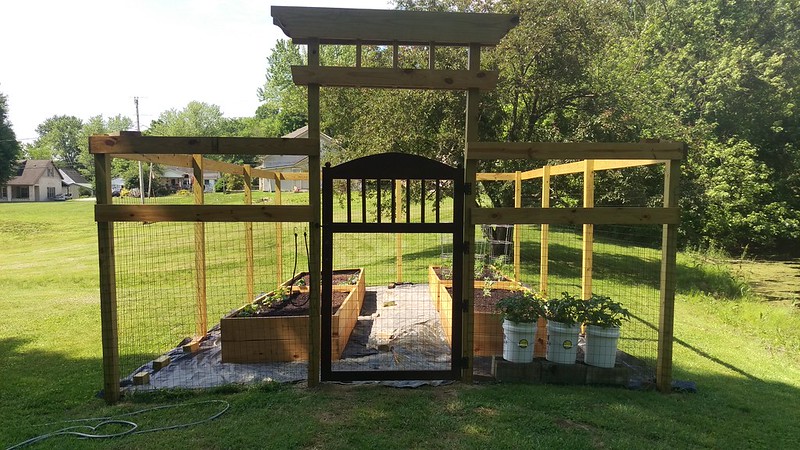 IMAG2970 by jarrod vanwinkle, on Flickr IMAG2970 by jarrod vanwinkle, on Flickr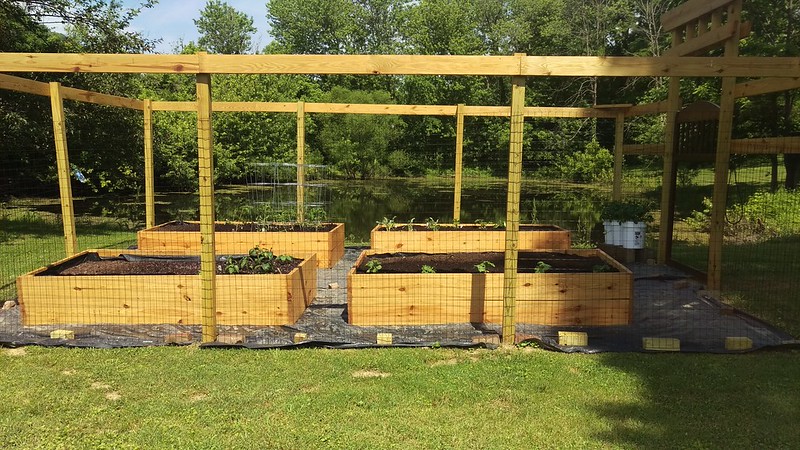 IMAG2969 by jarrod vanwinkle, on Flickr IMAG2969 by jarrod vanwinkle, on Flickr IMAG2973 by jarrod vanwinkle, on Flickr IMAG2973 by jarrod vanwinkle, on Flickr IMAG3009 by jarrod vanwinkle, on Flickr IMAG3009 by jarrod vanwinkle, on Flickr IMAG3008 by jarrod vanwinkle, on Flickr IMAG3008 by jarrod vanwinkle, on FlickrI aired out the truck to make it easier to work in the engine bay.  IMAG2989 by jarrod vanwinkle, on Flickr IMAG2989 by jarrod vanwinkle, on Flickr IMAG2990 by jarrod vanwinkle, on Flickr IMAG2990 by jarrod vanwinkle, on Flickr IMAG2991 by jarrod vanwinkle, on Flickr IMAG2991 by jarrod vanwinkle, on Flickr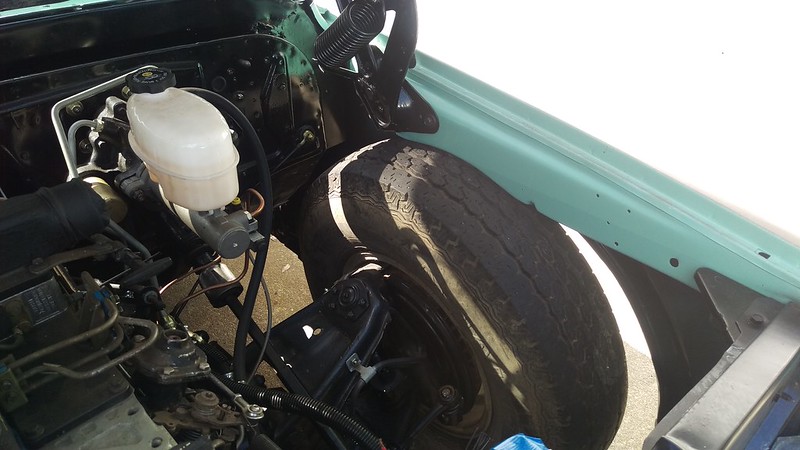 IMAG2992 by jarrod vanwinkle, on Flickr IMAG2992 by jarrod vanwinkle, on FlickrI installed quick disconnect battery terminals.  IMAG2965 by jarrod vanwinkle, on Flickr IMAG2965 by jarrod vanwinkle, on Flickr IMAG2966 by jarrod vanwinkle, on Flickr IMAG2966 by jarrod vanwinkle, on FlickrI also shortened the drive shaft. Hopeful it doesn't vibrate.  IMAG2980 by jarrod vanwinkle, on Flickr IMAG2980 by jarrod vanwinkle, on Flickr IMAG2981 by jarrod vanwinkle, on Flickr IMAG2981 by jarrod vanwinkle, on FlickrLast week I started the truck for the first time. I had never had the engine running since I got it. I wish I had test started it before I put it into the truck. When I first started it up I thought it was going to run away. Before I got the truck someone had gone through the pump before me. As when I went to install the new fuel pin and governor spring someone had already removed the tamper proof caps off of everything and some of the seals looked new. That and someone had messed up the idle adjustment screw. and at the time I could not turn it so I just left it where it was at. Well when I started it up I thought it was going to run away. unfortunately I had to pull the top of the pump off to adjust the idle screw. I had to put it in the vice and use a pair of pliers to remove it as when I tried to use a normal flat head like your supposed to I ended up snapping the tip off the flat head. Unfortunately the threads where mangled and I had to retap the top housing and I got a long full thread m6 bolt instead of the piece of all thread with a slot in the end. That said when I got it back together I had the idle bolt backed out all the way and It idles fine I don't know what its idling at but it sounds high maybe 1000 rpm But it may just sound high with no exhaust. Anyways I ended up replacing the seals on the top and installing a new throttle shaft bushing. As when I took the throttle nut off it was damp I don't know if it was the seal or the shaft itself as its a common problem and since I had the top off I figur I should replace it while I can. I also replaced the allen bolts as they were a bit loose and as I have to use a ball end allen socket I did not want to strip them out if I ever have to remove the top again. I ended up replacing them with a grade 12.9 allen bolt. So hopeful I will never have to worry about them striping out.  IMAG3004 by jarrod vanwinkle, on Flickr IMAG3004 by jarrod vanwinkle, on FlickrI don't know if this is the stock adjustment for the smoke screw or not the paint looks untouched and it doesn't smost at all. if its stock adjustment i'm going to leave it alone. 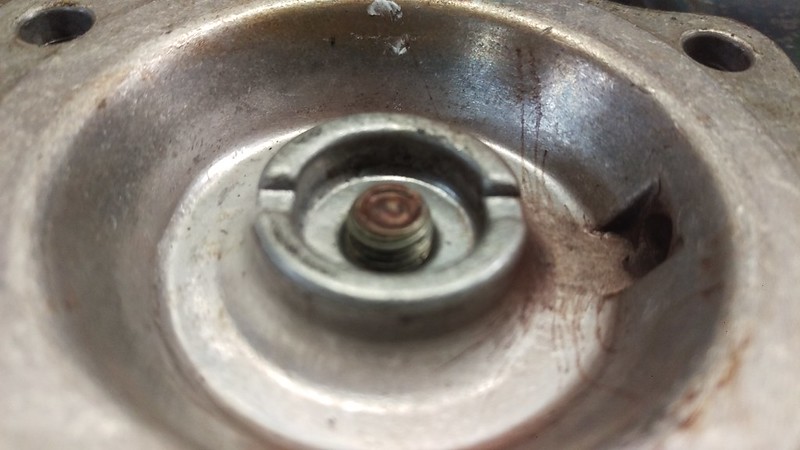 IMAG3005 by jarrod vanwinkle, on Flickr IMAG3005 by jarrod vanwinkle, on Flickr IMAG3007 by jarrod vanwinkle, on Flickr IMAG3007 by jarrod vanwinkle, on FlickrThe old throttle shaft bushing. I don't know if it had been replaced or not I though the stock one was brass as that is what it looks like in some pics. But this one was steel.  IMAG3028 by jarrod vanwinkle, on Flickr IMAG3028 by jarrod vanwinkle, on FlickrHere it is running I tried to rev it a few times but I think it had air still in the lines because after I let it idle for a few minutes it reved fine, but it was getting dark so I did not record it. Maybe tomorrow. I have a leak in the return line and the power steering has a few leaks but it was getting too dark.  VIDEO0052 by jarrod vanwinkle, on Flickr VIDEO0052 by jarrod vanwinkle, on Flickr
|
|

|

|
| Bookmarks |
| Tags |
| air ride, c30, cummins, nv4500, ramp truck |
| Thread Tools | |
| Display Modes | |
|
|


 Threaded Mode