
|
 03-03-2025, 09:05 AM
|
#1401 |
|
Registered User
Join Date: Jan 2013
Location: Leonardtown, MD
Posts: 1,666
|
Re: 55 Wagon Progress
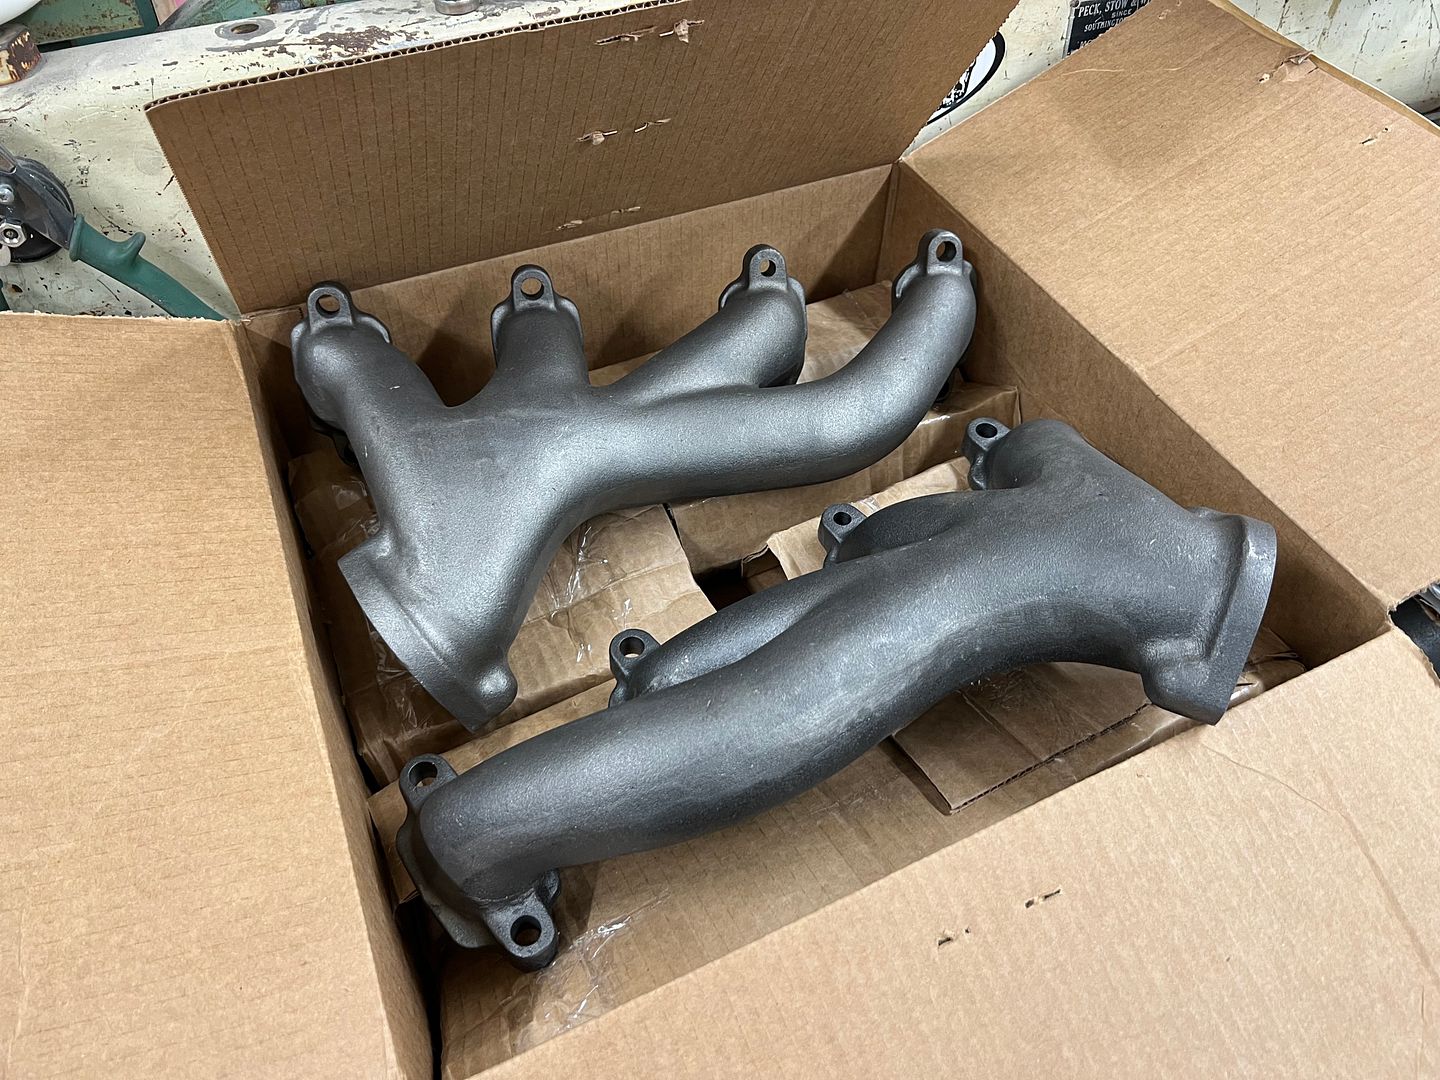
Collecting more parts for the shop truck... These are reproduction cast shorty headers by Kugel Komponents, based off the OEM Ford 406 headers. They were media blasted and have been dropped off for a Cerakote finish. Still looking for some C6AE-R cylinder heads, rockers, and an intake for the 410 block.
 We also got the underdash AC bezel back from Chrome plating, still waiting on the round vents [IMG][/IMG] 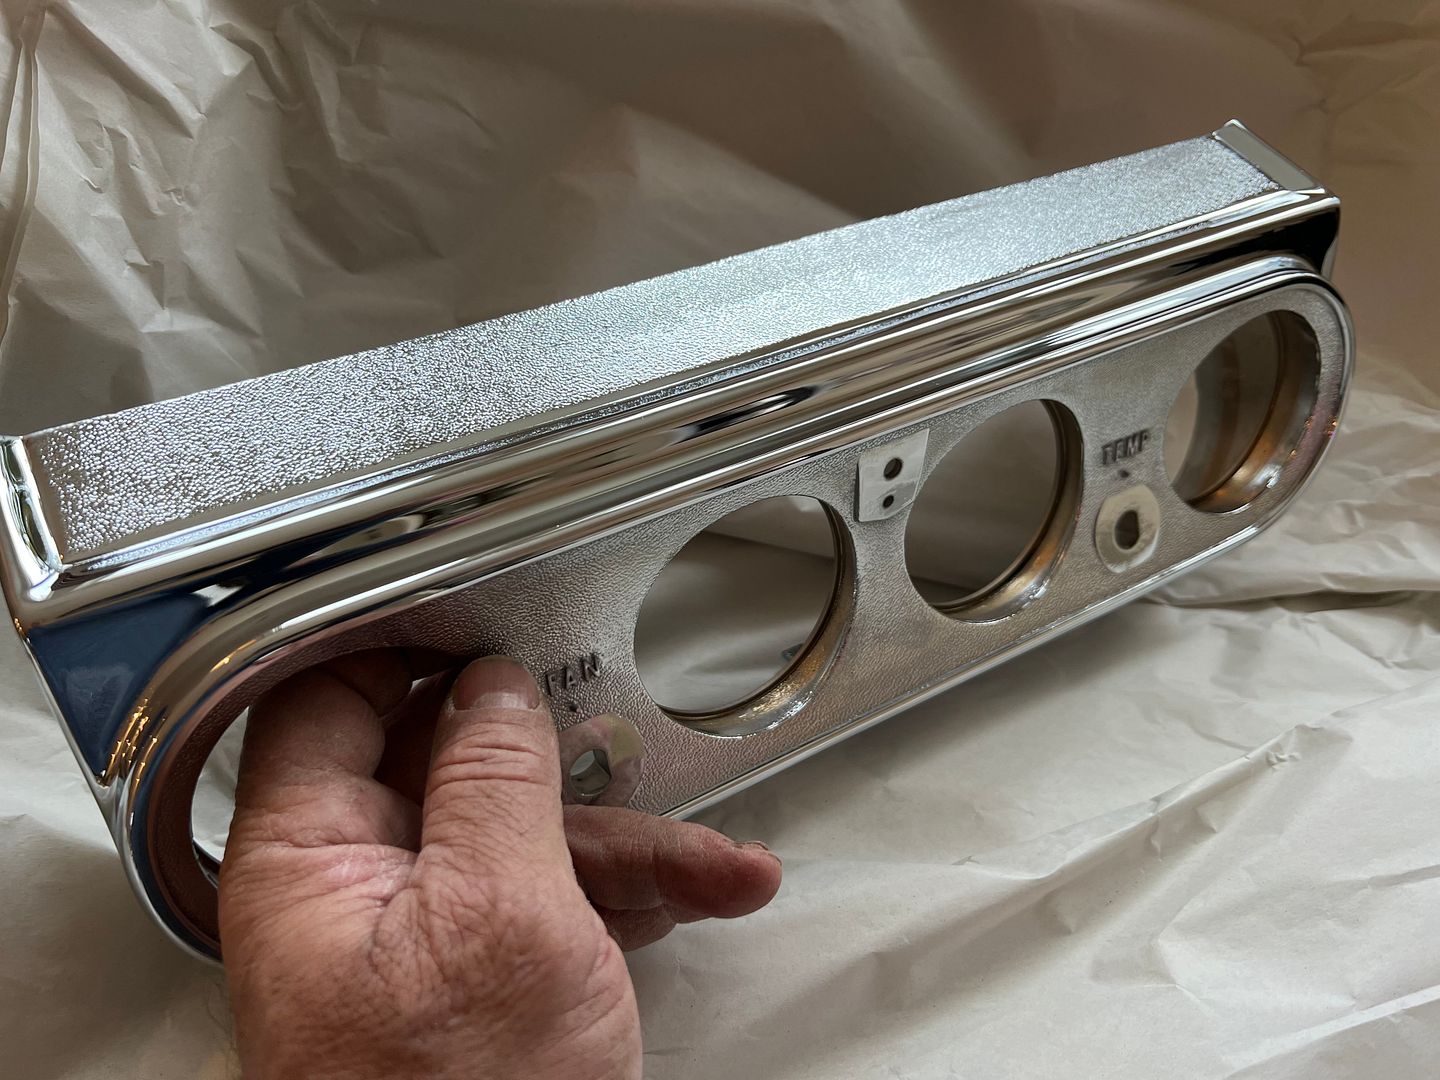 https://www.youtube.com/watch?v=-vhiNxtUtxE  Still plugging along with the wiring on the 55. Fuse box is installed, still have some fine tuning (shortening) on some of the wire bundles.. but someone installed a steering wheel in the way. And since our Snap On puller doesn't fit the Billet Specialties hole pattern, it's time to make a new one.. 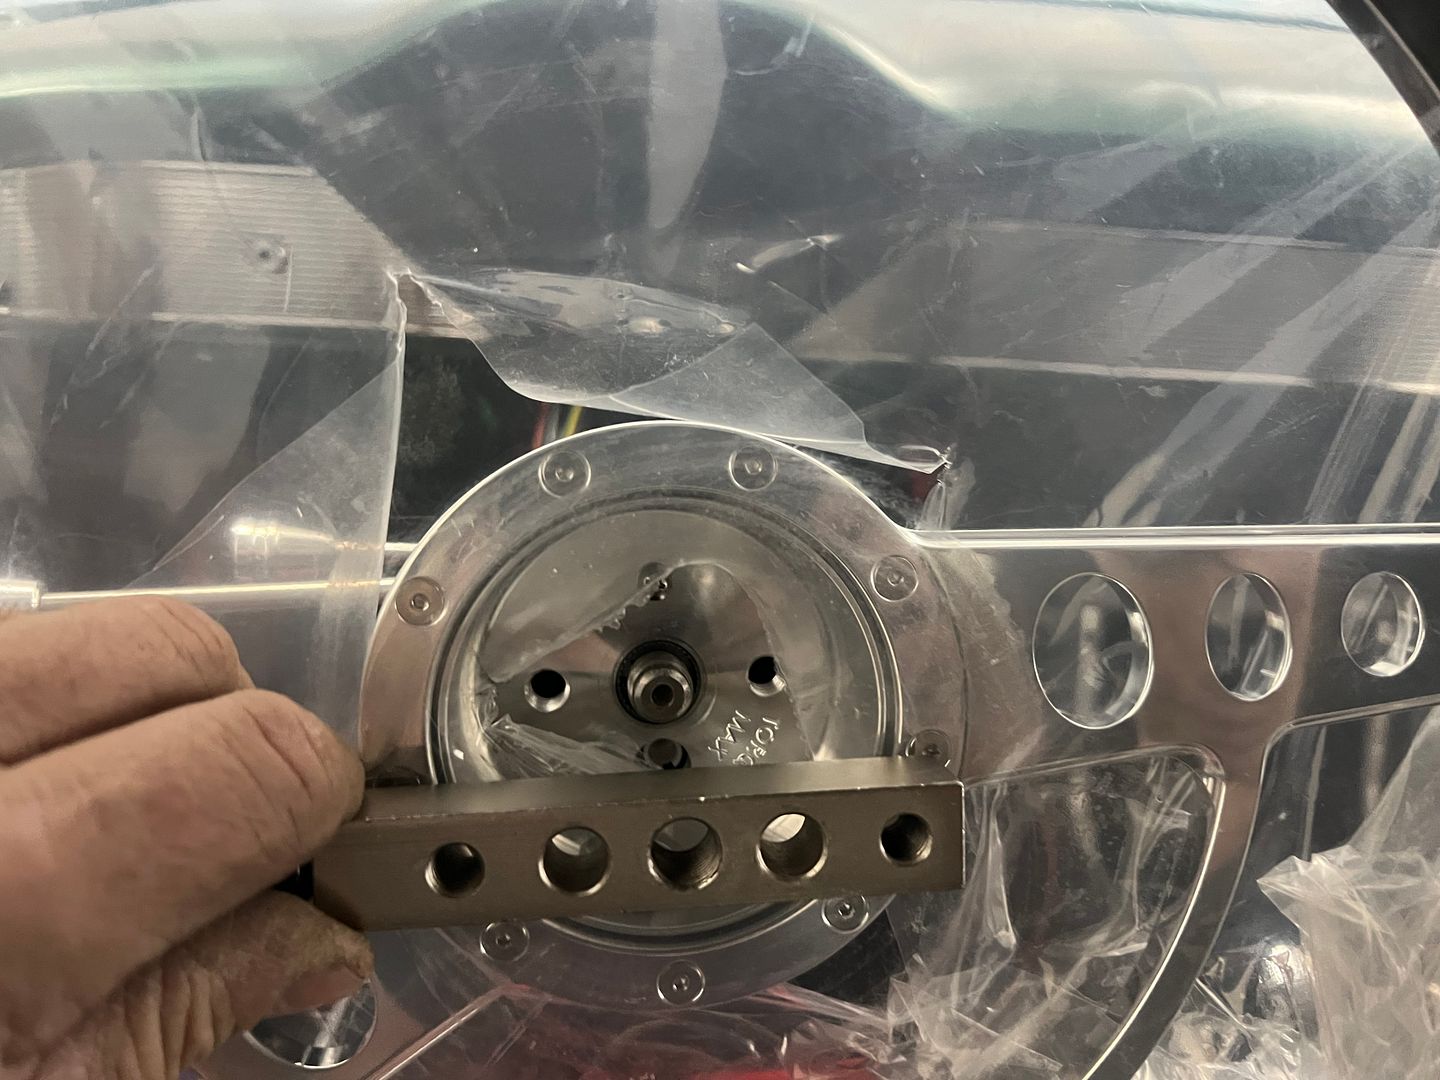 Strike two, we didn't have a 1/2-20 tap to fabricate the new part, so we opted for a 1/2-20 hex nut. A shoulder was machined to center it up in the clearance hole, and welded onto our bar stock 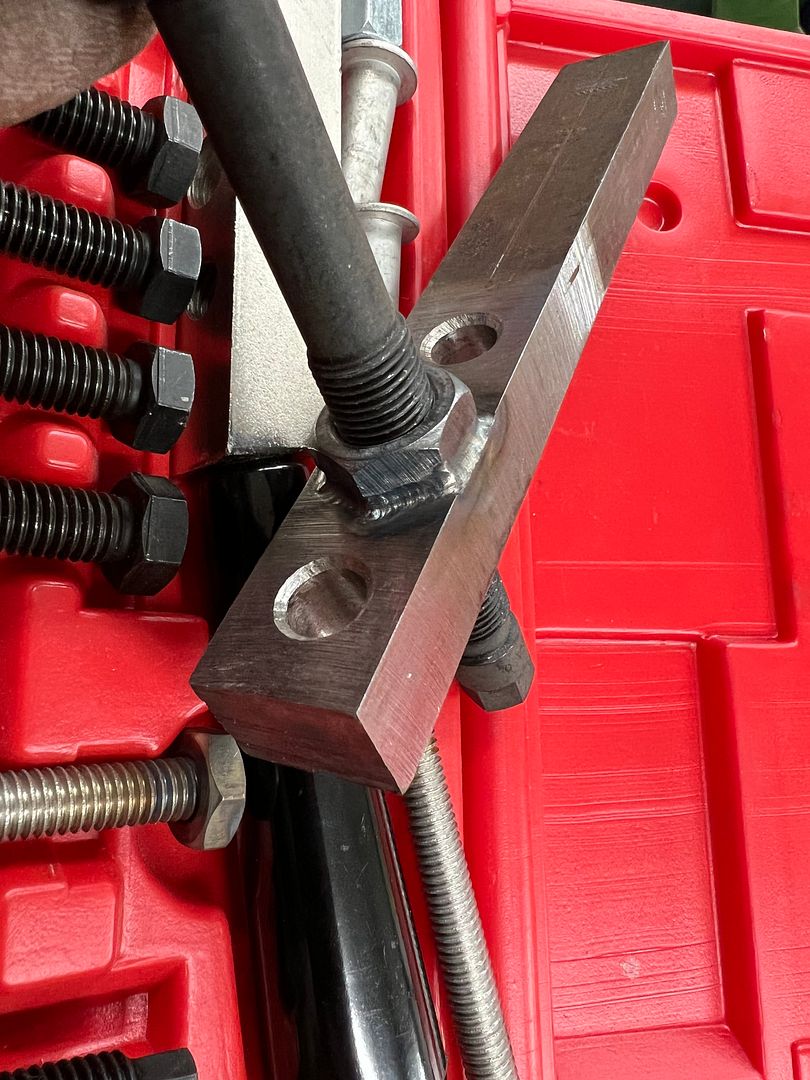 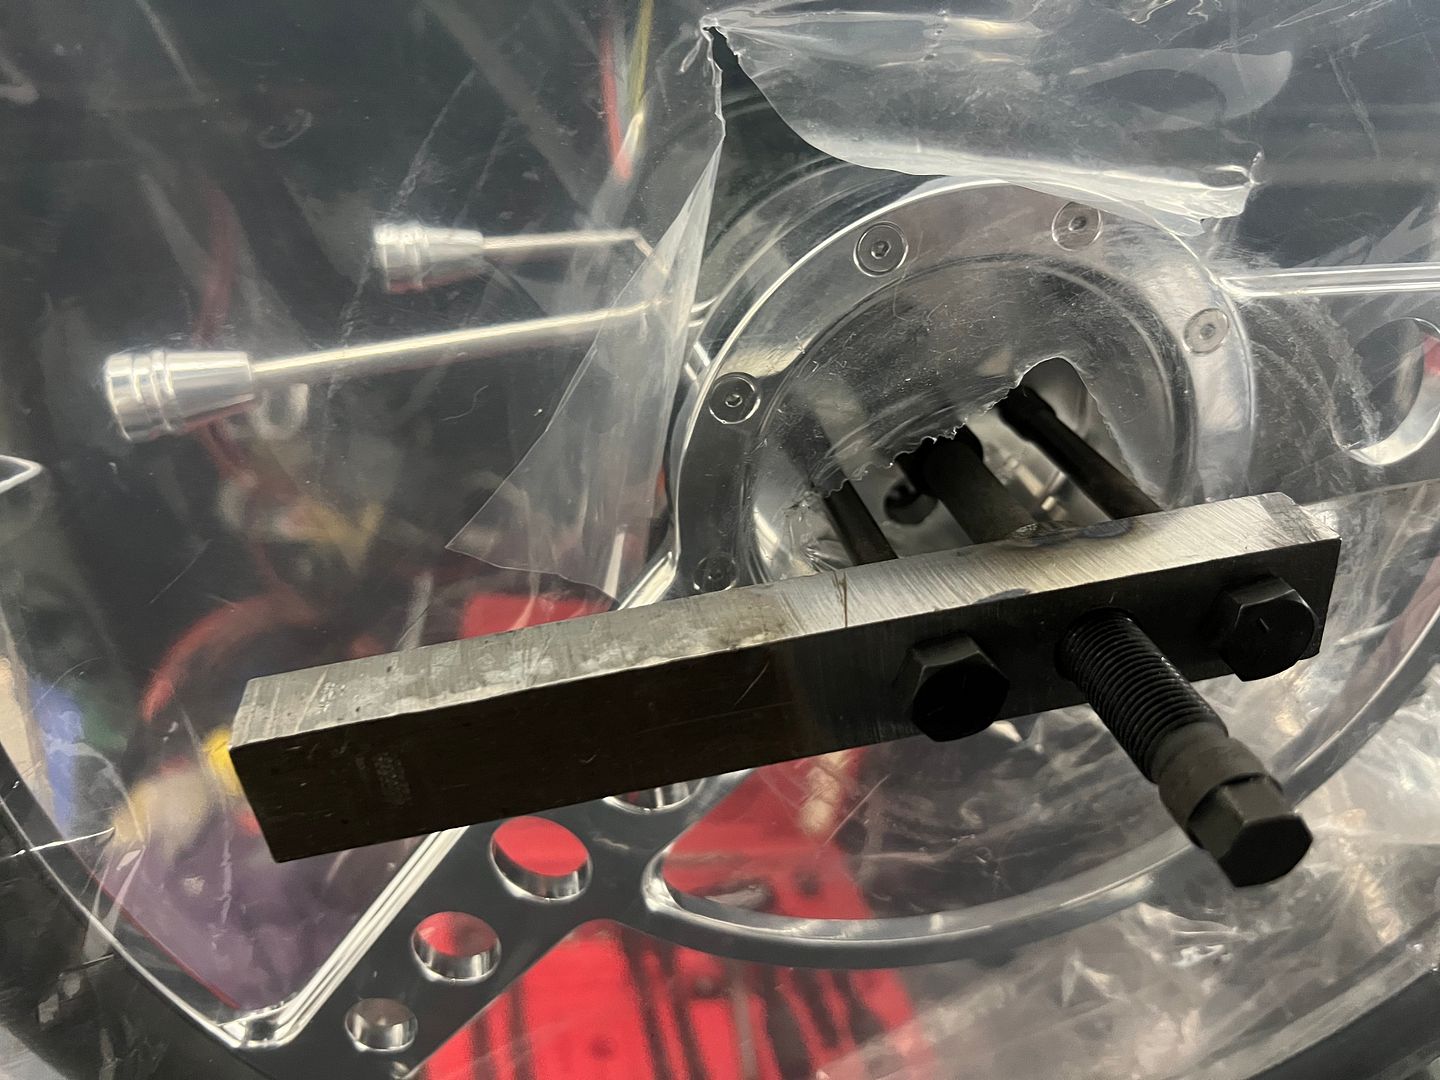 All removed, ready for some wiring...  Shortening up another bundle and crimping on new Pak-Con pins 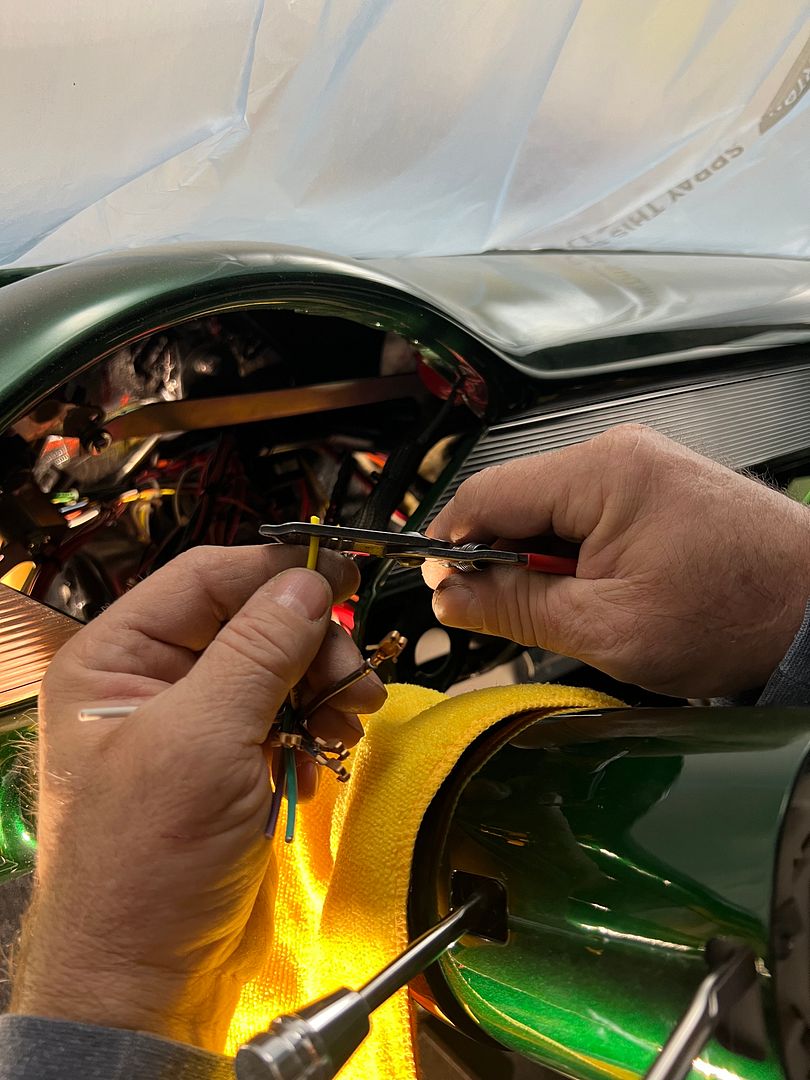 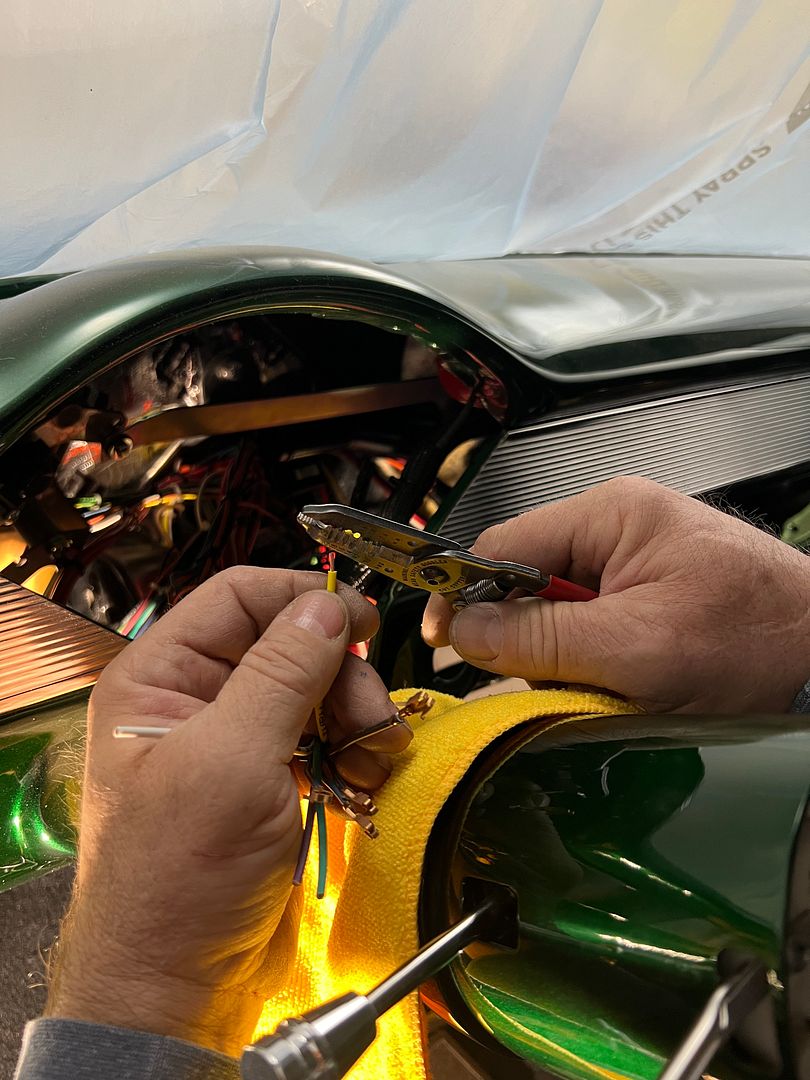 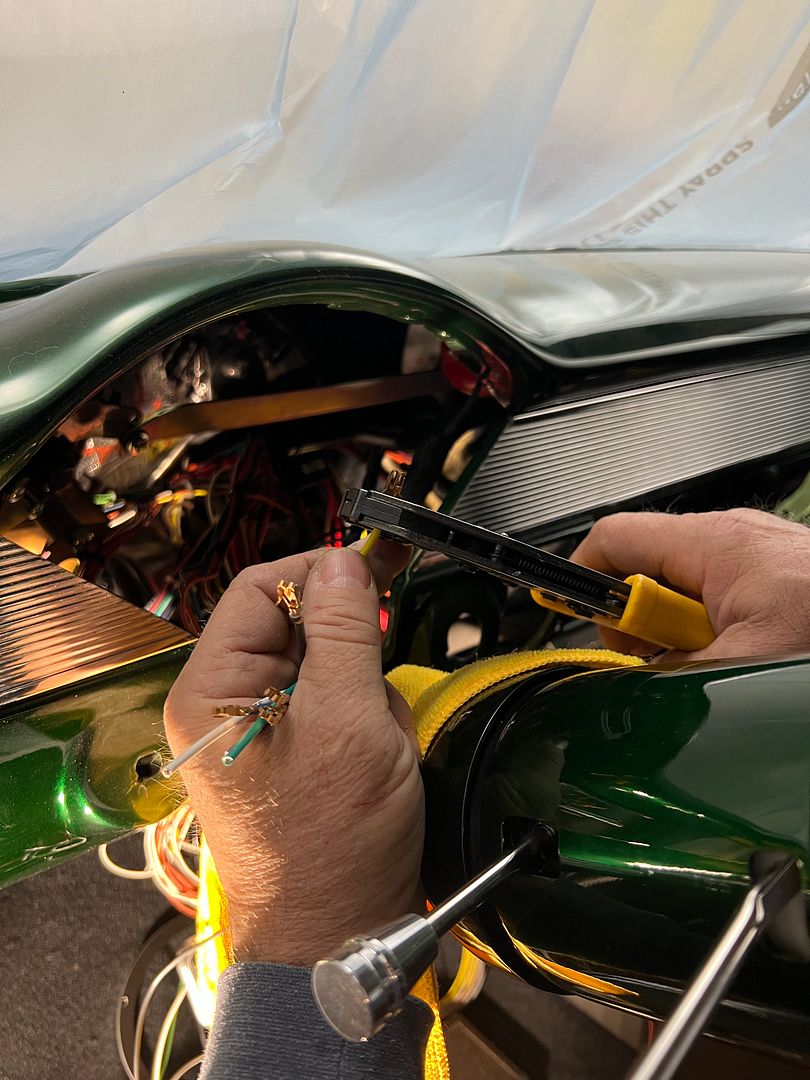 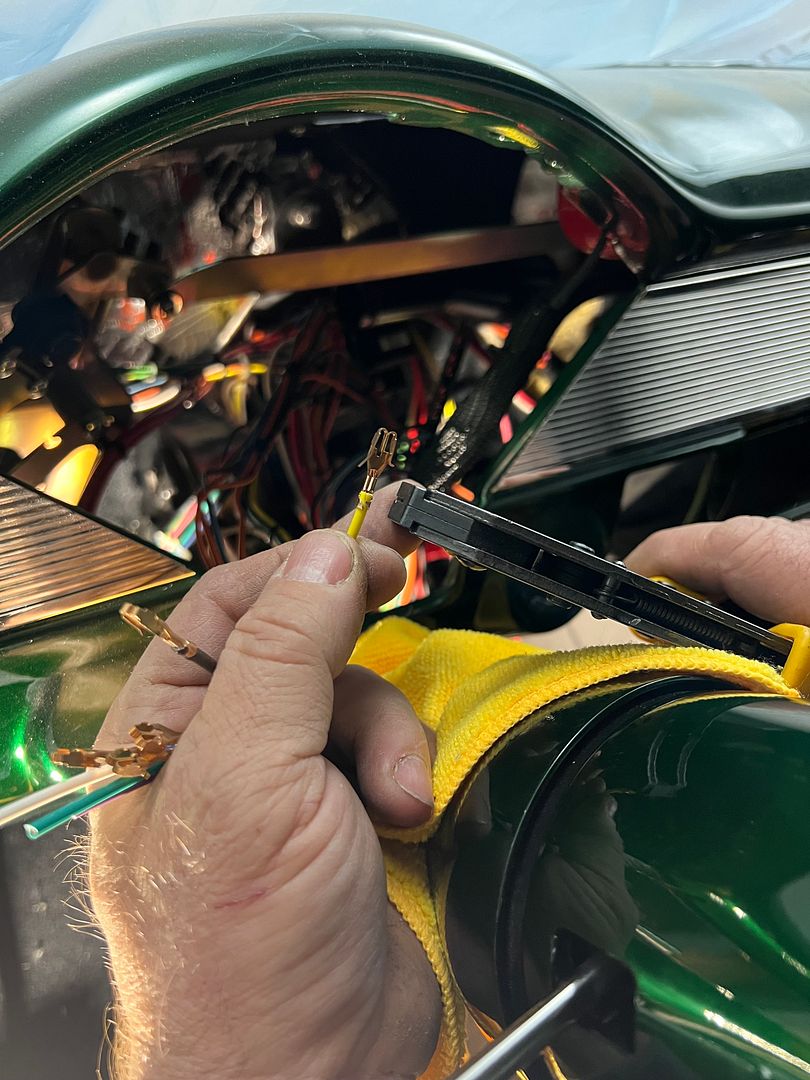 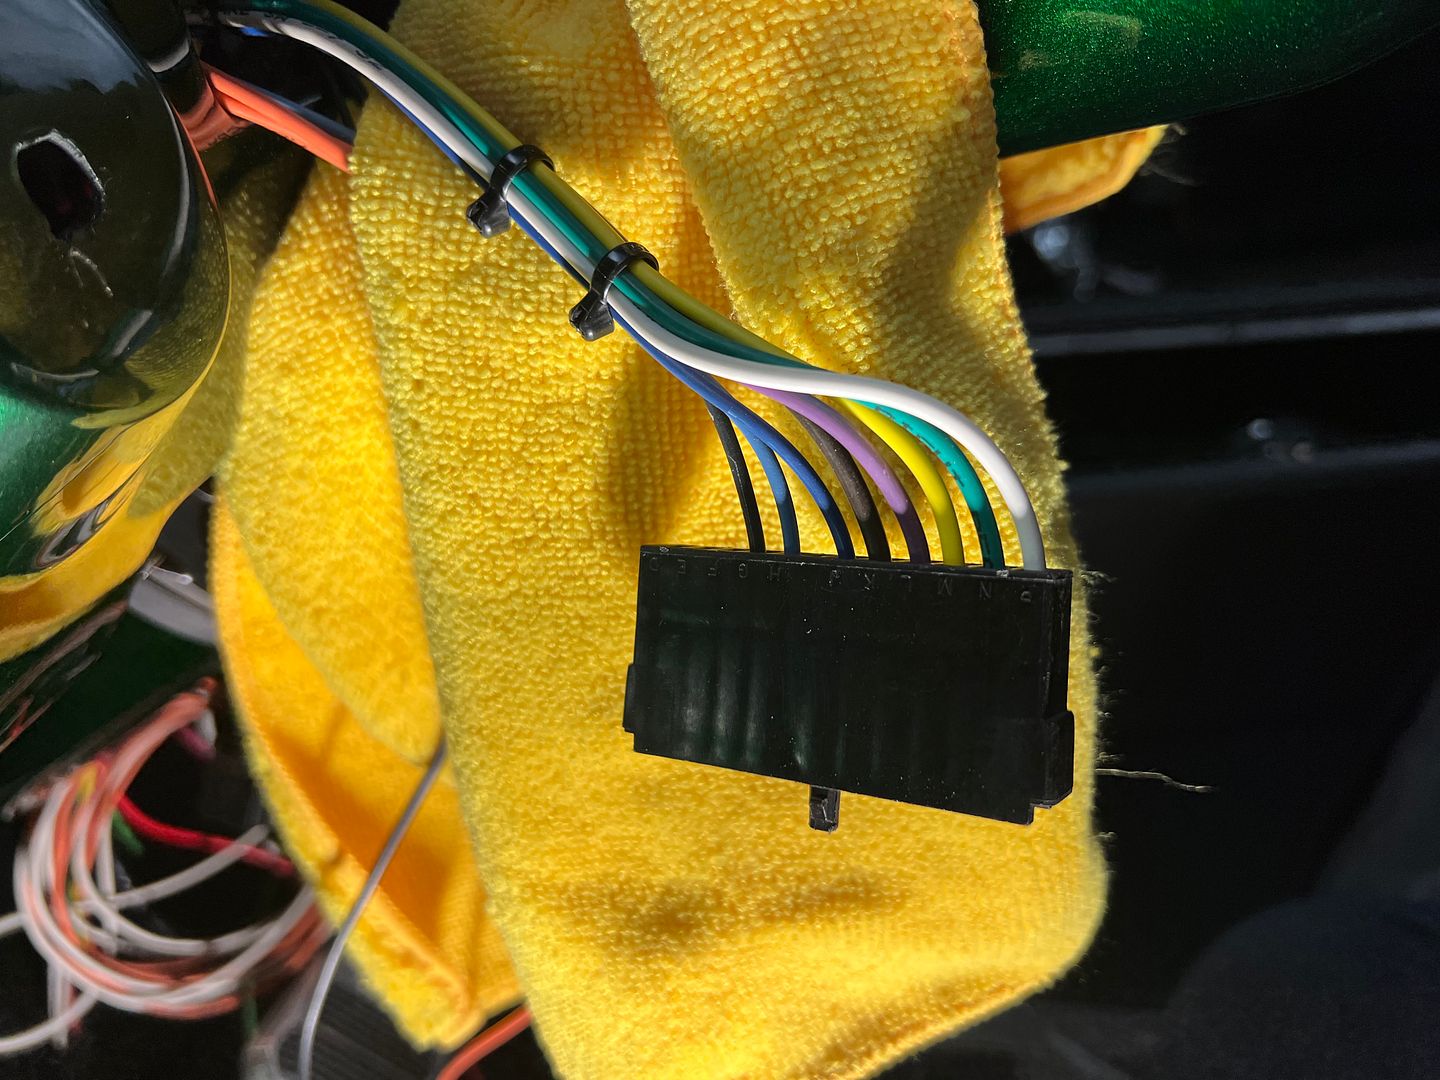 We went to install the reproduction ignition switch, which came with a grooved retaining nut. We didn't have the needed "socket", and the one found online had fingers that were too short, for a guaranteed slip and scratch of the chrome finish. So yeah, let's raid the scrap pile of some 1-1/4" tubing..  https://youtube.com/shorts/6BCdxgtIQ...3lPnJ6-O-g4KVx  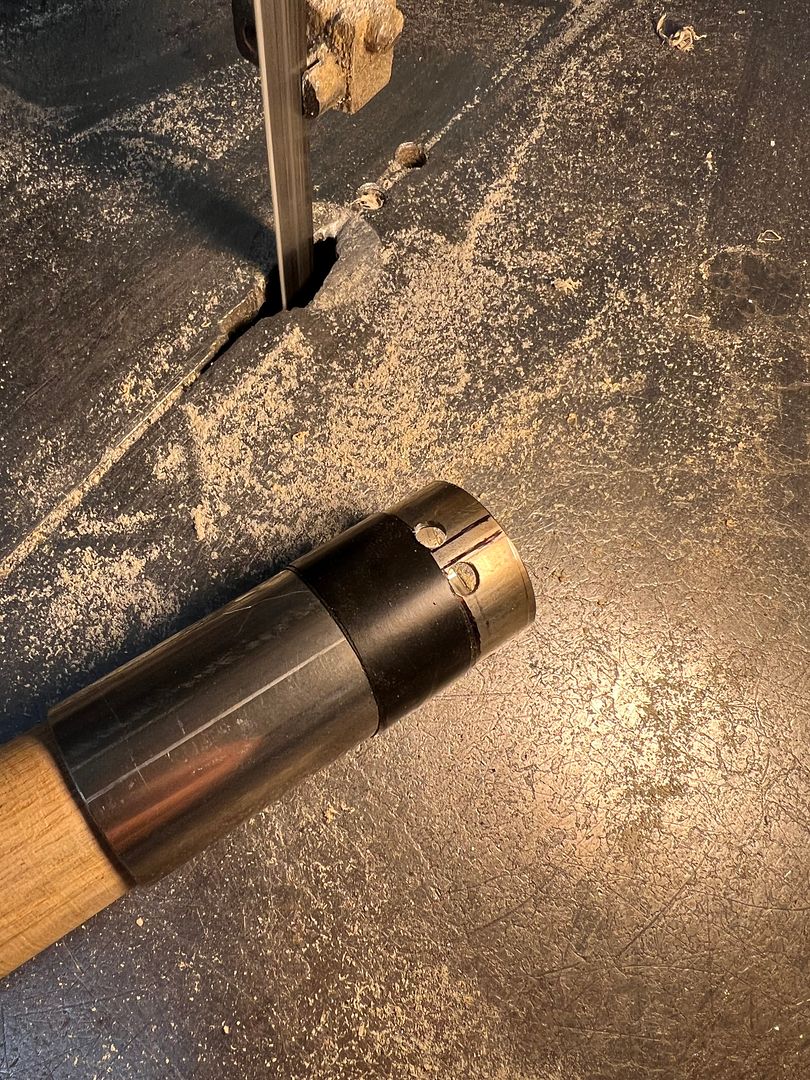 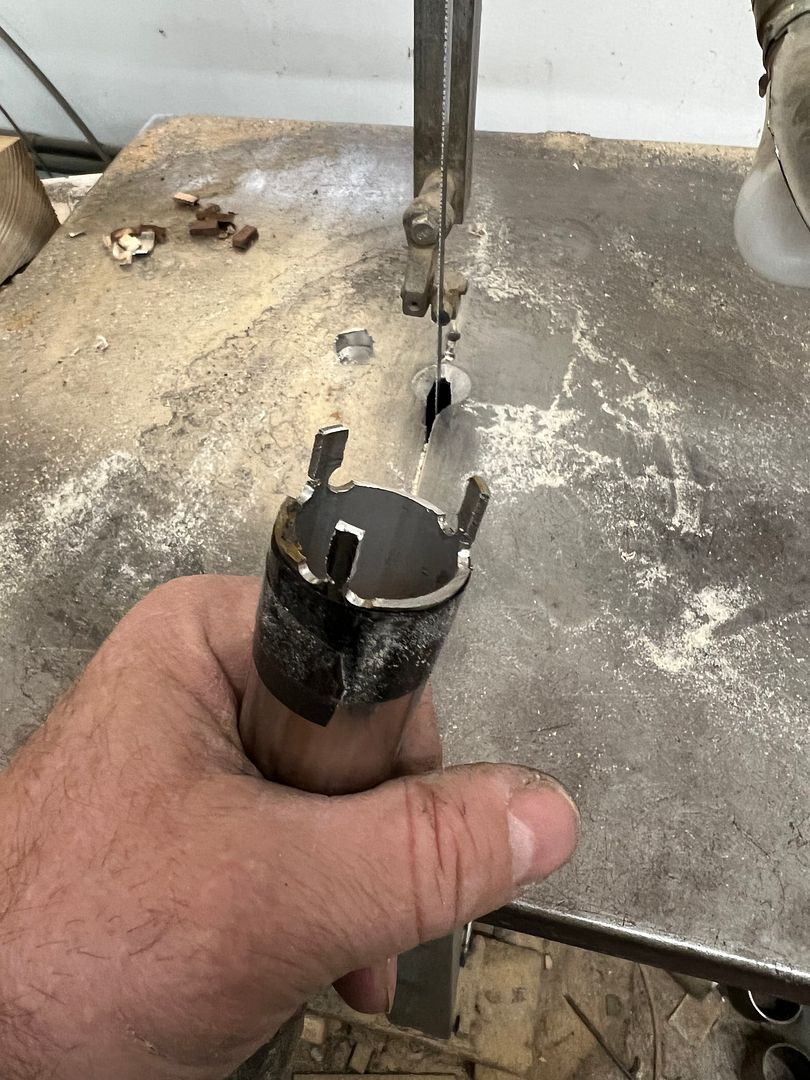 https://youtube.com/shorts/mQLstGXZn...lj5an-ORz-DULd  Works like a charm...
__________________
Robert |

|

|
|
04-03-2025, 12:42 PM
|
#1402 |
|
Registered User
Join Date: Feb 2007
Location: Marana, Arizona
Posts: 3,479
|
Re: 55 Wagon Progress
Those manifolds look awesome! Wish they made something like that for SBF.
__________________
"I feel the need for speed!"... as soon as I am done with my nap. |
|
|
|
|
06-18-2025, 01:58 PM
|
#1403 |
|
Registered User
Join Date: Sep 2008
Location: Newport, North Carolina
Posts: 688
|
Re: 55 Wagon Progress
Never gets old coming in here and seeing your updates. I always leave amazed.
|
|
|
|
|
07-14-2025, 12:14 PM
|
#1404 |
|
Registered User
Join Date: Jan 2013
Location: Leonardtown, MD
Posts: 1,666
|
Re: 55 Wagon Progress
Some wagon updates!!!
Still working on the wiring, and to this stage we've done our best to eliminate all the butt-splice pigtails that come with the American Autowire kit. On the front end, the pigtail for the OEM parking light fixtures seemed to have an unobtainium style contact. Shout out to Sean Matthews at American Autowire. After explaining my OCD condition and the need for original pins to eliminate the butt splicing, a few messages and pictures back and forth, and he came up with the correct contact for us. Part numbers shown for those with similar OCD twitch. 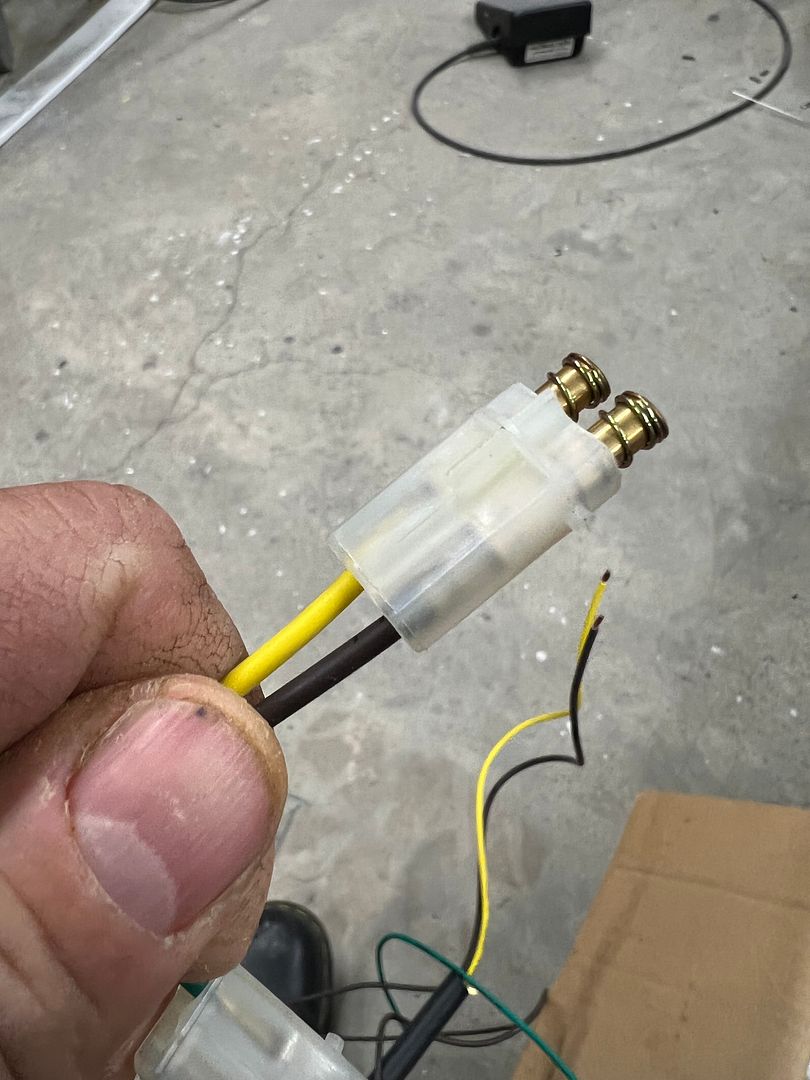 It takes a bit of force, but here's the slightly mis-shapen contact after strong arming its removal  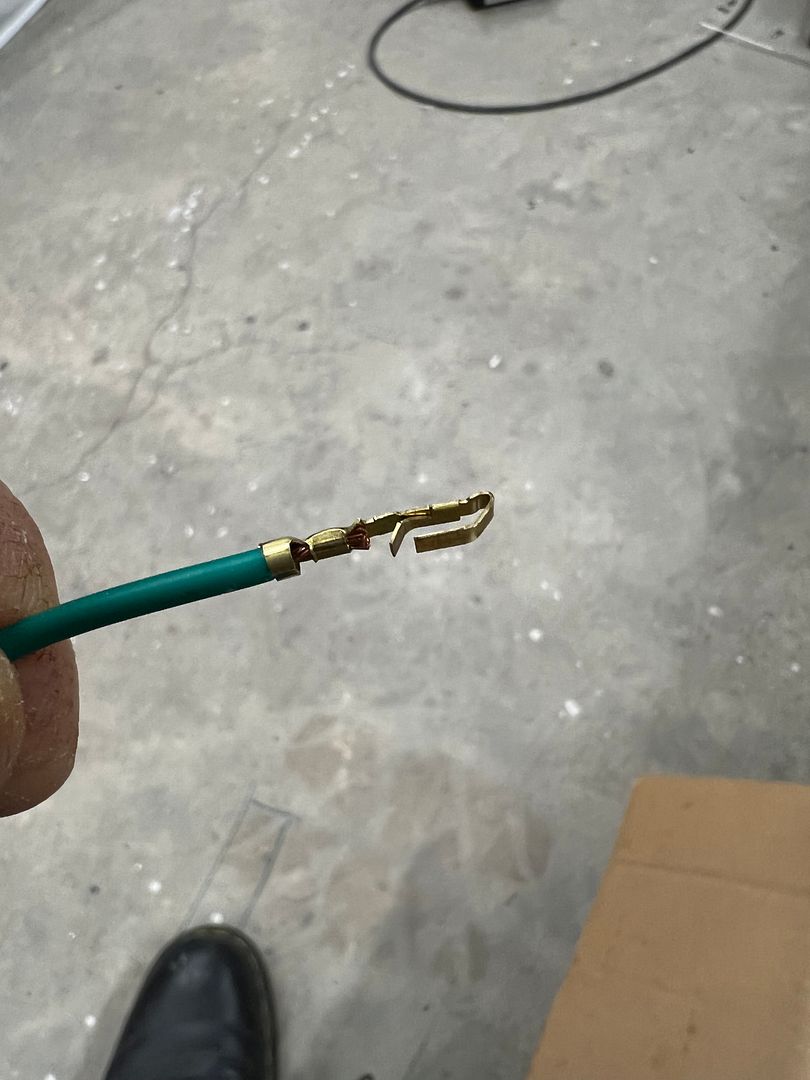 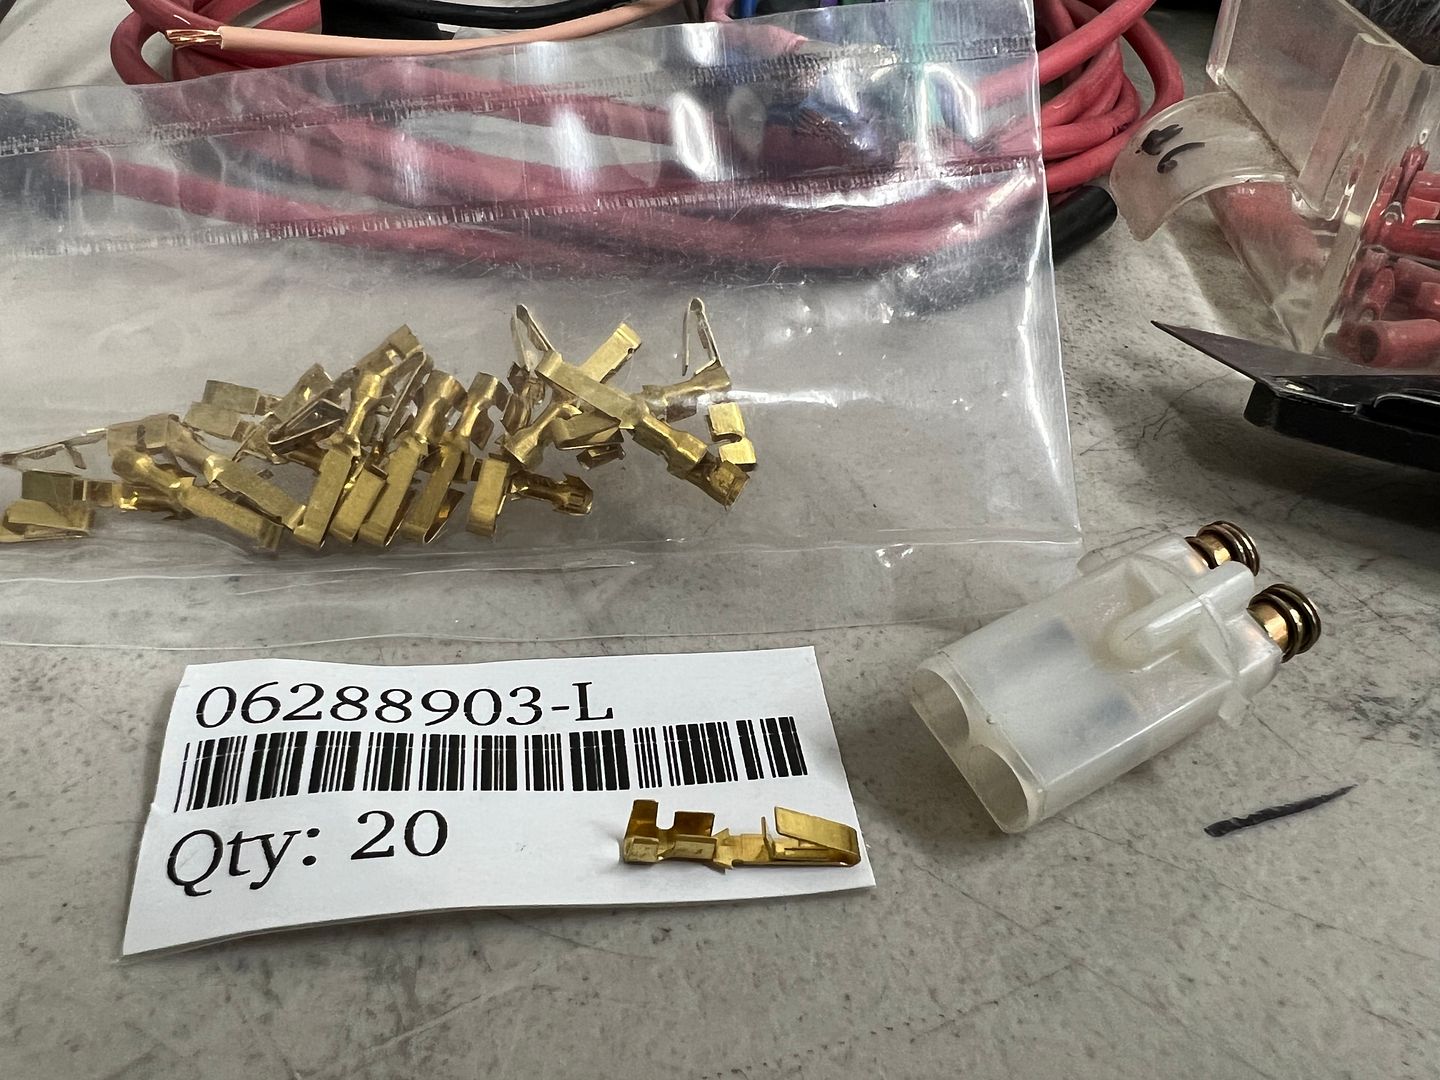 It's not often I do spring cleaning, call it hoarding if you will. But here's a case where I got rid of the old grill from the wagon because I got tired of tripping over it. Then at a local show and I see this brace behind the stainless grill of a 55, and it hit me... The old grille still had that part attached. 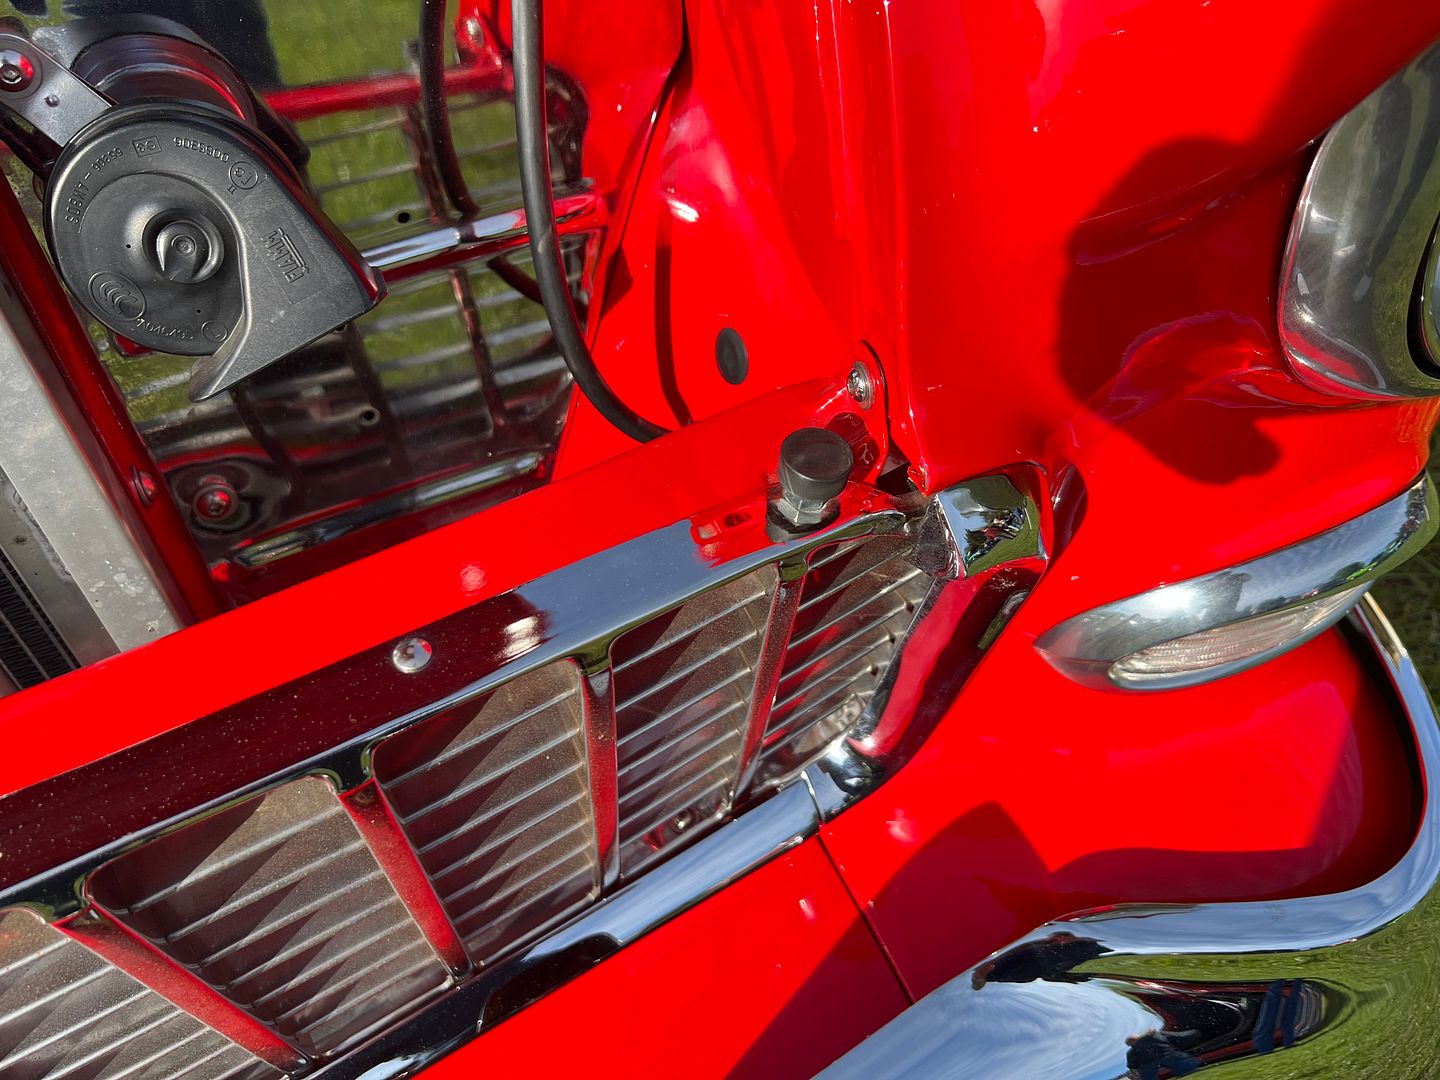 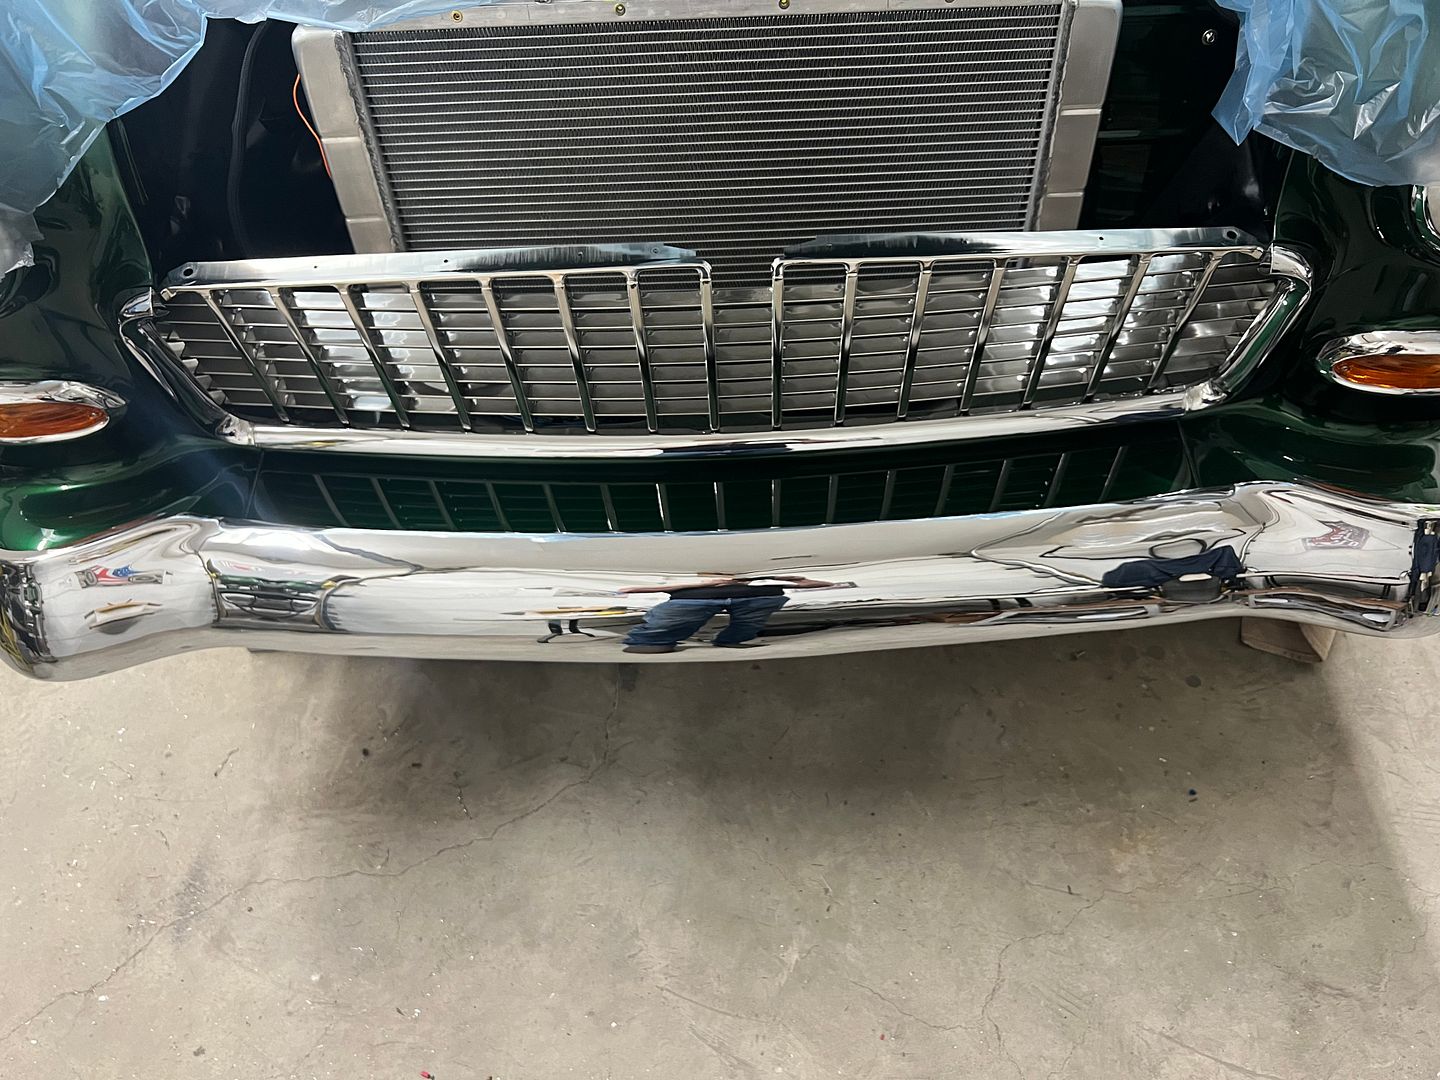 So I reached out to a local buddy who just finished his 55 to see if he had one. Sure enough, he saved the day.. 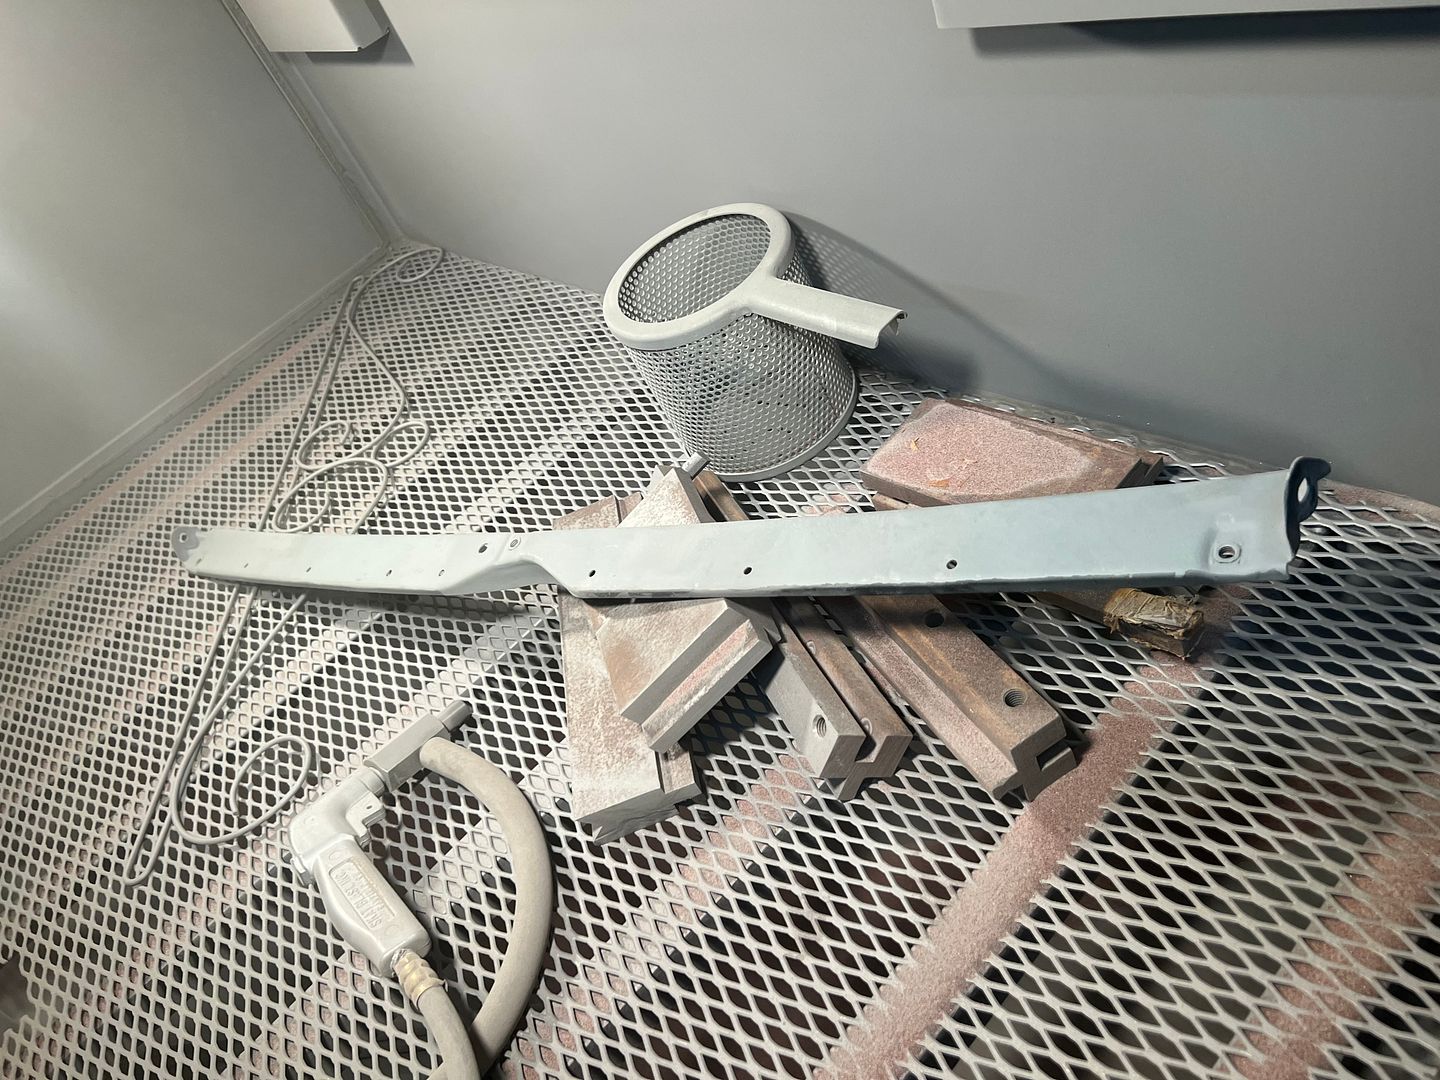 a bit of media blasting before it gets the SPI epoxy primer. The front end of the 55 also has separate harnesses for the headlight and parking lights, both visible when you open the hood. In order to clean this up a bit, we ran both into the headlight bucket and then down to the parking light fixture. This also helps in that we ran a separate ground to each light fixture to help eliminate those electrical gremlins, so it makes for a cleaner bridge between the two, out of sight under the fender. 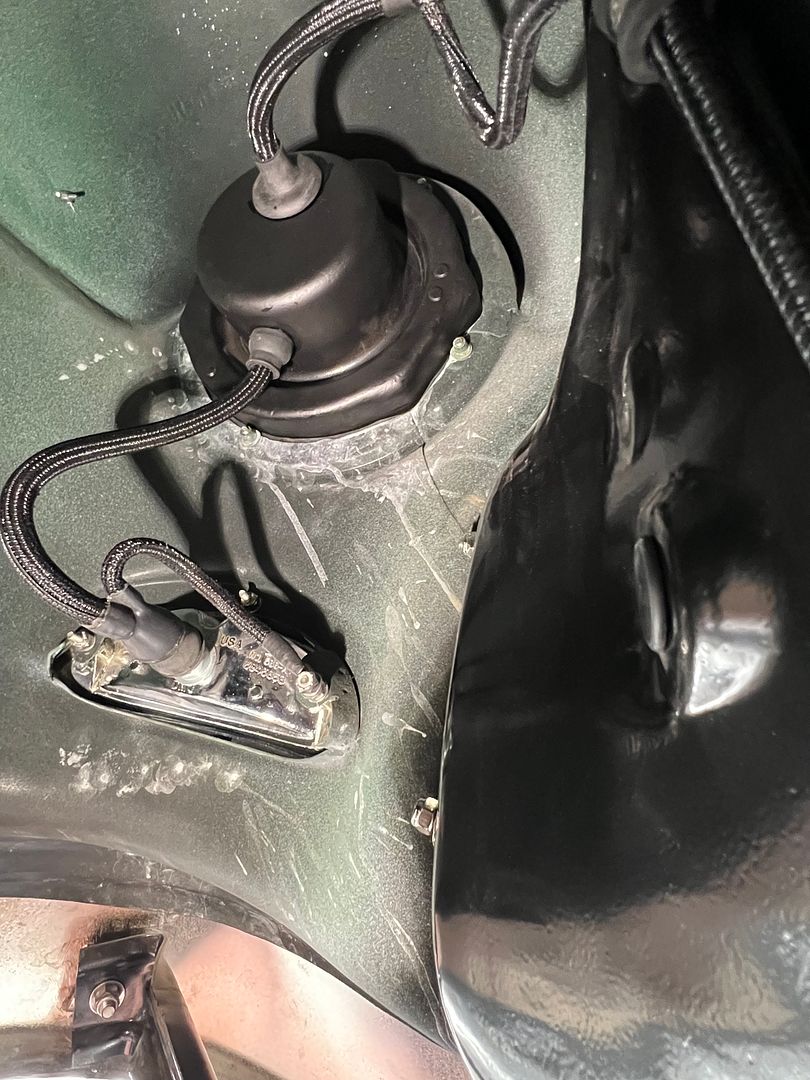 fun fun.....  And then there's the shop truck.. I wanted to add some oil capacity to the new engine, and since the original drain plug dumps on top of the crossmember, let's move that enough to clear. 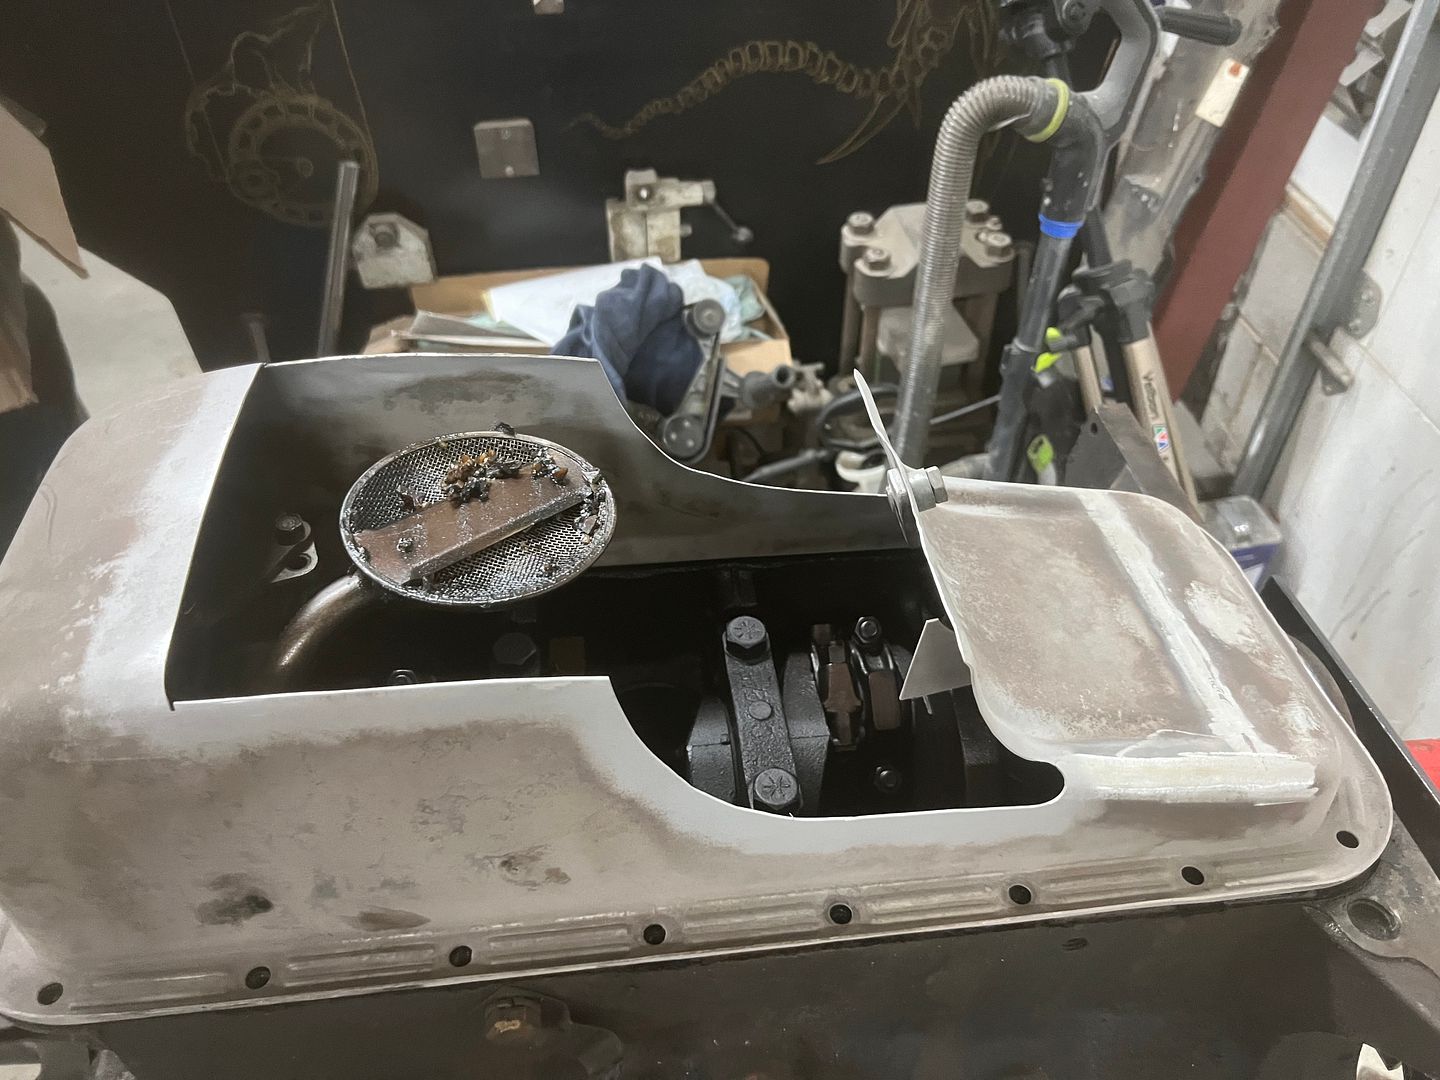 and yes, that's remnants of Ford's better idea for a quiet timing chain on the oil sump. 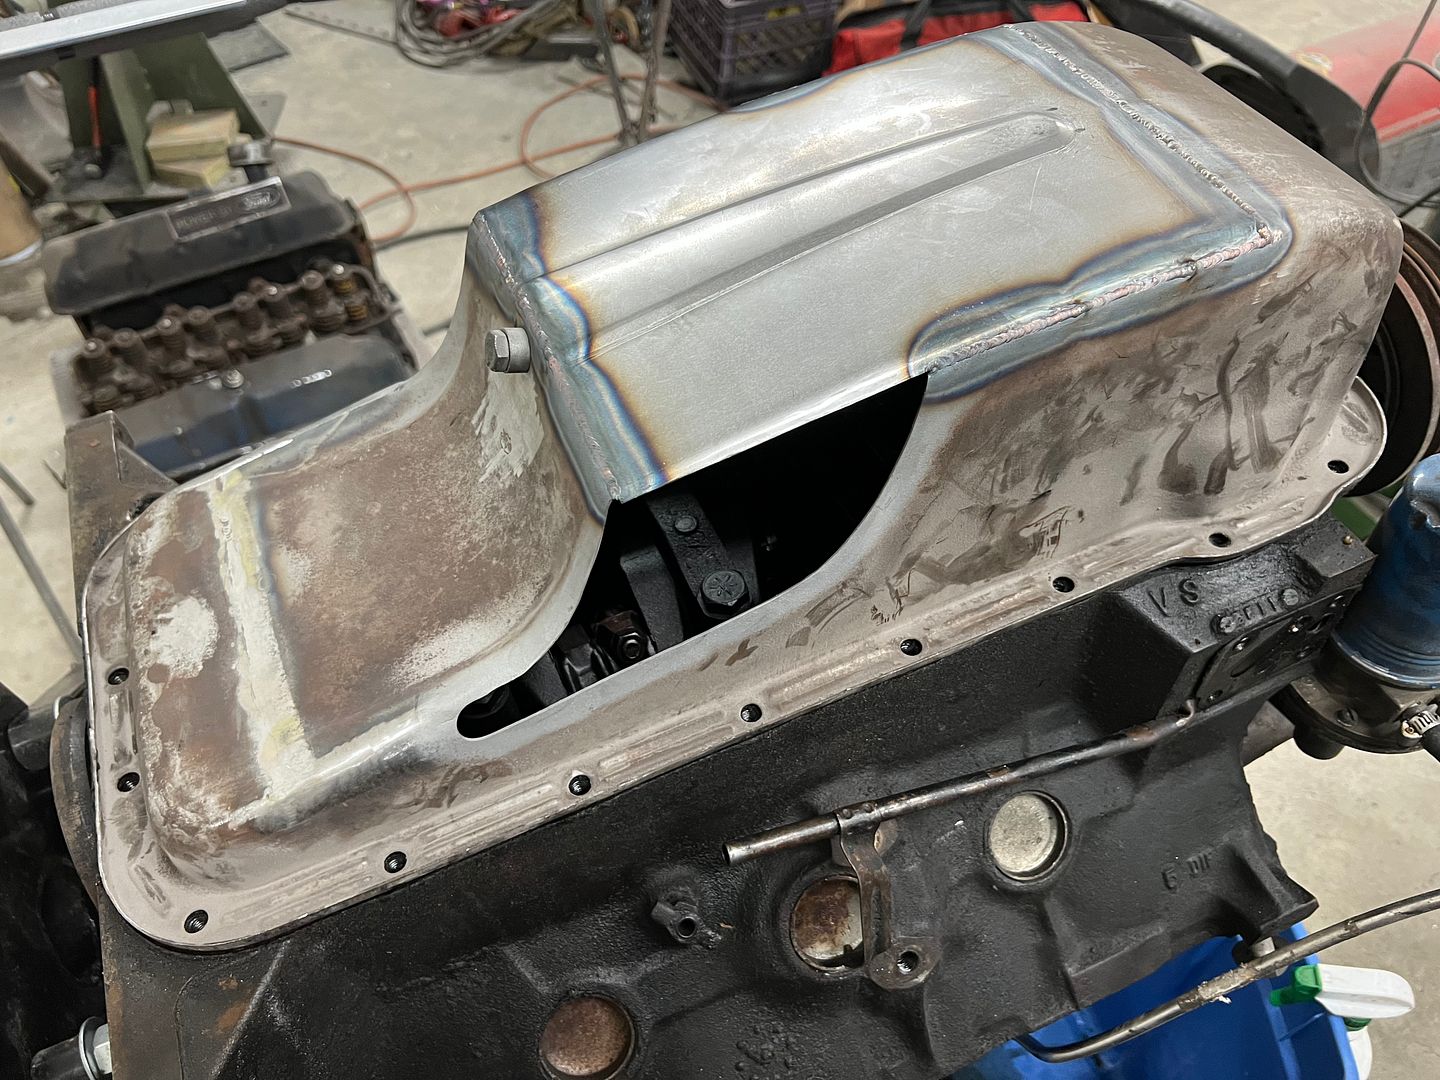 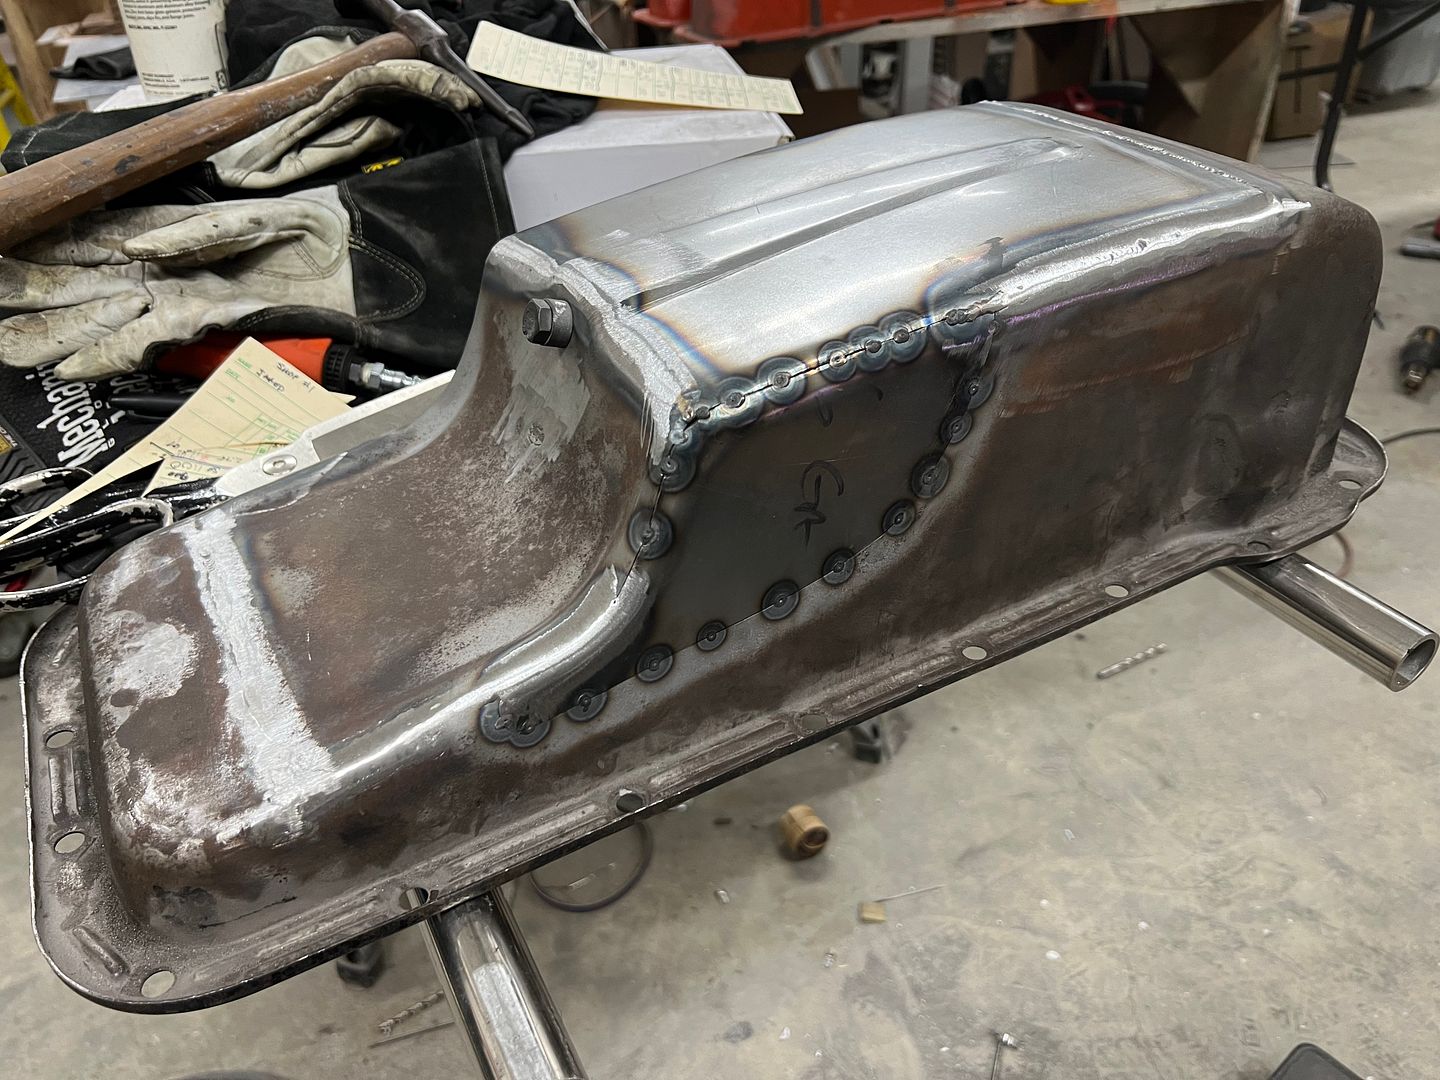 Missed getting a final shot, and we did add a baffle inside. Another piece to the puzzle, I always liked the Mopar pistol grip shifters. In today's world, I don't like the price.. I found an aftermarket version in Sweden (eBay) and it actually already has the 5 speed bezel on top. Like it was meant to be. Also note the proximity of the original shifter to the dash. The under dash AC will never fit with that in there, so the T5 will be a welcome addition for the missus in being able to add AC to the equation.. 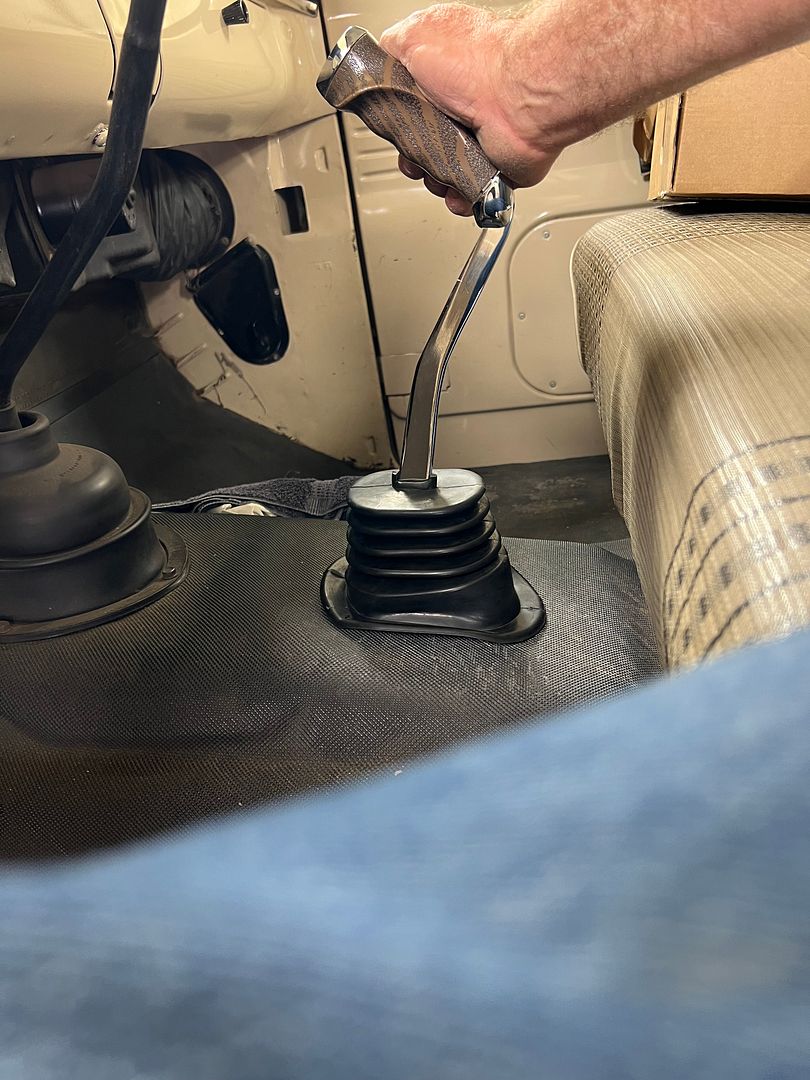 and 410 pickup day.. 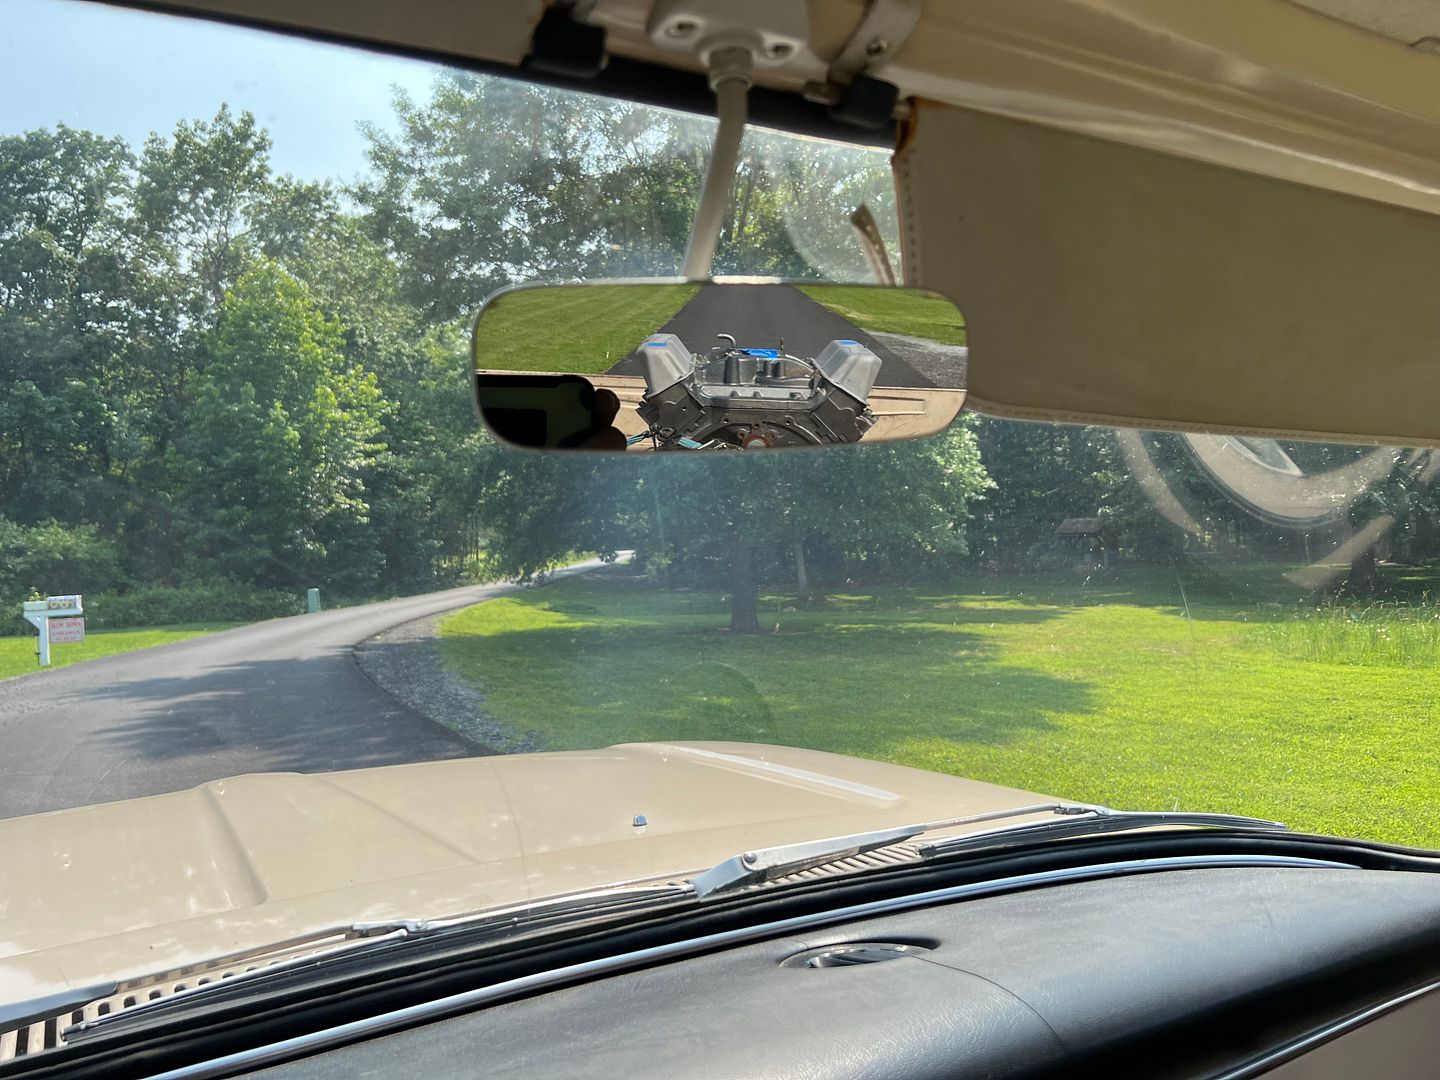 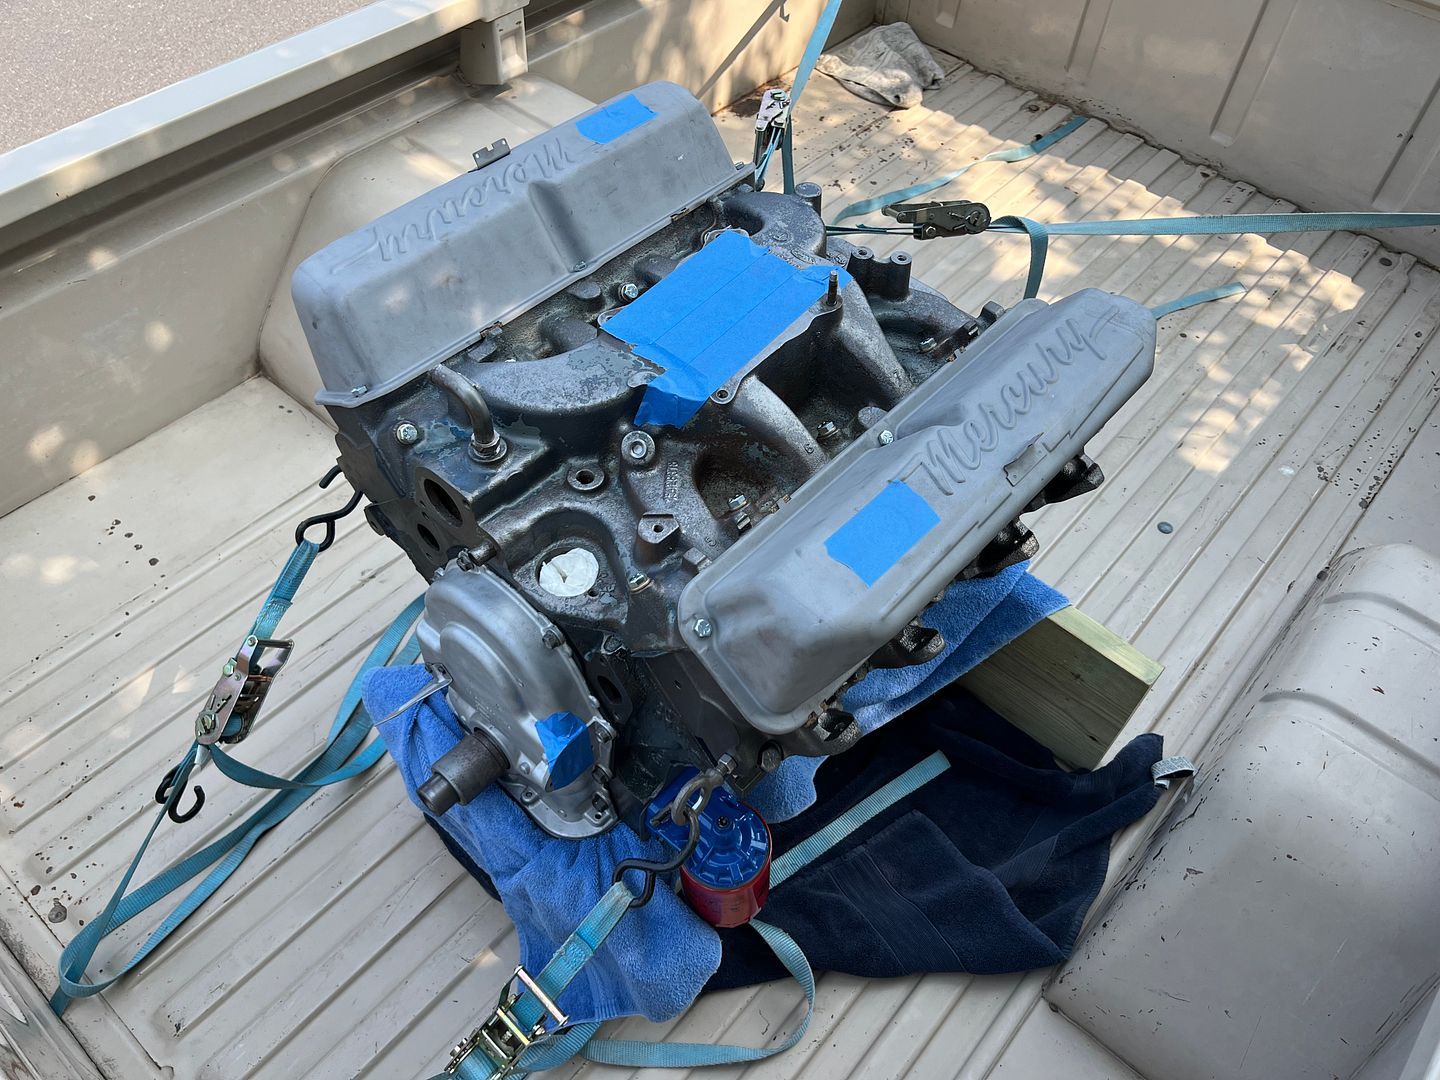  On the way to pick up a used bell housing from a local salvage yard, the old 352 left me stranded. Some roadside diagnostics, a changeout of the 59 year old OEM ignition coil, and we were back in business.  It made an uneventful trip back and forth to Downingtown PA yesterday to pick up some 19 ga AKDQ sheet. 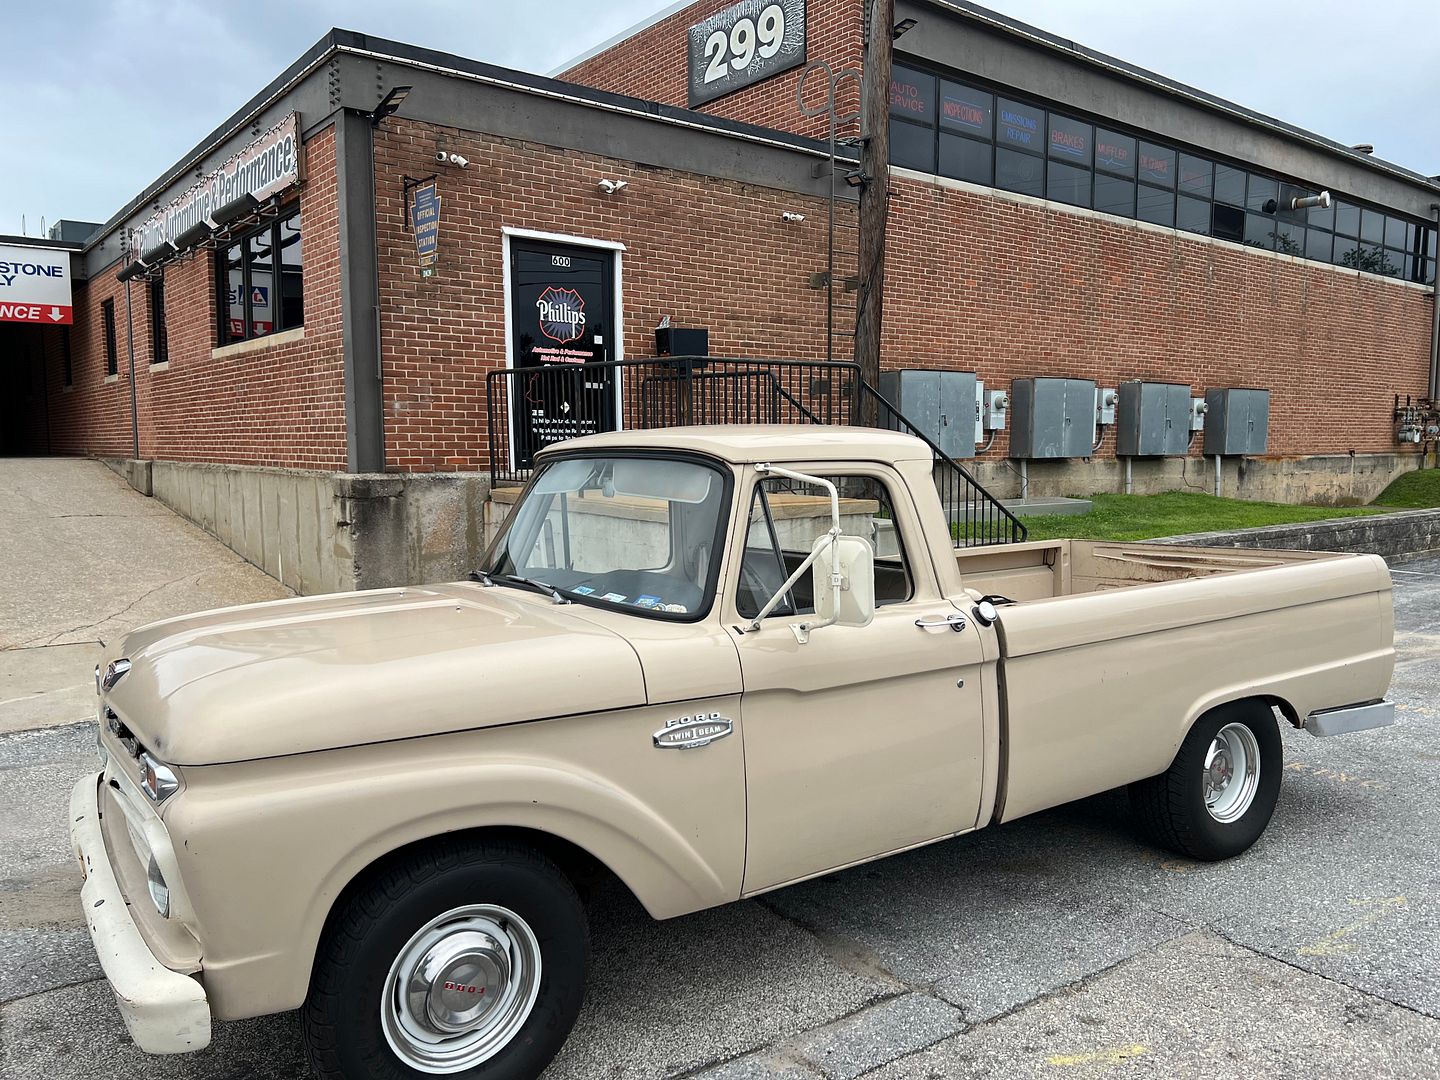
__________________
Robert |
|
|
|
|
07-15-2025, 11:25 AM
|
#1405 |
|
Registered User
Join Date: Nov 2011
Location: Omaha, Nebraska
Posts: 576
|
Re: 55 Wagon Progress
This is why we never throw anything away... LOL
Beautiful twin I beam Ford! I love those trucks!
__________________
Travis' Tribute Truck - 65 C10 Frame Up Restoration http://67-72chevytrucks.com/vboard/s...d.php?t=495073 |
|
|
|
|
08-13-2025, 06:39 AM
|
#1406 |
|
Registered User
Join Date: Sep 2008
Location: Newport, North Carolina
Posts: 688
|
Re: 55 Wagon Progress
I've been MIA for a little while...just caught up. Thanks for the updates! How do you like the Black Widow exhaust? I'm trying to decide which route to go with my truck and they had come to mind, as an option.
|
|
|
|
|
08-13-2025, 07:34 AM
|
#1407 | |
|
Registered User
Join Date: Jan 2013
Location: Leonardtown, MD
Posts: 1,666
|
Re: 55 Wagon Progress
Quote:
__________________
Robert |
|
|
|
|
|
08-25-2025, 07:43 AM
|
#1408 |
|
Registered User
Join Date: Jan 2013
Location: Leonardtown, MD
Posts: 1,666
|
Re: 55 Wagon Progress
an update on the shop truck, when I took delivery of the truck last year, the rear bumper came with two hitch balls already installed (and welded in place). If the dings in the tailgate serves as a clue, I saw this as a recipe for a bent up vintage license plate.
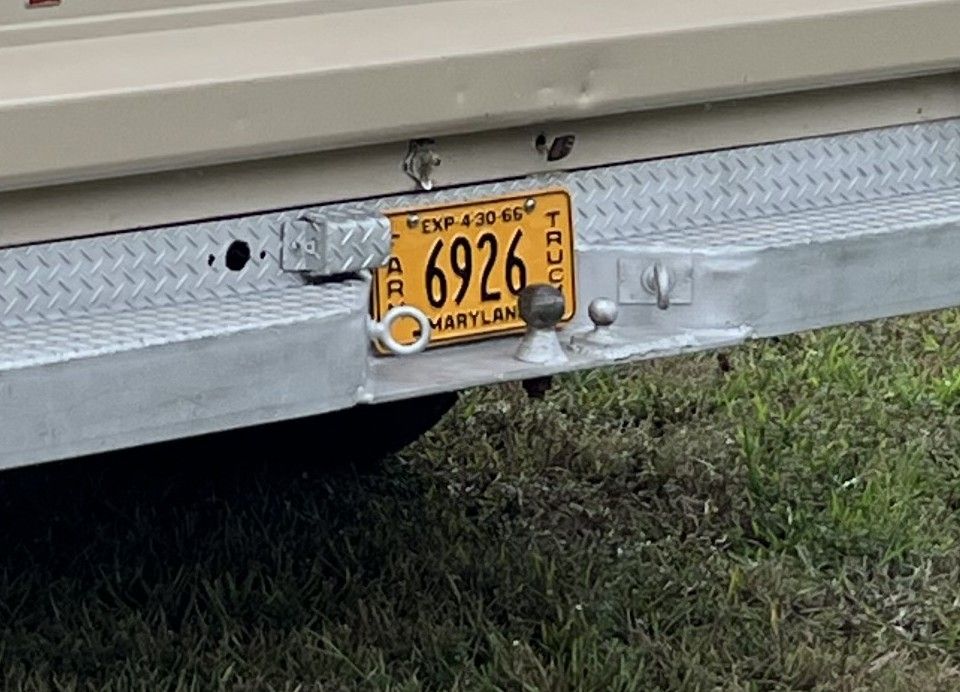 If I had any plans at all of pulling a trailer, those needed to go in lieu of a receiver style hitch. I had full intentions of fabricating a Reese style that would attach to the frame, but after inspecting the rear frame, the existing bumper had those same features. So option B, lets hang the receiver below the bumper. Some 3/8 plate was bent at a 90, RotoCut cutters used to add the safety chain slots and the corners for the receiver, and a jigsaw connects the dots. 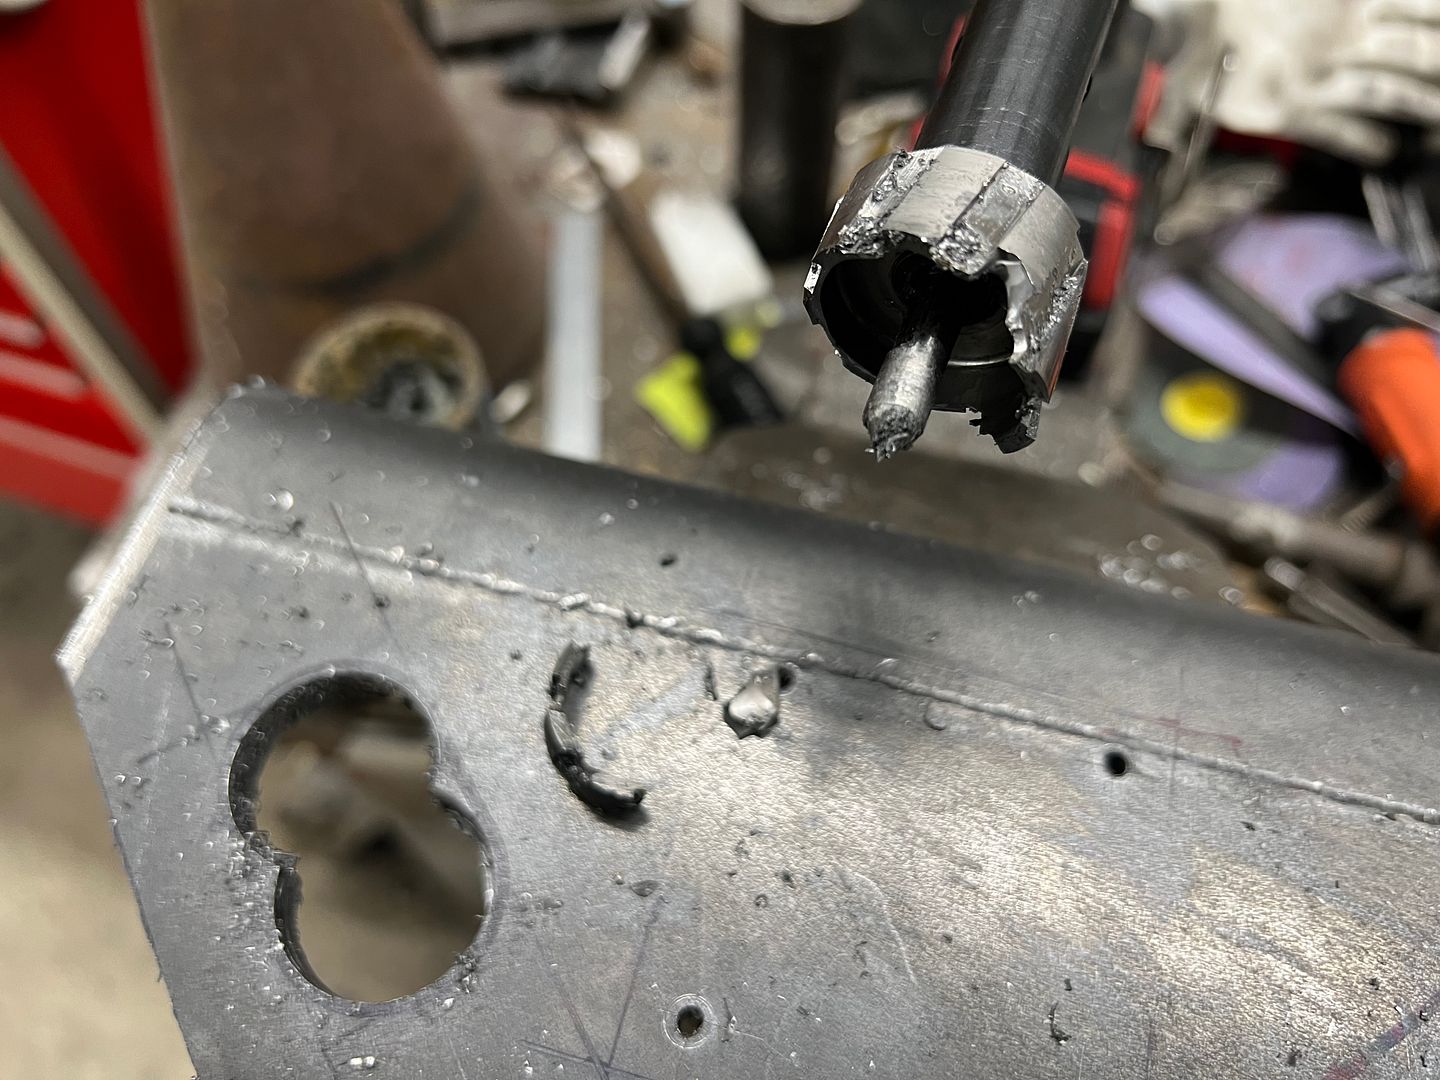 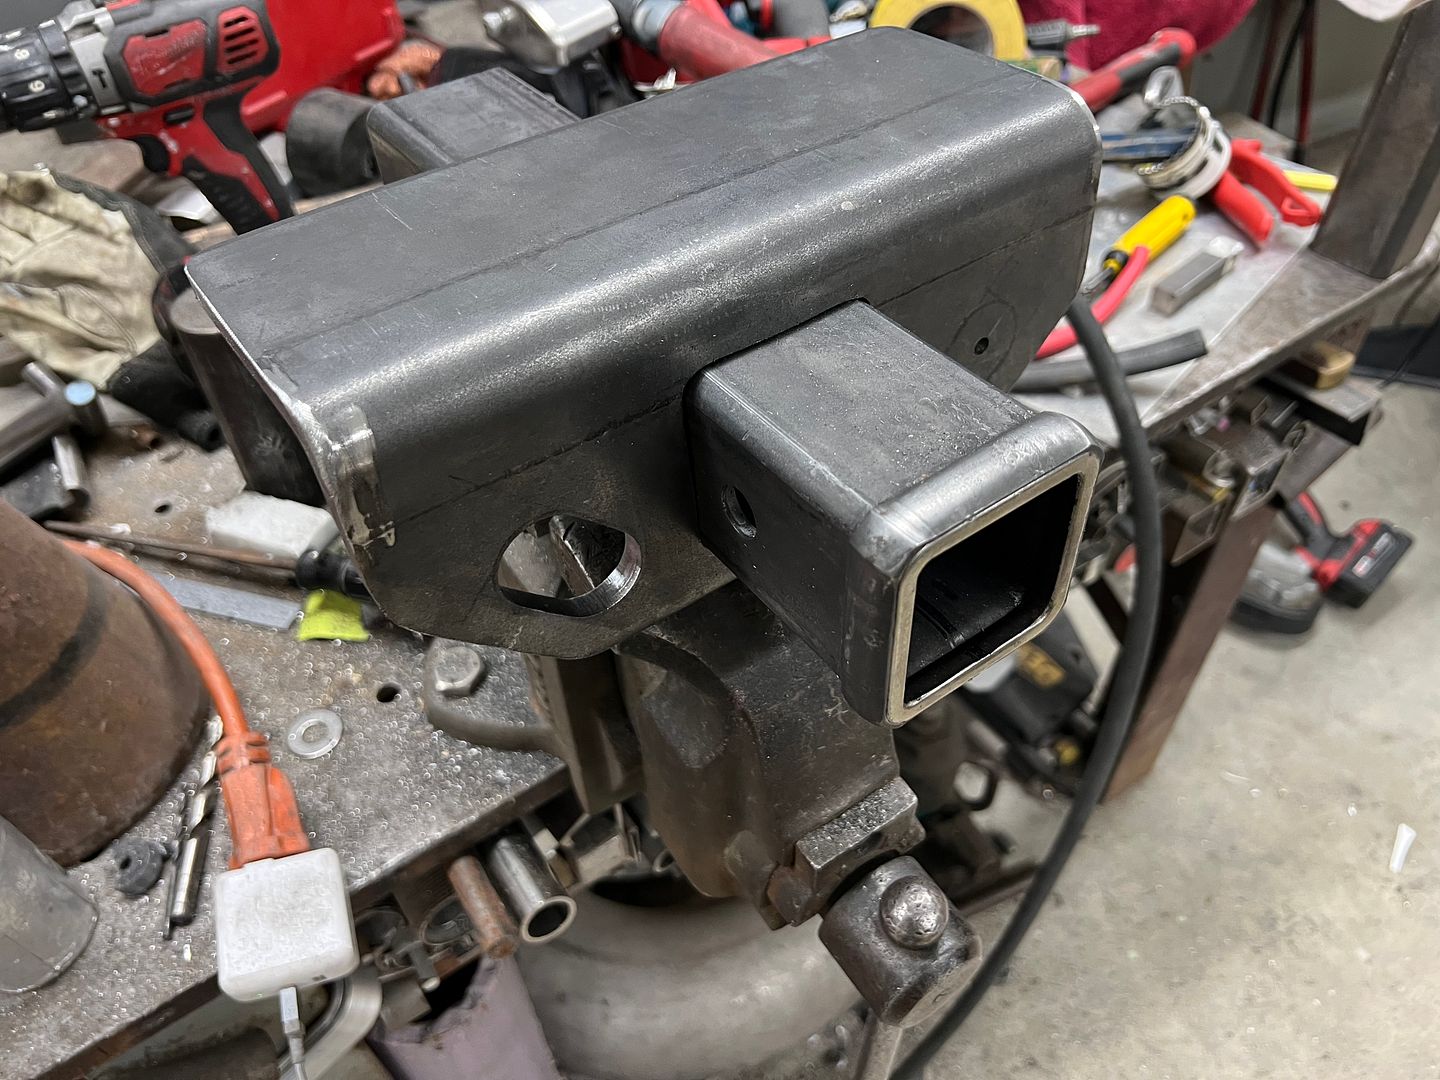 A vertical section was added to attach to an existing crossmember in front of the bumper 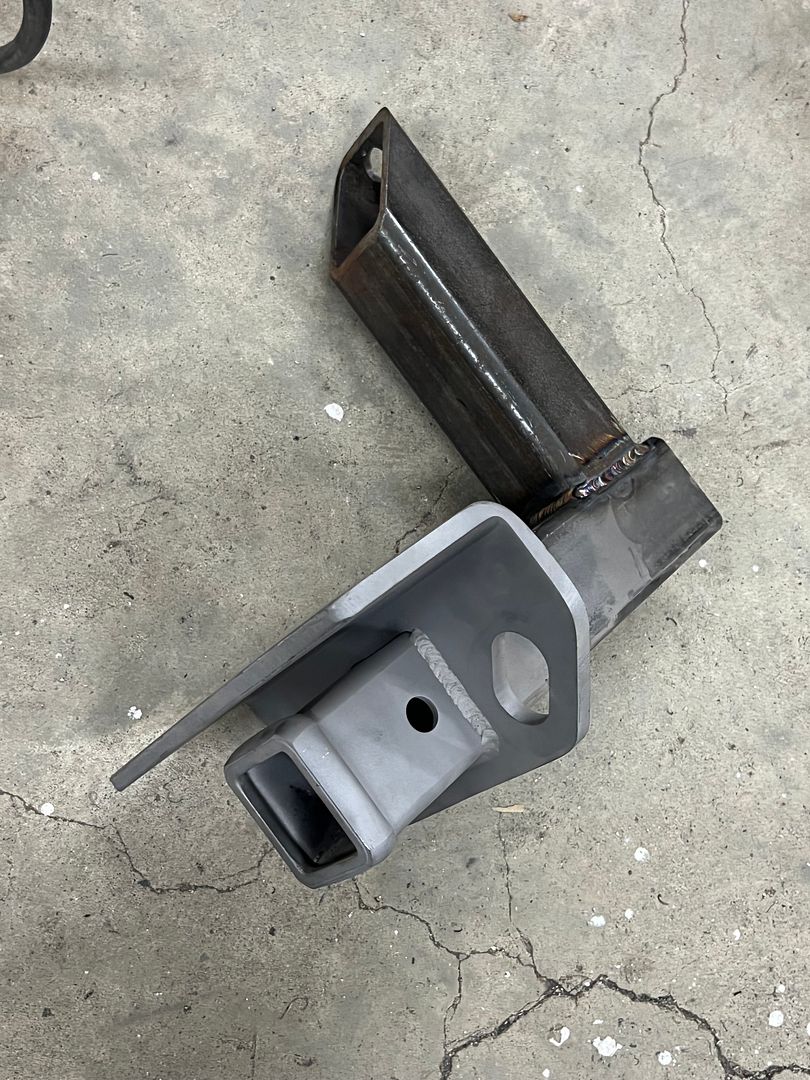 tucked under for just a bit of subtlety 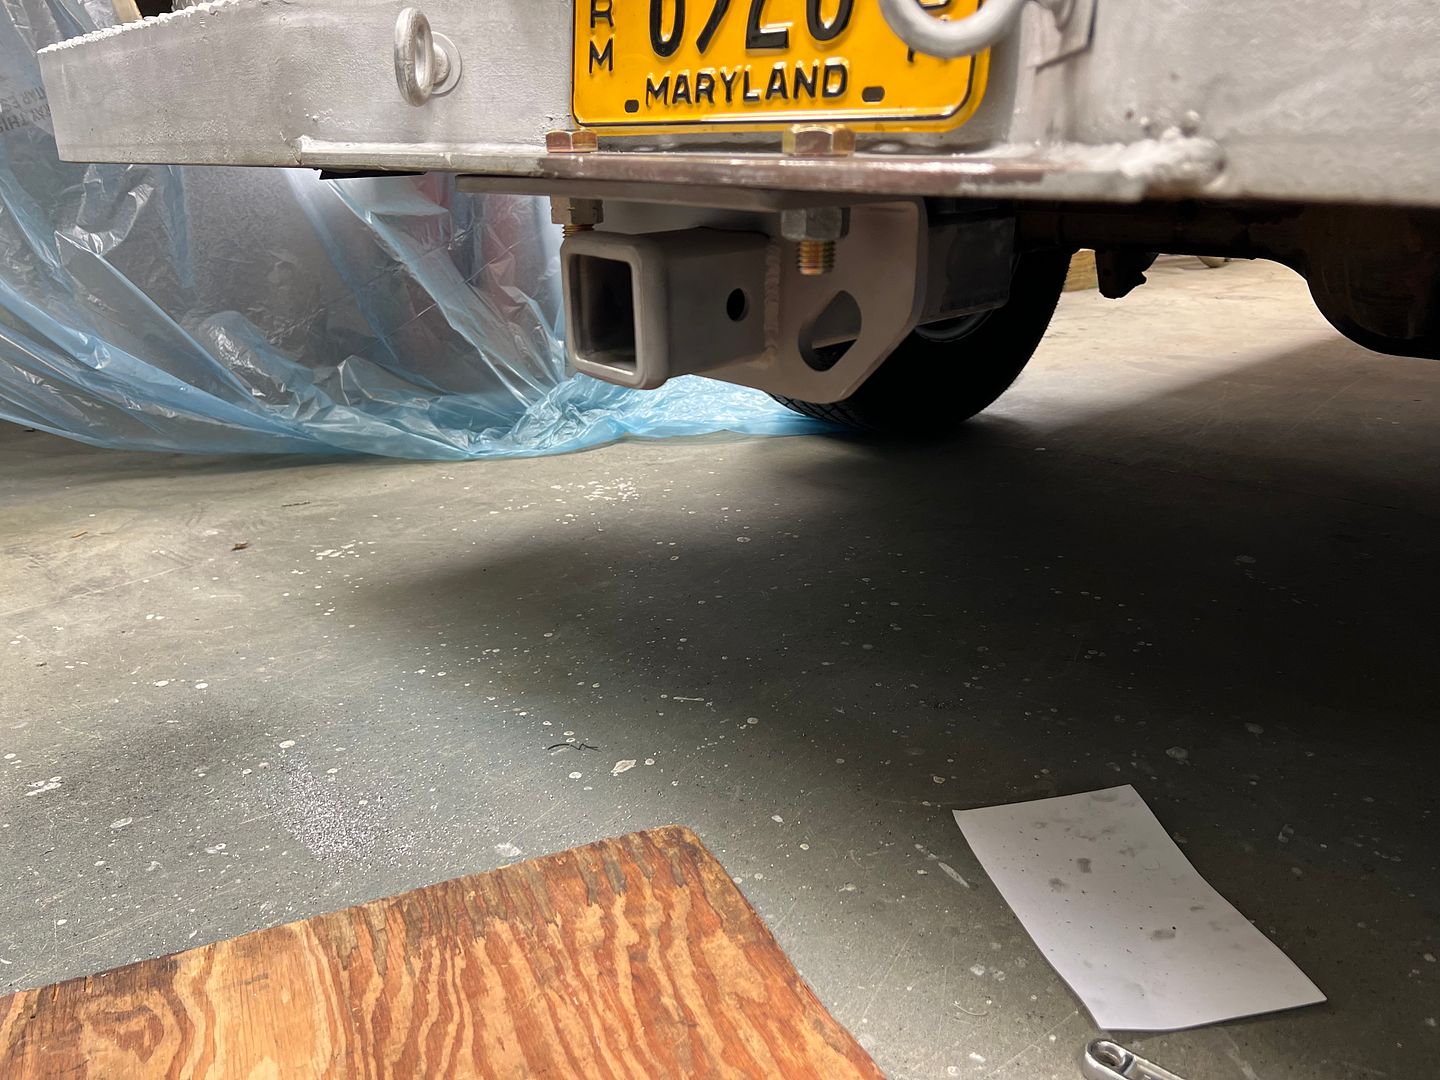 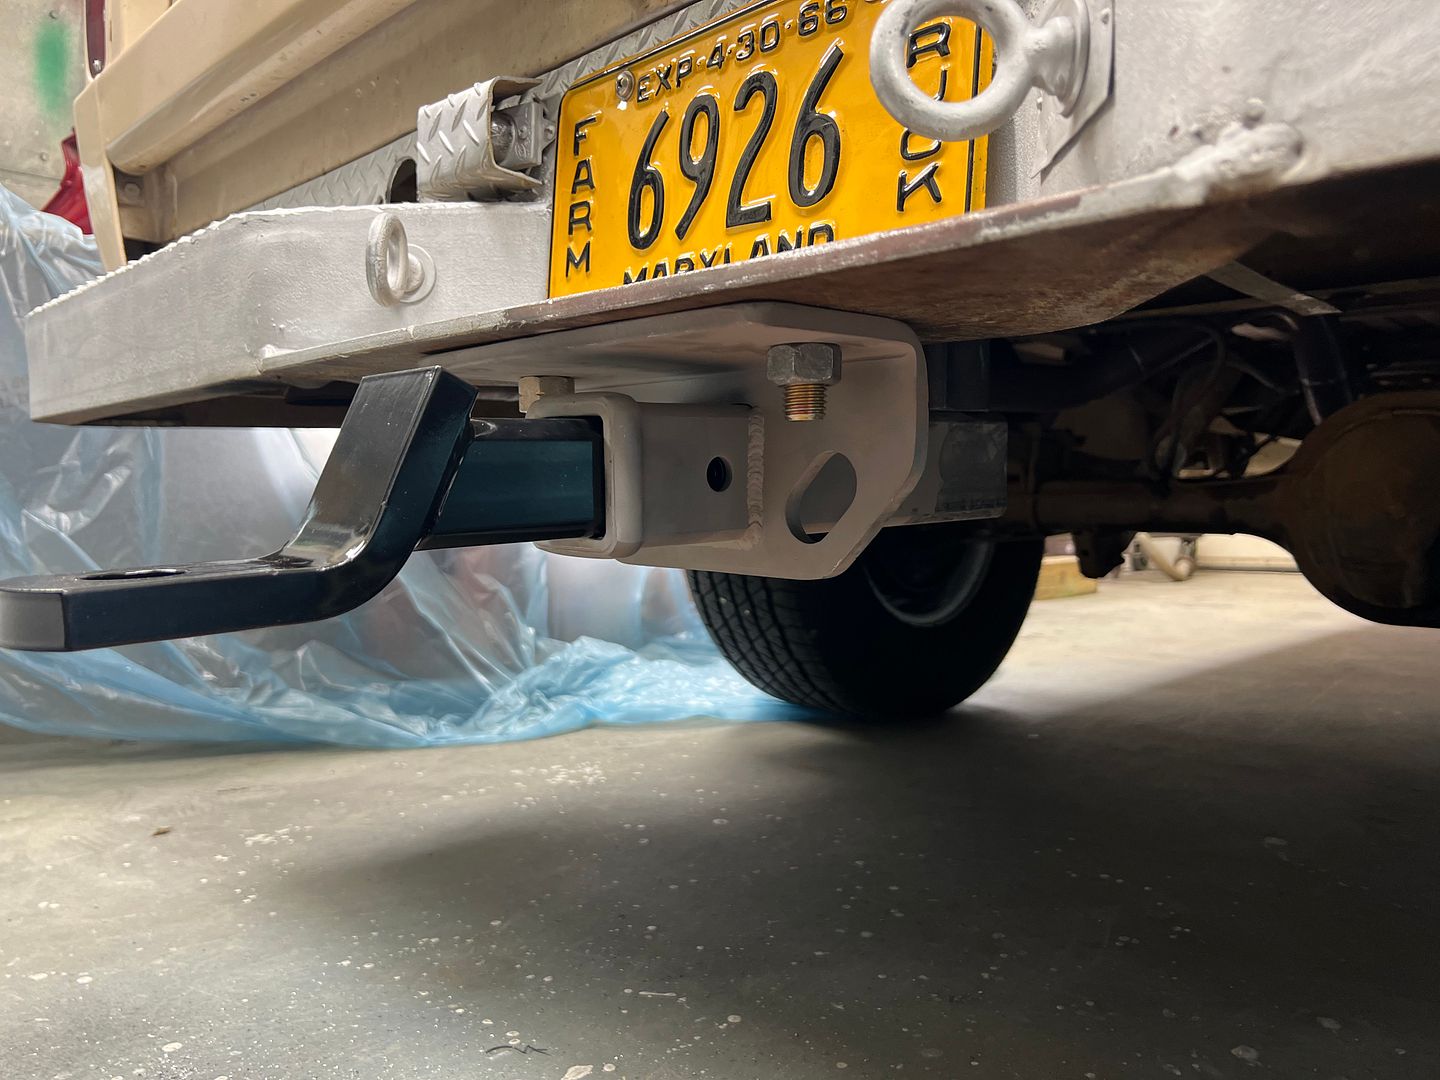 After a powder coat finish of satin black 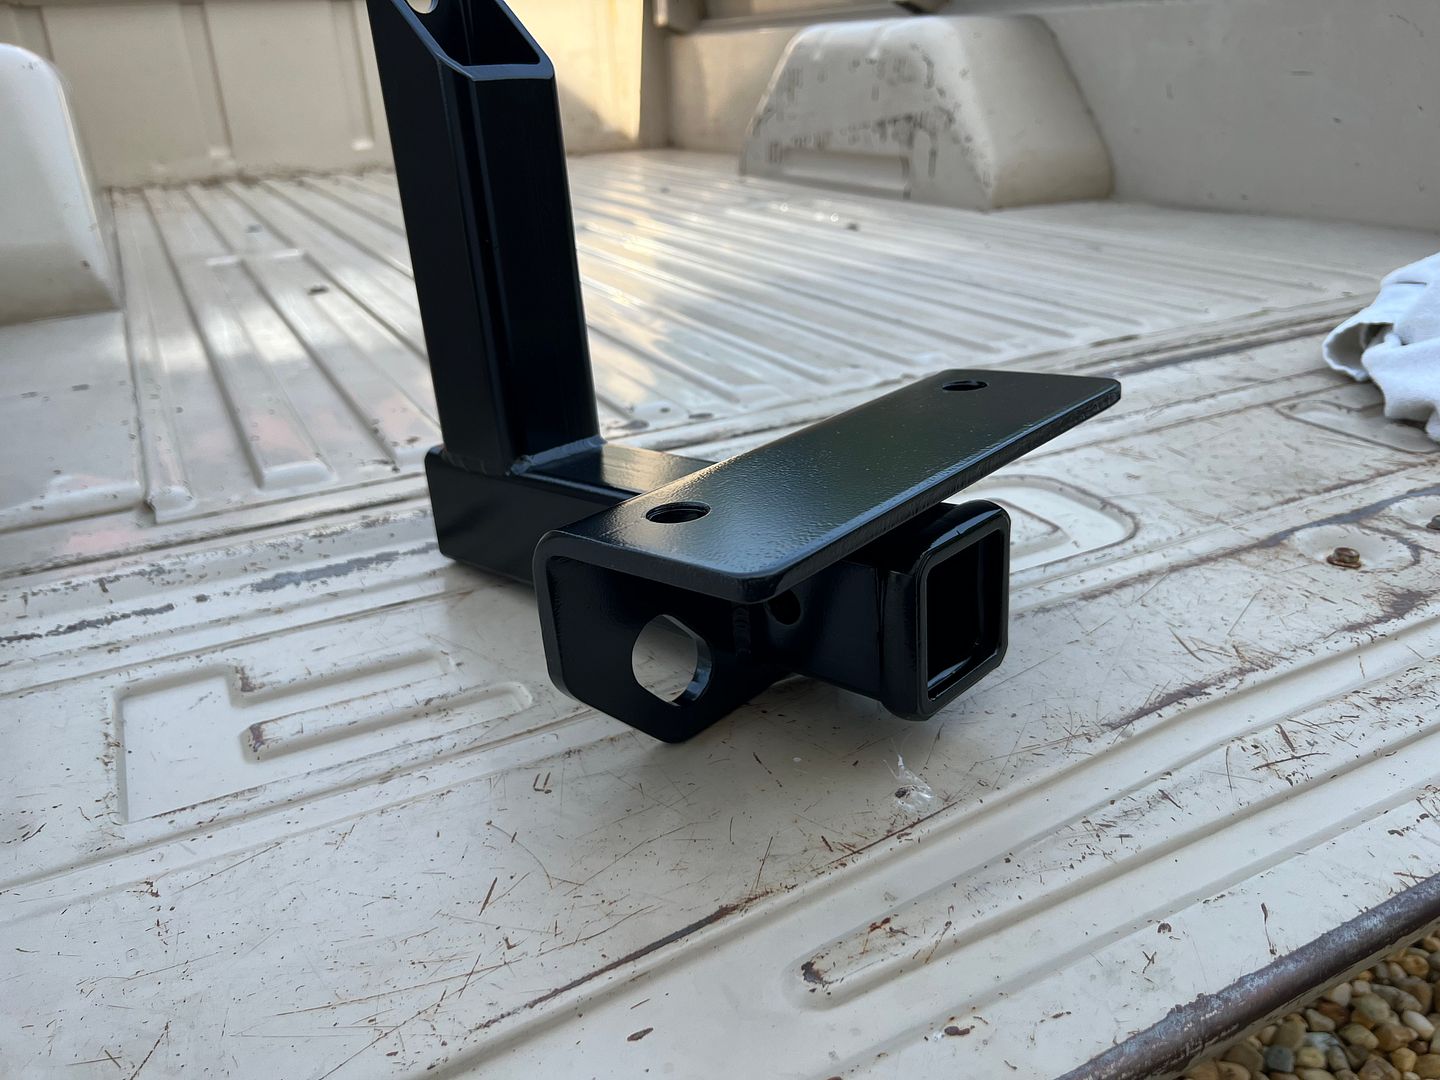 installed with some grade 8 hardware 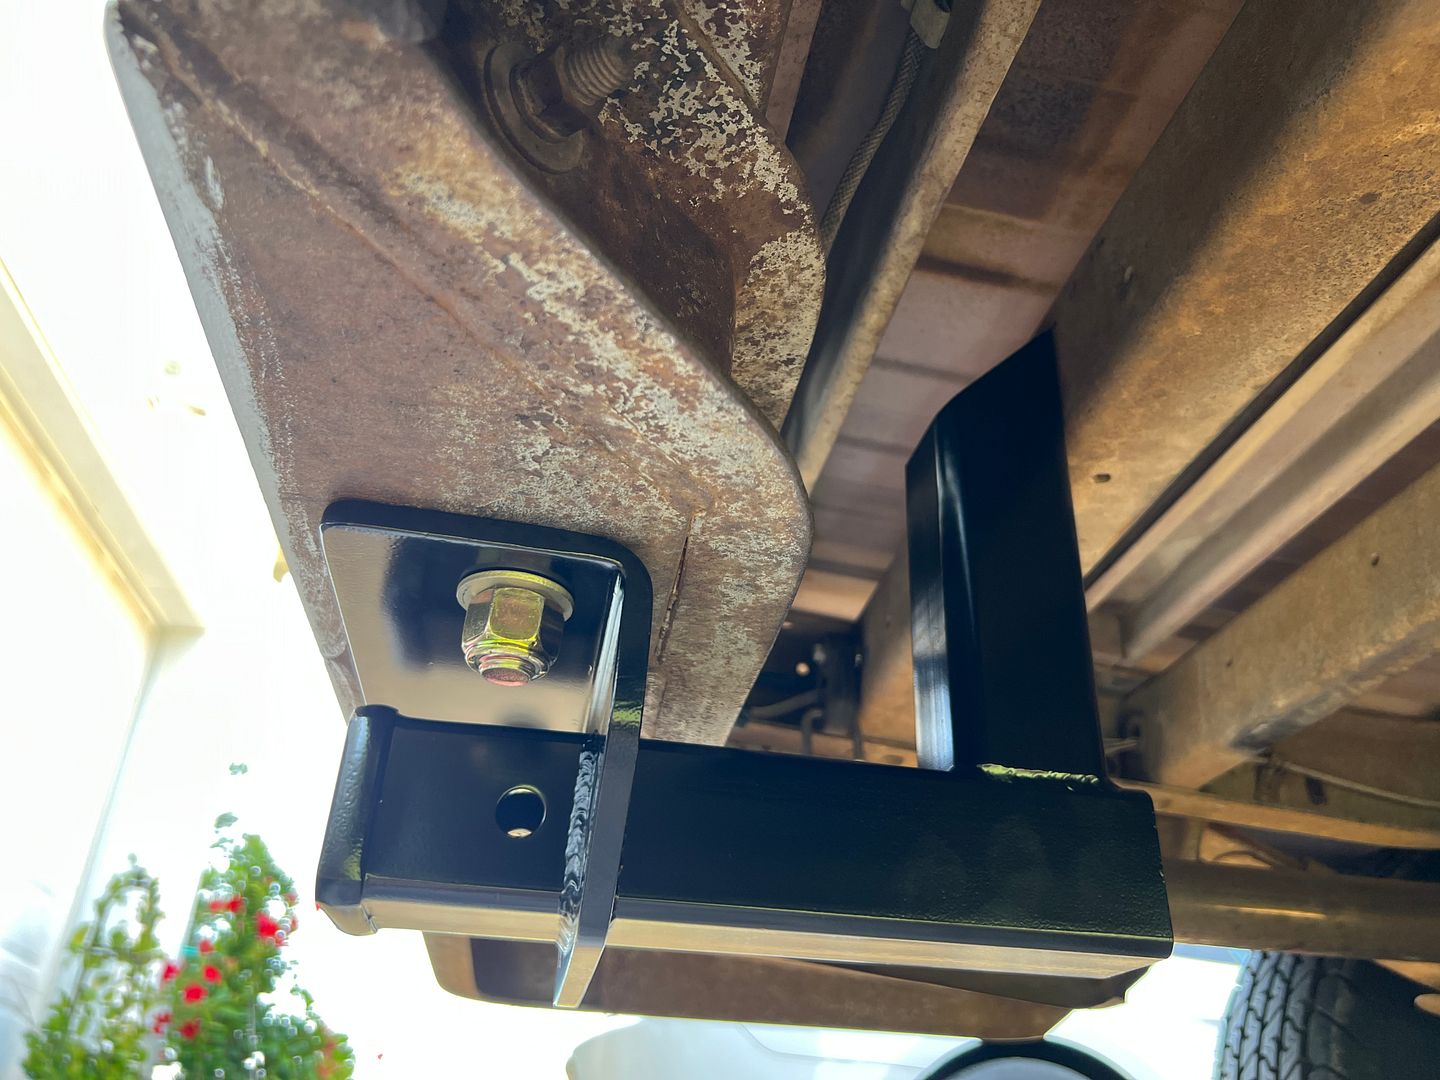 Touched up with some period correct oil base enamel aluminum paint.... 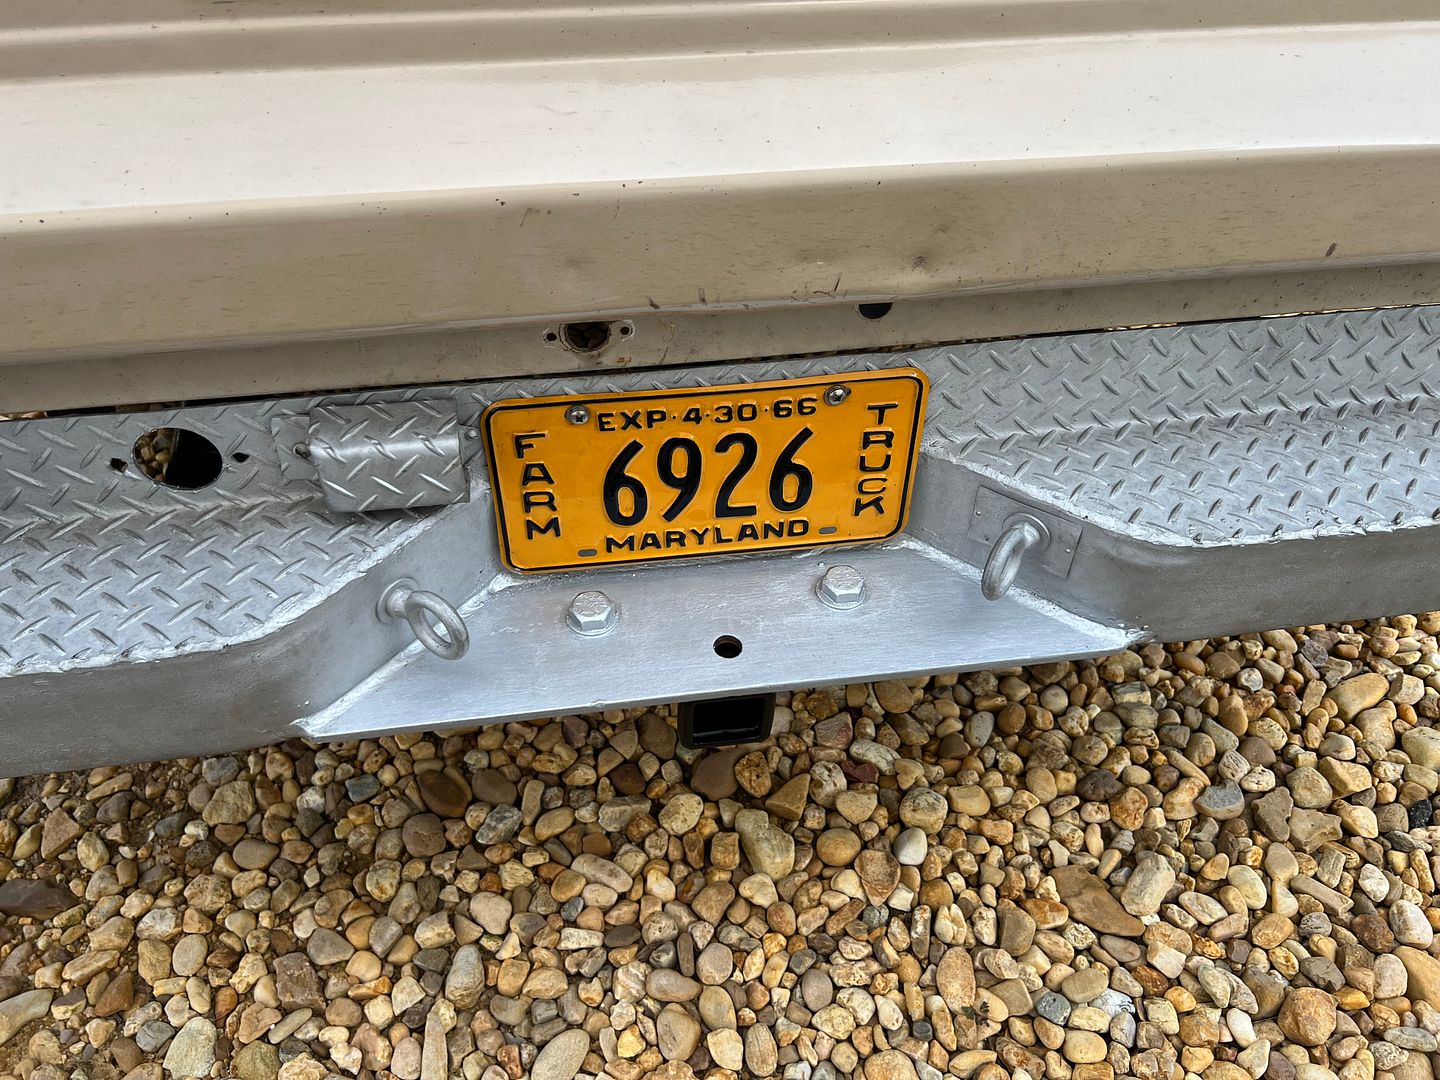 I wanted a brake controller that was as old as we could get without tapping into hydraulic brake lines. This NOS version from ebay fit the bill 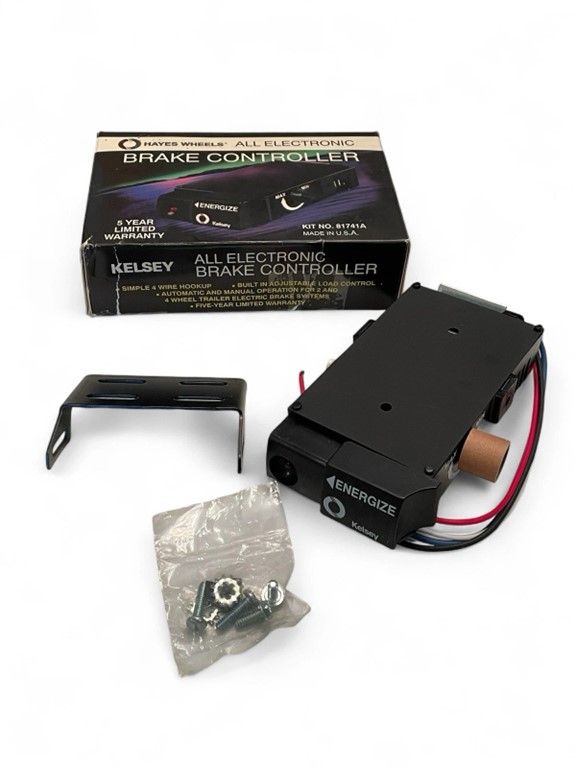 and then a test run with the car trailer to test everything out. The lights all worked out of the gate and the pendulum style brake control worked flawlessly. 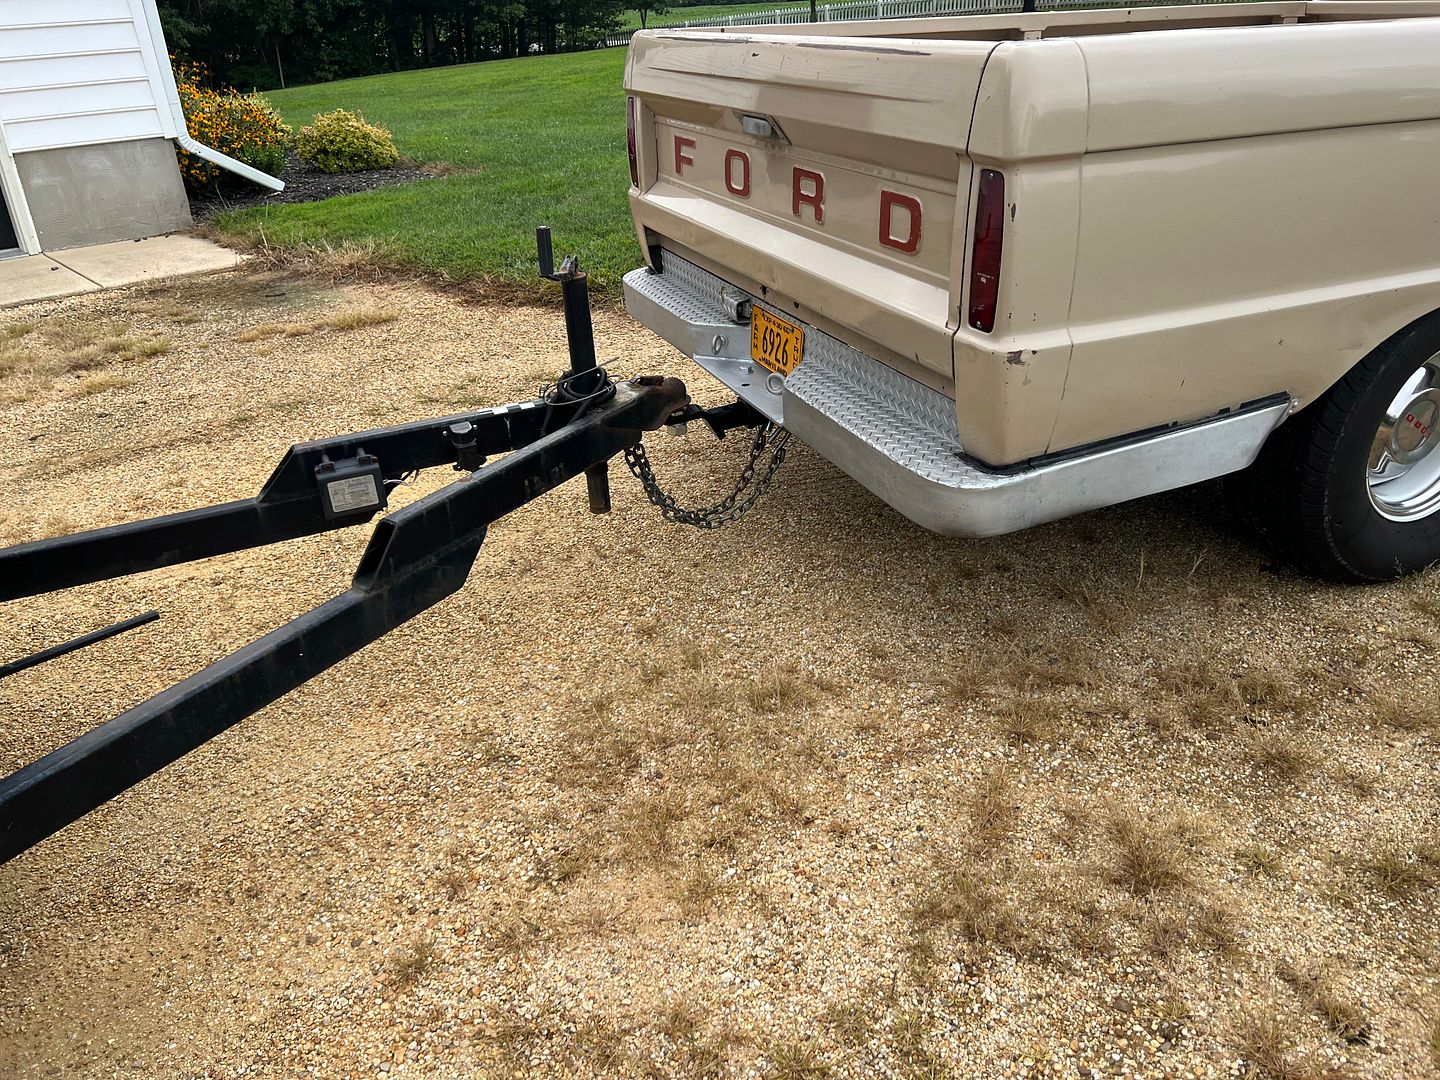 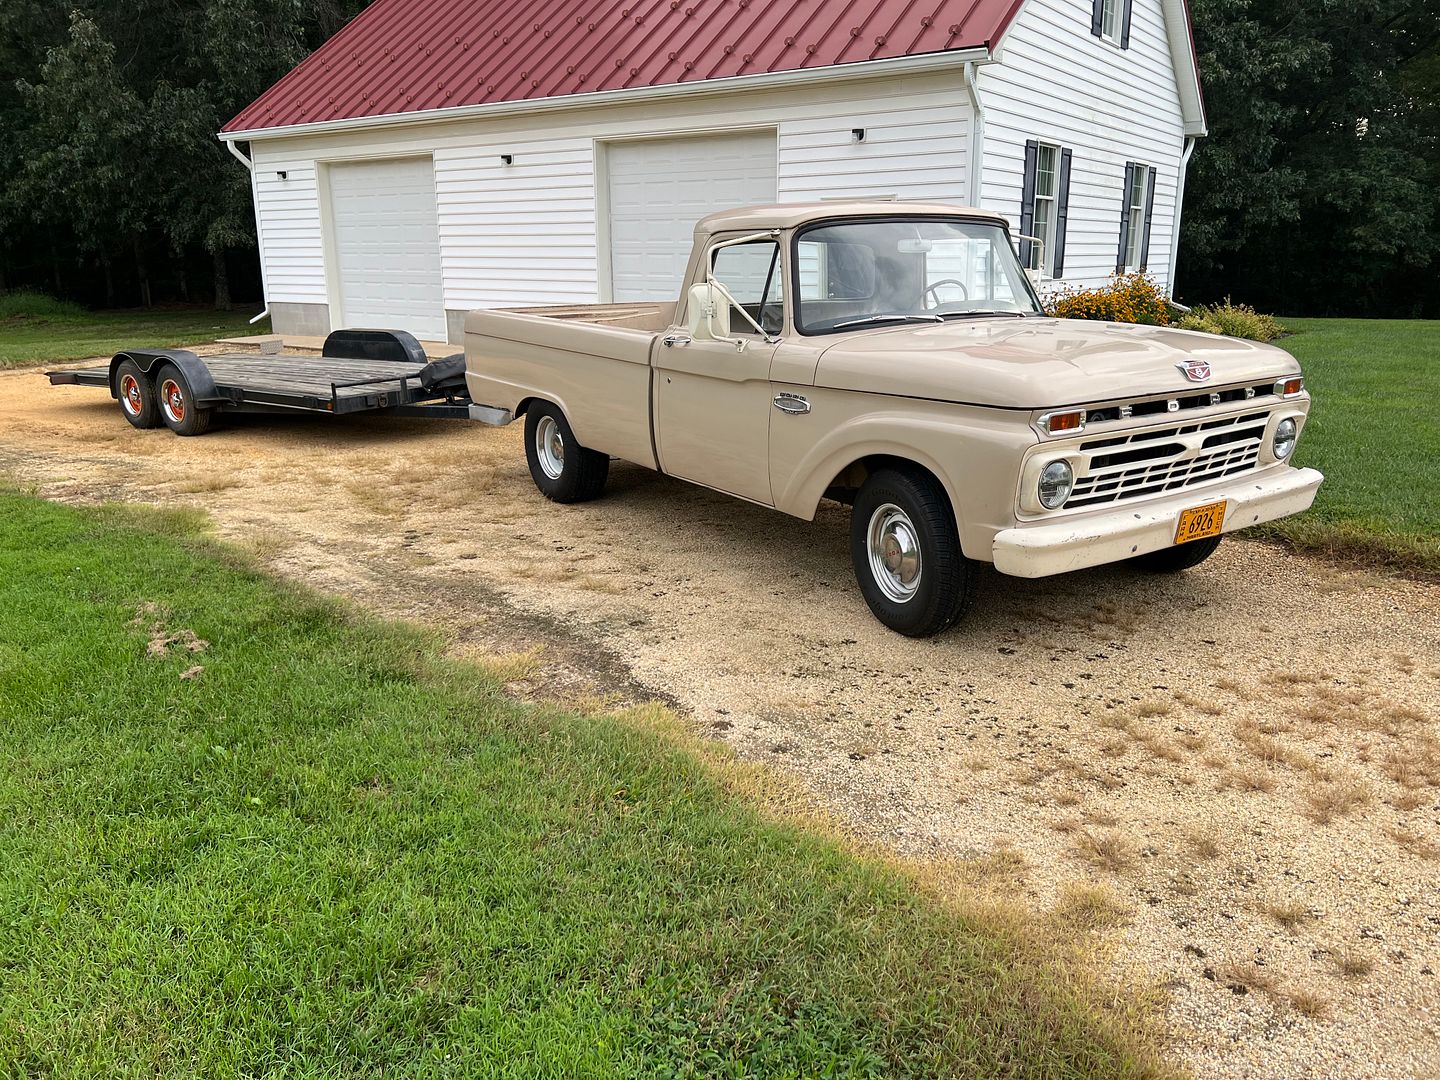 all ready for towing duties, the trailer was returned and we did a couple of photo ops. Point Lookout lighthouse... 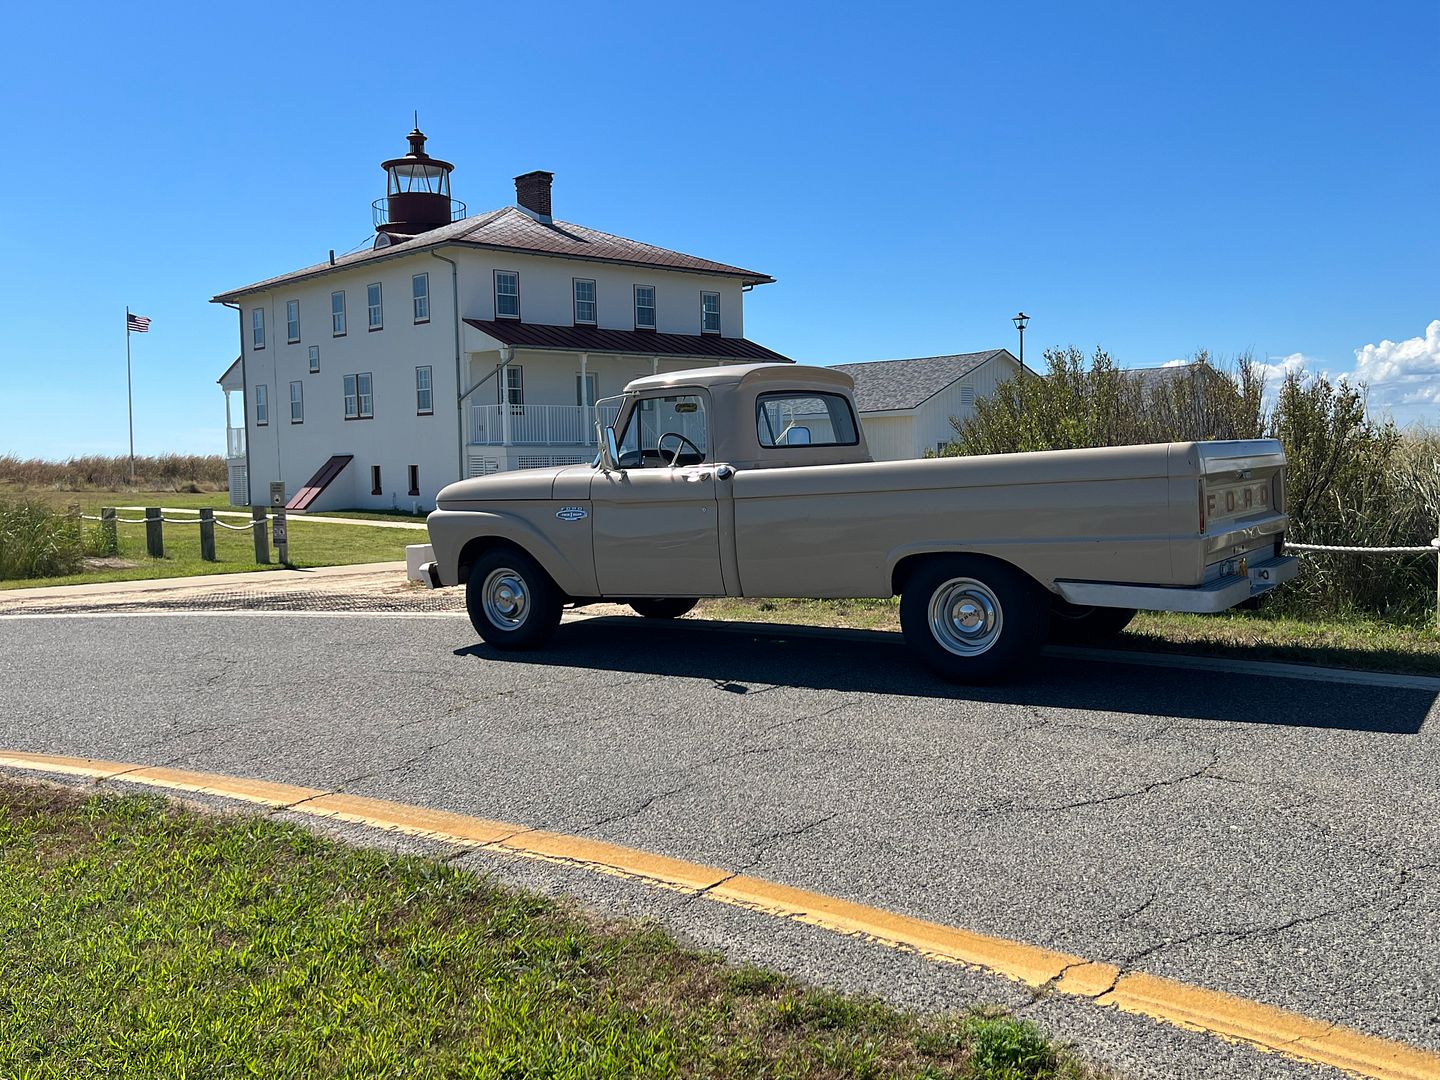 and Buzzy's store.... 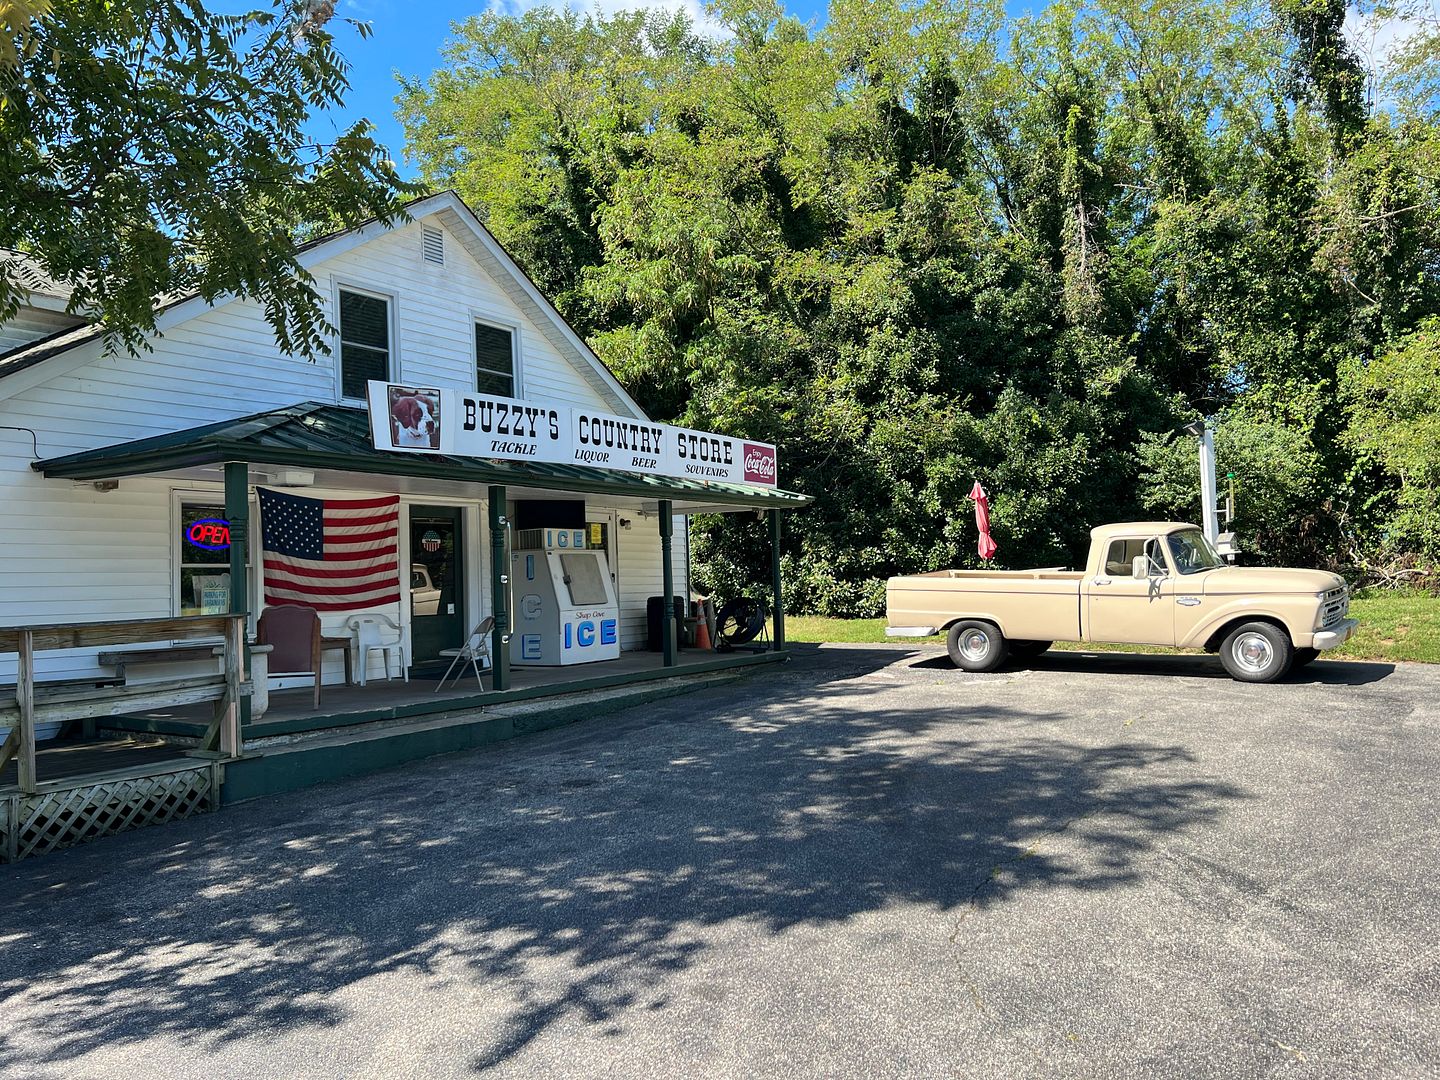
__________________
Robert |
|
|
|
|
09-18-2025, 11:33 AM
|
#1409 |
|
Registered User
Join Date: Jan 2013
Location: Leonardtown, MD
Posts: 1,666
|
Re: 55 Wagon Progress
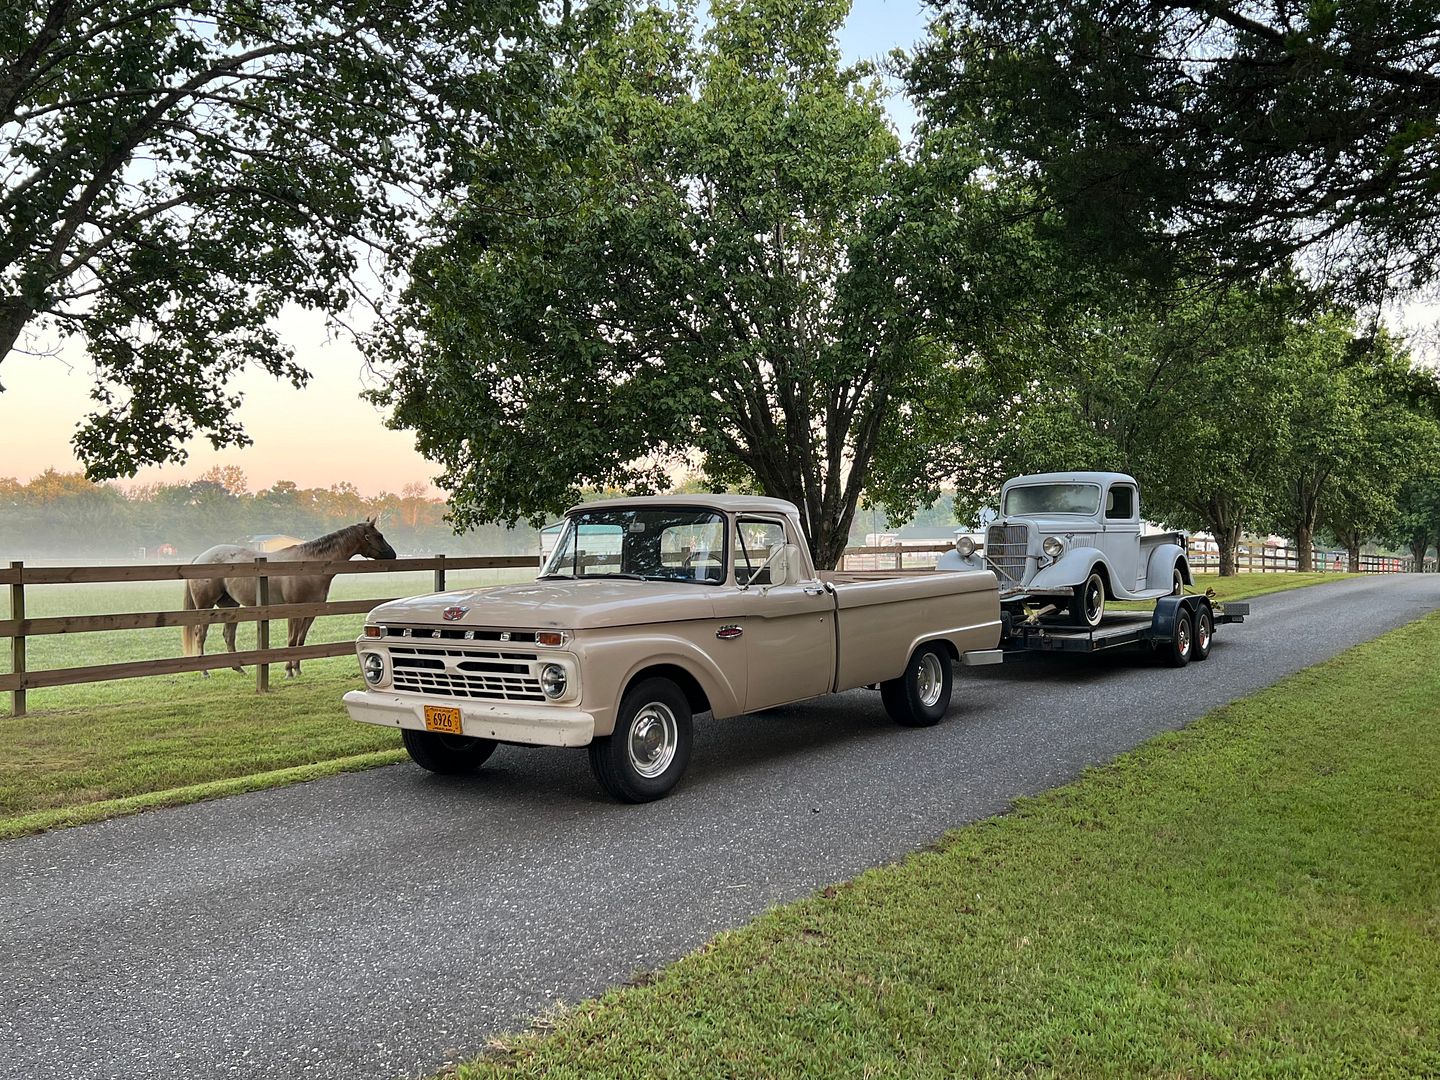
And now for the real reason we got the trailer hitch all squared away. A friend of mine has a 35 Ford PU that he bought out of OH, where it had been sitting inside a building for a number of years. He had just started the disassembly for starting on the frame mods, and there was a benefit car show locally last weekend that I thought WE should attend. I tried twisting his arm into bolting things back together so we could take it to the show, but it really helped that his wife agreed with me. He and his wife have a local horse farm, and when I stopped after loading up to grab a picture, he says to wait a couple minutes as the horse in the adjacent pasture was nosy and would walk over. Sure enough, and it really made the picture..
__________________
Robert |
|
|
|
|
09-18-2025, 03:46 PM
|
#1410 |
|
BlahBlahBlah
Join Date: Feb 2002
Location: Wa.
Posts: 20,571
|
Re: 55 Wagon Progress
That really is a great picture!
__________________
... |
|
|
|
|
09-19-2025, 07:31 AM
|
#1411 |
|
Registered User
Join Date: Jan 2013
Location: Leonardtown, MD
Posts: 1,666
|
Re: 55 Wagon Progress
Thanks! glad I stopped and waited for the horse.
__________________
Robert |
|
|
|
|
09-22-2025, 01:52 PM
|
#1412 |
|
Registered User
Join Date: Sep 2008
Location: Newport, North Carolina
Posts: 688
|
Re: 55 Wagon Progress
That is a great picture...thanks for sharing!
|
|
|
|
|
09-29-2025, 08:16 AM
|
#1413 |
|
Registered User
Join Date: Jan 2013
Location: Leonardtown, MD
Posts: 1,666
|
Re: 55 Wagon Progress
Wiring... hard to show all the details, but hope some of this is of interest...
Our rear sub uses those spring loaded connectors, which aren't very friendly to stranded wire. We've got these pin contacts (McMaster) so we eliminated the insulation to be able to use a W crimp, and added some glue lined heat shrink for strain relief.  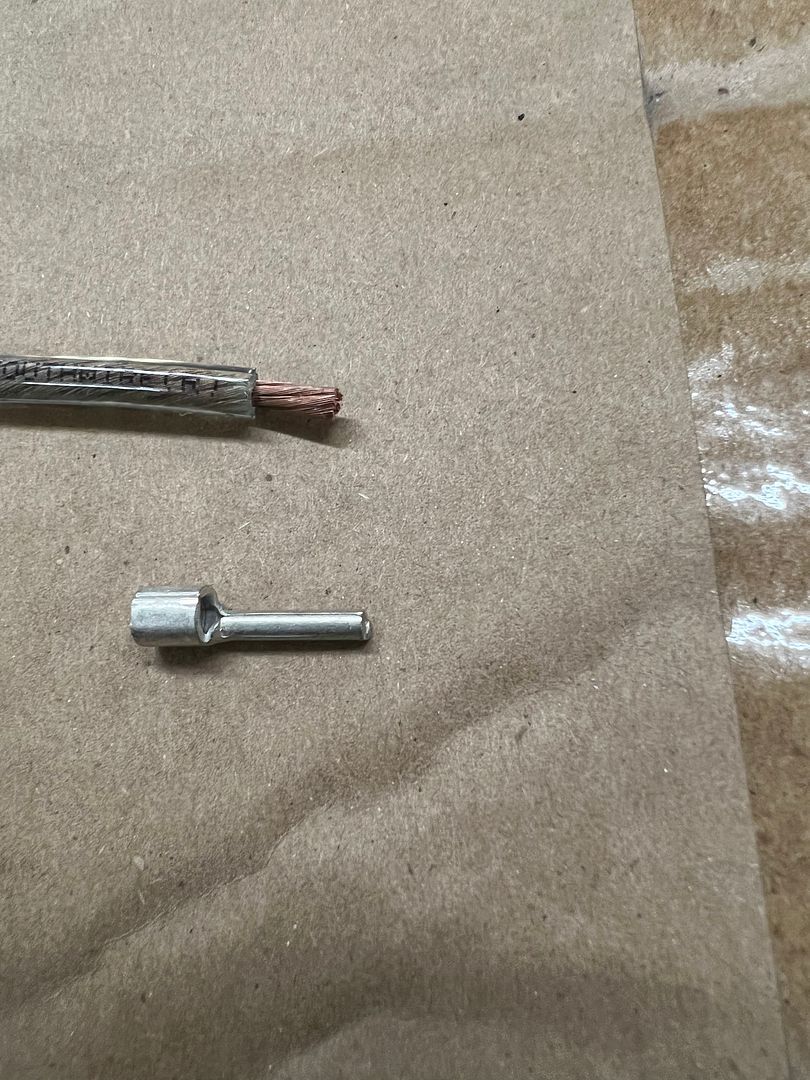 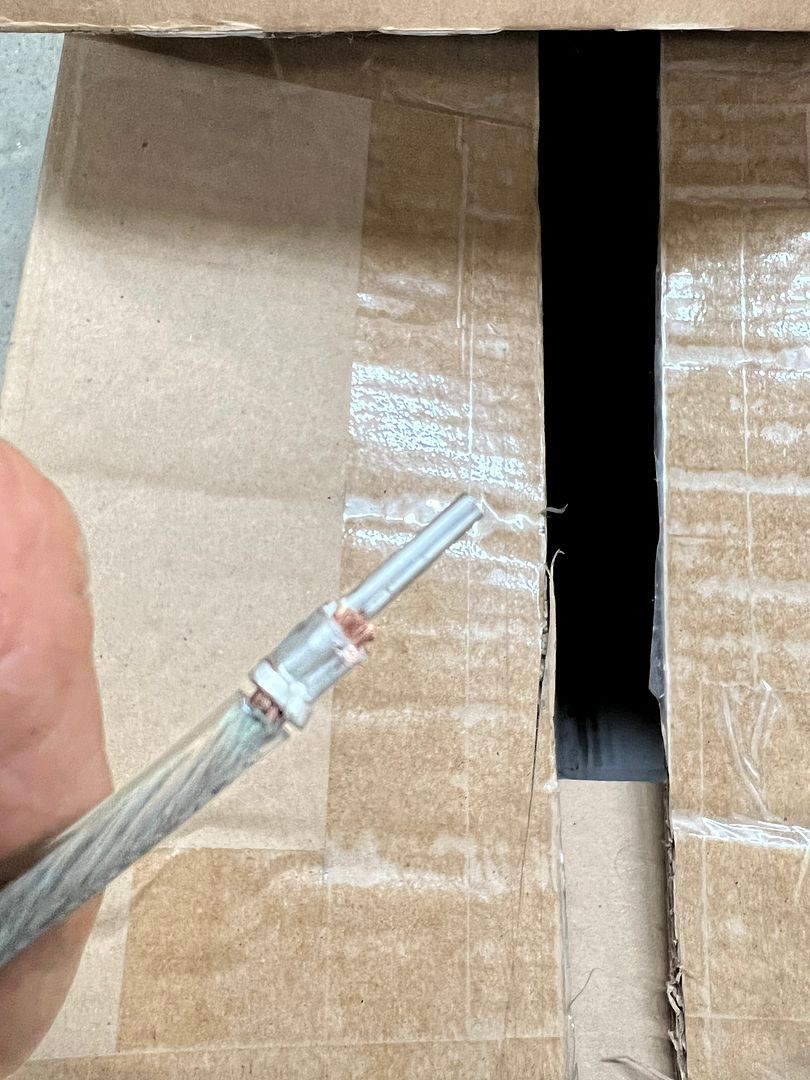 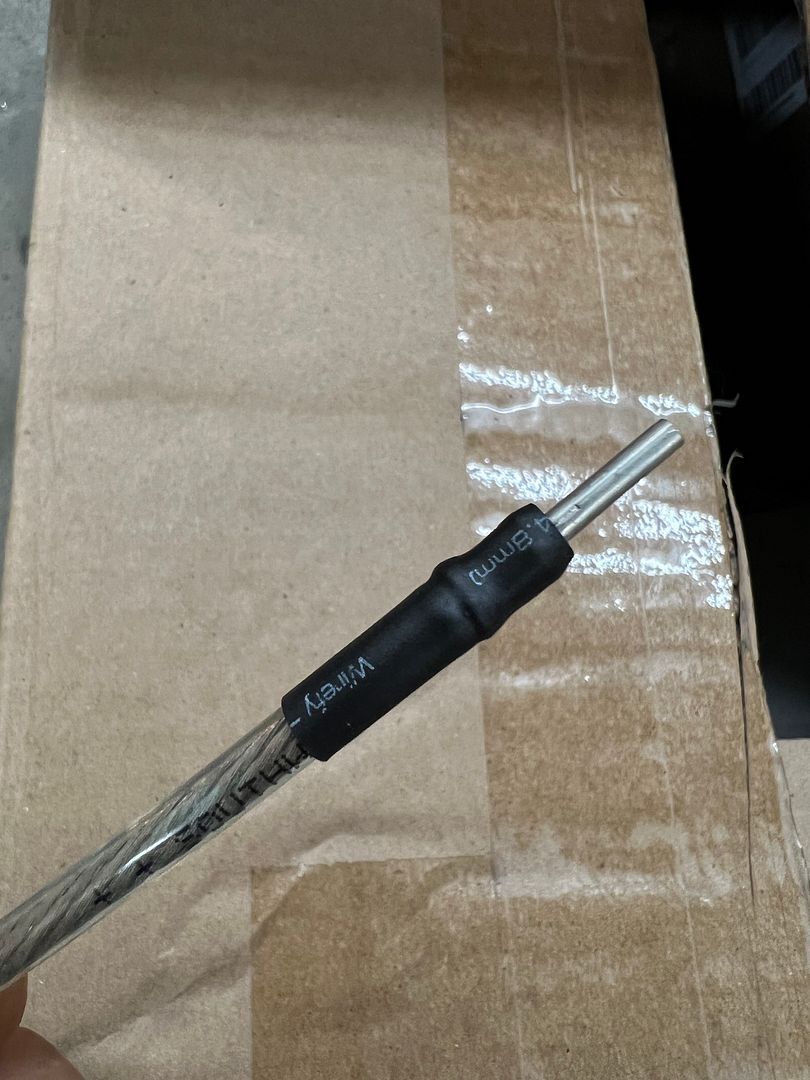 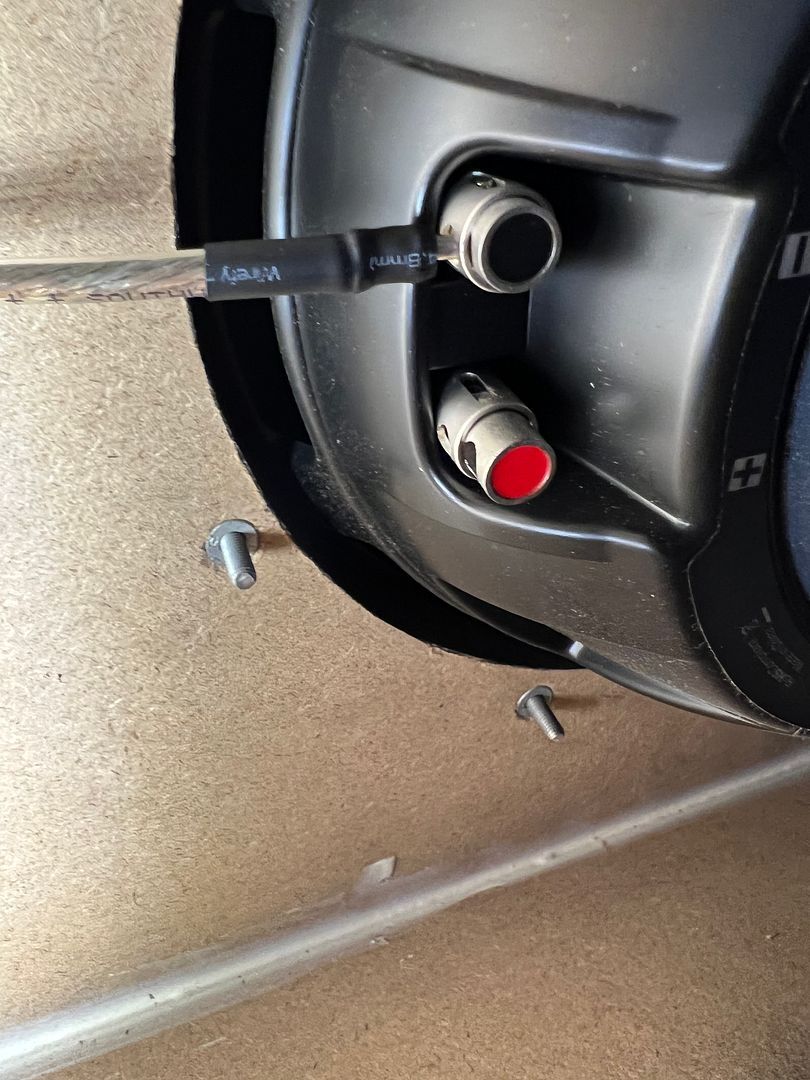 We have a bundle coming up the passenger side of the block, mainly power to alternator and fuse block, and didn't want this resting on the front edge of the intake. We were leaning toward an adel clamp but wanted to isolate it a bit from the engine heat. We opted for a standoff, machined out of phenolic and uses a heli-coil for the internal threaded hole. 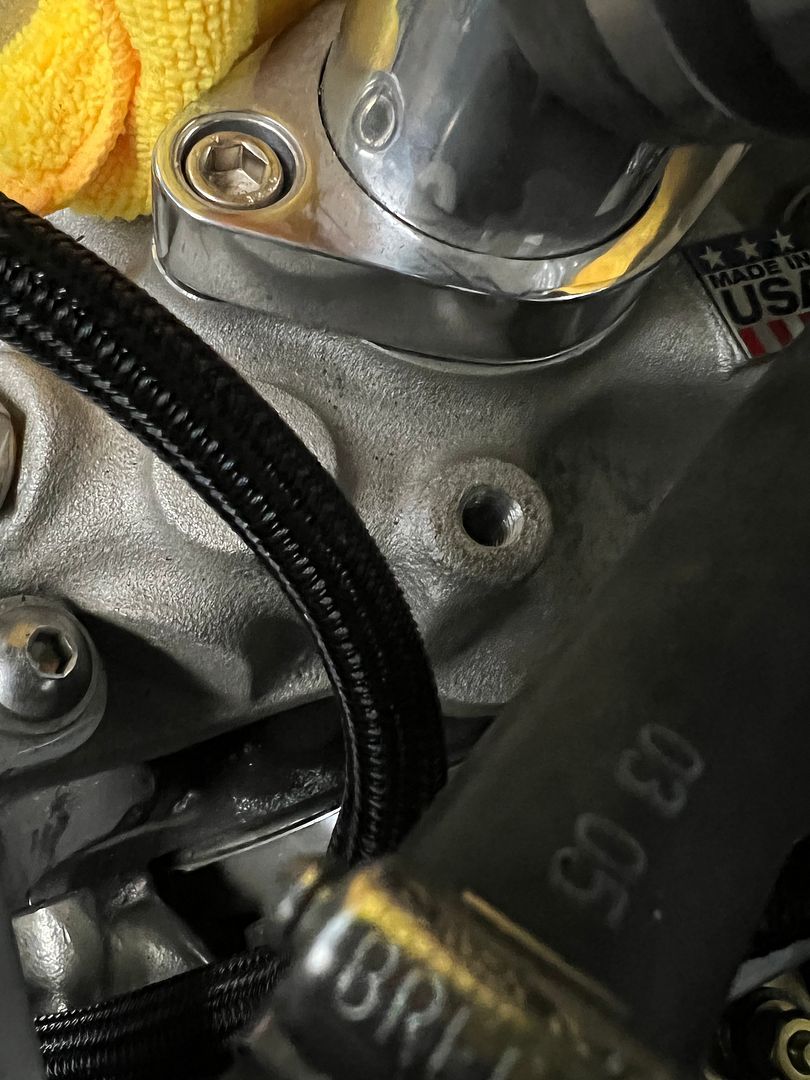 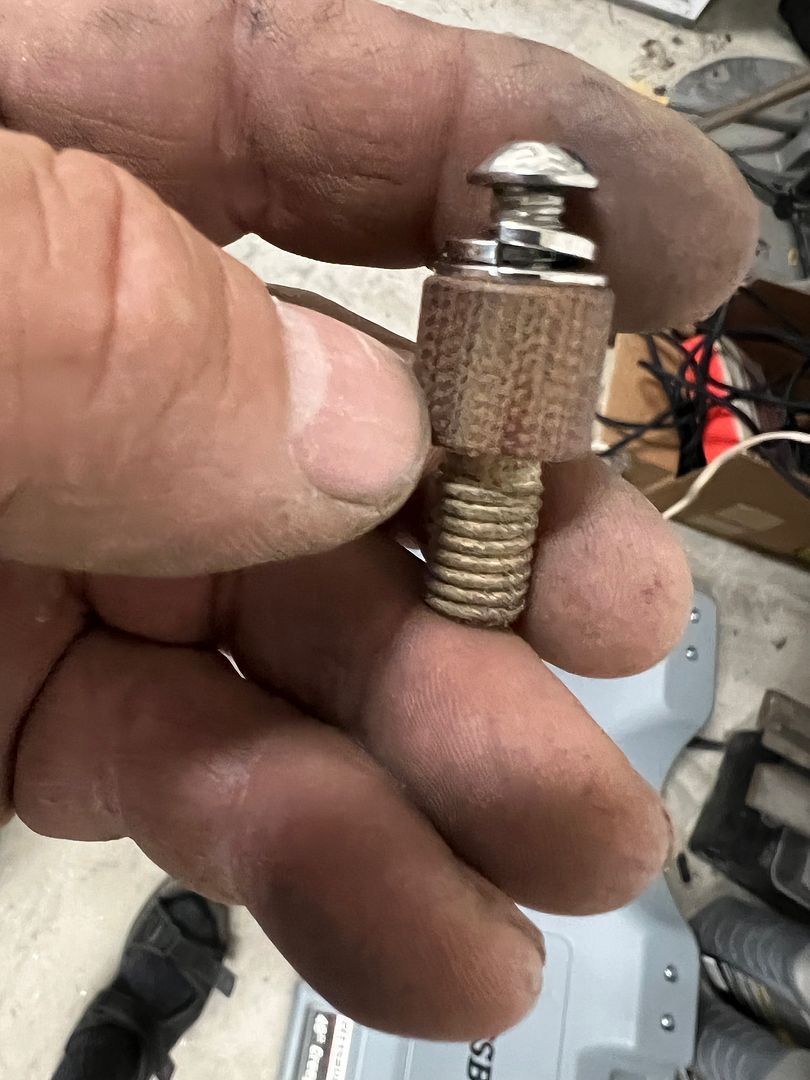 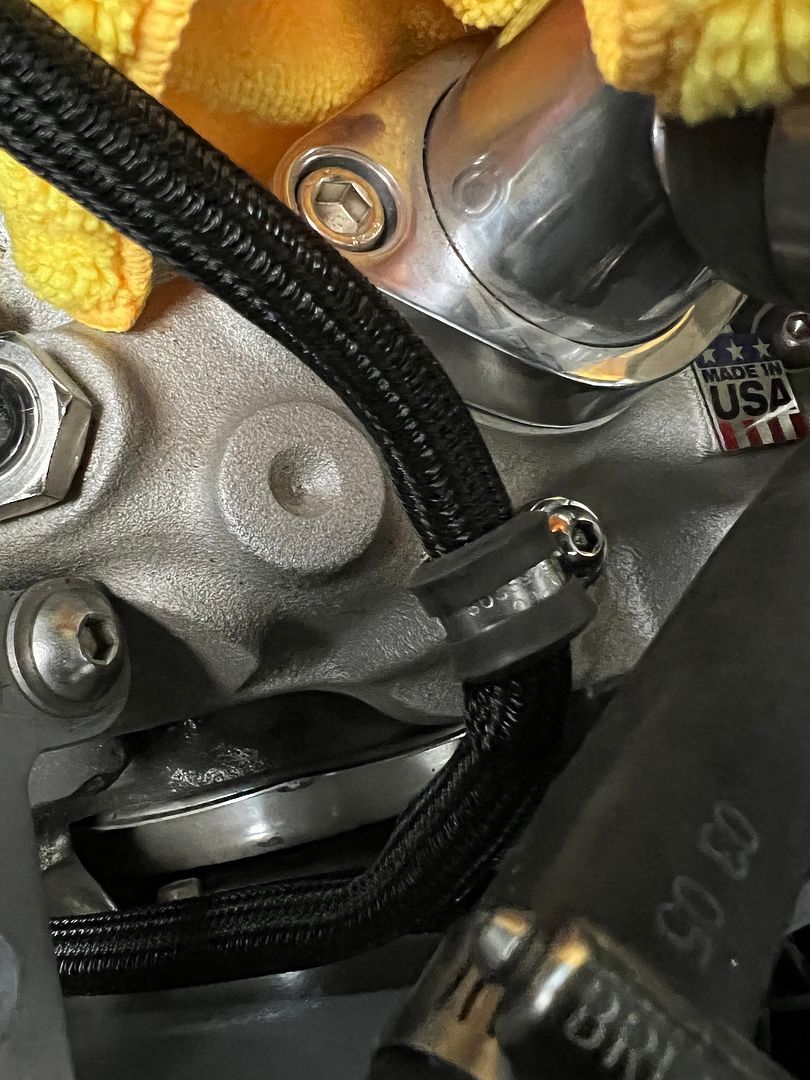 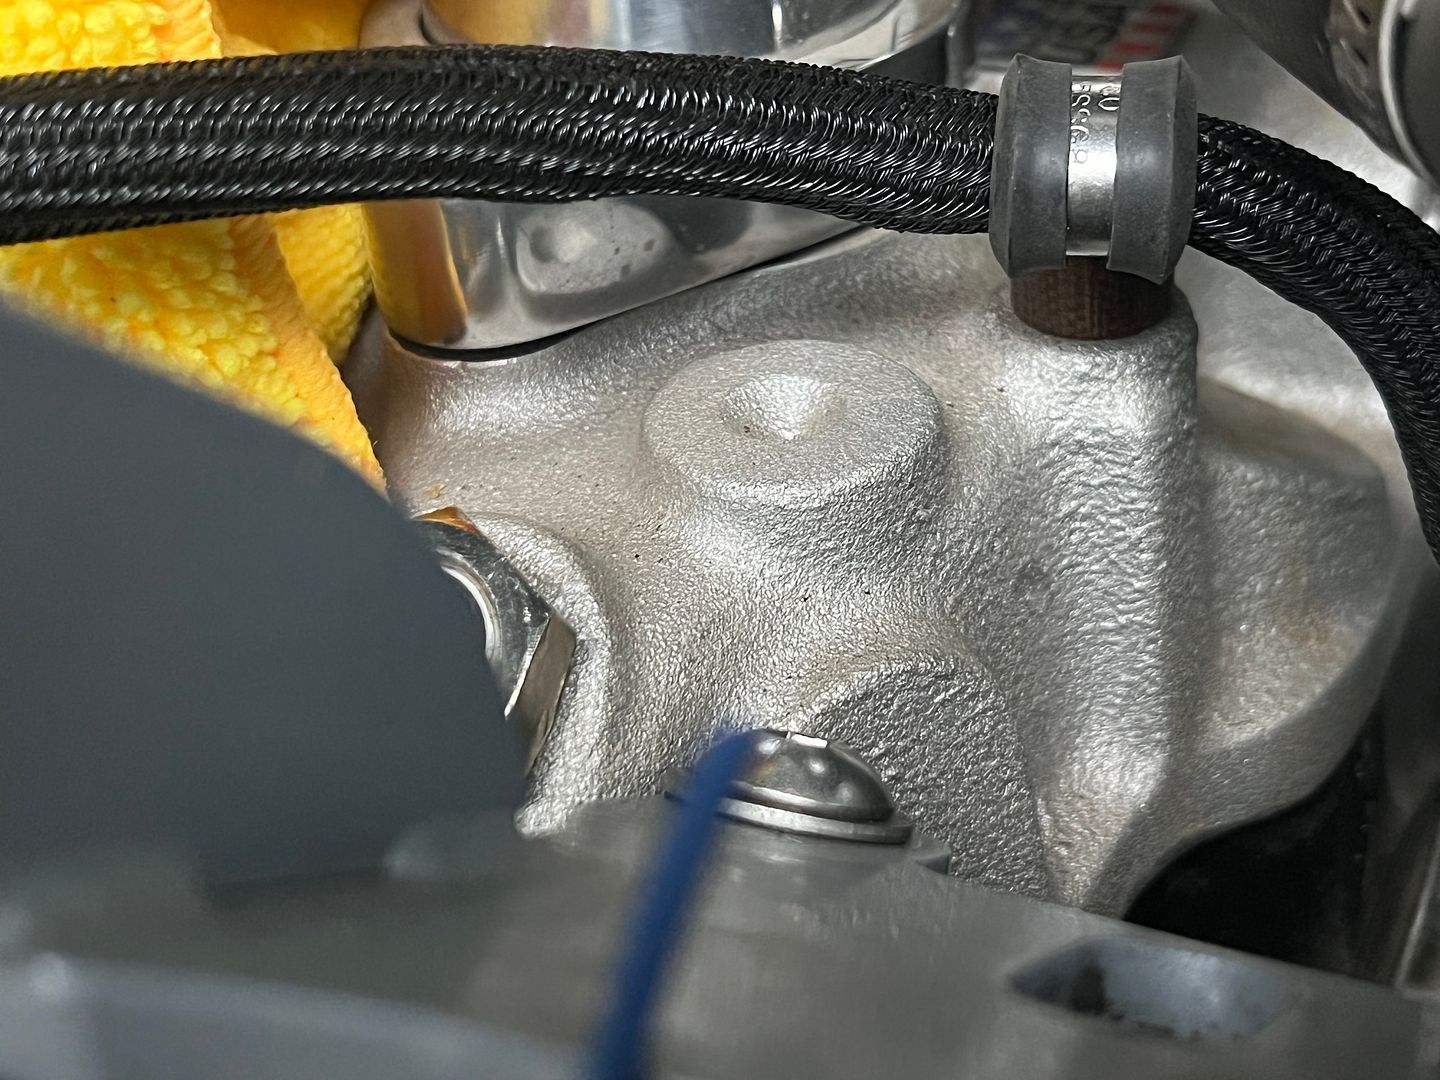 Next, the length of our pre-made spark plug wires limited the routing path. They needed to cross over the valve cover but keeping them there was a challenge. None of the available loom guides worked, so let's make our own out of 16 gauge stainless. 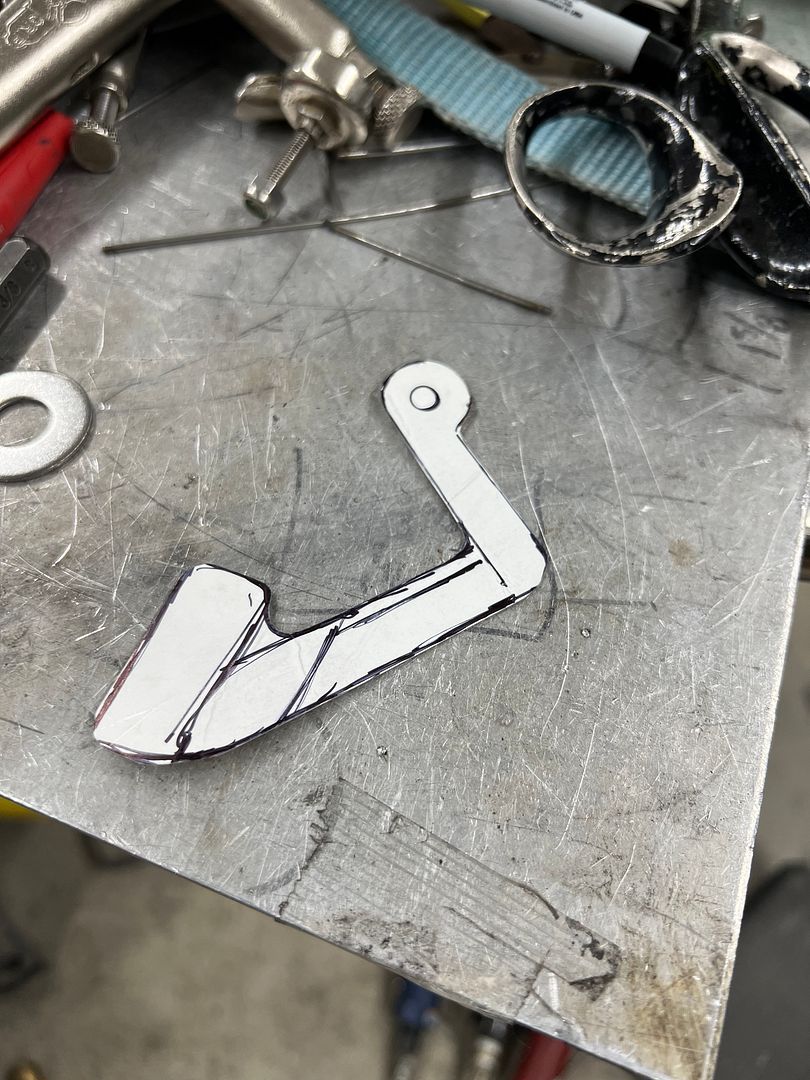 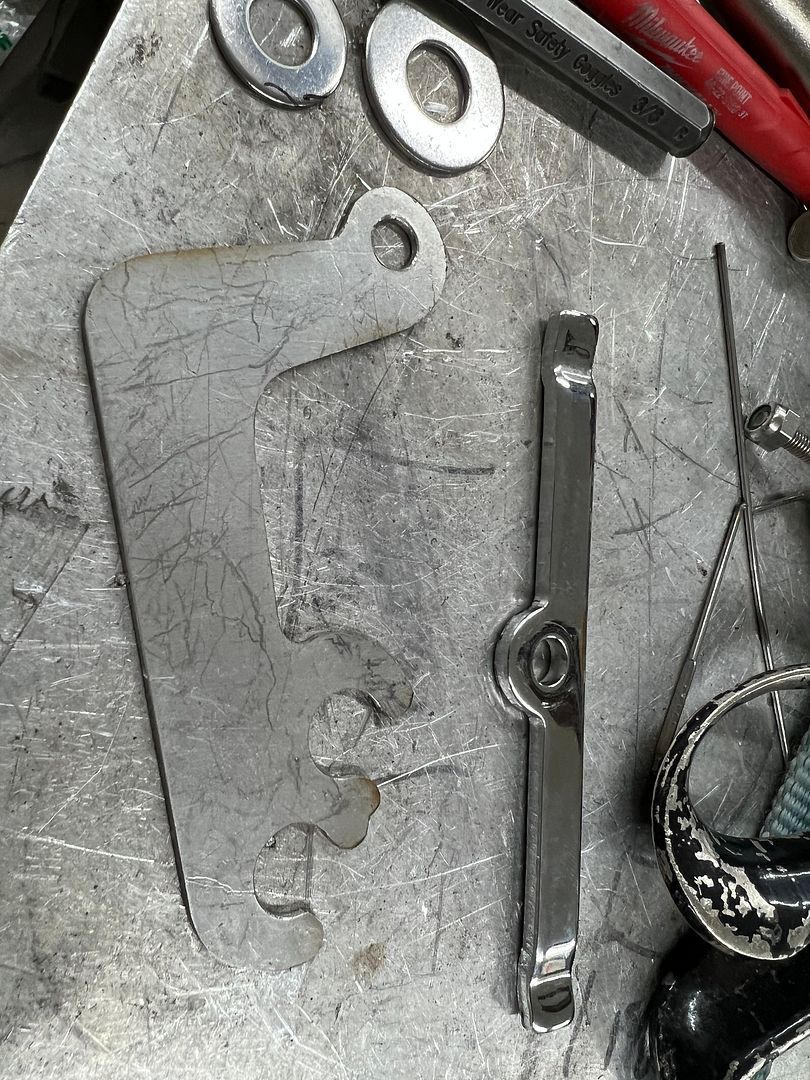 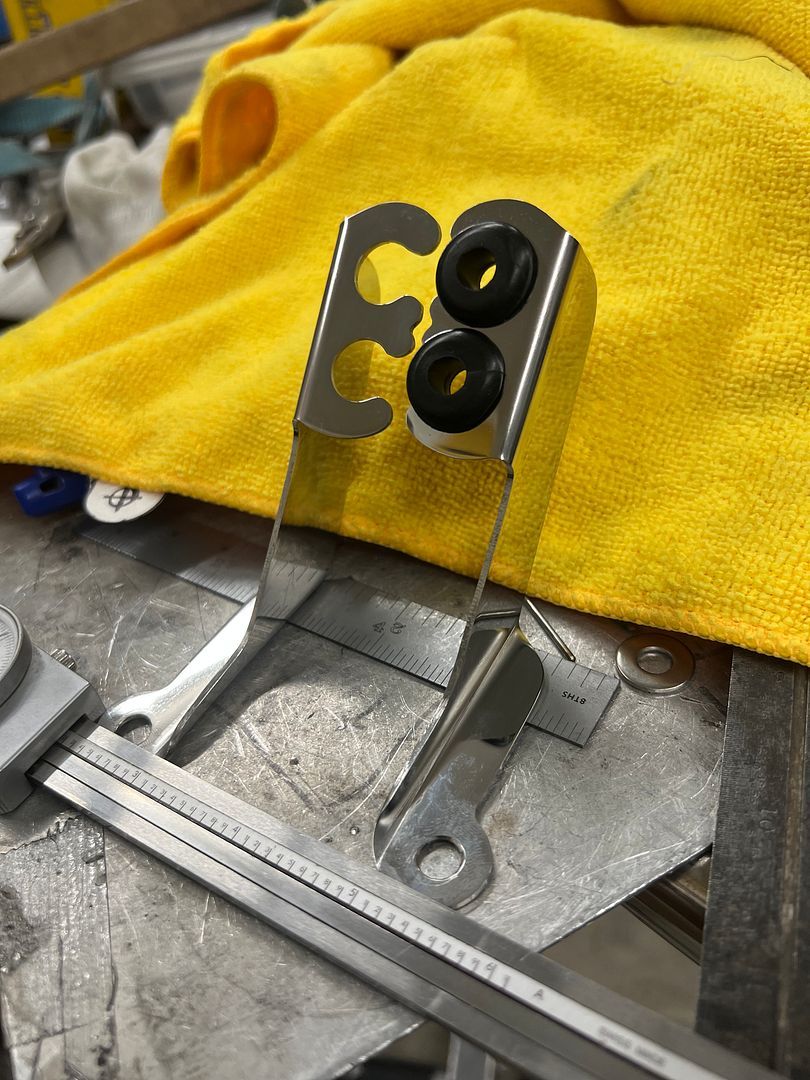 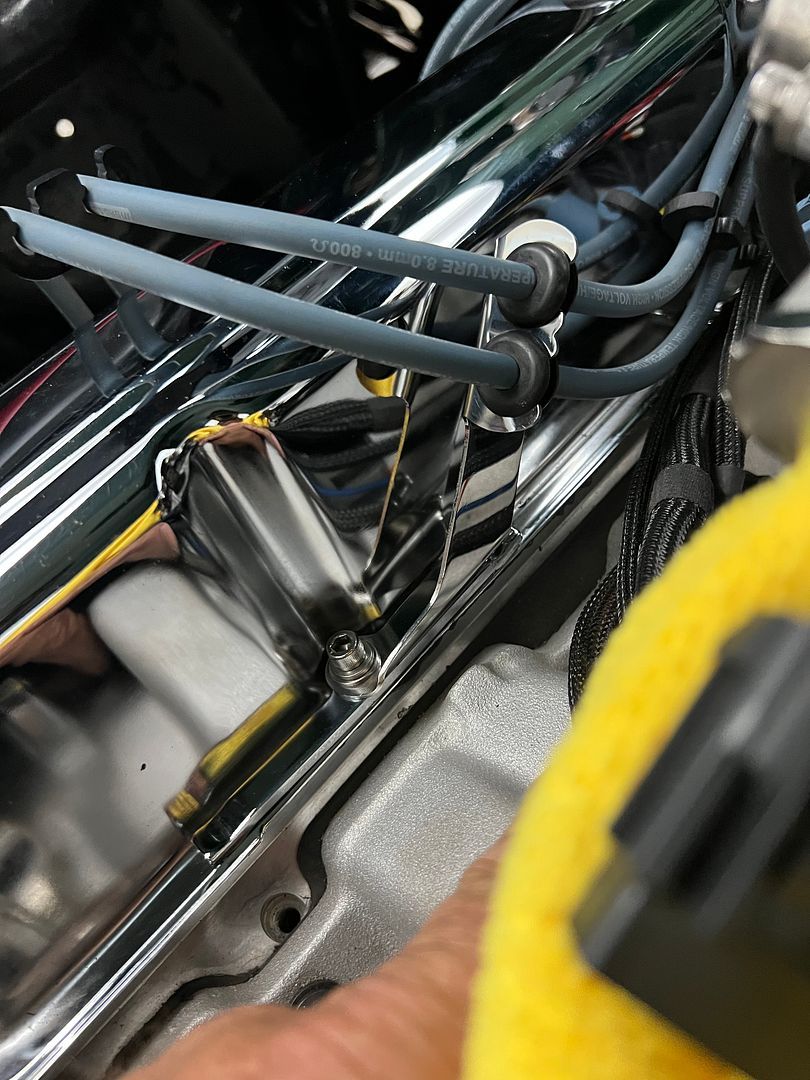 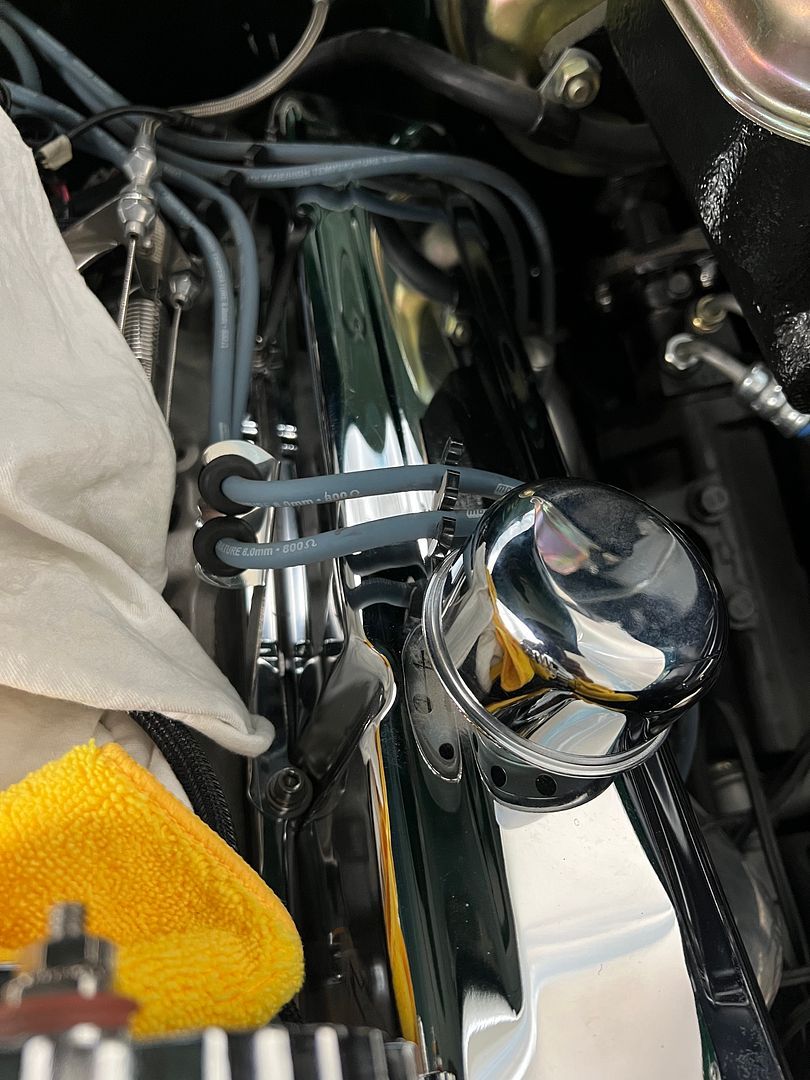 We also had a temperature feed for the fuel injection that needed to follow the spark plug wires, so the wire separators were modified to secure this as well. 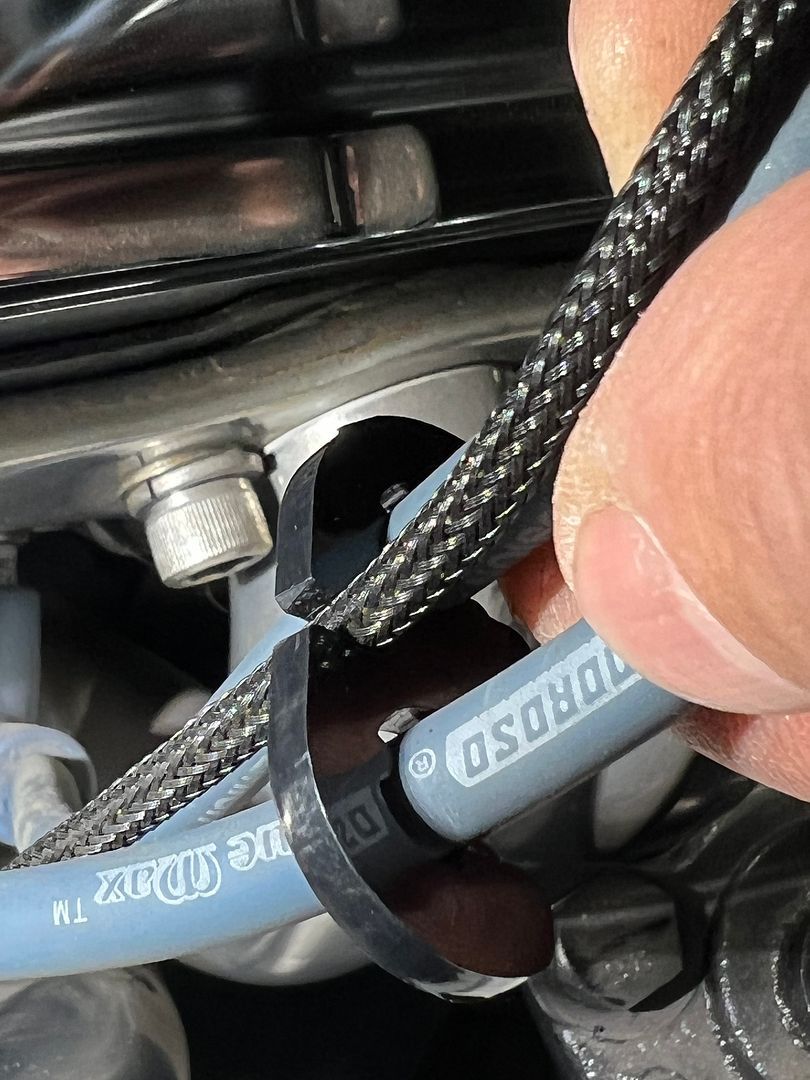 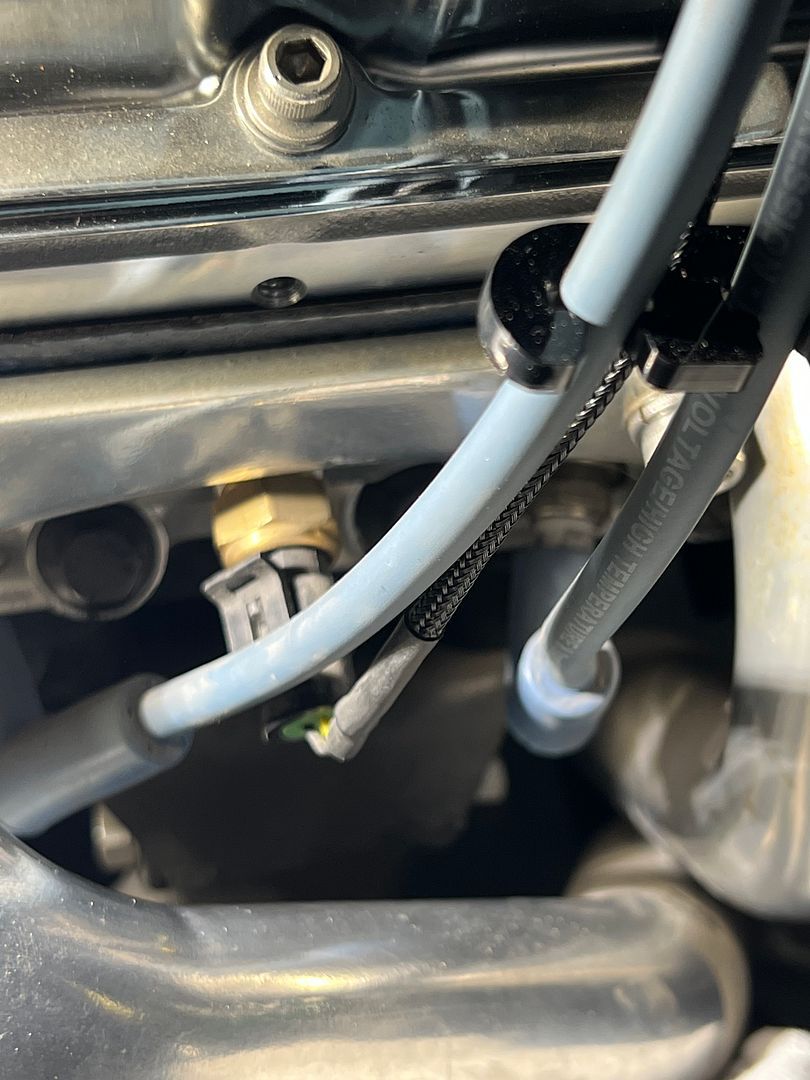 for the oil and temperature sending units for the gauges, the stud with a terminal lug doesn't look clean, so we used these barrel connectors (McMaster) with some glue lined heat shrink to provide strain relief. 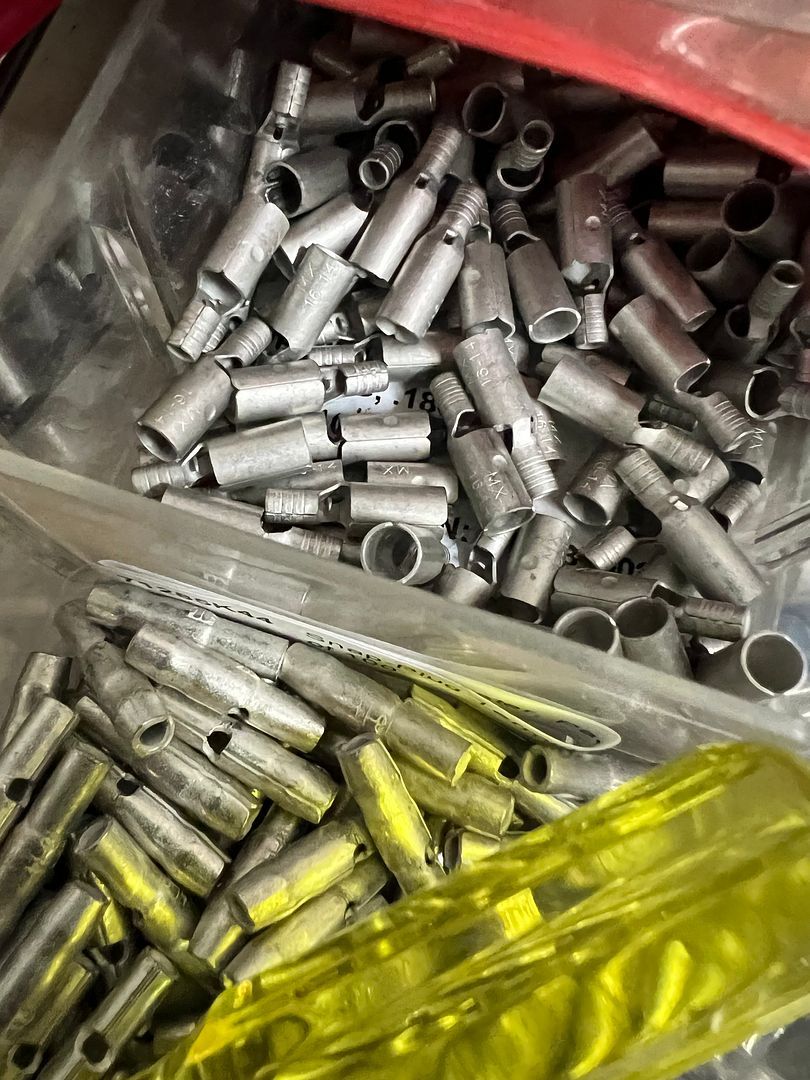 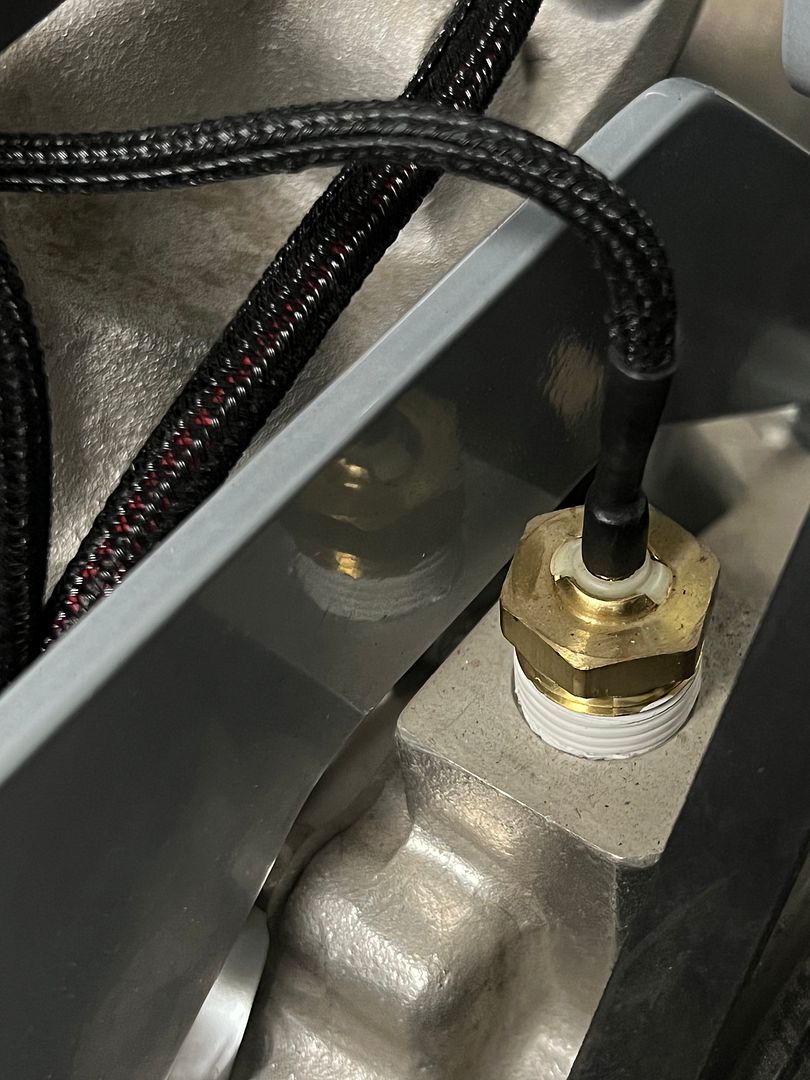 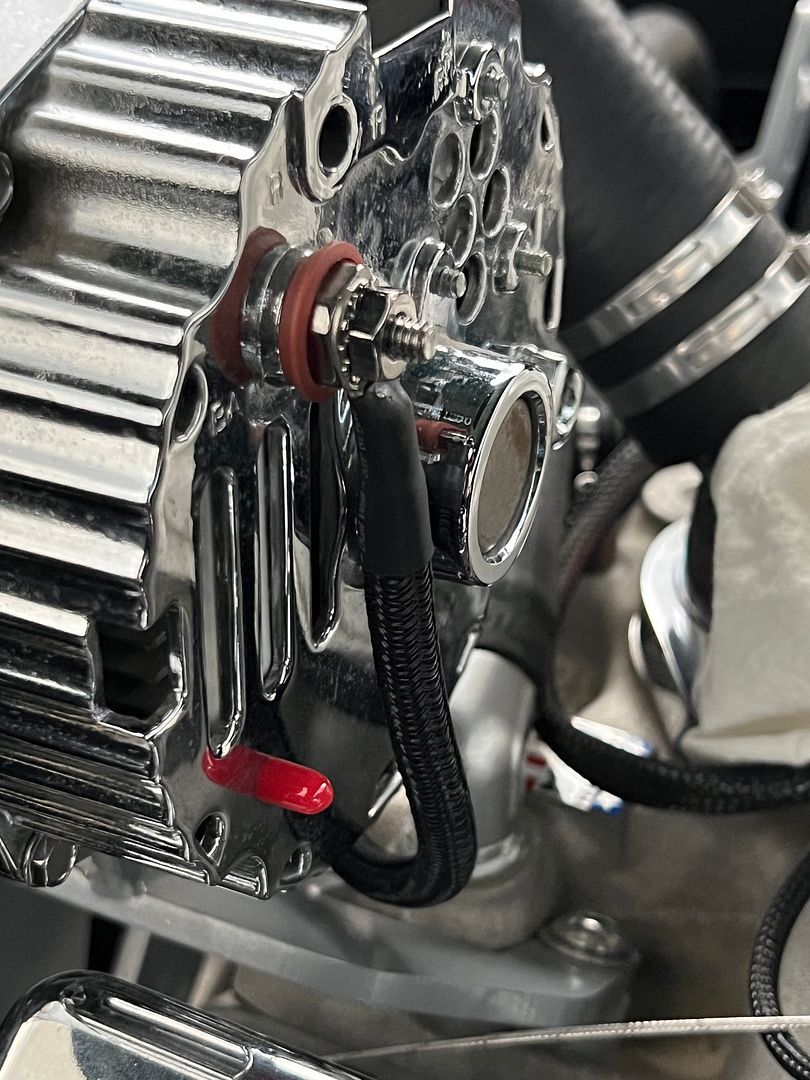 the FI Tech has some downright fugly fuse holders as part of its harness, so we used some lacing cord to dress that mess up the best we could. The barrel connector at the front is for our AC compressor. 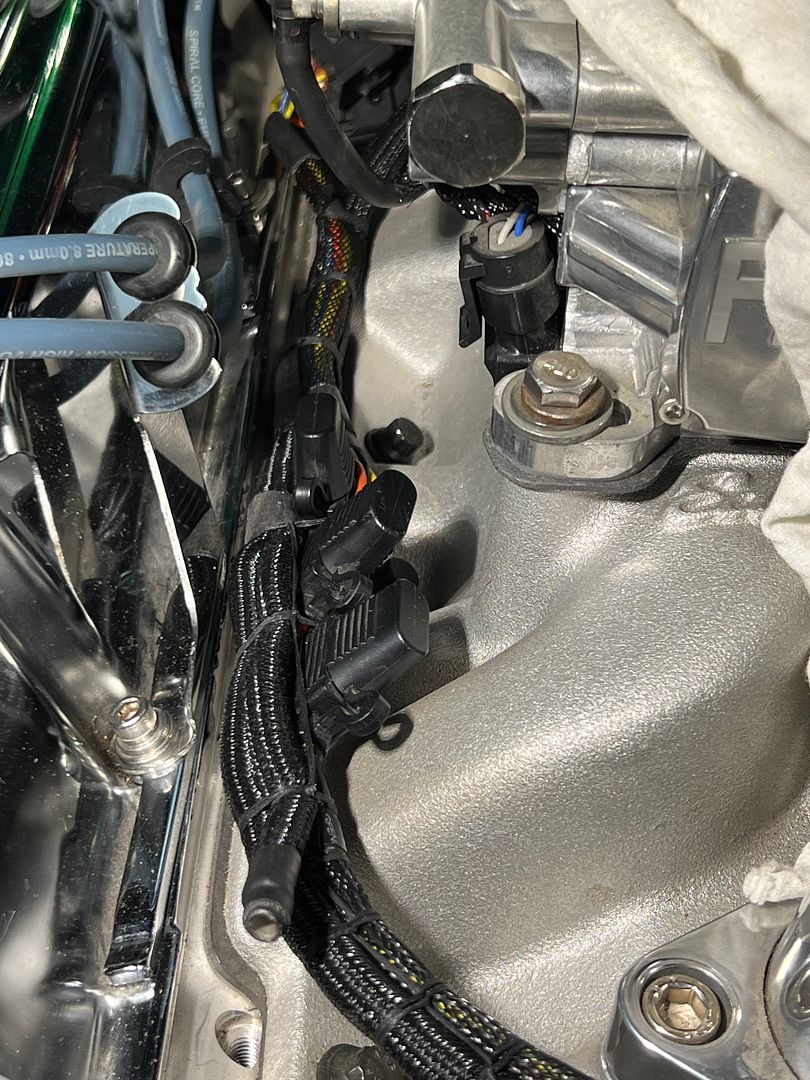 Next, we'll get started on buttoning up all the under-dash wiring.
__________________
Robert |
|
|
|
|
10-02-2025, 04:03 PM
|
#1414 |
|
Registered User
Join Date: Sep 2008
Location: Newport, North Carolina
Posts: 688
|
Re: 55 Wagon Progress
I always love seeing the pictures and updates and attention to every detail.
|
|
|
|
|
12-23-2025, 08:36 AM
|
#1415 |
|
Registered User
Join Date: Jan 2013
Location: Leonardtown, MD
Posts: 1,666
|
Re: 55 Wagon Progress
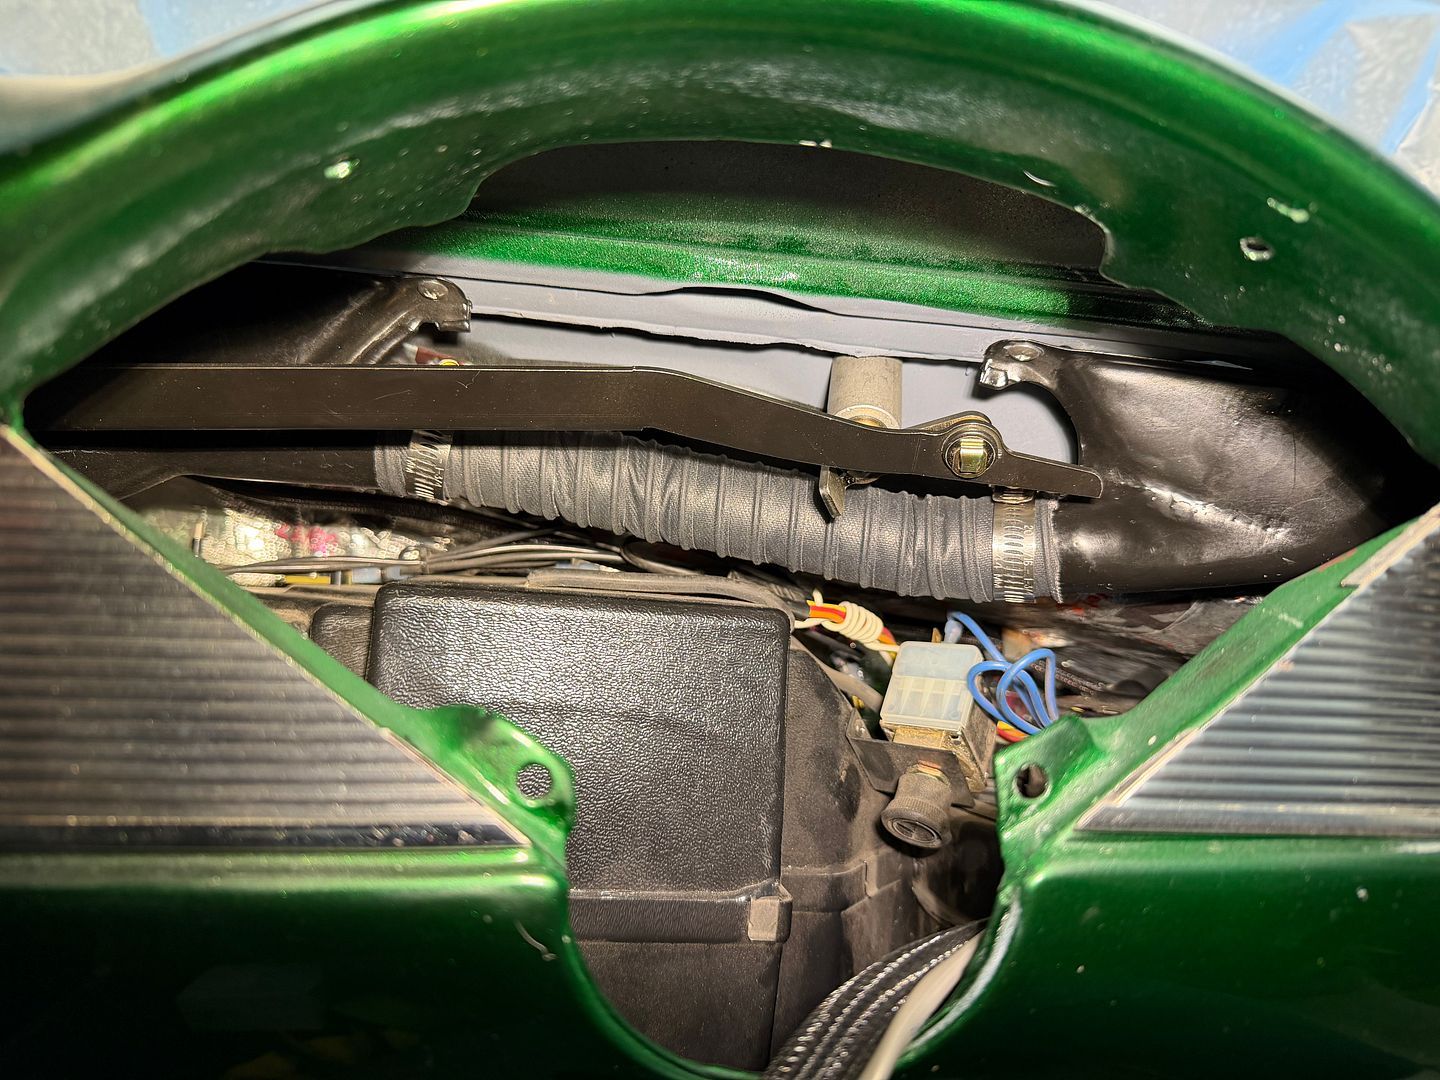
Getting some of the wiring done behind the dash and adding the interconnect ducts between the defrost vents. This made it glaringly obvious that the speaker grille that covers this hole would show the unsightly mess behind.
 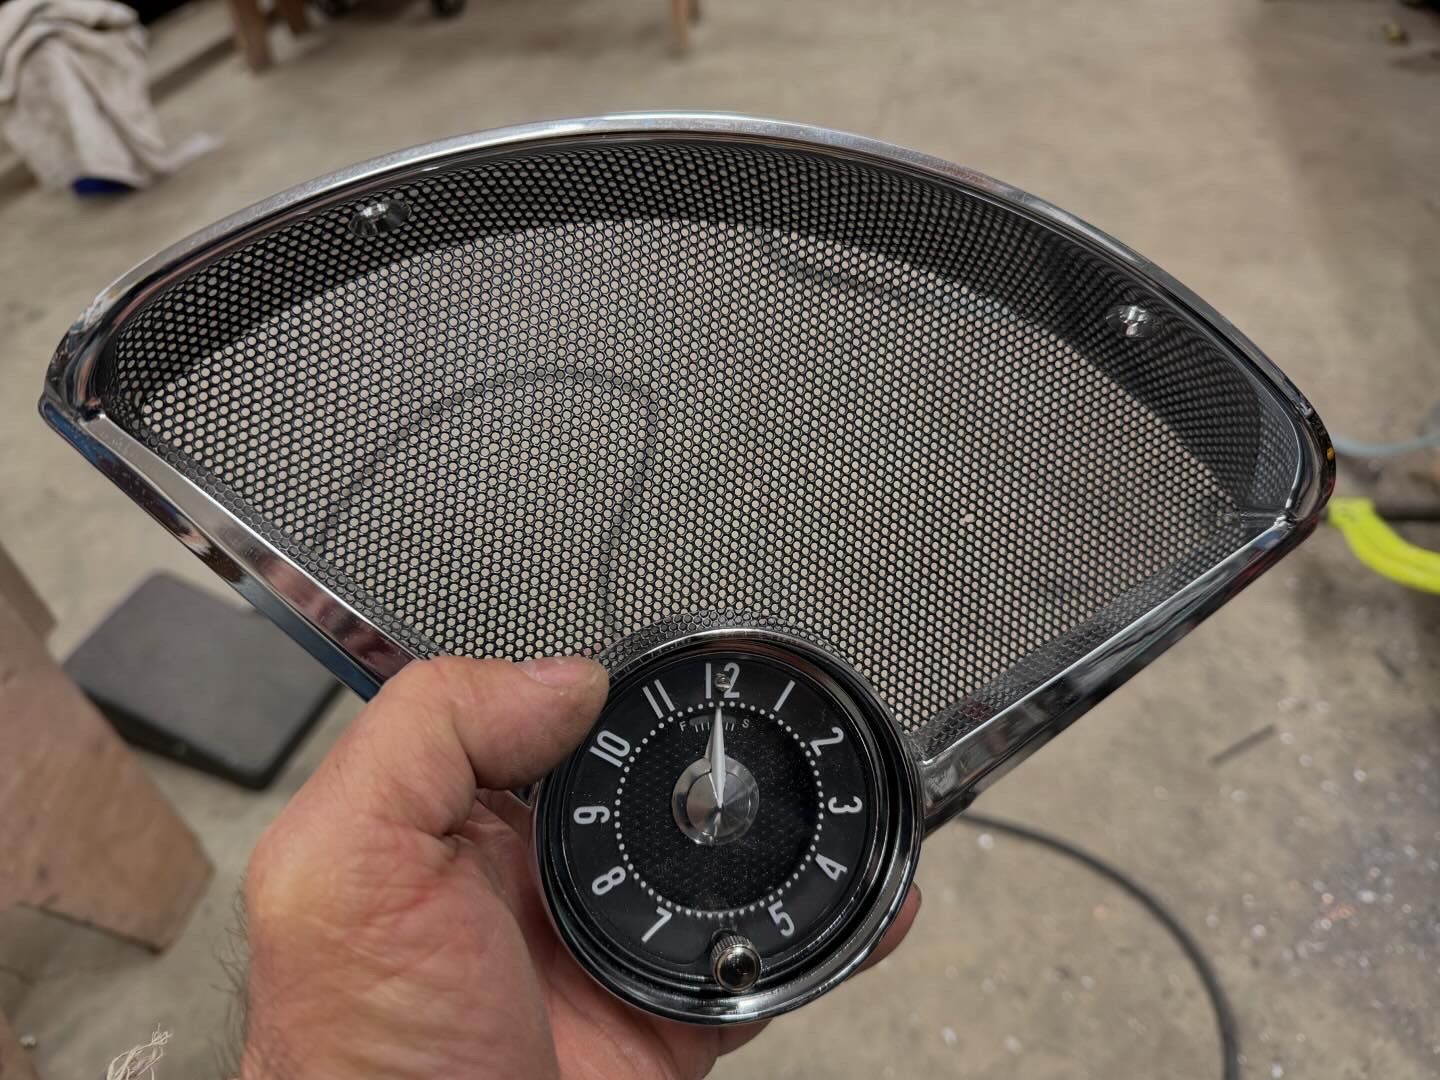 We had picked up some pre-painted aluminum sheet from the local stock car supply, and here we cut out a poster-board template. 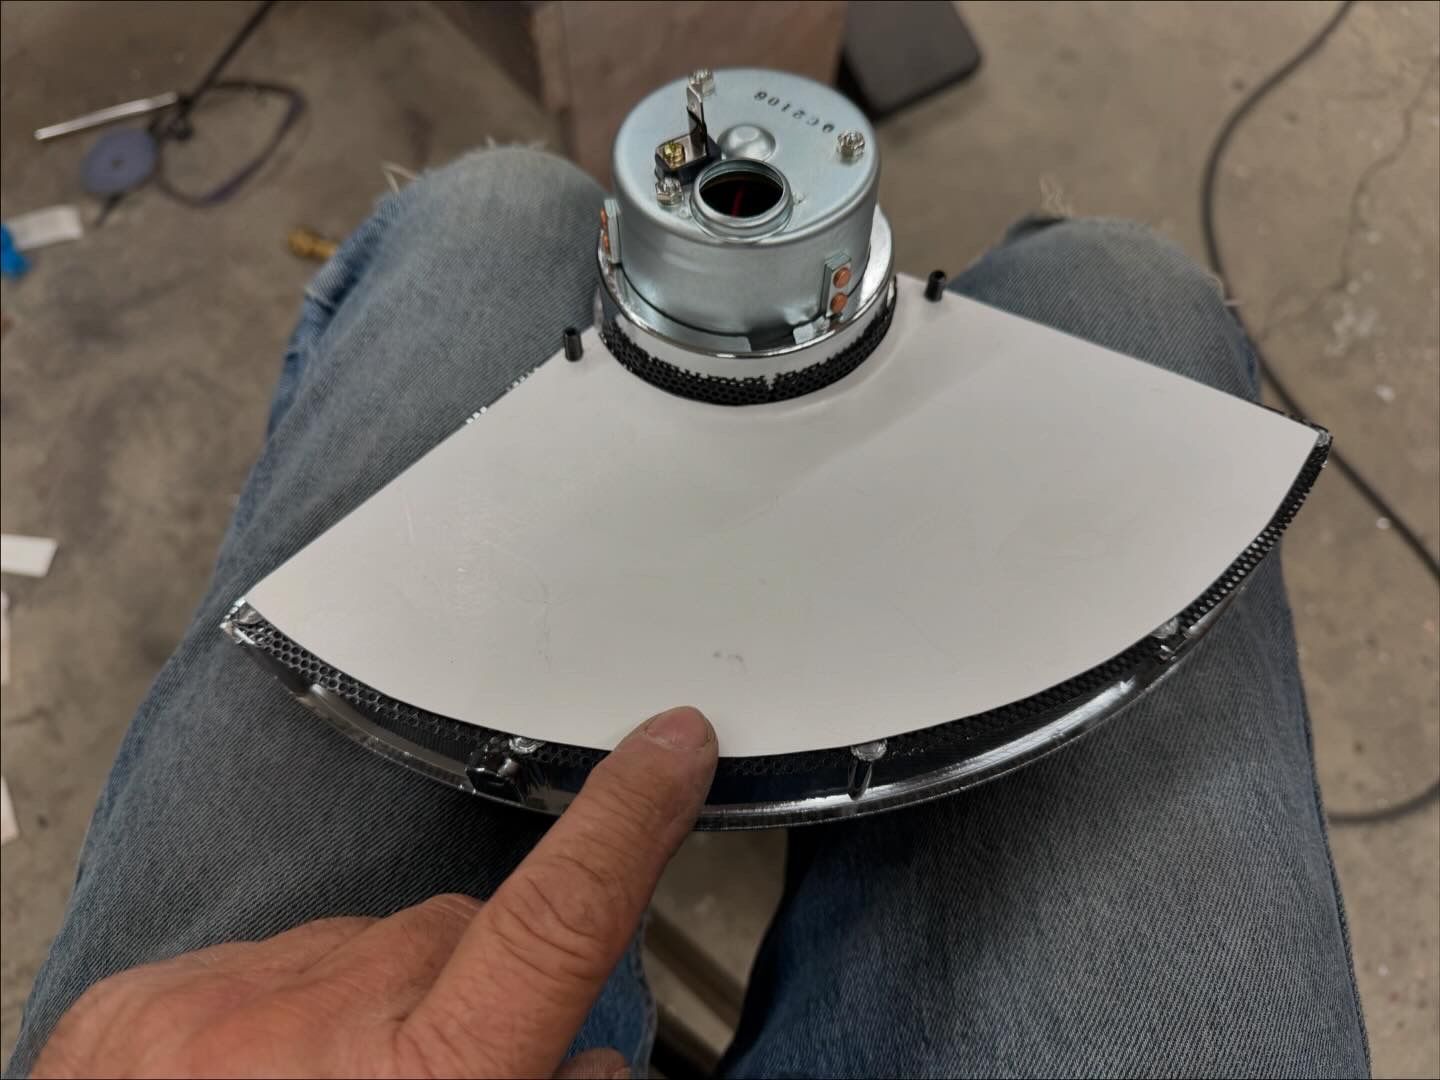 which was used as a pattern to cut out the aluminum sheet. 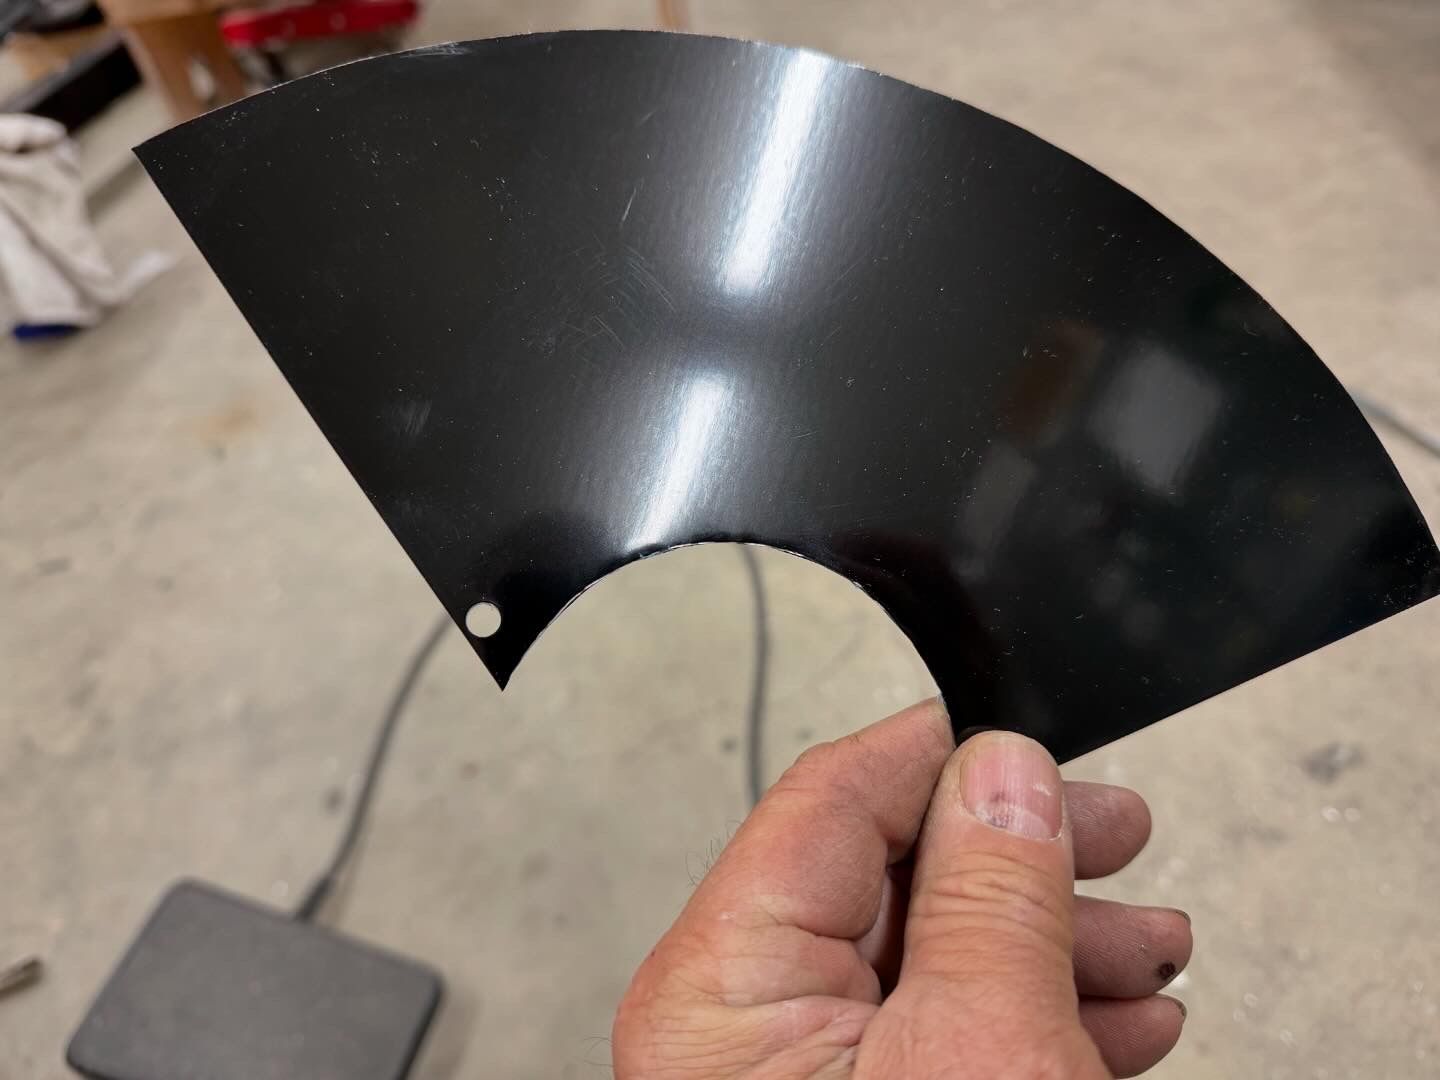 We found the finish a bit too shiny for what was intended to mimic a shadow, so a DA and a 1000 grit Sunmight foam pad toned things down a bit. 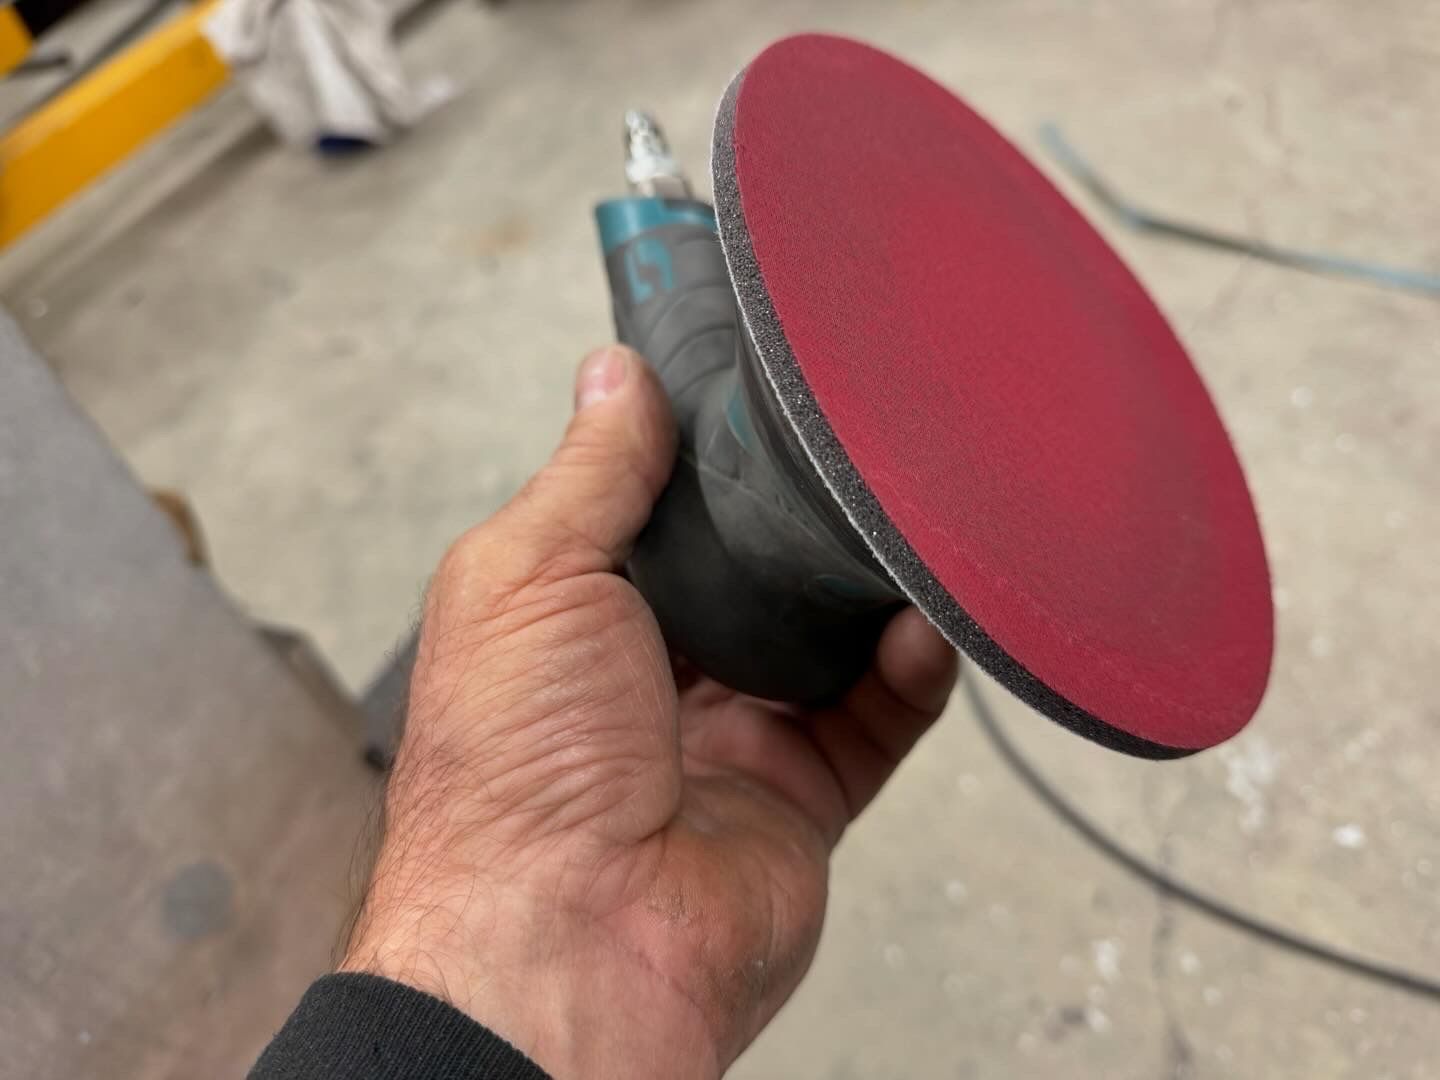 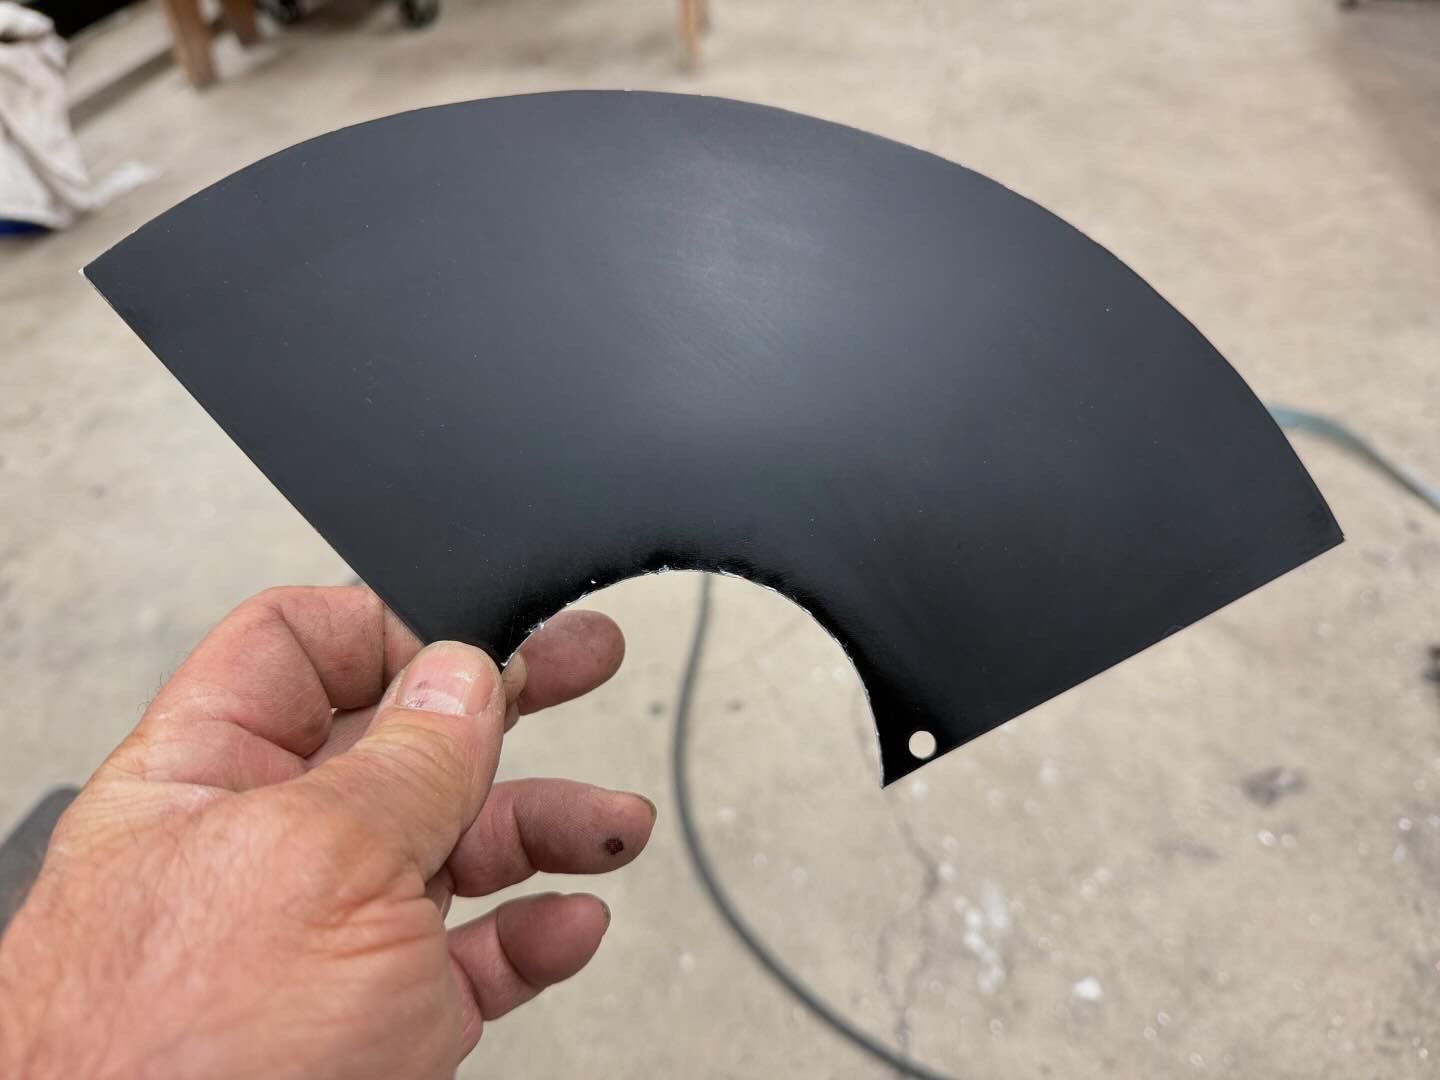 This should do the trick.. 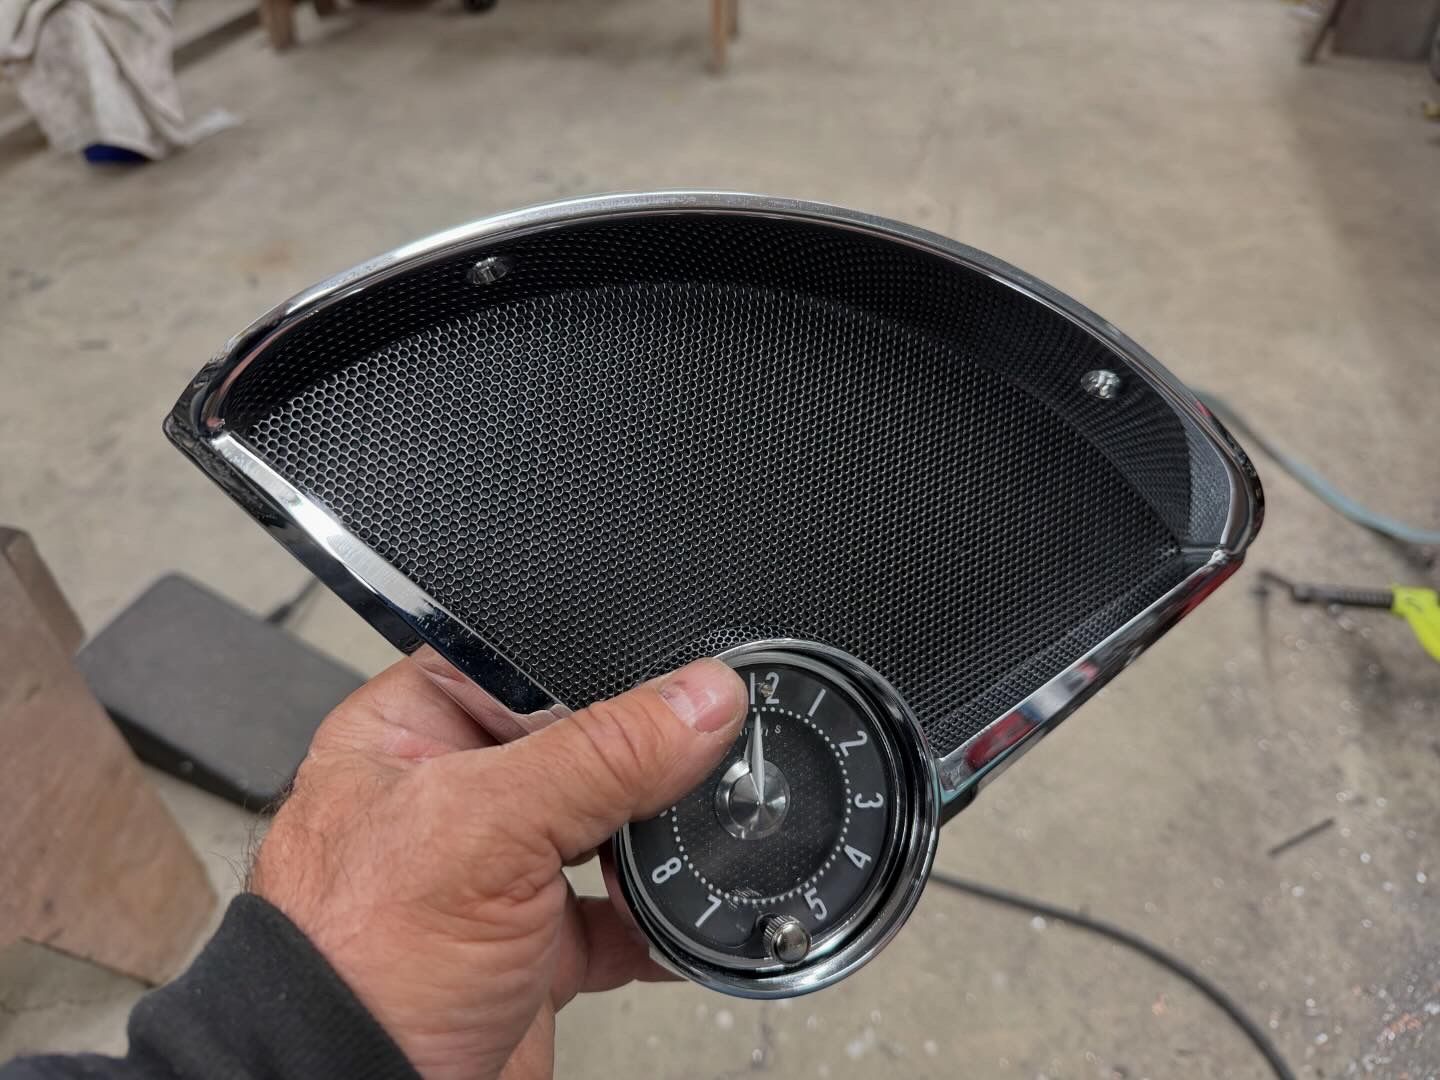 On our shop truck, we had picked up an air cleaner for the 410 replacement engine. Looking at the snout opening, it was 2” diameter, or 3.14 square inches. 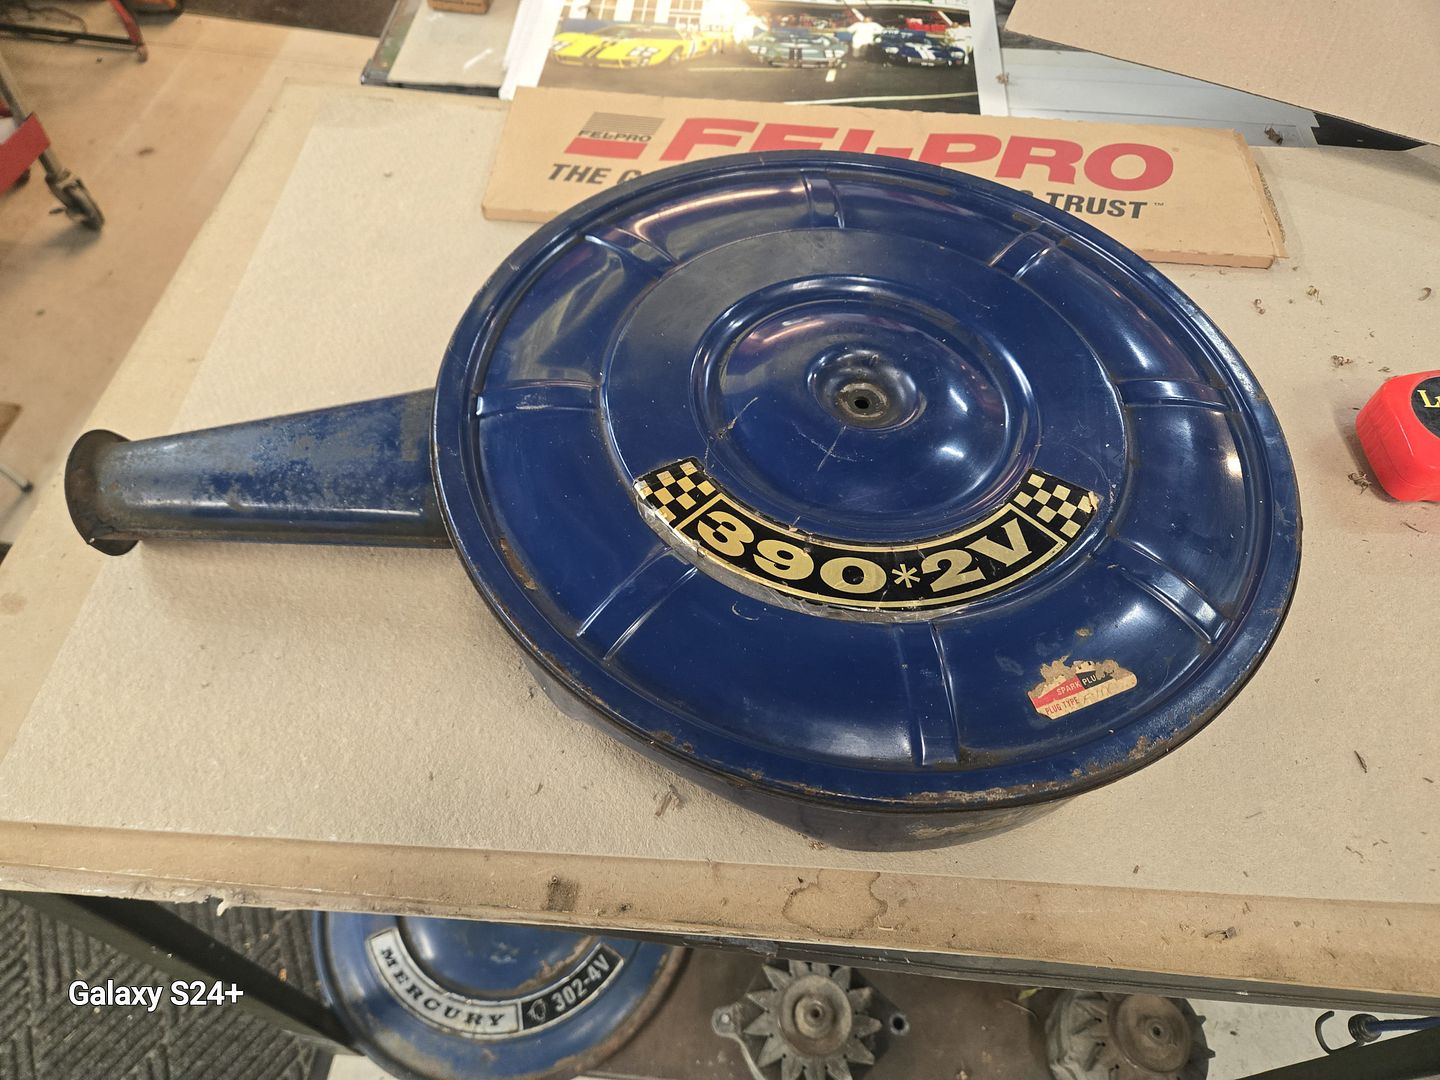 The 4bbl carburetor I have for the engine has 1.19 diameter Venturi (x4) or 4.44 square inches. So our factory breather has a built in choke, let’s see if we can open it up a bit 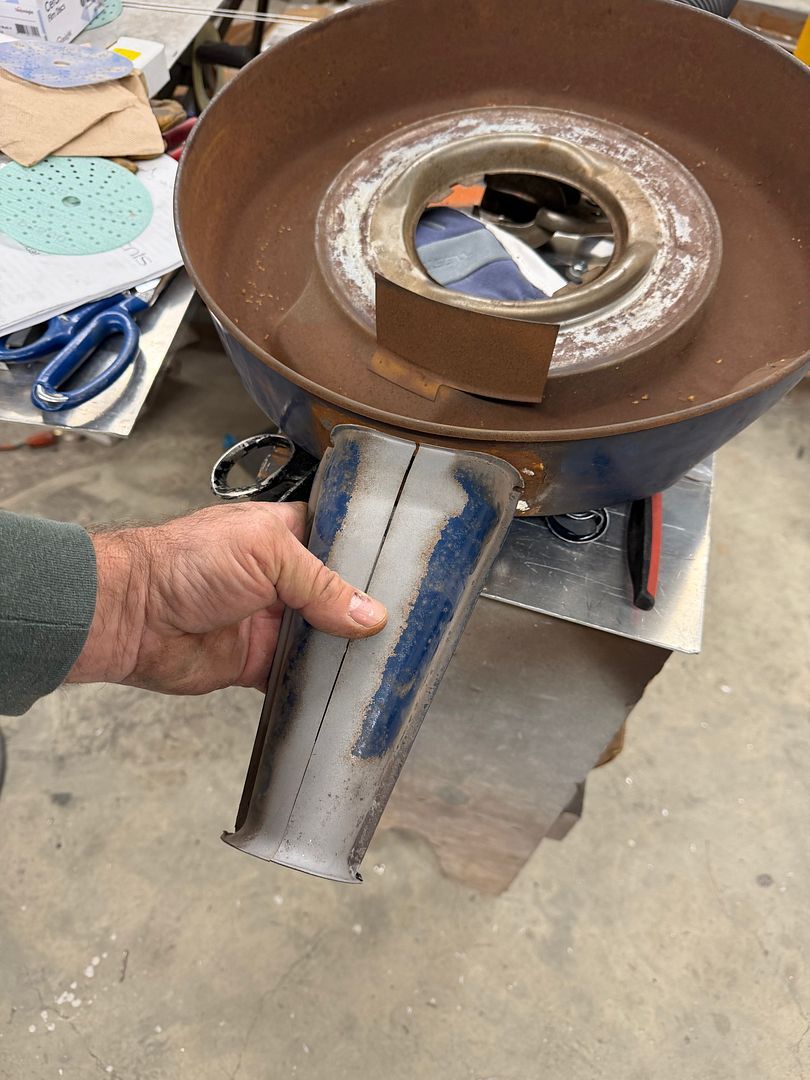 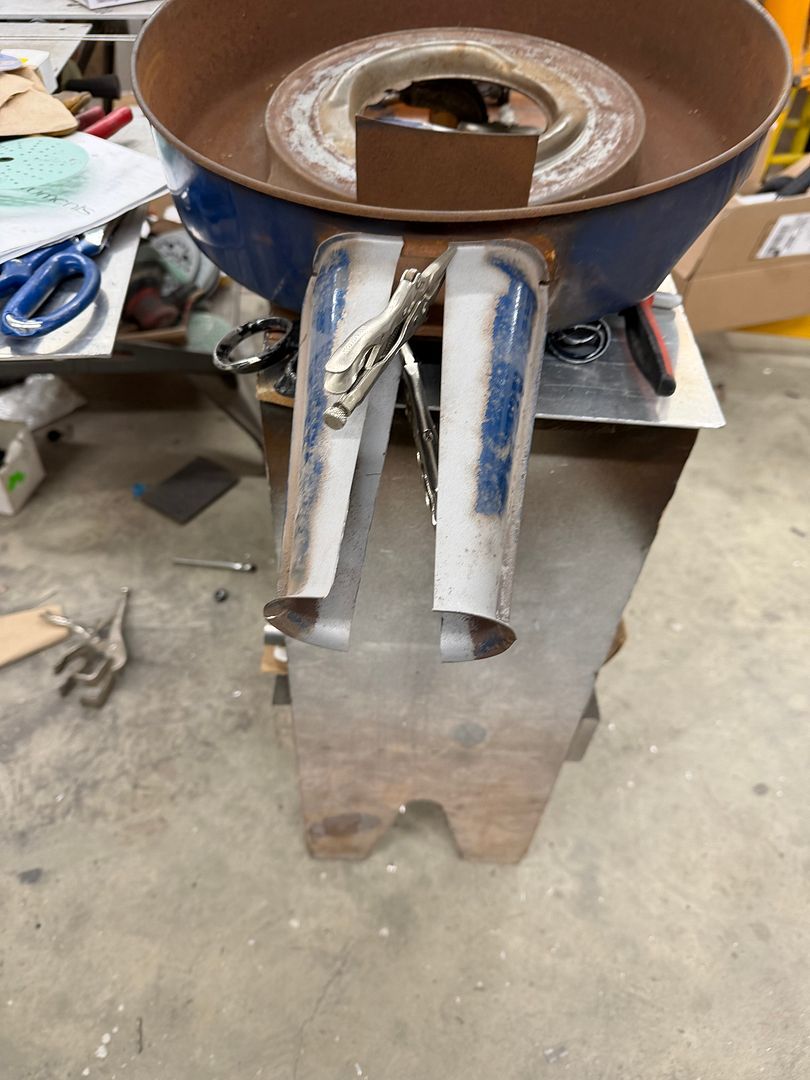 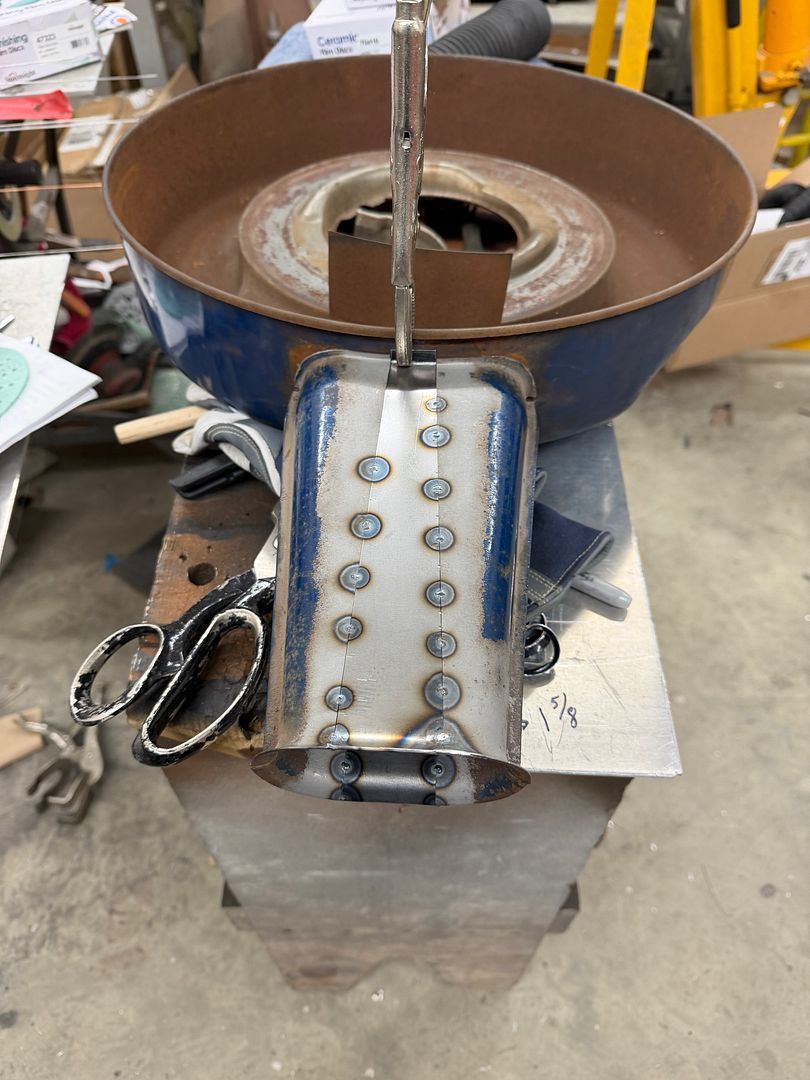 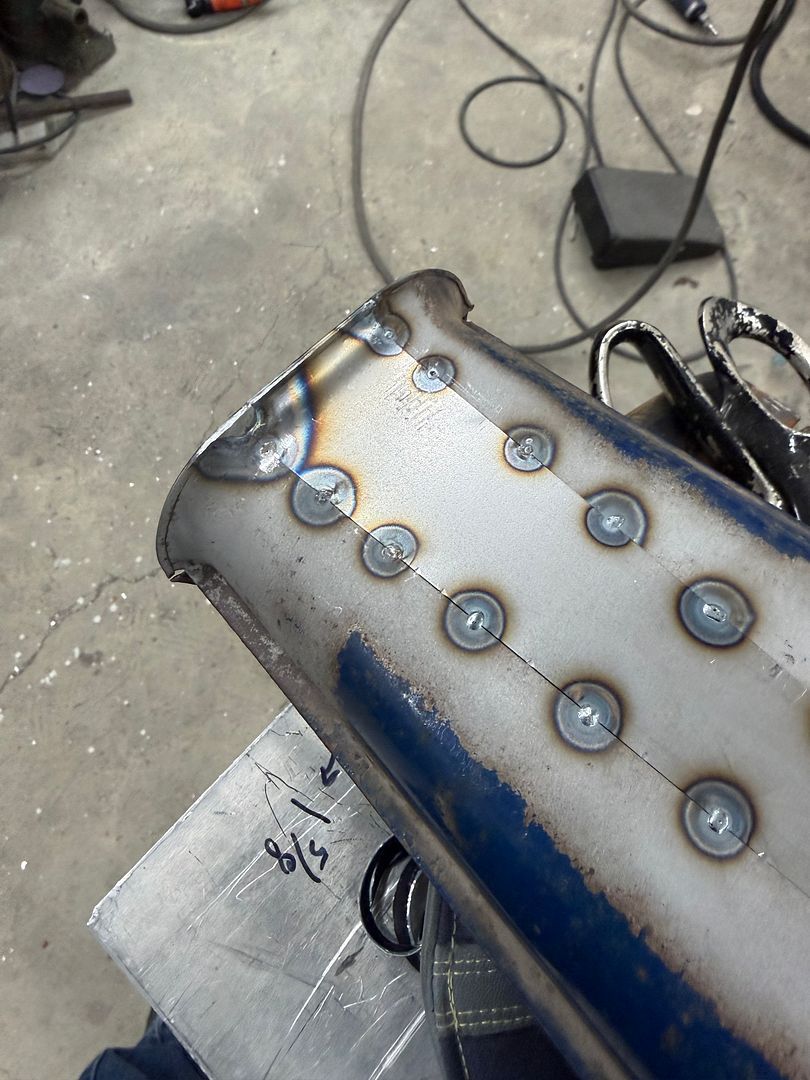 A hammer form was made out of some MDF to match the ends of the opening in the housing, a ball end hammer was used to move the flanged opening outward to match the new snout. 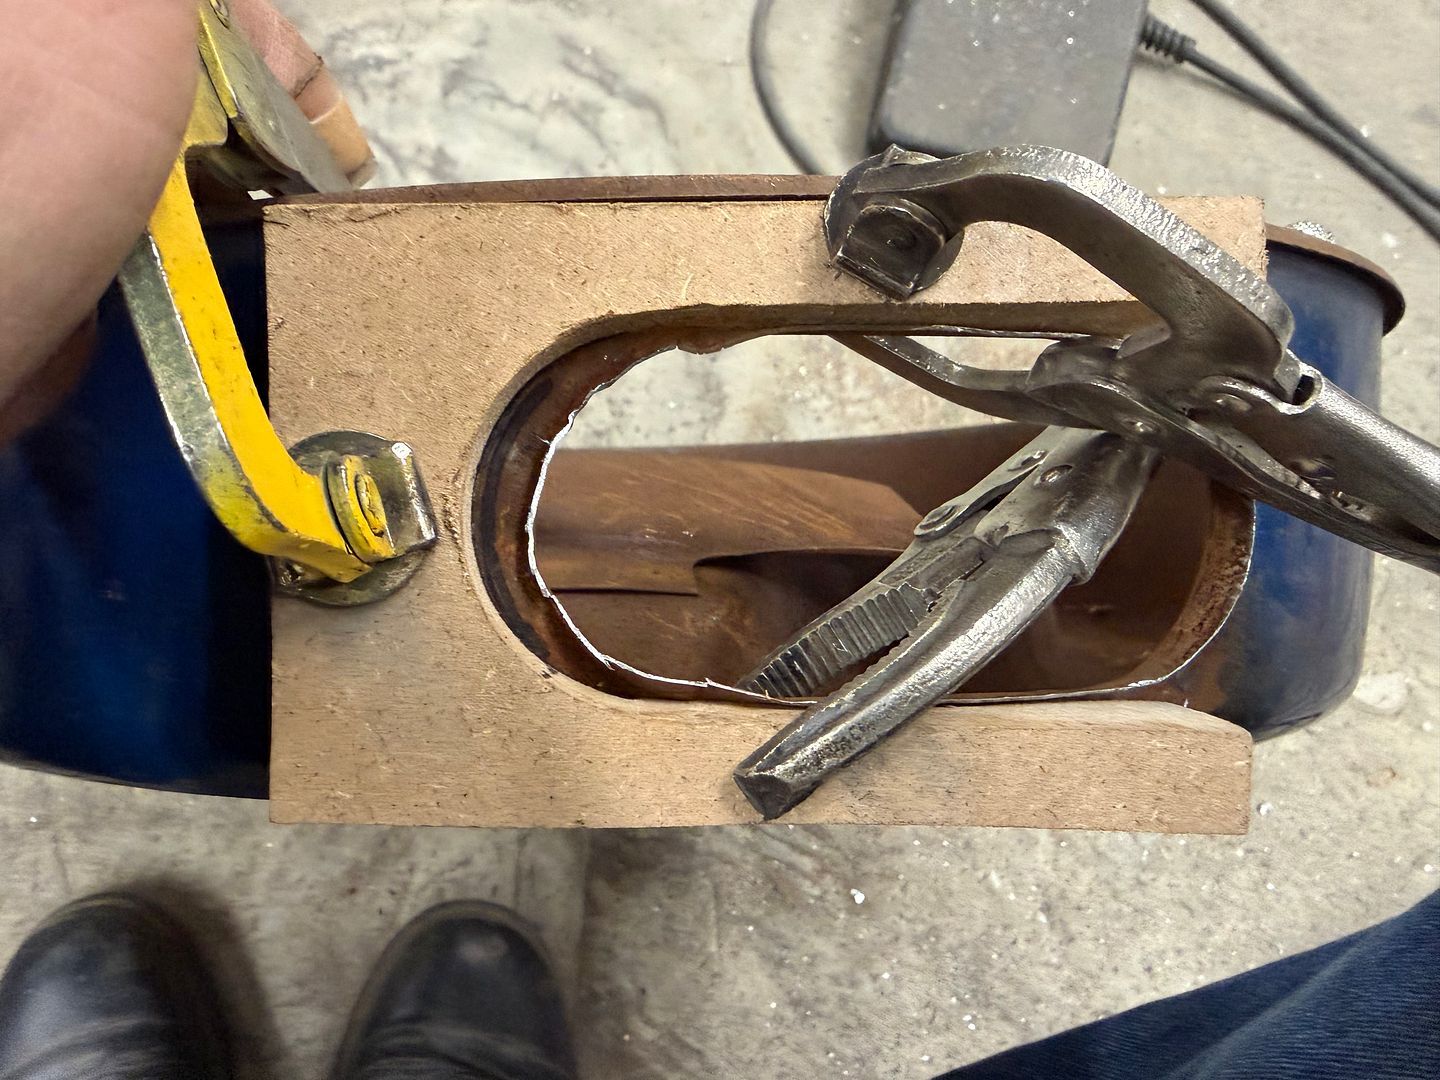 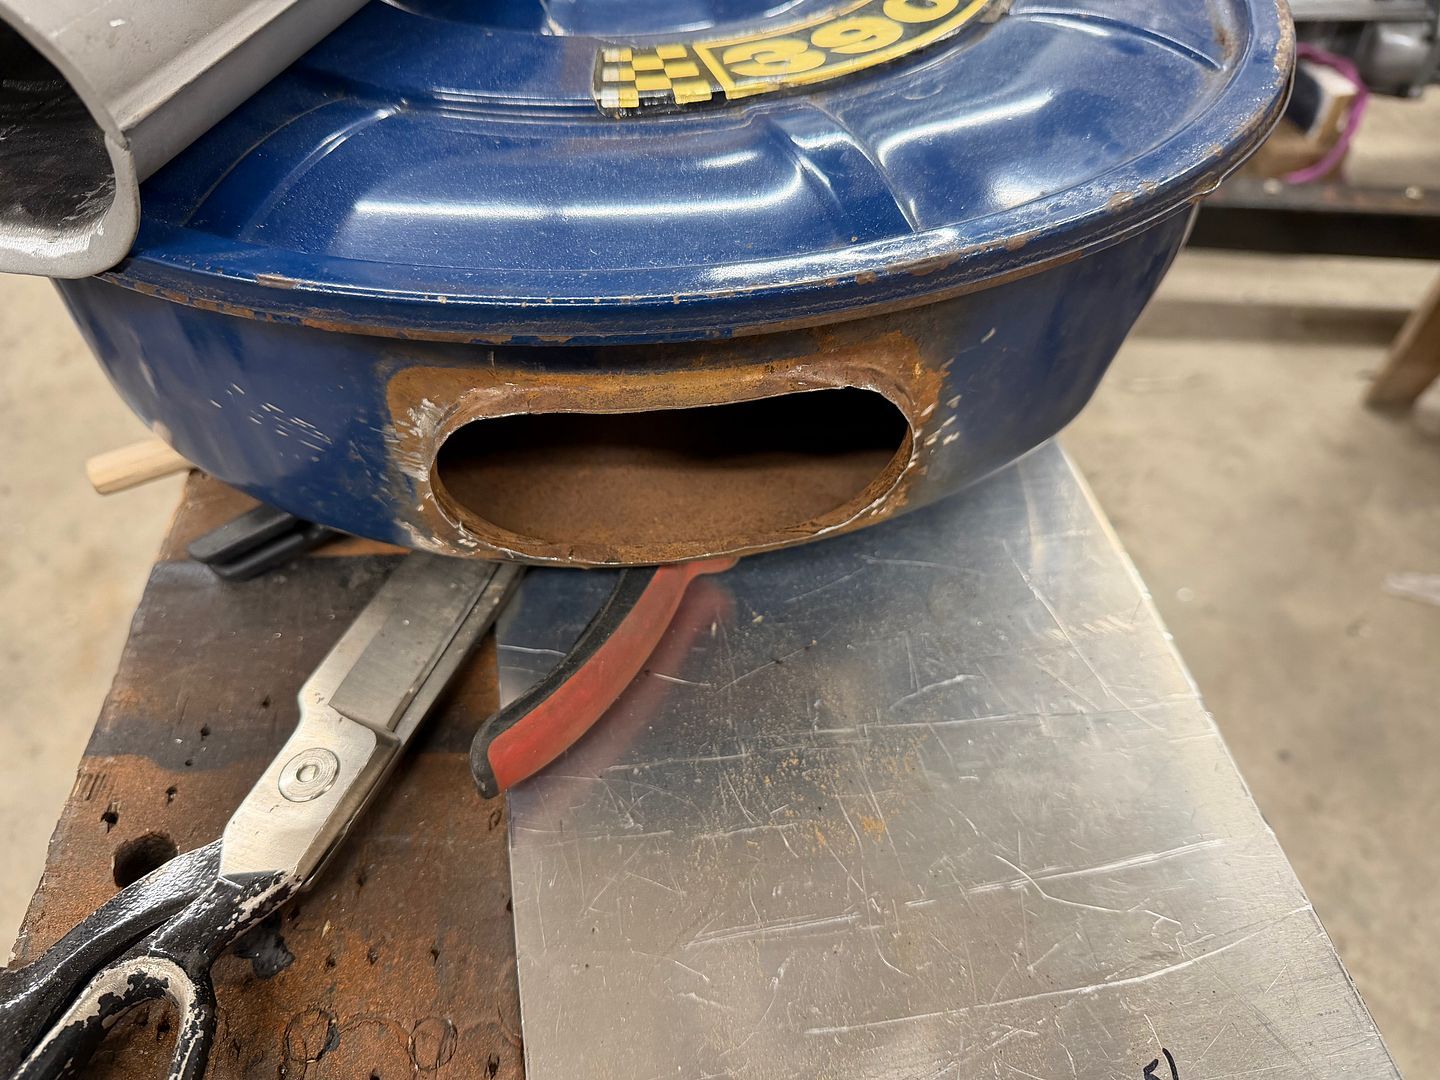 Mocked up….  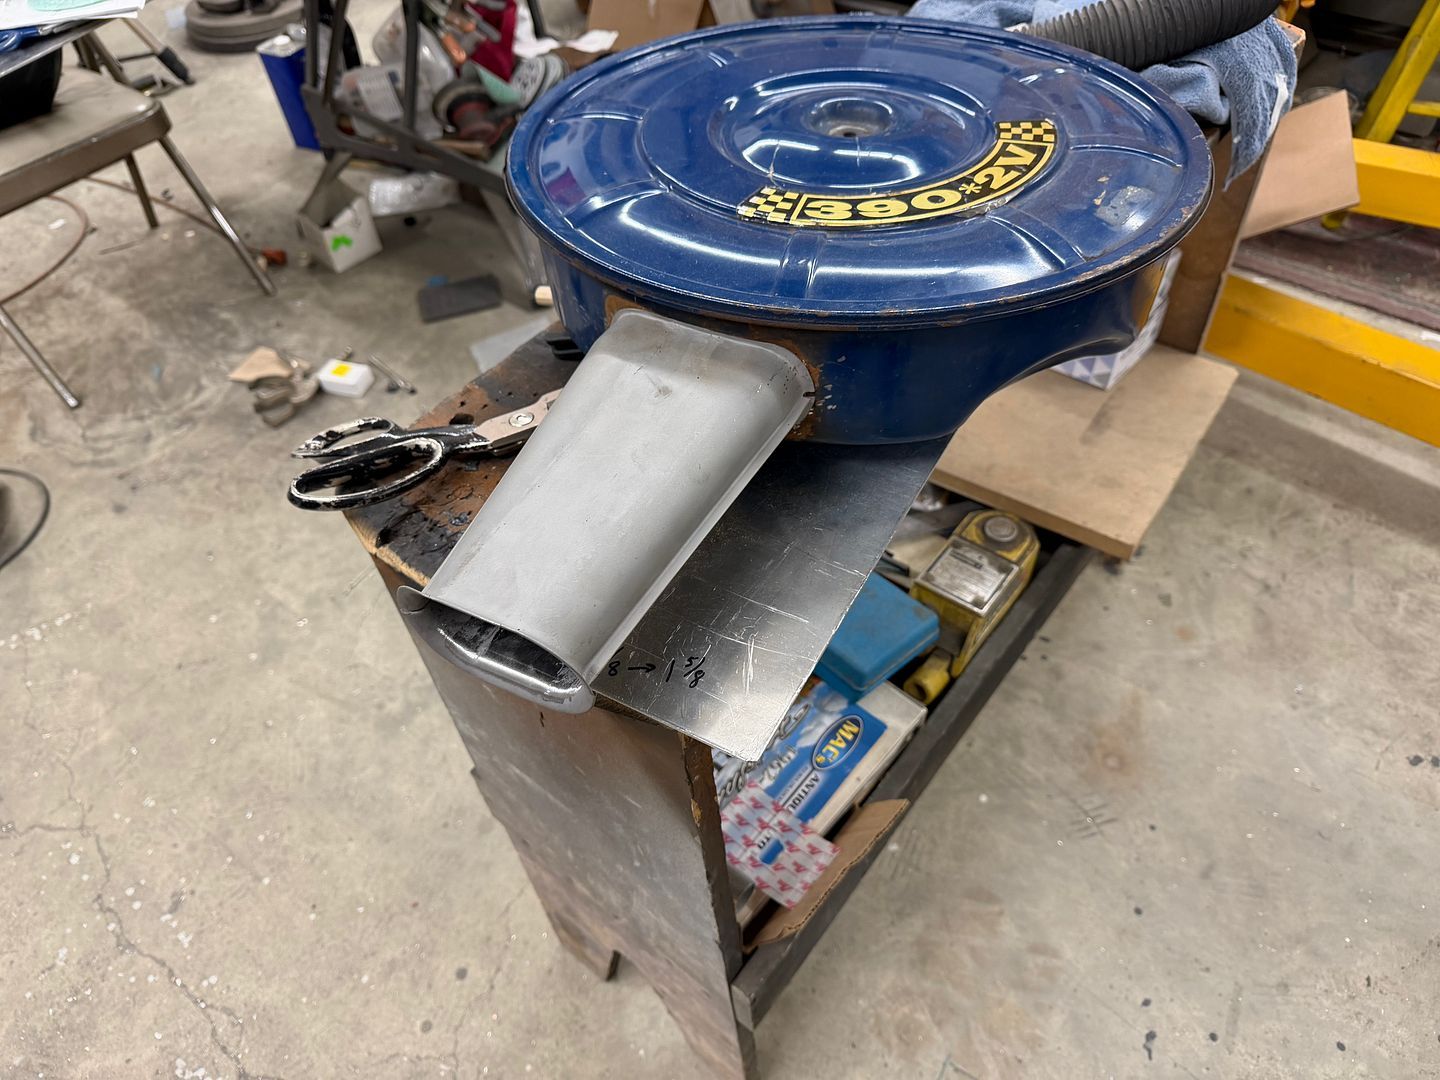 With the additional width, the snout opening is now 6.14 square inches, should be plenty.
__________________
Robert |
|
|
|
|
12-26-2025, 02:43 PM
|
#1416 |
|
Senior Member
 Join Date: Mar 2011
Location: West Plains, Missouri
Posts: 7,570
|
Re: 55 Wagon Progress
Nice work as always...Jim
__________________
my build thread: http://67-72chevytrucks.com/vboard/s...d.php?t=459839 Jimbo's long bed step build:http://67-72chevytrucks.com/vboard/s...t=464626<br /> |
|
|
|
|
02-04-2026, 08:54 AM
|
#1417 |
|
Registered User
Join Date: Jan 2013
Location: Leonardtown, MD
Posts: 1,666
|
Re: 55 Wagon Progress
Thanks Jim!
We're still plugging along with the wiring on the wagon, a couple minor details to finish that part up. I was at a local body shop to order some paint matching the state of Maryland's 1955 license plates for the one we're restoring for the wagon. The owner asked if I could make some patches for a step van that is in his shop for repairs.  At some point in its life someone had made previous repairs, adding an aluminum cover to mask the rust beneath. He wanted some weld-in versions in steel.   Some dies were made for the Lennox, using the same upper die but two different flavors for the bottom. One would have straight flanges top and bottom for the "rocker", and the other would have one 90* flange for a wheel arch and the outer door steps. 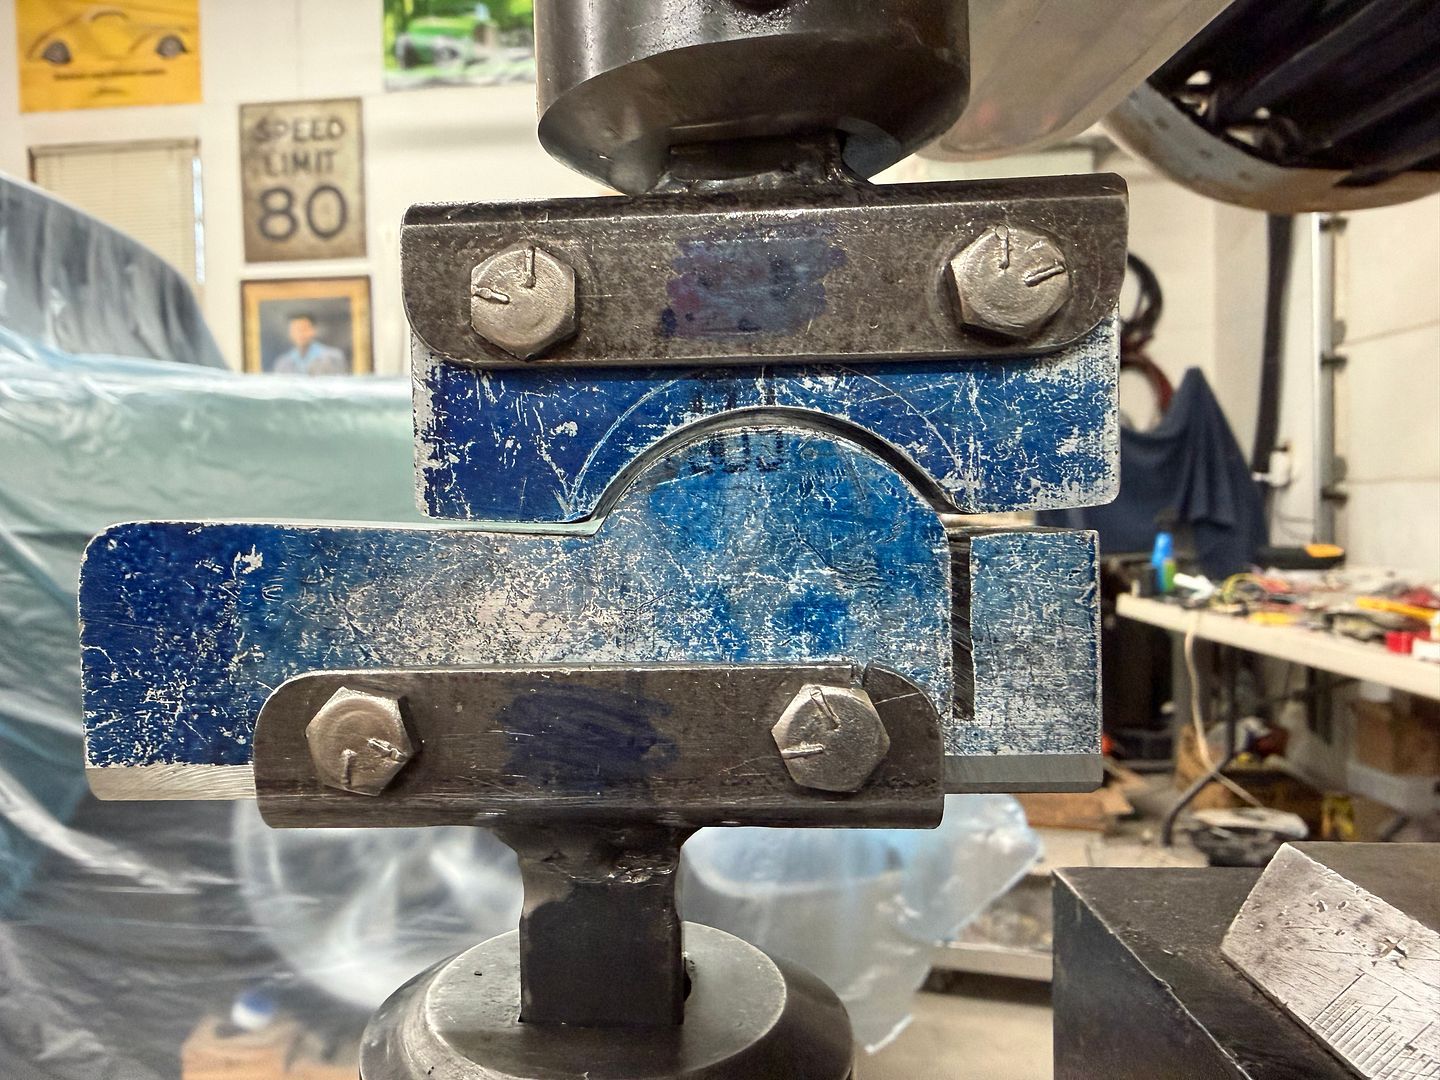 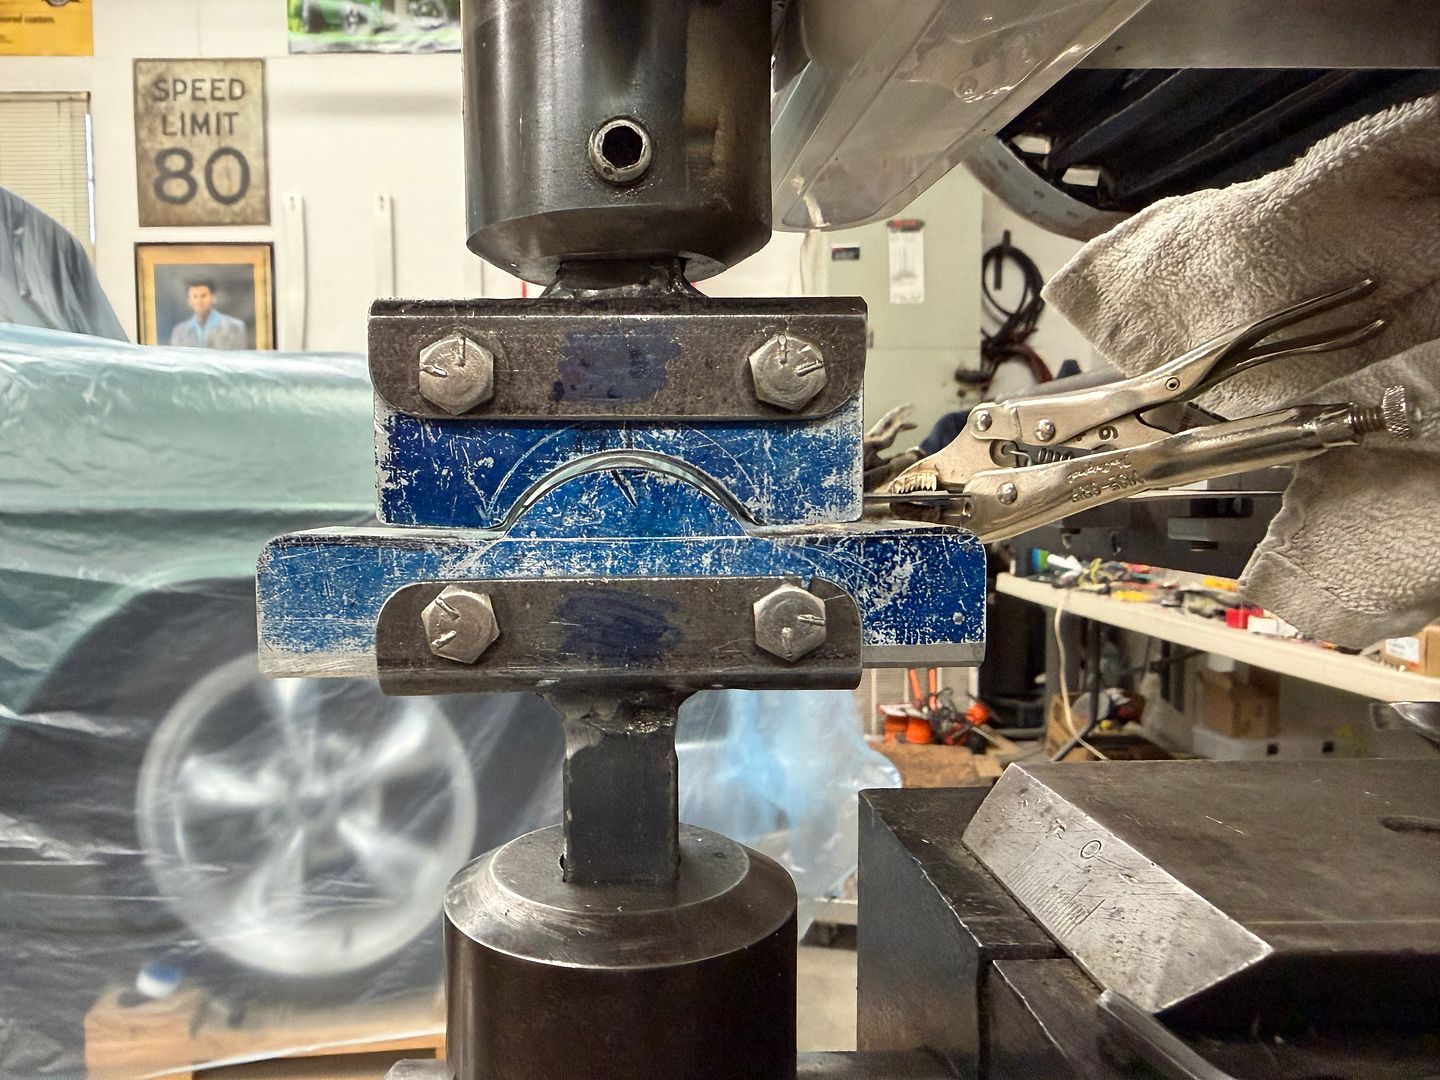 Note in the above picture the lower die with flat flanges has the support wings cut about 3 degrees upward. With the forming that takes place a flat die would tend to have the flanges dropped slightly from a spring back effect. These upward supports help to counter any spring back effect and ensure the flanges are perfectly flat.. sample: 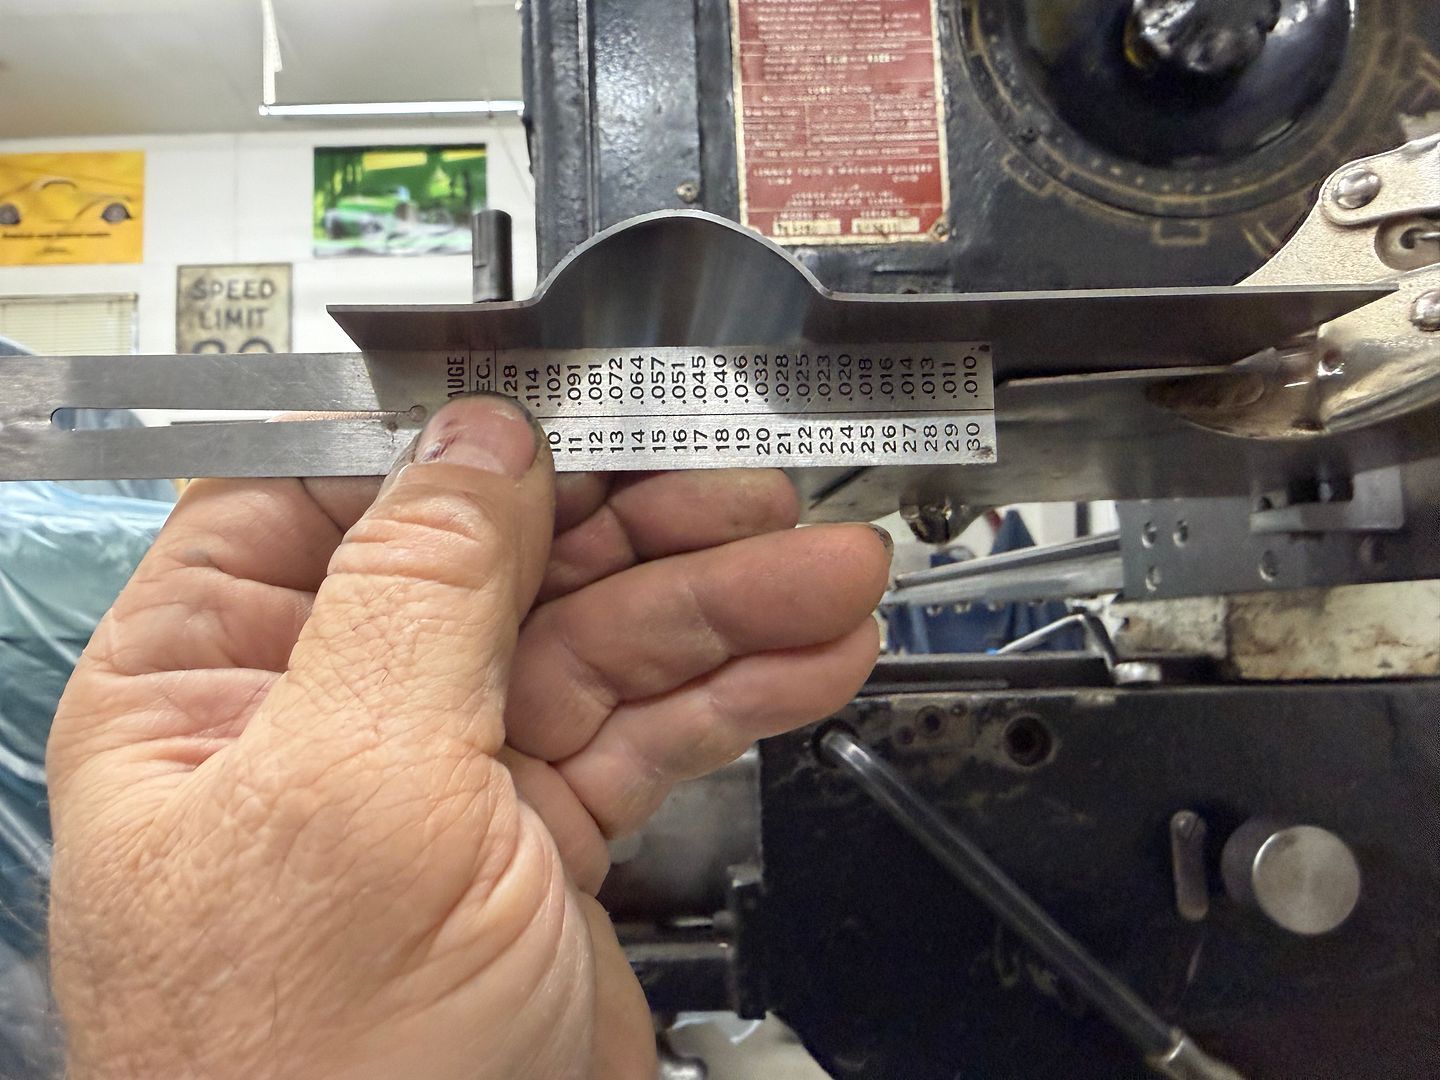 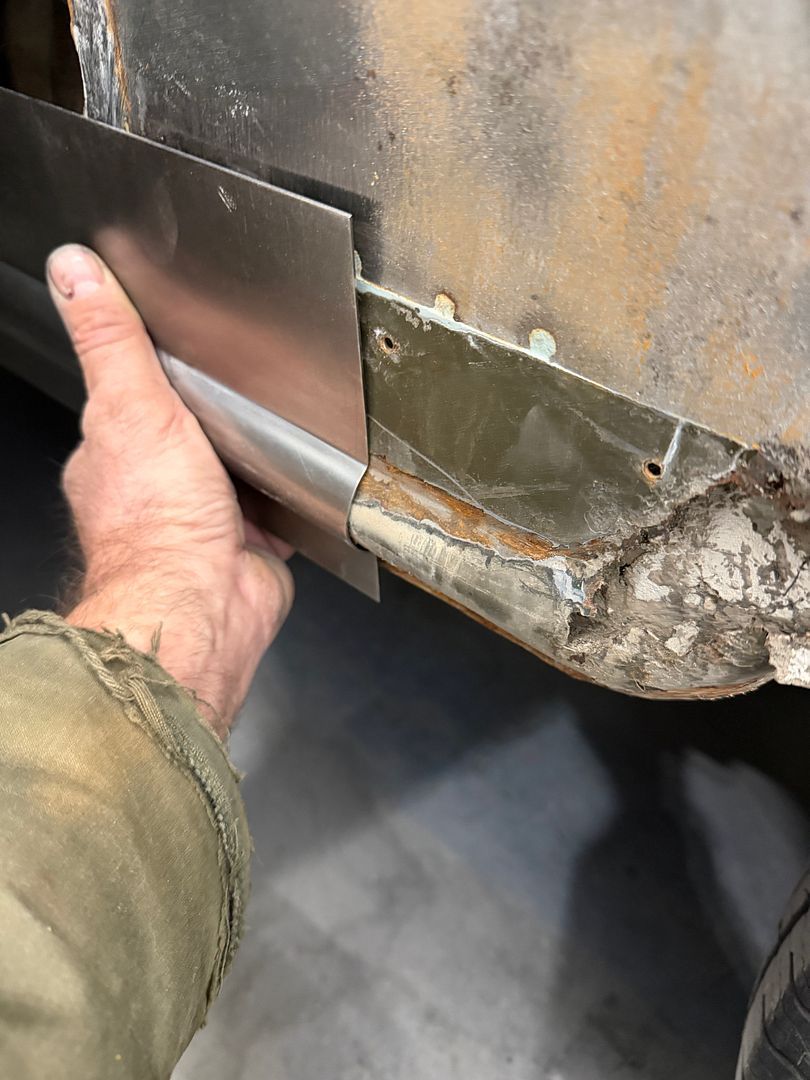 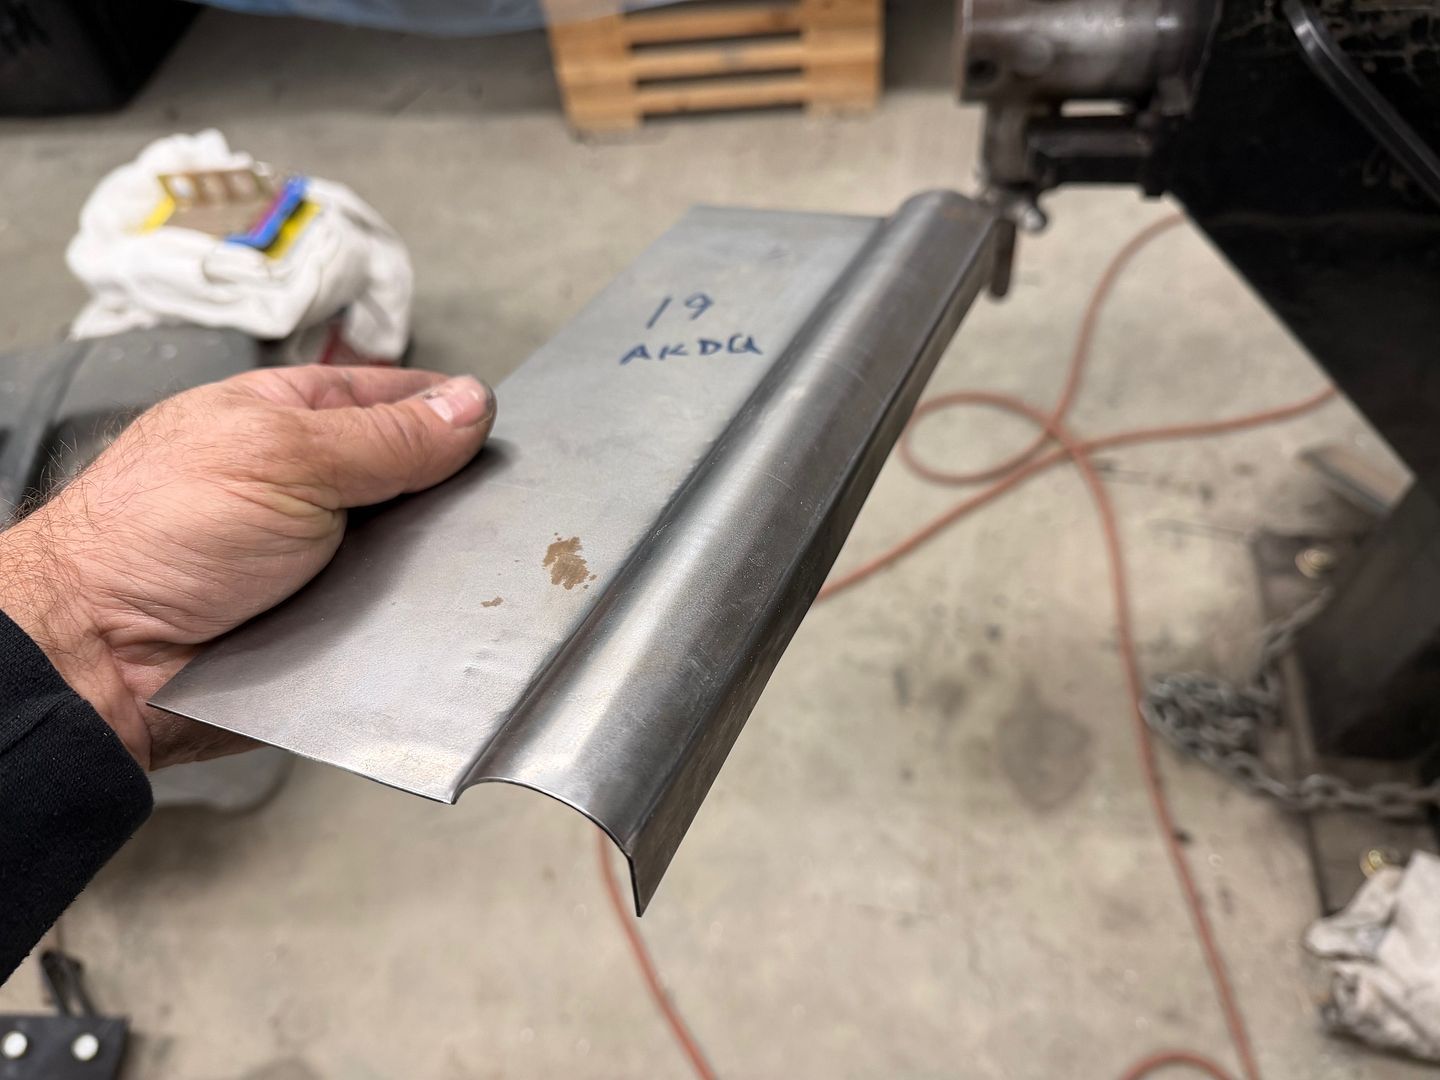 Enough practice, here's a Video of the process: https://youtu.be/gWTSgkBYX0k 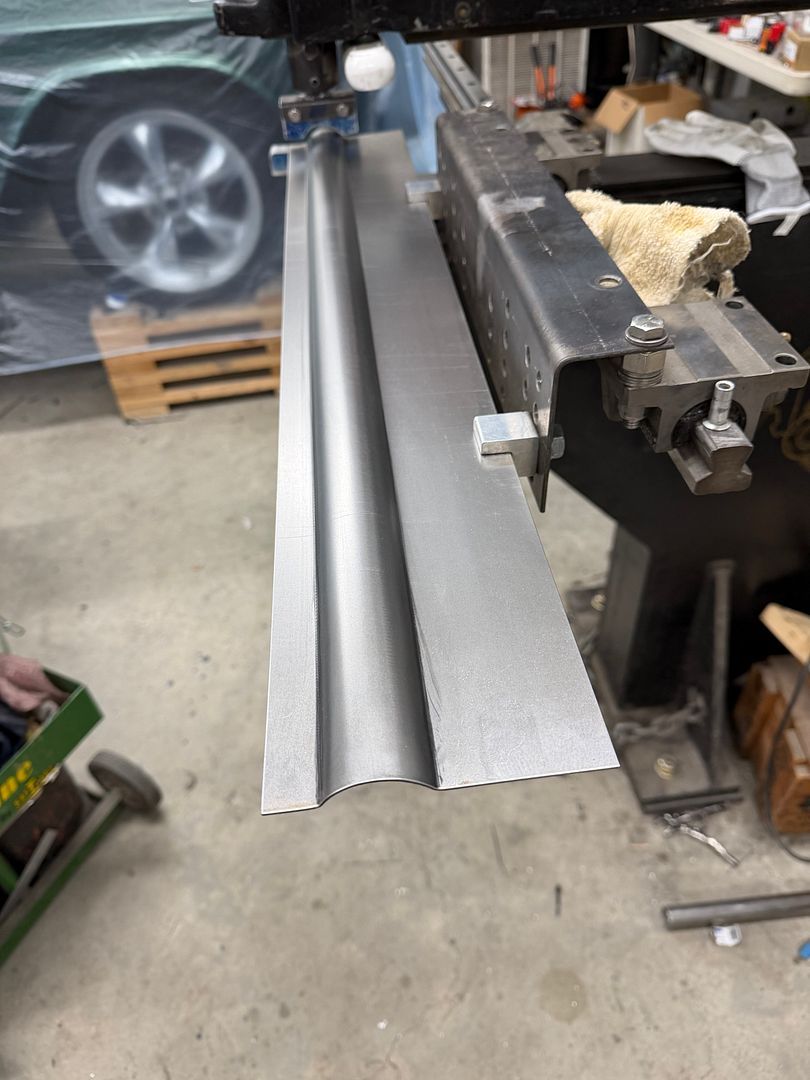 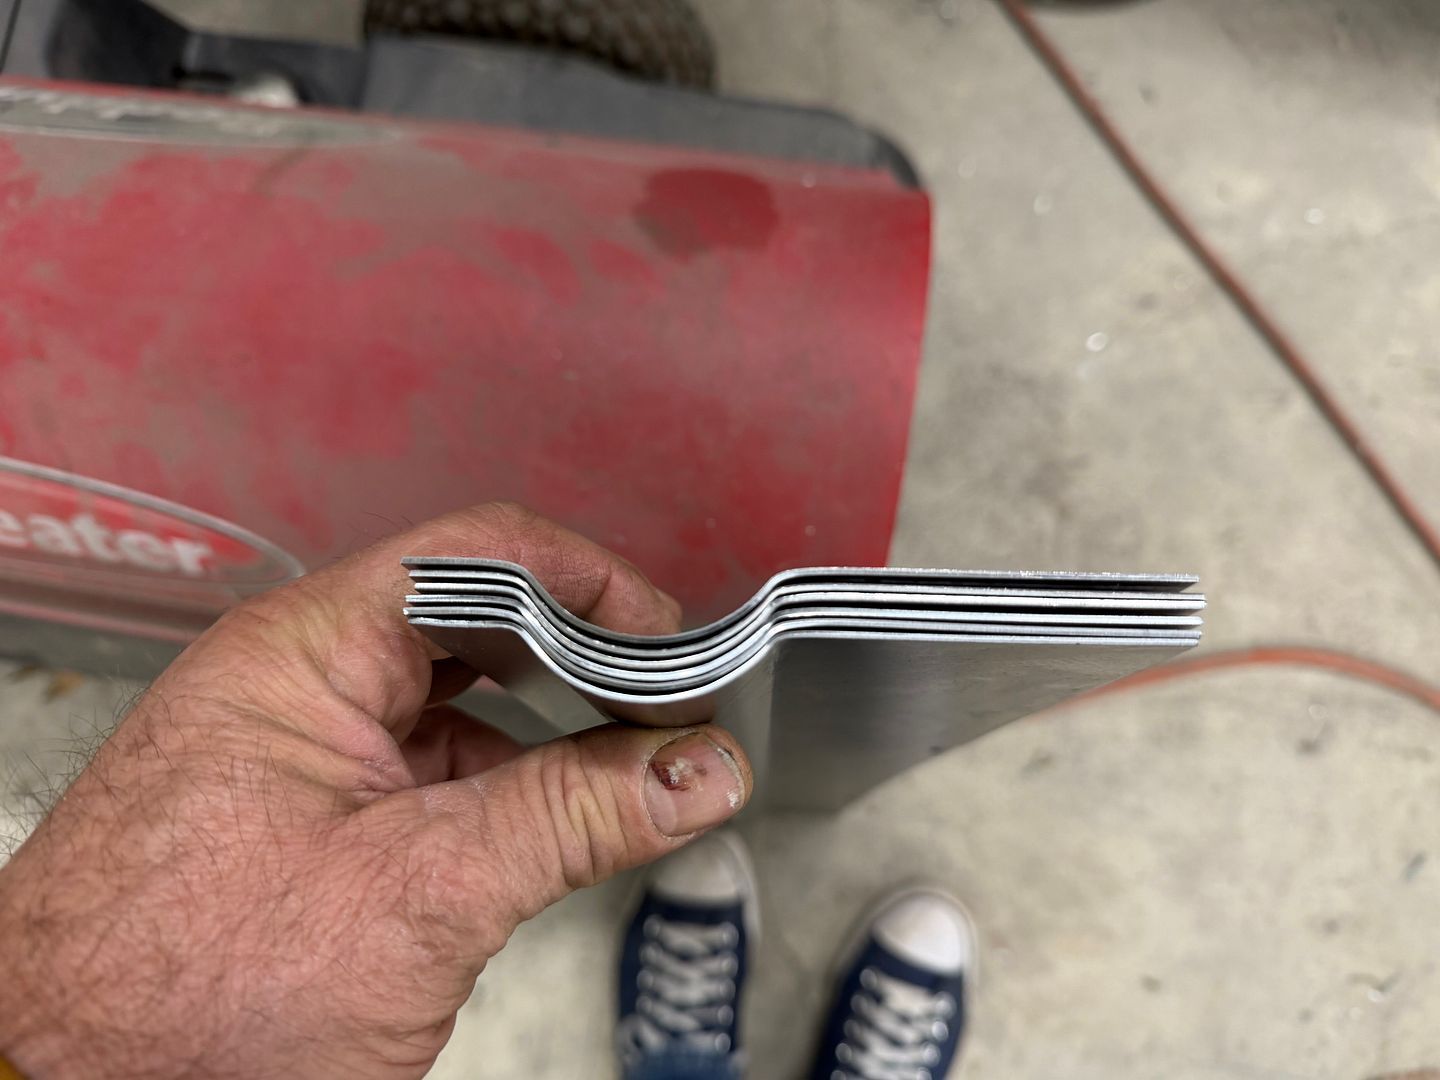
__________________
Robert |
|
|
|
|
02-10-2026, 01:21 PM
|
#1418 |
|
Registered User
Join Date: Jan 2013
Location: Leonardtown, MD
Posts: 1,666
|
Re: 55 Wagon Progress
Next on the Metro's list, as can be seen in the above pictures, is the patches for the wheel arches. We started with a paper pattern to capture the bead details and transferred that to the sheet metal using the trusty ice pick.
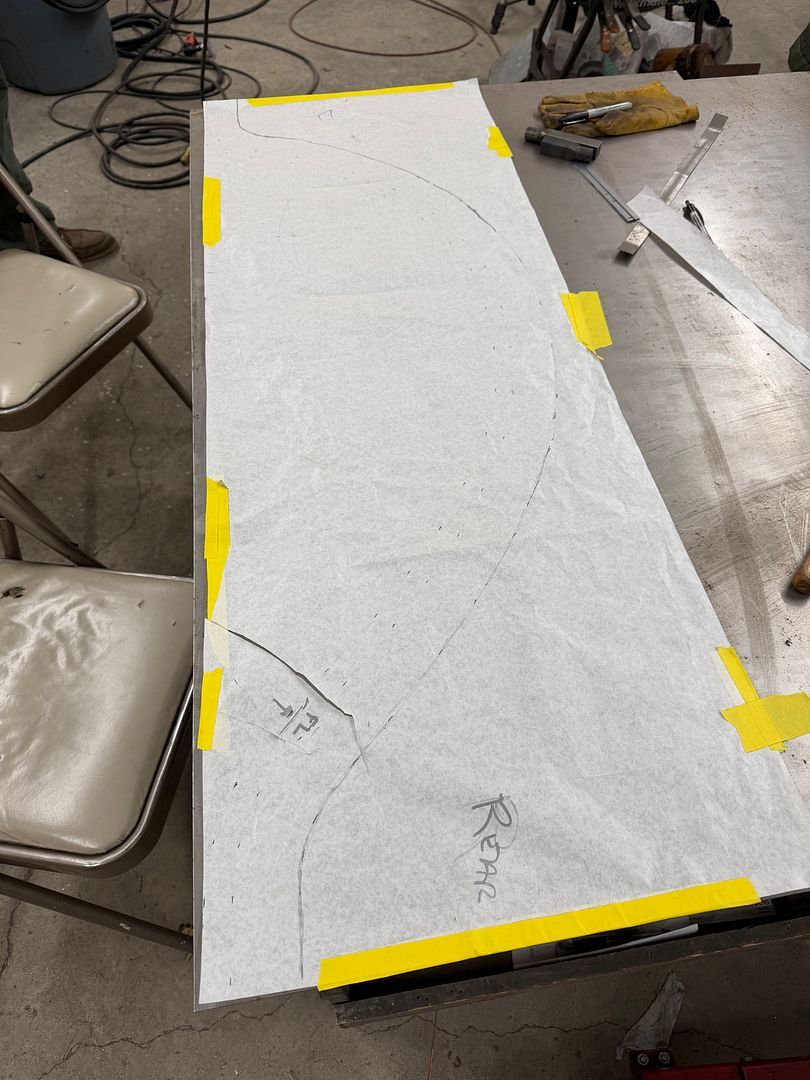 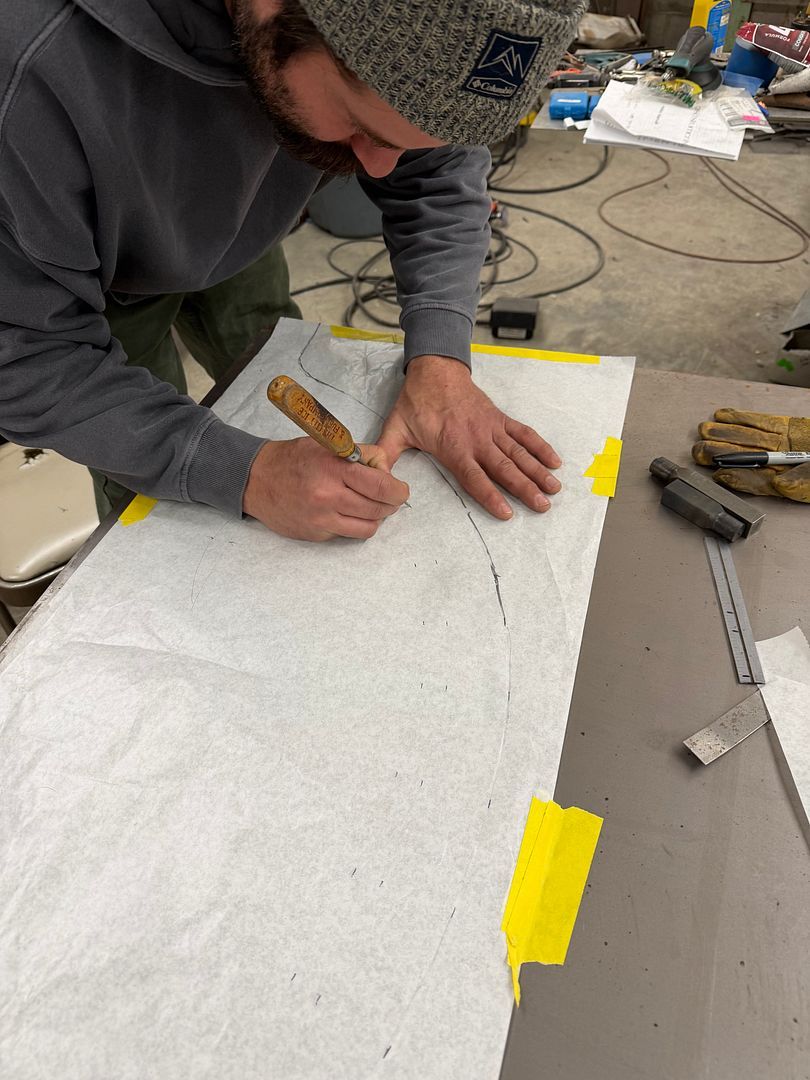  Once cut out, the lower flange was hammered over by hand and then stretched using the linear stretch dies in the Lennox. 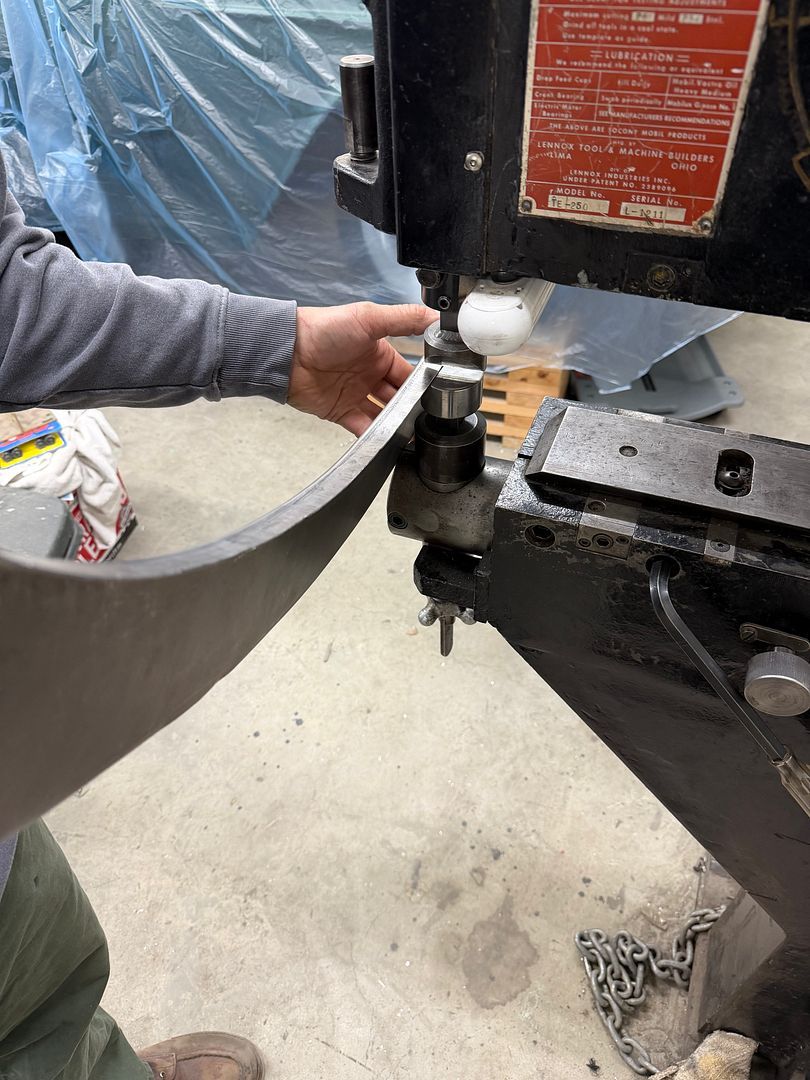 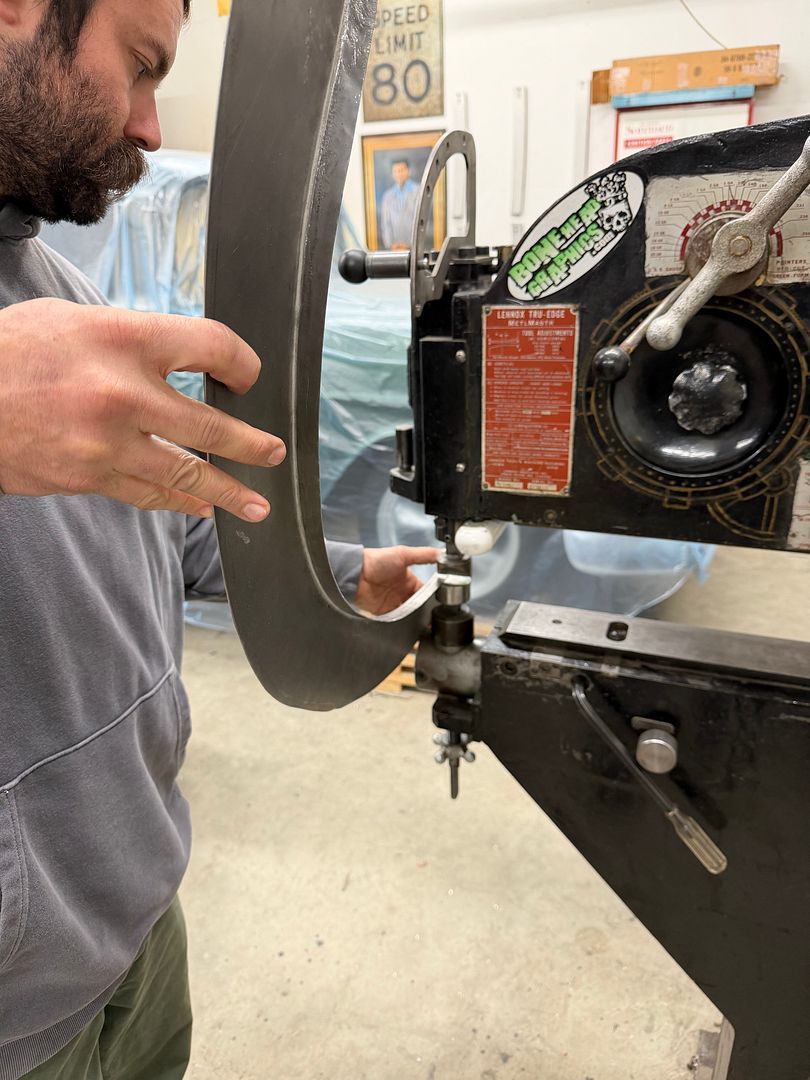 Then run through the shaping dies, the folded flange acts as the guide for the dies. Video (sped up to shorten the time span) : https://youtu.be/Z5VGLil29q4 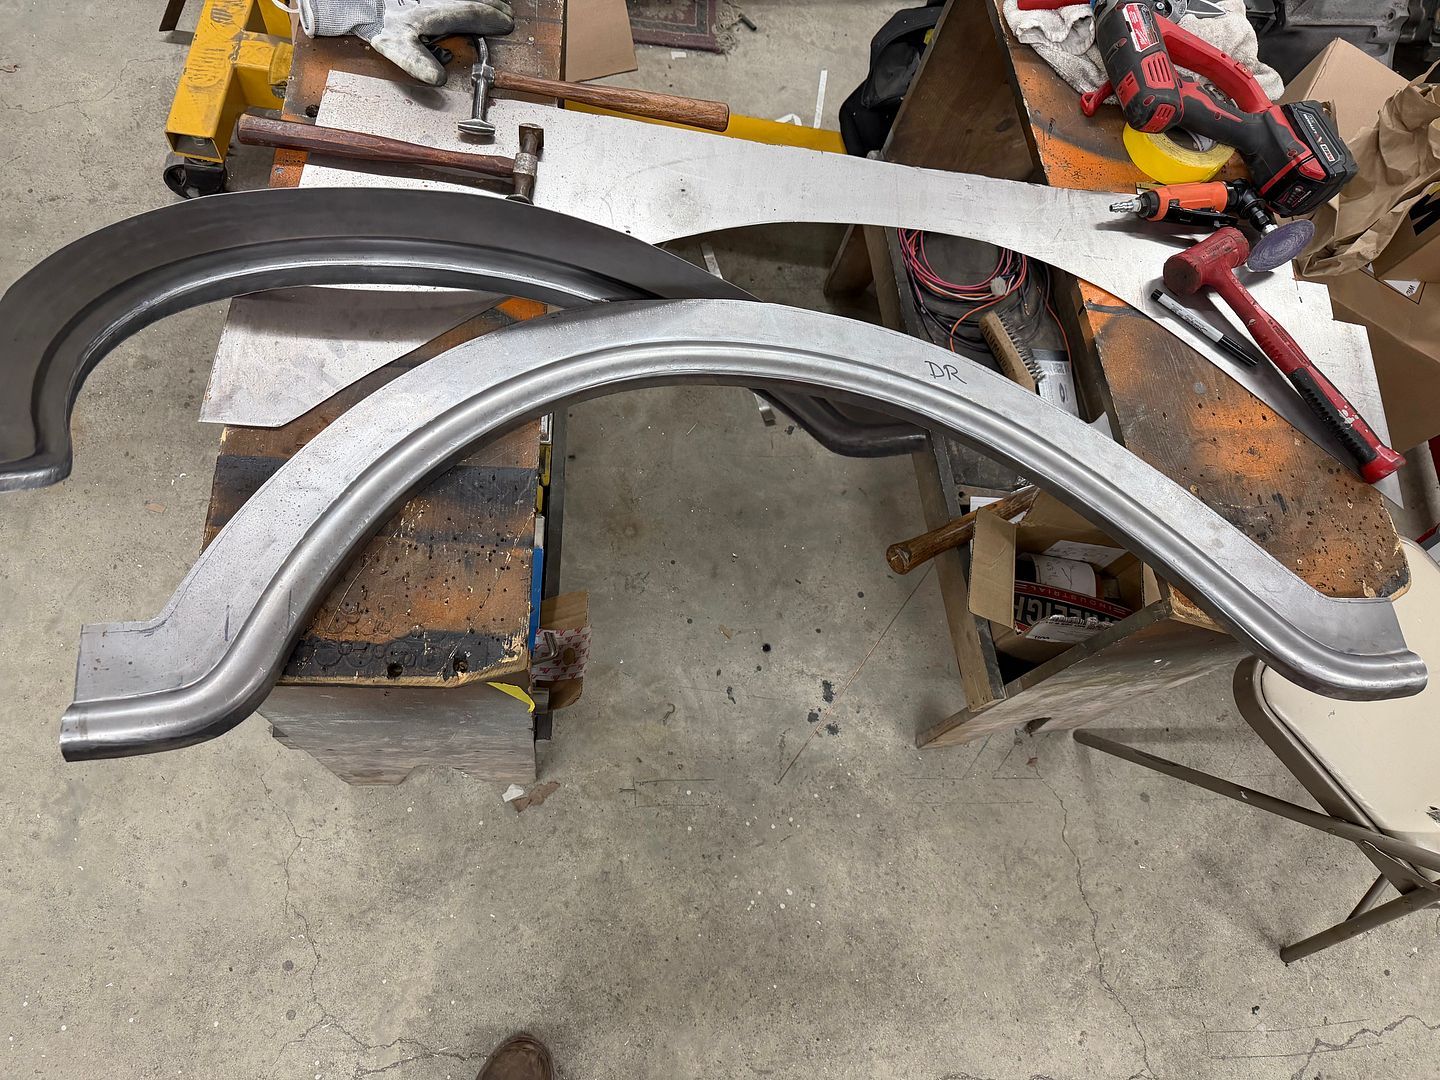
__________________
Robert |
|
|
|
|
02-10-2026, 04:43 PM
|
#1419 |
|
Registered User
Join Date: Sep 2008
Location: Newport, North Carolina
Posts: 688
|
Re: 55 Wagon Progress
So cool to watch the metal take shape like that. Thanks!
|
|
|
|
|
03-18-2026, 11:51 AM
|
#1420 |
|
Registered User
Join Date: Jan 2013
Location: Leonardtown, MD
Posts: 1,666
|
Re: 55 Wagon Progress
Thanks!!
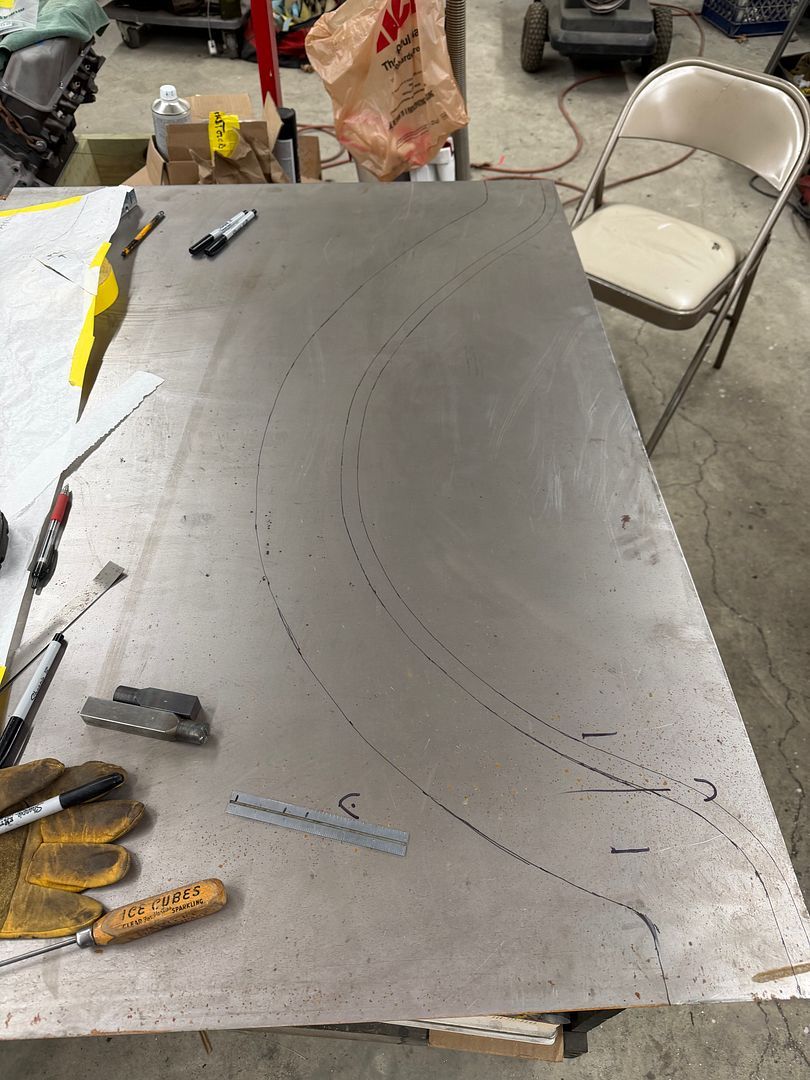
The radius at the bottom of either end of the wheel arches was a bit too tight for the dies in their standard form, I had to add a relief and neglected to get pictures.. To make room, the die was modified using a portaband to cut an X pattern, then a small screwdriver to bend the center tang back and forth until it broke free. 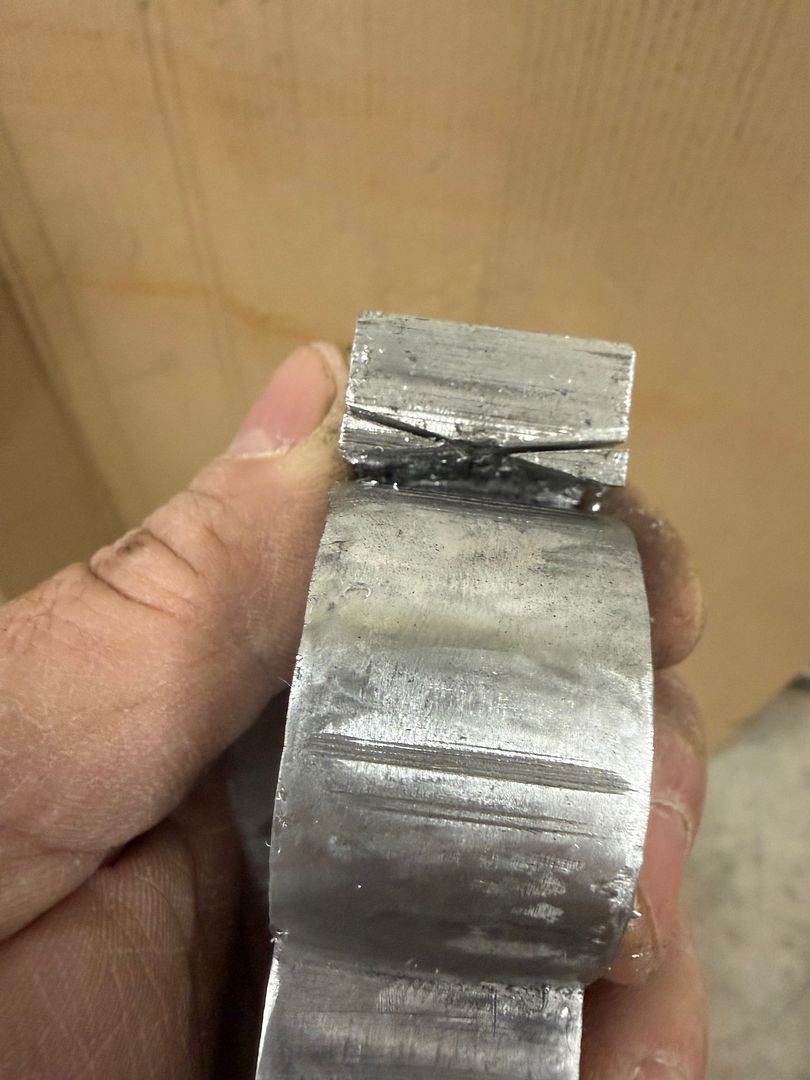 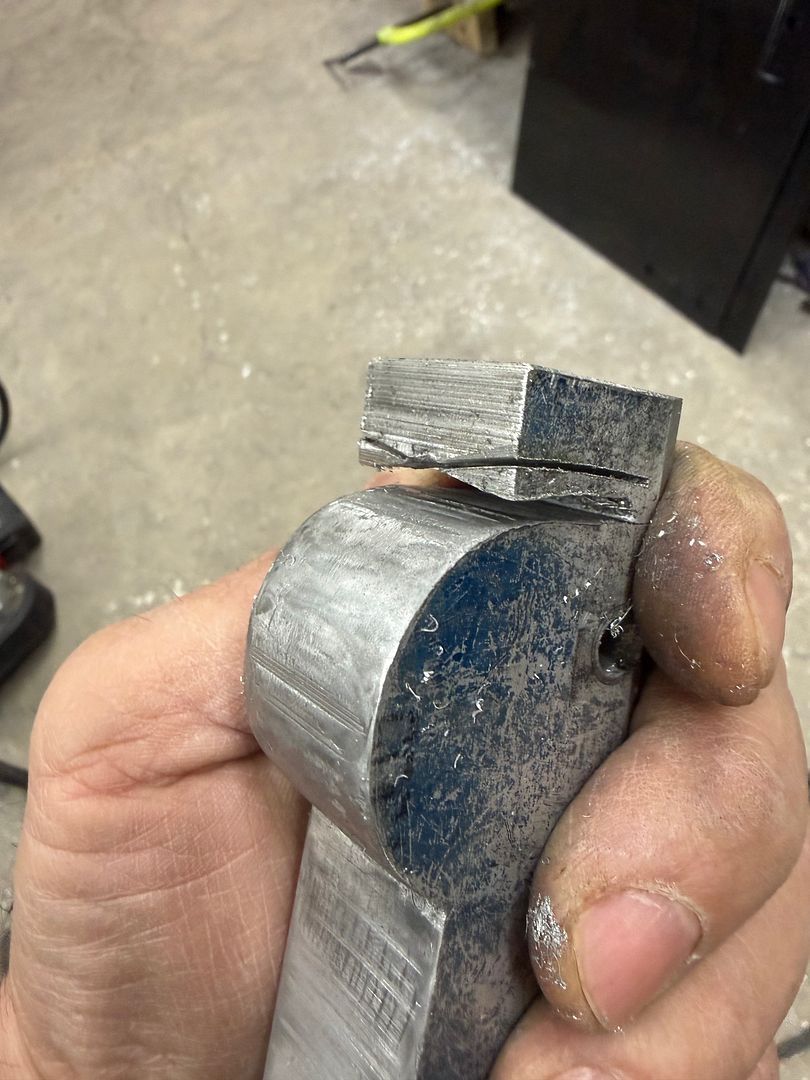 After the wheel arches, we had one more area to fabricate, the step going into the side doors. 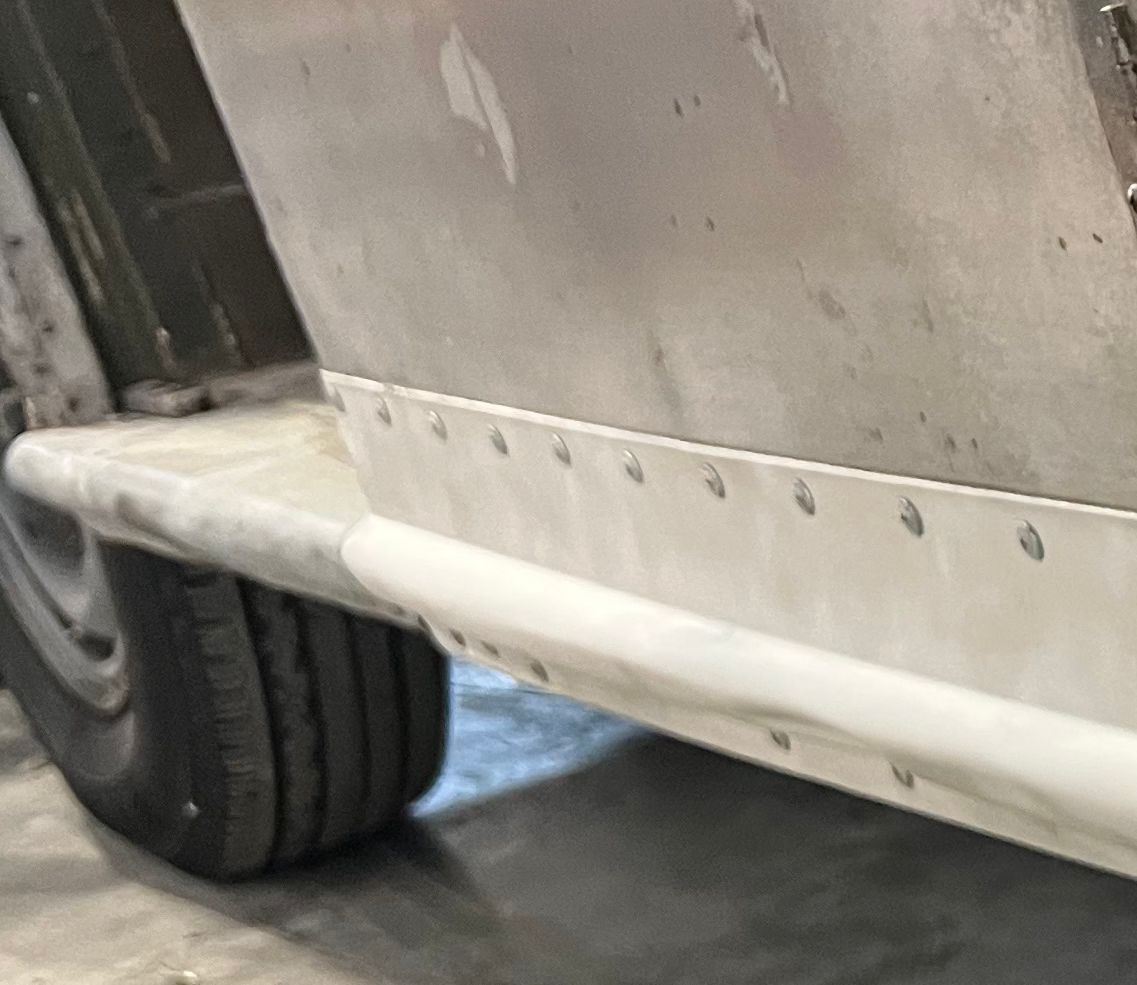 Time to modify the bottom die again... 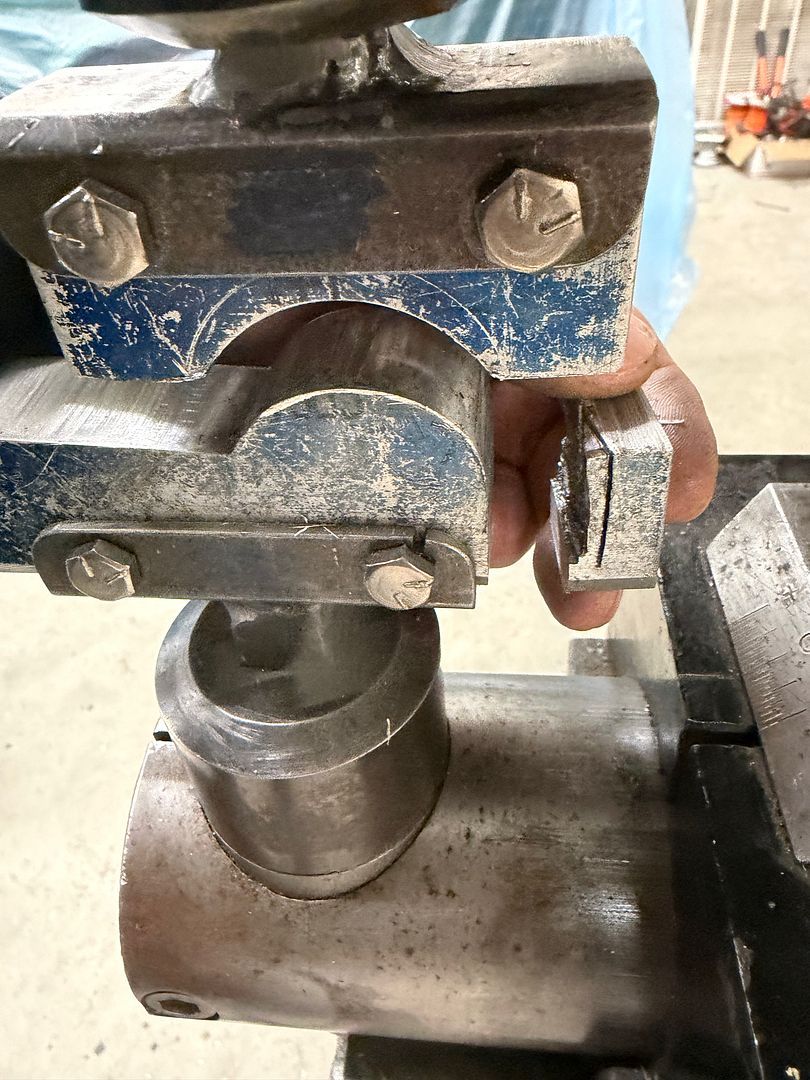 Then we started with an 8" wide piece with a 90 folded down the middle, using a .25R die. The fold was held in snug against the back of the die to act as our guide. Cut off piece was saved in case we need to weld it back on for another set of wheel arches.. 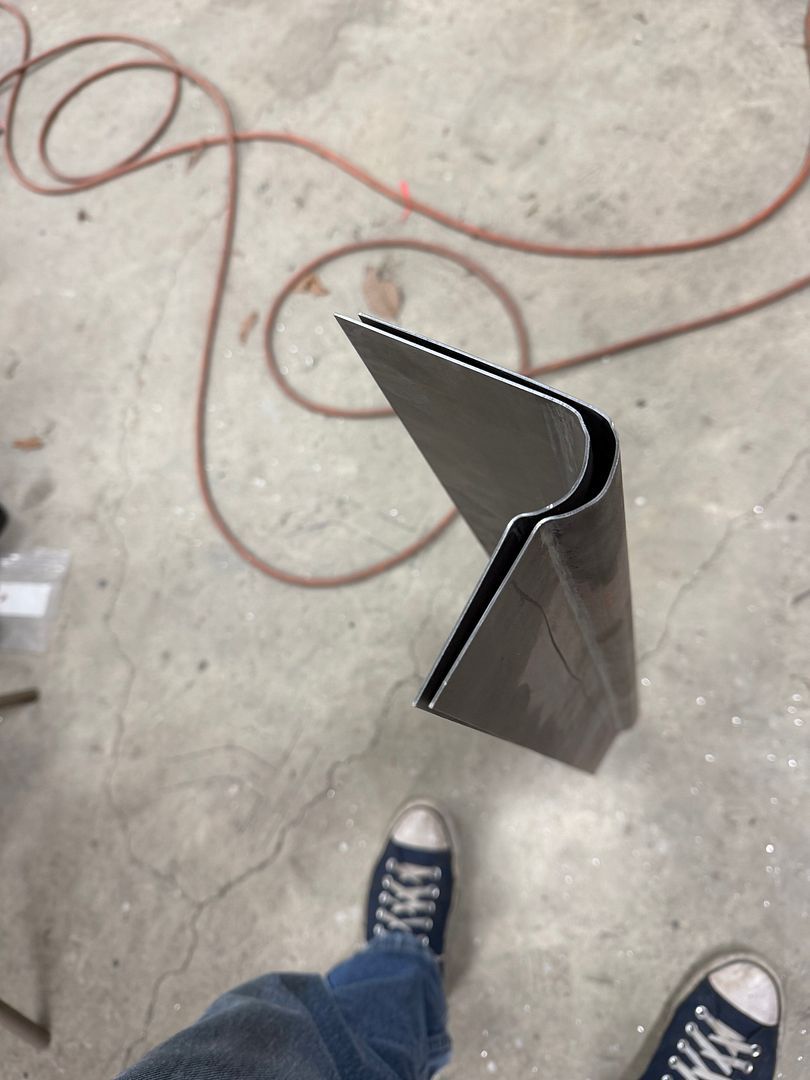 These will be trimmed on the bottom to match the adjacent patches, somewhere along the sharpie mark. 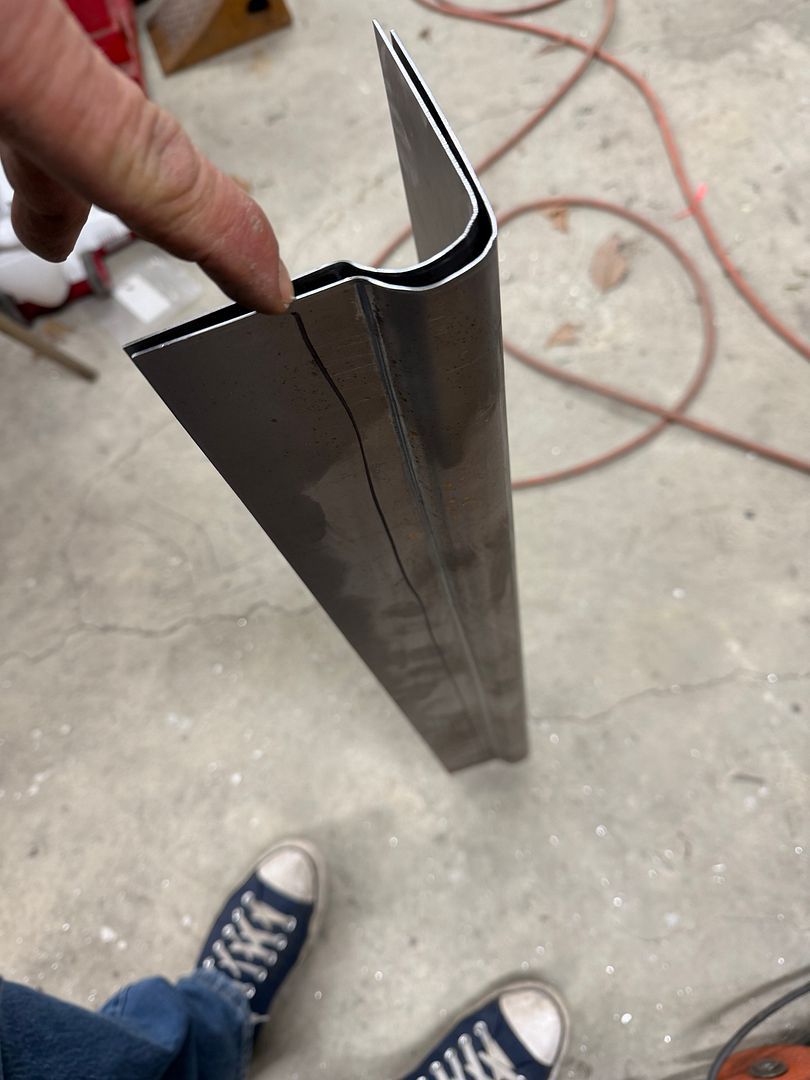
__________________
Robert |
|
|
|
 |
| Bookmarks |
| Thread Tools | |
| Display Modes | |
|
|


 Linear Mode

