
 |
|
|
#26 | |
|
Registered User
Join Date: Jan 2012
Location: Motown
Posts: 7,680
|
Re: 58 TRUK intro
Quote:
on a custom truck, that seam is just plain old fugly. my cowl and firewall were off by an 1/8'', i'll try to explain my method. i tried to find better pics of the process but obviously i didn't take any. there are 3 pieces of metal in the seam: firewall, cowl and inner cowl. if you pull the cowl vent off you will see the inner cowl piece. i started by spot welding the firewall to the the inner cowl from under the dash. you can see where the welding burned the paint on the top of the flange. then i cut out 8'' pieces of the seam, leaving 6'' pieces in between them. a little push pull to line up the 2 sides and welded the center inch together. then i went back and removed the rest of the seam, lined them up and finished welding it. 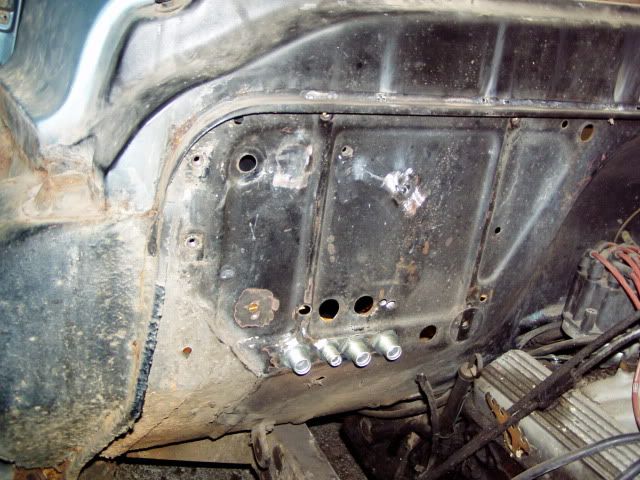 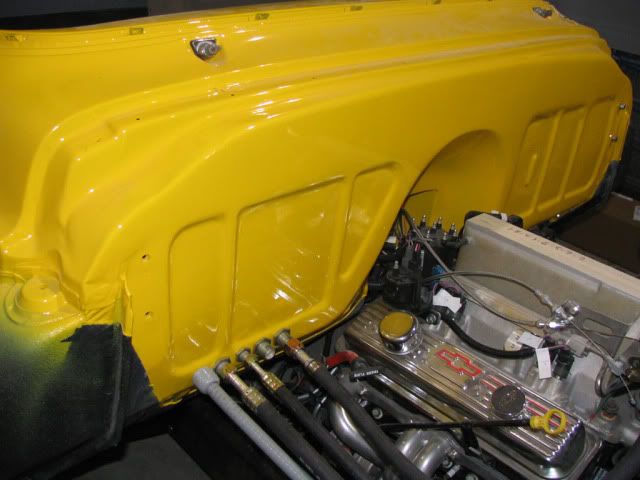 it did take a bit of filler to get the finished firewall flat, luckily it was a inny not an outy.  i left a little seam above my inner fenders, it's right next to the hood hinge and doesn't detract from the look. i welded up 100+ holes in the firewall, the easy way would be a flat sheet over the whole thing. but i think the original ribs make for a more pleasing look. also notice that i shaved my cowl vent. the cowl vent is the number one reason our trucks rust. leaves and junk get in the vent, add some rain and you have a recipe for rust. inner cowl rust, front cab corner rust and hinge pocket rust are all caused by junk in the cowl vent. if you do only one mod to your truck, shave the cowl vent... 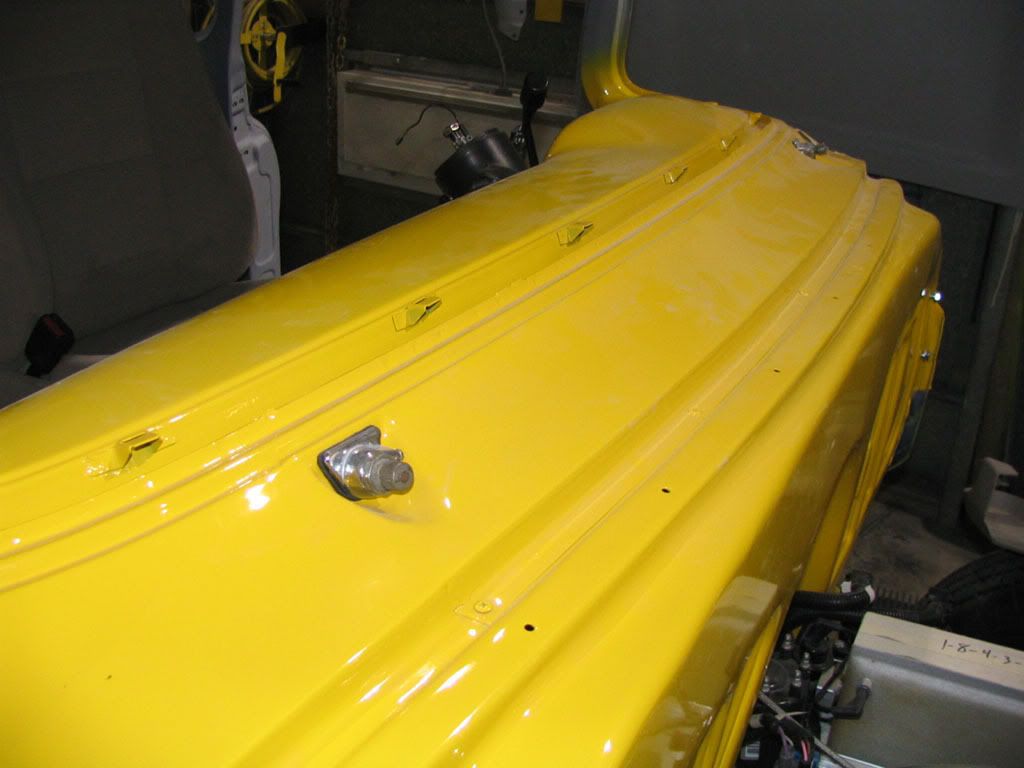 added bonus of no cowl vent is no kick panel vents. this allows you to put some kick speakers in there... 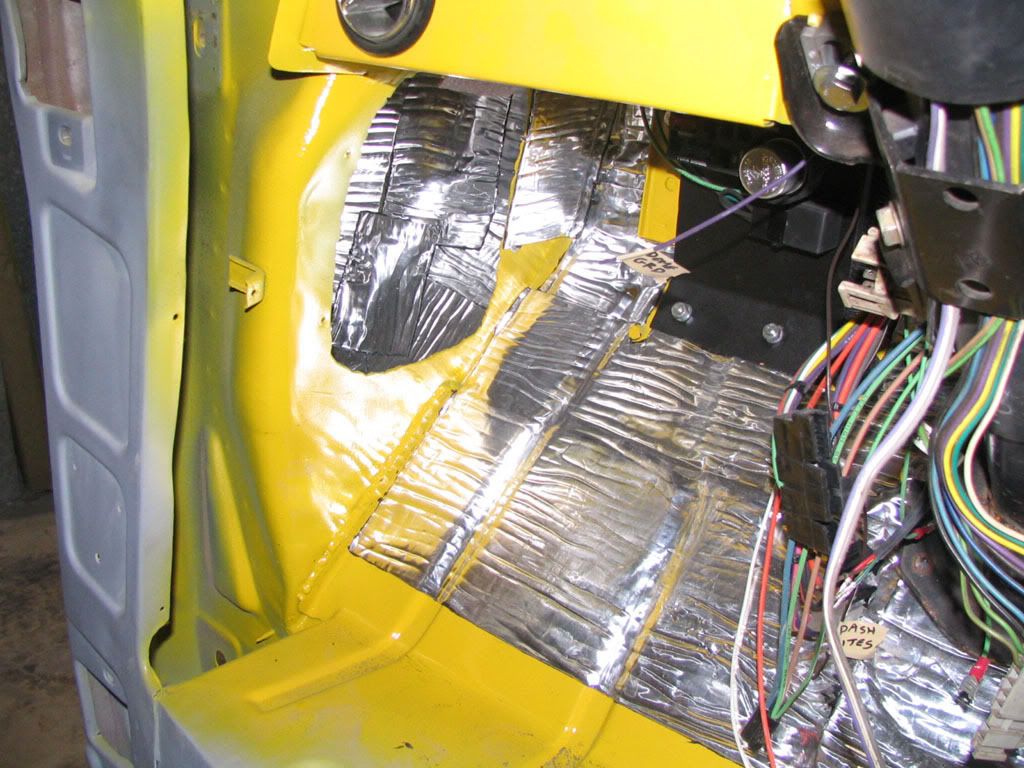 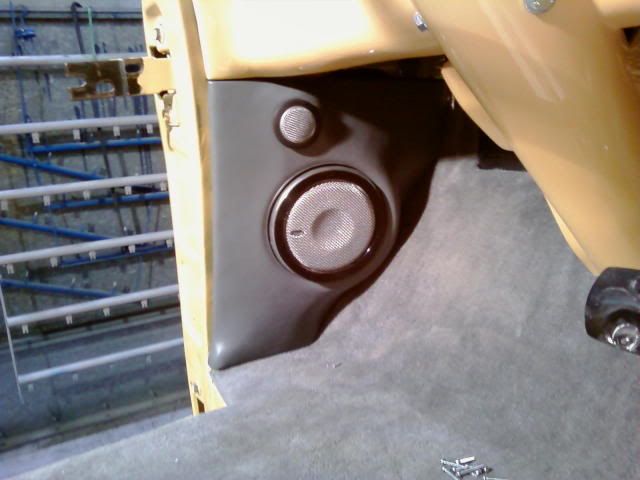
__________________
cool, an ogre smiley  Ogre's 58 Truk build Ogre's 58 Truk buildhow to put your truck year and build thread into your signature shop air compressor timer |
|
|
|

|
|
|
#27 |
|
Registered User
Join Date: Jul 2011
Location: Las Vegas - Nev. aka Sin City
Posts: 1,835
|
Re: 58 TRUK intro
really nice work on everything 1- the door wire looms are very nice - may have to rethink my own thoughts on that
|
|
|

|
|
|
#28 | |
|
Registered User
Join Date: Aug 2007
Location: Corona, California
Posts: 7,998
|
Re: 58 TRUK intro
Quote:
Kim |
|
|
|

|
|
|
#29 |
|
Registered User
Join Date: Jan 2012
Location: Motown
Posts: 7,680
|
Re: 58 TRUK intro
go for it. i won't sue for patent infringement (yet)...
 bed wood: i've seen bed wood that looked worst than original after a couple of years. plus i wanted something different. trex plastic decking from home depot 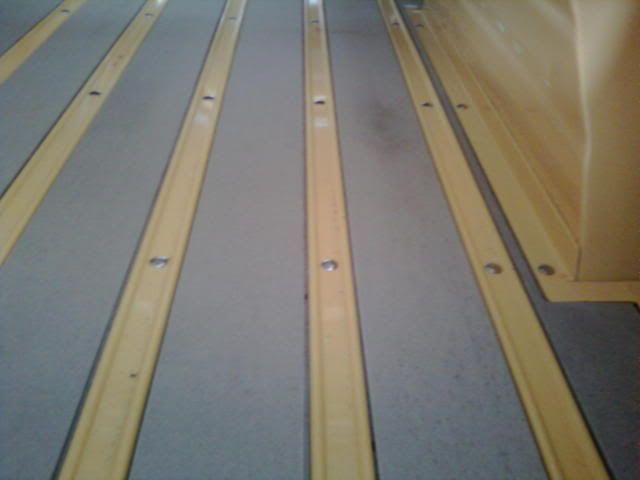 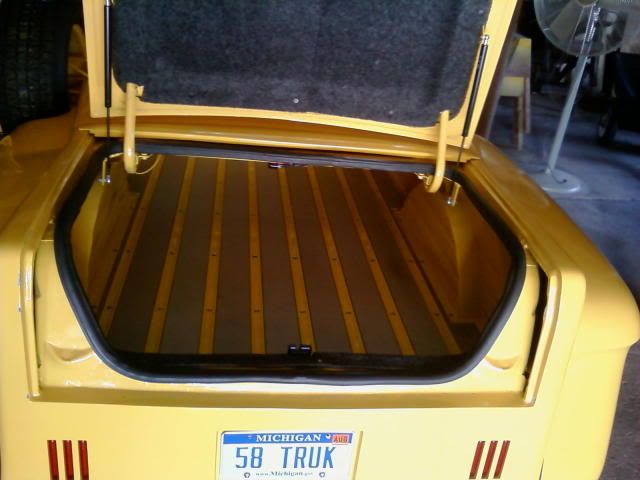 yes, it really is 58 TRUK ^^^^ 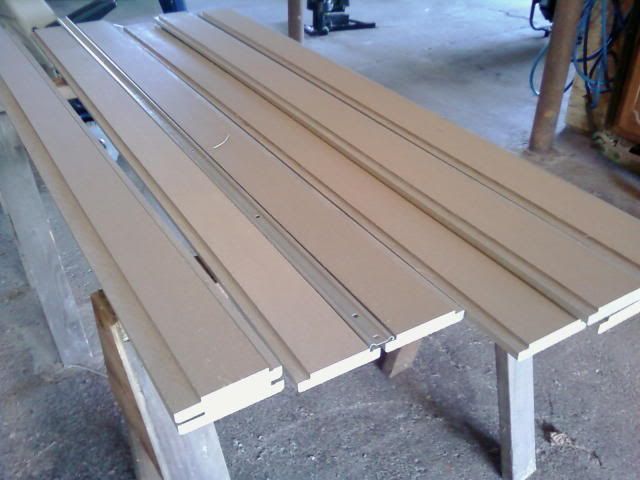 easy to cut on the table saw, won't rot, never needs finishing... what else can i say?
__________________
cool, an ogre smiley  Ogre's 58 Truk build Ogre's 58 Truk buildhow to put your truck year and build thread into your signature shop air compressor timer |
|
|

|
|
|
#30 |
|
Registered User
Join Date: Jan 2012
Location: Motown
Posts: 7,680
|
Re: 58 TRUK intro
if you like the door loom, you'll love these.
door switches: i have an alarm that needed door switches for obvious reasons and i like the dome light on when i open a door. these are 3/4'' strips cut out of some 10ga steel i had laying around. maybe 5'' long. 2 holes. 2 bends. nothing critical, final adjustment is to bend the bracket after installation.  the switches are typical gm door switch from the 60s to 90s. 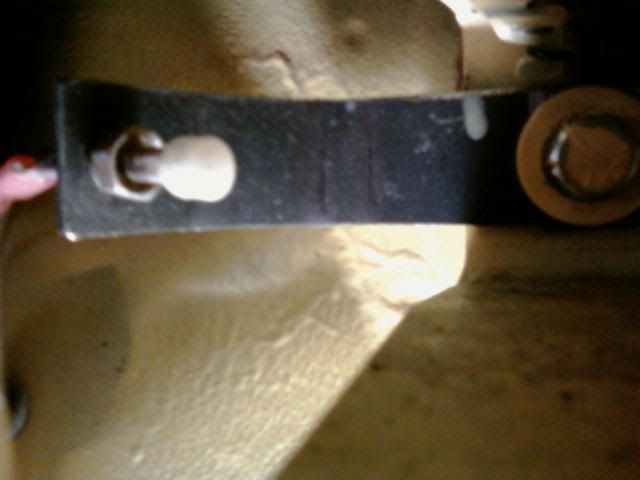 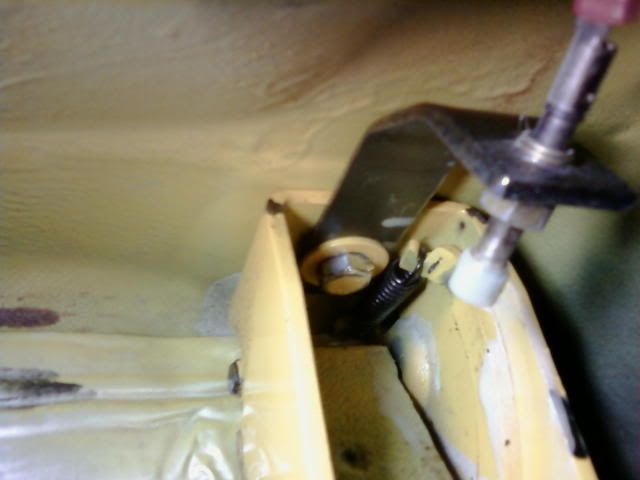 lousy cell phone pics, but you get the idea. door closed (shot looking up at the top hinge). 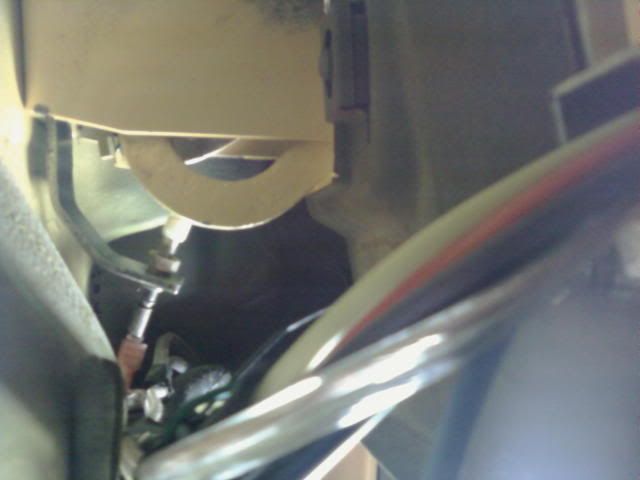 door open 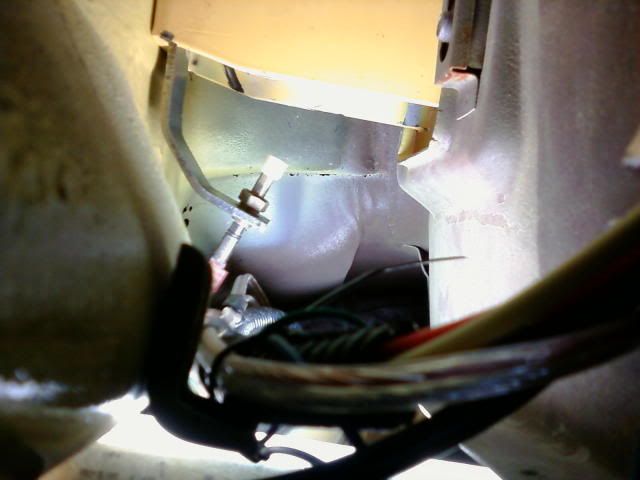
__________________
cool, an ogre smiley  Ogre's 58 Truk build Ogre's 58 Truk buildhow to put your truck year and build thread into your signature shop air compressor timer |
|
|

|
|
|
#31 |
|
Registered User
Join Date: Mar 2011
Location: Queensland, Australia
Posts: 120
|
Re: 58 TRUK intro
lot's of great ideas
|
|
|

|
|
|
#32 |
|
Registered User
Join Date: Jul 2010
Location: Victoria,B.C. Canada
Posts: 175
|
Re: 58 TRUK intro
Cool build. Have anymore picture of the sub box as its being built? I assume its resin soaked fleece?
|
|
|

|
|
|
#33 | |
|
Registered User
Join Date: Oct 2009
Location: Monson,MA
Posts: 503
|
Re: 58 TRUK intro
Quote:
This will be next on the list now! Brian 
__________________
current project; 1950 GMC "Junk Yard Dawg" http://67-72chevytrucks.com/vboard/s...d.php?t=635960 ___________________________________________ SOLD to "ONEBADFIVEFIVE" http://67-72chevytrucks.com/vboard/s...d.php?t=436406 |
|
|
|

|
|
|
#34 |
|
Registered User
Join Date: Nov 2011
Location: Bothell, WA
Posts: 63
|
Re: 58 TRUK intro
Thanks for the help on the ugly firewall seam. I also like the stock look of the firewall ribs so the new flat cover plates doesn't work for me.
I really like the idea of shaving the cowl vent, but if you do, and get rid of the side vents, how do you get fresh air into the cab? |
|
|

|
|
|
#35 |
|
Registered User
Join Date: Jan 2012
Location: Motown
Posts: 7,680
|
Re: 58 TRUK intro
dads burb
how do i get fresh air in the cab? close the doors, roll up the windows and drive. the air rushing past the doors seals will deafen you at 85mph.  that and truk has ac
__________________
cool, an ogre smiley  Ogre's 58 Truk build Ogre's 58 Truk buildhow to put your truck year and build thread into your signature shop air compressor timer |
|
|

|
|
|
#36 |
|
Registered User
Join Date: Jan 2012
Location: Motown
Posts: 7,680
|
Amp gauge to volt gauge conversion
Amp gauge to volt gauge conversion
when i re-wire my truck with a EZ Wire harness and added all the accessories and a lot of loads, i decided not to use the amp meter in the gauge cluster. rather than leave it dead, i converted it to a volt gauge. i didn't take any pics of the conversion, but this is how it turned out. i used a $10 autozone off the shelf 2'' volt gauge. i gutted the gauge down to the bare essentials, no case and no face plate. i gutted the stock amp meter down to the bare essentials too. no guts, just the back and face plate. it was a close fit width wise, to screws held the face plate on the volt gauge, 2 screws held the face plate on the volt gauge. hammered a couple of dimples out of the amp gauge face plate and drill 2 holes to match the volt gauge and screwed it on. the needle didn't match the other gauges so i whacked it off and used a little epoxy to attach the old needle to the new gauge. the studs on back of both gauges were the same. i carefully reused the old and new insulators to make sure nothing would short out. calibration: hooked it up to a fully charged battery and bent the needle to match the center dot on the old face. installed it. usually it run positive of the center dot; charging at 14 volts. ignition off it goes to the left 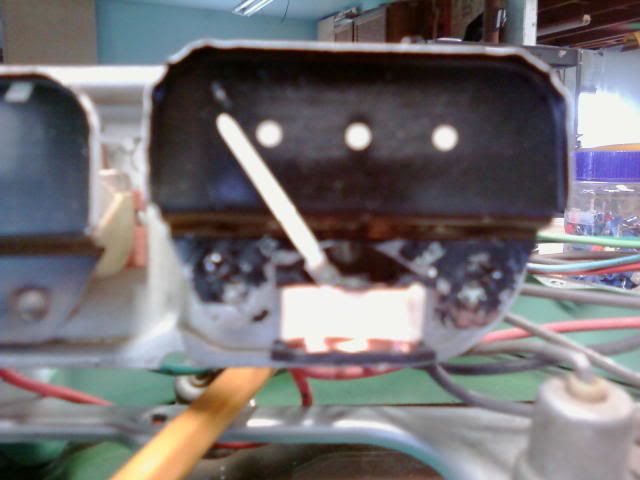 old temp gauge and new volt meter. new gauge sticks out 1/16'' past, but who cares... 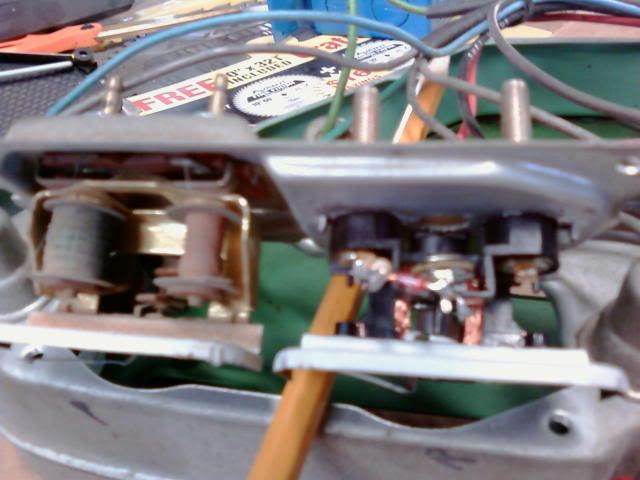 gauge back with old and new insulators. new gauge has threaded studs. 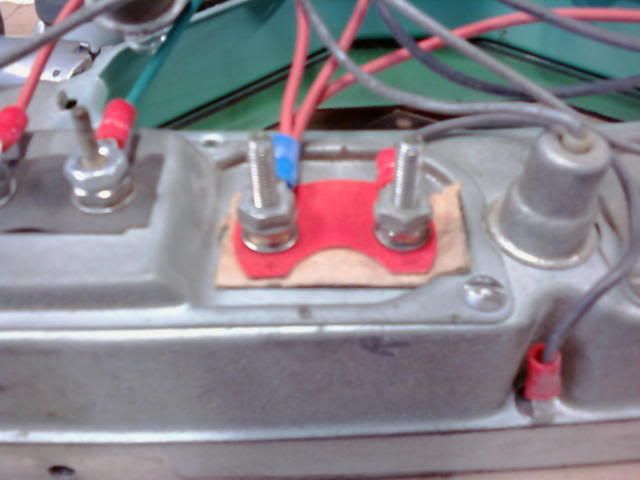 new face plate ($9) and a little crinkle paint from a spray bomb and this is the finished product. 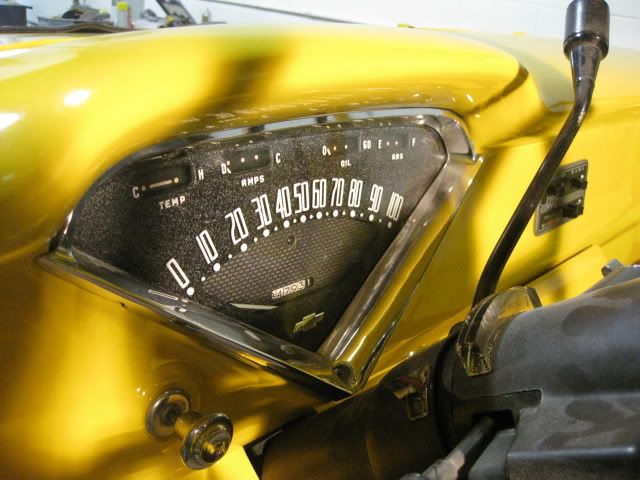 notice the new volt gauge position, just right of center tell me i'm approx at 14 volts. i bought a new speedo to reset the odometer, i figured everything on truk was new, the odometer should show new truk miles   it's an amazing transformation from old to new. all new bulbs, a little washing and a little paint and it looks better than new. i have my gauges out to replace the speedo, it was hanging at 30 and would work again after 45 (and a bump in the road) classic parts has new speedos for $99, cheaper than i could get it worked on.
__________________
cool, an ogre smiley  Ogre's 58 Truk build Ogre's 58 Truk buildhow to put your truck year and build thread into your signature shop air compressor timer |
|
|

|
|
|
#37 |
|
Registered User
Join Date: Aug 2007
Location: Corona, California
Posts: 7,998
|
Re: 58 TRUK intro
The gauge cluster looks real nice.
Kim |
|
|

|
|
|
#38 | |
|
Registered User
Join Date: Jan 2012
Location: Motown
Posts: 7,680
|
Re: 58 TRUK intro
Quote:
 i learned everything i know from fiberglassforums.com good site too, the admin just revamped it. shaping 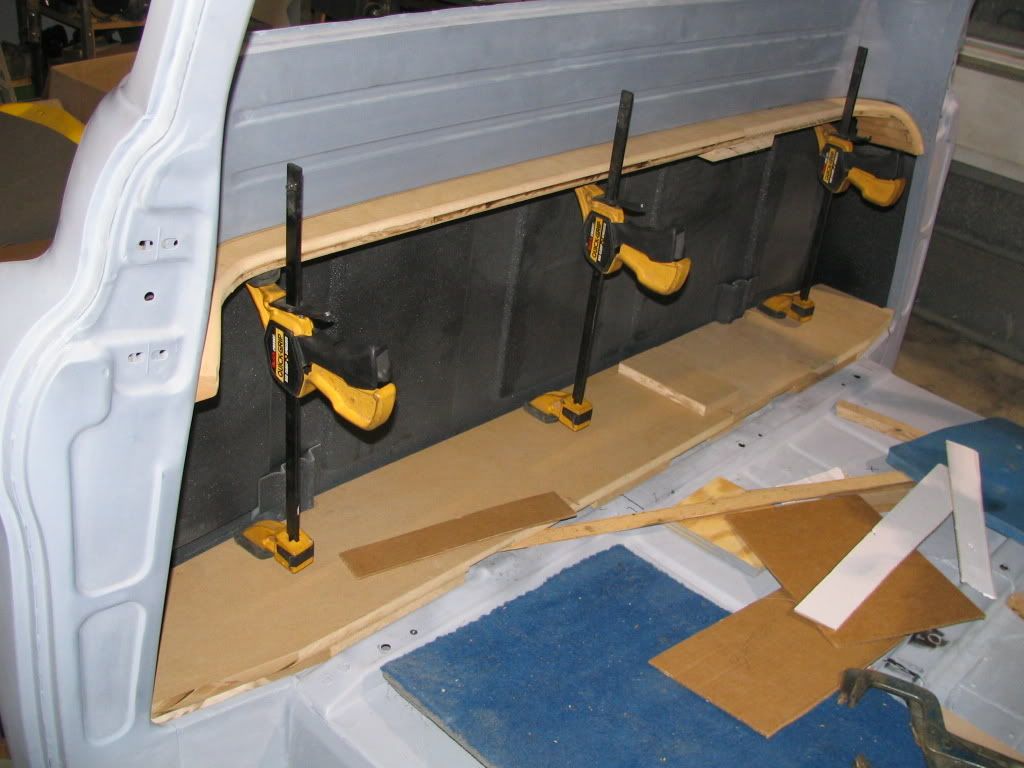 pre-fleece 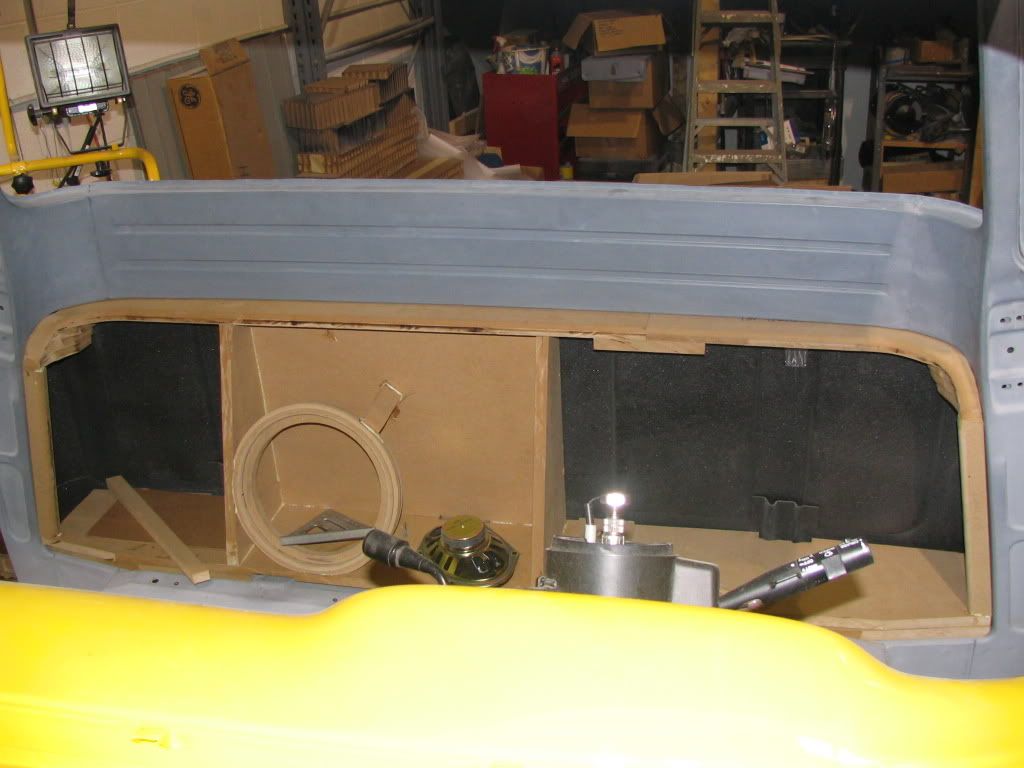 fleeced (actually ponte) 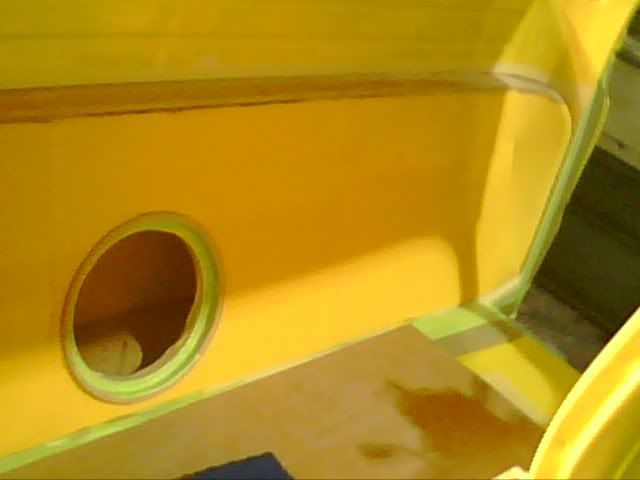 glassed  painted  the enclosure with out the arm rest would fit behind any bucket or bench seat. it finishes of the whole area behind the seats all the way to the door edge. follow the link above to see an in depth overview of my fiberglass interior. i designed everything to slide in and out, though i have to gut truk to remove this 
__________________
cool, an ogre smiley  Ogre's 58 Truk build Ogre's 58 Truk buildhow to put your truck year and build thread into your signature shop air compressor timer |
|
|
|

|
|
|
#39 |
|
big guy
Join Date: Jun 2008
Location: mass
Posts: 824
|
Re: 58 TRUK intro
Your truck just blew me away! very impressive work and the quality is top notch. I like how you add new technology with old school looks, very nice.
Ray |
|
|

|
|
|
#40 |
|
Registered User
 Join Date: Mar 2007
Location: Scotts, Michigan
Posts: 3,774
|
Re: 58 TRUK intro
Great pics. I have to complete this same area on my interior...I will be tackling that this winter. I have also book marked the fiberglass site.
Keep it up. Marc
__________________
…………...........__________ .................. ((__|__||___\____ ..;.;;.:;:;.,;..;((_(O))____ (_(O)) 1948 Chevy Truck - Finished SOLD!! 1953 Chevy Suburban "Family Truckster" Completed: Spring of 2021 http://67-72chevytrucks.com/vboard/s...d.php?t=605484 1994 4x4 Blazer - "Field Find" https://67-72chevytrucks.com/vboard/...ferrerid=30857 |
|
|

|
|
|
#41 |
|
Registered User
Join Date: Jul 2010
Location: Victoria,B.C. Canada
Posts: 175
|
Re: 58 TRUK intro
|
|
|

|
|
|
#42 |
|
Registered User
Join Date: Jan 2012
Location: Motown
Posts: 7,680
|
Re: 58 TRUK intro
thanks people.
 i spent a yr on the fiberglass, i will warn you: once you start, it will snowball from there. the basic idea for the subwoofer/battery/amp enclosure would work behind the seat of any truck. i found this picture the other day, it shows the kick vent cut out. notice my original dash fascia at the top of the photo, this was my original interior design. a bent piece of metal that went the whole length under the dash. ac vents and the stereo were already installed at this time, it was cheesy to say the least. 
__________________
cool, an ogre smiley  Ogre's 58 Truk build Ogre's 58 Truk buildhow to put your truck year and build thread into your signature shop air compressor timer |
|
|

|
|
|
#43 |
|
Registered User
Join Date: Jan 2012
Location: Motown
Posts: 7,680
|
step well paint protect
i used body color in my step wells.
one of the guys that hangs around the shop installs 3m paint protection film as a side job. he put 2 coats of the 3m film on both my steps to keep the paint from being scratched. i've seen carpet, aluminum plate and other methods to keep foot prints off the steps. the film works well, been there for 3 yrs thru construction and 5000 miles and my steps still look good. we tried to put it on the bed steps, but the ups and downs of those steps were too sharp to get the film to lay down. 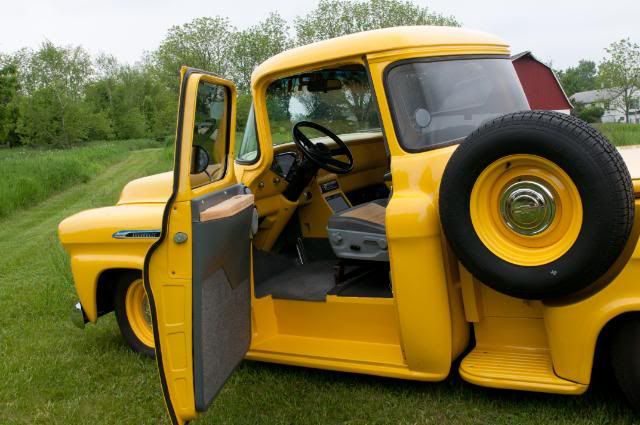
__________________
cool, an ogre smiley  Ogre's 58 Truk build Ogre's 58 Truk buildhow to put your truck year and build thread into your signature shop air compressor timer |
|
|

|
|
|
#44 |
|
Registered User
Join Date: Jan 2007
Location: York, Pa.
Posts: 1,386
|
Re: 58 TRUK intro
Ogre, very nice truck. I love all the custom interior stuff you did. I plan to do my panel like that when I get to that point. Great job and drive the wheels off it.
Shannon |
|
|

|
|
|
#45 |
|
Registered User
Join Date: Aug 2011
Location: North Carolina
Posts: 275
|
Re: 58 TRUK intro
Ogre you have a great looking truck. I like the cover and deck lid on your bed.
__________________
1958 Chevy Apache Stepside 1955 BBW Fleetside |
|
|

|
|
|
#46 |
|
Registered User
Join Date: Jan 2012
Location: Motown
Posts: 7,680
|
Re: 58 TRUK intro
thanks again guys...
 since i shaved my truck, i still wanted to identify it as a 58. the fender spear is an inch thick and didn't look right with the shaved look. so i did this ( i really need to get a better picture) 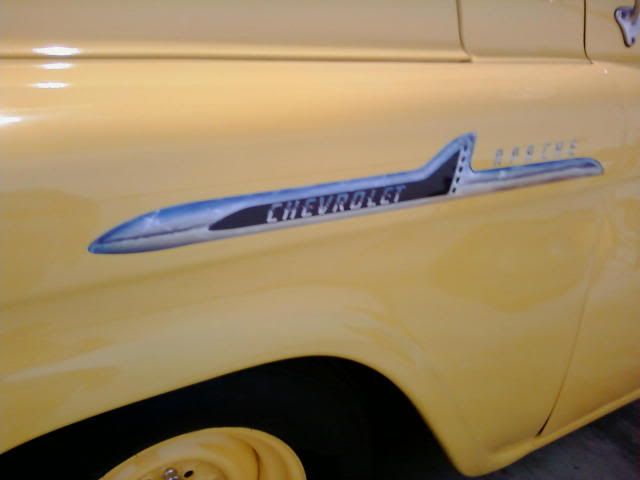 air brush artist, shaggy, at work. gee, i wonder why they call him shaggy. he only used blue, black, brown and white paint. looks like chrome. i have people touch it to make sure it's not real. then they say ''a sticker?''  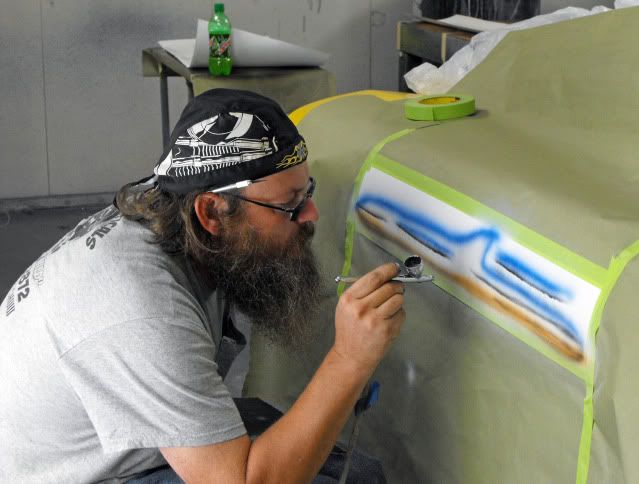
__________________
cool, an ogre smiley  Ogre's 58 Truk build Ogre's 58 Truk buildhow to put your truck year and build thread into your signature shop air compressor timer |
|
|

|
|
|
#47 |
|
Registered User
Join Date: Aug 2011
Location: Western Iowa
Posts: 147
|
Re: 58 TRUK intro
Man, that's waaay cool. He did a terrific job!
|
|
|

|
|
|
#48 |
|
Registered User
Join Date: Aug 2007
Location: Corona, California
Posts: 7,998
|
Re: 58 TRUK intro
Very slick. I like the airbrushed emblems.
Kim |
|
|

|
|
|
#49 |
|
Registered User
Join Date: Jul 2011
Location: Las Vegas - Nev. aka Sin City
Posts: 1,835
|
Re: 58 TRUK intro
gee he looks like me!!!!!!!!!!!
|
|
|

|
|
|
#50 |
|
Registered User
Join Date: Jan 2012
Location: Motown
Posts: 7,680
|
remote reservoir
thanks folks. i appreciate it.
 took these pictures of the remote reservoir removed from a nissan quest or mercury villager. i bought the mc, tank and lines for $35, had to add 2- 3' lines to it. i tried to keep the firewall clean, but had to add this item. the lines exit out of the back at an angle down, so i managed to keep it low as possible. 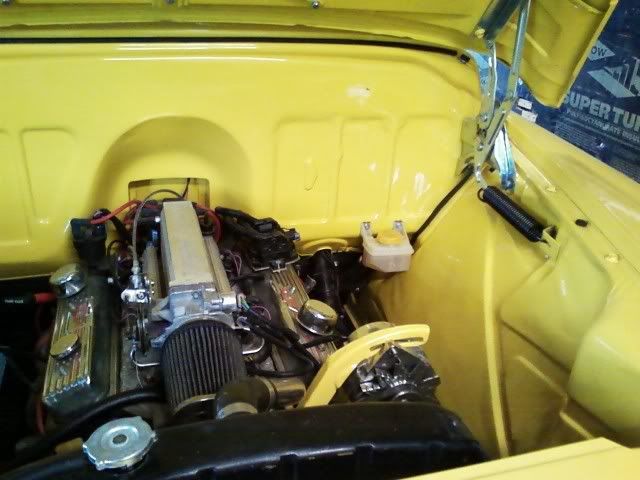 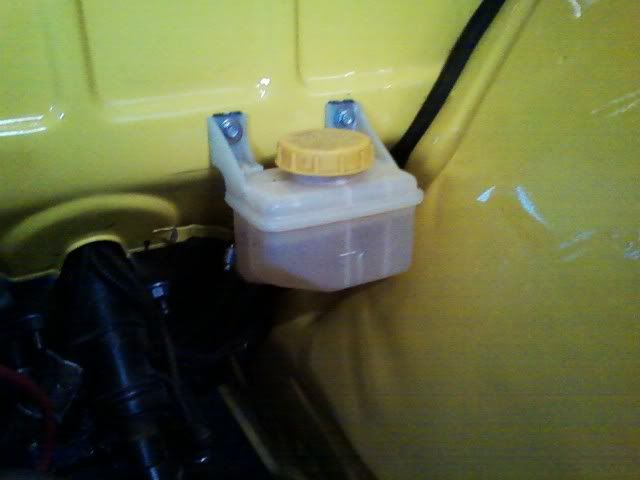
__________________
cool, an ogre smiley  Ogre's 58 Truk build Ogre's 58 Truk buildhow to put your truck year and build thread into your signature shop air compressor timer |
|
|

|
 |
| Bookmarks |
| Thread Tools | |
| Display Modes | |
|
|