
 |
Register or Log In To remove these advertisements. |
|
|
|
|||||||
 |
|
|
Thread Tools | Display Modes |
|
|
#26 |
|
Registered User
Join Date: Mar 2012
Location: Red Lake, ON
Posts: 106
|
Re: '87 GMC Blue Rhino Project
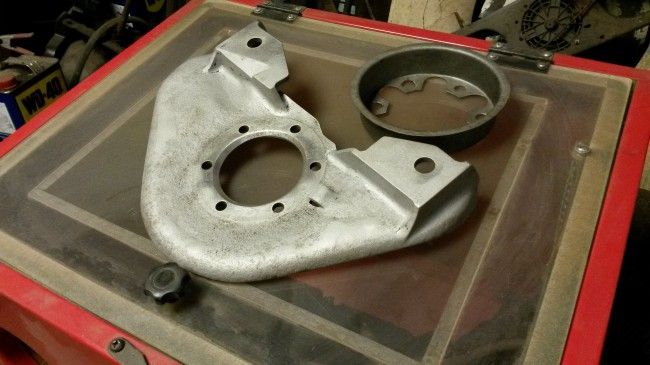
I bought a used media blaster box and was anxious to try it out. Already there is a huge difference on this part for the few minutes I spent on it. Even thou it's enclosed there's a lot of dust and I was out of masks so I will leave it for another day. Next I will clean up the part next to it, not sure what it is called but it will be welded onto the backside of this bracket. It was quite an adventure finding 2 that were usable.
|
|
|

|
|
|
#27 |
|
Registered User
Join Date: Dec 2011
Location: Regina, SK, Canada
Posts: 622
|
Re: '87 GMC Blue Rhino Project
Nice work, looking forward to seeing your disc's up and running or should I say stopping!
__________________
1979 Chevy Dually Crew 4X4 454, D60 Tru-trac, D70 Detroit Locker, 3.73, 4L80E/NP205 1971 GMC 3/4 Ton 4X4 |
|
|

|
|
|
#28 |
|
Registered User
Join Date: Mar 2012
Location: Red Lake, ON
Posts: 106
|
Re: '87 GMC Blue Rhino Project
Thanks, Bilfman-me too
Did a bit of progress on the rear brakes. Got the axle tube bracket positioned and have beveled the inside edges for welding. On the donor axle this flange was tilted to the back 20 degress so I did the same here. Only tacked it into place before I get carried away. 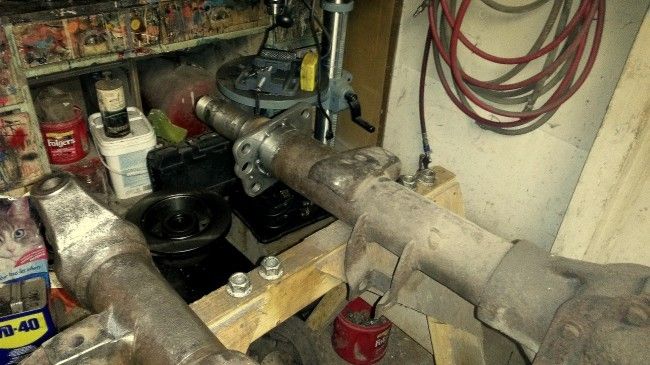 I did a mock up and so far everything looks straight and in place. 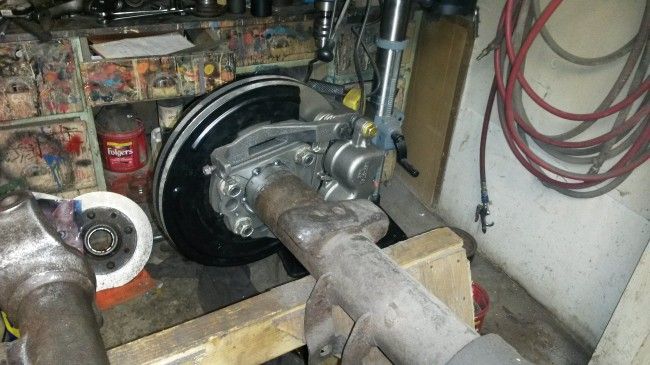 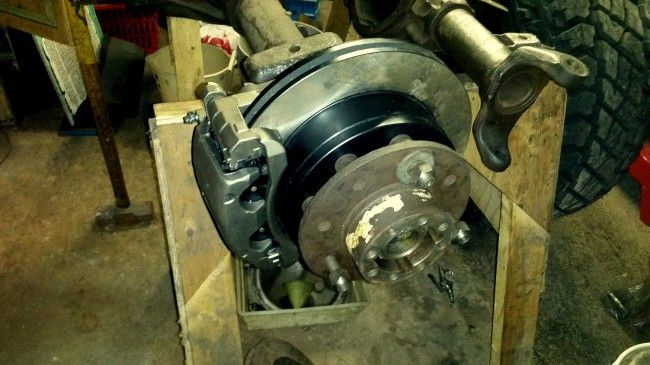 I thought I would take a break from this and get to some exhaust work. Just some quick welding for the O2 sensor bung and flanges, add some high temp paint and start installing. Well the next day and today it snowed so I will wait for another time. Noticed some bear tracks in the fresh snow, wished I could've gotten some pics of them. Sorry for the poor quality pics, I will try to do better next time. Just got too excited with some actual progress on this long slow project. 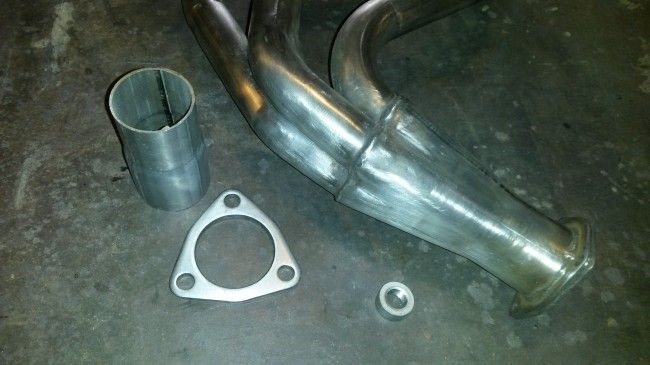
|
|
|

|
|
|
#29 |
|
Registered User
Join Date: Mar 2012
Location: Red Lake, ON
Posts: 106
|
Re: '87 GMC Blue Rhino Project
It's been a long summer but I still haven't given up. I decided to finally tackle the exhaust now that I had the headers painted. The header instructions said to remove the spark plugs for installation but I couldn't resist putting new ones in with all the room available. It also said to trim the left side engine mount, (which I did). I had to bend the shifter linkage for clearance also. The driver's side headers were installed from the bottom up. Working slowly I cleared the spark plugs althou I mangaged a few scrapes.
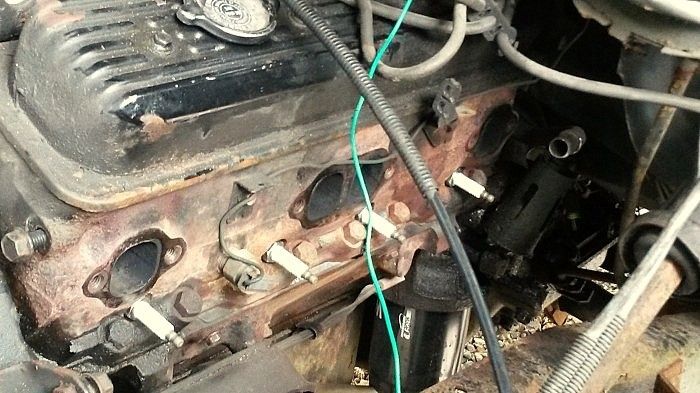 I painted the headers with common wood stove paint without much expectations but it has held up surprisingly well. The passenger side headers dropped in from the top without a hitch althou I had to tweak the dipstick tube a bit. 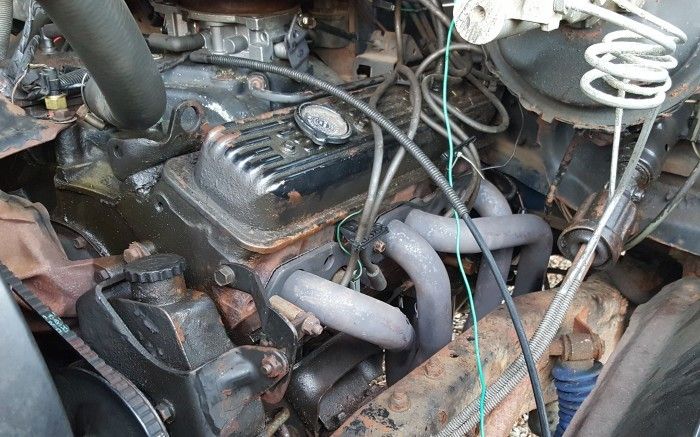 While I was working underneath I decided the useless long rusted out right side tank could come off to clean things up a bit. I have had a filler neck leak for a long time but the smell of gas was way too noticeable and sure enuff the left side tank sprouted a leak. The next day I ordered one up along with the straps. But the support brackets were finished and the fuel pump outlets were in very poor shape too. I scrounged around our wrecking yard and salvaged two brackets. These are from the passenger side and one set had holes that didn't line with the holes on the frame. I drilled out the new locating holes and welded nuts on. After a good sand blasting they ended up looking nice. 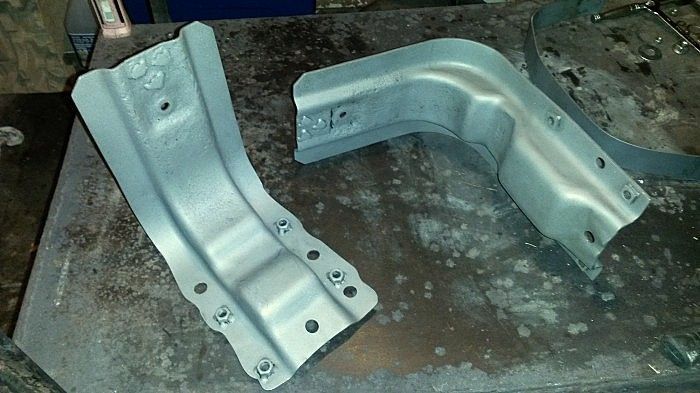 These are the pieces that used to hold up the tanks. The salt is brutal here on the roads during winter months. 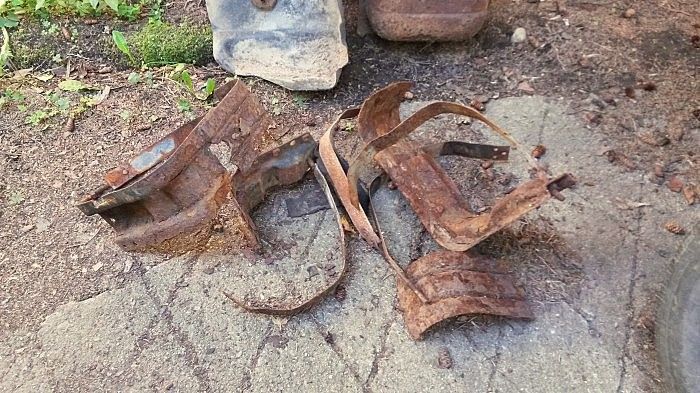 Here I am test fitting all the pieces together. 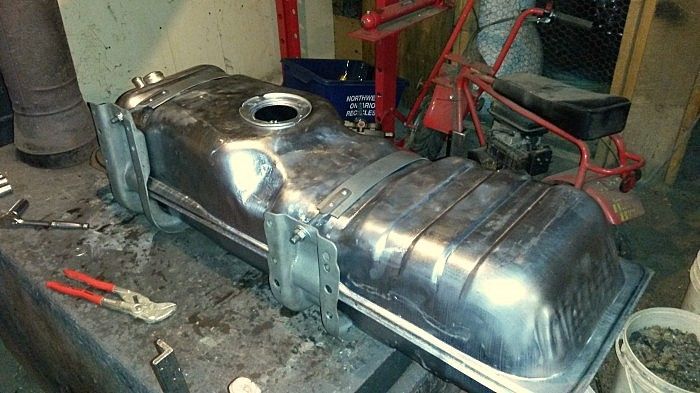 Pump installed and all sealed with some paint. The padding is an inner tube I cut up. 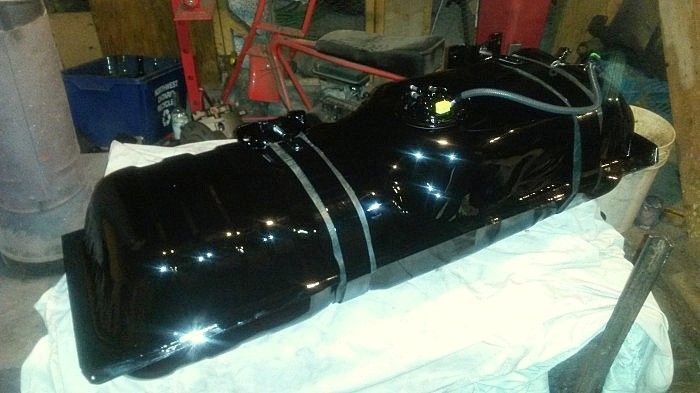 Now to address the filler neck. Could not find a new one and the ones in the wrecking yard were unusable. I ordered a new one for a '95 Chevy. Too long but the filler diameter was perfect. 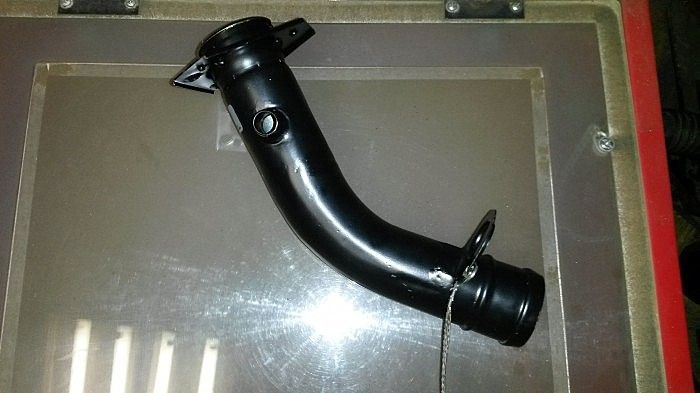 I cut it down and welded a good section of one I found from a donor. One left is the actual neck from my truck. No wonder if leaked when I filled the tank. Not shown here but I did weld the loop that held the grounding strap to my new piece. Painted with the same paint I did the tank with. 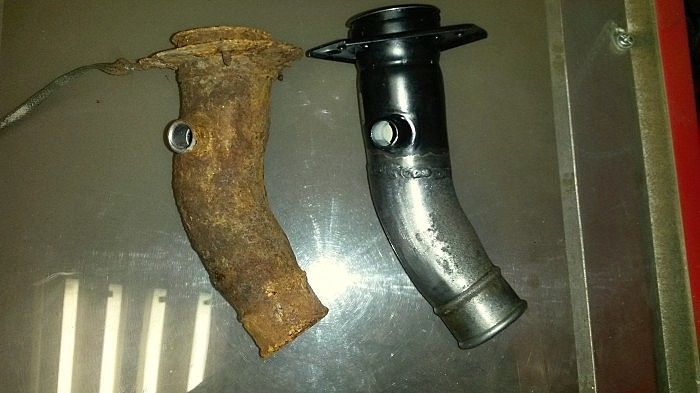 Fitting the exhaust took a lot of trial and error but once I got going with the first pieces it came together well. I sliced out sections for the Magnaflow CATS and mounted them as close to the collectors as possible while keeping them close together at the same time. I can live with the left side being offset with the right. 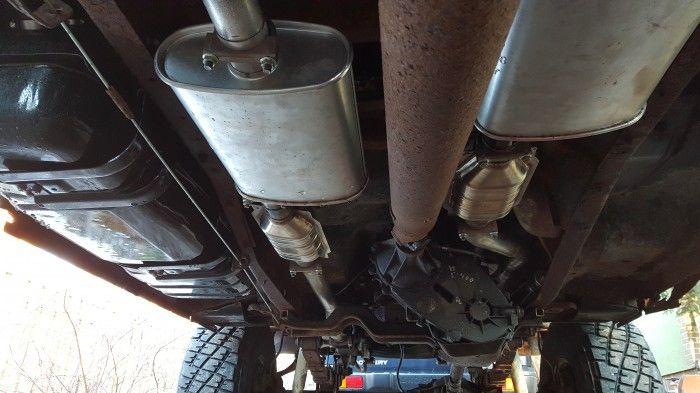 I wasn't looking for performance here but I expected a bit more power with the twin exhaust and headers. Eliminating the original ancient CAT would have been a huge improvement alone I thought but the truck performs exactly the same. At least I don't leave a puddle of fuel behind now. Althou the truck ran like a champ, a week after I did this work I found the truck could barely start and couldn't make it out of the driveway. Took a lot of digging into and reading but I was stumped. The idle would surge, stumble when given gas and the truck couldn't move itself. I replaced the coolant temp sensor, the MAP sensor, cap and rotor and the injectors. Nothing. My boss came by and scanned it, no codes. But right away he said it was starving for fuel but since I had just installed a brand new pump I knew it couldn't be that. He suggested a fuel pressure test and I bought a pressure tester from NAPA. Sure enough the pump could only manage 8 psi. Picked a nice warm day and down came the tank. The small rubber line on the pump that connects to the hanger assy had come off. Someone installed the hose clamp on the wrong side of the line flare and could only pump enough fuel into the system to start the truck but not much else. Happy to solve that I tested the pressure, 13 psi now. Earlier in my repair attempts when I reconnected the lines to the throttle body I over tightened the line fitting only to snap a huge chunk of the throttle body off. So I had to order one of these: 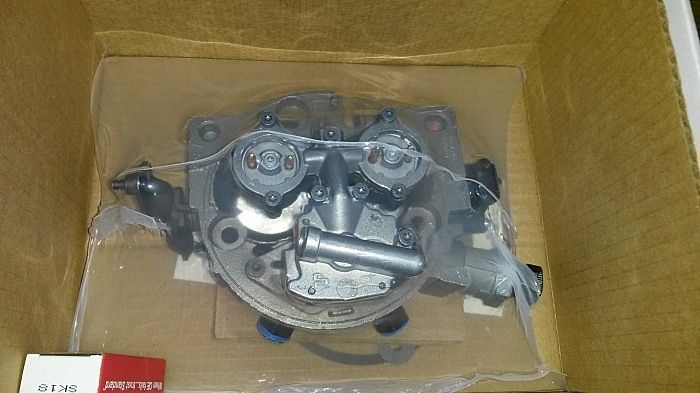 It was a very expensive fix for something so simple. The bang head icon here doesn't do justice to how dumb I felt when I broke it. 
|
|
|

|
|
|
#30 |
|
Registered User
Join Date: Mar 2012
Location: Red Lake, ON
Posts: 106
|
Re: '87 GMC Blue Rhino Project
The other day we picked up this truck. The plow was sold to a customer and I got the truck for $100. It runs but has a major fuel leak. I was very happy to have this as another parts truck as our yard is getting scarce for these. This isn't me, but one of our mechanics who towed the truck in.
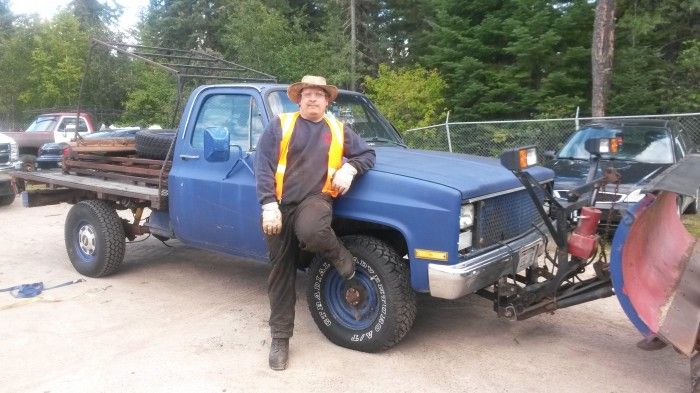 Towed in another GM derelict a bit ago and scored these little guys, along with a flawless windshield, great front chrome bumper and somewhat nice tube grill. 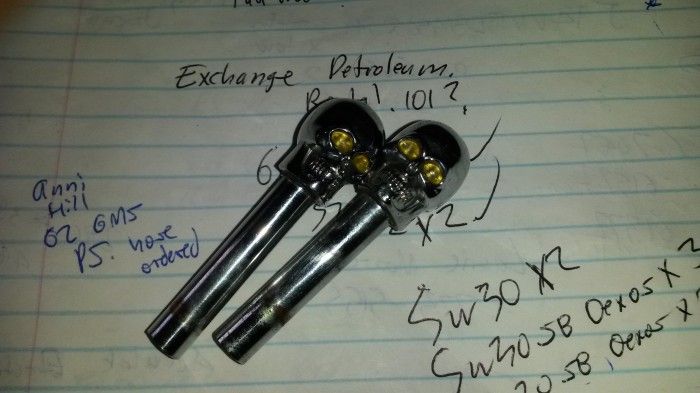 Thanks for looking in, everyone. Les. |
|
|

|
|
|
#31 |
|
Registered User
Join Date: Oct 2007
Location: Spanaway
Posts: 8,451
|
Re: '87 GMC Blue Rhino Project
Breaks happen in busy lives, just ask me..... Glad your back at it!
__________________
Mike. Swamp Rat build thread : http://67-72chevytrucks.com/vboard/s...d.php?t=595019 72 3/4T 4X4 4" BDS Lift 33" BFG's |
|
|

|
|
|
#32 |
|
Registered User
Join Date: Dec 2009
Location: Fairbanks, AK
Posts: 1,830
|
Re: '87 GMC Blue Rhino Project
Good to see you back at it. Work looks great. What can you tell us about the new truck? Looks like an 83 up but has drive flanges in place of hubs?
__________________
-Marcus 1991 V3500 L29 454 4L80E NP205 D60/14 Bolt 4.56's 1984 K30 292 TH400 NP205 D60/14 Bolt 4.56's flat bed 7'6" Meyer Plow 2022 Silverado 3500 L8T Project Daily Driver Project Heavy Hauler Project Plow Truck |
|
|

|
|
|
#33 |
|
Registered User
Join Date: Mar 2012
Location: Red Lake, ON
Posts: 106
|
Re: '87 GMC Blue Rhino Project
Thanks guys. That fuel pump problem was a real setback for time and money. And two months ago I started the living room renovations and I'm still at it. The poor truck just gets pushed back further and further. The new truck is in fact an '83 and has a 350, (according to the VIN). Since it came in running I'm considering on having the block rebuilt. I don't know much else about it but the rear driveshaft was exactly what I needed and the fuel tanks supports and filler neck look good too so hopefully I can have a passenger side tank again. I don't know what is with the drive flanges but the bolts holding it together don't look original and seem very over-sized. Hopefully if it doesn't snow I will have them off this weekend.
|
|
|

|
 |
| Bookmarks |
| Thread Tools | |
| Display Modes | |
|
|